
2025 McArthur-Burney Falls State Park Guide
Located within the Cascade Range and just outside the small town of Burney, McArthur-Burney Falls State Park features…
Disclosure: This post contains affiliate links. If you make a purchase through these links, I may earn a small commission at no additional cost to you. I only recommend products or services that I believe will add value to my readers.
2024 TRAVEL UPDATE: Park officials have announced that beginning in early April, all access to the waterfall and the fall’s pool area will close due to a reconstruction project of the main trail. This closure will remain in effect throughout the entire 2024 summer season. For more information, read my post about it here.
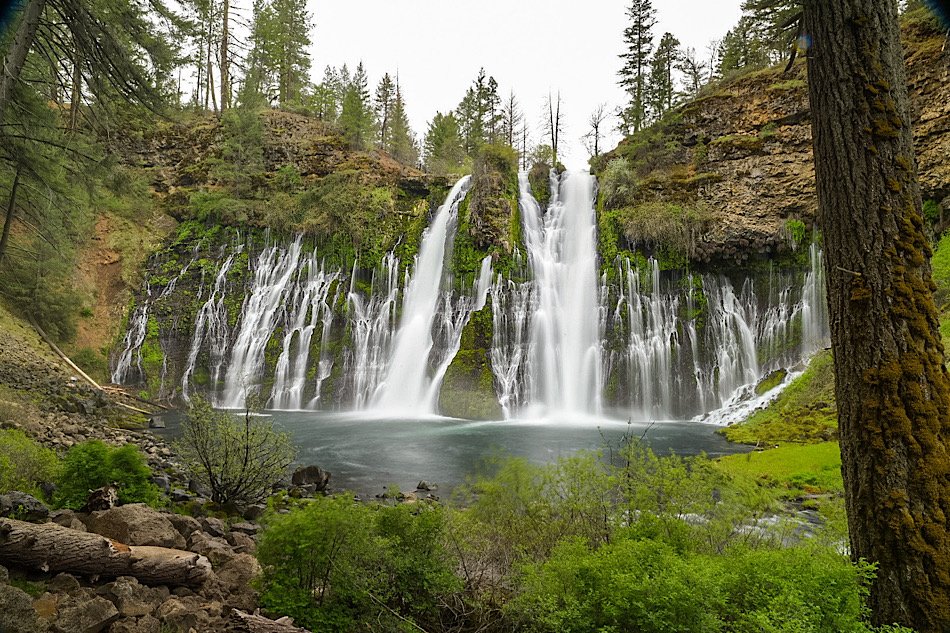
Located within the Cascade Range and outside the town of Burney, McArthur-Burney Falls State Park features quite possibly the most beautiful waterfall in the state; the eighth wonder of the world, Burney Falls.
Burney Falls is one of California’s many must-see natural attractions. It’s worth a trip all in itself as well as an easy add-on if you’re already in the Shasta region.
We have been to this park a few times and have amassed all the information we could find to put together a comprehensive guide to help you plan a successful visit.
Click/tap the ad to view offer
Quick Stats
Location: Burney, CA.
Fee/Permit: $10 per vehicle.
Open: Year round.
Parking: Medium sized paved lot.
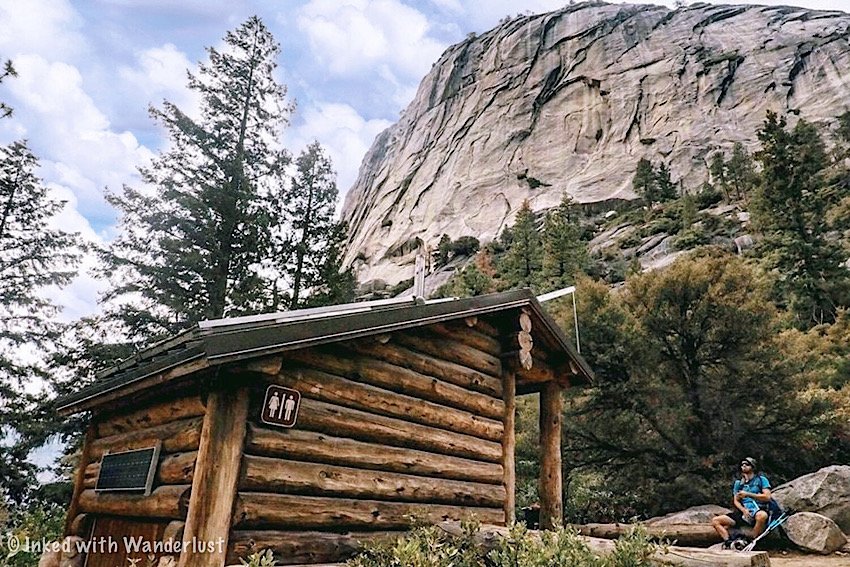
Restroom: Yes. At the visitor center and campground.
EV Stations: None.
Drone Use: Not allowed.
Difficulty: Easy.
Popularity: High.
Time: One hour to a full day.
Milage: 0.3 - 2.5 miles (depending on the trail you take).
Trail Condition: Well maintained.
Main Feature(s): The 129-foot Burney Falls, scenic trails and Lake Britton.
Pets: Allowed in the campground but not on any park trails or at the fall’s pool.
Special Notes/Hazards: This is a bear-heavy area.
Our Visit(s): 2016, 2019, & 2022
Directions to Burney Falls

Getting to Burney Falls is easy and straightforward. There’s no off-roading or miles of hiking involved. Simply park your car at the visitor center and either view the falls from the upper deck or take the trail down to the pool.
To get there:
From Reno
Take US 395 North for 90 miles.
Turn right onto CA-44 West for 46 miles.
Turn right onto CA-89 North for 28 miles.
Turn left on Lake road.
Turn left into McArthur-Burney Falls State Park
Total drive time is around 3 hours.
From Sacramento
Take I-5 North for 161 miles towards Redding.
Merge onto CA-299 East for 59 miles.
Turn left onto CA-89 North for 6 miles.
Turn left onto Lake road.
Turn left into the park.
Total drive time is around 3.5 - 4 hours.
Burney Falls is close to many large cities. Keep in mind that if you decide to drive here during the winter months, road conditions can be rough. This region gets a healthy amount of snow annually.
Burney Falls Campground & Entry Fees

Camp Sites & Cabins
The Burney Falls Campground is open year round and features 102 campsites. Each holds a max of eight people and includes one vehicle. Each additional vehicle will incur a fee.
Fees for campsites begin at $35 per night and include a picnic table, fire ring, and food locker. Bathrooms and showers are located near the entrance of the campground with tap water spigots positioned throughout.
Seventeen of the sites are designated for tent camping only with the remaining accommodating tents, trailers, and RV’s (up to 32 feet in length).
Additionally, the Burney Falls campground features 24 cabins. There are two types of cabins, each with their own features and sizes:
18-foot: Can accommodate up to 4 people and comes with one bunk bed and two extra mattresses.
24-foot: Can accommodate up to 6 people and comes with two bunk beds and two extra mattresses.

Reservations
As stated above, the Burney Falls campground is open throughout the year, but how you go about securing a site varies depending on time of year:
Labor Day to mid-May: Campsites are available on a first come, first serve basis and are payable by cash at the kiosk at the entrance. The park is near empty during this time with sites being easy to come by.
Mid-May to mid-September: You must make a reservation through ReserveAmerica.com or by calling 1-800-444-7275. You can reserve a site up to 6-months in advance. It’s during this time where crowd levels soar and the park regularly fills to capacity.
All cabins come with a covered porch and room outside for tents and/or a campfire. They do NOT come with electricity or plumbing. The cabin is heated by propane (included) and you’ll have a bathroom with showers located nearby.
To make a campsite or cabin reservation, head over to reserveamerica.com or call 800-444-7275. (Cabins are NOT available between Labor Day and mid-May).

2024 Camping & Day-Use Fees
The following are fees you can expect to pay at the park in 2024:
Day Use Entry: $10 per vehicle.
Campsite: $35 per night, per site (one vehicle included).
Cabin: $85-$105 per night (depending on group size).
If you have a campsite or cabin reservation, then the day-use fee is included in your nightly rate. However, they do not allow early arrivals (before 2pm). If you arrive before then, you may be subject to the day-use fee.
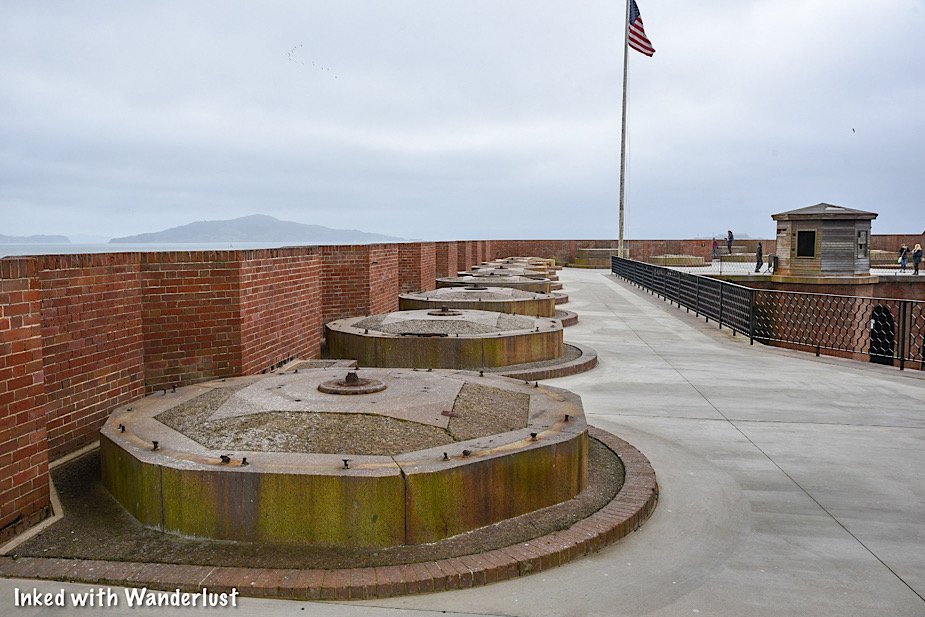
If the booth at the entrance is unstaffed, use the electronic pay station near the picnic tables in the visitor center parking lot to pay your fees. If you’re paying cash, do so with exact change as it does not give back change.
Now, you’re able to pay day-use, camping, and boat launch fees via the pay station pictured above. It’s located outside, adjacent to the visitor center.
Simply make your selection, pay the fees (cash or credit/debit card), enter your license plate, and place your receipt on your dashboard.
Additional Lodging Options

Dusty Campground
Just thirteen miles away from the park, “Dusty Campground”, is located on the north shore of Lake Britton. The six available sites are available on a first come, first serve basis and include picnic tables. Bathrooms and coin operated showers are provided.
Hotels
Alternatively, the town of Burney is just ten miles away from the park and has multiple hotels. Our personal recommendation is Shasta Pines Motel & Suites.
We stayed there during our trip in 2022. It’s an older property, but the rooms were clean, the bed was comfortable, and the rate was reasonable.
Hiking Trails and Amenities

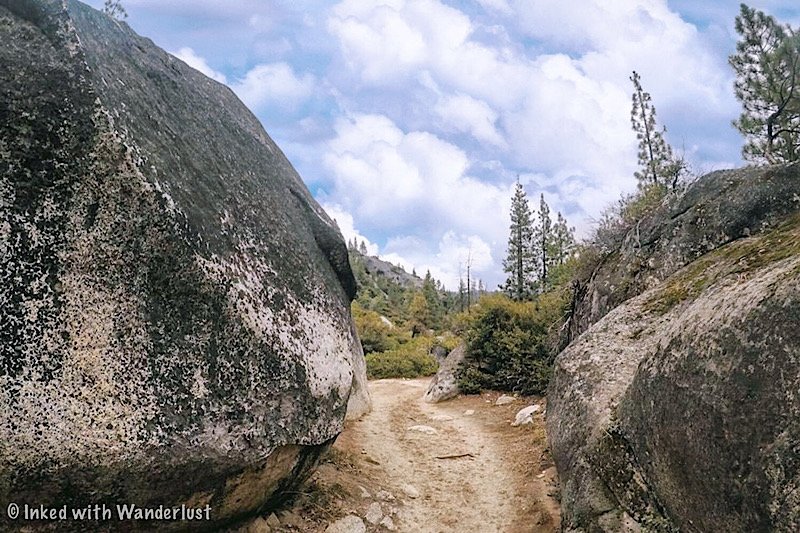
Inside the park, you’ll find a few trails to enjoy. All of them are on the shorter side, mostly flat, well maintained, and are perfect for families with little ones who don’t have a lot of hiking experience.
Burney Falls Scenic Loop

The Burney Falls Scenic Loop is a 1.2 mile loop that begins at the rim, loops around to a bridge that crosses Burney Creek upstream from the edge of the falls and concludes at the base of the falls.
It is a well-maintained trail but throughout much of it, you won’t have a view of the falls. You’ll see it at the beginning and end, but you’ll only see it sporadically through the rest of it.
Regardless of the lack of view, it’s a serene trail. Along the way you’ll find interpretive signs detailing the history and development of Burney Falls. You’ll also enjoy an abundance of shade and seating along the way.
To get more details, check out trail guide about it here.
Burney Creek Loop

This trail is around the two mile mark. We started from our campsite, worked our way down to Lake Britton, to the base of the falls, then back up to our campsite.
If you’re not staying at the campground, you’ll begin at the Rim. You’ll either go right and through the campground or go left on the Rim Trail, cross the bridge, and go left towards Lake Britton.
You’ll follow the creek the entire way, passing a beautiful wooden bridge and non-stop serene beauty before reaching the lake. You’ll also see evidence of Burney’s volcanic past.
The Pool of Burney Falls

This is the trail most people utilize. It’s a third of a mile, beginning at the rim and terminating at the base of the falls.
The “trail” is paved and you’ll need to navigate a series of stairs near the beginning. Due to this, the trail is not handicap accessible.
The trail consists of three switchbacks on a fairly even decline. It’s easy going down but due to elevation, you’ll definitely feel it going back up (though it isn’t hard).
When you’re done looking at the falls, you can head back up to the rim or continue down the trail along Burney Creek.
Visitor Center and Pioneer Cemetery

The trail to the cemetery begins near the campground restrooms and is 2.5 miles, out and back. It’s well maintained, but the trail can be difficult to follow durning winter. The cemetery itself has a lot of overgrowth and isn’t overly impressive, but still worth checking out.
The visitor center is located to the right of the entrance as you drive in. It’s small, but it features a lot of informative displays explaining Burney Fall’s development and history.

It opens at 9am and closed at 5pm. It closes on major holidays and due to staffing issues, could close at random times.
If it’s open during your visit, we highly recommend stopping in. The staff inside are very knowledgable and can answer any questions you have.
Further down the road is the park general store. This is where you can pick up some last minute camping essentials, limited hot food, and souvenirs.
Best Time to Go

McArthur-Burney Falls State Park and its campground are open year round and thus, each time of year brings its own positives and negatives.
Spring (March - May): While snow is possible in March, it drops considerably from the month prior with April and May seeing virtually none. March is also the month with the most spring rainfall. Crowd levels begin to pick up in April, especially on weekends and holidays.
Summer (June - August): Hot and crowded sums it up. Rain is rare. Both the parking lot and campground fill quickly and crowds at the base of the falls have been known to be dense. If you must come during this time, mid-week and early morning is best.
Fall (September - November): It starts to cool down but not to the point where you’ll be freezing. Crowds have tapered off and you’ll be able to enjoy the falls without fighting for a spot. We camped here in October and it was fantastic! This is, in our opinion, is the best time to go.
Winter (December - February): Cold, icy, and no shortage of snow. However, there are virtually no crowds. You’ll probably have it to yourself, especially if you arrive on a weekday. If you can tolerate the cold and have the vehicle to navigate the snow and ice, this is the time for you.

Our first visit was in October 2016. Crowds were low and while it was chilly at night, the weather during the day was mild.
Our second visit in August 2019 was far different. Unbearably hot and there were people shoulder-to-shoulder at the falls.
Our third visit in 2022 was during the first week of May. While it rained on two of the days, the weather was otherwise perfect and we had the falls all to ourselves.
Additional Information

Dogs are permitted. You may bring your dog with you into the park and the campground. However, they are not allowed inside the visitor center or on any trails (except the cemetery trail).
Buy local wood. If you’re camping at Burney, the park sells wood bundles near the entrance (cash only). You can also buy wood in town. The reason for this is so people don’t unintentionally introduce diseases from outside the area.
Parking can be a pain. During the summer, it isn’t uncommon for the parking lot to fill quickly. Your best bet is to arrive early. If you try to park along the road outside the park you risk a fine and tow. If it fills, come back after 4pm and you should be fine.
No restaurants in the park. The nearest restaurants are located in the town of Burney 12 miles away. Each campsite features a grill, so your best bet is to bring your own food, charcoal, and lighter fluid.

You can swim in the pool. The pool below the falls is ok to swim in. In the fall and winter months, however, the water gets very cold.
There is wheelchair access. The main trail leading down to the falls is unfortunately NOT wheelchair accessible due to stairs and a steep decline in some places. However, the visitor center and observation decks are!
EV Charging is not available. This includes the park itself and the town of Burney. The closest charging stations are located in the towns of Dunsmuir (ChargePoint) and Shingletown (Tesla), respectively.
Drone use not permitted. As is the case in most parks of this nature, the use of Drones are not allowed.
Things To Do Nearby

While Burney Falls is the main attraction in the area, there are still plenty of other attractions to check out. You could easily spend a few days or more here.
Below, we’ll cover a handful of our favorites. Some are within a few minutes drive while others are further out, but still in the same vicinity.
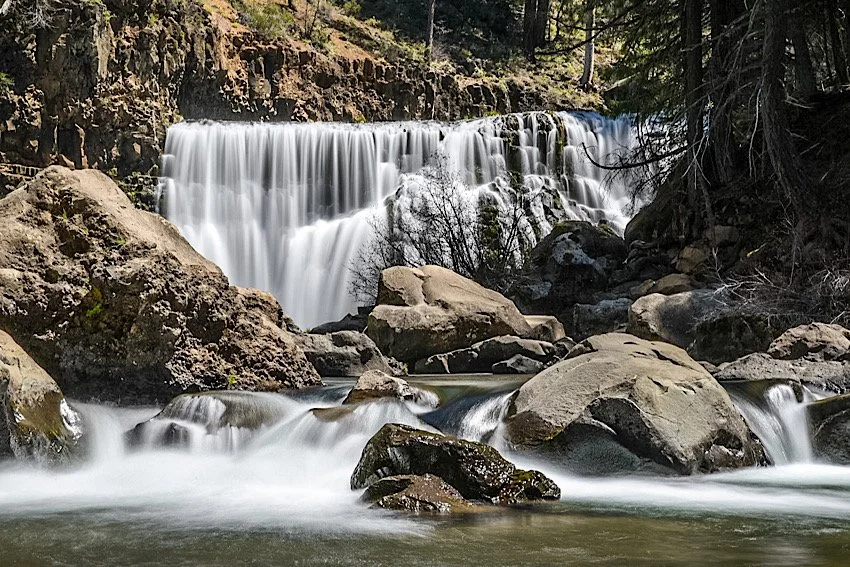
McCloud River Falls

McCloud Falls is a series of three beautiful waterfalls (lower, middle, and upper) located about 45-minutes north from Burney right off Highway 89.
You can start at either the Lower Falls or Upper Falls and hike the 3.5-mile trail that connects all three. The trail is considered easy for most.
Alternatively, if you’re short on time, you can simply drive to each waterfall and take the short trails to view each one.
To get more information of these beautiful waterfalls, go here.
The ‘Stand By Me’ Bridge

If you’ve seen the classic 80’s movie, ‘Stand By Me’, you'll no doubt remember the scene where the boys had to run for their lives across the bridge.
Most don’t realize that you can visit the actual bridge where that scene was filmed. It’s is just a few short miles from Burney Falls.
Due to a death that occurred in 2021, the bridge is barricaded off and walking on it is no longer allowed. However, it’s still worth checking out. (you can read my post about it here.)
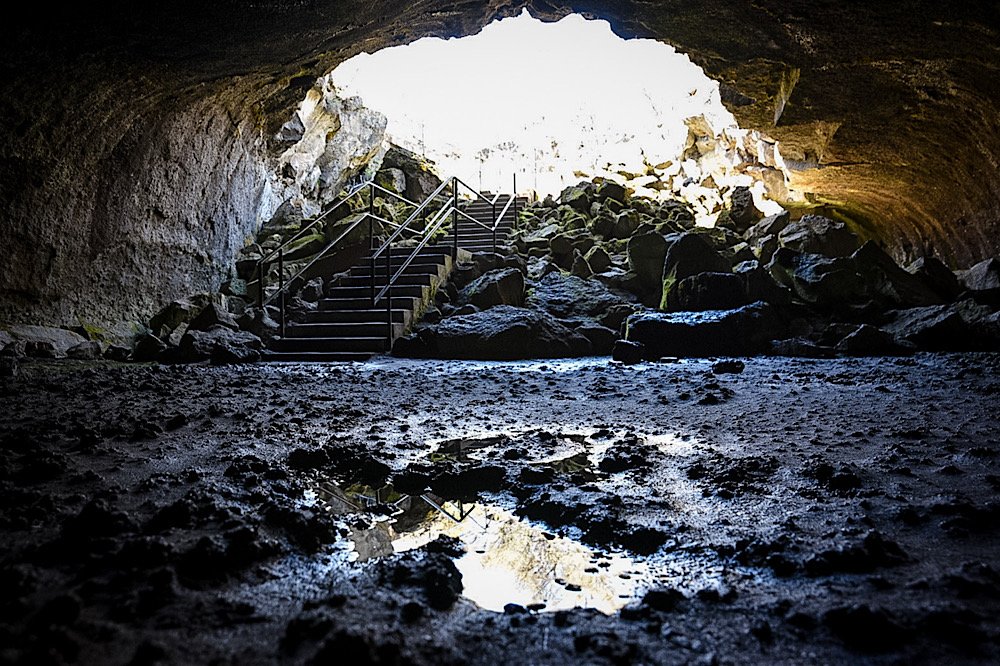
Subway Cave

You can put this one in the super cool, but a bit freaky column. Subway Cave is one of the largest, but easily accessible lava caves in the world.
You’ll need to bring a flashlight with you as there are no natural or artificial light sources inside the cave. It’s literally pitch black.
You can explore the cave at your leisure or take part in one of the free, guided tours that take place during the summer months.
To get further details on Subway Cave, check out our article here.
Junk Art Sculptures

Located about 15-minutes from Burney in Cassel, you’ll find one of the coolest roadside attractions you’ll ever see.
There’s about a dozen or so giant sculptures made from old vehicle parts and other pieces of metal. There’s a couple tin mans, a dog, a spider, and more!
For some reason, Google has this listed as permanently closed but we decided to go anyway and found it to be 100% open. (you can read my post about this place here.)
Hedge Creek Falls

You’ll have to drive for about an hour to see this one as it’s located in Dunsmuir, but trust us when we say it’s worth it.
The parking lot and trailhead can be found right off Interstate-5 and it’s an easy, third of a mile hike down to the falls.
The coolest feature to this one (aside from the waterfall itself), is that you’re able to walk behind it along the basalt rock walls.

Click or tap ad to view offer


How To Hike Half Dome: The Complete First Timers Guide
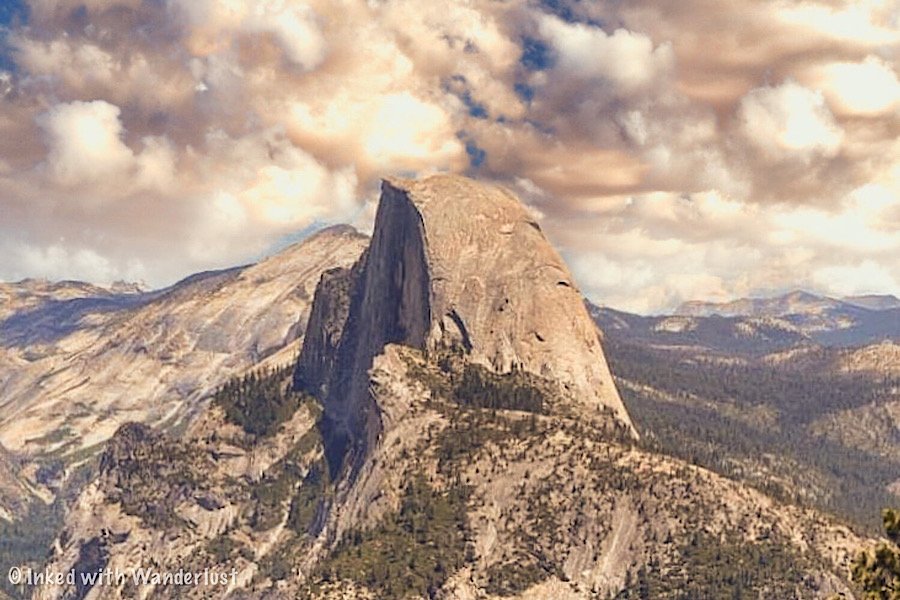
Towering nearly 5,000 feet above the valley and 8,800 feet above sea level, Half Dome is considered one of the top day hikes…
4 minute read | contains affiliate links
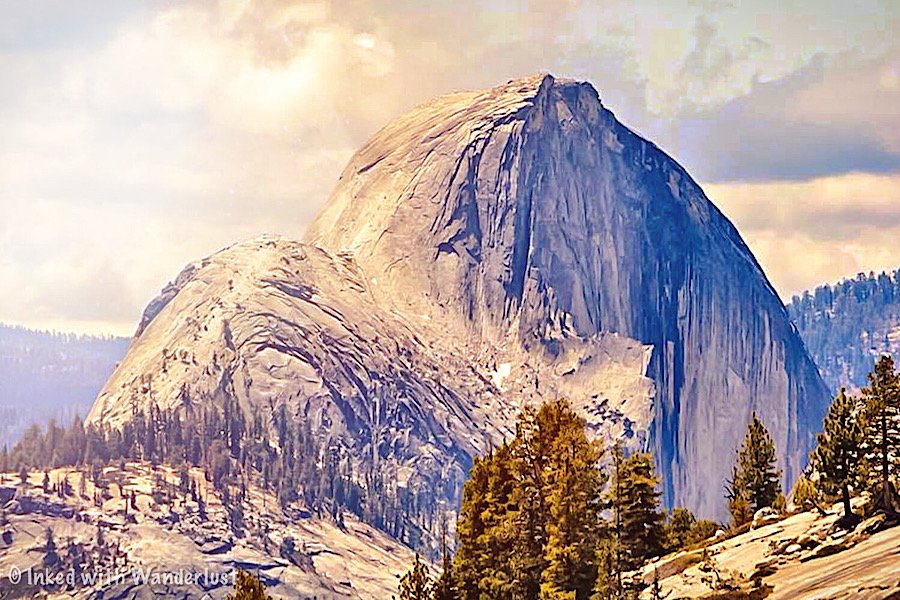
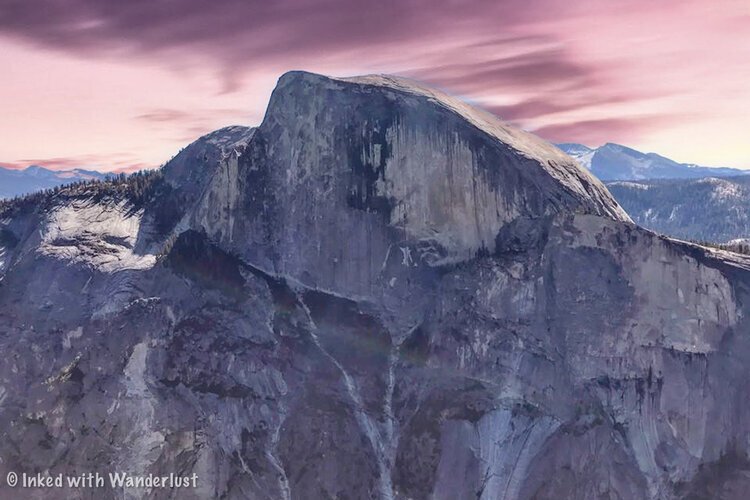
Towering nearly 5,000 feet above the valley, Half Dome is considered one of the top day hikes in the country. In 1865 it was considered, “perfectly inaccessible”.
In 1875 a man by the name of George Anderson proved that theory wrong. Not only did he reach the summit, but he installed the predecessor to what we now know as the cables.
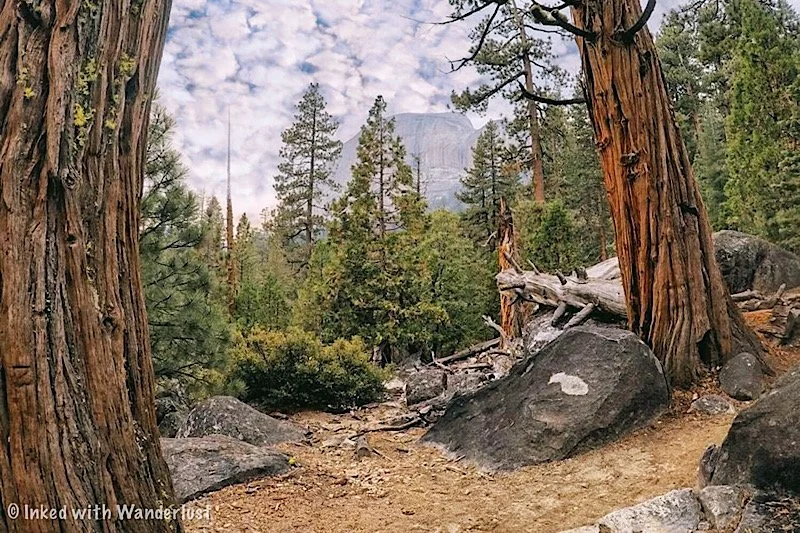
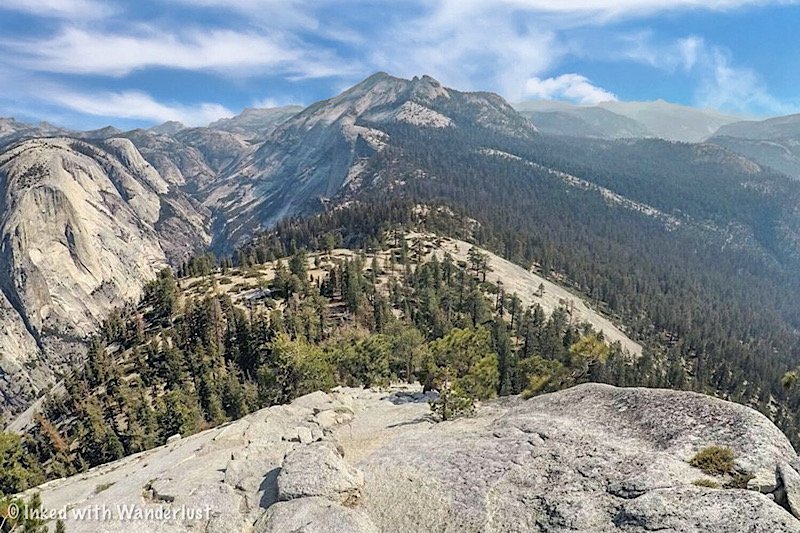
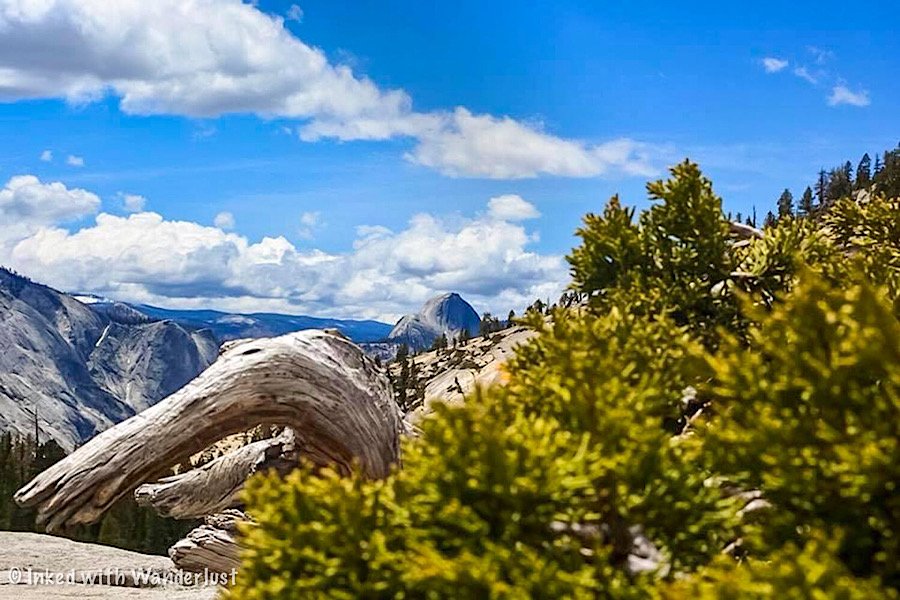
These days, you’ll see hundreds of people summiting Half Dome on a daily basis and it can be viewed prominently at various locations throughout the park.
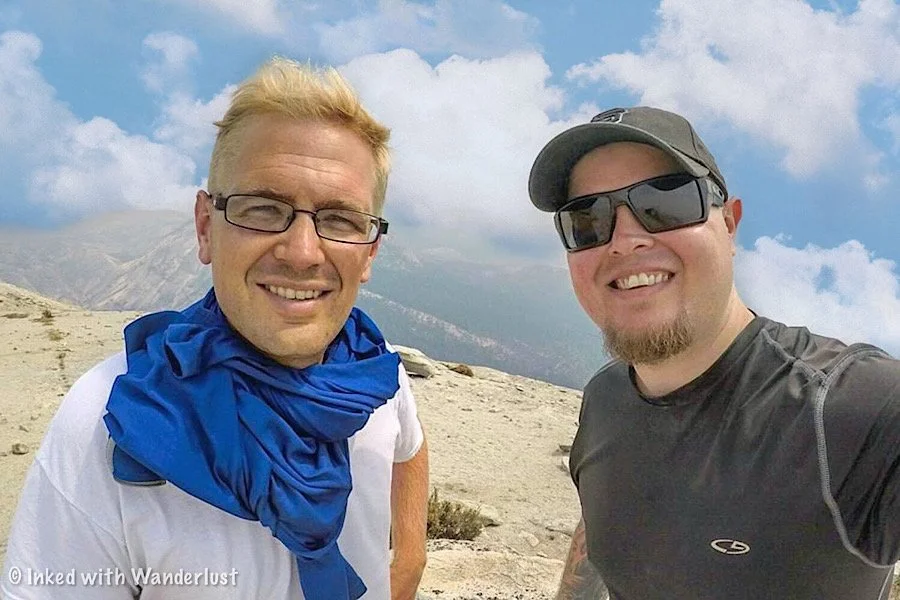
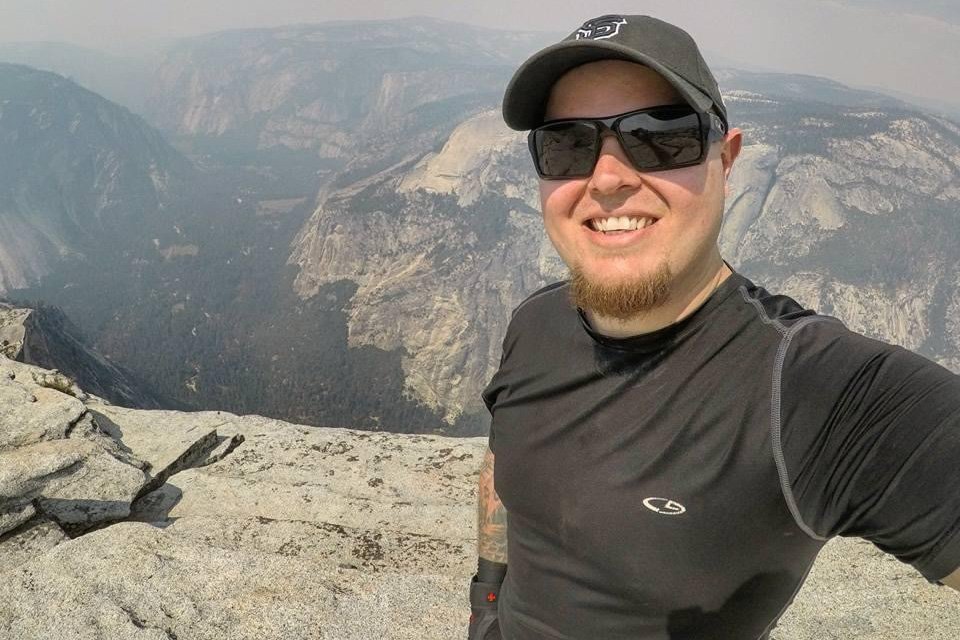
I hiked Half Dome on September 11th, 2017. It’s a day that will live in my memory forever because even to this day, it was my most rewarding experience.
If you’re considering hiking Half Dome, this guide will provide you with everything you’ll need to know.
READ ALSO: “Hiking Half Dome In Yosemite: My Journey In 30 Pictures”
Disclosure: This post contains affiliate links. If you click through and make a purchase, I may earn a commission at no additional cost to you. Thank you for supporting us!
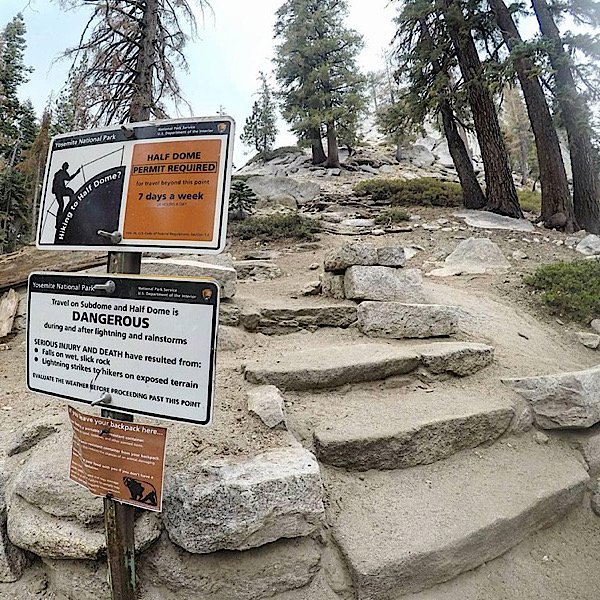
First - You’ll Need A Permit
Before hiking Half Dome, you’ll first need to apply for and win a permit. The extreme popularity of this hike has made it a necessary evil.
The NPS limits the amount of permits issued for the season to 300 per day, with 225 going to day hikers and the remaining 75 to backpackers.
I can’t speak from experience exactly how your permit is checked as when I hiked it, there was no one checking.
What I do know is you can hike without a permit up until (at least) the sign just before the start of Sub Dome (pictured above).
From what I hear, there is usually a ranger either on Sub Dome or just below it checking permits. If you do not have one, you will be turned around.
READ ALSO: “Half Dome Permit: The Ultimate 2023 Permit Lottery Guide”
Starting At The Happy Isles Trailhead
Depending on your starting point, the miles you hike will vary greatly. This guide covers the Happy Isles trailhead as it’s the starting point for most hikers.
Starting at Happy Isles, your milage will be 16.2 miles, round trip. Your elevation gain will be 4800 feet and it will be a strenuous, full-day hike. Plan for 8-12 hours.
You can find parking in the Yosemite Valley Trailhead lot just past Curry Village. From there, it’s a quarter mile from the trailhead.
You should seriously consider beginning your hike as early. Pre-dawn is ideal. The reason for this is because you will be racing to beat the afternoon storms and crowds.
If your plan is to utilize the shuttle, keep in mind that they do not start running until 7am. Also, the parking lot is known to fill quickly.

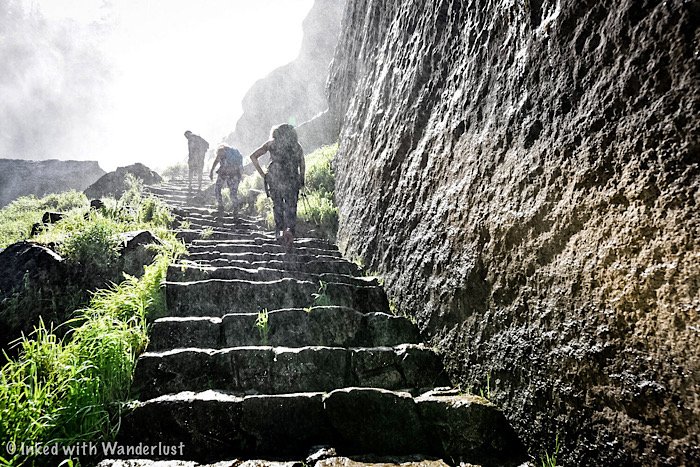
The Mist Trail
My brother and I arrived to a fairly empty parking lot at 2:45am, ate a super quick breakfast and were at the trailhead by 3am.
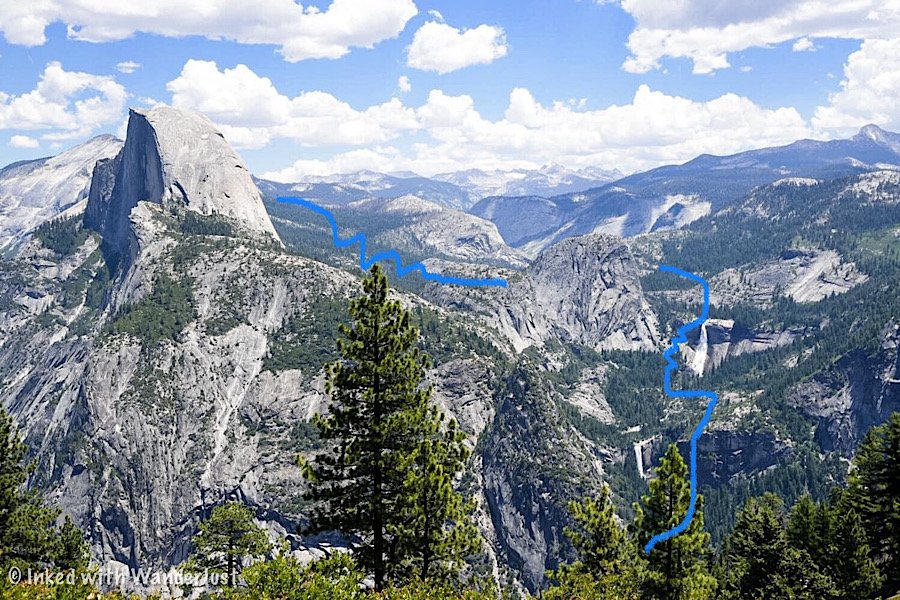
You’ll start out on a paved path that works its way to Vernal Falls. From the trailhead, it’s just 1.5 miles to Vernal but don’t underestimate it, because it is steep.

As you arrive to the Vernal Fall footbridge, you’ll see a restroom and water fountain (the one source of filtered water on this trail).
Past the footbridge, the trail again climbs steeply and is also where you are introduced to the brutal, stone steps that lead to Vernal and beyond.

Vernal Falls
Here is where you’ll receive the first fruit of your labor. The chance to stare in awe and amazement at Vernal Falls.
When I got to Vernal it was still pitch black. Once my eyes adjusted, the view of Vernal with stars sparkling above was breathtaking.
The time of year you do this hike will determine how “misty” it will be. Early in the season, it isn’t unusual to see hikers donning ponchos.
Be sure to take pictures but don’t spend too much time as you still have hundreds of steps to climb to get to the top of Vernal. Once there, you’ll get a commanding view.
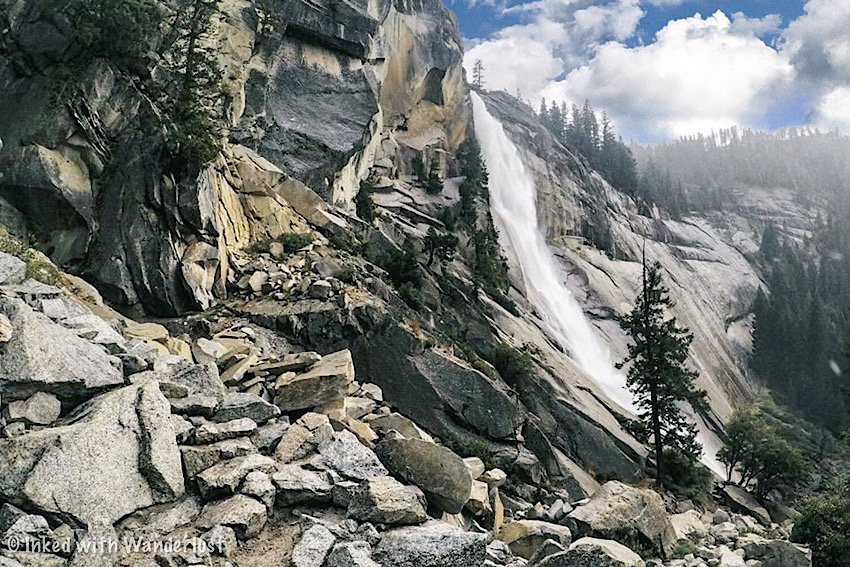
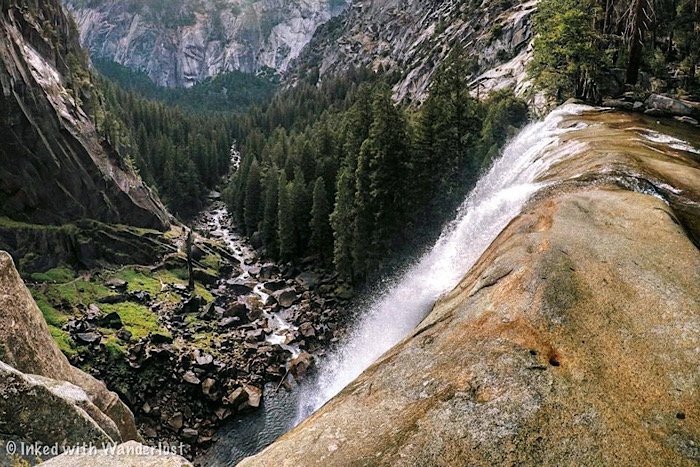
Nevada Falls
From the top of Vernal, you have another 1.5 miles or so to the top of Nevada Falls and the official end of the Mist Trail.
You initially start out on relatively flat terrain through shady pines along the Merced. Soon, it’ll transition into another series of rocky switchbacks.
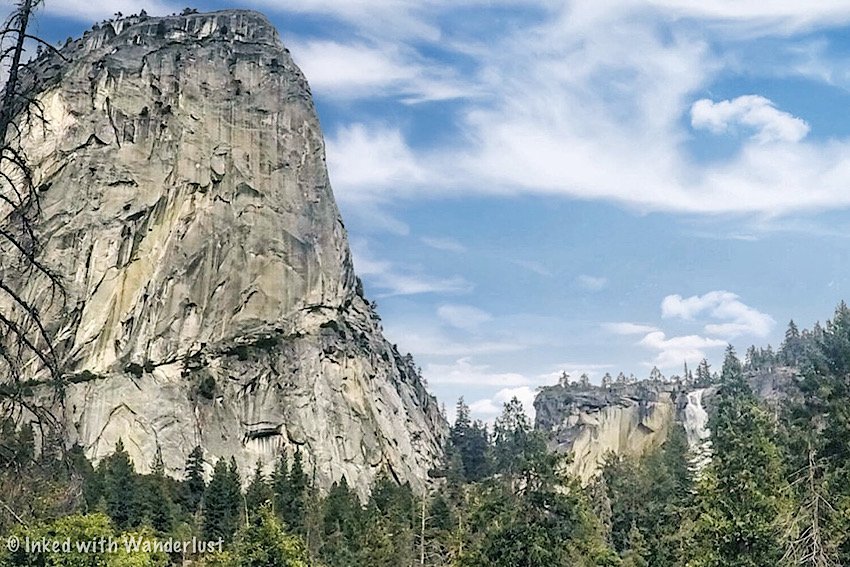
As you make your approach you’ll come across another footbridge and take notice of, “Liberty Cap”, A large piece of granite that is often mistaken for Half Dome.
As you reach the base, you’ll work your way up the switchbacks mentioned above. Once there, you’ve reached the end of the Mist Trail and the first milestone of your hike.
Here, you will find an opportunity to use the provided facilities and take advantage of the many logs/rocks to sit on while enjoying a snack (or two).
You could also detour to the right (away from the restrooms) for 0.2 miles to see the top of Nevada Fall from yet another footbridge.
READ ALSO: “The Mist Trail: Hike One Of Yosemite’s Most Beautiful Trails”
Onward to Half Dome
Once you’ve taken in the sights at Nevada Fall and feel rested enough, it’s time to continue your journey. From here, you’ll enjoy a brief flat section of trail.
The next point of interest you’ll reach is Little Yosemite Valley (and a backcountry campground of the same name).
Securing a spot here allows you to break your hike up into two or more days. To do this, you’ll need a wilderness permit in addition to your Half Dome permit.
I highly recommend going this route to get the most out of your experience.
After passing through Little Yosemite Valley, the trail begins to climb again. Tall sequoias provide shade from the sun as you work your way up the mountain.
This climb isn’t overly difficult, but it is constant and steady. Occasionally, you’ll get sneak peaks of Half Dome between the trees.
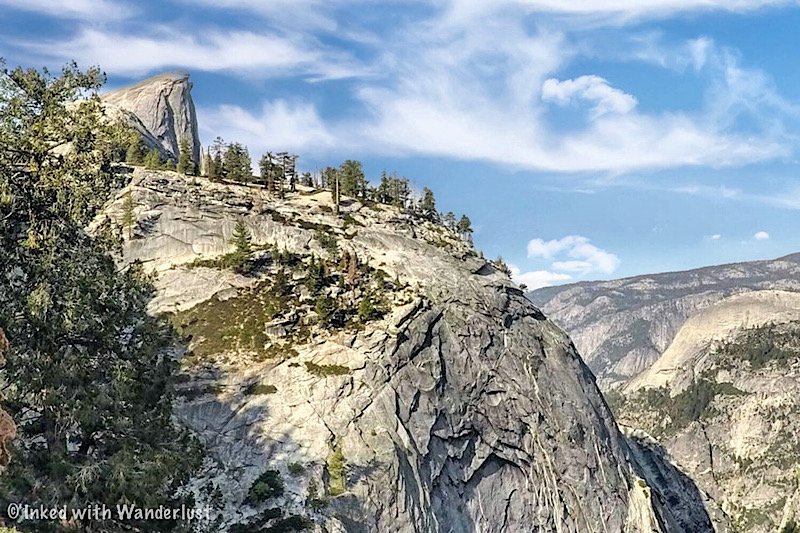
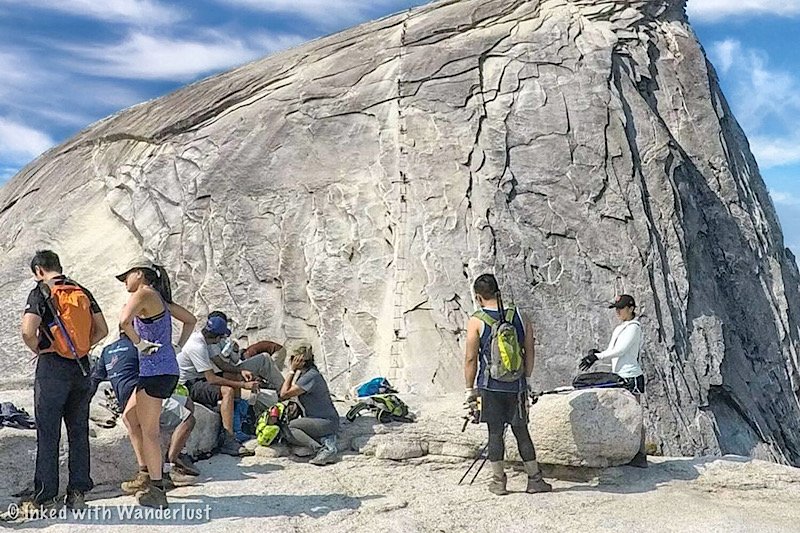
Sub-Dome - The Final Obstacle
I fully believe that Sub-Dome’s sole purpose is to wreck whatever’s left of your legs. At this point, you’re at 8,000+ feet and just hiked for nearly 8 miles.
Half Dome’s base is within reach and Sub-Dome will make you question how badly you actually want to do this.
Take your time and pace yourself here. Not only is Sub-Dome difficult to ascend, but it could also be dangerous as there’s little room for error.
You’ll know you’re near the top when you see the lone tree sticking out of the granite, providing the only shade on this section.
Once you get over the hump just beyond this tree, the cables are just a short distance ahead of you.
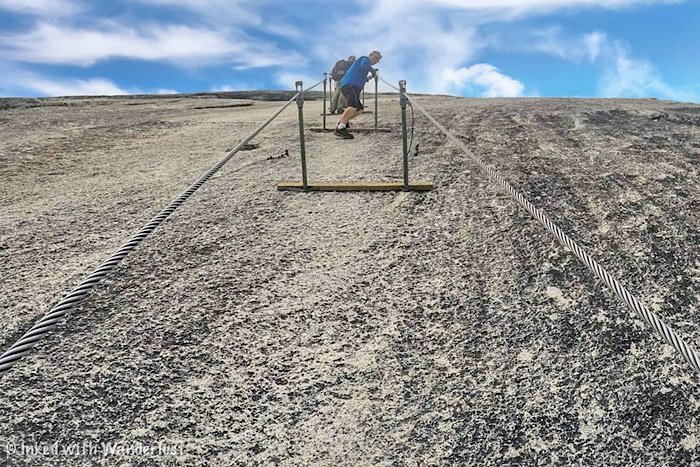
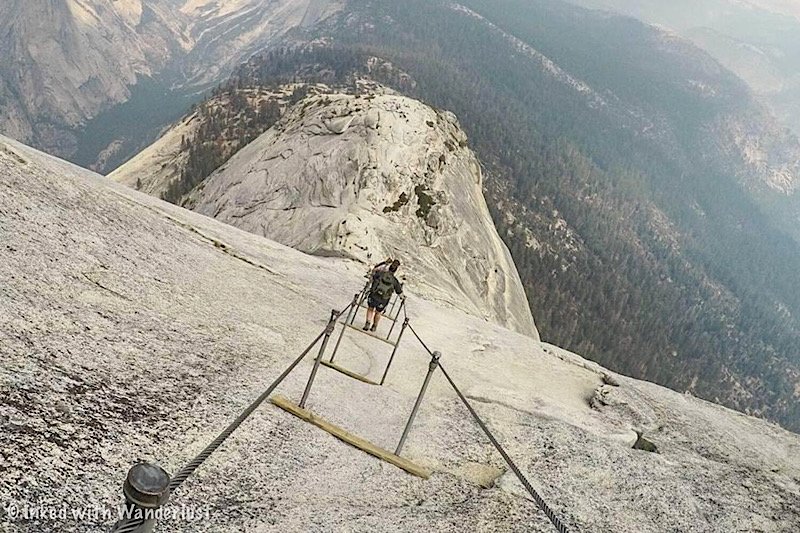
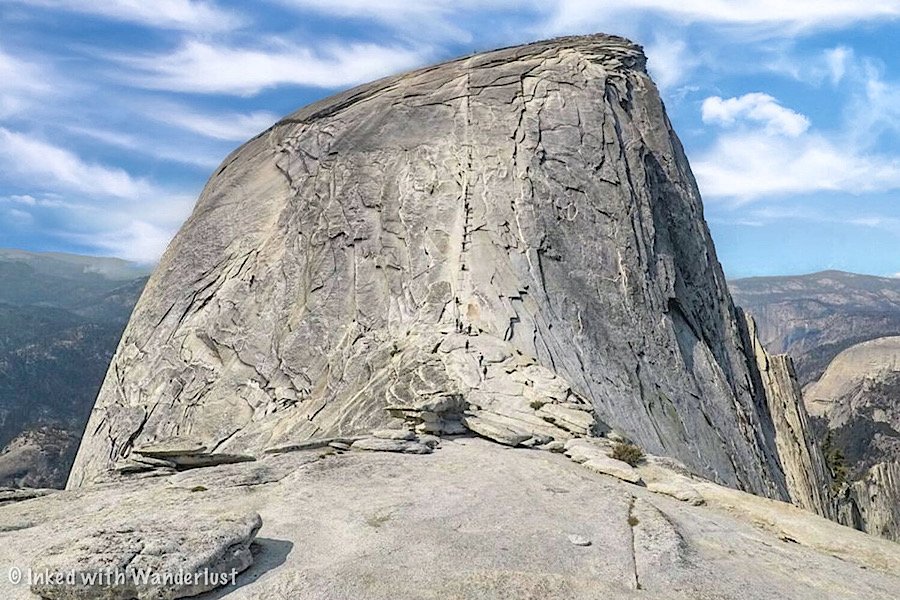
The Half Dome Cables
Two steel poles are placed (not exactly secured) into the granite rock, roughly six feet apart (length wise) with a wooden plank between each pair.
Running the length of the dome from top to bottom are two steel cables running parallel to one another.
As stated above, the poles are not secured. Hikers have accidentally pulled them out. If that happens, don’t panic, just place it back in.

As you work your way up, you’ll notice it get steeper with each step. From my perspective, it wasn’t that bad. In fact, I felt it to be fairly simple and straight forward.
Keep a firm grip on the cables and use the wooden planks as a goal to work towards. Once you get to each plank, use them as a resting point if you need to.
While on the planks, keep your fellow hikers in mind and consider their speed. If someone behind you wants to pass, let them.
From the base to the top, you’ll climb a total of 400 feet. It took me around 20 minutes to do it. That’s with stopping to rest and taking a few pictures.
The granite is slick from the thousands of hiking boots that have traversed it over the years. Sturdy hiking boots with excellent tread are a must!
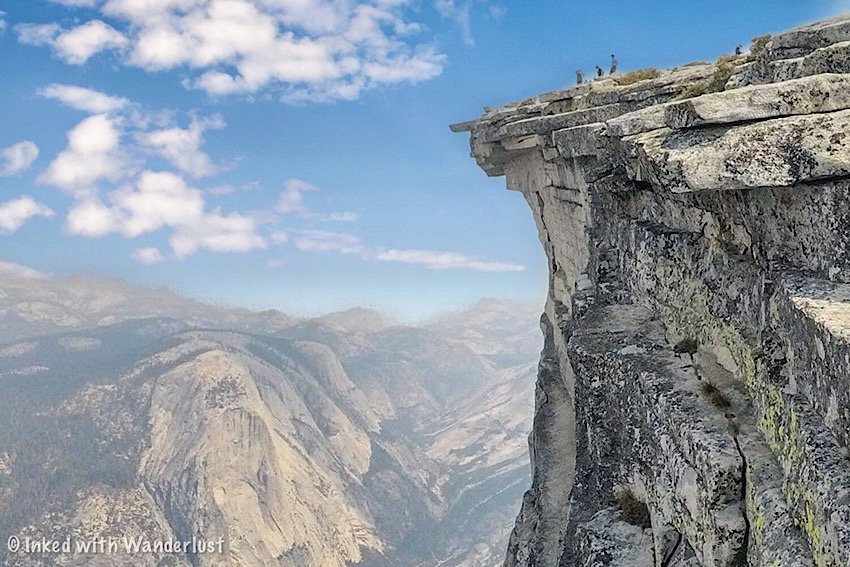
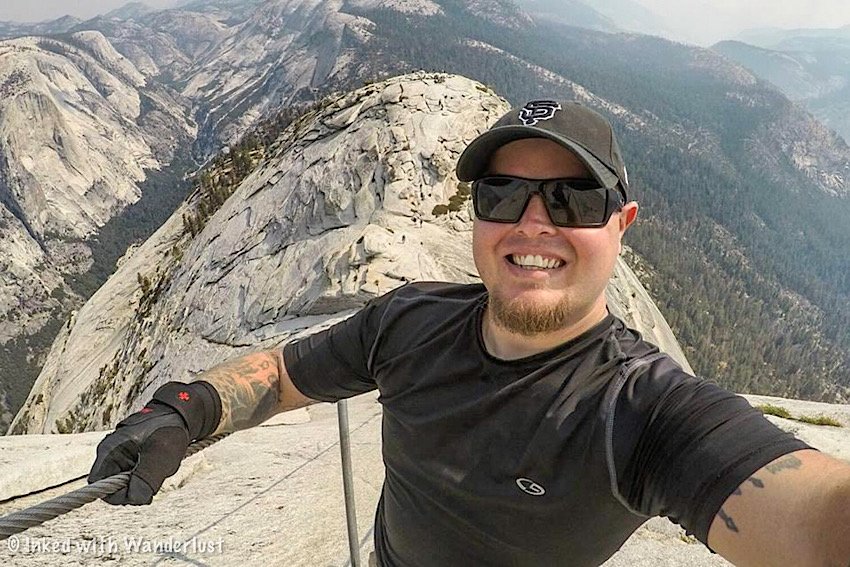
The Summit
To reach the summit, you would’ve hiked 8+ miles, gone up several hundred stone steps, inclined nearly the entire way, felt the pain of subdome and completed a fear inducing 400 foot climb.
The area of the summit is roughly the same size as seven combined football fields. There’s plenty of room for everyone to explore.
The views from Half Dome’s summit are unsurpassed. You can see Yosemite Valley, Tenaya Canyon, North Dome, Cloud’s Rest and more.
It’s important to note that if you see storm clouds in the area, it’s best to head back down asap. Trying to navigate the cables in the rain is dangerous.
To me, going down was more difficult for me than going up was. I tried both forward and backwards. In my opinion, descending backwards was easier.
When you’re back the base, collect your packs, take a few more pictures and start your way back.
Decide Which Route To Take Back
Once you’ve made it back to the top of Nevada Fall, you’ll now have to decide which direction you want to go. Your options are:
Back down the Mist Trail: This option is just you going down the same way you came up. The drawback are the steep, slick steps that make the process of going down a slow one.
Take the John Muir Trail: This option will add a mile and a half to your decent but will allow you to skip the steps on a relatively smooth path.
My brother and I chose the Mist Trail because it was pitch black during our way up and we wanted to see the waterfalls. However, the rain made me regret that decision.
Those steps were now ultra slick and forced us to move painfully slow. Suddenly, dealing with more mileage but smoother terrain felt like the better option.
By the time we made it back to the car my legs were jello, my shoulders were screaming and I was dehydrated (I didn’t bring nearly enough water).
Despite all that, it was an epic adventure and I would do all over again in a heartbeat.
Is Half Dome For You?
That’s a question you’ll need to ask yourself. Half Dome, without question, is a difficult and dangerous hike. However, it’s also a rewarding accomplishment.
You don’t need to be a top level athlete, but you do need a reasonable level of fitness and have at least some hiking experience. Climbing experience is not necessary.
People have died on this hike! I’m not trying to scare you, but you need to be aware of the dangers. People have fallen off the cables, been struck by lightning and have had heart attacks which all lead to their demise.
Be smart and aware of your surroundings. Stay on the trail, don’t attempt Half Dome if dark clouds are in the area, be honest about your fitness level/health, etc.
If you have heart problems or a fear of heights, this is NOT the hike for you.

Alternate Routes To Consider
Happy Isles is just one of a few starting points for Half Dome. Other trailheads include:
Tenaya Lake: You’re looking at 23 miles round trip. Next time I hike Half Dome, this is where I plan to leave from.
Glacier Point: You’re looking at 20 miles round trip. Essentially, you’ll work your way down the Panorama Trail to Nevada Fall, then from there to Half Dome (on the way out, you could simply exit at Happy Isles instead of going back up to Glacier Point. That’ll save you some milage).
Little Yosemite Valley: This is the backcountry campground I mentioned earlier. You’ll hike 4.3 miles from the Mist Trail to here, then 7 miles round trip from Little Yosemite to Half Dome and back.
Alternate Hikes In Yosemite
Half Dome isn’t for everyone. Thankfully, Yosemite is jam packed with incredible hikes you can do if you didn’t obtain a permit or if it’s too much for you.
Some of these include:
4-Mile Trail (Yosemite Valley/Glacier Point road)
Upper Yosemite Falls (Yosemite Valley)
The Mist Trail (Yosemite Valley)
Pohono Trail (Yosemite Valley/Glacier Point road)
Cathedral Lakes (Tioga road)
Cloud’s Rest (Tioga road)
Glen Aulin/Grand Canyon of the Tuolumne (Tioga road)
North Dome (Tioga road)
These are just a handful of the amazing hikes Yosemite has to offer. So if you didn’t get a permit, there’s no need to cancel your trip to Yosemite.
READ ALSO: “10 Awesome Things To Do In Yosemite Valley”
Stats And Additional Tips
Total mileage: 17 miles round trip if you utilize the Mist Trail (the most commonly used trailhead).
Length of time: This will vary from person to person and highly depends on your level of fitness. Typically, expect an 8-12 hour hike.
Location: Yosemite Valley.
Water intake: Bring more than what you think you’ll need. You’ll have an opportunity for more water at the Vernal Footbridge via the filtered fountain, but that’s it. 4-5 liters or more would be wise.
Permit required: As stated above, a permit is required for this hike. The only time a permit isn’t needed is when the cables are down during winter (not recommended).
Avoid weather: If you see dark clouds or if it’s activity raining or snowing, do not climb up the cables. It is not worth the risk!
READ ALSO: “15 Tips For Your First Time Hiking Half Dome”
What Gear To Bring
This depends on if you’re doing it as a day hike or over 2-3 days. For simplicity sake, I’m going to assume you’re like most people and doing it as a day hike.
Some essential gear includes:
Daypack
Full-fingered gloves (to grip the cables)
Hiking boots/shoes with excellent tread
Hydration bladder insert (preferably 3+ liters)
Moisture wicking socks
Sunglasses and hat
Camera
Trekking poles
Sunscreen
Moleskin (for blisters)
Rain jacket/poncho
Your Thoughts…
I’d like to know your thoughts on Half Dome. Have you hiked it before? If so, was it easier or harder than you expected?
If you haven’t hiked it, are you planning to hike it this year? If so, was this post helpful? Sound off in the comments below.

Click or tap ad to view offer

15 Tips For Your First Time Hiking Half Dome
Every year, thousands of hikers summit Half Dome, many of them for the first time. In 2017, I was one of those first timers…
3 minute read | contains affiliate links
Each year, thousands of hikers summit Half Dome, many of them for the first time. In 2017, I was one of those first timers and though I felt like I was fully prepared, truth is, I wasn't.
In fact, I’m confident that if you polled others who’ve hiked Half Dome, I’m willing to bet that many of them would agree.
If you’re hiking Half Dome for the first time this season (or just mildly curious), this post is for you. I’m giving you 15 tips I feel all Half Dome hikers should be aware of going in. Let’s get into it.

Disclosure: This post contains affiliate links. If you click through and make a purchase, I may earn a commission at no additional cost to you. Thank you for supporting us!
1) Get An Early Start
This is especially true if, like most people, you’re doing this as a day hike. You’ll want to arrive to the trailhead as early as possible.
When my brother and I hiked it, we arrived at the Happy Isles trailhead at 3am. We didn’t see any daylight until we got past Nevada Fall.
The reasons you’ll want to start early are:
You’ll beat the crowds to the cables and avoid bottlenecks
You’ll likely avoid the afternoon storms that are notorious in Yosemite
You’ll beat the mid-day heat
If you’re doing this hike as a multi-day and you’re just hiking to your camping spot the first day, you won’t have to worry about it as much.
If you’re doing this as a day hike, however, definitely get started as soon as you can. It doesn’t have to be 3am, but pre-dawn is ideal.

2) Bring Gloves With You
Surprisingly, many people don’t think of this. The Half Dome cables are made of steel and they get hot. They’re also blister inducing.
Using gloves on the cables will help prevent blisters, protect you from burns and most importantly, provide you with good grip.
Sometimes, a pile of discarded gloves forms near the base. You’re welcome to use a pair but you shouldn’t count on the pile being there.
While it’s thoughtful, Rangers will collect and throw the gloves away as it’s technically littering. So bring your own. Full fingered preferably.
SEE MY TOP RECOMMENDATION FOR GLOVES TO USE ON HALF DOME HERE!

3) Bring More Water Than You Think You’ll Need
I cannot stress this enough. It’s always important to bring water with you on a hike but it’s especially true on this one.
I recommend 3-4 liters, per person. I only brought two liters with me and ran out on the way back (with over six miles left to go).
The only filtered water source is the fountain at the Vernal Fall footbridge (just about a mile into the hike). After that, you’re on your own.
4) Trekking Poles Are A Must!
My knees were killing me on the way back. If it weren’t for my trekking poles helping to off-set the weight, my brother would’ve had to carry me out.
If you’re someone who’s prone to knee pain or you know you usually require trekking poles on normal hikes, you’ll definitely want to bring them along on this one.

5) Wear Shoes/Boots With Excellent Grip
While granite usually has excellent natural grip, years of hikers traversing it has caused that section to become smooth and slick.
Seriously, normal shoes or ones that are worn down will not suffice. You’ll definitely want to break them in prior to your hike, but the tread should be as new as possible.

6) Leave Your Backpack At The Base
It may be tempting to bring your backpack with you as you climb up the cables but take it from me, make it easier on yourself (and others) and ditch it at the base.
The reason I say this is twofold:
There isn’t a lot of space between the cables, so if everyone’s wearing a bulky backpack, that space only becomes more restrictive
For some, it’s already challenging enough to climb the cables. Adding the weight/balance of a backpack only complicates matters
If you must bring a backpack to the top, bring a smaller day bag and leave the bulky one behind. No one’s going to mess with your stuff.
Do be sure to seal your bag before leaving, though. You don’t want Marmots and other critters getting in there.
7) Take As Long As You Need On The Cables
There’s no shame in taking it slow. This isn’t a race and there’s no prize at the top for the fastest climber. Go at your own pace.
Every six feet or so (at each set of steel poles) are wooden planks. Use those as a guide and focus on them if the heights start getting to you.
Rest at each one if necessary. No one will make fun of you. Just be mindful of those who may want to go faster and let them pass.

8) If You See Dark Clouds, Don’t Attempt It
Yosemite is infamous for its afternoon storms. It isn’t uncommon to go from clear blue sky to rain and lightning in the blink of an eye.
Bad weather and climbing Half Dome isn’t a good mix. If lightning decides to strike, there’s a good chance Half Dome will be where it hits.
If you get to the base and it starts to rain, don’t risk it. If you’re at the summit and see black clouds rolling in, get back down pronto.
In the 1980’s, numerous people were killed and injured on the summit when a sudden storm came in. It’s always best to er on the side of caution when it comes to storms.

9) You Can Use A Climbing Harness If You Want
Some opt to utilize a harness to secure themselves to the cables, reducing their chance of falling.
It’s a device that you wear around your waist and legs, with the other end connecting to the cables via a carabiner.
Personally, I don’t think it’s necessary. However, if it’ll make you feel better and help you fulfill your dream, go for it.
You will need to unclip and clip back in every six feet or so, so it will slow you down a bit. The peace of mind it provides may be worth it, though.

10) Get Into The Best Shape You Can
There’s no need to be a top-level athlete or master climber, but the better shape you’re in, the easier time you’ll have.
The cables themselves are more upper strength than leg strength and the hike itself will test your cardiovascular endurance.
Hitting a stair master will prepare you for the Mist Trail portion of the hike. Likewise, a strength training routine would be beneficial.
Most importantly, hike as much and as often as you can prior to your trip. The higher the elevation, the better.
11) Bring Extra Socks
This is one I wish I’d thought about. You should always take care of your feet…always. That means bringing a fresh pair of socks (or two).
If you don’t and get soaked on the Mist Trail, you’ll be forced to hike the rest of the way with soggy socks.
If the Mist Trail doesn’t get you, then your socks will most definitely be soaked in sweat by the time you make it to the summit.
Packing extra socks will allow you to swap out the nasty ones for a fresh pair for the hike back down.

12) Have A Hard Copy Of Your Permit Available
Some hikers spend 8-10 hours or more doing this hike. Consequently, if you’re taking a lot of pictures, your phone battery will almost certainly die.
If that happens and all you have is a digital copy of your permit, you’ll have nothing to show the ranger when asked. Guess what that means? Off you go.
It wouldn’t hurt to have a printed copy in a plastic bag inside your backpack. That way, you won’t risk getting turned around.
13) Bring Ibuprofen & Moleskin
You can add this one to the, “wish I thought of it”, category. As stated above, my legs and feet were wrecked by the time we got back to the car.
It was only then that I realized my mistake. I had absolutely nothing to help mask the pain and had a long drive home ahead of me.
Bring some Ibuprofen (or an alternate pain killer) with you. Take a couple at the summit, if needed, to reduce the discomfort on the way back down.
Also, moleskin does wonders for covering and preventing blisters. If you don’t know what it is, it’s a dense, woven cotton fabric that acts as a shield between your skin and shoes in areas where blisters are most common. Highly recommended for ANY hike.

14) Eat, Eat And Eat Some More
This is a long, demanding hike and for most people, will take a full day. You will burn a serious amount of calories and energy.
Due to this, you’ll need to replenish your body with as many nutrient dense foods as you can.
Foods with complex carbs, low amounts of sugar, decent level of healthy fats and high amount of protein will do the trick.
Also, salty snacks, such as beef jerky and sunflower seeds, will help you retain water and keep you hydrated for longer.
Stop as often as you need if you’re feeling hungry or low on energy. Trust me, you don’t want to tackle the cables with nothing in the tank.
SEE MY TOP RECOMMENDATION FOR PREPARING FOOD IN THE WILDERNESS!

15) There’s No Shame In Turning Around
More hikers do it than you might think. I’d wager a guess that for every ten hikers that make it to the cables, at least one decides against it.
Whether it’s due to bad weather or simply a gut-feeling on your part, there’s no shame in turning around. The cables are intimidating.
So don’t succumb to peer pressure or allow pride to take over. If you get there and it doesn’t feel right, then don’t do it. You still had an amazing adventure!
BONUS: Peak Design Camera Clip

This camera clip by Peak Design is a MUST for anyone using their DSLR or point-and-shoot camera while out on a hike or are just out and about on a shoot.
As shown in the image above, it securely attaches to your backpack strap and firmly holds your camera in place. Allowing you to be hands free while not in use.
When inspiration strikes, a quick button press is all it takes to remove it. When done, simply snap back into place and you’re done.
CHECK OUT THIS SOLID CAMERA CLIP BY PEAK DESIGN ON AMAZON HERE!
If you’re serious about hiking Half Dome, be sure to read my other Half Dome related posts…
Disclosure: This post contains affiliate links. If you click through and make a purchase, I may earn a commission at no additional cost to you. Thank you for supporting us!
Please support this website by subscribing to the newsletter below.
Thanks for reading.

5 Incredible Lake Tahoe Waterfalls You Need To See
Waterfalls are a huge attraction to nature enthusiasts. No matter the size or accompanying surroundings, people flock…
2 minute read | may contain affiliate links
Waterfalls are a huge attraction to nature enthusiasts. No matter the size or accompanying surroundings, people flock to these nature-made wonders.
Lake Tahoe has many waterfalls. Some you drive up to while others require a bit of effort. The effort to see the waterfalls on this list is minimal, making it possible to see each one in a single day.
The best time of year to see waterfalls in Lake Tahoe is spring or early summer, due to them being fed by snowmelt in the mountains. So plan accordingly.
So which Lake Tahoe waterfalls made the list? Read on to find out.
Disclosure: This post contains affiliate links. If you click through and make a purchase, I may earn a commission at no additional cost to you. Thank you for supporting us!
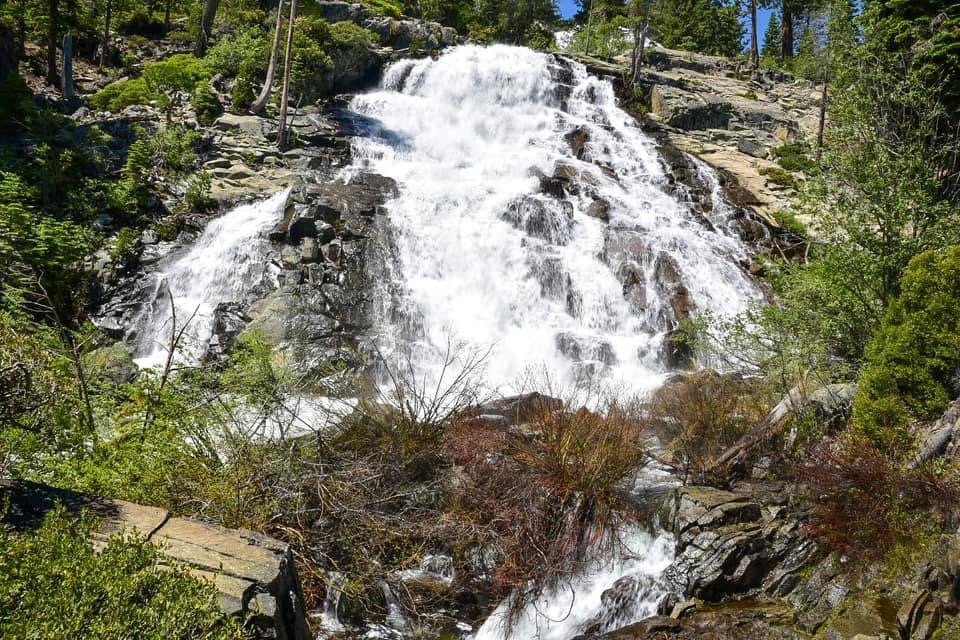
1) Glen Alpine Falls

Glen Alpine Falls is a beautiful 65-foot waterfall with multiple layered drops. It’s located at the southern end of famed Fallen Leaf Lake at the end of a narrow, bumpy road.
Thankfully, driving to the falls in the hardest part as it’s just a stones throw away from the parking area. Check out my article on Glen Alpine Falls for more details.
2) Lower Eagle Falls
Most people see the upper section of Eagle Falls (which we’ll get to in a moment) but many don’t realize that you can see the lower section as well.
To see it, you’ll need to hike the steep(ish) one mile trail into Emerald Bay State Park, as the trailhead for the falls is behind the visitor center.
3) Upper Eagle Falls

Just because it’s popular and requires some logistical planning to find a place to park, doesn’t mean you shouldn’t make the effort.
When you are able to find a spot, seeing the upper section requires minimal effort as it’s only a quarter-mile hike from the parking lot.
While you’re at it, continue another mile or so up a moderately easy trail to the picturesque, Eagle Lake. To read about that, check out my post below.
4) Horsetail Falls

If you’ve driven into (or out of) Lake Tahoe on highway 50, you’ve undoubtedly took notice of the 800-foot tall, Horsetail Falls. Technically, it’s located in the tiny town of Twin Bridges, but it’s only a few miles from Lake Tahoe, proper.
It’s height makes it the tallest waterfall in the Tahoe region and while you can see it from the highway, you’ll need to hike it to truly appreciate it.
The trail is steep, sun exposed, and difficult to follow. If you decide to do this, take your time. You’ll gain roughly 1,300 feet in two miles.
5) Cascade Falls

Cascade Falls can be found at the end of a one-mile trail. I would rate the trail as easy, as there’s little elevation gain/loss, but the last half is incredibly rocky.
To see it in its full glory, definitely make it a point to go in the spring. If you get there later in the season, though, you’ll be treated to dozens of mini-waterfalls.
At the crest of the falls, you’ll be treated to a fantastic view of Cascade Lake in the foreground and the indelible Lake Tahoe in the background.
I hope you’ll consider visiting these waterfalls during your Lake Tahoe trip. It’s definitely possible to see them all in one day but to truly enjoy yourself, try to spread them out over at least two days.
To save you from scrolling up again, here are the links to the waterfalls mentioned in this list:
Also, if you’re planning a trip to Lake Tahoe, check out our list of 25 lake and beach day essentials!
Please support this website by subscribing to the newsletter below.
Thank you for reading.

How To Hike To Lower Eagle Falls In Lake Tahoe
Nestled within the captivating natural beauty of the iconic Emerald Bay State Park, the trail to Lower Eagle Falls offers…
2 minute read | contains affiliate links
Nestled within the captivating natural beauty of the iconic Emerald Bay State Park, the trail to Lower Eagle Falls offers an awe-inspiring experience for outdoor enthusiasts and nature lovers alike.
Most are aware of the upper section of Eagle Falls just outside the park and how you can traverse the crest of lower falls across the highway.
If you want to see Lower Eagle Falls straight on, though, you’ll need to hike down into Emerald Bay via the short, but steep, one mile trail.
In this guide, we’ll discuss the parking situation, fees, what to expect on the trail and more. Let’s get into it!

Trail Stats
Location: Emerald Bay State Park, Lake Tahoe
Fee: $3 - $10 parking fee
Permit: None
Open: Seasonally
For: Hikers
Restroom: At the trailhead and in Emerald Bay
Parking: Medium sized paved lot
EV Stations: None
Difficulty: Easy going in, moderate going out
Popularity: Mega High
Mileage: About 2.5 miles total, RT
Time: 2-3 hours
Condition: Maintained, easy to follow
Features: Waterfall, Island, Visitor Center, Beach
Best Time: Spring/early summer
Pets: Not allowed
Drones: Not allowed
Hazards: Trail is steep going back out. Can be difficult for some
Our Visit(s): August 2022 & July 2023
Disclosure: This post contains affiliate links. If you click through and make a purchase, I may earn a commission at no additional cost to you. Thank you for supporting us!
Emerald Bay Parking Lot

Your trip to Lower Eagle Falls begins and ends in the Emerald Bay parking lot. To avoid the hassle of having to wait for a spot to open, you should arrive as early as possible as it’s known to fill up quickly.
There are pay stations near the trailhead that accept credit or debit cards. The parking fees are:
$3.00 for one hour (select this option if all you want to do is go to the viewing deck)
$10.00 for day use
To begin your hike, head towards the wooden booth past the pay station. To your right, there’s a viewing deck that provides a great view of Emerald Bay and your destination, Lower Eagle Falls.
The Trail To Emerald Bay

Going into Emerald Bay, the trail is all downhill and easy going. Just prepare yourself for the way out because it’s fairly steep and can be difficult for some. So come prepared.
It’s slightly less than a mile along a wider than usual dirt path. Near the bottom you’ll arrive at a junction. Head right to continue to the waterfall.
After this junction, you’ll officially be in Emerald Bay State Park. Continue straight as you pass the restroom, beach access and the Vikingsholm Castle.
Keep straight on the trail until you reach the visitor center. The incredibly short trail to Lower Eagle Falls begins just behind it.
Lower Eagle Falls

Facing the visitor center, the tail to the waterfall begins on the right. It starts out as gravel but as you get closer the falls, it’ll turn to dirt and stone.
When the trail aligns with the water, your first glimpse will be off two mini-waterfalls split between rocks and brush.
Further up, you’ll work your way up several granite rock steps before arriving at the Rubicon trail footbridge.

Go ahead and take in the views of the creek from the bridge, but don’t cross it to the other side as that’ll take you along the Rubicon Trail.
To continue towards Lower Eagle Falls, head up the trail for another 2/10’s of a mile while keeping the creek to your left.
You’ll encounter several more flights of granite steps just before reaching the falls. When you reach the top of those steps, the viewing deck and waterfall come into view.

The viewing deck is split in two by a tree and provides a straight-on view of Lower Eagle. There’s a fair amount of room but it doesn’t take many people to feel cramped.

There’s no access to Highway 89 from here. The viewing deck is the literal dead end of the trail. So when you’re finished taking it in, simply head back the same way you came.
I hope you’ll consider checking out Lower Eagle Falls. It’s a beautiful waterfall and worth the effort to see. If you’re interested in other sites nearby, check out our articles below.
Disclosure: This post contains affiliate links. If you click through and make a purchase, I may earn a commission at no additional cost to you. Thank you for supporting us!
Please support this website by subscribing to the newsletter below.
Thank you for reading.

Unveiling The Magic: Visit The Walt Disney Museum In San Francisco
Welcome to the enchanting world of the Walt Disney Family Museum, nestled in the heart of San Francisco’s historic Presidio…
3 minute read | contains affiliate links
Welcome to the enchanting world of the Walt Disney Family Museum, nestled in the heart of San Francisco’s historic Presidio.
Stepping through its doors is like embarking on a journey through the life and legacy of one of the greatest visionaries of our time. As you explore the exhibits, you'll be transported to a time where imagination knew no bounds.
From the earliest sketches of beloved characters to groundbreaking technological advancements in animation, this museum offers a truly immersive and multimodal experience that engages all your senses.
Join us as we delve into the magical realms created by Walt Disney and unravel the extraordinary story behind the man who forever changed the landscape of animation.
Get ready to be inspired, amazed and filled with childlike wonder as we embark on a tour of the Walt Disney Family Museum in San Francisco.
I’m going to be somewhat vague in the descriptions of exhibits and the museum itself, as I highly encourage you to see it for yourself and I don’t want to spoil it.
Disclosure: This post contains affiliate links. If you click through and make a purchase, I may earn a commission at no additional cost to you. Thank you for supporting us!
Location, Parking & Admission Fees

The Walt Disney Family Museum is located in the historic Presidio in beautiful San Francisco, just a stone’s throw from the Golden Gate Bridge.
The museum’s address is:
104 Montgomery Street
Entering that address (or simply the museum’s name) into any GPS device will place you directly in front of the museum, where the closest available parking is.
If there’s no parking available there, you can try the Main Post Parking Lot (across the Main Post Lawn) or behind the museum in the Taylor Road Parking Lot.
Keep in mind that parking is metered credit/debit cards (as well as cash) is accepted.

Admission fees to the museum are as follows:
Adults: $25
Senior (65 and up): $20
Student (w/ ID): $20
Youth (6-17): $15
Child (5 and under): Free
Military (active, veteran, or retired): Free
Military Spouse/Dependent: Free
These prices pertain to the main museum only. The museum features regular special exhibits on a rotating basis. If you want to tour those exhibits, add $5 to the prices above.
When buying your tickets, you’ll be asked to select an arrival date and entry window. This is to help the museum with over-crowding.
I had no issue getting tickets the day before and even though we arrived past our entry window, we were still able to get in. I can’t guarantee they’ll be lenient every time, though.
The Walt Disney Museum
When you walk inside you’ll be greeted, be asked to show your tickets and be given a quick breakdown of the museum and where everything is.
To the left of the entrance is the cafe and gift shop. To the right are some exhibits to see while you wait for your entry time if you arrive early.
At the podium, you’ll present your tickets and be given a quick explanation of the camera/filming policy before proceeding into the first room.
*I was told that pictures and video were fine, but that flash photography was prohibited. Most cameras, including those with detachable lenses, are good to go.

The first room you’ll enter is on the ground floor and details Walt’s early life. You’ll learn about where he was born, his earliest entry into the world of cartoons and his service in the Red Cross during World War One.
When you’re done looking around, head to the elevator in the next room and take it to the next floor where the remaining museum exhibits are located.

Coming out of the elevator, the next few rooms are a treasure trove of the early works of Disney animation and the equipment Walt and his animators used.
The first room heavily focuses on the musical animated classic series, Silly Symphonies. These musical shorts were the bread and butter for Disney at the time and would pave the way for musicals we all love such as, Beauty and the Beast and Frozen.

The next room details the beginning stages of the development of Disney’s first full-length animated move, Snow White and the Seven Dwarfs.
The walls are adorned with early sketches, rough drafts of the script, props, images and more. It’s a literal treasure trove of all things Snow White.


You’ll also see the multi-pane camera Walt and his animators invented in order to create the multi-dimensional look of their films.
This gave their movies depth rather than having that “flat” look that other animated features of the time had. Past that, you’ll see examples of how Disney began diversifying their character roster.

Next, you’ll learn about the Hollywood writer’s strike of 1941 and how it affected the relationship Walt had with his animators.
The exhibits also detail the events of World War Two and how Disney did his part to help keep the moral of the troops up.


From here, you’ll make your way into what I refer to as the, “transition room”. The walls are lined with screens where clips from some of Disney’s most beloved films play.

It’s a dark room with plush seating in the center, allowing you to rest and comfortably view the clips and images that rotate on the screens.
After the transition room, you enter a beautifully lit hallway with floor to ceiling windows allowing for a commanding view of the Golden Gate Bridge.

At the end of this hallway is one of the actual benches from Los Angelas’s Griffith Park. Walt brought his kids to this park numerous times and sat on this very bench (and others).

It is these benches where Walt’s idea for Disneyland first came about. He was watching his kids ride the carousel and thought to himself, “there outta be a place where kids and their parents could have fun together”.
As you move past the Griffith Park bench you’ll enter the final and perhaps most popular exhibit in the museum; the development of Disneyland.


As you work your way down the spiral ramp you’re surrounded with images and props used during creative sessions and the construction phase of Disneyland.
At the end of the ramp is a beautifully rendered model of Disneyland called, “The Disneyland of Walt’s Imagination”.


The model isn’t an exact representation of the park, but more of a, “fun map-style”, model. This allows for each of the park’s most popular aspects to be highlighted without regard to scale. Tony Baxter, a famed Disney Imagineer, is responsible for the idea.

The model was easily the most popular exhibit. Not just in this room, but in the museum as a whole. After admiring the model, your visit to the museum concludes with a touching tribute to Walt.
The final room covers his final days and the impact his death had on not just the entertainment idustry, but the world. It’s easy to see how special Walt was and how we’ll never have another one quite like him.


I hope you’ll consider paying a visit to the Walt Disney Family Museum. If you’re a Disney fan, particularly of its history, you’ll enjoy it immensely.
If you’re considering a vacation to Disneyland, doing proper research is imperative. Head over to our Disneyland section for many planning resources.
Recommended photography products (opens new link to Amazon)…
Disclosure: This post contains affiliate links. If you click through and make a purchase, I may earn a commission at no additional cost to you. Thank you for supporting us!
Please support our website by subscribing to our newsletter below.
Thank you for reading.

Glen Alpine Falls: A Beautiful Lake Tahoe Waterfall
In Lake Tahoe, not too far from Emerald Bay and located on the southern end of Fallen Leaf Lake is a somewhat-hidden…
Disclosure: This post contains affiliate links. If you make a purchase through these links, I may earn a small commission at no additional cost to you. I only recommend products or services that I believe will add value to my readers.
In Lake Tahoe, not too far from Emerald Bay and located on the southern end of Fallen Leaf Lake is a somewhat-hidden waterfall named Glen Alpine Falls.
Glen Alpine Falls is about 80-feet and cascades over multiple rocks and outcroppings. Additionally, there’s no hiking involved to see it. Simply exit your car and walk a few feet.
So how do you get there? What should you expect? I answer all these question (and more) in the guide below. Let’s get into it.

Click or tap to view offer
Quick Stats
Location: South Lake Tahoe at the sound end of Fallen Leaf Lake
Fee: None
Permit: None
Open: Seasonally (Fallen Leaf Lake road is closed in winter)
Best Time of Year: Spring through early summer
Restroom: None at the falls
Parking: Multiple pull-out style lots around the falls
EV Stations: None
Difficulty: Easy
Popularity: High
Time: One hour or less
Pets: Allowed
Drones: No signage stating you can’t
Hazards: Watch your footing around the falls
Our Visit(s): 2023
Getting There & Parking

The parking lot for Glen Alpine Falls can be found at the terminus of Fallen Leaf Lake road, itself being located off Highway 89, south of Emerald Bay State Park.
From the turn-off to the falls, it’s about four miles along a narrow, bumpy road with several tire-busting potholes. The recent record snowfall did a number on this road.
Most of the road cannot accommodate two vehicles passing each other without one pulling over to the side. If you’re driving an RV - forget it.
Fallen Leaf Lake road runs parallel to the namesake lake between many gorgeous cabins. It would be amazing to rent one of these for a weekend.

After passing the lake, you’ll come to fork in the road with the Fallen Leaf Lake Fire Station in front of you. Turn left and you’ll arrive at the falls after a quarter of a mile or so.
There’s no proper parking lot. Just multiple pull-out style lots of varying sizes. Some can accommodate half a dozen vehicles while others can only fit one or two.
You should have Glen Alpine Falls in sight after exiting your vehicle (or hear it, at minimum). Simply walk towards to the main viewing point located just off the parking area.
Glen Alpine Falls

Glen Alpine Falls is large and wide so no matter where you’re viewing it from, you’ll get a great view. The main viewing area is on a large, rocky outcropping perfect for viewing the falls straight on.
You can also do a little scrambling down some boulders to get an even closer view of the falls or the river it feeds. It was easy doing so as I was able to do it while holding a camera and tripod.
Additionally, you can easily reach and see the falls along its crest. Just walk a little further up the road and turn right towards the waterfall.

The best time to see Glen Alpine Falls is in the spring as it ebbs and flows with the snowpack melt. The waterfall reduces to a trickle as summer progresses.
Plan to visit by the end of May to see it at peak flow. All in all, it’s awesome to be able to get so close to a waterfall like this with no effort required. It’s definitely worth a stop.
If you’re interested, check out my guides below to see three other beautiful waterfalls nearby…

Hike The Waterfall Trail In Grover Hot Springs State Park
Nestled within a quiet corner of the eastern Sierra Nevada mountains lies an underrated, little-known gem in the…
3 minute read | contains affiliate links
Nestled within a quiet corner of the eastern Sierra Nevada mountains lies an underrated, little-known gem in the California state park system; Grover Hot Springs.
Grover doesn’t have the same notoriety as Yosemite or even nearby Lake Tahoe, but that’s where it gets its charm. It isn’t dense in crowds, so it’s incredibly easy to spend a serene day (or two) in its pristine setting.
In 2021, the park was shuttered due to damage sustained by the Tamarack Fire. Many trees and other shrubbery were charred, in addition to the parks infrastructure (including the hot springs complex).
Thanks to the efforts of park staff, the park’s campground and hiking trails reopened in time for the 2022 summer season. The hot springs, unfortunately, did not reopen and remain closed at the time of this writing.
In June 2023, I returned to the park to hike the Waterfall Trail. It’s a short and sweet hike terminating at an incredible 50-foot waterfall with multiple cascades.
The trail is perfect for families as there’s little elevation gain, it’s easy to follow and you’re treated to an amazing award with little effort required. Additionally, your furry, four-legged kids can join you.
So how do you get there? How many miles are involved? Is parking available? I answer all these questions and more below. Let’s get into it!

Exciting news for our readers!
We’re excited to introduce the all-new "Inked with Wanderlust" online store!
We're thrilled to bring you a fantastic collection of wanderlust-inspired merchandise. Celebrate your love for travel and exploration with our stylish apparel and accessories, designed to ignite your sense of adventure.
Discover a range of unique designs that capture the spirit of wanderlust, from cozy hiking-themed t-shirts to charming accessories that make your wanderlust spirit soar!
Visit our online store today and start your journey of style and adventure. Happy exploring!

Trail Stats
Location: Grover Hot Springs State Park. Markleeville, CA
Fee: $8 day-use fee
Payment Type: Cash only. No digital pay stations
Open: Seasonally
For: Hikers
Restroom: In the campground and near the hot springs complex
Parking: Small lot near the campground, large lot near the hot springs (currently inaccessible)
EV Stations: None
Difficulty: Easy
Popularity: Medium to low
Mileage: 1.5 miles, one way
Time: 45 minutes to one hour
Elevation Gain: 90 feet
Condition: Maintained, but damaged from the Tamarack Fire
Features: 50-foot water, alpine meadows, craggy peaks
Pets: Allowed on leash
Drones: Not allowed
Hazards: Soft soil, downed trees and trees with potential to fall are still present. Additionally, this area sees heavy bear activity
My Visit(s): 2017, 2018 and 2023
Getting to Grover Hot Springs SP

As stated above, Grover is located in the beautiful eastern pocket of the Sierra Nevada mountain range so no matter which route you take, the drive is going to be scenic.
There are multiple routes to take depending on which direction you’re coming from:
Lake Tahoe: You’ll simply go south on CA-89
Sacramento: Travel east on US-50 and then south on CA-89
Bridgeport: Go north on US-395 and then north on CA-89
Reno: Head south of US-395/US-88, before going south on CA-89

My recommendation, unless you’re coming the opposite side, is to choose a route that traverses over Monitor Pass (pictured above). It’s a jaw-dropping, beautiful drive and my personal favorite.
Even if you’re coming from the opposite side, try to build driving through Monitor Pass into your travel plans. Trust me, it’s worth it.
Once you’re in Markleeville proper (you’ll pass numerous shops and restaurants), turn onto Montgomery street and continue straight until it terminates at Grover Hot Springs.
Grover Hot Springs Parking & Fees

Presently, there is only one option for parking at the park; near the campground (or in it if you’re camping). Assuming you’re just hiking, you’ll park in a small dirt lot with enough room to accommodate a dozen or so vehicles.
Once the hot springs reopens there’s a much larger lot you could utilize there. The trail to the waterfall can be accessed from either, though, and neither one is any longer than the other.
To use the hiking trail, you’ll need to pay an $8 day-use fee. There are no digital pay stations, so fees must be paid in cash via the yellow envelopes. Be sure to keep the receipt on your dash.
If you purchase a pass to the hot springs once they reopen, that pass includes the park’s day-use fee, FYI.
Where Does The Waterfall Trail Begin?

The trail goes by a few names but for all intents and purposes, I’ll refer to it as the, “Waterfall Trail”, in this post as it is the main (and only) trail in the park proper.
There’s a trailhead near the day-use parking lot by the campground and another just past the hot springs complex. They both eventually intersect.
I have taken both routes but in order to present the most current information, this post will focus on the trailhead near the campground.
The Waterfall Trail

The trail begins along an accessible wooden boardwalk through a beautiful alpine meadow. It’s one of the few areas of the park that wasn’t heavily affected by the fire.


Along the boardwalk, there are numerous informational boards detailing the park’s history and development as well as benches to relax and take in the scenery on.
It’s quick, though, as you’ll soon reach a cluster of pine trees where the boardwalk ends and becomes a gravel/dirt path.

You’ll soon approach the only un-jumpable stream crossing of the trail. At worst, it’s ankle deep and will undoubtedly evaporate as snow-melt eases.
Shortly after this stream crossing, you’ll come to a slight fork. Coming from the direction of the campground, you’ll want to continue straight towards the charred trees.

This will be your first real example of the damage done by the Tamarack Fire. Many trees remain standing, but just as many were reduced to ash and/or had to be downed.
On the forest floor, you’ll see greenery sprouting through, trying to breathe new life into the area. You can also see trees shedding charred bark.
You’ll get an up-close-and-personal look at not only the ugly, destructive side of a fire, but the beauty and new life it brings about as well.

Soon, the trail will align with the creek on your left and that’ll continue throughout the rest of your hike until you reach the waterfall.

Shortly after aligning with the river, you’ll come to another fork. Continuing straight will take you to the falls while going right will take to Burnside Lake (5-miles).
From here, you’re only half-a-mile away from the falls. However, you’ll first have to negotiate the one and only “adventurous” section of this trail; the boulder field.

Initially, the trail appears to vanish, but fret not. Simply look to your right and you’ll notice a trail heading up and into the boulder field in front of you.
Negotiating it isn’t difficult and doesn’t require any rock climbing know-how. A little bit of boulder hopping and common sense will get you through just fine.
I’ve always found that keeping to the left side of the boulder field offers the path of least resistance. However, any route you decide to go with will get you there.

Once you get to the other side of the boulders, you’ll get your first glimpse of the waterfall ahead of you. Actually, you’ll likely hear it long before you see it.
Continue straight and you’ll soon reach the waterfall.


To view the falls from the base, you’ll need to break away from the trail proper and take a spur trail down. There isn’t a lot room down there so plan to arrive early if you want it to yourself.
If you continue further up the trail, you’ll get much closer the waterfall’s crest and have considerably more elbow room if you’re hear on a particularly busy day.


While this is the official conclusion of this portion of the trail, you can continue to explore further up and find more waterfalls.
If you’re not feeling up to it, though, spend as much time here as you please and when ready, go back the same way you came.
I hope you’ll consider hiking this trail. Whether solo, with a partner, or your family. I have no doubt you’ll love it as much as I do.
Travel safe, travel responsibly.
Check Out These Amazing Nearly Destinations!
Please support this website by subscribing to the newsletter below.
Thank you for reading.

Fort Point National Historic Site: Parking, History, Fees and More
Nestled at the entrance to Golden Gate Bay in San Francisco lies a hidden gem of American history - Fort Point National…
3 minute read | contains affiliate links
Nestled at the entrance to Golden Gate Bay in San Francisco lies a hidden gem of American history - Fort Point National Historic Site.
Steeped in military heritage and offering breathtaking views, this site transports visitors back to the era of the Civil War.
In this post, we'll delve into the captivating history of Fort Point, exploring its significance and the unique experiences it offers to those who visit.
Topics such as parking, the fort’s history, fees, how to get there and more will be discussed. Let’s get into it!

Exciting news for our readers!
We’re excited to Introduce the all-new "Inked with Wanderlust" online store!
We're thrilled to bring you a fantastic collection of wanderlust-inspired merchandise. Celebrate your love for travel and exploration with our stylish apparel and accessories, designed to ignite your sense of adventure.
Discover a range of unique designs that capture the spirit of wanderlust, from cozy hiking-themed t-shirts to charming accessories that make your wanderlust spirit soar!
Visit our online store today and start your journey of style and adventure. Happy exploring!
Fort Point History

Constructed between 1853 and 1861, Fort Point stands as a testament to the nation's military defense strategies during the mid-19th century.
Its primary purpose was to protect San Francisco Bay from potential attacks. Named after the rocky promontory on which it was built, Fort Point was initially armed with hundreds of cannons and a garrison of soldiers.
During the American Civil War, Fort Point played a vital role in safeguarding the Pacific Coast. Despite its strategic significance, it never saw direct combat during the conflict.
Its mere presence deterred Confederate vessels from venturing too close to the Bay Area, thereby safeguarding the Union's interests until 1886, when all troops were withdrawn.

In the mid-20th century, there were plans to demolish the fort in order to make way for the construction of the Golden Gate Bridge.
However, due to the efforts of preservationists, the fort was spared and bridge was purposely built around it. In 1970, it was designated a National Historic Site, ensuring its protection.
Today, the fort serves as a tangible reminder of the nation's turbulent past and the enduring strength of the United States.
Parking at Fort Point

Fort Point National Historic Site, located underneath the southern end of the Golden Gate Bridge, offers visitors a fascinating glimpse into the city's rich history.
As you plan your visit, a key consideration is parking. As I’m sure you know, parking anywhere in San Francisco can be quite the task. Thankfully, at Fort Point, there are a few viable options.
On-Site Parking

Fort Point National Historic Site has dedicated on-site parking for visitors. There’s a handful of spaces directly adjacent to the fort.
Limited street parking is also available along Marine Drive, just outside the entrance. I suggest arriving early to secure a spot.
If you intend to park here and are utilizing GPS, be sure to punch in the exact address OR its full name (Fort Point National Historic Site). The address is:
201 Marine Drive, San Francisco, CA, 94129
If you only punch in, “Fort Point”, like I did, it’ll likely take you to the Battery East parking lot (which isn’t necessarily a bad thing).
By inputting the address or full name, it’ll take you to the parking spaces along Marine drive.
Crissy Field Parking Lot
Situated a short walk away from the fort, the Crissy Field parking lot offers ample space. It provides easy access to the site and is often a preferred choice due to its proximity.
Parking here is free on weekdays but there is a fee on weekends. They are:
$1.20 per hour
$7.00 for the day
The payment kiosks accept credit or debit cards, as well as coins.
From this parking lot, it’s 1.6-miles to the fort and takes roughly thirty minutes by foot.
While it isn’t the closest lot, it’s situated near many other attractions in the Presidio. If you’re visiting them as well, parking here may be the most strategic option.
Battery East Parking Lot

Located east of Fort Point, the Battery East parking lot is another viable option. Although it requires a short downhill hike to get to the fort.
If you feel up to hiking, I highly suggest parking here. The views of the Golden Gate Bridge from this trail are outstanding. Especially in the spring when local floral is in bloom.

There are parking fees at this location. They are:
$3.00 per hour
$10.00 for the day
There are two pay stations located at each end of the lot and they only accept credit or debit cards. Be sure to place your receipt on your dashboard.
It’s about 3/4’s of a mile (one-way) to the fort and takes roughly 15-minutes to get there.
Fort Point Fees & Hours of Operation

At Fort Point, there are no admission fees (or parking fees if you park along Marine drive).
That’s the good news. The bad news? The fort isn’t open every day of the week. The fort’s hours of operation are:
Open Thursday - Monday, 10am - 5pm (roof access closes at 4:30)
Closed Tuesday, Wednesday and on Thanksgiving, Christmas and New Year’s Day
These hours pertain to the interior of the fort. The exterior can be accessed seven days a week.
If you’ll be here on a day when the fort is closed, I still recommend going as the views of the bridge from here are amazing.
However, I highly suggest timing your visit to a day when the interior is open to get the most out of Fort Point.
The Interior of Fort Point

When you step through the iron gates of Fort Point, the first thing you’ll likely take notice of is the beautiful contrast of 1800’s and 1900’s architecture as the Golden Gate Bridge intersects with the fort nearly directly above you.
There are several levels to the fort, most of which (including the open top roof) are accessible to visitors.
Something to note is that only the bottom level is wheelchair accessible. The remaining levels must be accessed via the spiral staircase leading up to the guard towers.

There are many artifacts on display, such as canons and several images showing what the fort looked like prior to the construction of the bridge.

As you move up the levels, you’ll find several rooms that were once living quarters for the soldiers and officers with exhibits on display.


You’ll also notice dozens of look-out holes along the brick walls that once allowed soldiers to maintain surveillance of the bay and utilize artillery, if needed.

Make your way up to the roof and treat yourself to amazing views of the Golden Gate Bridge and the bay. Dotted along the roof are foundations that once housed artillery batteries.
If you can, try to picture the bay without the bridge and put yourself in the point of view of the soldiers as they wondered if that would be the day the Confederacy attacked.


When you’re finished exploring, simply make your way outside the fort and move on to your next adventure of the day.
If you’re interested in additional sites that detail the area’s rich military history, consider reading a few more of our posts to help map out your trip. They are:
“The Ultimate Guide To Visiting and Touring Alcatraz Island”*
“San Francisco’s Embarcadero: Best Things To Do, Getting Around and More”*
“Muir Beach Overlook: A Breathtaking View Of The Pacific Ocean”*
“Kirby Cove: The Most Gorgeous View Of The Golden Gate Bridge”*
*Denotes a link to a separate post
Please support this website by subscribing to our newsletter below.
Thank you for reading.

Hiking Half Dome In Yosemite: My Journey In 30 Pictures
Back in 2020 when I launched this website, the very first published post was, “Half Dome: The Complete Guide To Yosemite’s Epic Day Hike”, and it’s…
3 minute read | contains affiliate links
In 2020, when I launched this website, the very first published post was, “Half Dome: The Complete Guide To Yosemite’s Epic Day Hike”, and it’s the one i’m most proud of.
The reason for that is because hiking Half Dome was a goal of mine and accomplishing that goal is what gave me the confidence and drive to launch Inked with Wanderlust.
The original post contains a ton of information and I highly recommend giving it a read if you’re planning to hike Half Dome (especially if it’s your first time).
*PRO TIP: Bookmark both of these posts to your device so you can return to the information later
This post, however, will be the shorter, stripped down version. It’ll focus solely on the trail itself and nothing else. So you’ll quickly get an idea of what this hike is like.
It’ll also focus solely on the trailhead where most Half Dome hikers begin their journey; the Happy Isles trailhead and through the Mist Trail.
If reading this post gives you some inspiration to hike Half Dome yourself, check out our ultimate beginners guide here (opens a new window).
Quick Stats
Location: Yosemite Valley, California
Fee: $35 to enter Yosemite + applicable permit fees
Permit: Required when cables are up (typically between Memorial Day and Columbus Day)
Open: All year (cables are down during winter)
For: Hikers
Restroom: Five: 1) At the trailhead 2) At the Vernal Fall footbridge 3) Near the Emerald Pools at the top of Vernal 4) At the top of Nevada Fall 5) At Little Yosemite Valley campground
Parking: Large dirt lot a quarter-mile from the trailhead
EV Stations: None
Difficulty: Hard
Popularity: Extremely high
Mileage: 14.2 - 16.5 miles, RT (depending on which route you take back)
Time: Full day/Overnight
Elevation Gain: 4,800 feet
Condition: Maintained and easy to follow
Features: Two waterfalls and summiting Half Dome itself
Pets: Not allowed
Drones: Not allowed
Hazards: The slick stone steps of the Mist Trail and the potential for fatal falls
Our Visit(s): 2017
Half Dome Trailhead and Parking
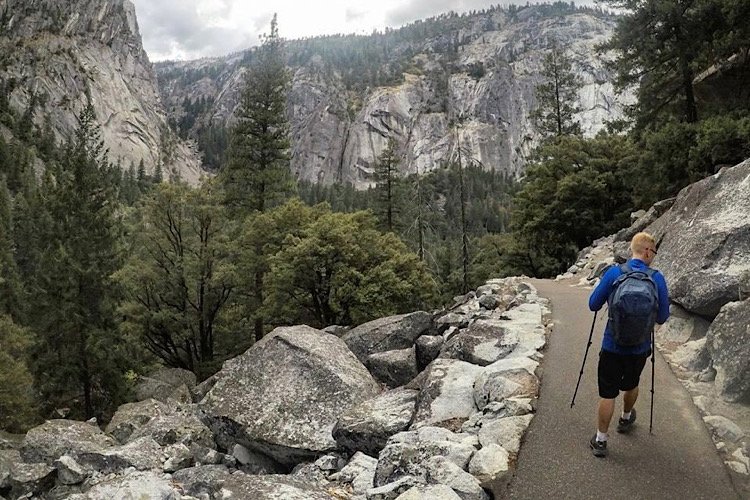
For most hikers, the official starting point for Half Dome is the Happy Isles trailhead. Which is also the trailhead for the Mist Trail and John Muir Trail.
There is no parking lot at Happy Isles itself. The nearest one is a large dirt lot located about a quarter-mile down the road (near Curry Village).
To get to it, look out for Curry Village signage and follow them. As you near Curry Village, you’ll see signage pointing the way to the parking lot.
The lot is known to fill quickly. Especially during the summer and spring season. Plan for an early start, pre-dawn preferably. I began my hike at 3am.
If full, you can always utilize the shuttle. It’ll drop you off near the trailhead. Keep in mind, though, that the shuttle doesn’t begin operations until 7:00am.
The Mist Trail
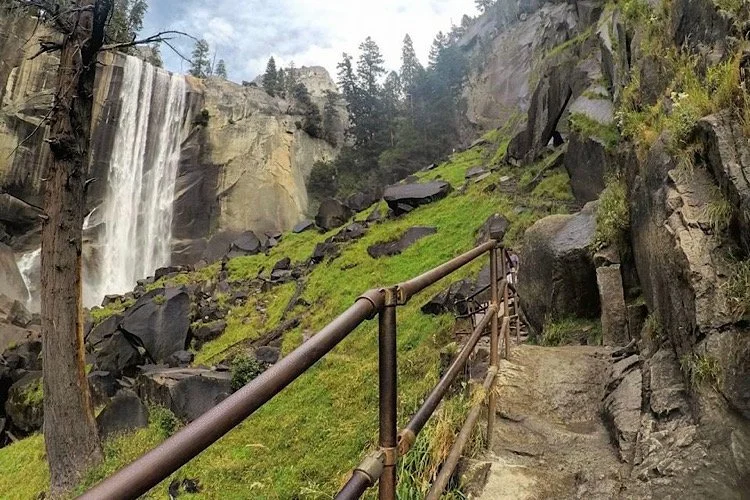
Aside from Half Dome, the Mist Trail is arguably the most popular trail in Yosemite. It features two beautiful waterfalls (Vernal and Nevada Falls) in a relatively short hike.
If you’re here in spring or early summer, prepare to get wet. They don’t call it the Mist Trail for nothing. Later in the season, it isn’t so dramatic as run-off is minimal.
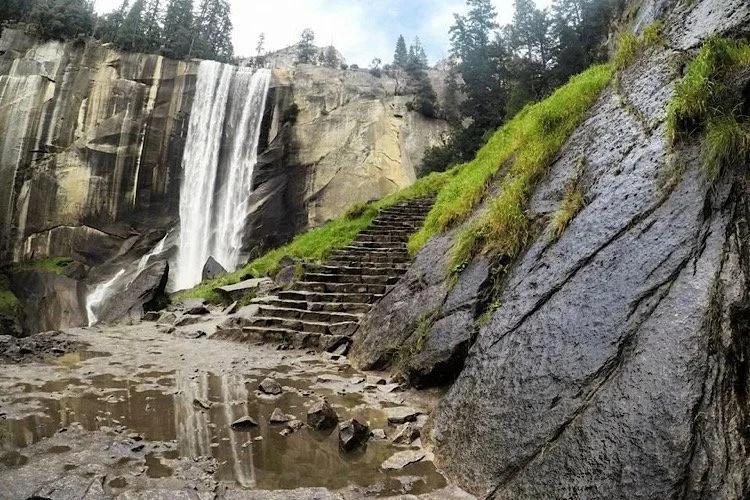
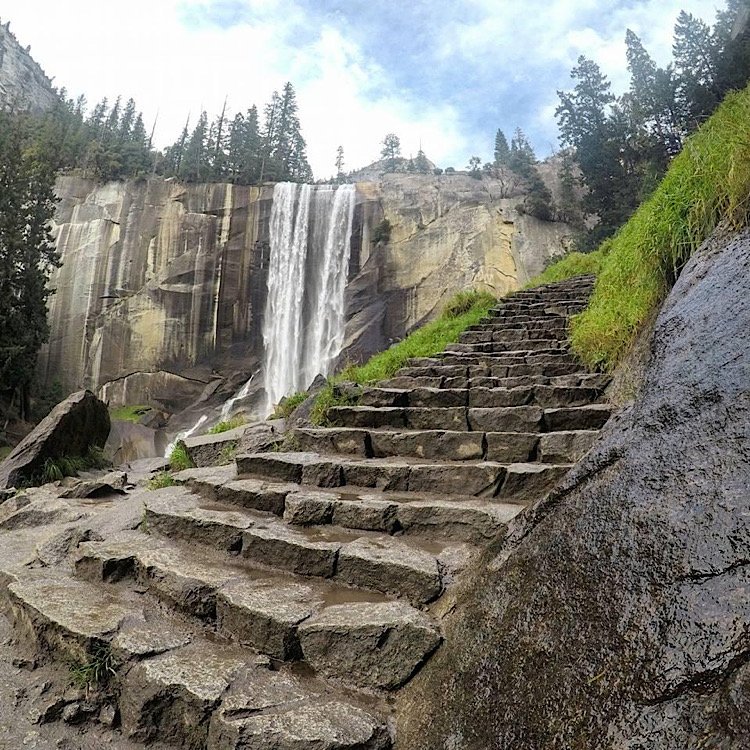

One danger you’ll need to be cognitive of are the stone steps. There are hundreds of them and they get incredibly slick from the constant mist.


From the trailhead, it’s 1.5-miles to Vernal Fall. By the time you’ve reached Nevada Fall, you’re about 3.5-miles in.


Between Vernal Fall and Nevada Fall you’ll get a reprieve from the stone steps as the trail turns to a traditional dirt path.
After crossing the footbridge near Nevada Fall, the stone steps return as you work your way to the top of the beautiful waterfall.


At the top of Nevada Fall is a restroom and a few benches/rocks scattered about to sit on. It makes a great spot to relax and gather yourself.
Little Yosemite Valley & Incline

After Nevada Fall, you’ll start on the one and only flat portion of the trail. Be sure to enjoy the reprieve because it won’t last long.
This stretch will take you through what’s known as Little Yosemite Valley (where a backcountry campground by the same name is located).
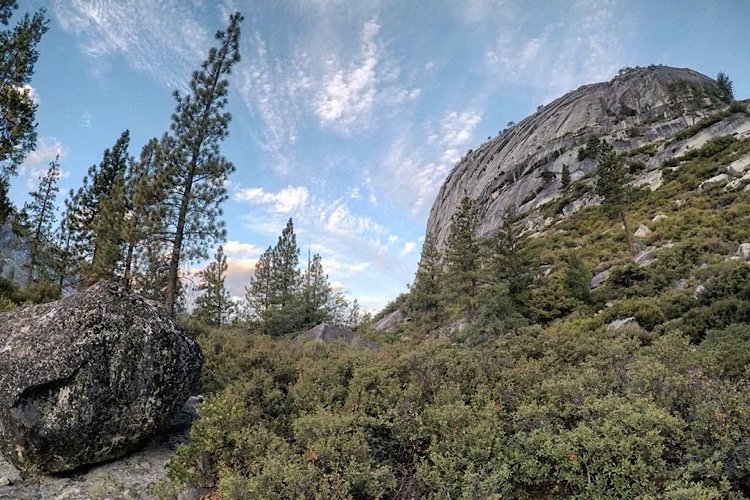


When you reach the campground, you’re right around the halfway mark to Half Dome. There, you’ll find your fifth and final opportunity to use a restroom.

Shortly after the campground is when you’ll again begin another relentless incline as you make your way to Sub-Dome.
You’ll make your way up the mountain via a series of switchbacks. They’re not difficult but if you’re not used to the elevation, you’ll feel it.
Sub-Dome
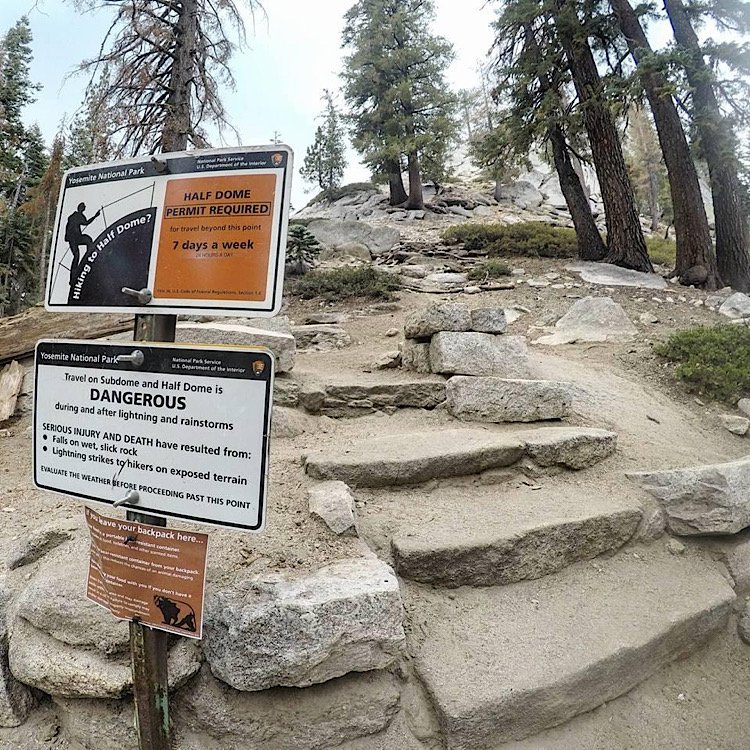
Sub-Dome is your final obstacle before reaching the cables. I believe Mother Nature designed it to do one thing; destroy whatever’s left of your legs.
It’s a mini granite-dome connected to the back half of Half Dome. A series of short switchbacks built into the granite take you to the top.
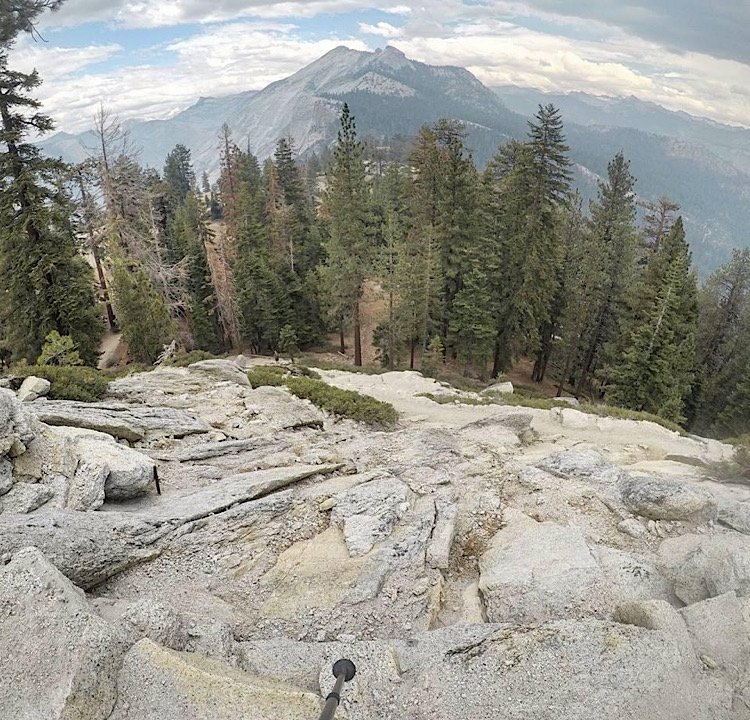
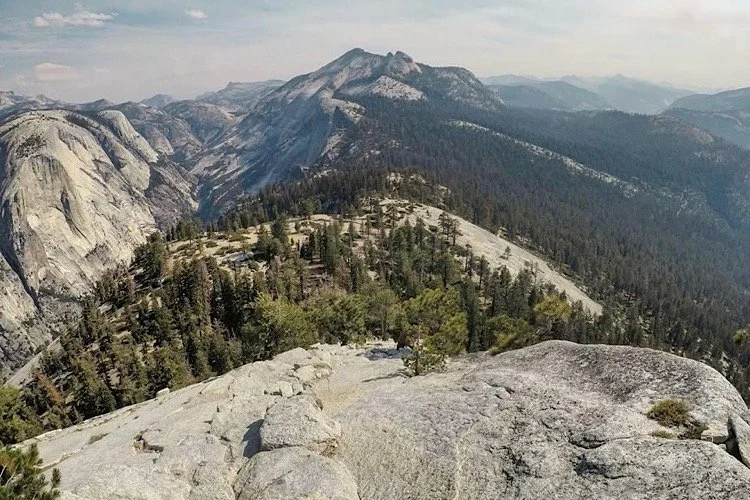
This is also the point in the hike where you’ll likely need to show your permit to a Ranger for inspection (if there’s one stationed there).
Sometimes the Ranger is stationed just before Sub-Dome, sometimes their stationed at the top. Don’t risk going through all that if you don’t have one.
READ ALSO: “Half Dome Permit: The Ultimate Permit Lottery Guide”
Half Dome Cables

From here, the only thing standing between you and the summit are the cables. The cables are there to assist you in reaching the top.
They’re placed in the granite and feature a wooden plank between two steel poles every six feet or so. Along the entire length are two elevated steel cables.
To use them, simply grab hold of the cable and hoist yourself upward to each wooden plank. My brother and I used those planks as resting points.
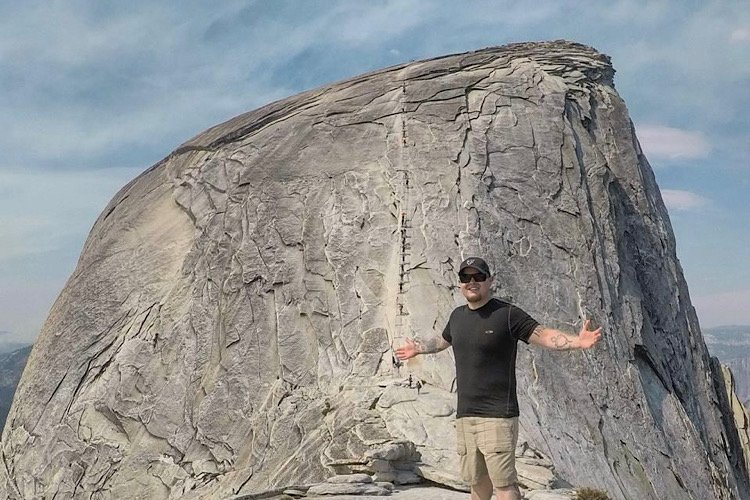
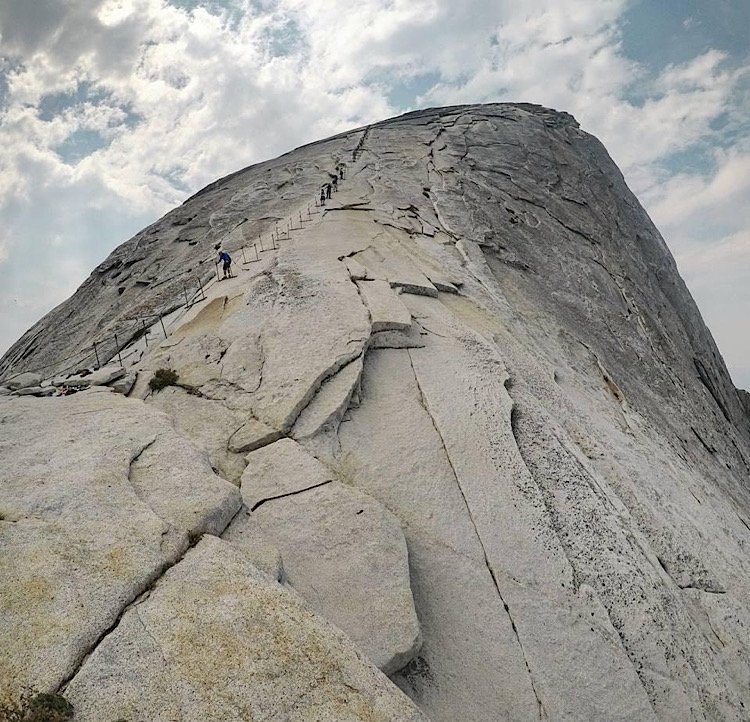
The space between the cables isn’t very wide and those going in both directions share the space. No matter your direction, stay to the right.
If you want to use a harness to secure yourself, you can. You’ll need to unhook/hook-up again at every pole so it will slow you down a bit.


If you feel like you need to take it slow, that’s perfectly fine. Just keep in mind that people behind you may want to go faster. If so, simply let them pass.
When I was on the cables, I was impressed by how cooperative and helpful everyone was to each other. There was no chaos or rudeness.
To me, the ascent wasn’t that bad. It looked much worse in pictures and video. Still, it gets near vertical the higher you go, so take precaution.
Half Dome Summit
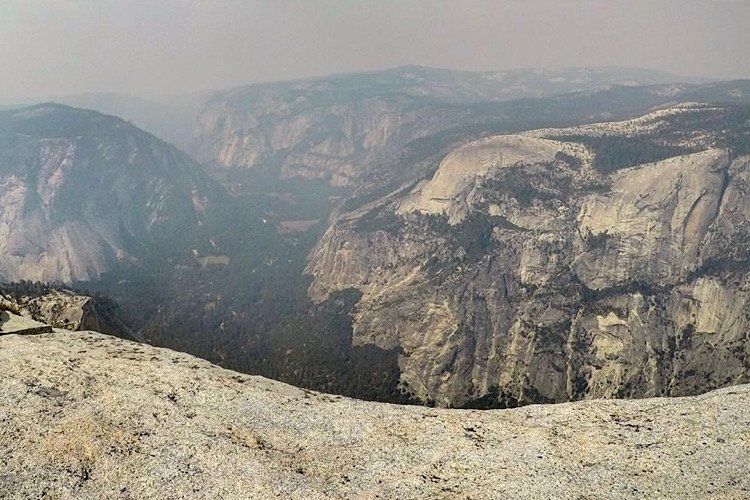
Reaching the summit of Half Dome is quite the accomplishment for all who attempt it. For me, this was an “Everest” moment (cheesy, I know).
The views are astounding no matter which way you look. Walk straight (away from the cables) to the edge to get a commanding view of the valley.
Other points of interest visible from Half Dome are North Dome, Cloud’s Rest, Glacier Point, Tenaya Canyon and more. The views are simply unsurpassed.
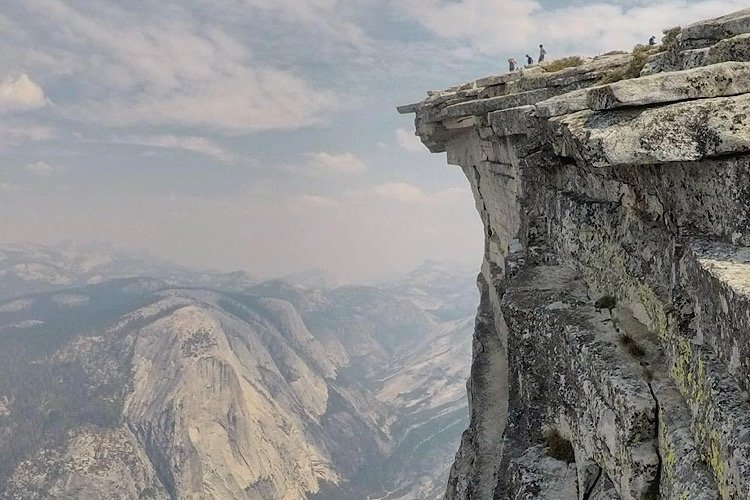
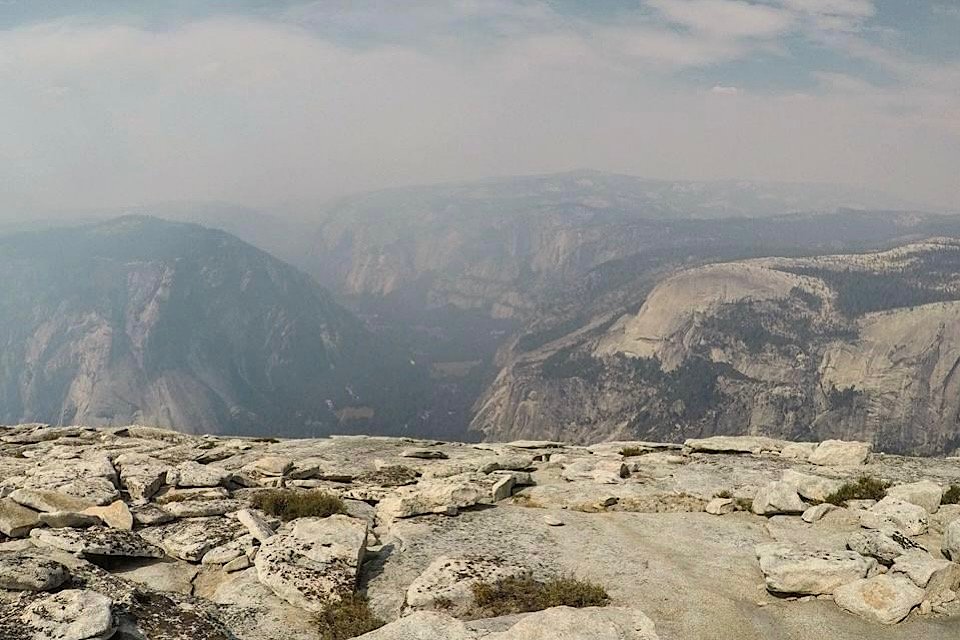
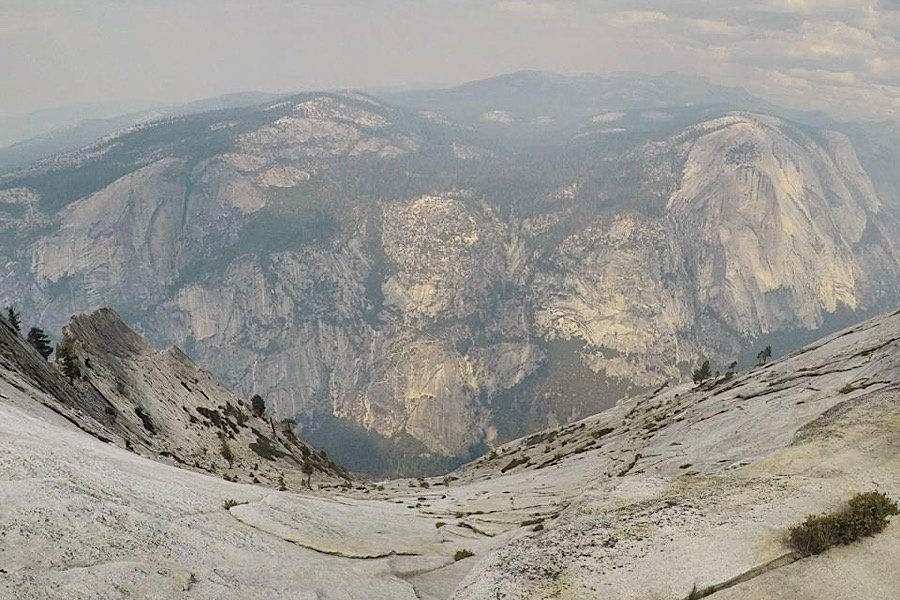
The summit is about the size of seven combined football fields, so there’s plenty room to walk about and explore. So take your time.
One thing I should mention - if you see dark clouds coming, head back down asap. You do not want to be stuck up there during a storm.
Heading Back
When you’re finished, simply head back the same way you came…with one exception. When you reach the top of Nevada Fall again, you’ll have two choices:
Head back down the Mist Trail (remember the slick, stone steps)
Take a detour down the John Muir Trail (JMT)
When I hiked it, we made the decision to hike back down the Mist Trail because on our way up, it was still dark and we didn't see much.
Trust me when I say that if there’s one aspect of our experience I regret, it’s not taking the JMT detour. My legs were jello and navigating those steps was miserable.
Taking the detour will add another mile or so to your hike BUT…you won’t have to contend with the steps. It’s a standard dirt path.
Your Thoughts…
I’d like to know your thoughts on hiking Half Dome and the cables themselves. Is this something you think you’d want to do?
Have you done it? If so, i’d like to hear your perspective. Perhaps it wasn’t that bad to you or maybe it was harder than you anticipated?
Let us know in the comment section below or send us a private message on our Instagram. We love hearing from our readers!
Also, don’t forget to check out our insanely detailed ultimate guide about Half Dome to get suggestions, advice, alternate routes and more!


Please support our website by subscribing to our newsletter below.
Thanks for reading.
CHECK OUT THESE OTHER AMAZING CALIFORNIA DESTINATIONS!


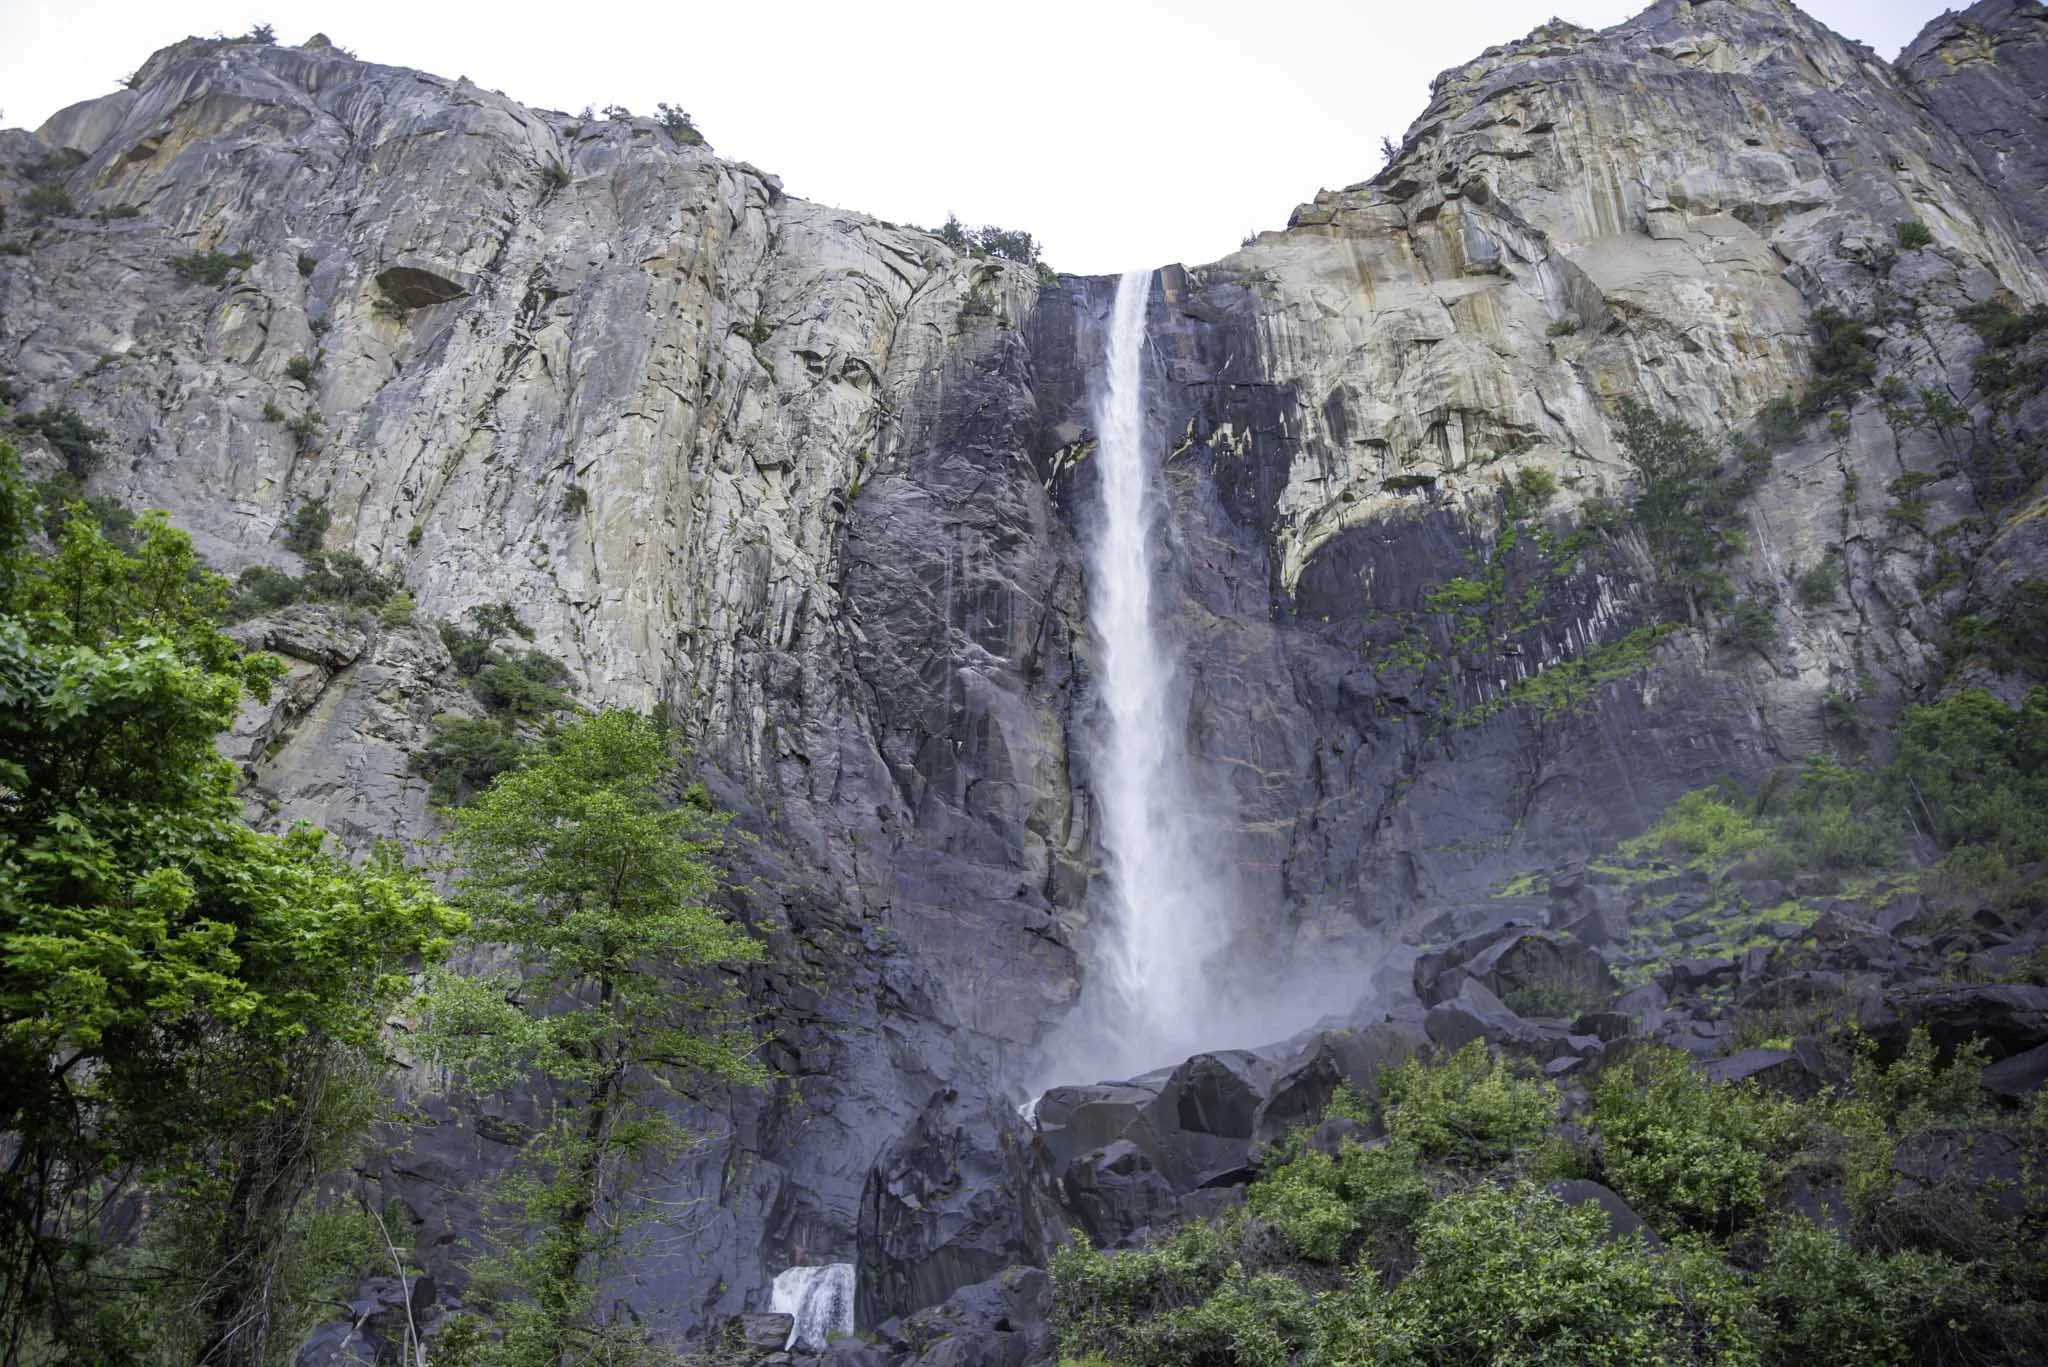


How To Hike To The Base Of Middle McCloud Fall
Middle McCloud Fall is just one of three beautiful waterfalls, collectively known as McCloud Falls, along the McCloud…
3 minute read | contains affiliate links
Middle McCloud Fall is just one of three beautiful waterfalls, collectively known as McCloud Falls, along the McCloud River about 45 minutes from the town of Burney.
Being that there’s two more waterfalls, you may be wondering why i’m only writing about the middle fall in this post. There reason is simple…it’s my favorite.
I have a post dedicated to the three falls as a whole. If you’re interested in reading that one, you can do so here.
In that post, I state near the end of article that if you only have time to visit just one of these, make it the middle fall.
On top of that, of the three, the middle fall is the only one that requires any real effort to reach the base (you can drive to all three but the middle one requires a small hike to reach it).
So in this post, i’m going to cover where to find parking, what to expect along the trail and what it’s like at the base of the fall. Let’s get into it!

Quick Stats
Location: McCloud, CA (45 minutes from Burney Falls)
Fee: None
Permit: None
Open: Spring, summer & fall
For: Hikers, swimmers, sightseers
Restroom: At the trailhead
Parking: Large, paved lot
EV Stations: None
Difficulty: Easy
Popularity: Medium to high
Mileage: 0.8-mile, out-and-back
Time: 1-3 hours (depending how much you spend at the fall)
Elevation Gain: 157-feet
Condition: Maintained & easy to follow
Features: Waterfall and great swimming hole
Pets: Allowed on leash
Drones: No signage stating you can’t use them
Hazards: Boulder field near the base and submerged boulders in the swimming hole
Our Visit(s): September 2019 and May 2022
Getting There and Parking

Middle McCloud Fall is fairy easy to get to. If you’re coming from the town of Burney:
Drive north on highway 89 for about 40-miles
Turn left onto Fowler Public Camp road
Continue for about a half-mile
Then turn left onto an unnamed, paved service road (you’ll see signage indicating the way)
If you’re coming from the Dunsmuir:
Drive south on highway 89 for about 22-miles
Turn right onto Fowler Public Camp road for a half-mile
Turn left onto the same unnamed service road.
Each of the three falls have their own paved parking lots but the middle one is the largest. It could easily fit dozens of vehicles plus some RV’s and buses.
You’ll find the trailhead directly adjacent to the bathrooms.
Trail To The Vista

For those who don’t want to make the trek down to the bottom, the middle fall can be viewed from above at the vista.
The trail to the vista is paved and is able to accommodate wheelchairs and strollers. There are two of them to choose from.
For most people, this is as far as they’ll go. The view of the falls from up there is nice but to get the true experience, you’ll want to hike down to the base.
Trail To The Base

Finding the beginning of the trail to the base can be a bit tricky. Especially if you aren’t paying attention (like me during our first visit).
The dirt path to the base spurs off from the paved trail that leads to the second vista. Right as the paved path elbows, look to your right (pictured above).
The dead giveaway are the rocks lining the right side of the trial, forming a path. How I missed that the first time I’ll never know.
*Side Note: There is no sign pointing the way. So keep an eye out for those rocks you see in the photo above.

From there, it’s only 0.4-mile down to the bottom. Accounting for a few stops to take pictures, it shouldn’t take more than 10 minutes or so.
Shortly after finding the trail, you’ll encounter a set of wooden stairs. After this, the trail continues its descent via a series of switchbacks.

The trail, while a bit rocky in some spots, is well maintained and easy to follow. There are no steep points as the switchbacks are gradual.
When you reach the bottom, you'll come to a junction. Going right will take you down to Lower McCloud Falls (about a mile out).

To continue to the middle fall, head left (you should have the waterfall in your line of sight as this point).
At the end of the trail, you’ll see a large boulder field in front of you. If you want to swim near the waterfall, you’ll need to negotiate it.

Most of the boulders are positioned fairly close to one another, so getting through it isn’t too difficult. Young children may have a tough time, though.
Once on the other side, you’ll have unobstructed views of Middle McCloud Fall and its pool. I was fortunate enough to have it all too myself.

The scenery is amazing. Huge, towering alpines surround you while the water pours over the crest and down the large basalt rock wall into the pool below.
If you plan to swim, I do caution you to watch for the submerged boulders and to wear water shoes as there’s tons of debris in the water.

When you’re done, simply head back up the same way you came. While you’ll definitely notice the incline going out, it’s still an easy trek.
I stand firm that the middle fall is the best of the three and if you only have time for one, to make it this one. You won’t regret it.
If you want to make it a point to see all three waterfalls and hike the trail connecting them, check out our post, “McCloud River Falls: Three Fantastic Waterfalls In One Hike”
Your Thoughts…
What do you think of Middle McCloud Falls? Does this seem like a waterfall/hiking trail you and your family would enjoy?
Let us know in the comments below! We love to hear from our readers.
Please support our website by subscribing to our newsletter below.
Thank you for reading.
Check Out These Other Amazing Destinations!


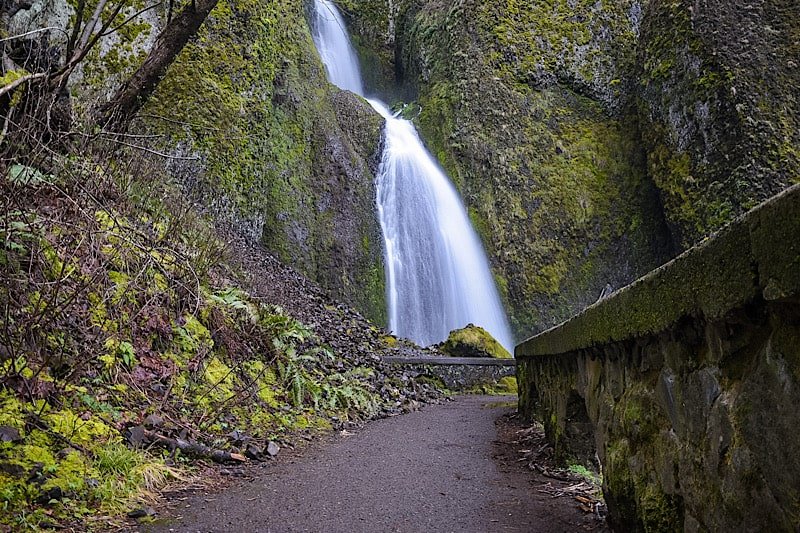


7 Things You Will Love About Burney
Burney is an unincorporated town in Shasta County in Northern California and has long been a haven for outdoor enthusiasts…
3 minute read | contains affiliate links
Burney is an unincorporated town in Shasta County in Northern California and has long been a haven for outdoor enthusiasts.
The town is mostly known for its waterfall of the same name, Burney Falls, a 129-foot, nearly 300-foot wide behemoth.
While Burney Falls deserves its status as the town’s main offering, there are many other things to do in and around Burney that most may not be aware of.
In this post, we’re going to discuss seven of our favorite things about Burney that we think you would love most.

A Quick Note…
We have several more “7 Things” posts about other great towns that you might want to read about. Click/tap any of the links below (opens a new window) to read them.
1) McArthur-Burney Falls State Park
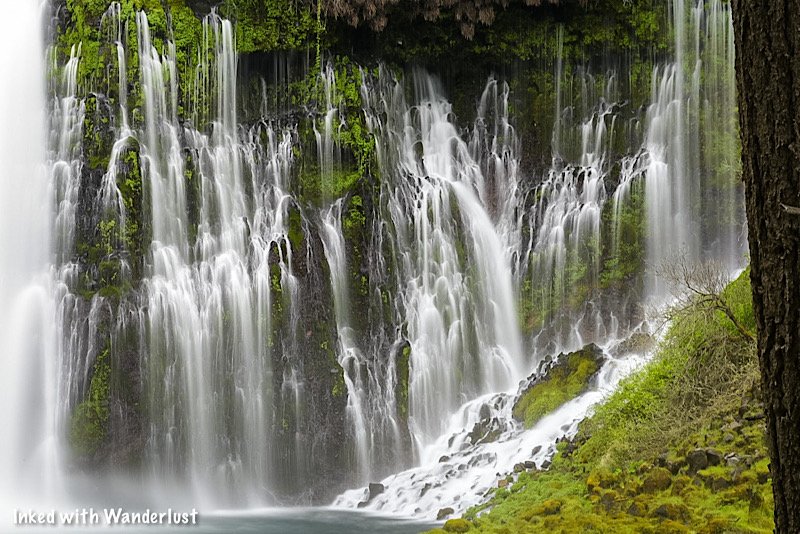
May as well get the main event out of the way at the start. You’ve undoubtedly heard of Burney Falls (or at the very least have seen pictures of it).
It’s more than deserving of its title as one of the best and most popular waterfalls in the entire state and you would agree once you’ve seen it.
Burney Falls has a commanding presence with a height of 129-feet and a width of nearly 300-feet. It’s an amazing sight to behold.
No trip to Burney would be complete without AT LEAST one visit to the falls and take in its beauty. If you’ve never been, be sure to check out our guide.
READ: “Burney Falls State Park: When To Go, Directions and More”
2) Junk Art Sculptures

Just down the road from Burney Falls in the tiny town of Cassel are a bunch of junk art sculptures that are open to the public.
They’re placed in front of a local construction company, the owners of said construction company being the artists behind them.
It is free to both park at and explore the sculptures and it’s open during daylight hours. It’s a great way to kill an hour or so.
READ: “Check Out Junk Art Sculptures Near Burney Falls”
3) Proximity to McCloud River Falls

While not in Burney itself (the falls are located near the town of McCloud), McCloud River Falls is a series of three scenic waterfalls.
It’s about an hour’s drive to these falls, but the trip is more than worth it, especially if it’s a hot day and you’re in search of a swimming hole.
The three falls can be accessed via a 3.9-mile, out-and-back hiking trail or by driving to each one. The lower and upper falls are right off their parking lots.
The middle fall (the most scenic of the three) can be viewed from above but for a closer look, you’ll need to take a series of switchbacks to the bottom.
READ: “McCloud River Falls: Three Fantastic Waterfalls In One”
4) Subway Cave

Just a short drive from Burney is the largest, most easily accessible lava tube cave in the world; Subway cave.
It isn’t open in winter but if you’re in the area any other time of year, you’re all set. Best part? It’s free to park and explore the cave.
You’ll definitely want to bring flashlights because there are no natural or artificial light sources anywhere in the cave.
READ: “Subway Cave: Explore An Awesome Lava Tube Near Burney Falls”
5) Proximity to MANY Waterfalls

Burney Falls is far from the only waterfall in the area. In fact, there are DOZENS scattered throughout the area.
A handle of examples of those include; Hedge Creek Falls (pictured above), Potem Falls, McCloud Falls, Mossbrea Falls and Faery Falls.
READ: “Hedge Creek Falls: A Short Hike To An Incredible Waterfall”
6) A Plethora of Hiking Trails

As is the case with the rest of California, there are hiking trails everywhere around Burney and the surrounding area.
In fact, a beautiful section of the infamous Pacific Crest Trail (PCT) goes through here.
Some other well known area trails include the Burney Falls Scenic Loop, the Spatter Cone Trail, the Great Shasta Rail Trail and more.
READ: “How To Hike The Burney Falls Scenic Loop”
7) The Bridge from ‘Stand by Me’

Finally, if you’ve ever seen the movie, ‘Stand by Me’, then you’ll undoubtedly remember the infamous bridge scene.
In it, the four boys attempt to cross the bridge but end up having to run for their lives from an oncoming train.
Many people don’t realize that the bridge used in the movie is still standing and is just down the road from Burney Falls.
Due to an unfortunate death in 2021, walking on the bridge is no longer permitted. You can, however, still visit it and take in the surrounding views.
READ: “How To Visit The Bridge From ‘Stand By Me’ In Burney”
Your Thoughts…
Does Burney sound like a place you and your family would enjoy? Have you been to any of the destinations listed above?
Let us know in the comments below! We love hearing from our readers.
Please support our website by subscribing to our newsletter below.
Thank you for reading.
Check Out These Amazing Oregon Destinations!
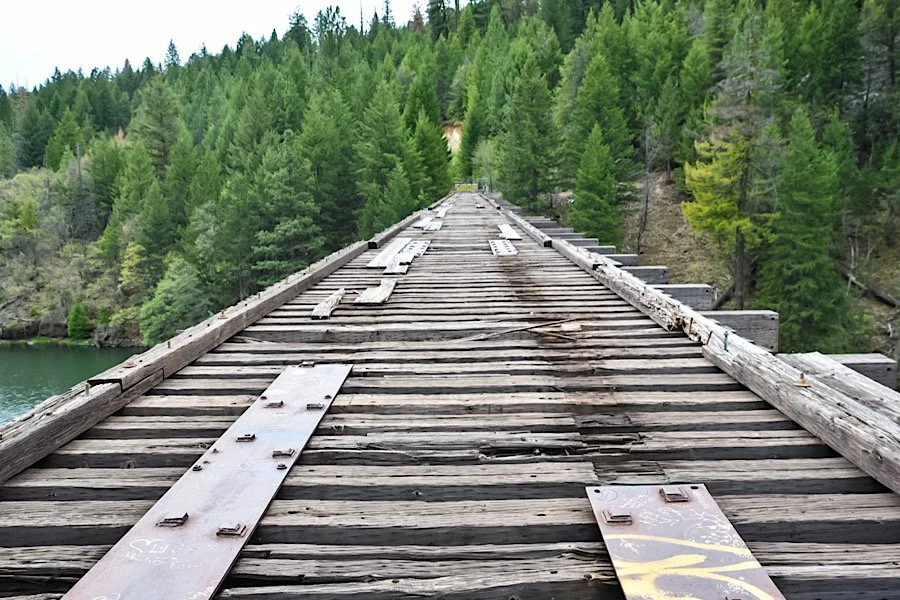
How To Visit The Bridge From 'Stand By Me’ In Burney
The 1986 Hollywood film, ‘Stand By Me’, wasn’t exactly a box office hit but over the years it has since gained a strong cult fan…
Disclosure: This post contains affiliate links. If you make a purchase through these links, I may earn a small commission at no additional cost to you. I only recommend products or services that I believe will add value to my readers.
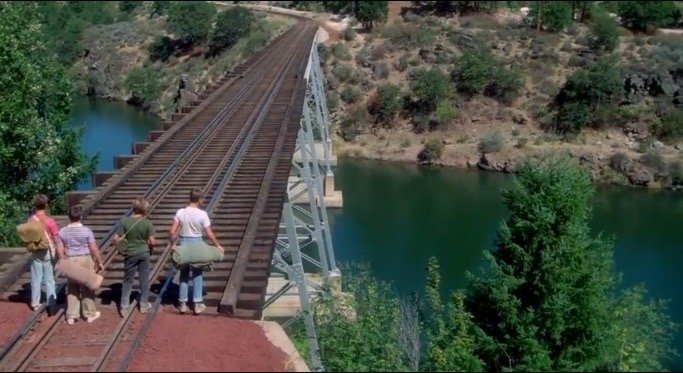
The 1986 Hollywood film, ‘Stand By Me’, wasn’t exactly a box office hit. Over the years, though, it has gained a strong cult following. If you’re a part of that following (and since you’re reading this i’m assuming you are), you undoubtedly remember that infamous bridge scene.
You may not realize this, but that scene wasn’t filmed in Oregon. It was filmed just down the road from Burney Falls in Burney, California. While it was taken out of service early into the new millennium, it still stands to this day and can be easily visited by anyone who wishes to.
So where is it? How do you get there? We answer these questions and more in the post below. Let’s get into it.
A Quick Word…
While you’re still permitted to visit the location of the bridge, the bridge itself has been blocked off. Accessing the bridge is no longer permitted due to the 2021 death of a Reno, NV man.
Getting to the Stand by Bridge

The bridge from ‘Stand by Me’ is located just a short drive away from the central part of Burney, California. From famed Burney Falls, it’s just a couple minutes away.
If you’re coming from Burney (whether the town or the waterfall):
Head north on highway 89 (if you’re at Burney Falls, take a left out of the park).
Shortly after crossing over Lake Britton, and driving through the overpass, take a (very) hard right onto Eagle Mountain lane.
You’ll continue on the dirt road for about a quarter mile before arriving at the bridge on your right.
If you’re coming from the opposite direction, such as McCloud or Dunsmuir, you’ll simply go south on highway 89 before taking a left onto Eagle Mountain lane.

Milage from additional cities and parks include:
Burney Falls: 2.5 miles
Lassen National Park: 43 miles
Redding, CA: 67 miles
Reno, NV: 168 miles
Medford, OR: 138 miles
Brownsville, OR: 338 miles
The dirt road going to the bridge is navigable for just about any vehicle. Our compact made it just fine. Though there are some potholes to keep an eye out for. There is no official parking lot, but there’s an open area of dirt on the side of the road that serves that purpose. Just find a spot that makes sense.
The ‘Stand By Me’ Bridge

The first thing you’ll likely notice is the blockade placed in front of the bridge. Prior to 2021, walking across the bridge was permitted. Since 2021, when a Reno man was killed after jumping from the bridge, a barricade was put in place and access to the bridge became prohibited.
Thankfully, there are open slots between the cement blockade and barbwire where you can get a clear photo of the bridge itself.
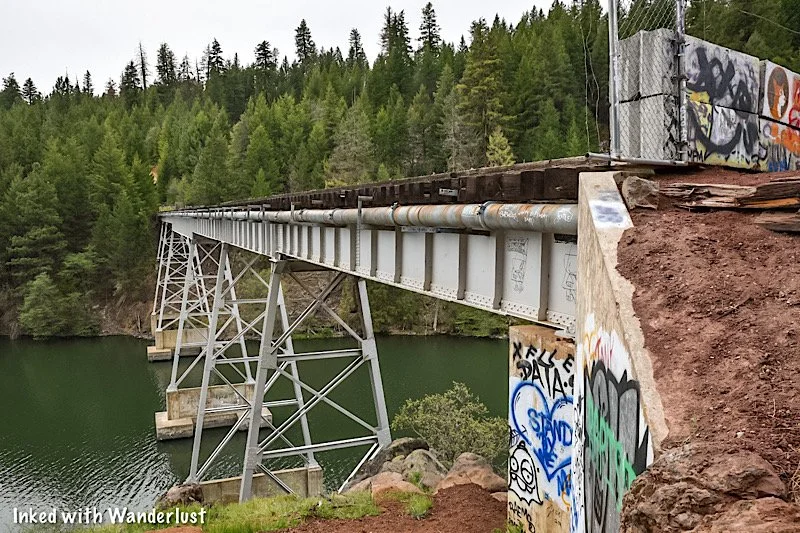
Despite the bridge being blocked off, it’s still worth a visit. Particularly if you’re a fan of the movie. Even if you’re not a fan, it’s a historic bridge with amazing views of the lake and surrounding hills. You can get those views on either side of the bridge.

I can’t say for sure, but it’s likely possible to access the bridge from the other side via the Burney section of the Pacific Crest Trail (PCT). Along the Burney Falls Scenic Loop there’s a point in which you can access the PCT. I’m not sure of the milage, though. I suggest hiking for a couple miles until you see what looks like old train tracks and follow those towards the water.
PSALM 91

Check Out Cool Junk Art Sculptures Near Burney Falls
The small town of Burney, California, is known as the home to the awe inspiring, Burney Falls, and central to many more amazing…
2 minute read | contains affiliate links
The small town of Burney, California, is known as the home to the awe inspiring, Burney Falls, and central to many more amazing destinations.
There is one attraction just ten minutes or so outside of Burney that isn’t well known, but is a fun (and free) way to spend an hour or more exploring - the Cassel Junk Art Sculptures.
So how do you get there? What kind of sculptures are there? Where are they located? We’ll answer these questions and many more. Let’s get into it.

Quick Stats
Location: Packway Materials - Cassel, CA
Fee: None
Open: Every day, during daylight hours
For: Everybody
Restroom: None
Parking: Medium sized dirt lot right off the road
EV Stations: None
Popularity: Low
Time: An hour or less
Features: Dozens of junk art sculptures
Pets: Not specified
Drones: Not specified, but this is private property so seek permission first
Our Visit(s): May 2022

About The Sculptures & Getting There
The Cassel Junk Art Sculptures are located in the tiny town of Cassel near the front entrance of Packway Materials, a local construction company.
The two brothers who own the company are also the artists behind these sculptures and use scraps from their business to create them.
The address for the sculptures is:
22244 Cassel road, Cassel, CA
If you’re coming from the town of Burney, head Northeast up highway 299 and go straight through the stoplight. Then, turn right onto Cassel road for two-miles.

If you’re coming from Dunsmuir/McCloud/Burney Falls, head south on CA-89 to the four-way stop. Turn left at the light and then turn right onto Cassel road for two-miles.
You’ll pass a huge, empty grassy field on your right just before arriving. On arrival, you’ll see a medium sized dirt lot near the sculptures. That’s where you’ll park.
There is no fee to park or to explore the sculptures, but keep in mind that this is private property. So please be respectful of that.
Junk Art Sculptures

There’s no specific order to view the sculptures. Simply go from one to the next. They’re fairly spread out, but not to the point where you’ll have to walk extensively.
There are a couple dozen sculptures of varying shapes, sizes and themes. A few examples of what you’ll find are:
A 40-foot, 5-ton dinosaur
A rock man
An ant
Aliens and their UFO
A Dragonfly
A Miniture Dachshund
A Giant Grasshopper
And Much More


It won’t take long to explore. When we were here we spent about an hour looking around and taking pictures.
If you bring kids, I’d imagine you could spend a little more time than that here. Especially if they’re interested in them.
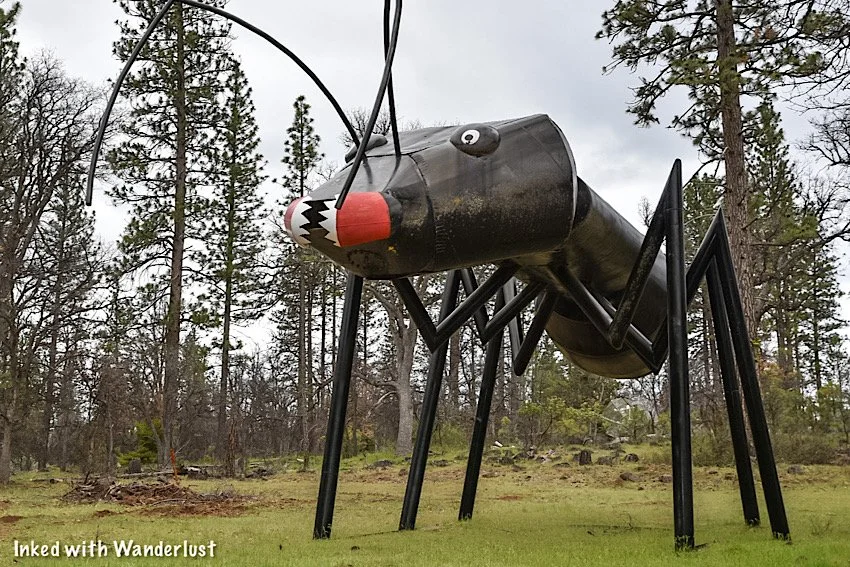
If you happen to be driving through or spending time at Burney Falls, the junk art sculptures are a worthy stop to get out and stretch your legs.
Your Thoughts…
Does this sound like something you and/or your kids would enjoy? Tell us in the comments below. We love hearing from our readers!
By the way, be sure to check out our posts below about the other amazing attractions in this area.
Please support our website by subscribing to our newsletter below.
Thank you for reading.
Check Out These Amazing Hiking Trails!


Our Pick Of 12 Mono County Destinations For Your 2023 Summer Plans
Situated between Nevada and Yosemite National Park, Mono County is located in the east central part of California with the…
3 minute read | contains affiliate links
Situated between the Nevada state line and Yosemite, Mono County is located in the east central portion of California.
Mono County is infamous for being a haven for fisherman, hikers, skiers and sightseers alike. It truly is a wonderful place.
Now that new year celebrations are past us, many people, including yourself, are probably beginning to map out your travel plans for the year.
I wrote this post to help inspire you to consider Mono County for your family vacation this year. It is one of our favorites and I have no doubt you’d love it too.
So read on as we list our twelve personal favorite destinations that we think you and your family would love.
1) Bridgeport, CA

Kicking off the list is our favorite little mountain town - Bridgeport. The town may be small but it’s packed with all sorts of sights to see.
You can soak in hot springs, explore historic buildings like the old jail, experience world-class fishing, dine at a local favorite or hit one the many hiking trails.
With so much to see and do, you could spend your entire vacation in Bridgeport. There are many hotels in and around town to accommodate you.
2) Travertine Hot Springs

Located down a dirt road behind the Bridgeport Ranger Station, Travertine Hot Springs in one of the many natural springs in Mono County.
This one, however, stands out as our favorite due to its ease of access and beautiful mountain views. Sunrise, in my opinion, is the best time to be here.
READ: “Travertine Hot Springs: A Relaxing Soak With Mountain Views”
3) The Robinson Creek Trail To Barney Lake

There are many fantastic hiking trails in Mono County, but the Robinson Creek trail to Barney Lake ranks up there as one our favorites.
The trail begins at the rear of the Mono Village campground and is a semi-moderate trek through the Hoover Wilderness.
It’s about 8-miles, out-and-back, and with the exception of some switchbacks towards the end, it’s fairly flat with no steep inclines.
4) The Virginia Lakes Trail
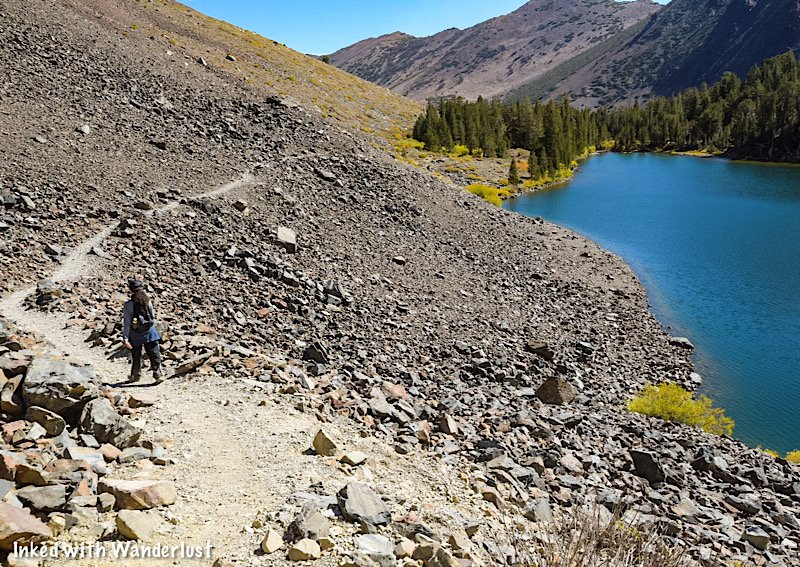
Another fantastic hiking trail, this one located at the mid-point between Bridgeport and Lee Vining, is the Virginia Lakes trail.
This trail is easy-to-moderate and around the same milage as Barney Lake but has a few semi-steep inclines. Still, they’re nothing difficult.
The best part of the trail is you’ll see three beautiful lakes; Blue Lake, Cooney Lake and Frog Lakes (which consists of three smaller lakes).
At the end, if you still have the energy, you can continue past Frog Lakes up the pass (difficult) to two additional lakes; Summit Lake and Hoover Lakes.
5) Conway Summit

Also situated between Bridgeport and Lee Vining (and just before the turn-off to Virginia Lakes) is Conway Summit.
What makes it special is it’s the highest point along highway 395. It’s easy to view as there are multiple pull-outs along the highway.
While it’s scenic any time of year, what really makes it shine is the fall colors that pop like none other. So be sure to add it to your plans if you’re driving through.
6) Lundy Canyon
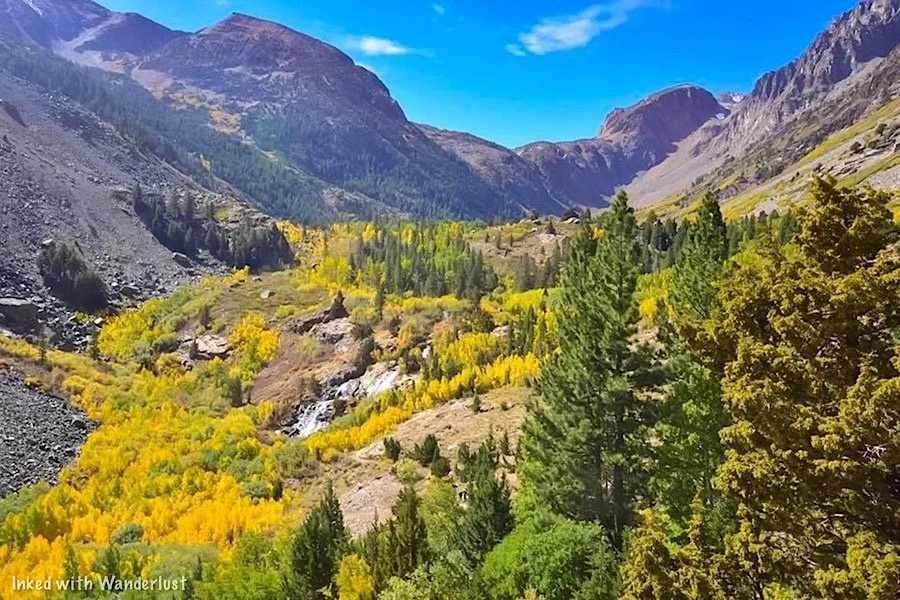
The third hiking trail on this list, the trailhead for Lundy Canyon can be found closer to Lee Vining, past Lundy Lake and down a dirt road.
This trail is less than five-miles, roundtrip, but is more on the moderately difficult side. Mainly due to its extended rocky section and numerous inclines.
While it’s a fine trail to do anytime of year, where it really shines is in the fall. Aspen trees are everywhere here and their foliage pops during that time.
7) Mono Lake Tufa Reserve

Perhaps the most recognizable attraction in Mono County, Mono Lake may look featureless from afar, but that changes as you get closer to the shore.
The Mono Lake South Tufa Reserve is where you’ll find the largest collection of tufa towers found anywhere on the lake.
Tufas begin their formation underwater, when calcium-rich freshwater springs mix with lake water rich in carbonates. This process continues over decades, forming tufa towers
The reserve allows you to get up-close-and-personal with the tufas and enables you to walk through what was once an ancient underwater world.
8) Drive Up Tioga Pass

Tioga Pass one of the highest drivable mountain passes in the United States and once at the top, you’ll get excellent views of the canyon looking down.
There are numerous lakes along the pass you can park and view but if you continue on, you’ll eventually reach the eastern entrance of Yosemite National Park.
9) Drive June Lake Loop

This 16-mile, highly scenic drive just past Lee Vining takes you on a tour through not one, not two, but FOUR stunning lakes. Each viewable from the road.
If you’re starting from the Lee Vining side, the lakes you’ll see are; Grant Lake, Silver Lake (my favorite), Gull Lake and June Lake.
If you get hungry during the drive, the town of June Lake has many local restaurants but for a real treat, stop by the Silver Lake Cafe for lunch.
READ: “June Lake Loop: A Highly Scenic Drive In The Sierras”
10) Convict Lake
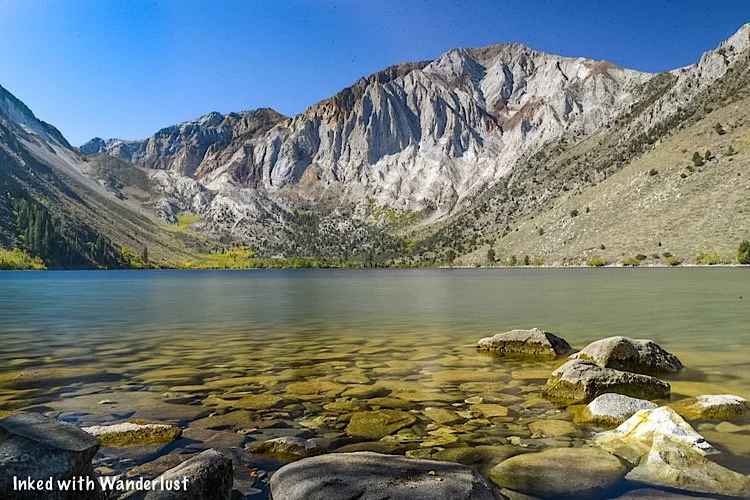
Convict Lake is a beautiful drive-up lake just outside of Mammoth Lakes. It’s renowned for its fishing, but you can also kayak, paddle-board, swim and hike.
The 2.5-mile loop trail that encircles the lake is considered an easy hike. It’s perfect for those with small children or for those who’re new to hiking.
For more of a challenge, you can break off from the loop trail to higher elevation lakes, such as Edith Lake, Mildred Lake, Lake Dorothy and Lake Genevieve.
11) Hot Creek Geologic Site

If you want to get a small taste of Yellowstone right here in Mono County, look no further than Hot Creek Geologic Site.
You can view the main geothermal pools from the viewpoint but for a better look, take the quick (but steep) trail down to the bottom.
Both parking and entry into Hot Creek is free, making it a great stop for the kids to get out and stretch their legs during a road trip.
12) Bodie State Historic Park
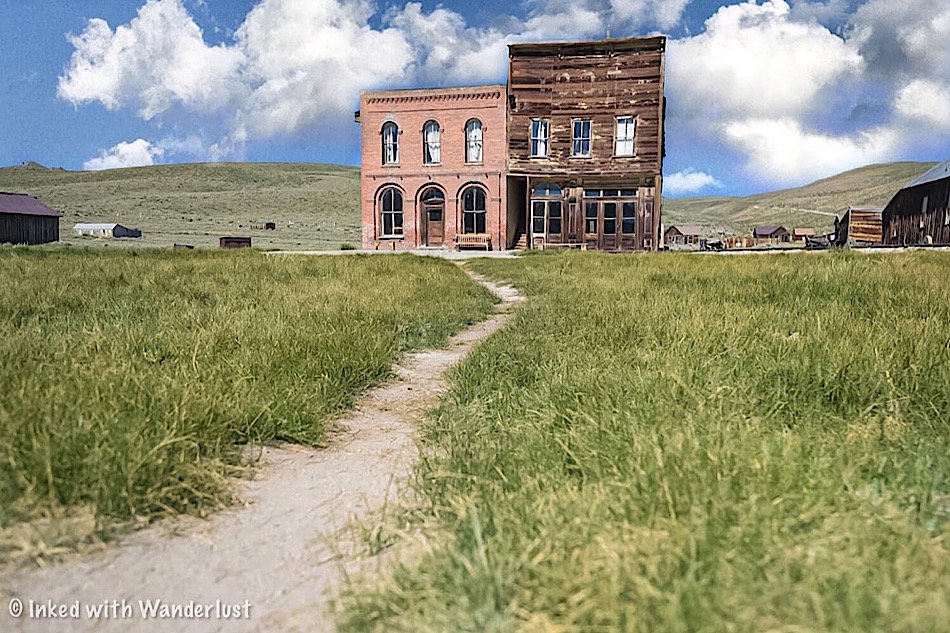
Coming in last (but nowhere near least), no trip to Mono County would be complete with a visit to California’s premier ghost town, Bodie.
Bodie was a huge boomtown during California’s gold rush but as soon as the gold dried up, its residents abandoned it. Leaving behind their homes and belongings.
The remaining buildings in the park are being preserved in a state of arrested decay. Meaning they’re maintained, but only to prevent them from deteriorating.
You could easily spend a full day, or even two, exploring this park. You can even take a tour of the town’s former process mill (for an additional fee).
Your Thoughts…
Those were our twelve picks of amazing places in Mono County that we feel you would love. Are you planning on visiting any of them this year? Let us know in the comments below! We love hearing from our readers.
Please support our website by subscribing to our newsletter below.
Thank you for reading.
Check Out These Amazing Destinations!

Tour The Historic Mono County Jail In Bridgeport
Found just off of Bridgeport’s Main Street, behind the historic courthouse, sits one of the oldest still-standing buildings in Mono…
Contains affiliate links | 2 minute read
Found just off of Bridgeport’s Main Street, behind the historic courthouse, sits one of the oldest still-standing buildings in Mono County, the historic jail.
Originally built in 1883 and made up of mostly concrete and iron, this wonderfully preserved jail gives visitors a small glimpse into what being imprisoned was like near the turn of the century.
The craziest fact of this jail is that it was in use as recently as 1964, when it closed. It still sits in its original location, with the modern county jail built directly adjacent to it.
These days, the county keeps the front door open to anyone who wishes to explore it. In this guide, we’ll cover topics such as fees, where to find it and much more.
Be sure to check out our post, “7 Things You’ll Love About Bridgeport”, for more amazing things to do in Bridgeport!
Quick Stats
Location: Bridgeport, California
Fee: None
Permit: None
Open: Open during daylight hours
For: Everyone
Restroom: None
Parking: Along the street
EV Stations: Nearest ones are down the street behind the Shell station
Difficulty: Easy, but not fully ADA compliant to protect historical integrity
Popularity: Low
Time: An hour or less
Condition: Well-maintained
Pets: Not allowed inside
Our Visit(s): September 2022

Getting There
As mentioned above, the historic jail is located in the tiny mountain town of Bridgeport, CA. It’s on Bryant street, directly behind the courthouse (a historic building in its own right).
If you’re coming into town from the north, you’ll turn left onto School street, then turn right onto Bryant street. The jail will be on your left.
If you’re coming from the south, you’ll turn right onto Sinclair street (just after Rhino’s Bar & Grill) and turn left onto Bryant street. The jail will be on your right.
Free parking is available along the street on either side. If for some reason there’s nothing there, you can find a spot along the main drag and walk to the jail.

Touring The Historic Jail
Tours of Mono County Historic Jail are self-guided and free of charge. So feel free to take as much or as little time as you wish.
There are no posted hours of operation, but I was told that the jail is usually open daily during daylight hours. It’s usually closed on major holidays, though.
Here are some stats of the historic jail:
Construction on the historic jail was completed on December 12th, 1883.
It’s original cost was $5,750.
The building is only 32 x 34 feet.
Its stone walls are two feet thick, twelve feet high, and are made up of hammer-dressed stone.
The iron cells were reused from the old jail.
The iron doors were constructed of 1.5 inch bar stock.
The iron gratings in the windows are one inch bars, set deeply into the stone blocks.
The jail remained in operation until 1964.
After learning these facts and experiencing the jail for yourself, you’ll quickly realize that this place wasn’t build for comfort. Not even a little.
There are around half a dozen or so jail cells of varying sizes, all of which are open for you to enter and explore. You can also see the two shower stalls that all inmates had to share.
Inside the cells are examples of bunks and bedding inmates were given to sleep on. I can’t say for certain if these were actually used in the jail or if they’re just examples, though.


It won’t take you very long to explore the jail. There’s only two main rooms consisting of six or so cells, two shower stalls and the administration area when you first walk in.
When you’re done checking it out, simply head back to your car and enjoy the rest of your day. While you’re in Bridgeport, be sure to check out the other amazing things to see.
If you’re not sure what else there is to do here, check out our post, “7 Things You’ll Love About Bridgeport”.
If you’re looking for a bite to eat (specifically a juicy burger), check out our post about our favorite burger joint in the area, Burger Barn.

Your Thoughts…
Are you or someone in your family history buffs? If so, we believe you (or them) would love this quick roadside stop. Tell us about any other historic structures in the area that you know of. We love hearing from our readers!


Please support our website by subscribing to our newsletter below.
Thank you for reading.
Check Out These Amazing Destinations!


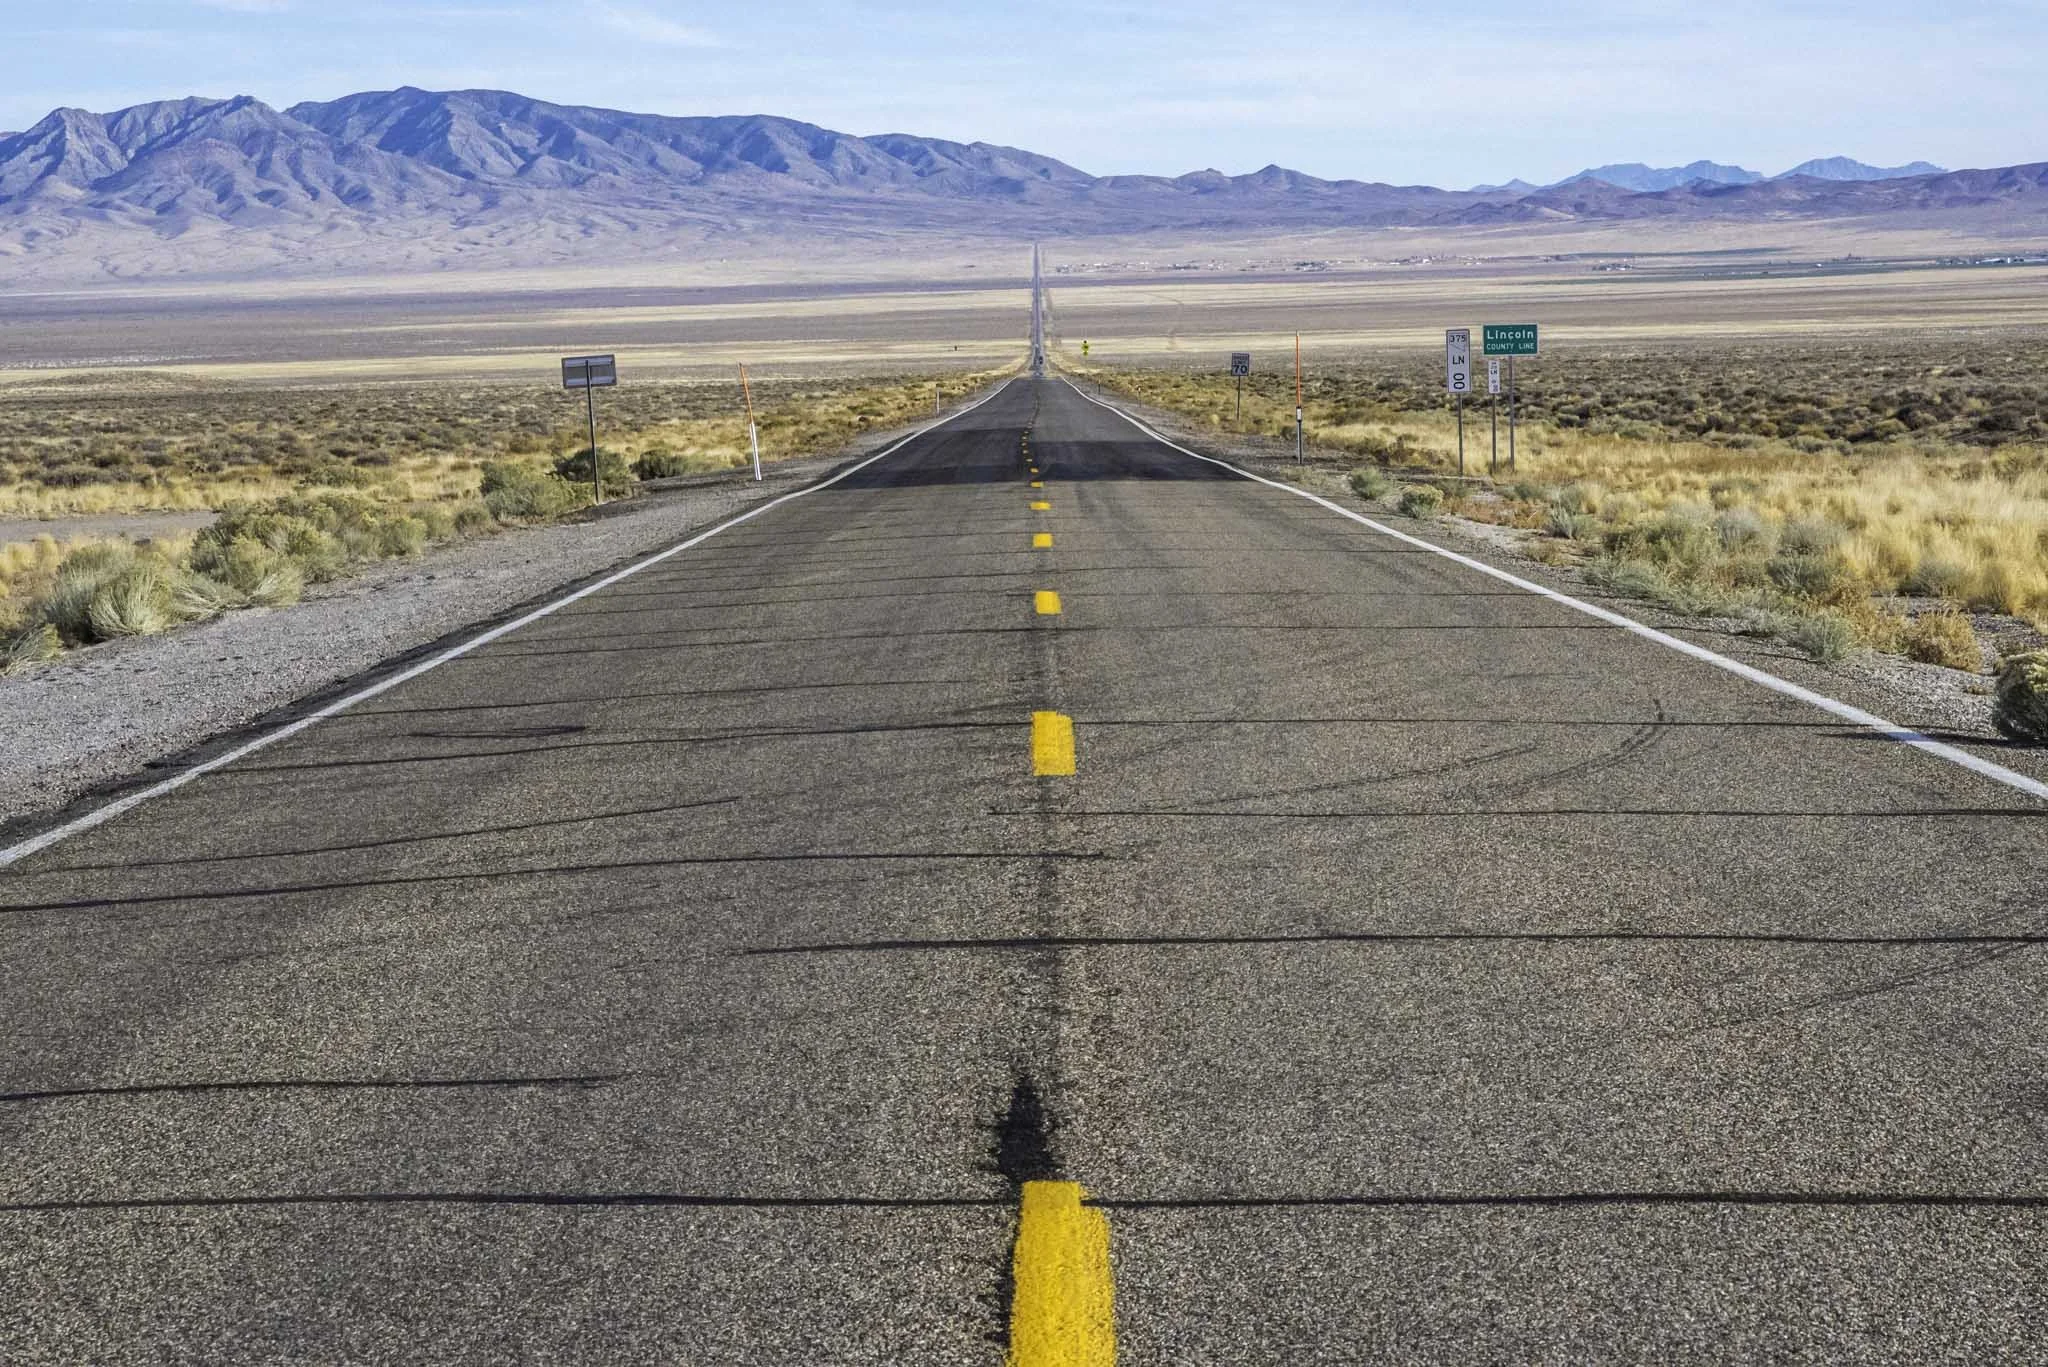


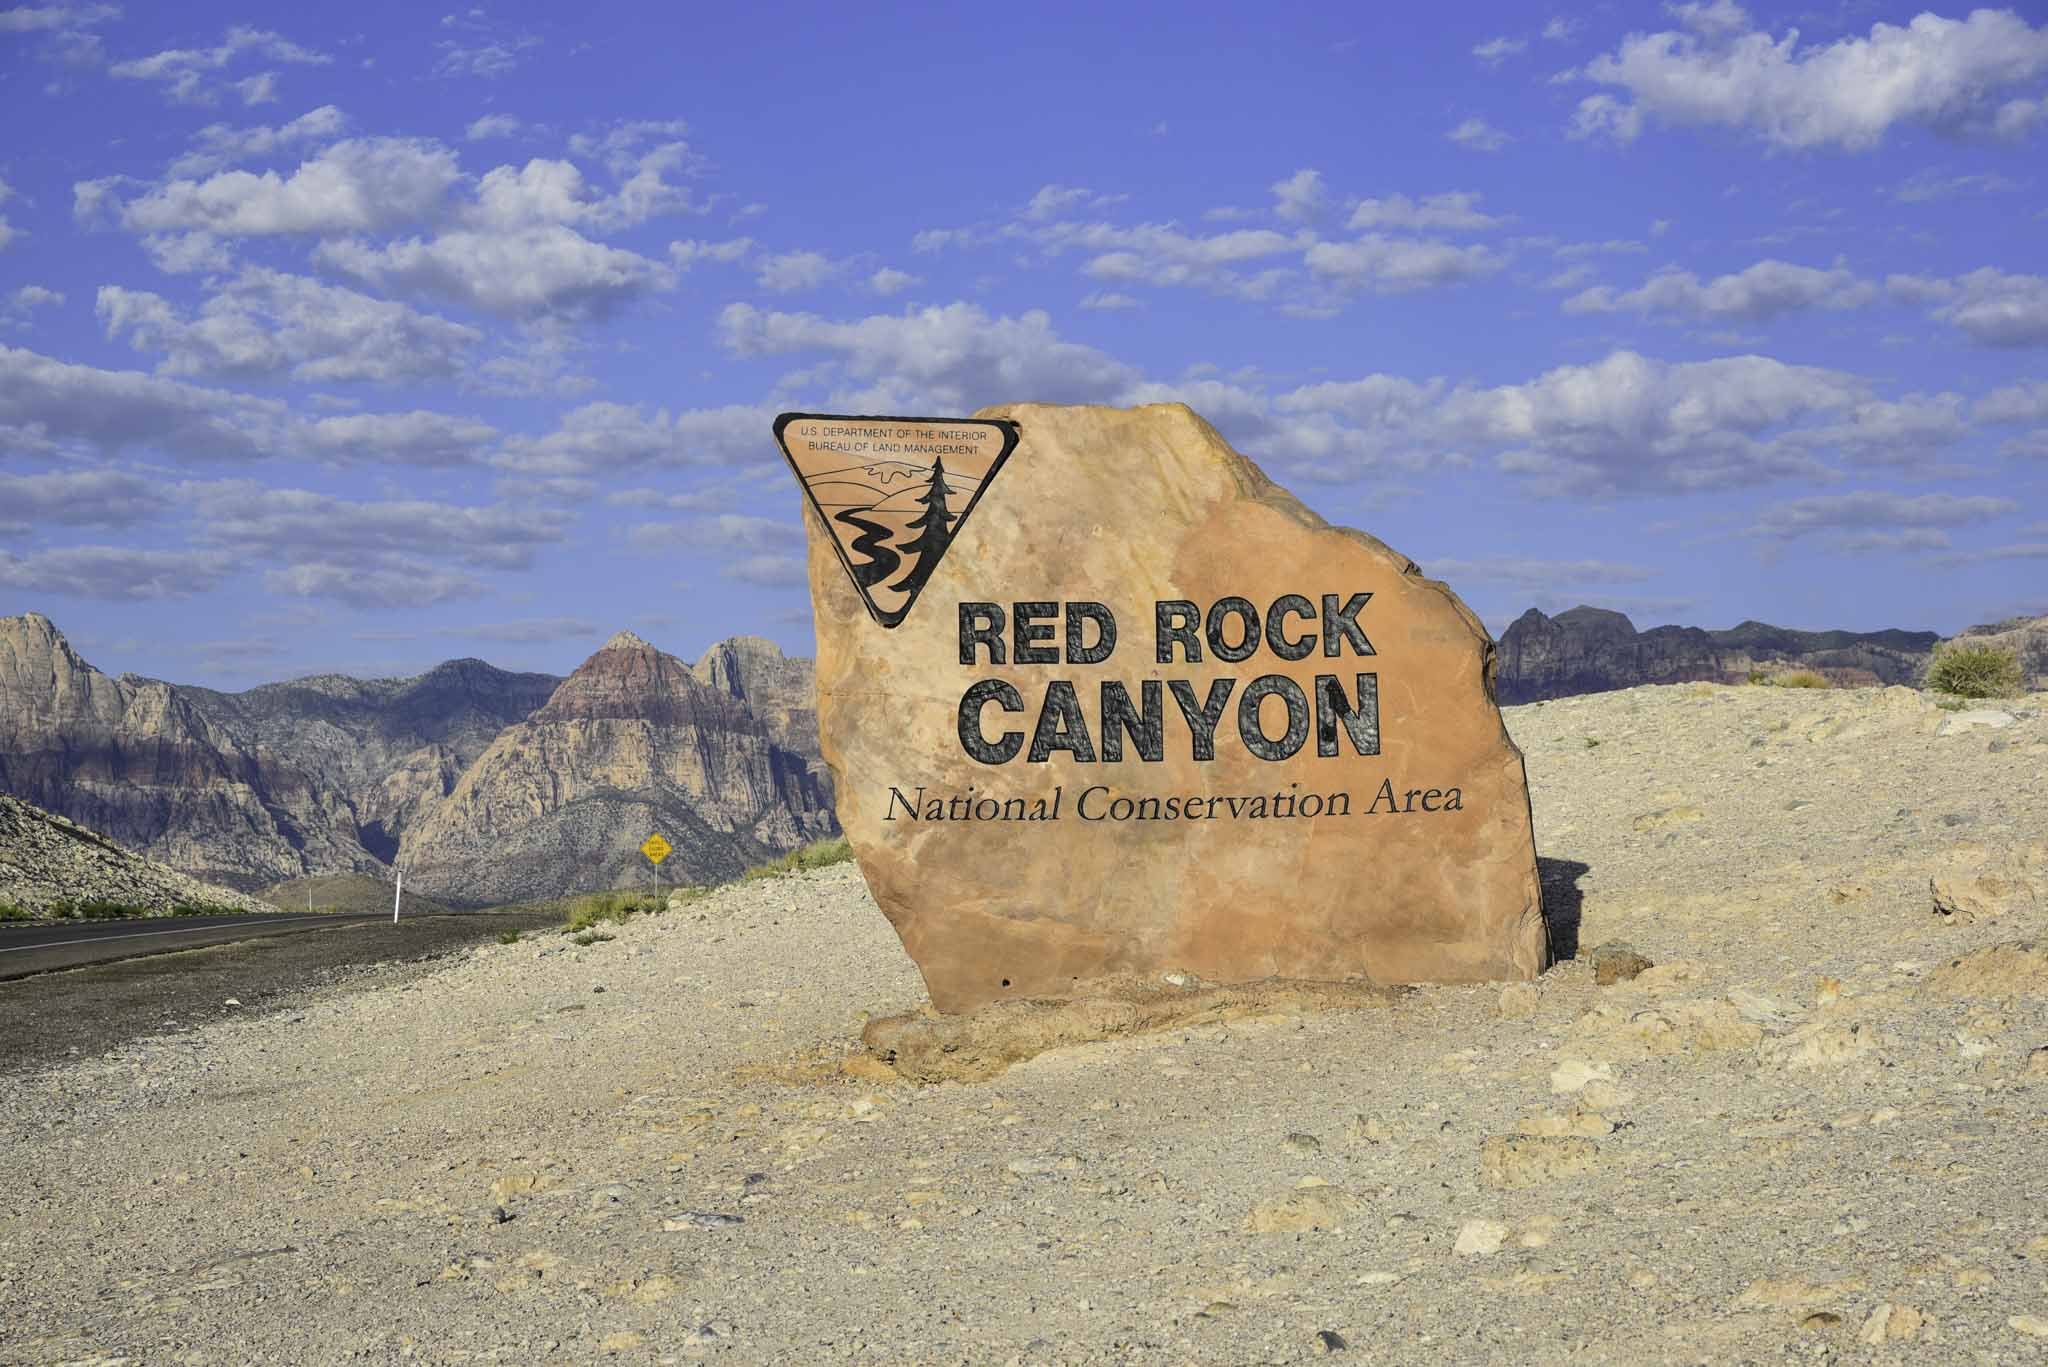


How To Apply For (And Win) A Mount Whitney Permit In 2023
Standing at a commanding 14,505 feet above sea level, Mount Whitney is the second tallest peak in the United States. Second only…
Contains affiliate links | 4 minute read
Standing at a commanding 14,505 feet above sea level, Mount Whitney is the second tallest peak in the United States. Second only to Alaska’s Mount Denali.
If you only count the lower 48 in the contiguous United States, Whitney is THE highest. Due to this, she attracts thousands of summit hungry hikers annually.
Due to the mountain’s popularity and out of a desire to protect it, if you want to want to hike up to the summit, you must have a permit.
In order to obtain a permit, you must enter the (highly competitive) permit lottery (whether that’s the pre-season lottery or the web reservations).
While there’s no way to guarantee yourself a permit, there a few things you can do to improve your odds. In this guide, we’re going to cover the lottery process, tips, things you should know and more.

Mount Whitney Lottery Process
Much like most wilderness lotteries, Mount Whitney’s begins and ends at recreation.gov. If you don’t have an account already set up, you should do so now.
The quota season for Mount Whitney is between May 1st and November 1st. So if your desired date coincides within that timeframe, you must have a permit.
Below are the dates you need to be aware of:
February 1st - March 1st: This is the period in which the lottery is open and when you're eligible to throw your name in the hat.
March 15th: This is when you’ll find out whether or not you’ve won a permit.
April 21st: This is the deadline to finalize your trip information, pay your fees and complete your reservation.
April 22nd: This is when web reservations for remaining dates become available on a first-come, first-serve basis.
When entering the lottery, you’ll want to have information such as desired dates, party size, etc, ironed out. Below are the steps you’ll take:
Head over the Mount Whitney permit page on recreation.gov.
Click/tap, “Register for Lottery”.
Fill out the information for the trip leader (probably yourself).
Select alternate trip leaders. You may select up to three. Being an alternate means they have the authority to pick up and use the permit if you’re unable to.
Select which permit you’d like. You can select either day-use or overnight. You’ll also select your desired dates (you can select up to 15).
Read through the pertinent information, then click/tap, “proceed”.
Take a second to ensure all the information you’ve entered is correct before proceeding from here. You do have a time-limit.
Enter your payment information and pay the $6 fee to submit your application.
There is no advantage to submitting your application early in the window. Those who submit theirs on the last day have as much of a chance as those who submit one on the first day does.
If you’re unsuccessful, you can try again once web reservations become available. If you’re successful, you’ll confirm your date and party size, then pay your per person fees.
One week prior to your trip, you’ll be asked to print your permit and will be expected to keep it on you throughout the duration of your time on the mountain.
*Note: If you’ve printed your permit, you will NOT have to pick one up in person at the Eastern Sierra Interagency Visitor Center as in years past
Rangers do patrol this trail and you may be asked to produce it. If you don’t have it on you, you’ll likely be asked to leave the trail and/or possibly be fined.
Mount Whitney Permit Fees
As with most things in life, there are fees attached to obtaining your permit. Thankfully, they’re reasonable and go towards the continuous improvement and care of the mountain.
The fees you’ll pay are as follows:
$6.00 per application: This is the fee you’ll pay when you first enter the lottery. Notice this is per APPLICATION, not per person. This fee is mandatory and will not be refunded regardless of the lottery results.
$15.00 per person: This is the fee you’ll pay if you’ve won a permit, the total of which being dependent on your party size (i.e - two people on your permit = $30 total). Once you’ve completed your reservation, this fee is non-refundable.
As stated above, all fees associated with a completed reservations are non-refundable. There are also no rain checks or credits given under any circumstances.
You're not able to sell or transfer your permit to another person. If you’re unable to make the trip, only the alternates listed on your reservation will be able to use it.
If you or anyone in your group is unable to make the trip, update your reservation through the portal so other hikers can have the chance of snagging a spot.

Best Time To Hike Mount Whitney
May 1st - November 1st is the timeframe when permits are required to be on this trail. Whether you’re doing it as a day hike or an overnight.
Outside of those dates, the only permit you’ll need is a wilderness permit. However, the reason you won’t need to enter the lottery for those months is due to one reason - heavy snow.
Unless you’re a skilled mountaineer, you should stick with the quota season. Though you’ll still encounter snow/ice along the trail up until July and as early as late September.
So if you don’t have experience hiking in snow/ice and/or have little experience on a mountain, your best bet is to hike sometime between July and September.
Things To Know and Consider
KNOW THIS INFORMATION PRIOR TO ENTERING THE LOTTERY: Group leader, alternates, party size (15 person limit), desired entry/exit dates (up to 15 selections), permit type (overnight or day-use), exit location and camp locations (if going overnight).
THE TRIP LEADER IS RESPONSIBLE FOR THE GROUP. As the group leader, you’re charged with ensuring everyone in your group understands the rules and regulations.
BEAR CANISTERS ARE REQUIRED. Bears are very active at Mount Whitney Portal and all along the trail. Keep yourself safe by stashing all smellables inside a bear proof container and ensure it remains outside and away from of your tent.
YOU MUST PACK OUT SOLID HUMAN WASTE. Complimentary WAG Bags can be picked up at the Eastern Sierra Interagency Visitor Center or you can bring your own. At the end of your trip, they can be disposed of near the restrooms at Mount Whitney Portal. Note that this is a requirement.
CHANGES TO YOUR PERMIT ARE LIMITED. Once you’ve confirmed your reservation, you’re only allowed to change your exit date (for overnight permits) and reduce your group size. You cannot change the group leader, alternates, increase your group size or change your entry date.
PRINT YOUR PERMIT TO AVOID PICKING IT UP IN PERSON. If you cannot print it, you can pick it up, in person, at the Eastern Sierra Visitor Center. They’re usually open daily between 8:30 to 4:30 but check the link above for up to date information.
DAY USE PERMITS CAN ONLY BE USED FROM MIDNIGHT TO MIDNIGHT. Consecutive day-use permits are not allowed. So if you’ll need to stay overnight, then obtain an overnight permit.
GROUP SIZE IS LIMITED. Your group size is limited to 15 people, including the group leader. While up to 15 people may be permitted, keep in mind that the bigger your group size, the higher the odds are against you.
DON’T GET SUMMIT FEVER. If there are stormy looking clouds in the area or you’re experiencing symptoms of altitude sickness, turn around. It isn’t worth the risk.

Increase Your Odds
In 2021, there were more than 25,000 applications submitted requesting space for 108,500 people. Of those, just 28% of group leaders were successful in obtaining a permit for their selected date.
The most competitive timeframe was during the months of July and August. This is due to the near picture-perfect weather during this time.
If you must go during these two months, I highly suggest requesting a weekday entry date and with a group size as small as possible.
If you’re flexible, the months of May and September, with midweek entry dates, offer the best chances. Keep in mind that until July, snow and ice are still present on the trail.
In my opinion, September would be the best month. It’s my personal favorite month of the year for hiking in the Eastern Sierras.
The summer heat has usually cooled down by that point and the notorious afternoon thunderstorms don’t occur nearly as much, offering you your best chance at a successful summit.
Your Thoughts…
Are you or someone you know planning to hike Mount Whitney this year? What’s your opinion on the permit lottery system? Were you successful in obtaining a permit? Let us know in the comments below. We love hearing from our readers!
Please support our website by subscribing to our newsletter below.
Thank you for reading.
Check Out These Amazing Destinations!

Hike The Convict Lake Loop In Mammoth Lakes
If you’ve never been to Convict Lake before, you really should plan a visit. It’s one of the most beautiful, photogenic and easy-to-access…
Contains affiliate links | 3 minute read
If you’ve never been to Convict Lake, you really should plan a visit. It’s one of the most beautiful, photogenic, easy-to-access lakes in the area.
While fishing is the top activity here, many people are unaware of the loop trail that encircles the lake. It’s a fairly easy-going trail with little elevation change.
In this article, we’re going to cover our experience hiking this trail for the first time. Topics such as where to find the trailhead, how Convict Lake got its name and more will be covered.

Quick Stats
Location: Convict Lake (Mammoth Lakes, CA)
Fee: None for the loop trail
Permit: None
Open: Spring, Summer & Fall
For: Hikers
Restroom: Near the trailhead
Parking: Small lot at the trailhead, larger lot further down the road
EV Stations: None
Difficulty: Easy
Popularity: Medium
Mileage: 2.5-miles
Time: 1 - 2 hours
Elevation Gain: 180-feet
Condition: Well-maintained
Features: Large lake surrounded by mountains
Pets: Allowed on leash
Drones: Not allowed
Hazards: None aside from usual wilderness hazards
Our Visit(s): October 2022
How To Get There

Getting to Convict Lake is pretty straight-forward as the street leading to the lake is directly off from Highway 395, just outside of Mammoth Lakes.
Regardless of which direction you’re traveling on the highway, you’ll want to turn onto Convict Lake road and follow that until it terminates at the lake.
For simplicity, plug in, “Convict Lake Resort”, into any GPS capable device and that’ll get you there. The resort is located right on the lake.
Trailhead & Parking

As you’re driving up on the lake, right before you’re forced to turn left, you’ll see a small parking lot for the marina on your right.
If there’s space, pull into this lot and park as this is the closest to the trailhead you can get. If not, continue left. There are numerous parking lots further down the road.
To find the trailhead, simply walk to the far end of the first parking lot (just a little bit past the marina). You’ll see trail signage indicating you’re in the right spot.
Convict Lake Loop

The trail is well-maintained and mostly flat throughout its entirety. You’ll encounter several small, gentle hills but most are barely noticeable.
Aside from a few moments of thick tree cover, the lake will be in view the entire time, giving you the opportunity to see it from multiple angles.
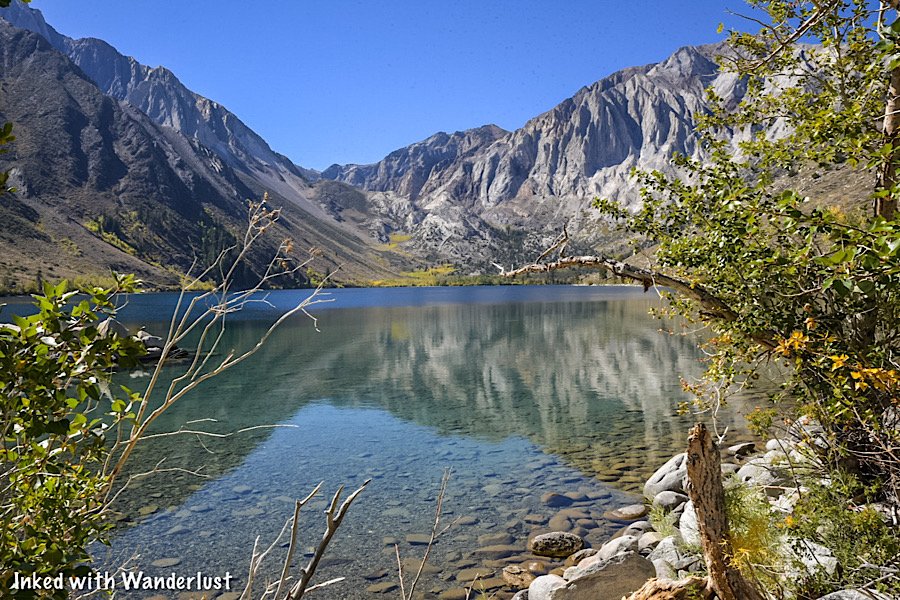
Also in view throughout much of the hike is Mount Morrison. This impressive, granite peak towers over Convict Lake at its head.
Mount Morrison is named after Robert Morrison, who was killed near the lake in a shootout with escaped convicts from Carson City (more on this later).

Along the trail, you’ll see many flora scattered throughout with rabbitbrush making multiple appearances (at least during our visit).
While not nearly as impressive of a view, be sure to look behind you as you progress. Many view the lake head-on but rarely do they see it from the opposite direction.

Prior to reaching the head of the lake, you’ll come across two forks on the trail. To remain on Convict Lake Loop proper, keep to the left at both junctions.
As you approach the head of the lake, you’ll come across a beach to relax on. There are many rocks and downed logs to sit on, as well as shade.
Depending on the time of year that you’re here, this beach may or may not be accessible. This is due to the decrease in snow pack as summer progresses.

Here, you’ll have easy access to the lake if you decide to go for a mid-hike swim (like I did) or to just simply dip your toes into the water.
When you’ve finished relaxing, simply continue in the same direction you were heading to complete the loop. More views await you.
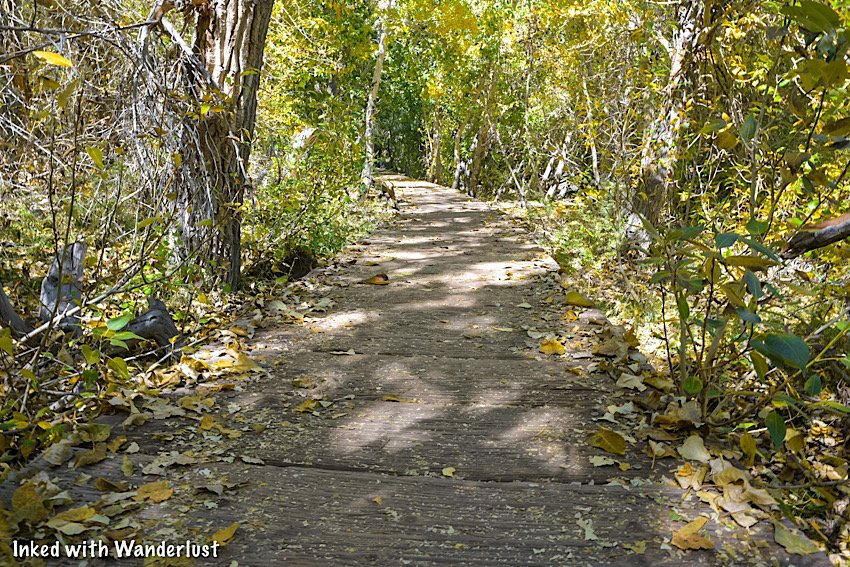
Soon after passing the beach is when you’ll come across the boardwalk that elevates you above the creek. It’s fairly slim with no guardrails. So take care when passing others.
The reason for the boardwalk is the heavy run-off from melting snow pack early in the season. If it weren’t for this boardwalk, this section of trail would be inaccessible during that time.
We were here in mid-October, so there wasn’t any run-off to speak of. Even without the run-off, though, the boardwalk made for an idyllic element to the trail.

After a short while you’ll be back on hard compacted dirt and hiking through beautiful aspens before heading up a short incline to the other side of the lake.
Up until this point, the trail was relatively flat. On this side of the trail, you’ll encounter quite a few ups and downs. Fret not, they’re barely noticeable.

Soon, you’ll come to a point that’ll appear to be the end of the trail. That point is another beach with a large, paved parking lot just above it.
To re-join the trail, work your way through this area (or the parking lot). From this point forward, you’ll be on the paved, accessible portion of the trail.

Throughout this section of the trail, the views of Convict Lake and Mount Morrison will be heavily obstructed by trees.
Here and there, the views open up through the trees and as you near the end, you’ll come across an accessible fishing dock with a commending view.

From here, simply continue on until you’ve reached your vehicle. Better yet, stop by the marina and inquire about kayak or paddle board rentals.
You could also head a ways up the road and stop at the resort for lunch. They’re open daily during the summer months and most days in the fall.
How Did Convict Lake Get Its Name?

In 1871, a group of inmates escaped from a prison in Carson City and somehow, without shoes, made it all the way to what was then known as Monte Diablo Creek.
These days, with established highways, that trek would be about 140-miles. Keep in mind that Highway 395 wasn't constructed until 1926. So they trekked much, much longer than that.
At Monte Diablo Creek (what is now Convict Creek) Sheriff George Hightower and members of his posse (consisting of Robert Morrison, Mono Jim and others) encountered the inmates.

The inmates ambushed the posse and a shootout ensued. In the shootout, both Robert Morrison and Mono Jim were killed. The inmates got away, but were later captured in Round Valley.
For their sacrifice, the mountain towering over the lake was named, Mount Morrison, while the smaller peak adjacent to it was named Mono Jim.
Then, the lake was named, Convict. This gives the representation that the two posse members who perished will always have the watch over the convicts.

Your Thoughts…
Have you hiked the Convict Lake Loop before? If not, does this sound like a trail you and your family would enjoy?
Let us know in the comment section below! We love hearing from our readers.
Please support our website by subscribing to our newsletter below.
Thank you for reading.
Check Out These Amazing Oregon Destinations!

How to Visit Hot Creek Geologic Site in Mammoth
Located right off of the famed highway 395 and a stone’s throw from Convict Lake, Hot Creek Geologic Site is a wonderful example…
Contains affiliate links | 3 minute read
Located right off of the famed highway 395 and a stone’s throw from Convict Lake, Hot Creek Geologic Site is a wonderful example of the area’s volcanic past and present.
Here, you’ll bear witness to geology in action as boiling water rises to the surface from a chamber of hot magma lying three miles below your feet. It’s appropriately nicknamed, “Little Yellowstone”.
Read on below to find out how you can visit this amazing California destination for yourself. It’s definitely worth a stop on your travels along highway 395.

Quick Stats
Location: Mammoth Lakes, CA (Mono County)
Fee: None
Permit: None
Open: All year, sunrise to sunset (road can be difficult to navigate during winter)
For: Everyone
Restroom: Multiple at the parking lot
Parking: Large, paved lot at the main overlook.
EV Stations: None
Difficulty: Easy, but does have a slightly steep pathway
Popularity: Moderate
Mileage: Less than a mile, out and back
Time: One hour or more
Elevation Gain: N/A
Condition: Well-maintained
Pets: Allowed on leash
Drones: Drone friendly, but small airport nearby
Hazards: Stick to the path and do not enter the water
Our Visit(s): 2017 and 2022
Getting To Hot Creek
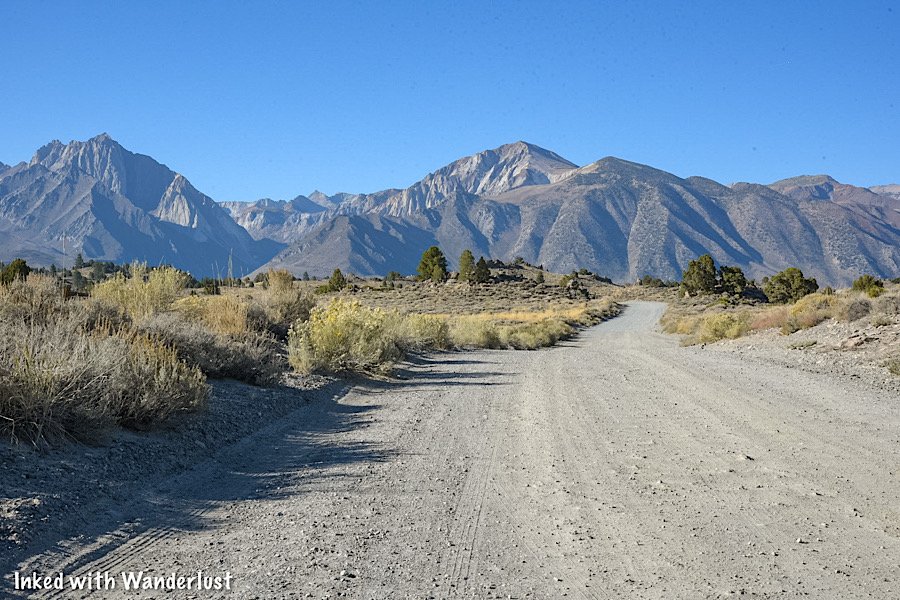
As stated above, Hot Creek is just a few miles off of highway 395, just outside of Mammoth Lakes. If you’re in the area visiting Convict Lake (or just driving through), Hot Creek is an easy stop.
Regardless of which direction you’re traveling from, you’ll turn onto Hot Creek Hatchery road for about 3.5 miles to the parking lot on your left.

The road is paved for the first half mile or so but will turn into dirt/gravel path for the remainder. Our Chevrolet Cruze made it just fine, so high clearance isn’t necessary.
Do note that during winter, this road can be difficult, even impossible, to navigate in a vehicle. Skis, snowmobiles or snowshoes may be necessary.
The parking lot is fairly large with ample space. There is no parking or entry fee to worry about. If needed, there are multiple restrooms at the far end of the lot.
Hot Creek Overlook and Trail
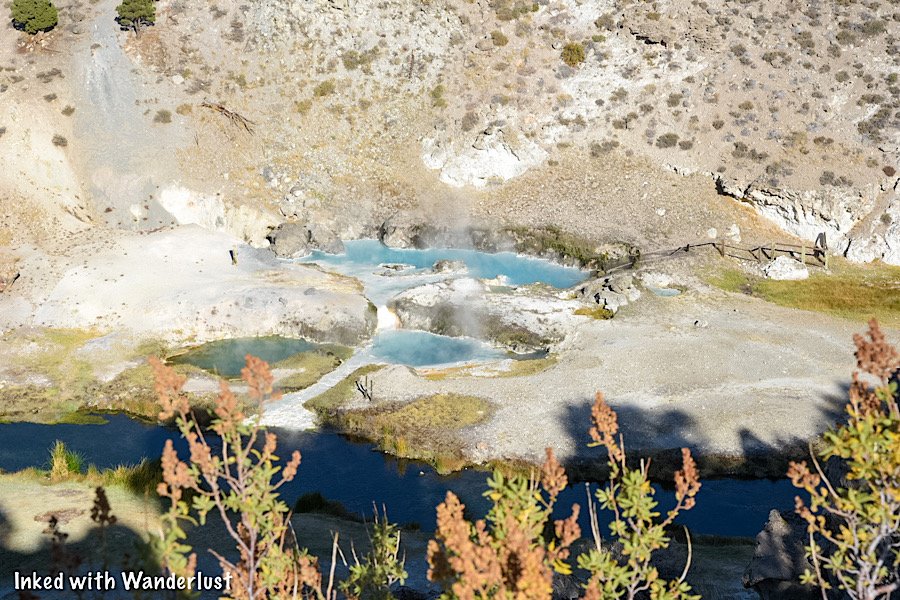
If all you want to do is see the geothermal pools but you don’t want to trek to the bottom, you can easily do so from the overlook.
The trail going to the bottom is paved and easy to follow, but it is steep going in and coming back out. I’m not sure I would recommend it to someone using a wheelchair.
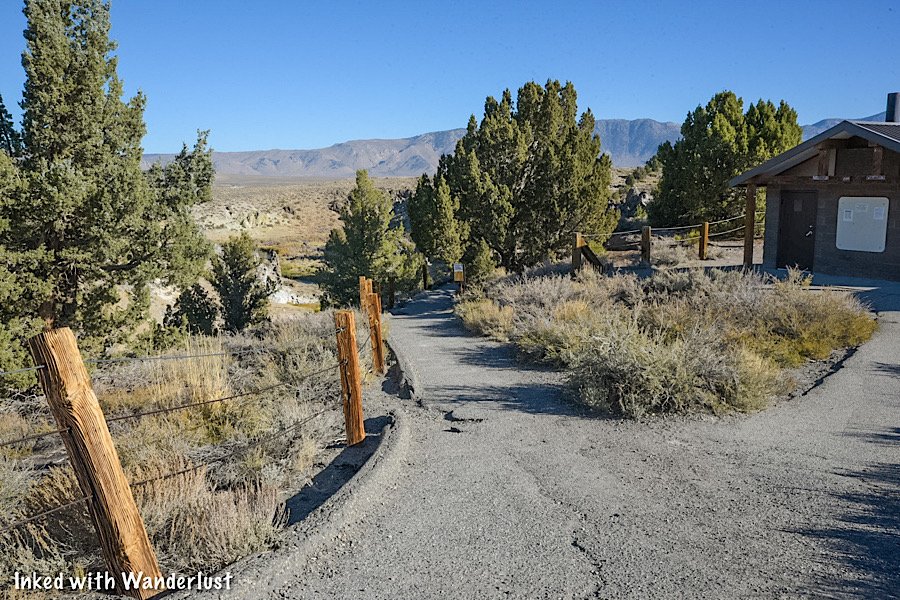
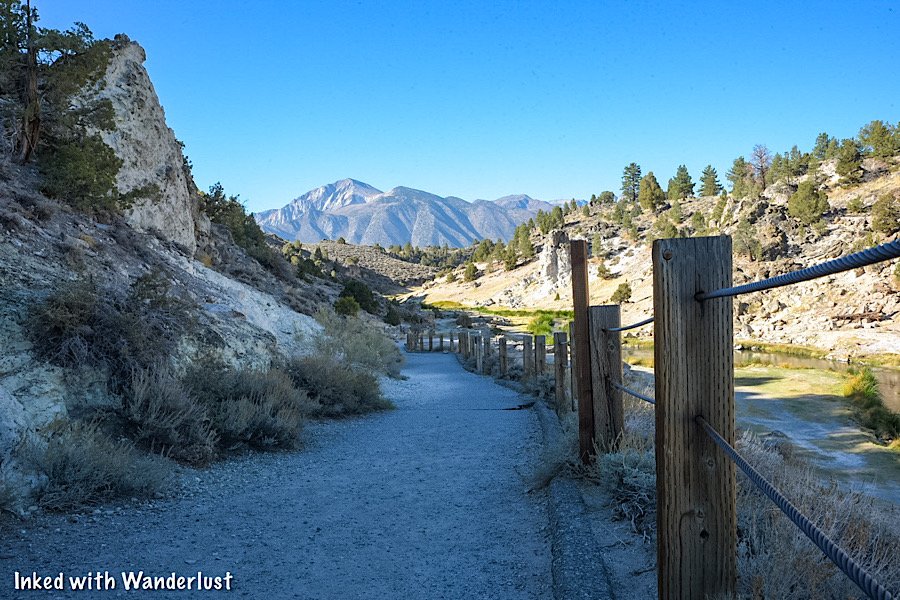
Following the trail, head past the restrooms on your right and then go left at the junction. From here, you’re less than a quarter-mile to the bottom.
Along the way, you’ll see multiple signs warning you to keep to the trail and the dangers of the water. Please heed these warnings
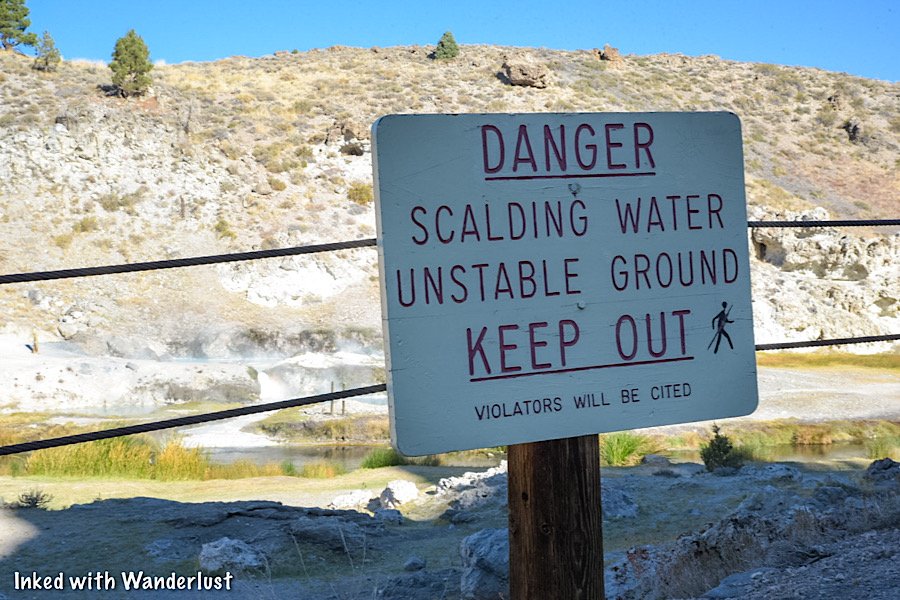
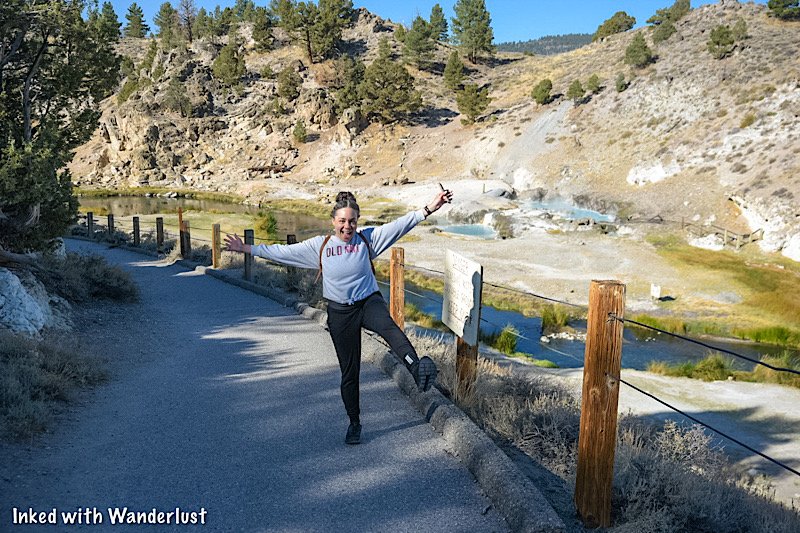
Years ago, people were actually permitted to soak in the pools. However, the pools have since risen to a dangerous temperature, so soaking is now banned.
At the bottom, there will be signs stating which areas are closed off. Unfortunately, you can’t get near the water and the geothermal pools are actually located across the river.
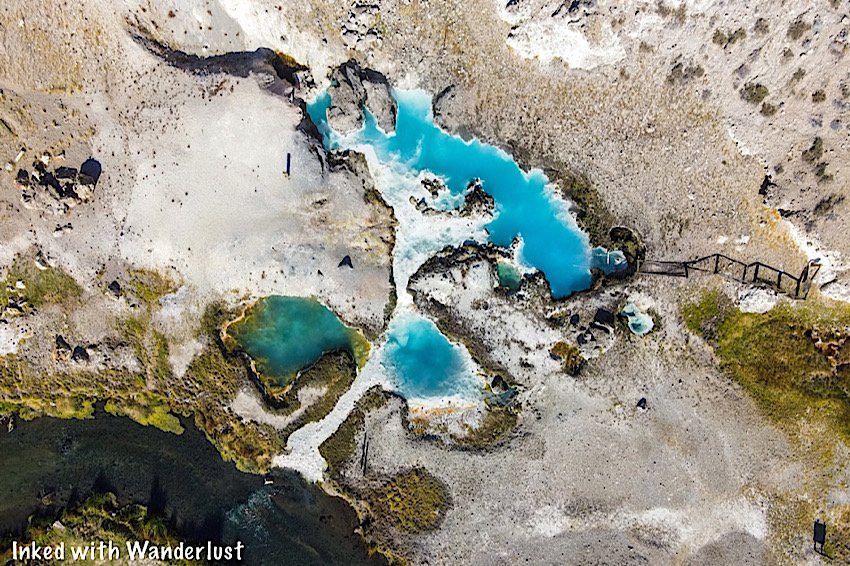
The main pools across Hot Creek give off a beautiful baby blue hue when the sun hits them just right. It’s a stark contrast to the darker color of the creek.
Further up river, there are additional thermal pools, but they are difficult to see as most of this area is closed off due to unstable ground.

To see them, head back up the pathway where you initially turned left at the junction. At the junction, go left and continue straight to a small overlook.
Be careful here. The views of the creek, pools and mountains are top notch, but there are no guard rails and the drop-offs are steep.
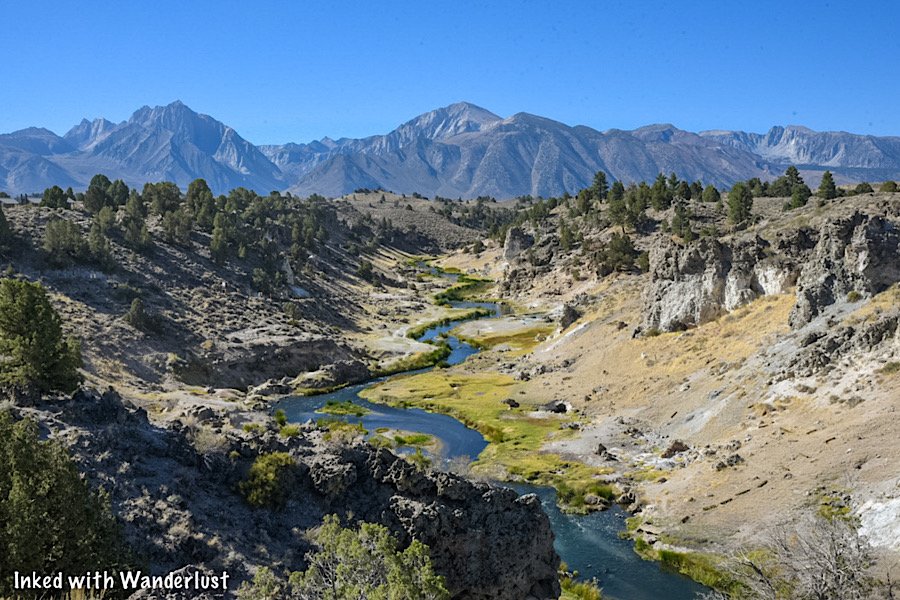
Your Thoughts…
Have you been to Hot Creek Geologic Site before? If not, is this something you think you and your family would enjoy checking out? Do you know of more sites like this?
Let us know in the comments below! We love hearing from our readers!
Be sure to check out our posts about more great destinations in Mono County below.
Please support our website by subscribing to our newsletter below.
Thank you for reading.
Check Out These Amazing Nevada Destinations!

Base Camp Pizza: An Excellent Option For Pizza in Tahoe
We’ve all been there. You’ve been outside, hiking or skiing all day long, and you’re completely famished. To make matters…
3 minute read | contains affiliate links
We’ve all been there. You’ve been outside, hiking or skiing all day long, and you’re completely famished. To make matters worse, you have no idea where to eat.
Thankfully, in Lake Tahoe, there is no shortage of amazing eateries to choose from. You’ll find everything from fine dining establishments to burger shacks and everything in between.
If you and your family are looking for delicious pizza, though, we believe we have a great recommendation for you; Base Camp Pizza.
Located in Heavenly Village in South Lake, Base Camp Pizza offers up amazing, mouth-watering pizzas with all sorts of creatively unique toppings.
In this post, we’ll discuss our experience dining here and hopefully help you determine whether or not you and your family would enjoy it as well. Let’s get into it!

Pertinent Info
Location: South Lake Tahoe in Heavenly Village
Address: 1001 Heavenly Village way
Cost: $10 - $15 per person
Food: Pizza and other Italian food
Open: All year
Seating: Indoor and outdoor
Alcohol: Full bar w/ extensive cocktail menu
Website/Menu: www.basecamppizzaco.com
Our Visit(s): 2017 & 2022
The Restaurant
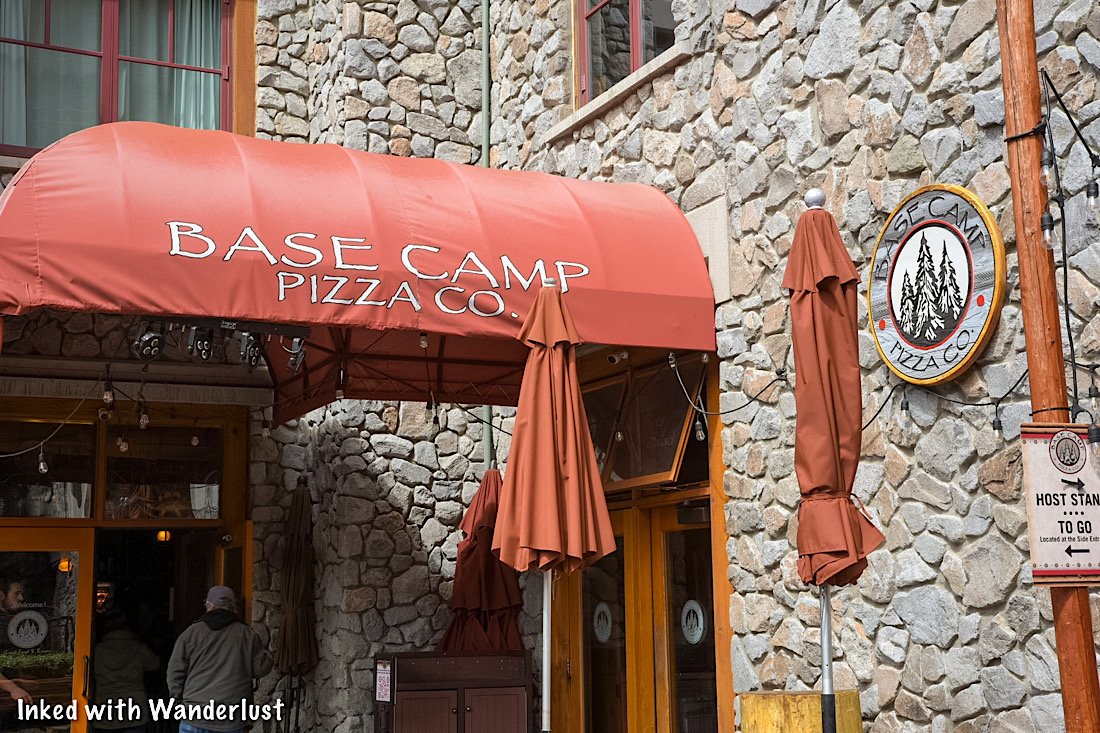
As stated above, Base Camp Pizza is located in the Heavenly Village complex in South Lake Tahoe (the busiest and most developed area of the lake).
If you park in heavenly’s parking garage, you’ll find Base Camp across from the garage’s exit just past the bathrooms and ATM machines.

If you don’t want to pay for parking, park in the Safeway parking lot across the street from Heavenly Village Cinemas.
Simply cross the street and walk past the movie theatre. You’ll soon see a mini-put course in the center of the walk-way. Base camp will be just past that on your left.

The restaurant features both indoor and outdoor seating. If your visit coincides with the busy summer months, both will likely be full.
One downside to here is they don’t accept reservations. So if it’s busy (or if your group is larger) we would recommend eating during non-traditional times to avoid a lengthy wait.
The Food

Much like most pizza eateries, Base Camp offers a variety of creatively topped pies. Of course, they also offer your garden variety types such as combo, pepperoni and plain cheese.
So as long as everyone in your group likes pizza, chances are, no one will go without. In the event that someone in your party doesn't , however, they do have other options. Such as:
Spaghetti Bolognese
Italian Herb Shrimp Pene
Four Cheese Ravioli
Gouda Mac & Cheese
Tomato Basil w/ Meatballs
A variety of soups and salads

As far as appetizers are concerned, we were impressed with Base Camp’s offerings. Typically, pizza eateries don’t put too much thought into those.
We went with the beer battered parmesan garlic fries and loved them. They were perfectly crisp and came with a generous amount of garlic and parmesan.
Our one and only critique was we wish they got a little more creative with the dipping sauce rather than serving basic ketchup. Aside from that, they were great.

Now we get to the pizza. The hero. I assume that’s why most of you are reading this post, correct? As stated above, they have a variety of toppings to choose from but if you’re into the classics, they have those.
I ordered the smokey bbq chicken with bacon. It was topped with roasted chicken, crispy bacon, red onions, bbq sauce, cilantro, creamy smoked gouda cheese and their signature four cheese blend.
In short, it was delicious! I’m usually a pepperoni guy, so this was a break from my normal. If you’re picky (like me), go with this one. It doesn’t have any “scary” ingredients on it.

We also ordered the restaurant’s namesake pizza, The Base Camp. Its toppings include pepperoni, Italian sausage, roasted onions, portobello mushrooms and their signature four cheese blend.
This one was full of flavor, but all the heavy toppings caused the crust to get a bit soft towards the middle. Just fair warning if you plan on ordering this one.

They also have an extensive drink menu with a full bar. If you don’t see a drink you like on the menu, they can make most cocktails if you request it.
Since it was a stormy day I ordered an Irish coffee with a shot of Baileys. Kisha ordered the, Tahoe Toddy. Both drinks were delicious and hit the spot.
Our Thoughts…
We’ve eaten at Base Camp Pizza twice and both times were stellar experiences. The service was good and the food was great. We really don’t have much to complain about.
The only negative we can come up with is the price but honestly, you’re eating at a restaurant in the Heavenly Village complex. You’re going to pay more for everything here.
All things considered, you could bring a large group here, order a couple large pizzas and still get away with feeding that large group for a decent price. Especially if the group splits it.
So in reality, a family eating here would make the most economical sense versus a place where you would each order your own own entree at $15 to $20 (or more) per plate.
So, yes, we recommend giving Base Camp Pizza a try if you’re planning a trip to the South Lake Tahoe area. We don’t thin you’d regret it.
Your Thoughts…
Does Base Camp Pizza sound like a place you and your family would enjoy? Do you have a recommendation for another great eatery in the area? Let us know in the comments below. We love hearing from our readers!


Please support our website by sharing it with your family and friends.
Thank you for reading.