15 Tips For Your First Time Hiking Half Dome
3 minute read | contains affiliate links
Each year, thousands of hikers summit Half Dome, many of them for the first time. In 2017, I was one of those first timers and though I felt like I was fully prepared, truth is, I wasn't.
In fact, I’m confident that if you polled others who’ve hiked Half Dome, I’m willing to bet that many of them would agree.
If you’re hiking Half Dome for the first time this season (or just mildly curious), this post is for you. I’m giving you 15 tips I feel all Half Dome hikers should be aware of going in. Let’s get into it.

Disclosure: This post contains affiliate links. If you click through and make a purchase, I may earn a commission at no additional cost to you. Thank you for supporting us!
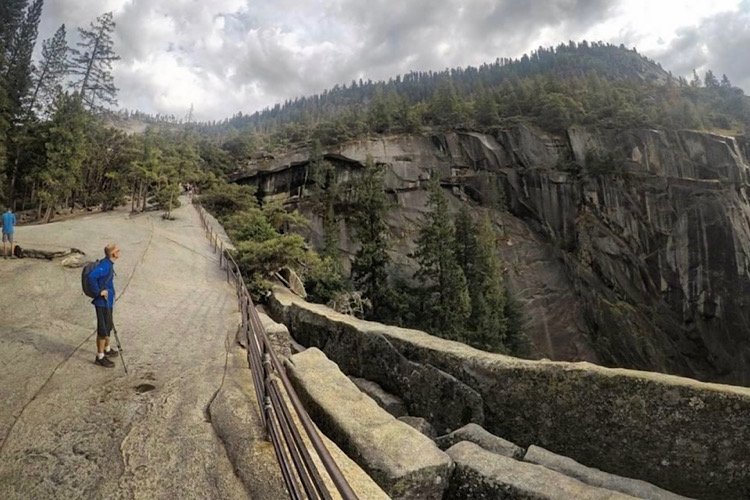
1) Get An Early Start
This is especially true if, like most people, you’re doing this as a day hike. You’ll want to arrive to the trailhead as early as possible.
When my brother and I hiked it, we arrived at the Happy Isles trailhead at 3am. We didn’t see any daylight until we got past Nevada Fall.
The reasons you’ll want to start early are:
You’ll beat the crowds to the cables and avoid bottlenecks
You’ll likely avoid the afternoon storms that are notorious in Yosemite
You’ll beat the mid-day heat
If you’re doing this hike as a multi-day and you’re just hiking to your camping spot the first day, you won’t have to worry about it as much.
If you’re doing this as a day hike, however, definitely get started as soon as you can. It doesn’t have to be 3am, but pre-dawn is ideal.

2) Bring Gloves With You
Surprisingly, many people don’t think of this. The Half Dome cables are made of steel and they get hot. They’re also blister inducing.
Using gloves on the cables will help prevent blisters, protect you from burns and most importantly, provide you with good grip.
Sometimes, a pile of discarded gloves forms near the base. You’re welcome to use a pair but you shouldn’t count on the pile being there.
While it’s thoughtful, Rangers will collect and throw the gloves away as it’s technically littering. So bring your own. Full fingered preferably.
SEE MY TOP RECOMMENDATION FOR GLOVES TO USE ON HALF DOME HERE!

3) Bring More Water Than You Think You’ll Need
I cannot stress this enough. It’s always important to bring water with you on a hike but it’s especially true on this one.
I recommend 3-4 liters, per person. I only brought two liters with me and ran out on the way back (with over six miles left to go).
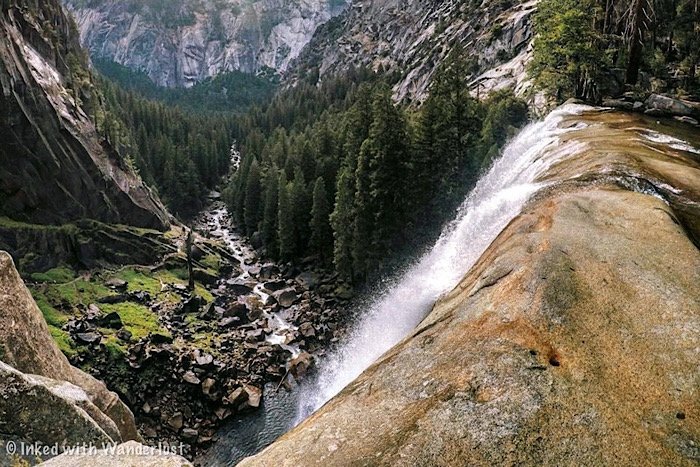
The only filtered water source is the fountain at the Vernal Fall footbridge (just about a mile into the hike). After that, you’re on your own.
4) Trekking Poles Are A Must!
My knees were killing me on the way back. If it weren’t for my trekking poles helping to off-set the weight, my brother would’ve had to carry me out.
If you’re someone who’s prone to knee pain or you know you usually require trekking poles on normal hikes, you’ll definitely want to bring them along on this one.

5) Wear Shoes/Boots With Excellent Grip
While granite usually has excellent natural grip, years of hikers traversing it has caused that section to become smooth and slick.
Seriously, normal shoes or ones that are worn down will not suffice. You’ll definitely want to break them in prior to your hike, but the tread should be as new as possible.

6) Leave Your Backpack At The Base
It may be tempting to bring your backpack with you as you climb up the cables but take it from me, make it easier on yourself (and others) and ditch it at the base.
The reason I say this is twofold:
There isn’t a lot of space between the cables, so if everyone’s wearing a bulky backpack, that space only becomes more restrictive
For some, it’s already challenging enough to climb the cables. Adding the weight/balance of a backpack only complicates matters
If you must bring a backpack to the top, bring a smaller day bag and leave the bulky one behind. No one’s going to mess with your stuff.
Do be sure to seal your bag before leaving, though. You don’t want Marmots and other critters getting in there.
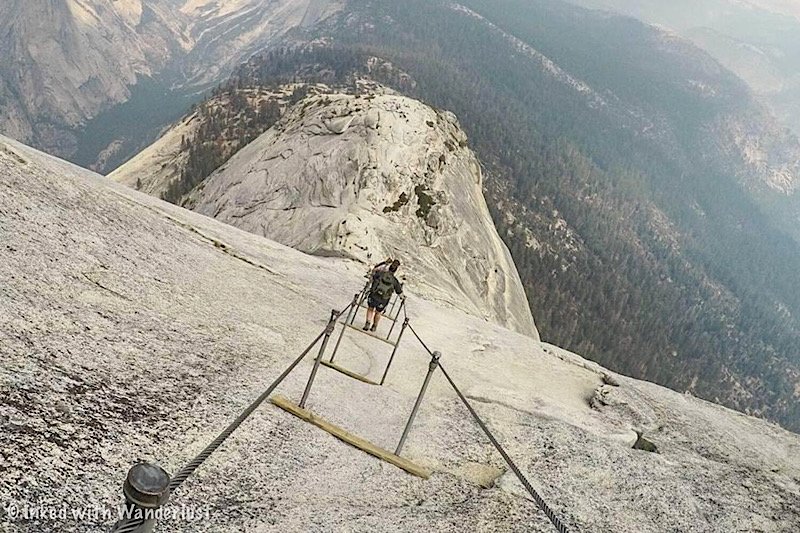
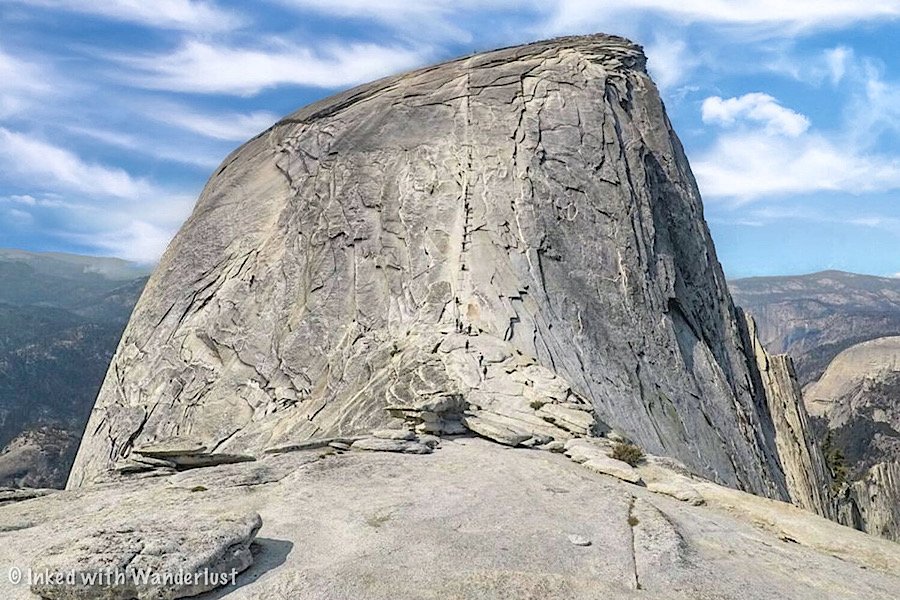
7) Take As Long As You Need On The Cables
There’s no shame in taking it slow. This isn’t a race and there’s no prize at the top for the fastest climber. Go at your own pace.
Every six feet or so (at each set of steel poles) are wooden planks. Use those as a guide and focus on them if the heights start getting to you.
Rest at each one if necessary. No one will make fun of you. Just be mindful of those who may want to go faster and let them pass.
8) If You See Dark Clouds, Don’t Attempt It
Yosemite is infamous for its afternoon storms. It isn’t uncommon to go from clear blue sky to rain and lightning in the blink of an eye.
Bad weather and climbing Half Dome isn’t a good mix. If lightning decides to strike, there’s a good chance Half Dome will be where it hits.
If you get to the base and it starts to rain, don’t risk it. If you’re at the summit and see black clouds rolling in, get back down pronto.
In the 1980’s, numerous people were killed and injured on the summit when a sudden storm came in. It’s always best to er on the side of caution when it comes to storms.
9) You Can Use A Climbing Harness If You Want
Some opt to utilize a harness to secure themselves to the cables, reducing their chance of falling.
It’s a device that you wear around your waist and legs, with the other end connecting to the cables via a carabiner.
Personally, I don’t think it’s necessary. However, if it’ll make you feel better and help you fulfill your dream, go for it.
You will need to unclip and clip back in every six feet or so, so it will slow you down a bit. The peace of mind it provides may be worth it, though.
10) Get Into The Best Shape You Can
There’s no need to be a top-level athlete or master climber, but the better shape you’re in, the easier time you’ll have.
The cables themselves are more upper strength than leg strength and the hike itself will test your cardiovascular endurance.
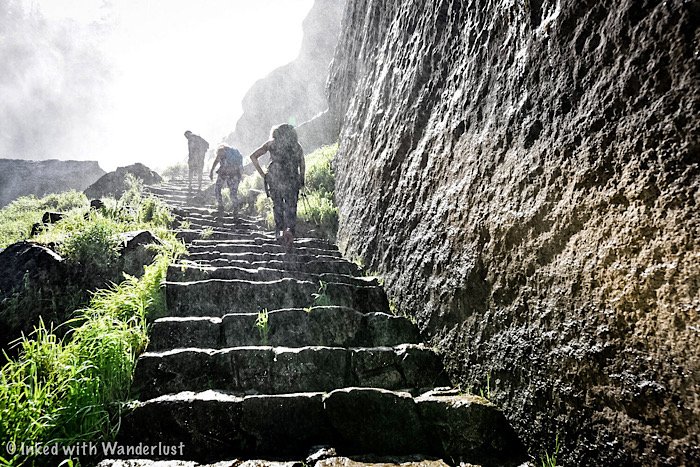
Hitting a stair master will prepare you for the Mist Trail portion of the hike. Likewise, a strength training routine would be beneficial.
Most importantly, hike as much and as often as you can prior to your trip. The higher the elevation, the better.
11) Bring Extra Socks
This is one I wish I’d thought about. You should always take care of your feet…always. That means bringing a fresh pair of socks (or two).
If you don’t and get soaked on the Mist Trail, you’ll be forced to hike the rest of the way with soggy socks.
If the Mist Trail doesn’t get you, then your socks will most definitely be soaked in sweat by the time you make it to the summit.
Packing extra socks will allow you to swap out the nasty ones for a fresh pair for the hike back down.

12) Have A Hard Copy Of Your Permit Available
Some hikers spend 8-10 hours or more doing this hike. Consequently, if you’re taking a lot of pictures, your phone battery will almost certainly die.
If that happens and all you have is a digital copy of your permit, you’ll have nothing to show the ranger when asked. Guess what that means? Off you go.
It wouldn’t hurt to have a printed copy in a plastic bag inside your backpack. That way, you won’t risk getting turned around.
13) Bring Ibuprofen & Moleskin
You can add this one to the, “wish I thought of it”, category. As stated above, my legs and feet were wrecked by the time we got back to the car.
It was only then that I realized my mistake. I had absolutely nothing to help mask the pain and had a long drive home ahead of me.
Bring some Ibuprofen (or an alternate pain killer) with you. Take a couple at the summit, if needed, to reduce the discomfort on the way back down.
Also, moleskin does wonders for covering and preventing blisters. If you don’t know what it is, it’s a dense, woven cotton fabric that acts as a shield between your skin and shoes in areas where blisters are most common. Highly recommended for ANY hike.

14) Eat, Eat And Eat Some More
This is a long, demanding hike and for most people, will take a full day. You will burn a serious amount of calories and energy.
Due to this, you’ll need to replenish your body with as many nutrient dense foods as you can.
Foods with complex carbs, low amounts of sugar, decent level of healthy fats and high amount of protein will do the trick.
Also, salty snacks, such as beef jerky and sunflower seeds, will help you retain water and keep you hydrated for longer.
Stop as often as you need if you’re feeling hungry or low on energy. Trust me, you don’t want to tackle the cables with nothing in the tank.
SEE MY TOP RECOMMENDATION FOR PREPARING FOOD IN THE WILDERNESS!
15) There’s No Shame In Turning Around
More hikers do it than you might think. I’d wager a guess that for every ten hikers that make it to the cables, at least one decides against it.
Whether it’s due to bad weather or simply a gut-feeling on your part, there’s no shame in turning around. The cables are intimidating.
So don’t succumb to peer pressure or allow pride to take over. If you get there and it doesn’t feel right, then don’t do it. You still had an amazing adventure!
BONUS: Peak Design Camera Clip

This camera clip by Peak Design is a MUST for anyone using their DSLR or point-and-shoot camera while out on a hike or are just out and about on a shoot.
As shown in the image above, it securely attaches to your backpack strap and firmly holds your camera in place. Allowing you to be hands free while not in use.
When inspiration strikes, a quick button press is all it takes to remove it. When done, simply snap back into place and you’re done.
CHECK OUT THIS SOLID CAMERA CLIP BY PEAK DESIGN ON AMAZON HERE!
If you’re serious about hiking Half Dome, be sure to read my other Half Dome related posts…
Disclosure: This post contains affiliate links. If you click through and make a purchase, I may earn a commission at no additional cost to you. Thank you for supporting us!


Please support this website by subscribing to the newsletter below.
Thanks for reading.