
How to Visit Meow Wolf Omega Mart in Las Vegas
Las Vegas is filled with quirky, one-of-a-kind attractions that promise something different, but few are as unexpected as Meow Wolf’s Omega Mart inside…
Disclosure: This post contains affiliate links. If you make a purchase through these links, I may earn a small commission at no additional cost to you. I only recommend products or services that I believe will add value to my readers.

Las Vegas is filled with quirky, one-of-a-kind attractions that promise something different, but few are as unexpected as Meow Wolf’s Omega Mart. What initially appears to just be a parody of a grocery store quickly transforms into a mind-bending adventure.
Filled with hidden passageways, surreal art installations, and a story that unfolds the deeper you explore, it quickly becomes clear that Omega Mart is far more than a simple attraction. It’s an immersive world designed to spark your curiosity.
After constantly hearing about Omega Mart, I finally decided to see what the hype was all about for myself. What I found was one of the most creative and imaginative attractions in Las Vegas that left me wanting more.
In the post below, I’ll discuss topics such as what to expect, ticket prices, roughly how much time you’ll spend exploring it, and hidden passages (and more), with the intended goal of helping you decide if Omega Mart is worth it to you. Let’s get into it!

What is Meow Wolf?

If you’ve never visited a Meow Wolf attraction before, it’s difficult to articulate exactly what it is. Part immersive art exhibit, part interactive storytelling experience, and part giant playground for the imagination, Meow Wolf creates elaborate worlds inviting guests to explore and interact with their surroundings.
Rather than simply observing artwork, guests become active participants, uncovering hidden details, secret passageways, and interconnected stories throughout the experience.
Each Meow Wolf location (soon to be six) features its own unique theme and narrative, but all share the same sense of creativity and exploration. There’s no right or wrong way to experience them. Solve a mystery or simply wander freely, the choice is yours.
Location, Parking, and Hours
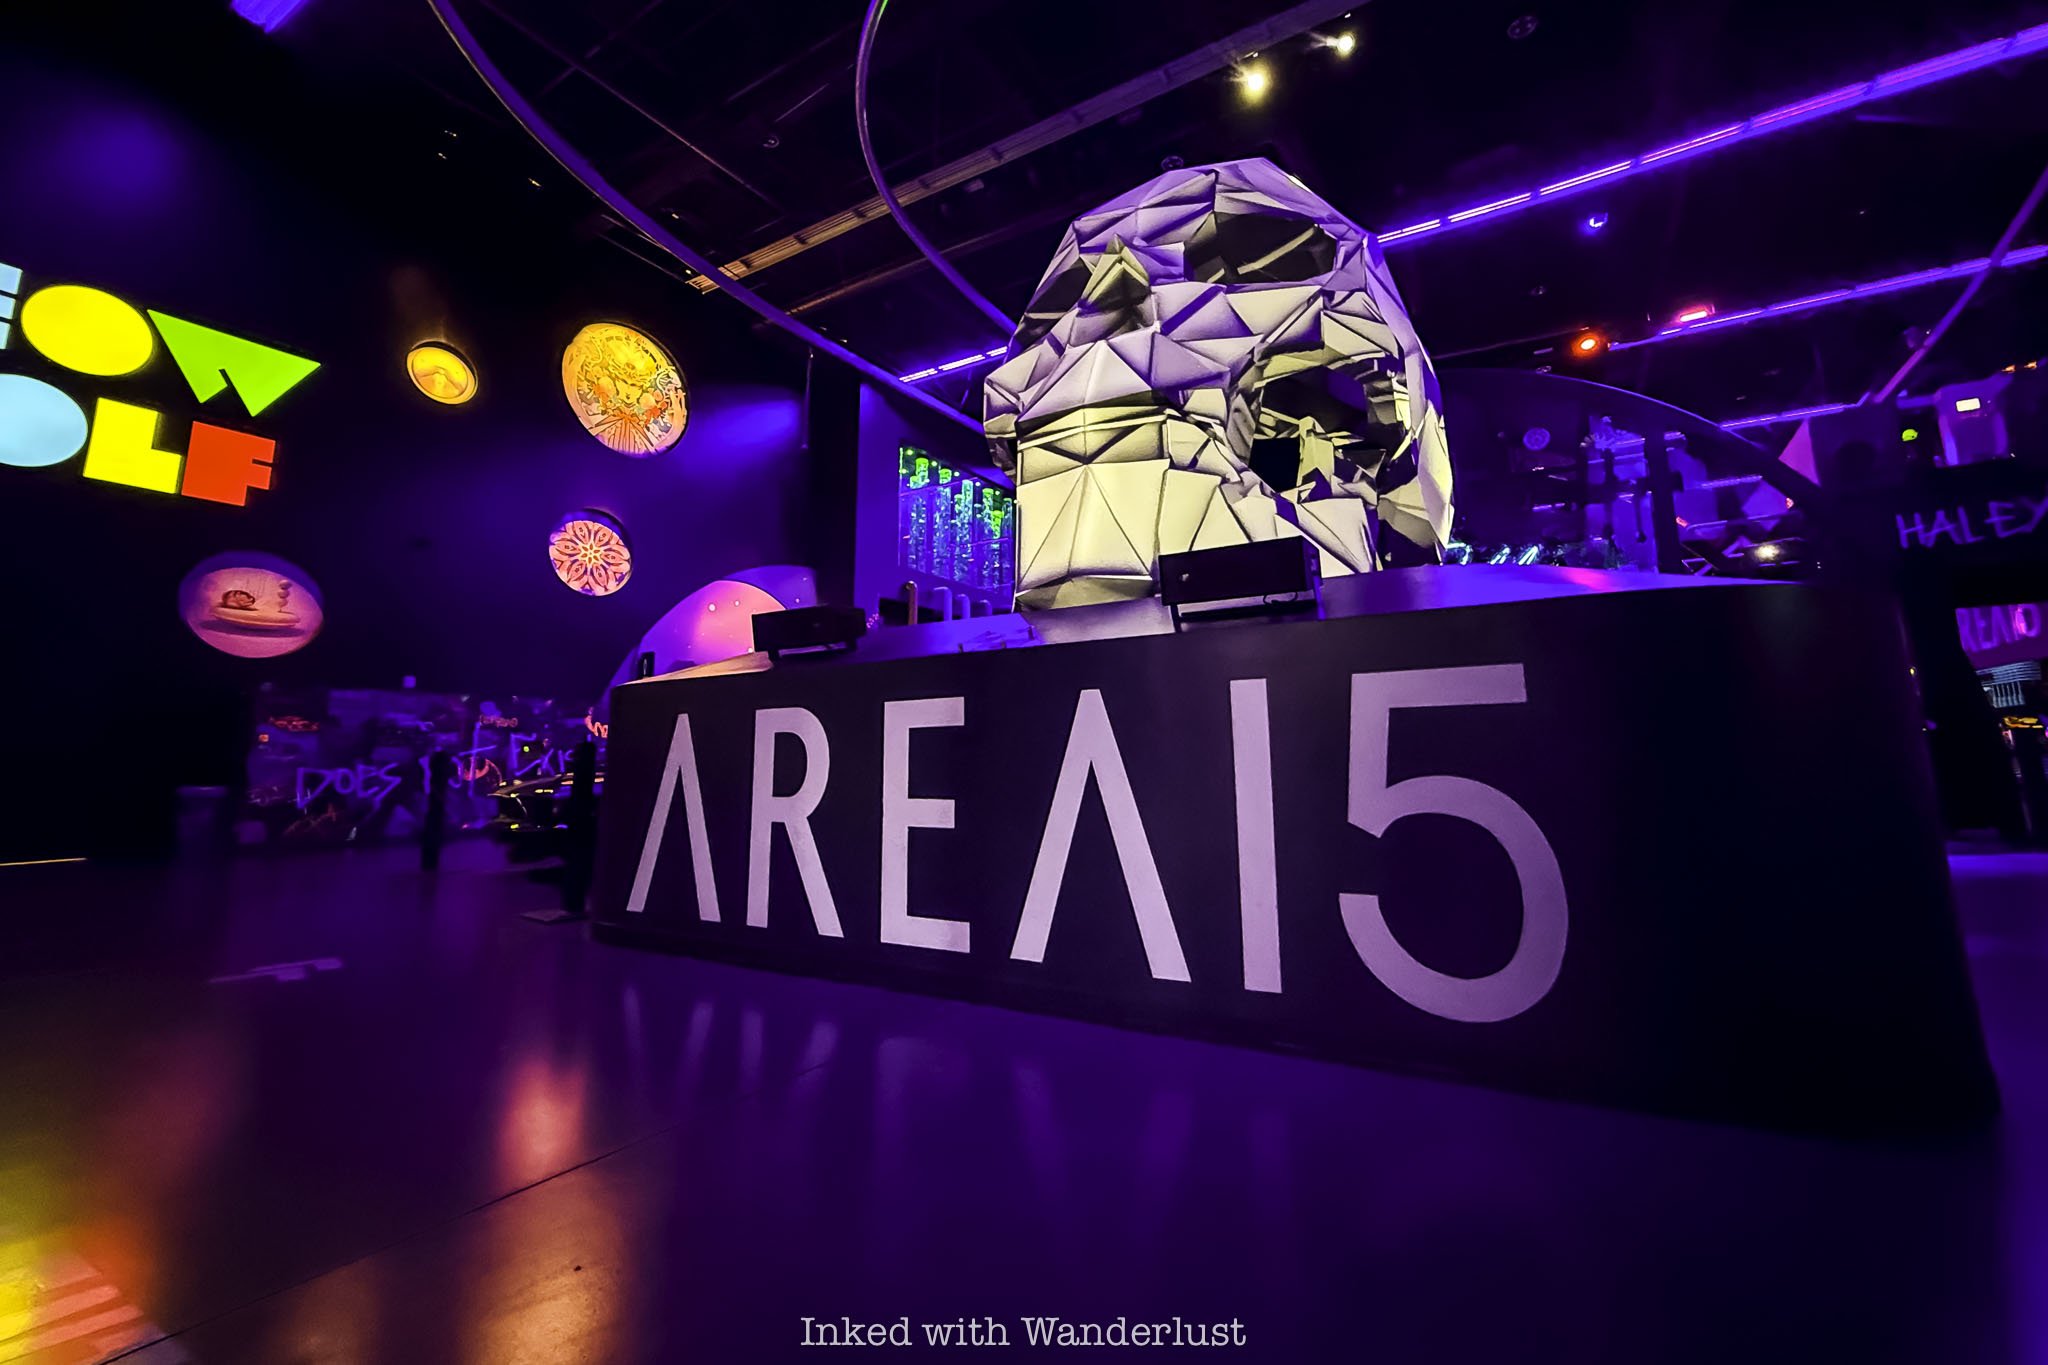
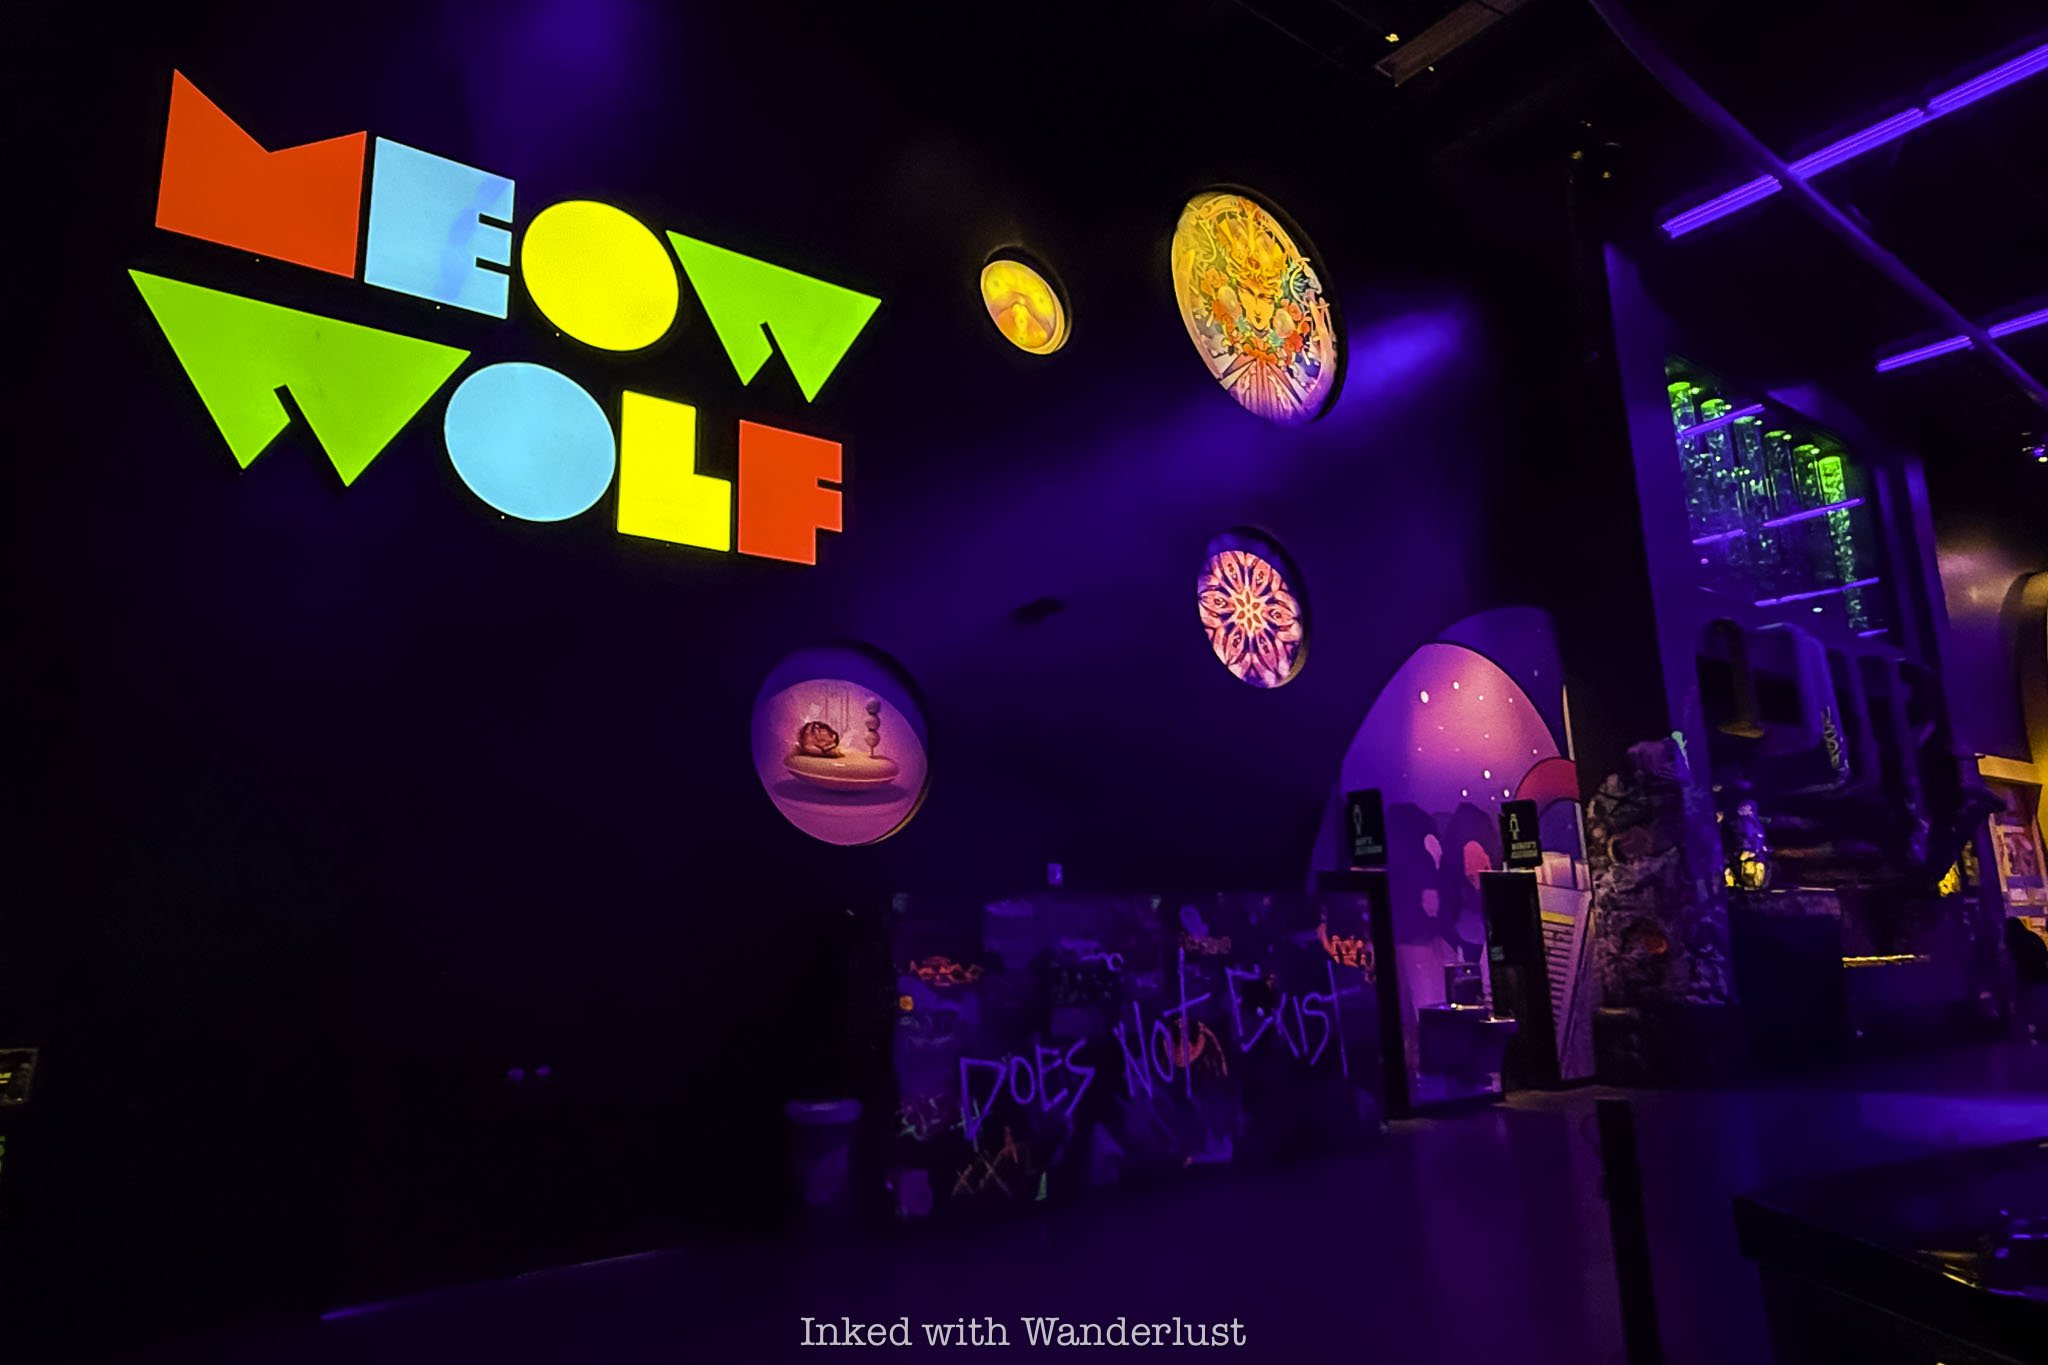
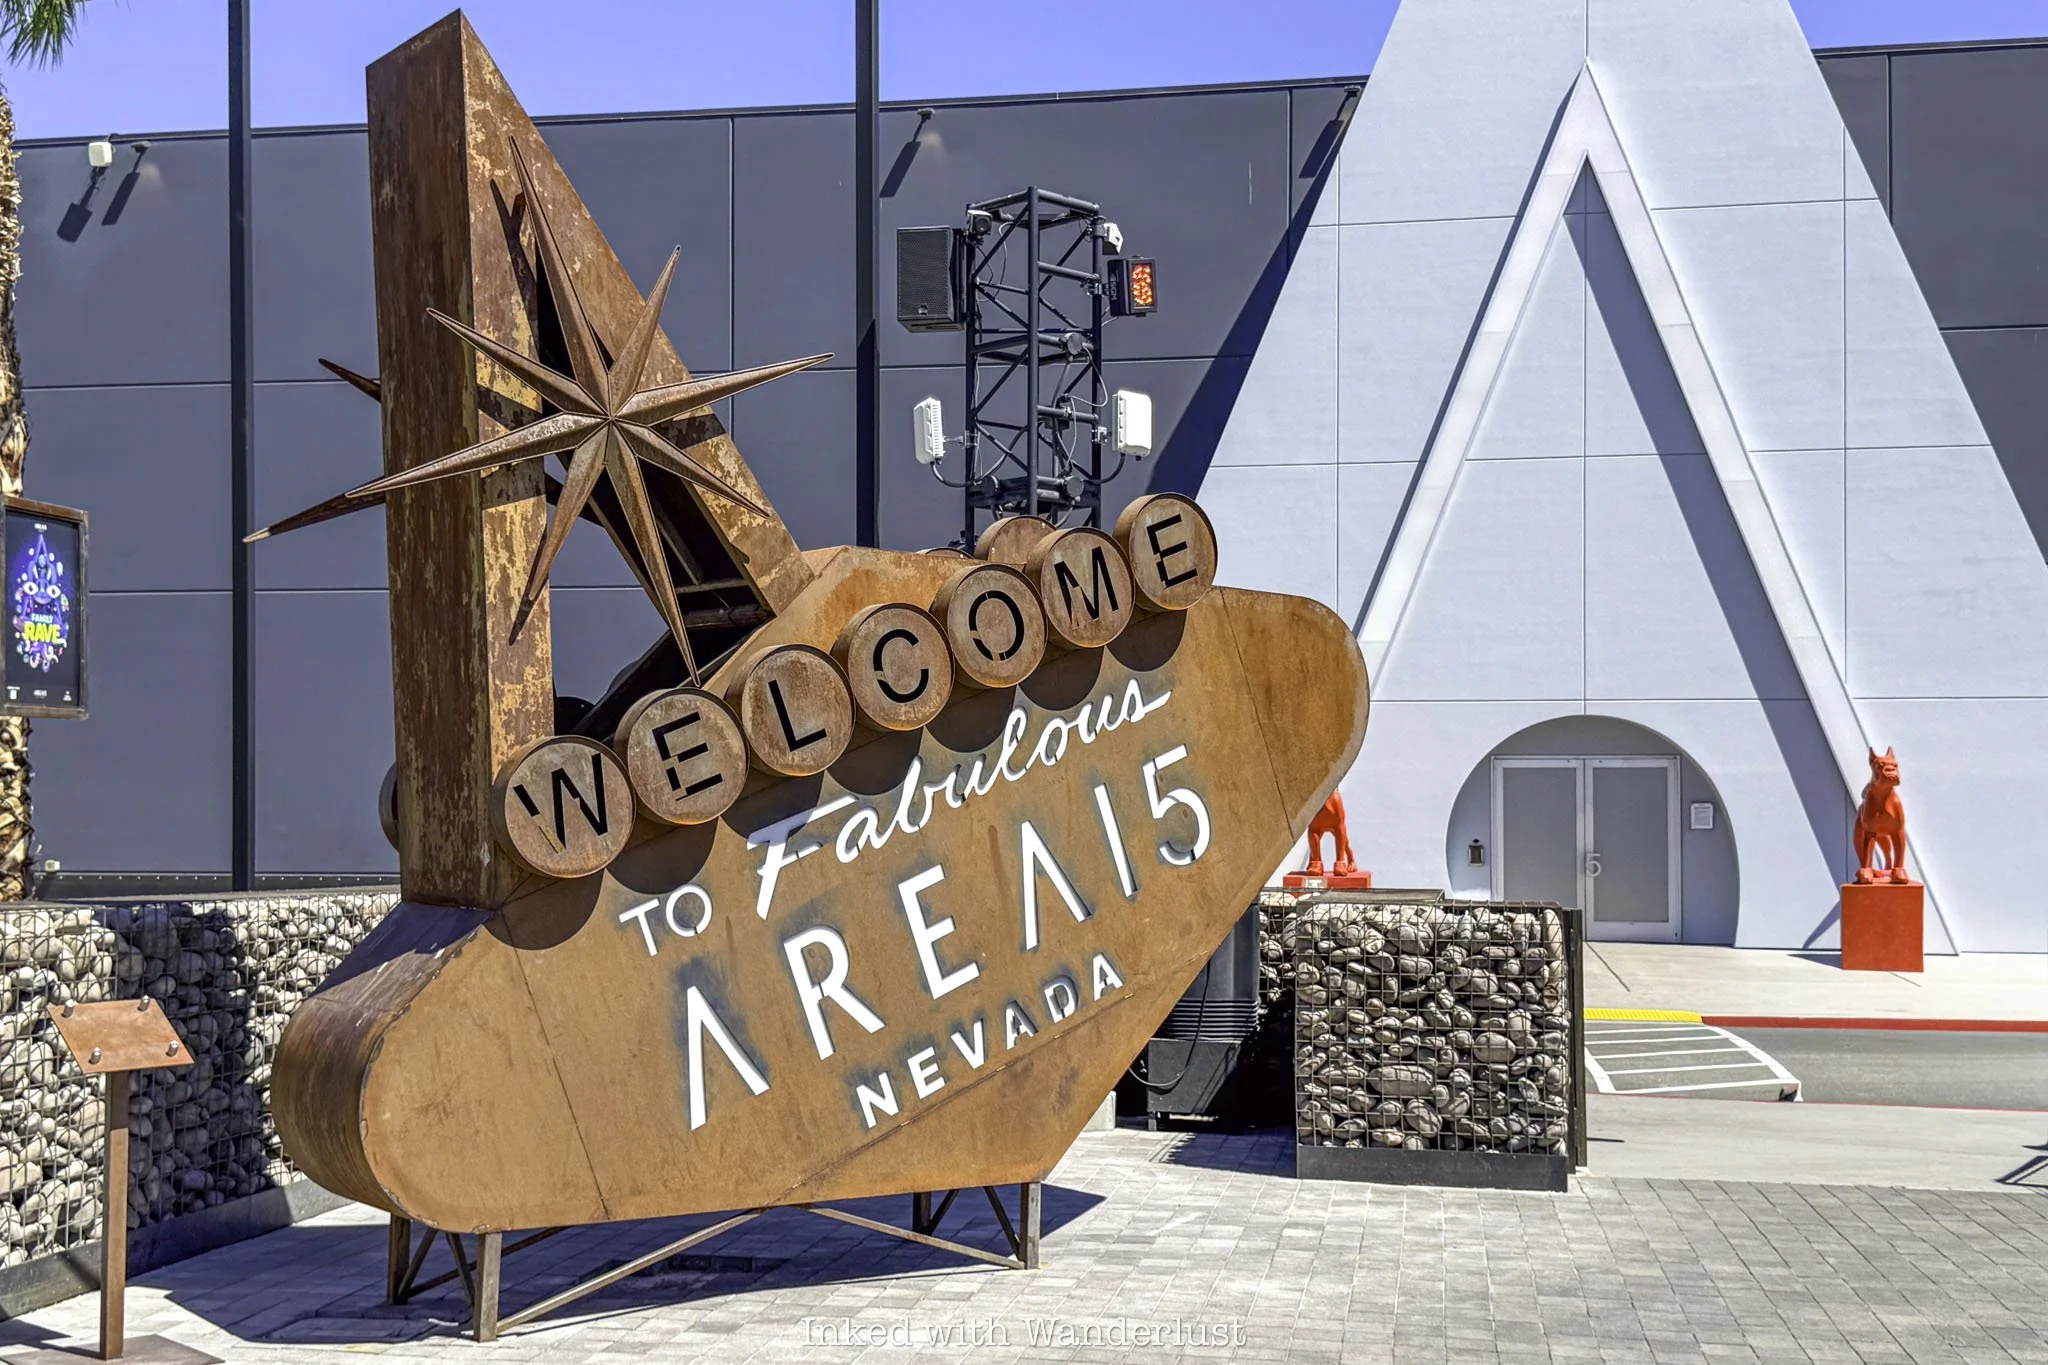
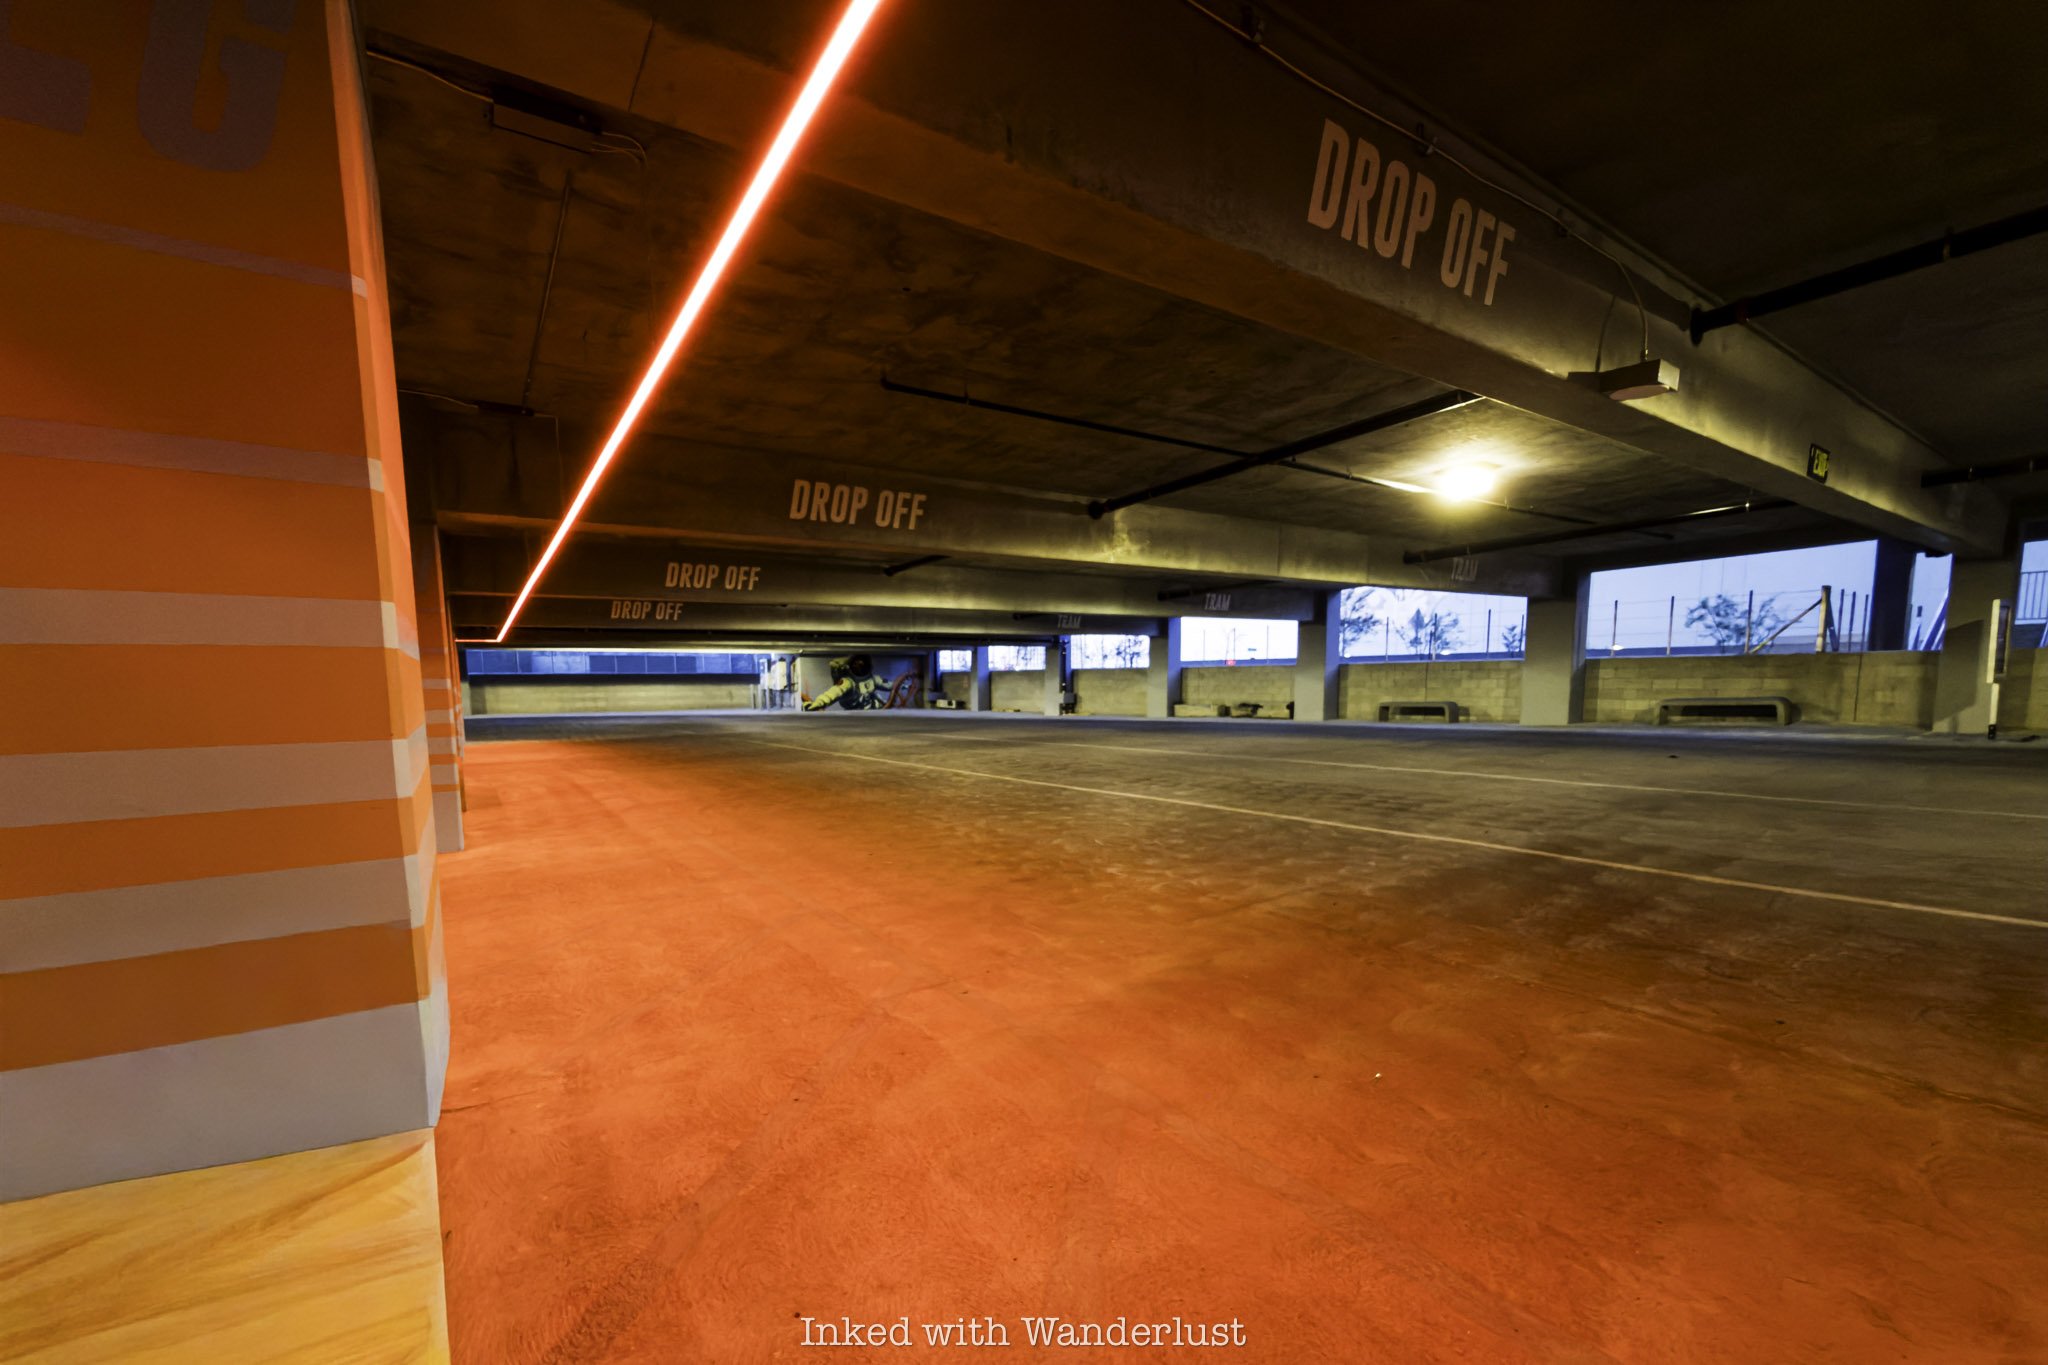
Meow Wolf’s Omega Mart is located in Las Vegas, Nevada. It’s the anchor attraction within the Area 15 Entertainment District, housed inside the namesake building in zone one. Upon walking inside, go left at the giant color-changing skull and you’ll find Omega Mart shortly thereafter.
Parking can be found throughout the grounds. The closest lot to Omega Mart is directly adjacent to the building and there’s a multi-story garage in zone two. Nevada residents (with NV plates) receive free parking while everyone else pays a modest $6.99 (full day/no cash).
As far as hours of operation is concerned, Omega Mart is open seven days a week from 10am - 11pm each day, though this can vary. Note that on select nights Omega Mart may close early for private events. Refer to their calendar for up-to-date hours and scheduled events.
Omega Mart Ticket Prices
Since Omega Mart is owned by Meow Wolf, meaning it’s independently operated from Area 15, it has its own ticket requirement and price. There are many ways to purchase Omega Mart tickets and we’ll cover a few below.
One way is to purchase an Area 15 Experience Pass that includes Omega Mart. Going that route, you have two options - their Level 3A or Level 4 passes. Those are the only two Area 15 passes that include Omega Mart. You can read more details about Experience Passes in my Area 15 Ultimate Guide here.
Secondly, you can purchase directly through Meow Wolf at this link. They have several options which include:
General Admission (starts at $45 for adults and $40 for kids)
Nevada Resident General Admission (starts at $35)
Anytime Admission (starts at $75 for adults and $70 for kids)
VIP Package (starts at $90)
Omega Quest (starts at $119)
Portal Pass (starts at $139 for the year)
General and anytime admission tickets are the most common and are virtually the same with the exception of the “anytime” element. With general, you select a time of arrival but with anytime, you aren’t beholden to a specific time.
The VIP option also includes the anytime option, along with a few other perks such as a VIP lanyard, commemorative ticket, one beverage at their speakeasy “Datamosh”, 15% off merchandise, and more.

The Omega Quest ticket includes everything in the VIP package along with VIP entry and a “detailed-hungry scavenger hunt of Omega Mart”. Not sure the latter is worth the extra expenditure but if you’re into scavenger hunts, this is the ticket for you.
Thirdly, you can purchase Omega Mart tickets through my preferred ticket partner, Viator. Viator is a reputable ticket vendor worldwide and sells tickets to many of Las Vegas’ most well-known attractions.
Purchasing through them often results in spending less as they frequently sell below face value but are sometimes the same, at worst. Purchasing through my link helps to support Inked with Wanderlust and doesn’t cost you anything extra as my small “cut” comes directly from Viator.
The Omega Mart Experience

No Ordinary Grocery Store…
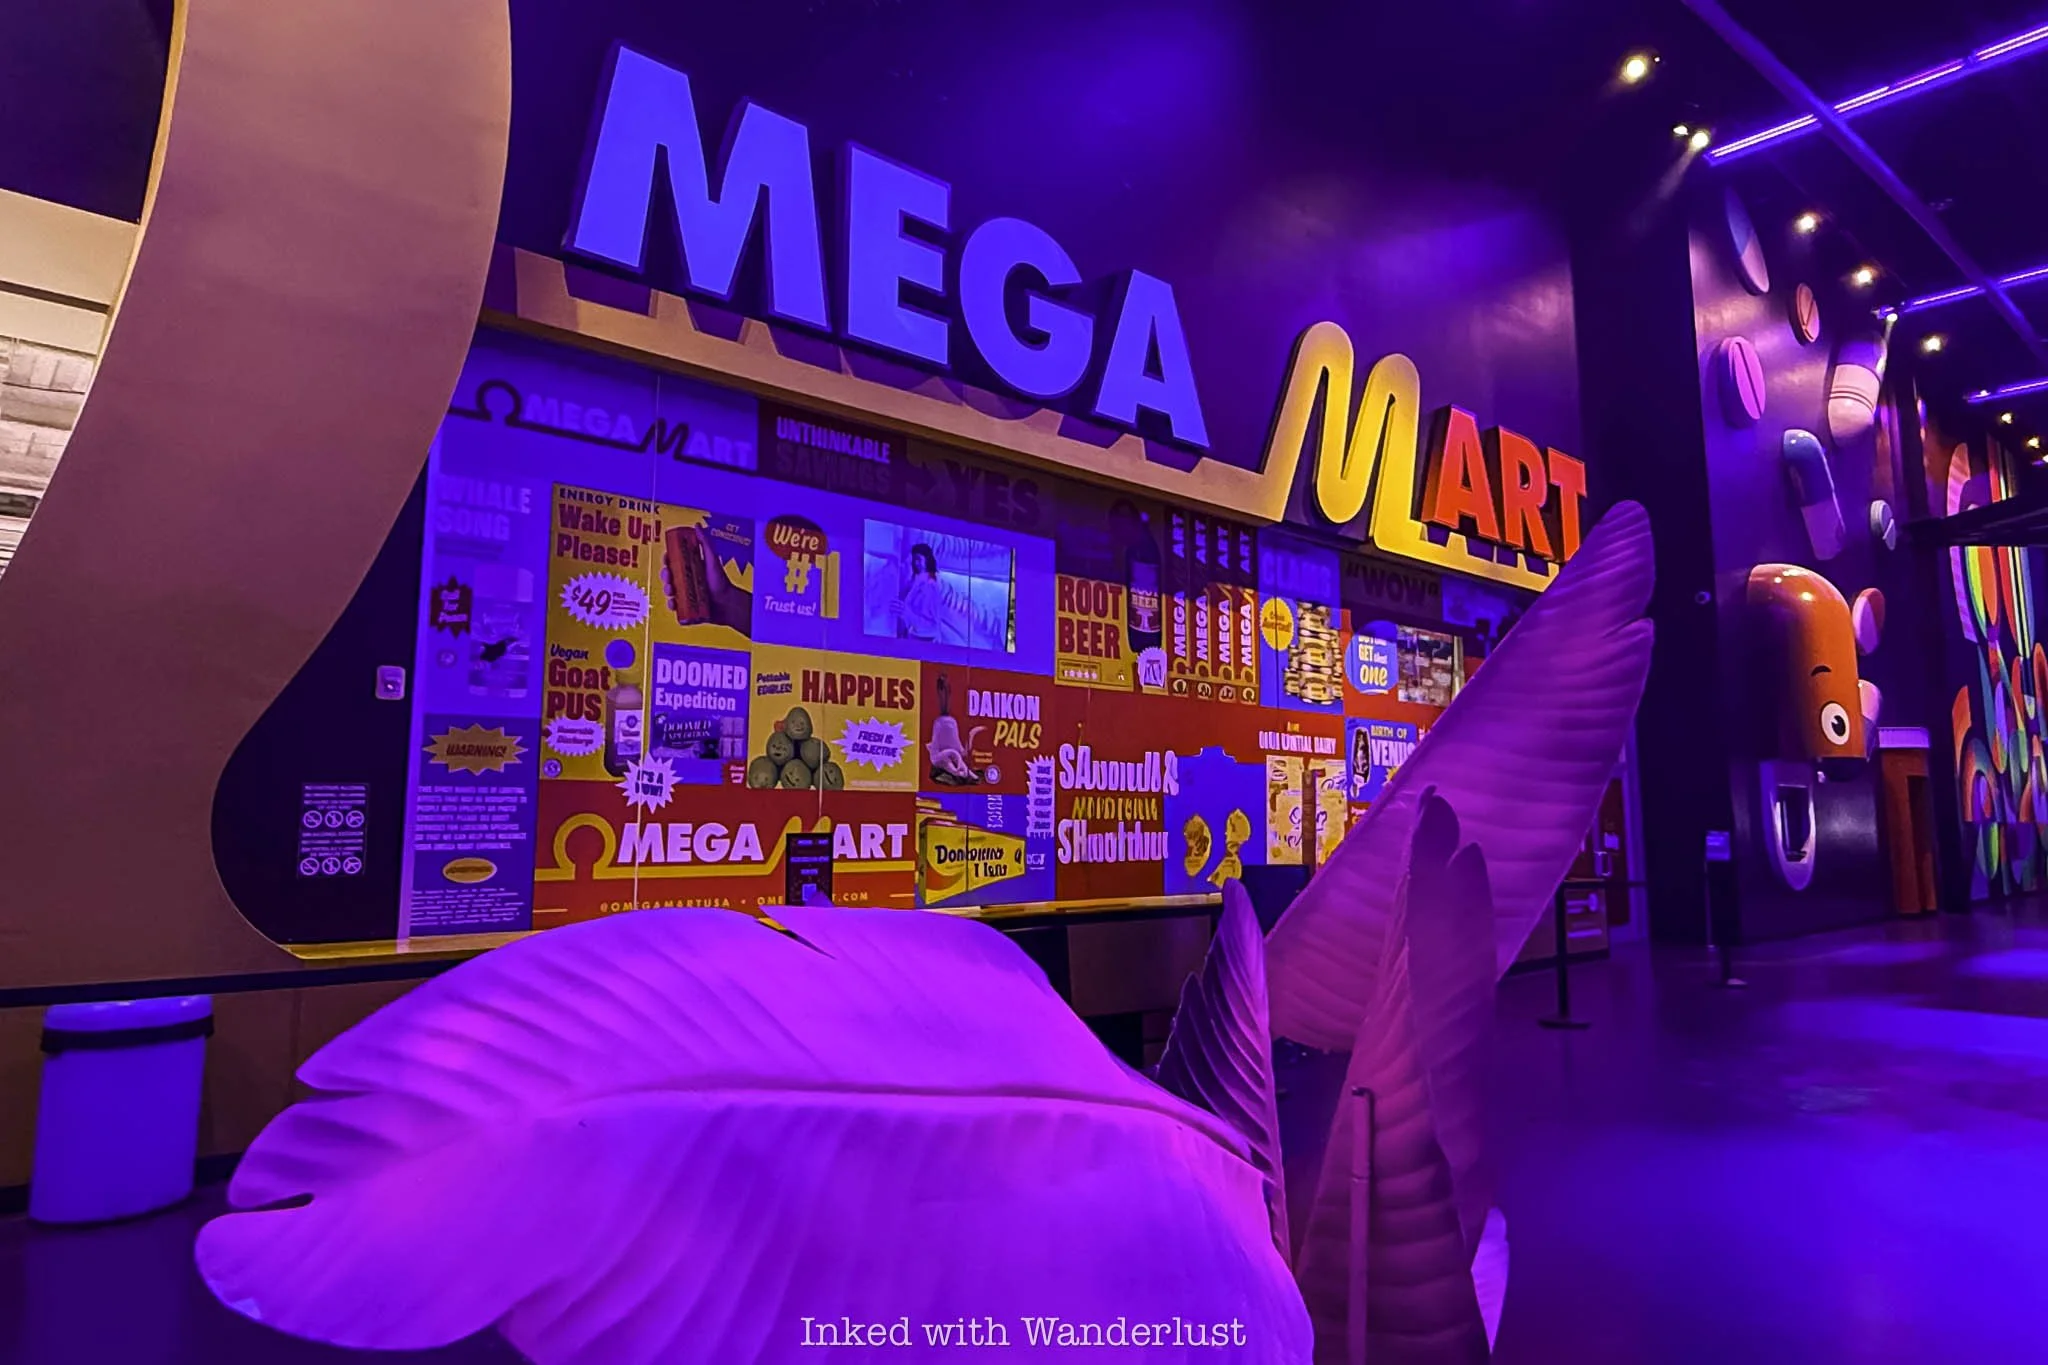
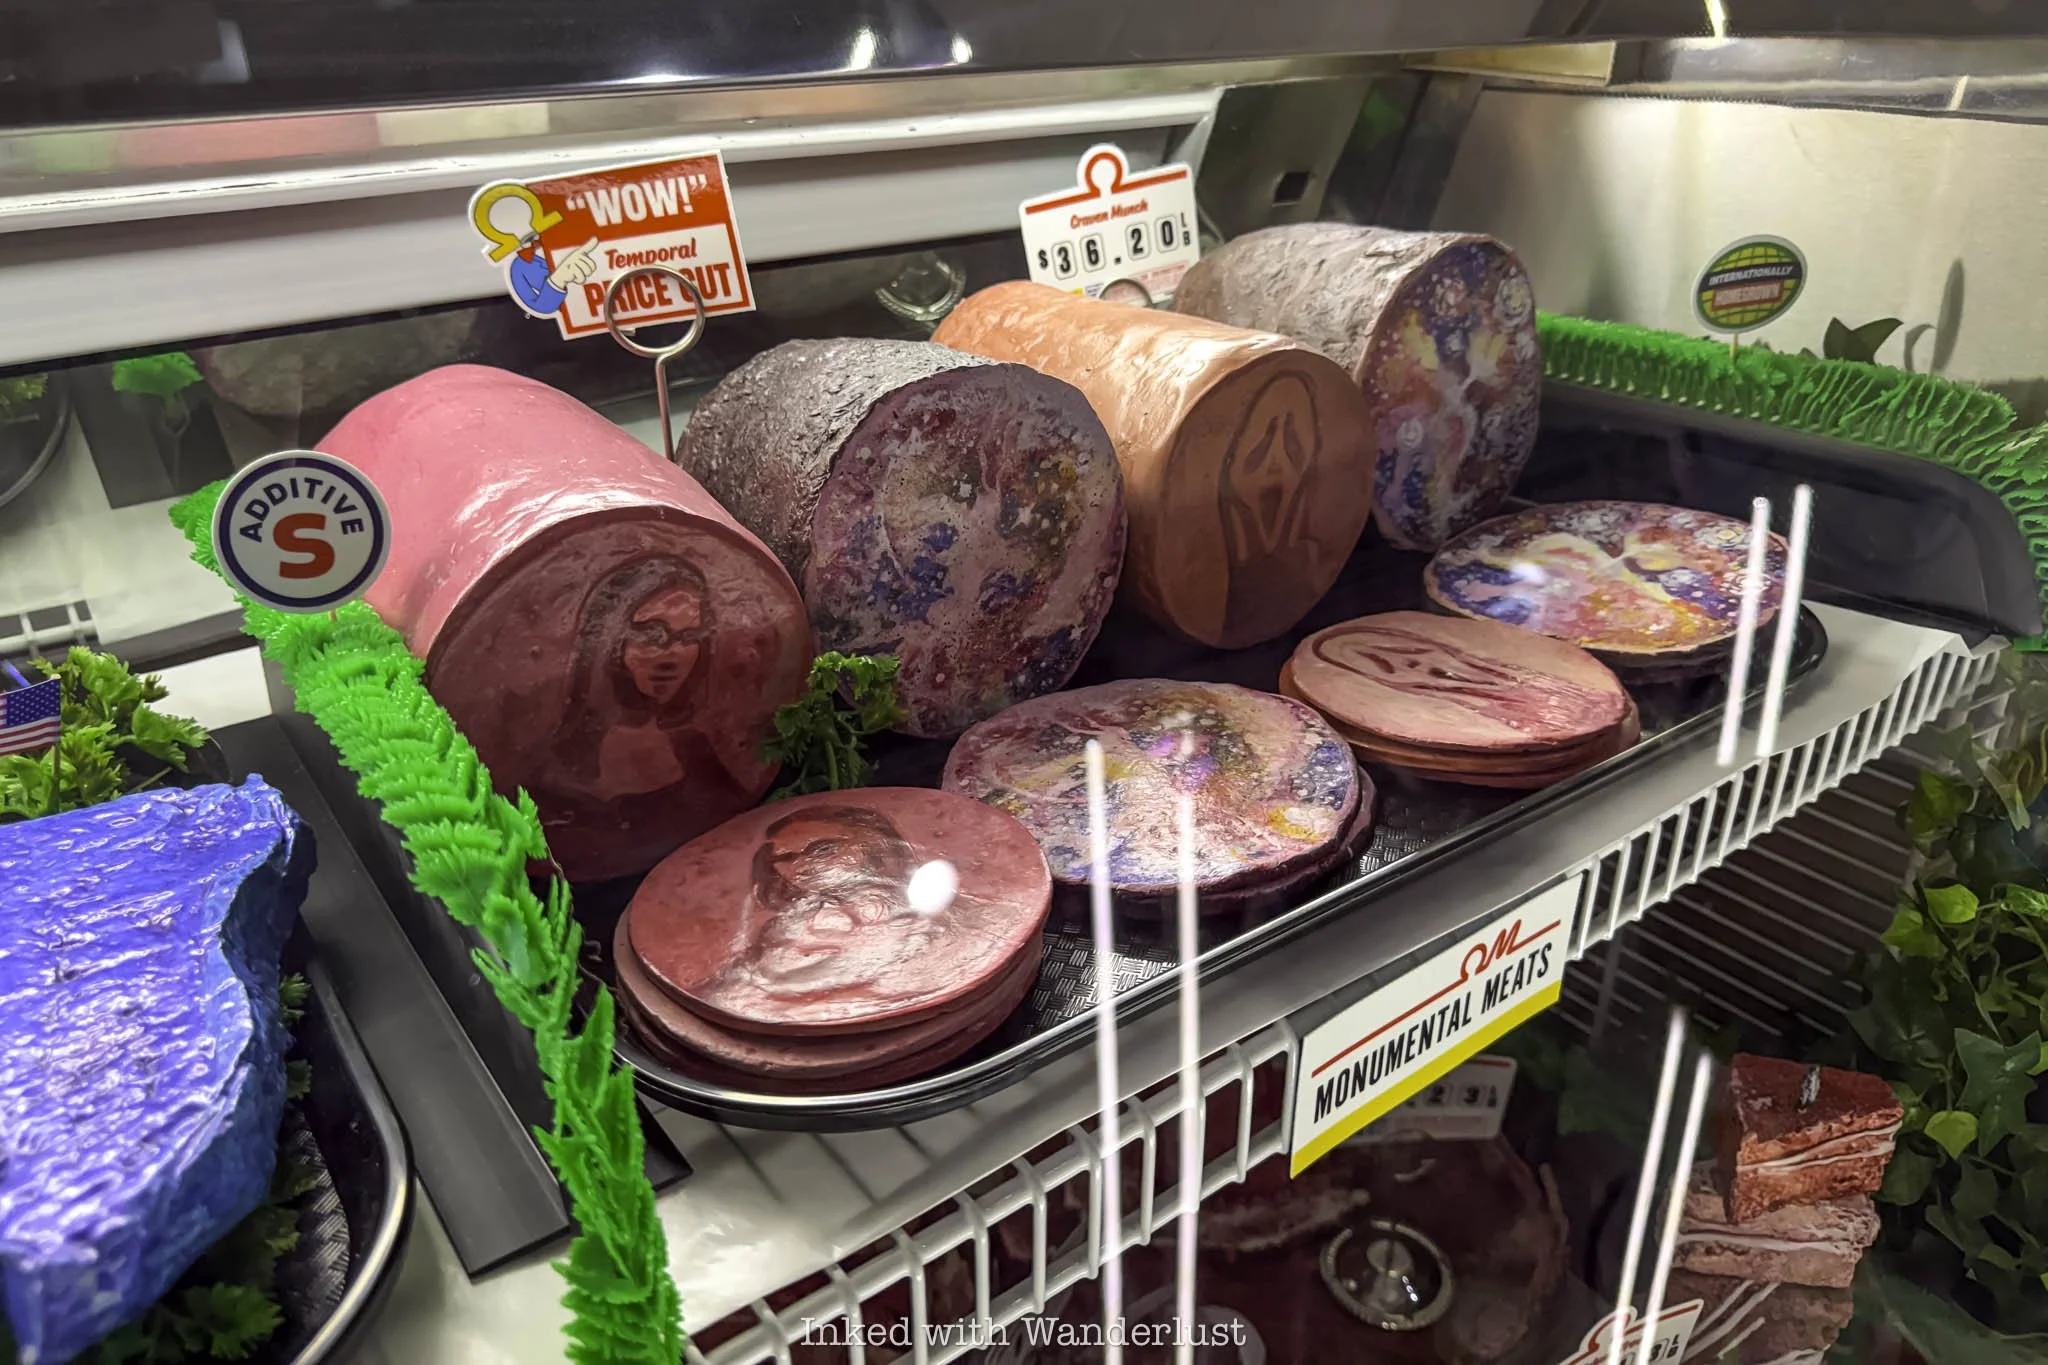
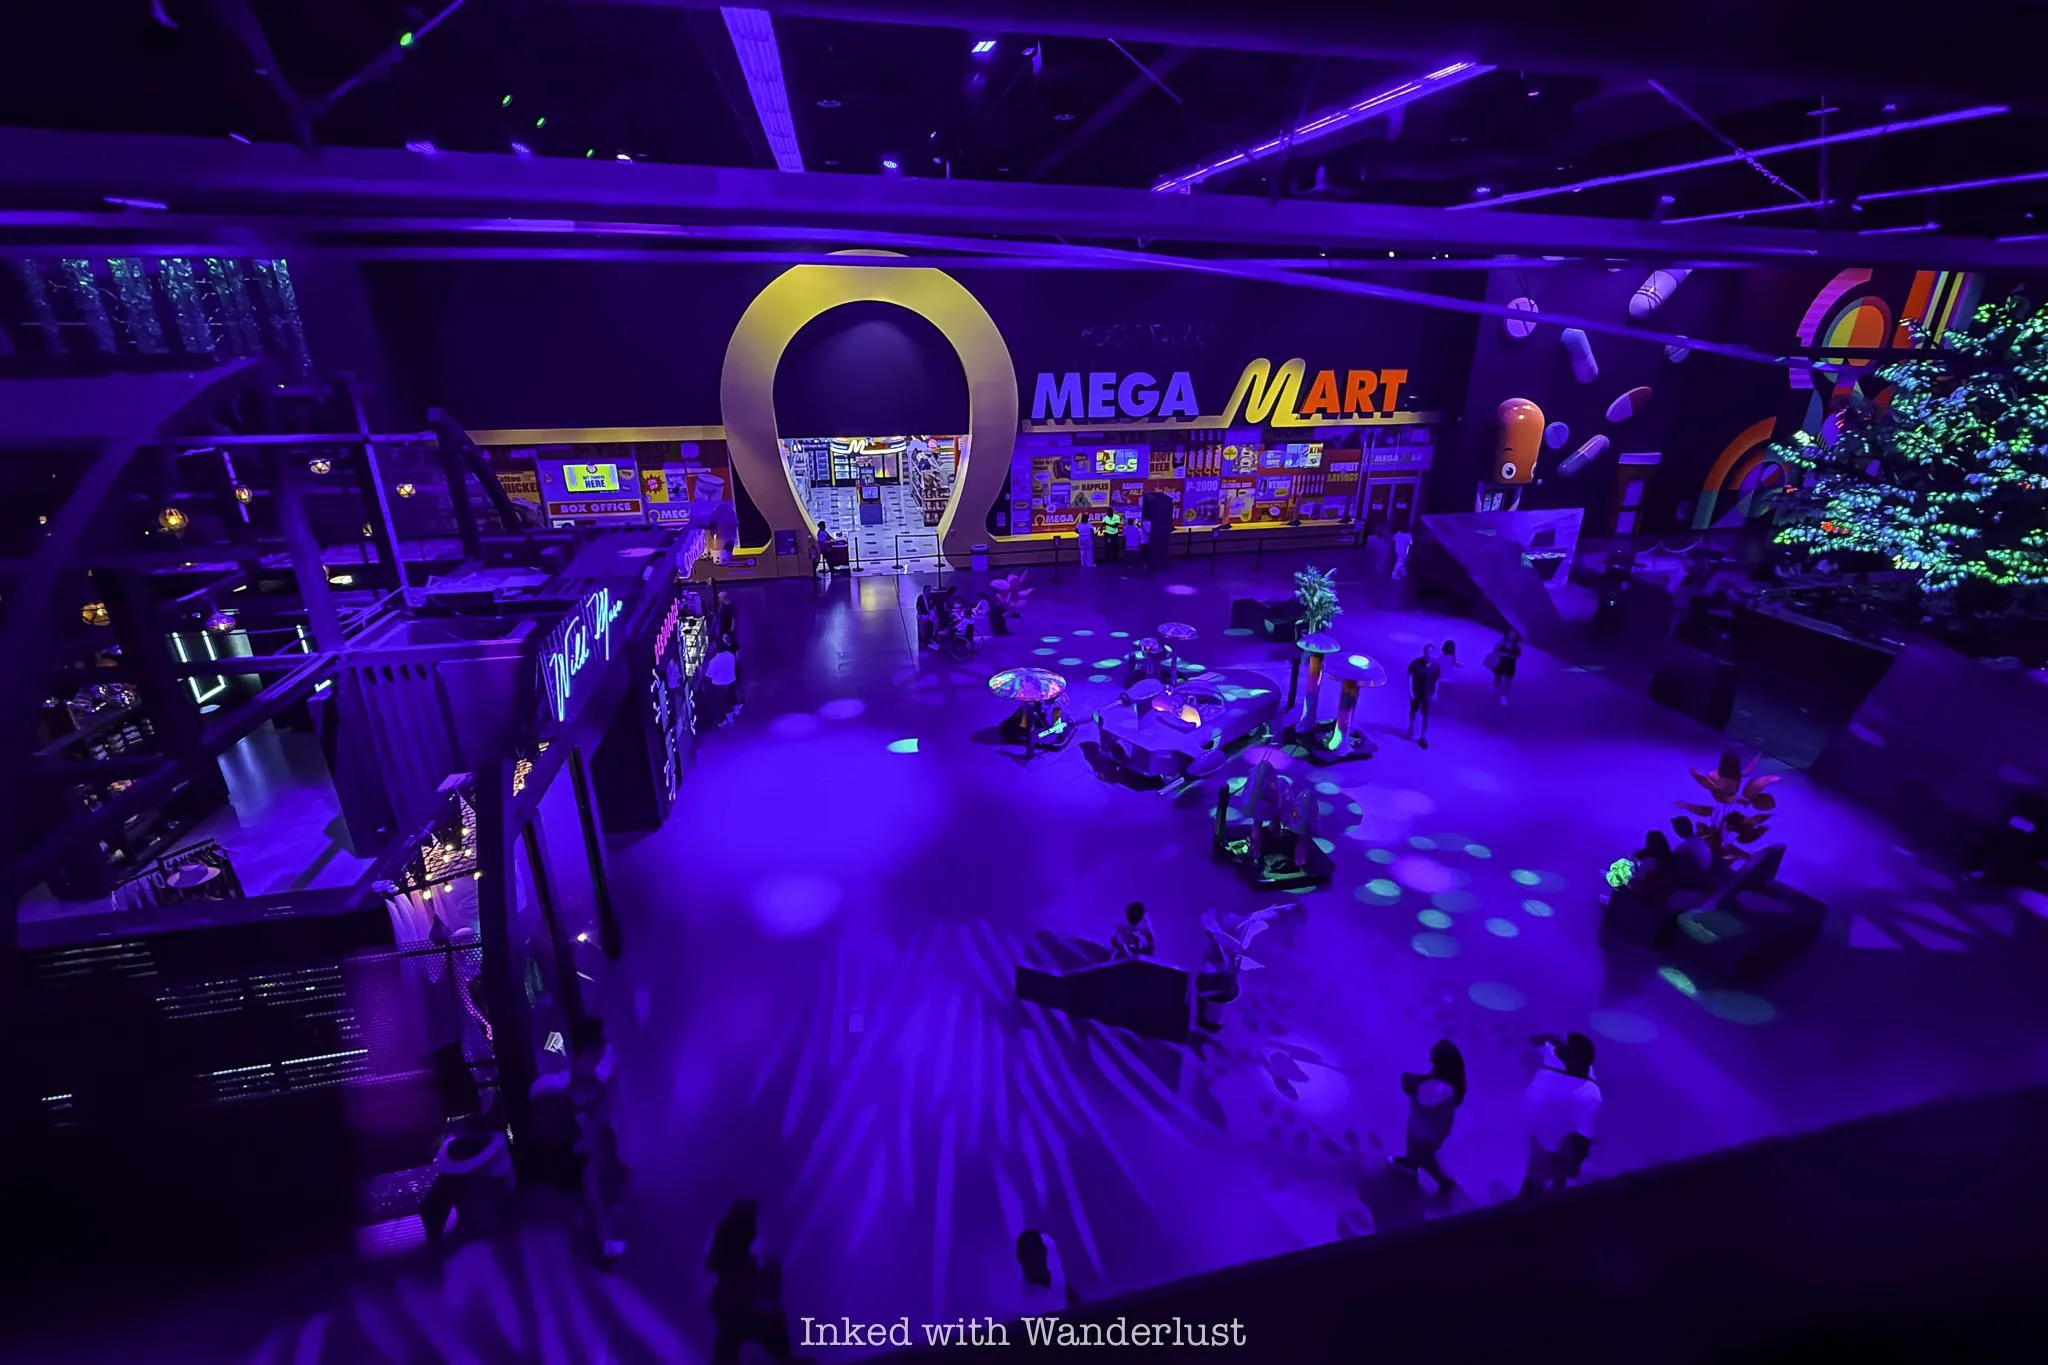
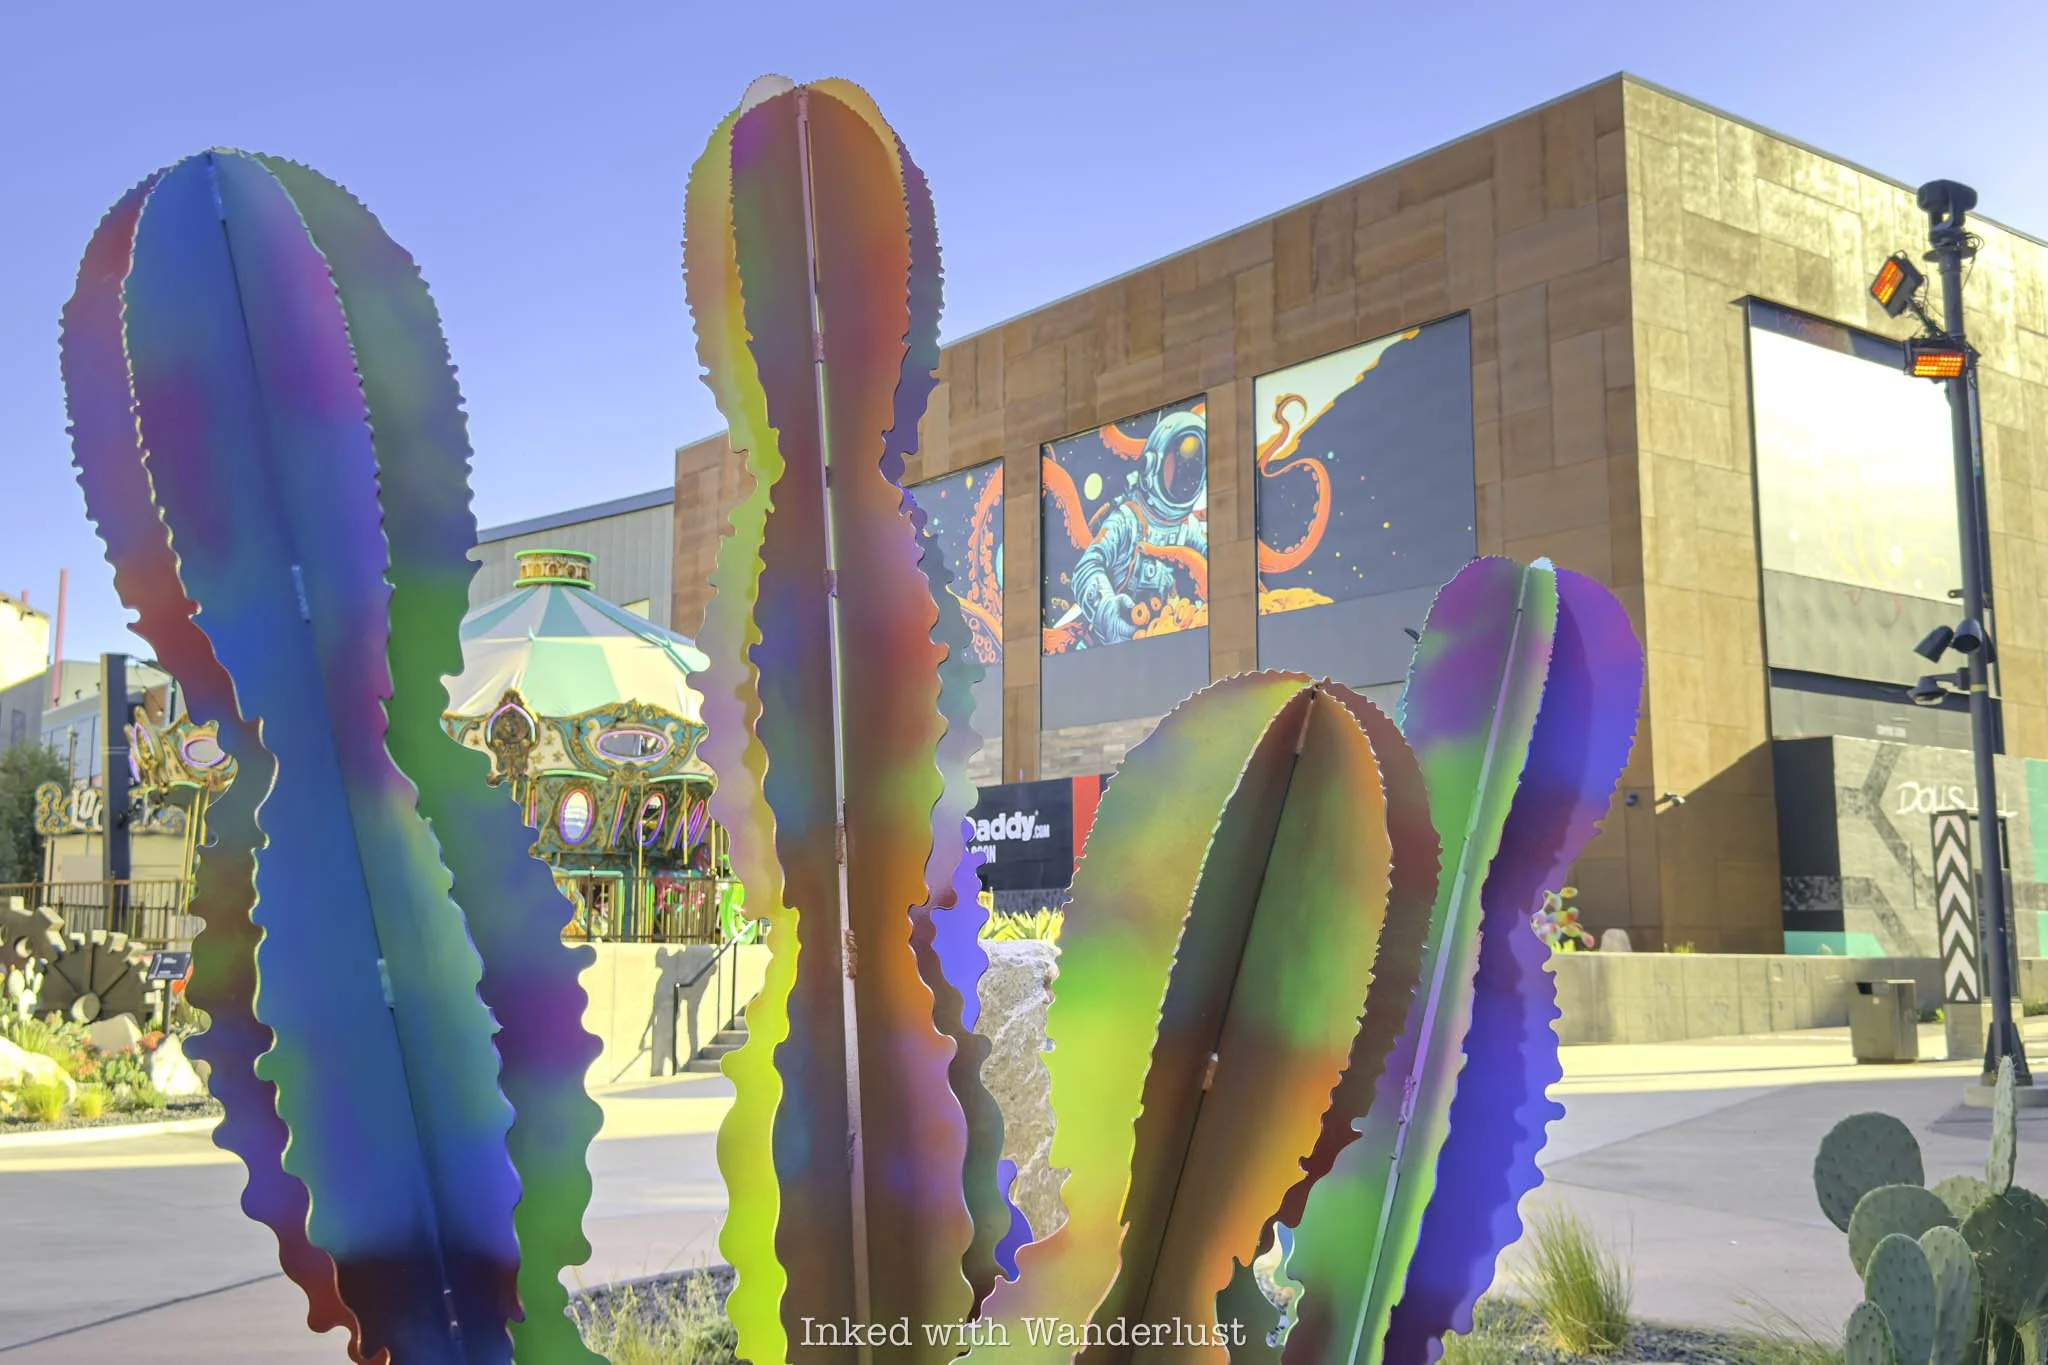
At first glance, Omega Mart appears to be a mock, ordinarily-looking grocery store. Shopping carts are parked near the entrance, the shelves are stocked neatly, and eye-catching advertisements promote a variety of products.
The more you look around, though, the more you begin to realize that something just doesn’t add up. Strange brands line the aisles, bizarre products fill the shelves, and just about every display contains a pun, hidden clue, or mystery.
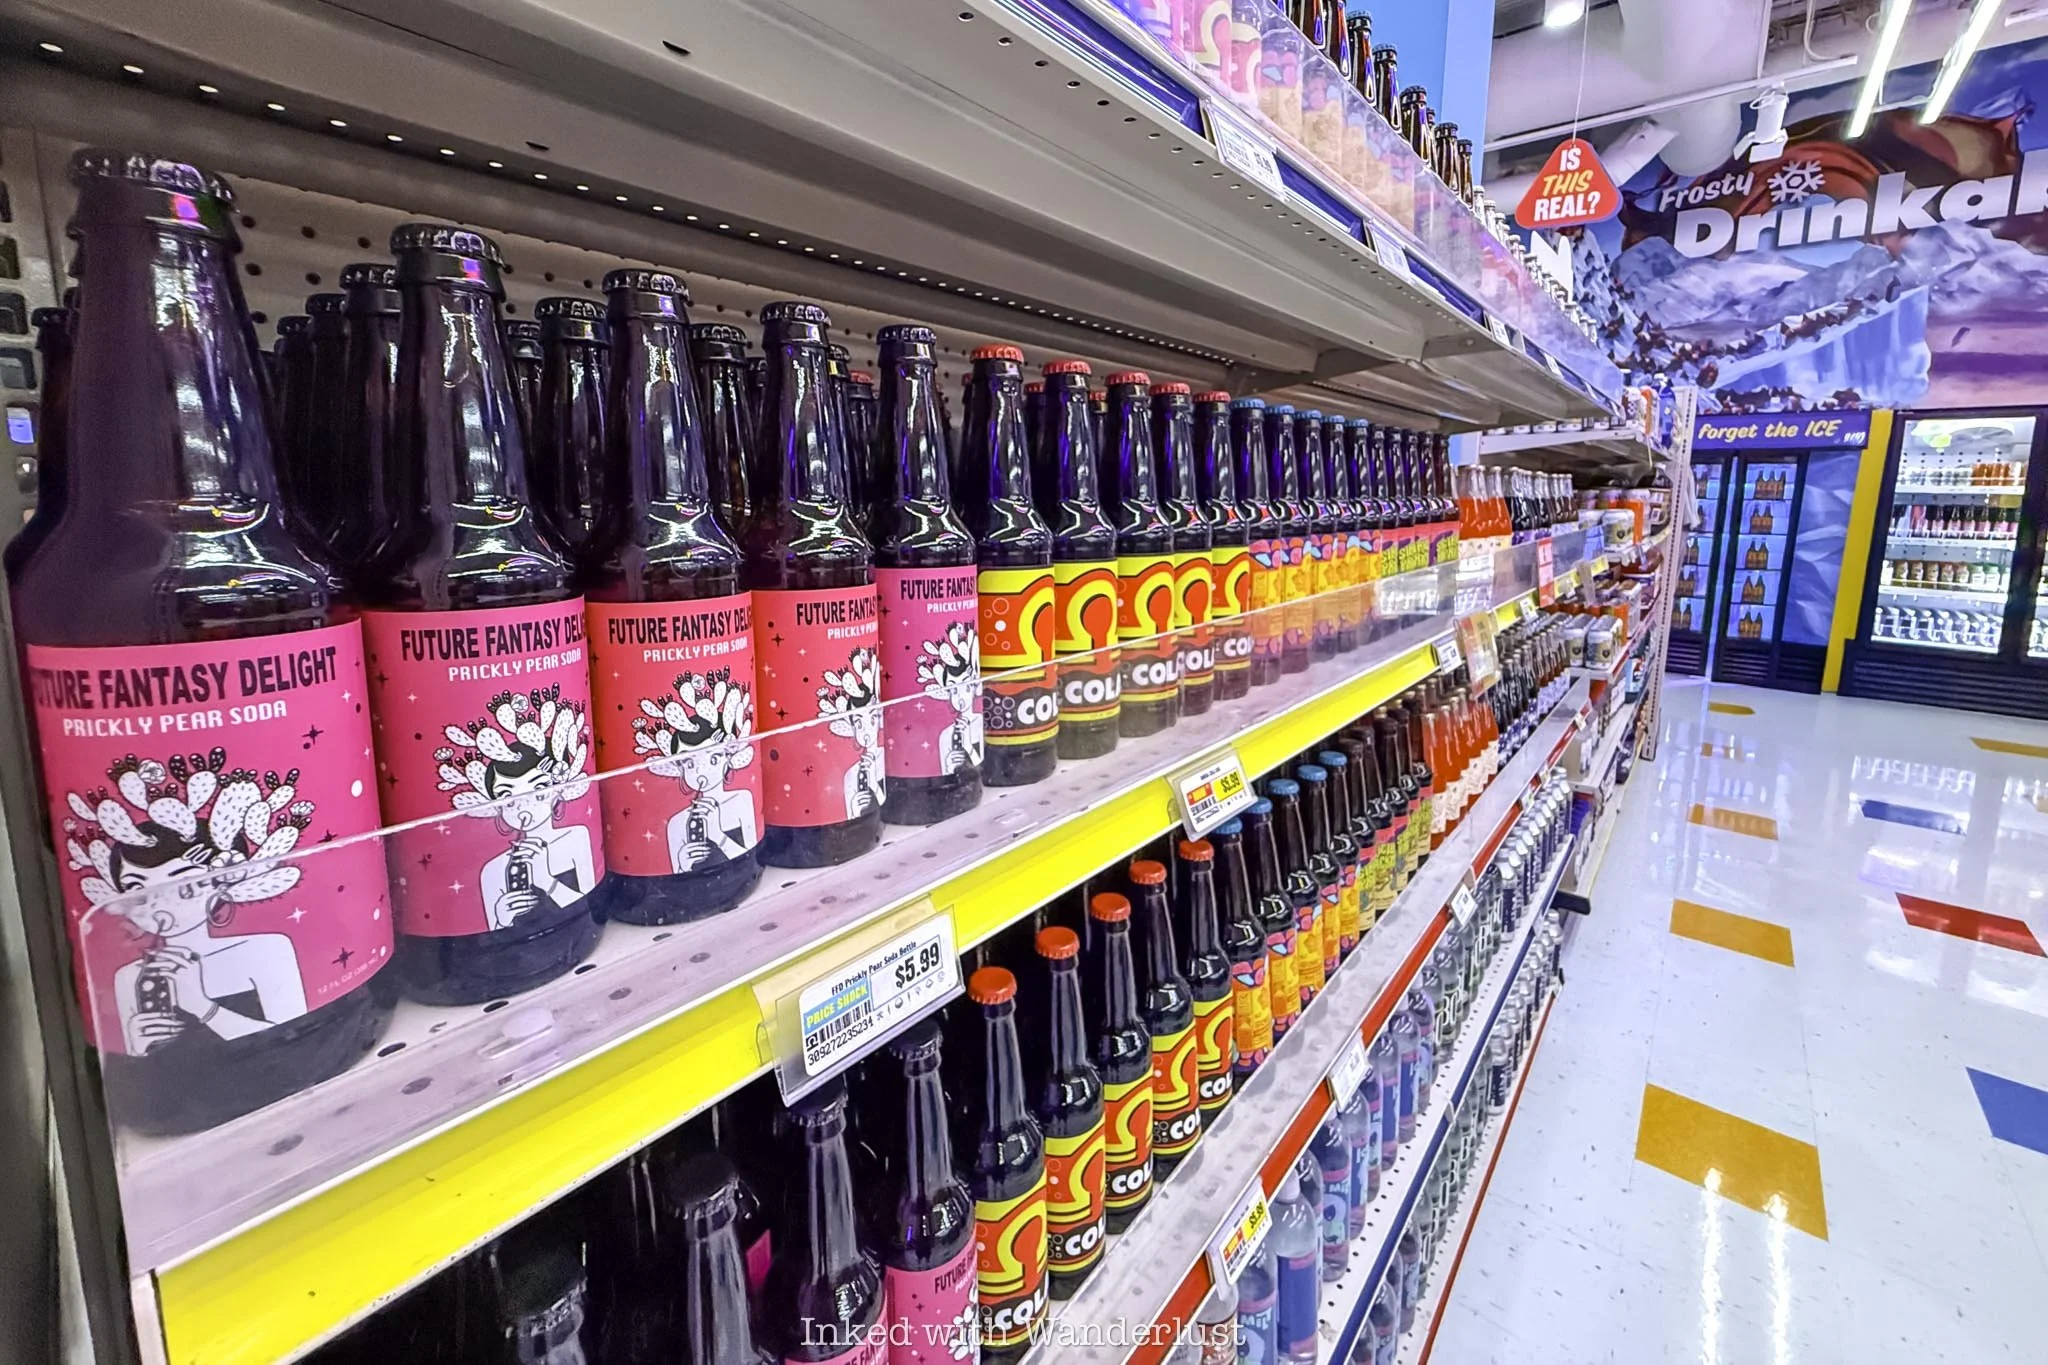
If you’ve never been to Omega Mart, you may be thinking, is this it? I did. Initially, it came across to us as nothing more than a pun-filled grocery store with items for sale (yes, you can purchase most of the items on the shelves).
It had everything you’d find at your local grocery store - a meat department, produce department, coolers with chilled items, bakery, slushie station, etc.
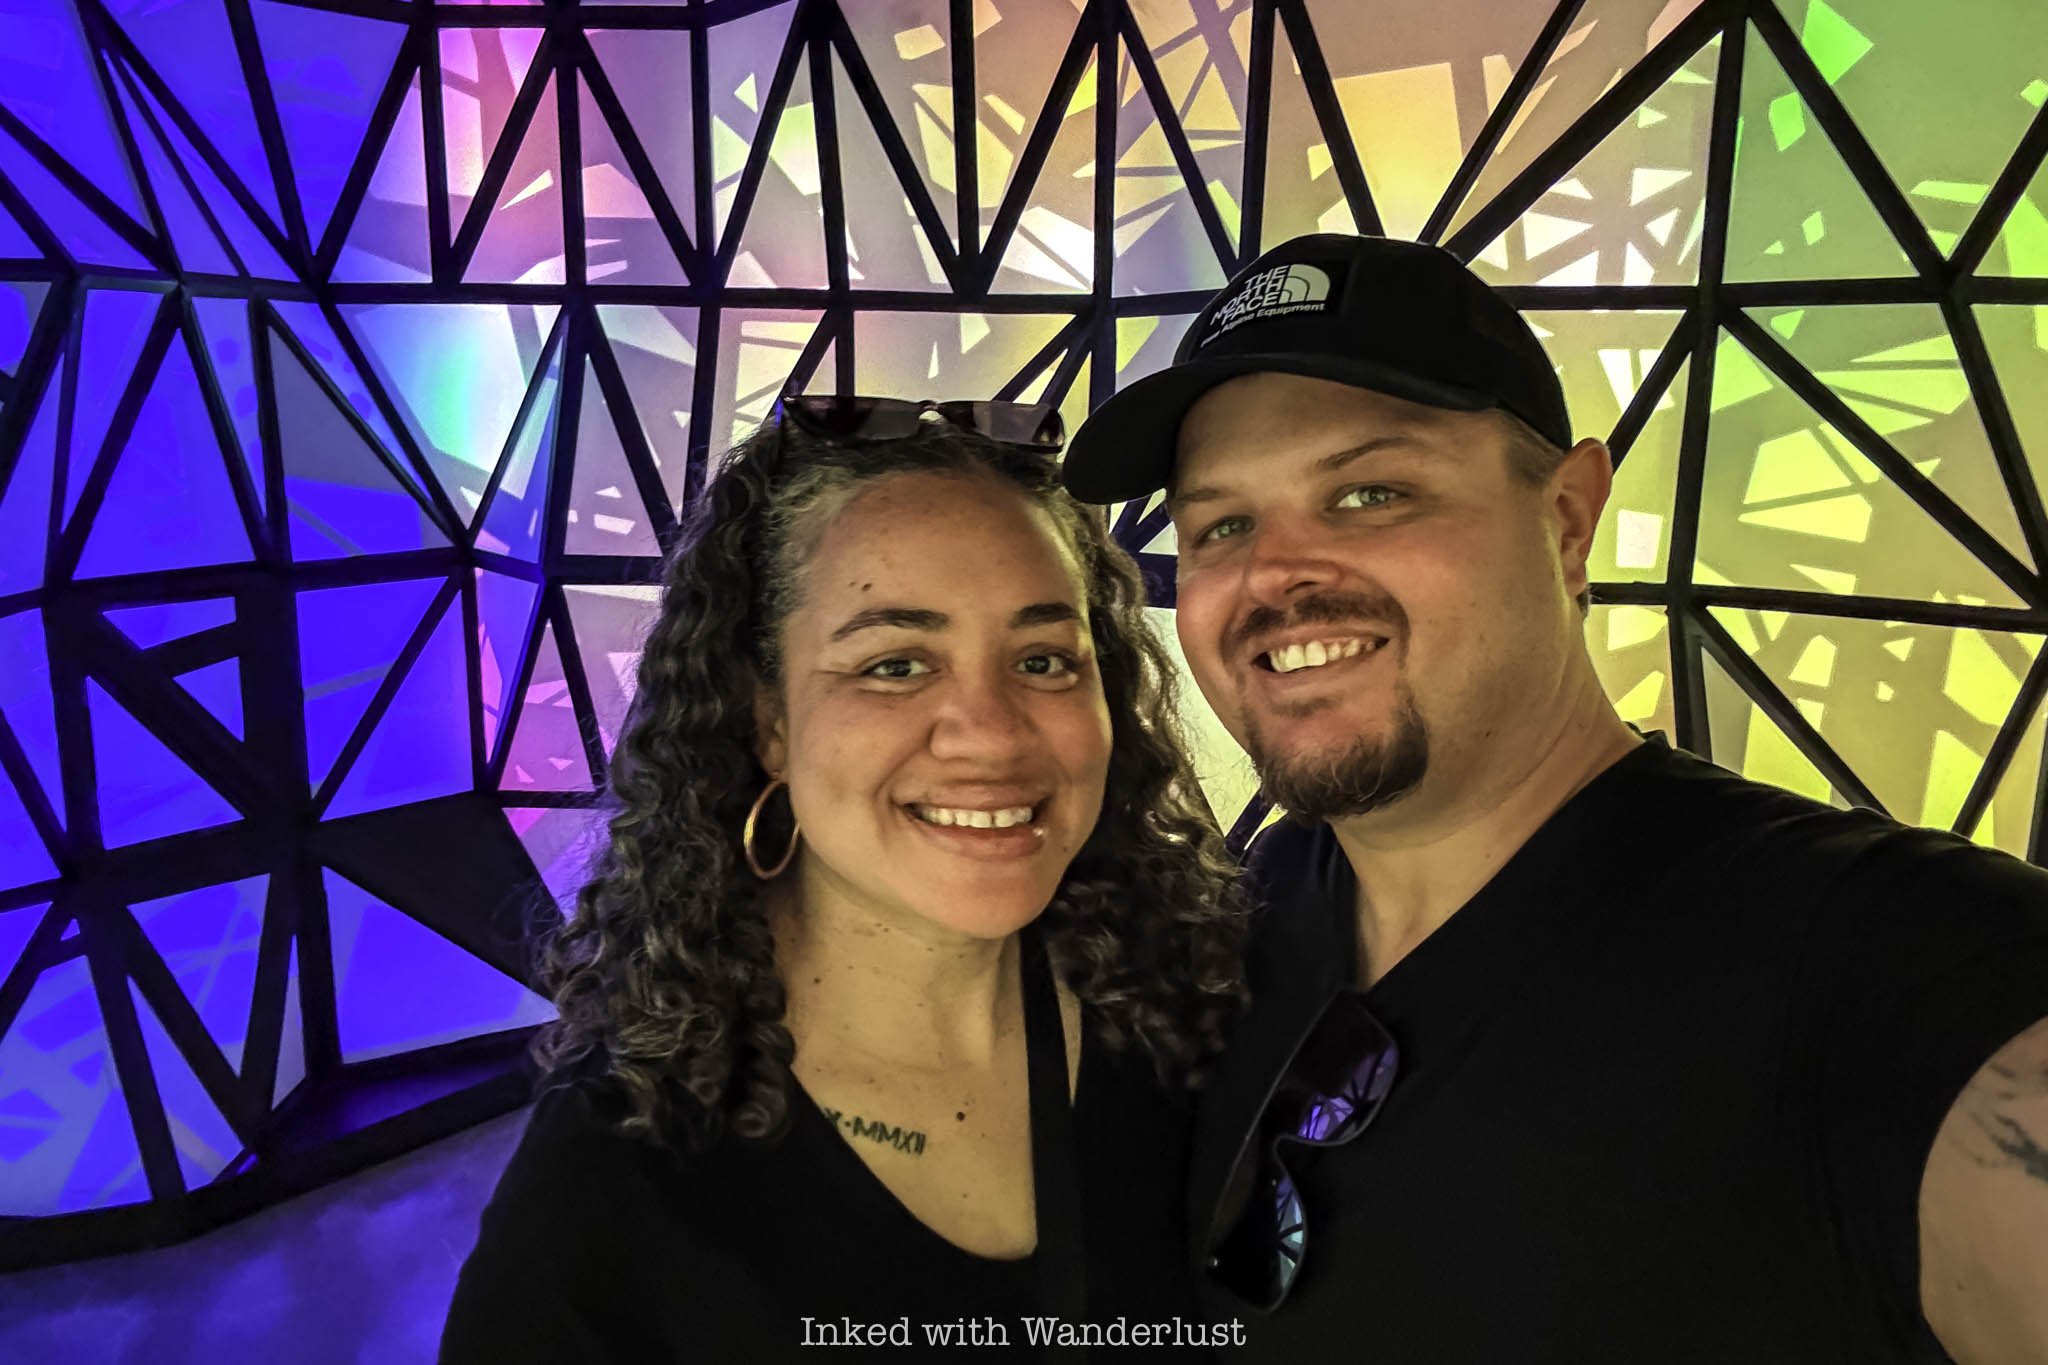
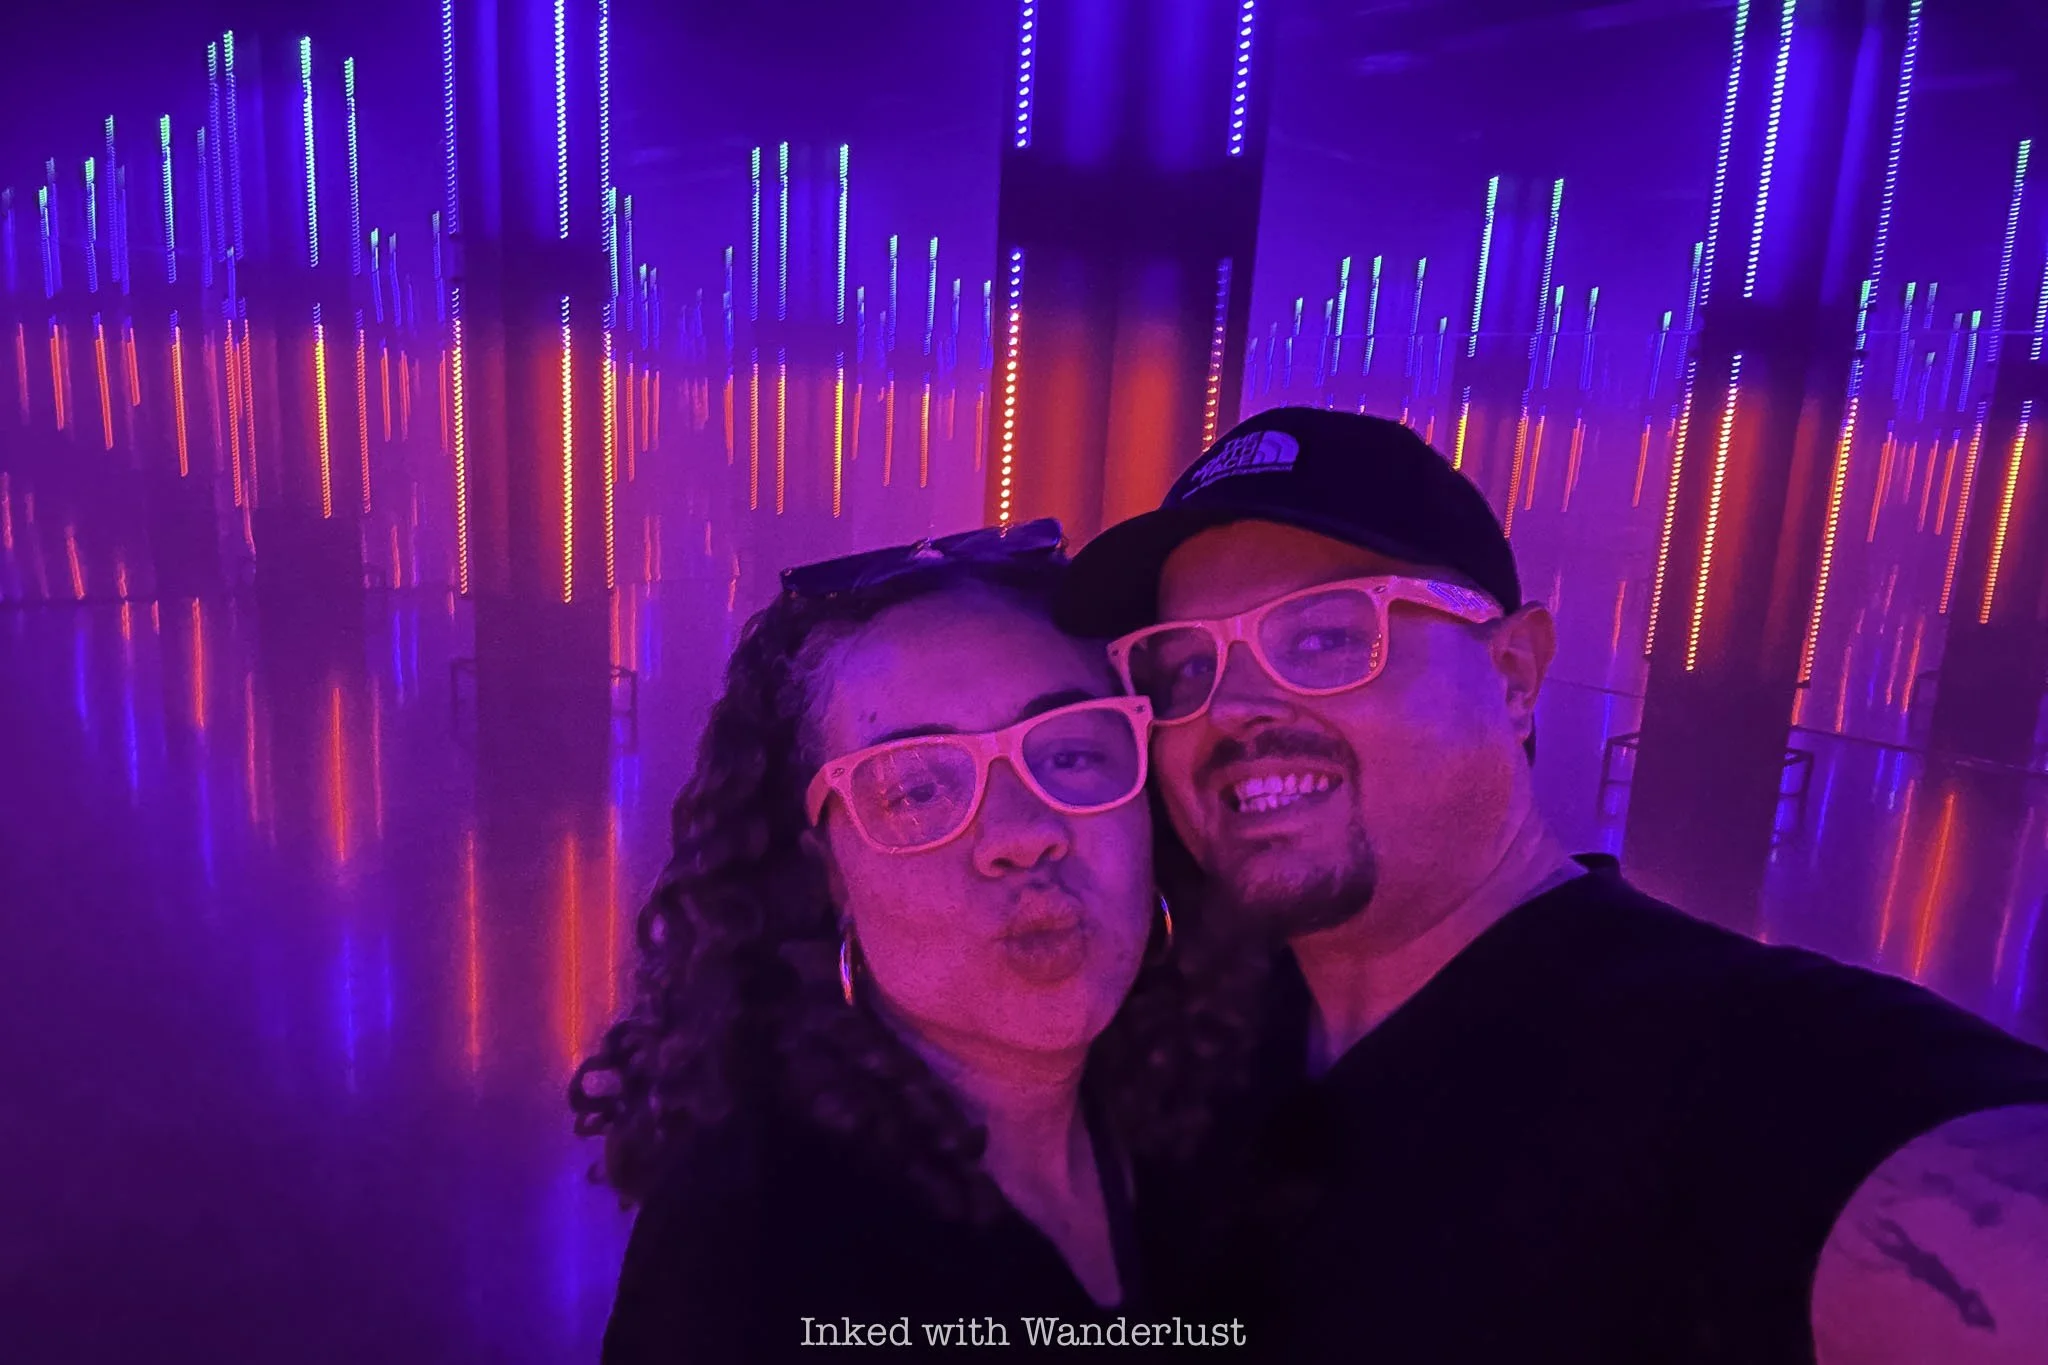
As my wife and I made our way to the back of the store, though, we discovered these unassuming, unsigned passageways leading to the “backroom”. We took one, thinking it would be a walk-through of a stock room or something similar. But little did we know…
Something Otherworldly…
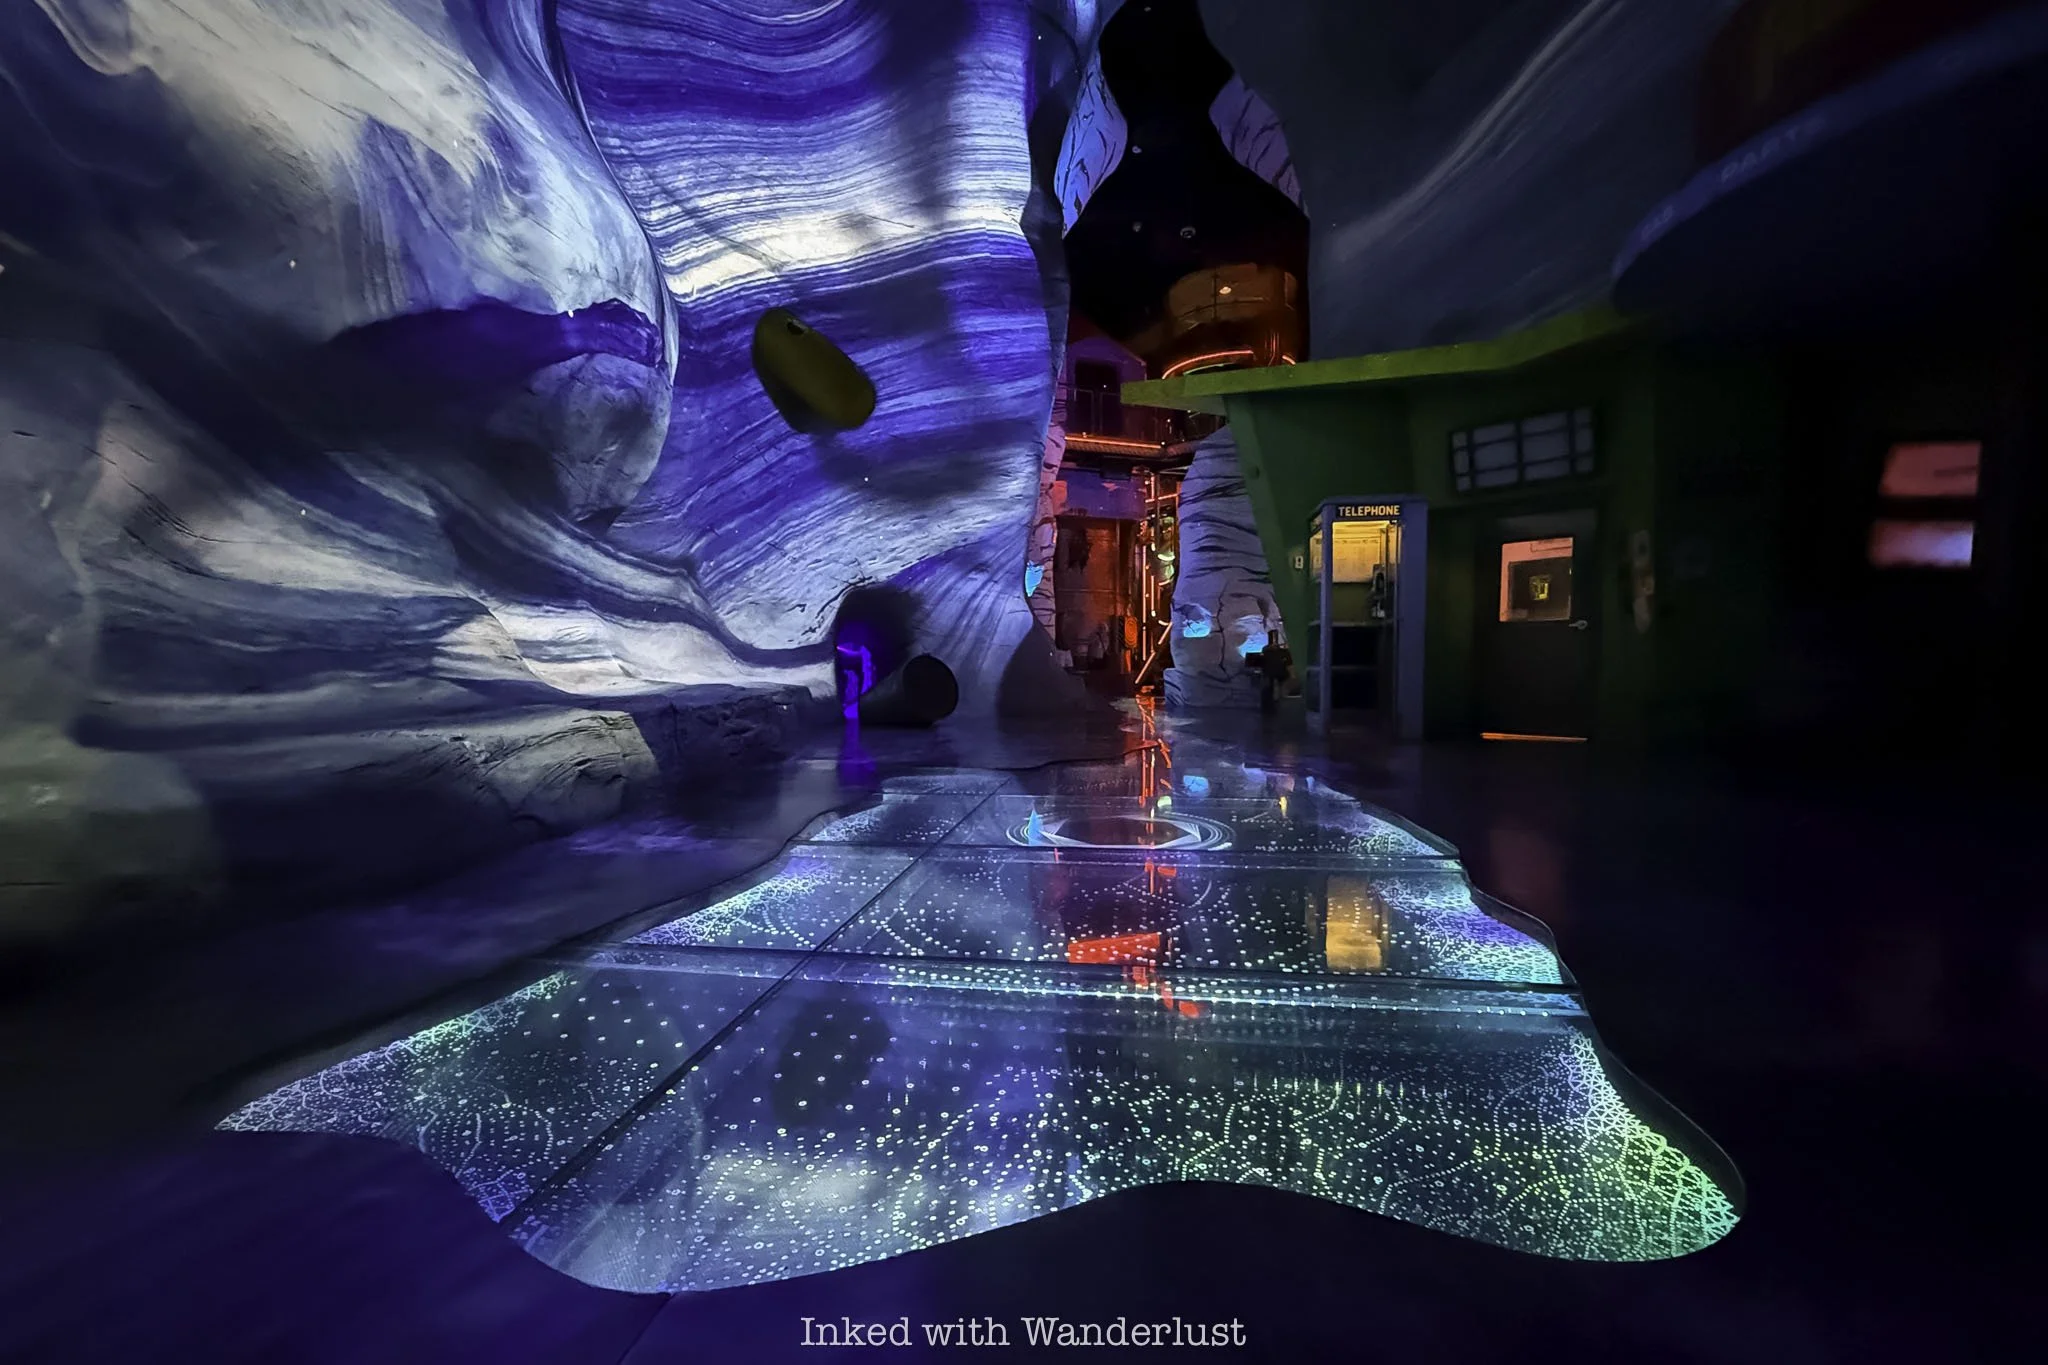
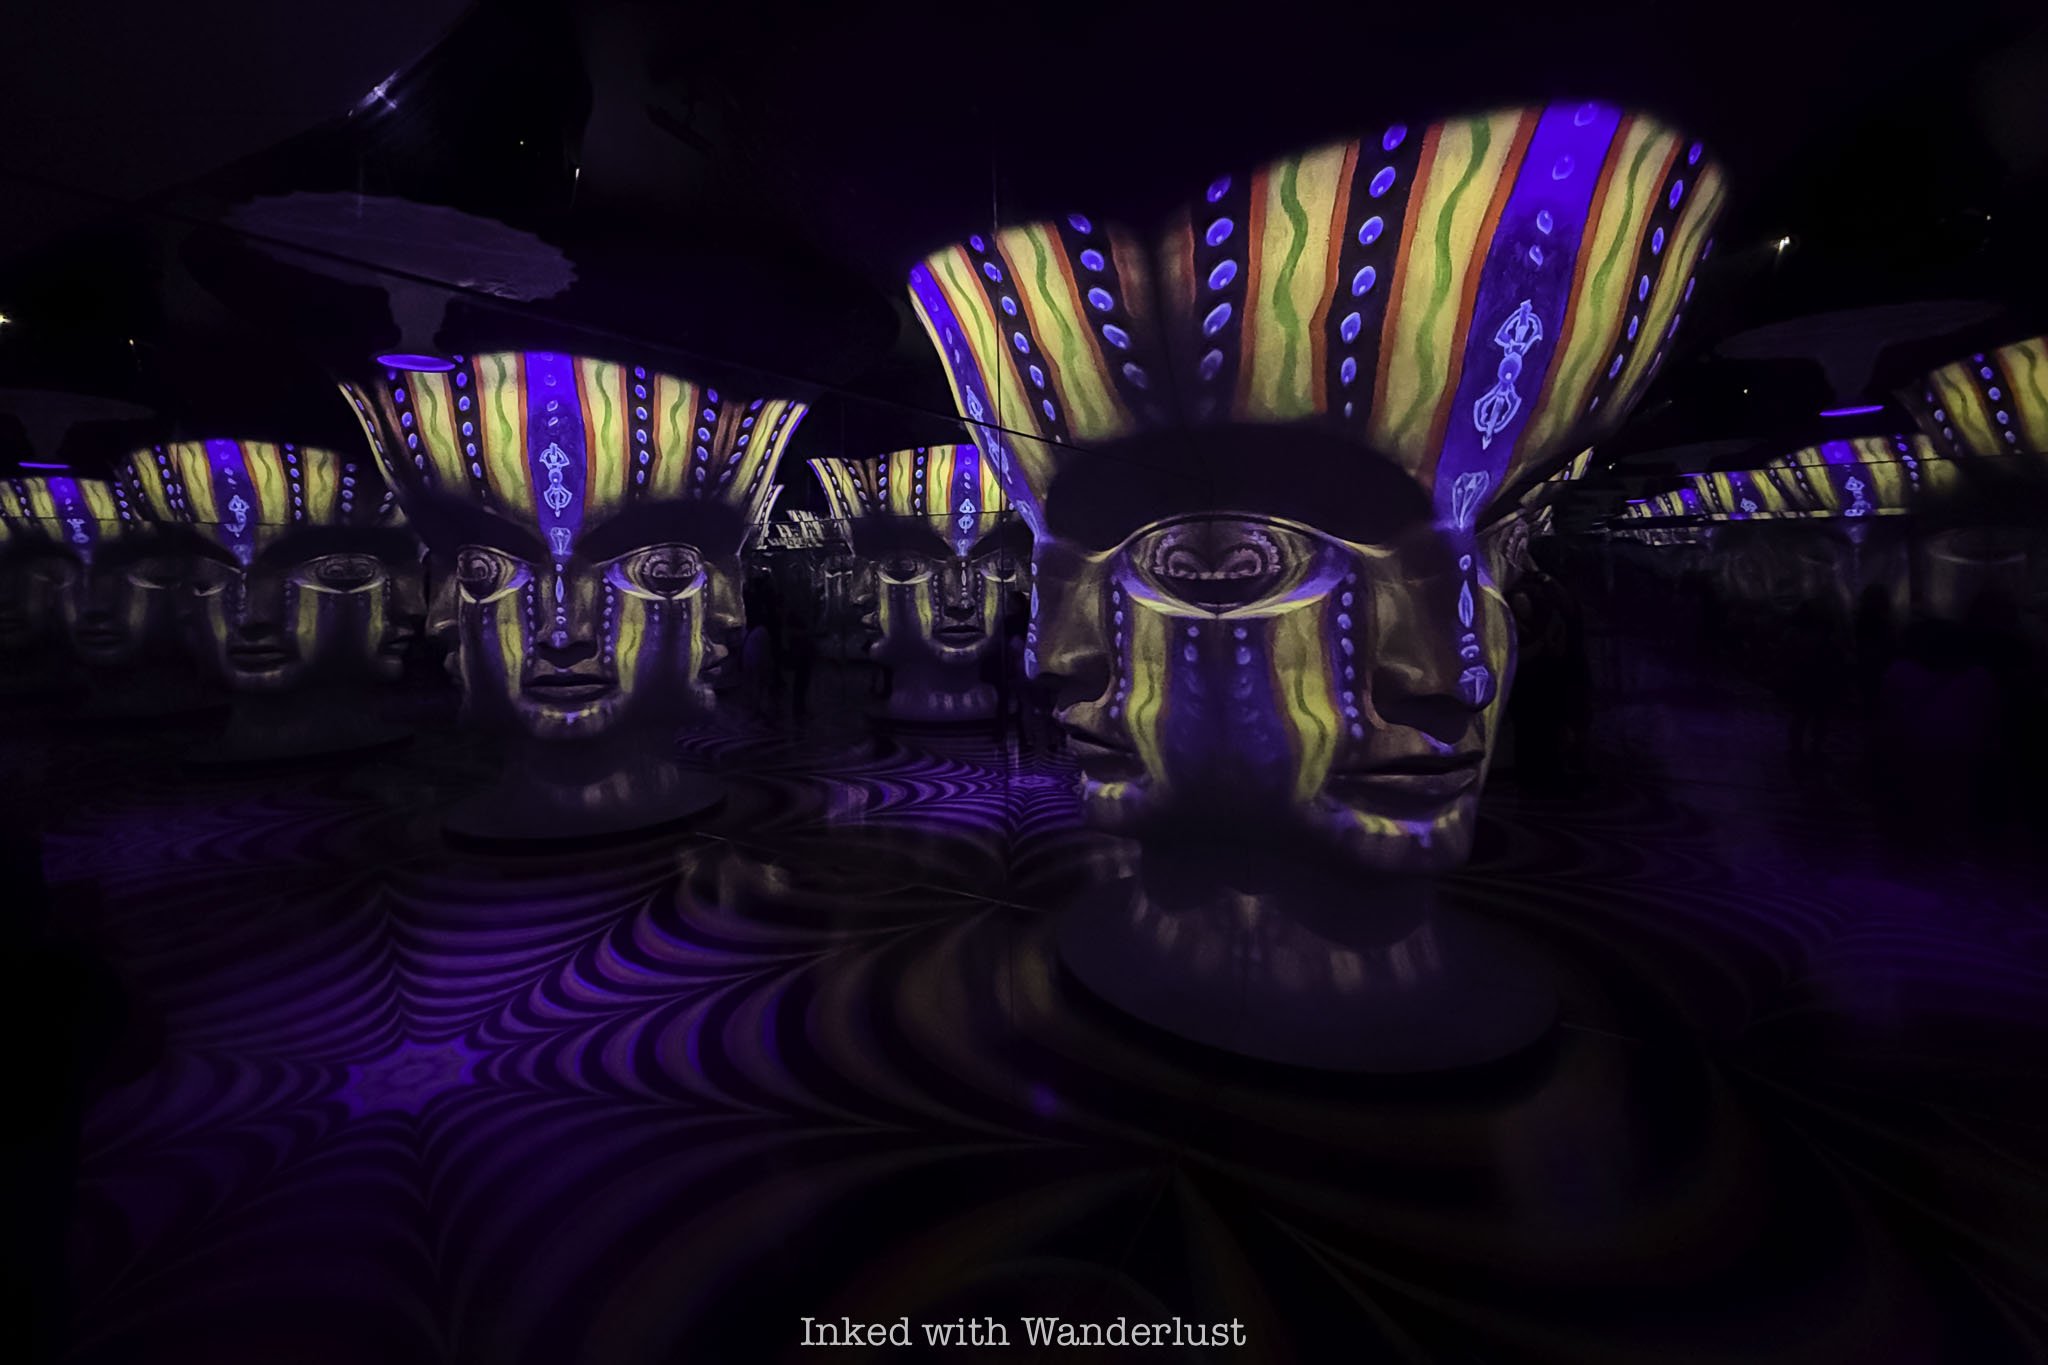
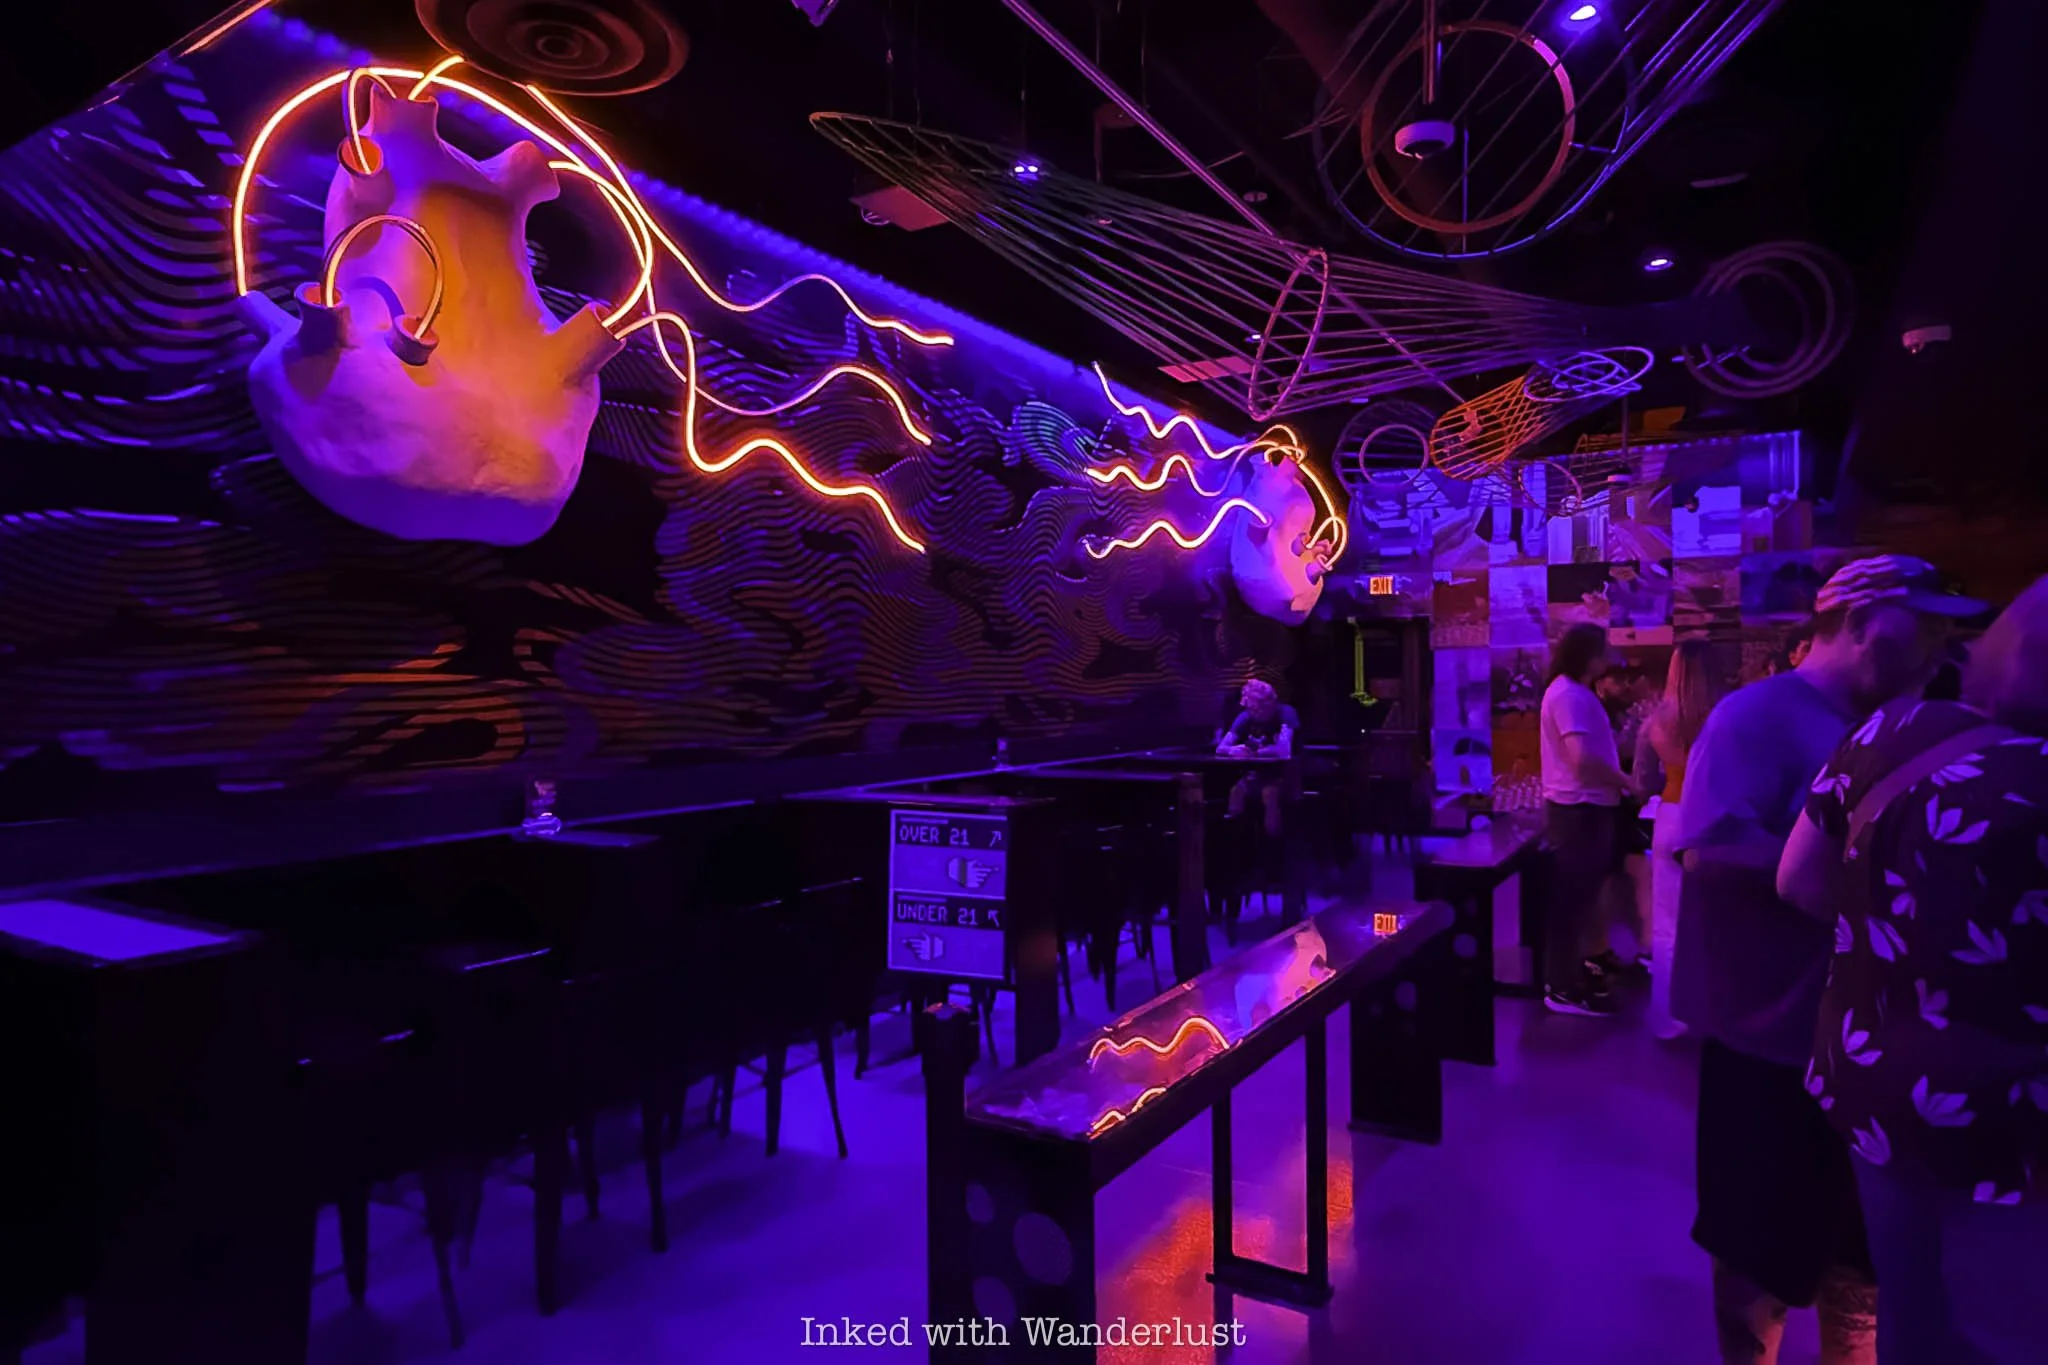
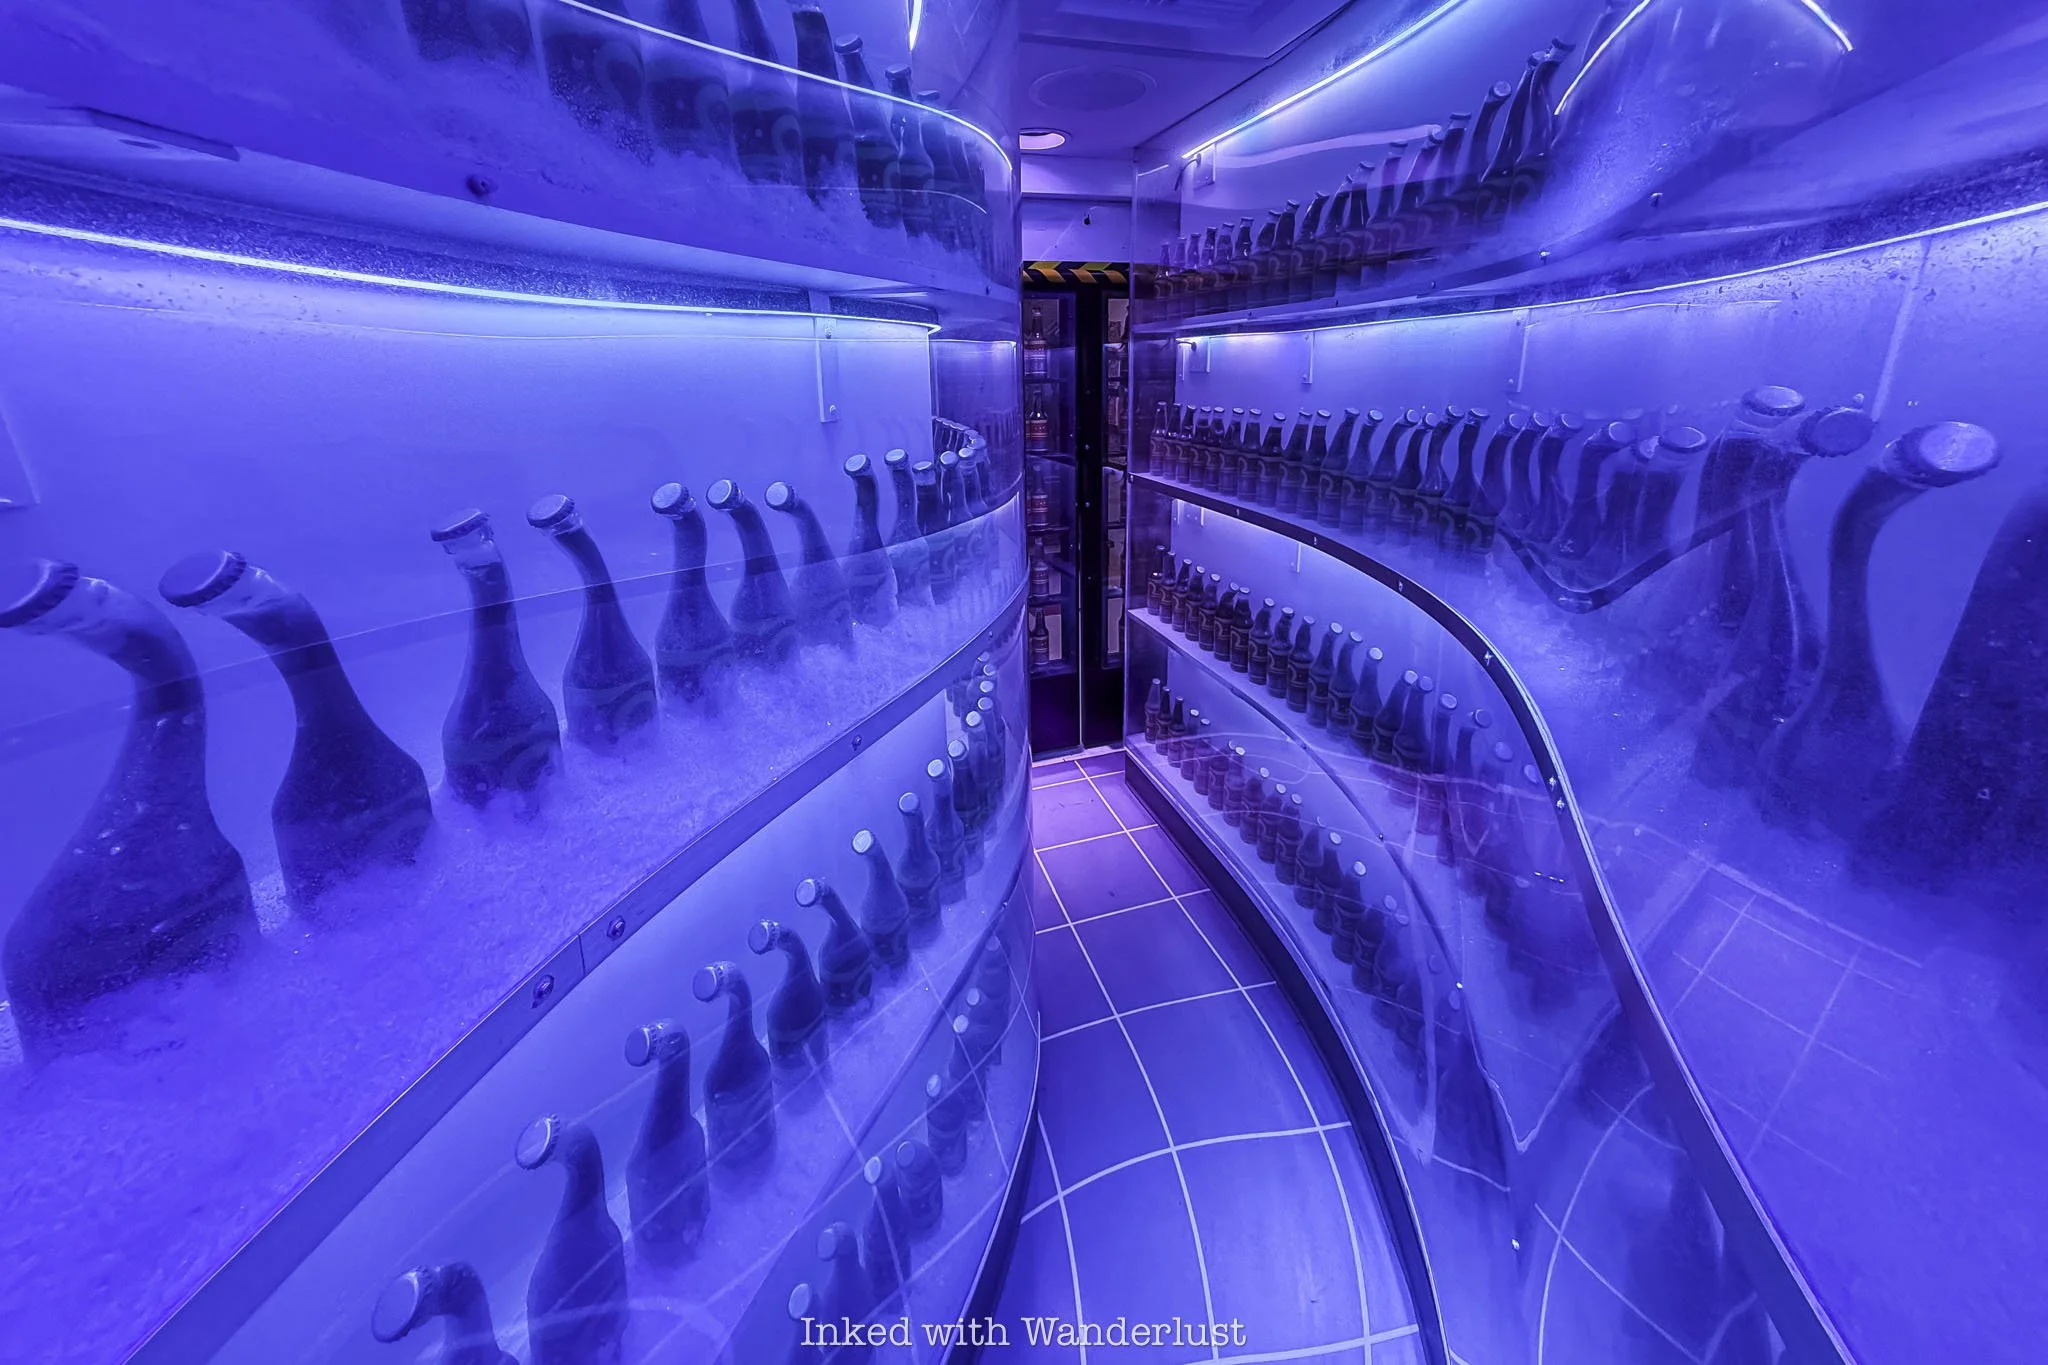
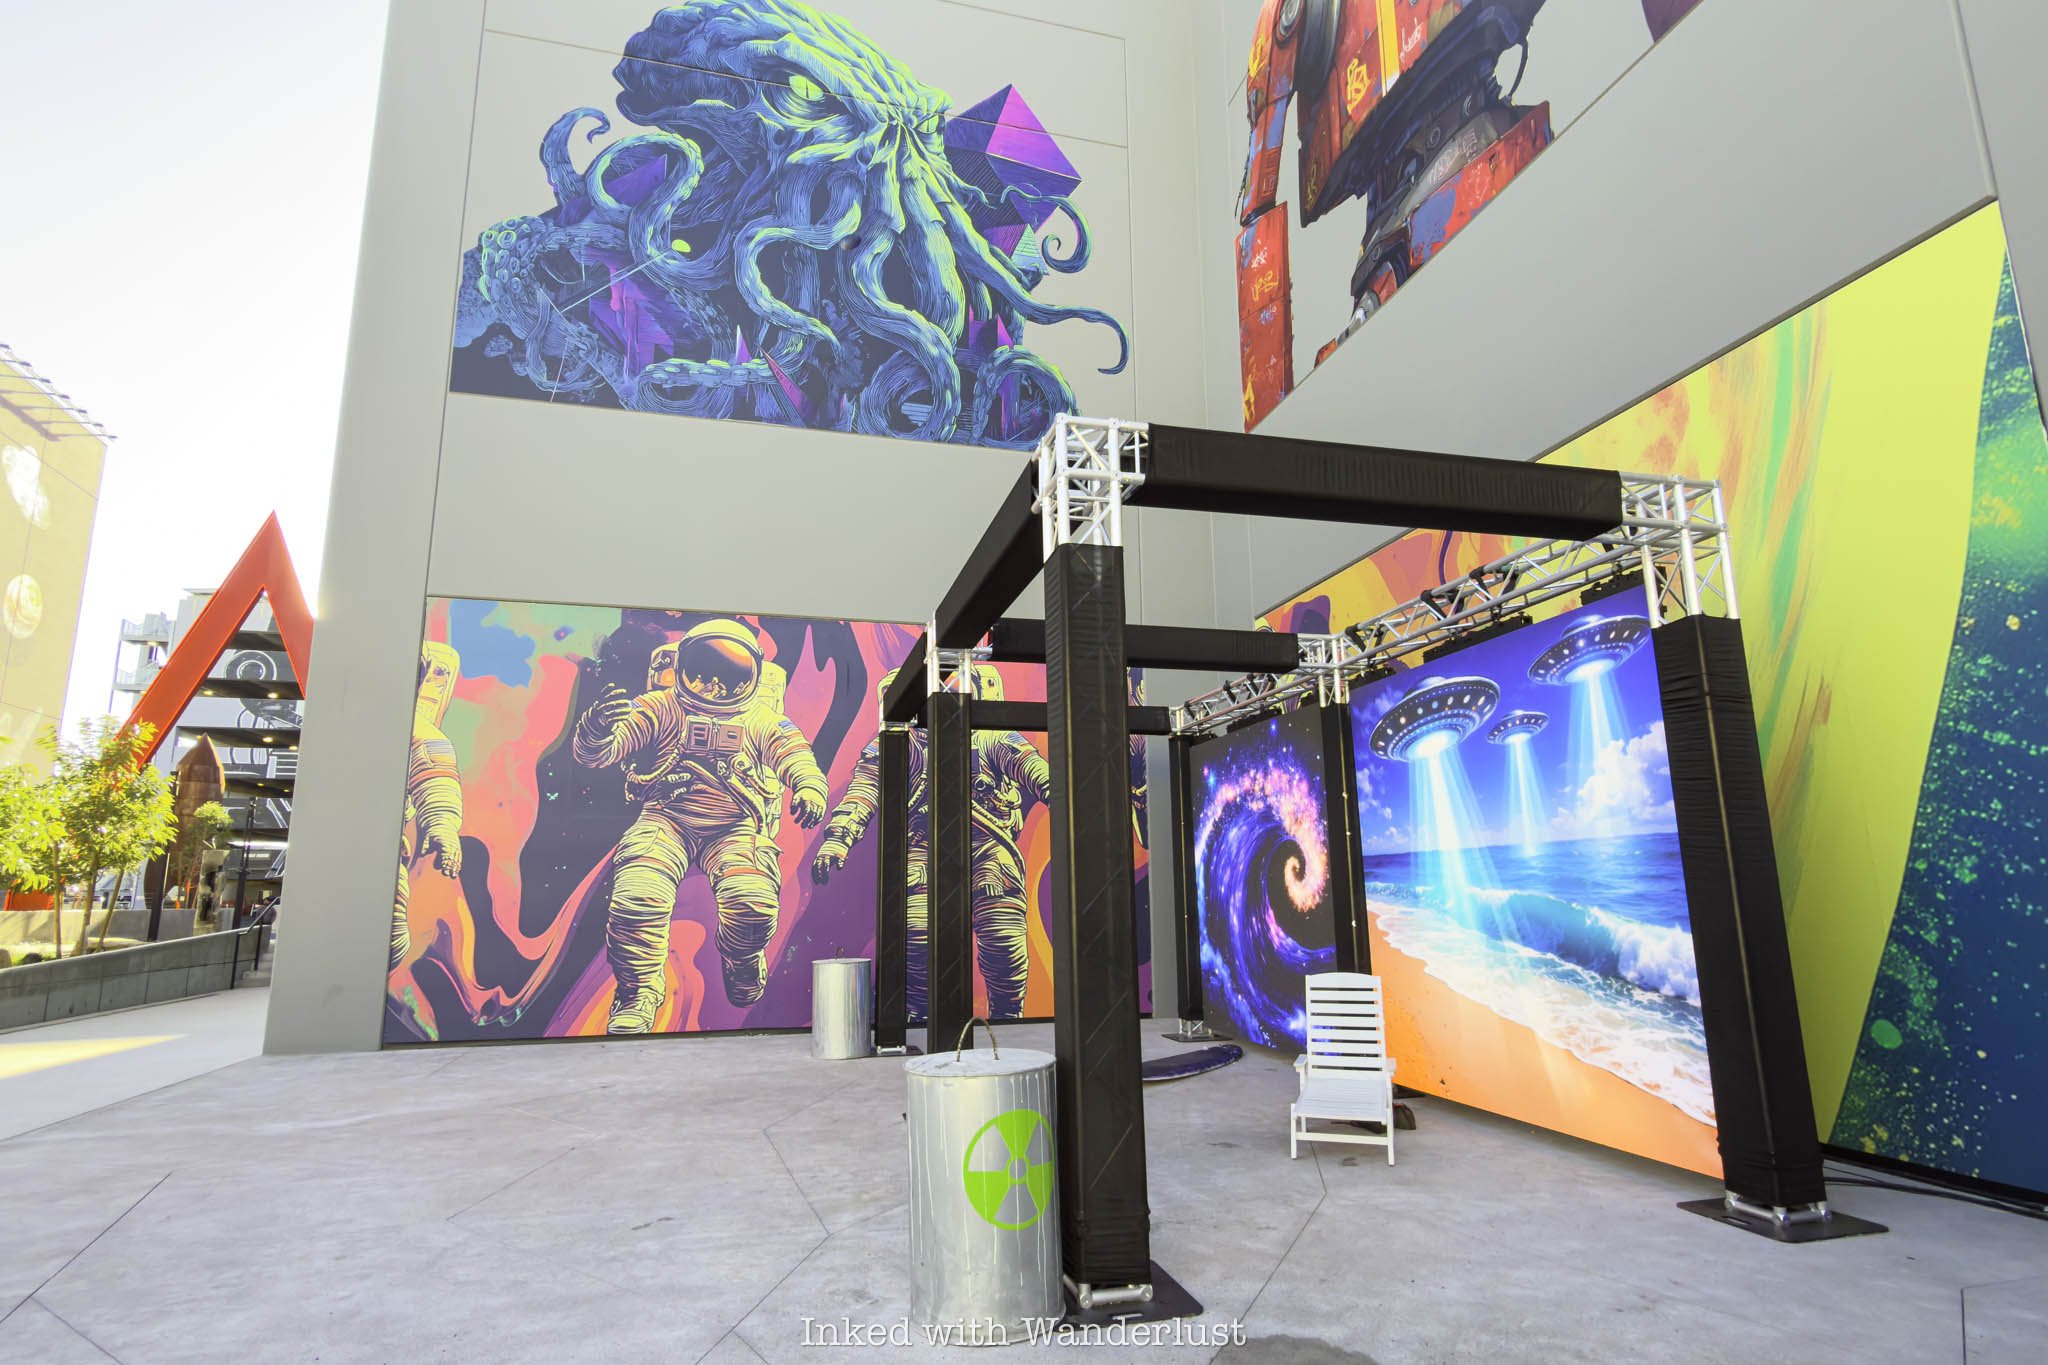
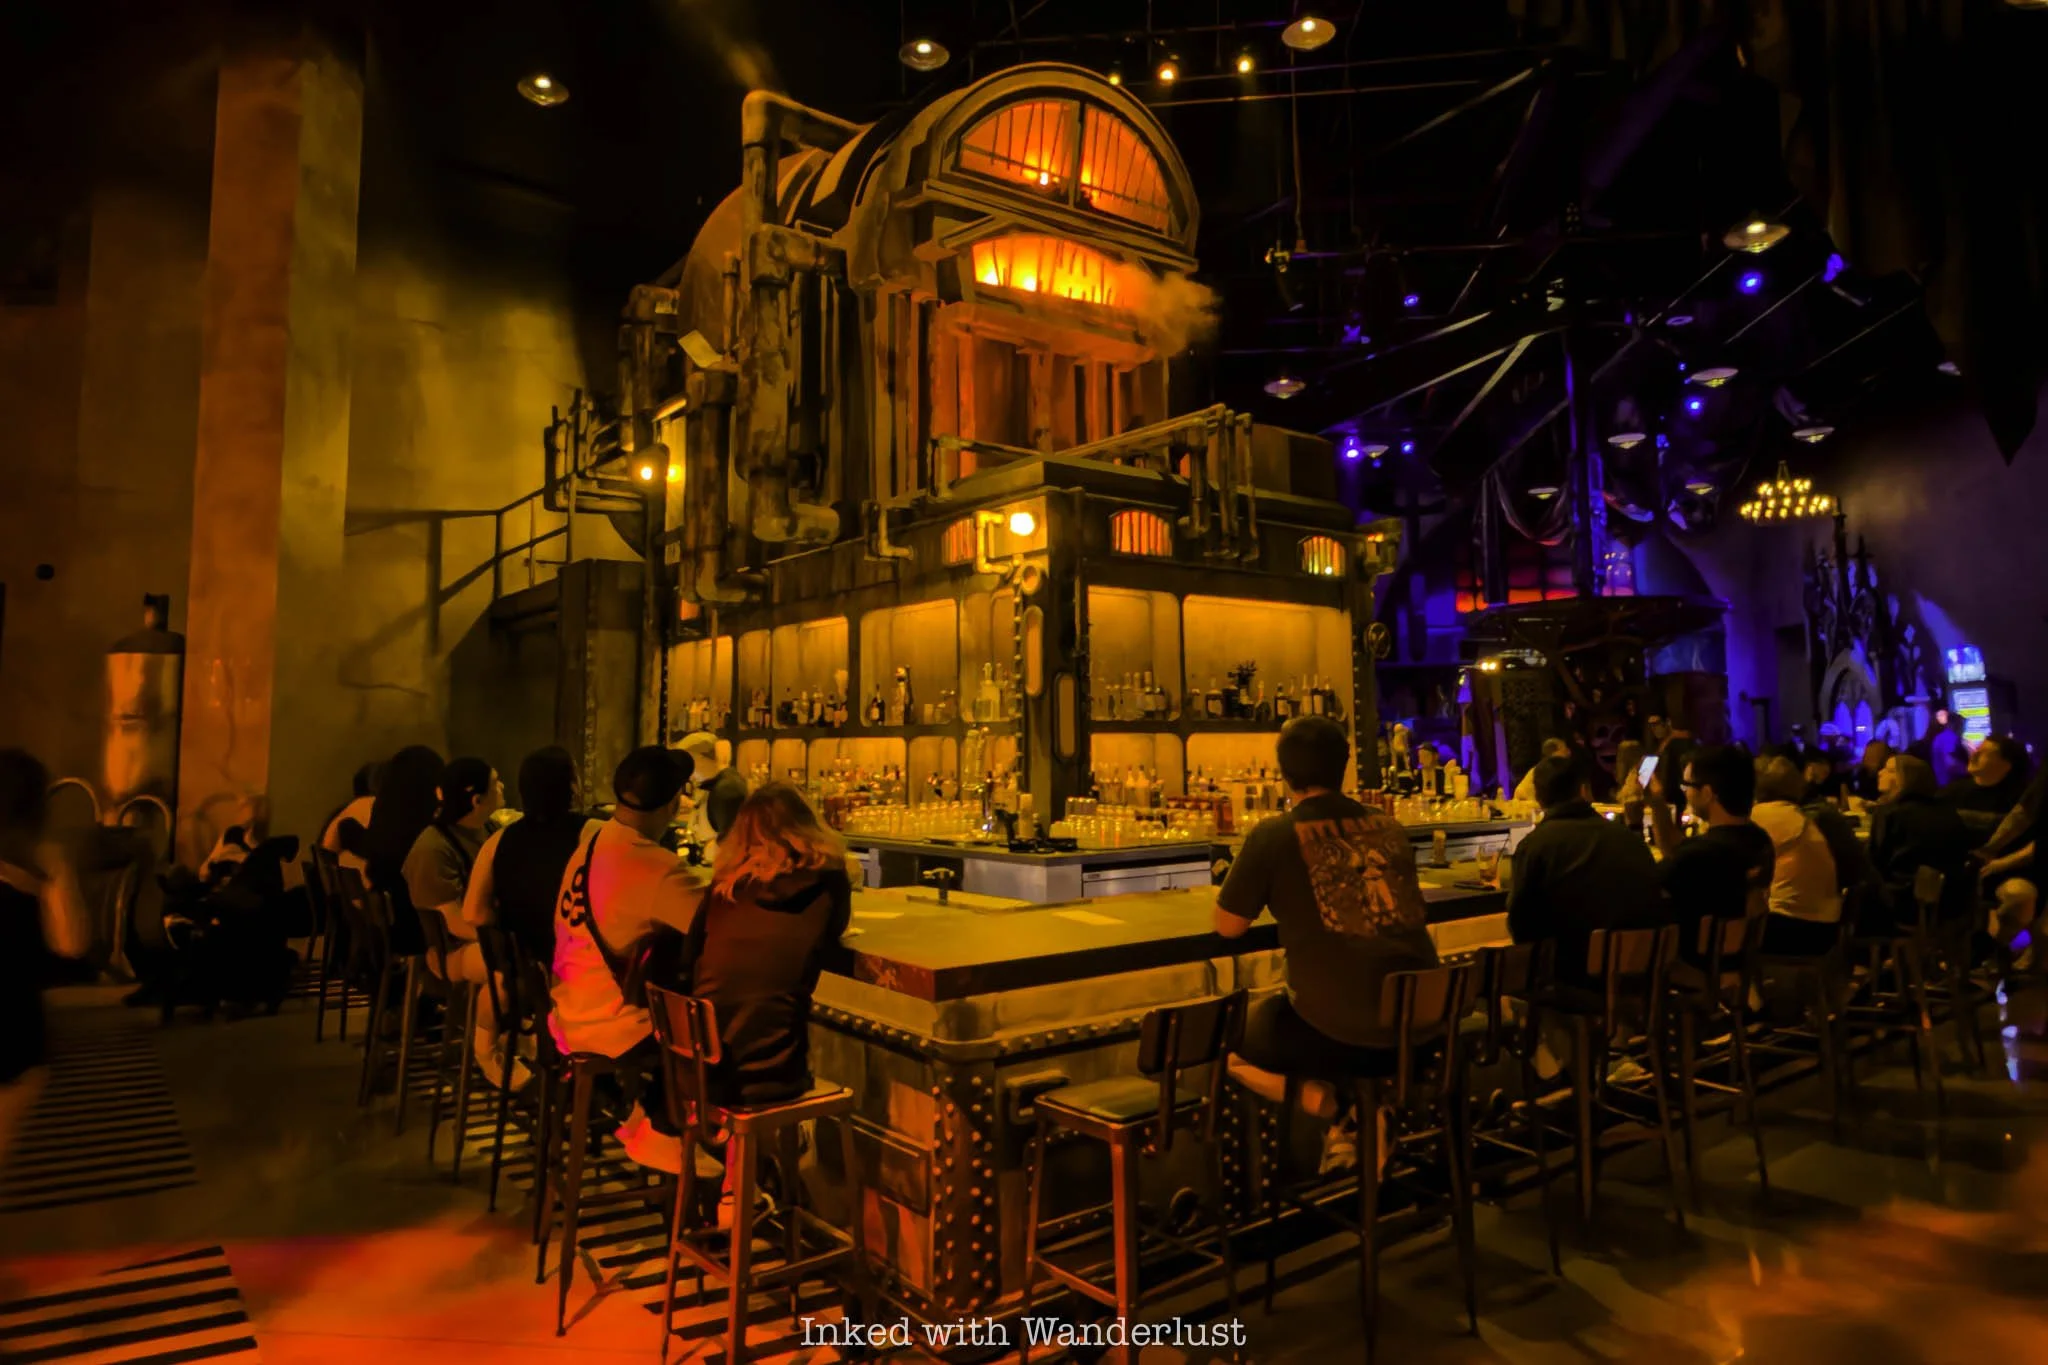
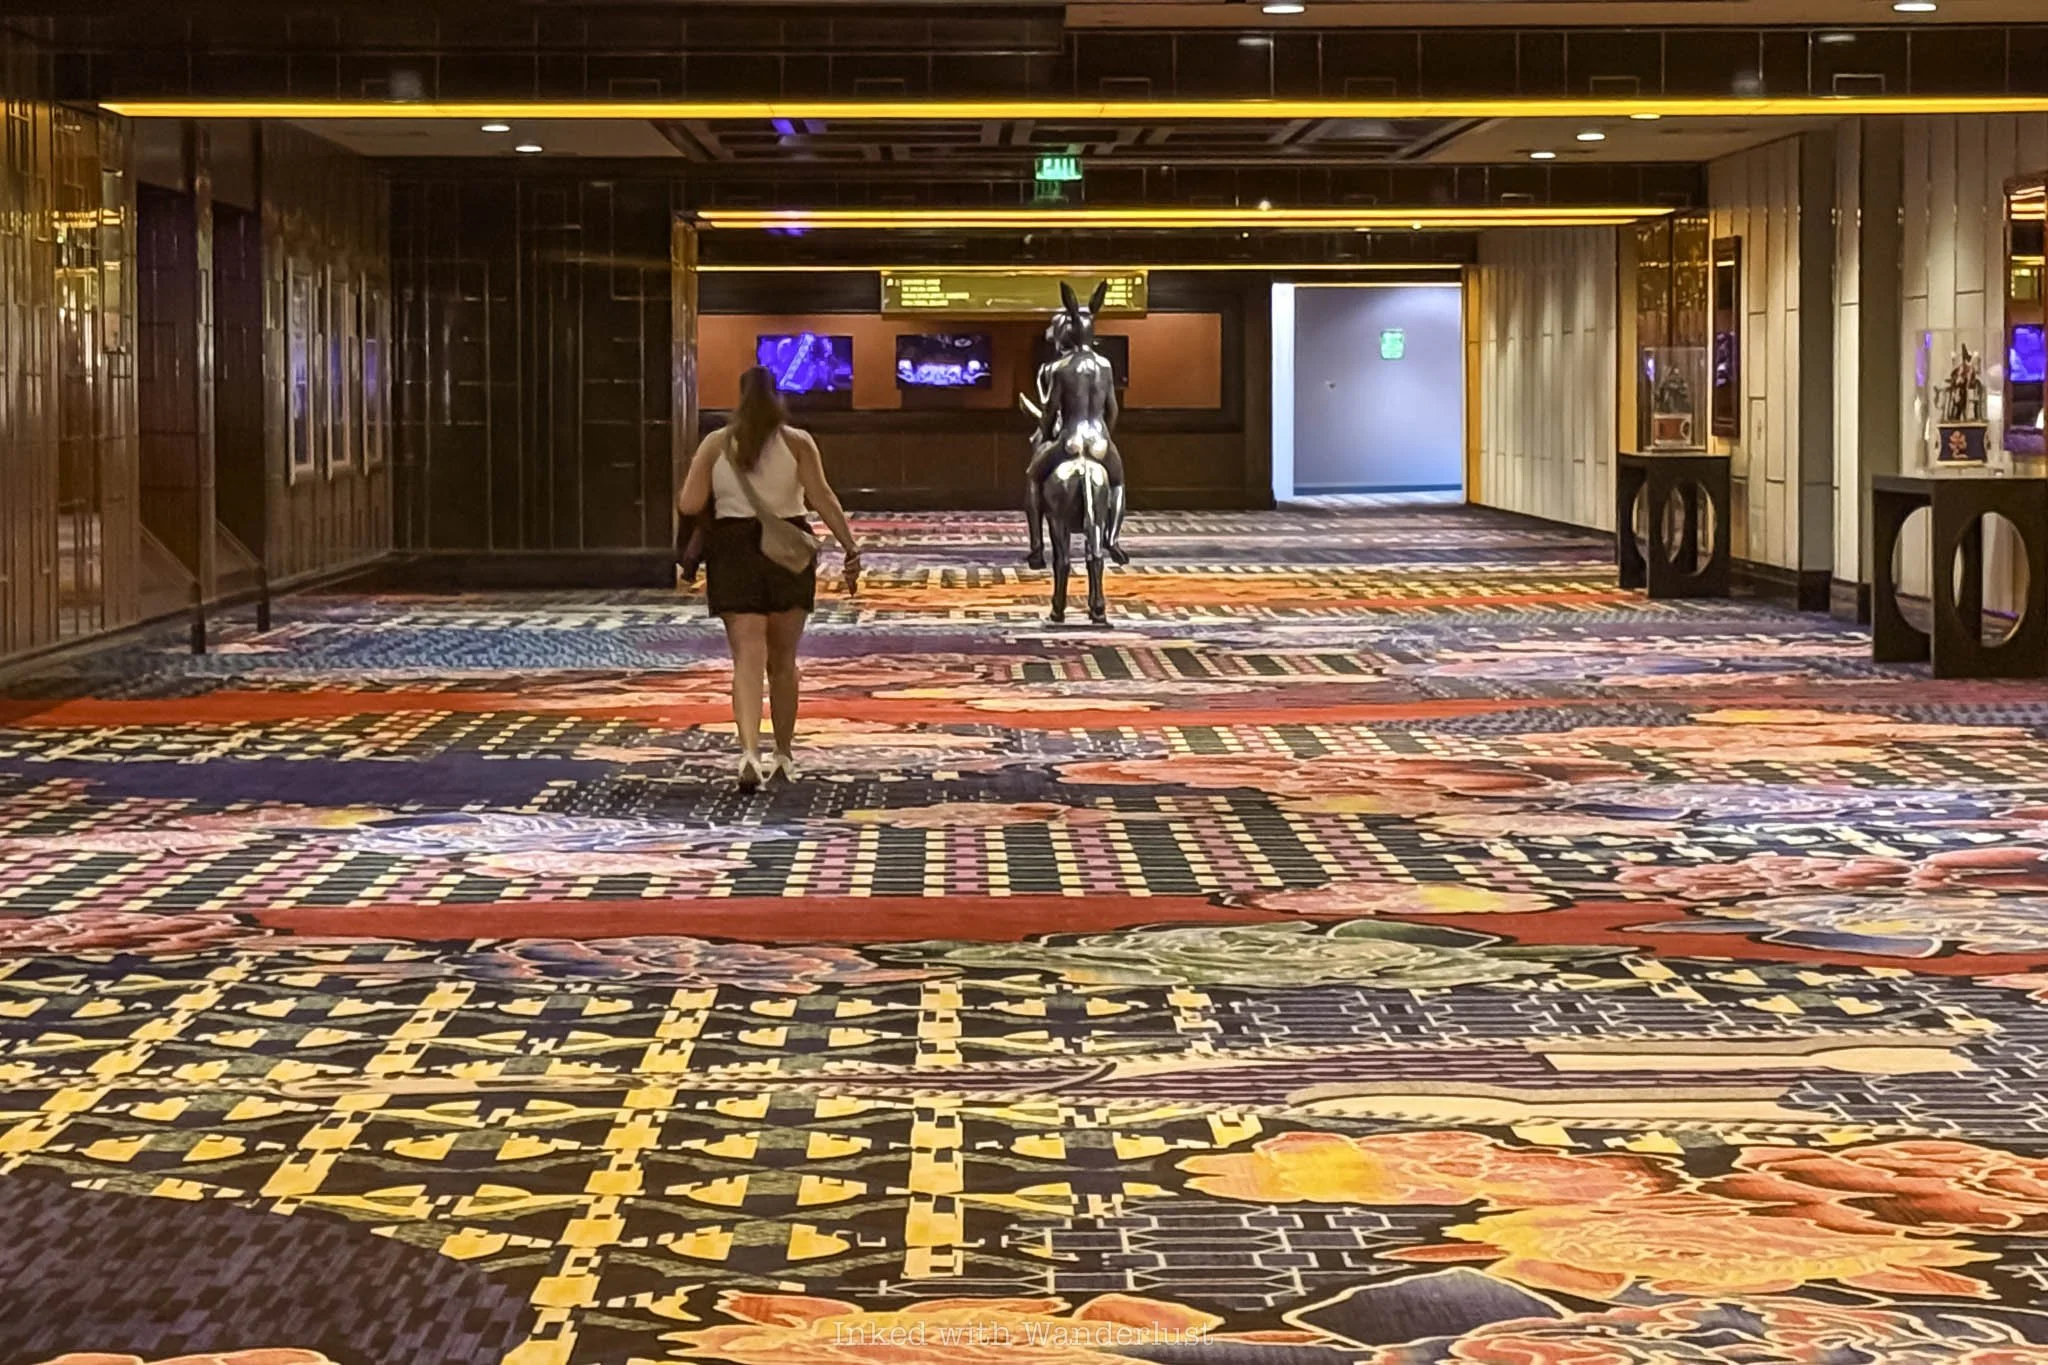
Venturing beyond the supermarket portion of Omega Mart is where the real fun begins. Several hidden and not-so-hidden passageways concealed behind soda coolers, a camping tent, and other seemingly ordinary fixtures lead you into a sprawling network of surreal environments.
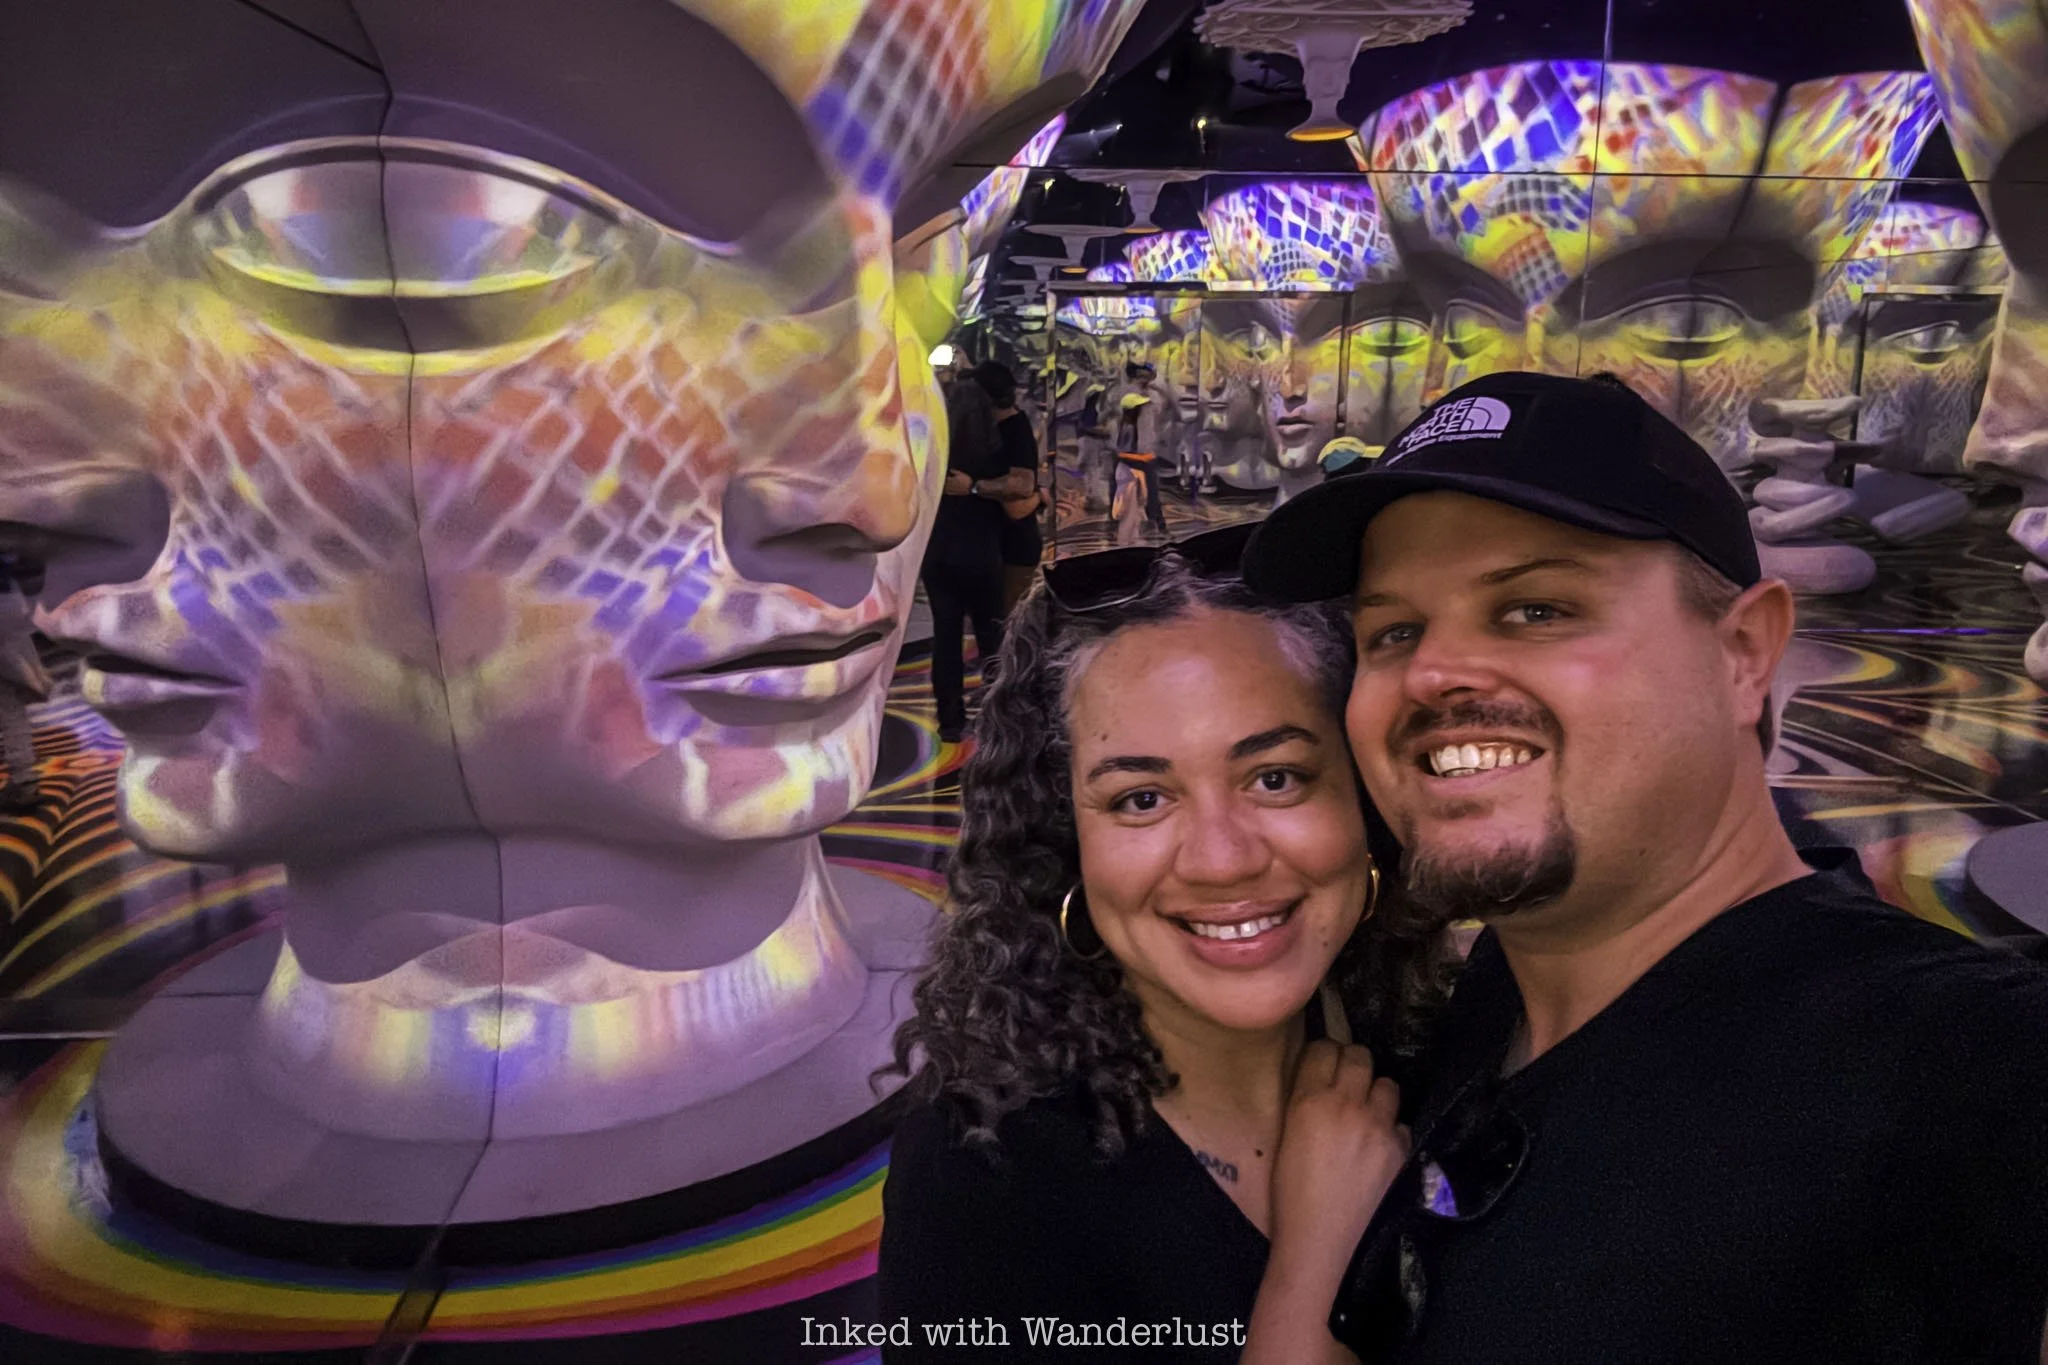
When you walk (or crawl) into the other side, you’re transformed into a journey through impossible spaces, where glowing tunnels, cosmic landscapes, and futuristic, dreamlike art installations replace the familiar surroundings of the market.

Each new room feels like stepping into a different dimension. Some of the spaces are filled with vibrant colors and interactive artwork, while others are mysterious, immersive, and outright otherworldly.
The transitions between these worlds are part of the experience, creating a constant sense of surprise as you uncover secret doors and hidden routes. Omega Mart isn’t just another attraction you walk through, it’s a place to explore.
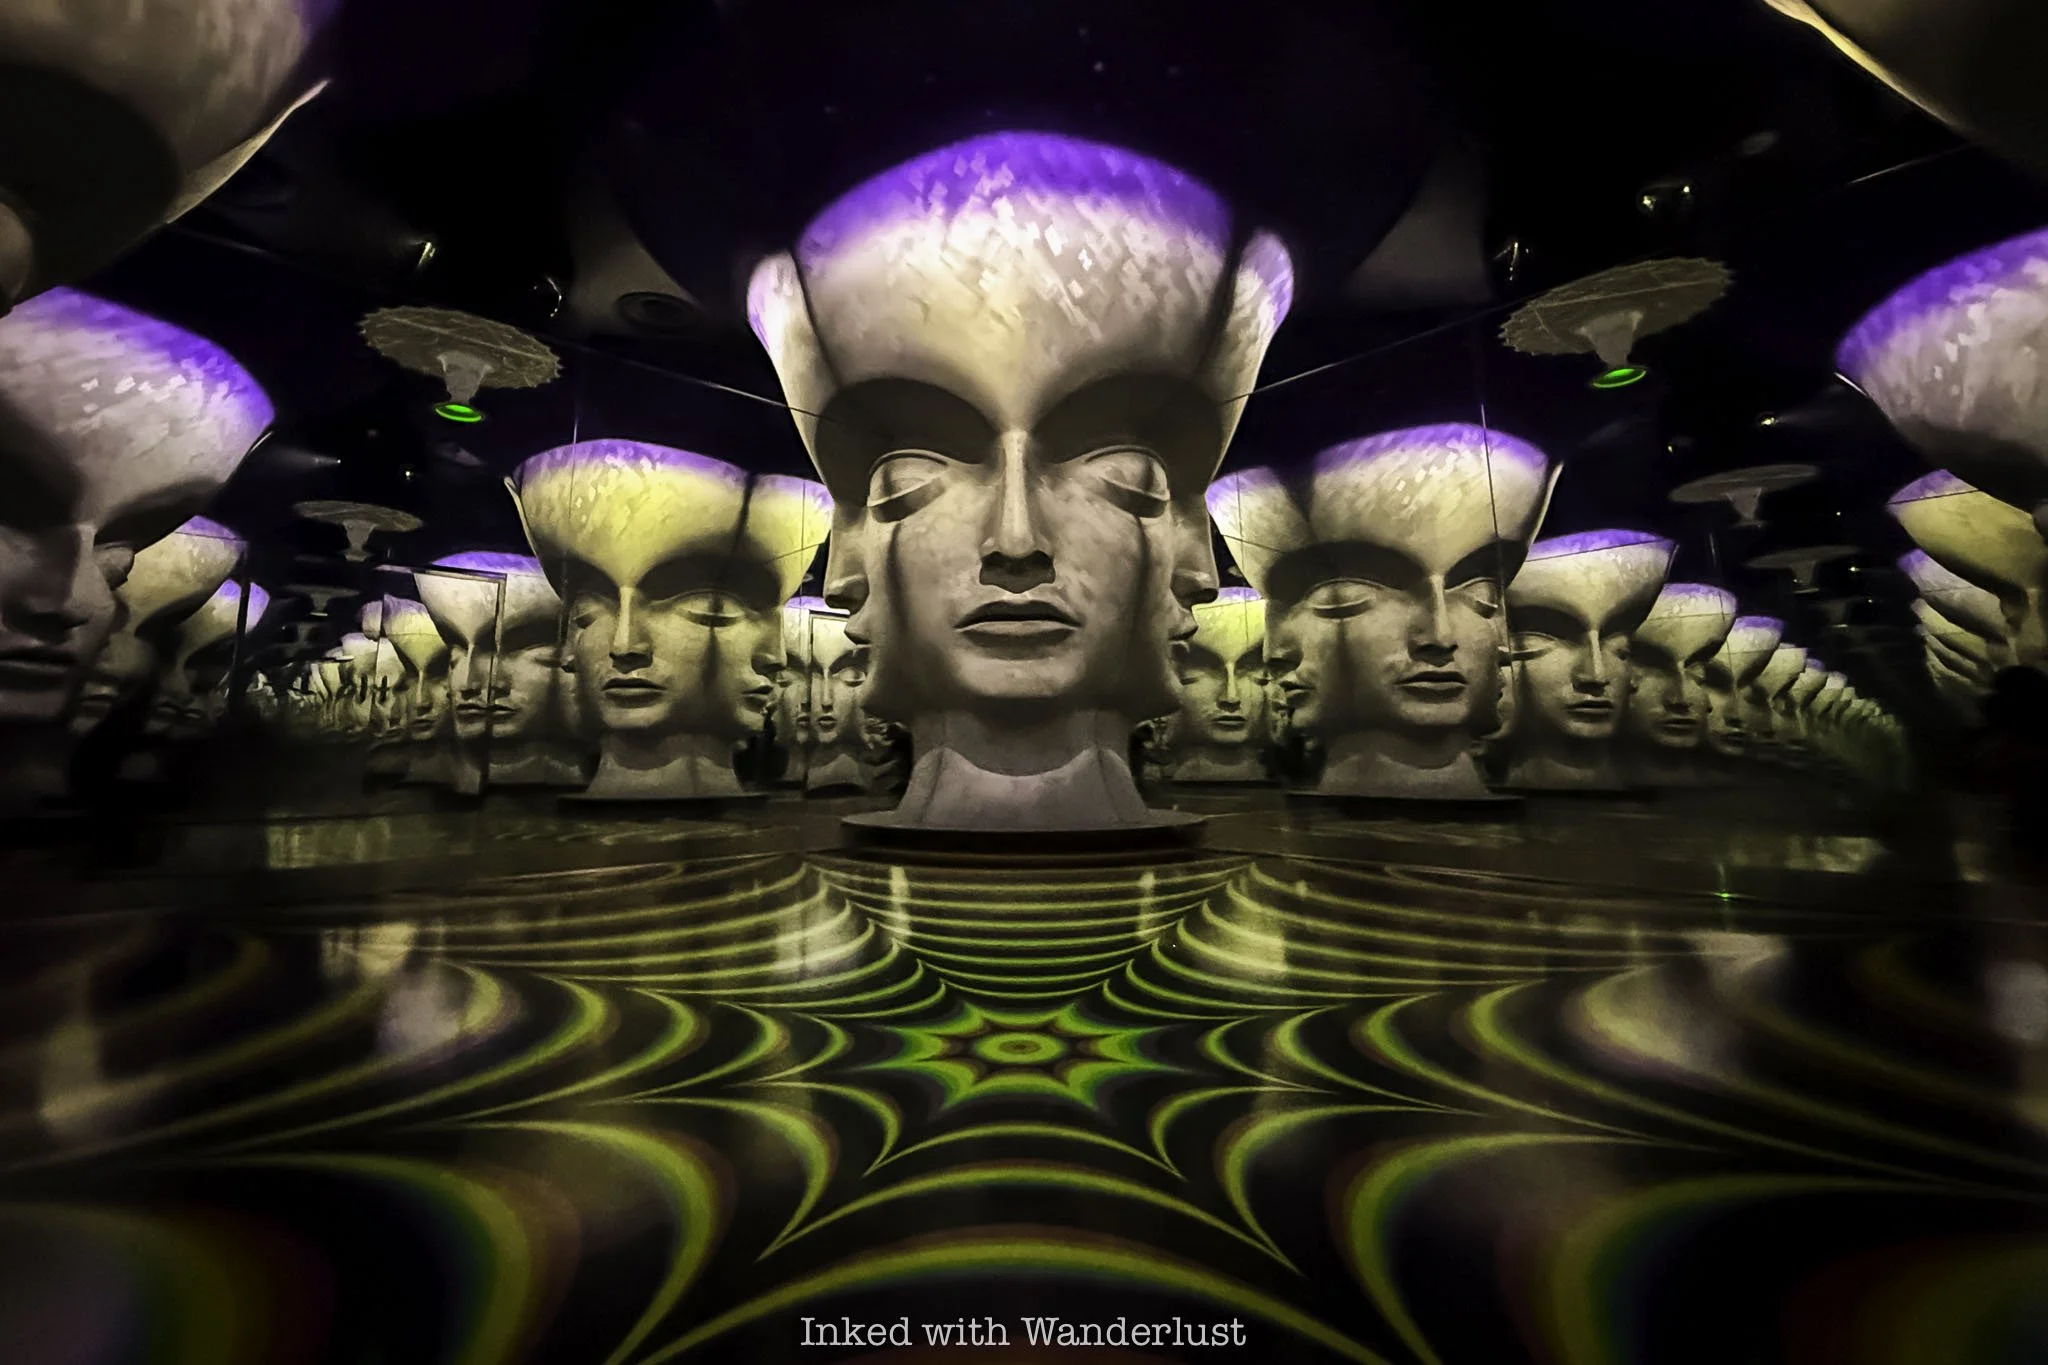
Some rooms pulse with color and music, while others feel strangely peaceful and contemplative. Interactive elements encourage visitors to touch, explore, and experiment, creating the feeling of actively participating in the environment you’re in.
Every doorway seemed to lead to somewhere unexpected and every turn revealed another layer of the attraction’s intricate narrative. Its sheer scale and seemingly endless creativity both impressed and overwhelmed me.

By the time my wife and I returned to the supermarket portion of Omega Mart, it felt almost normal compared to what we’ve just seen. What began as a playful parody of everyday life quickly morphed into a collection of imaginative dimensions, blurring the lines of reality.
That contrast is what makes Omega Mart such a memorable experience. Once you’ve experienced it, it’s easy to see how it became such a popular attraction in the short amount of time it did.
Omega Quest…
While many visit Omega Mart to simply admire the immersive artwork and discover hidden details, the Omega Quest ticket option (starting at $119) adds an entirely new layer to the experience.
Think of it as a high-tech scavenger hunt woven directly into the attraction’s mysterious storyline. Participants use interactive stations scattered throughout Omega Mart to collect clues, unlock intel, and piece together the secrets behind the strange events unfolding within it.
You’ll encounter terminals, exhibits, and interactive elements that reveal details about the characters, corporation, and mysteries that make up Omega Mart’s universe. The more you explore, the more the puzzle falls into place.
It isn’t necessary to enjoy your time here, but it does add new layers of depth and meaning to your visit. Omega Quest provides a rewarding reason to slow down, investigate every corner, and look beyond what first appears on the surface.

Night Shift - Adults Only…
Night Shift is Omega Mart’s exclusive, adults-only (21 years+) after-hours event held on select Thursday nights. By 8pm, all guests under the age of 21 must exit as Omega Mart transforms itself with dimmed lights, pop-up bars, music, and curated cocktails.
Event Time: Select Thursday nights starting at 8pm. Last entry for all guests under 21 is 6pm.
Tickets: Night Shift is included in any purchased ticket or Portal Pass.
Cocktails: A variety of curated cocktails, such as their famous Orange Dream, available for purchase at their in-house bar, Datamosh, or at the various pop-up bars.
Datamosh Speakeasy
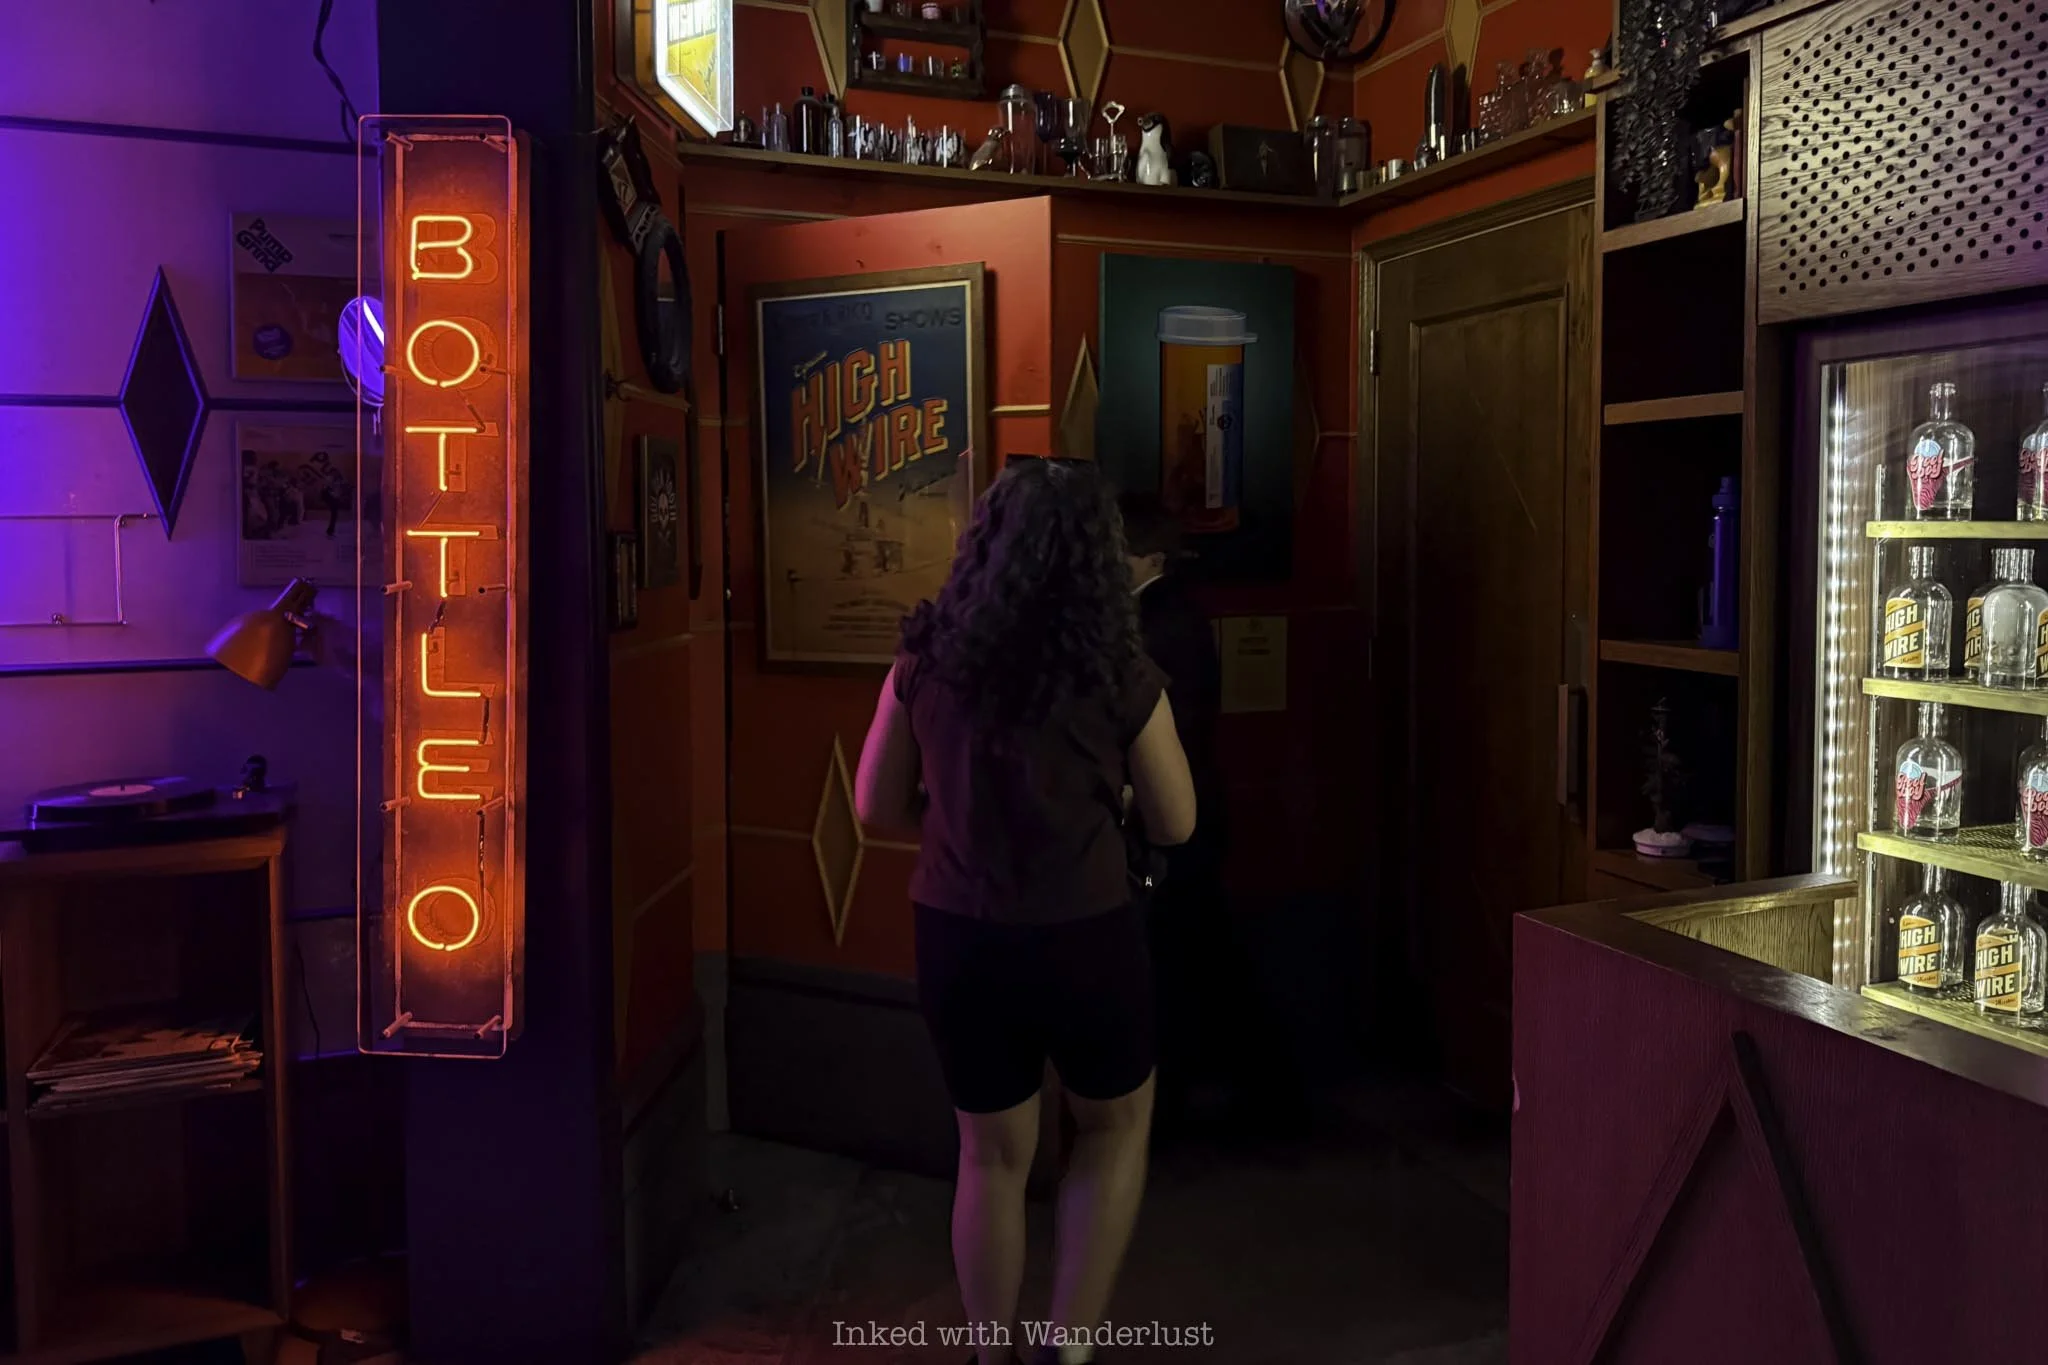
Hidden behind an unassuming entrance (a mock walk-in cooler), Datamosh, Omega Mart’s speakeasy-style bar, rewards curious guests with a space that feels worlds away from the bustling grocery store just steps away.
From the moment you arrive, you’re surrounded by glowing neon lights and a vibe-packed space that perfectly compliments the surreal nature of the attraction. Datamosh is intimate and inviting, making it the perfect spot to relax after exploring Omega Mart’s extensive backroom.
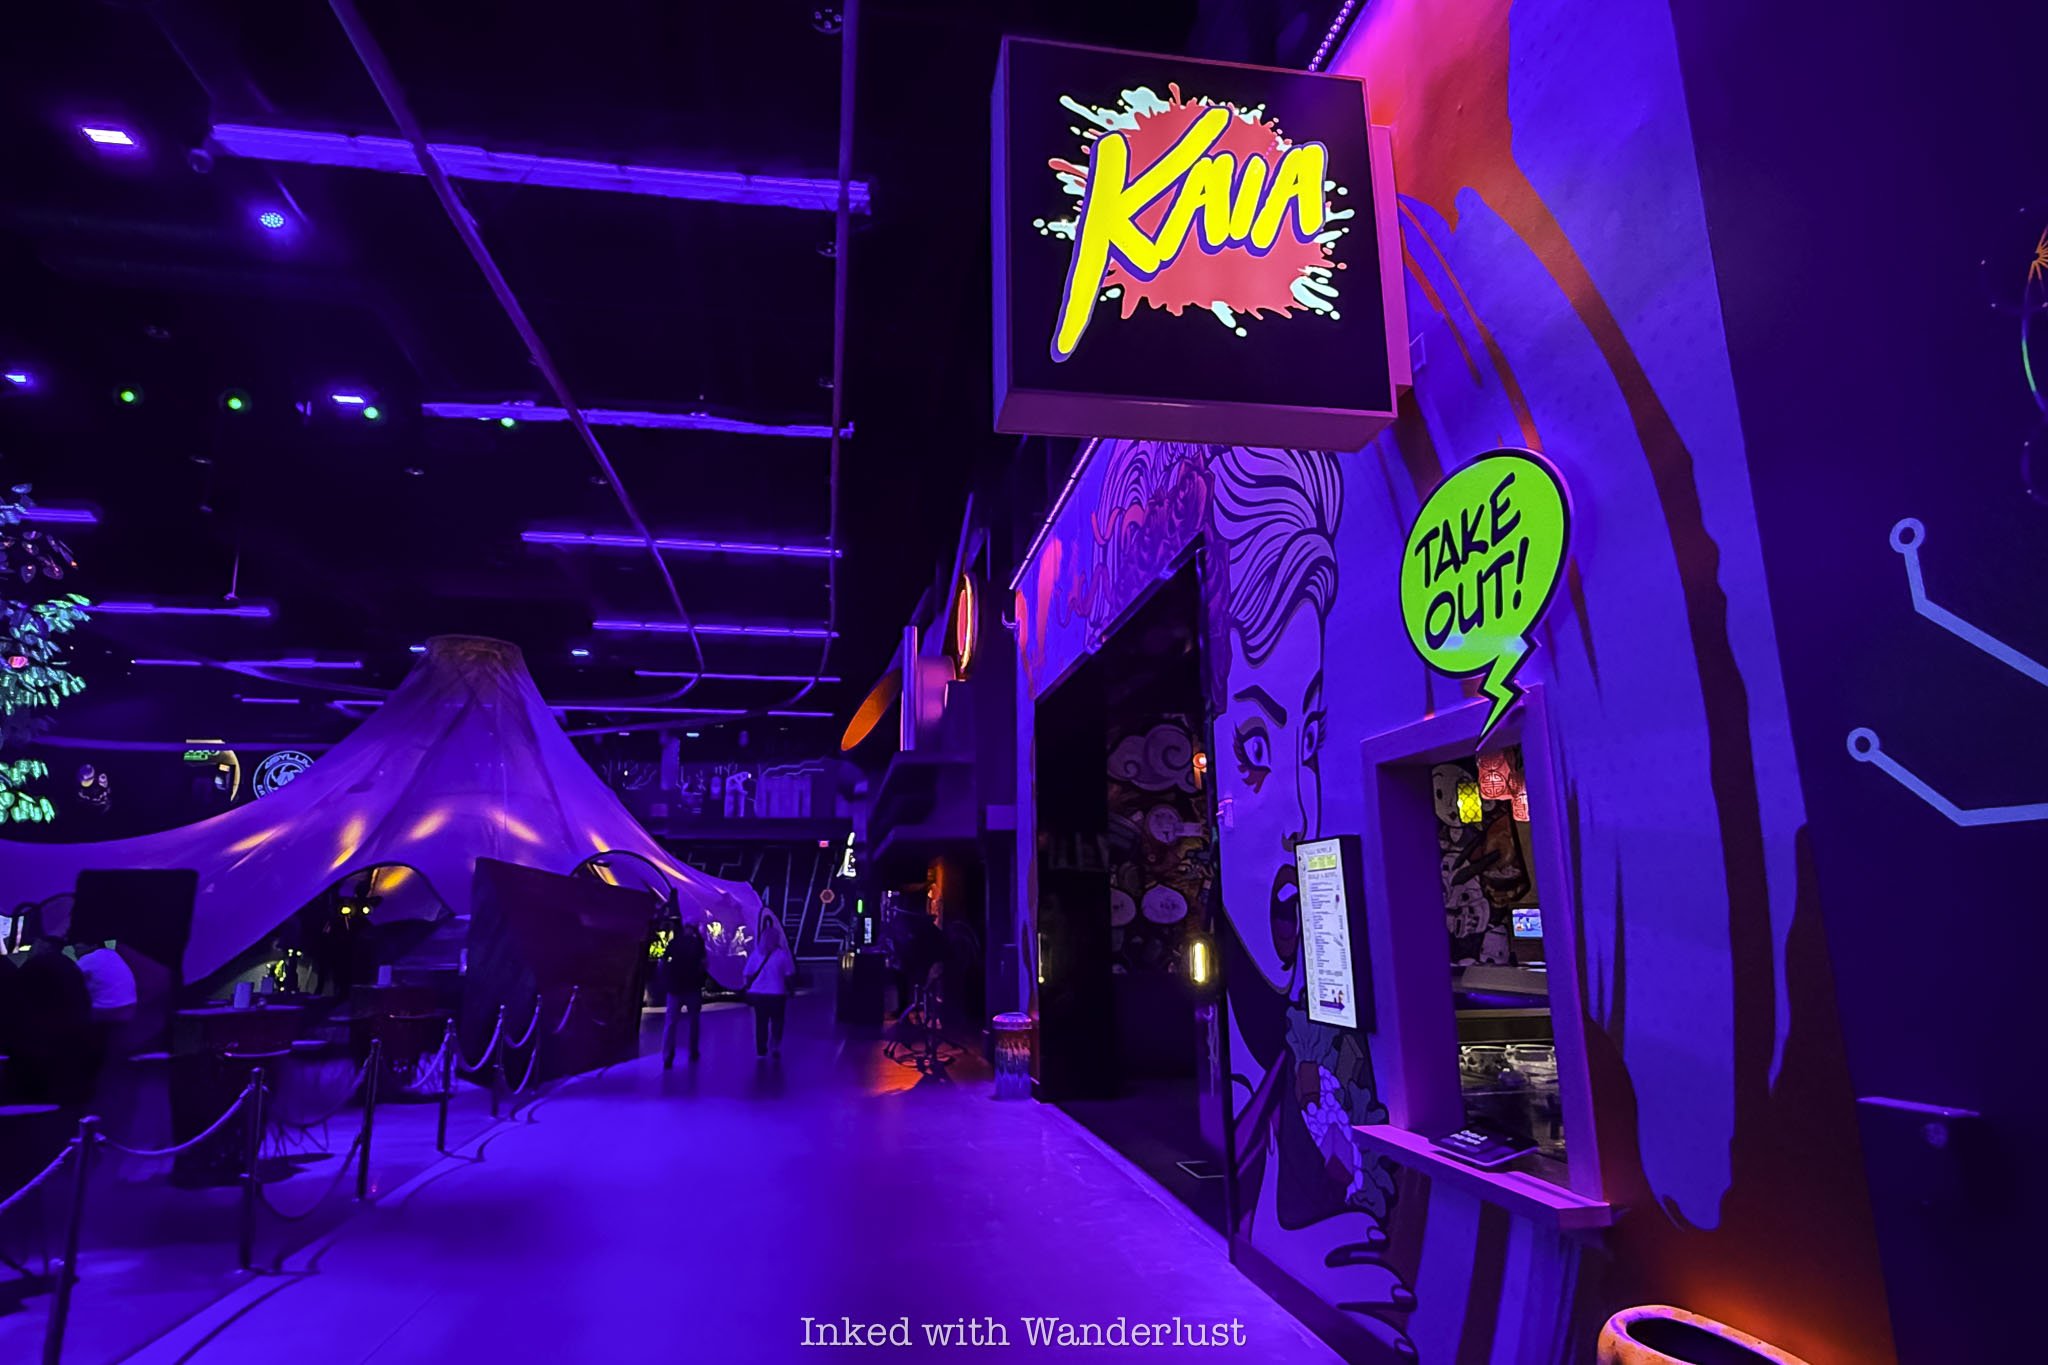
Even if you don’t order a cocktail, it’s still worth stopping by to see the unique design elements and soak in the ambiance. It’s mostly just drinks, though. They do offer light snacks (popcorn, nuts, etc), but that’s it. If you’re hungry, head over to nearby Kaia for excellent sushi and ramen bowls.
How Long Does it Take to Go Through Omega Mart?
One of the most common questions people have about Omega Mart is how much time they’ll need to set aside for it. The answer largely depends on how you plan to explore. Most attractions take around an hour or so, maybe two, but Omega Mart isn’t just any attraction.
Omega Mart was designed to reward curiosity, making it more than easy to spend more time inside than you initially anticipated.
For those who simply want to explore and wander through the exhibit, check out the artwork, and discover the hidden passages, I recommend setting aside a minimum of 90-minutes to two hours.
This allows enough time to explore the grocery store, uncover the secret portals, and experience many of the immersive environments and exhibits without feeling rushed. Perhaps you can even sneak in a drink or two at Datamosh.
Conversely, if you plan to participate in the aforementioned Omega Quest, expect your visit to expand to three to four (or more) hours. Remember, the deeper you dive into the narrative, the more time you’ll end up dedicating to it.
Personally, I would recommend setting aside at least two to three hours to take it all in, especially if it’s your first time. Omega Mart is one of those rare experiences where slowing down pays dividends for your time. Above all, don’t rush, and allow Omega Mart to guide you.
Is Meow Wolf Omega Mart Worth It?
If you appreciate attractions that are totally unique and unlike anything you’ve ever experienced, yes, Meow Wolf’s Omega Mart is absolutely worth it. The immersive exhibits, pun-filled grocery items, speakeasy, and seemingly endless exploration makes it must-see.
Admittedly, admission isn’t cheap, which is the biggest downside to Omega Mart. If you’re visiting with a family in tow, costs can add up quickly. Additionally, Omega Mart can be overwhelming to guests who prefer a more traditional, low-key attraction.
There is no clear, single path to guide you. As much of the experience is intentionally built to be open-ended, those expecting a conventional museum-like attraction or quick walk-through may become confused, potentially frustrated, and experience sensory overload.
That said, I believe Omega Mart delivers in every conceivable way and provides an excellent value for those who do enjoy immersive experiences. It was easy for my wife and I to kill over two hours without even trying. We only left when we did because we were on a time crunch.
Despite spending several hours at Omega Mart, I left with the feeling that we barely scratched the surface. I’ve been to many attractions in Las Vegas, but Omega Mart was easily the most memorable of the bunch and one that I highly recommend.
If you’re looking for more unique Las Vegas attractions nearby, click or tap on the links below for more recommendations:
Minus5 Ice Bar (post coming soon)
Mob Museum (post coming soon)
***If you’ve found this post helpful, please consider leaving a tip via the “Buy me a Coffee” button above. These tips help to cover expenses such as parking fees, meals, entry fees, permits, etc.


My Honest Review of Kaia at Area 15
With so many attractions competing for attention at Area 15, it would be easy to overlook the food. That would be…
Disclosure: This post contains affiliate links. If you make a purchase through these links, I may earn a small commission at no additional cost to you. I only recommend products or services that I believe will add value to my readers.
With so many attractions competing for attention at Area 15, it would be easy to overlook the food. That would be a mistake, as Kaia offers a welcome escape from the venue’s sensory overload.
While most visitors come for the immersive art installations, interactive exhibits, and one-of-a-kind experiences, Kaia offers a reason to slow down and take a break from the excitement while enjoying a delicious meal.
Pairing its stylish atmosphere with a menu that blends creative flavors and beautifully presented dishes, Kaia lives up to the hype. The restaurant feels more refined than you might expect from an attraction-focused destination.
My wife and I recently enjoyed lunch here during our visit to Area 15. In this review of Kaia, I’m going to discuss topics such as its location, as well as detail my experience with the service, food, and drinks.
Kaia Location
As stated above, Kaia is located within the Area 15 building, which itself is west of the Las Vegas Strip. Its exact address is:
3215 South Rancho Drive, Suite 150
How far it is from the strip entirely depends on which hotel you’re staying (north, center, south). A center-strip hotel (Flamingo, Cosmo, Linq, Caesars, etc) would put you closest to Area 15. Rio, while off-strip, is even closer.
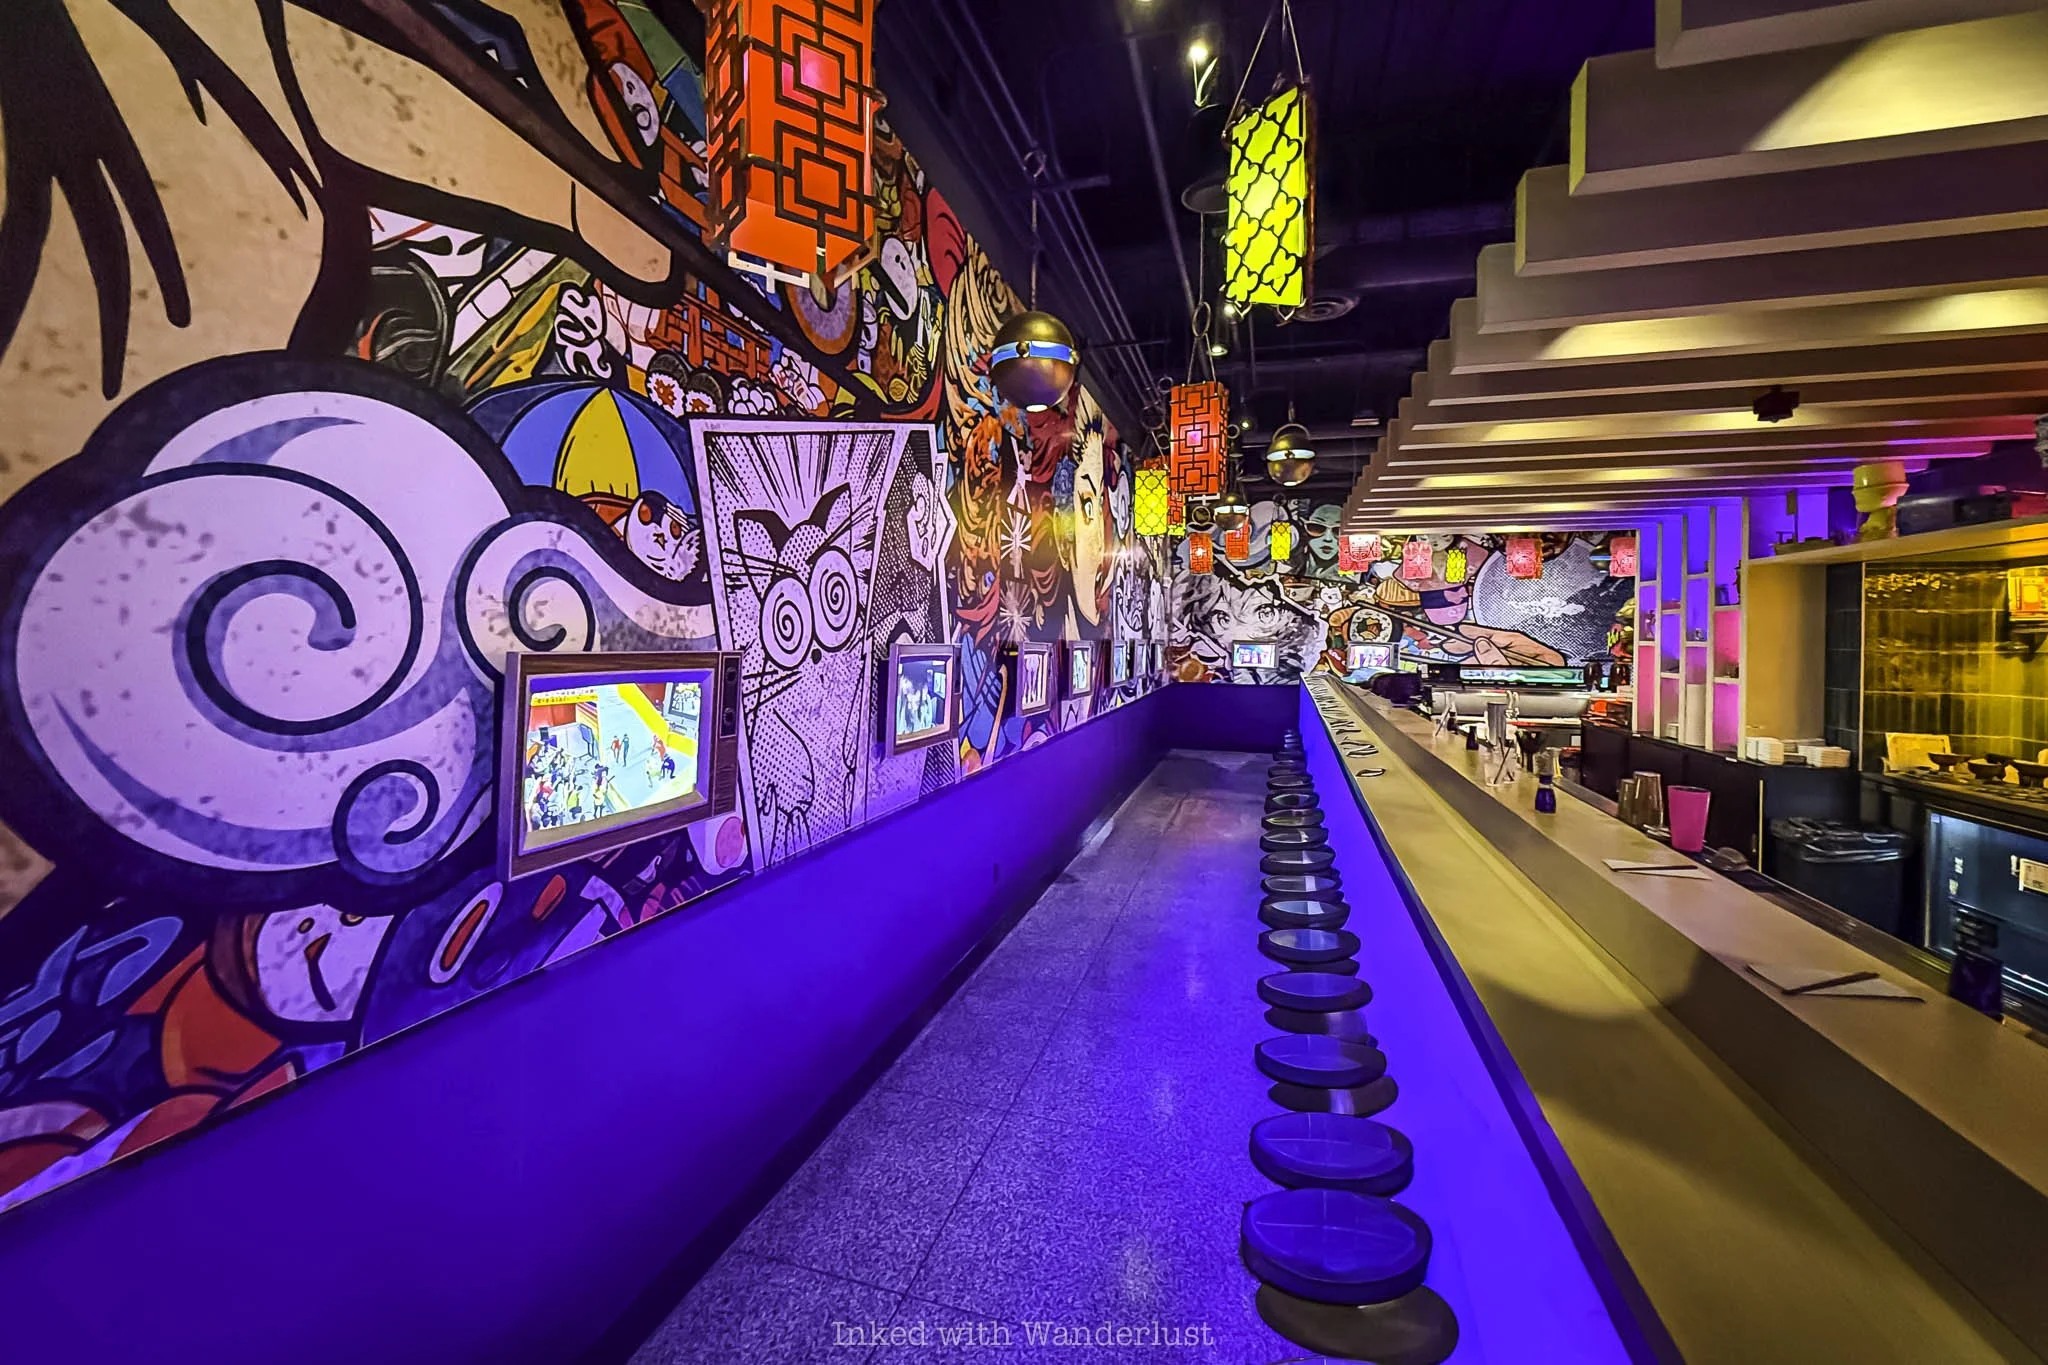
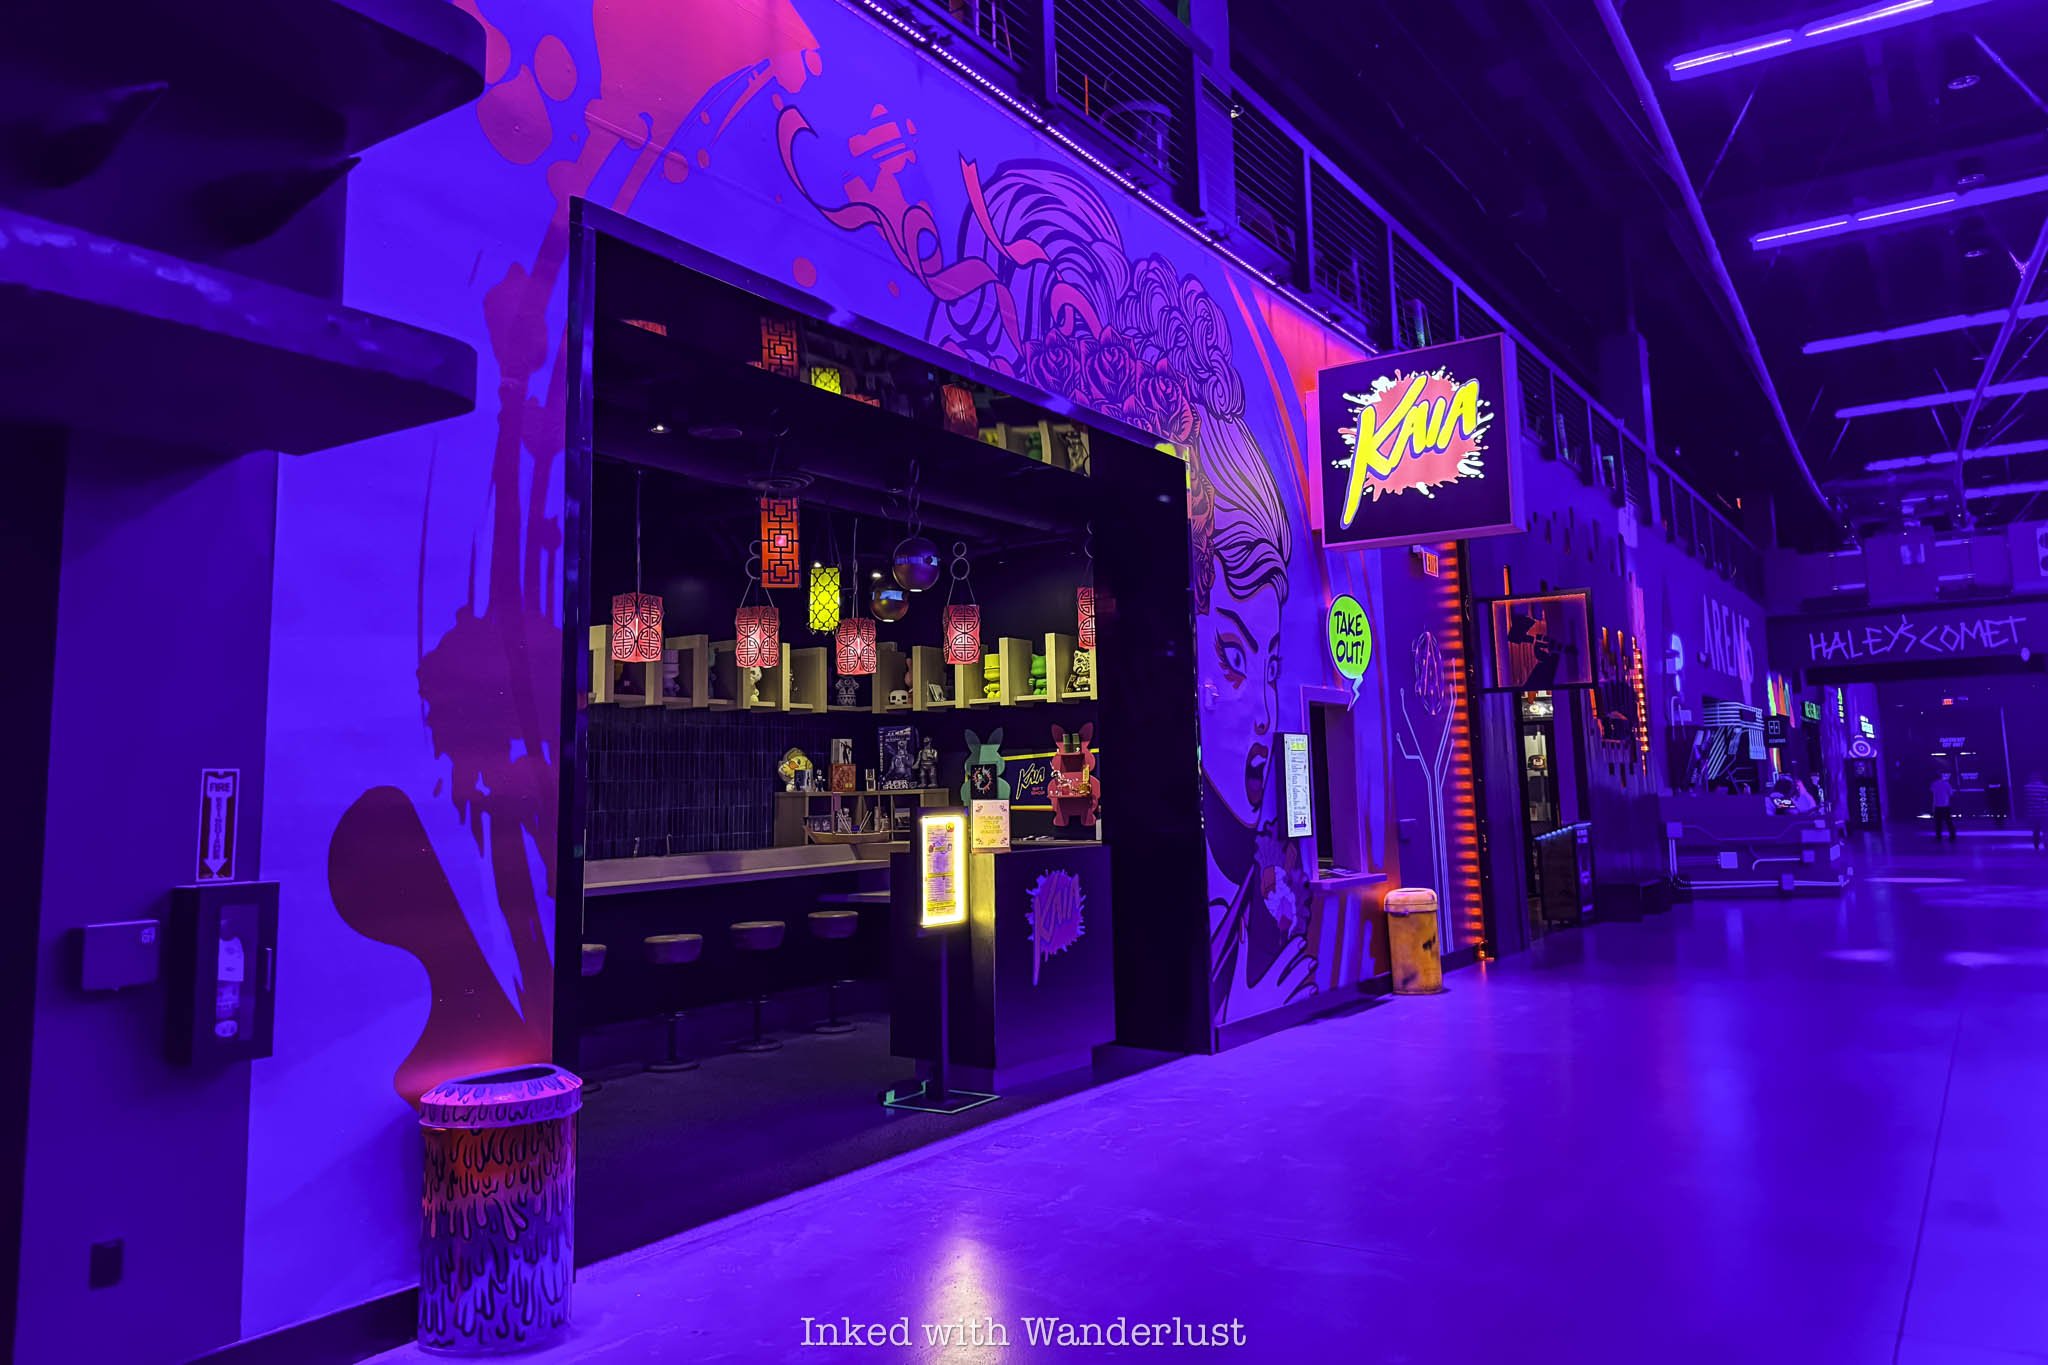
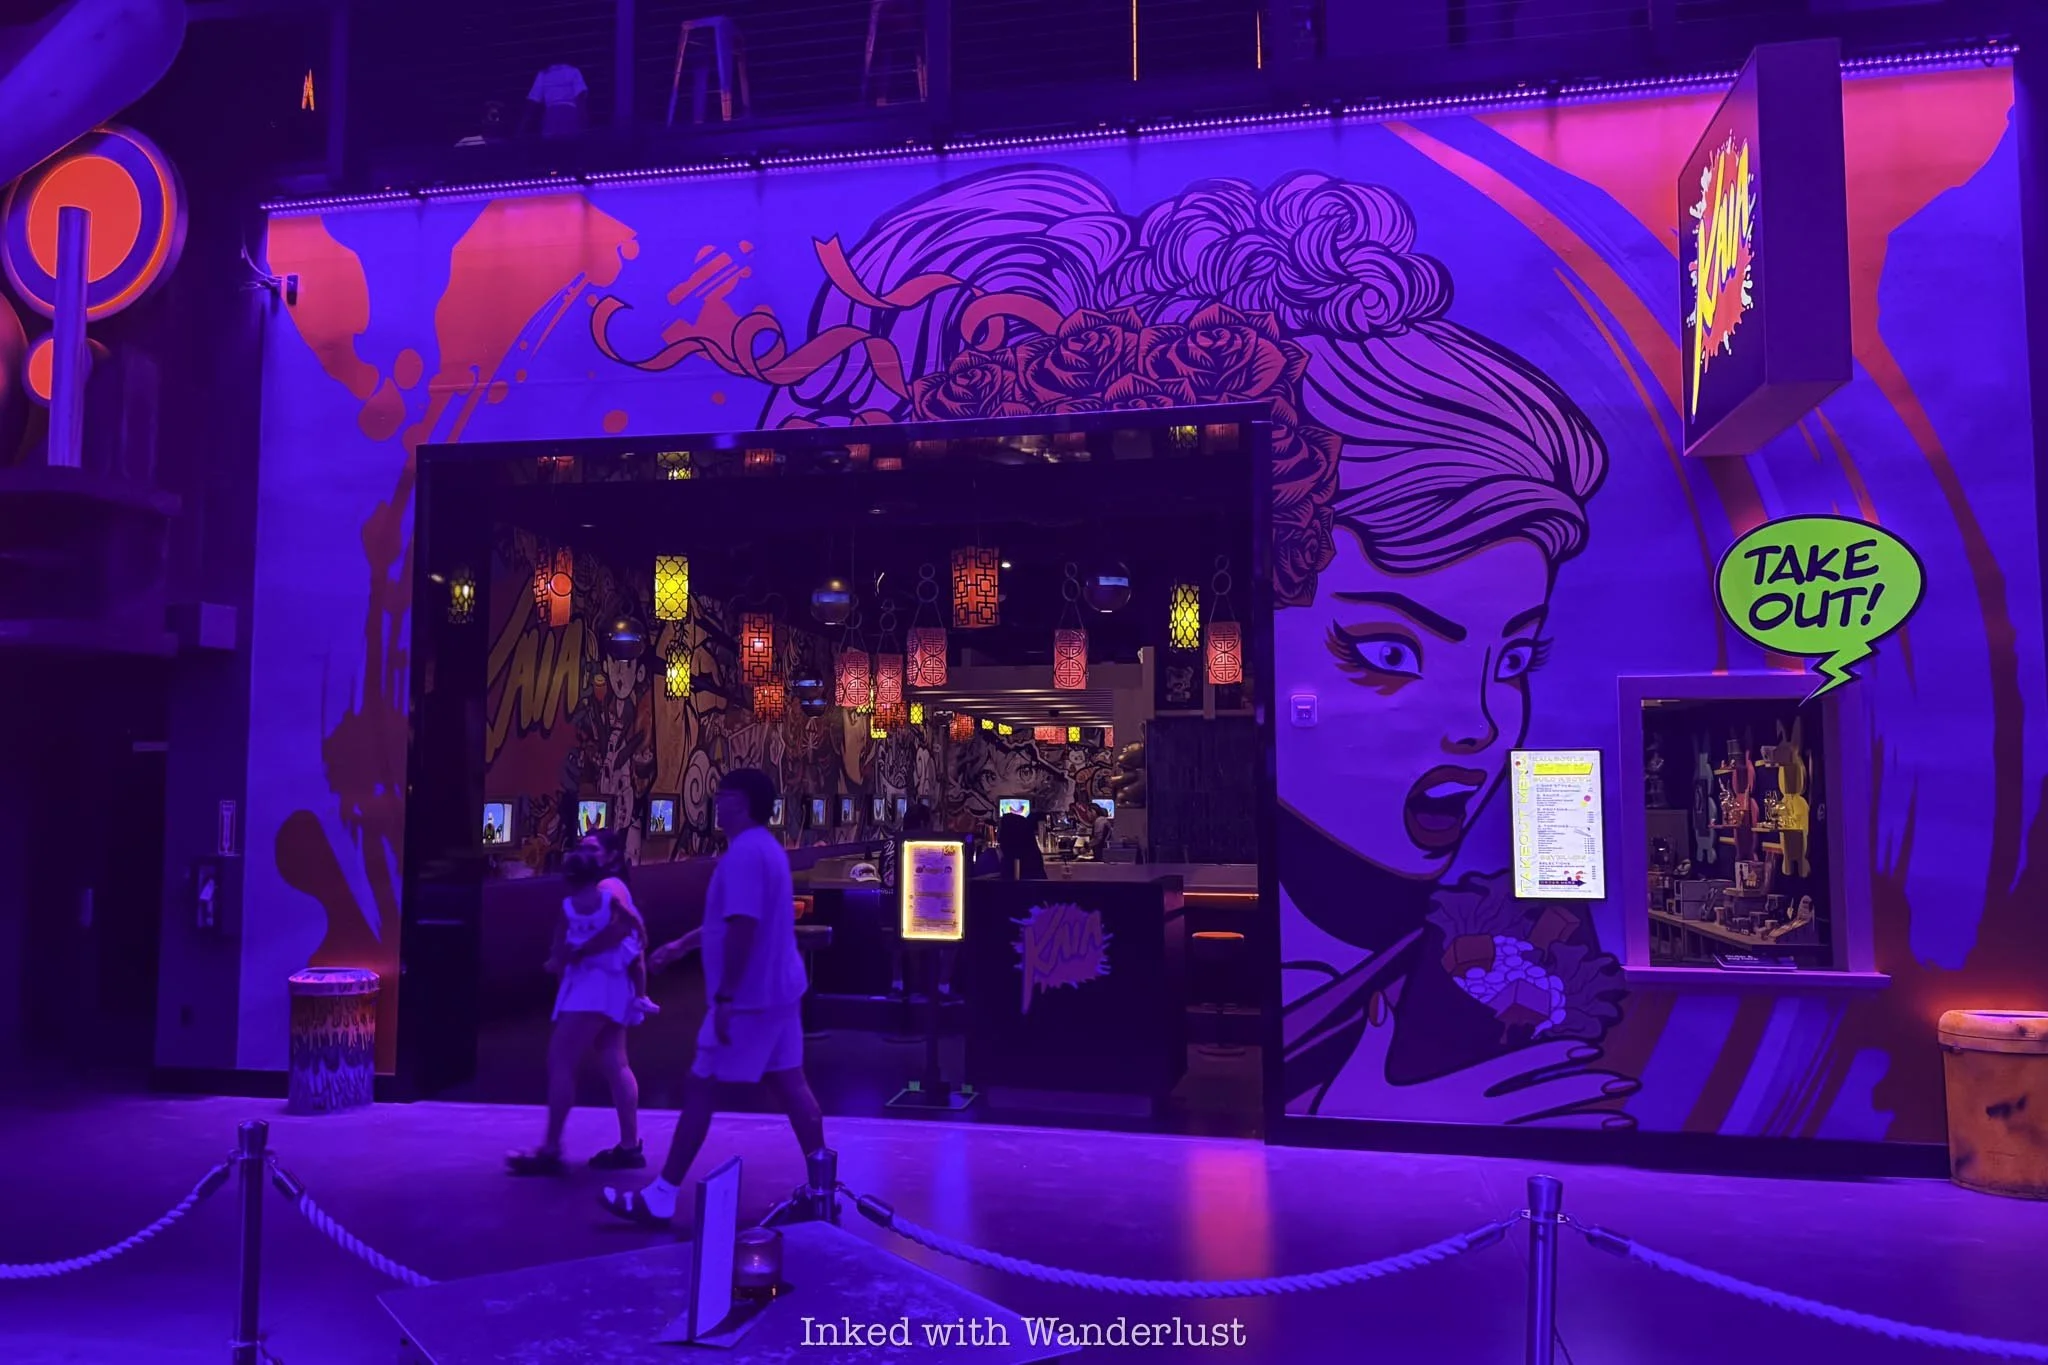
On arrival, you can find Kaia on the ground level of Area 15. Upon walking in, keep to the right, go past the information desk and you’ll immediately recognize Kaia. It’s across from Meow Wolf Omega Mart and Oddwood Bar.
Kaia Menu
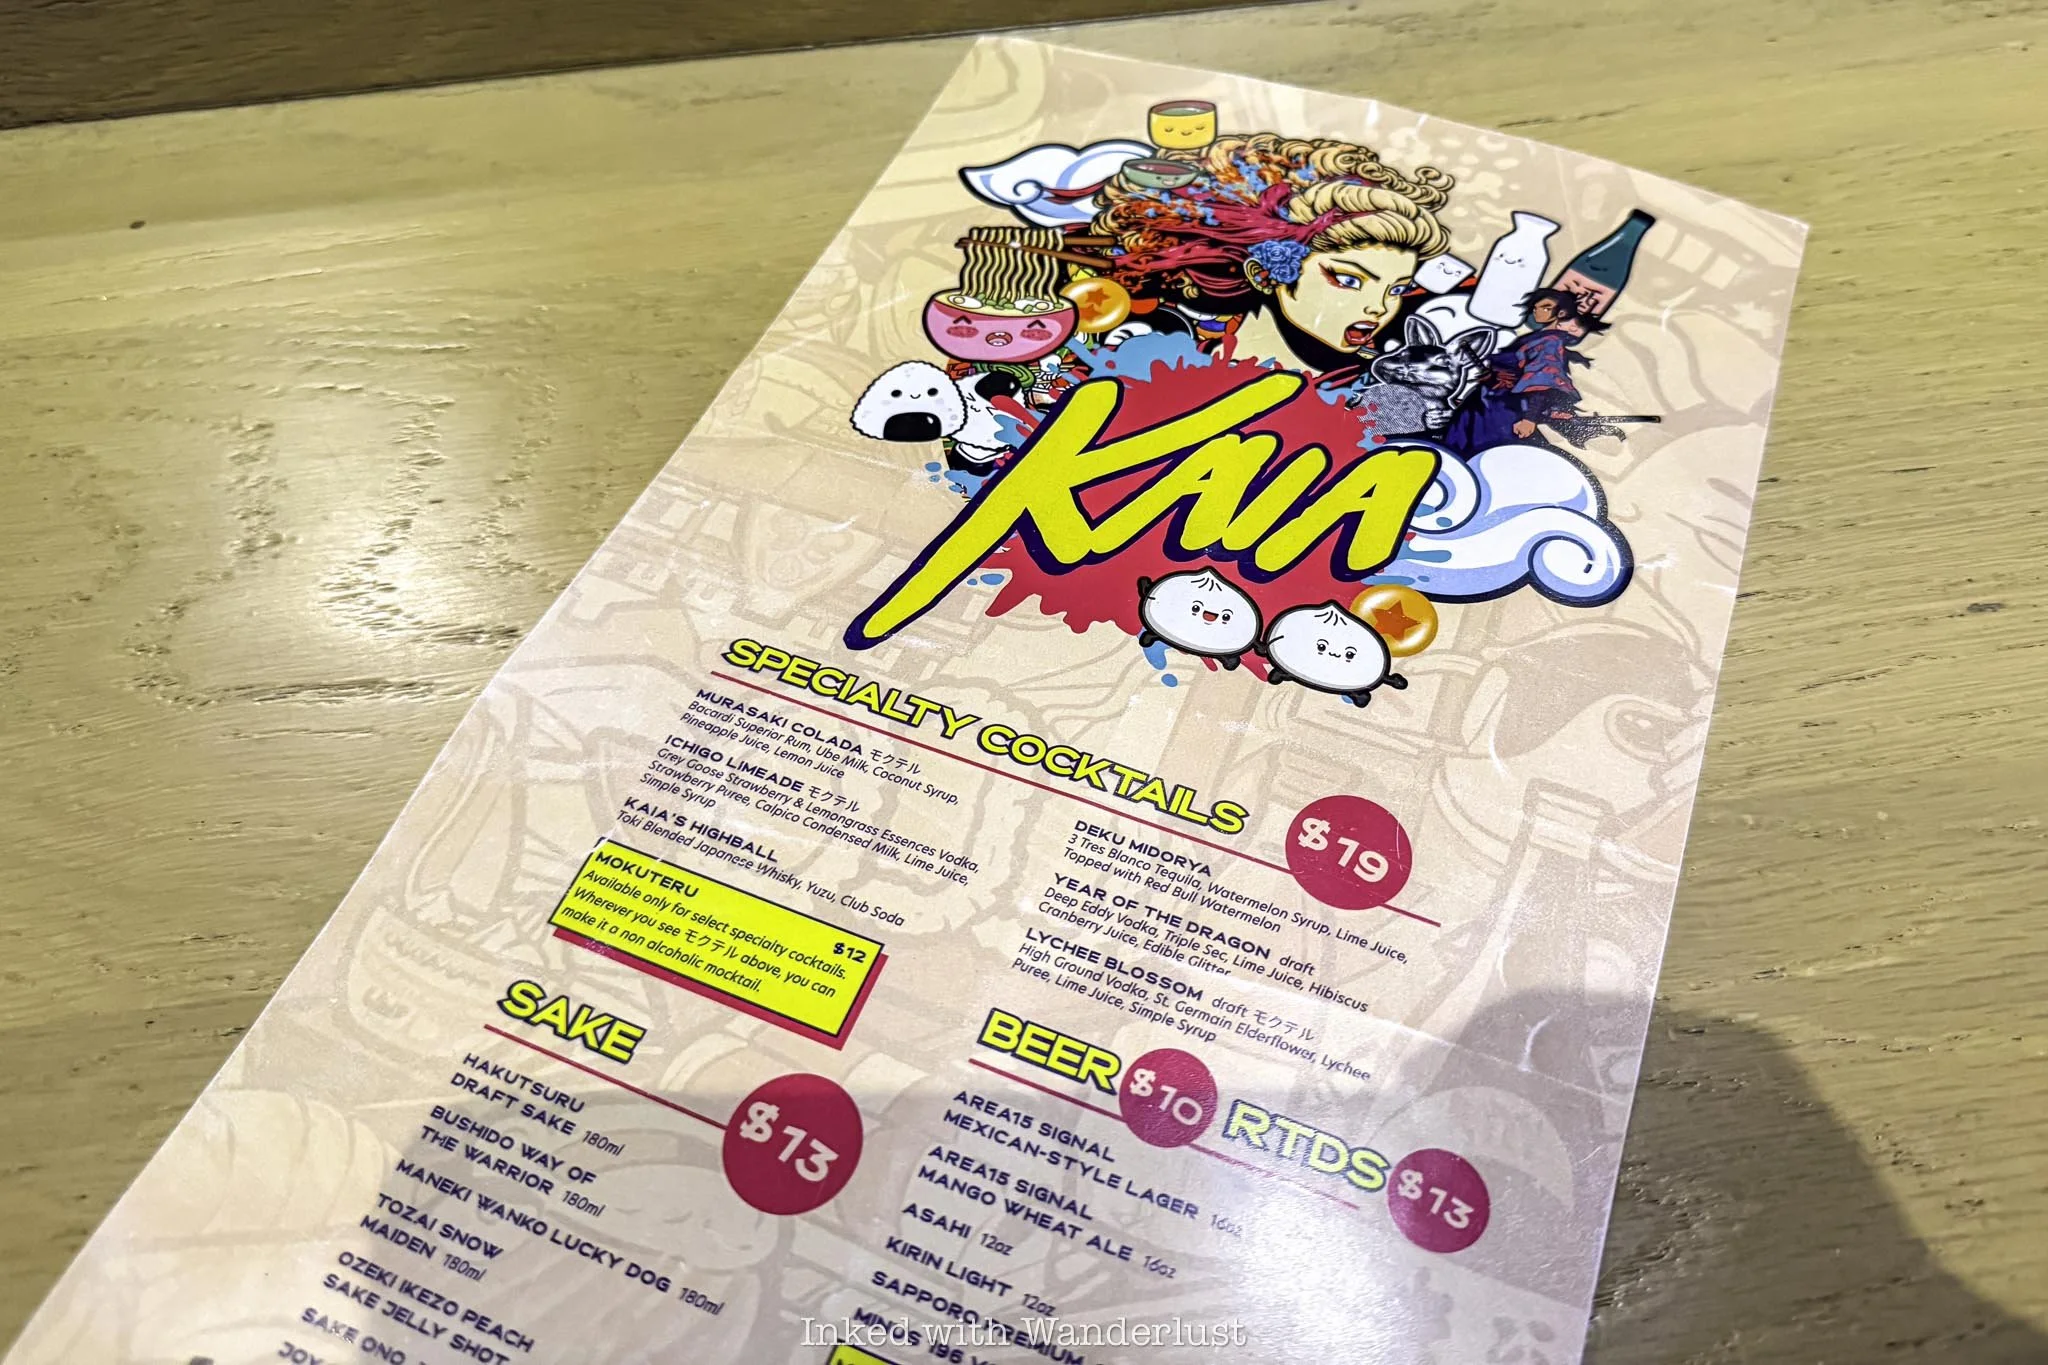
On Kaia’s menu, guests will find a variety of sushi rolls, ramen, small plates, and shareable dishes alongside specialty cocktails and desserts. The menu is minimalistic, but that’s a positive as it isn’t overwhelming and there’s enough variety to appeal to most.
The menu draws inspiration from Asian cuisine while incorporating creative twists and contemporary flavors. Sushi is the clear headliner with selections ranging from traditional rolls and fresh sashimi to speciality creations with bold flavors.
While known for their hand rolls, the noodle offerings deserve just as much attention. Kaia’s ramen selection provides a hearty alternative to the lighter seafood-focused dishes on the menu, providing a choice for guests who particularly don’t enjoy sushi.
Kaia also offers a thoughtfully curated beverage selection featuring specialty cocktails, sake, beer, and mocktails. Furthermore, while options are limited, their featured dessert offering serves up an explosion of creamy flavor (details below).
Atmosphere and Vibe

Kaia’s modern interior feels both comfortable and upscale, creating a relaxing contrast to the sensory overload found throughout the Area 15 venue. Warm lighting, contemporary decor, and open layout provides a great spot to recharge.
Known for its bold color that compliments its host venue, Kaia offers a more refined experience without completely disconnecting from the creative energy that makes Area 15 so unique. Stepping inside feels like entering a sophisticated retreat tucked within the excitement.


The restaurant embraces its modern design aesthetic, blending clean lines, warm lighting, and natural textures to create an inviting environment. Wood accents, counter-based seating, and bold artwork give Kaia an upscale feel, while remaining casual.
It’s stylish without being intimidating, making it equally suitable for a casual lunch, date night, or or special occasion. Music enhances the atmosphere without overpowering it, allowing guests to conversate without a need to shout.
Unlike some restaurants inside venues that rely heavily on spectacle, Kaia focuses on creating an environment where food remains the centerpiece while still celebrating the artistic and free-spirited nature of its host.
The Menu Items We Tried

I booked a reservation at Kaia because my wife is a sushi connoisseur and doesn’t get it too often. I’m not one for sushi, so I went with their Birria Ramen bowl. We also began with an item from their starter selection, as well as a couple cocktails before finishing with dessert.
My description of the sushi will be my wife’s take. She ordered one roll each from their “Classics” and “Specialties” sections - the Spicy Tuna and Tempura Trolley Roll, respectively. If you’ve purchased an Area 15 experience pass, present it to receive a complimentary classic roll.
Ninja Beans (starter)

We started our meal with their Ninja Beans appetizer, which was a bowl of Edamame beans coated in garlic and chili oil. It’s easily the simplest item on the menu, but they proved to be surprisingly additive.
They were the perfect snack to enjoy while waiting for our entrees to arrive, offering a light yet satisfying beginning to the meal. They’re certainly not their flashiest offering, but they were executed exceptionally well.
Lychee Blossom (cocktail)
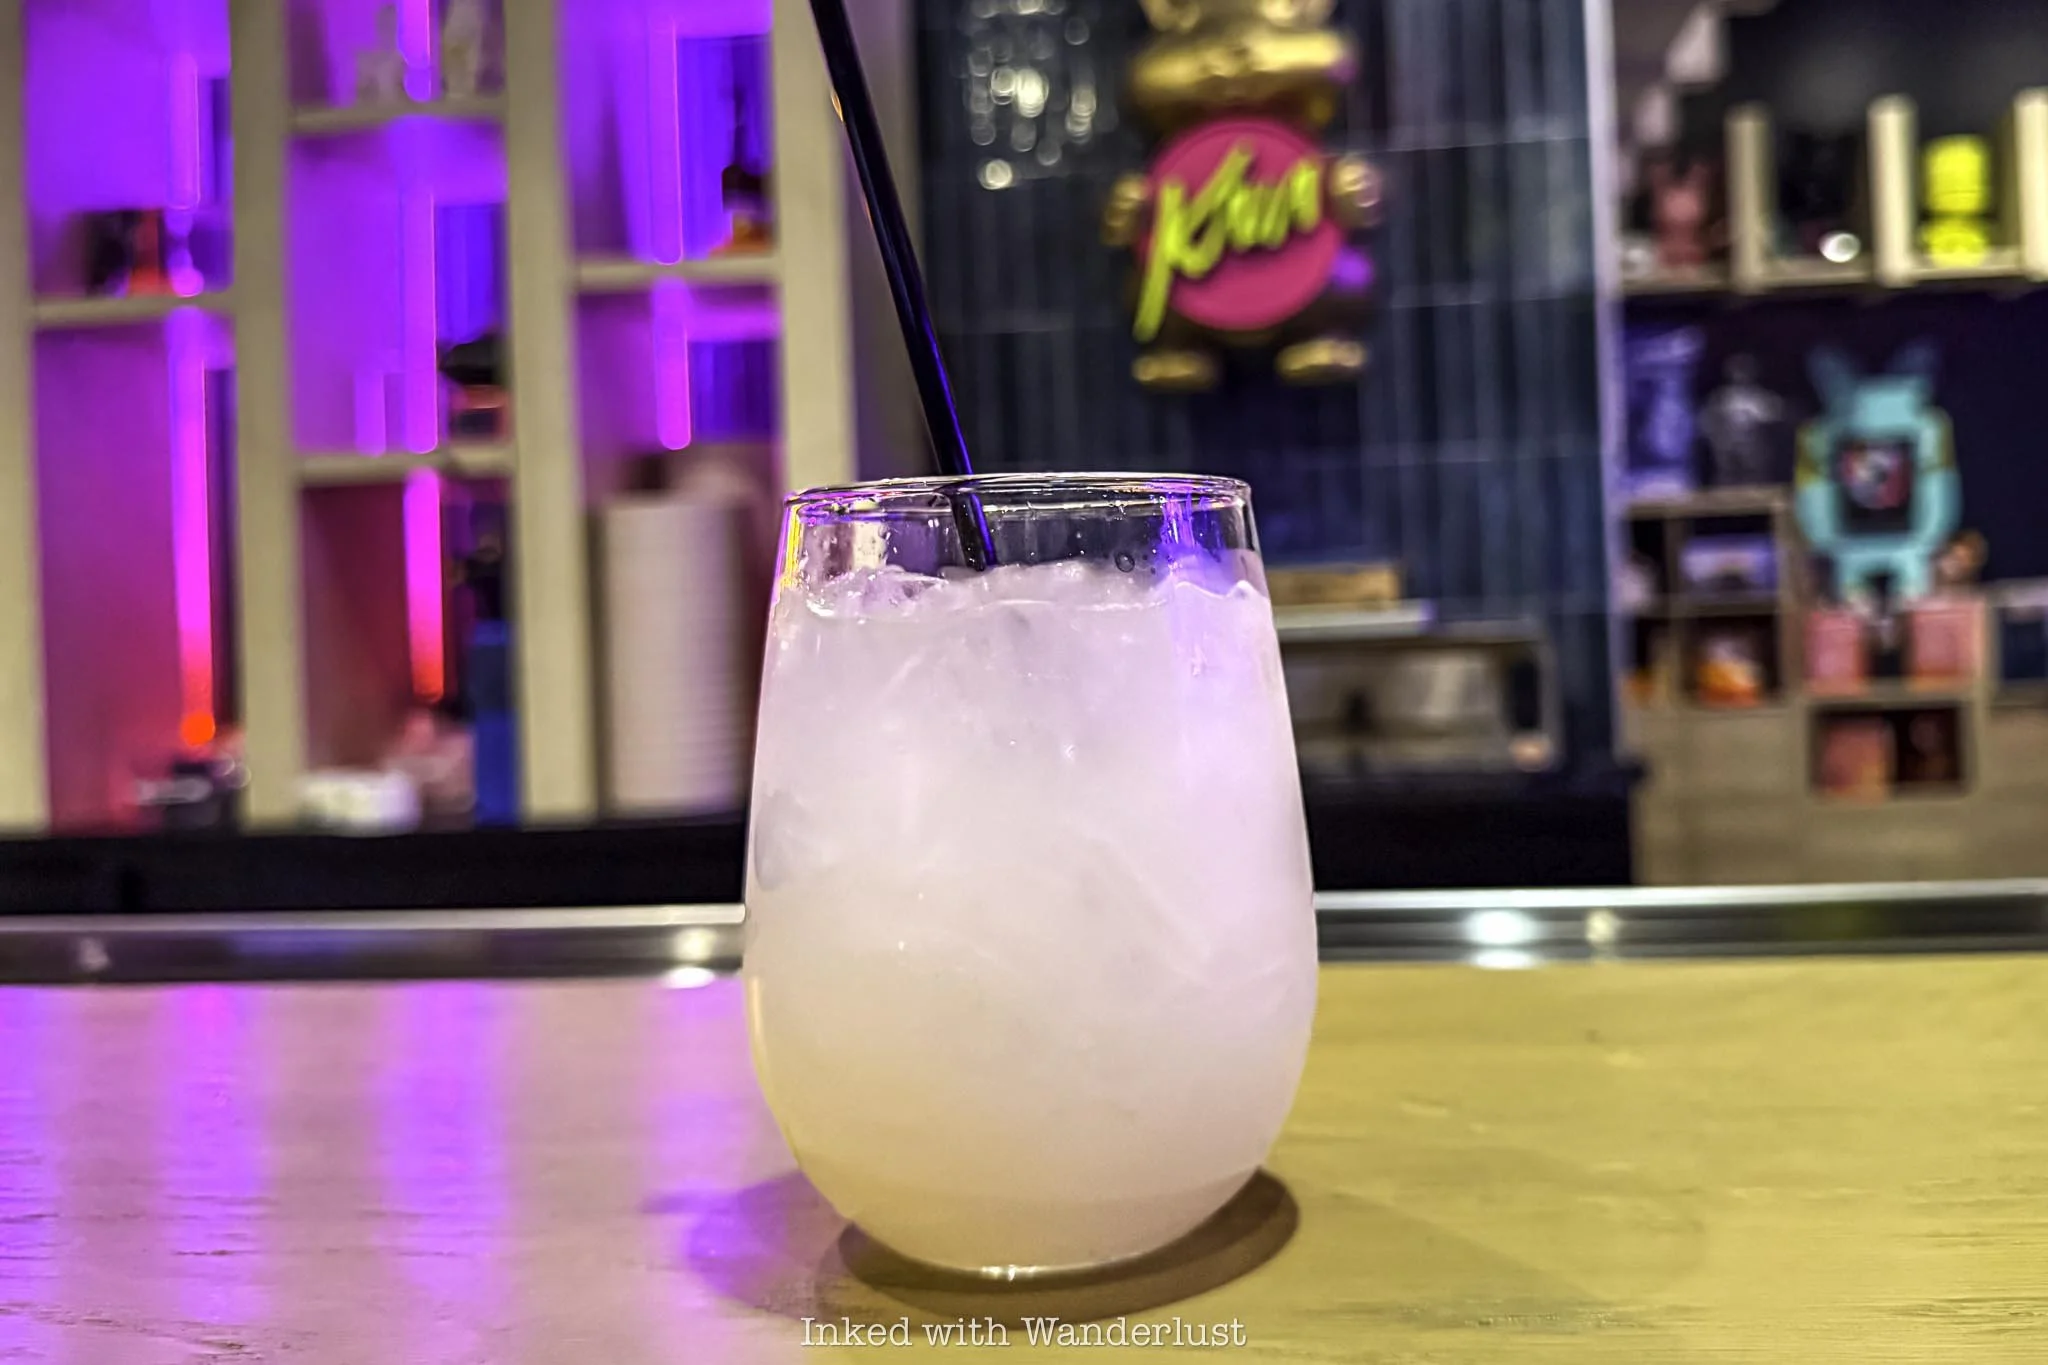
Their featured cocktail is the Lychee Blossom. It’s a vodka based beverage with St. Germain elderflower, lychee puree, lime juice, and simple syrup. It’s refreshing and elegant, pairing well with Kaia’s Asian-inspired menu.
Light, slightly sweet, and beautifully presented, it showcased the delicate floral notes of lychee without being overly sugary. Each sip proved smooth and balanced, making it a sip-easy drink that felt sophisticated, yet simple.
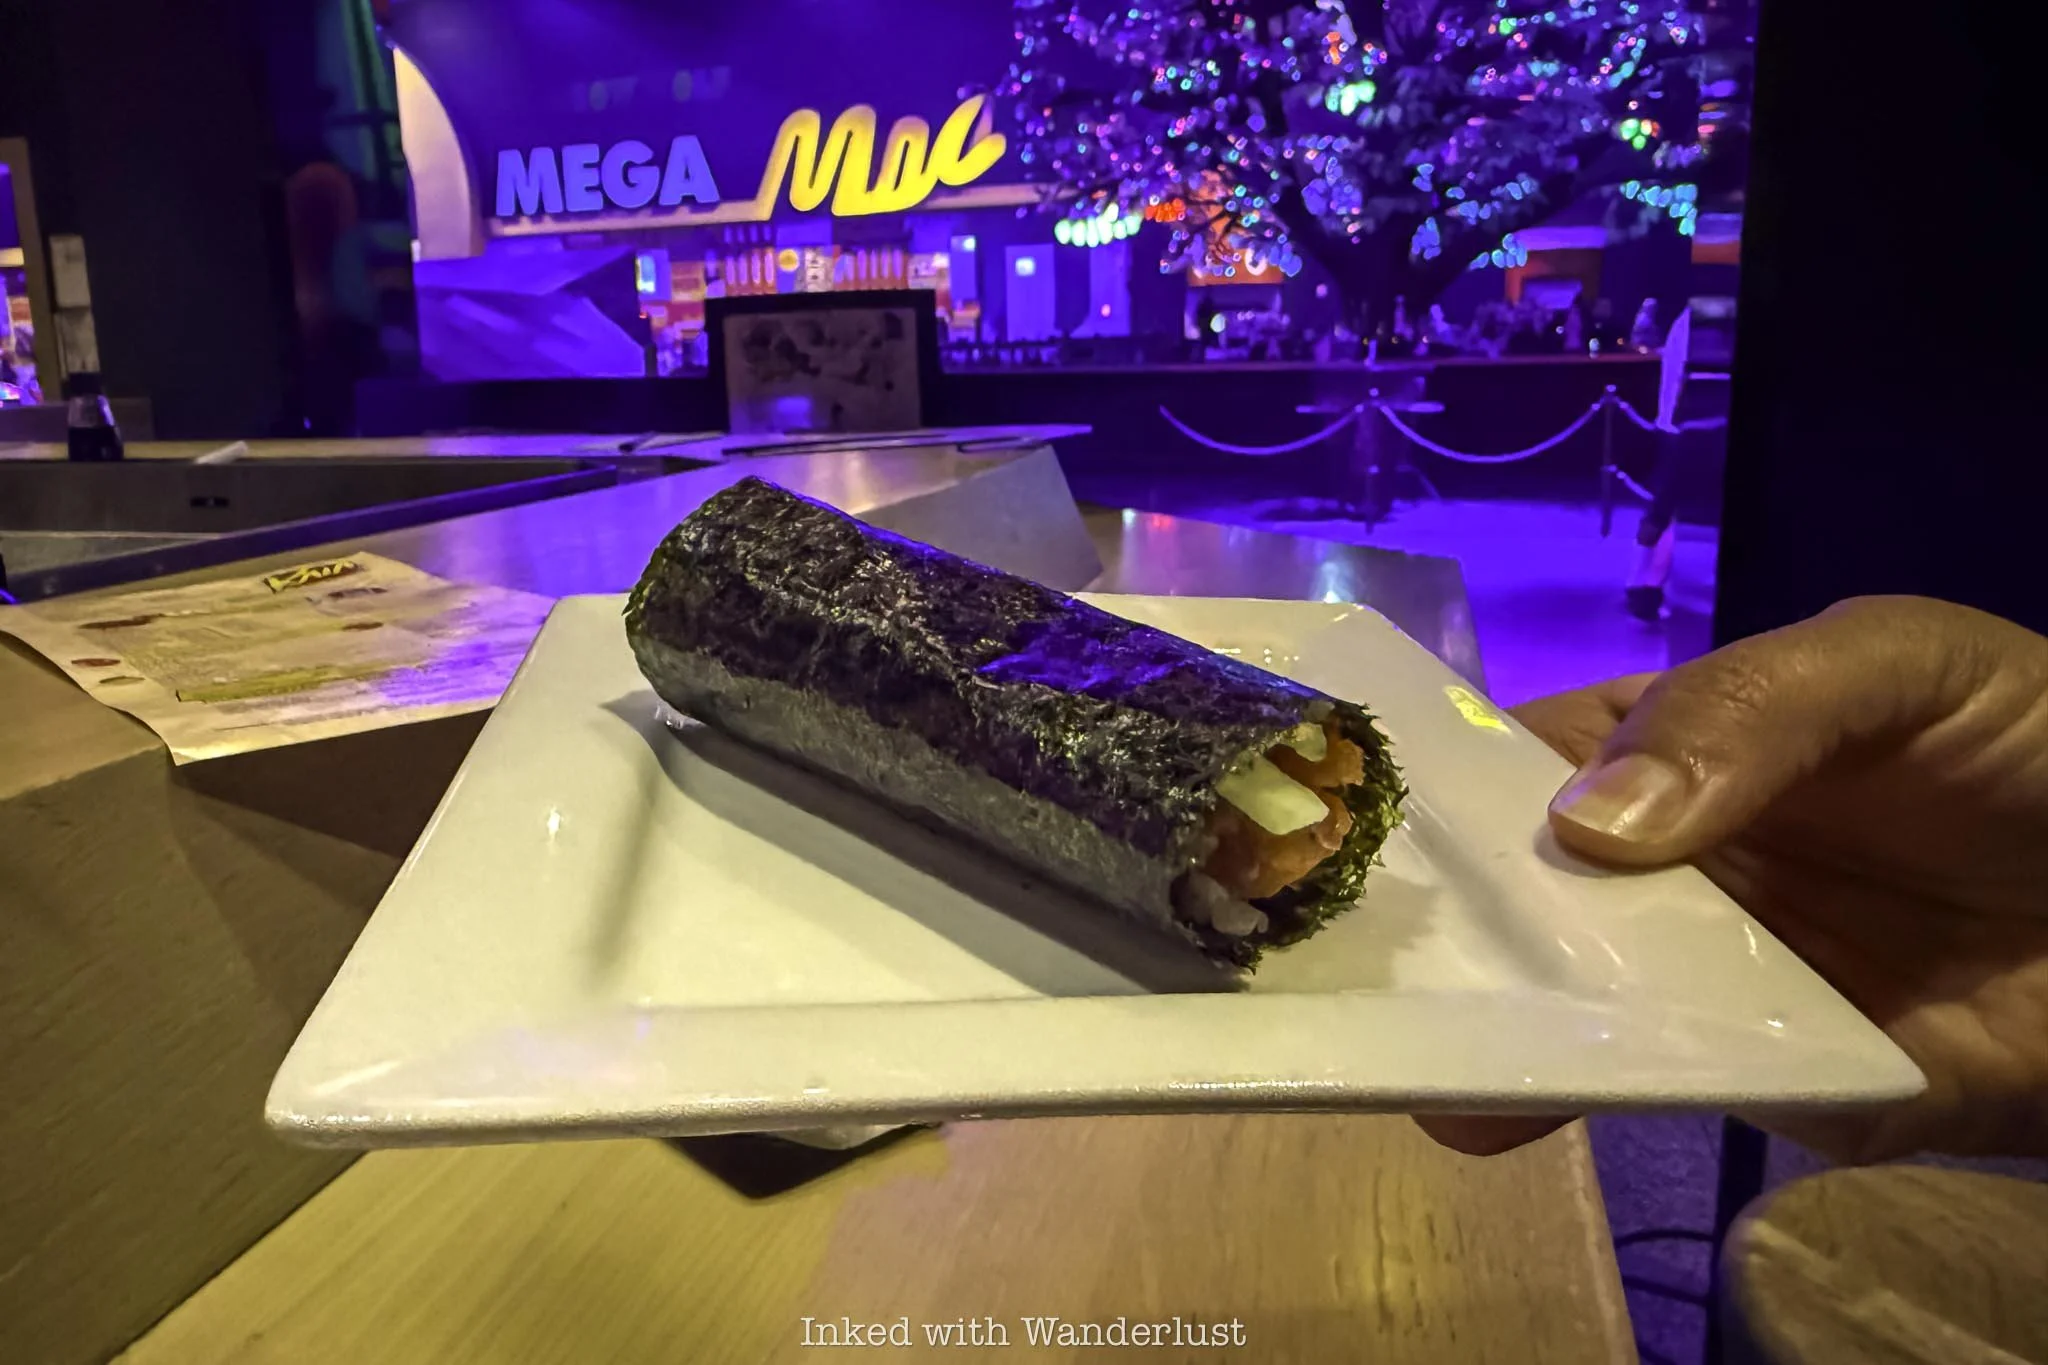
Spicy Tuna (classic roll) & Tempura Trolley (specialty roll)
The Spicy Tuna Roll (above) takes a minimalistic, traditional-leaning approach. Served fresh and wrapped in crisp nori, it offered a pleasant kick of heat that complemented rather than overwhelmed the tuna. Its simple presentation emphasized balance and freshness, making it an excellent choice for sushi purists.
Conversely, the Tempura Trolley Roll (below) delivered a satisfying crunch every great tempura roll should have, with a combination of textures that kept each bite interesting. The crispy exterior contrasted nicely with the interior’s fresh ingredients, resulting in a roll that felt indulgent without being overly heavy.

Together, these two items demonstrated the versatility of Kaia's menu. The Tempura Trolley Roll satisfied cravings for something rich and crunchy, while the Spicy Tuna Roll delivered clean flavors with a more traditional sushi experience.
If you're looking to sample both the creative and classic sides of Kaia, these two menu items are worth ordering. As mentioned earlier, be sure to present your Area 15 Experience Pass, if you have one, as you’ll receive a complimentary classic roll for doing so (such as the Spicy Tuna).
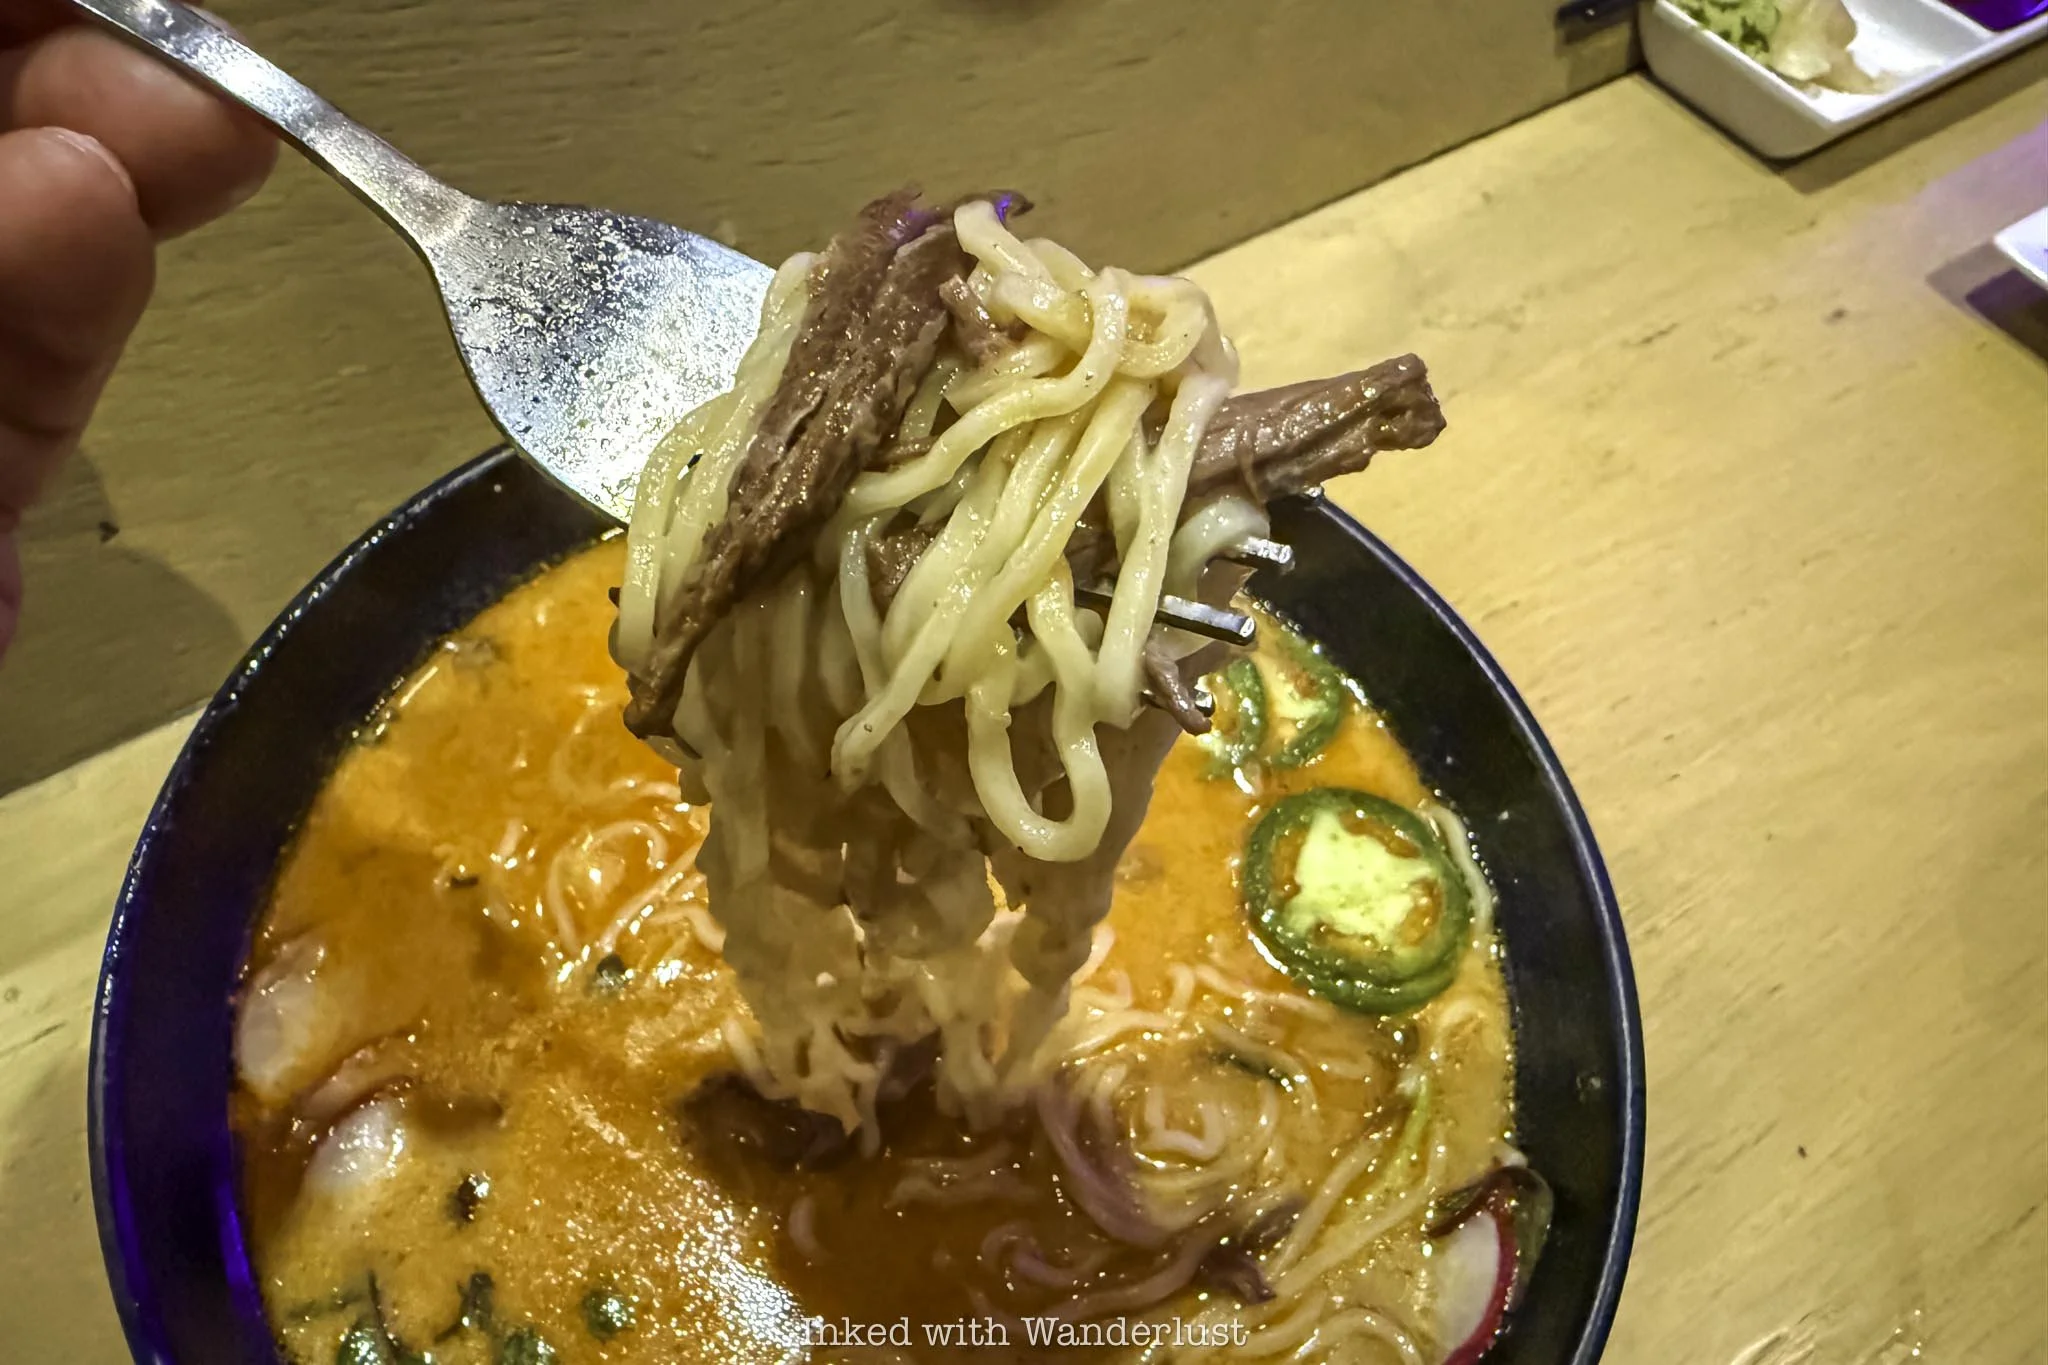
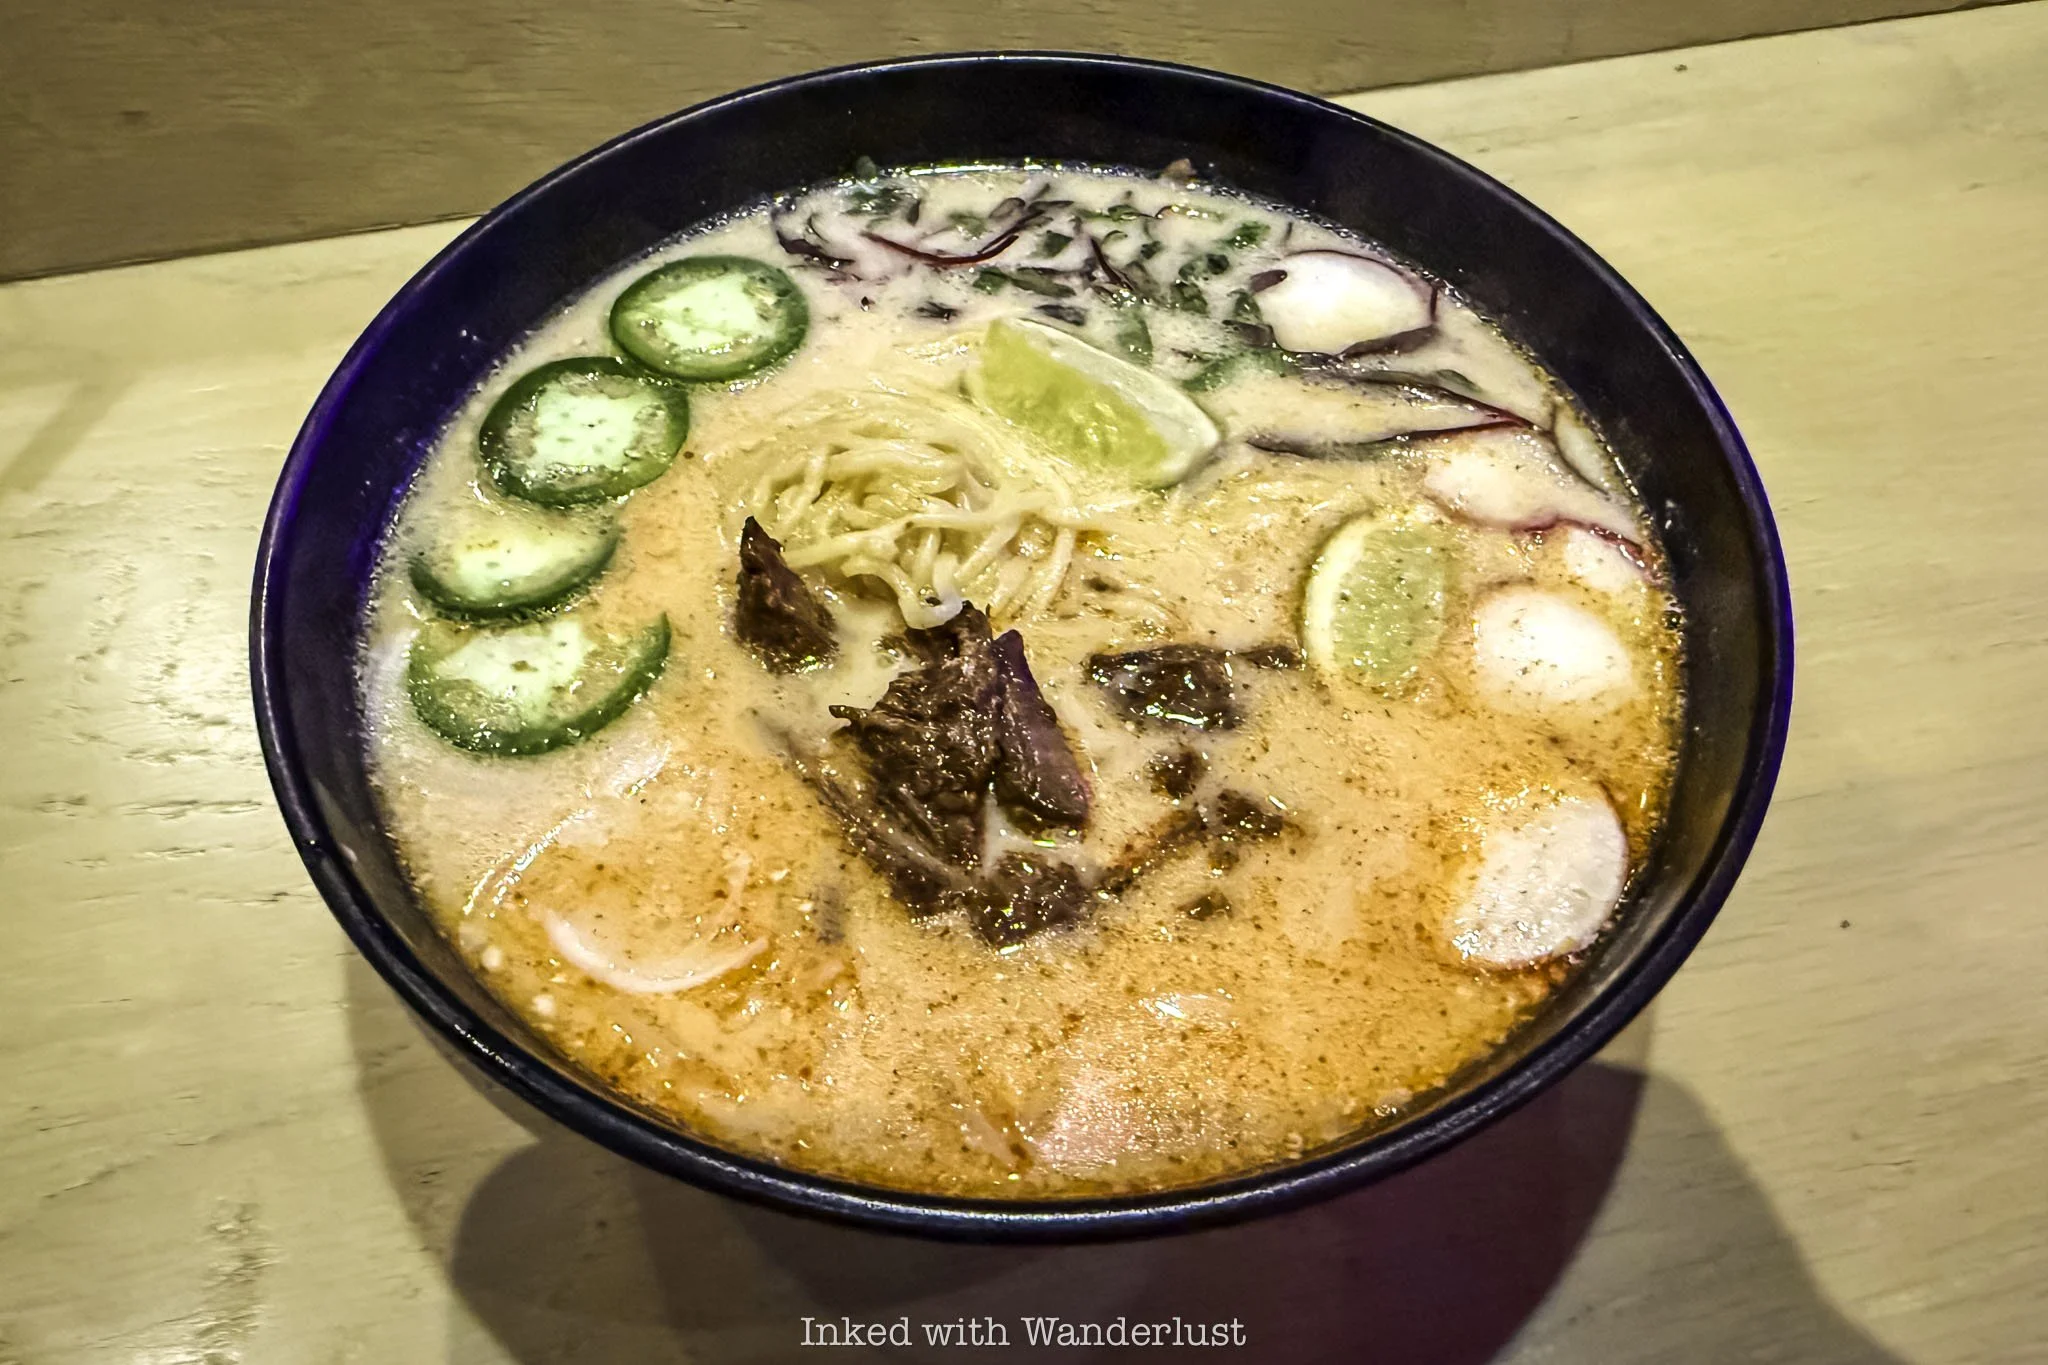
Birria Ramen

In my humble opinion, the Birria Ramen has to be one of the most memorable dishes at Kaia. Combining the rich, slow-cooked flavors of traditional birria with the comforting elements of ramen, it delivered a bold and satisfying bowl packed with flavor.
The broth was deeply savory, the meat flavorful and tender, and the thick noodles provided the perfect foundation for every bite. Furthermore, the generous, hearty portion Kaia provides doesn’t leave a whole lot of room for much else.
Much like the Birria Ramen at Disney California Adventure, it’s a creative fusion that may appear gimmicky on the surface, but fret not, because it comes together seamlessly, making it a must-try entree.
Ube Cheesecake (dessert)
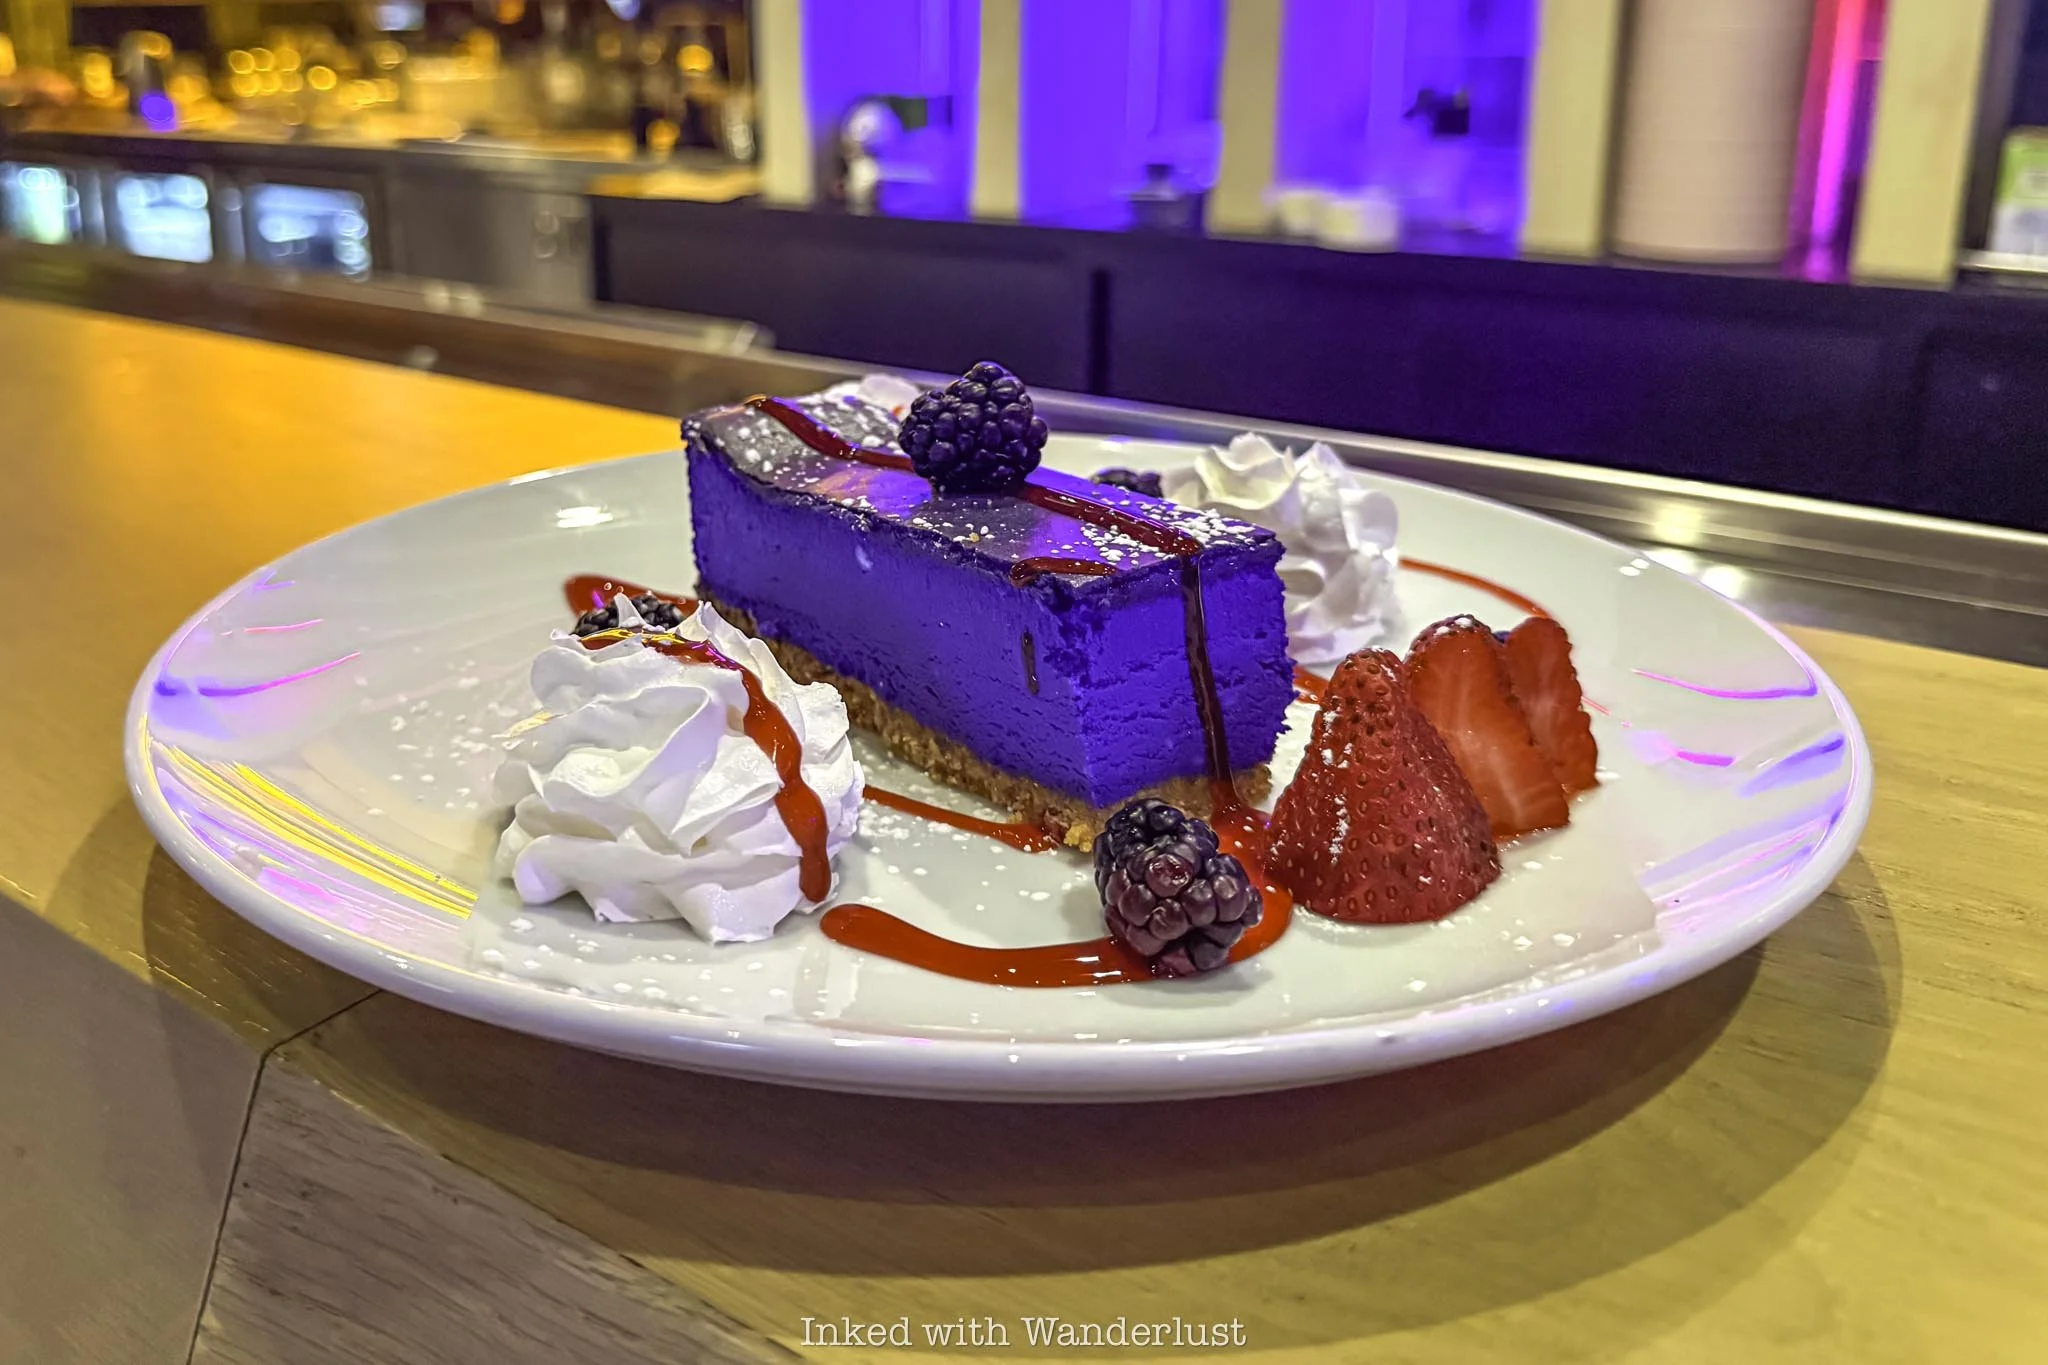
The Ube Cheesecake was a standout dessert and memorable finale to our meal at Kaia. Its vibrant purple color immediately catches your attention, making it one of the most visually appealing items on the menu. Fortunately, the flavor lived up to the presentation.
The cheesecake was rich and creamy with a smooth texture that practically melted with each bite, while the ube added a subtle sweetness and nutty depth that set it apart from traditional cheesecake.
Despite its decadent appearance, the dessert never felt overly heavy nor overly sweet. Instead, it offered a light and satisfying finish after enjoying our sushi, ramen, and cocktails. The combination of unique flavor and creamy consistency made the Ube Cheesecake much more than an afterthought.
Final Thoughts
Kaia succeeds at being much more than a convenient restaurant inside Area15. Between its stylish atmosphere, creative menu, and well-executed dishes, it delivers a dining experience that can easily stand on its own.
Highlights such as the Birria Ramen, specialty rolls, crafted cocktails, and Ube Cheesecake showcase a kitchen that isn't afraid to experiment while still keeping quality and flavor on the forefront.
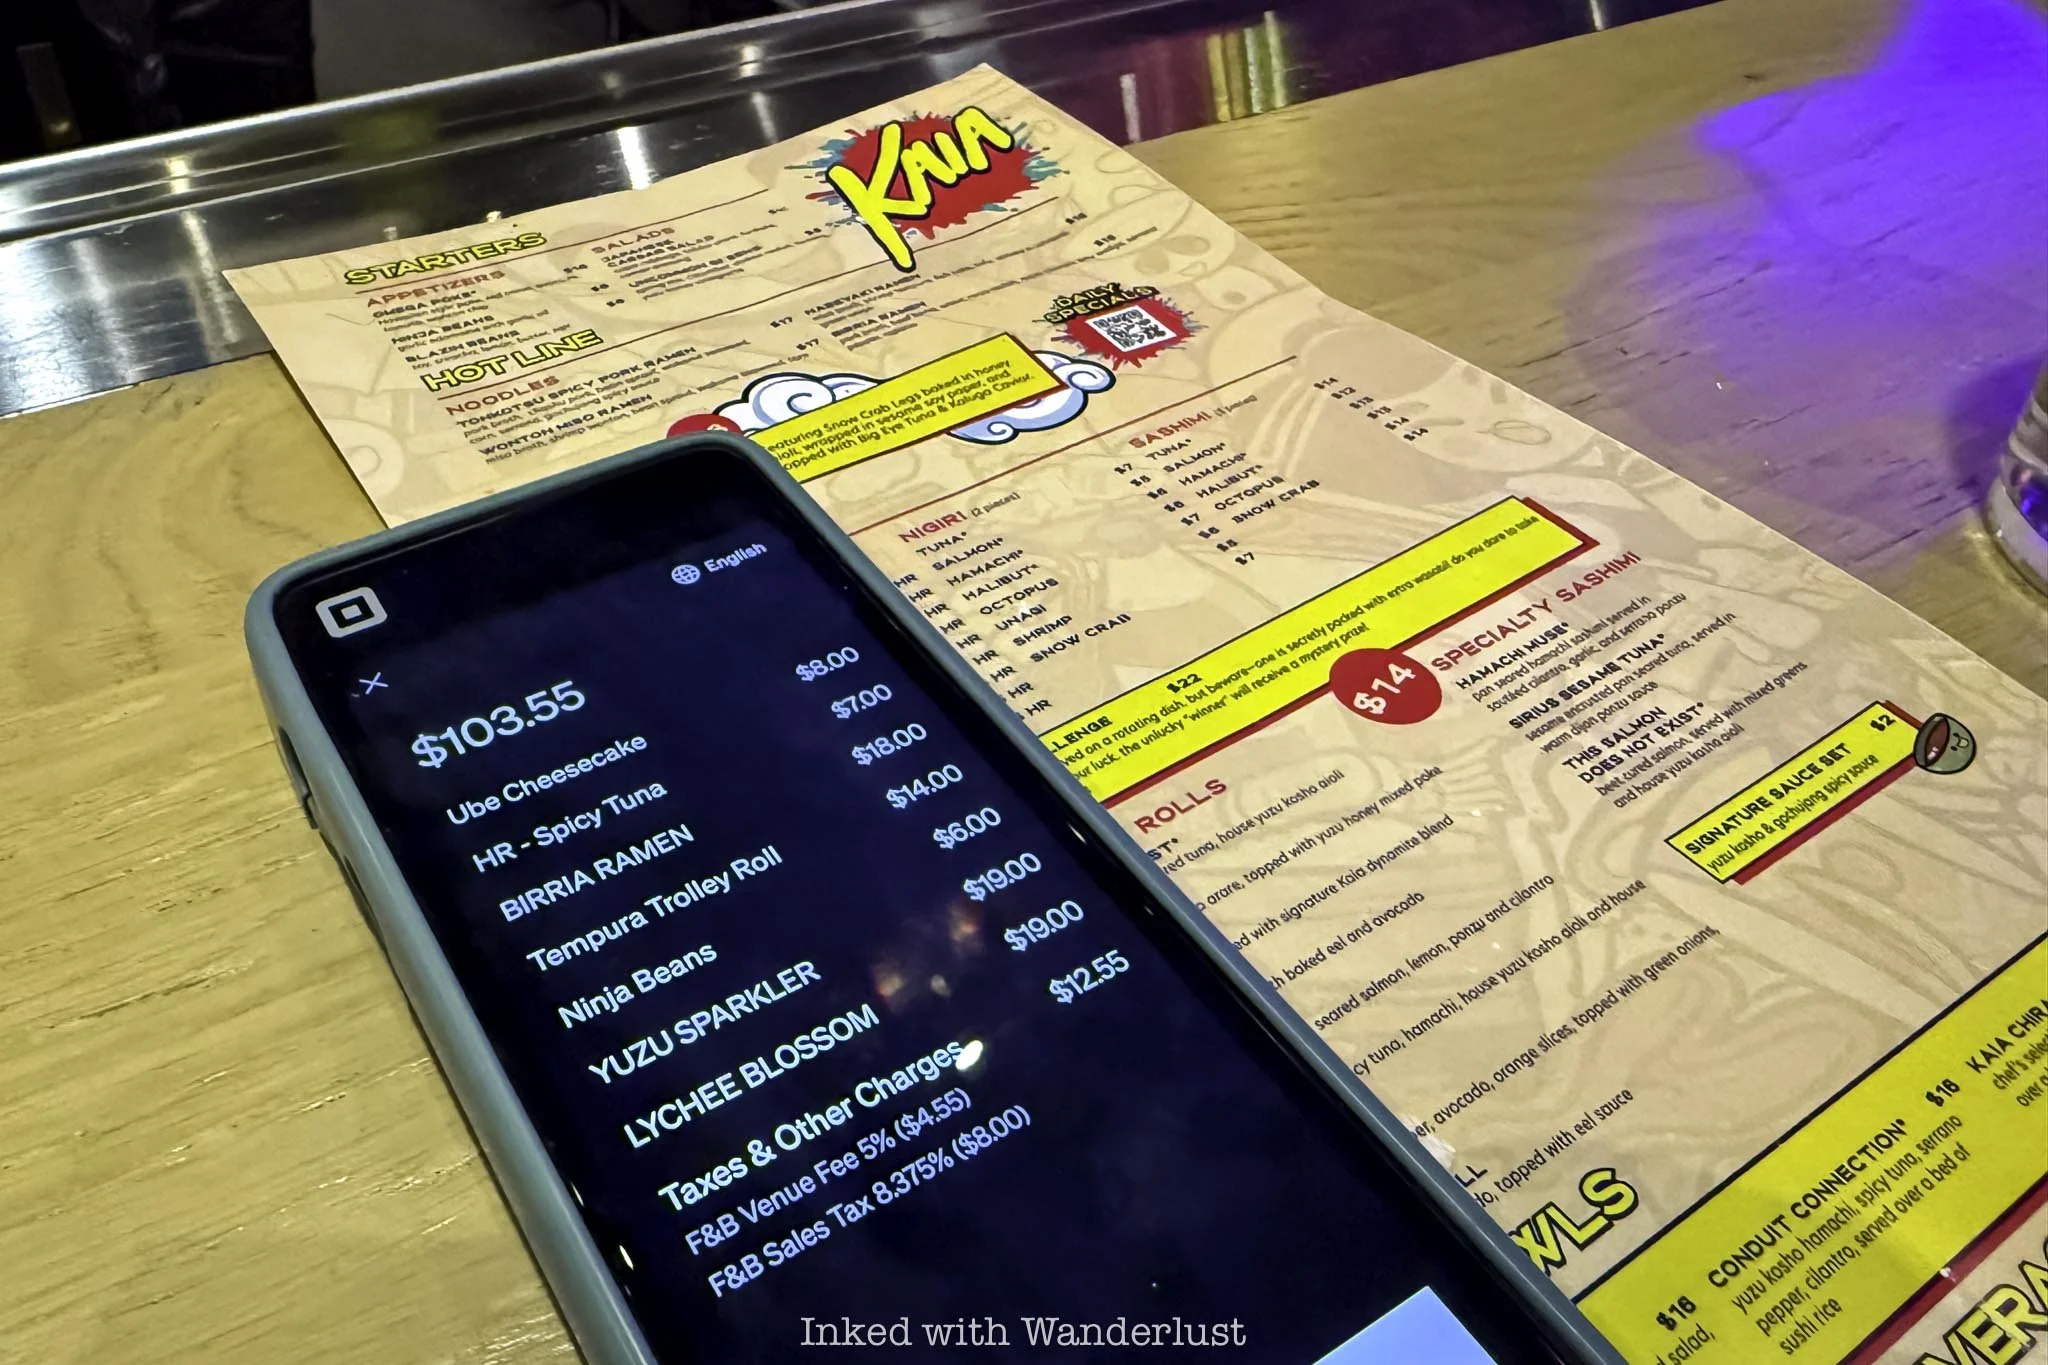
The biggest drawback is the price. Like many restaurants located within major entertainment destinations, the cost can add up quickly (see photo of my bill above), especially if you're ordering multiple courses and cocktails.
That said, the quality of the food, attentive service, and inviting atmosphere help justify the expense. Kaia offers a welcome break from the excitement of Area15 while still remaining “in the bubble”. If you're looking for a solid meal during your visit, I highly recommend Kaia.
Once your meal concludes, head across the walkway to Oddwood Bar for an excellent selection of crafted cocktails. If you’re spending the day at Area 15, consider purchasing an experience pass or tap the “book now” tab in the ad below for a deal on tickets to Meow Wolf’s Omega Mart!
Nearby experiences…(tap link to view post)

The Ultimate Guide to Area 15 in Las Vegas
Opening its doors back in September 2020, Area 15 quickly garnered the attention of Las Vegas locals and visitors alike. What…
Disclosure: This post contains affiliate links. If you make a purchase through these links, I may earn a small commission at no additional cost to you. I only recommend products or services that I believe will add value to my readers.

Opening its doors back in September 2020, Area 15 quickly garnered the attention of Las Vegas locals and visitors alike. What began as a 200,000 square foot bunker with select art installations and interactive features, it has since expanded into a 40 acre entertainment district.
While featuring popular premium attractions such as Universal Horror Unleashed, the John Wick Experience and Omega Mart, Area 15 itself offers its own attractions and dining/drink offerings. Having fun isn’t an issue…but figuring it all out can be.
Despite researching prior to my first visit, I found myself dazed, confused, and sometimes lost at Area 15. It’s a place with a lot to do and even more to see, so it’s easy to get distracted and even disappointed if you don’t know what’s going on. This guide aims to clear that up for you.
In my ultimate Area 15 guide, I’m going to discuss important visitation details such as where everything is, the different zones, ticket pricing and inclusions, what isn’t included in your ticket, dining options, parking, and more.
How Far is Area 15 From the Strip?

Given the sheer size of Area 15, there was no way they would be able to fit it all on the strip. Don’t make the mistake of thinking it’s there. Area 15 was built on a large land parcel west of the strip.
How far Area 15 is from the strip depends entirely on which section of the strip you’ll be coming from:
From north strip: About 1.9 to 2.2 miles (Sahara, Strat, Resorts World)
From center strip: About 1.3 to 1.8 miles (Caesars Palace, Flamingo, Wynn, Linq)
From south strip: About 2.9 to 3.6 miles (Luxor, MGM Grand, Mandalay)

As you can see, booking a center-strip hotel would put you closest to the action. Furthermore, it would be advantageous to book a hotel on the strip’s west side. These include properties such as Caesars, Bellagio, Treasure Island, and Hard Rock (coming soon).
There is an on-site hotel and residential complex planned for Area 15 as part of their “Zone 3” expansion, which also includes more restaurants and attractions, but those are a ways off still.
If Area 15 will be a major part of your Las Vegas travel itinerary, staying off-strip may be your best bet. The two closest major off-strip hotels to Area 15 are Rio Hotel (about 1.3 miles south) and Palace Station (about one mile north).
Getting There and Parking

If you’re driving yourself to Area 15, there’s a large open lot located right next to the building in zone one. In zone two (more on that later), there’s a multi-story garage. Nevada residents (with registered plate) receive complimentary parking in both.
For non-residents, it’s a super reasonable $6.99 for a full day of parking. That’ll be the least you’ll pay for parking in all of Vegas. Area 15 uses the Metropolis app to collect parking fees and you can download the app to your phone at this link.
Getting around the entertainment complex is easy via Area 15’s free tram that’ll take you between both zones throughout the day and evening. There are designated pick up and drop off areas in both zones (just follow the signs).
Ride share remains the preferred method, though. There is a designated ride share space just outside of the bunker in zone one. In zone two, riders can be picked up on the bottom level of the garage, which is the same space the tram uses.
Area 15 Experience Pass

At Area 15, tickets are referred to as “experience passes”. They’re multi-tired according to how much you want to do and are priced accordingly. It’s important to note that Area 15 itself doesn’t cost anything to enter. You could just go in and look around if you wanted.
If you want to take part in any of the attractions, though, you’ll either have to pay a la carte or purchase an experience pass. A la carte pricing depends on the attraction and day, but you can expect to pay between $5 and $35 each (not including premium attractions - more details later).
Some pricing examples are as follows (these can change at any time):
Brainstorm: $5
Particle Quest: $8
Birdly: $13.50
Haley’s Comet: $15 - $18
Wink World: $12 - $15
Dueling Axes: $35 (starting)
I advise researching the various attractions ahead of time before investing in an experience pass. If only two or three interests you, paying a la carte would be more affordable. If you decide to do several, though, an experience pass would be the way to go.
As stated above, there are five experience passes to choose from:
Access Level 1: Starts at $31
Access Level 2: Starts at $63
Access Level 3A: Starts at $116 (includes Omega Mart and good for two days)
Access Level 3B: Starts at $144 (includes Universal Horror Unleashed and good for two days)
Access Level 4: Starts at $160 (includes Omega Mart and good for three days)
Pricing listed above are current as of the publishing of this post. Exact pricing is day and time of year dependent as well. I recommend checking Area 15’s website for current pricing and inclusions.
Each pass includes and excludes certain attractions. For example, the Level 1 pass includes thirteen attractions such as Brainstorm, Museum Fiasco, Laser Maze, Liftoff, and more.
The Level 2 pass includes eighteen attractions, including popular Haley’s Comet and Wink World. Additionally, you can choose one premium attraction, such as Interstellar Arc or John Wick Experience.
The two versions of Level 3 passes (3A and 3B) include everything level two does, except one includes Omega Mart and other Universal Horror Unleashed(there’s no single pass that includes both). They’re good for two days, whereas the first two are good for one, and you can choose two premium attractions.
Level 4 is virtually the same as Level 3A, in that it includes all Area 15 attractions and Omega Mart. Though what sets it apart is it’s valid for three days and includes access to all premium attractions (Universal Horror Unleashed being the sole exception).
You can purchase a level one or level two experience pass from my preferred ticket vendor, Viator, at this link or by clicking/tapping the ad below.
Doing so helps support Inked with Wanderlust and doesn’t cost you anything more.
Area 15 Zones

There are currently two zones at Area 15, each with its own attractions, shops, and dining options. Zone one is referred to as “The Bunkers” and zone two is referred to as “The Terminals”.
This is important to distinguish as depending on which attractions(s) you’re going to be visiting, you’ll need to know which zone it’s in to avoid having to needlessly spend time walking or taking the tram to the other side.
The Bunkers (Zone 1)
The Bunkers is the original zone of Area 15. The list of attractions you’ll find in this zone include:
Area 15 complex
Meow Wolf Omega Mart (anchor attraction)
John Wick Experience
Art Island
Liftoff Bar & Ride
Odyssey Manor (dining, drinks, and performance)
Kaia (dining)
Haley’s Comet
The Beast (dining)
Oddwood (drinks)
Wink World
The Terminals (Zone 2)

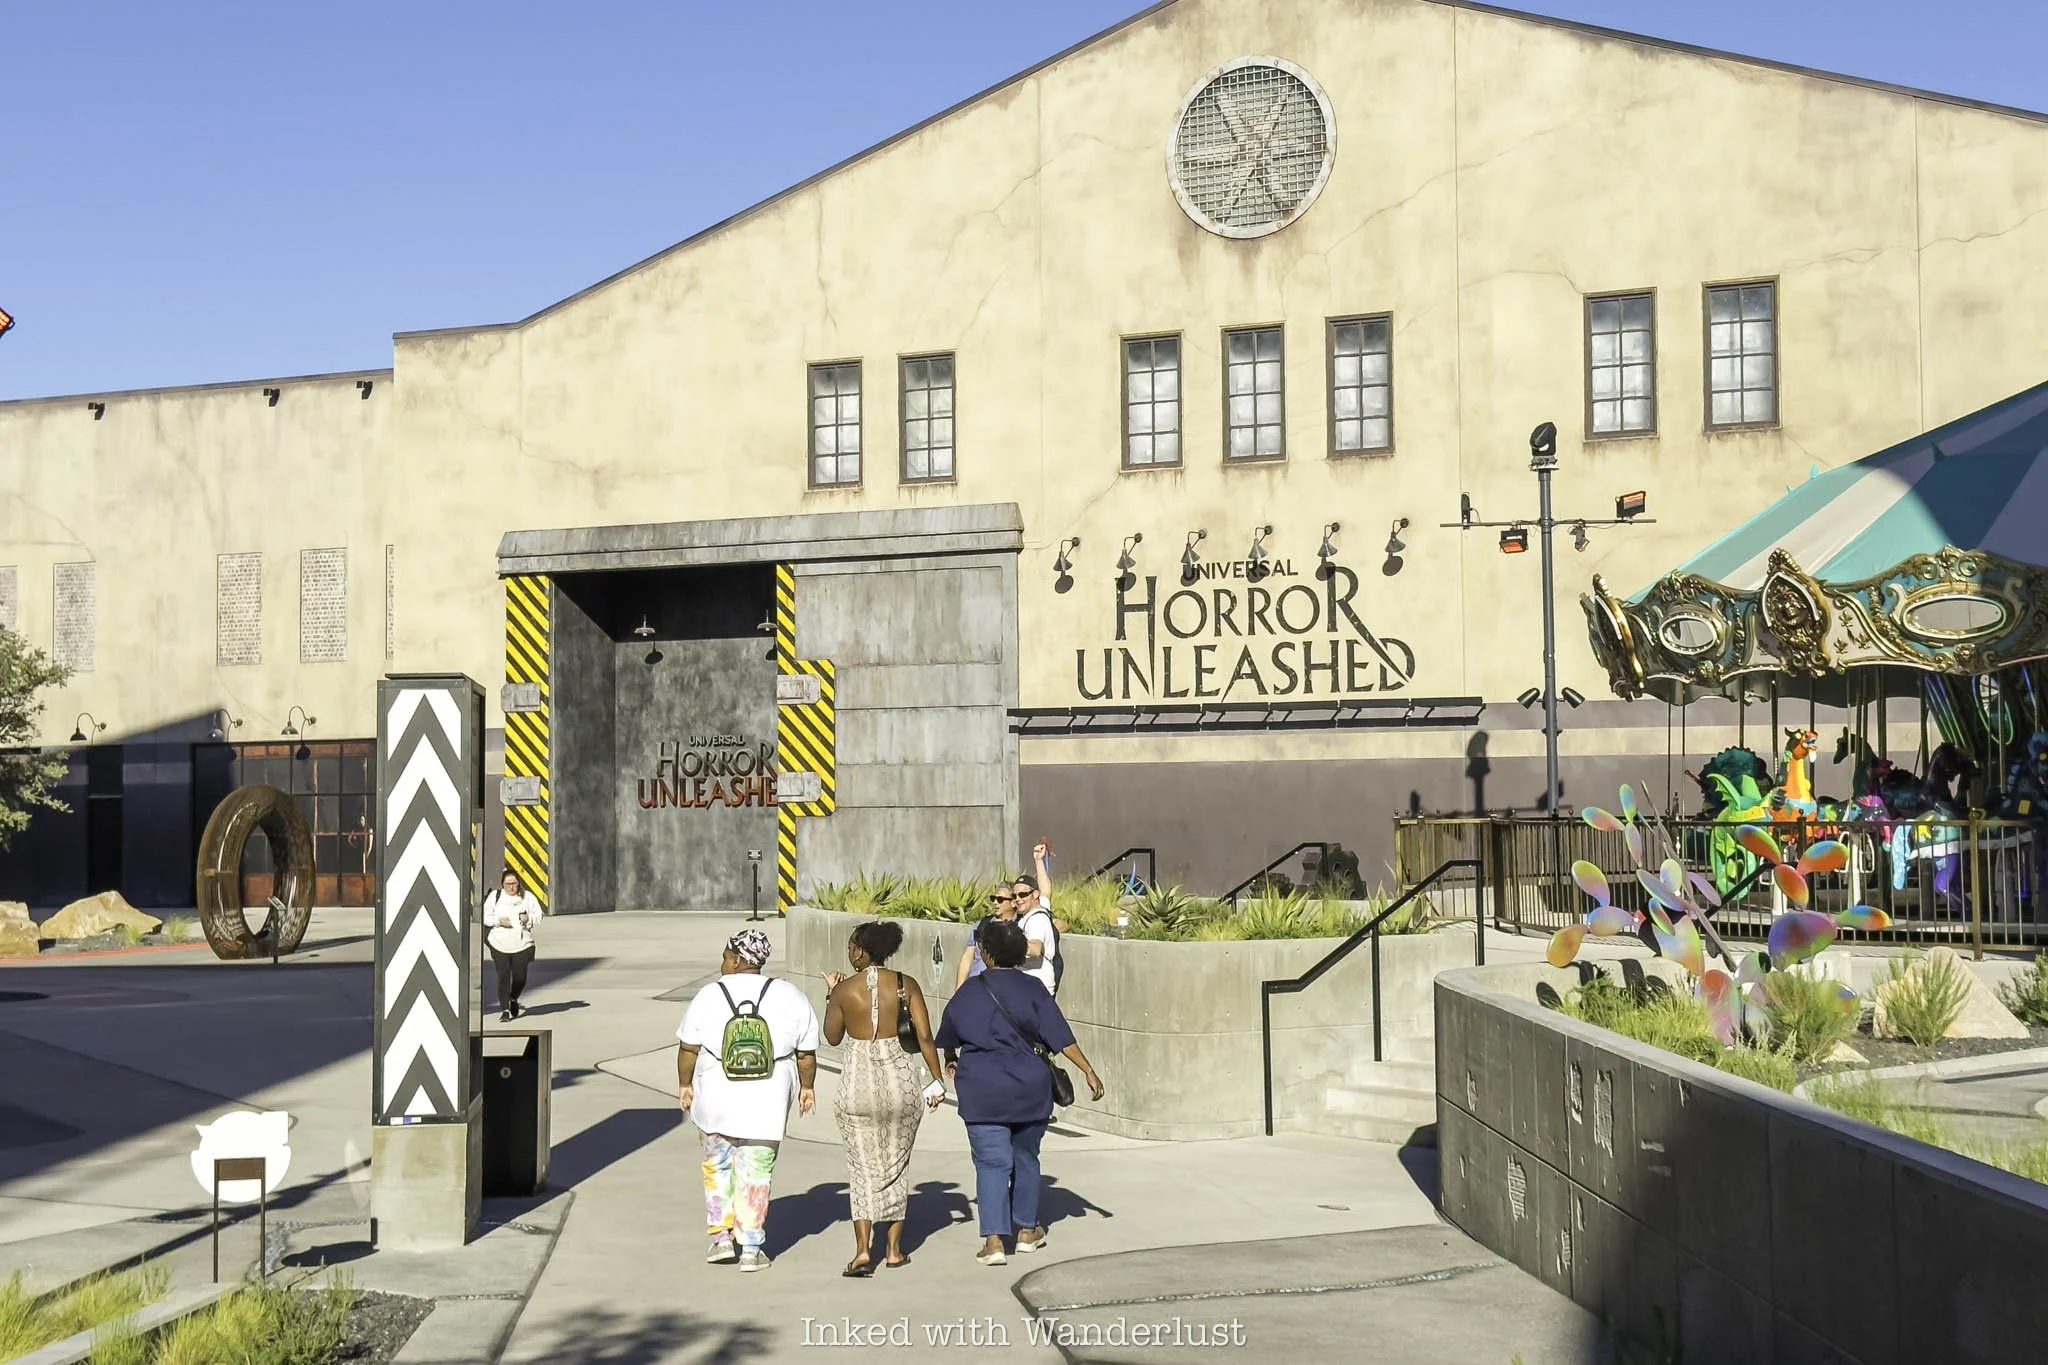
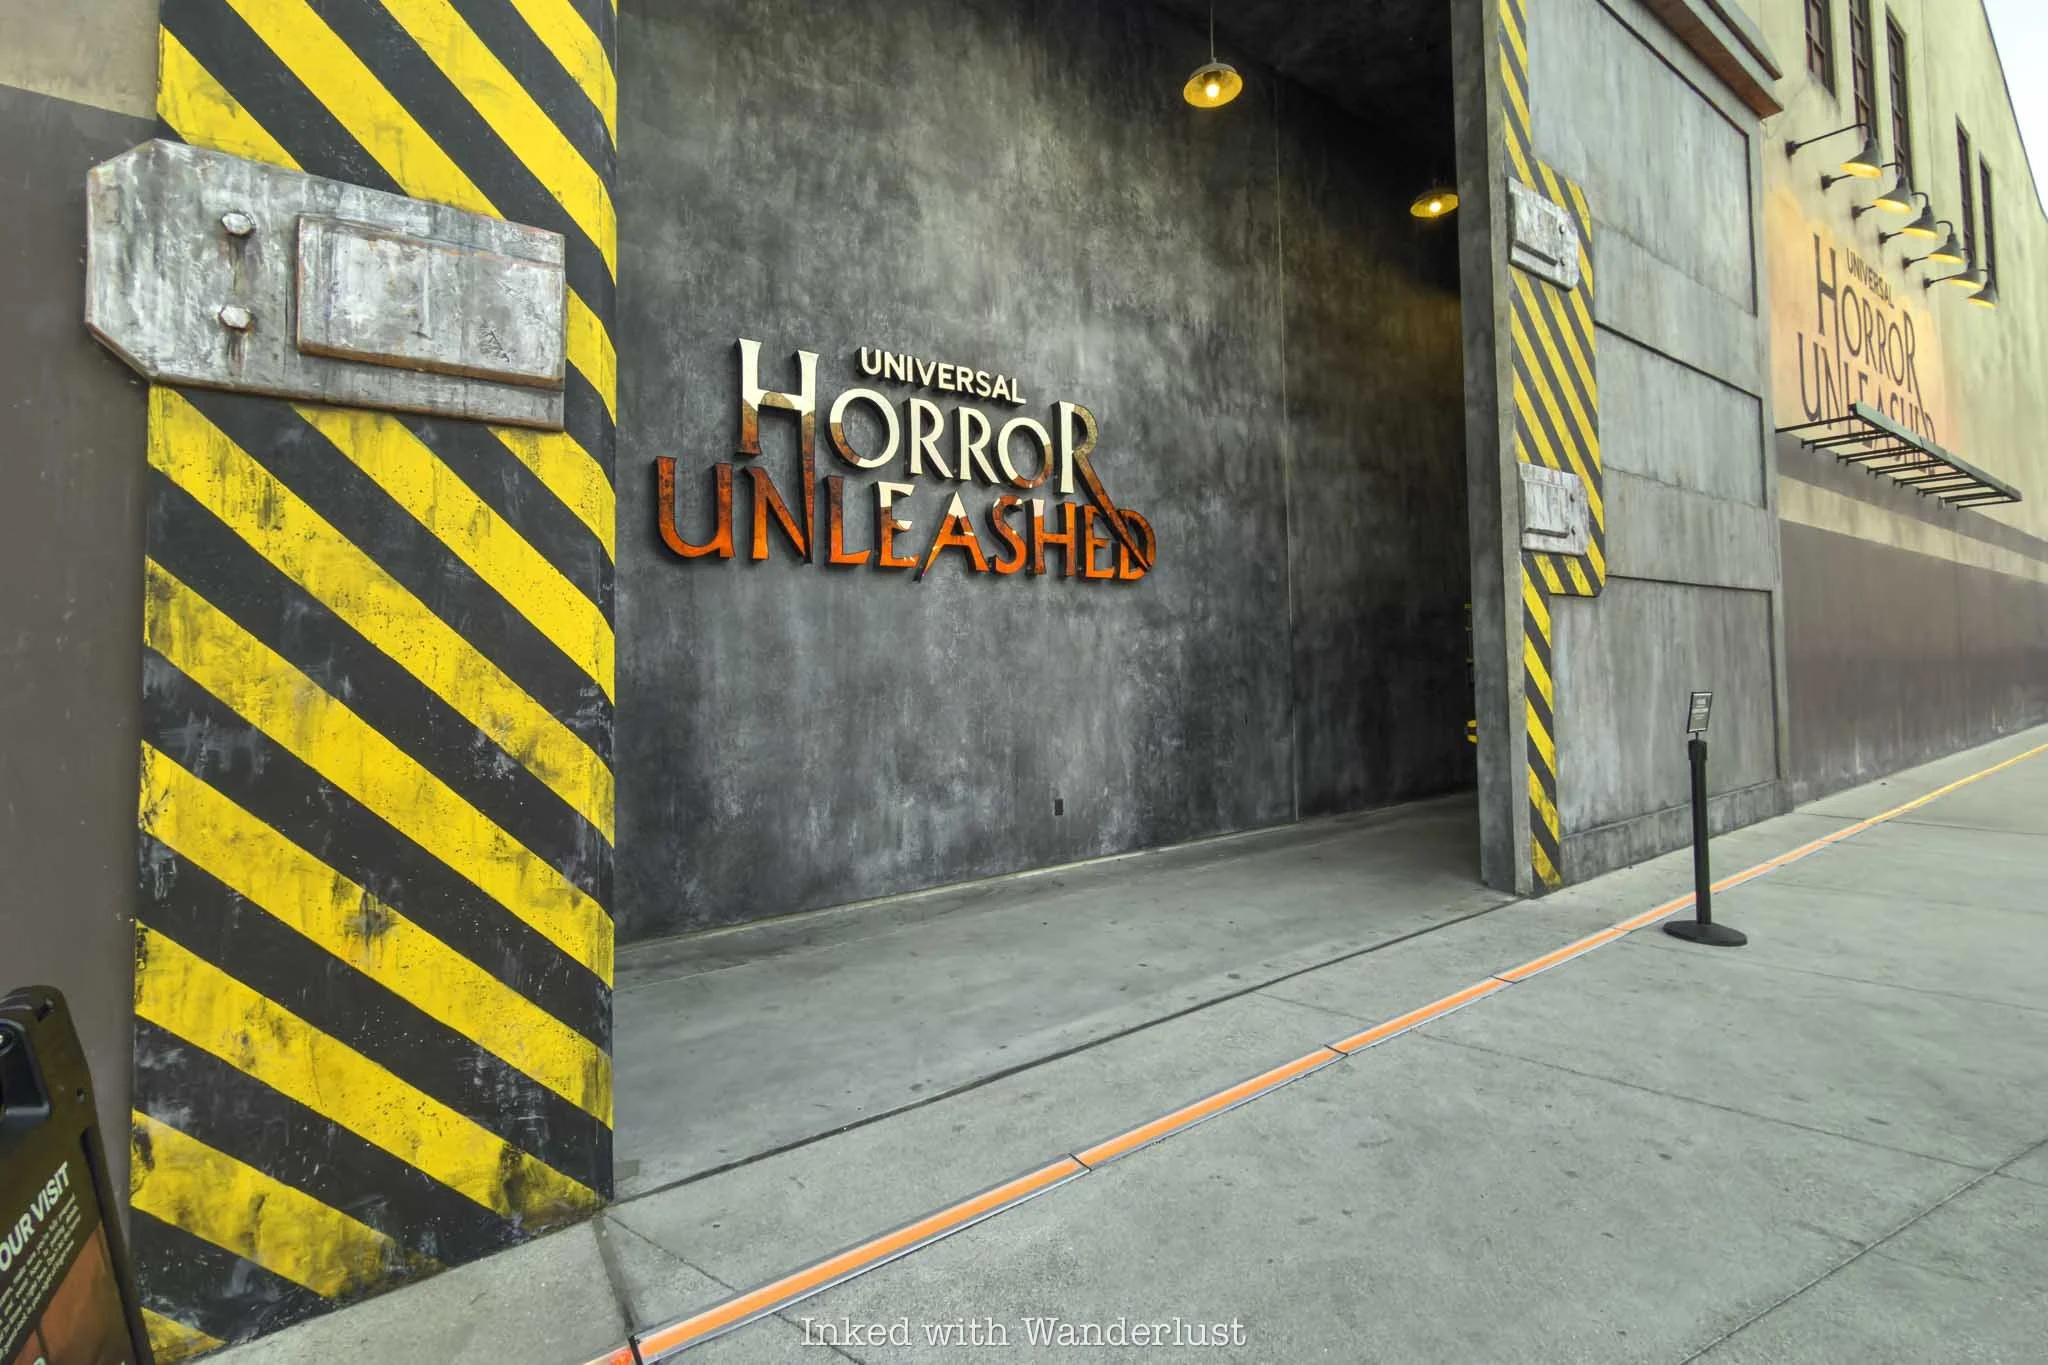
Officially opening in August 2025, the Terminals (zone two) is a 20-acre expansion that features headline anchor attraction, Universal Horror Unleashed. Here, you’ll also find shops, dining options, art installations, and more.
A list of said attractions in The Terminals include:
Universal Horror Unleashed (anchor attraction)
Interstellar Arc
Looper
Gateway Plaza
Great Big Game Show
The Escape Game
Museum of Ice Cream (opening July 3, 2026)
Runway Plaza
ALTAIR Lounge (event space)
Grounded Grills (dining)
Dolls Kill (retail)
Eye Dropper
Saint Honore Doughnuts & Beignets (coming soon)
iFly Indoor Skydiving (coming soon)
Nacho Daddy (coming soon)
Good Company Burgers (coming soon)
Fuku (coming soon)
Chilangos Tacos (coming soon)
The Bowl (coming soon)
Alien Pizza Party (coming soon)
Premium Attractions

Premium attractions at Area 15 are those that are part of the entertainment district as whole but not necessarily operated by Area 15. In simple terms, think of Area 15 as a mall. While malls themselves will have their own features, they’re largely fueled by third-party businesses.
Premium attractions are only included in the higher-tiered experience passes (level three or higher). Alternatively, you can purchase tickets through each one directly.
These premium attractions include:

Meow Wolf Omega Mart (Zone 1 anchor)
Universal Horror Unleashed (Zone 2 anchor)
Interstellar Arc
John Wick Experience
Odyssey Manor
The Escape Game
Great Big Game Show
Eye Dropper
Museum of Ice Cream (opening July 3, 2026)
iFly Indoor Skydiving (coming soon)
Meow Wolf’s Omega Mart opened in 2021 (read my extensive post here) and has since become Area 15’s most popular attraction, often eclipsing that of Area 15 itself. Furthermore, it’s the only premium, third-party attraction located inside the Area 15 bunker.

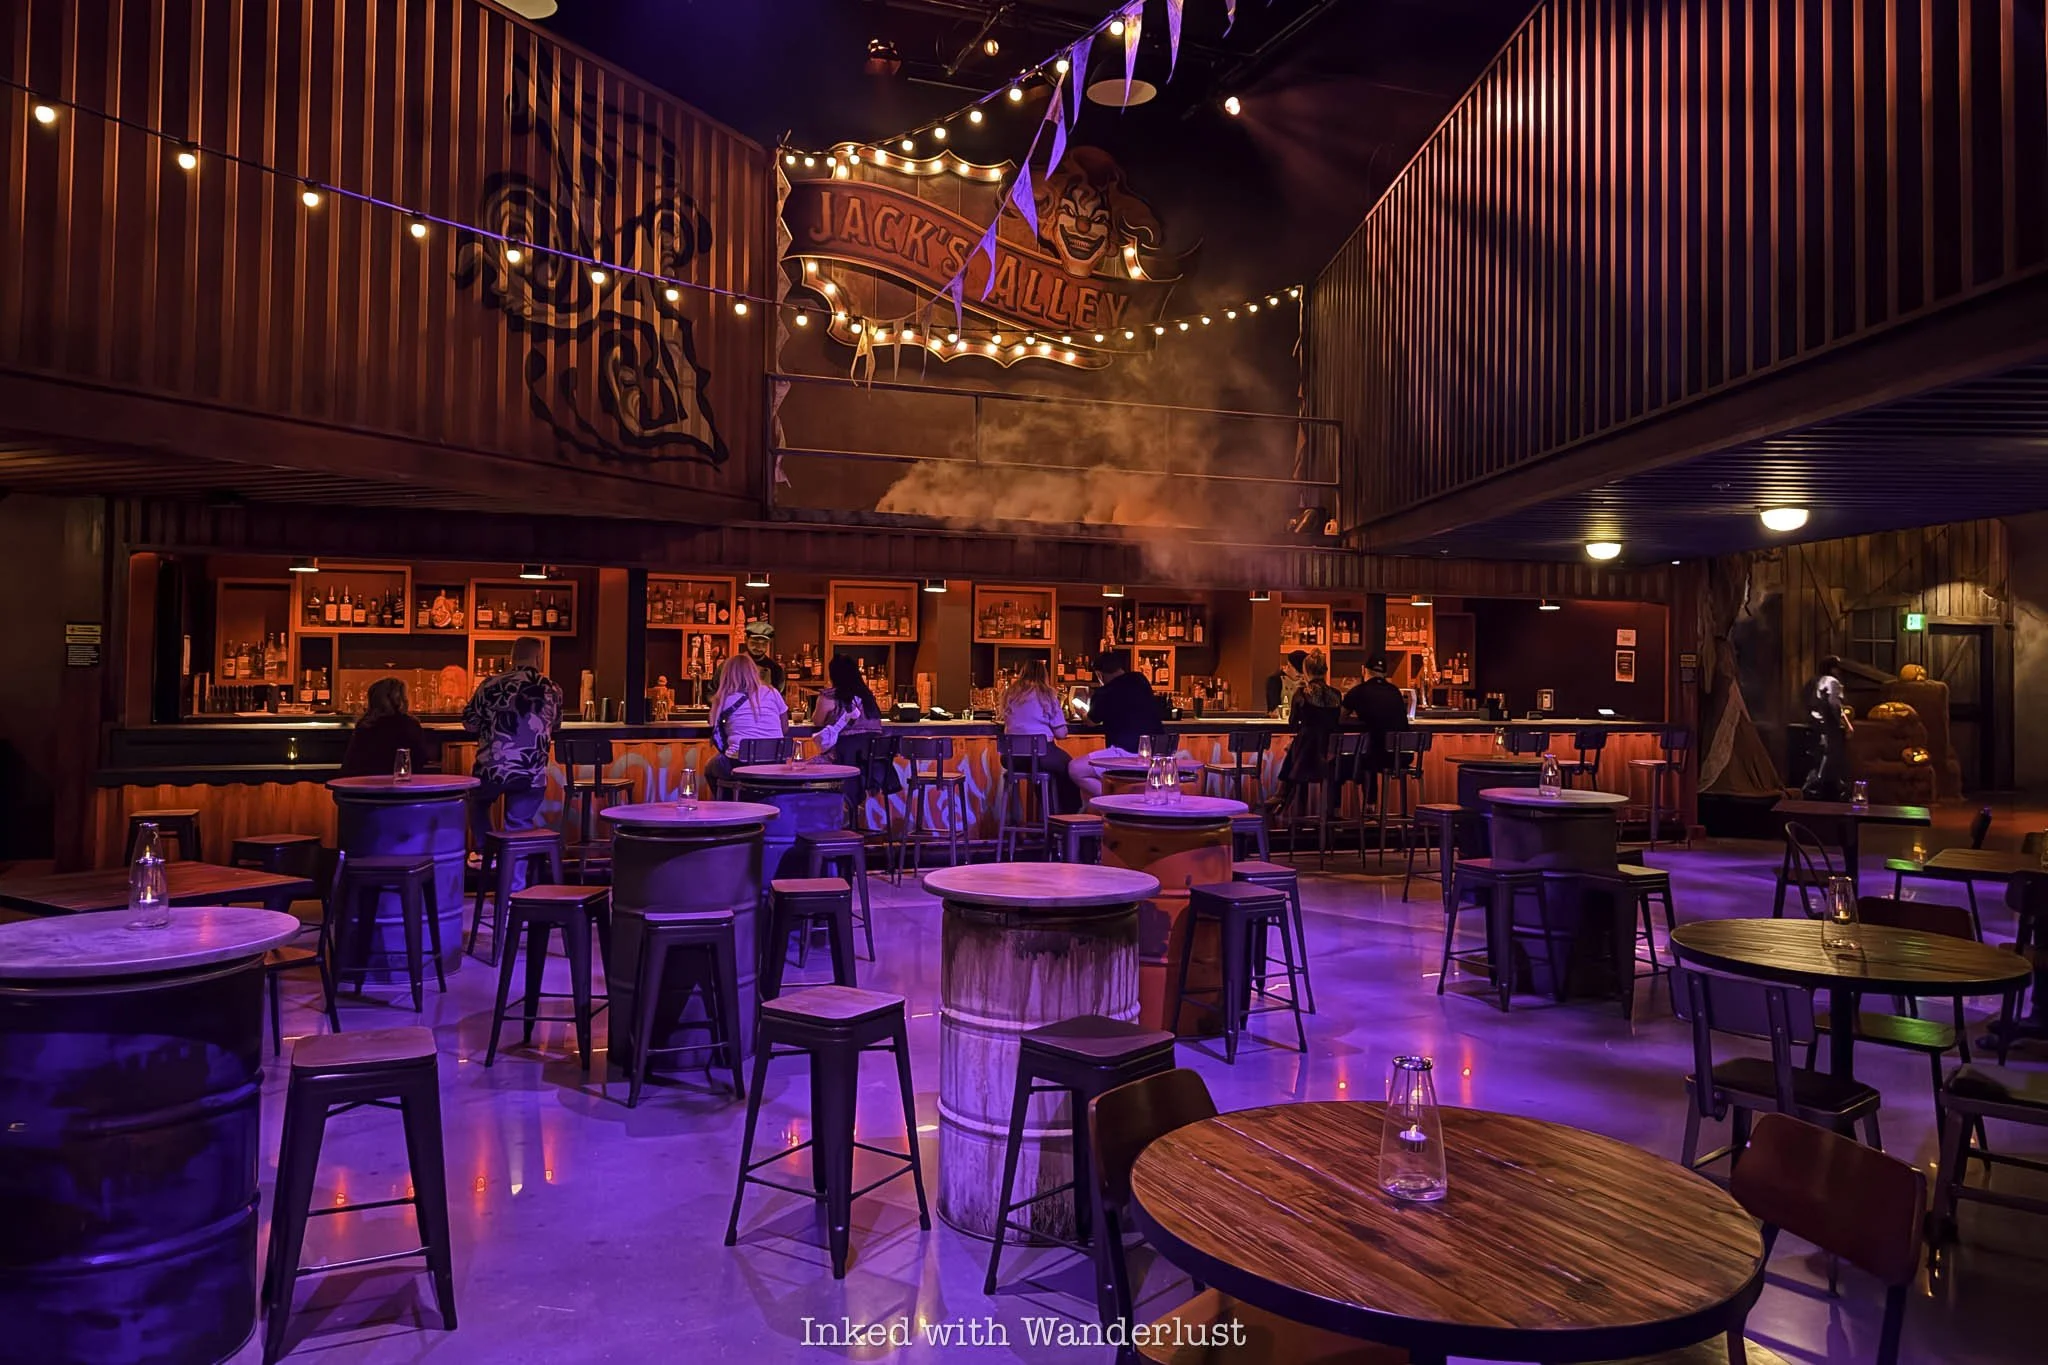
Universal Horror Unleashed, located in the Terminals (Zone 2) is Area 15’s year-round haunt. Brought to the complex by Universal, Horror Unleashed features four themed haunted houses, character experiences, dining options, bars, and live entertainment.
I won’t get too deep in UHU here, as I’ve previously written an extensive review of my experience at Horror Unleashed (that you can read here). If you’re a horror fanatic, or even just mildly curious, I highly recommend it.

Coming soon to the Area 15 Entertainment District is the Museum of Ice Cream. With several locations throughout the world, their upcoming Vegas location will be their biggest one yet, advertised to eclipse their flagship New York venue in both size and scope.
Plans include 14 immersive, Las Vegas-inspired installations, a “sprinkles filled banana boat” canal ride, an ice cream wedding chapel, and an expansion of their popular sprinkles pool. The museum is expected to open sometime in 2026.
***Announced June 13: Museum of Ice Cream opens July 3, 2026
Area 15 Dining and Drink Options
Within the vast Area 15 Entertainment District, there are a plethora of dining and drink options to satisfy just about anyone. The list (and their locations) include:
The Beast (Area 15 - ground level)
The Beast food truck (outside - Art Island)
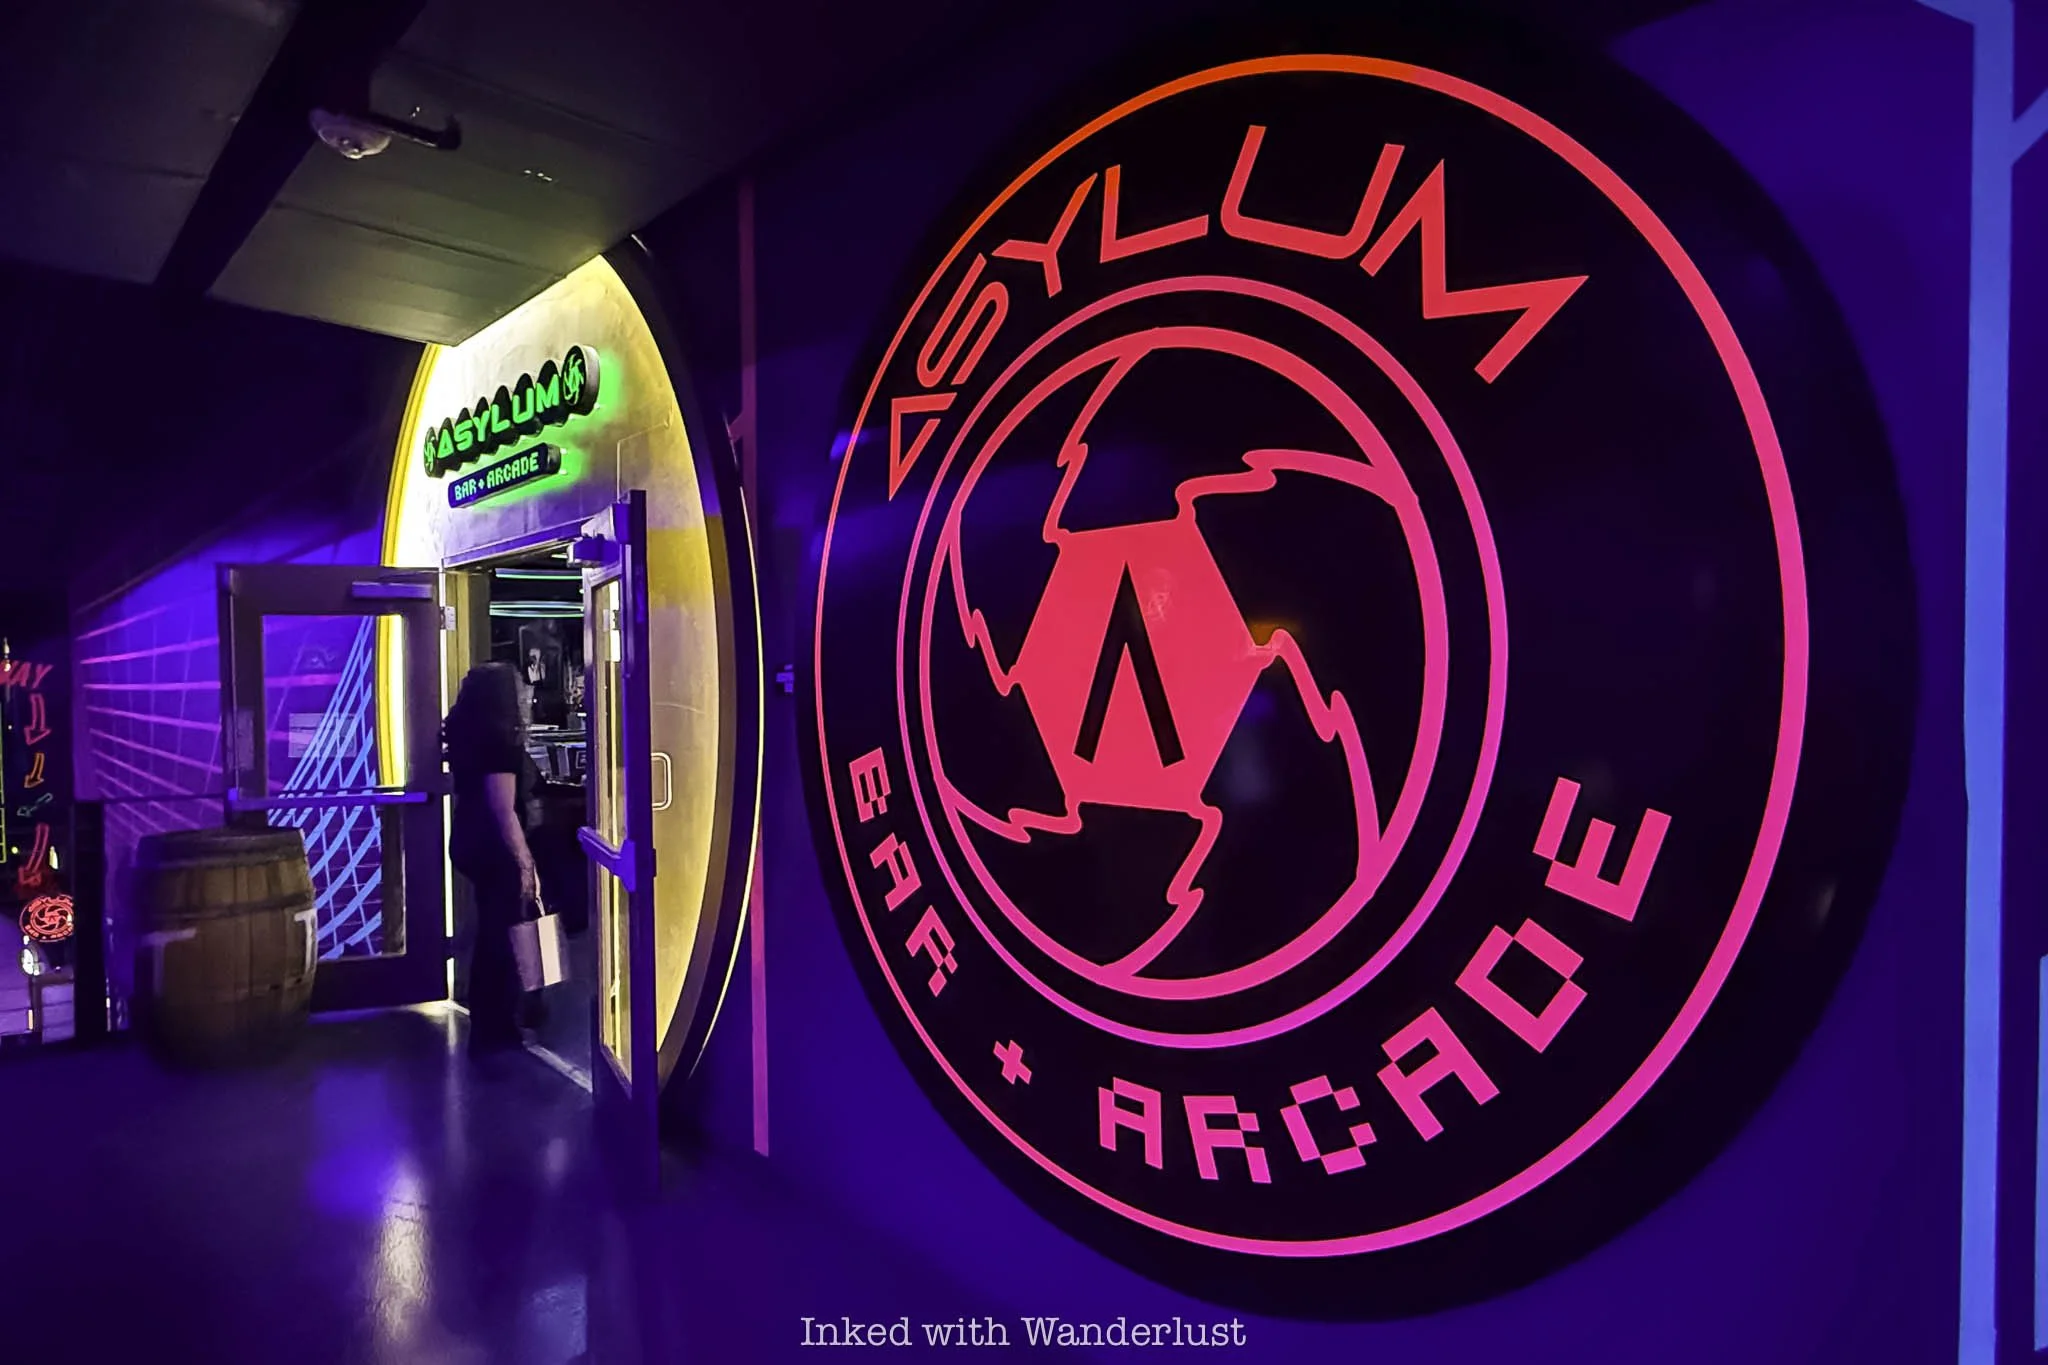
Asylum Bar & Arcade (Area 15 - second level)
Conduit Cafe (Area 15 - ground level)
Dream Weaver (Area 15 - ground level)
Oddwood Bar (Area 15 - ground level)
Datamosh (Omega Mart)
Grounded Grills (The Terminals - Runway Plaza)
Liftoff Bar & Ride (outside - Art Island)
Looper (The Terminals - Gateway Plaza)
Premiere House (Universal Horror Unleashed)
Rough Cuts (Universal Horror Unleashed)
The Broiler (Universal Horror Unleashed)
Jack’s Alley Bar (Universal Horror Unleashed)
On my wife and I’s visit to Area 15 we enjoyed lunch at Kaia, an Asian-electric sushi and noodle restaurant. Its interior matches the creative, artistic spirit of Area 15. Warm lighting, bold artwork, and contemporary design elements give the eatery a distinct personality.
I tried their stand-out dish, Birria Ramen. It’s packed with rich, slow-cooked flavors with a comforting broth that felt both indulgent and unique. Their sushi line-up features traditional favorites as well as inventive, beautifully presented rolls.

Our finale was the bold, eye-catching Ube Cheesecake. It featured the distinctively sweet, nutty flavor of ube, giving the cheesecake a rich purple hue and a taste that’s slightly earthy, but pleasantly sweet. It’s smooth, creamy, and checks all the boxes.
***You can read my comprehensive review of Kaia at this link!
For post-game drinks we headed across the venue to Oddwood Bar. Anchored by its glowing centerpiece tree, the space is filled with vibrant colors, shifting lights, and an energy reflective of Area 15’s atmosphere.

It was a great place to sip on a crafted cocktail while taking in the scenery surrounding us. If you’re like me, you may end up spending more time admiring the environment than looking at the menu.
Even among Area 15’s many visual spectacles, Oddwood managed to stand out as an attraction in its own right. The multi-colored illuminated tree catches your eye while managing to bring you in, if nothing else, out of pure curiosity.
There are many additional dining options coming soon to the property, mostly within The Terminals zone. Everything from gourmet doughnuts and smash burgers to pizza and protein bowls prepared by robotic chefs are in the pipeline.
How Many Days Should You Spend at Area 15…

For most visitors, I’d recommend budgeting and planning for half a day to a full day, depending entirely on how much you want to do. I suggest researching each Area 15 attraction and deciding on which ones (how many) you want to experience.
Omega Mart is the top draw for a reason, so I highly recommend starting your day there as it gets packed quickly. They either open at 10am or 11am, depending on the day. My suggestion would be to get there right at opening.

If you’re wanting to visit Universal Horror Unleashed as well, that doesn’t open until 4pm. If you plan accordingly and don’t get tied up on too many Area 15 attractions, it’s entirely possible to visit Omega Mart, a handful of Area 15 attractions, and Horror Unleashed in one day.
Conversely, if Horror Unleashed doesn’t interest you, you could easily knock out Omega Mart and a few other attractions in a half day. Each attraction (aside from Omega Mart) takes five to ten minutes each to do. Omega Mart will easily set you back a couple hours on its own.
Multiple days only comes into the equation when considering additional premium attractions like Interstellar Arc or the John Wick Experience, and/or you’re wanting to experience all of what Area 15 proper has to offer. If that’s you, two days would be essential.
Is Area 15 Worth It?

If you enjoy immersive attractions, interactive art, and outside-the-norm experiences, then Area 15 is absolutely worth a visit. It’s one of the most unique attractions in Las Vegas because it combines art, bars, restaurants, rides, virtual reality, and interactive exhibits into a single venue.
Since it acts as a pick-your-poison type of attraction, controlling costs is manageable. You can do as little or as much you want, or pay nothing to walk in and simply explore the space, or simply just enjoy a meal with your partner.
Like most things, it has its drawbacks. If left unchecked, it can get very expensive to visit, crowds can get dense (particularly on weekends and evenings), and let’s just say not all of the attractions were created equal.
The best attractions, in my opinion, are Omega Mart, Universal Horror Unleashed, Interstellar Arc, Wink World, Liftoff (at night is best), Haley’s Comet, Museum Fiasco, and Eye Dropper. When it opens, I’m sure Museum of Ice Cream will make this list as well.
If you go with a plan and budget, Area 15 can be an enjoyable experience for couples, friend groups, or the whole family. Much like a trip to Disney, it’s a place where children, parents, and couples alike can all have fun together.
See my review of my experience at Universal Horror Unleashed to decide if it’s for you. Also, if you’ve never experienced Omega Mart, read my comprehensive post to learn more about it.
If you’re looking for an on-strip activity, read about my experience at Flyover Las Vegas, as well as my review of the Happy Half Hour ride on High Roller.

My Experience at Universal Horror Unleashed in Las Vegas (+ Info)
Opening in 2025 as one of the newest additions to ever-expanding Area 15 complex, located roughly one mile west from the Las Vegas Strip, Universal Horror…
Disclosure: This post contains affiliate links. If you make a purchase through these links, I may earn a small commission at no additional cost to you. I only recommend products or services that I believe will add value to my readers.

Opening in 2025 as one of the newest additions to the ever-expanding Area 15 complex, located roughly one mile west from the Las Vegas Strip, Universal Horror Unleashed became one of the region’s first year-round haunt.
Universal Horror Unleashed delivers an immersive horror experience that feels more like stepping into a series of nightmare-ish movie sets than visiting a traditional attraction.
The detailed environments, talented and committed scare actors and impressive special effects create a near-constant sense of tension, even between scares. For horror fans, it’s one of the most unique and ambitious attractions currently in Las Vegas.
In this post, I’m going to cover several topics, including getting there, where to get tickets (and discounts), how much it costs, what to expect and dining options, while also articulating my experience to help you decide whether or not it’s for you. Let’s get into it!
Universal Horror Unleashed Location and Parking
Universal Horror Unleashed (will go by the initialism, UHU, going forward) is located on the vast grounds of the Area 15 complex, but not attached to Area 15 itself. Area 15 is in Zone 1 (or, “The Bunkers”) while UHU is in Zone 2 (or, “The Terminals”).
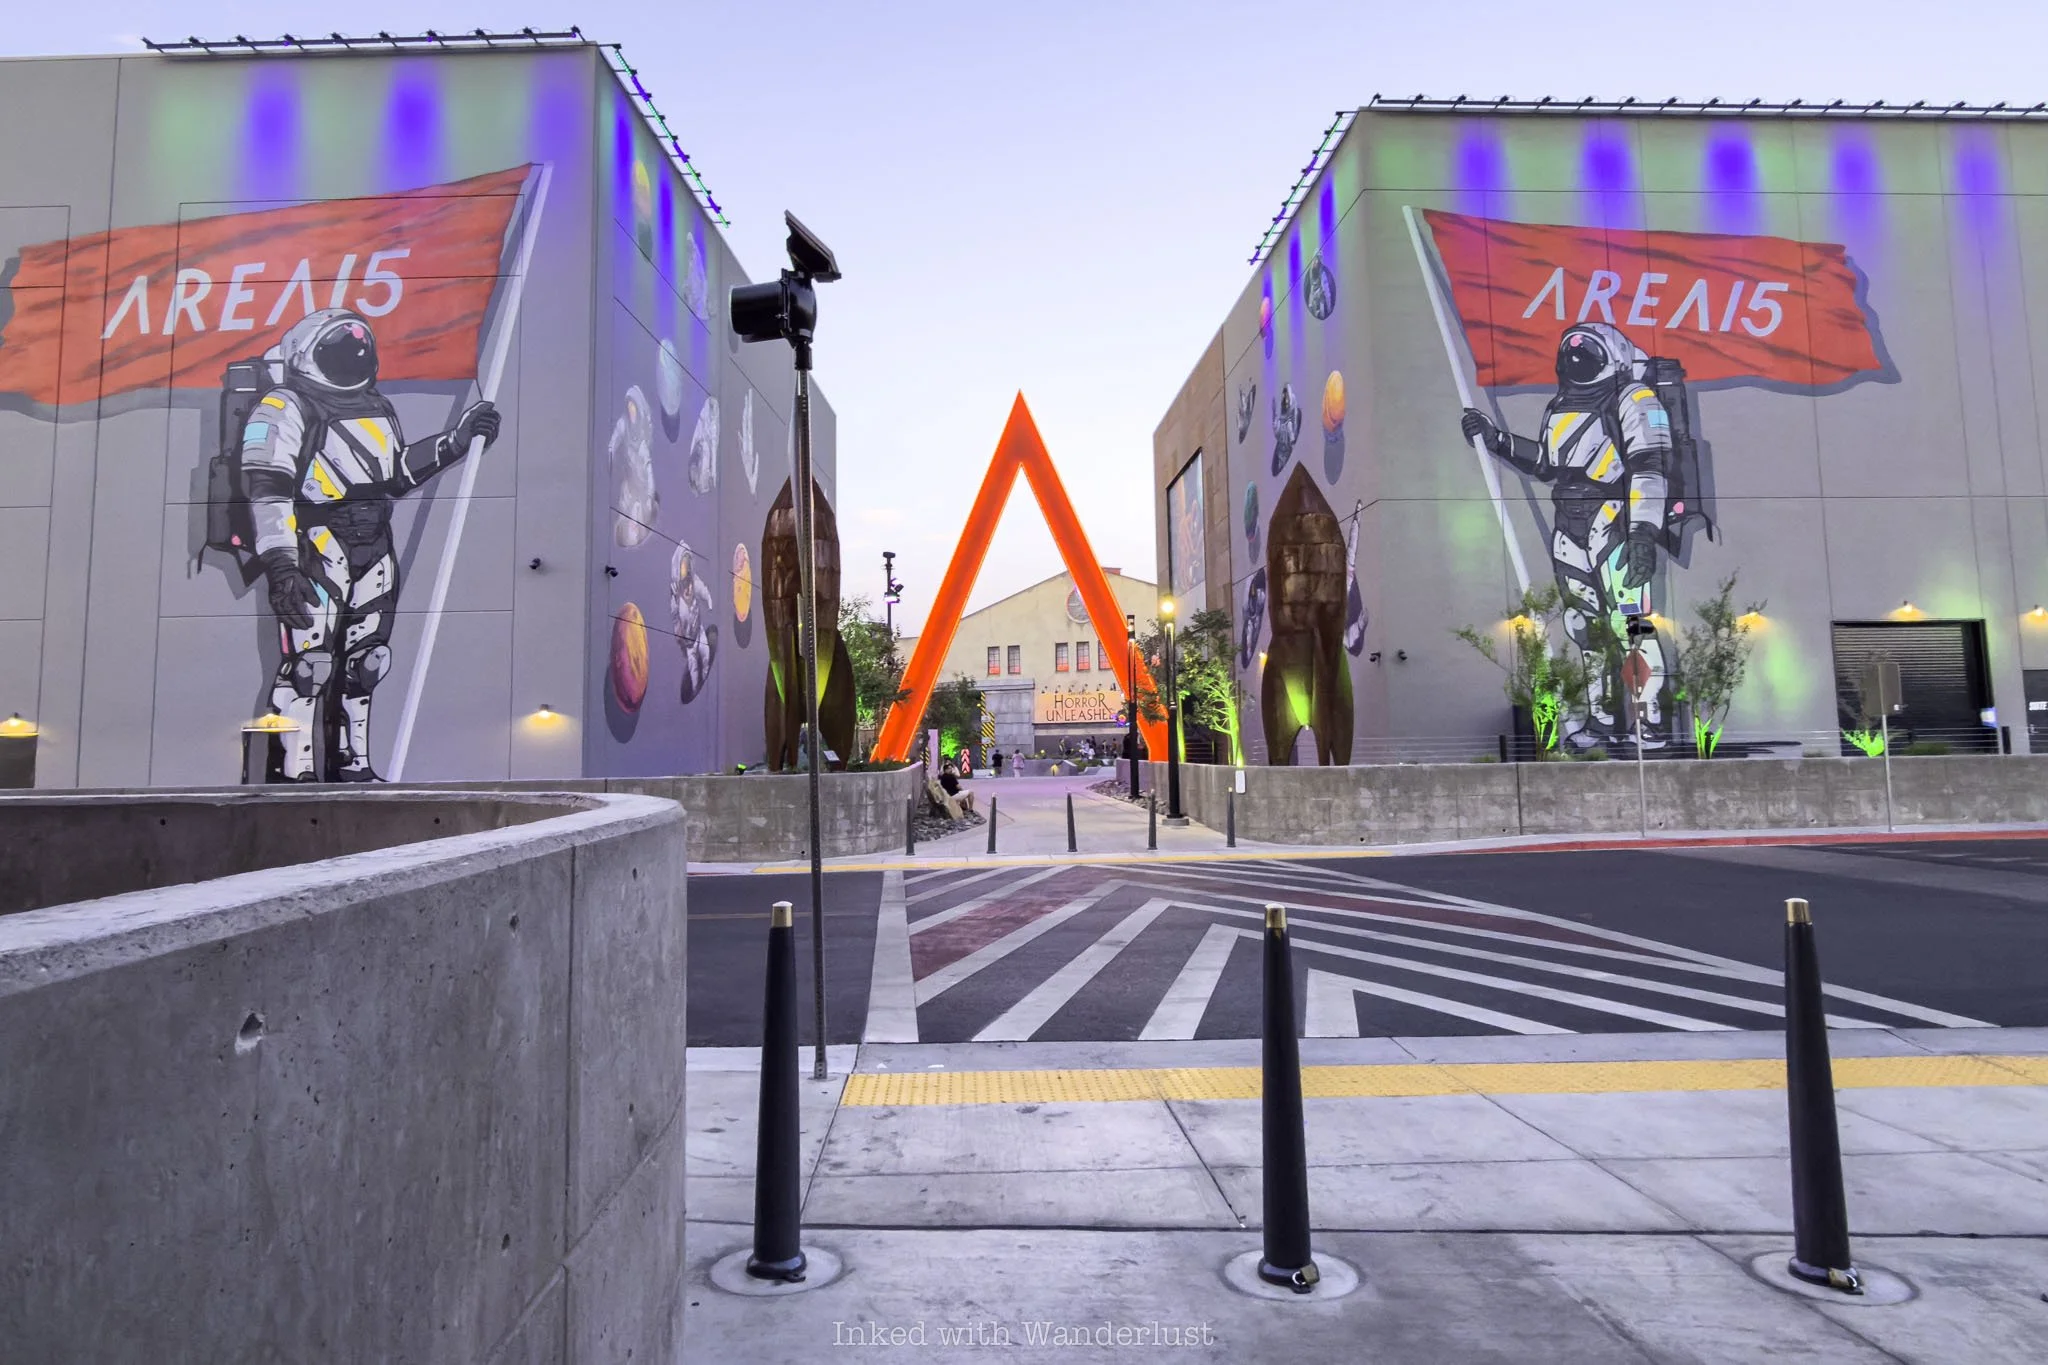
Due to its popularity, it isn’t difficult to find as there is plenty of signage pointing the way. You’ll find it between and beyond two other giant buildings donned in various Area 15-themed artwork (pictured above).
If you’re driving in, parking is plentiful in the multi-story parking garage just across the road. Parking is free for Nevada residents (vehicle must have a Nevada plate) and out-of-towners pay a reasonable daily rate of $6.99.
The ground level of the parking garage is the drop off/pick up area. Again, this is just across the road from the UHU building. This is also where Area 15’s tram picks up and drops off. If you’re already at Area 15, the free tram will transport you between venues.
Remember, UHU (and Area 15 as a whole) isn’t on the Las Vegas Strip. It’s roughly one mile (give or take) from the strip’s center portion. There are numerous transport options, including ride share (what we did) and taxi.
There are no hotels on property. A handful of the closest strip and strip-area hotels to Area15 include Rio, Treasure Island, Resorts World, and Towneplace Suites Stadium District. These hotels are a seven minute or less drive away.
Universal Horror Unleashed Tickets and Hours
Unlike nearby Area 15, admission tickets are required in order to enter UHU, as the action begins almost as soon as you walk inside. There are several ticket types and ways to purchase them.
You can either purchase tickets either directly through Universal, as part of an Area 15 “Experience Pass” (which includes several Area 15 experiences as well), or through my preferred ticket partner, Viator, which offers discounts.

Through Universal, there are three ticket tiers:
General Admission (unlimited access)
General Admission (one-time access)
Fraidy Cat
The difference between the general admission tickets is one grants unlimited access to each haunted house and the other grants one-time access to each. These tickets offer the highest value, but the one-time access ticket is the most popular.
The Fraidy Cat ticket, as the name would imply, is for those who would prefer to skip the haunted house aspect of UHU and simply access the common areas, which include the bars, restaurants and interacting with the scare actors.
Ticket Price and Discounts

Exact ticket prices are dependent on time of year and day of week. Generally, summer months garner the highest price range with Saturday and Sundays commanding the high-end of said range.
Unlimited access tickets start at $89 each and top out at $129 (at time of publishing). Looking at the summer calendar, $99 appears to be the cheapest option and those are all weekdays. Into the fall and winter is when you’ll see the $89 price-point more.
One-time access tickets start at $69 each and peak at $89 throughout the summer. If you reside in Nevada, you can take advantage of their resident discount on one-time access tickets, which is currently $10 less than face pricing.
*Note: There’s no separate pricing for adults and children
The “Fraidy Cat” ticket ranges between $29 and $49. Remember, this is for those who still want to go but don’t want to walk through the haunted houses. These ticket holders will only have access to common areas.
Furthermore, there’s a VIP package that includes tickets for six, unlimited access to each haunted house, a $450 dining credit with reserved table and bottle service, and additional perks, starting at $2,750.
**My preferred ticket vendor, Viator, offers discounted one-time access tickets. They also vary according to day and season but you’ll pay $8 - $10 less per ticket than if purchased through Universal directly. You can take advantage of that discount at my link here.
Hours of Operation

Universal Horror Unleashed is a year-round operation, but not a daily one. It’s currently closed on Mondays, Tuesdays and Wednesdays, operating only Thursday - Sunday.
Additionally, it opens at 4:00pm daily and closes at 10:30pm. Admission is granted anytime up to 8:30pm, as the entry cut-off window is two hours prior to closing. My suggestion is to arrive as close to opening time as possible to maximize value.
My Experience at Universal Horror Unleashed
Arrival
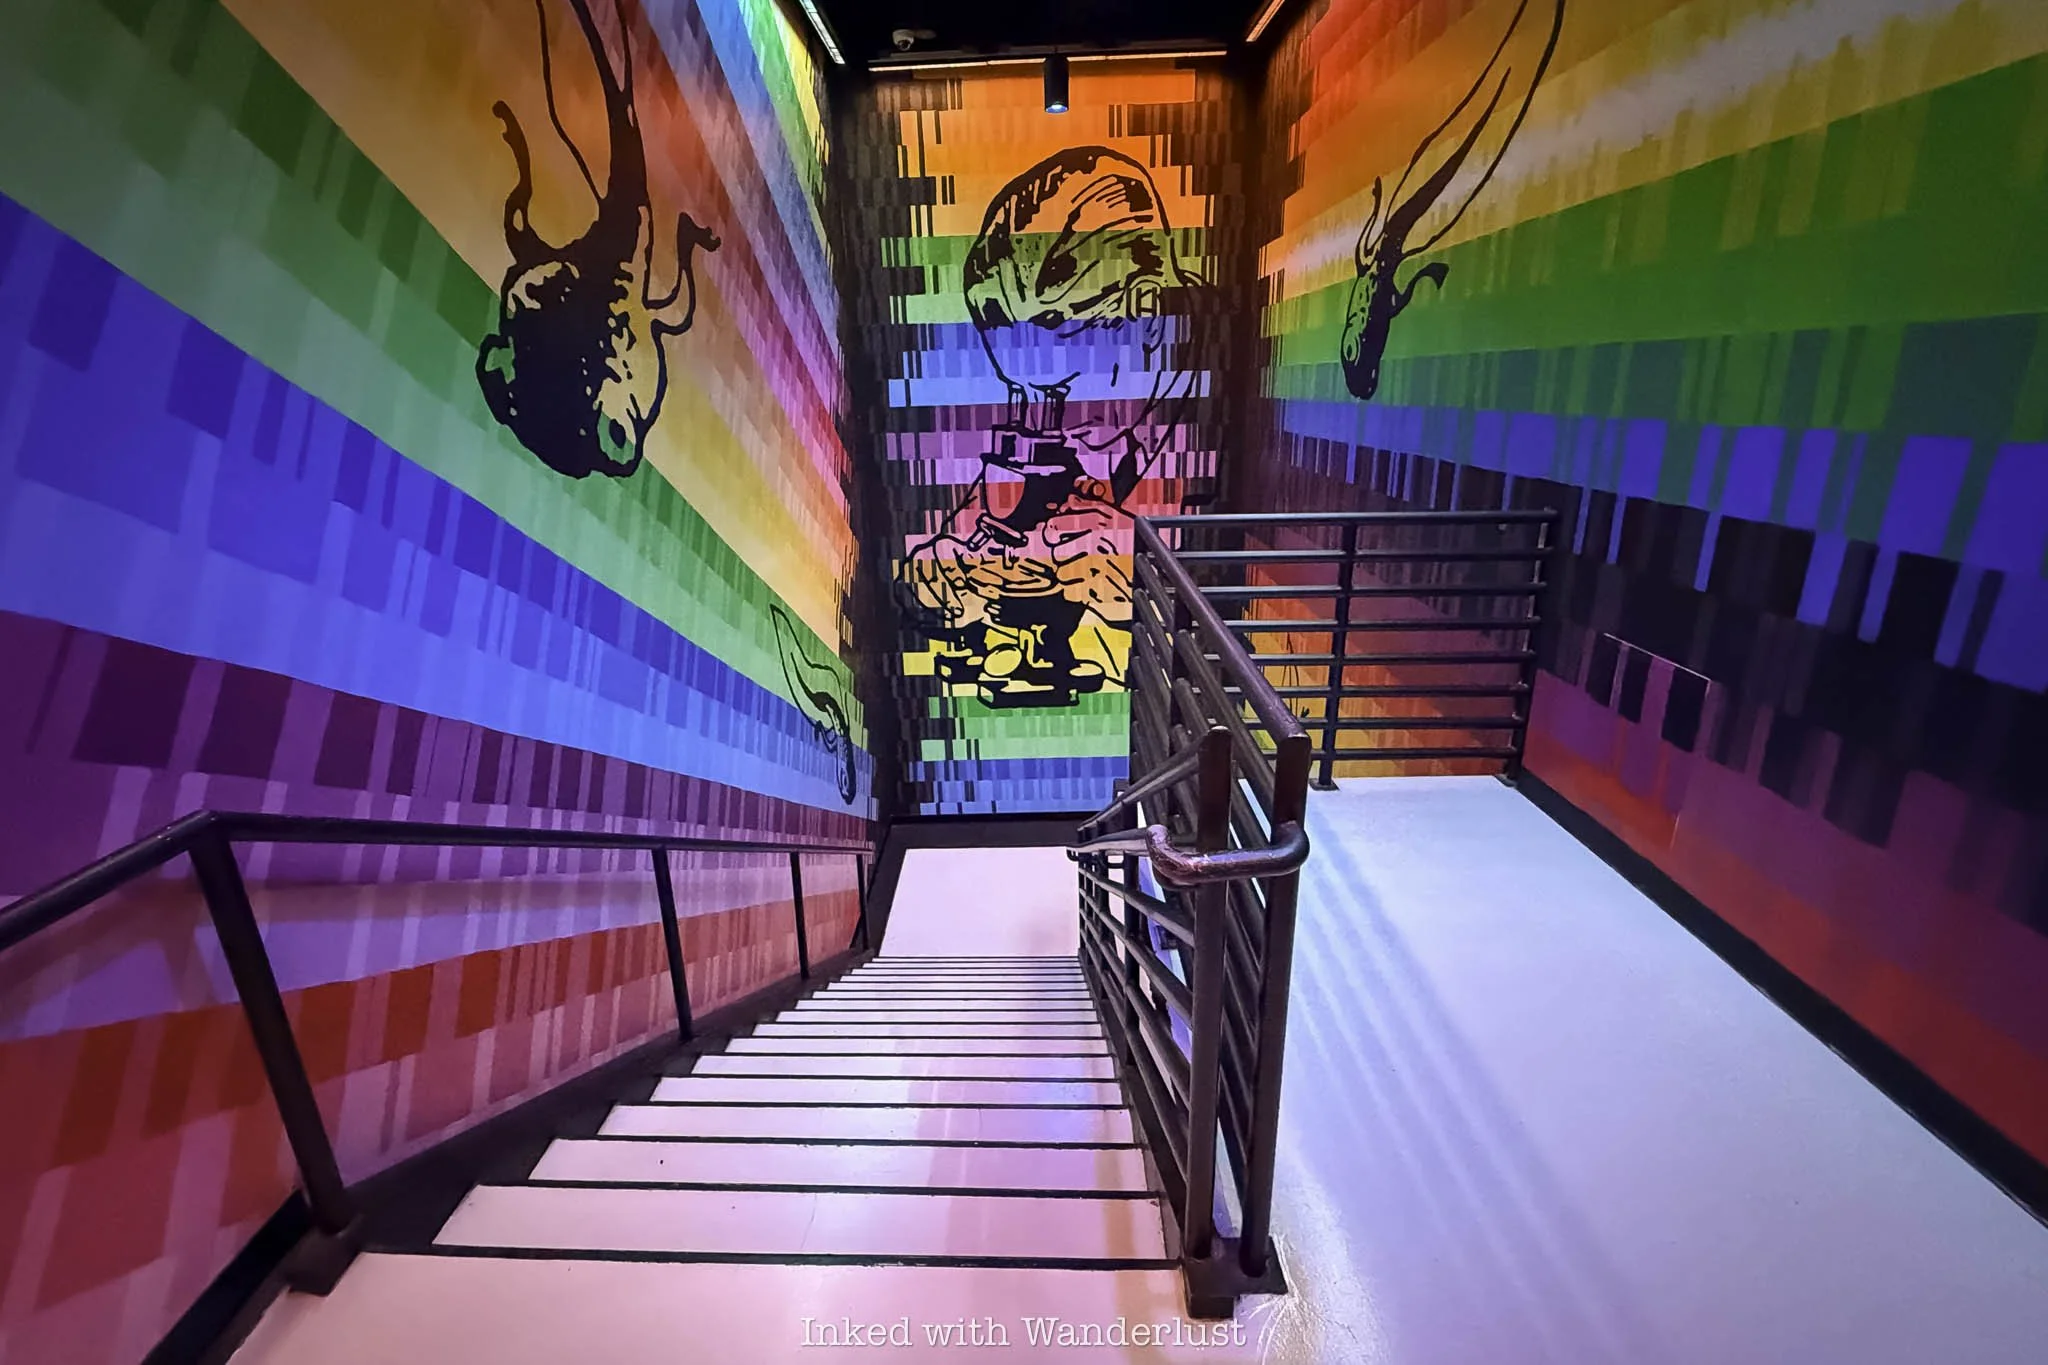
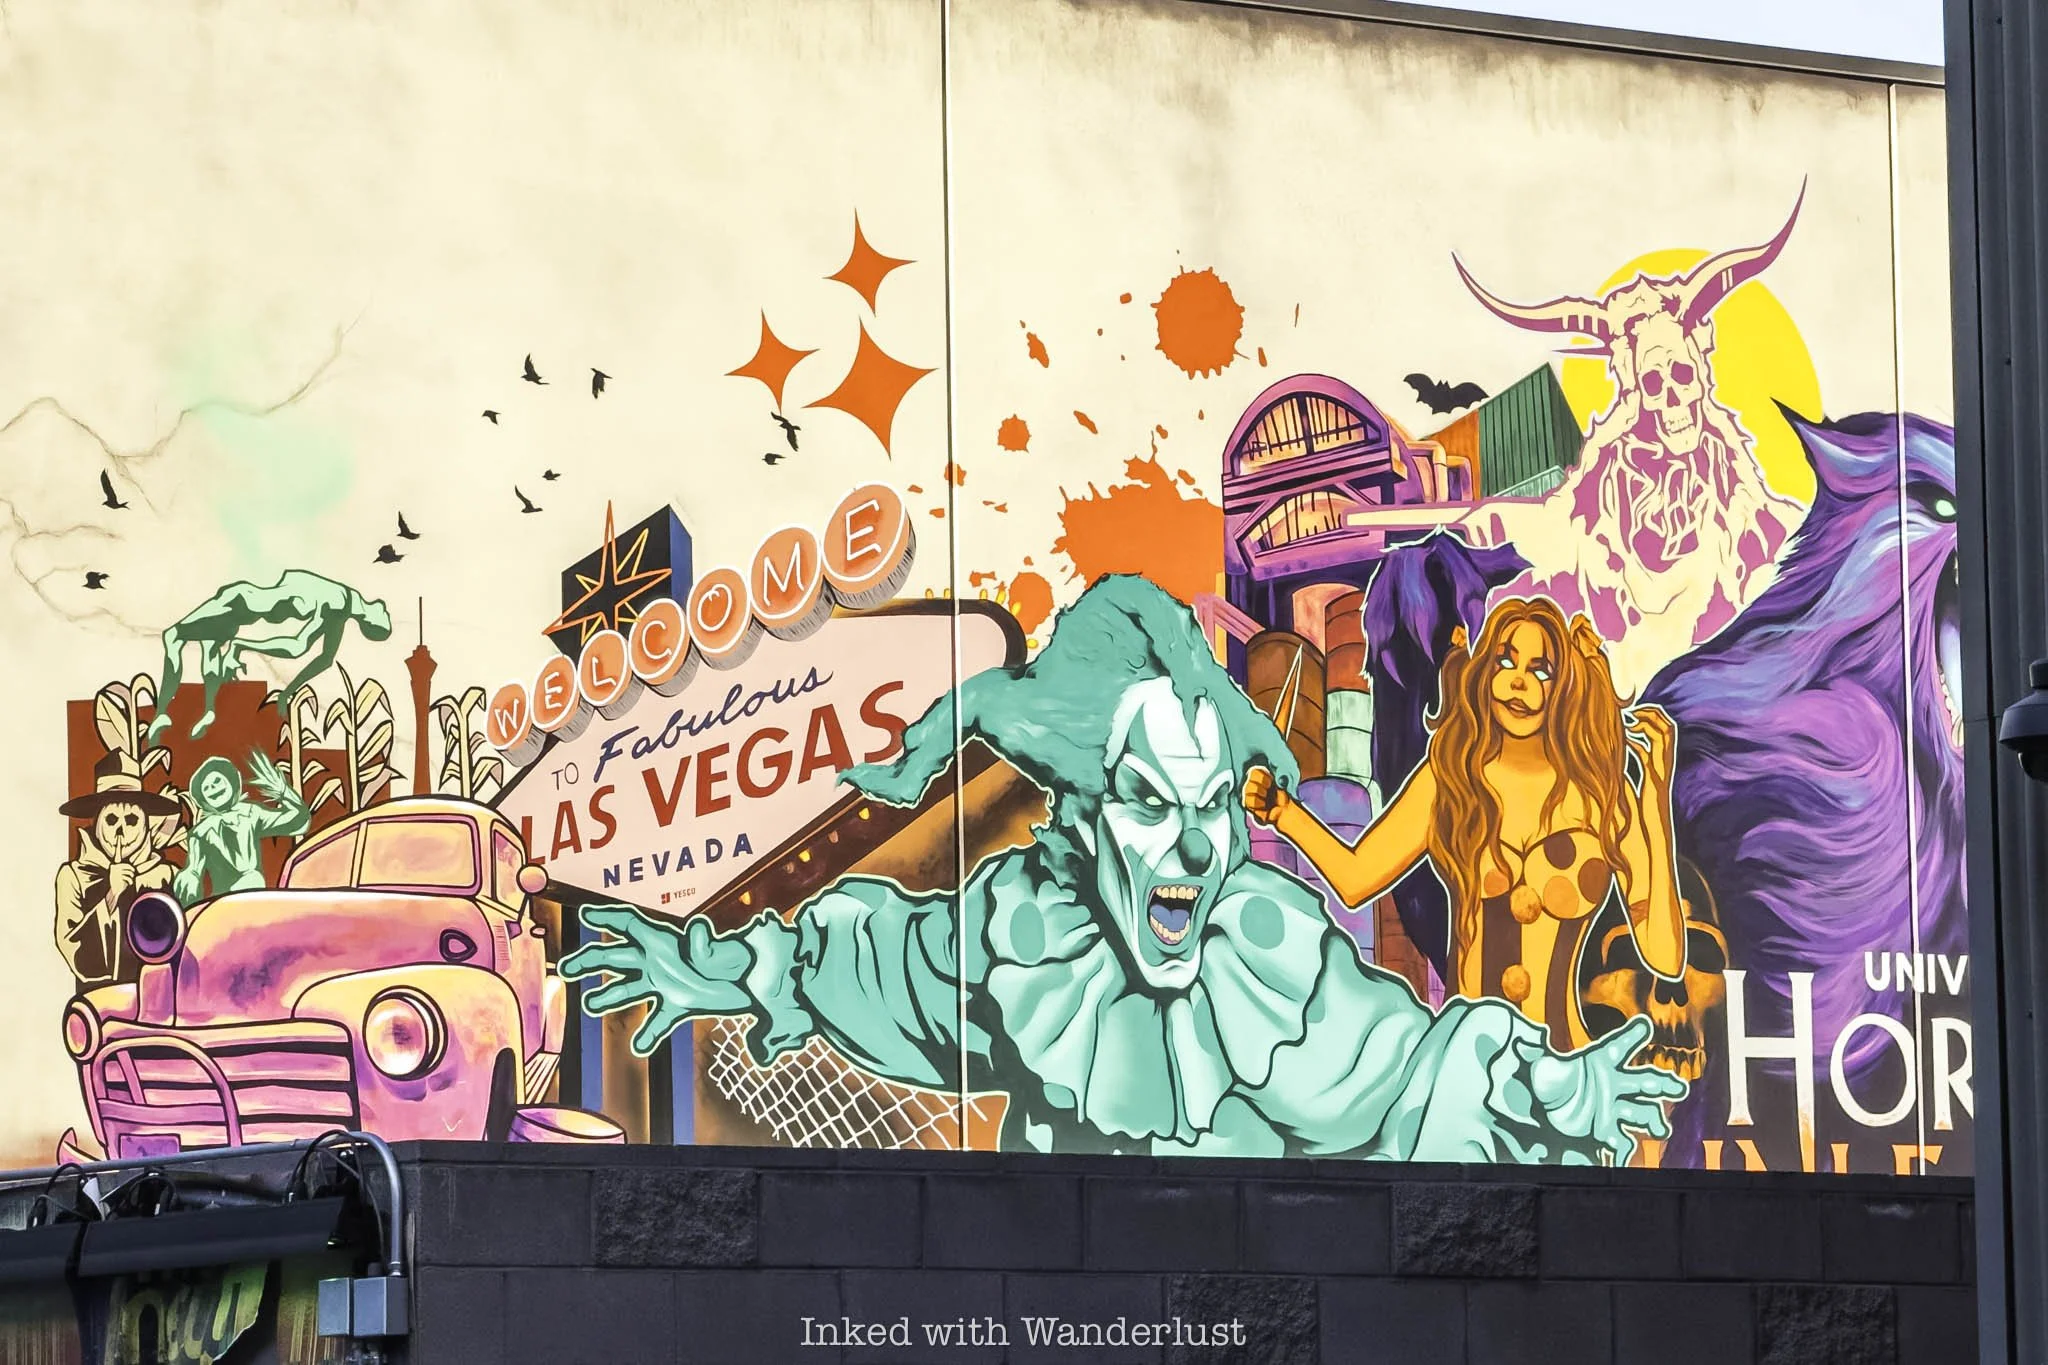
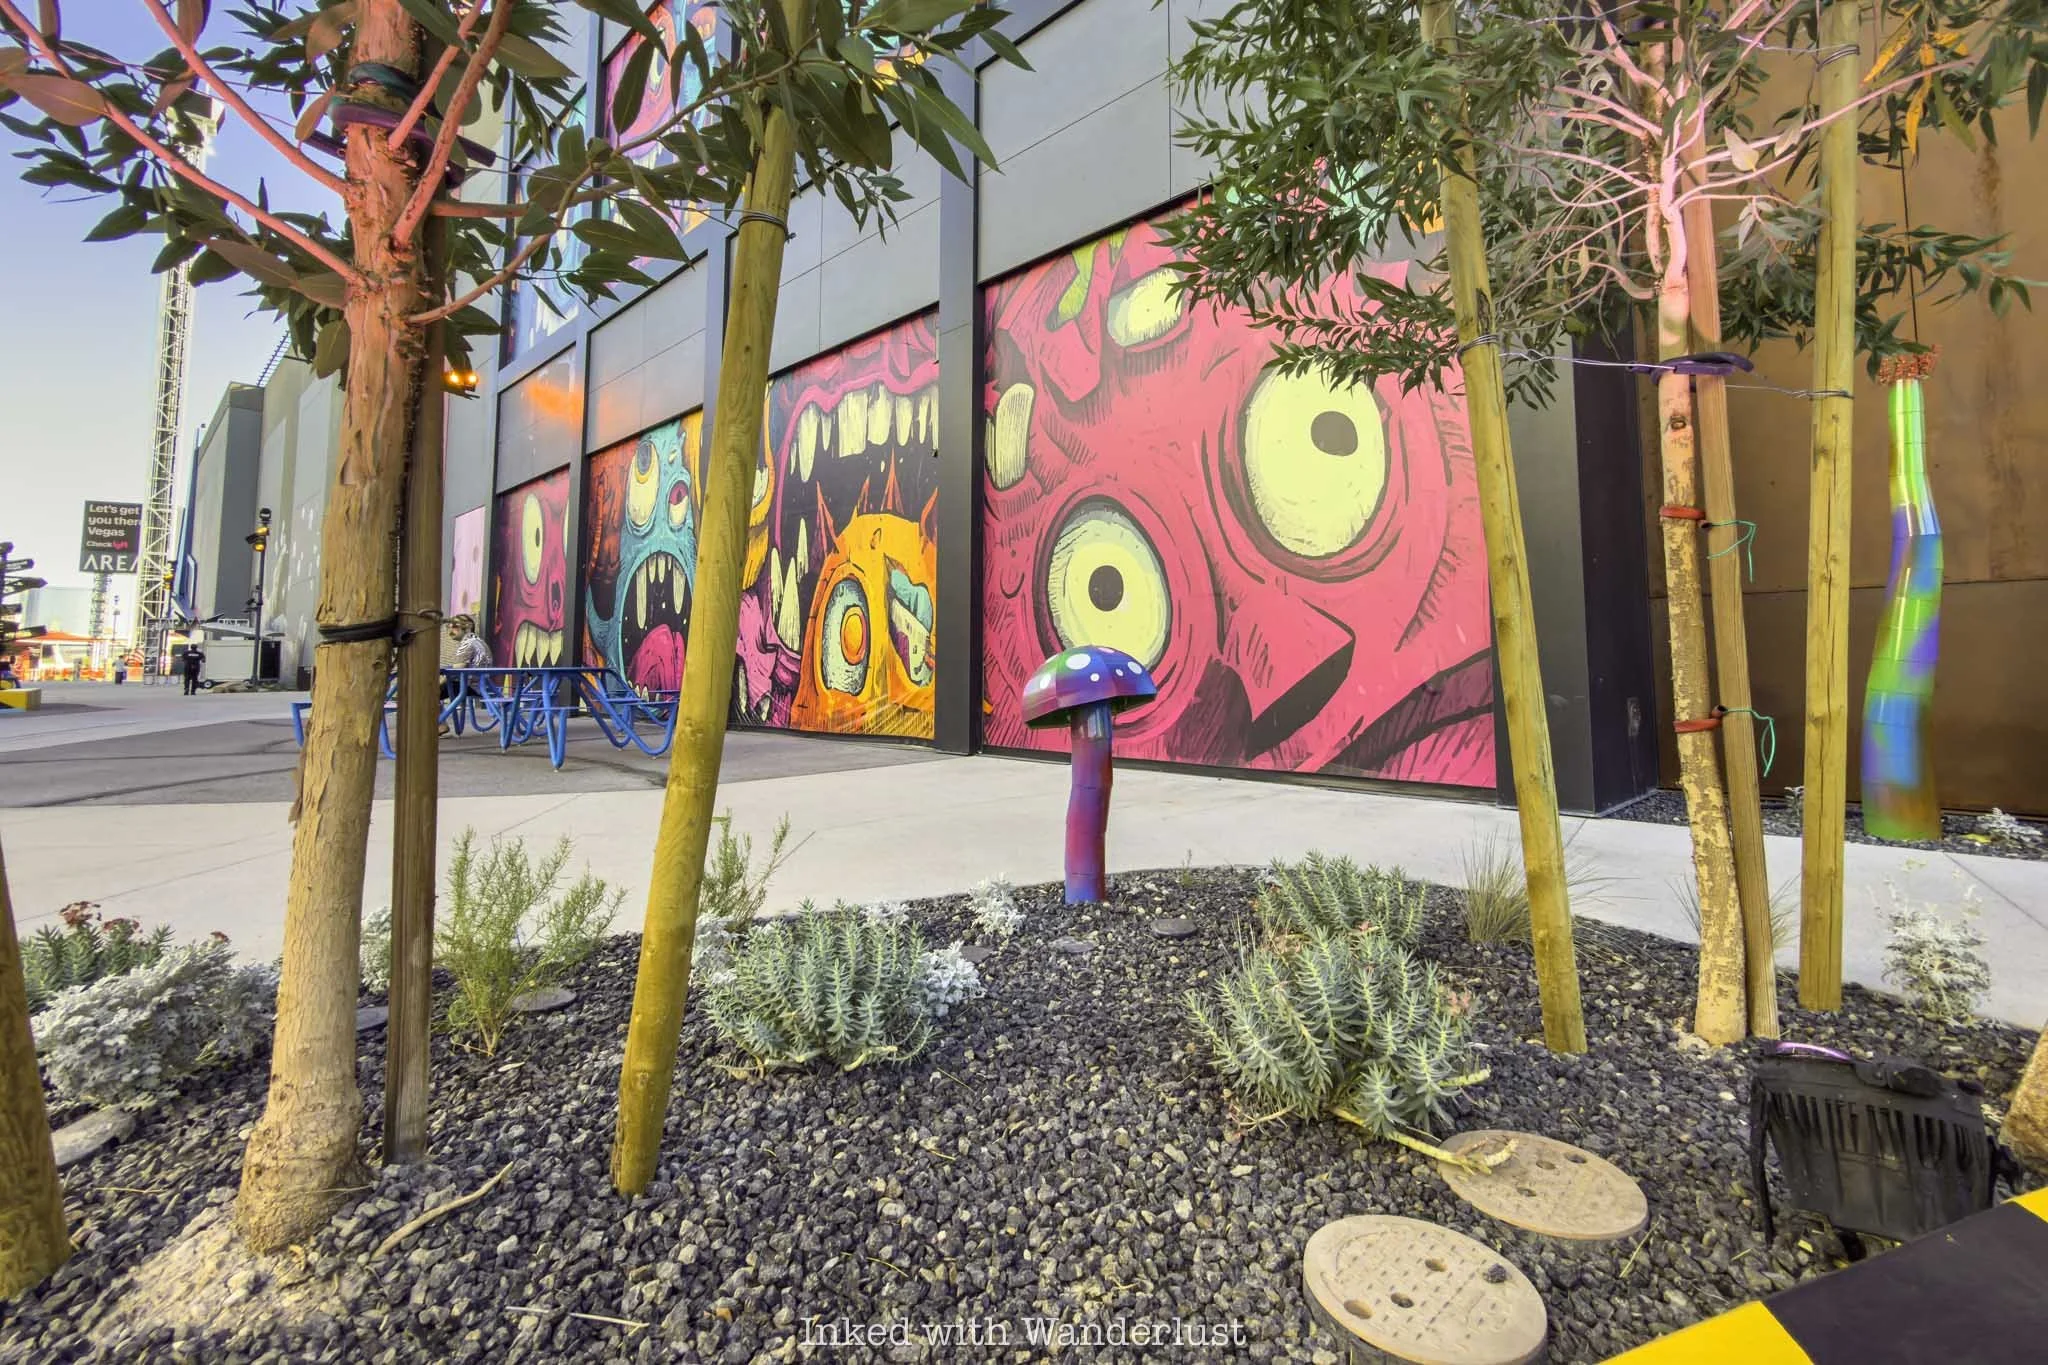
After getting dropped off, our journey to UHU temporarily halted just prior to the entrance. Around us were numerous art installations, wall murals, and even a carousel! Though they proved distractive, we didn’t mind the temporary detour.
Exploring the “Terminals” space of Area 15 revealed much more than just UHU. Here is where other attractions such as Interstellar Arc and The Escape Room reside, as well as a plethora of shops and dining options (more coming soon).
We had a lot fun exploring the area, seeing and photographing the many art murals, as well as the art installations scattered throughout the property. It was an appetizer, of sorts. A way to “wet the whistle” before walking into the horror-vibes that awaited us.
There are also a handful of photo ops inside some containers near the entrance to UHU. To be honest, I wasn’t entirely certain it was ok to step inside them, but there wasn’t anything indicating we couldn’t and on top of that…nobody stopped us.
While I wanted to explore further, we had an itinerary to stick to with dinner plans on the strip and a ride on the High Roller that night. Not wanting to rush through Horror Unleashed, it was time to make our way inside.
That tense, anxious feeling in my stomach began to churn as we made our way inside. I’m not much of a horror genre fan and I’ve never particularly enjoyed being scared, so I was completely out of my element here.
We were quickly greeted by a pair of staff members who welcomed us and gave us a brief, in-character spiel about what to expect and the rules. The “in-character” trait was a taste of things to come, as the commitment to being “on” by the employees was spot-on for the entirety of our visit.
After posing for a photo, security check was up next. It was your standard metal detector and bag search that most places in Las Vegas implement. We got through swiftly, as the friendly security personnel did their jobs efficiently.
Atmosphere
After passing through security, we were directed down a dimly lit hallway with creepily framed photos plastered along both walls. At the end, we came into an illuminated atrium, giving the feeling of crossing a threshold into another world.
The lighting is kept intentionally low and eerie music echoes throughout the space. Those design features, in combination with the intricate and detailed set pieces, immediately established a creepy atmosphere.
Before we even entered a haunted house, the roaming characters, themed environment, and ominous sounds created a sense of anticipation that kept my wife and I on edge. We never quite knew what was lurking around the corner.
Roaming Characters
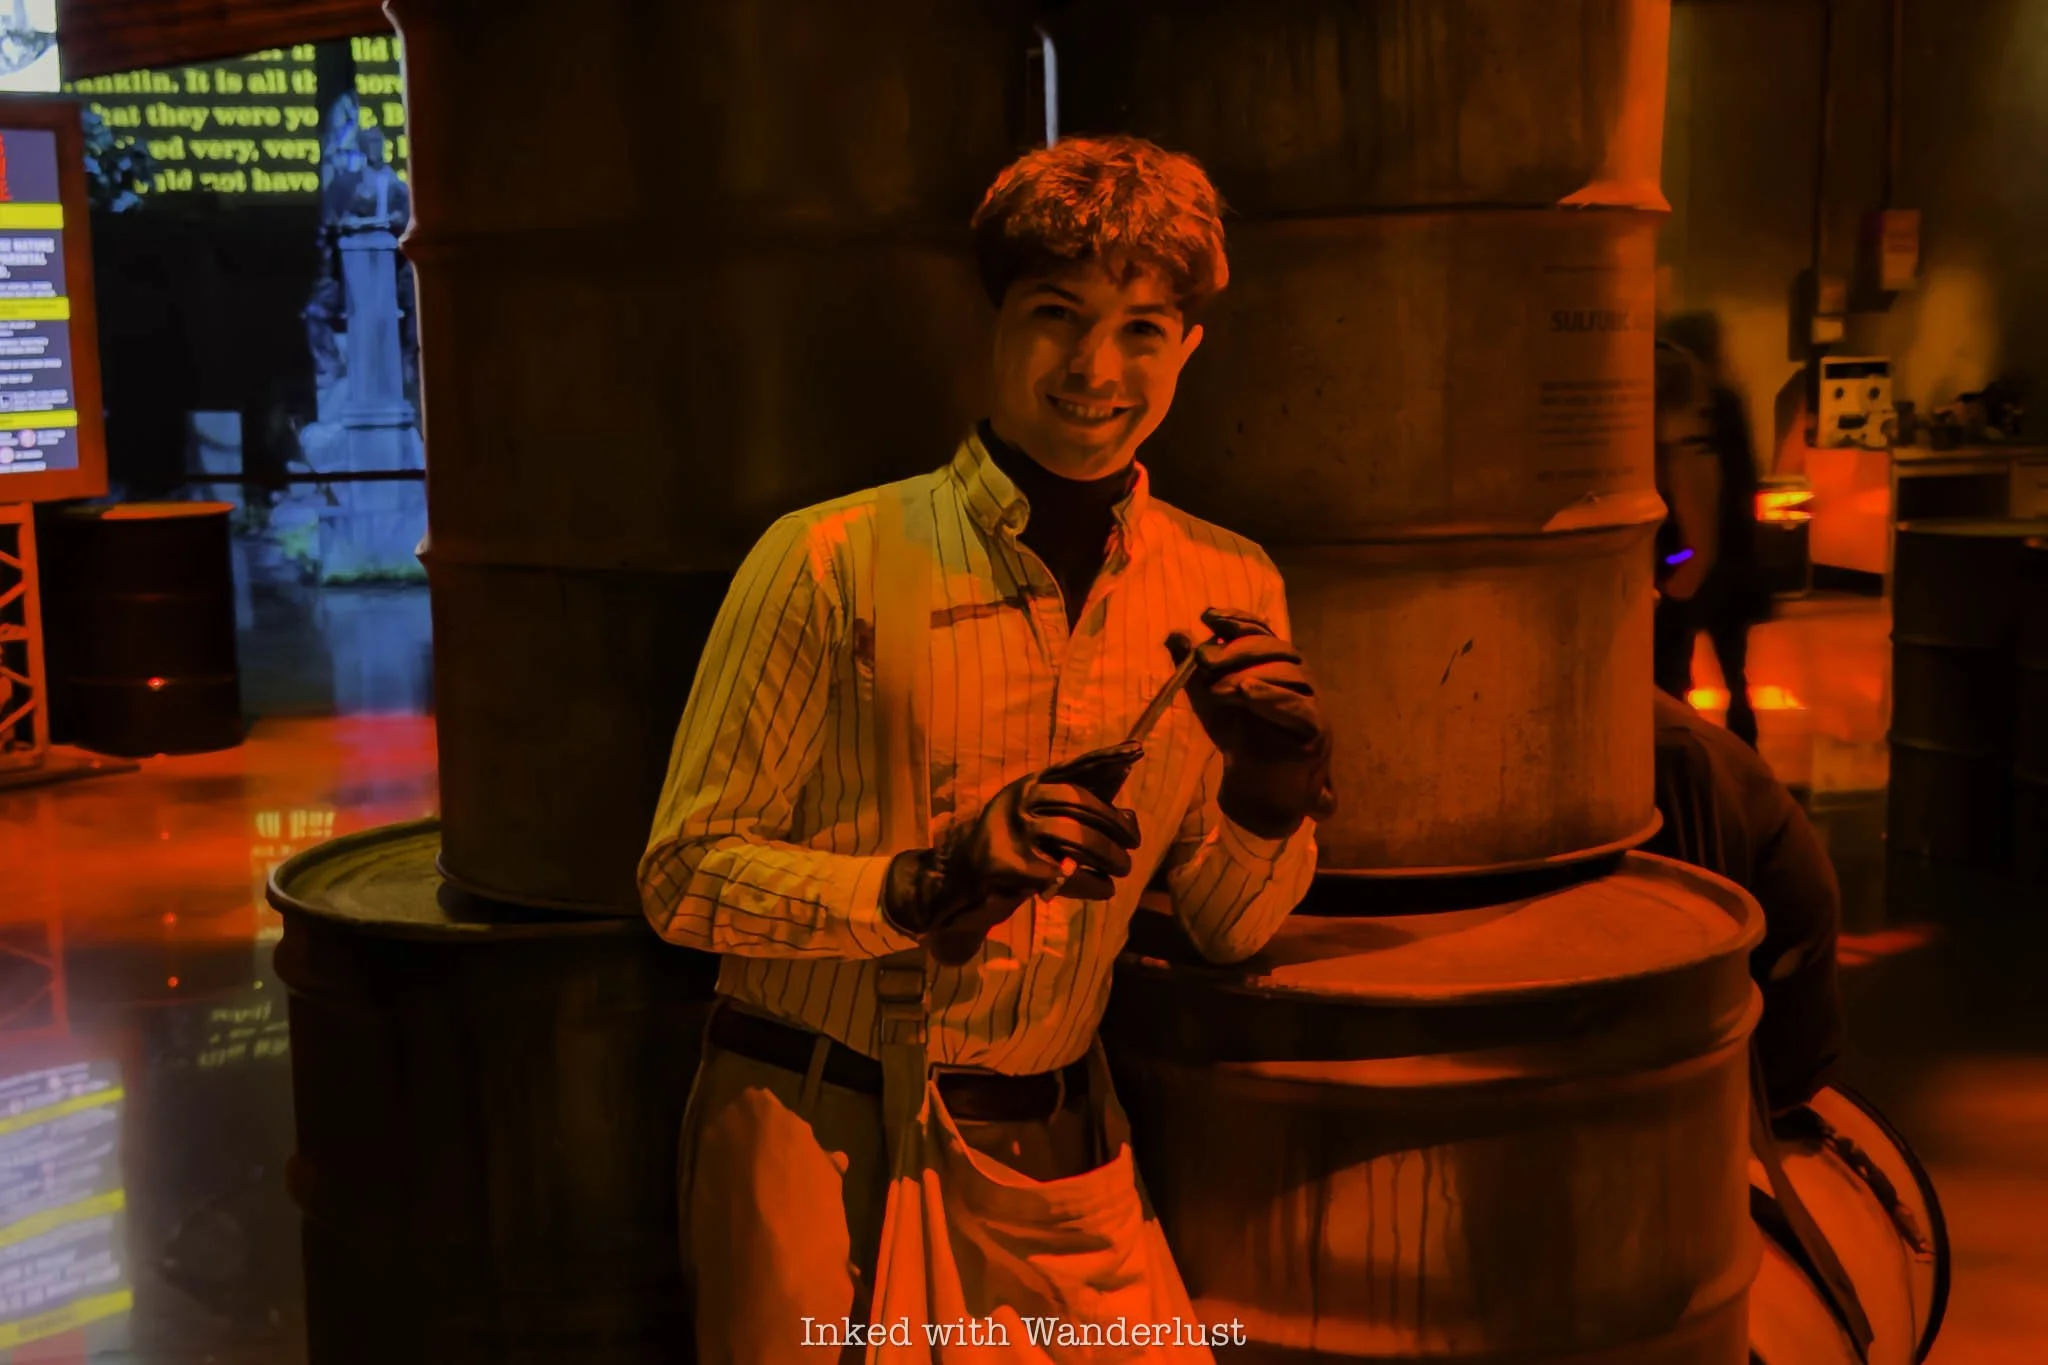
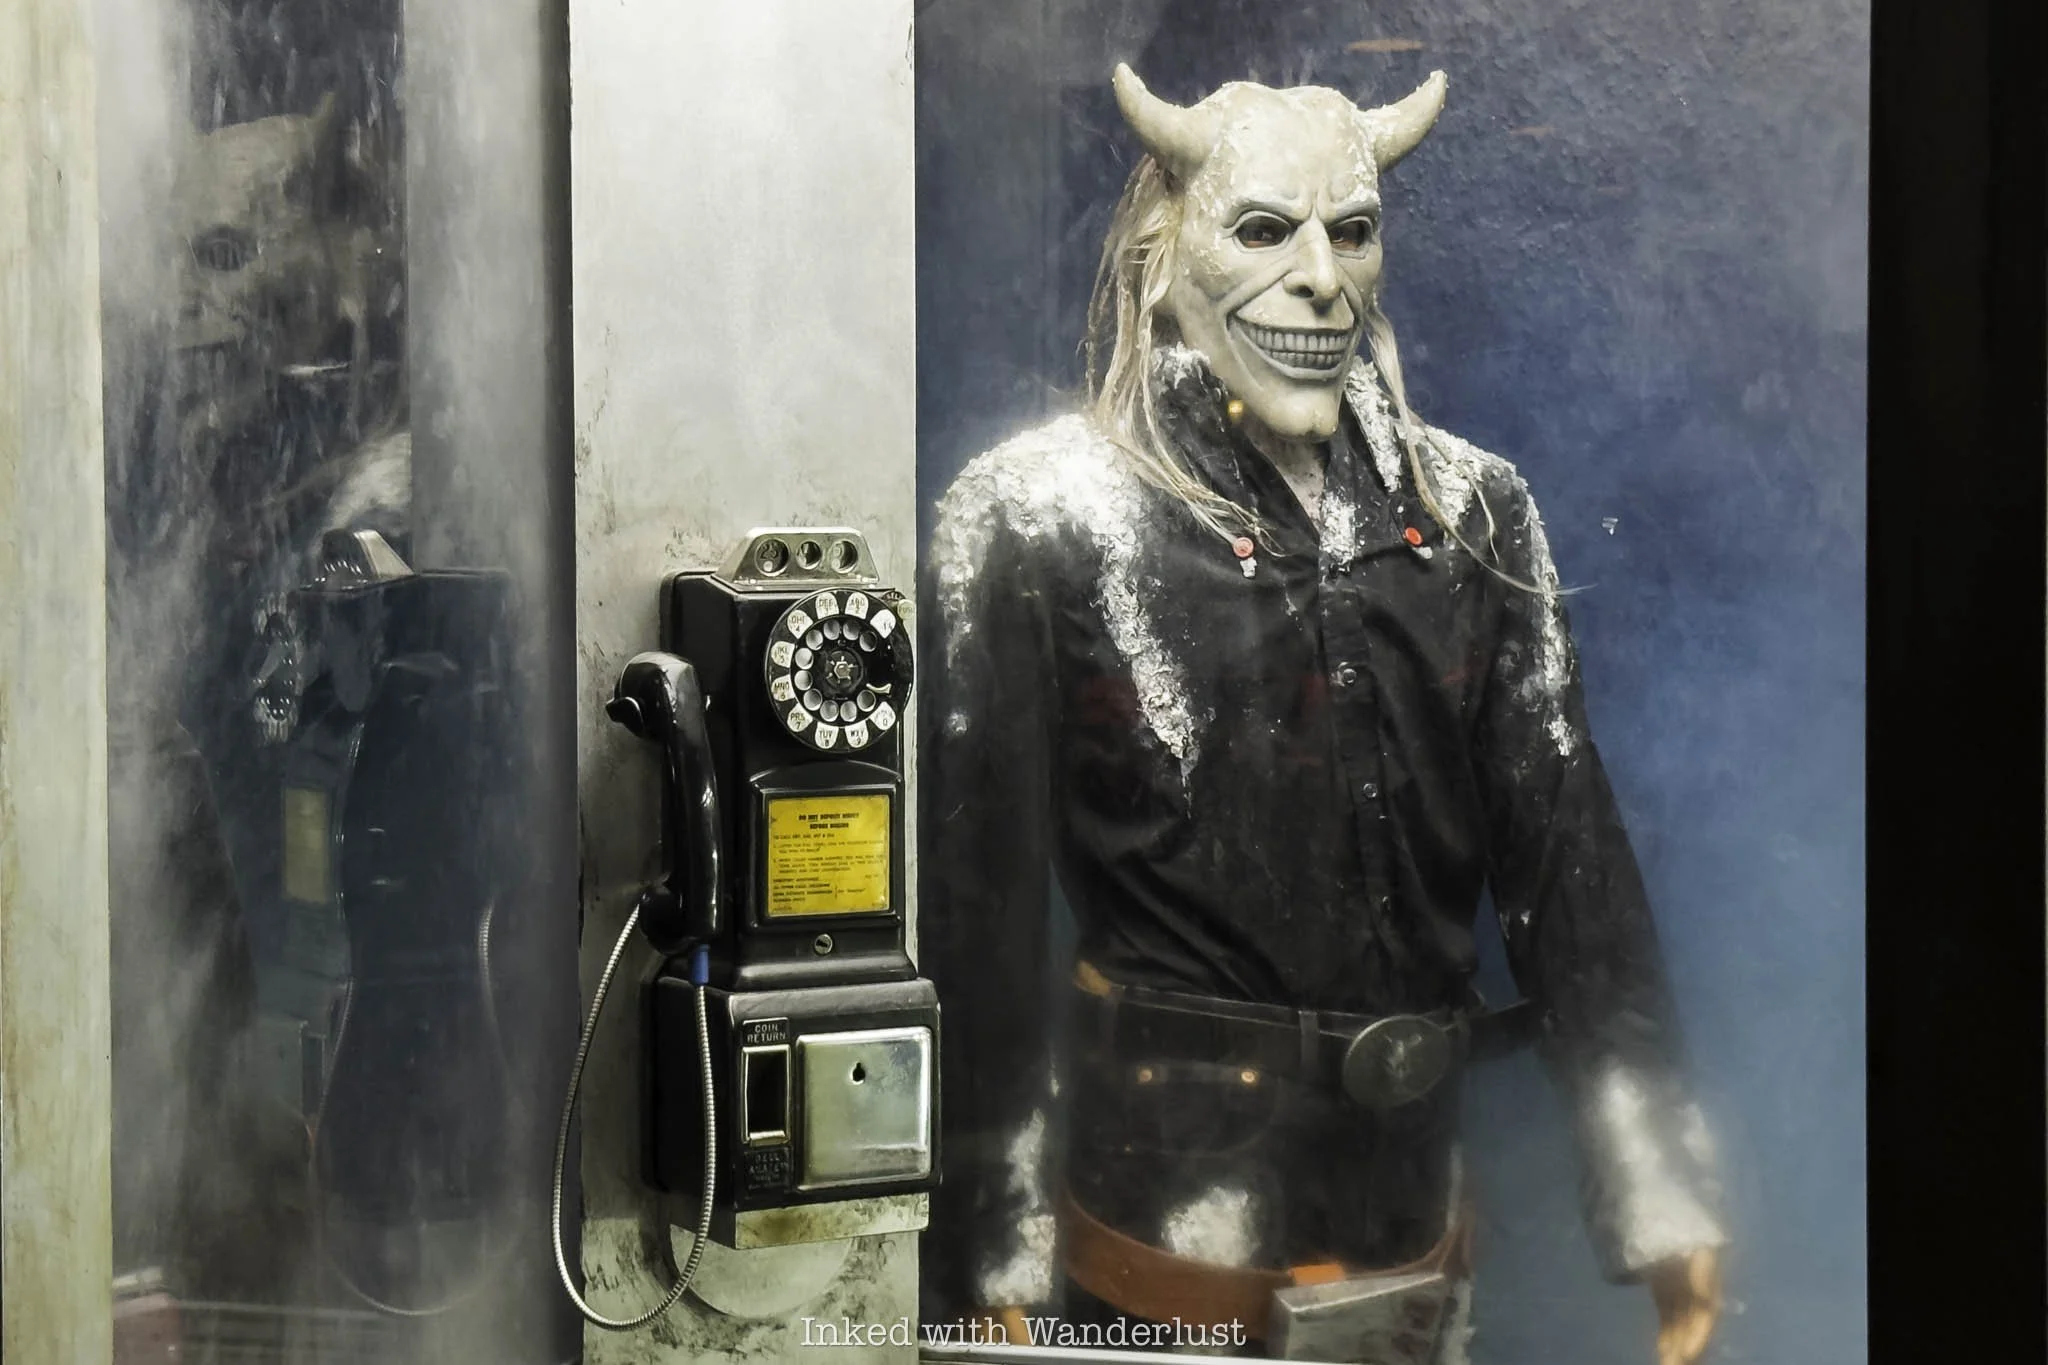
The stand-out feature for us were the dedicated scare actors. They fully inhabited their role, roaming the themed areas with unsettling confidence and remaining in character during every interaction.
In fact, the scare actor pictured above took a disturbing interest in my wife, silently following her every move while starring and grinning intently, all while fiddling with an obviously fake, but real-looking enough knife.
Every time we found him he’d be in a different spot, still starring and grinning. At one point, we thought we’d lost him, but as we gazed at themed elements in the rafters above, he popped up behind us out of nowhere, giving us a good scare. This was just the first ten minutes!

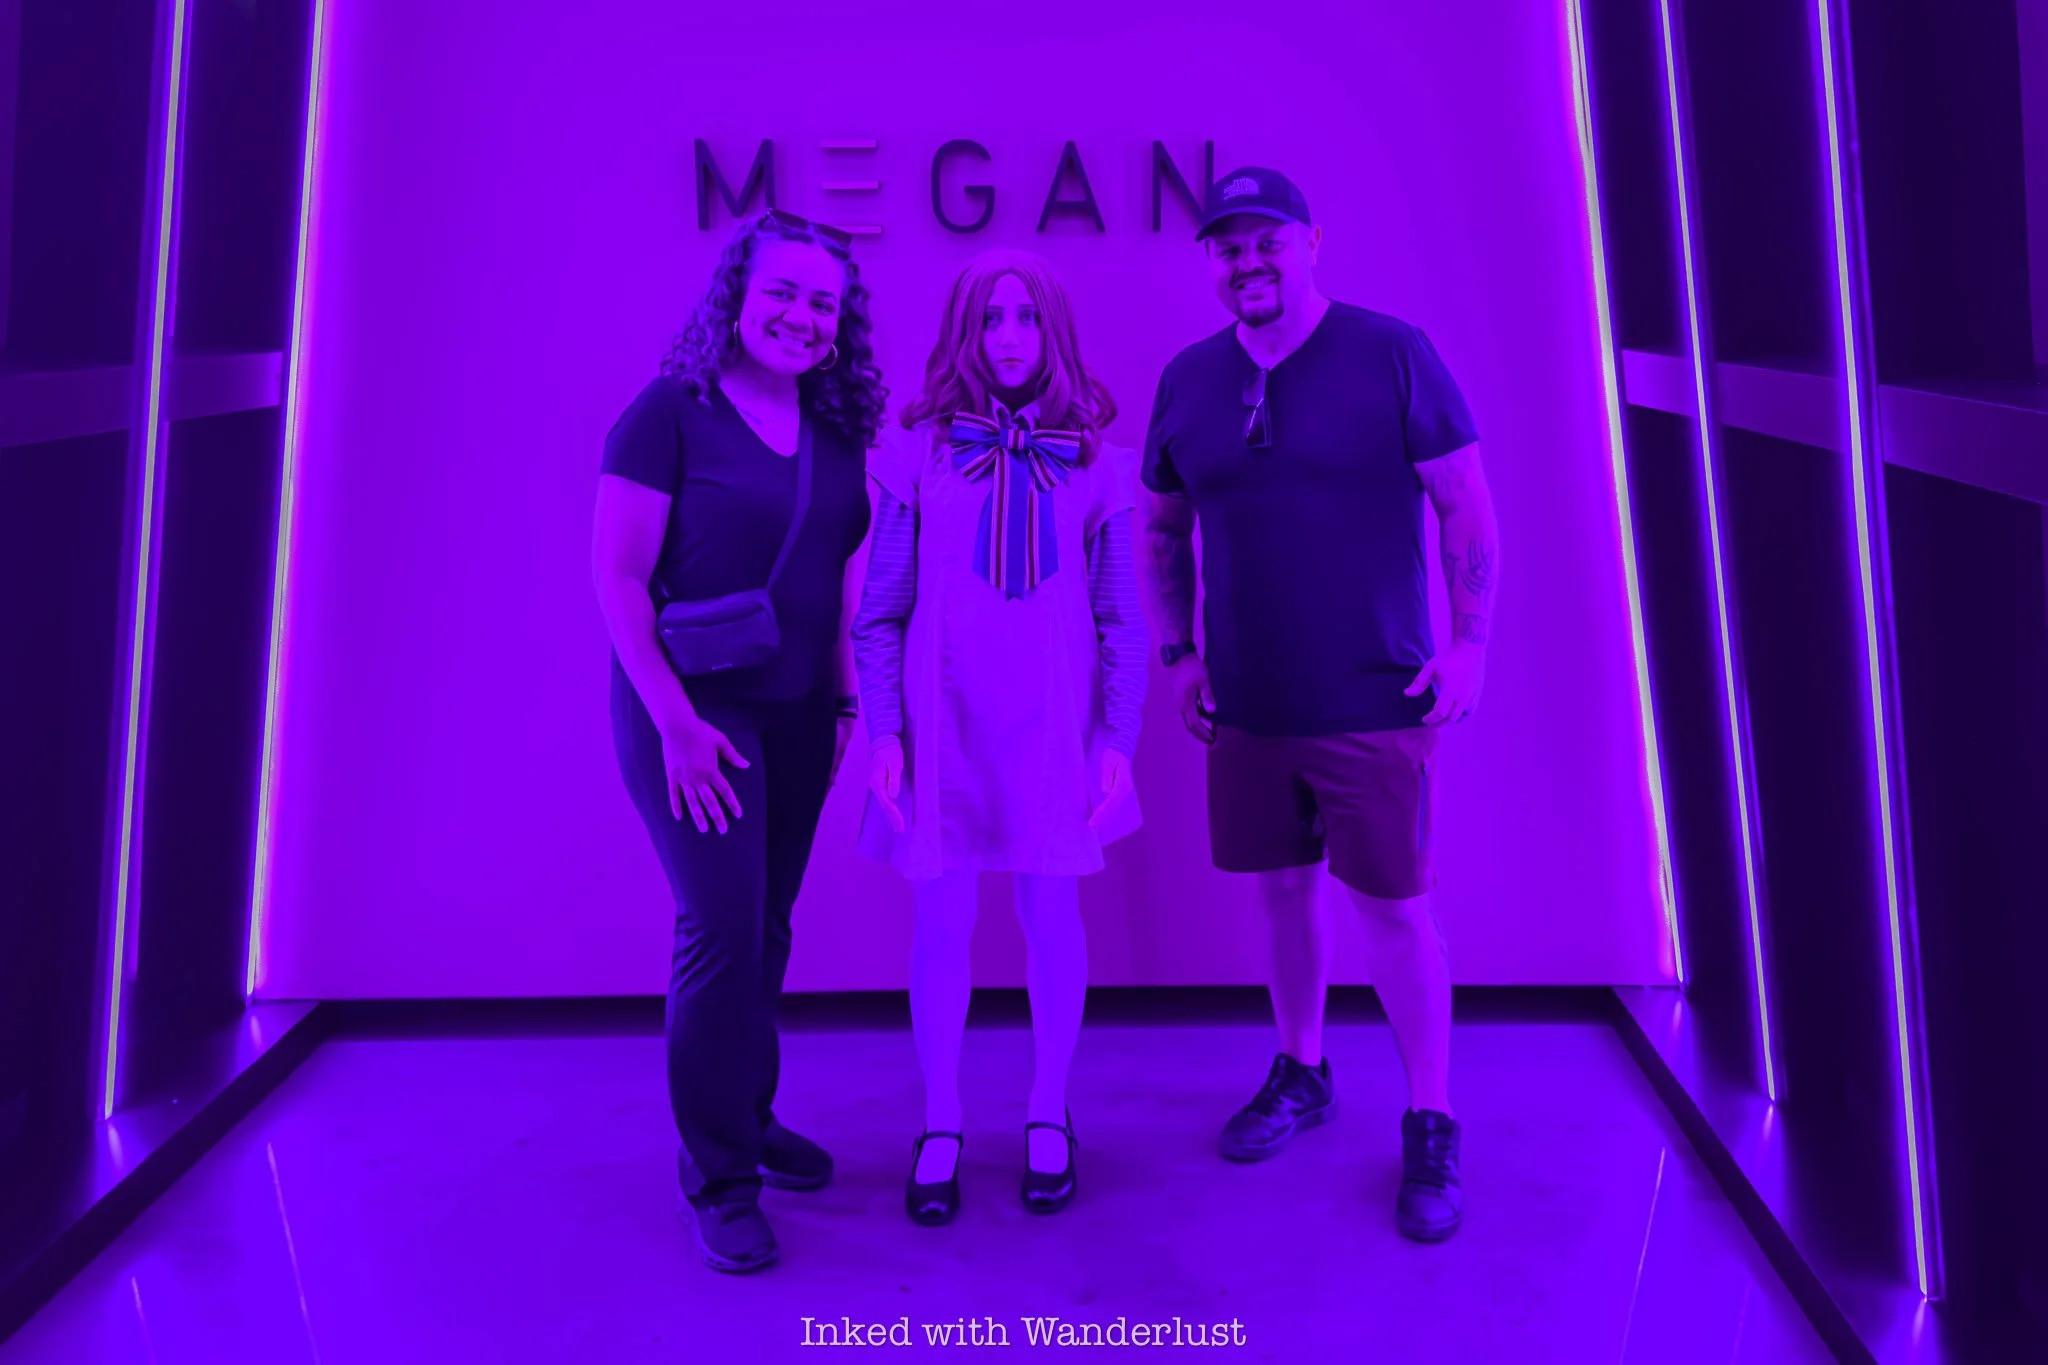
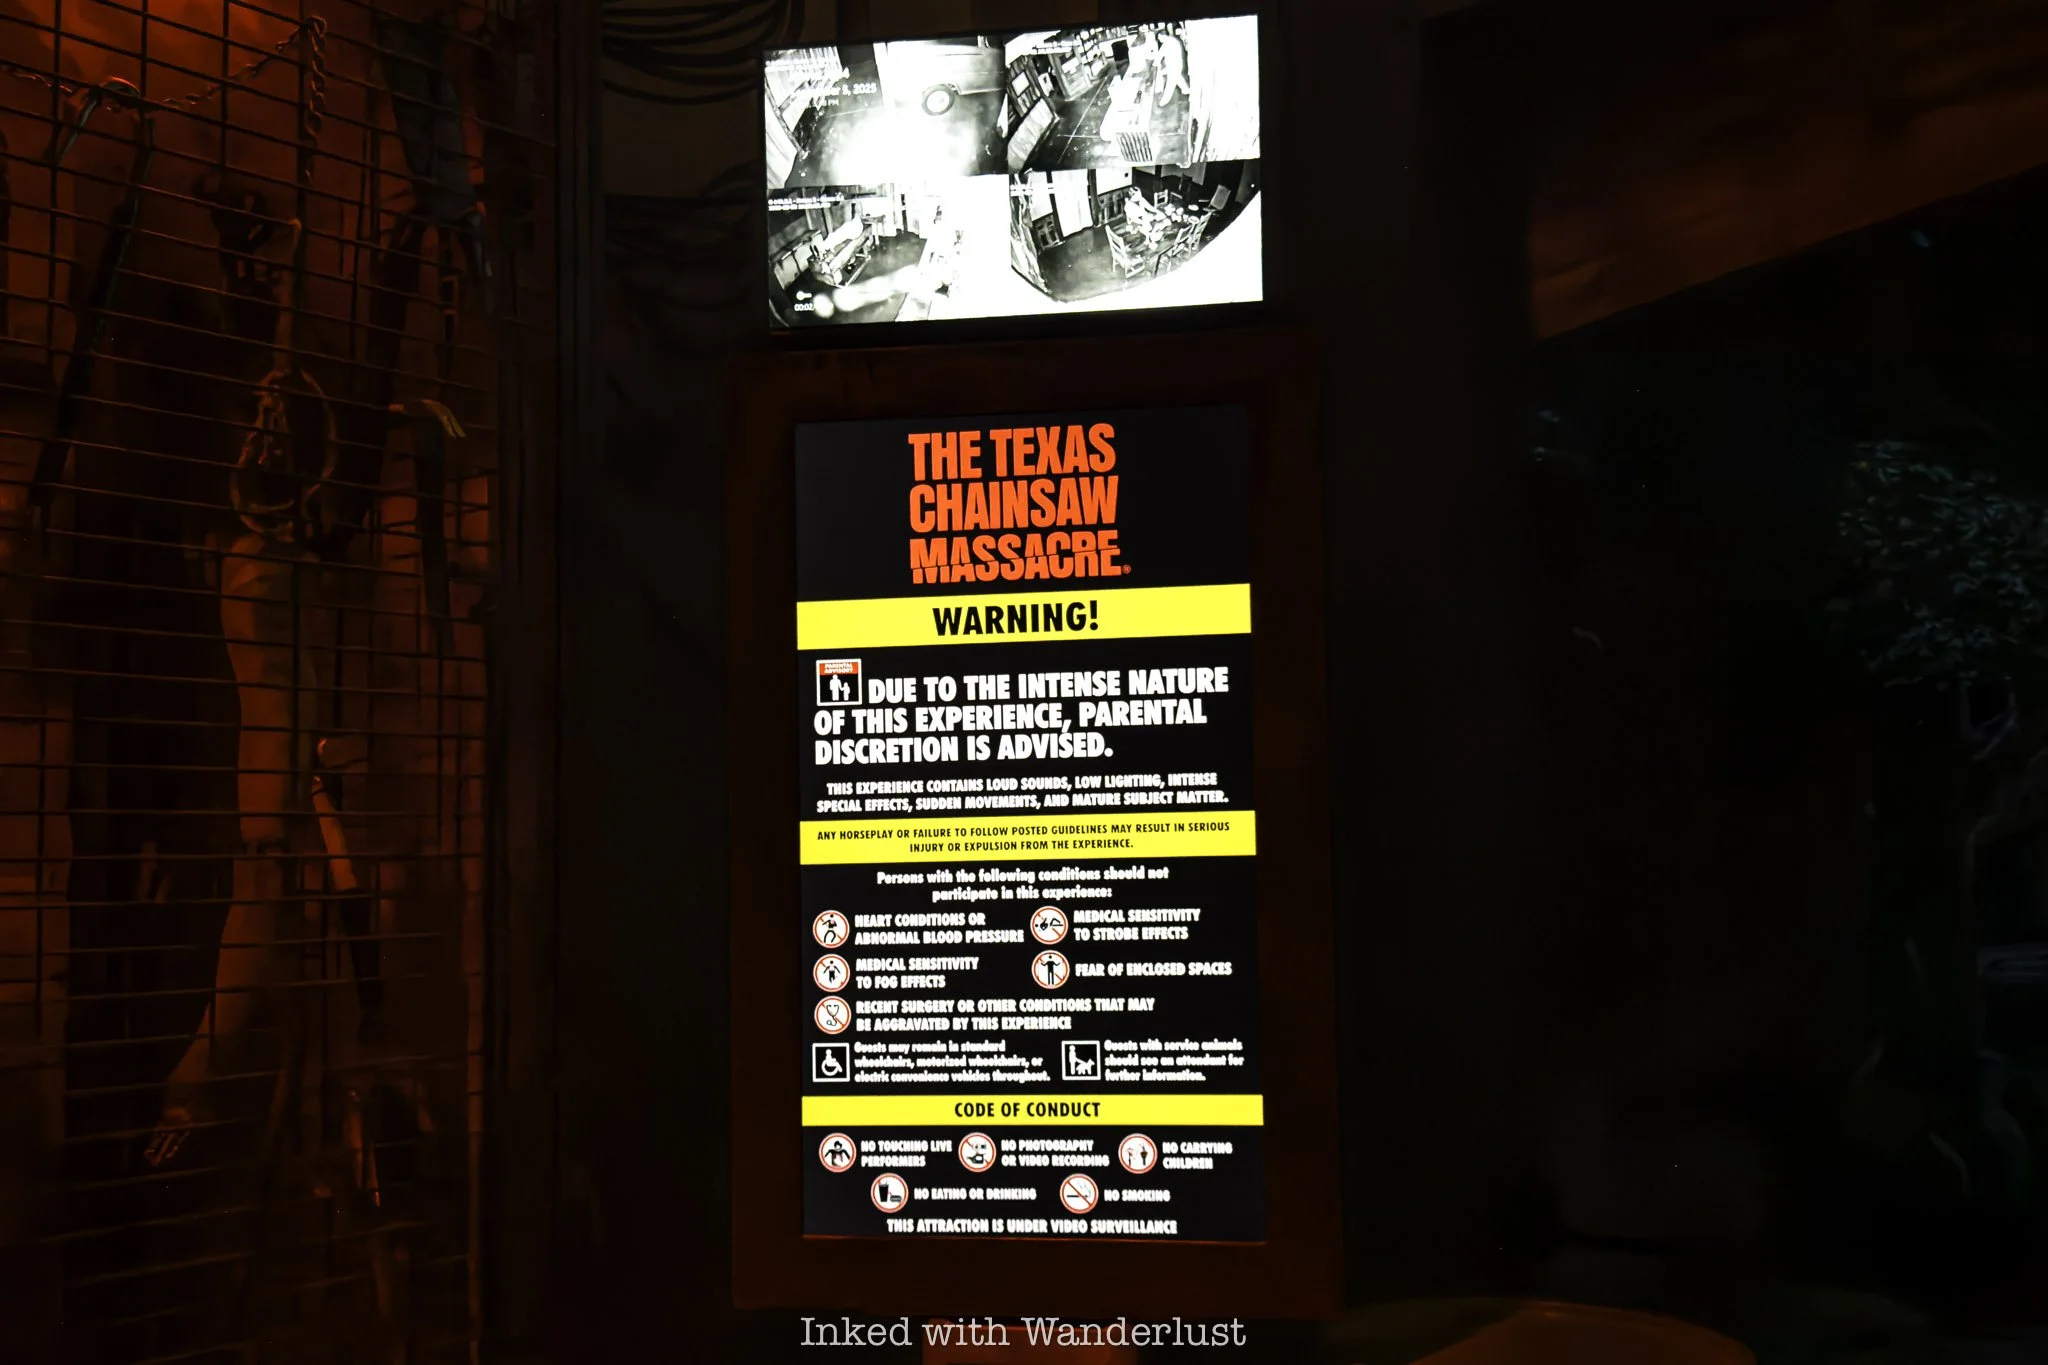
Characters included stationary ones inside the haunted houses and roaming characters in the common areas. There were a mix of original, non-specific characters and recognizable ones from movies like M3GAN, The Black Phone and Texas Chainsaw Massacre.
Some, like M3GAN, appear for meet and greet opportunities while others simply roamed the venue, randomly interacting with guests. Though even the ones that roamed would pose for photos if requested (at least those we interacted with did).

Interacting with the characters added an extra layer of immersion as each encounter appeared tailored to us specifically. They felt spontaneous rather than scripted and even when they weren’t actively scaring, their mere presence brought the entire venue to life.
The result was an atmosphere where we couldn’t let our guard down, as we knew a chilling interaction could happen at any moment. I cannot praise them enough. They were easily our favorite element of the entire experience and I hope Universal continues keeping them a priority.
Haunted Houses
Currently, there are four haunted houses at Universal Horror Unleashed. They’re each differently themed, with three of them themed for existing intellectual properties and the other an original concept.
The four haunted houses are:
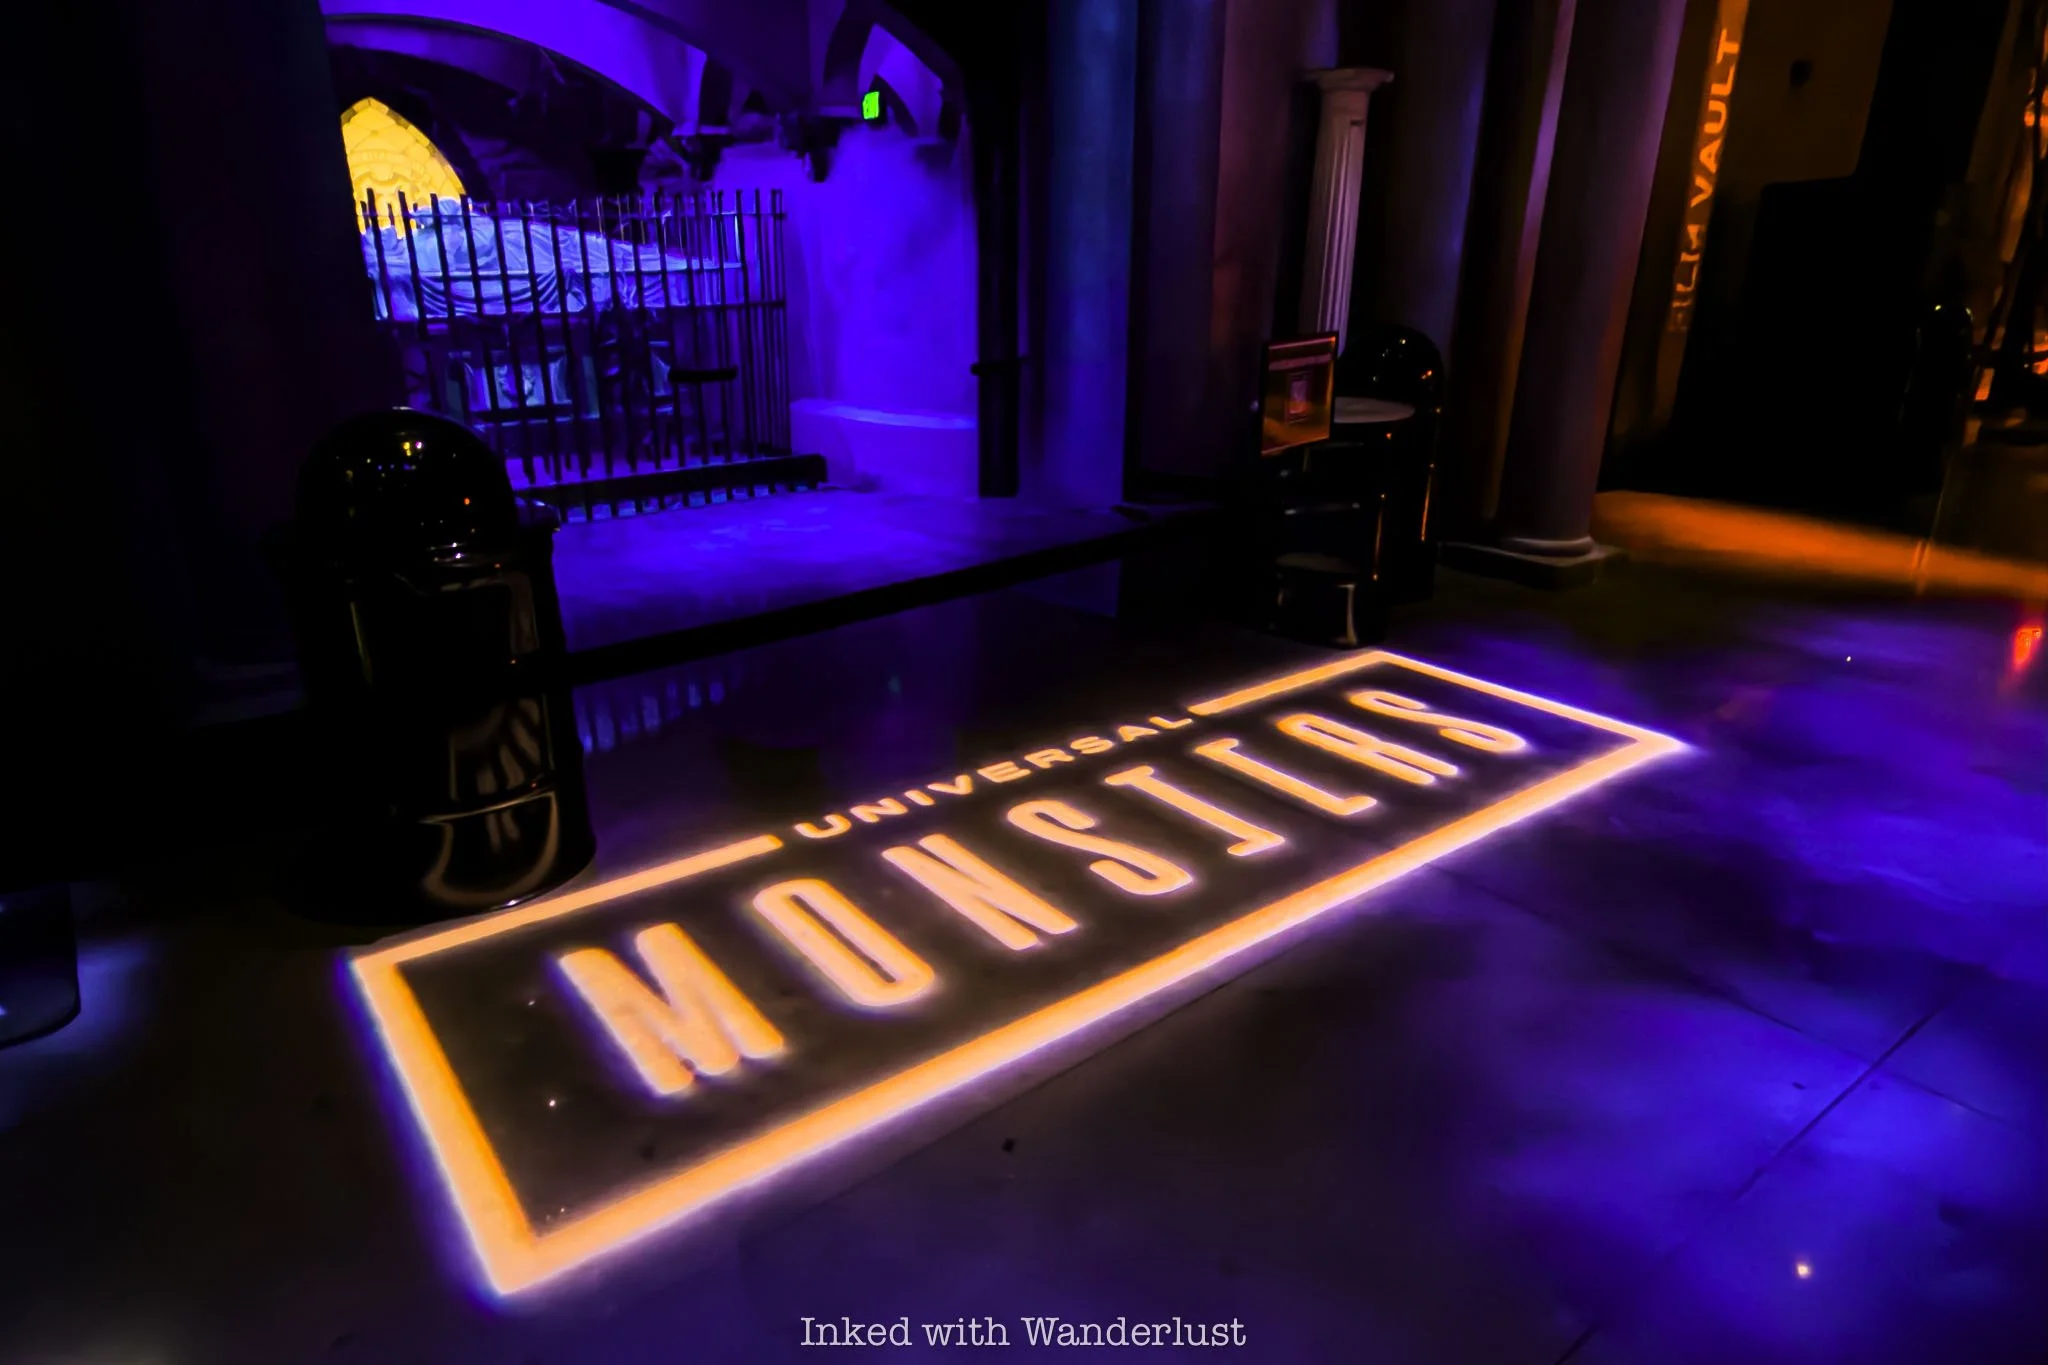
Universal Monsters
Texas Chainsaw Massacre
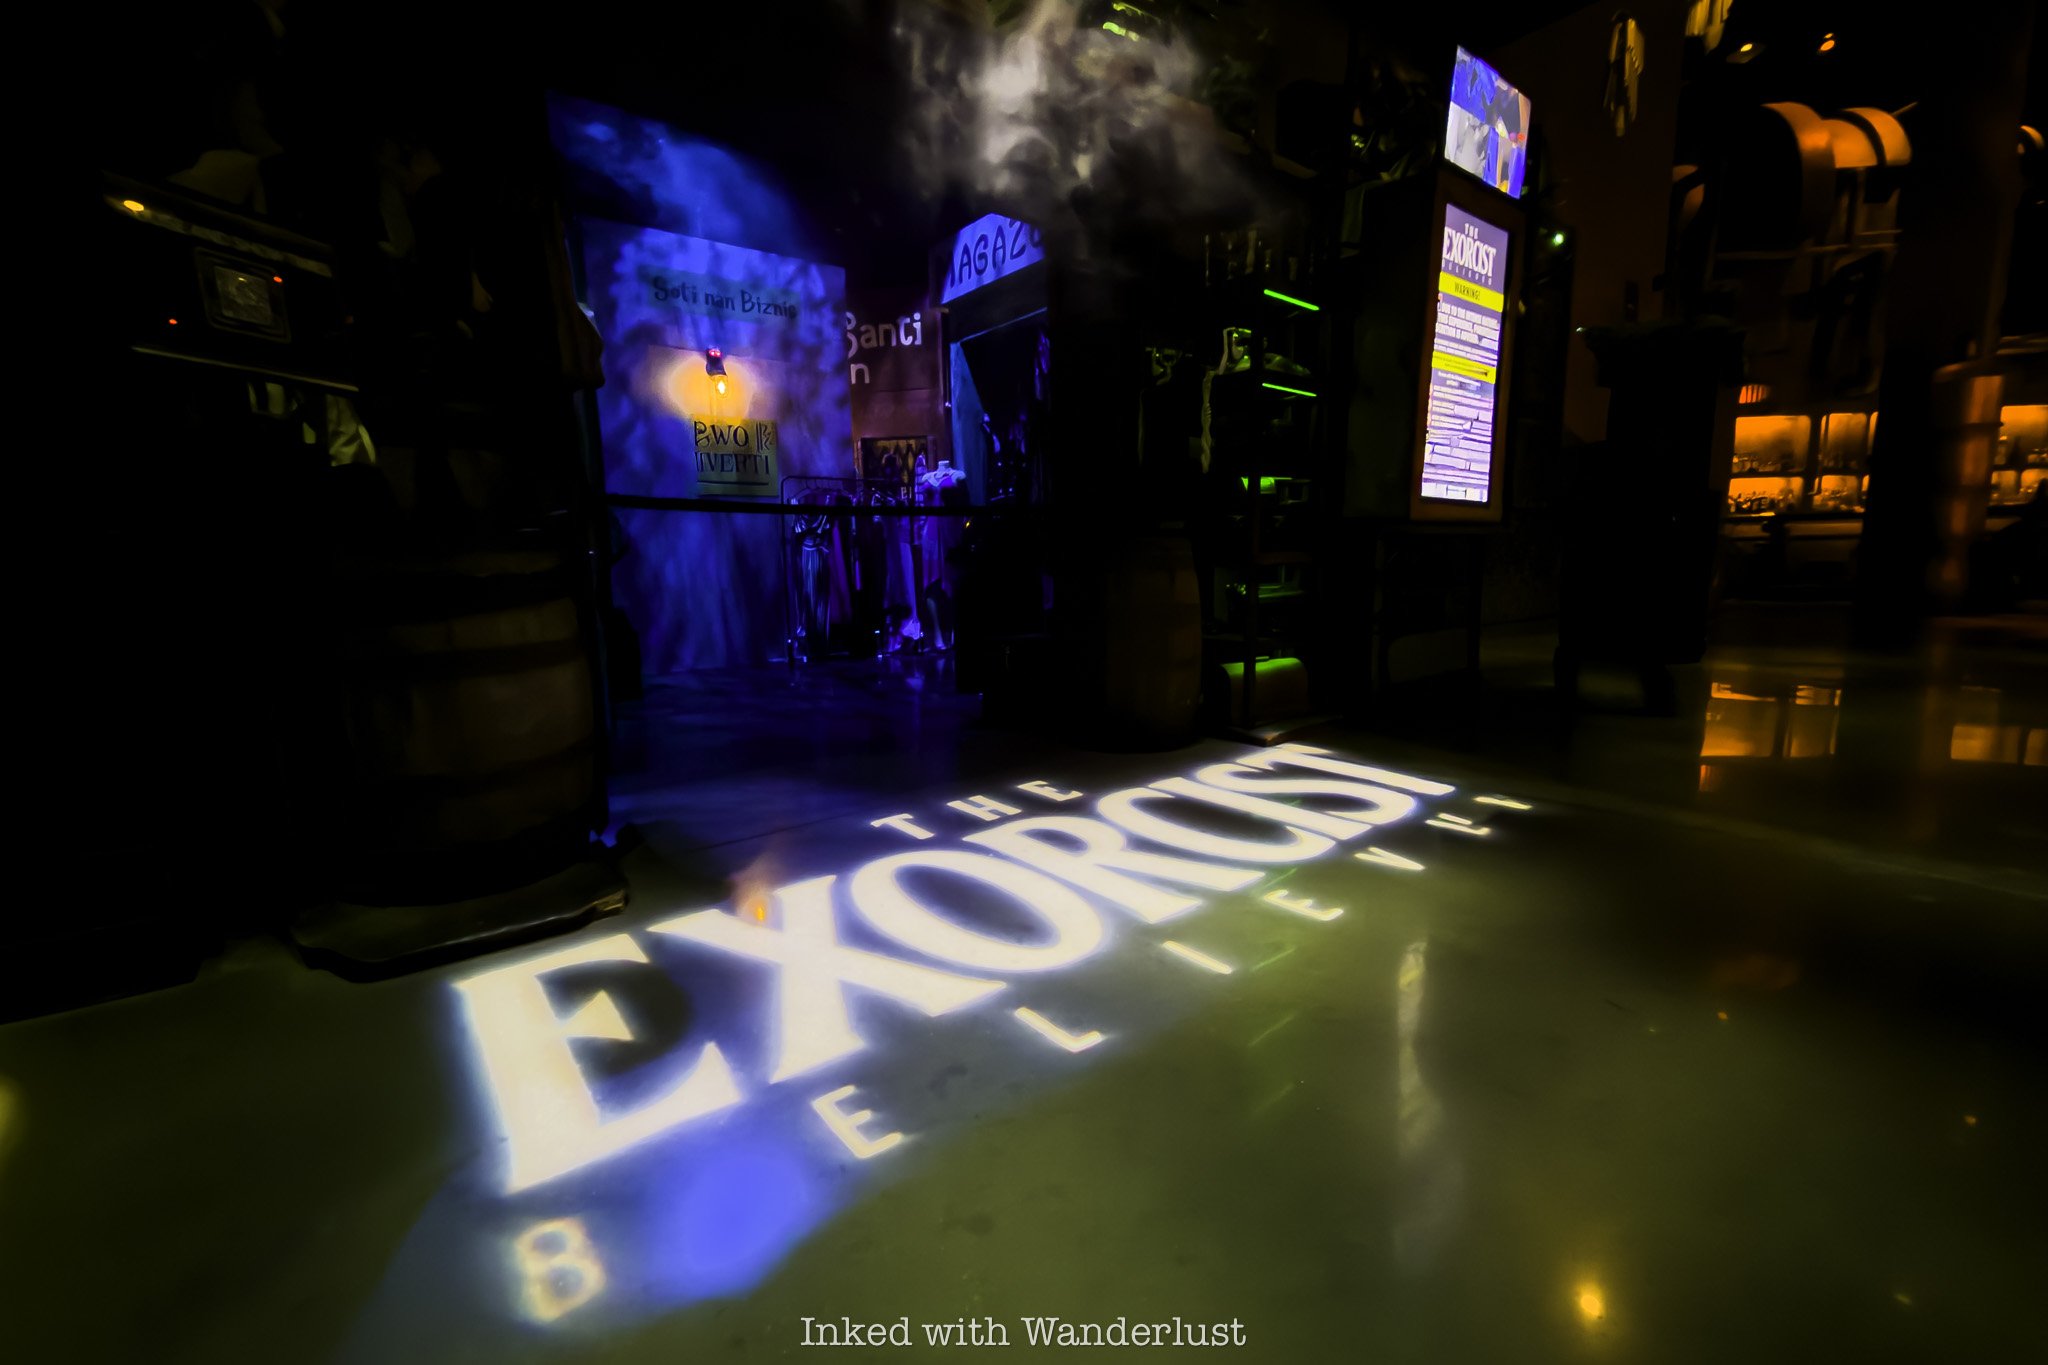
The Exorcist: Believer
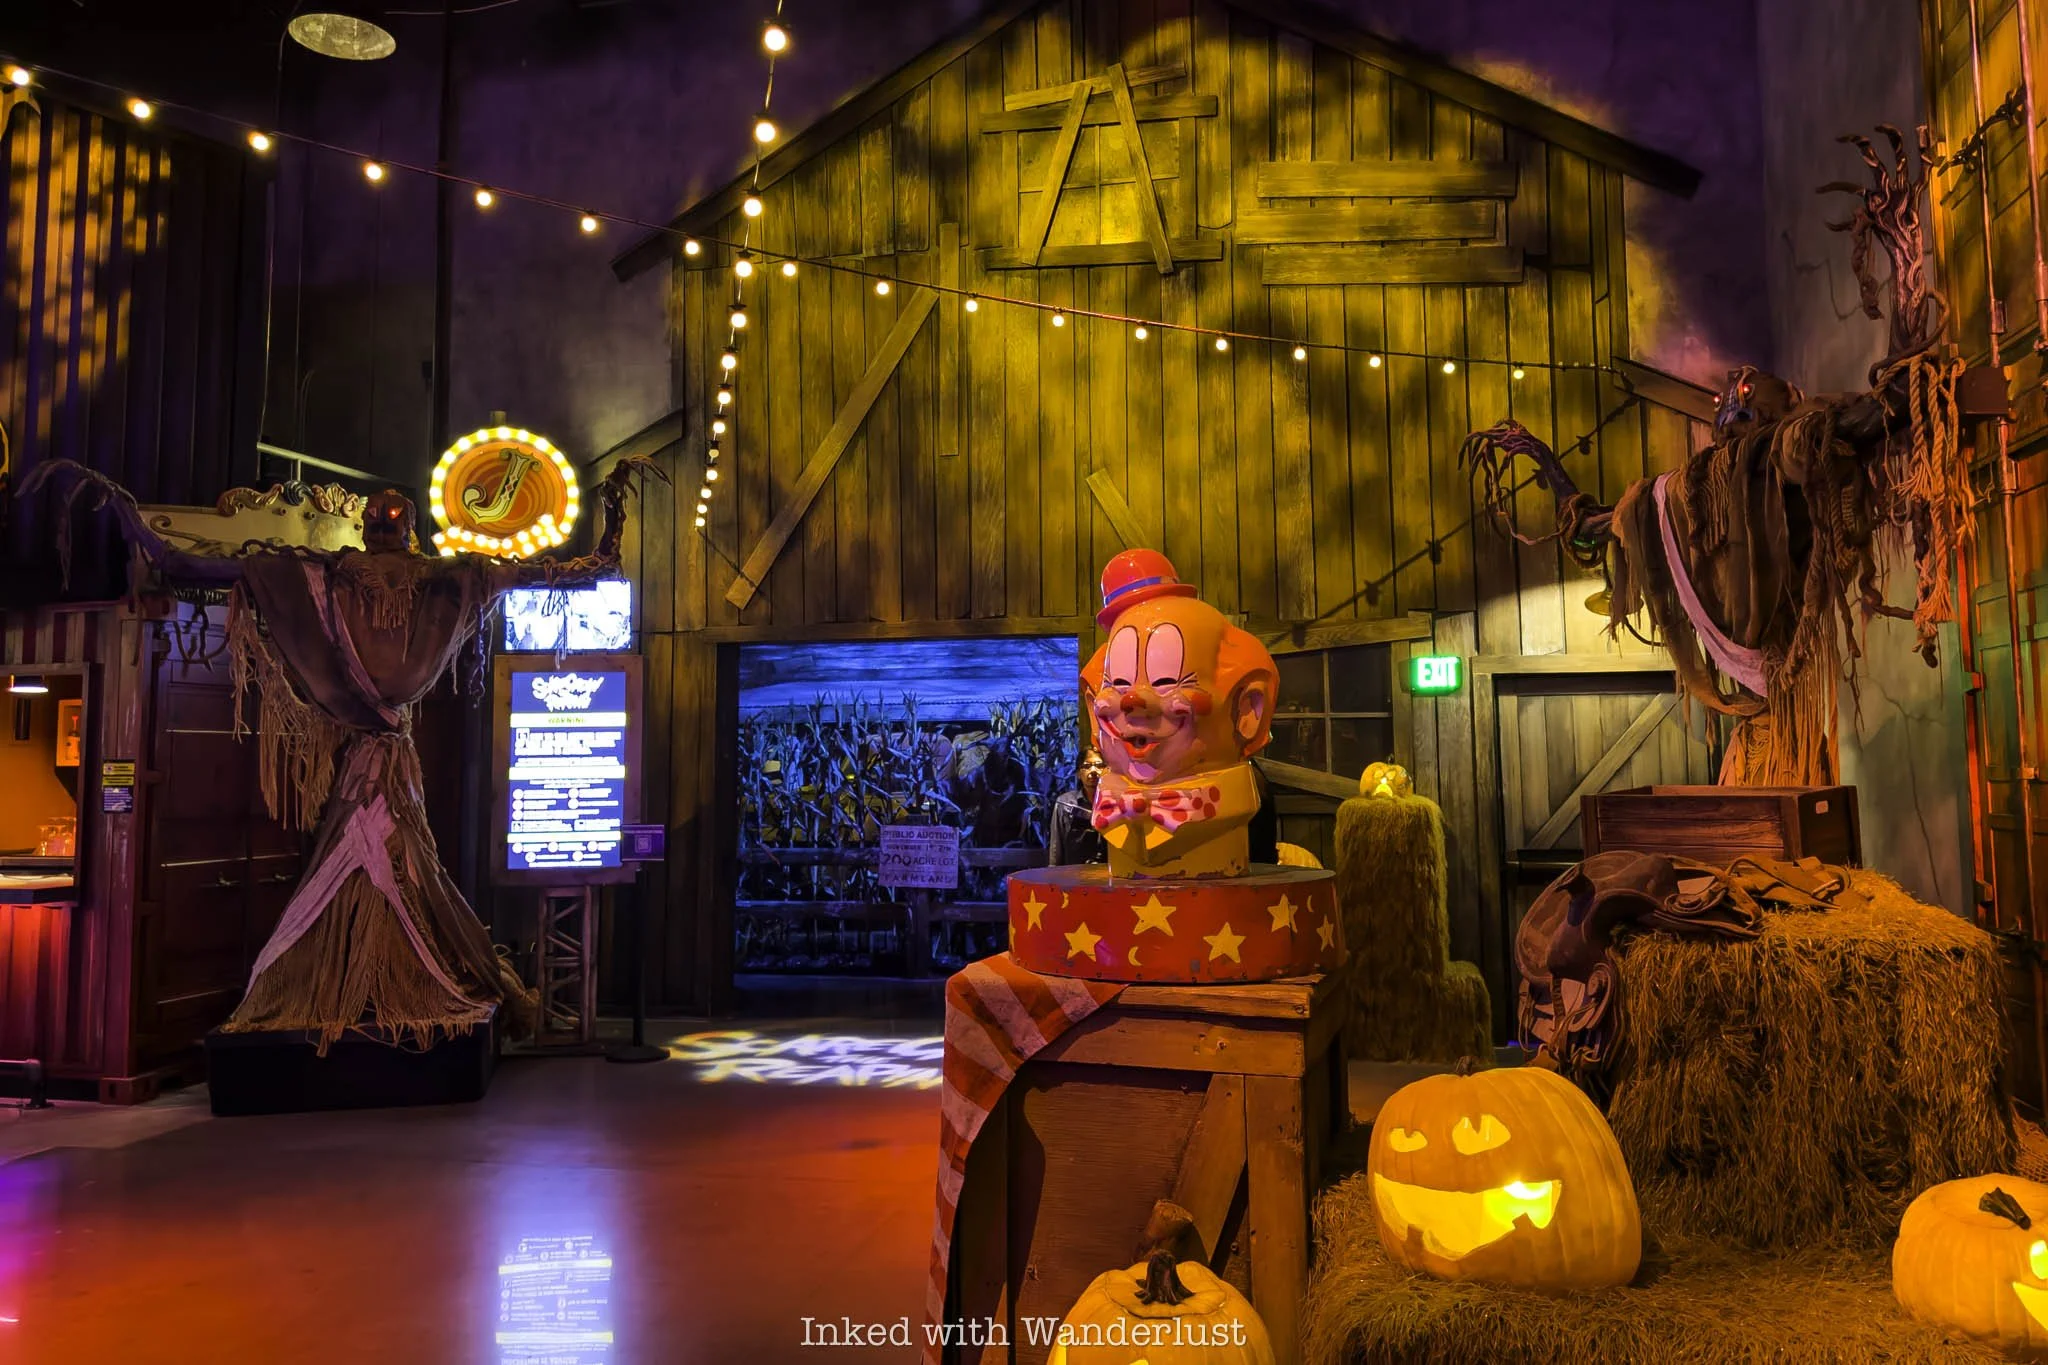
Scarecrow: The Reaping
These aren’t your standard, run-of-the-mill seasonal haunts. These distinctively detailed haunted houses offer a cinematic experience, at times making you feel like you’ve stepped right into a horror movie.
I was impressed with the level of detail, as each haunt we experienced featured expansive environments, cinematic lighting, immersive sound design and practical effects that blurred the line between attraction and film production.
Rather than rushing us from one scare to the next, the houses took time to establish their settings, allowing tension to build naturally as we moved from scene to scene, whether that was through a dark corridor or stepping into iconic horror movie moments.
Each house had its own distinct atmosphere, visual style and pacing, preventing them from feeling repetitive. The scare actors, of course, brought it all to life and made each encounter feel unpredictable.
The houses were noticeably longer than what many may be accustomed to at seasonal haunted houses. Instead of a quick walk-through, each experience unfolded over multiple scenes, giving you time to absorb the great deal of thought that went into each one.
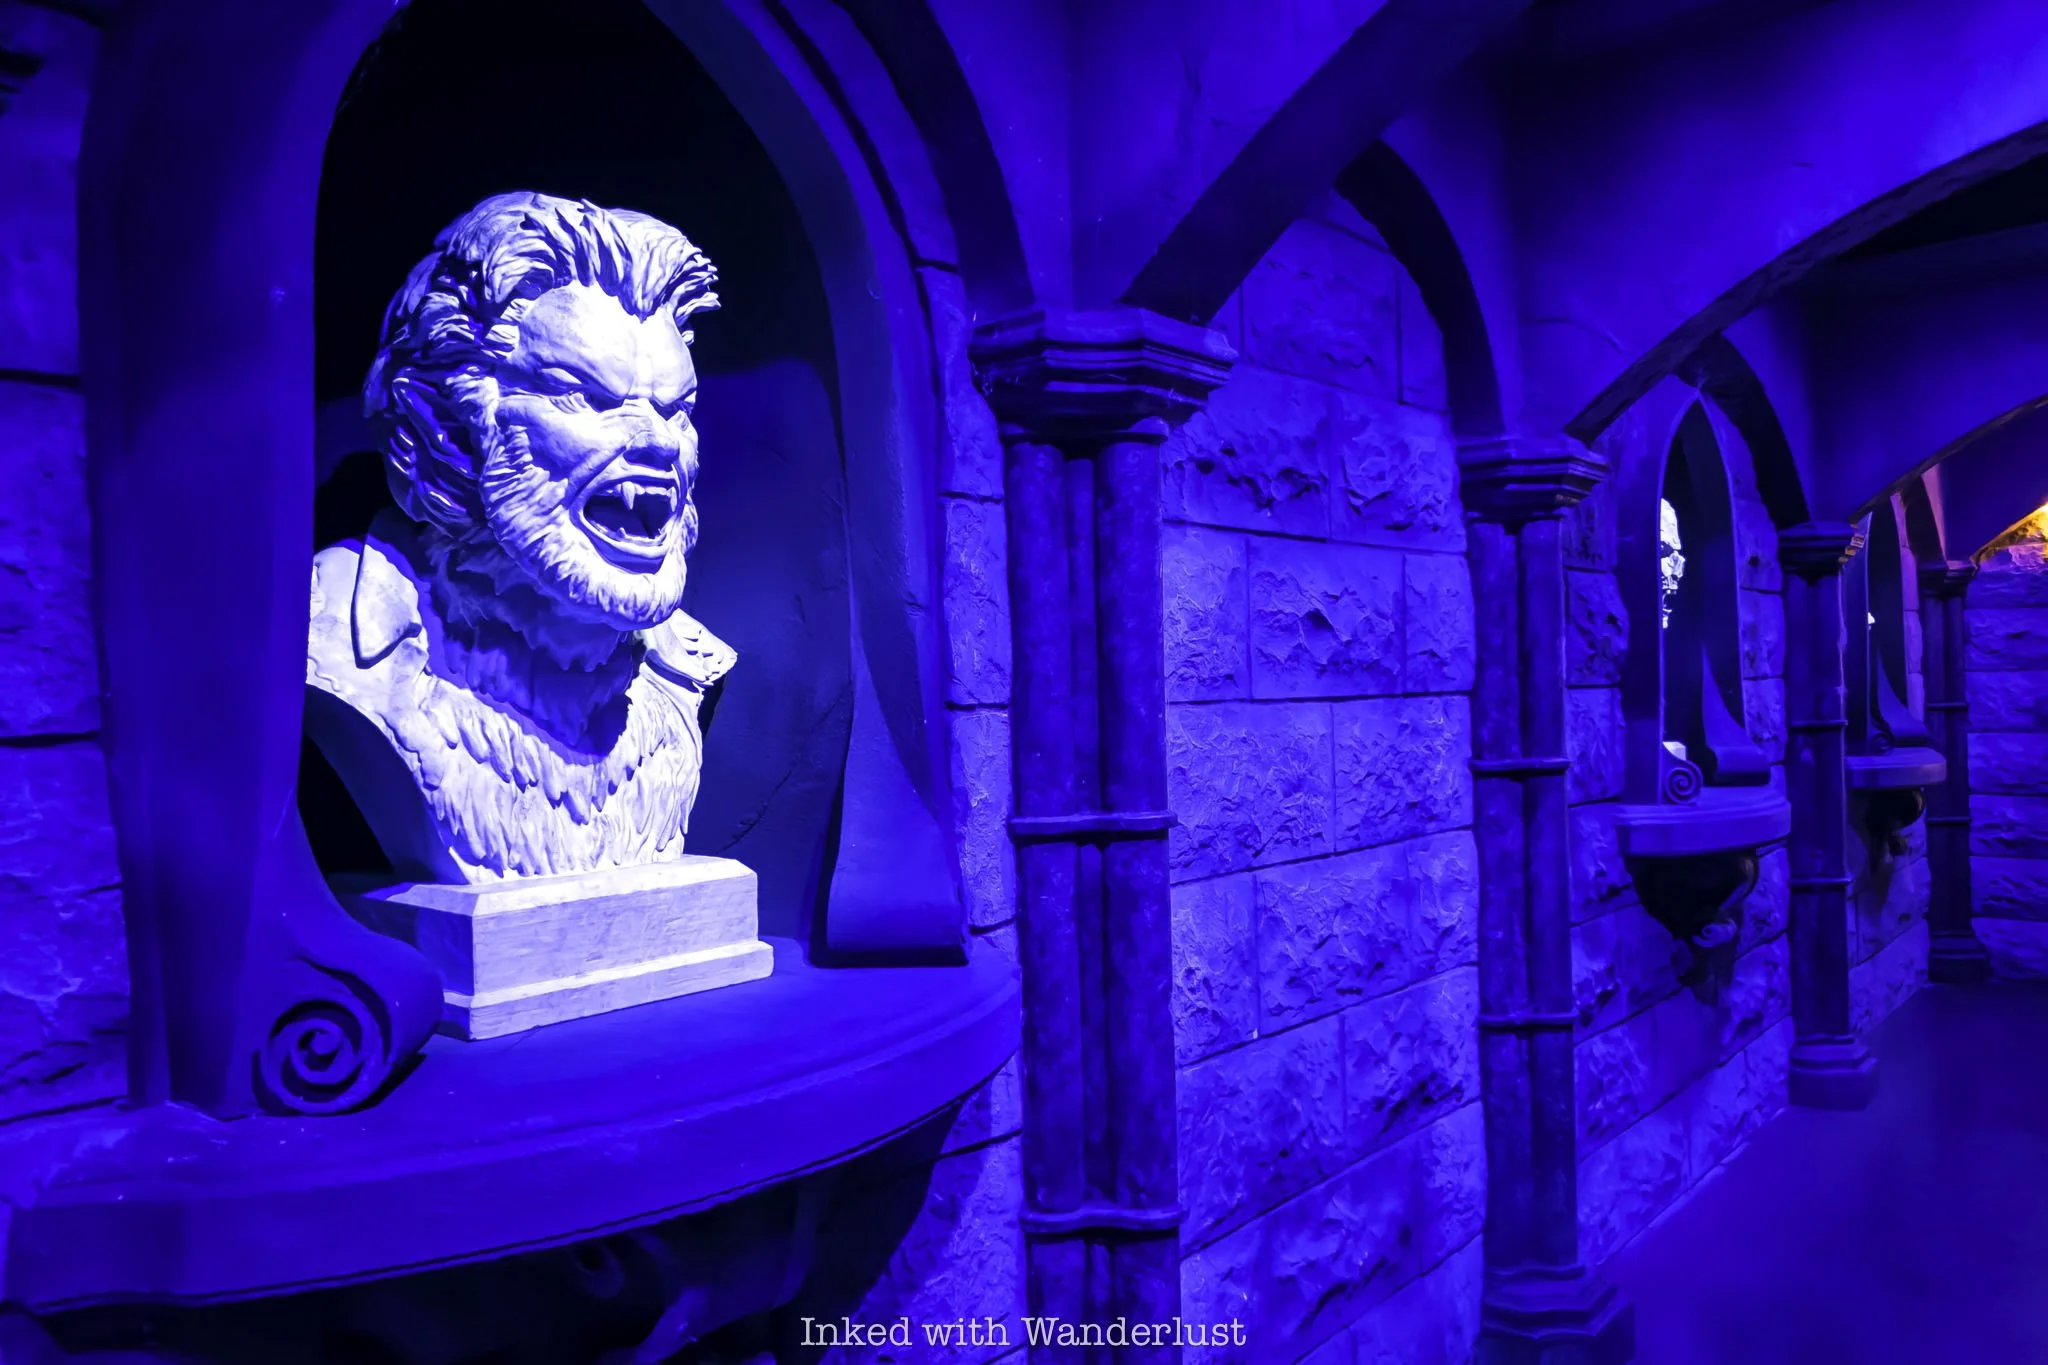
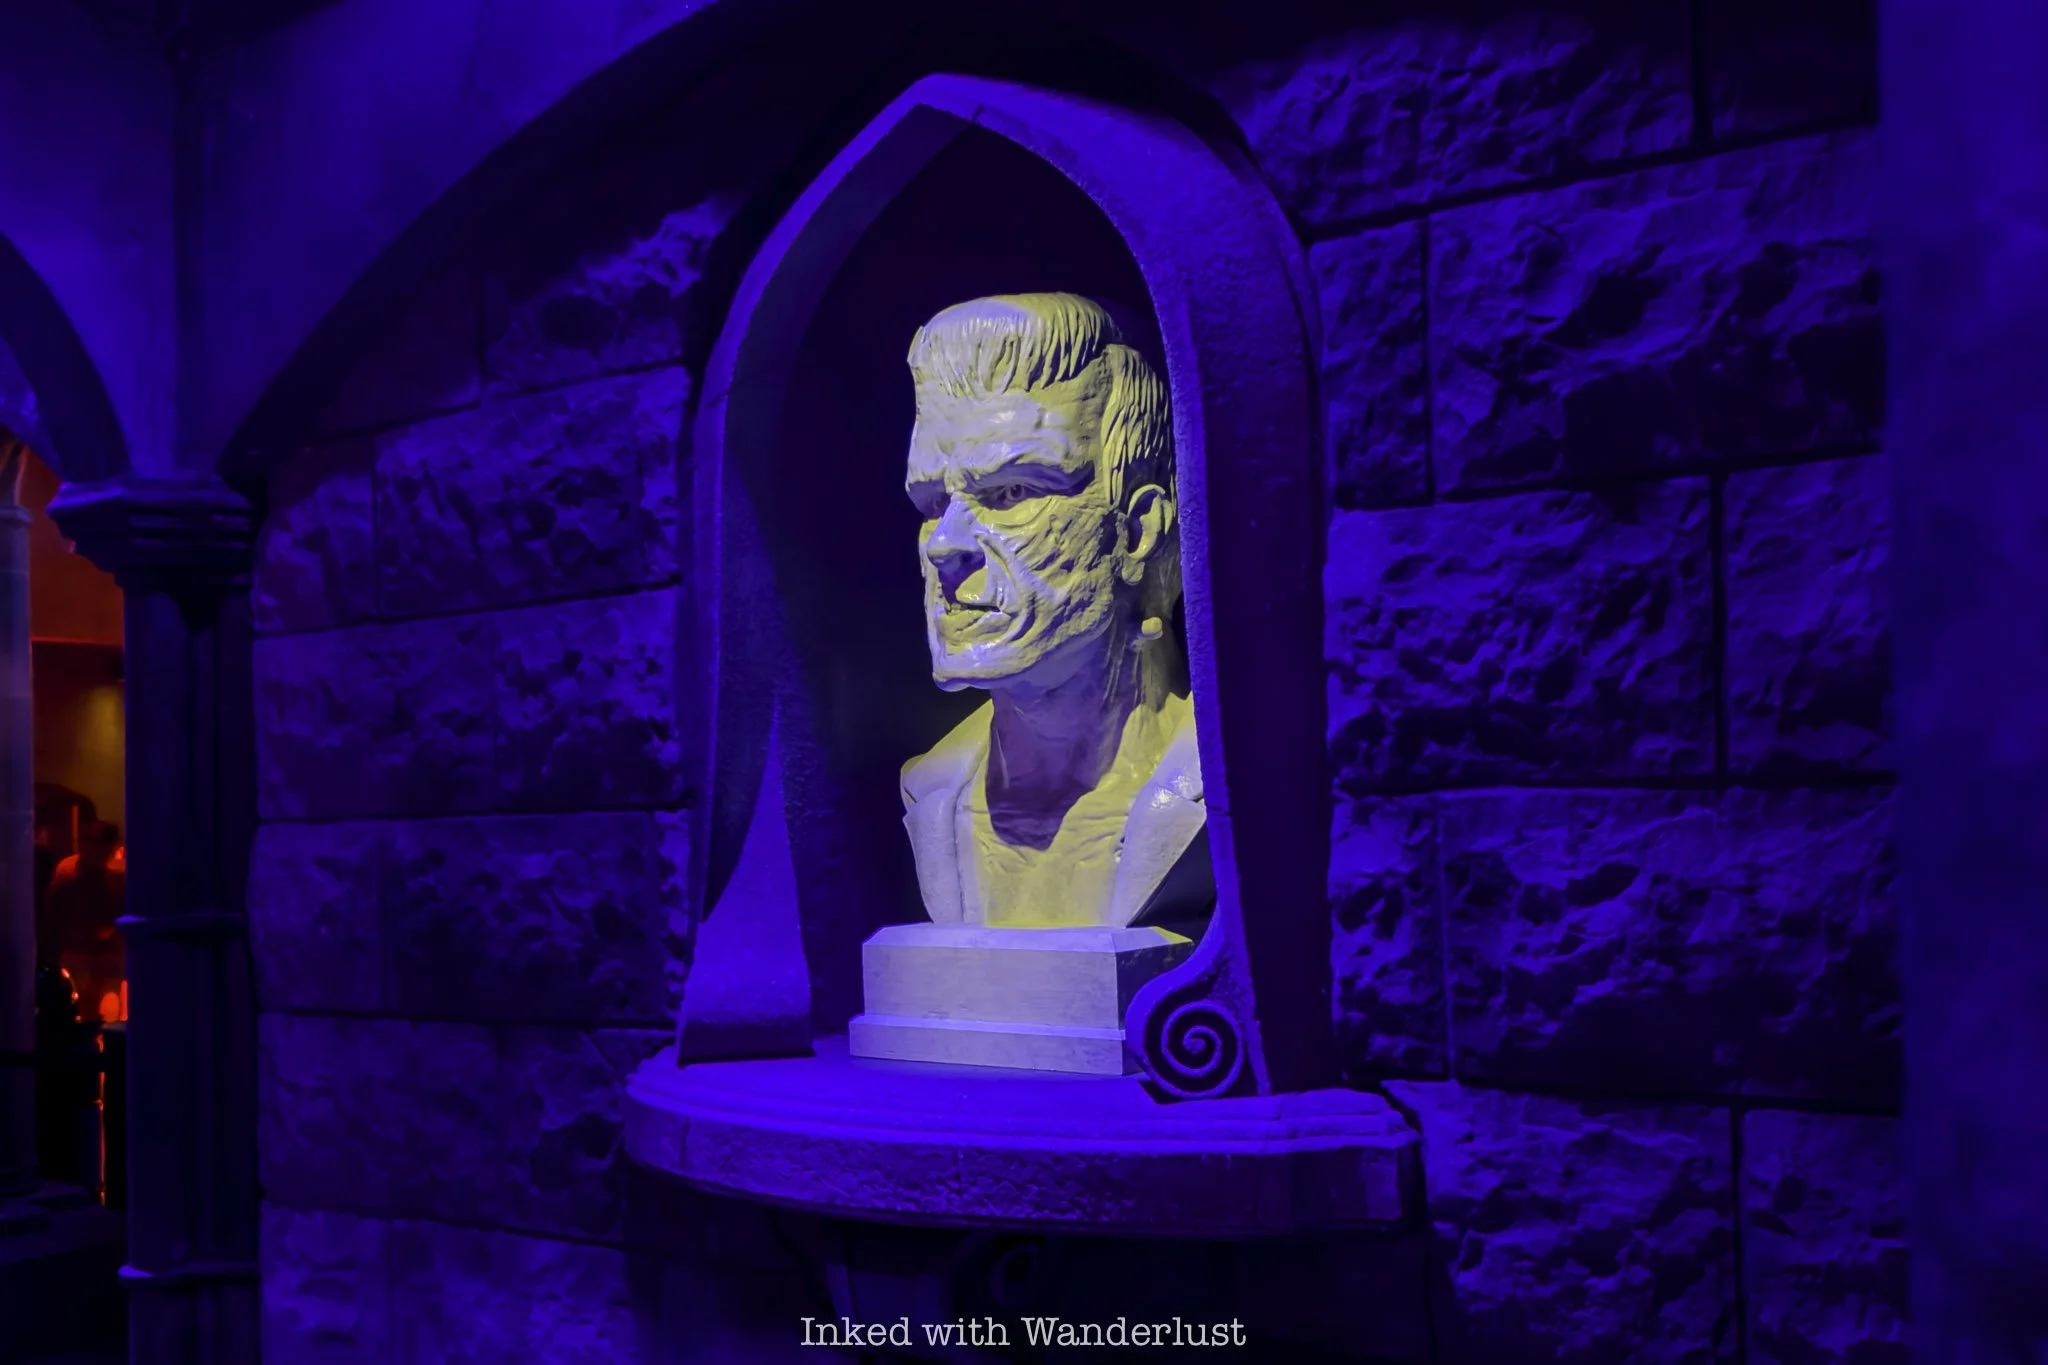
Universal Monsters, the flagship haunt at Horror Unleashed, focused more on atmosphere than outright terror. Iconic characters like Count Dracula and Frankenstein provided familiarity, but kept the scares coming with nondescript characters as well.
Seeing these classic monsters brought to life in such a setting was a true treat, despite my lack of extensive knowledge on the horror genre. It definitely wasn’t the scariest in the lineup, though I’d argue it was the most visually impressive.
Unfortunately, pictures and video are not allowed inside the haunted houses (in most cases), so I don’t have any to show you. There are several preview videos on Universal’s website and various YouTube influencer videos as well.
Kisha and I experienced two of the four haunted houses - Universal Monsters and Scarecrow: The Reaping. We ran out of time and couldn’t wait for Texas Chainsaw Massacre to reopen and there wasn’t a snowball’s chance in hell of me walking into the Exorcist haunt.
Of the two, Universal Monsters was my clear favorite. Scarecrow was excellent, though, as the rural farm setting gave me a feeling of isolation and unsettled anxiety. It built tension incredibly well, though the end fell flat as we ended up surprising the scare actor who initially didn’t see us.
Another well done trait of Universal’s haunted houses was the spacing of guests. A common complaint I’ve had of seasonal haunts is being sent in with a large group and the scares being ruined as they often occur at the front of said group, effectively ruining the experience for those in the back.
At Universal Horror Unleashed, employees send each party through by themselves and won’t let another through until the previous party reaches a certain threshold. Not once did I hear or see a scare coming due to the previous party’s screams.
Spacing us out retained the surprise element while also making us feel isolated, which significantly increased the suspense and tension, making each scare an event rather than a cheap pop. Aside from that one flub in Scarecrow, the actors executed each scare superbly well.
Live Entertainment

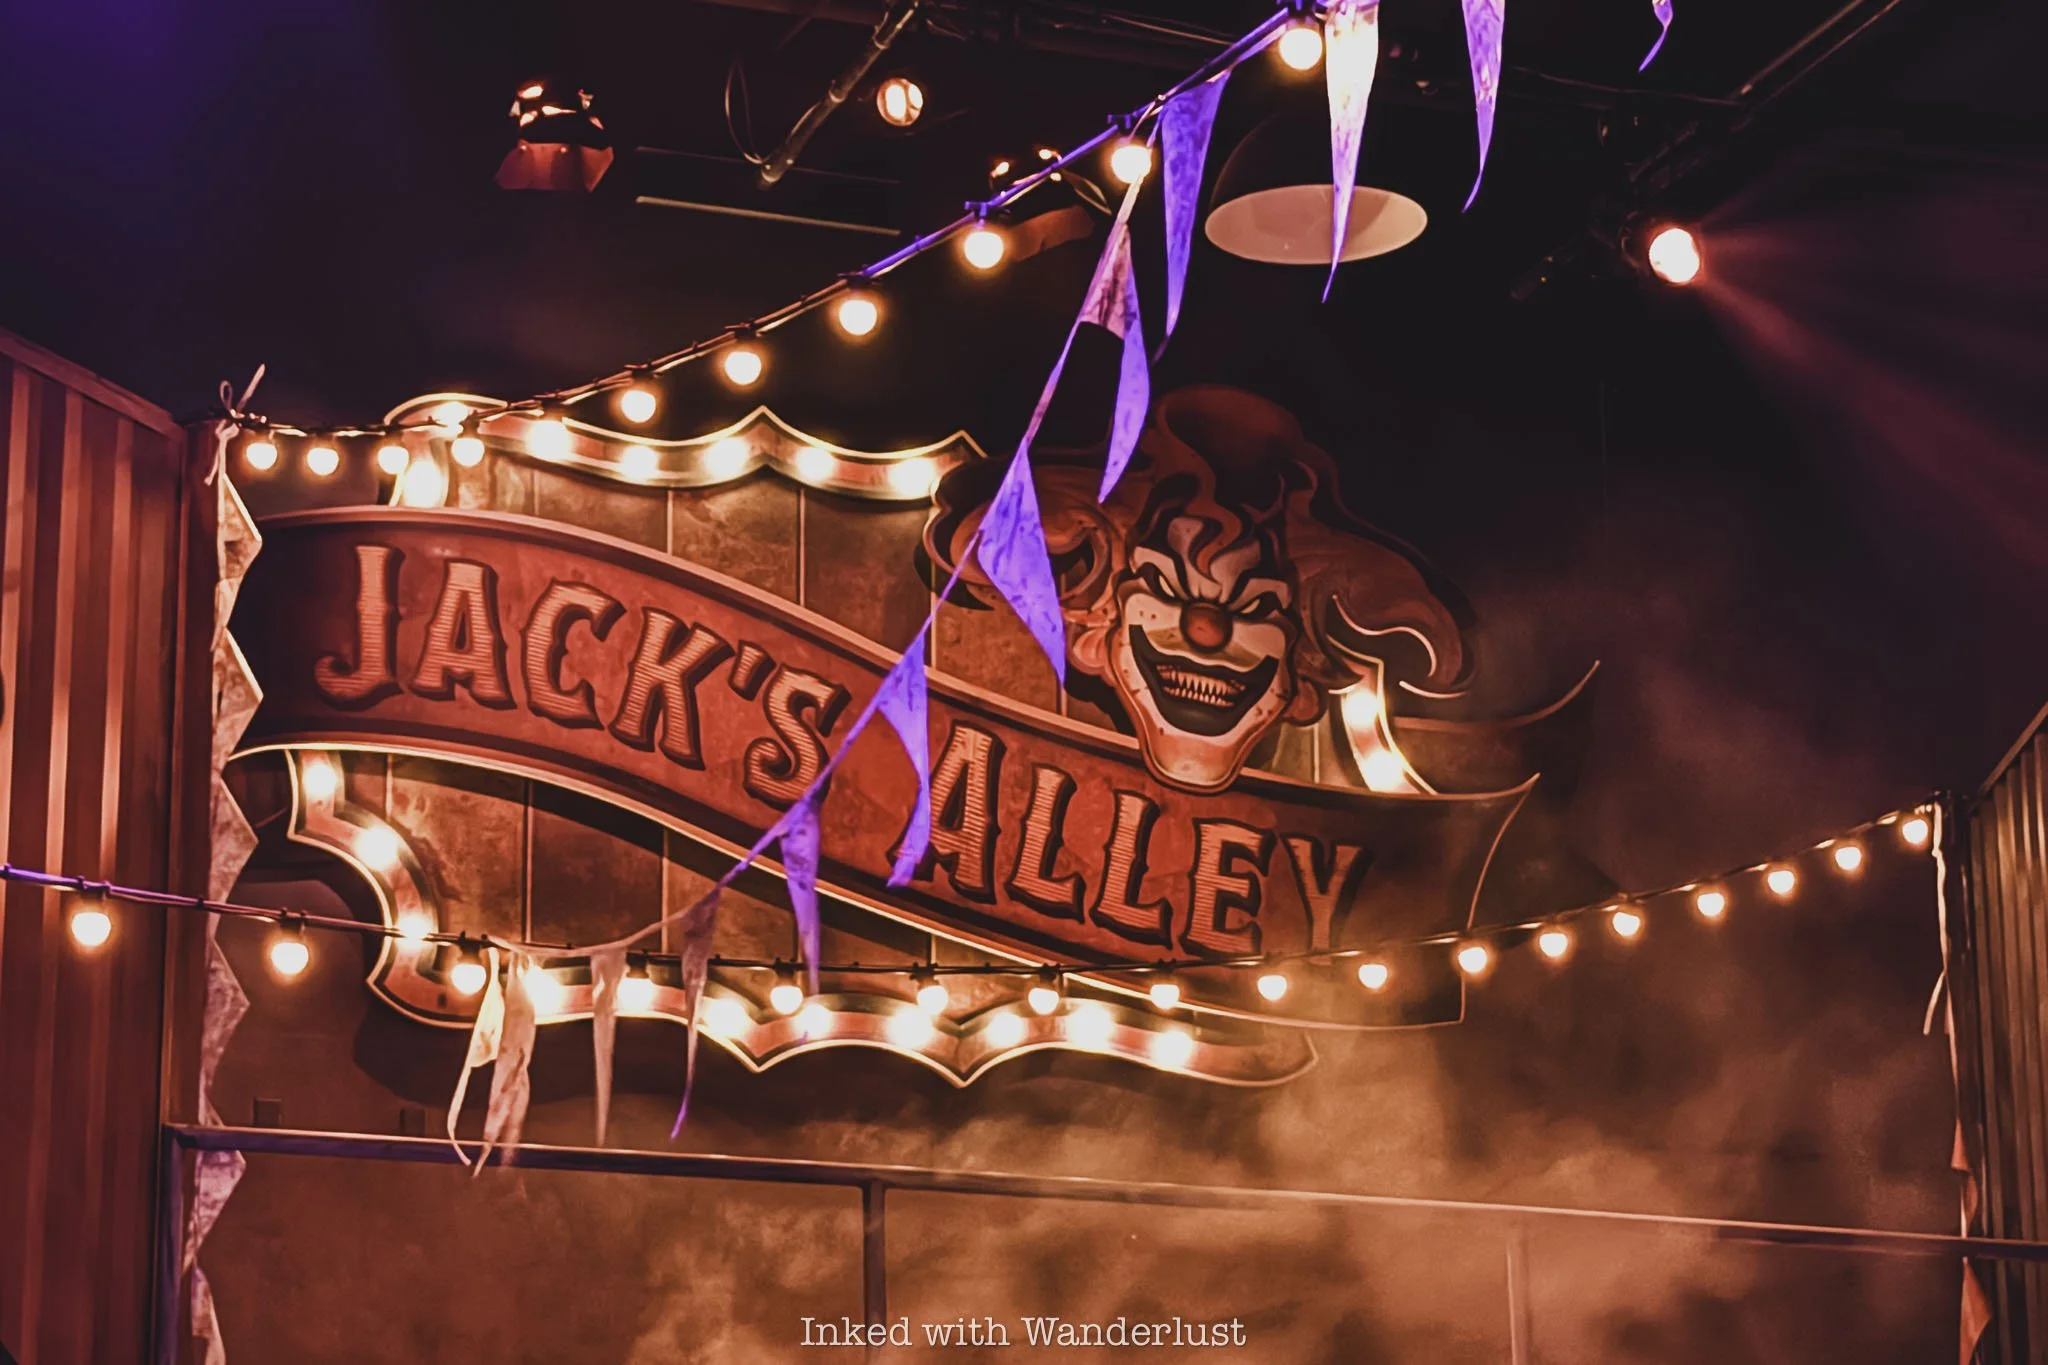
On the stage between Scarecrow: The Reaping haunt and the Premiere House restaurant, in the “Jack’s Alley” space of the venue, a variety of stage shows occur throughout the night at regular intervals.
The main show, hosted by Halloween Horror Nights icons Jack the Clown and his partner, Chance, is aptly named “Jack & Chance: Stay or Slay”. It’s a dark comedy talent show where unwilling “contestants” are brought on stage.
The contestants perform a variety of acts to impress Jack and his followers. If they do, they’ll stay (or, live). If they fail, they’ll slay (or, die - figuratively, of course). I caught this show from afar while enjoying a drink and meal at Premiere House.
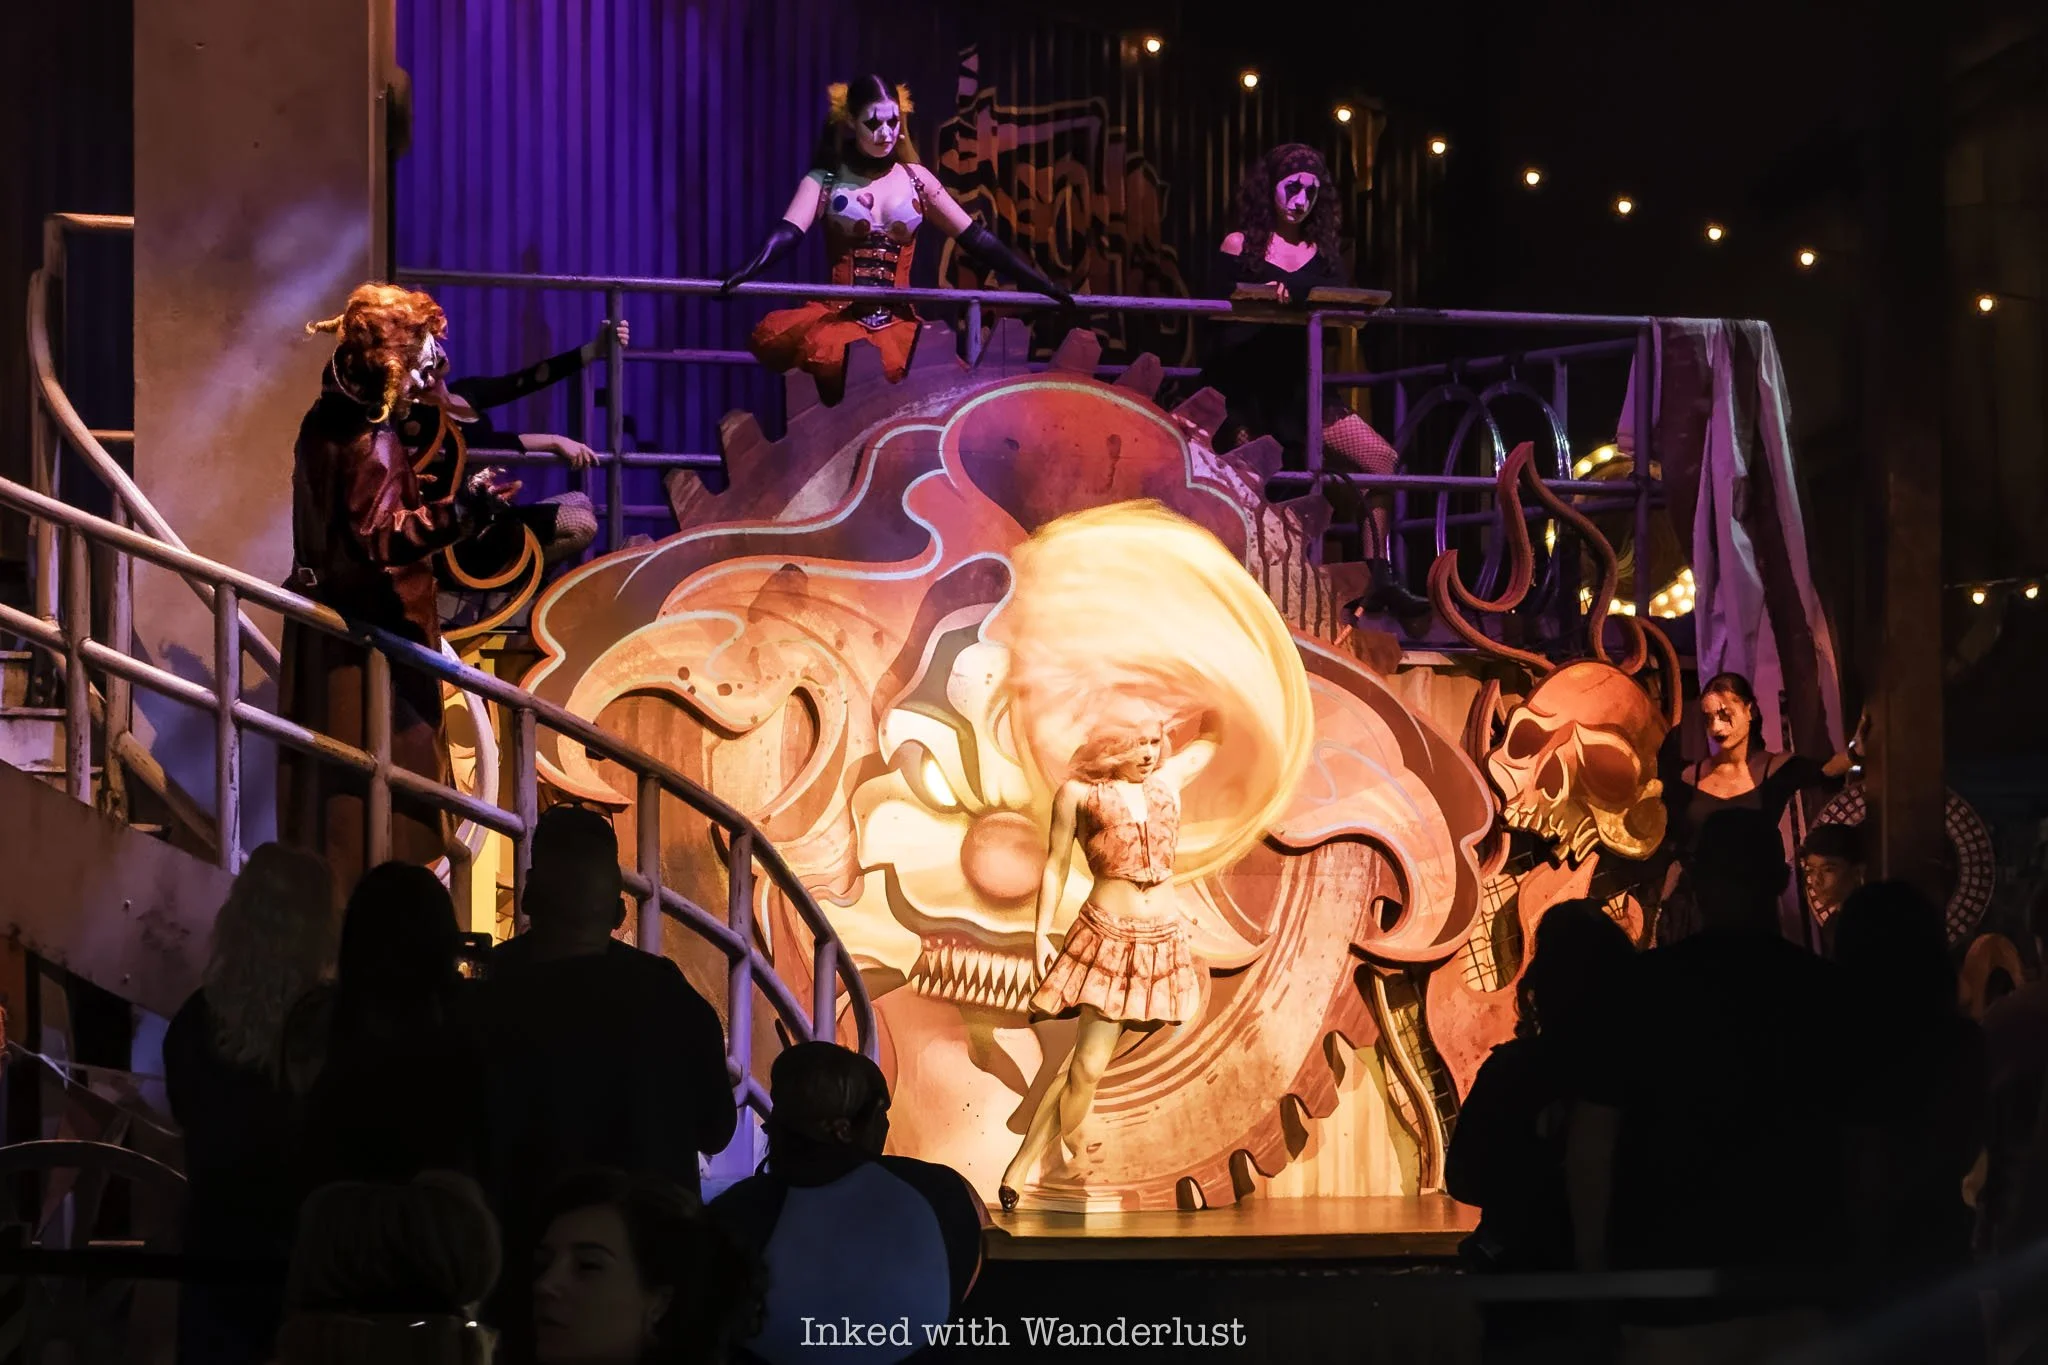

Another show is performed by a character named, The Joker. It’s a stand-up comedy-style show with heavy emphasis on adult-oriented topics. The Joker also performs an impressive juggling act using various “severed body parts” and other objects.
Both stage shows are more appropriate for a mature audience, but The Joker’s show is definitely not suitable for kids at all. There are many murder and domestic violence-related remarks, as well as many sexual innuendos.
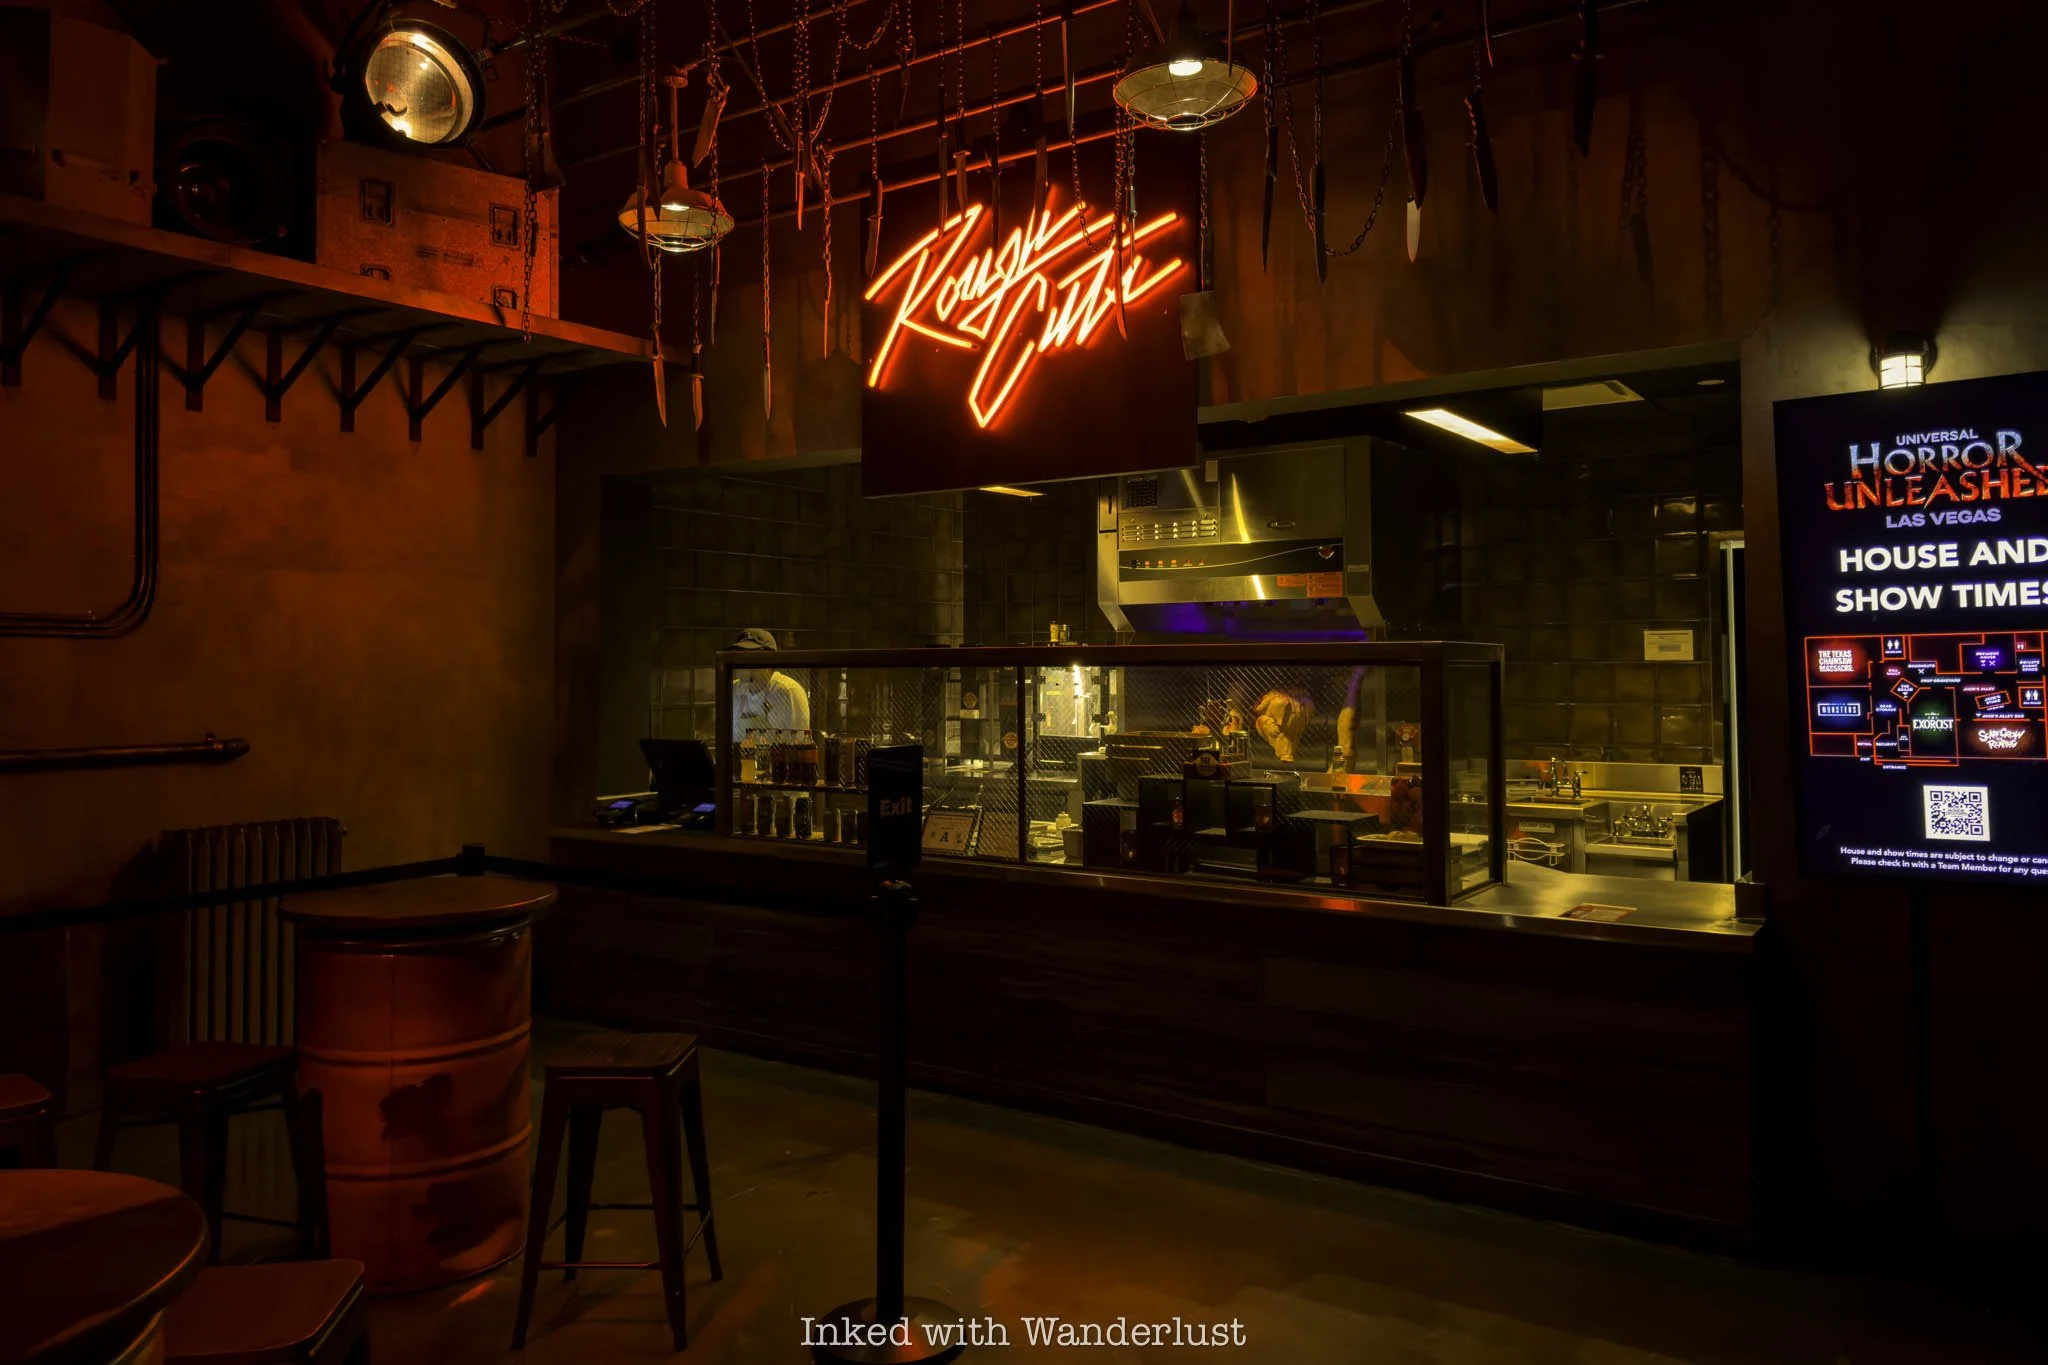
To see which shows are planned for the day and their respective showtimes, you can check the digital board on the wall to the right of the Rough Cuts ordering counter. There may be other boards throughout the venue, but that’s the only one I noticed.

Both shows offer a pleasant change of pace between haunted houses, offering a mix of horror, dark humor and energetic performances. The performers are clearly committed to their roles and production values are decent.
They’re high energy, but relatively short. Depending on your timing, it could be easy to miss large portions of a show while exploring the venue. Also, I felt that storytelling took a bit of a backseat to spectacle, which devalued the overall show.
That said, the stage shows are a fun addition that help make Universal Horror Unleashed feel like a complete travel destination rather than just a collection of haunted houses. They play a significant role in keeping the energy of the venue high.
Dining Options
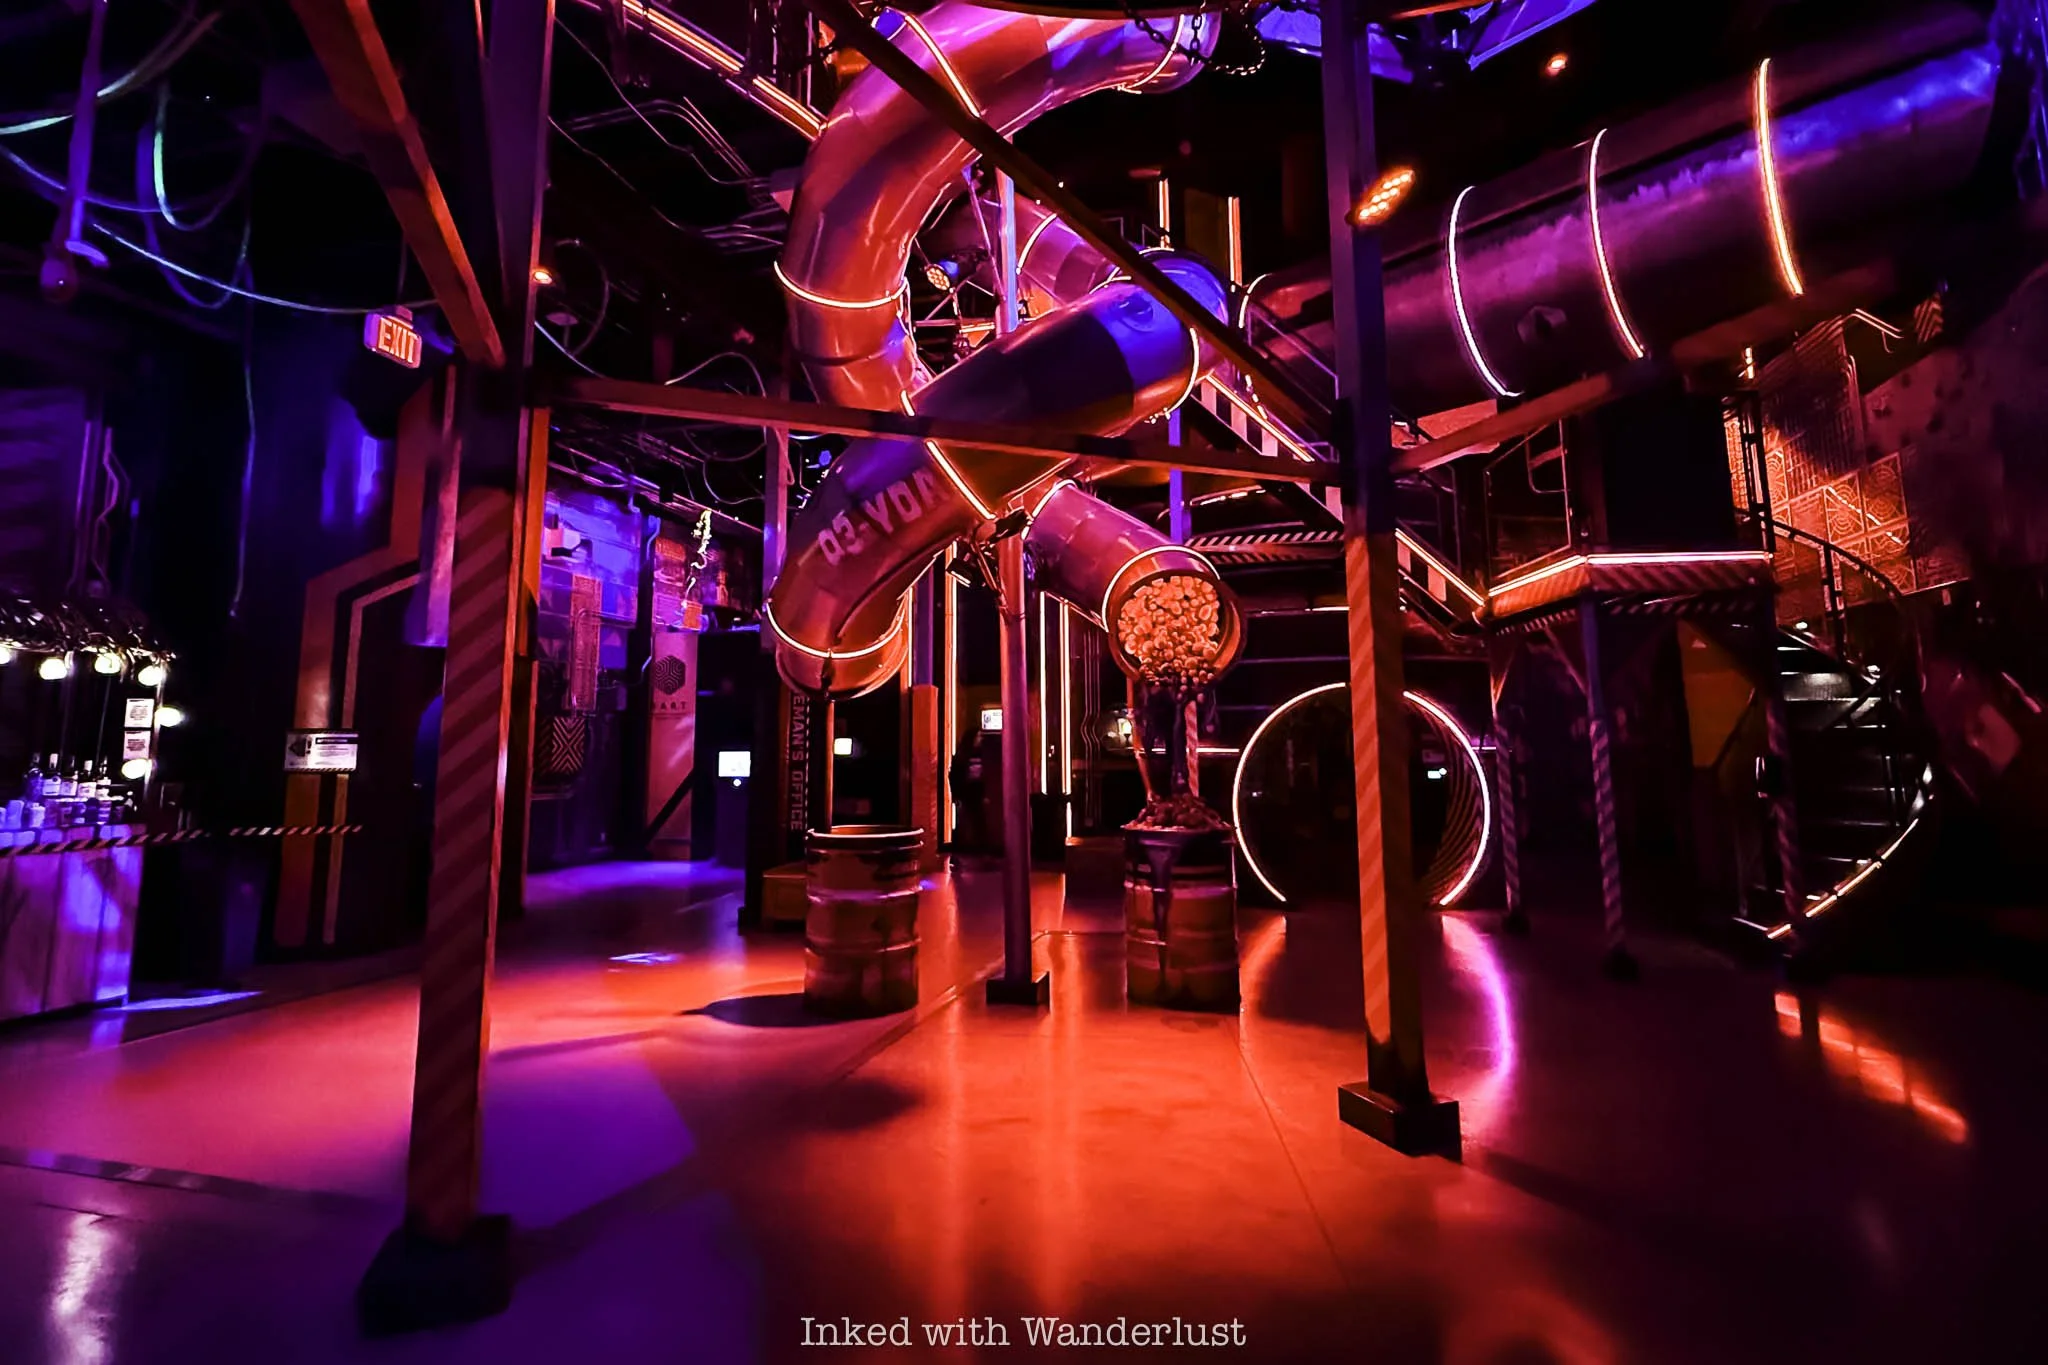
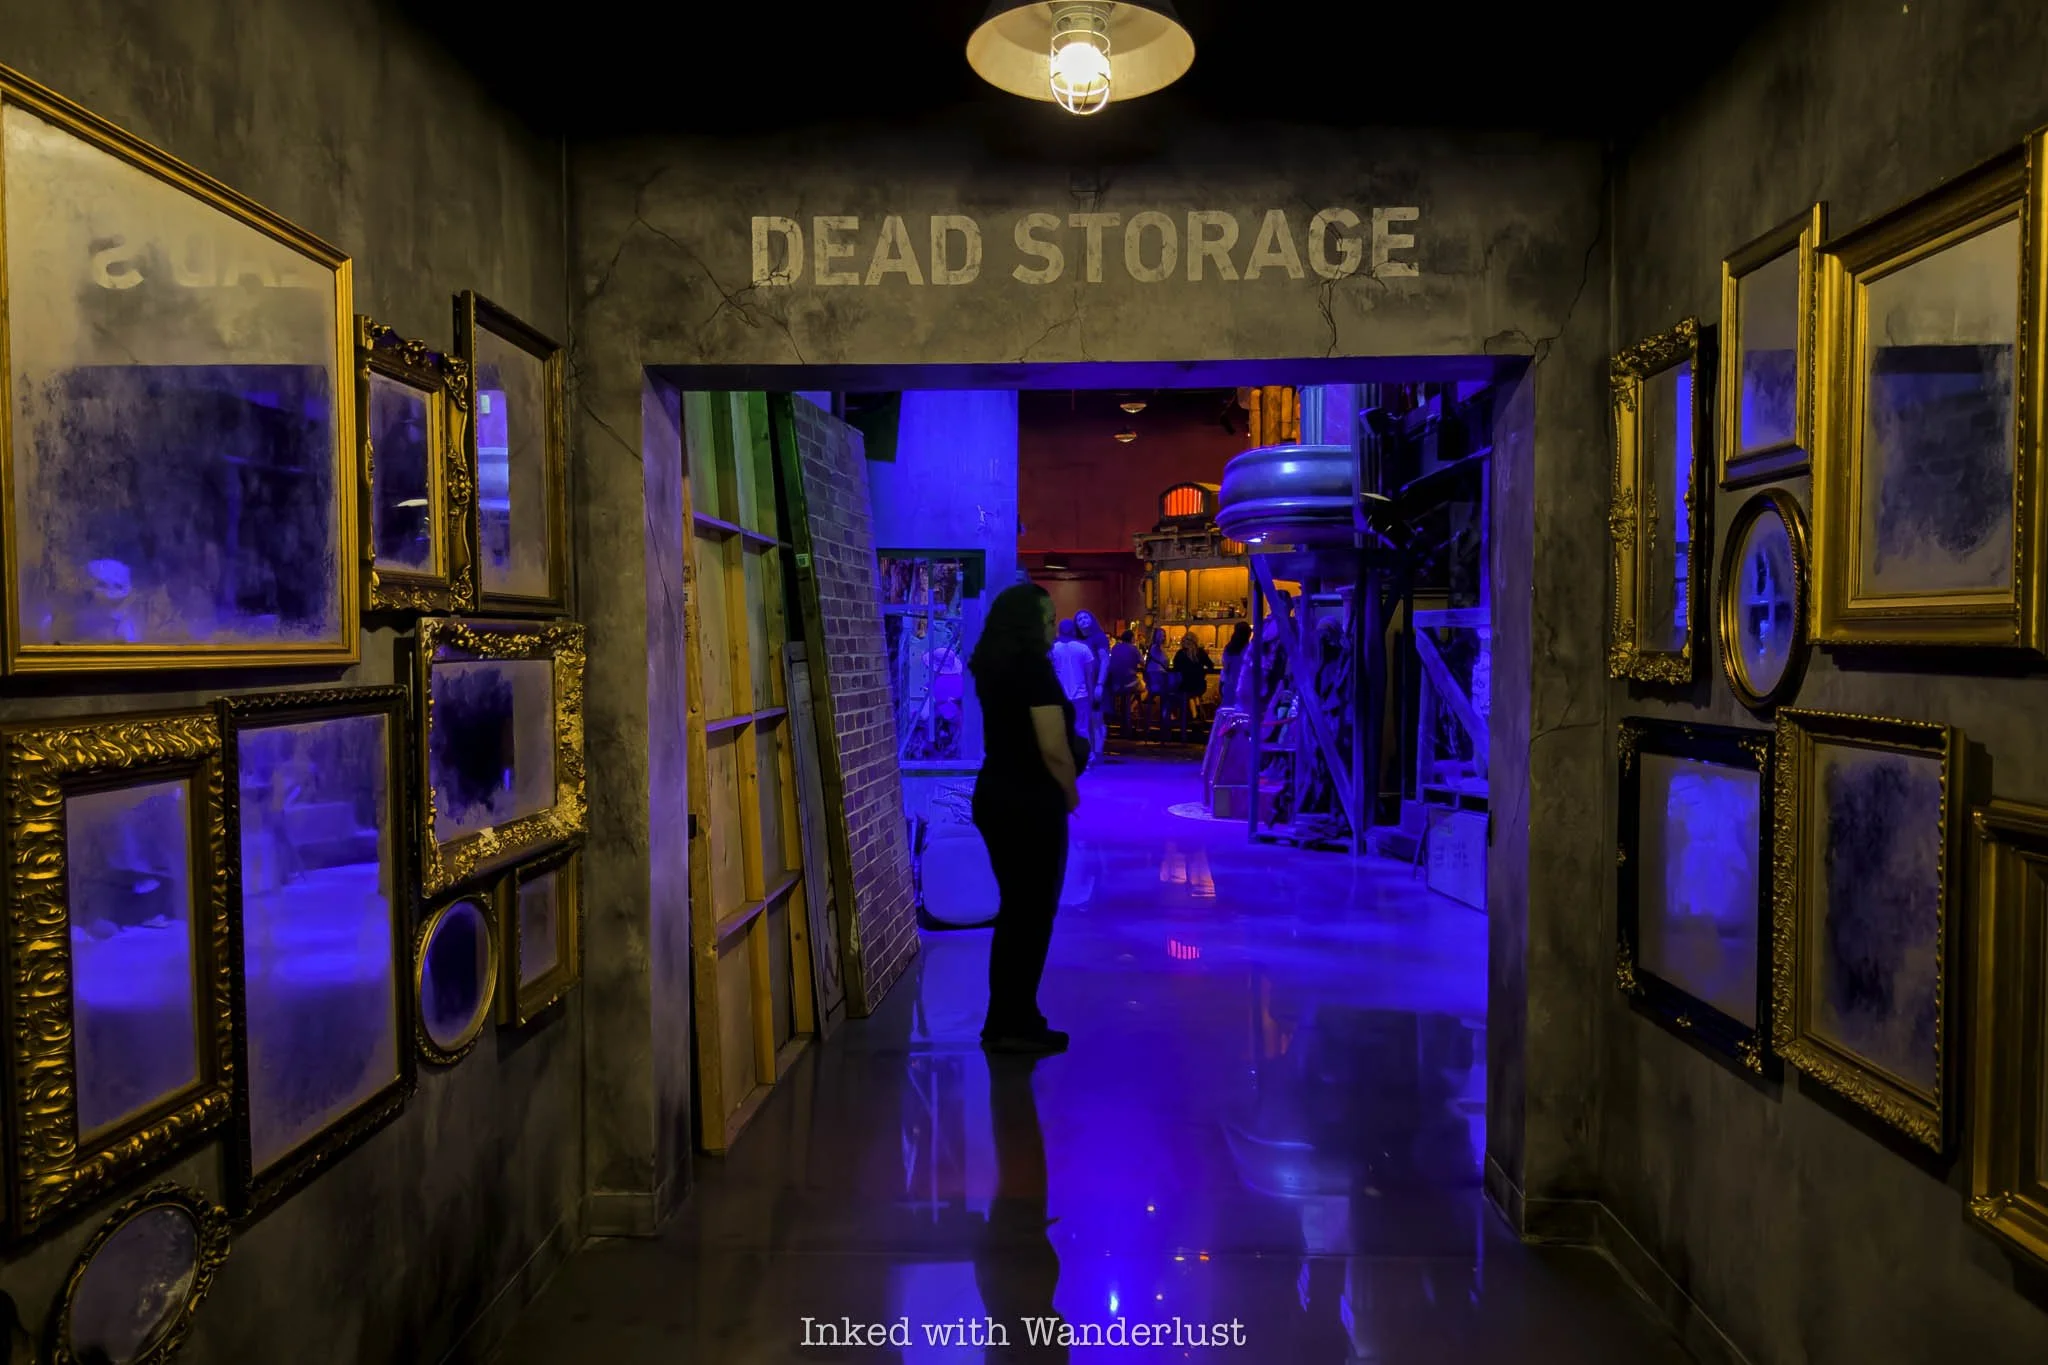
There are several on-site dining and drink options at Universal Horror Unleashed. They have a quick service-style eatery, “Rough Cuts”, that serves a variety of handheld entrees such as ribs, pizza and hot chicken sandwiches. You can find it adjacent to the Texas Chainsaw Massacre haunt.
In the same vicinity is “The Boiler”, an industrial-themed bar serving up crafted cocktails, beer, wine and mocktails. It’s an eye-catcher, as it’s one of the first features you’ll see upon entering the Dead Storage area of the venue.
Past the Prop Graveyard hallway and into Jack’s Alley are two more food and drink options. To the left of Scarecrow: The Reaping haunted house is Jack’s Alley Bar, heavily themed after HHN icon Jack the Clown and his demented circus.
Many of the drinks served at The Boiler are also served here, but Jack’s Alley Bar features exclusive drink options as well. One such cocktail is the rum-based “Jack’s Juice”, a delicious concoction of cherry brandi, bitters, lime, simple syrup and mango nectar.
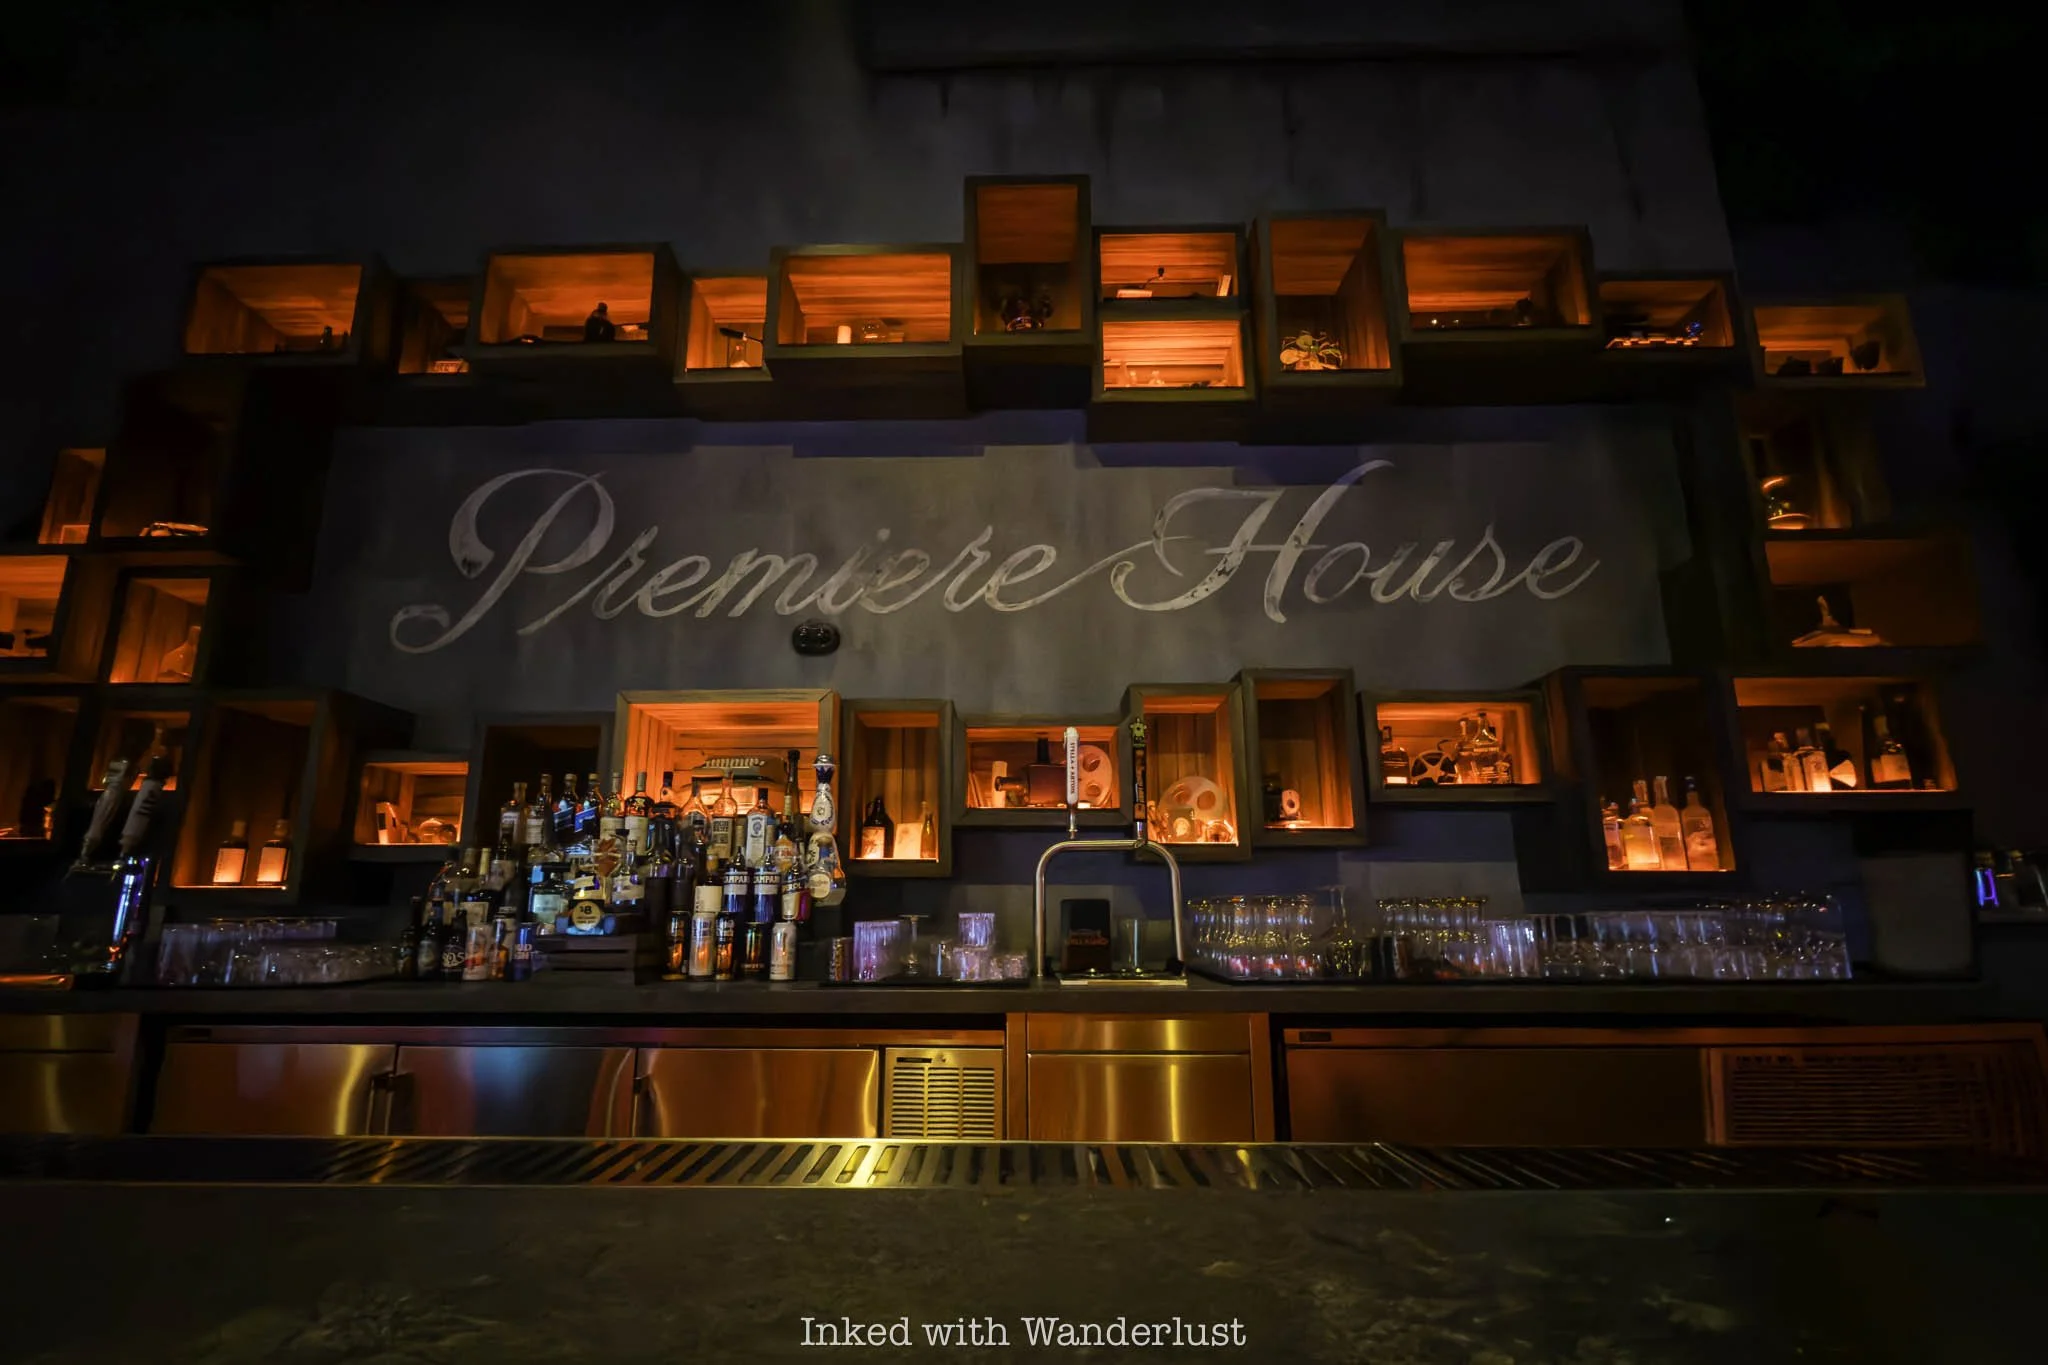
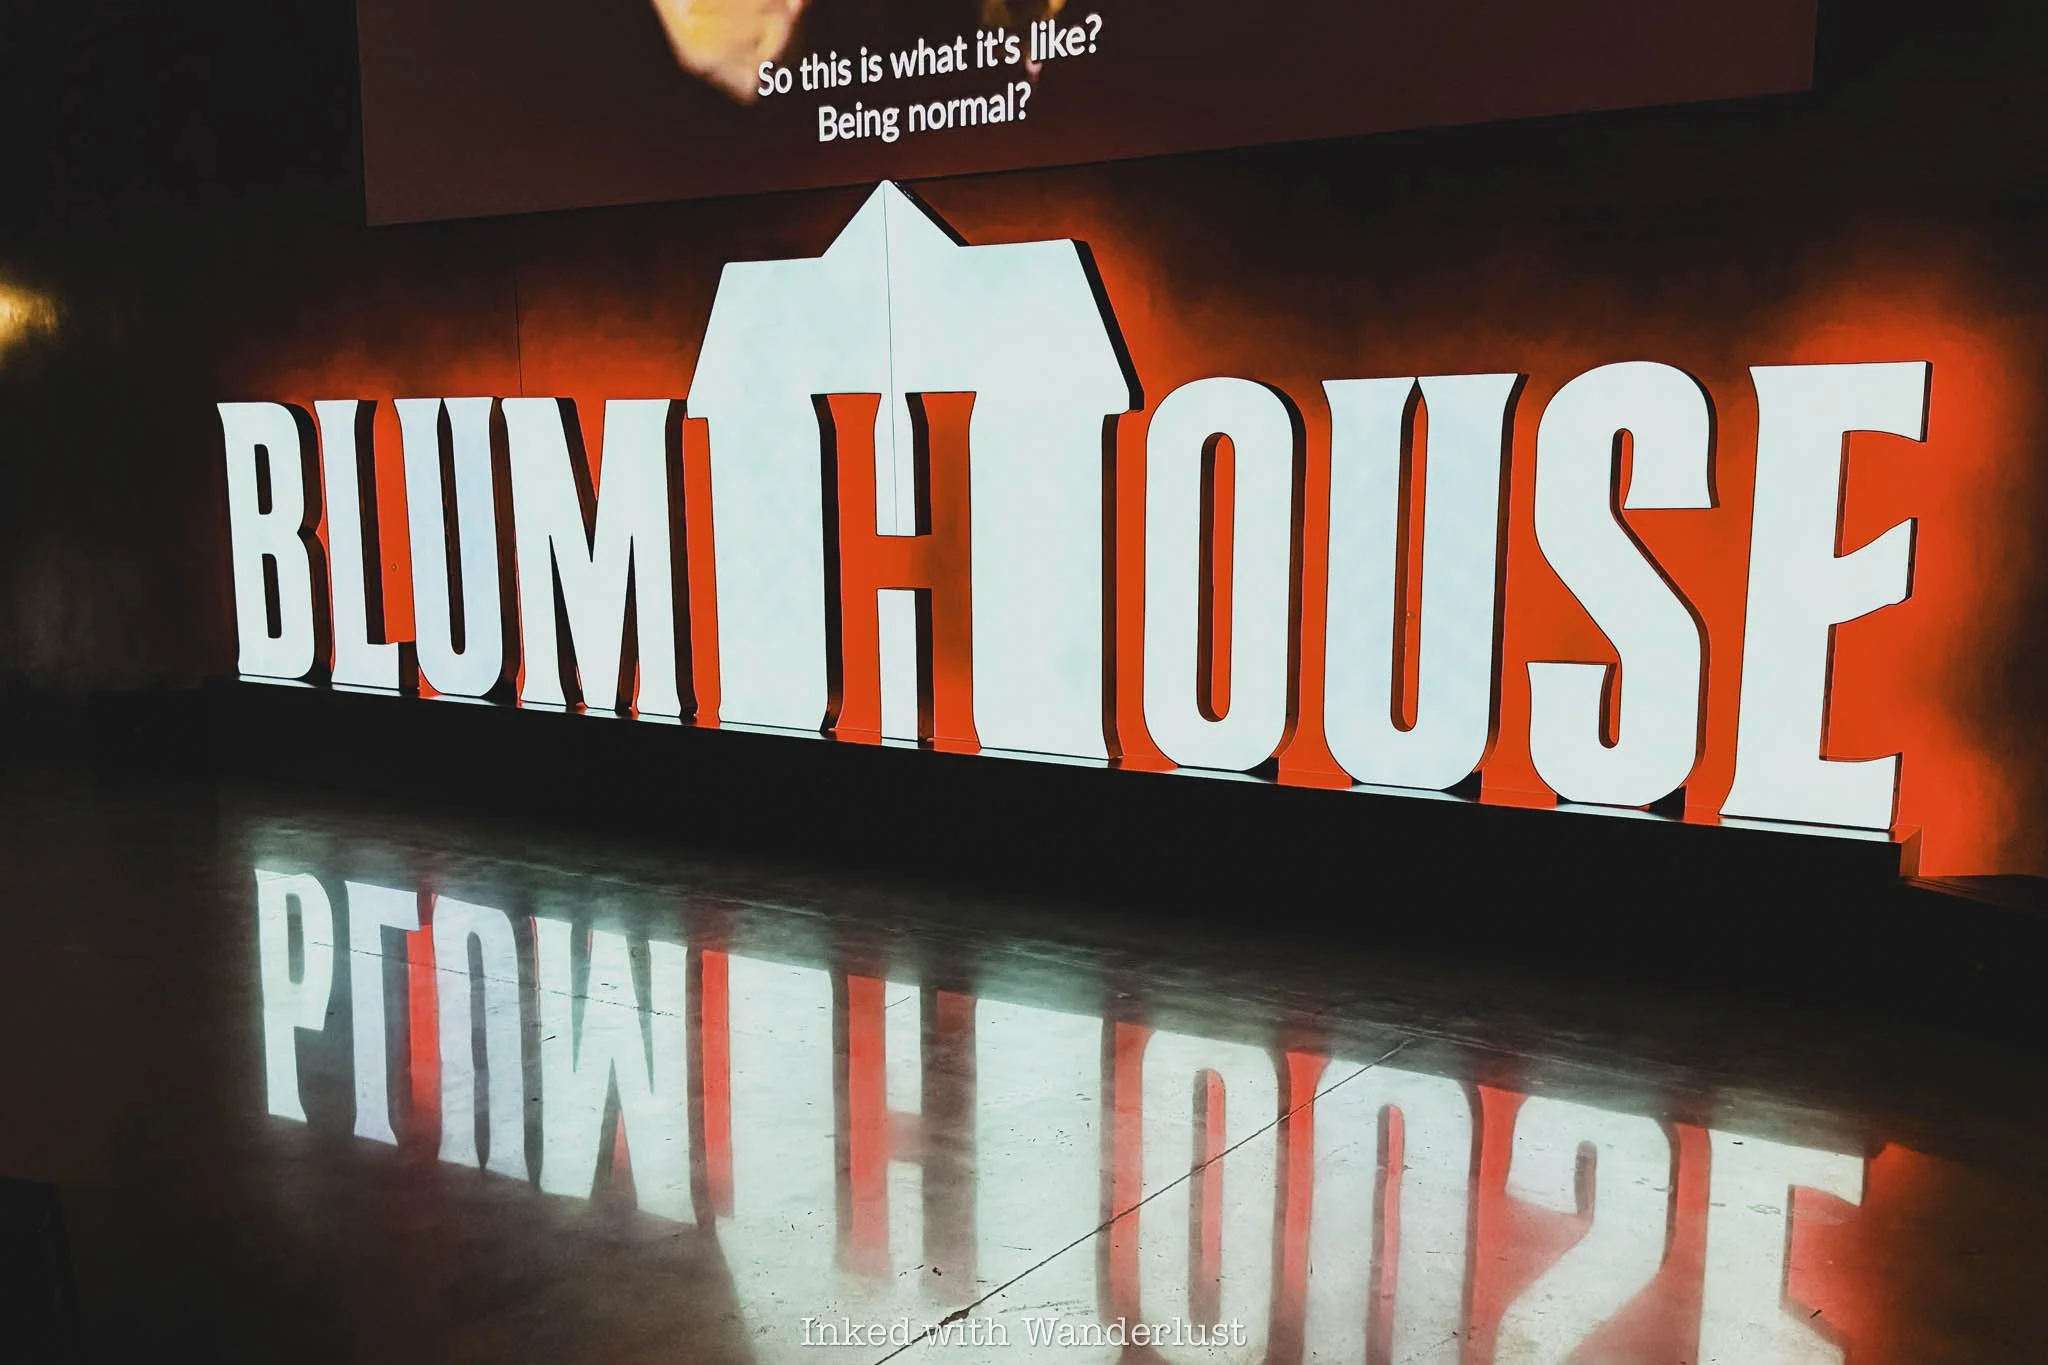
The flagship restaurant at Universal Horror Unleashed is “Premiere House”, heavily themed to Blumhouse, an immensely popular production company responsible for many modern day horror film classics.
Premiere House extends the horror experience with a moody, cinematic atmosphere filled with creepy details, dramatic lighting, and subtle nods to some of horror’s most recognizable films. It feels more like another attraction rather than just a restaurant.
Despite its unsettling surroundings, it’s a great place to sit and relax between scares while enjoying a meal from their surprisingly polished menu. There are also movie props on display, as well as appearances from horror AI doll, M3GAN.
Is Universal Horror Unleashed Ok for Kids?
I believe questions like this are highly subjective and are up to each person’s perspectives and beliefs. What one parent may deem inappropriate for their child, another may see as no big deal for theirs. Neither are more right or wrong than the other.
Full transparency, I do not have kids. I do, however, have a young nephew and two, even younger nieces. So I’m going to answer this question from an Uncle’s perspective and whether or not I would take my own nephew and nieces to UHU.
Let’s begin with the fact that Universal themselves recommends taking no one under the age of thirteen to their venue. They don’t outright say that those under thirteen cannot enter, though. It’s important to distinguish that.
Conversely, they’ve implemented a chaperone policy for anyone under eighteen. So Universal doesn’t necessarily prohibit children from Horror Unleashed, but they do discourage bringing those under thirteen and require an adult to accompany any and all minors.
Honestly, it’s for good reason. The four haunted houses are indeed scary (likely downright terrifying to children), the props/decor are gory and lifelike, and the stage shows portray explicit topics and language.
So do I feel that Universal Horror Unleashed is suitable for kids? The answer is no, I do not. I wouldn’t judge any parent (or cool Uncle) for bringing theirs but I, personally, wouldn’t bring my young nephew and nieces here.

To say I wouldn’t recommend bringing kids to Universal Horror Unleashed isn’t a knock on the venue and shouldn’t be perceived as such. In fact, it’s a compliment. They’ve executed the horror element to the point that I just feel most kids wouldn’t handle it well.
That said, for everyone else, I highly recommend visiting UHU. If horror isn’t your thing but you’re mildly curious or you’re coming with someone who’s a fanatic, Horror Unleashed is a great introduction into the world of horror entertainment.
It made me a fan, for sure. While you’ll never catch me in any of the hardcore haunted houses or watching gory thrasher movies, I’m now more open to the entertainment and immersive side of the horror genre than I ever was before. I, for sure, will be going back.
Since you’ll be there anyway, consider exploring another popular Area 15 attraction, Meow Wolf’s Omega Mart, located a stone’s throw from Universal Horror Unleashed. Or, head to the strip and take a ride of Flyover Las Vegas! Never been to Area 15? Read my ultimate guide here!
***Take advantage of discounts by purchasing Universal Horror Unleashed tickets through my preferred partner, Viator, at my link here.
Is the High Roller Happy Half Hour Ticket Worth It?
Opened in 2014 as the crown jewel attraction of the then newly minted Linq Hotel and Experience, High Roller…
Disclosure: This post contains affiliate links. If you make a purchase through these links, I may earn a small commission at no additional cost to you. I only recommend products or services that I believe will add value to my readers.

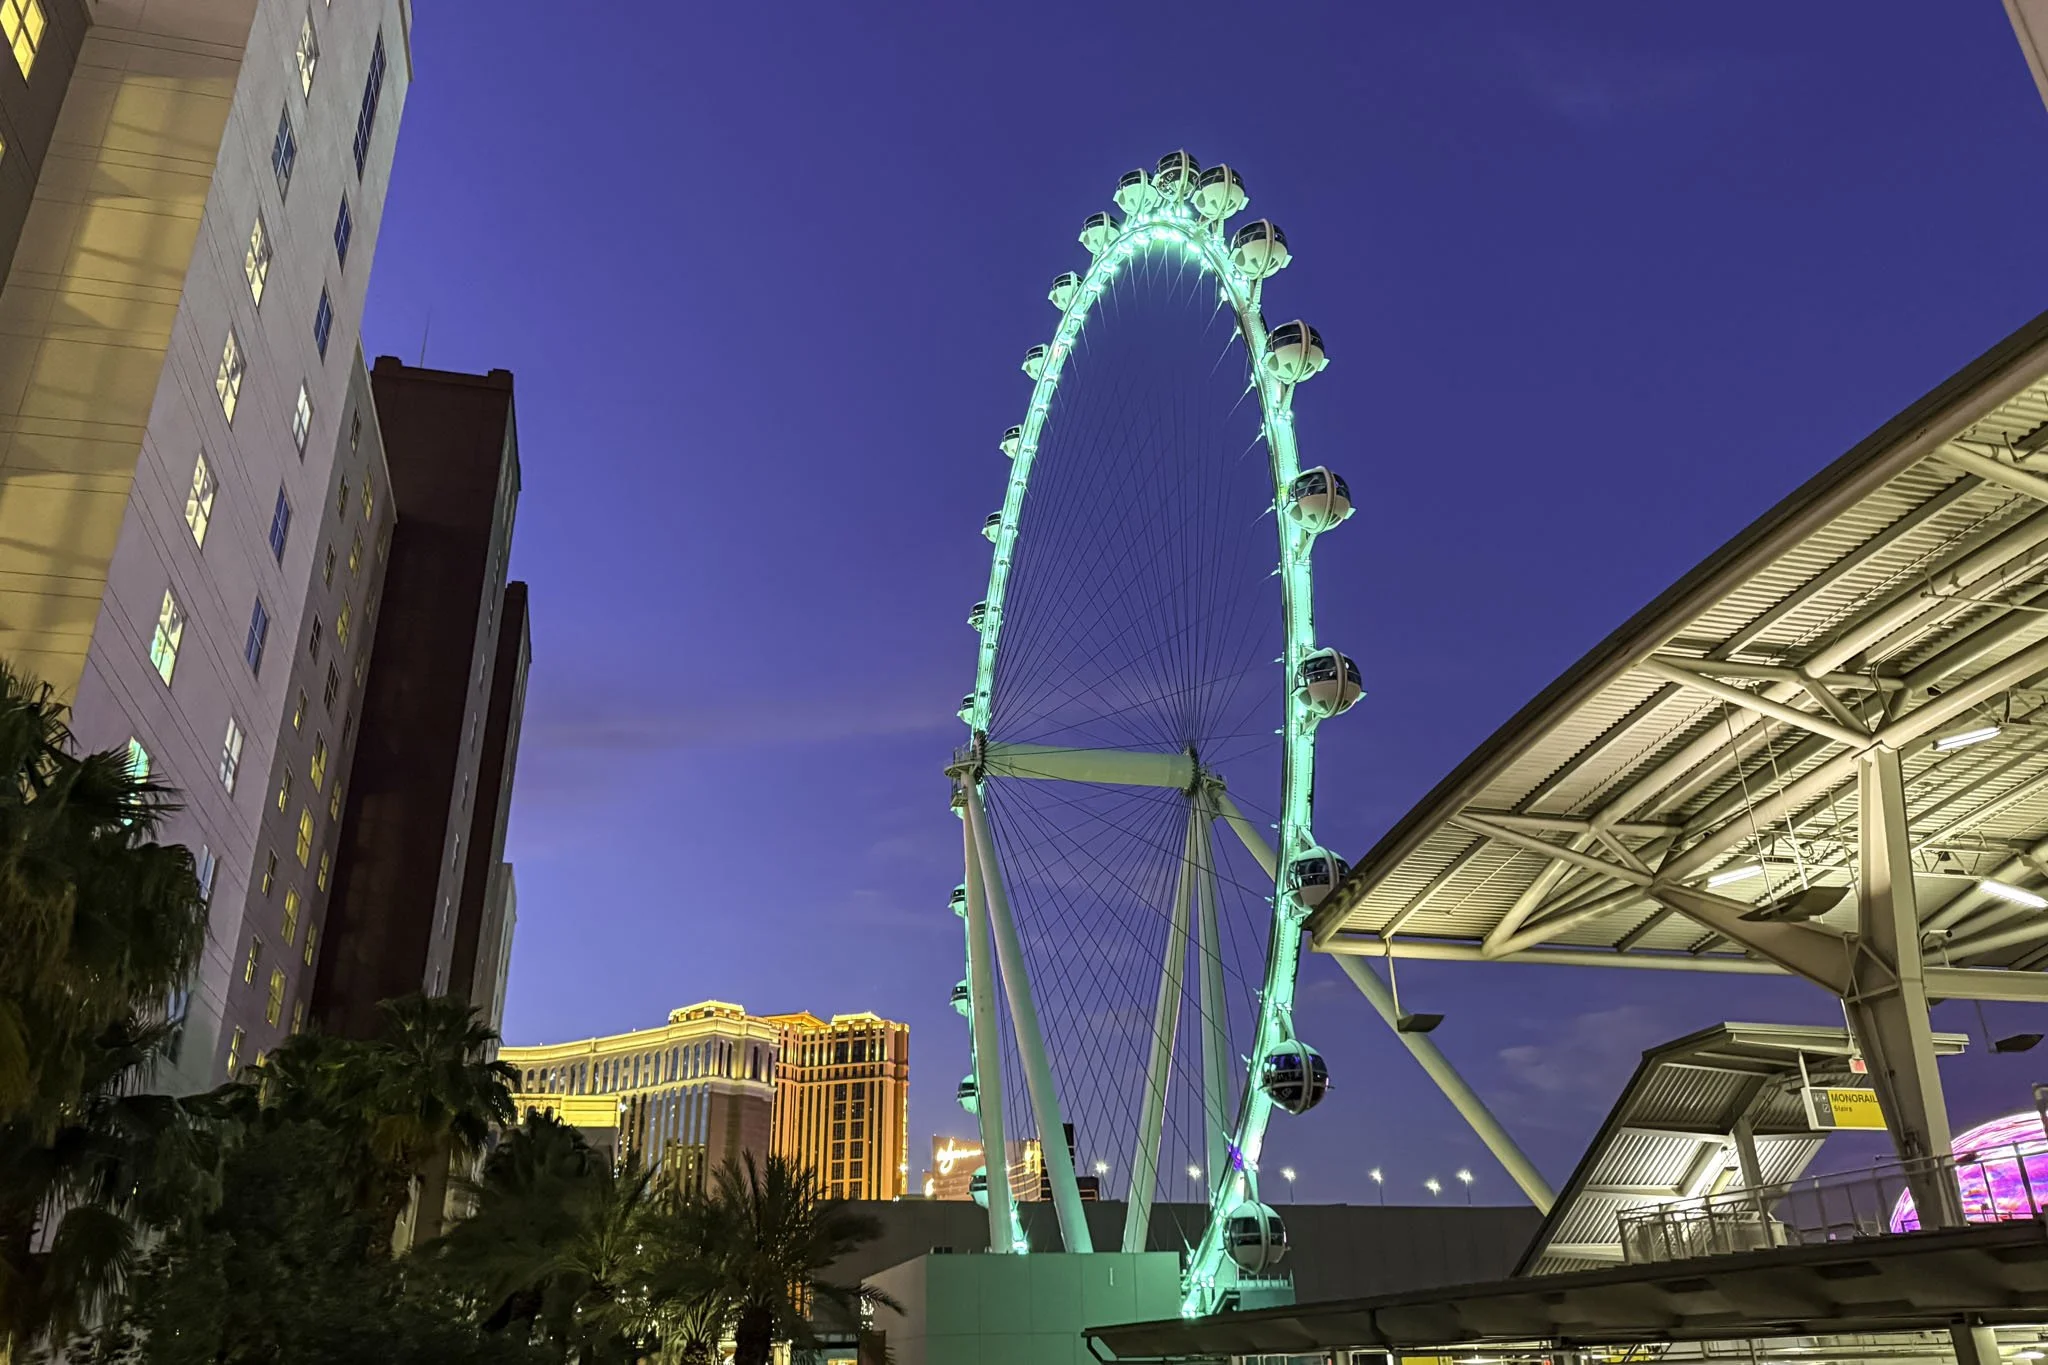
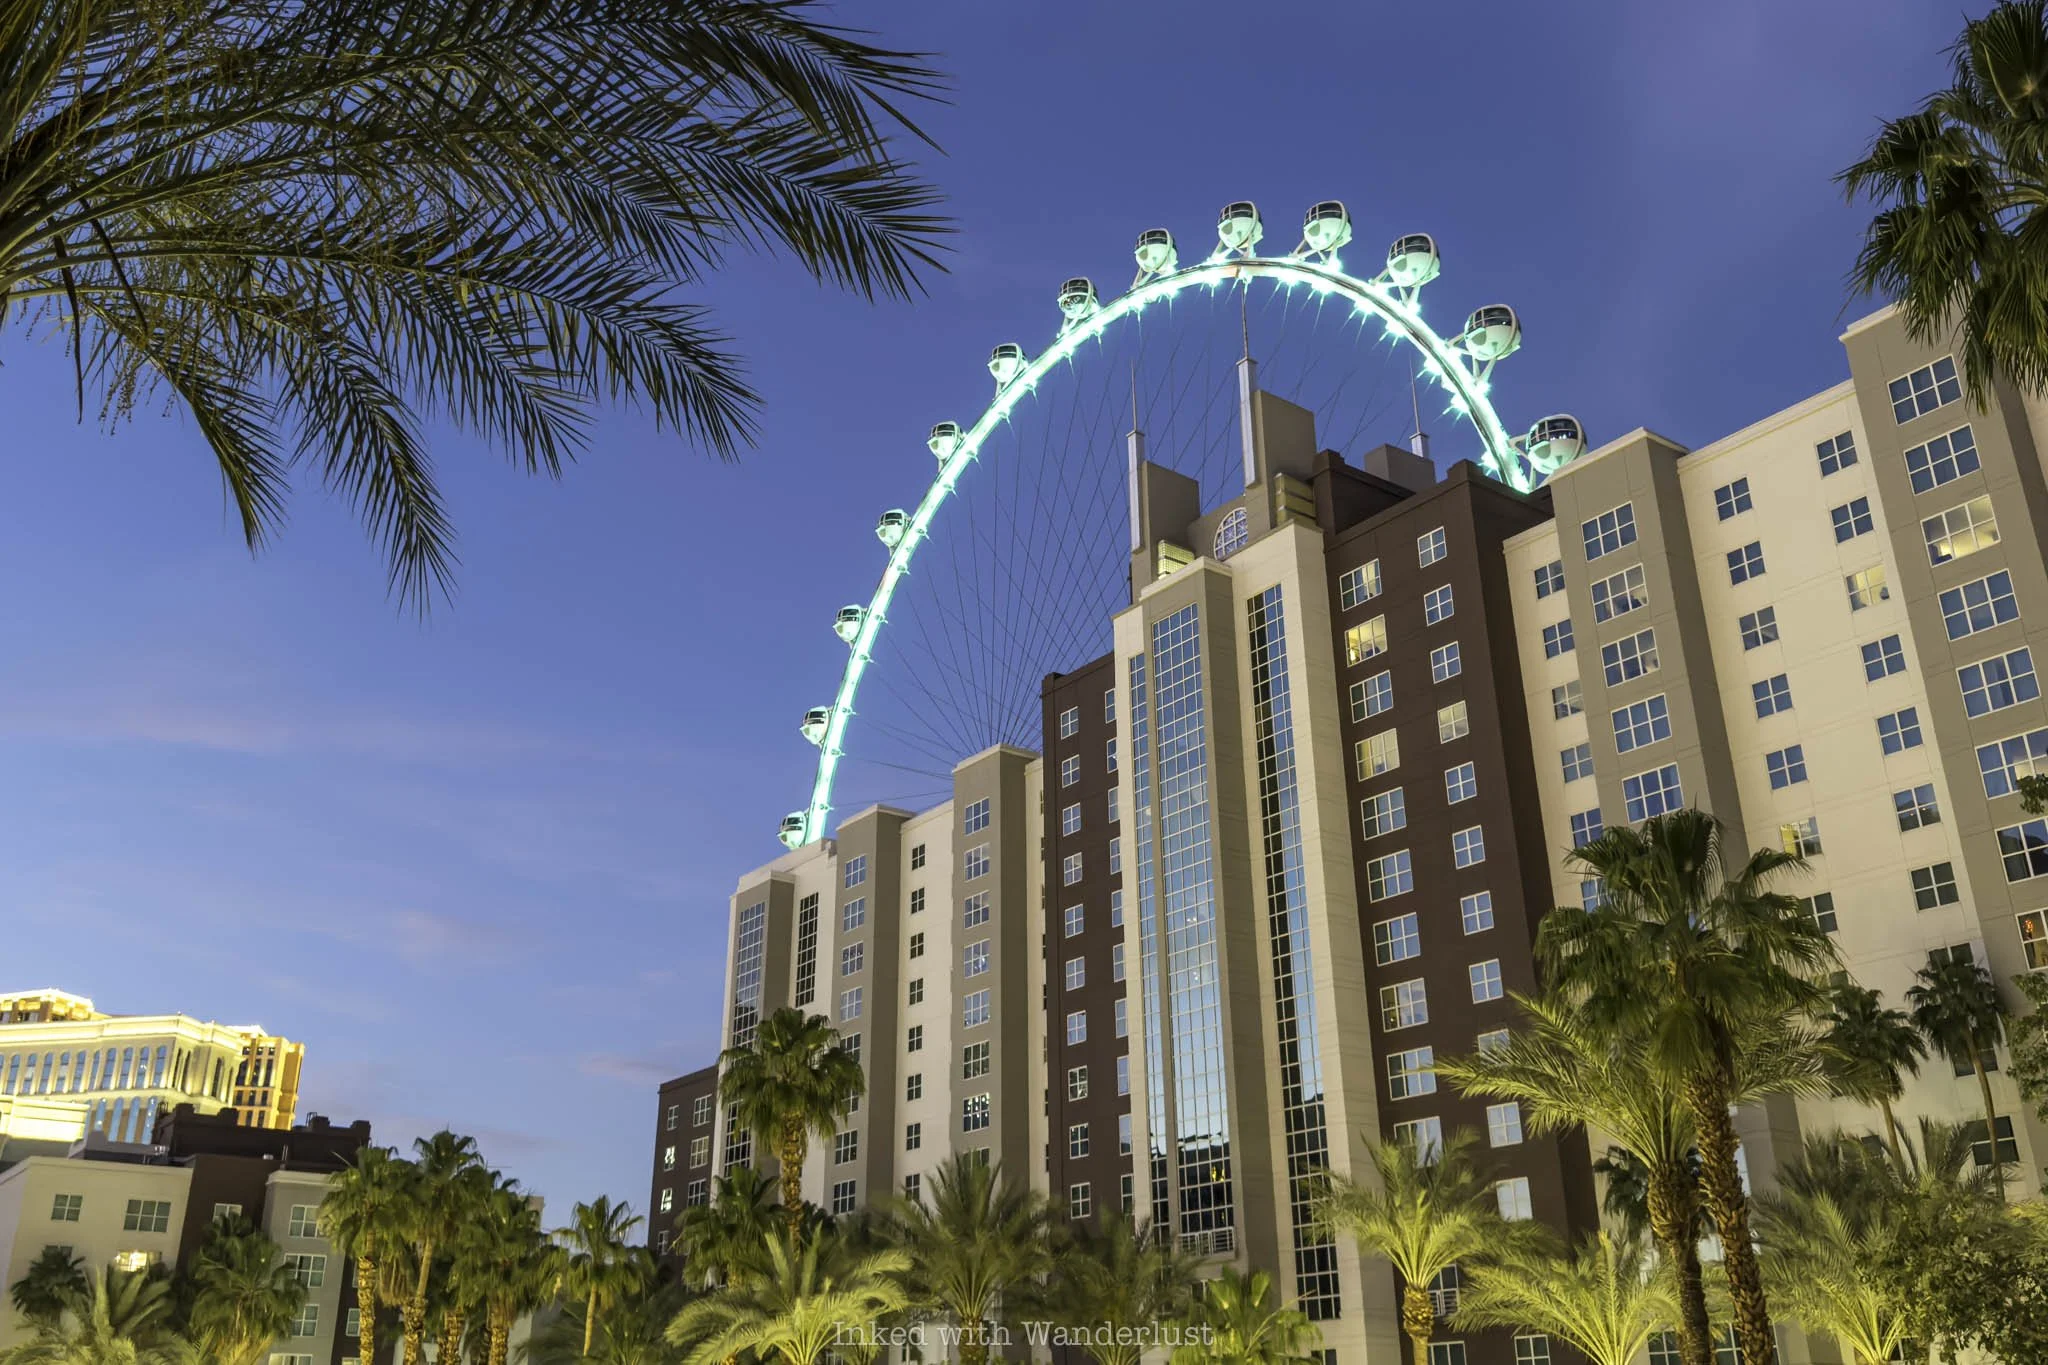
Opened in 2014 as the crown jewel attraction of the then newly minted Linq Hotel and Experience, High Roller quickly garnered the attention of Las Vegas tourists and cemented itself as a mainstay attraction along the strip.
Looming over the Las Vegas Strip at a commanding 550-feet (168 meters) tall, it’s currently the tallest ferris wheel in the United States and the second tallest in the world (behind only the Ain Dubai, which stands at an impressive 820-feet).
One of the featured upgraded tickets is the “Happy Half Hour” option. It’s a word-play on the happy hour moniker, with “half” added due to the wheel taking thirty minutes to complete one full cycle. Oh, and an open bar inside your pod is included.
Many people, such as yourself, wonder if the Happy Half Hour ticket is worth it, especially considering the additional cost. Recently, I set out to try it for myself in order to answer that very question. This post will also cover ticket information, location and more. Let’s get into it.
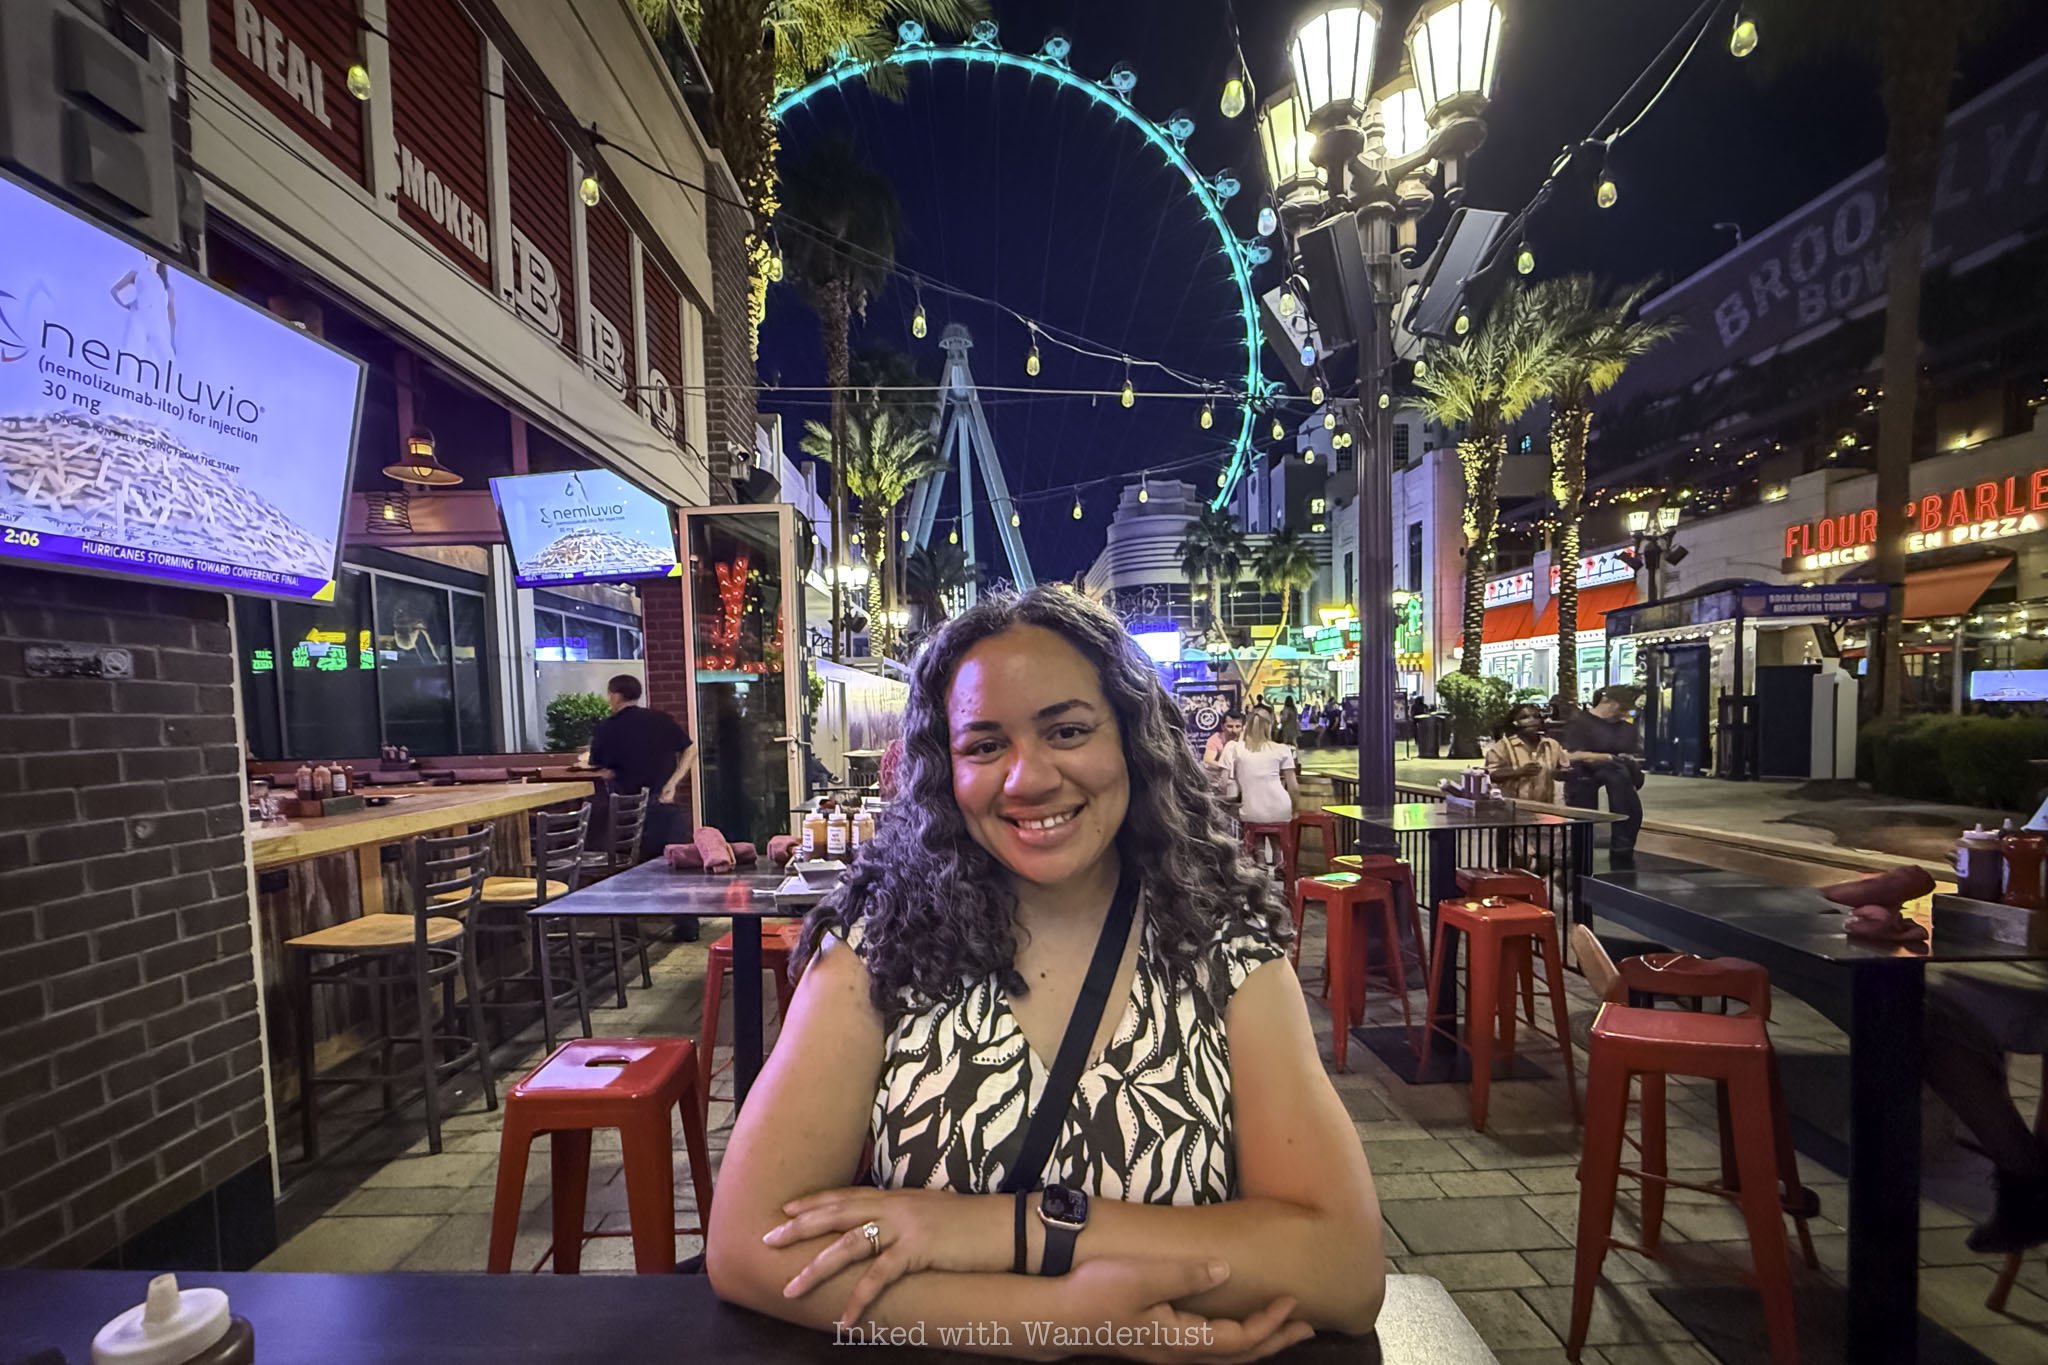
High Roller is located at the end of Linq Promenade, which itself is located center-strip between the Linq and Flamingo Hotels. If you’re staying at either, both properties have dedicated entrances to the promenade.
It isn’t a hefty walk to High Roller from the strip entrance, but it is at the very end. You’ll pass several shops and restaurants along the way, including Chayo Mexican Kitchen and Virgil’s BBQ (both of which are solid options if you’re hungry).
Tickets for High Roller start at $16 for youths (ages 4 - 12) and $30 for adults through High Roller directly (which, in turn, utilizes Ticketmaster as a sales portal, of all places). The prices above are for daytime rides, which mean you must arrive between 12 - 5pm.
For night rides, you have two options:
Elect for the “Anytime” option. This means you can arrive anytime, day or evening, during operating hours. This brings an additional cost of $10 - $12 each, depending on ticket type.
Elect for the “Happy Half Hour” ticket. This ticket includes the ride, anytime arrival and an open bar inside the pod. Yes, seriously. Clearly, this option is for those 21 years of age and up. Even if you don’t drink, you can opt for this if you’d prefer a kid-free experience. They start at $53.
Click or tap here to purchase your High Roller tickets through my preferred partner, Viator. They offer significant discounts on High Roller tickets (and other Vegas attractions).
For example, you can get two adult "Anytime” tickets for summer weekdays as low as $57.30 for the pair (just $28.65 each). Add youth “Anytime” tickets for as low as $18 each! Normally, these would cost $42 and $25 each, respectively.
If High Roller (or any Las Vegas Strip attraction) is on your itinerary, consider purchasing through Viator at my link to take advantage of these money-saving discounts!
High Roller Happy Half Hour Experience
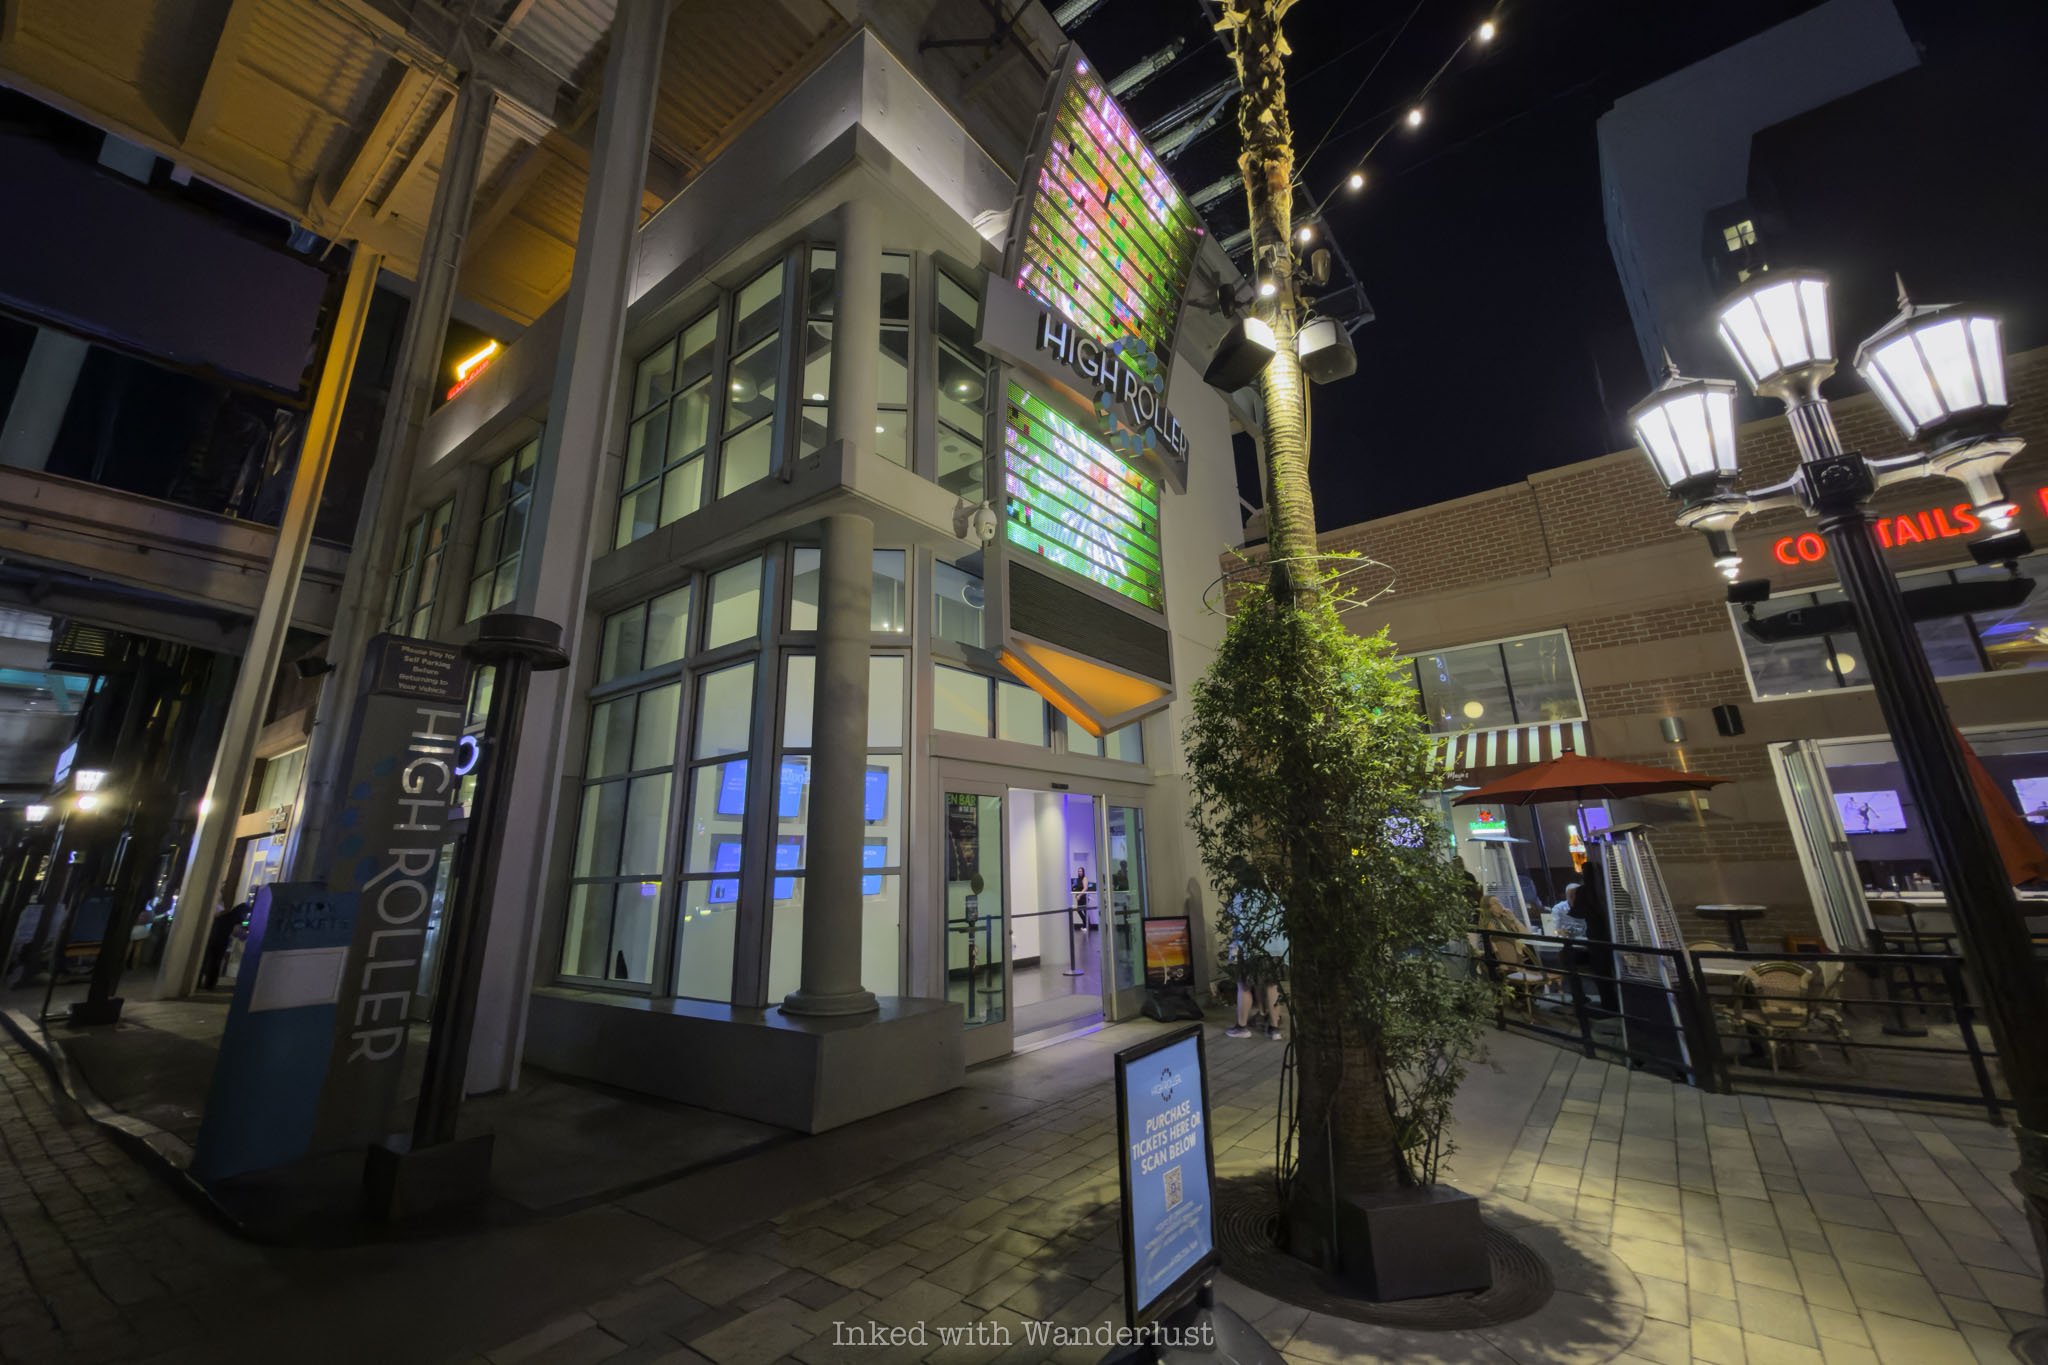
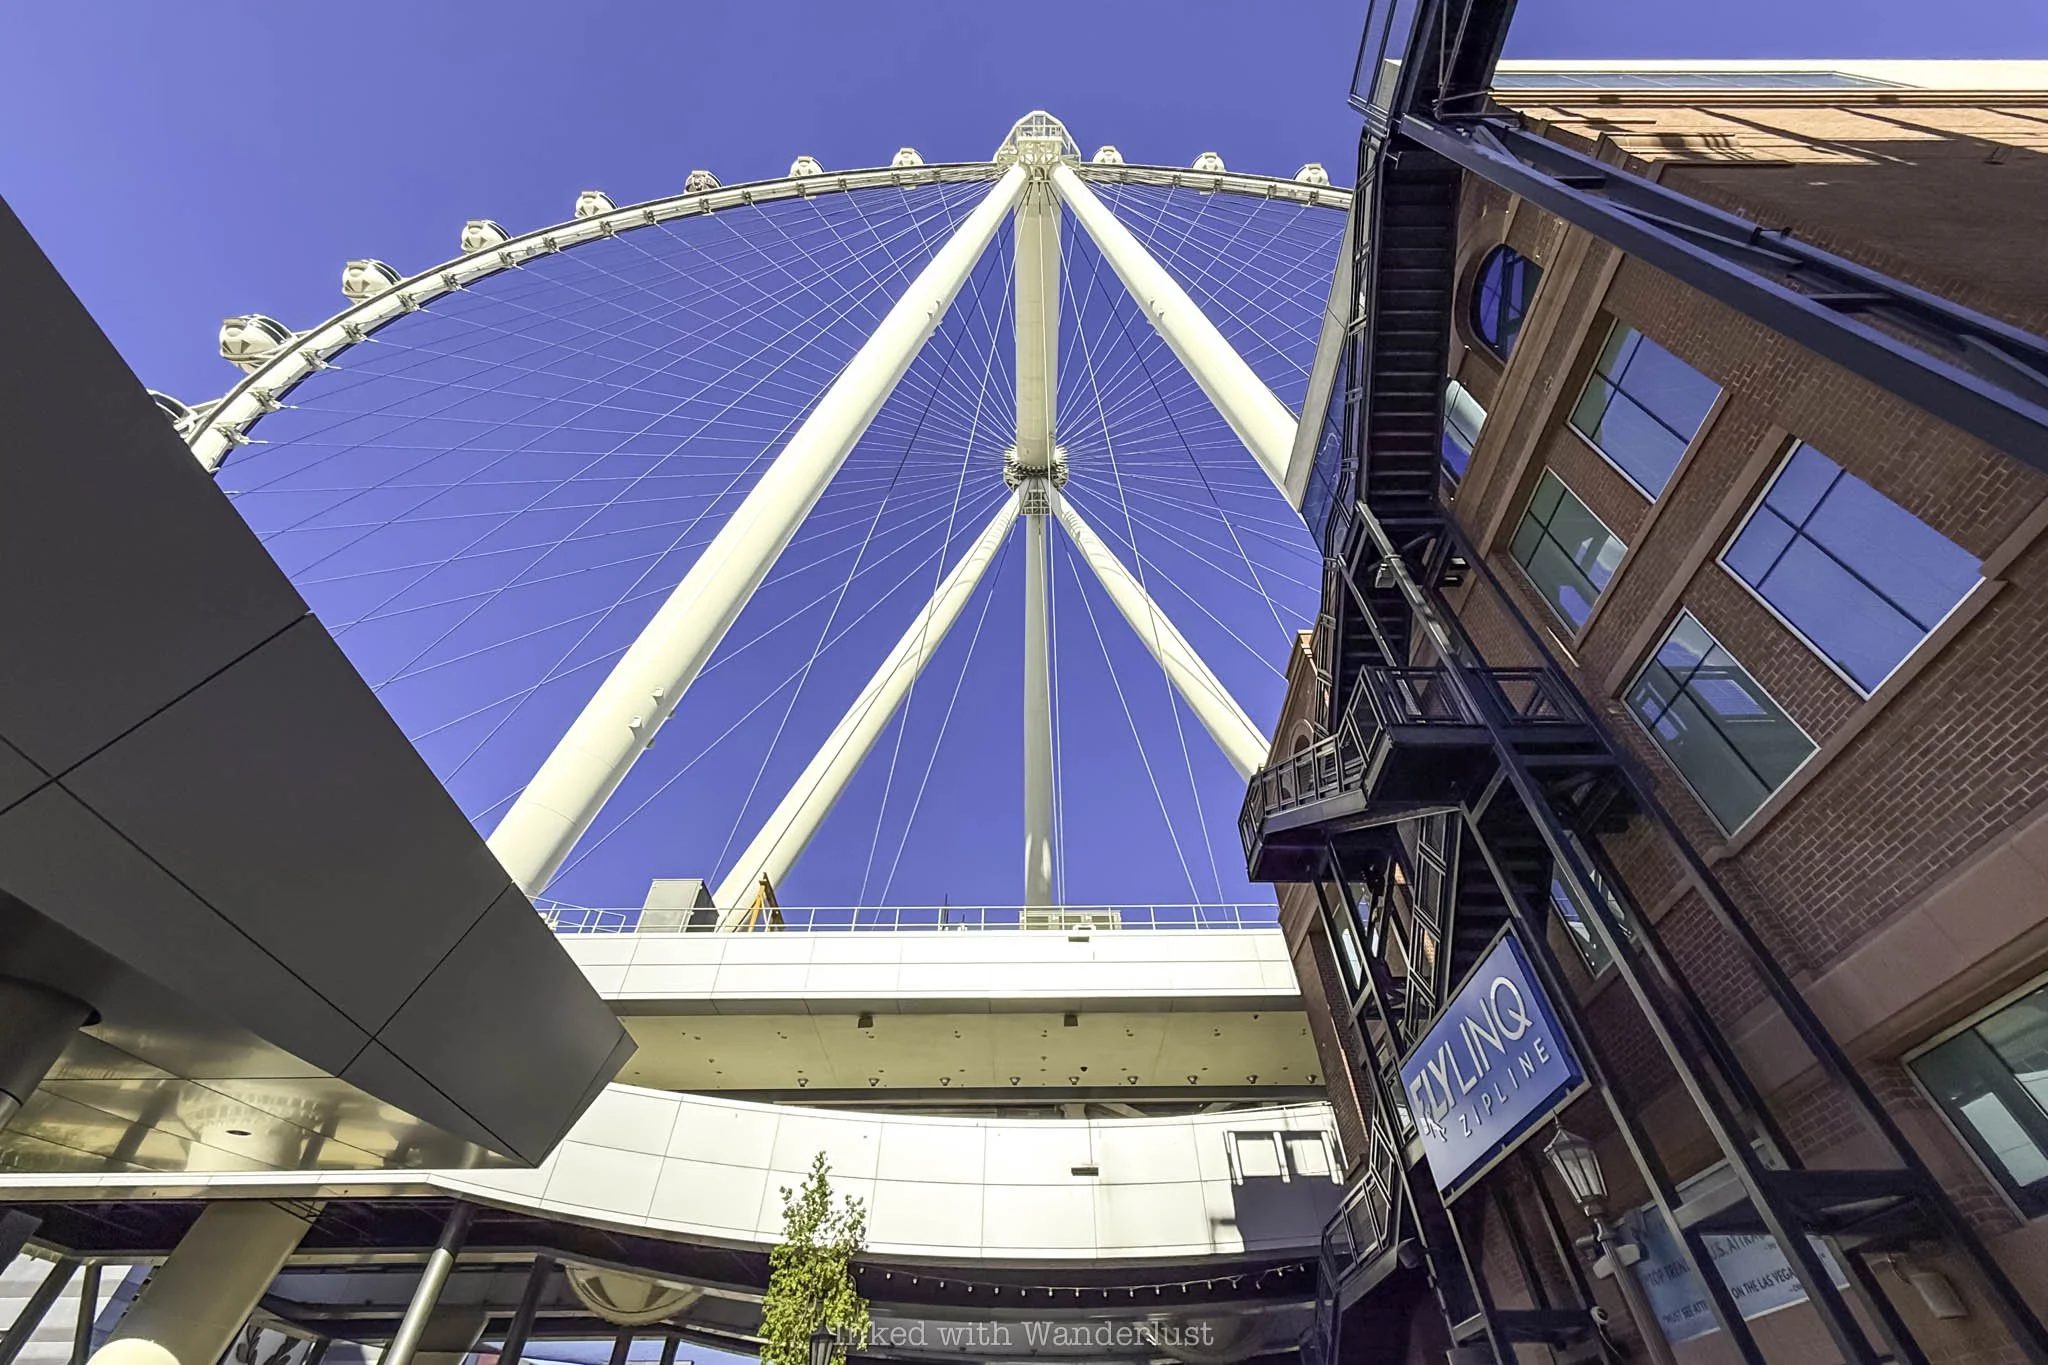
Your ride on High Roller begins at the end of Linq Promenade in what initially appears to be a small building on the right, just after passing Maxie’s restaurant. When entering, you’ll get into the left queue if you already have tickets or the right queue if you need to purchase.
**You’ll save a whole lot of time and money by purchasing your tickets online ahead of time.
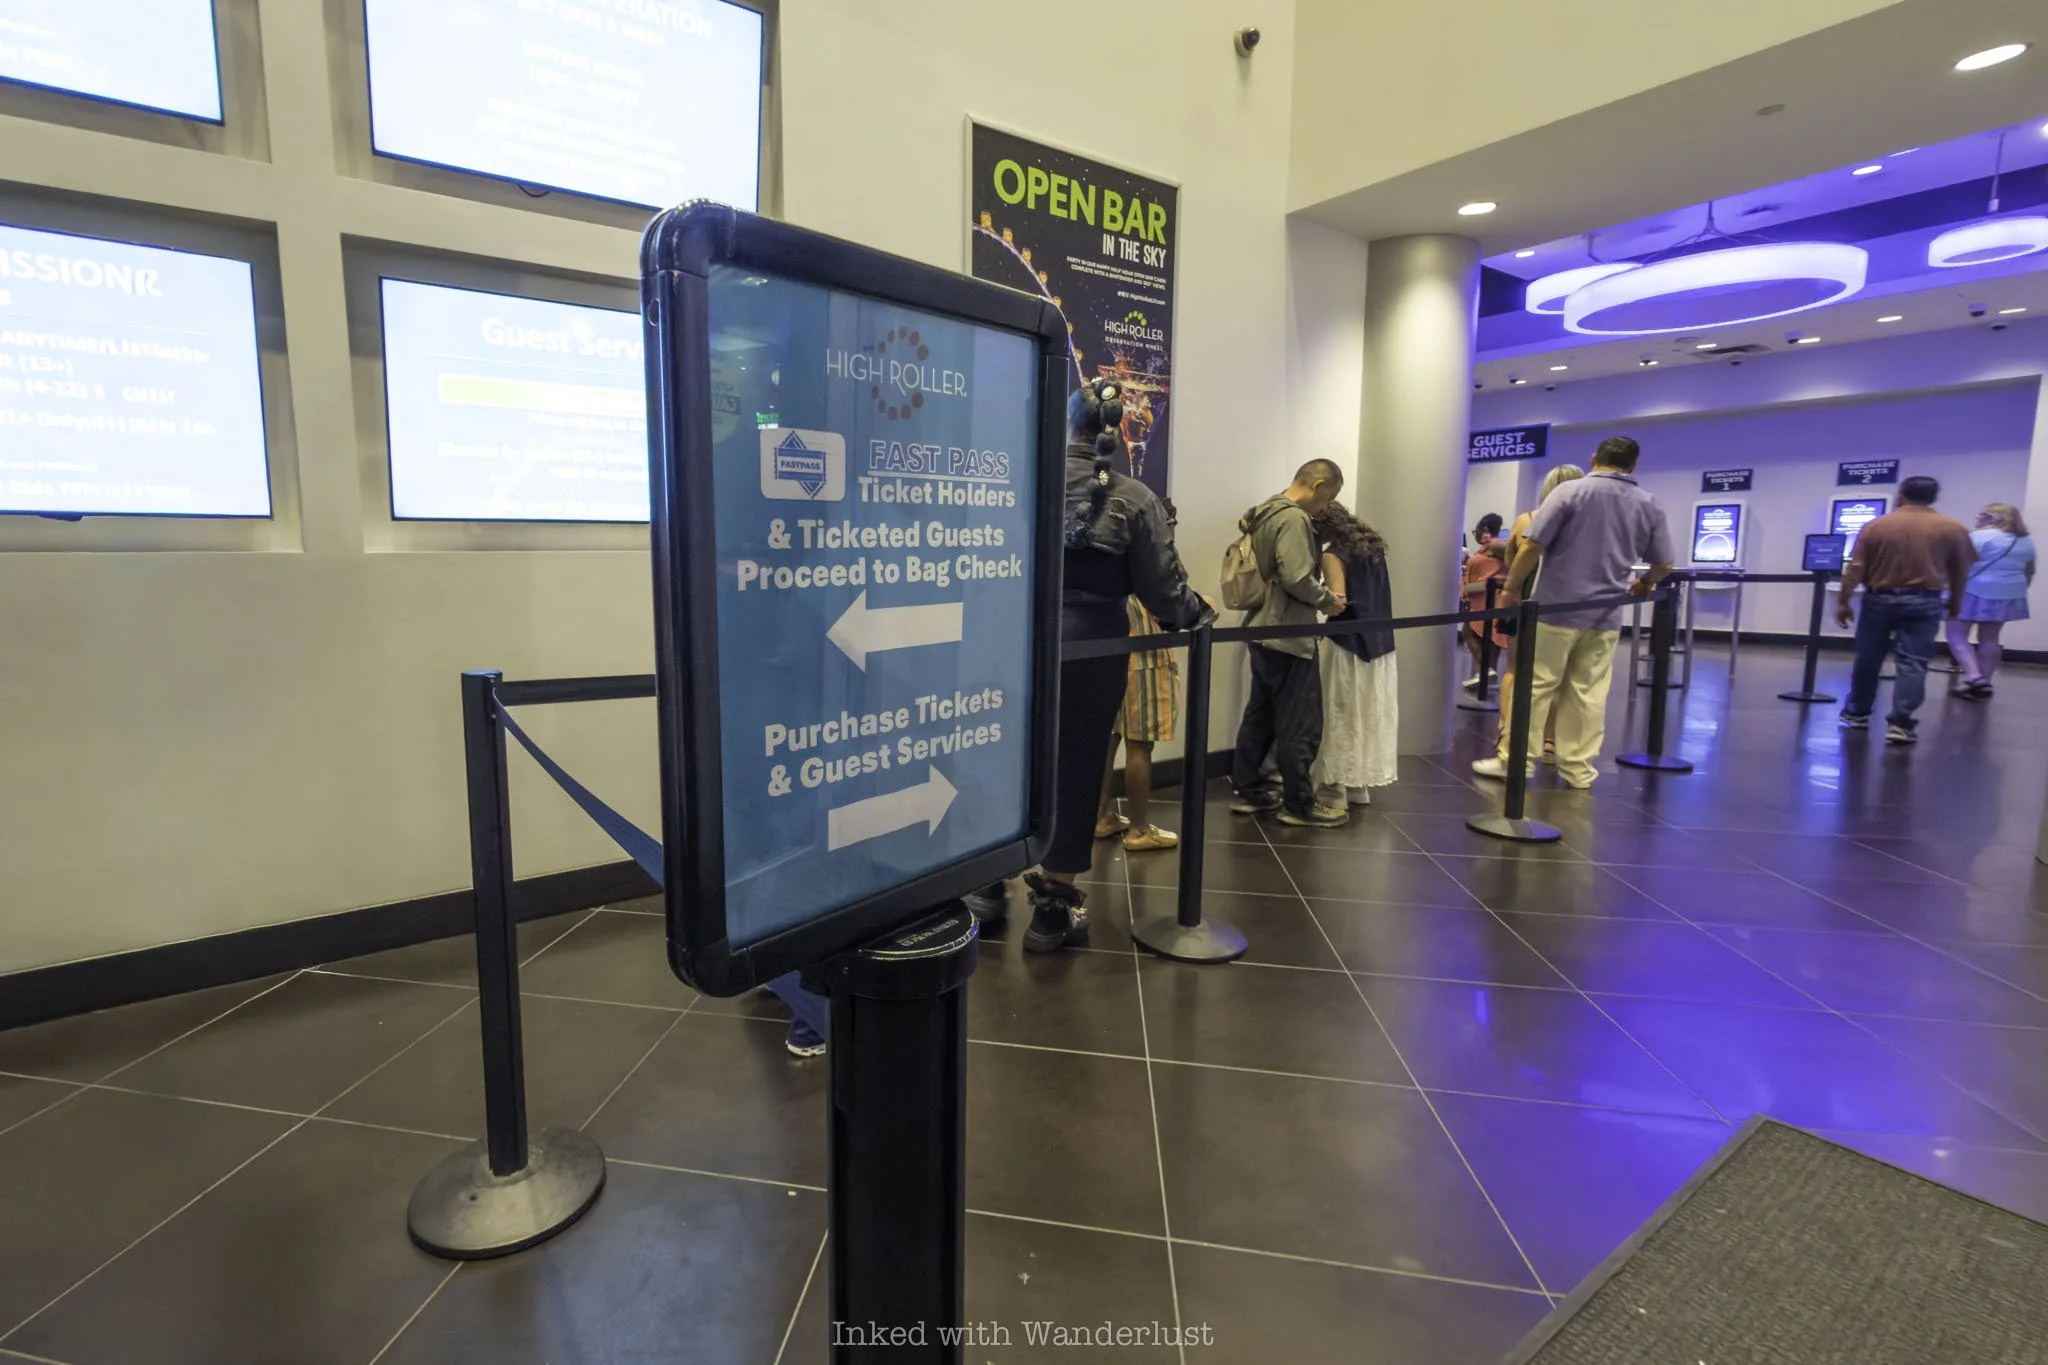
This initial queue is for security check. Here, you’ll go through a metal detector and if you have a bag it’ll be checked by security personnel. Small bags such as purses and cross-body bags are permitted. Larger bags such as backpacks and suitcases are not.
There are no on-site lockers, so it’s advisable to leave backpacks at your hotel. If you’re staying at a Caesar property that isn’t Flamingo or Linq, you can leave your bag with the front desk at either of those two hotels.
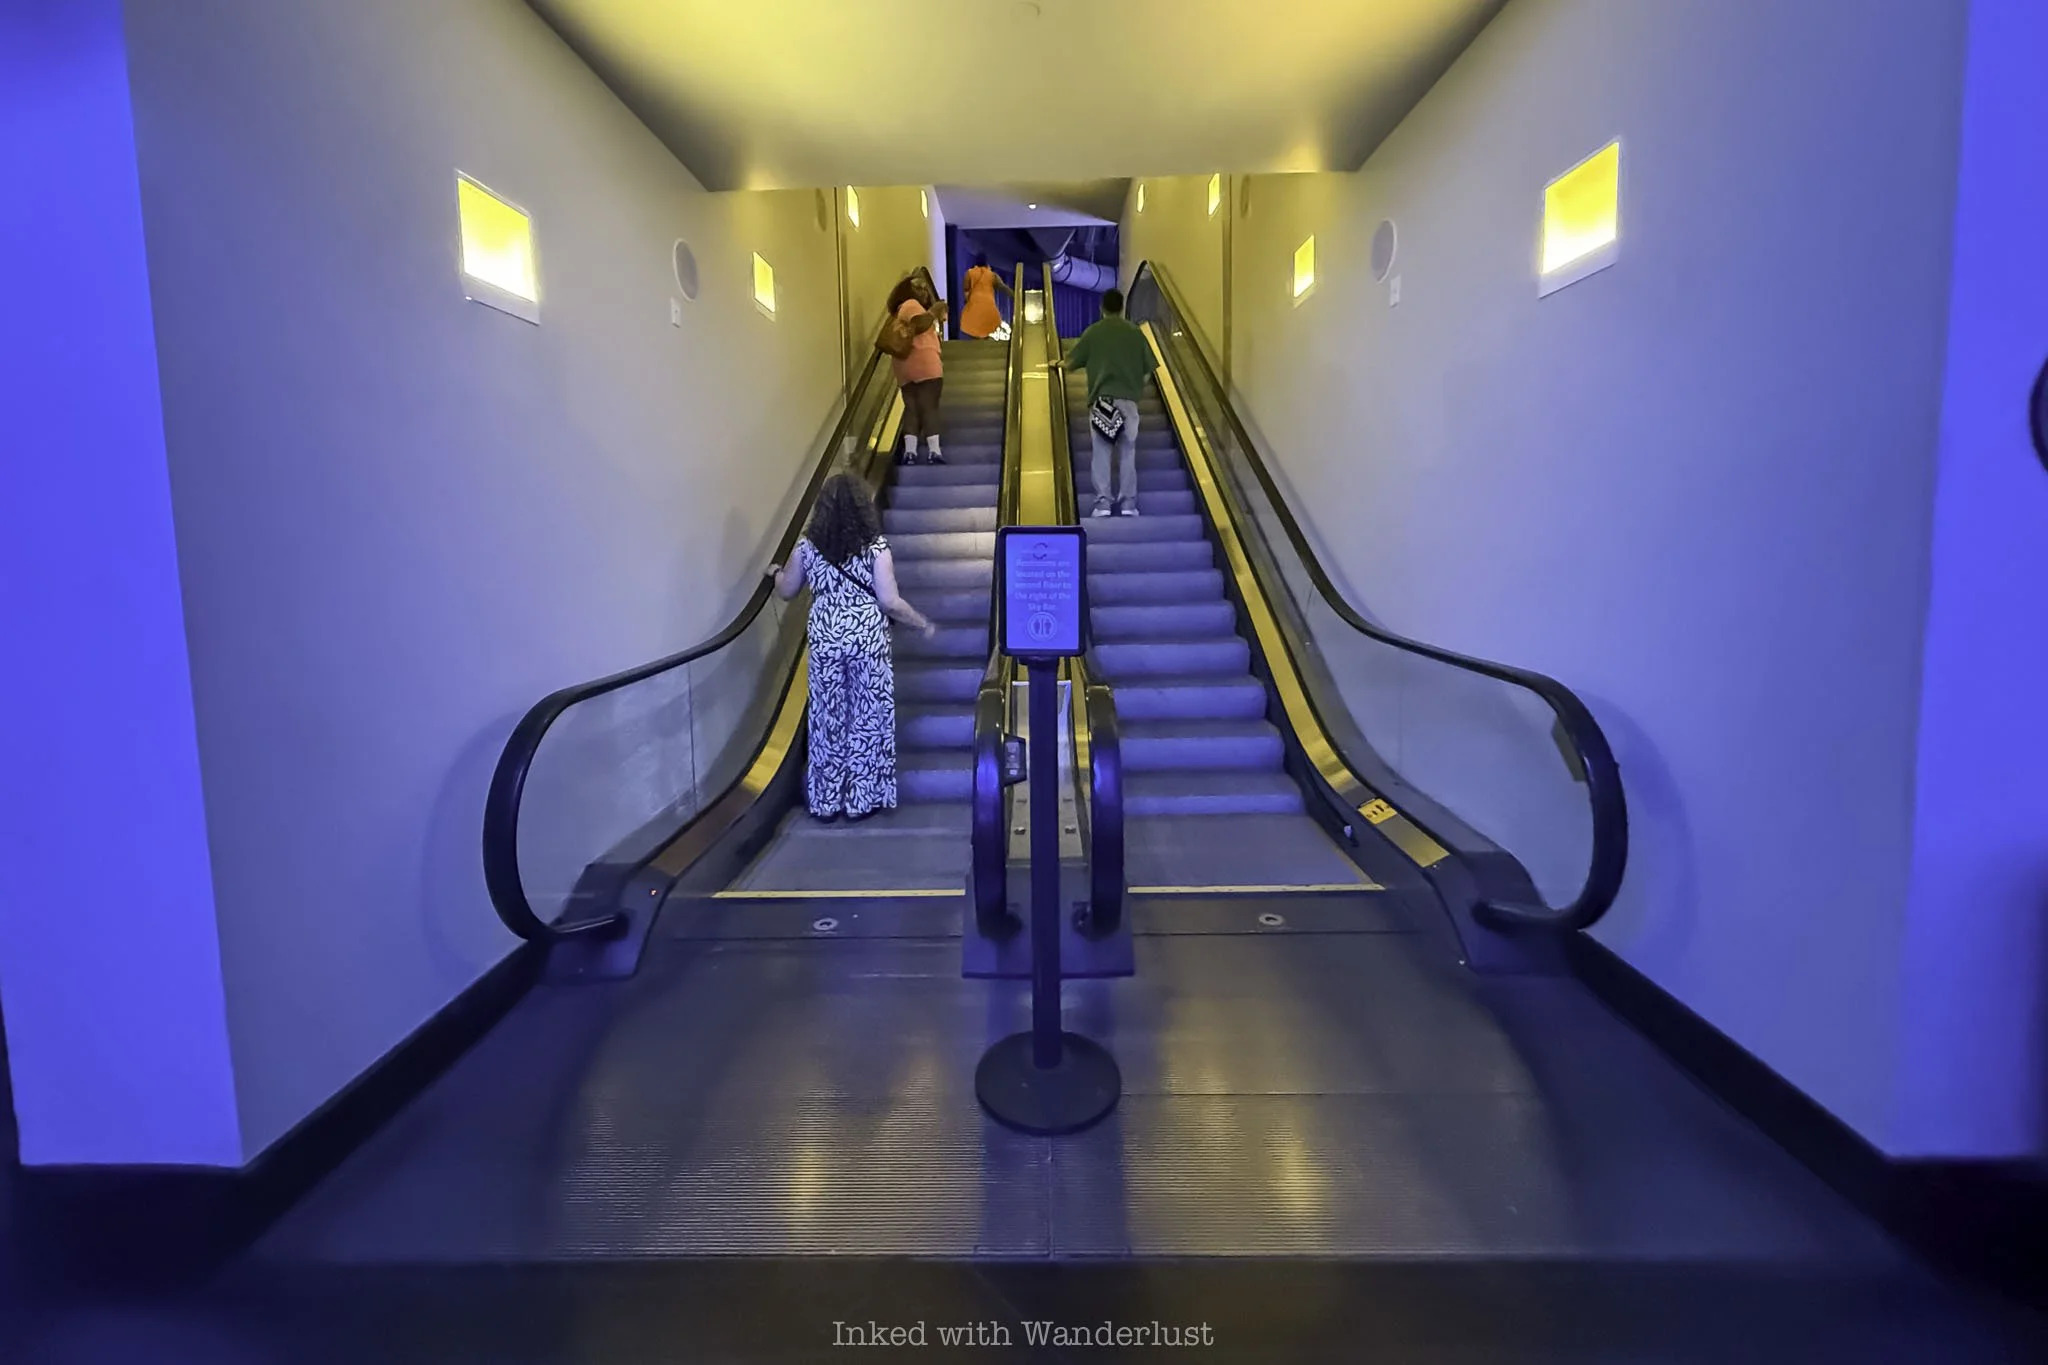
Past the security checkpoint is an escalator that will take you up to High Roller Sky Lounge. If you didn’t purchase the Happy Half Hour ticket, you can purchase a drink here and bring it with you onto High Roller.
From the sky lounge, you’ll walk into High Roller’s boarding area. Once through, you’ll enter another room where a queue may or may not have formed. If you purchased the “Fast Pass” ticket, this where you’ll cash that in.

Past that room, you’ll enter yet another room, this time for the shameless touristy photo. Here, a High Roller employee takes your photo in front of a green screen with hopes to sell you said photos after your ride concludes.
If you want the photos, cool. If not, you don’t have to participate. When it’s your turn, simply inform the employee that you’re not interested and you’ll be allowed to bypass (the photo opp, NOT the queue).
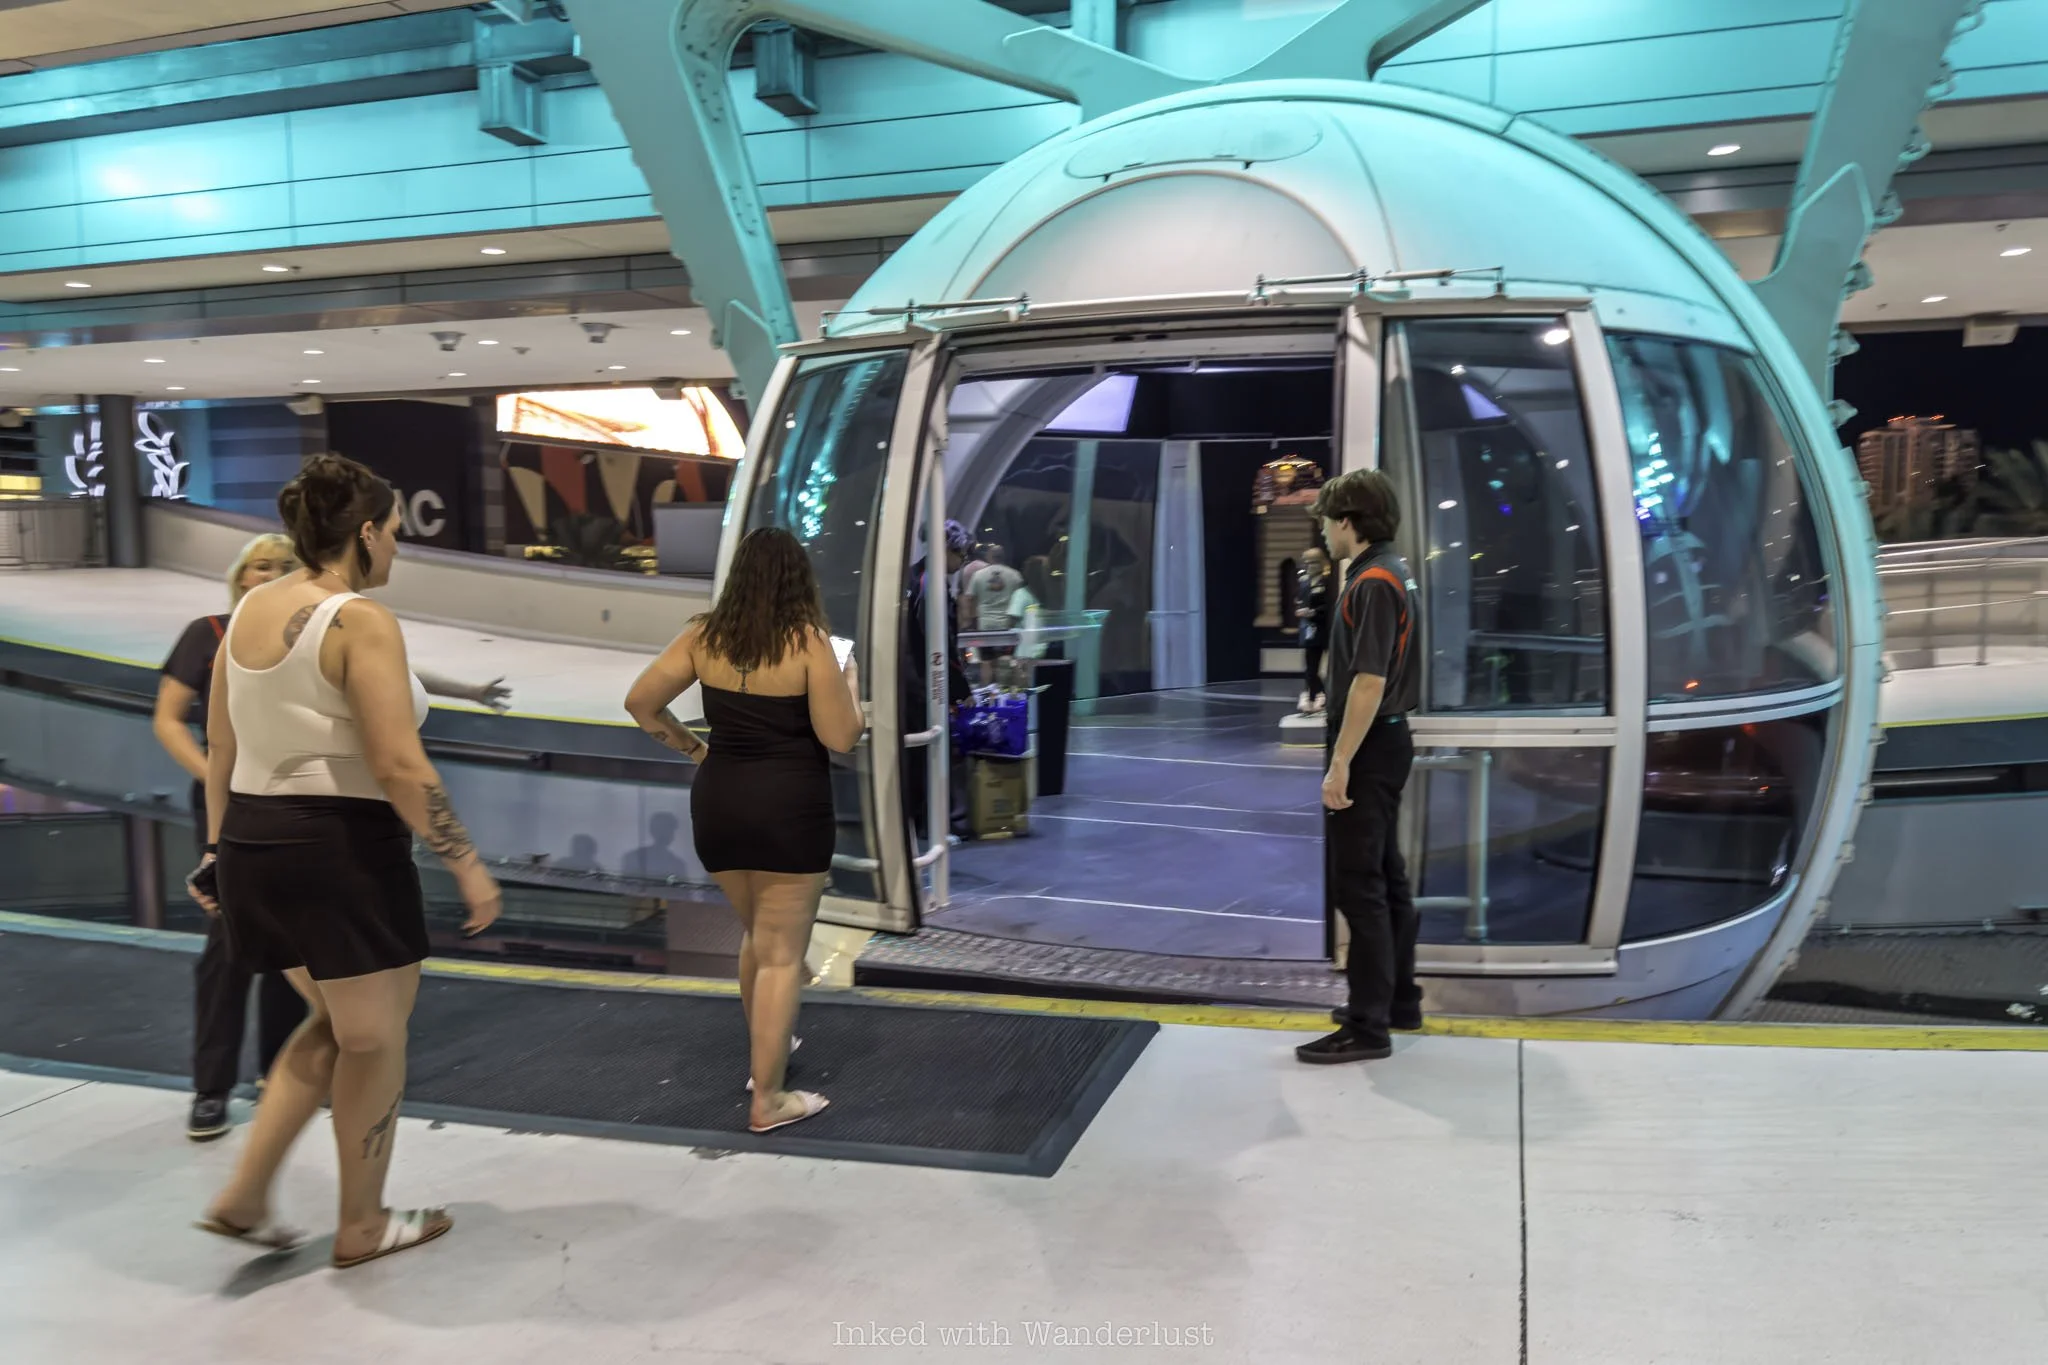
Afterwards, you’ll be asked to present your tickets. If you’re taking a normal ride you’ll be guided to the left. If you’re here for the Happy Half Hour, like my wife and I were, you’ll be guided to the queue on the right.
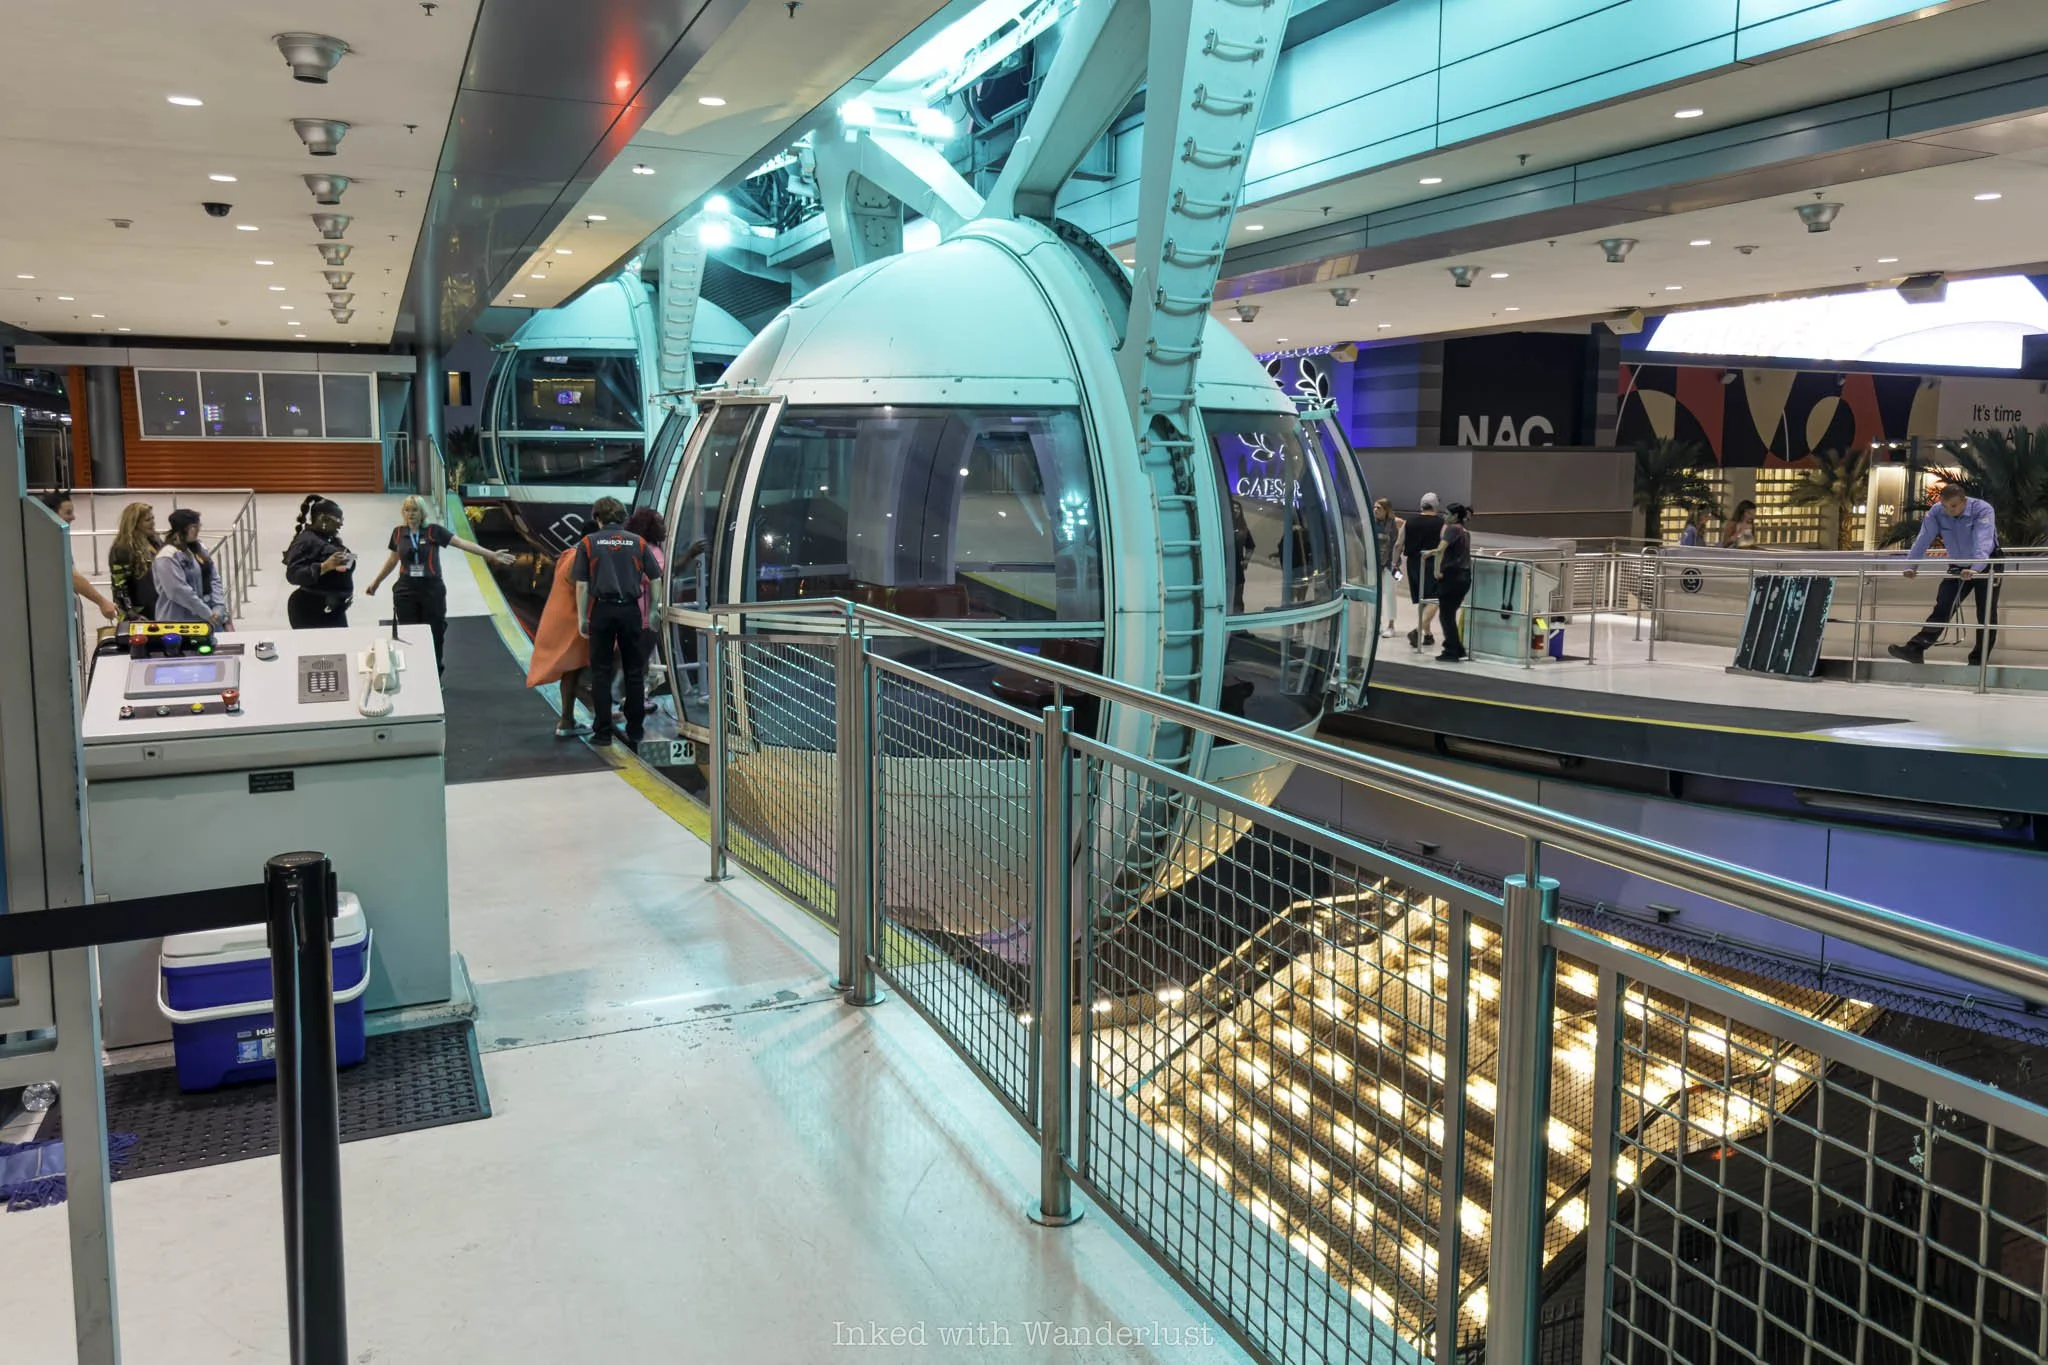
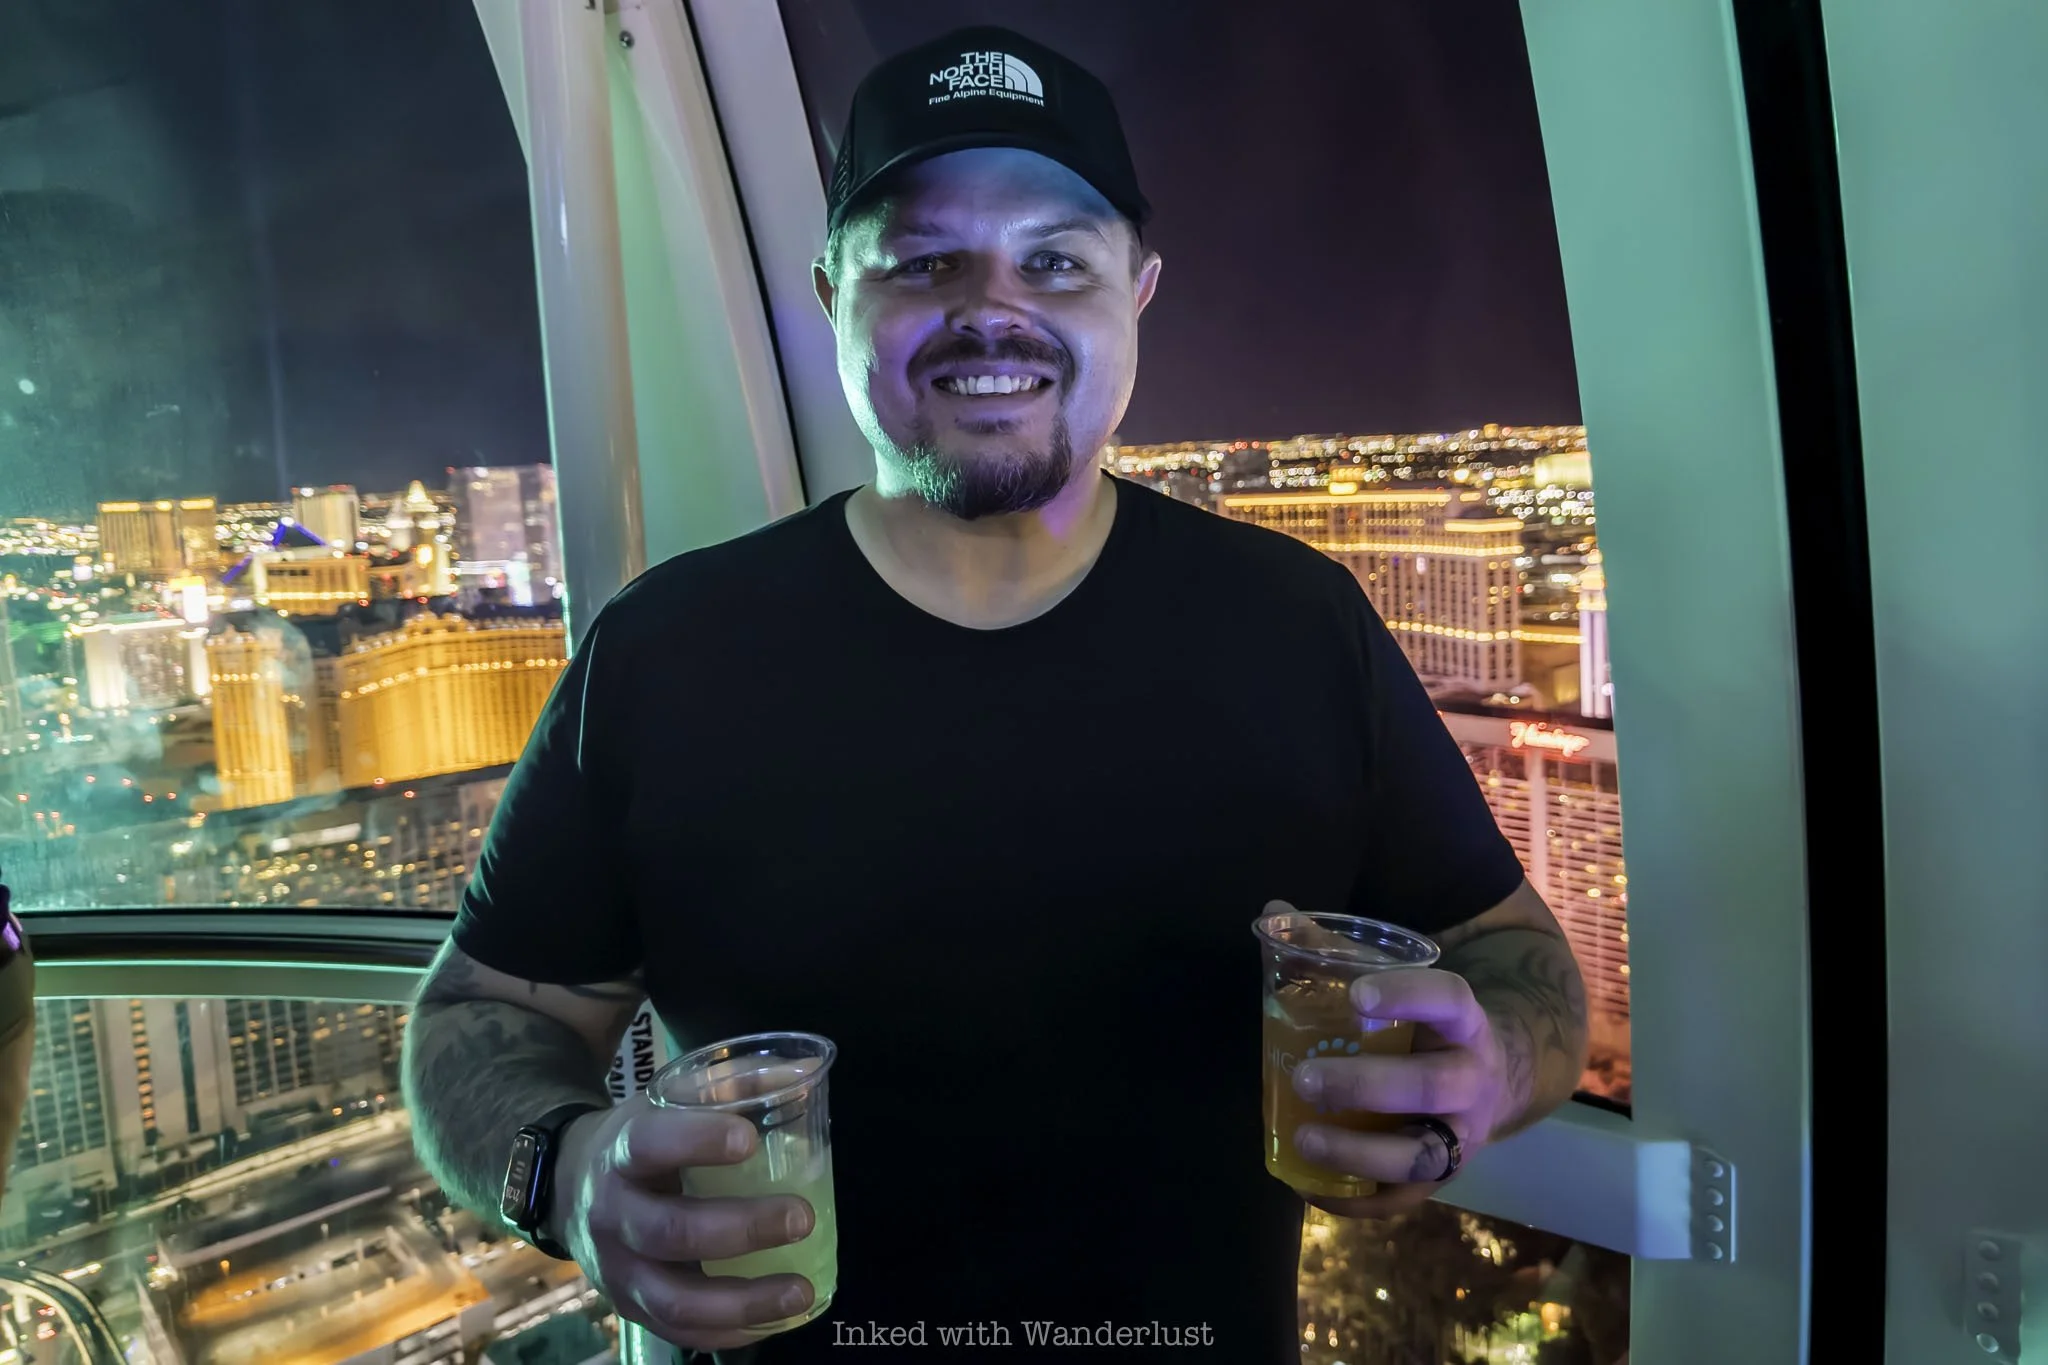
High Roller has 28 cabins, each capable of holding up to 25 people. However, not every cabin will have a bar inside of it, so you may have a bit of a wait. Once your cabin becomes available an employee will guide you in.
Just before walking in, your bartender will introduce themselves, go over the rules and policies, and check IDs. Everyone will file in and once the doors close a thirty-minute countdown will appear on the screens above you.
As stated above, each cabin can hold around 25 people at a time. Our cabin didn’t have that many, thankfully. I didn’t count everyone but I believe there were around ten people or so, including the bartender.
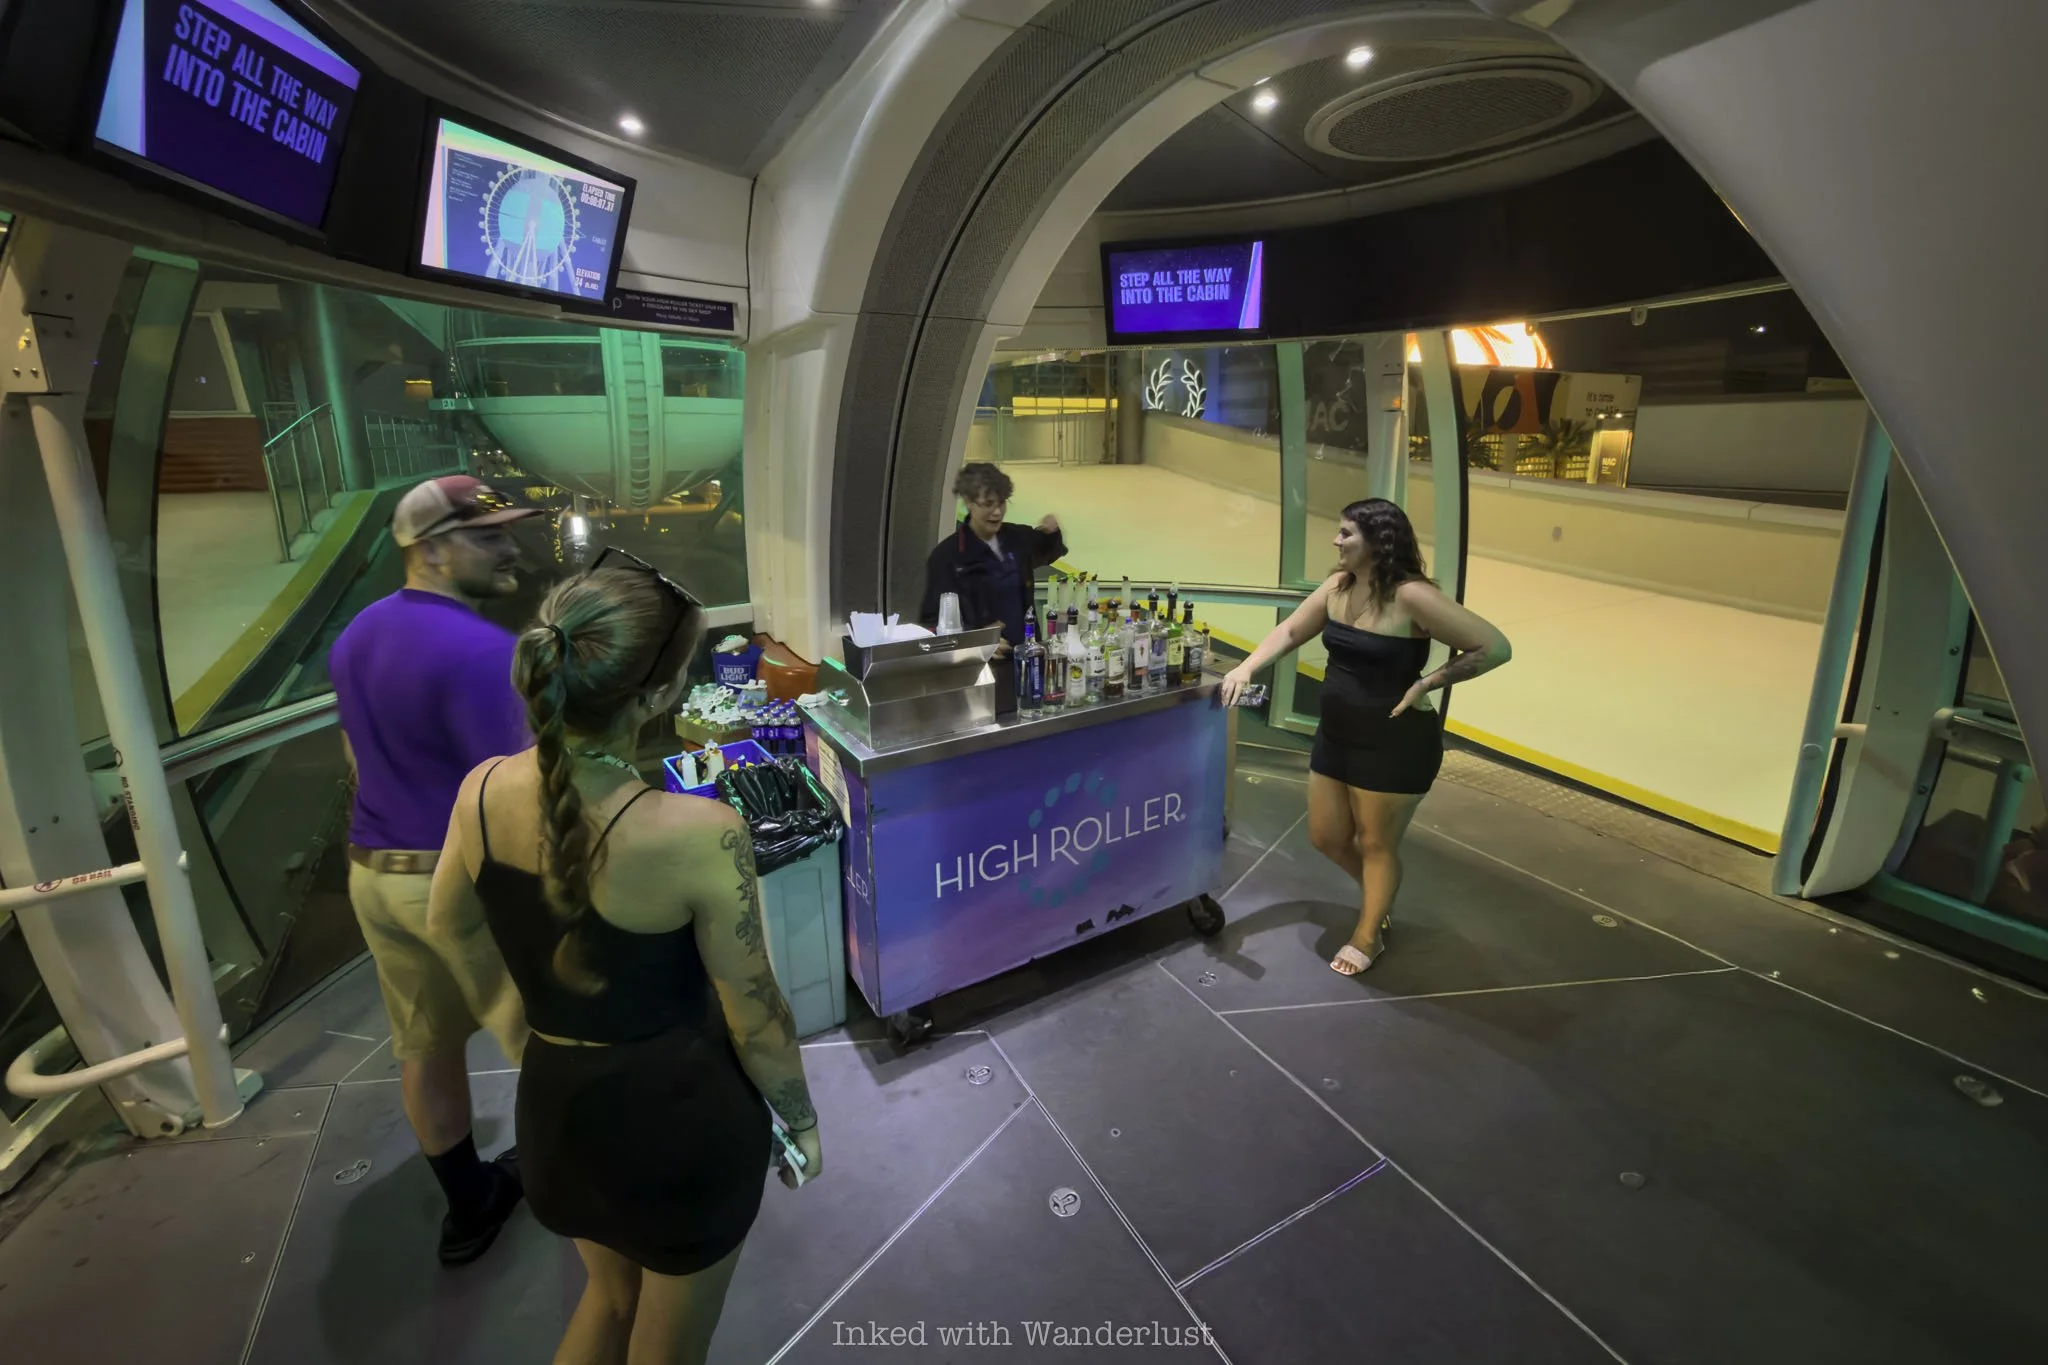
As stated above, a full rotation on High Roller takes thirty minutes. In that time, you can have as many drinks as you can handle. The drinks offered are typical fruity or citrus-based cocktails.
They’re fairly basic cocktails that wouldn’t stand out in nearly any other place in Vegas, but they’re certainly tasty. If those type of drinks aren’t your thing, your bartender will take special requests, provided it’s nothing overly complicated.
The cups are plastic and on the smaller side. Essentially, two drinks at High Roller would equate to one normal sized drink just about anywhere else but, hey, they’re included in your ticket. Also, they don’t load your cup with ice (our bartender didn’t, anyway).
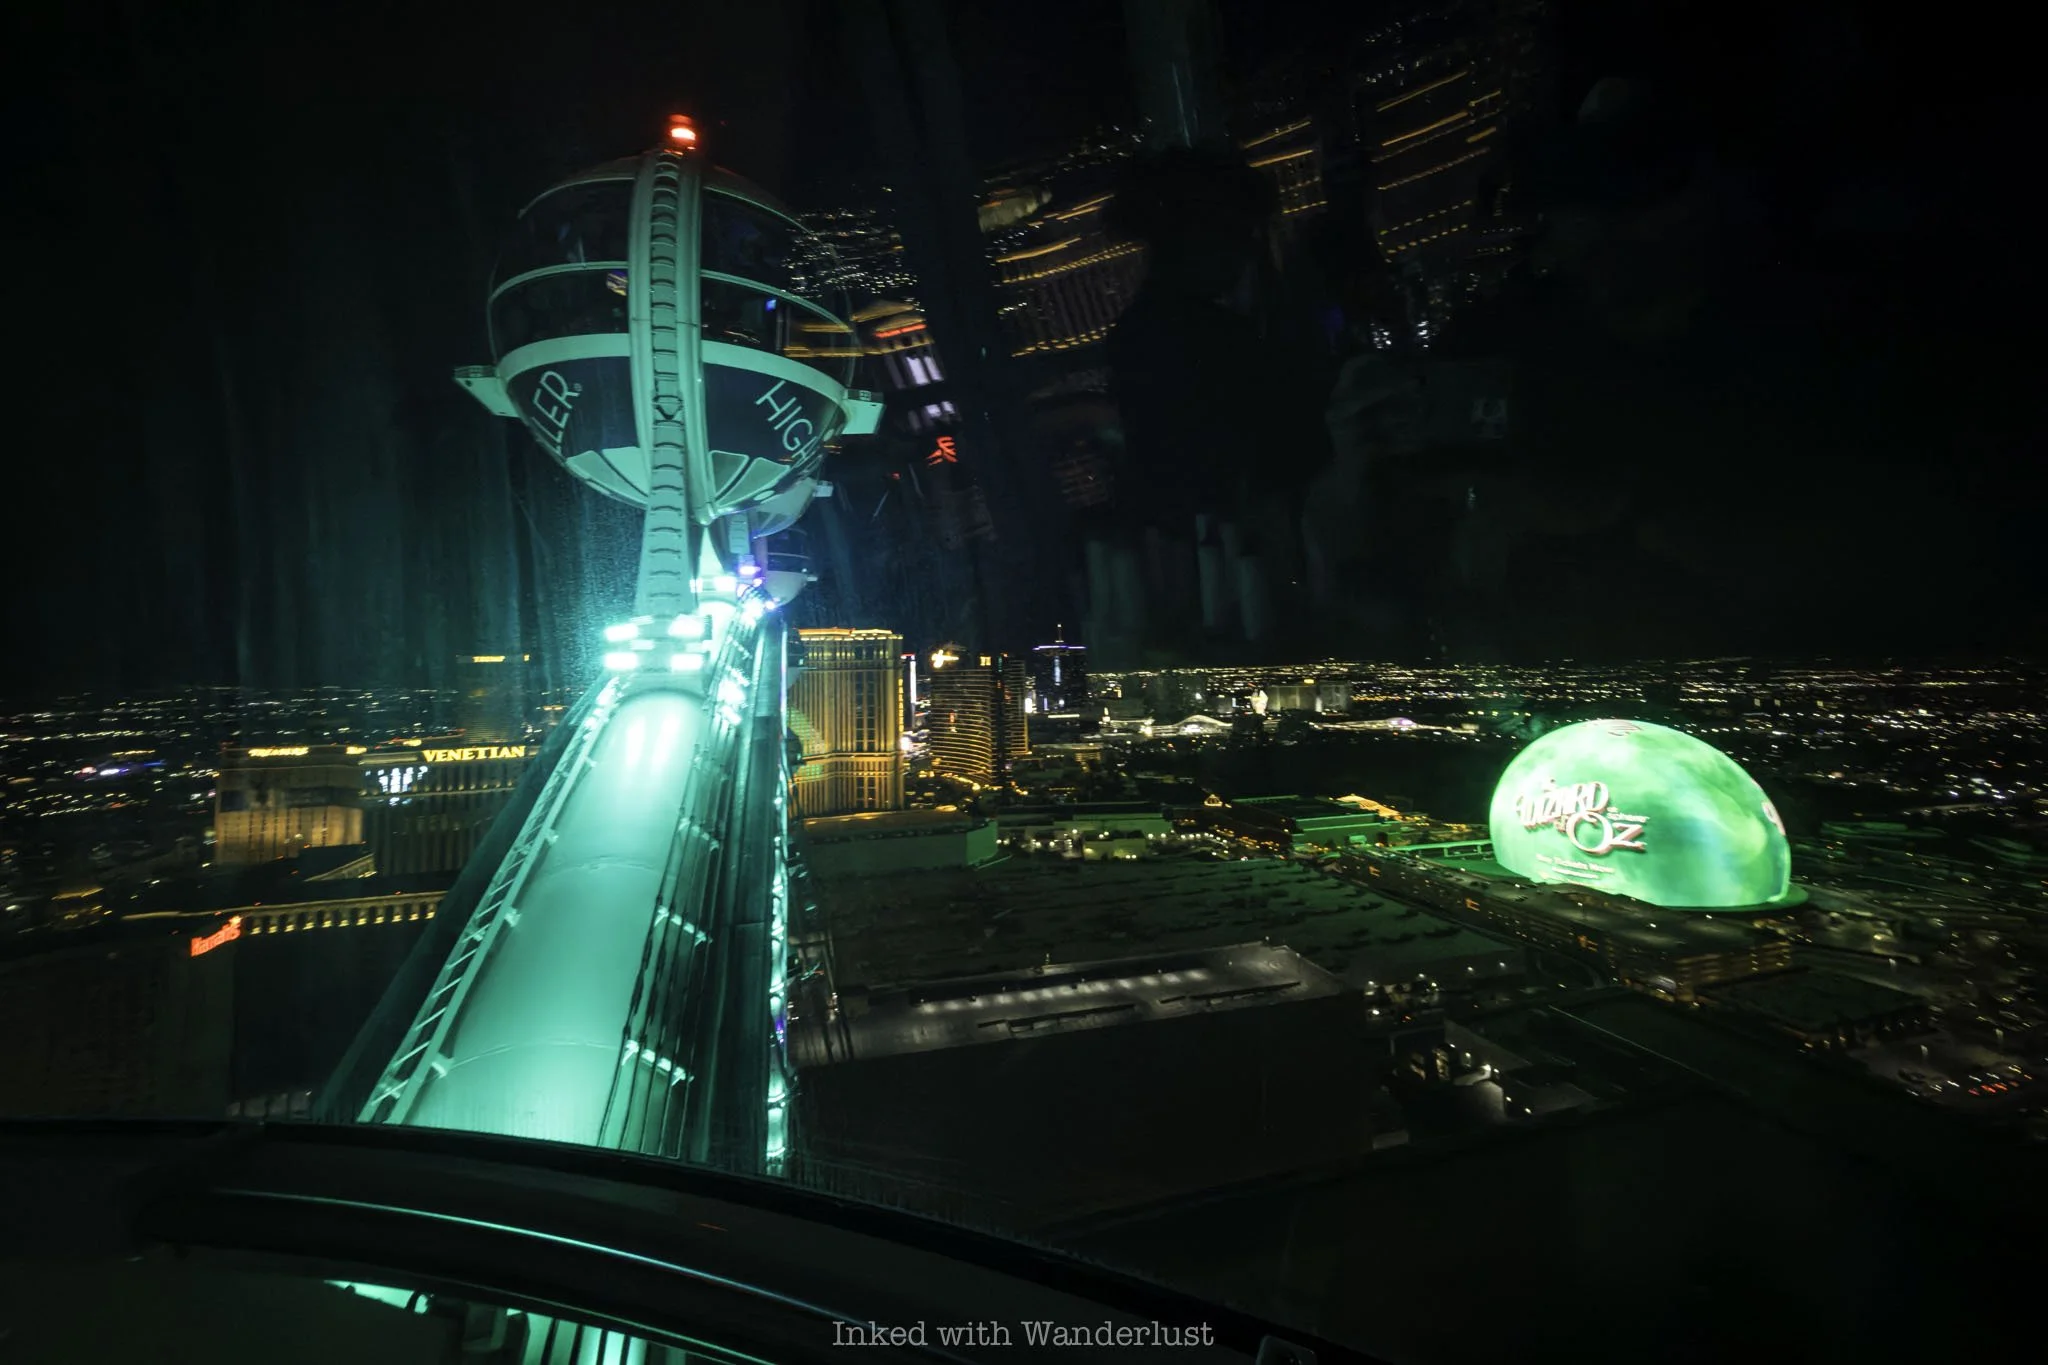
The ride on High Roller is smooth, though you can feel slight movements every so often. I don’t do well with heights and High Roller was the first attraction to test my courage since my visit to the Seattle Space Needle a few years back.
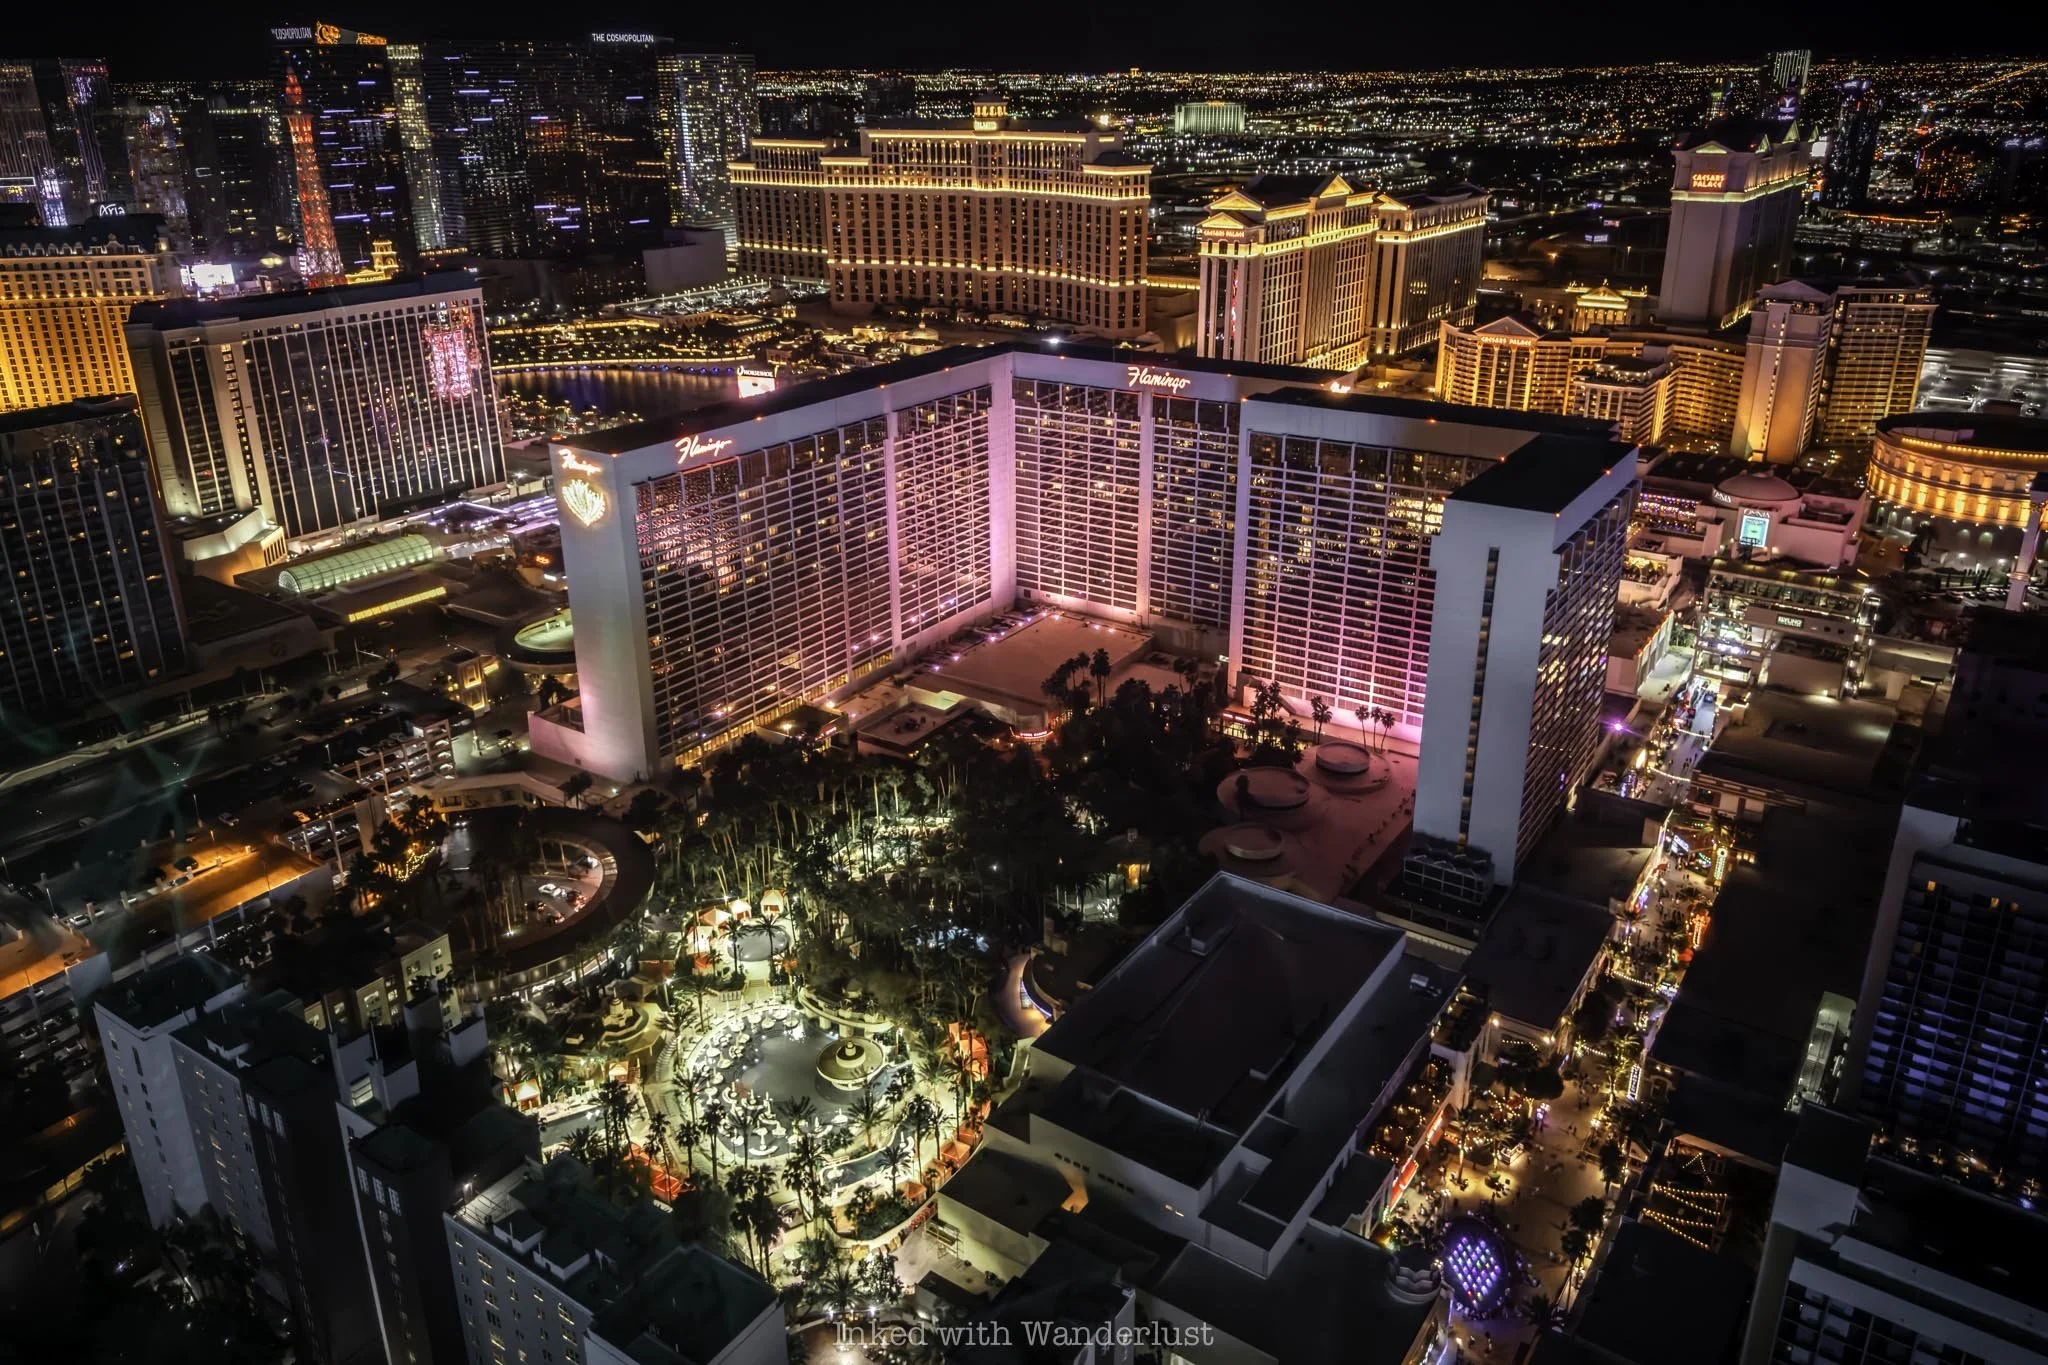
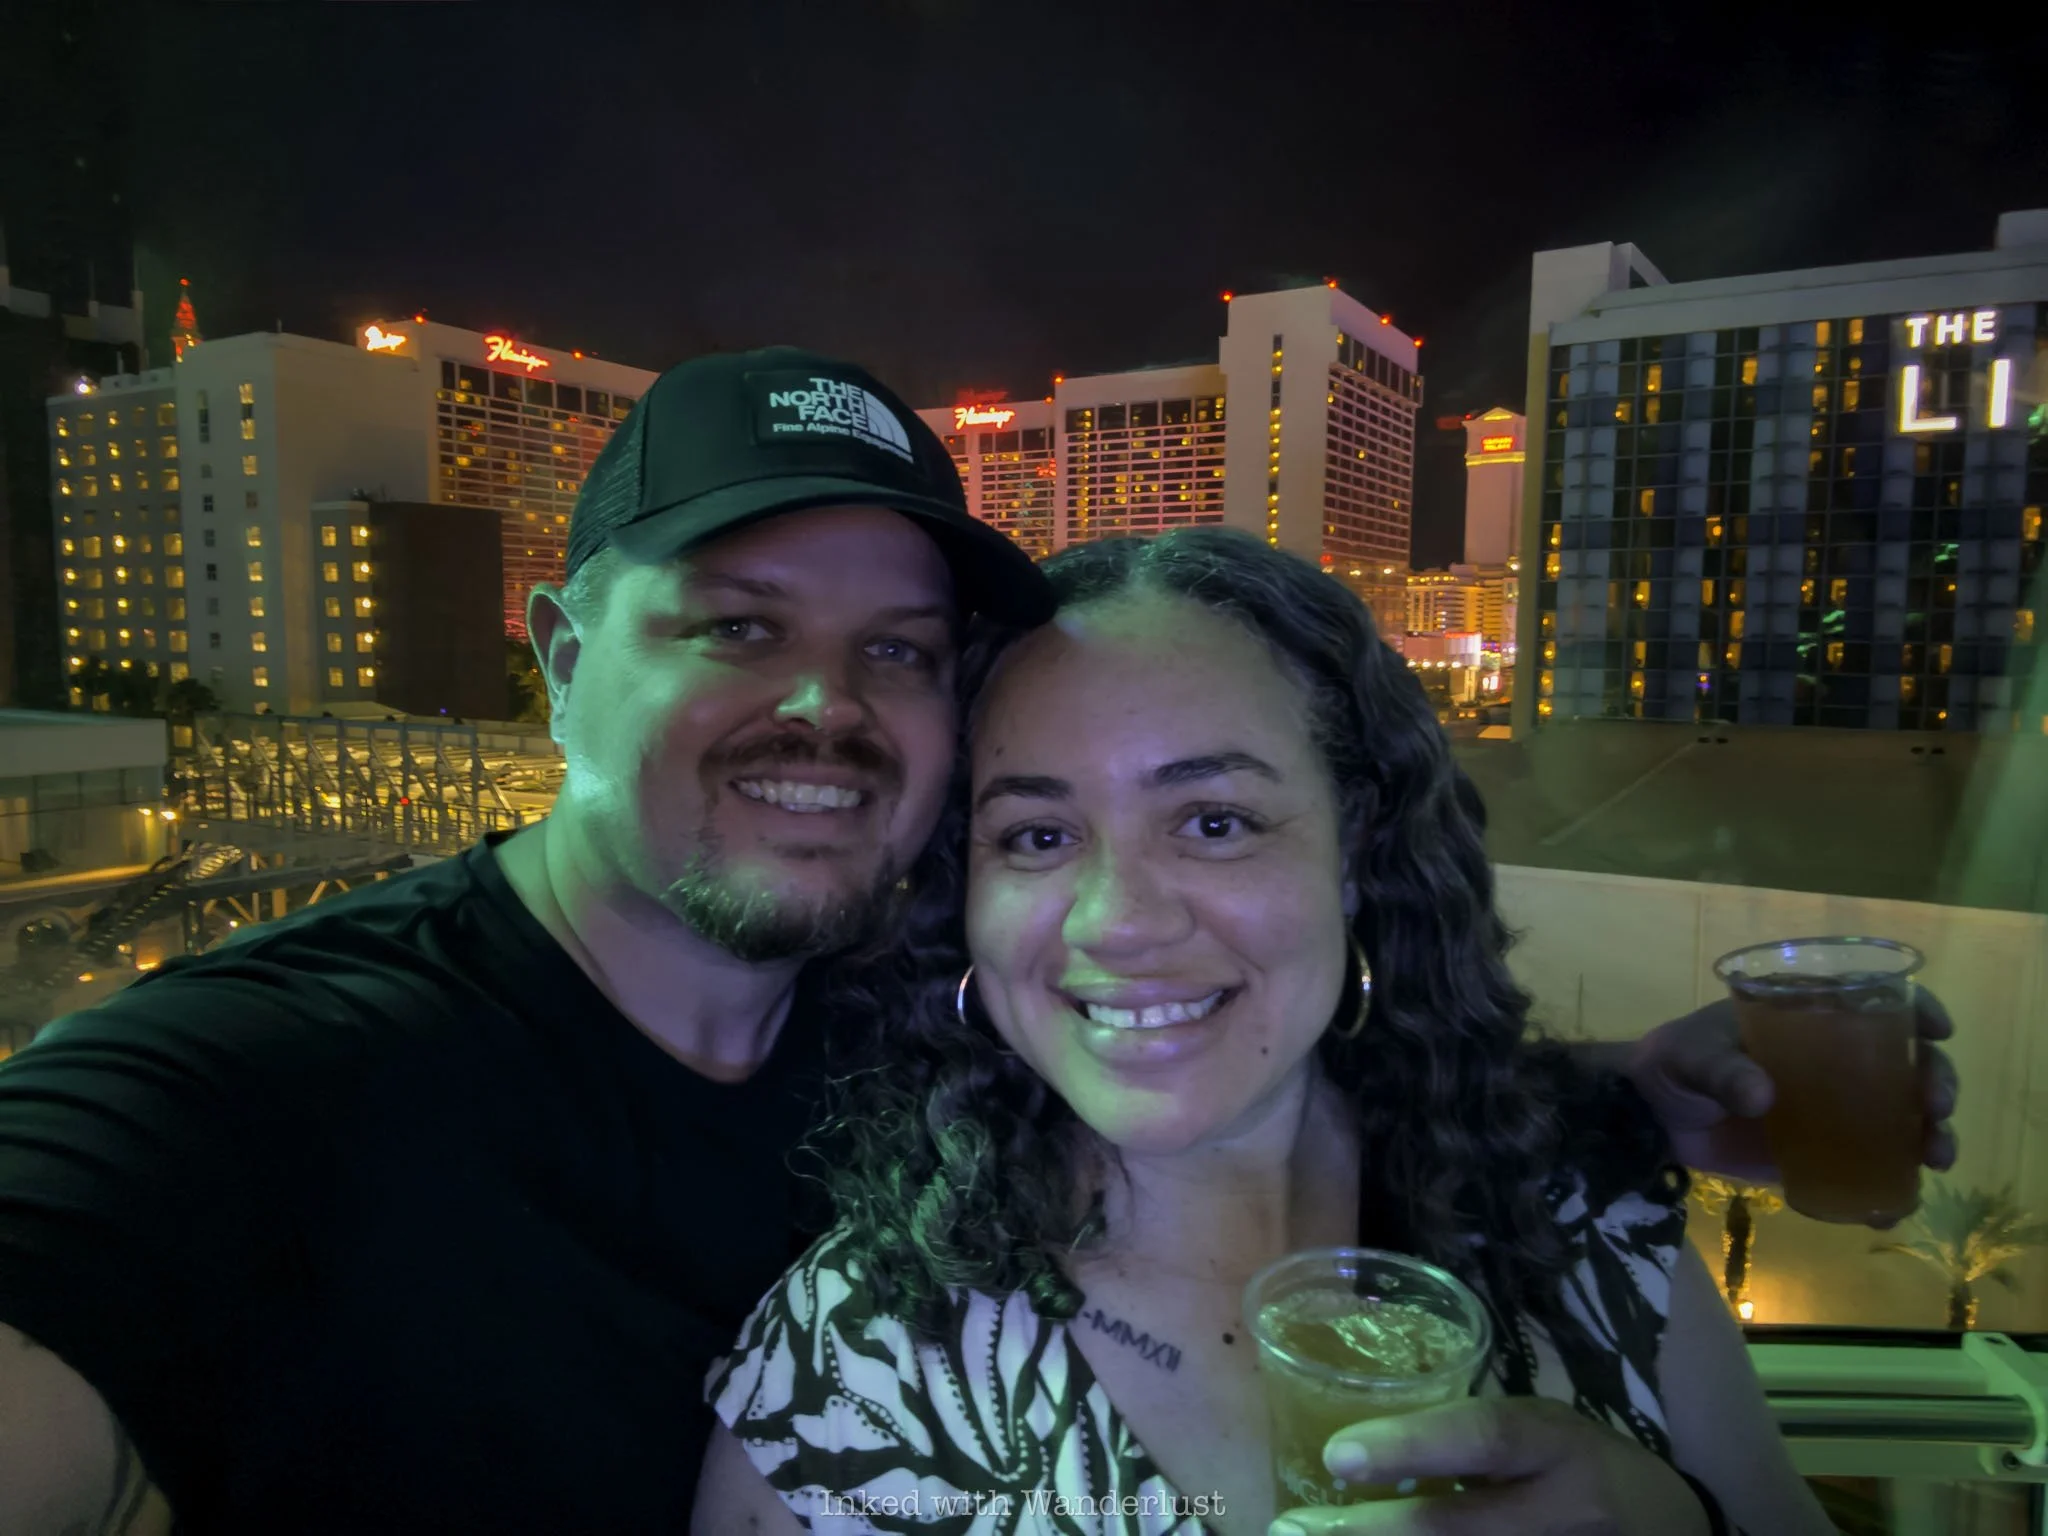
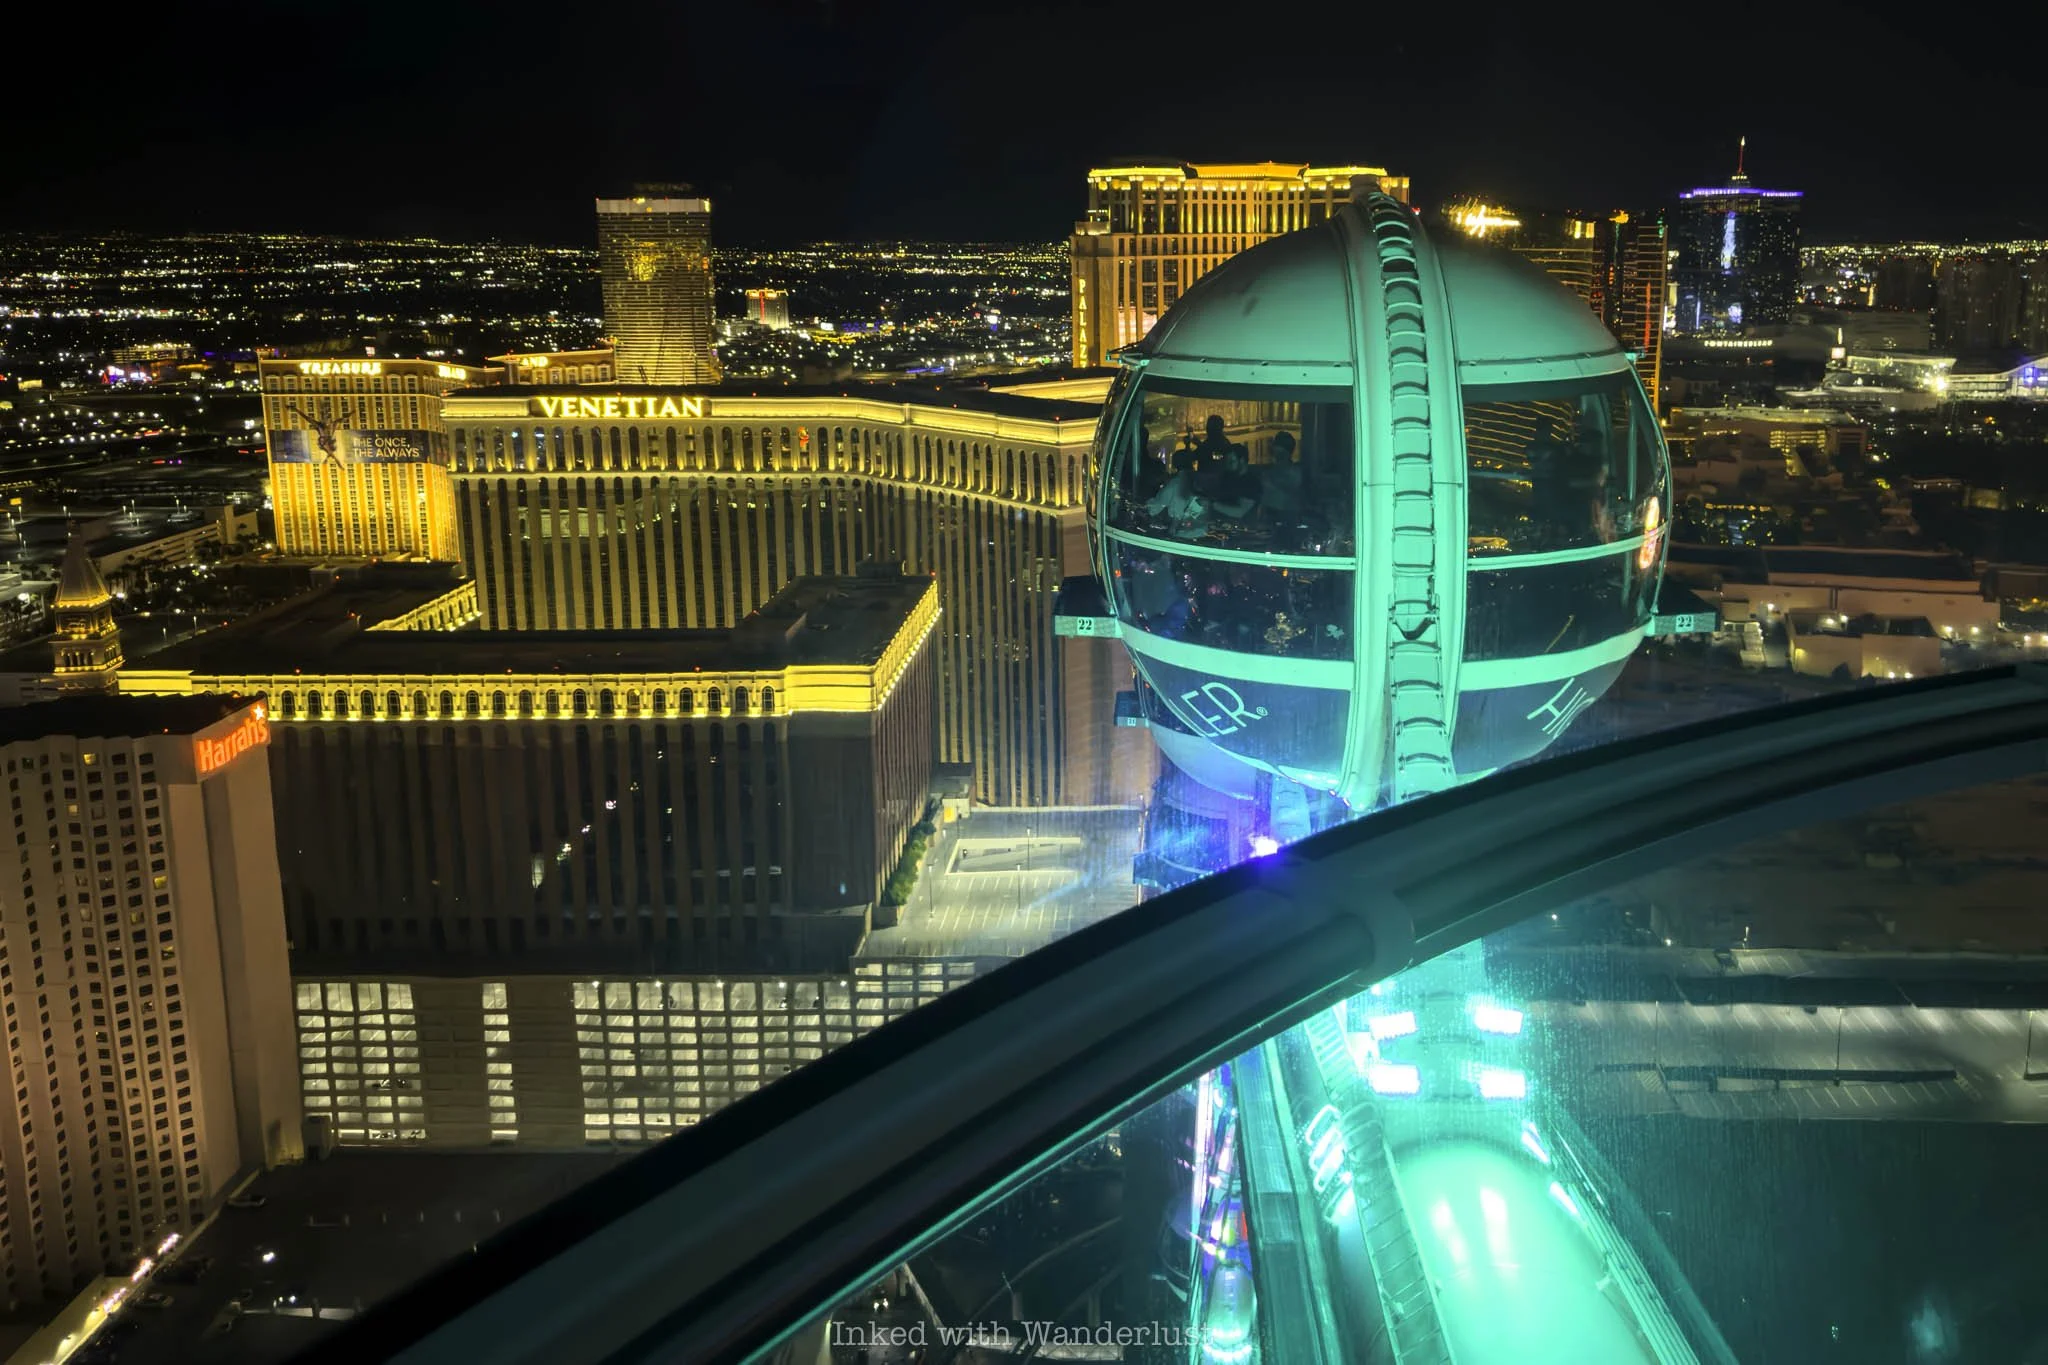
As your cabin begins to rise higher, jaw-dropping views start coming into frame all around you. To the east you’ll have a commanding view of the Las Vegas Sphere and to the west the center-portion of the strip (Flamingo, Linq, Bellagio, and Caesars) come into full view.
Look south and you’ll see the Luxor Light Beam (if riding at night) and various resorts off in the distance. Looking north will showcase the golden hues of the Venetian and Wynn Hotels. When completed, you’ll have an amazing view of the Hard Rock Guitar Hotel.
As you crest the top of the wheel, you’ve reached the official halfway mark of your ride. If you’re lucky, the ride will stop when you’re at or near the top. They sometimes do this for guest loading or unloading issues.
When your cabin begins its descent, your bartender will remind everyone they can keep ordering drinks and if they’re anything like our bartender was, they’ll offer to take photos for you. Ours was a riot and was cracking jokes with us the entire time.
You can order drinks right up until you reach the loading area below. You won’t need to chug your drink before leaving, as they allow you to leave with it. When you do reach the bottom, you’ll exit on the opposite side from where you entered.
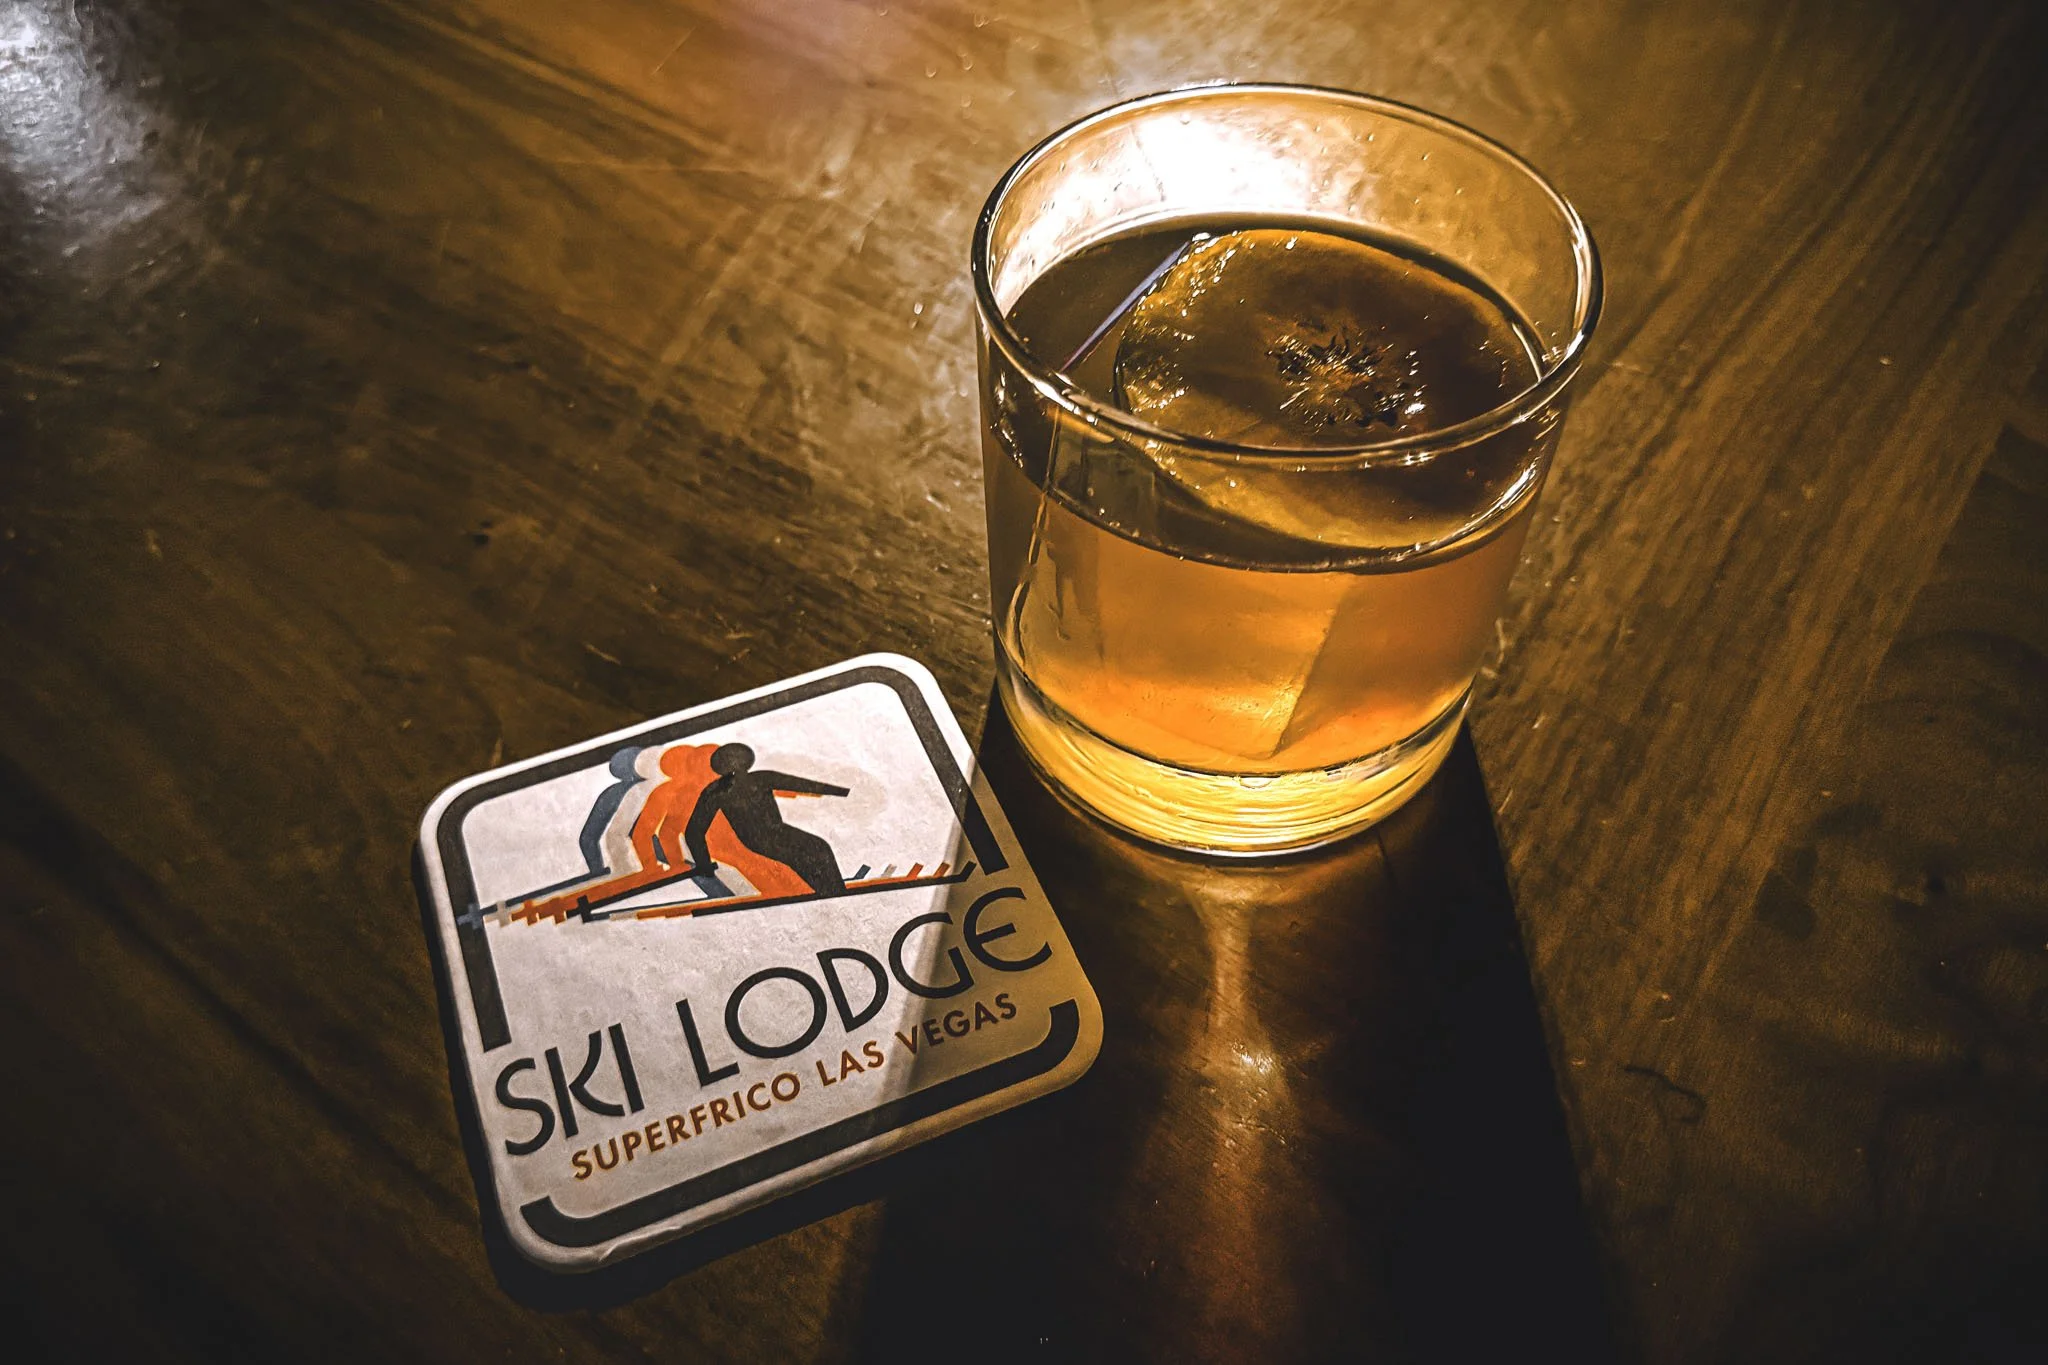
You’ll walk down a ramp, exit through the gift shop and arrive back at the promenade. If you’re hungry and can’t wait, I recommend Virgil’s BBQ or Chayo Mexican Kitchen. If you’re up for delicious cocktails and bomb pizza squares, walk over to the Ski Lodge speakeasy at Cosmo.
Is High Roller Happy Half Hour Worth It?
Would I say the Happy Half Hour ticket is worth it? My wife and I had a good time, so, yes, I would say it’s worth it. It’s subjective, really. Each person would need to experience it for themselves to truly determine that. However…
If enjoying unlimited (though, basic) cocktails while taking in the views of Las Vegas from up to 550 feet in the air sounds appealing to you, then I would say you’d find it worth it. Likewise if you’d prefer a kid-free experience.
Conversely, if you’re not a drinker, the only real benefit to you is the aforementioned kid-free experience. To some, that alone is worth the upgrade, while others don’t mind being around kids, rendering the extra expense unwarranted.
Additionally, if you’re being budget conscience, then the additional cost of the Happy Half Hour ticket may be prohibitive or at minimum, unappealing to you. If so, you’d be better off purchasing a standard ride and applying what you saved towards something else.
Looking for more to do? Head off-strip and test your courage at Universal Horror Unleashed at Area 15! Never been to Area 15? See my ultimate guide to the Area 15 Entertainment District here.
To save big on standard and “Anytime” High Roller tickets (and tickets to many Las Vegas attractions), purchase through my preferred partner, Viator, at this link.
You’ll save up to $15 per ticket by purchasing through Viator and by doing so, you’d be supporting Inked with Wanderlust.
How to Find Ski Lodge Speakeasy at Cosmopolitan Las Vegas (+ Review)
Requiring little more than a sense of adventure and tidbit of insider knowledge (like what you’ll get in this post), the Ski…
Disclosure: This post contains affiliate links. If you make a purchase through these links, I may earn a small commission at no additional cost to you. I only recommend products or services that I believe will add value to my readers.
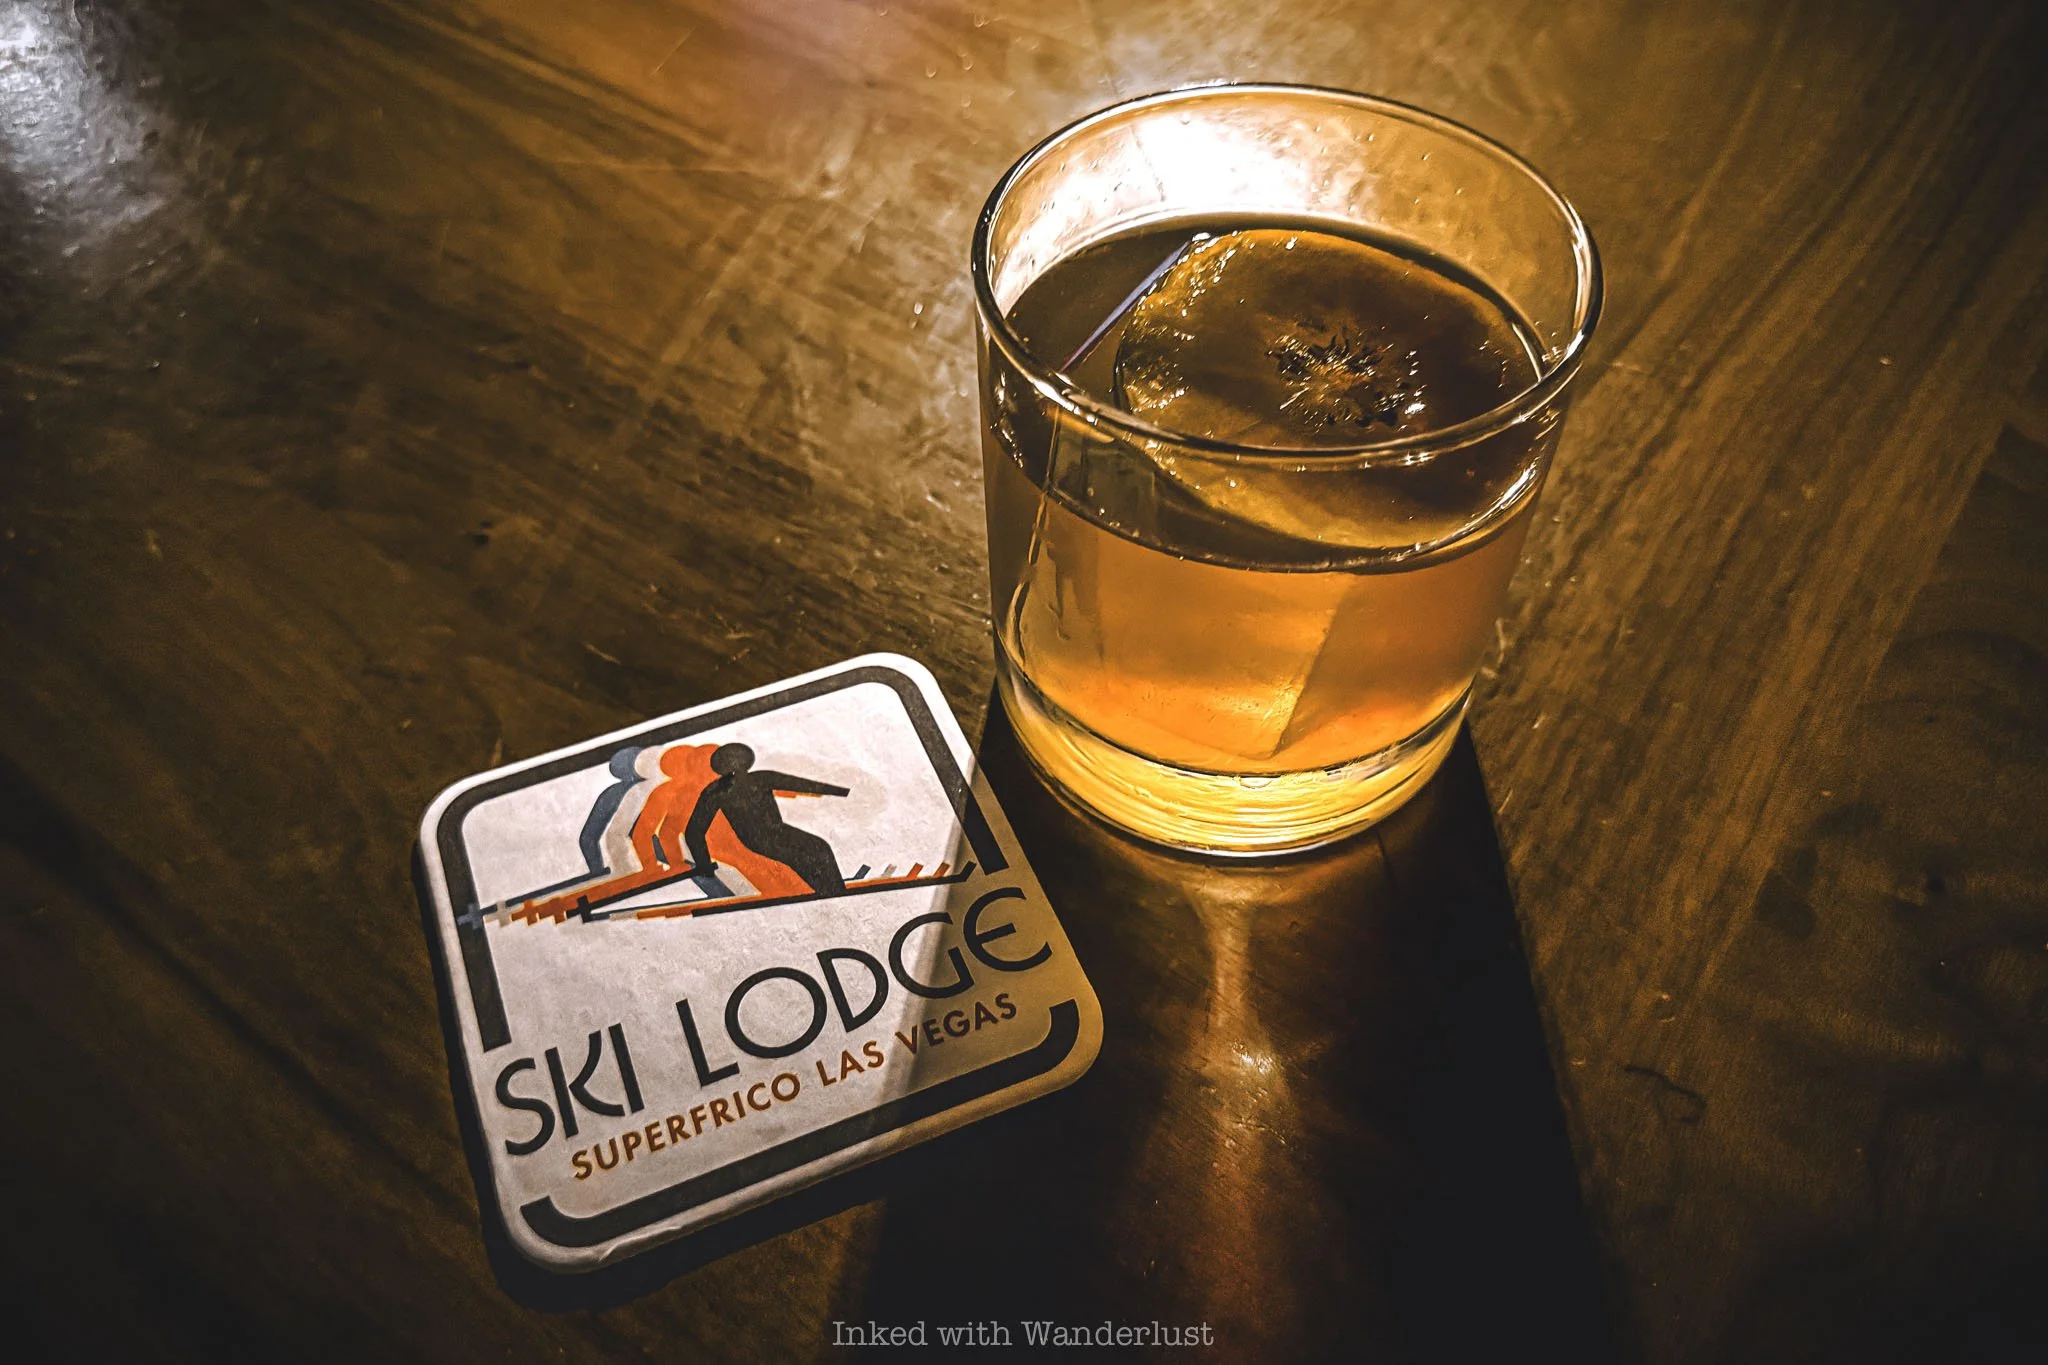
Requiring little more than a sense of adventure and tidbit of insider knowledge (like what you’ll get in this post), the Ski Lodge at the Cosmopolitan in Las Vegas is a cozy, low-key cocktail lounge with a members only vibe (though everyone is welcomed).
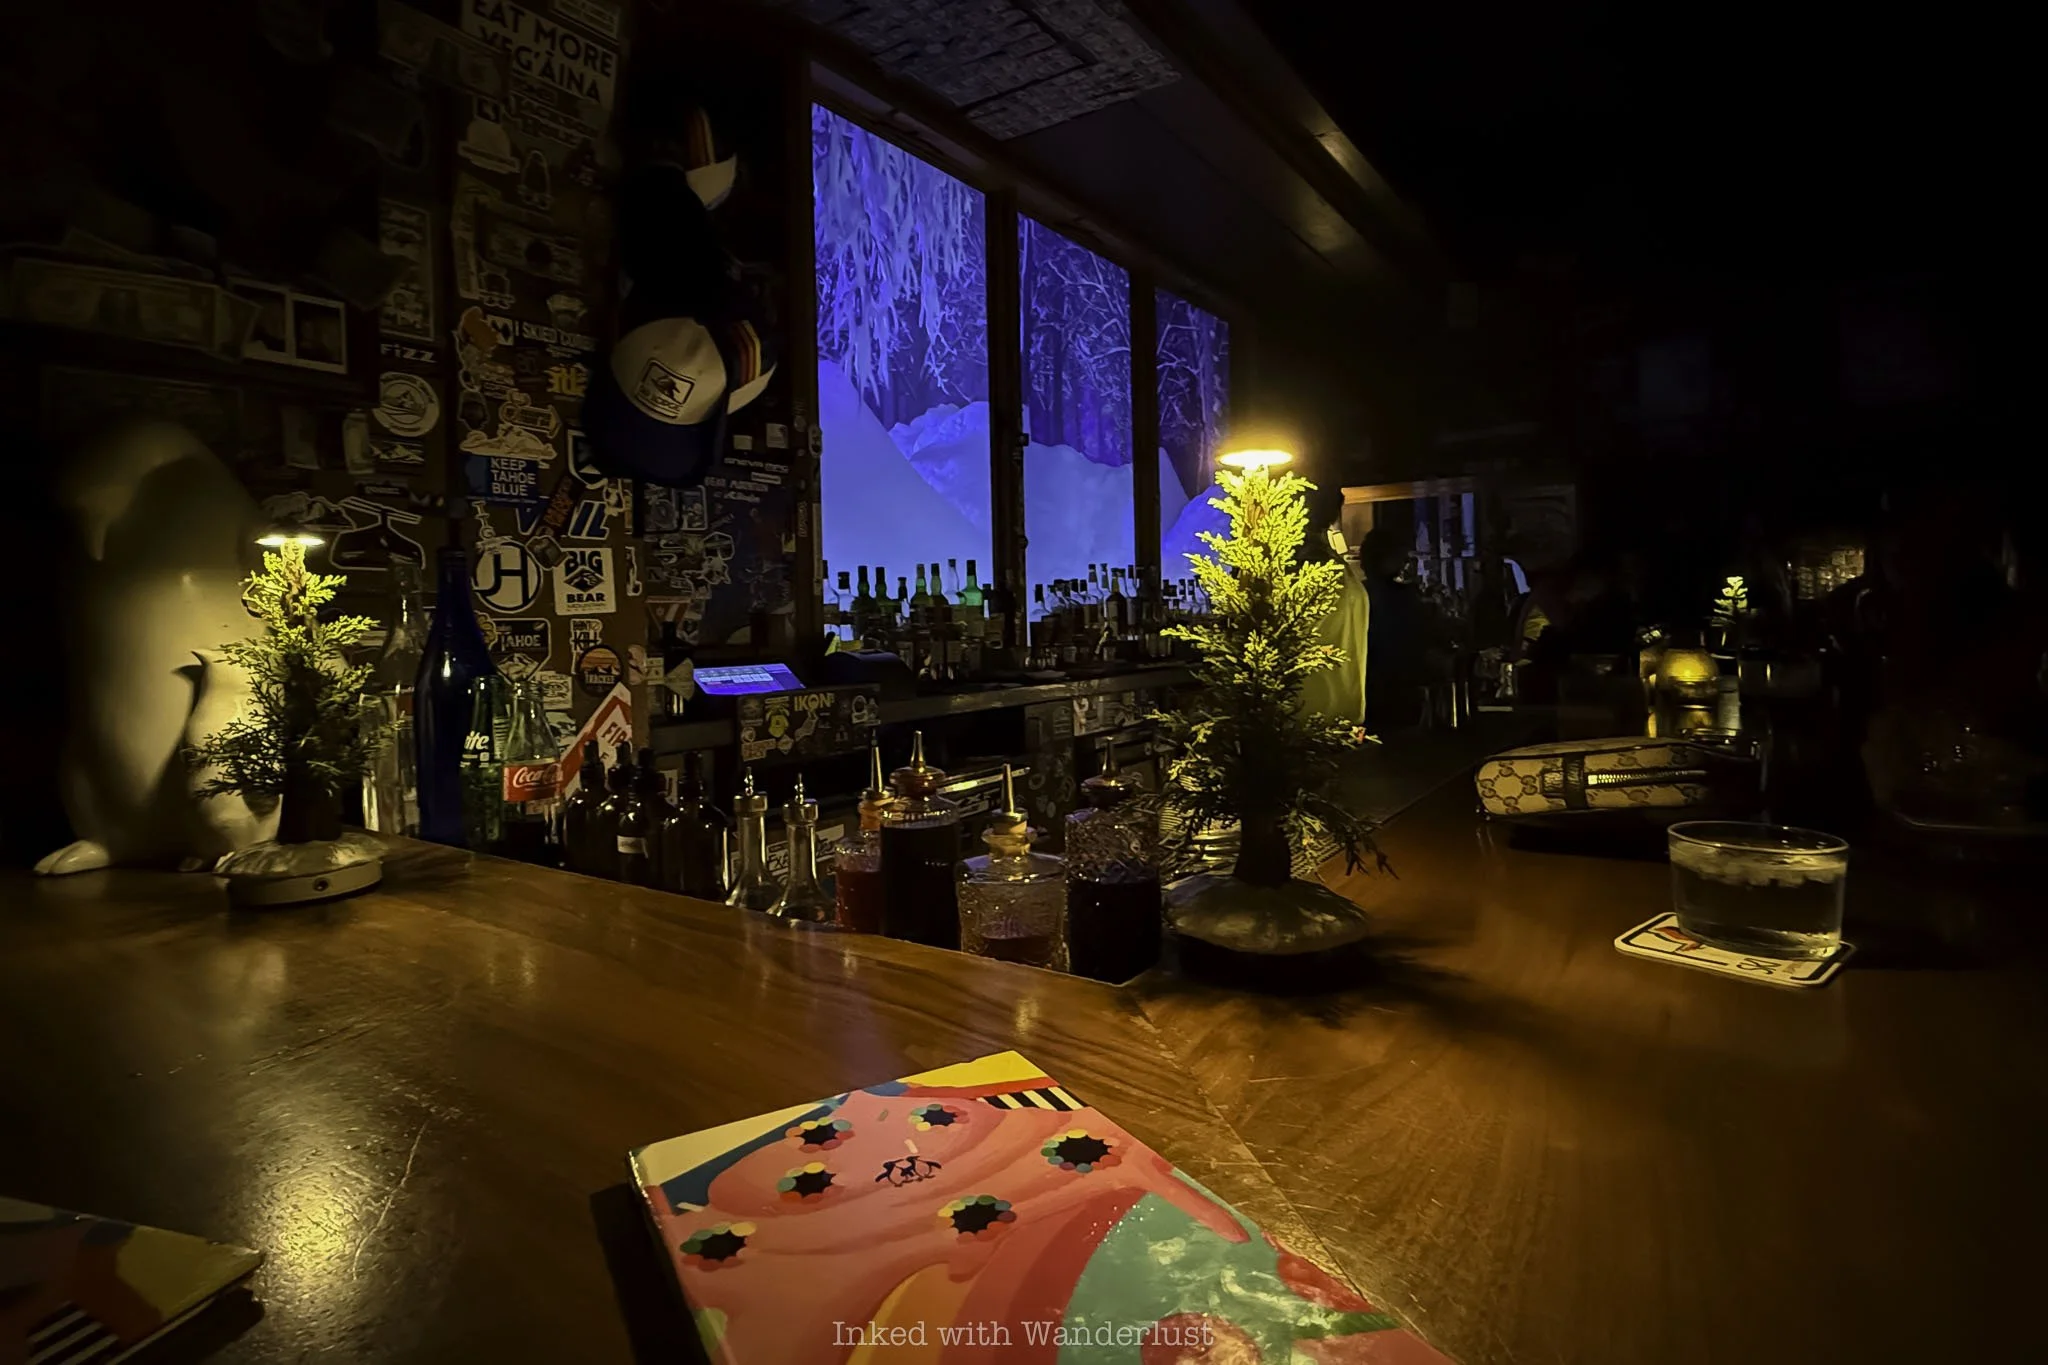
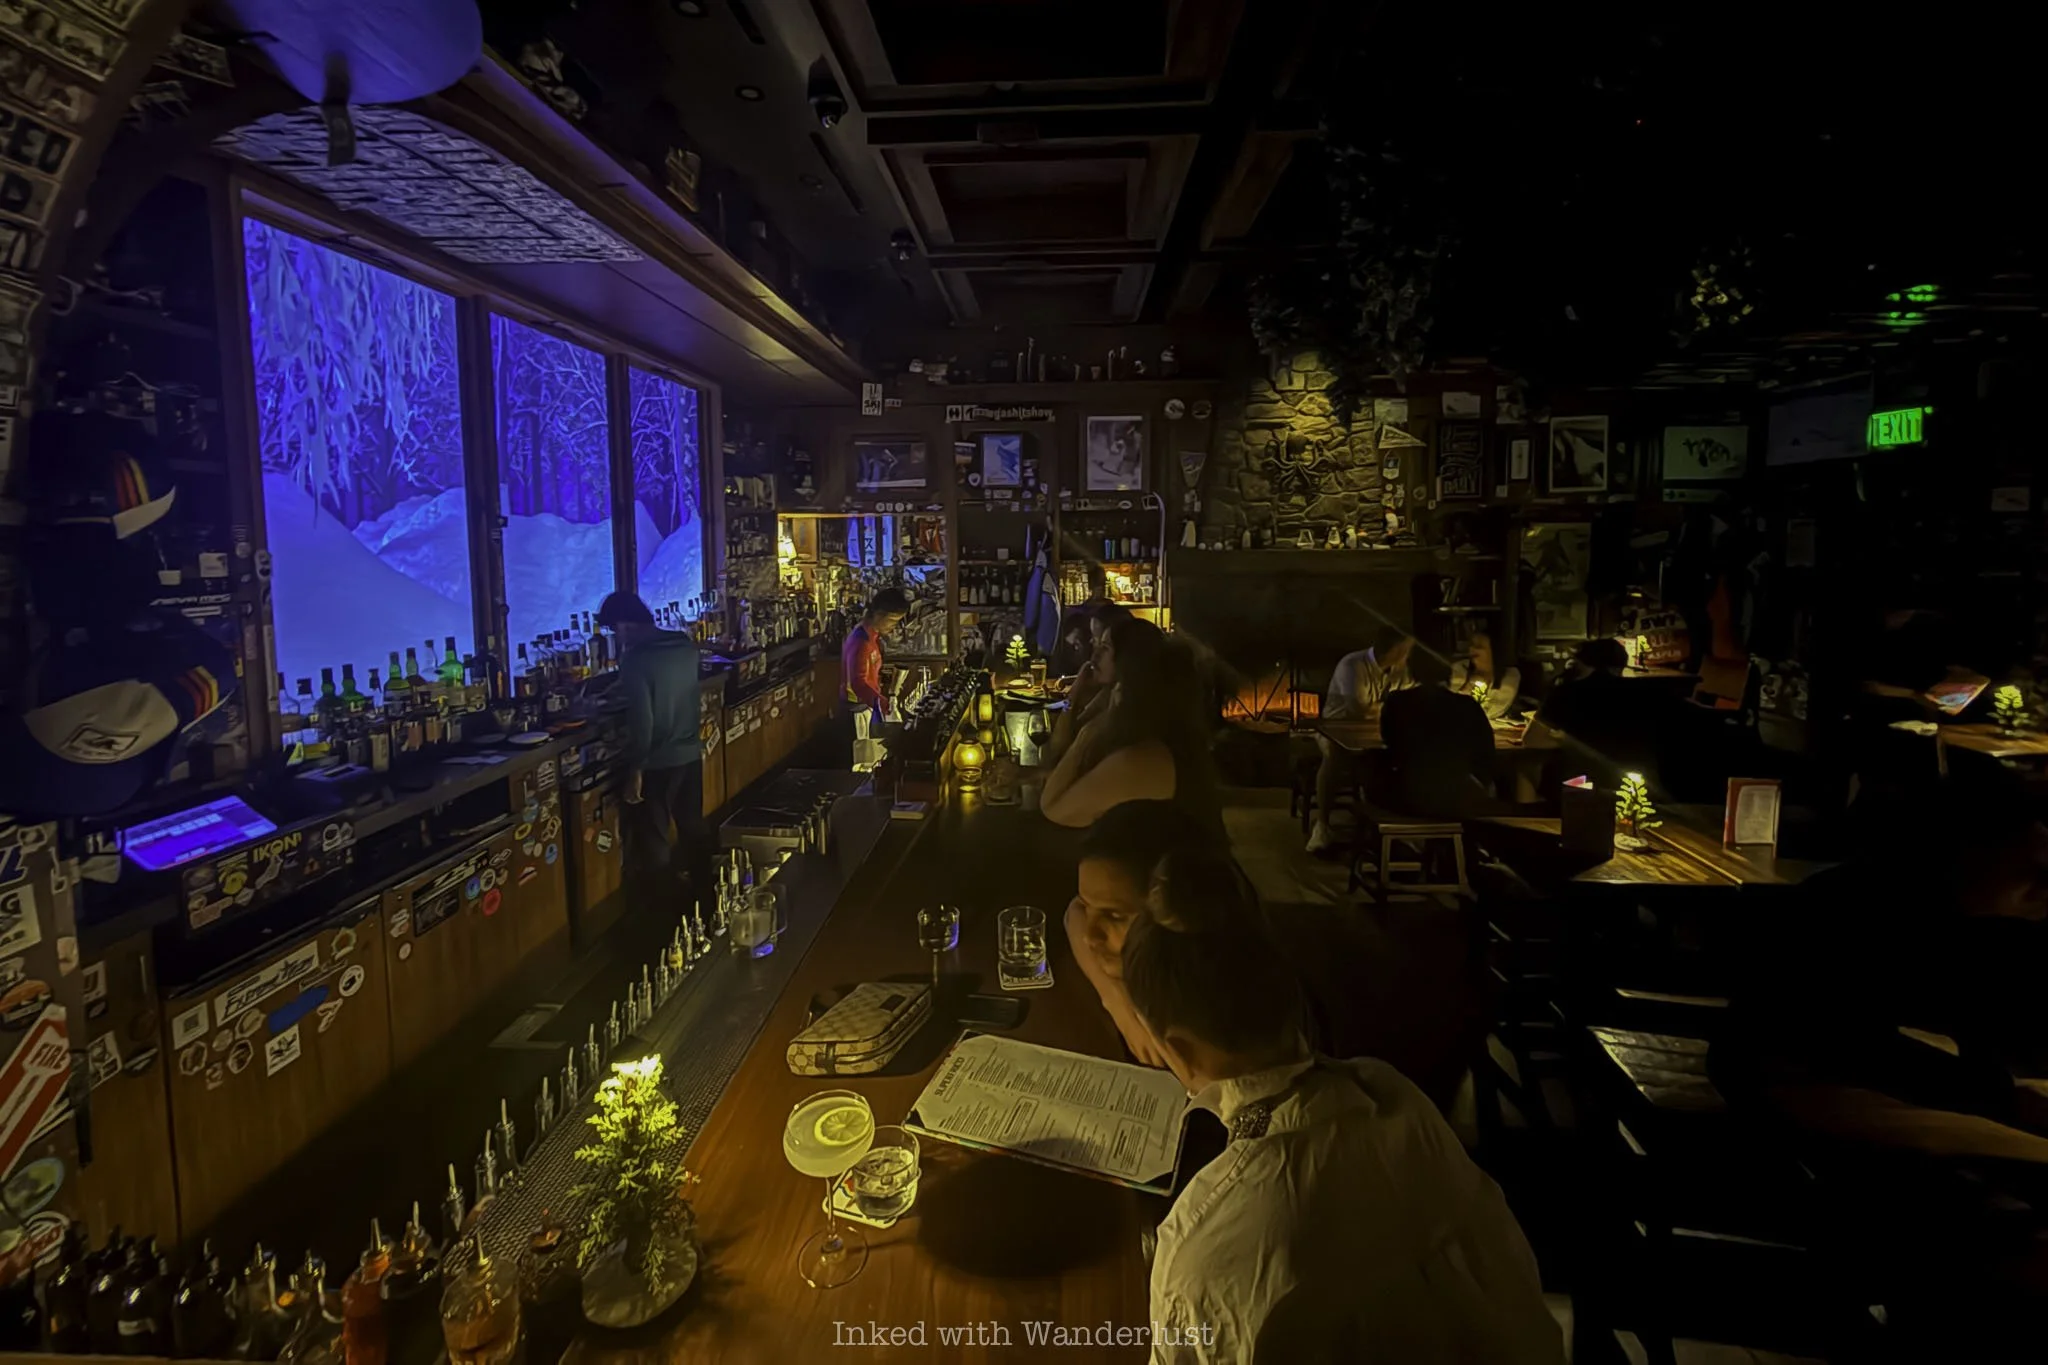
Drawing inspiration from the coziest alpine ski bars of the world, Ski Lodge transports it guests from the blazing heat of the desert sun to a winter lodge, complete with a window overlooking a forest snowfall and crackling fire blazing.
Between the smooth and well-balanced cocktails, the flavor-packed pizza squares from neighboring restaurant, Superfrico, and self-toasted marshmallows over an open flame, Ski Lodge is unlike anything else on the strip. You just need to find it!
In this review of Ski Lodge Las Vegas, I’m going to articulate exactly how to find this speakeasy with photos and turn-by-turn directions, as well as what to expect once you’re there. Let’s get into it!
What is a Speakeasy?
As stated above, Ski Lodge is a themed speakeasy, cheekily “hidden” in a way to feel secretive and needing to be “in-the-know”. Speakeasies originated during the Prohibition era (1920 - 1933), when alcohol was deemed illegal.
Largely fueled by mob influence (and other underworld organizations), hidden bars and establishments popped up all over major cities and rural areas alike, providing spaces for folks to consume their favorite pour of choice (for a price, of course).
Since alcohol was illegal, people needed to “speak easy” when discussing these underground operations with each other to avoid unwanted attention from law enforcement. From there, the term “speakeasy” was coined to identify these establishments during conversation and reference.
With prohibition now a bygone era, modern speakeasies have been trending upwards in popularity. They aim to invoke that hidden, old school atmosphere while operating as stylish (and legal) cocktail lounges. Essentially, the term “speakeasy” is in spirit (and fun) rather than practice.
How to Find Ski Lodge Las Vegas
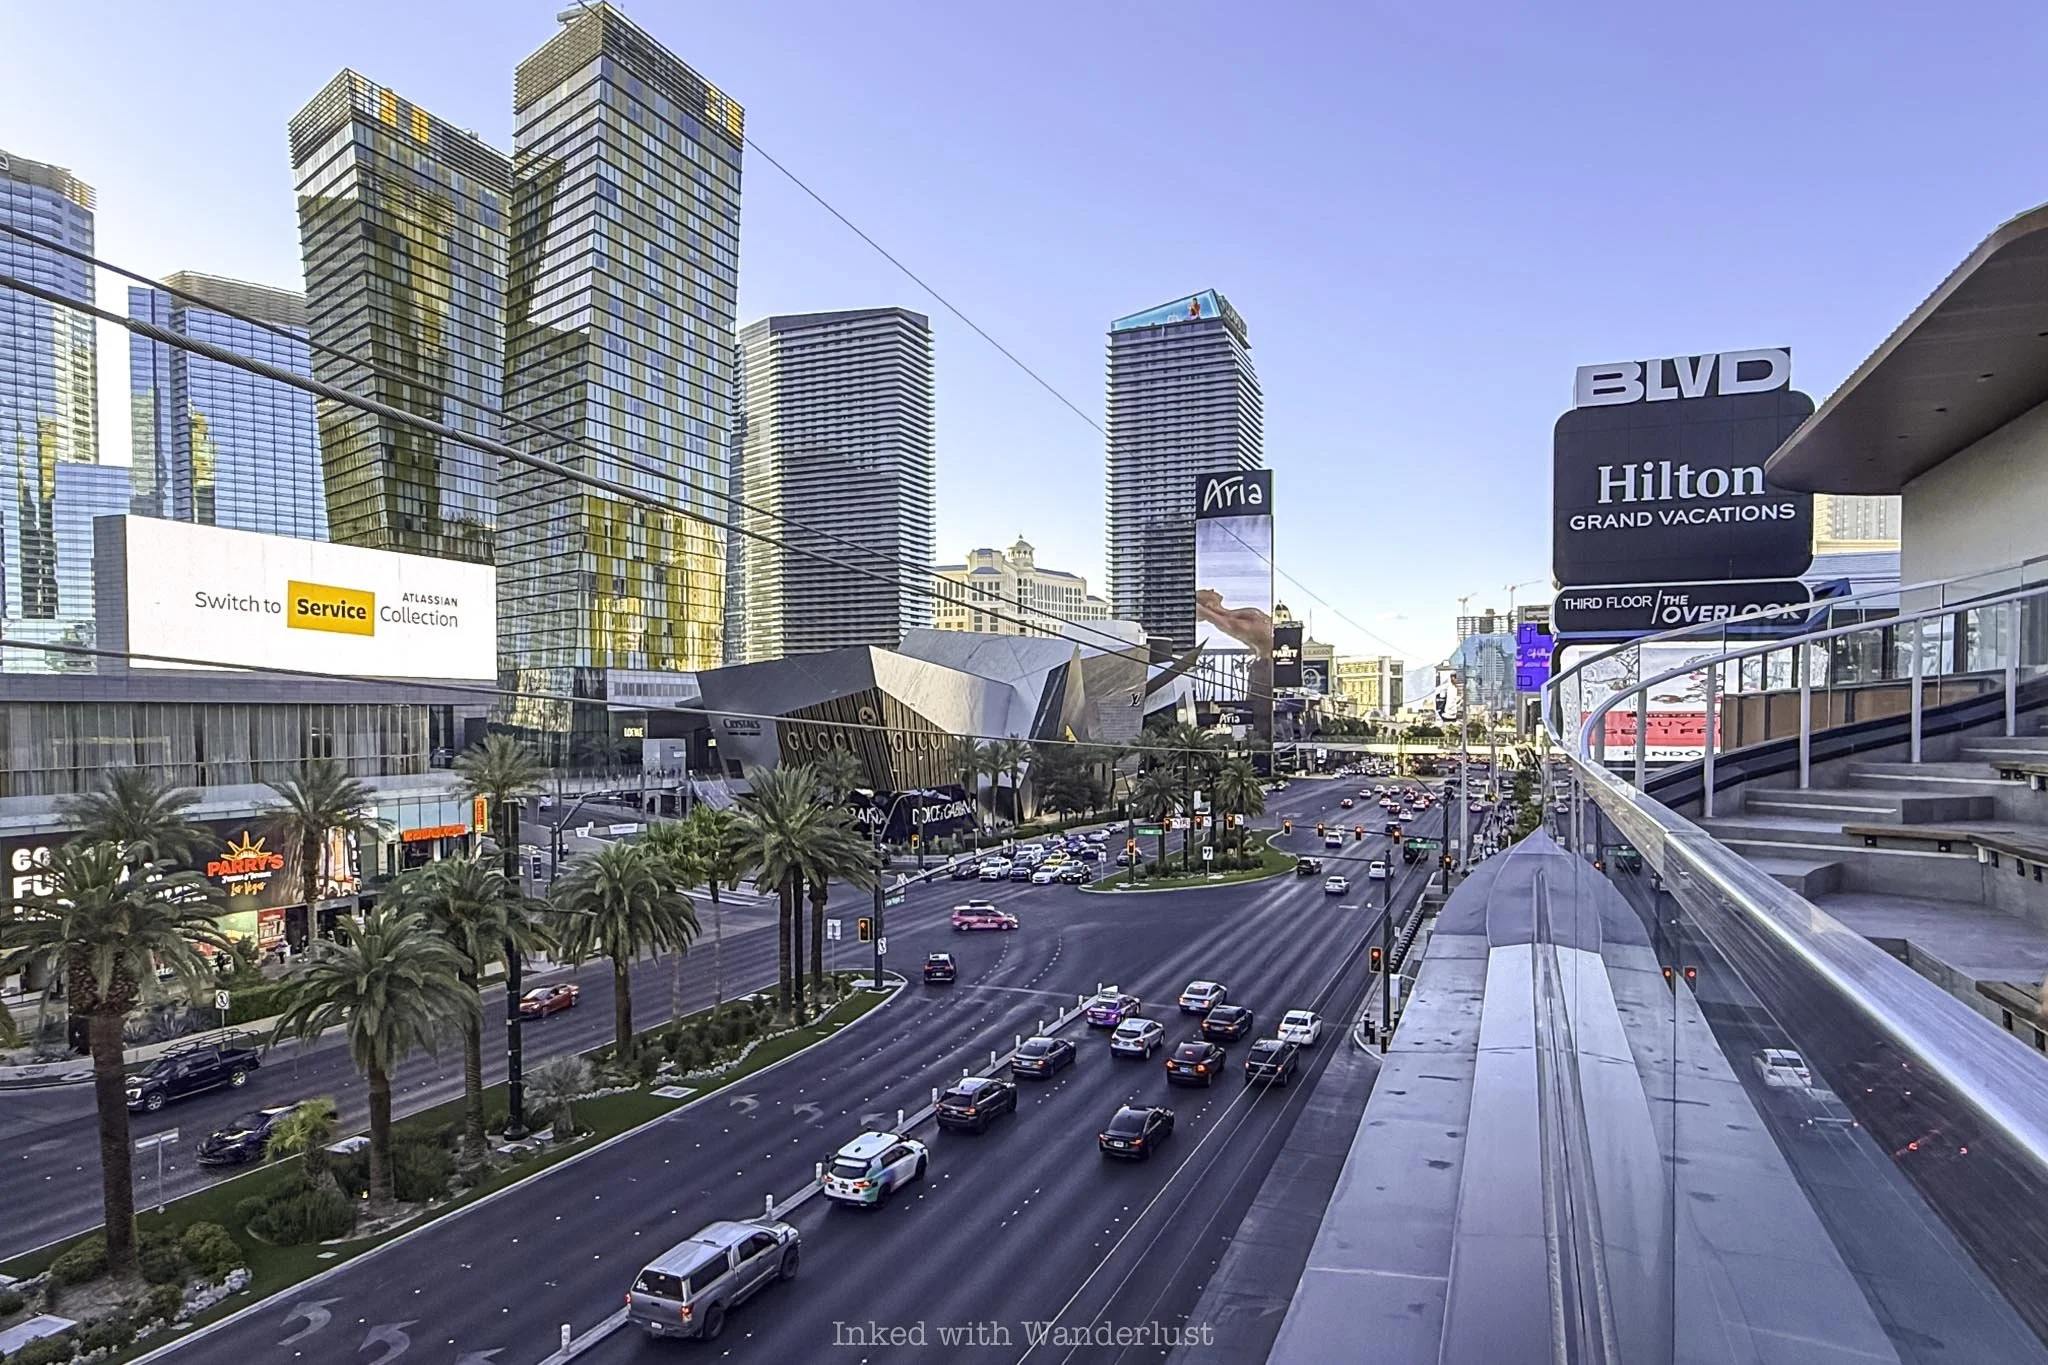
There are several points of entry when beginning your search for Ski Lodge. First things first, you’ll need to make your way to Cosmopolitan (Cosmo) Las Vegas, as Ski Lodge is located within it. Cosmo is located center-strip, on the west side, between Aria and Bellagio Hotels.
The Las Vegas Monorail doesn’t go to Cosmo, as the monorail is contained to the strip’s east side. However you can take the monorail to the Flamingo stop, which is the closest to Cosmo (roughly a twelve to fifteen minute walk away).
Once you’re at Cosmo, you’ll want to make your way to the second level. If you enter Cosmo walking from Flamingo you would have do so via the sky bridge over Harmon and thus, would already be on the second level. Entering from street level? Take the escalators.
Detailed Directions to Ski Lodge
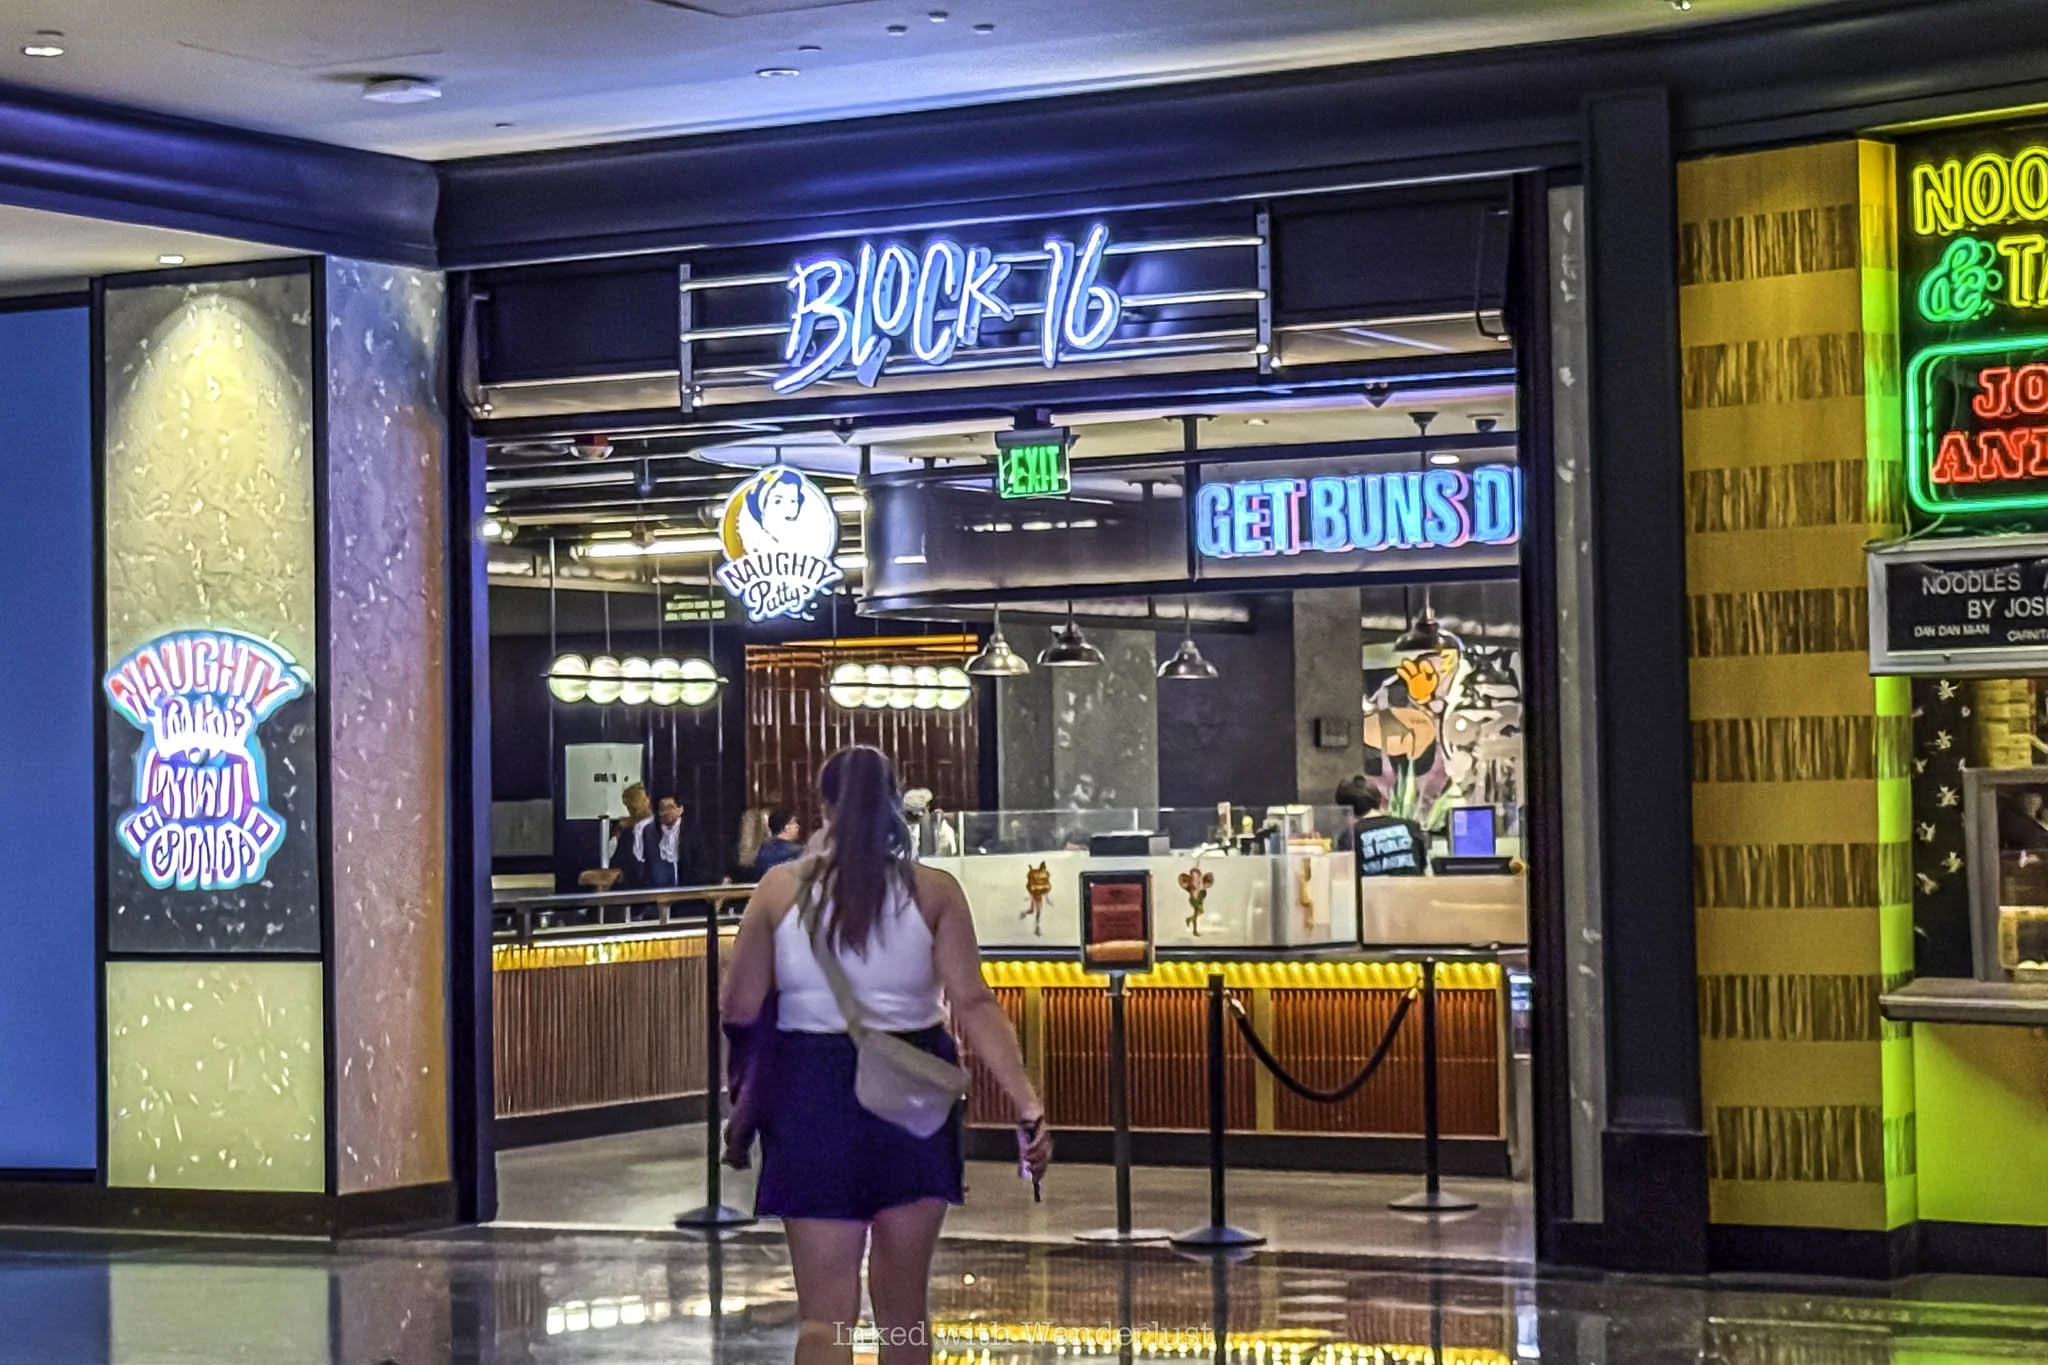
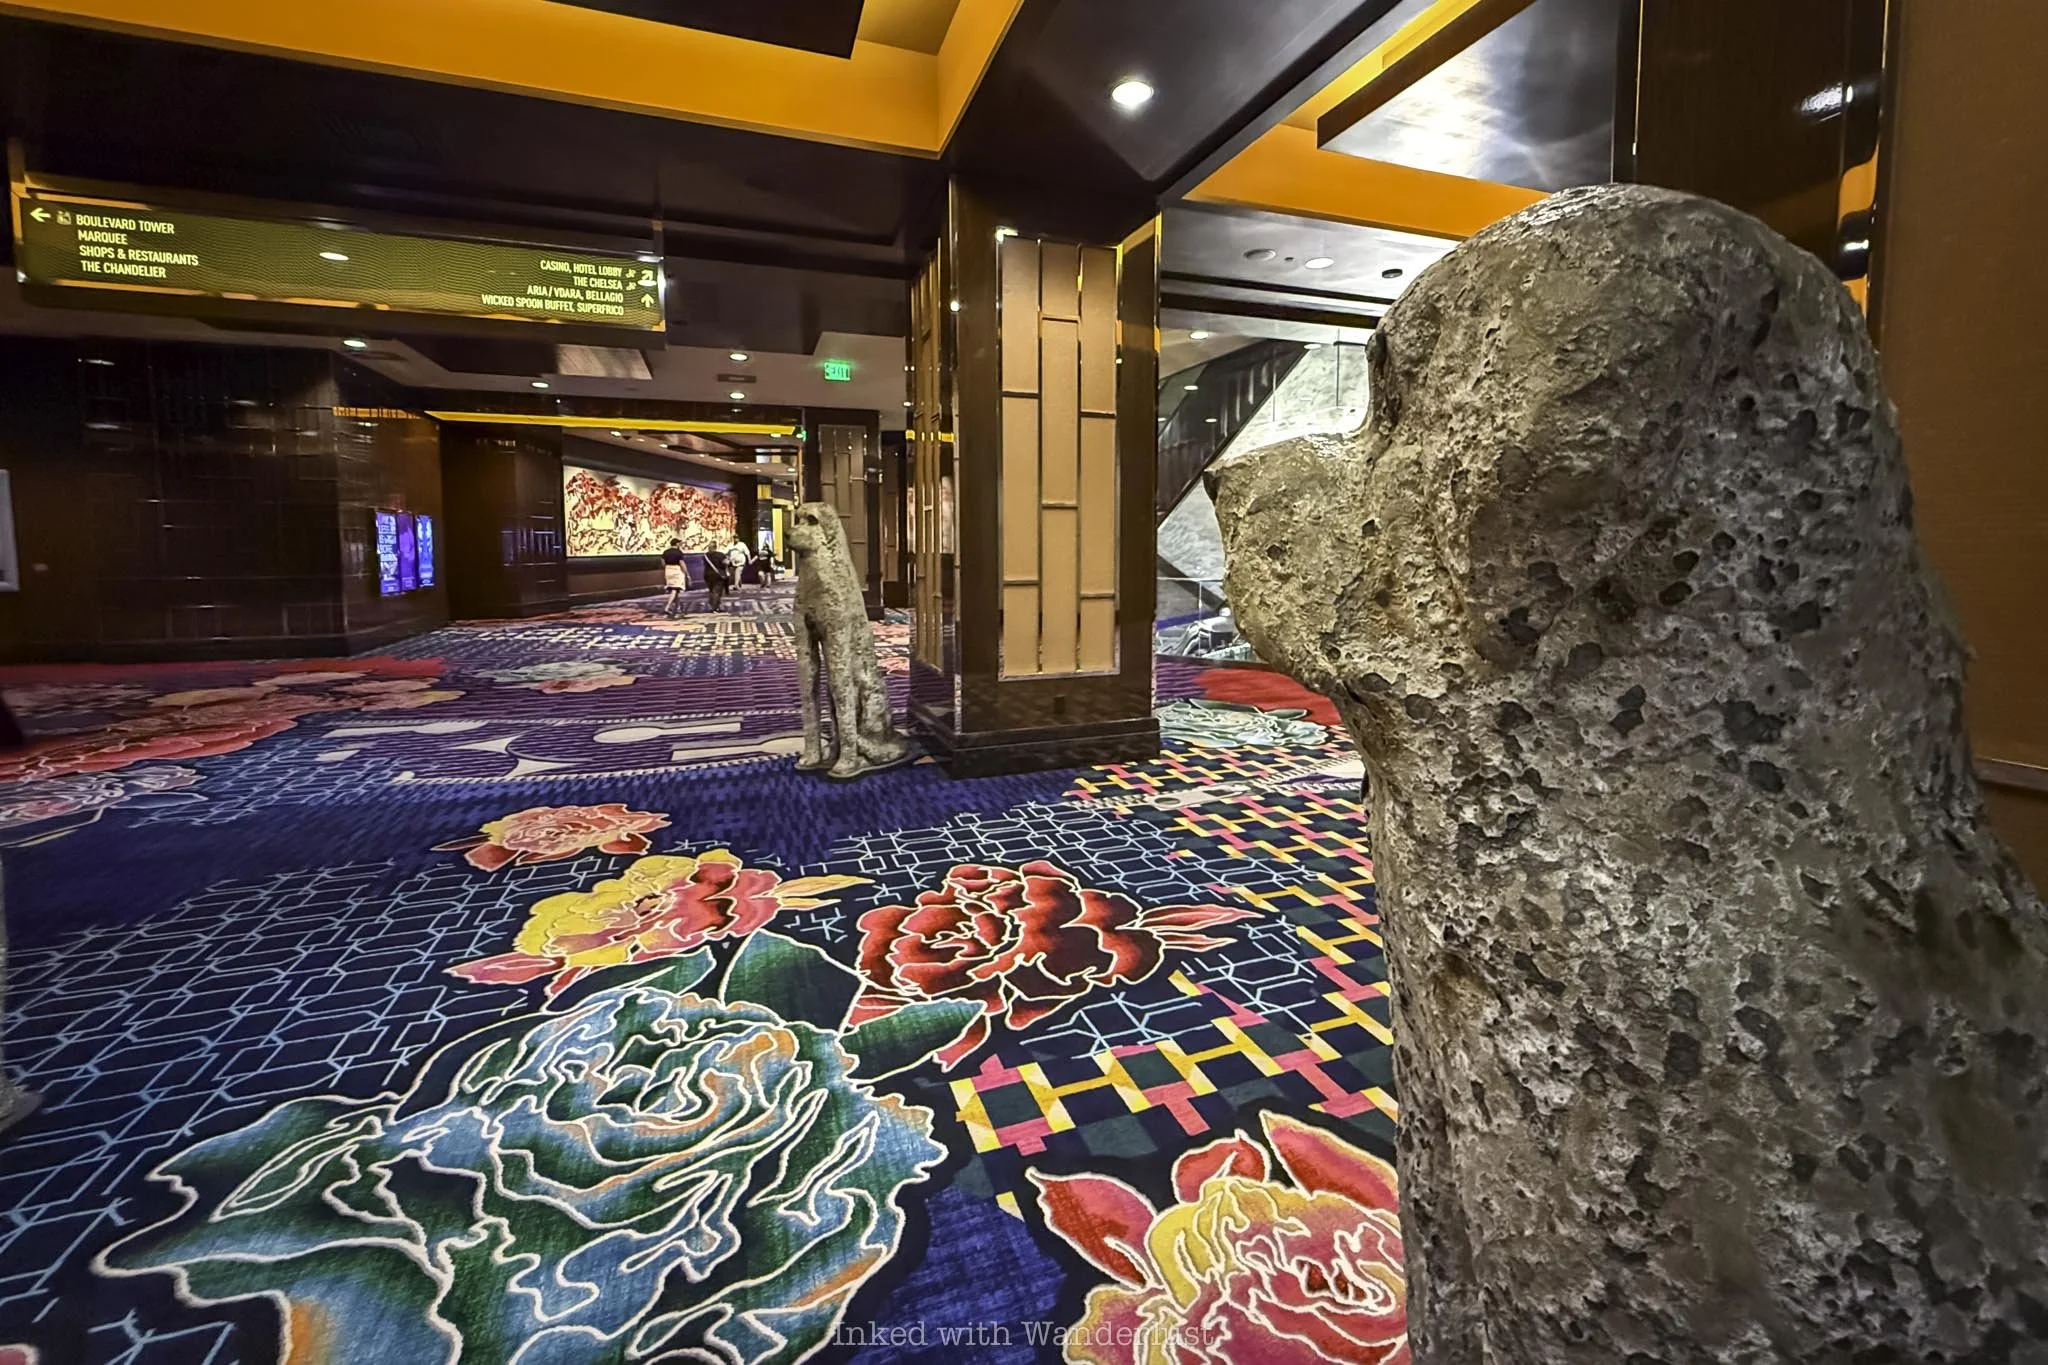
You’ll want to follow signs to their restaurant row. It isn’t officially called this, but it’s where many of their eateries, such as Eggslut, are located. When you come to “Block 16” (pictured above) continue left
After turning left from Block 16, you’ll come into this long and wide hallway with colorful, patterned carpeting. Go all the way down, veering right towards the end
You’ll know you’re going in the correct direction if you see these creepy-ass dog statues. They’ll be at the end of that hallway after you veer right (There’s a rather nice bathroom here, by the way)
Facing the dog statues, look left and you’ll see yet another hallway with a directional sign hanging above pointing the way to mega-popular restaurant, “Superfrico”. Go down that hallway, keeping the dog statues on your right
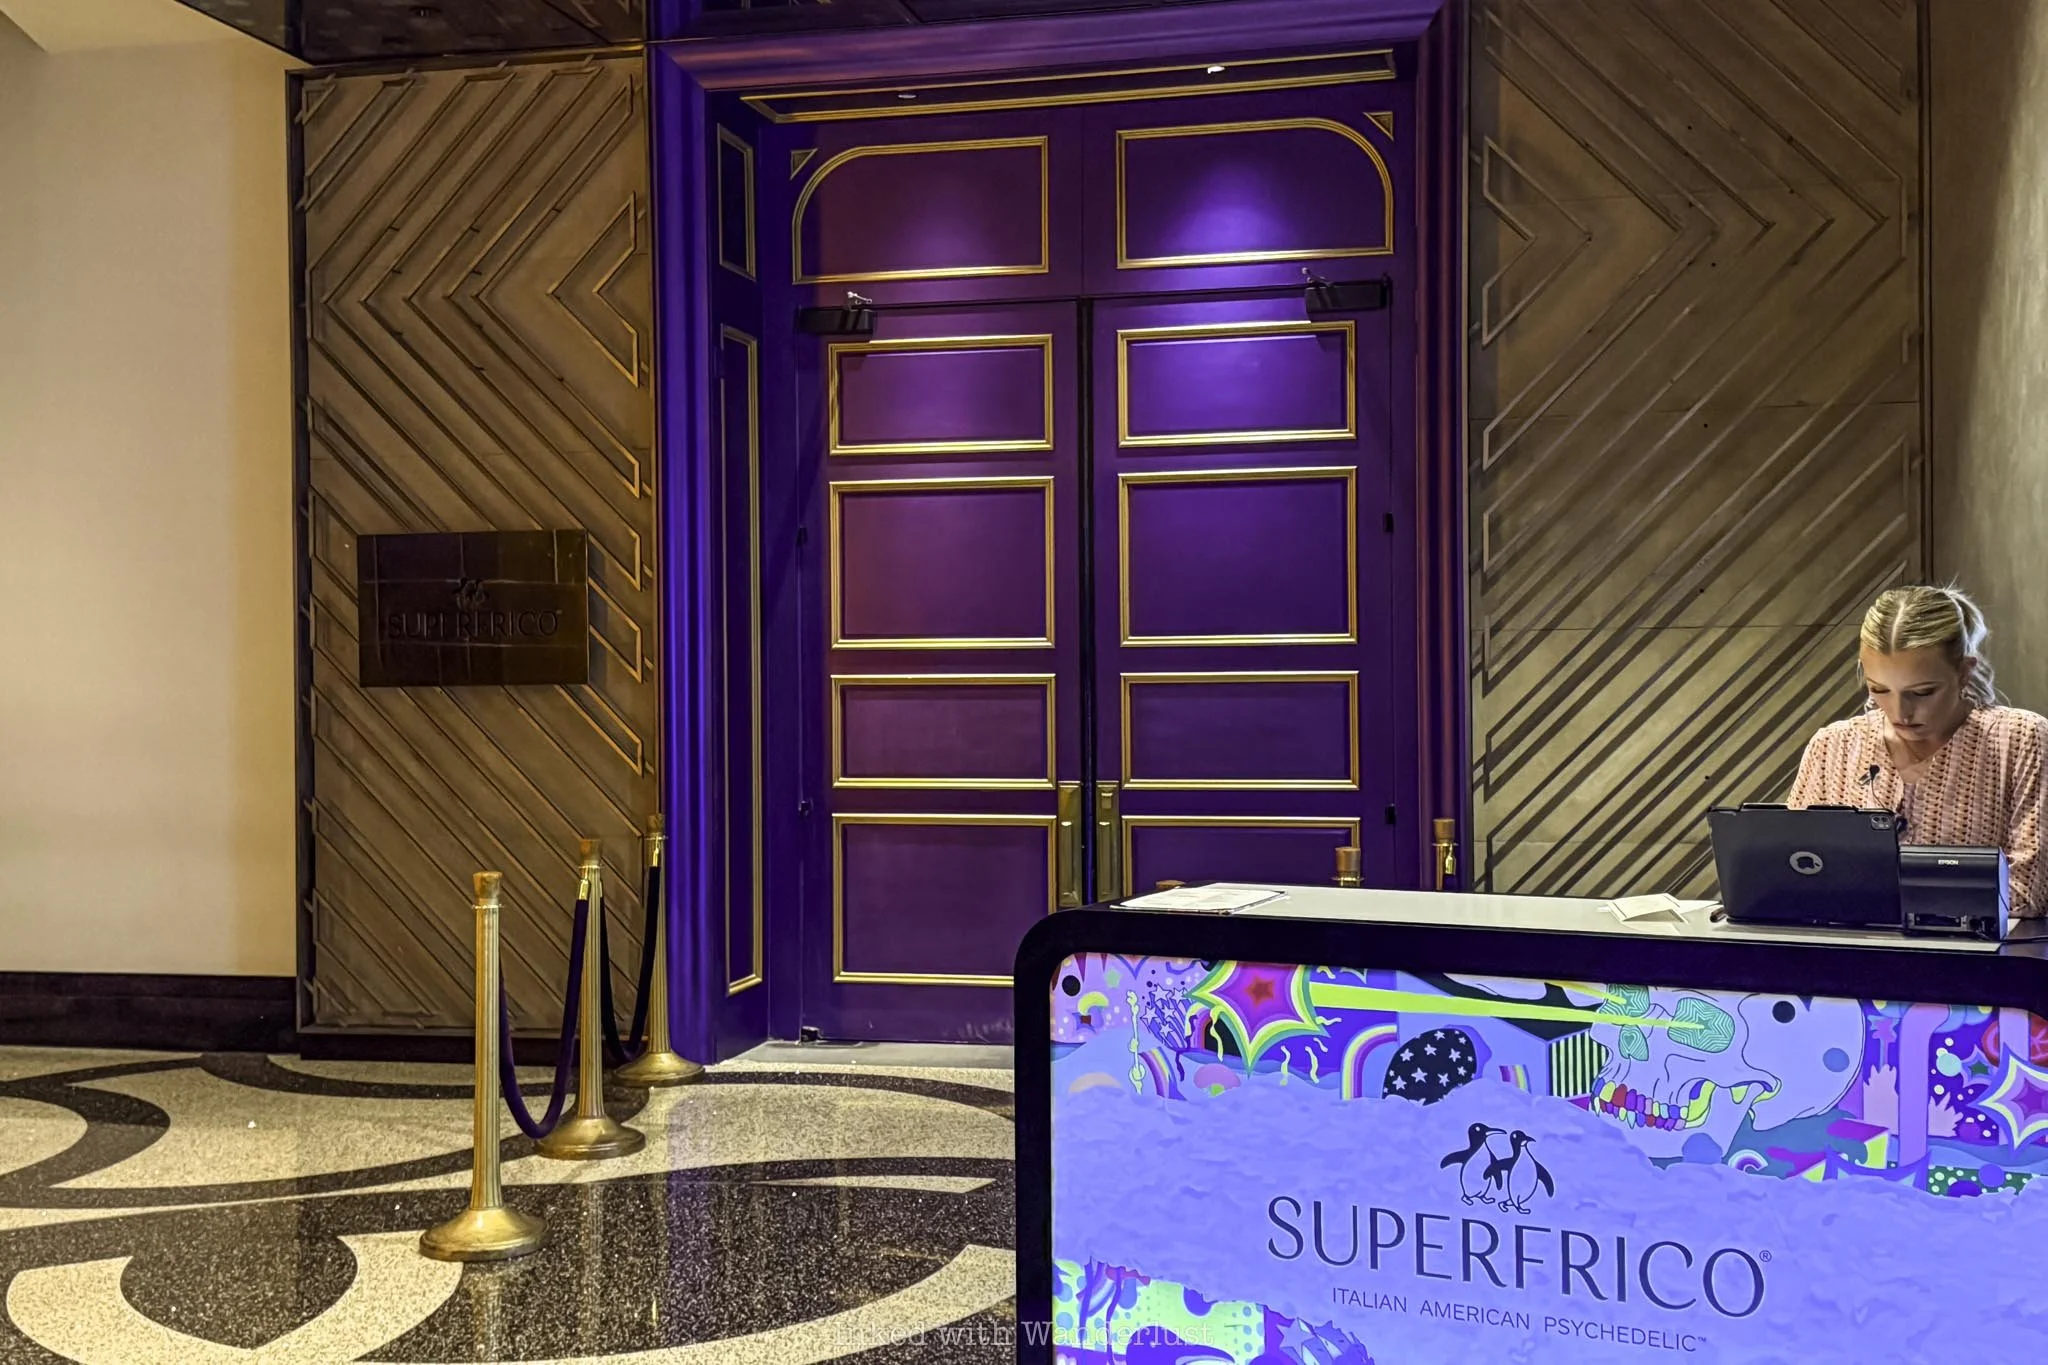
At the end of said hallway, you’ll come to a set of tall, purple doors behind the check-in desk for Superfrico. This is not where you’ll check-in for Ski Lodge, though
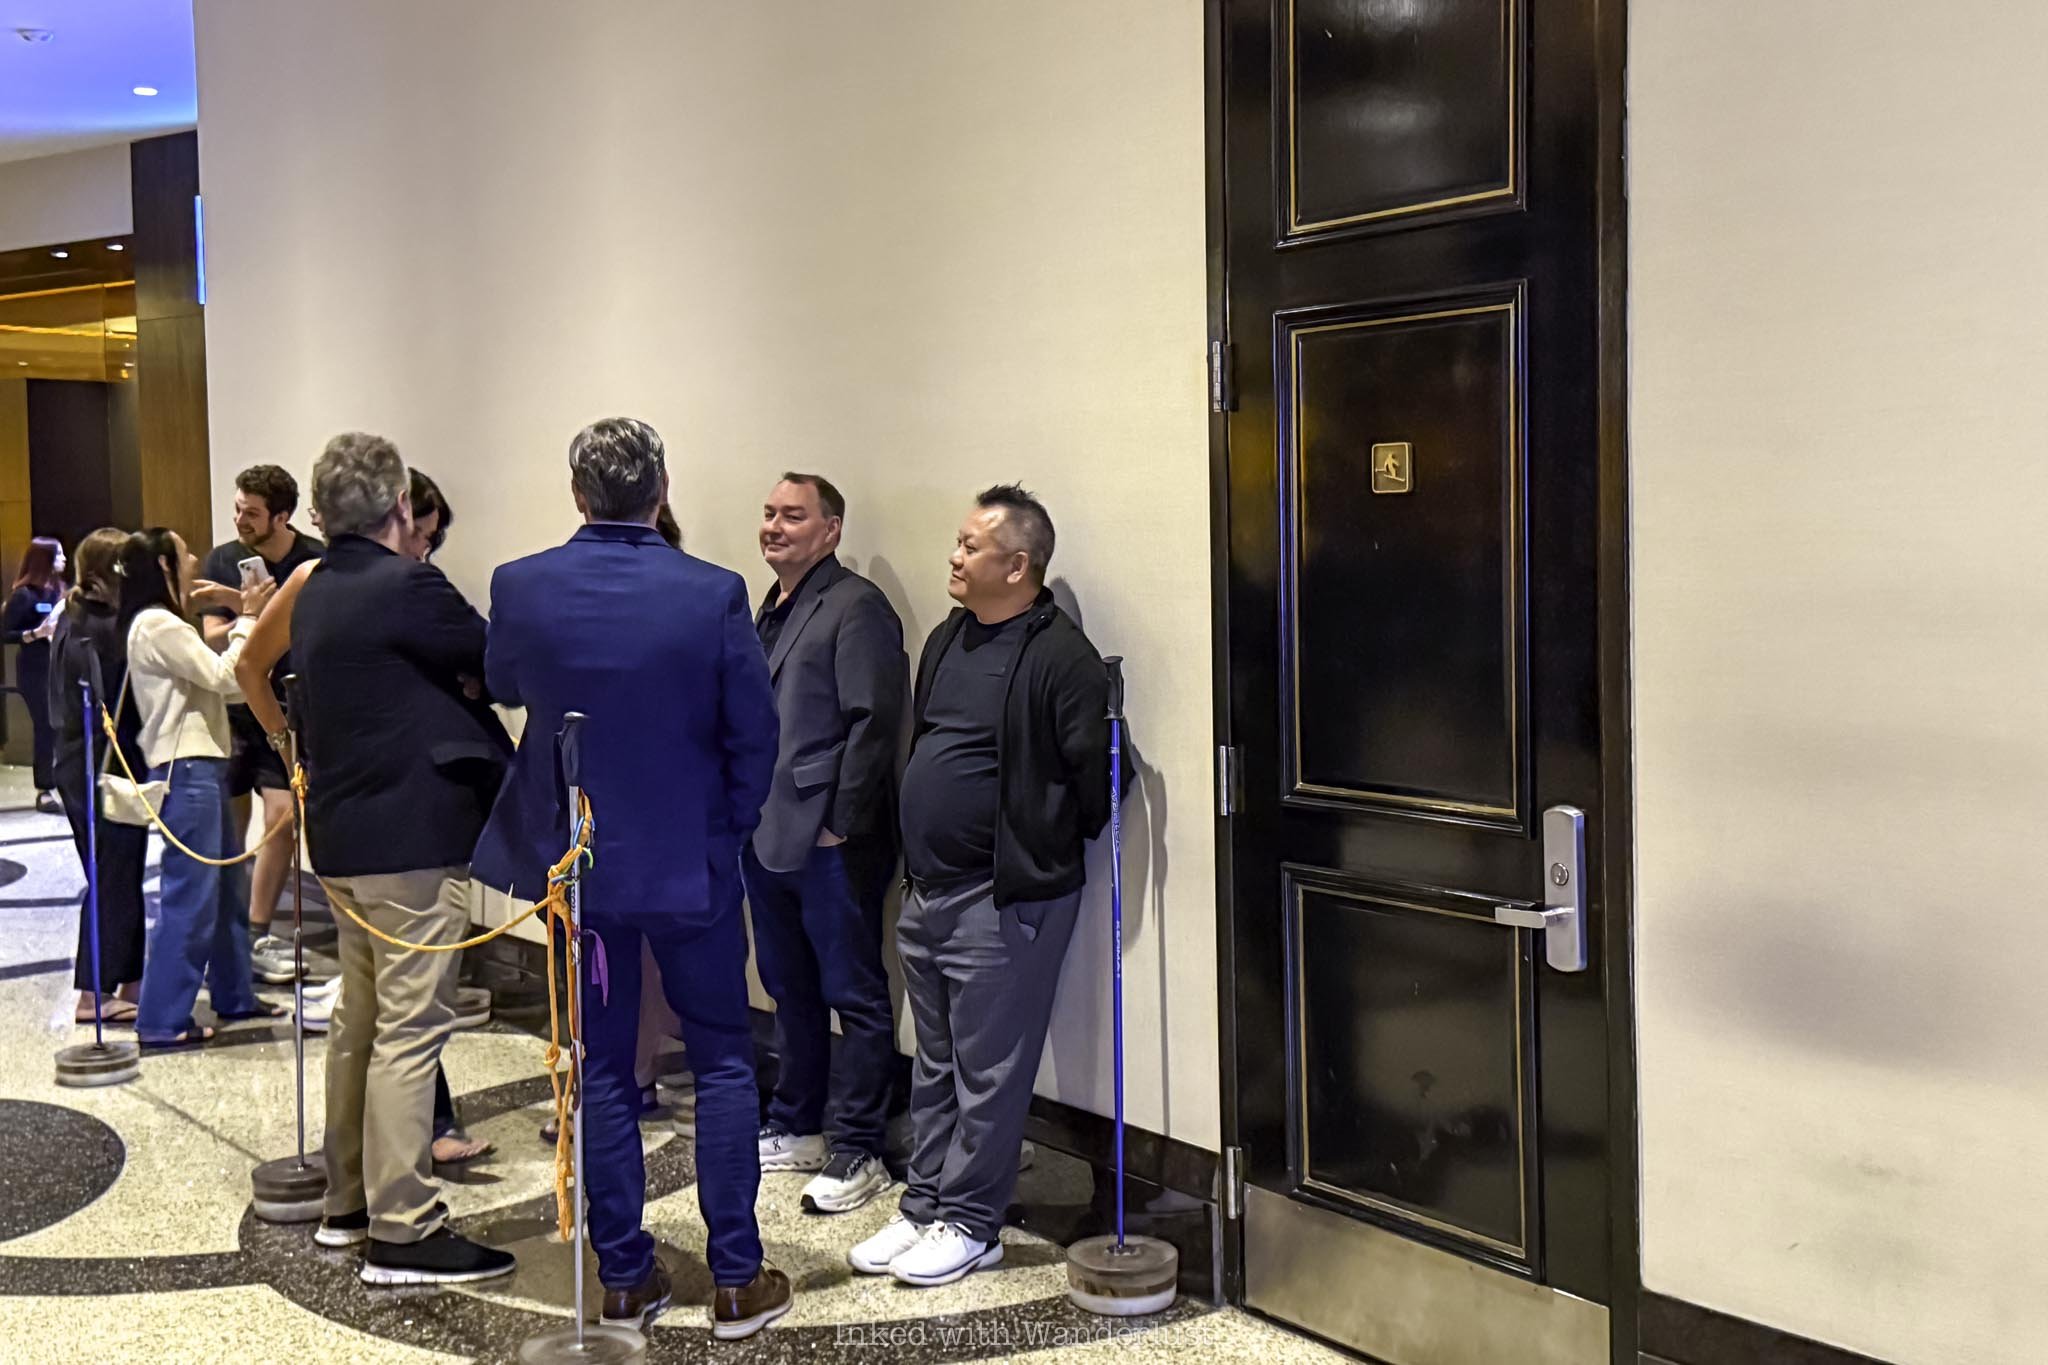
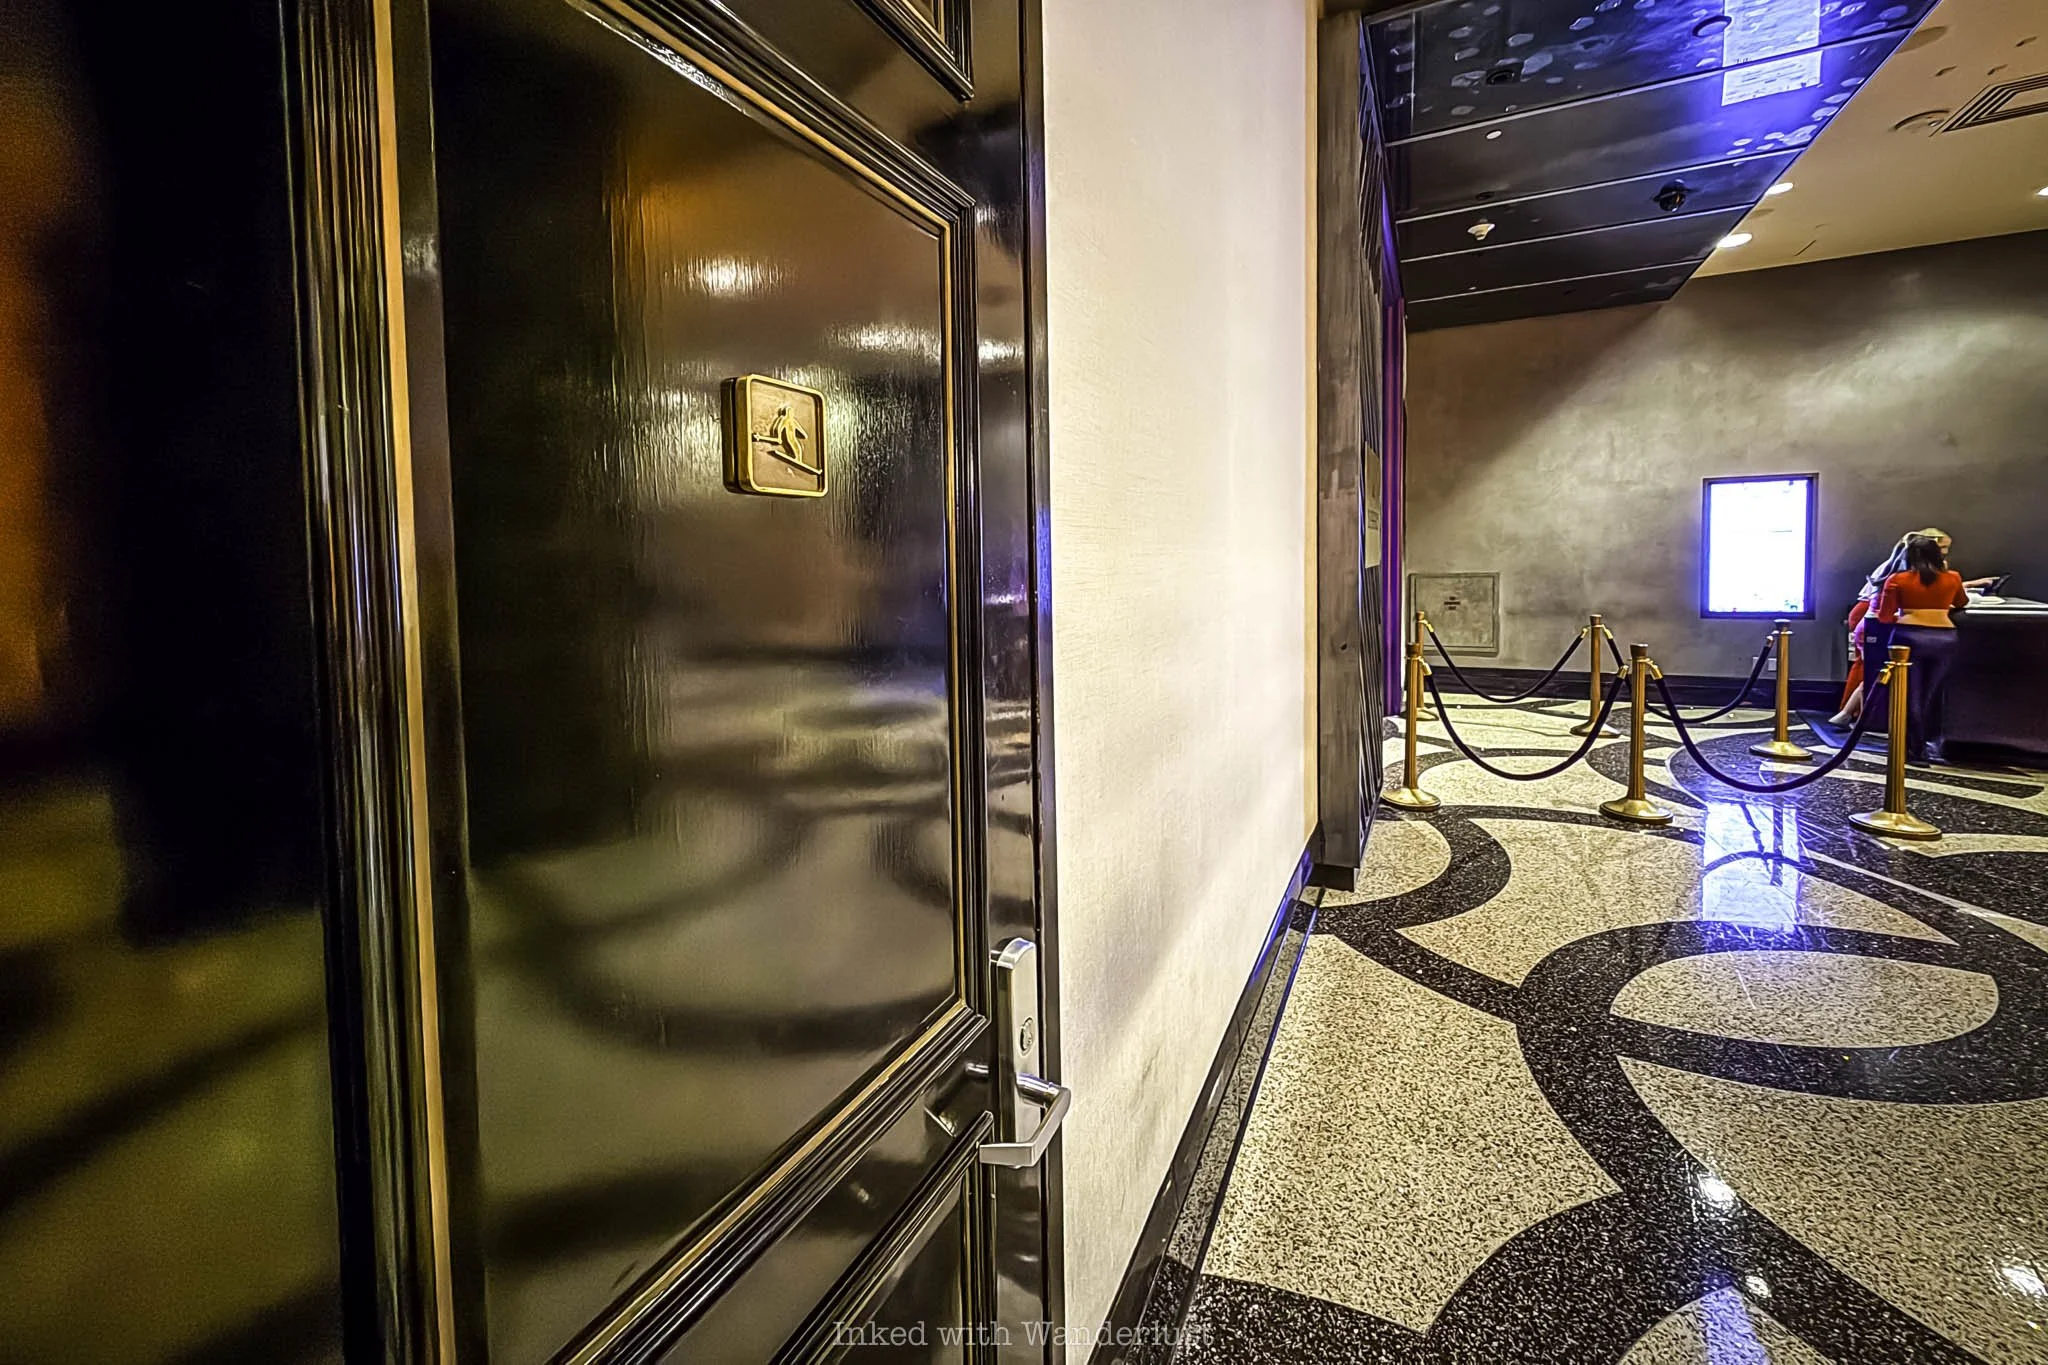
Facing the purple doors, look left and you’ll see a mostly nondescript black door. The identifying symbol that you’re in the right spot is the golden emblem of a skier in the center of that door. Congratulations, you’ve found it!
There may or may not be a queue of people during your visit. I’ve seen both cases online. On the day of my visit there was a small line to get in. Our wait wasn’t very long, though. Maybe twenty minutes. Your milage will vary, of course
If you’re staying in Cosmopolitan’s Boulevard Tower, you’ll take the elevator to the second floor. Coming out of the elevator, continue walking straight until you see Block 16 on your right and then follow the directions listed above.
If you’re staying in their Chelsea Tower you’ll also take the elevator to the second floor but you’ll simply walk left when exiting the elevator. You’ll almost immediately see Superfrico’s check-in desk.
Now, let’s get to the experience and my review!
Ski Lodge Las Vegas Review
As stated above, we did arrive to a small queue of people excitingly waiting to be seated. To contextualize, my wife and I were here on a weeknight during the second week of May. So your experience will vary depending on day of week, season, etc.
There was a gentlemen in a suit letting groups in one at a time, presumably as availability allowed. I’ve seen clips online of people entering Ski Lodge through the black door but when our turn came, we were guided through Superfrico’s purple doors.
From there we entered an atrium with patterned marble flooring, beautifully illuminated in a blue hue and an artsy, peacock-style colored chandelier hanging above. For a moment, my decision to skip Superfrico this time around became regrettable.
If you did have a reservation for Superfrico, you would enter through one of two sets of doors on the right. For Ski Lodge, we entered through the door second to left and came into a foyer.
I was doing my best not to get left behind as we were being swiftly led through the foyer. There wasn’t much time to look around or attain many photos, unfortunately. The foyer was similarly illuminated, but with red, purple and pink hues.
It portrayed a funky vibe that, in my opinion, was more in line with that of Superfrico rather than a lodge. I momentarily wondered if the gentlemen guiding us made a mistake and was taking us to the restaurant (honestly, I wouldn’t have been upset by that).
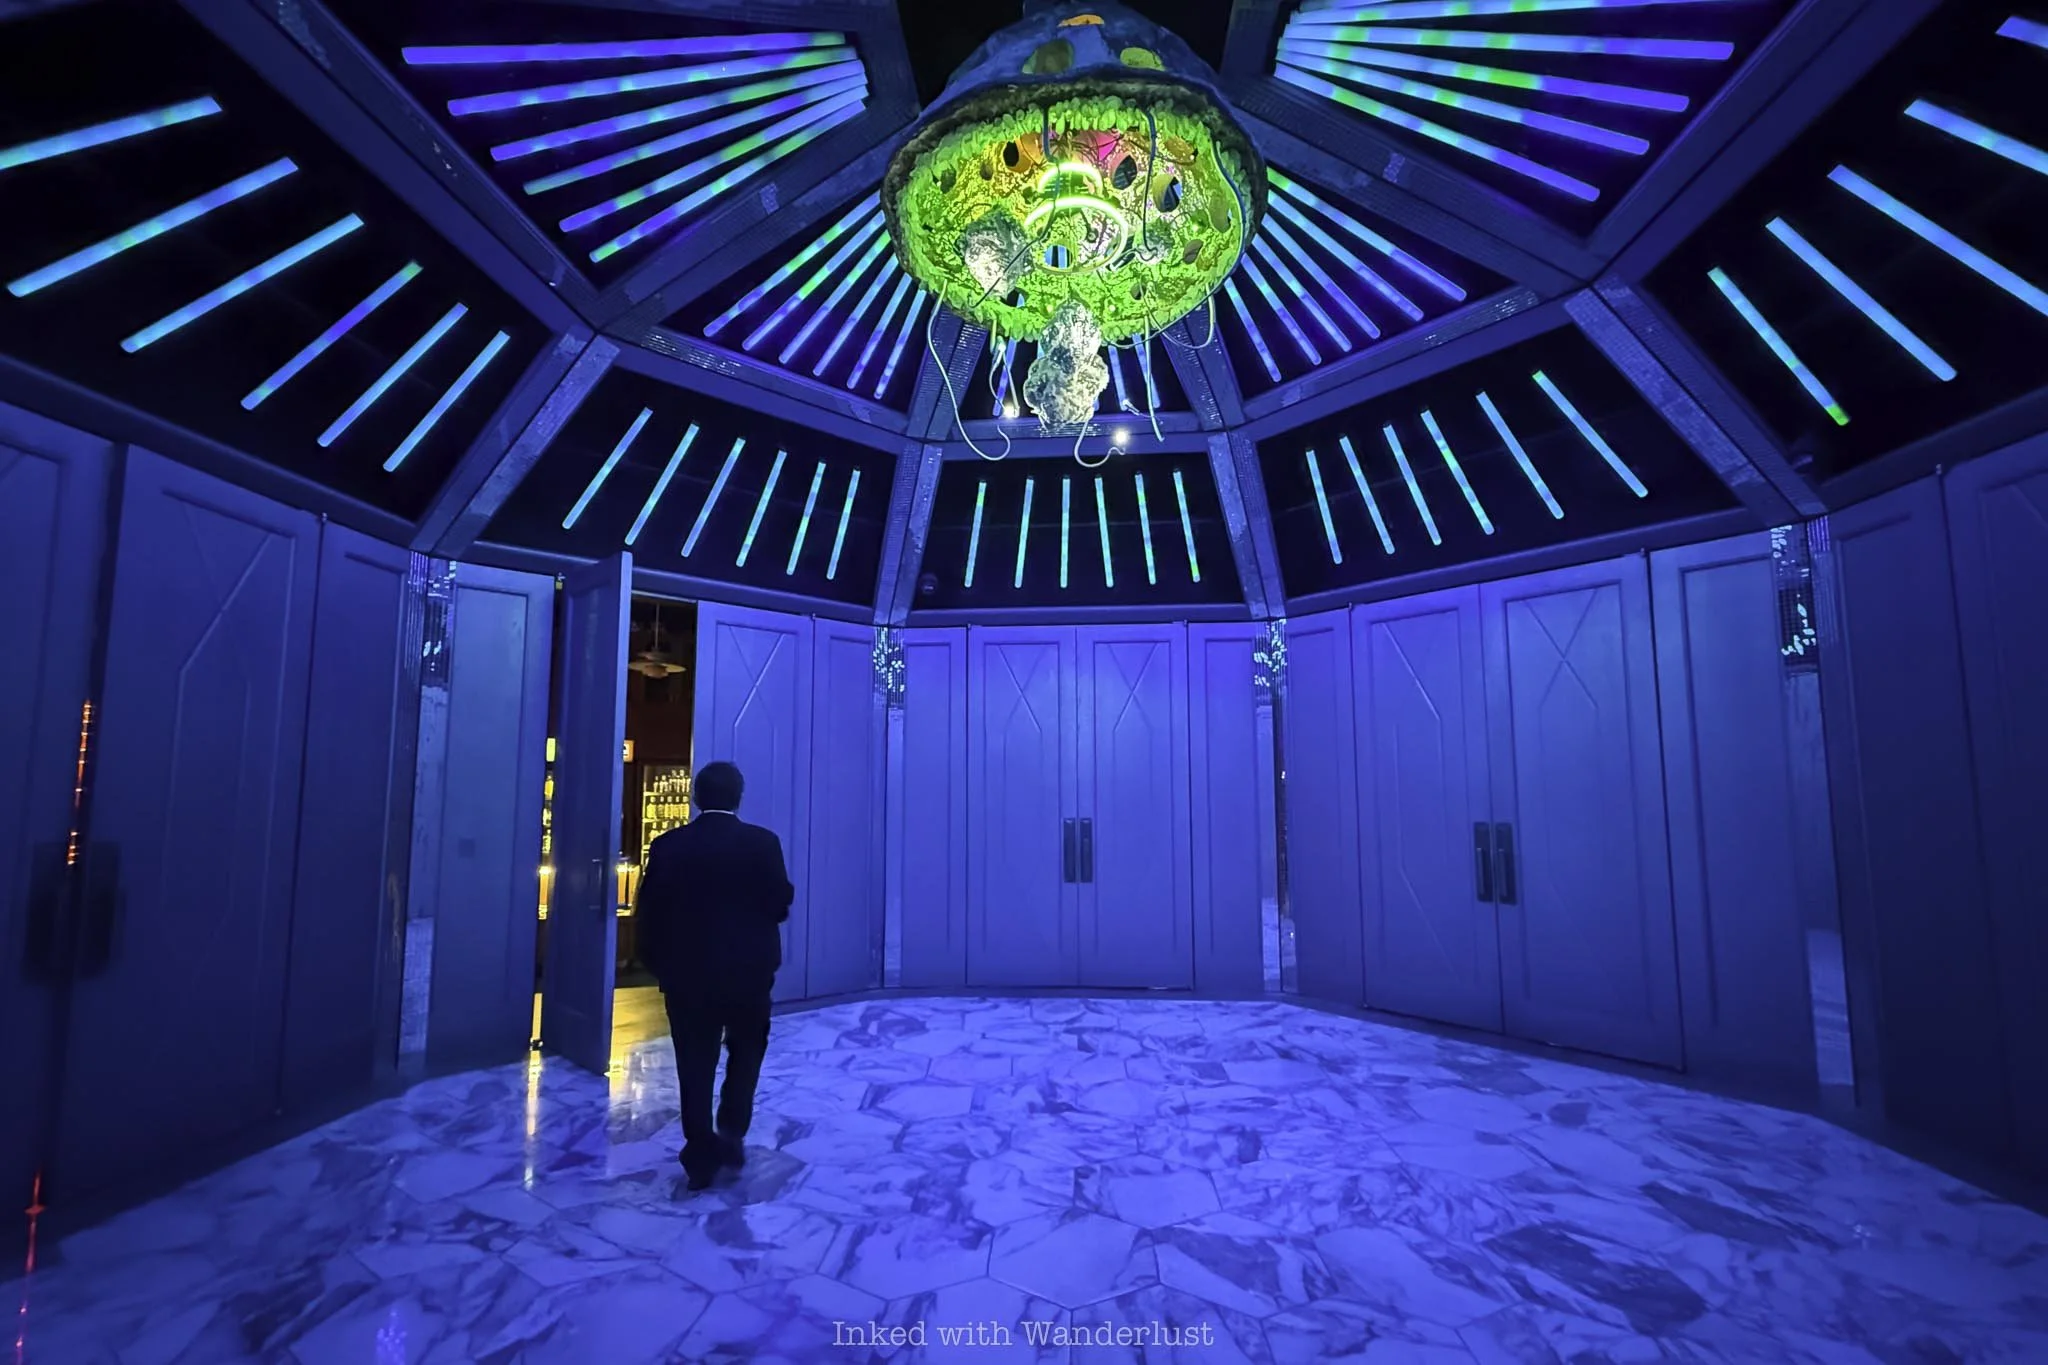
Alas, through another door on the other side of the room, just past an old Vegas-style neon sign, we entered a dimly lit room with the heavily-recognizable “window” behind the bar, showcasing a forested winter wonderland. We officially made it to Ski Lodge.
Seating and Atmosphere
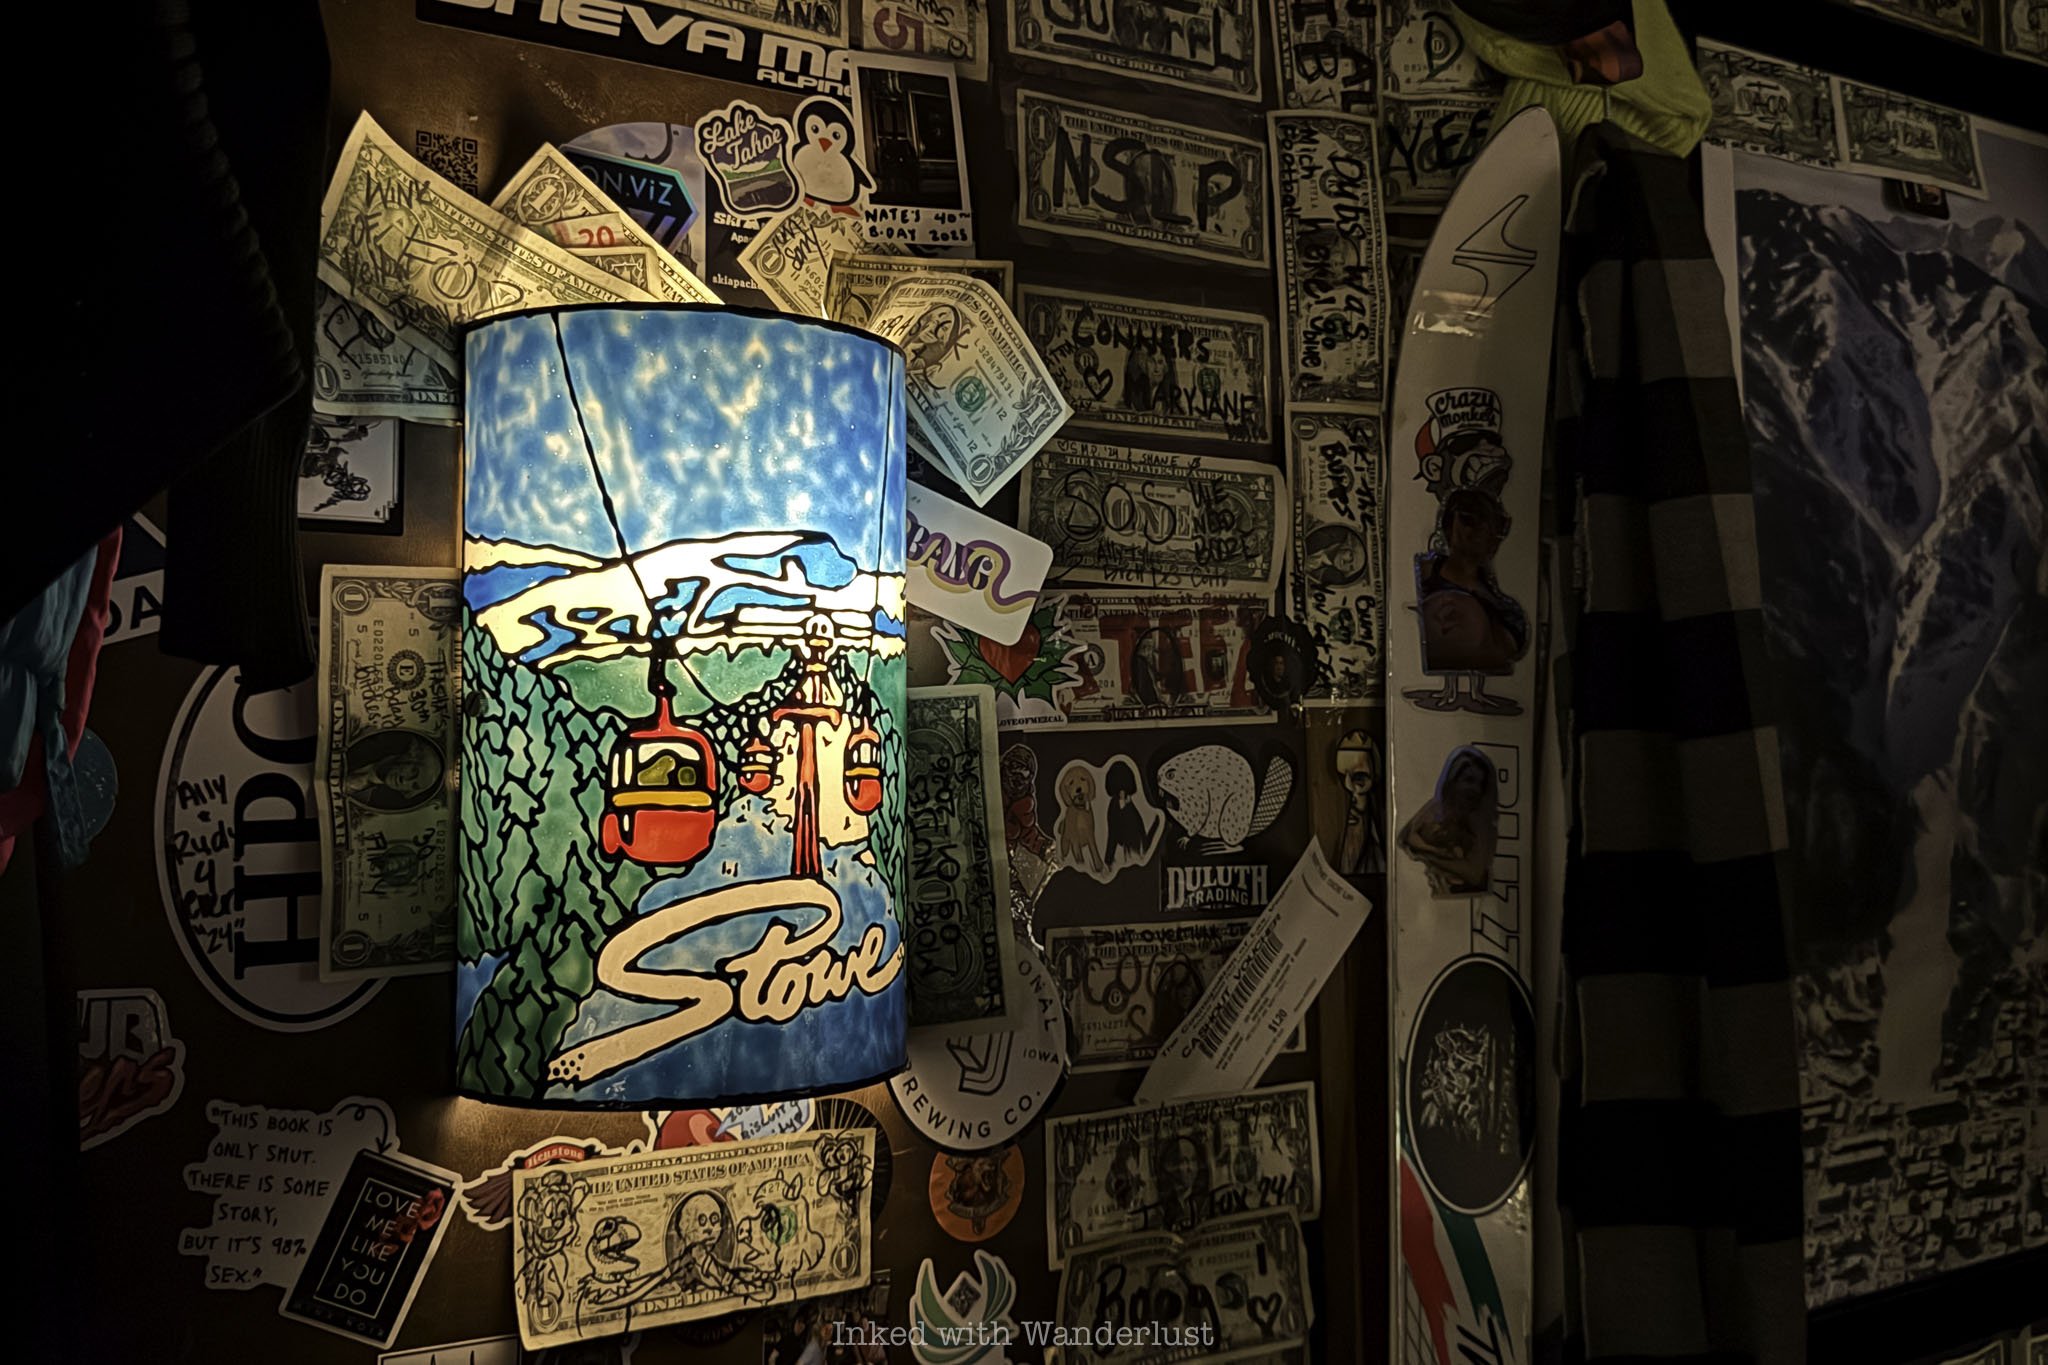
My wife and I were seated at the back corner of the bar (perfect for incognito photo gathering). Looking around, you’ll immediately take note of all the quirky and pun-filled skiing and outdoor-themed decor plastered all over the walls.
They come across as randomly placed and a bit dis-organized, but that’s part of the charm. I’ve personally never been to a mountain ski lodge but I would imagine that this speakeasy’s portrayal leans accurate, at a minimum.
Actual skis are displayed along the ceiling near the speakeasy’s entrance. Additionally, you’ll likely take notice of the dozen or so pine trees hanging upside down. This was an aesthetic choice to match the bar’s eccentric mountain vibe.
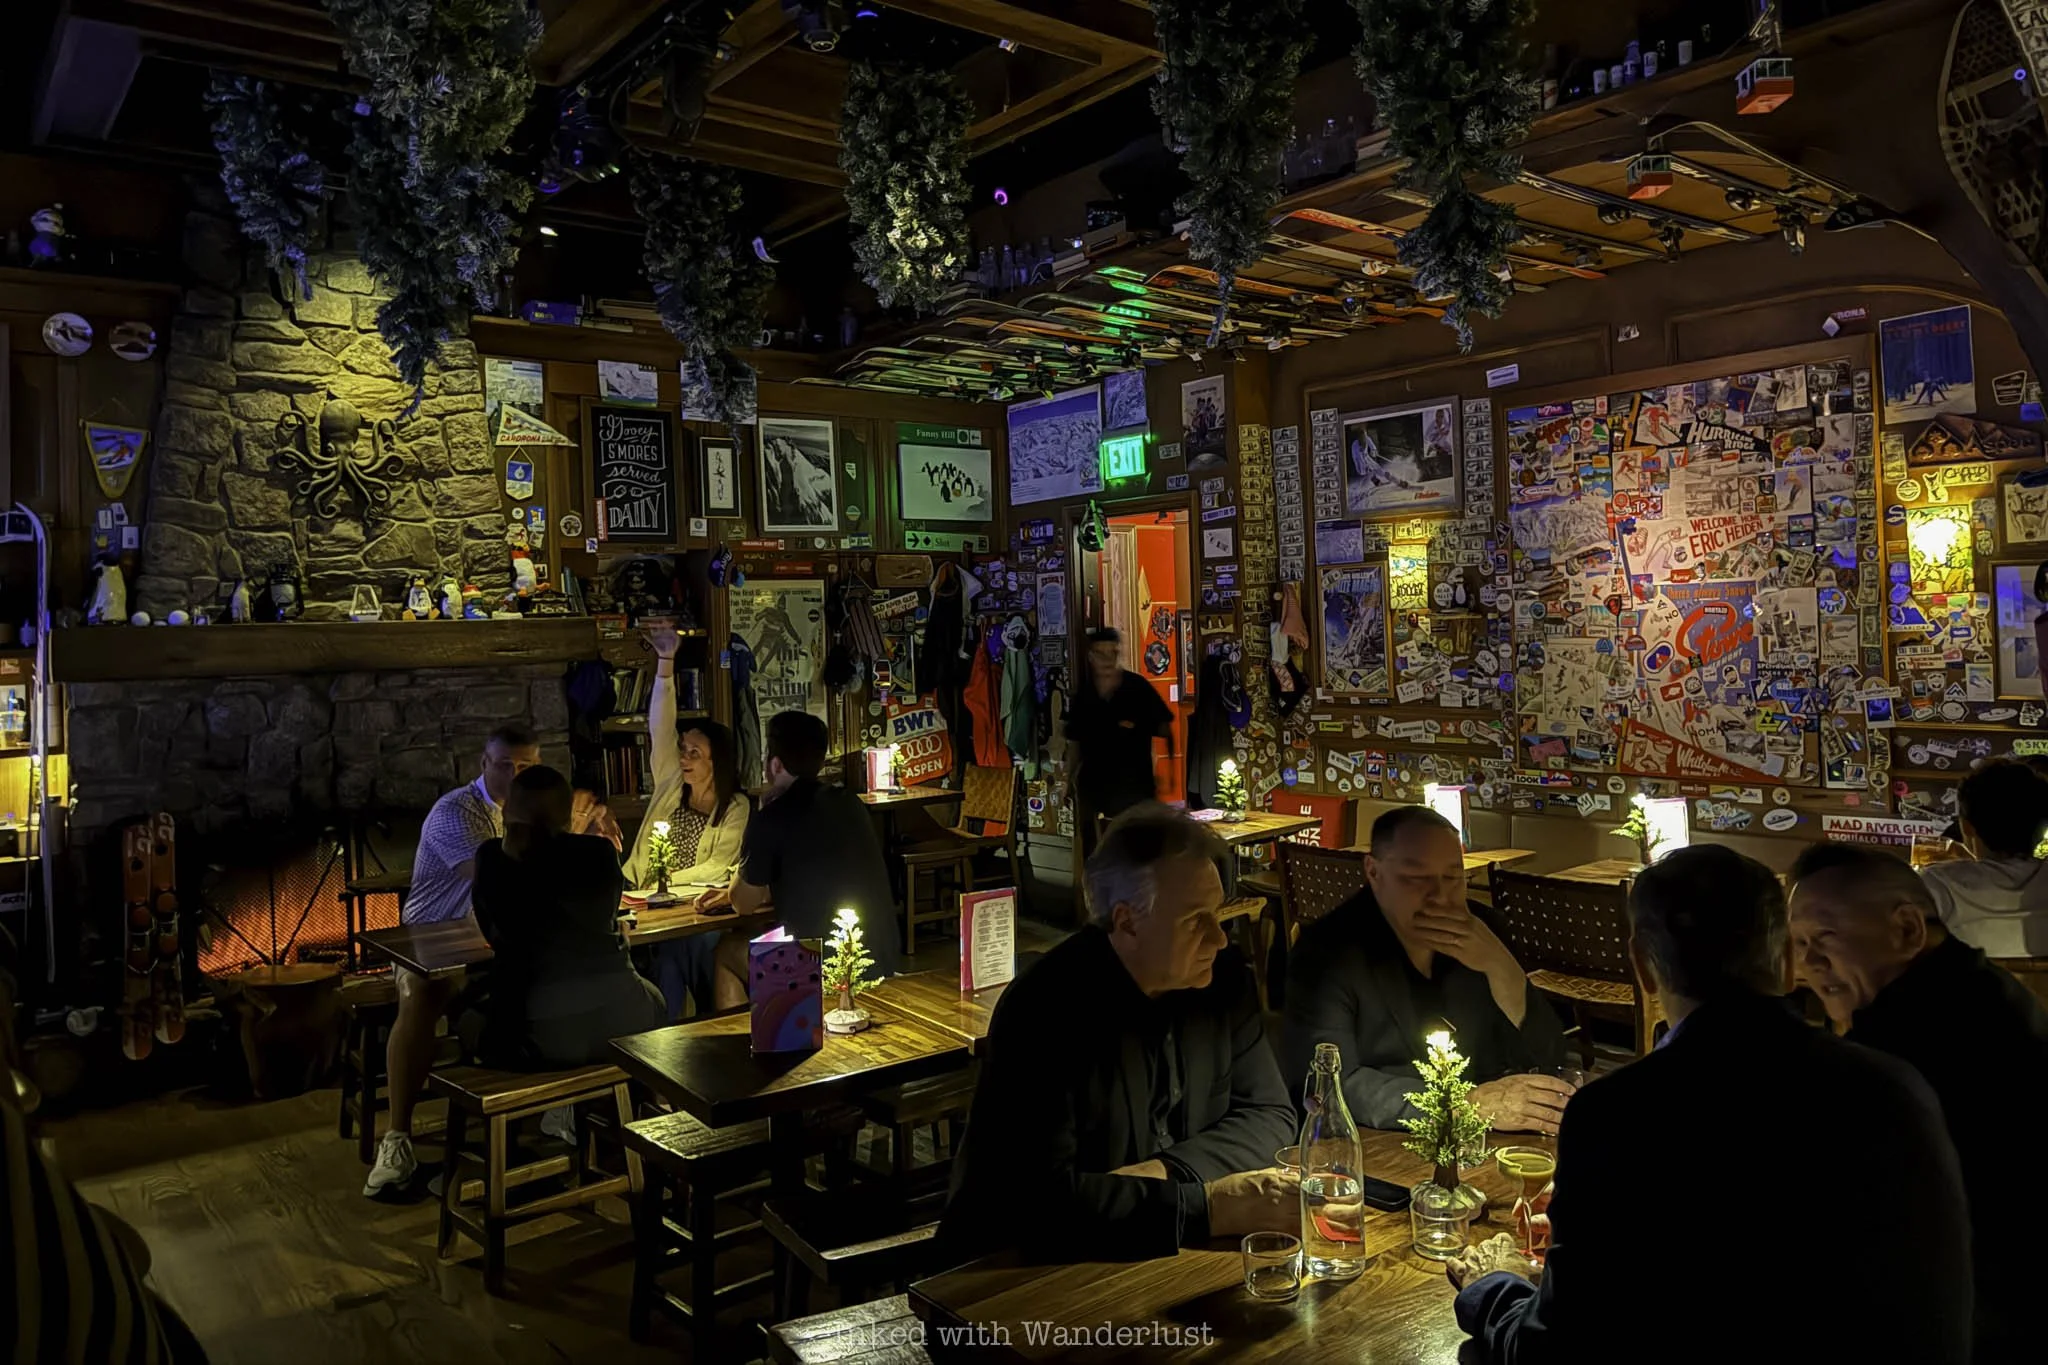
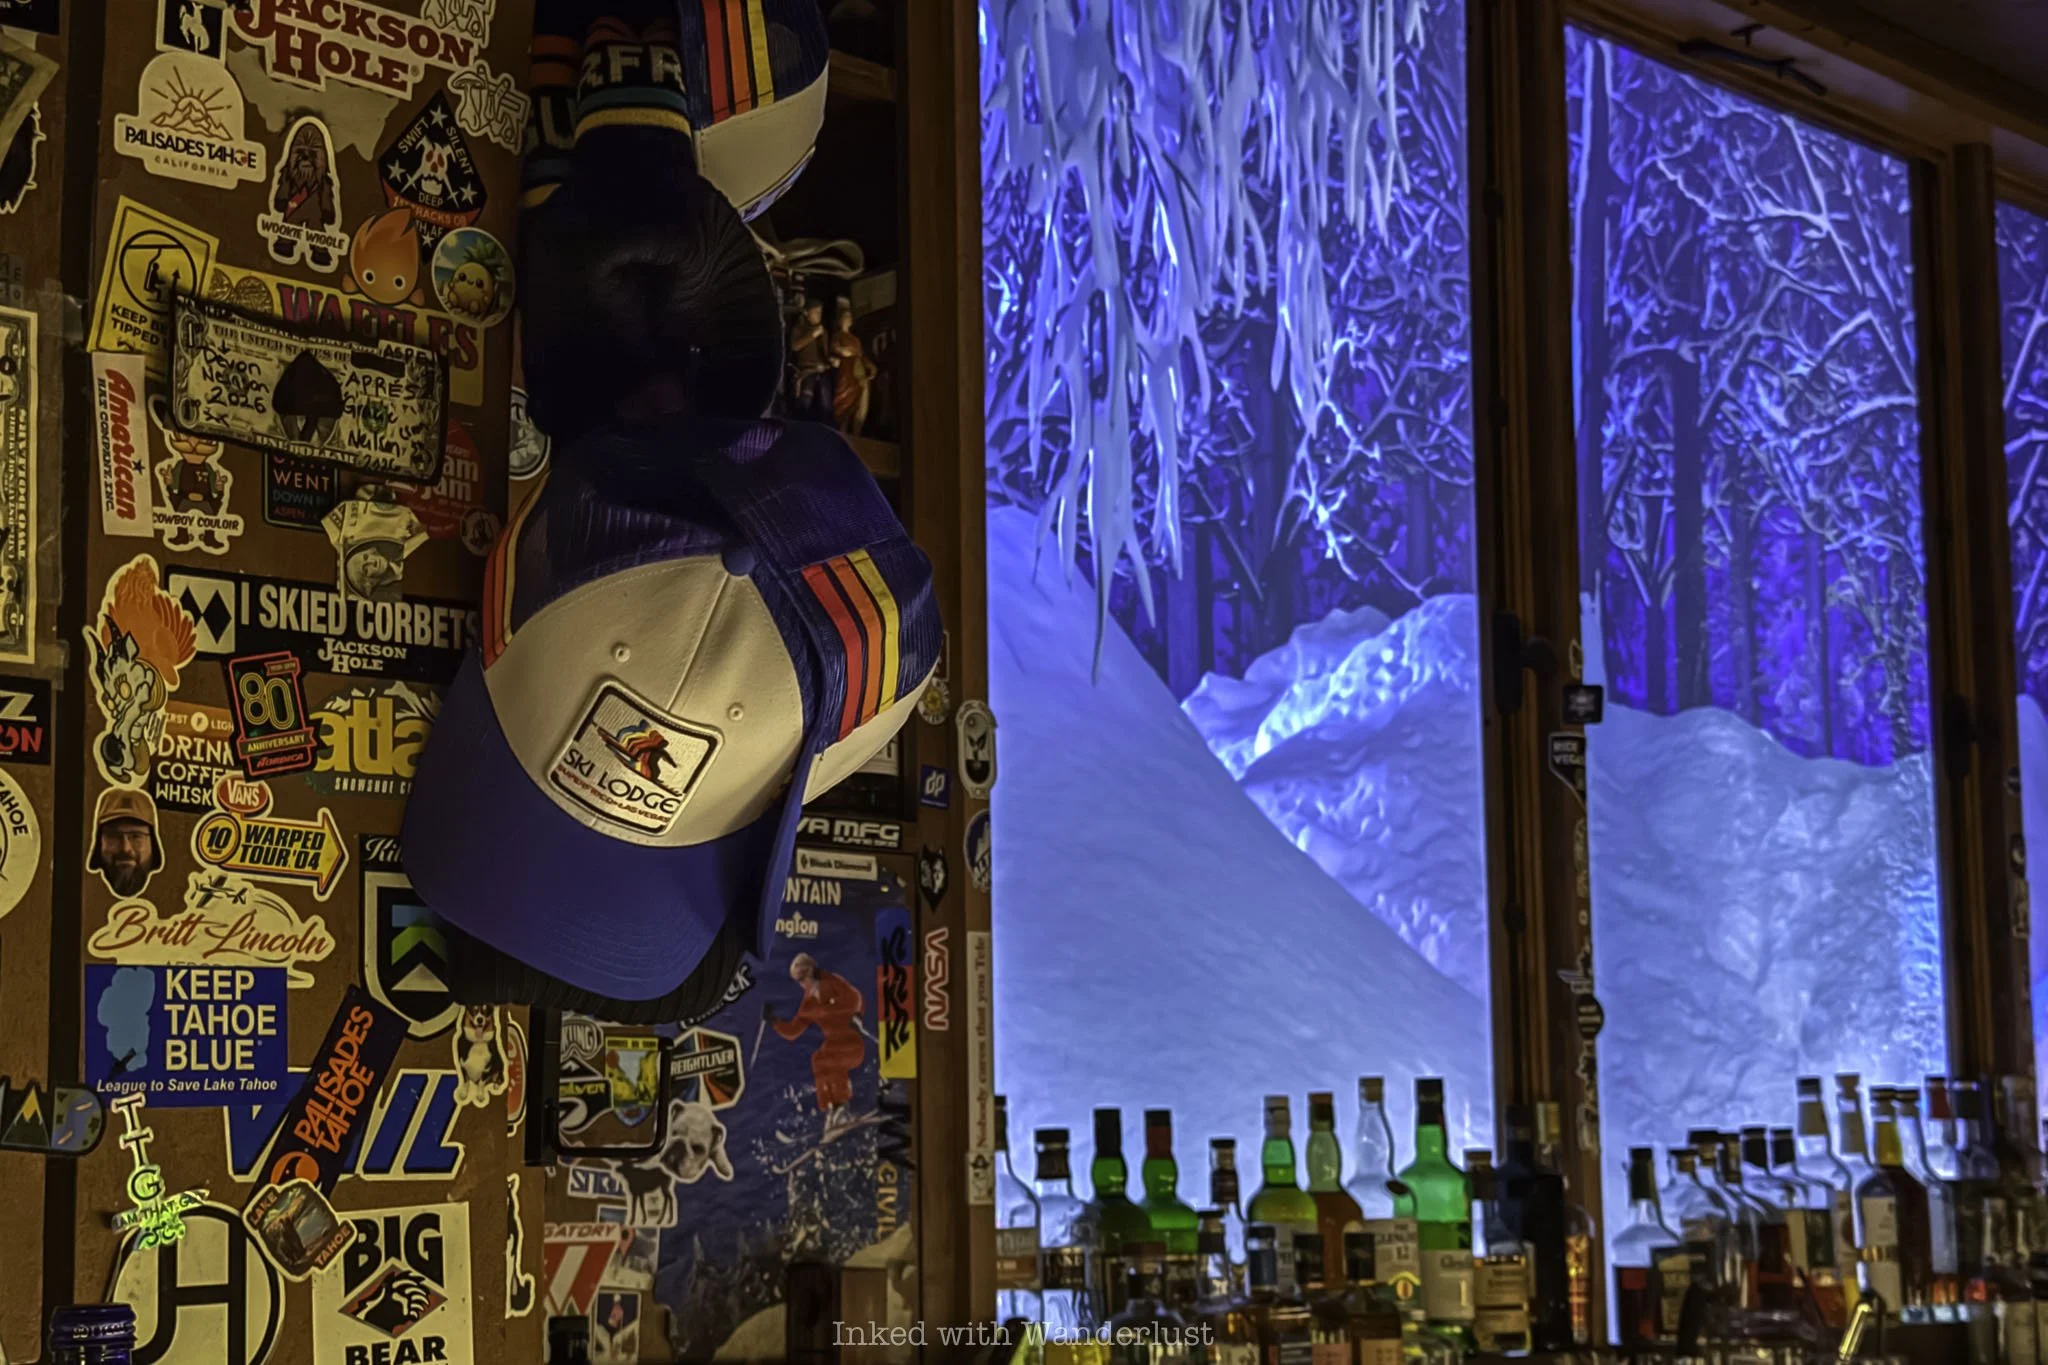
On the other side of the room from where I was sitting was a warm, crackling fire (the appearance of such, anyway). A strange feeling it was to leave the warm atmosphere of the strip and enter such a cozy, snowy vibe-filled space.
A blend of modern hits and nineties-era classics bellowed through the speakers, filling the room with feelings of nostalgia and excitement. The noise level was on the higher side, but not so high that I couldn’t hear my wife speak.

Space is a premium inside Ski Lodge, but they make good use of it. Aside from the bar, which itself is capable of seating around a dozen or so guests, there are half a dozen tables in the main room that’ll sit four to five each, in addition to several duel-seating tables.
Near the back of the room is a social space complete with couch and coffee table. Beyond that is a separate room additional tables. It appeared as though that space was mostly utilized for larger parties.
Drinks and Food
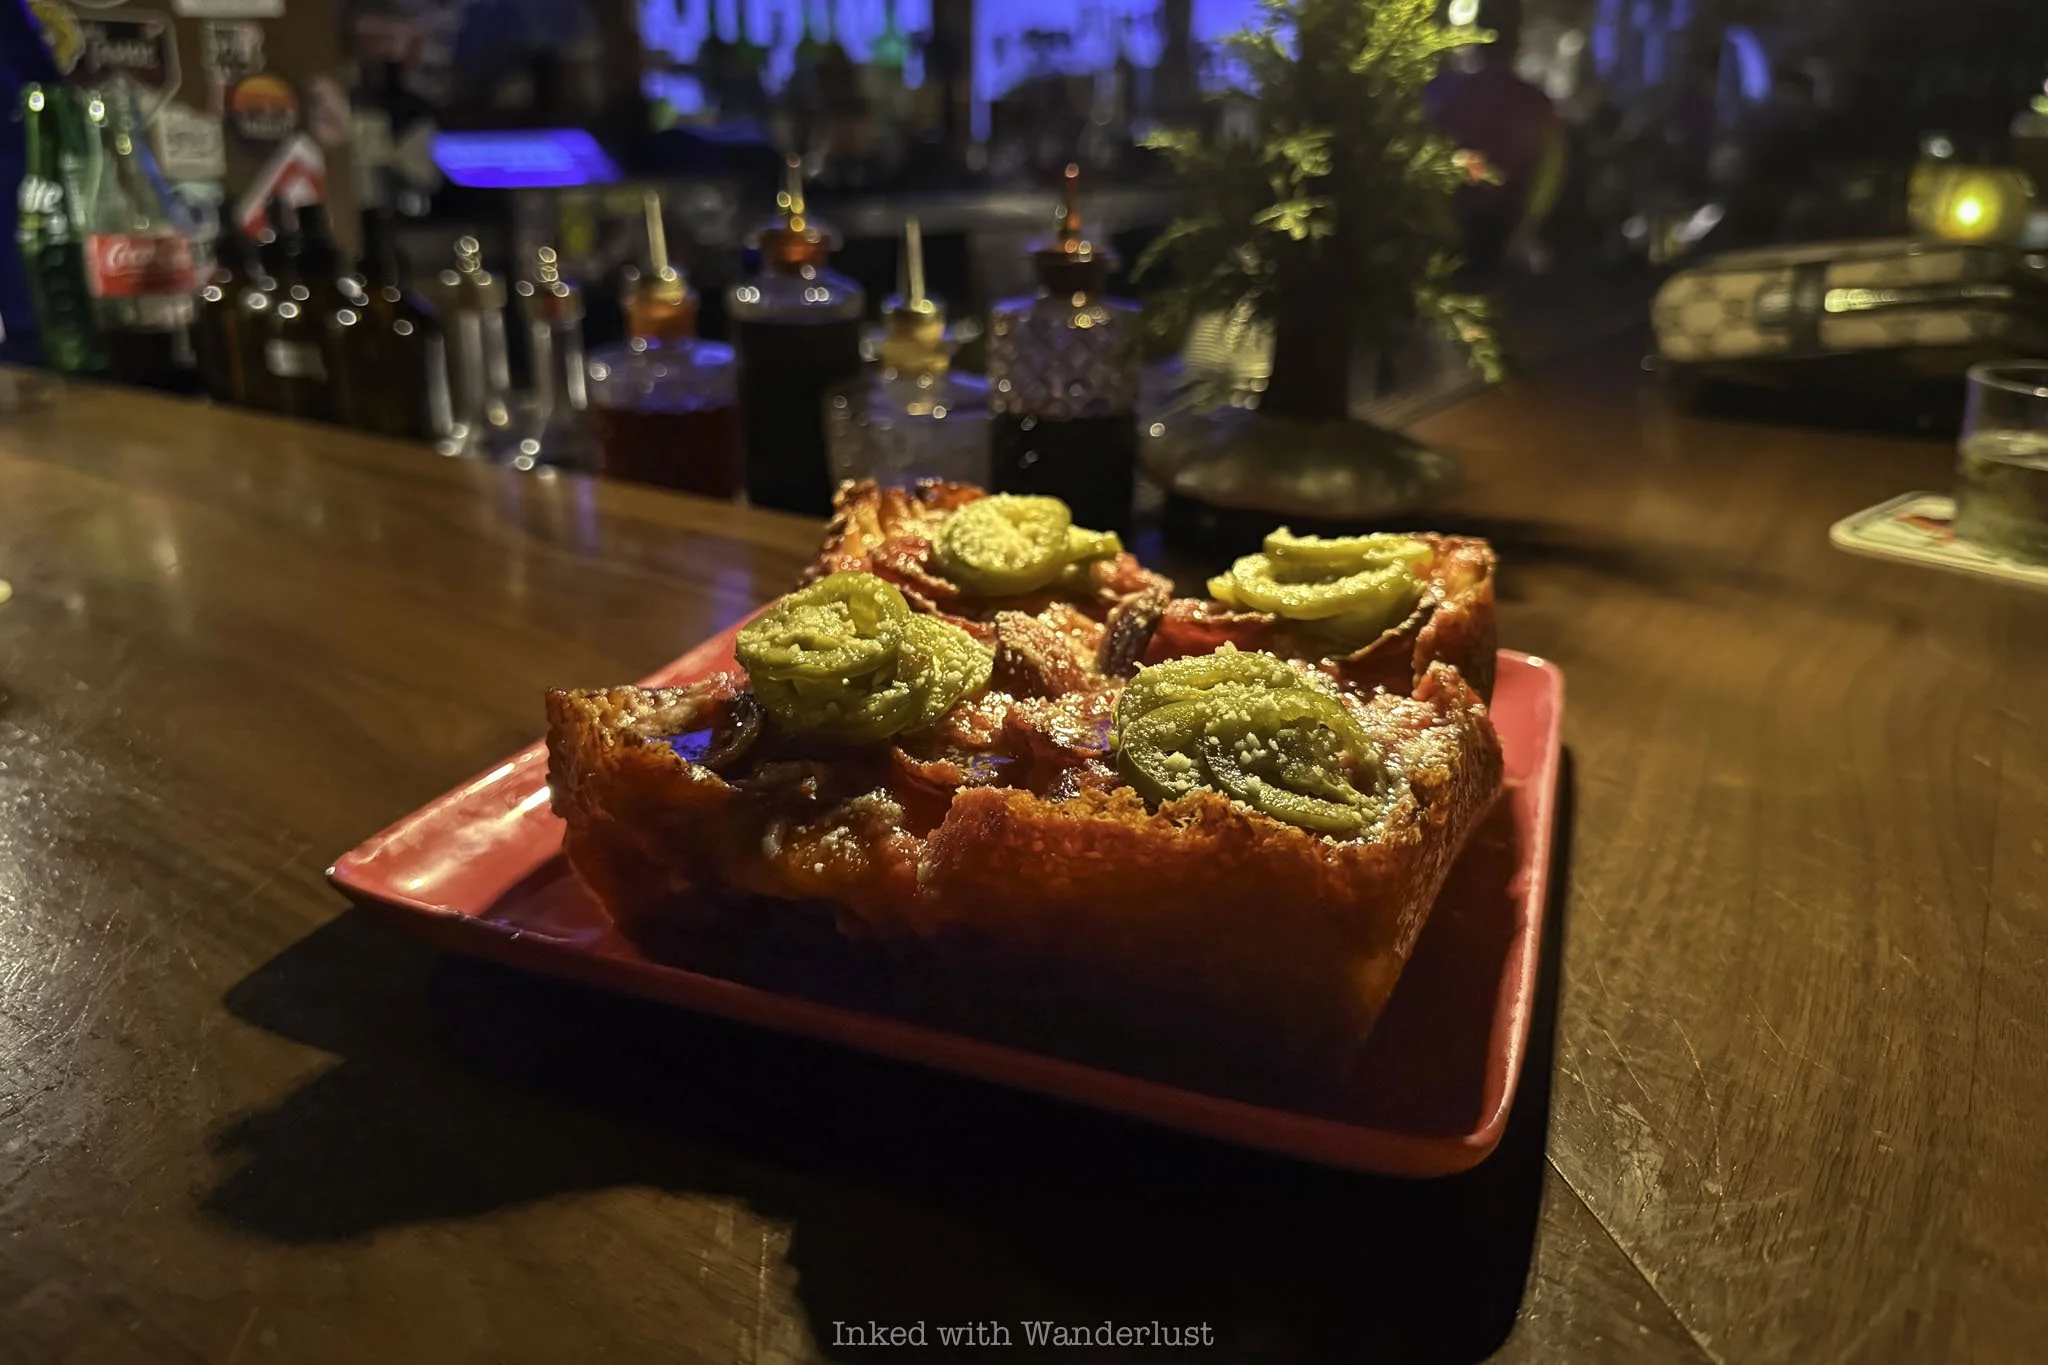
The sole food item listed on Ski Lodge’s menu is the famous pizza squares from neighboring restaurant, Superfrico. There are three variations listed - The OG (their vegetarian offering), Ultimate Pepperoni (pictured above) and one rotating (currently Pistachio Mortadella).
We had already enjoyed an early dinner at How Ya Doughin Pizza, just down the strip from Cosmo, prior to Ski Lodge but in the name of research, we decided to split the Ultimate Pepperoni. It’s essentially a Detroit-inspired-style pizza turned up a notch (or three).
A thick, airy crust with crispy, caramelized cheese along the edges serves as the pizza’s foundation. Look closely and you’ll notice the frico-style cheese baked into the crust, giving the square an extra layer of savory crispness.

The toppings, which include Superfrico’s house-made mozzarella, tomato sauce, spicy ‘nduja, ezzo pepperoni, pickled chilis, Sicilian oregano and a drizzle of honey brings an explosion of bold, yet balanced flavor.
The salty smokiness of the pepperoni, in concert with the slow-building heat of the ‘nduja and tanginess of the pickled chilis, is already indulgence at its finest. Then that drizzle of honey arrives and contributes just enough sweetness to balance the spice.
It’s stated on the menu to expect a bit of a wait, as these pizzas are made fresh to order. We ordered ours almost immediately with our cocktails and it took roughly twenty minutes to arrive. Trust when I say - even a thirty-plus minute wait would be worth it.
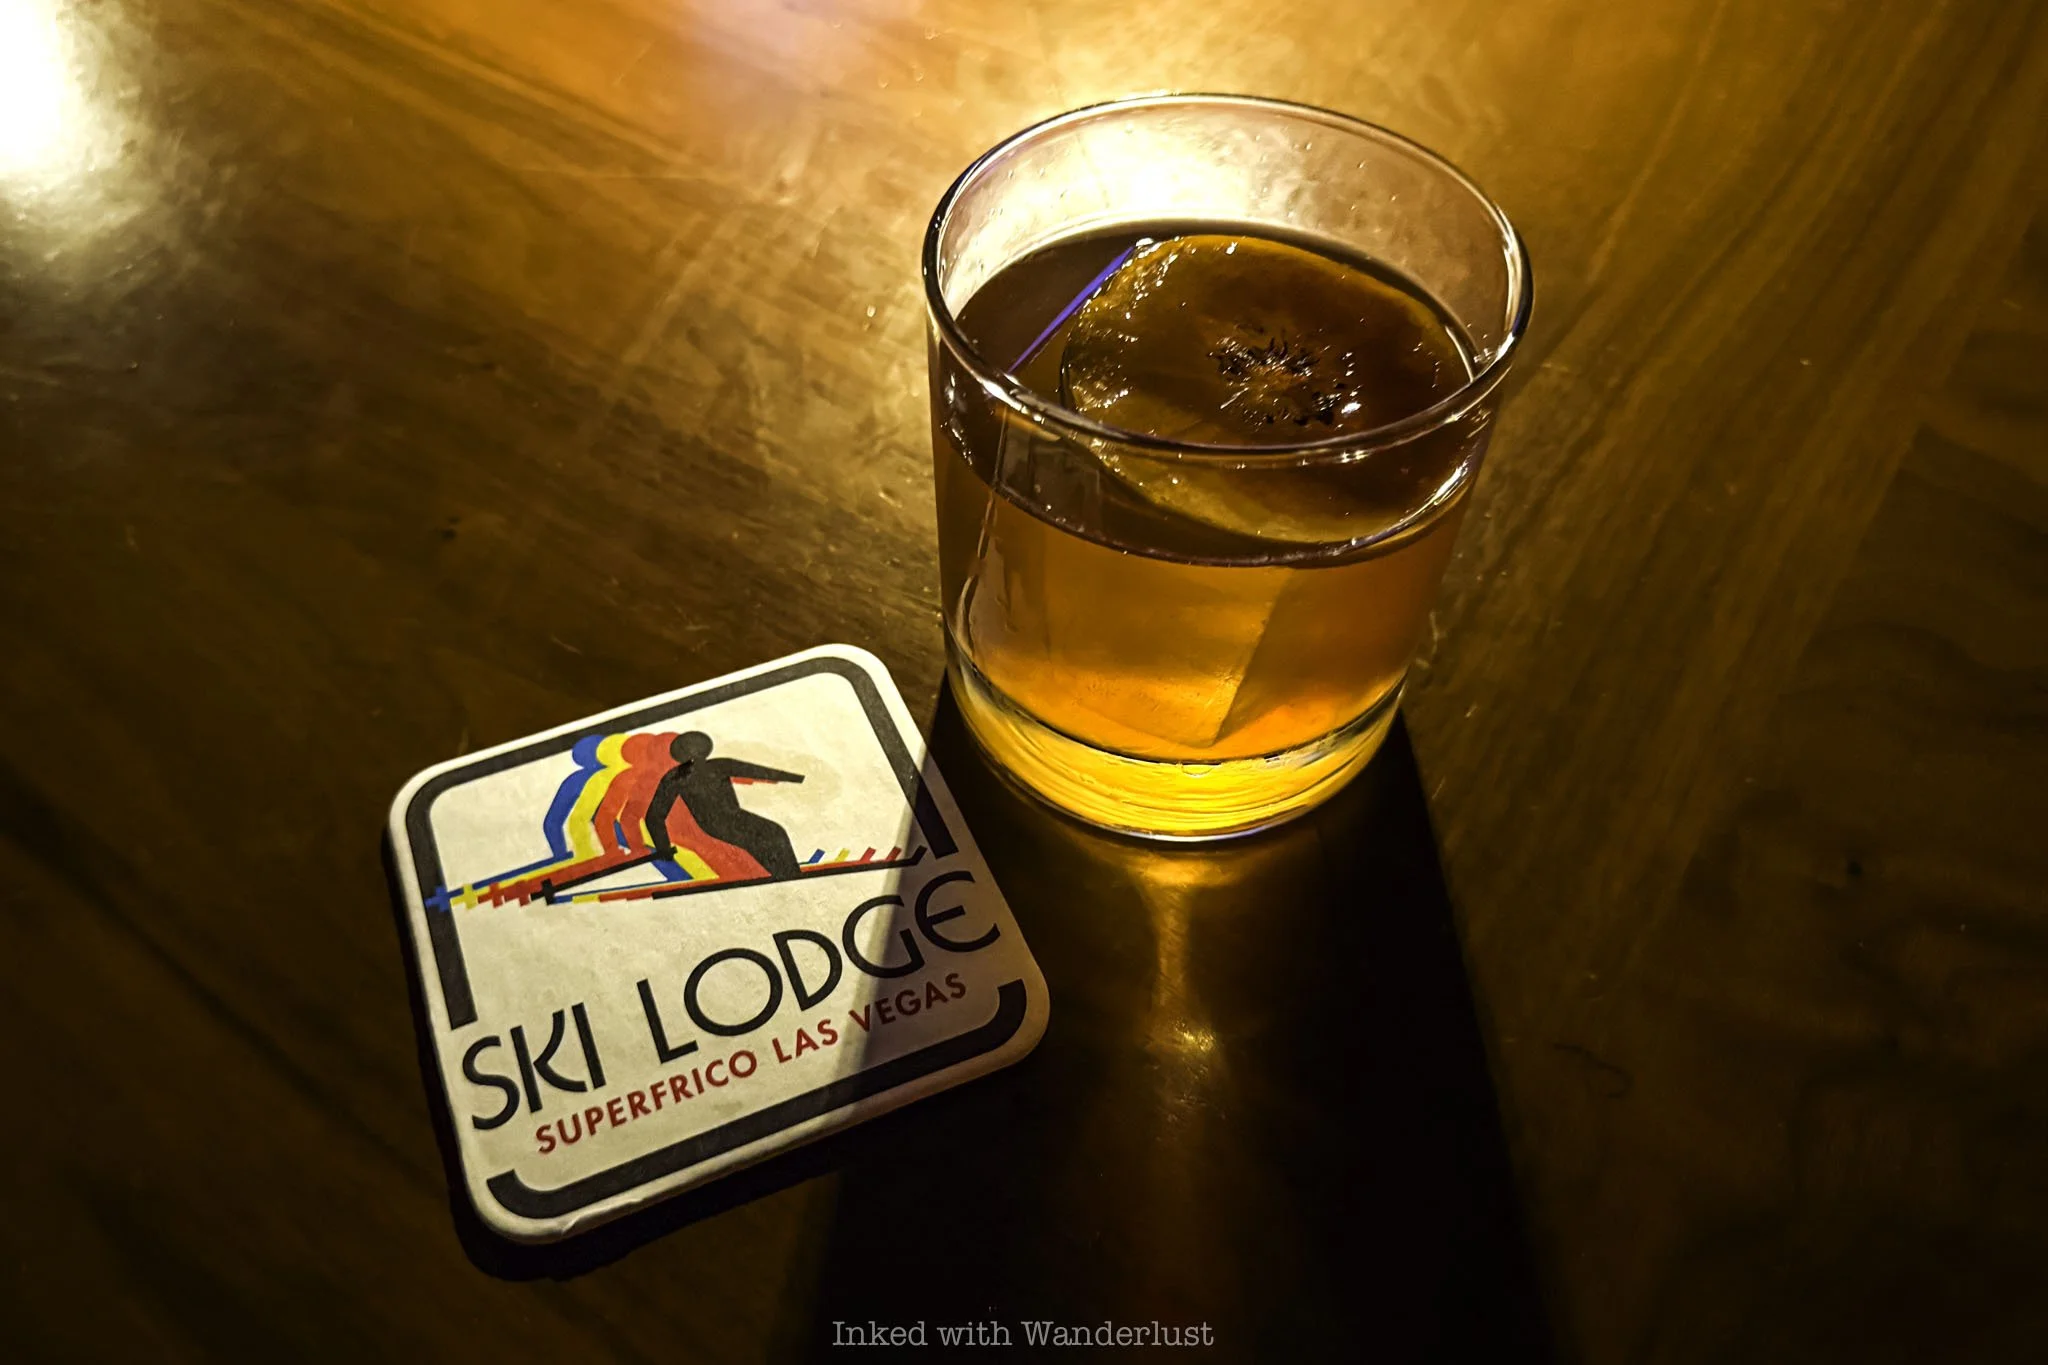
Of course, Ski Lodge serves a variety of craft cocktails as well. My choice was the “Niseko Old Fashioned”. Made with a legent bourbon and suntory AO whiskey blend and finished with spiced coconut, it wholly fits with Ski Lodge’s intimate atmosphere.
Rich whiskey notes lead the way, followed by subtle hints of sweetness and spice that adds depth without overwhelming the drink. It’s well-balanced, easy to sip and crafted with enough complexity to keep it interesting and pairs perfectly with the savory pizza squares.

Next up is “Slava’s Snowstorm”, my wife’s drink of choice. As one of the most popular drinks at Ski Lodge, it can be found in the “Gnar Classics” section of the menu. It’s the kind of cocktail that makes an impression even before taking your first sip.
A blanket of warm toasted coconut cardamom foam sits atop the chilled drink, creating a unique contrast that immediately sets it apart. The rich cold brew comes through first, delivering the familiar comfort of an espresso martini, while subtle notes of spice and sweetness add extra depth.
The coffee flavors are bold without being bitter, the foam adds a silky texture and the cardamom lingers pleasantly on the finish. Creative, smooth and easy to drink, Slava’s Snowstorm feels right at home in Ski Lodge’s cozy, fireside setting.
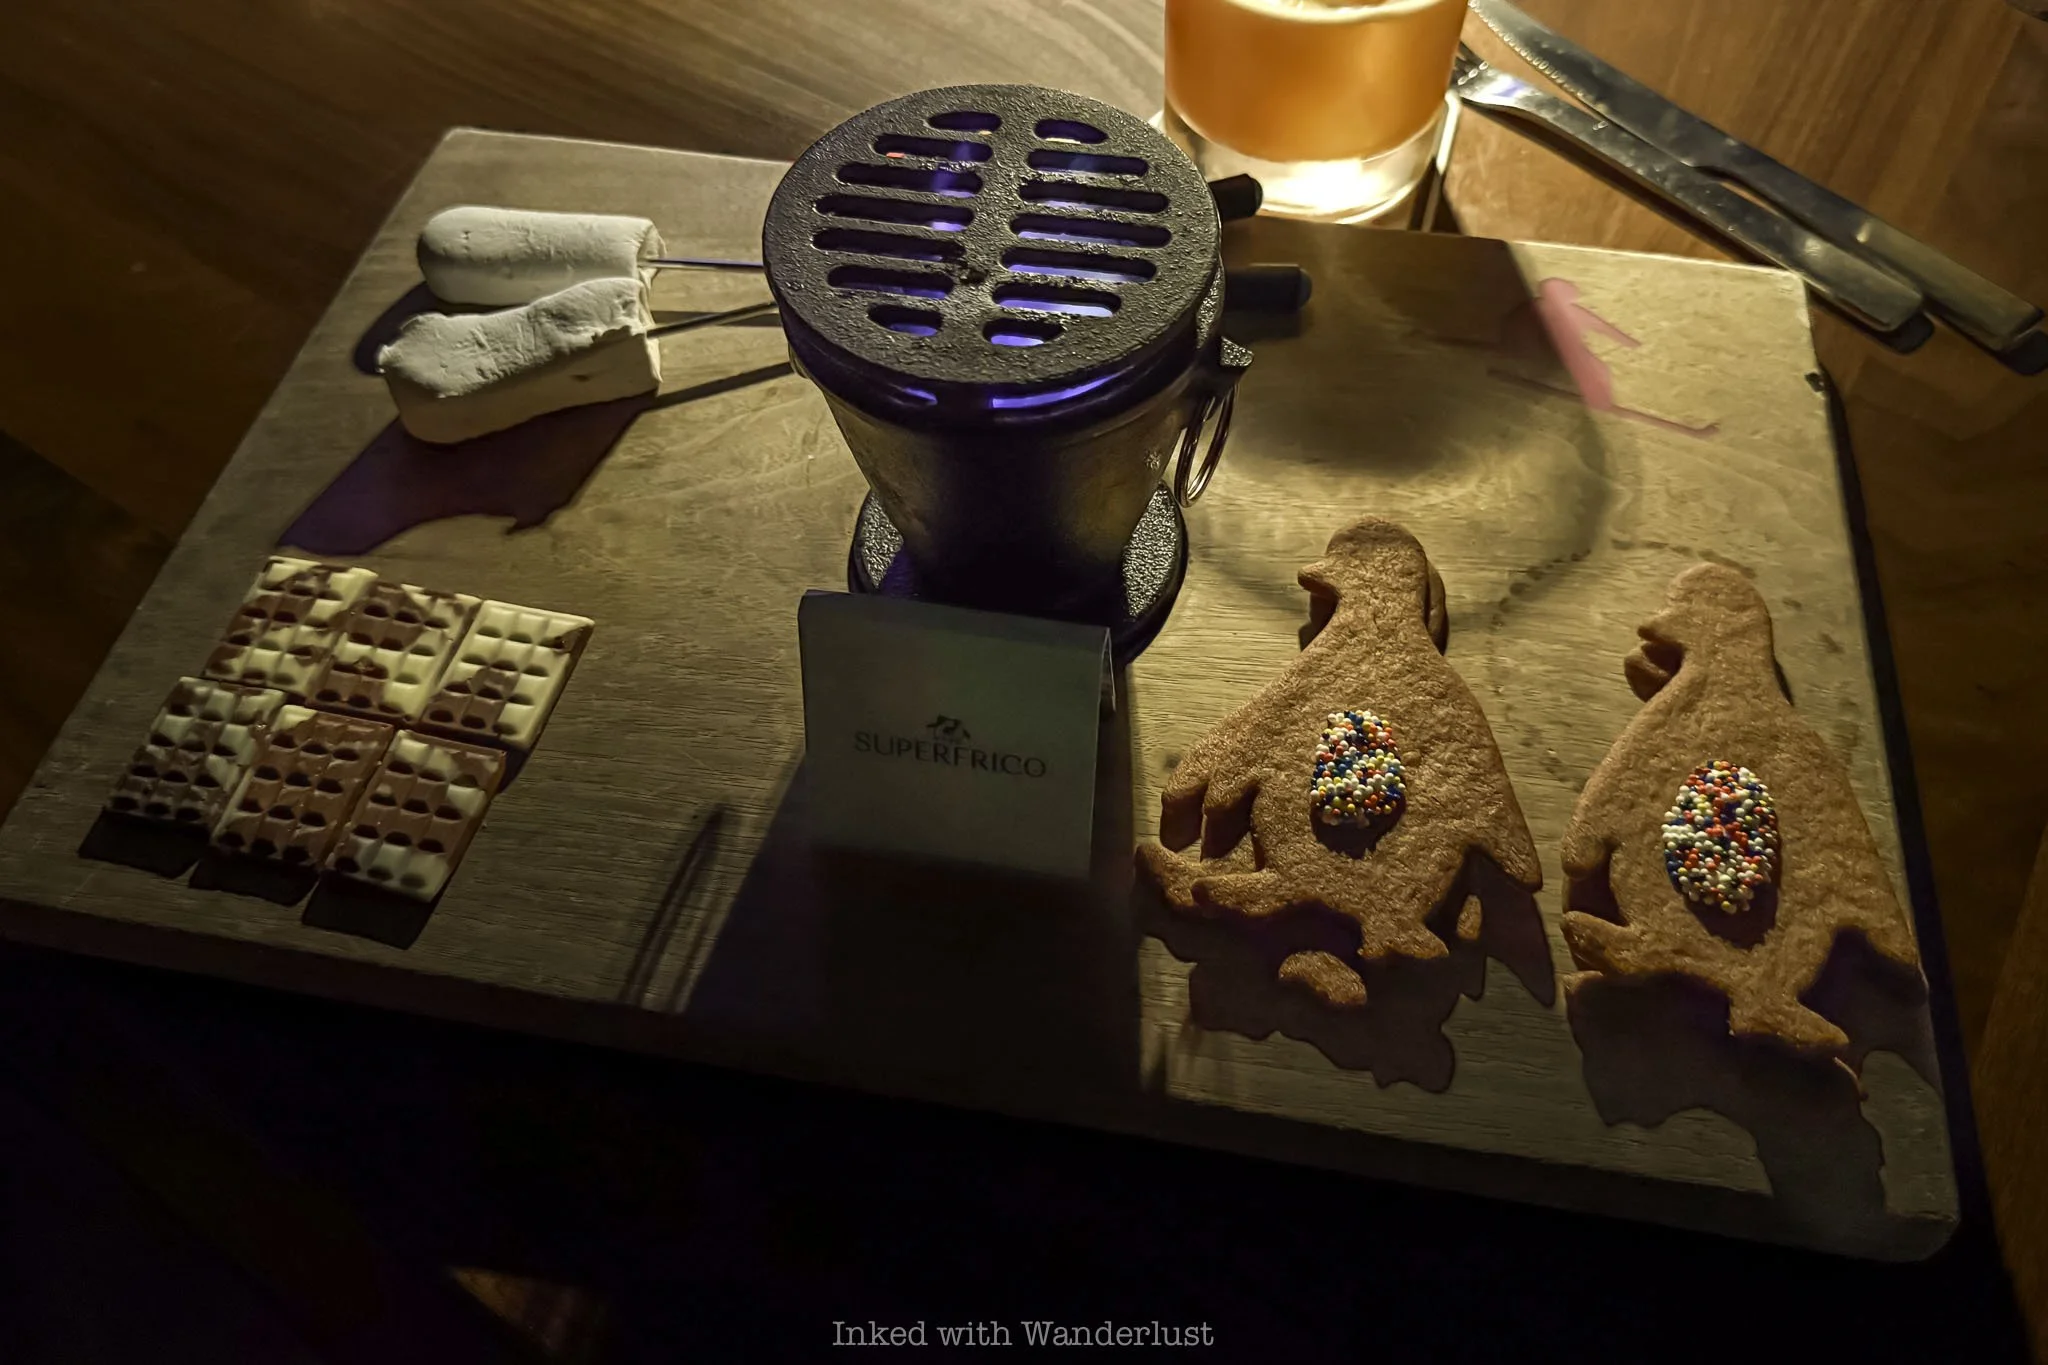
The sole dessert item on Ski Lodge’s menu is the S’mores Mountain Campfire Kit. It’s a fun addition to the Ski Lodge experience, especially if you’re leaning into the mountain-lodge vibe.
Roasting your own marshmallows at the table adds a playful, interactive element, and the finished s’mores are genuinely tasty. Gooey marshmallows, melted chocolate and crisp, penguin-shaped graham crackers come together just as you’d expect.
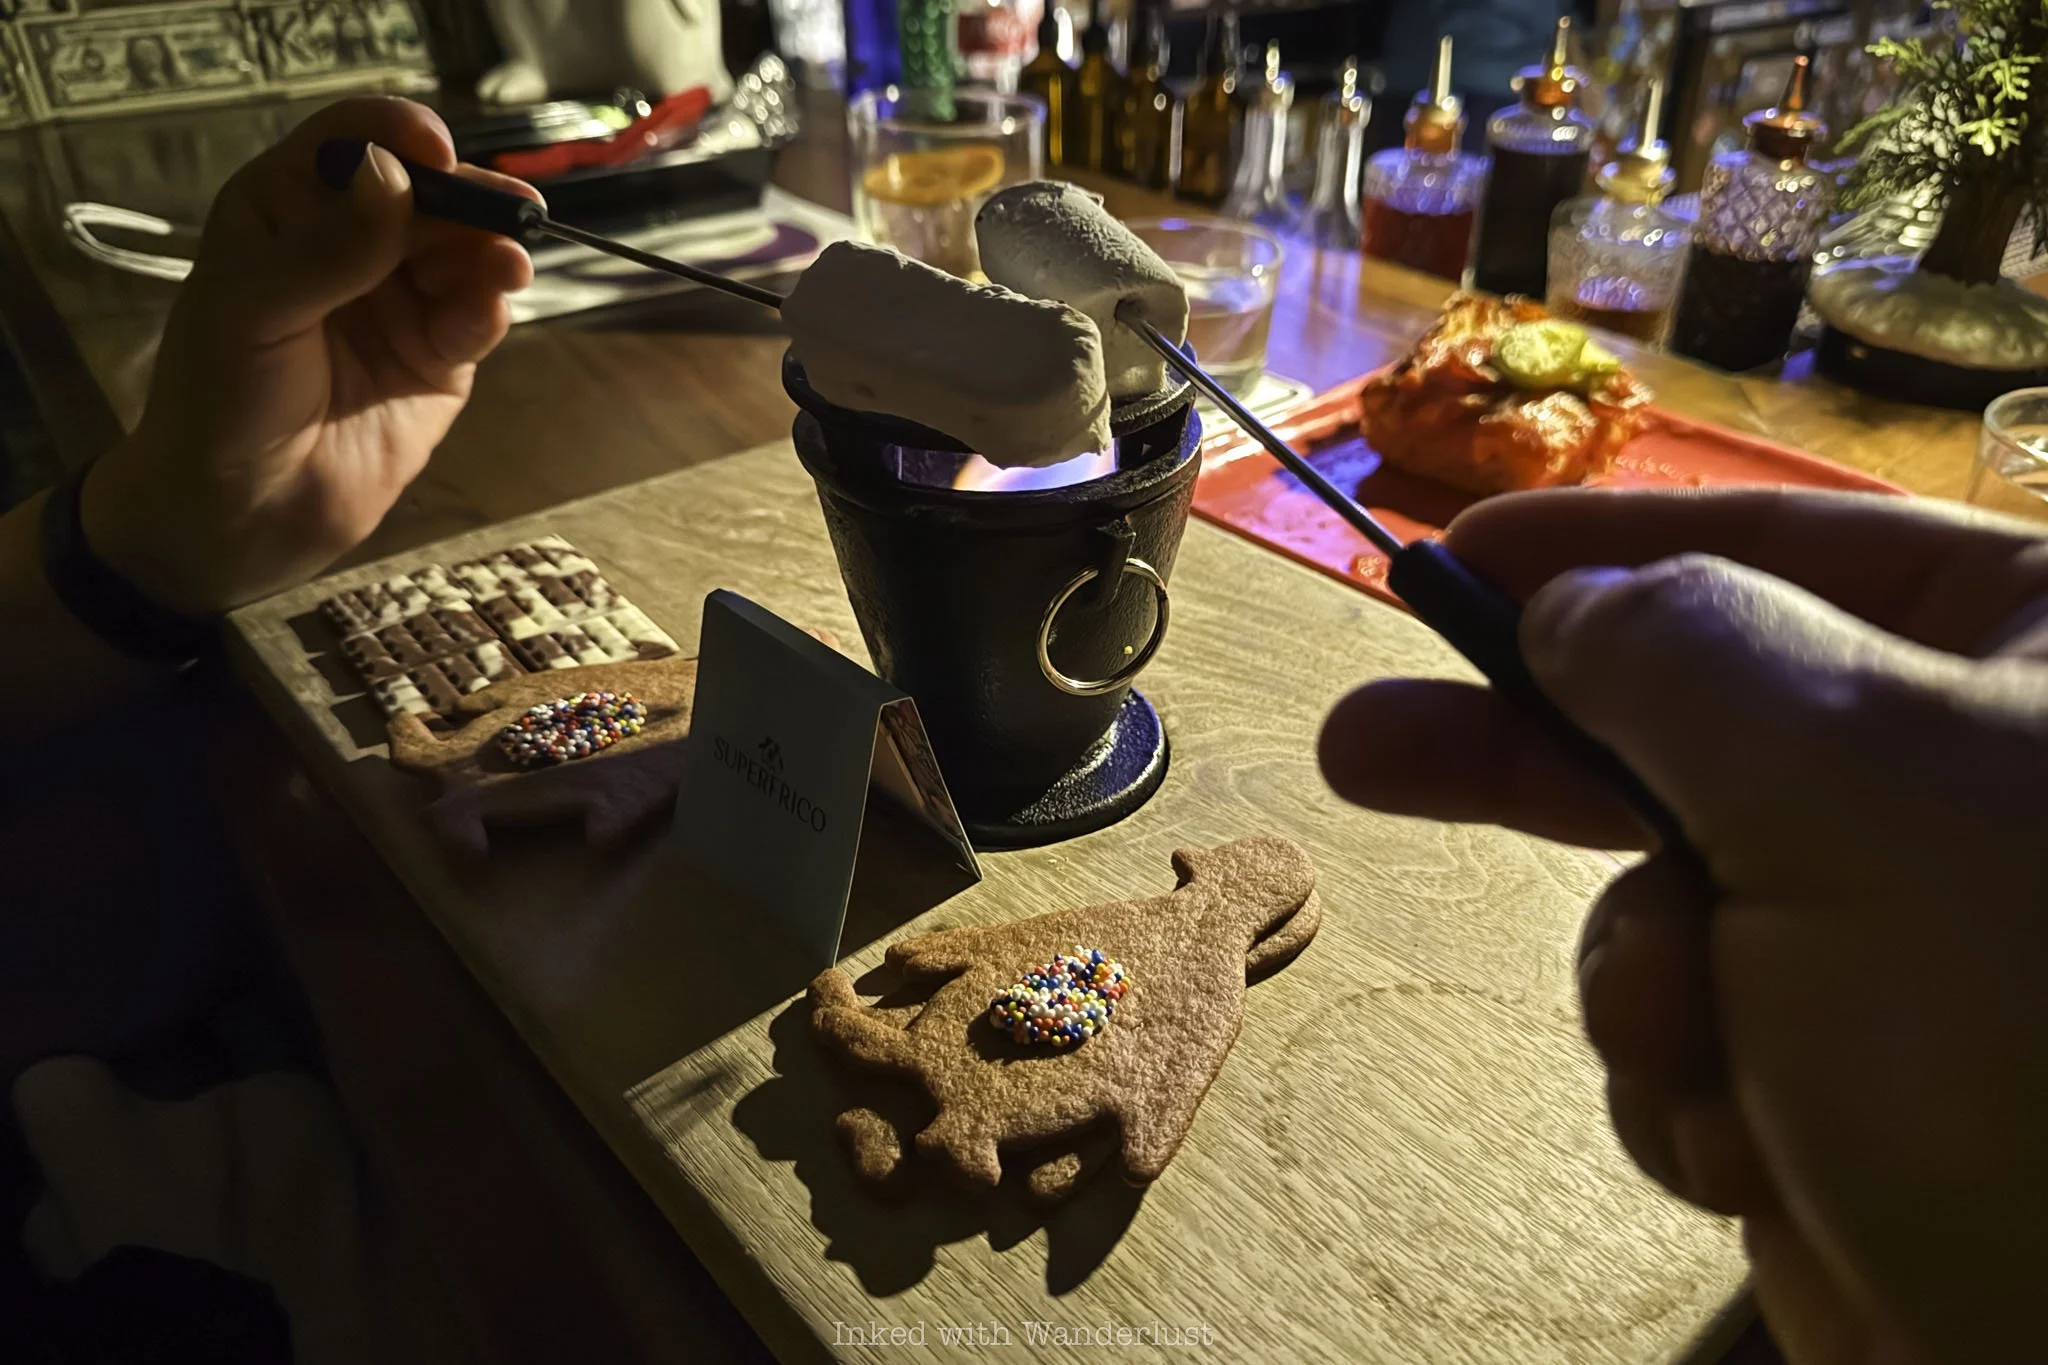
That said, the price feels a bit steep for what you actually receive. At $30 (at the time of this review’s publishing), it feels like you’re paying more for the experience, rather than the dessert itself. Which, to be fair, is a frequent characteristic in Las Vegas.
The quality is there and the experience is surely enjoyable, however the portion size left me questioning the value. It’s worth an order if it’s your first time and you want the full Ski Lodge experience, but it likely wouldn’t warrant an order on subsequent visits.
I didn’t do this myself, but I have been told that you can order most entrees off of Superfrico’s menu at Ski Lodge. Either use your phone to scan the menu or ask the bartender to supply you with one.
Does Ski Lodge Las Vegas Take Reservations
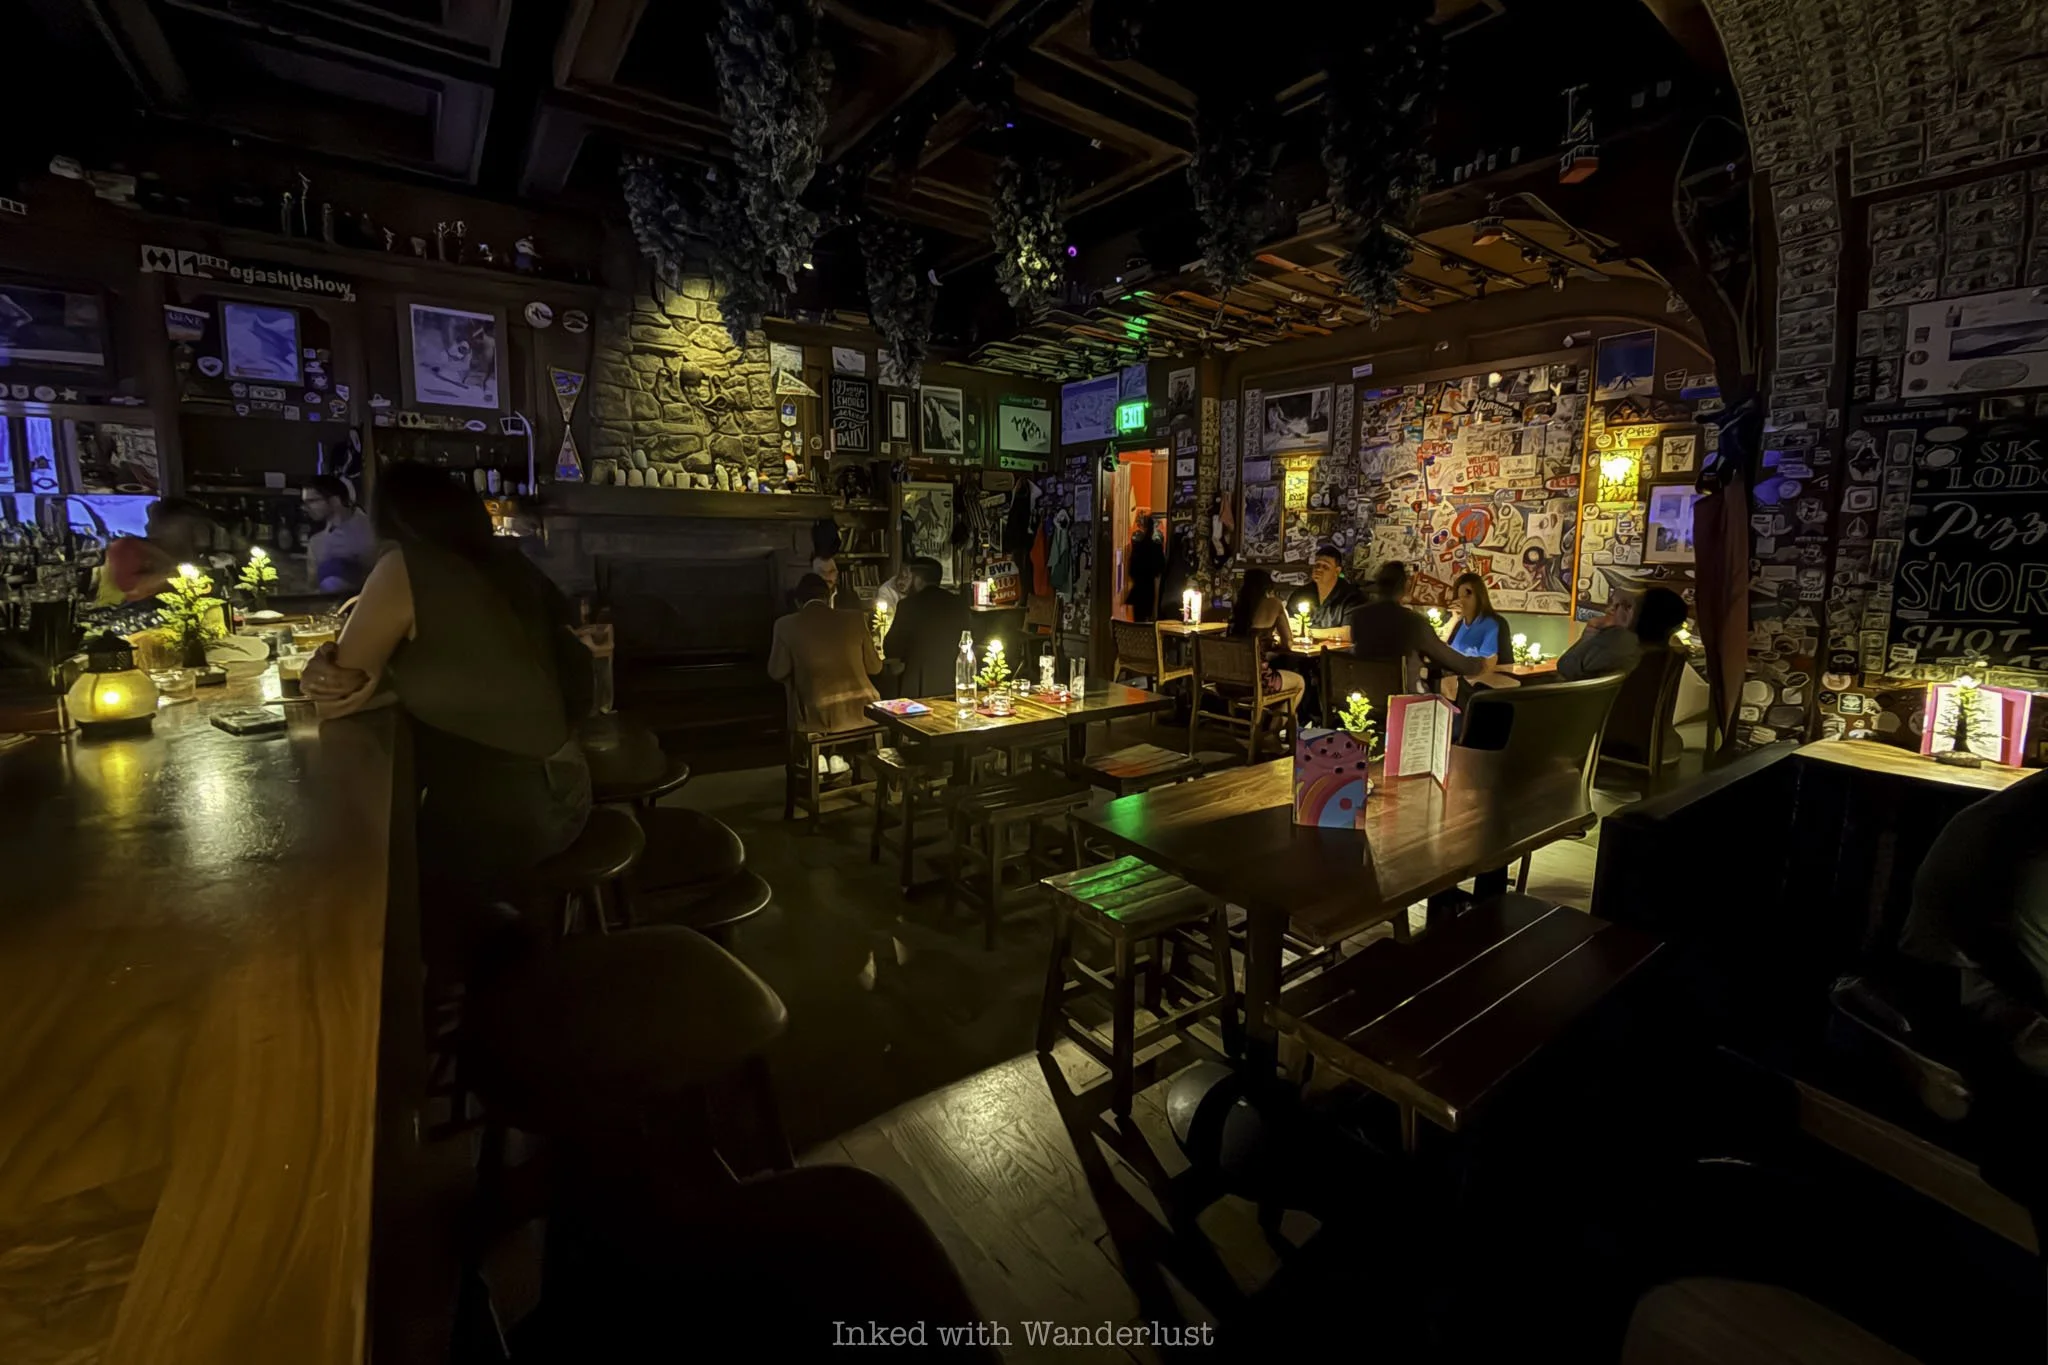
Unlike neighboring restaurant, Superfrico, where reservations are not only accepted but highly suggested, Ski Lodge does not accept reservations. It’s first come, first serve seating and crowds are controlled via a queue outside of the speakeasy.
Would I Recommend Ski Lodge?
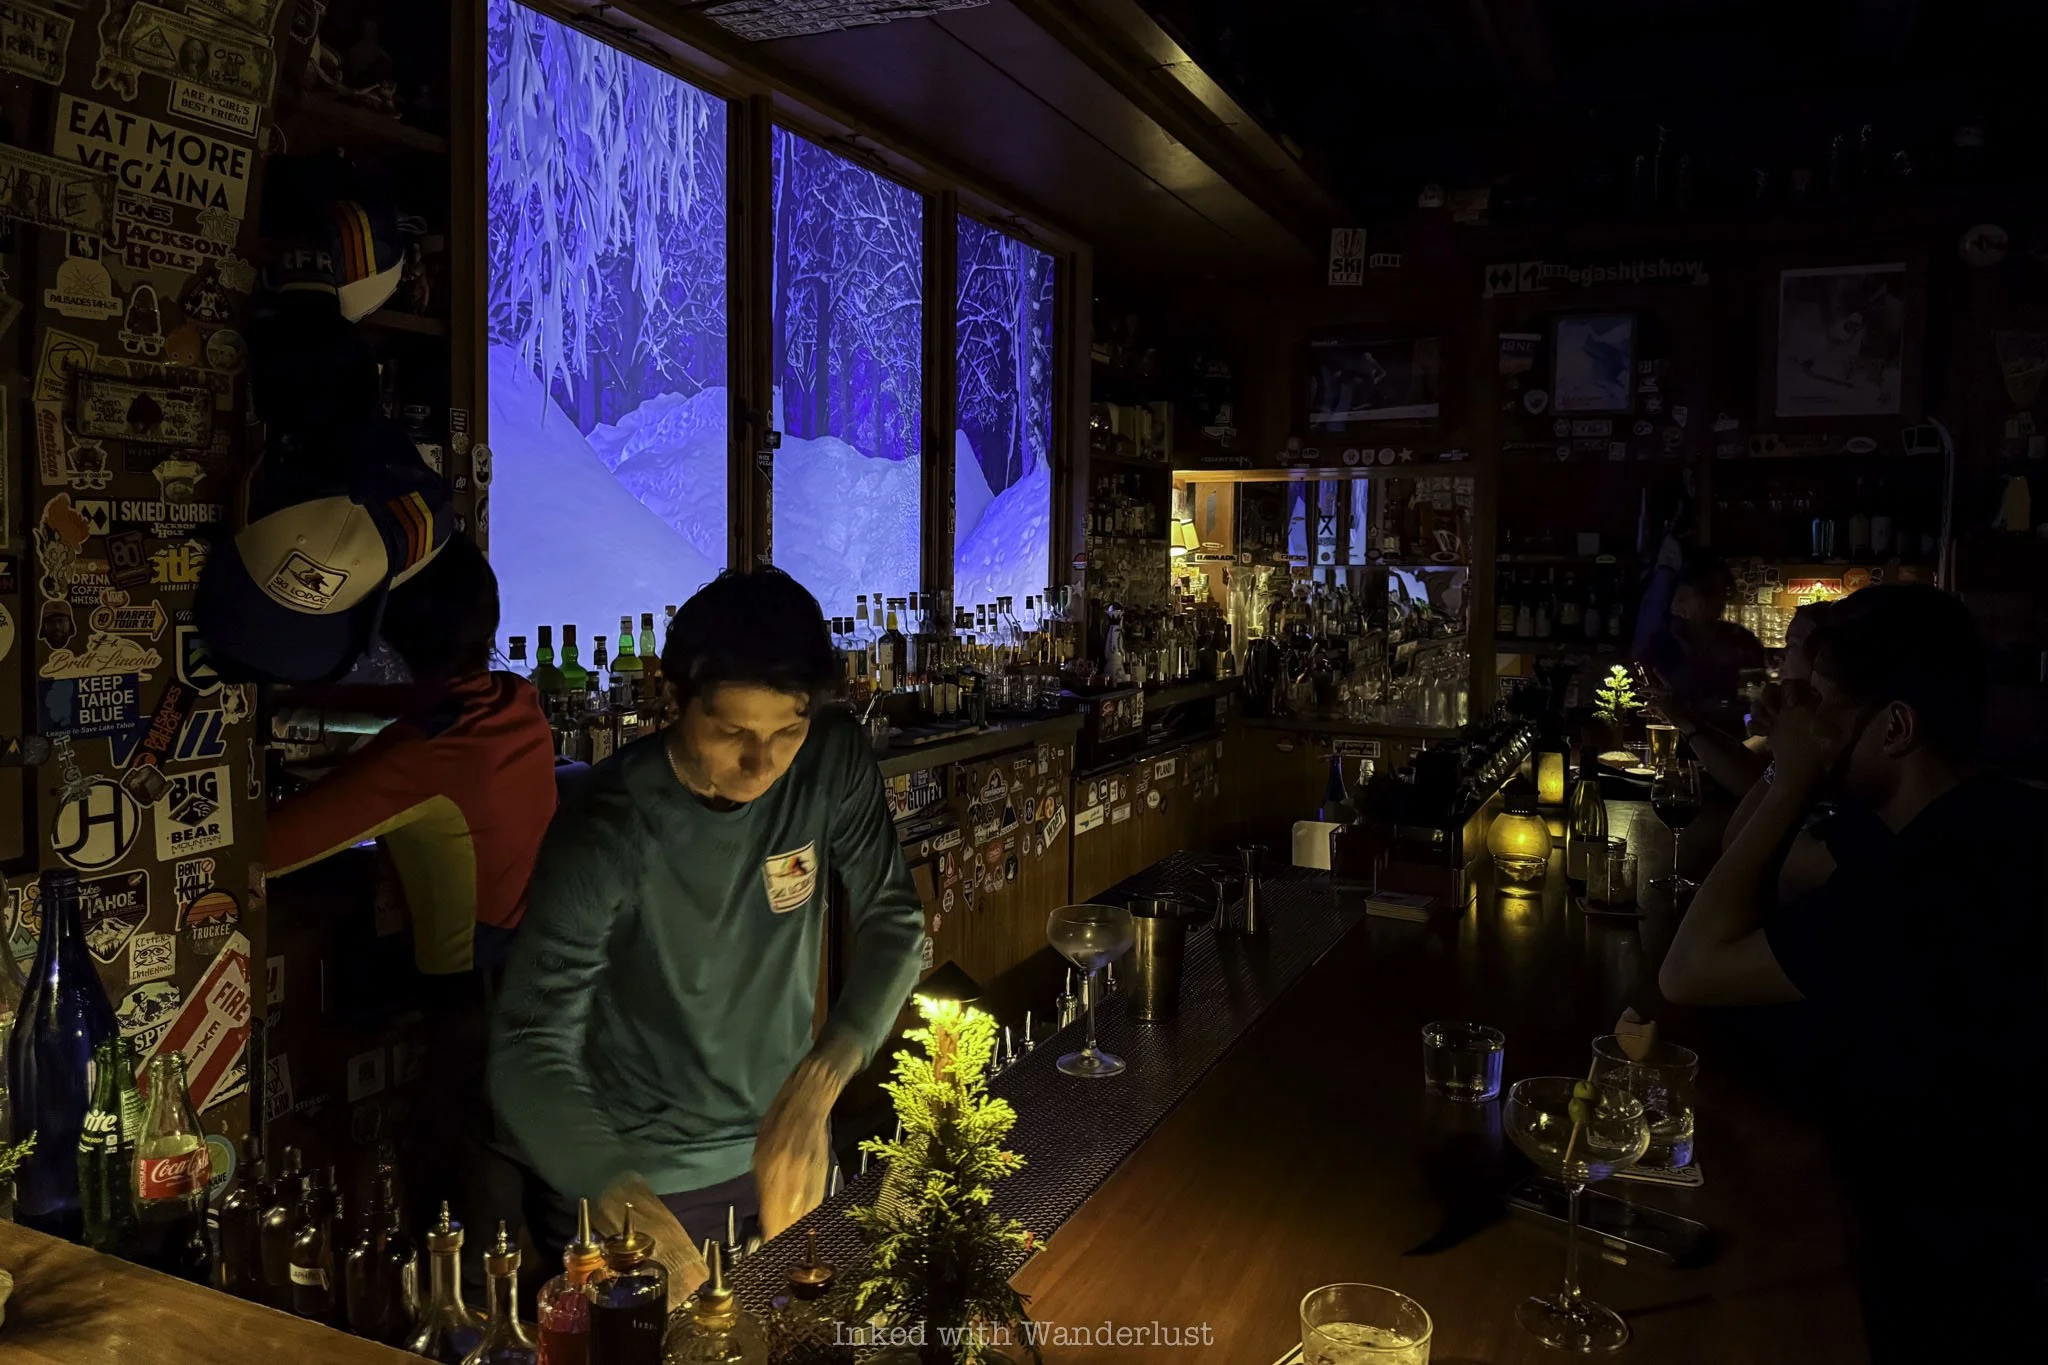
In short, yes. Highly, in fact. I first heard about Ski Lodge in 2024 when my wife sent me a Tiktok about it. Since then, it’s been at the top of my must-do list for our next visit to Las Vegas. Recently, that chance came.
The excitement and anticipation of merely looking for and finding Ski Lodge, in concert with the vibe-filled experience inside made the wait worthwhile. The crafted cocktails were amazing, the pizza was succulent and the service was exceptional.
In a city densely packed with bars, lounges and speakeasies, Ski Lodge sets itself apart with its unique theme and creative menu. No matter where you’re staying on the strip (or off) you should make Ski Lodge a part of your itinerary.
If you’ll still be up for more fun, you can walk over to Flamingo Hotel and experience their Bugsy Siegel-themed speakeasy, “The Count Room”. Or walk a bit further to Linq Promenade and take a “Happy Half Hour” ride on High Roller.
If you found this review helpful, please consider leaving a tip via the “Buy me a Coffee” button below. These tips help to offset ongoing expenses related to reviews like this, such as parking and entrance fees, food, drinks, gas, and more. All tips are appreciated. Thank you!

My Review of How Ya Dough’n Pizza in Las Vegas
Nestled on the top level of the BLVD complex on the Las Vegas Strip, directly across from the soon-to-be christened…
Disclosure: This post contains affiliate links. If you make a purchase through these links, I may earn a small commission at no additional cost to you. I only recommend products or services that I believe will add value to my readers.

Nestled on the top level of the BLVD complex on the Las Vegas Strip, directly across from the soon-to-be christened three-story In and Out Burger, sits one of the strip’s newest eateries - How Ya Dough’n Pizza.
What originally began as a pandemic-era home business in a Boca Raton backyard eventually blossomed into a burgeoning family owned and operated business with several locations throughout Florida.
What sets How Ya Dough’n apart from other pizza joints (which Vegas has no shortage of) is their use of sourdough crust. Due to its long fermentation process, the crust results in a near-perfect crisp that’s packed with flavor.
In this How Ya Dough’n pizza Las Vegas review, I’ll provide details as to its location and what my experience was like when my wife and I came here for the first time on our most recent visit to the strip. Let’s get into it!
How Ya Dough’n Pizza Location

As stated above, How Ya Dough’n is located on the top level of the BLVD complex. If you don’t know what that is it’s a new, still in progress 400,000 square foot retail, dining and entertainment center in the heart of the strip.
It’s on the east side of the strip closest to the southern end (though it’s also an easy walk from many mid-strip locations). To contextualize, my wife and I stayed at the Flamingo which is practically the strip’s mid-point and we walked to How Ya Dough’n in about fifteen minutes.

Given the strip’s often disorienting complexity to newcomers, it can be challenging to pin down its location. It can be found between Planet Hollywood and the MGM Grand and across the street from Park MGM, Aria Hotel and Cosmopolitan.
When you arrive to the Adidas store at BLVD, you’ll see a green and black escalator nearby. Take it to the second level. At the top, go left and take the second escalator to the third level. When you get to the top, turn around and you’ll see How Ya Dough’n.
My Experience at How Ya Dough’n Pizza
My wife and I stopped here for dinner on the first day of our visit. We had a reserved time at Flyover and How Ya Dough’n was the perfect choice as it was on the way to Flyover and was a quick walk from our hotel.
I first heard of How Ya Dough’n through Las Vegas influencer, Vegas Starfish, on TikTok (she has fantastic content that’s worth a follow, by the way).
We arrived to an empty yet beautifully lit interior as the sun was setting. There were only two others present, so we practically had the place to ourselves. I didn’t view this as a bad thing, though, as I feel it had more to do with “the secret not yet being out” more-so than a problem.
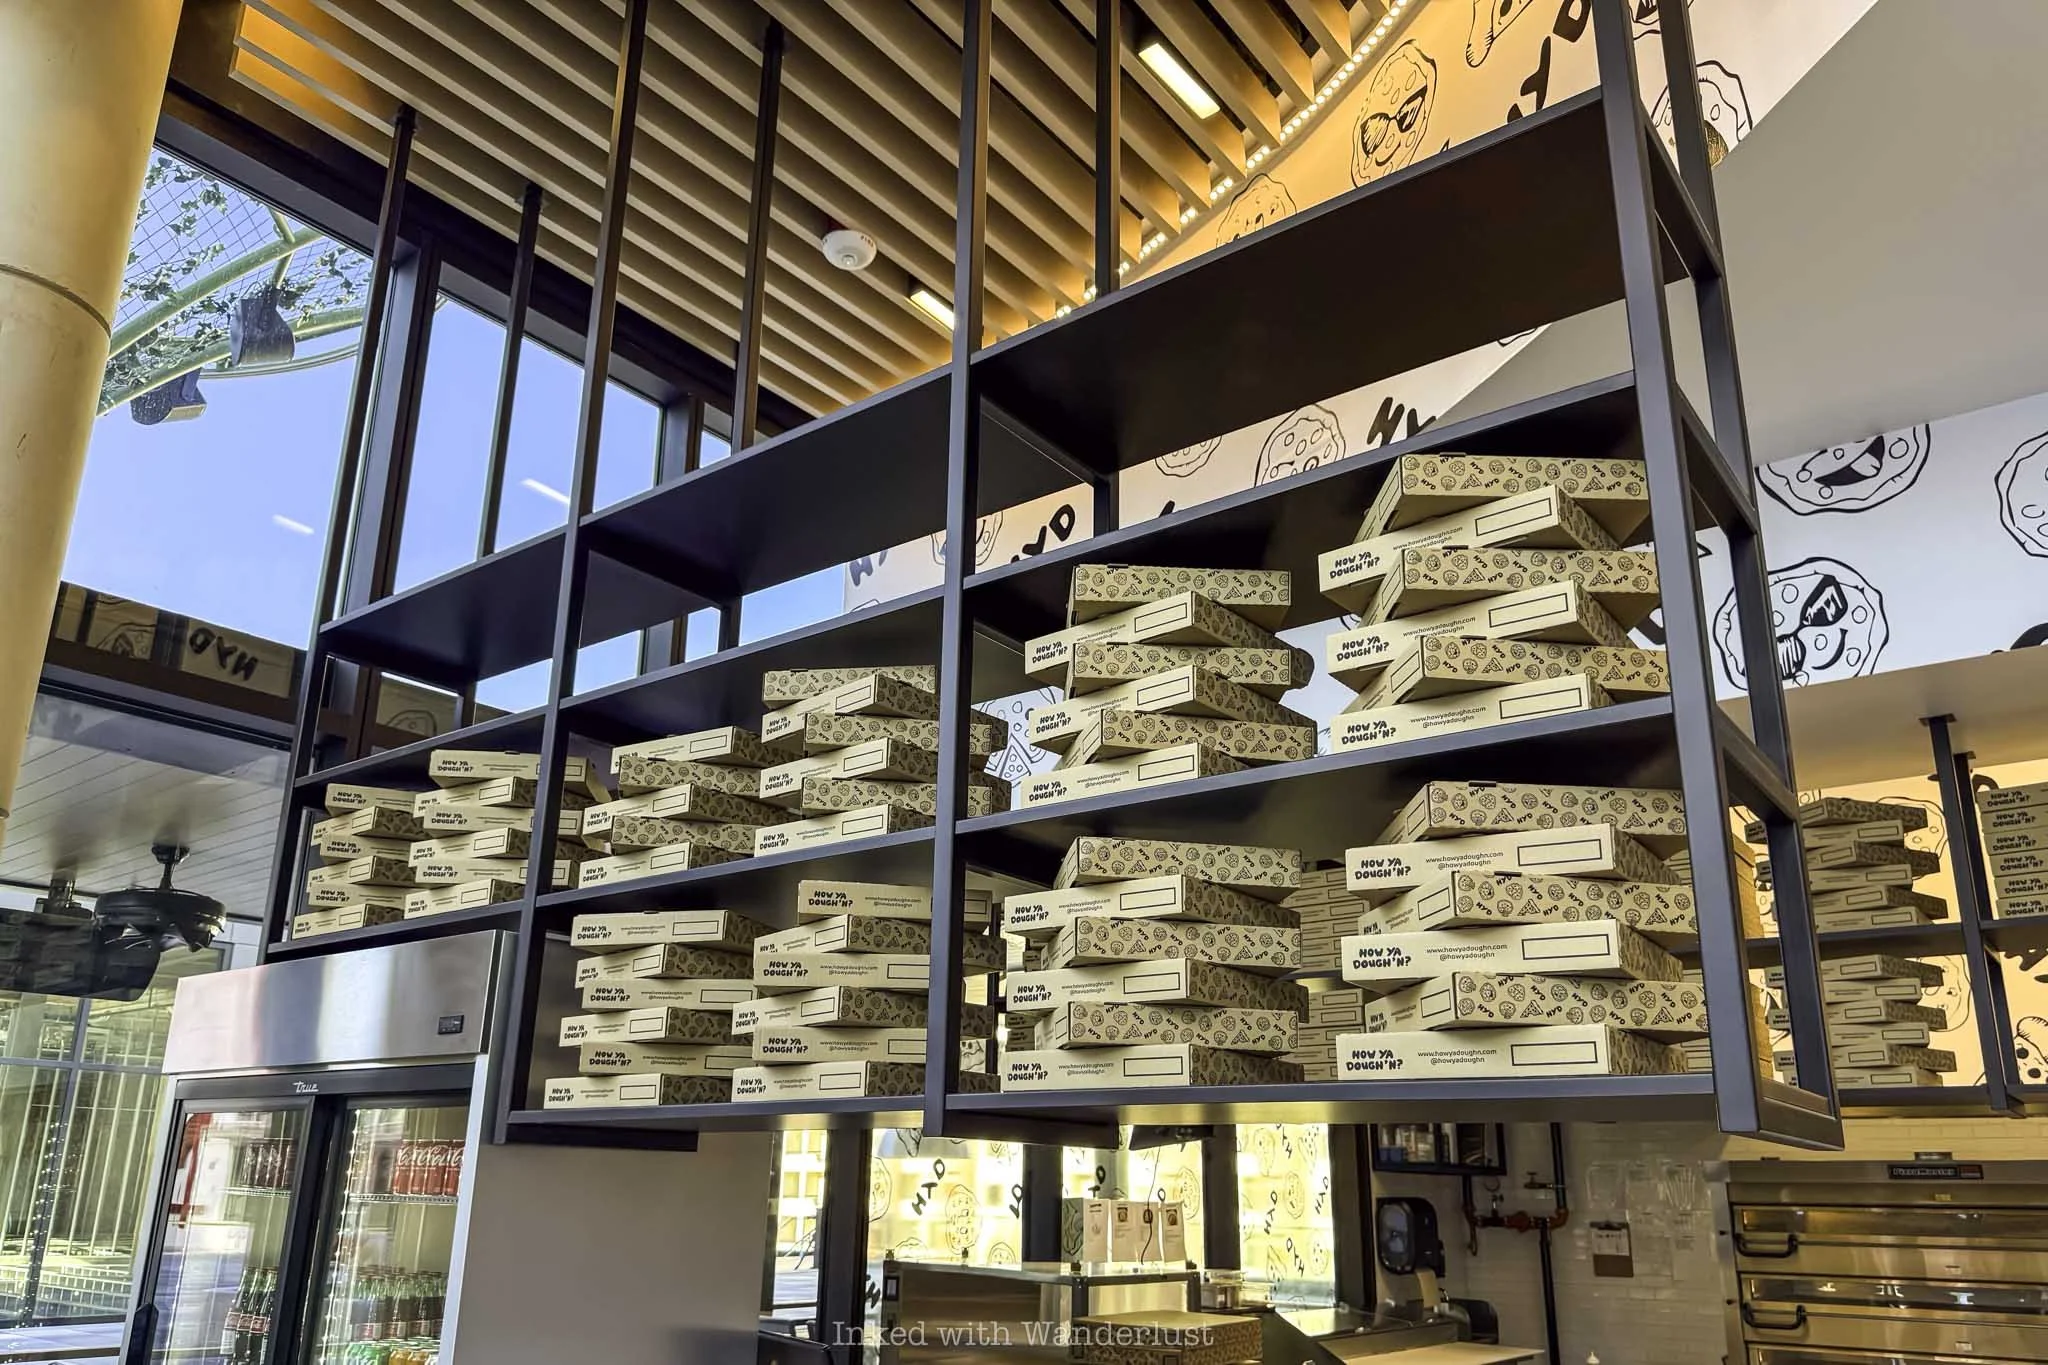
We were greeted by friendly staff right away and were given a quick explanation of the menu. She also gave recommendations as to the most popular pizzas on the menu, as well as her personal favorites. After a quick debate, we ultimately decided on the Spicy Goose.
The Spicy Goose is topped with a blend of mozzarella, provolone and pecorino cheeses, pepperoni, soppressata, Calabrian chili, garlic and oregano. Of course, their signature sourdough crust contains it all, along with their flavorful, sweet-leaning tomato sauce.
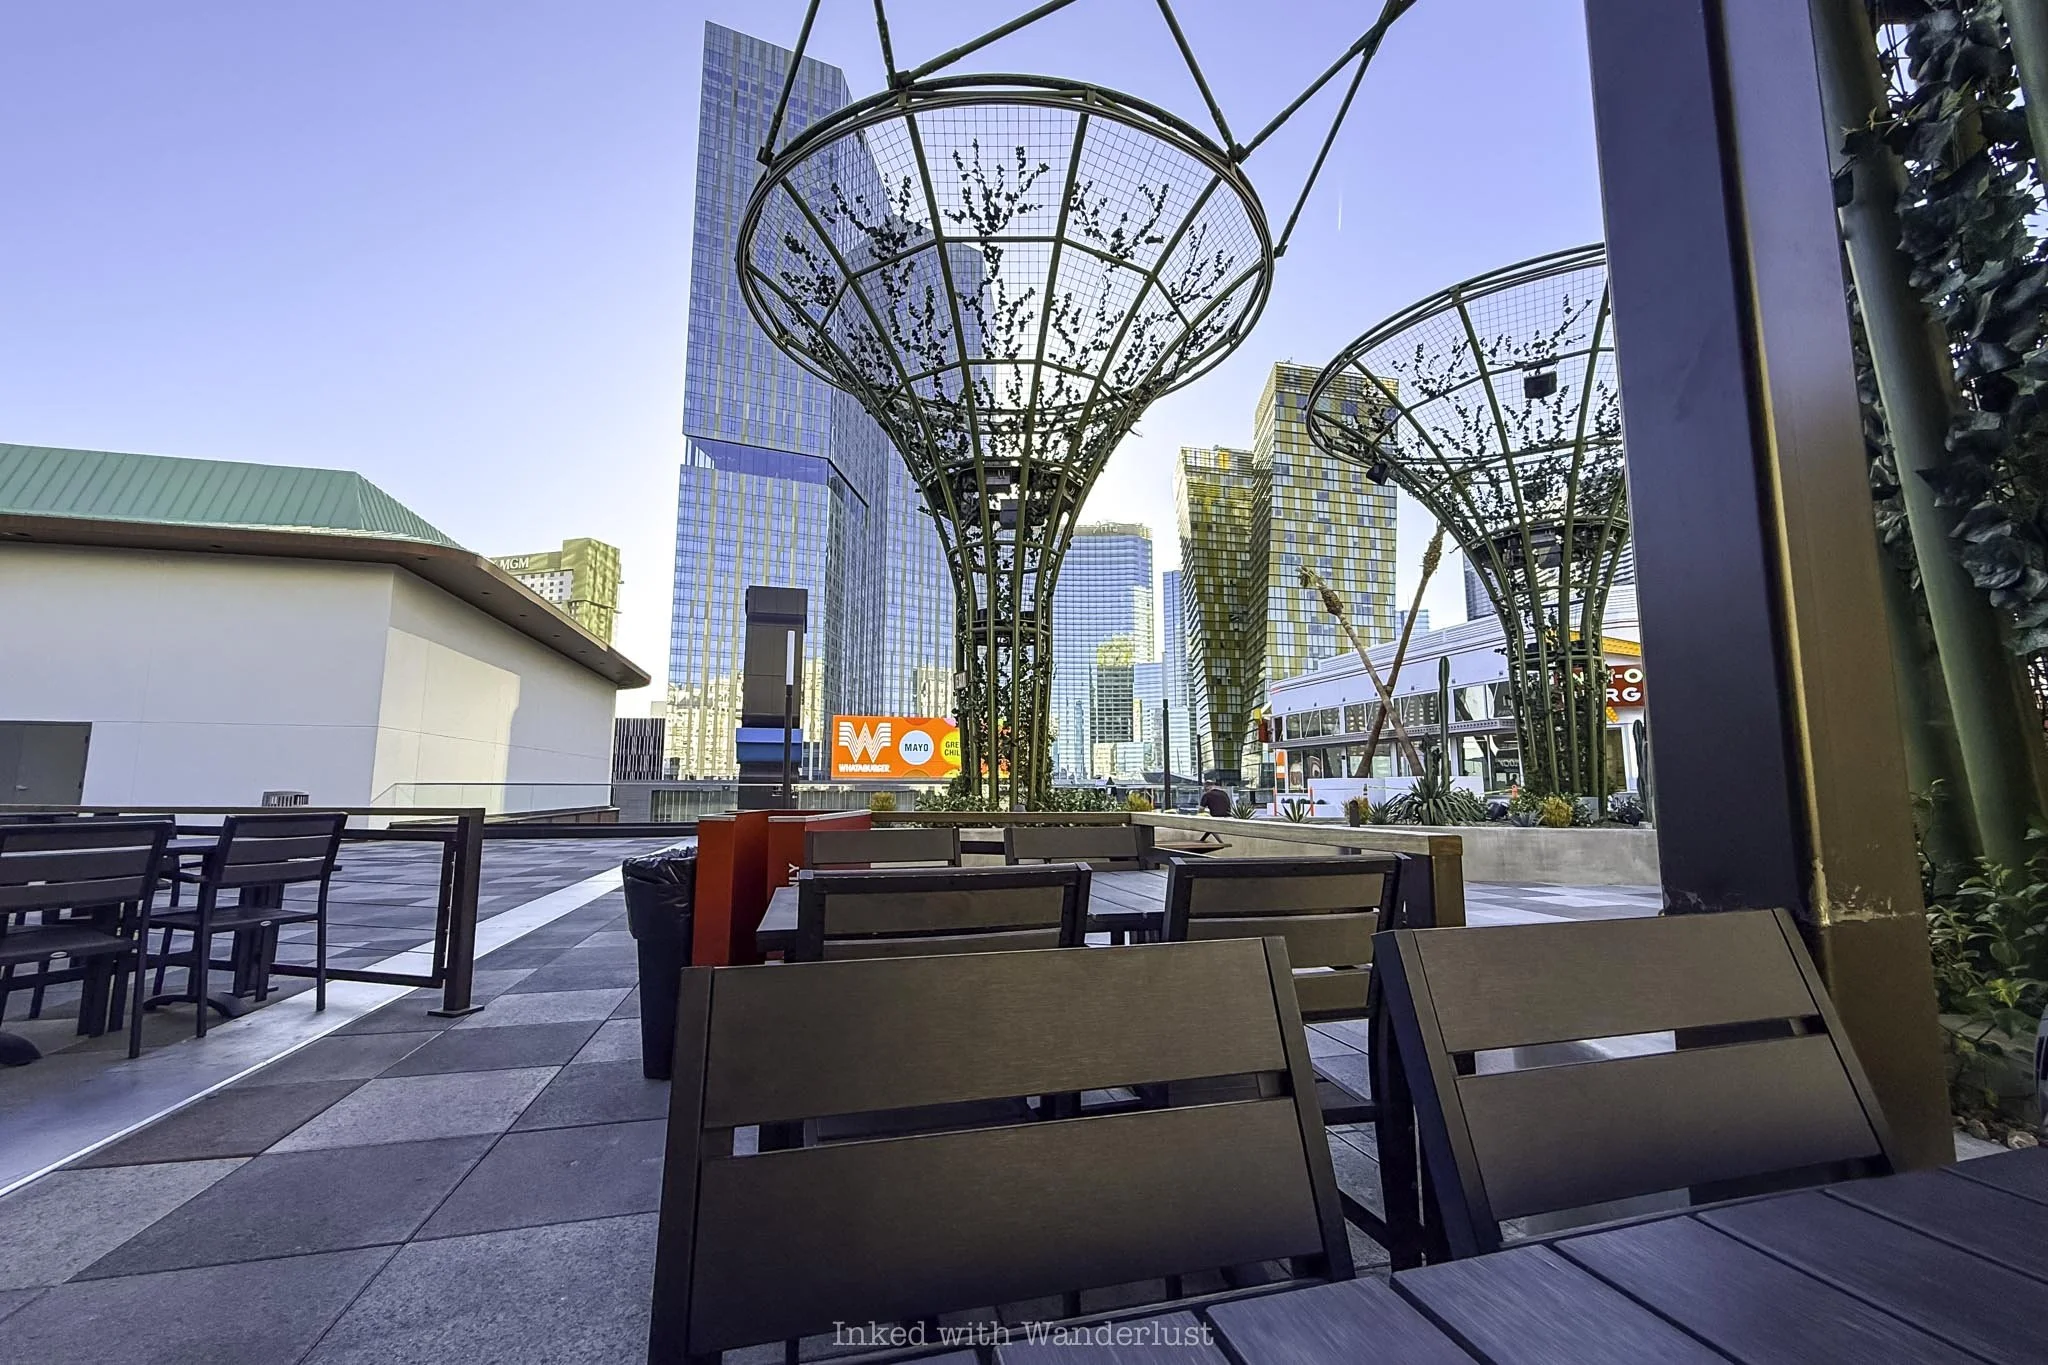
We took a seat in their exterior space while we waited for our pizza. At this time of day, the sun had already settled behind the looming towers of the hotels across the street, providing a much needed reprieve from the Las Vegas sun.
Before long, our pizza was brought out to us. Under most circumstances I’m a straight up pepperoni pizza guy. The Spicy Goose was surely a departure from my usual, but not too much as to “shock the system”, so to speak.


The sourdough crust was the first element to stand out. They’ve perfected that fine balance of crisp edges while remaining slightly chewy, which gives the whole pie a deeper flavor than your standard slice.
The aforementioned toppings blended together to bring a slow-building heat that complimented the flavor rather than overwhelming it. While noticeable, the spice level remained well balanced thanks to the richness of the trio-blend of cheeses.
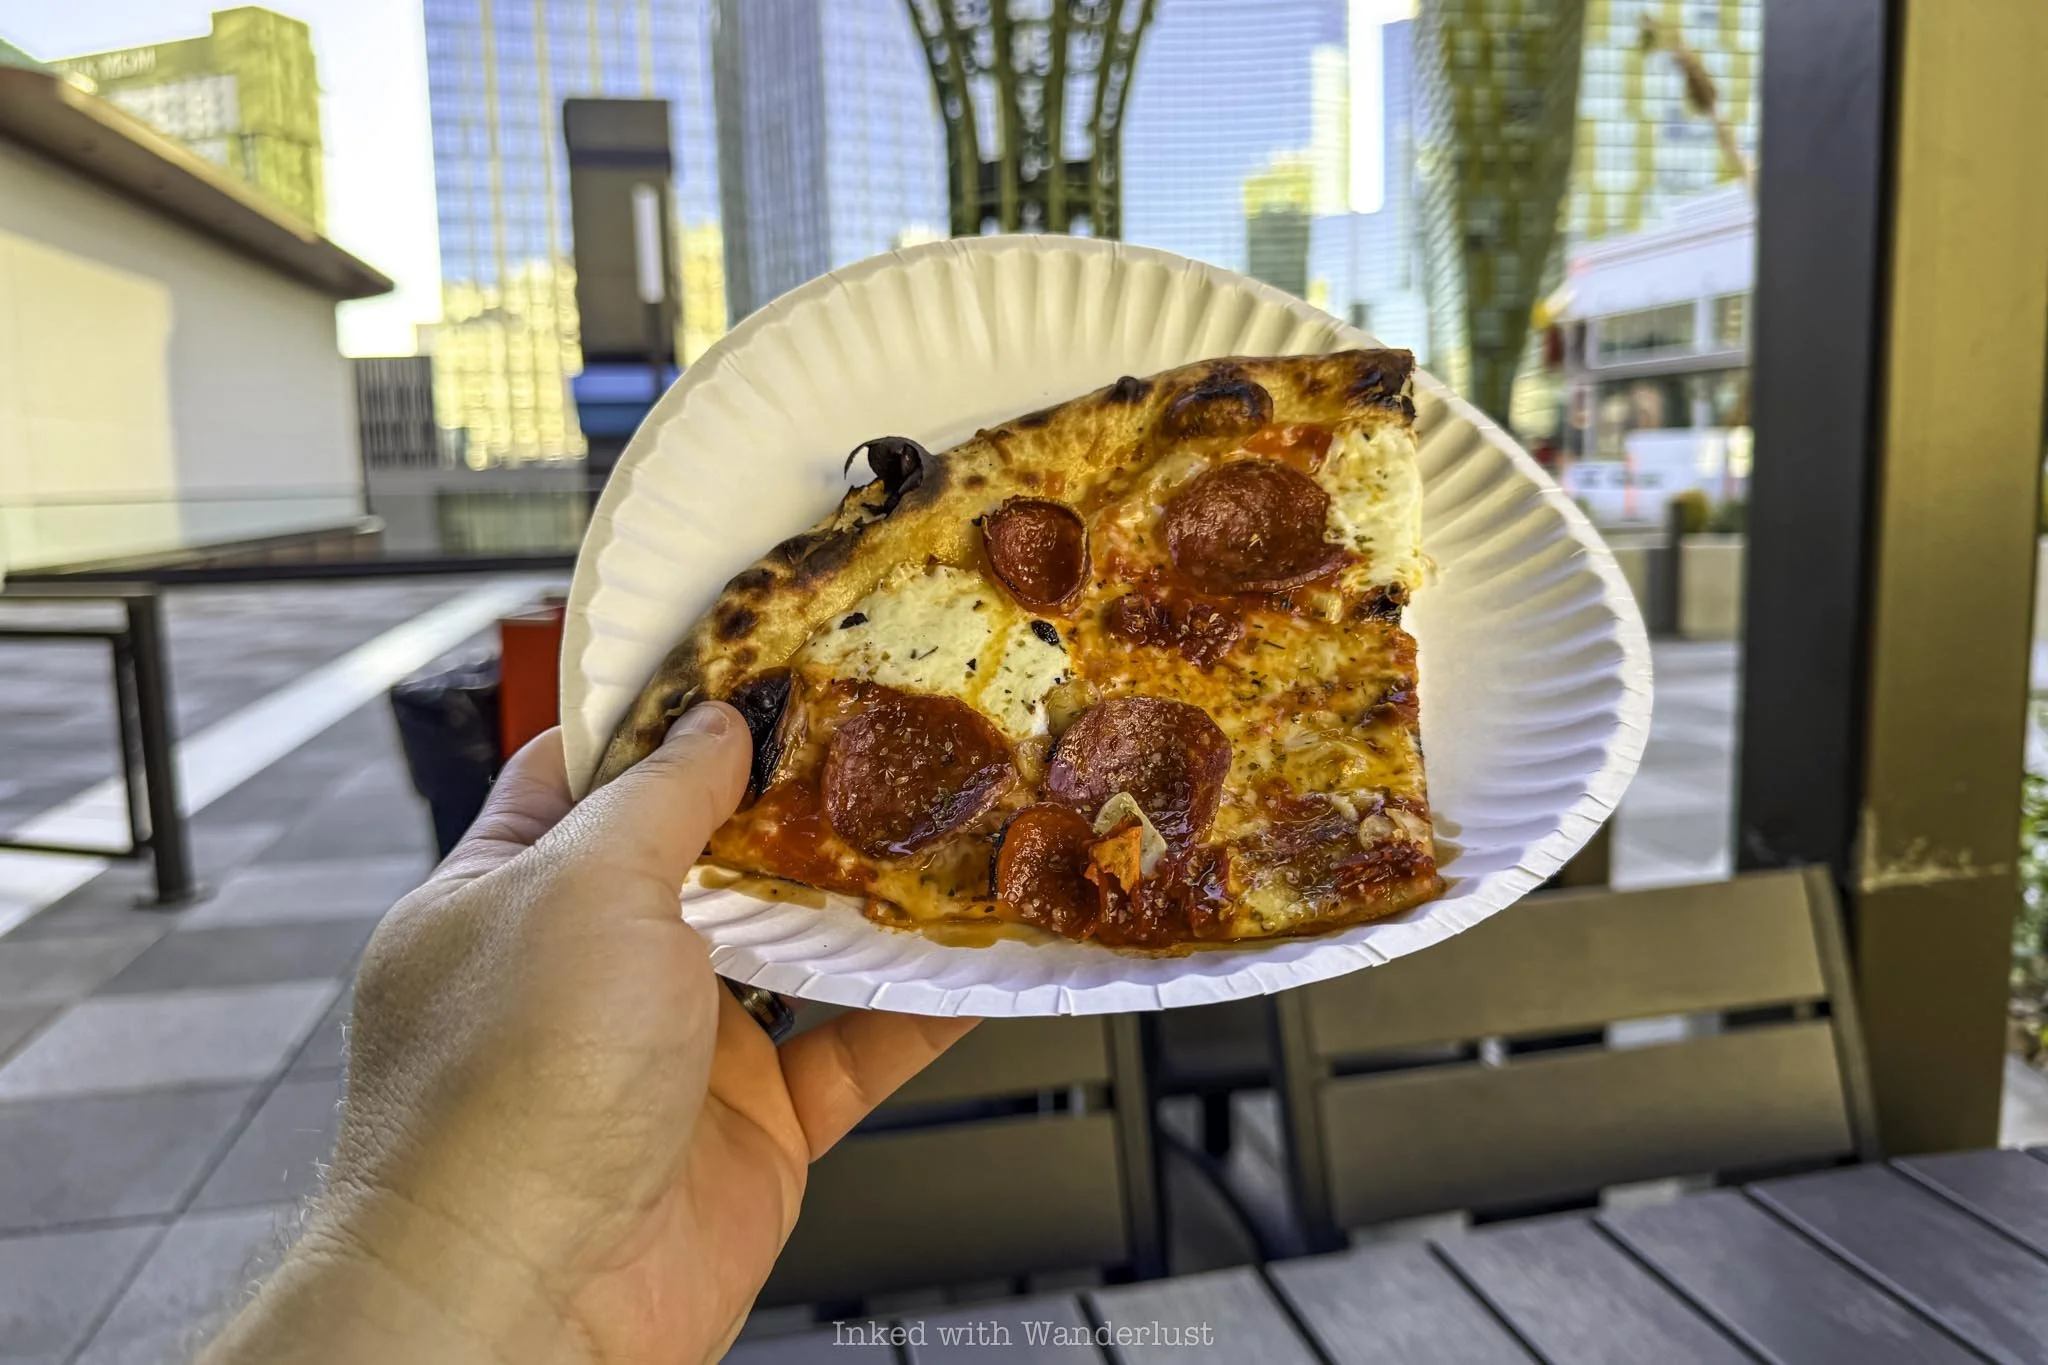
The cured meats brought a rich, salty bite with just enough grease to re-create that classic New York style slice, while the Calabrian chilies added a sharp, almost fruity heat that slowly builds the longer you chew.
The roasted garlic came through in the background, rounding everything out with a mellow and welcoming sweetness. Add to that the slightly tangy finish the fermented sourdough crust brings and that’s a recipe that kept bringing me back bite after bite.
If you’re a fan of spice, I would recommend ordering the Spicy Goose. Conversely, if you’re not, stay away. In that case, perhaps the “OG”, which is basically a Neapolitan style pizza, is more your speed. Or the “Cremini Special”, which is their veggie-forward offering.
If you find yourself on the Las Vegas Strip, definitely give How Ya Dough’n pizza an opportunity to satisfy your hunger. From here, enjoy a post-meal activity at Flyover Las Vegas just a few minute walk away.
Or, walk south a bit further to the Luxor and tour the “Titanic: The Artifact Expedition” museum. If one or two post-dinner drinks is more what you’re looking for, head north to Cosmopolitan and relax at The Chandelier or catch the vibes at the Ski Lodge speakeasy.
If you found this review helpful, please consider leaving a tip at the “Buy Me a Coffee” button below. These tips help to offset the cost of regular expenses, including parking fees, meals, gas, admission tickets, etc. Every tip is appreciated. Thank you!
My Experience at Flyover Las Vegas (Review)
In Las Vegas, a city densely packed with over-the-top-attractions, one sets itself apart from the neon lights, slot machine noise and…
Disclosure: This post contains affiliate links. If you make a purchase through these links, I may earn a small commission at no additional cost to you. I only recommend products or services that I believe will add value to my readers.
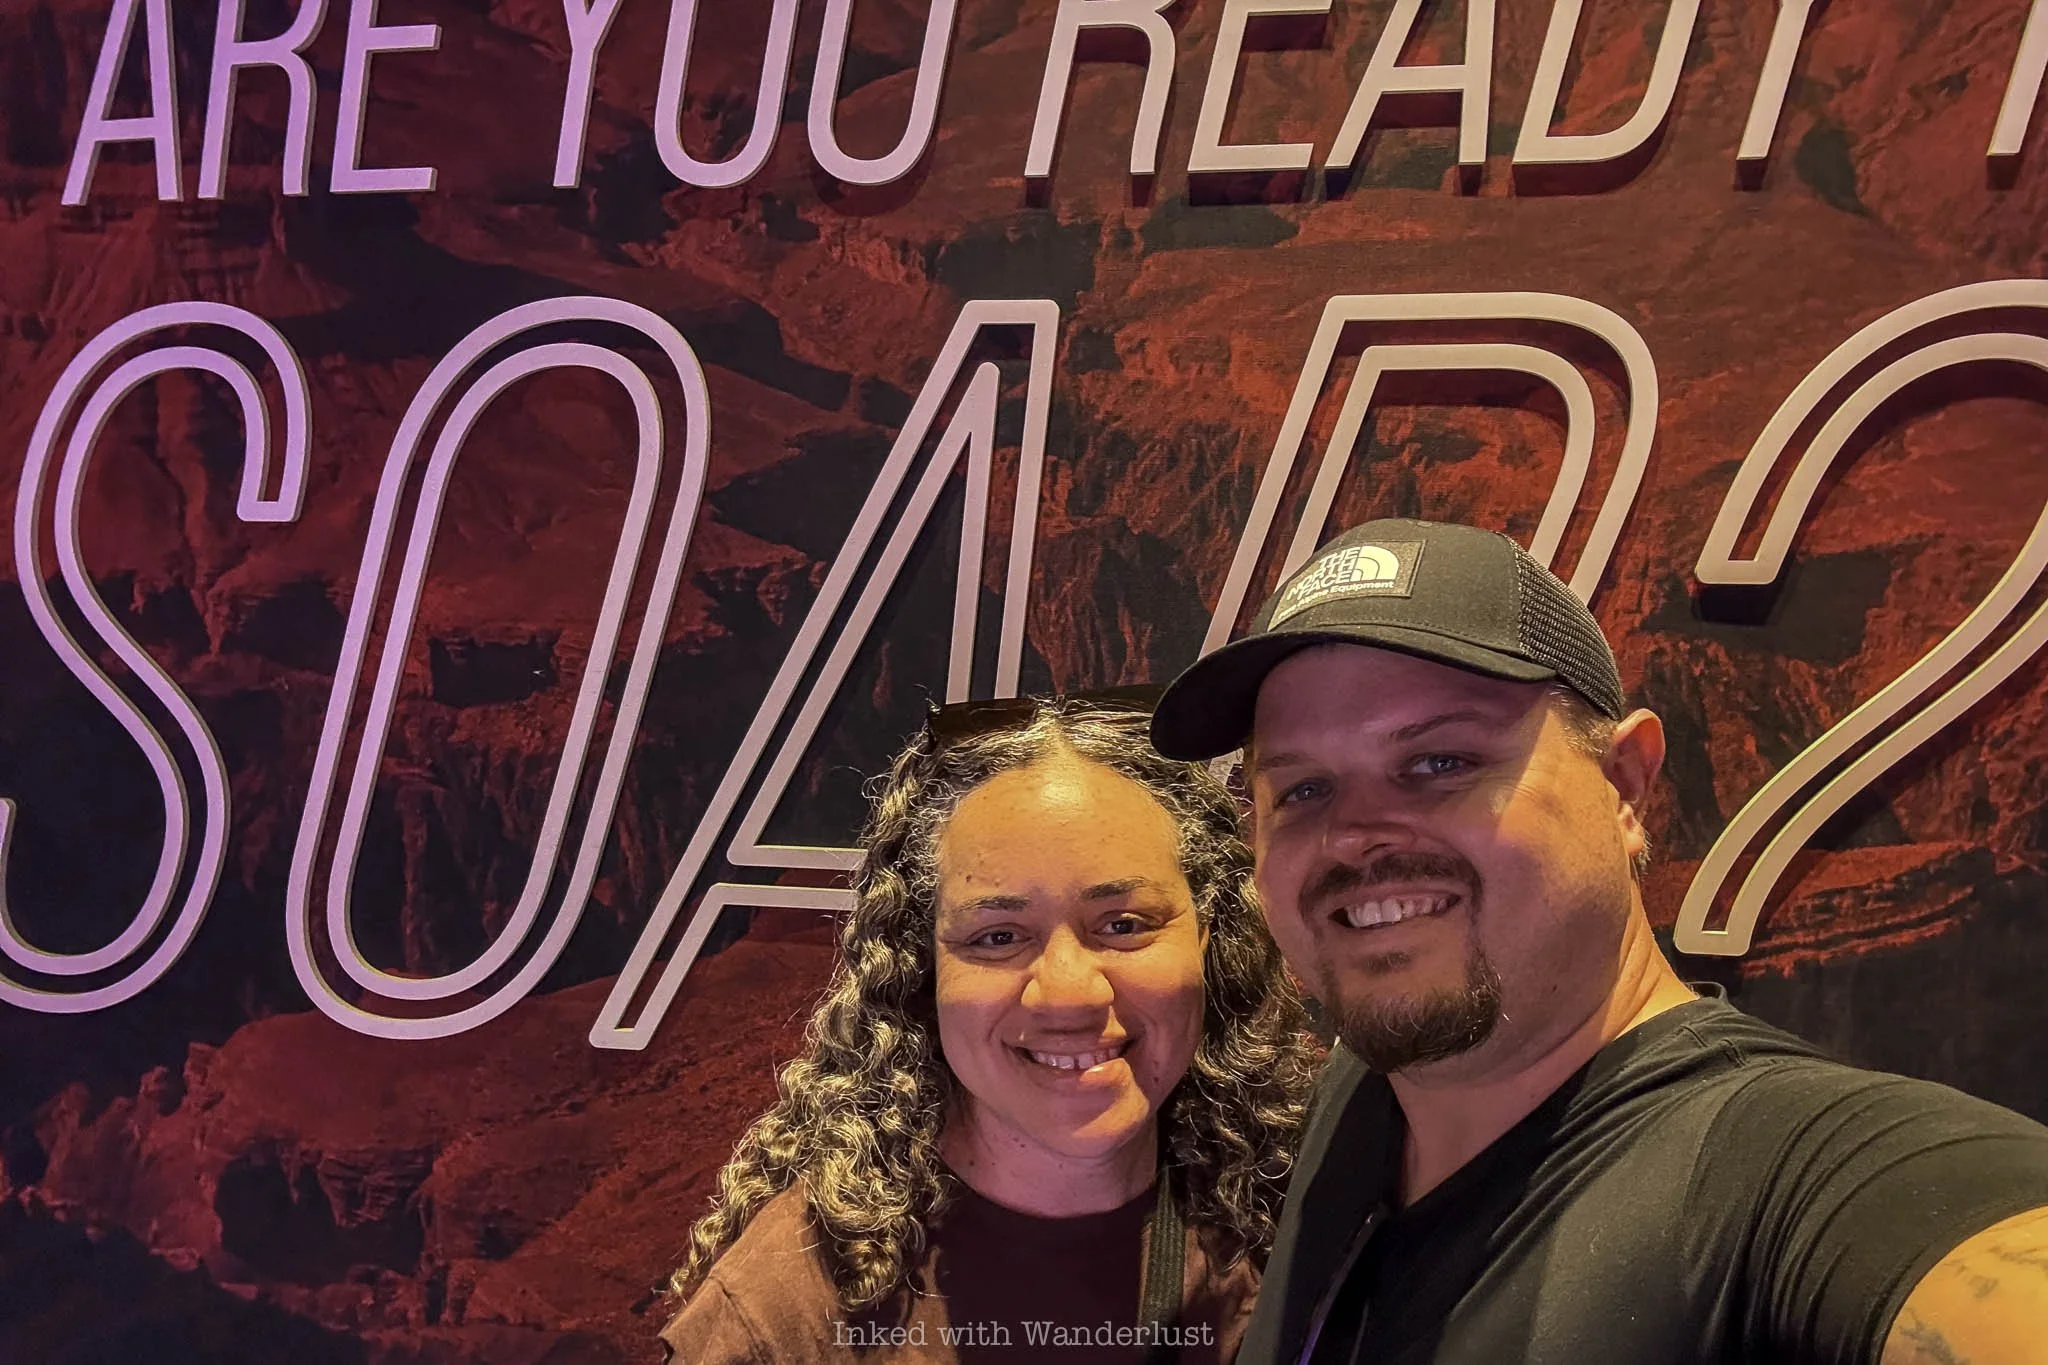
In Las Vegas, a city densely packed with over-the-top-attractions, one sets itself apart from the neon lights, slot machine noise and packed streets - Flyover Las Vegas.
This immersive flying attraction lifts you over sweeping landscapes, dramatic coastlines and iconic cities without ever leaving the strip.
With its combination of motion seating, curved screen, wind effects, mist and scent technology, it creates the feeling of true flight while only lifting you mere feet from the ground.
In this post, I’m going to detail my and my wife’s experience at Flyover during our visit. I’ll also cover topics such as location, ticket pricing, tips and more. Let’s get into it!
Location, Parking and Tickets
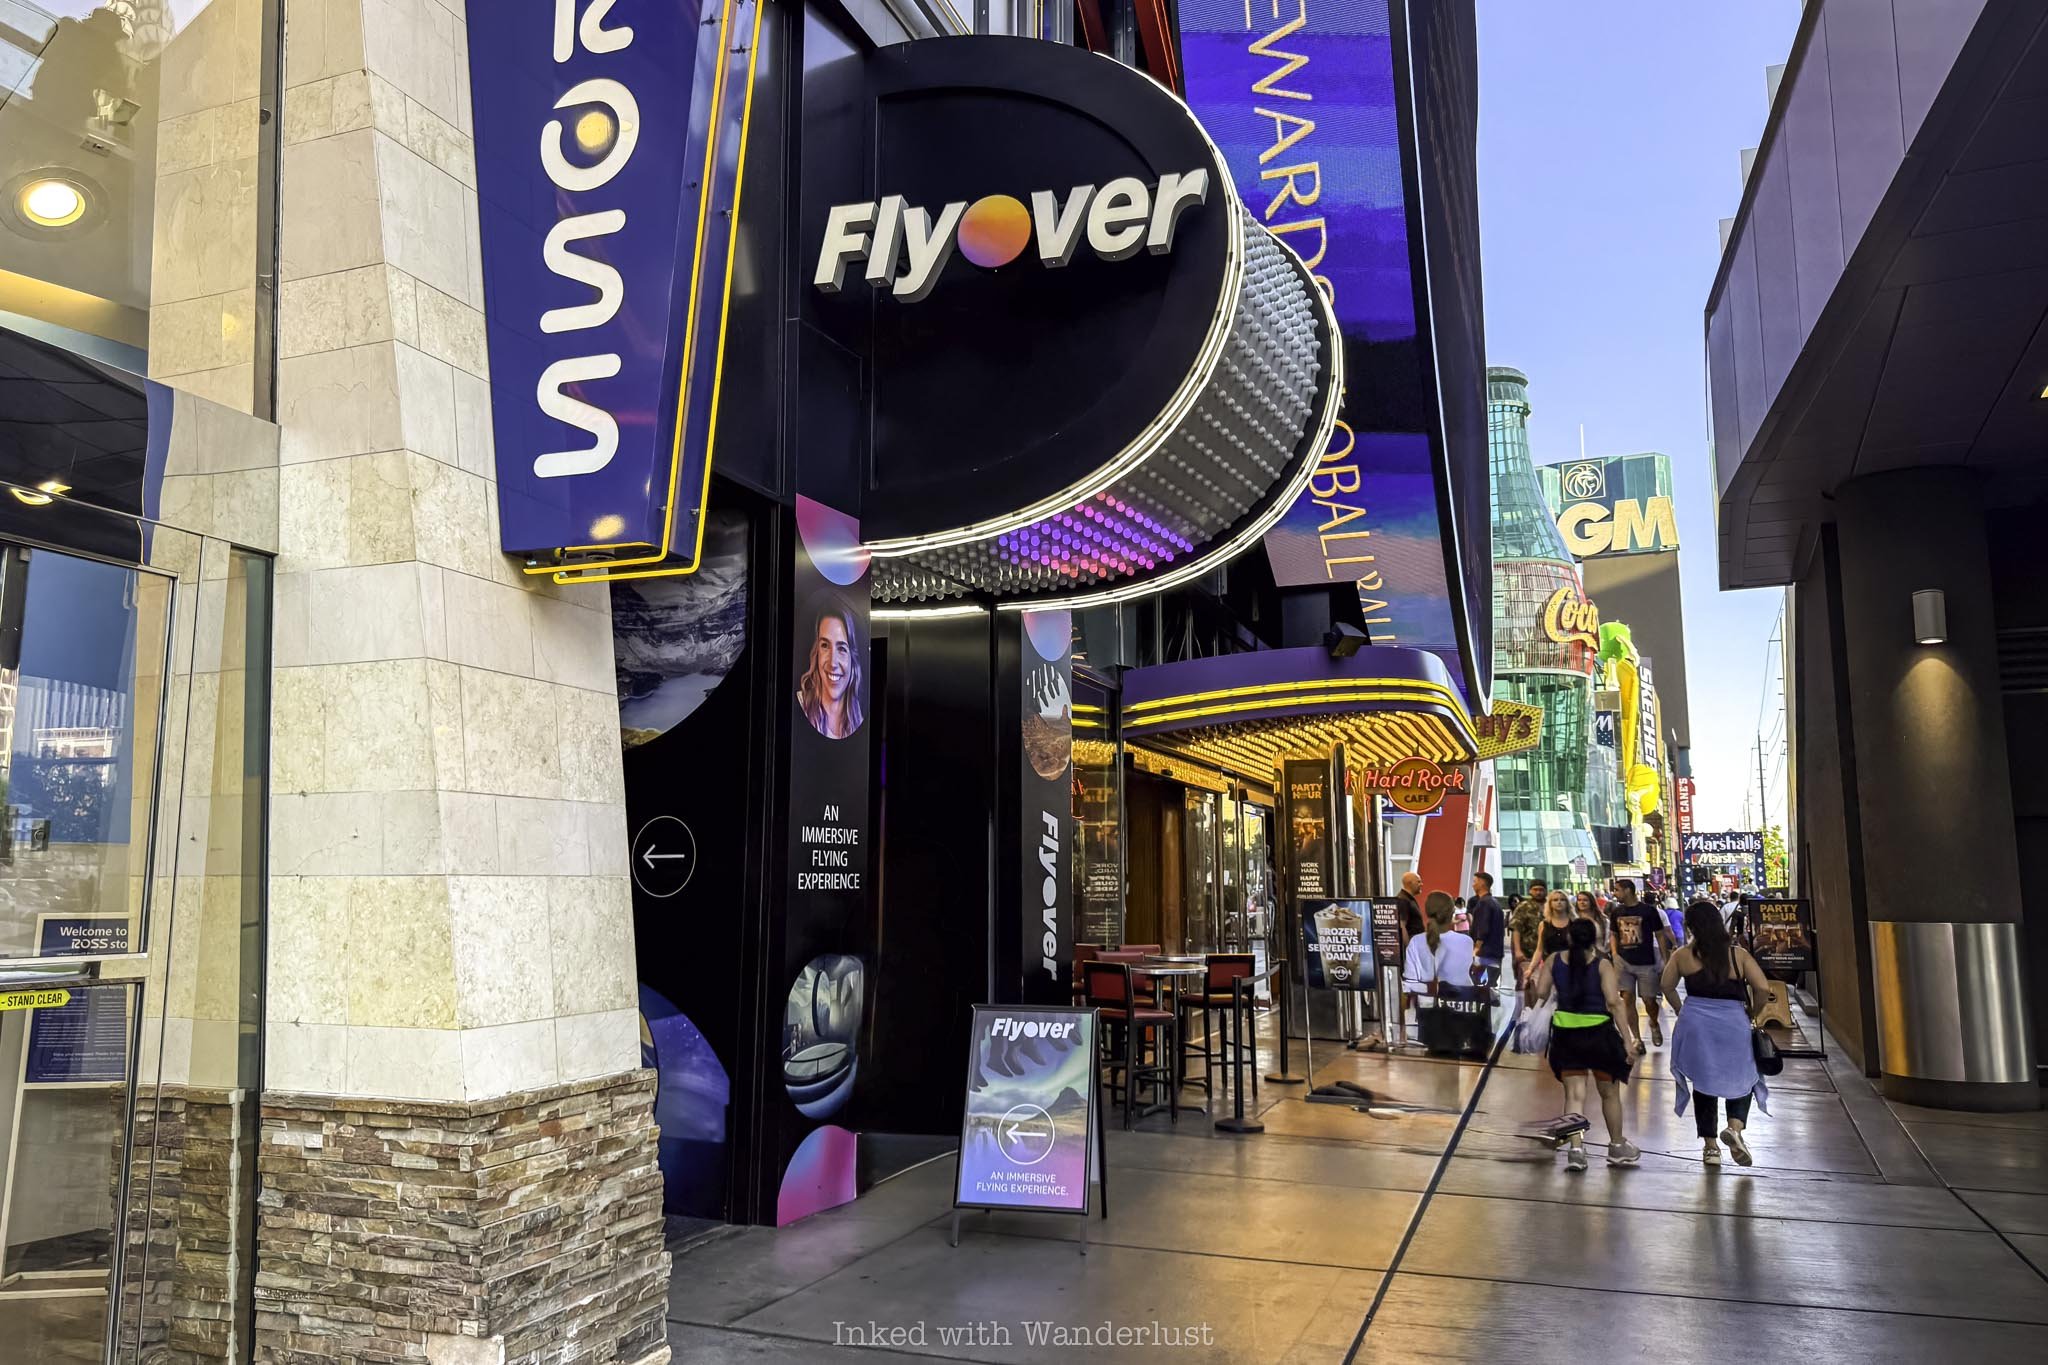
Flyover Las Vegas is located directly on the strip along its eastern side. It’s sandwiched between a Ross store and a Hard Rock Cafe, with MGM Grand being the closest resort and across the street from the New York, New York and Park MGM resorts.
This makes it closest to the southern end of the strip, but within a fairly easy walk from mid-strip. To contextualize, my wife and I were staying at the Flamingo Hotel (almost exactly at the strip’s mid-point) and it took us about twenty minutes to walk there.
From the northern end, it would be a hefty walk. If you’re staying there, I would suggest hopping on the monorail to the MGM Grand and walk from there. Of course, taxies, ride sharing, or driving and parking yourself are also options.
Parking is located in the Showcase Mall parking garage. It’s paid parking, so be prepared. Parking fees depend on several variables, including day of week, time of day, etc. Expect to pay between $15 and $23 per hour.
Tickets can be purchased through several resources, but I recommend booking directly on Flyover’s website. Unfortunately, there are several scammy sites that claim to sell legitimate tickets to many Vegas attractions but ultimately just take your money.
A few legitimate companies do sell Flyover tickets, though. A few include Viator, Vegas.com, Groupon (yes, it does still exist) and Undercover Tourist. You can purchase standalone tickets or as part of a bundle with other area attractions.
Myself, I purchased directly from Flyover and opted for their “Double Experience” ticket. There are several films to choose from and by going with this deal, you save 30%. For example, a single ride costs $39 (online) but with this ticket I paid $54 for two.
Your options for films are:
Legendary Iceland
Wonders of the American West
Believe Chicago
Call of the Canadian Rockies

Additionally, you’ll receive an additional discount ($10 or so) by being a Nevada resident. Don’t end up paying more at the gate by taking advantage of this option and NOT being a resident. They do check identification when you check in.
Another way to pay less is to purchase your tickets online ahead of time. Flyover offers discounts to those who purchase ahead of time rather than purchasing at the gate. Additionally, you can opt for their VIP option, which also includes two rides but offers one drink and skip-the-line privileges as well.
Furthermore, when purchasing your tickets, you’ll have to select your preferred arrival time as rides only begin at certain times. Be sure you’re on time. You can always arrive early and enjoy a drink at their on-site bar.
My Experience at Flyover
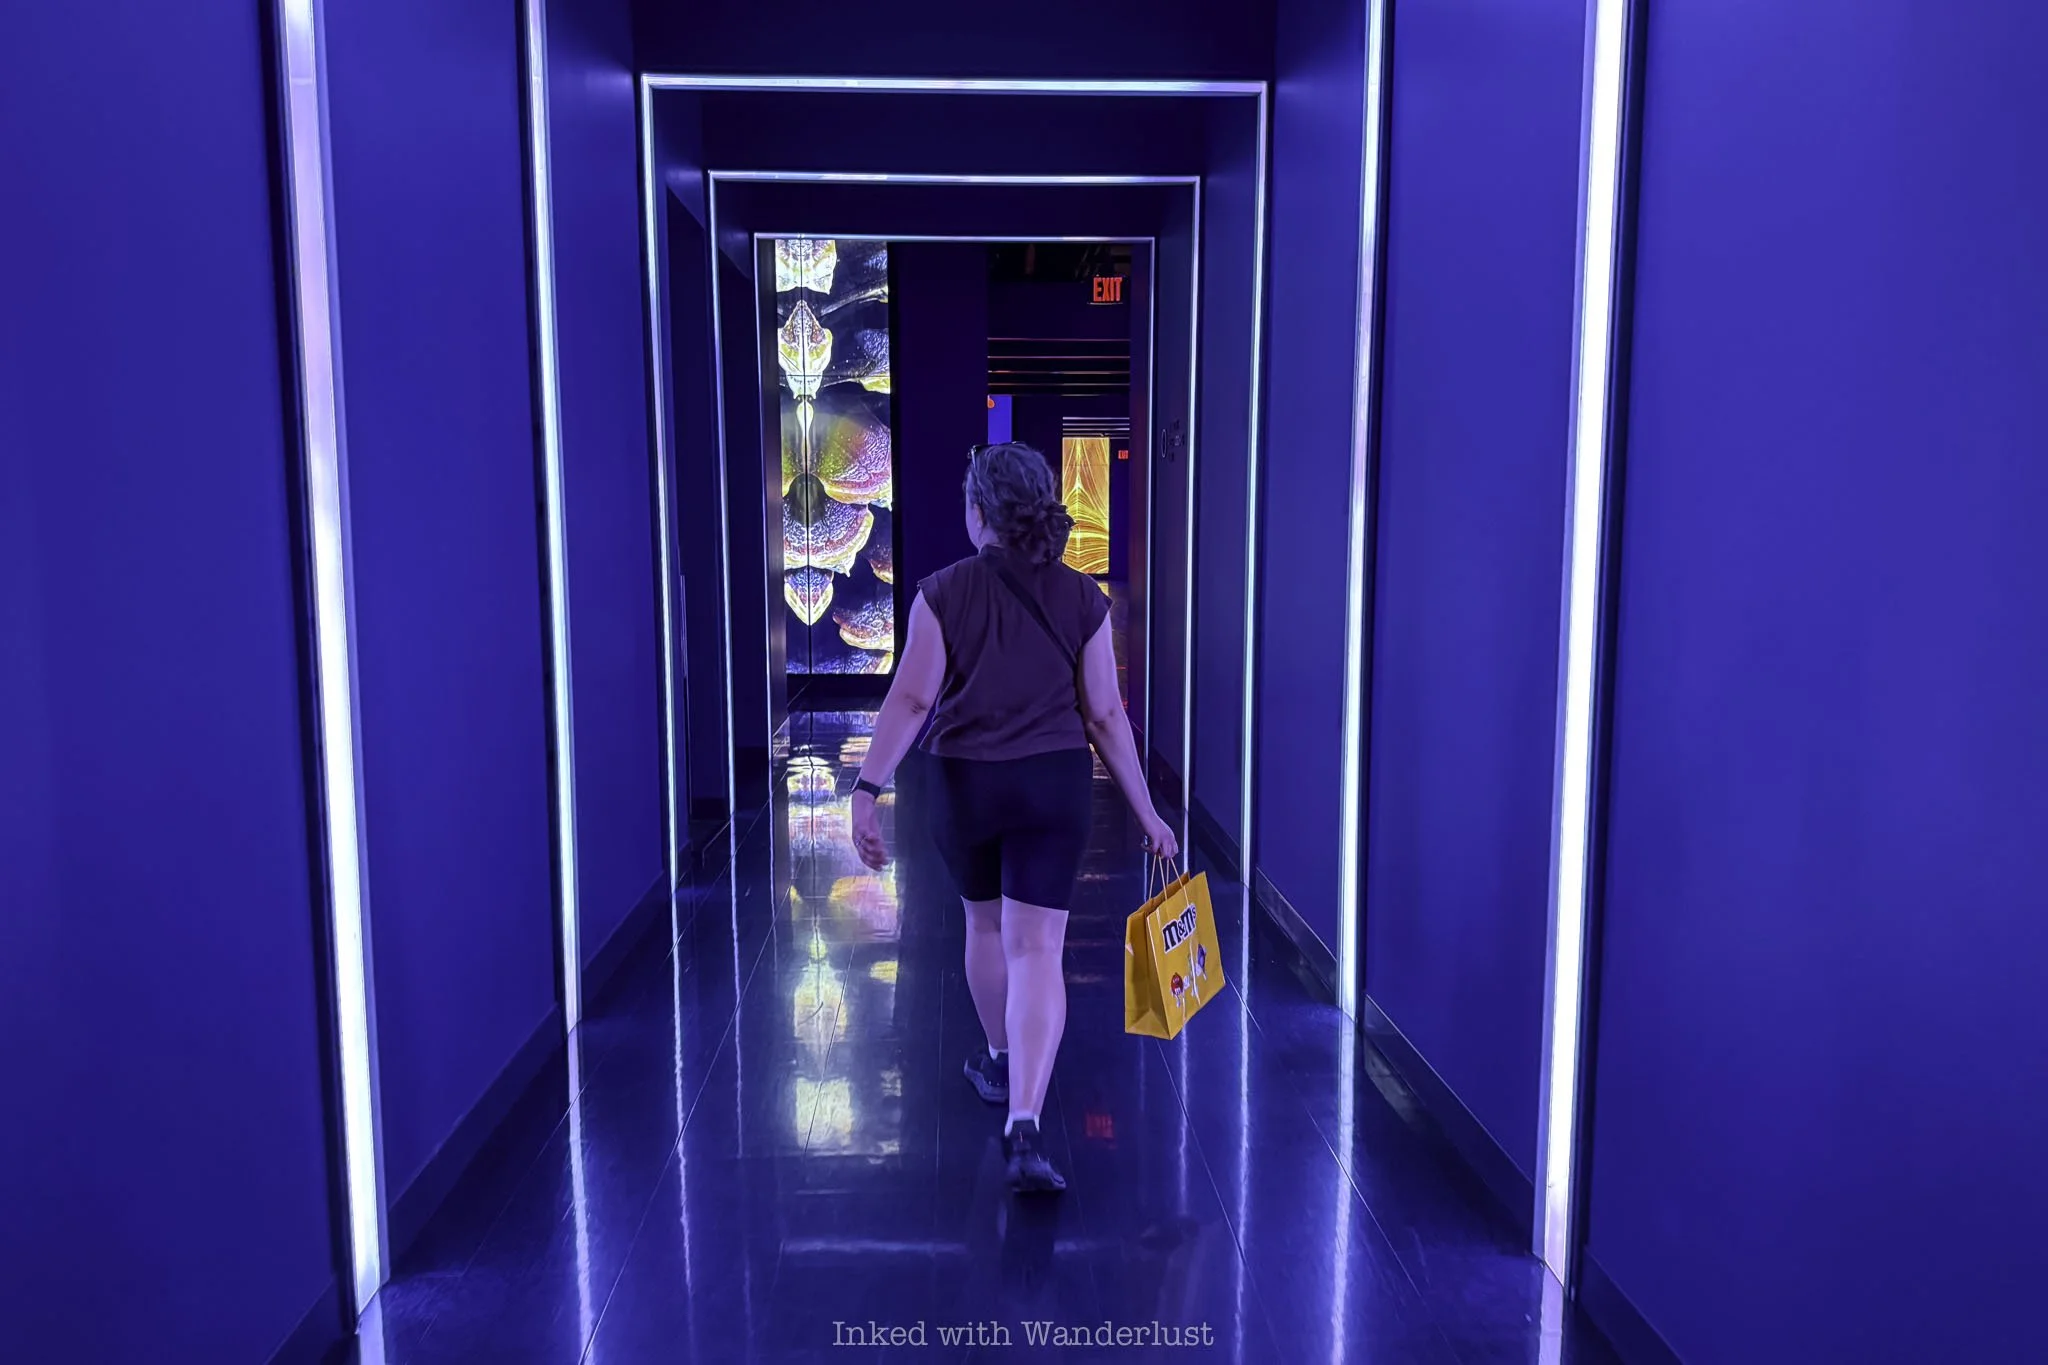
My wife and I arrived about fifteen minutes before our first scheduled ride. We entered through the strip-facing entrance and walked through a series of color-illuminated hallways before coming into the building’s atrium.
The first notable feature was the on-site bar. To the left of the bar is the entrance to the ride’s queue. Just beyond the bar is the gift shop and also where you can purchase tickets, if needed. Directly to your left will be lockers where you can store your belongings (not mandatory).
If you’re driving yourself here, this is where you’ll enter via the elevator (to the right of the bar) from the parking garage. We had some time to kill before our ride so my wife and I enjoyed a drink and some hilarious conversation with the friendly bartender.
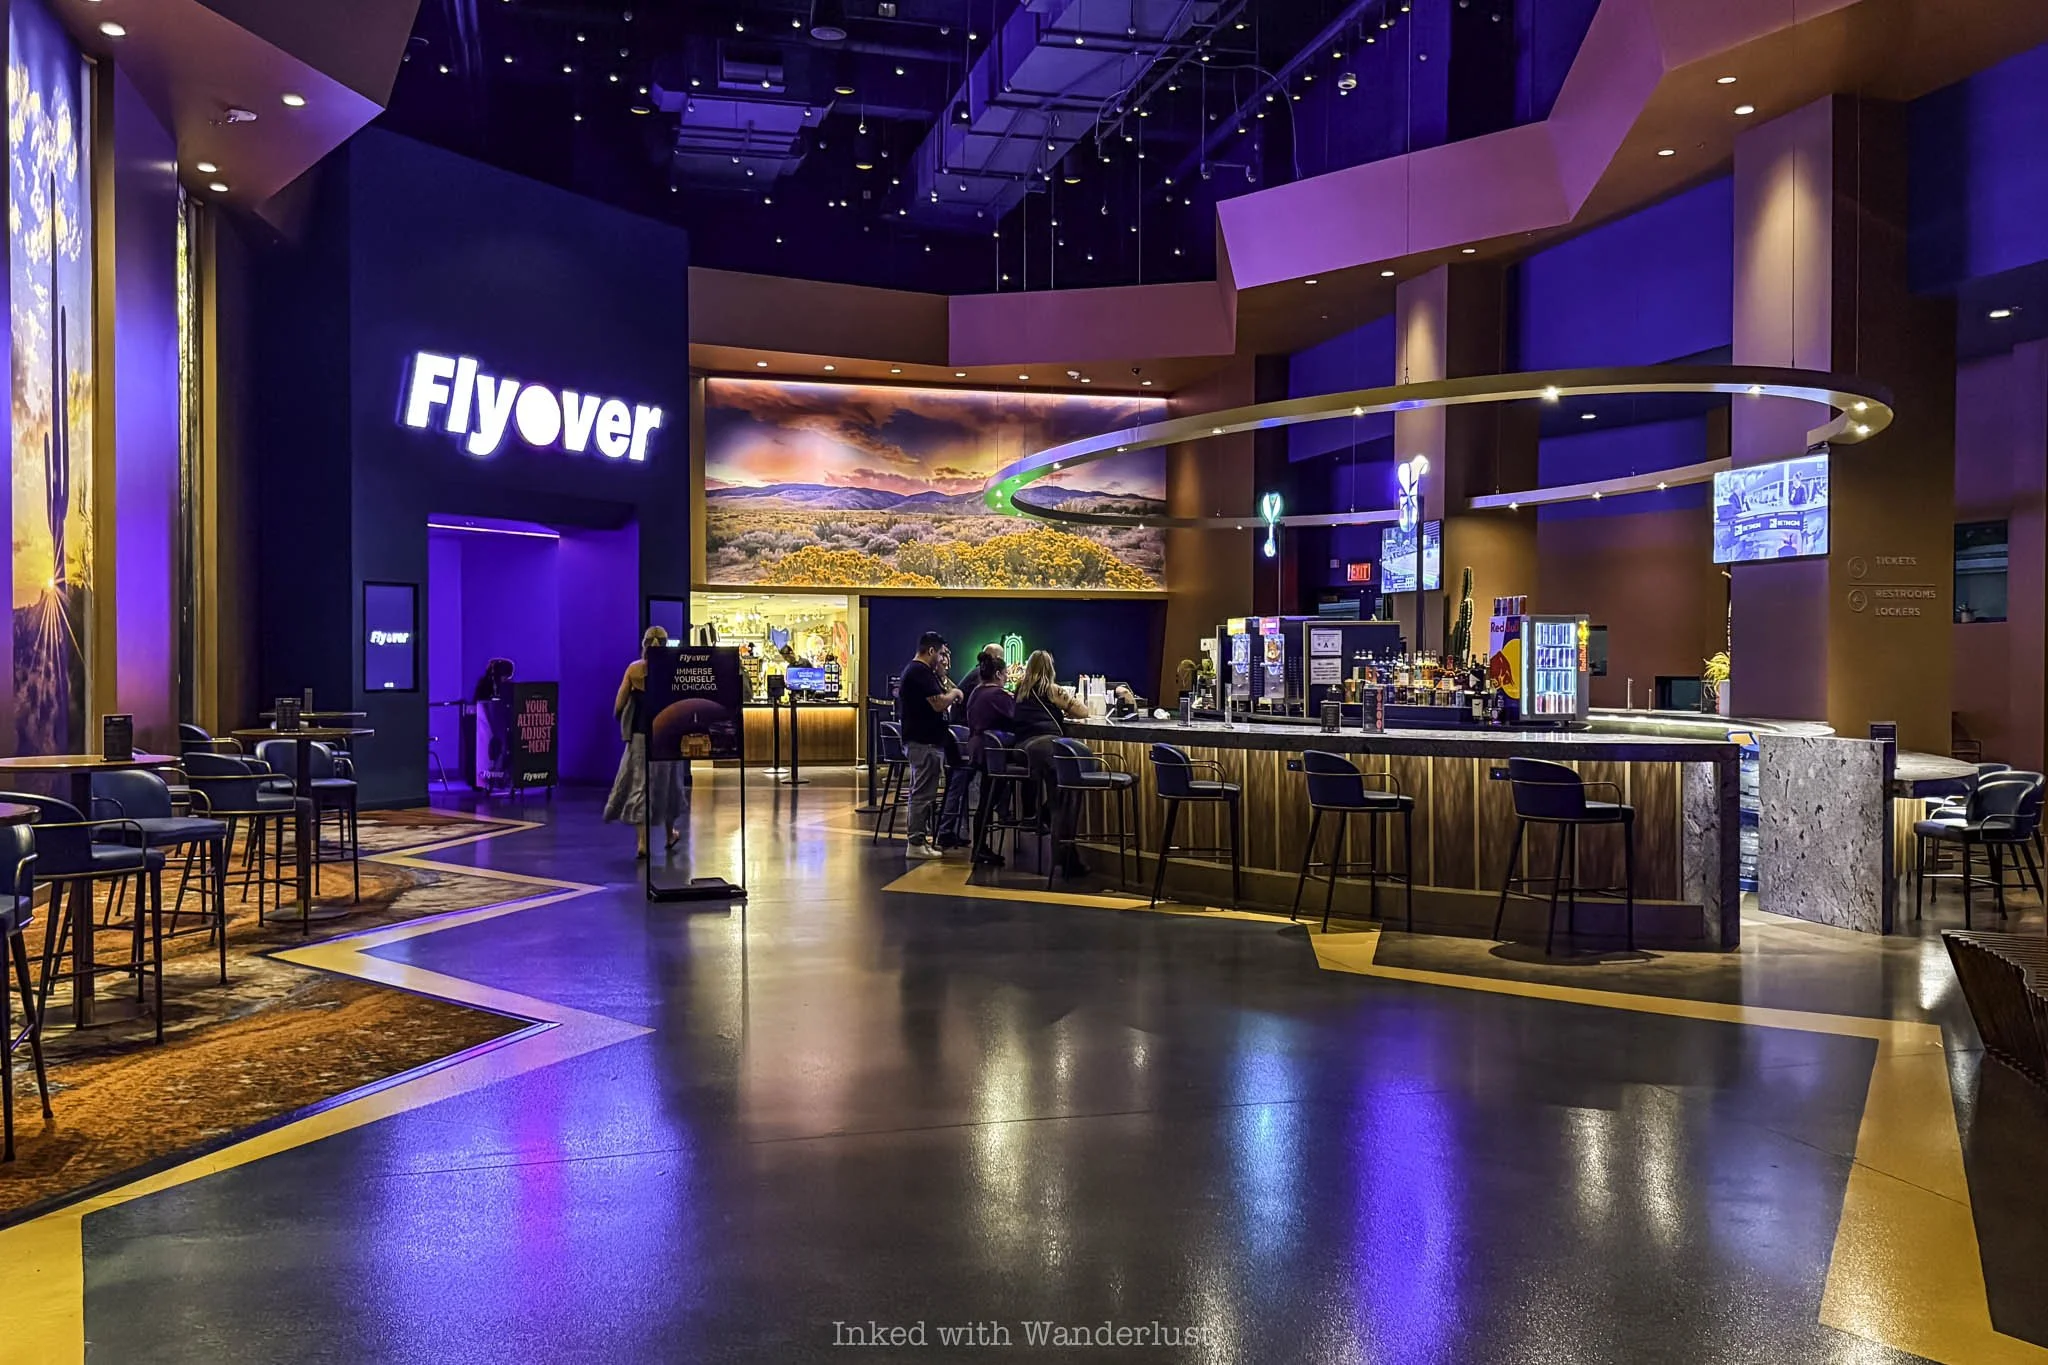
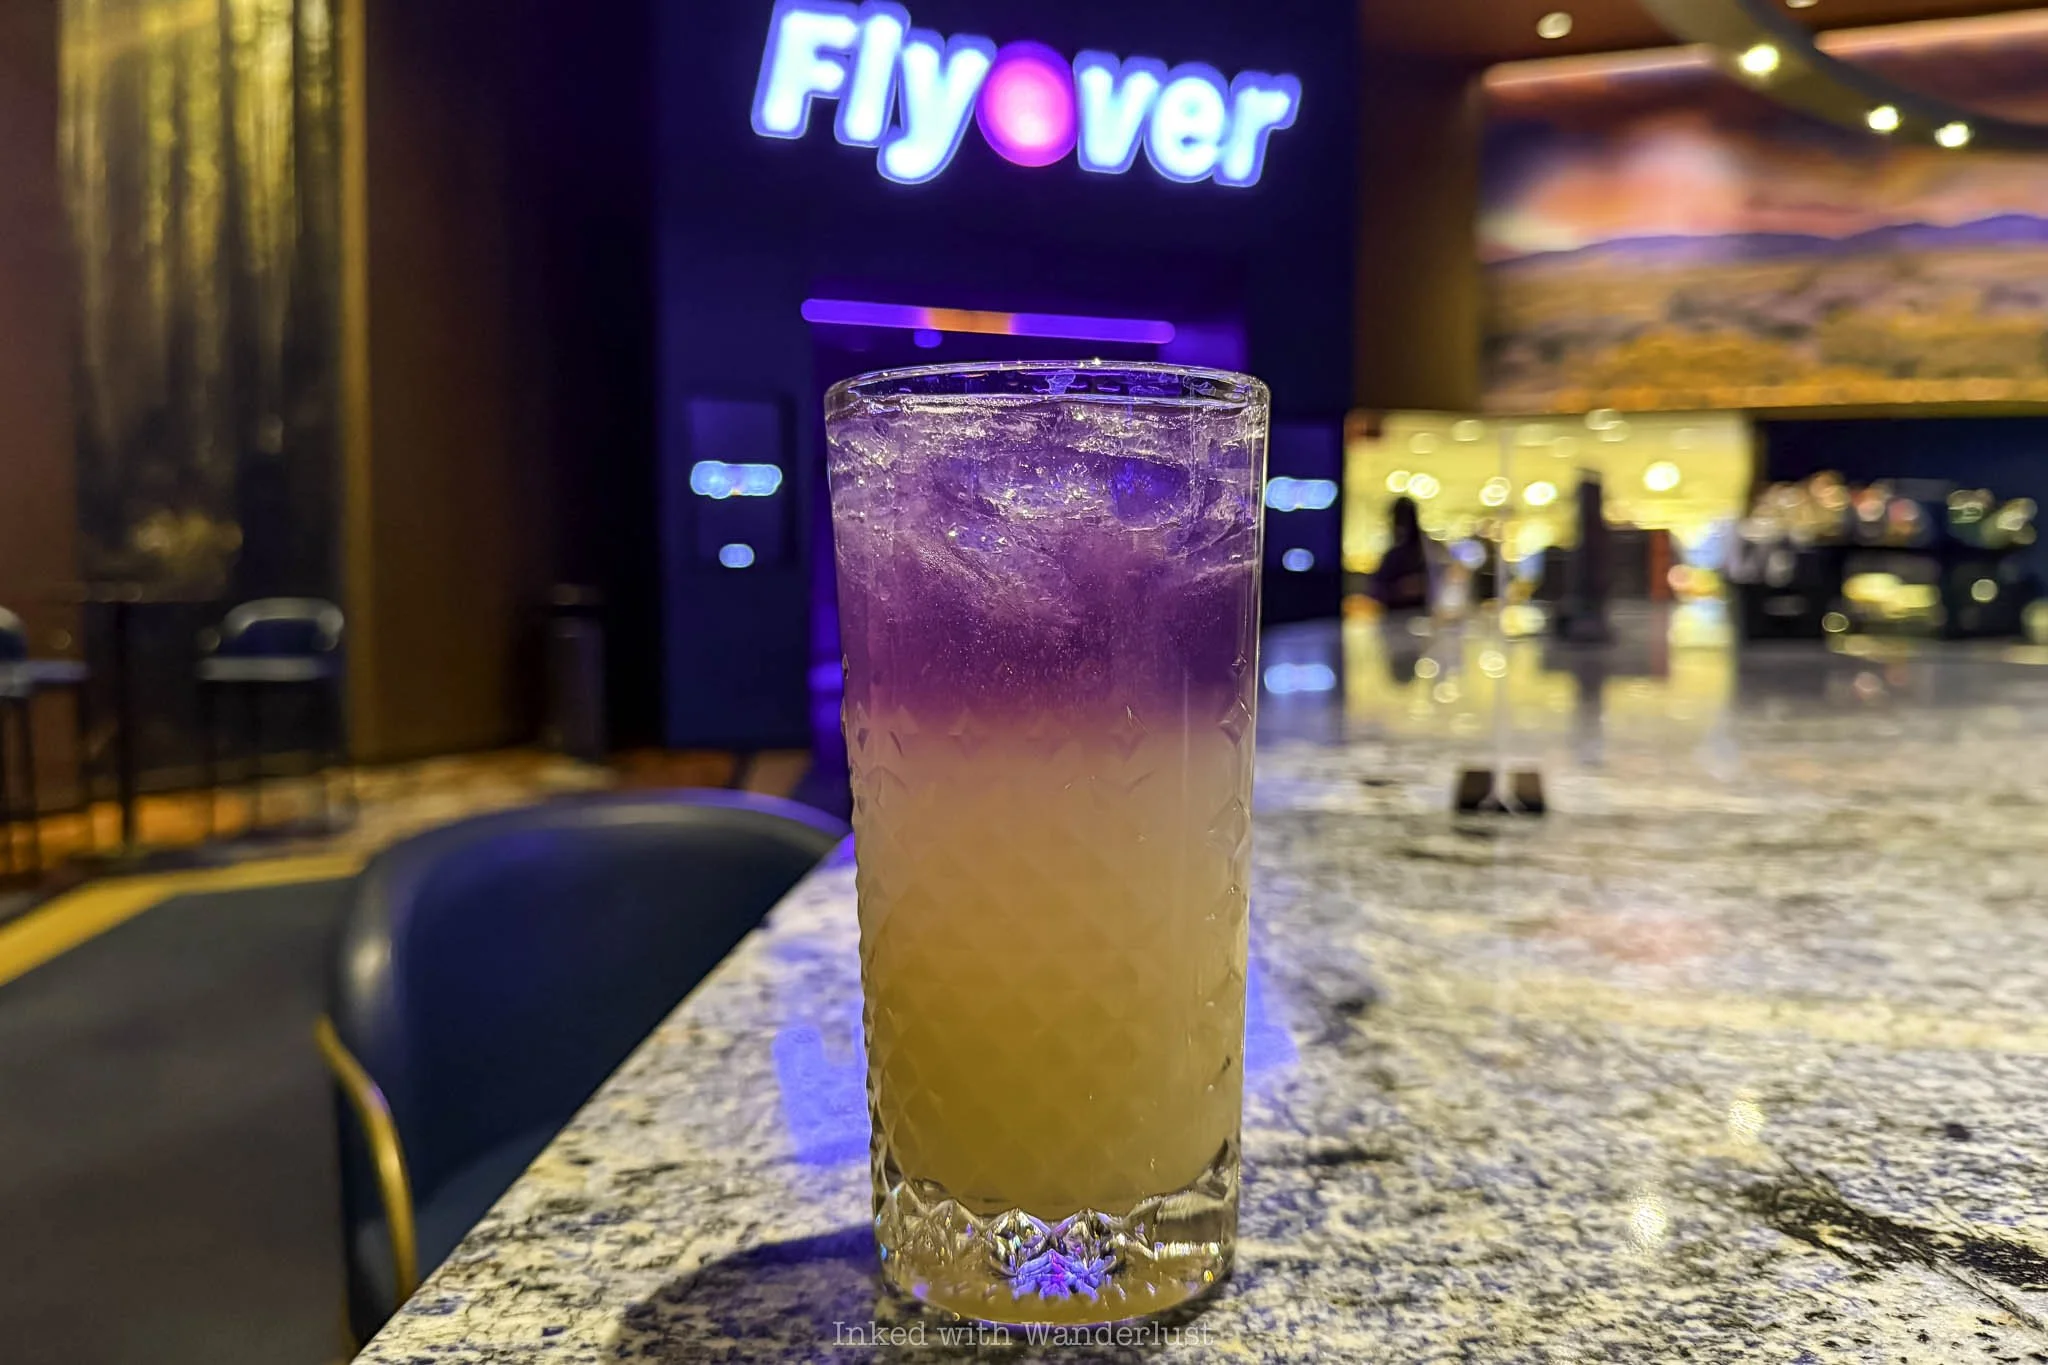
I was in Las Vegas in early May for punk band No Doubt’s residency performance at The Sphere. This time of year is a pretty good time to go, crowd and weather-wise. As a result, we were two of just half a dozen or so people at Flyover.
When it came time for our first ride, we paid our tab and headed over to the queue. There, the friendly staff member scanned our tickets and explained to us what to expect. We then began a lengthy walk through an empty queue to the first holding area.
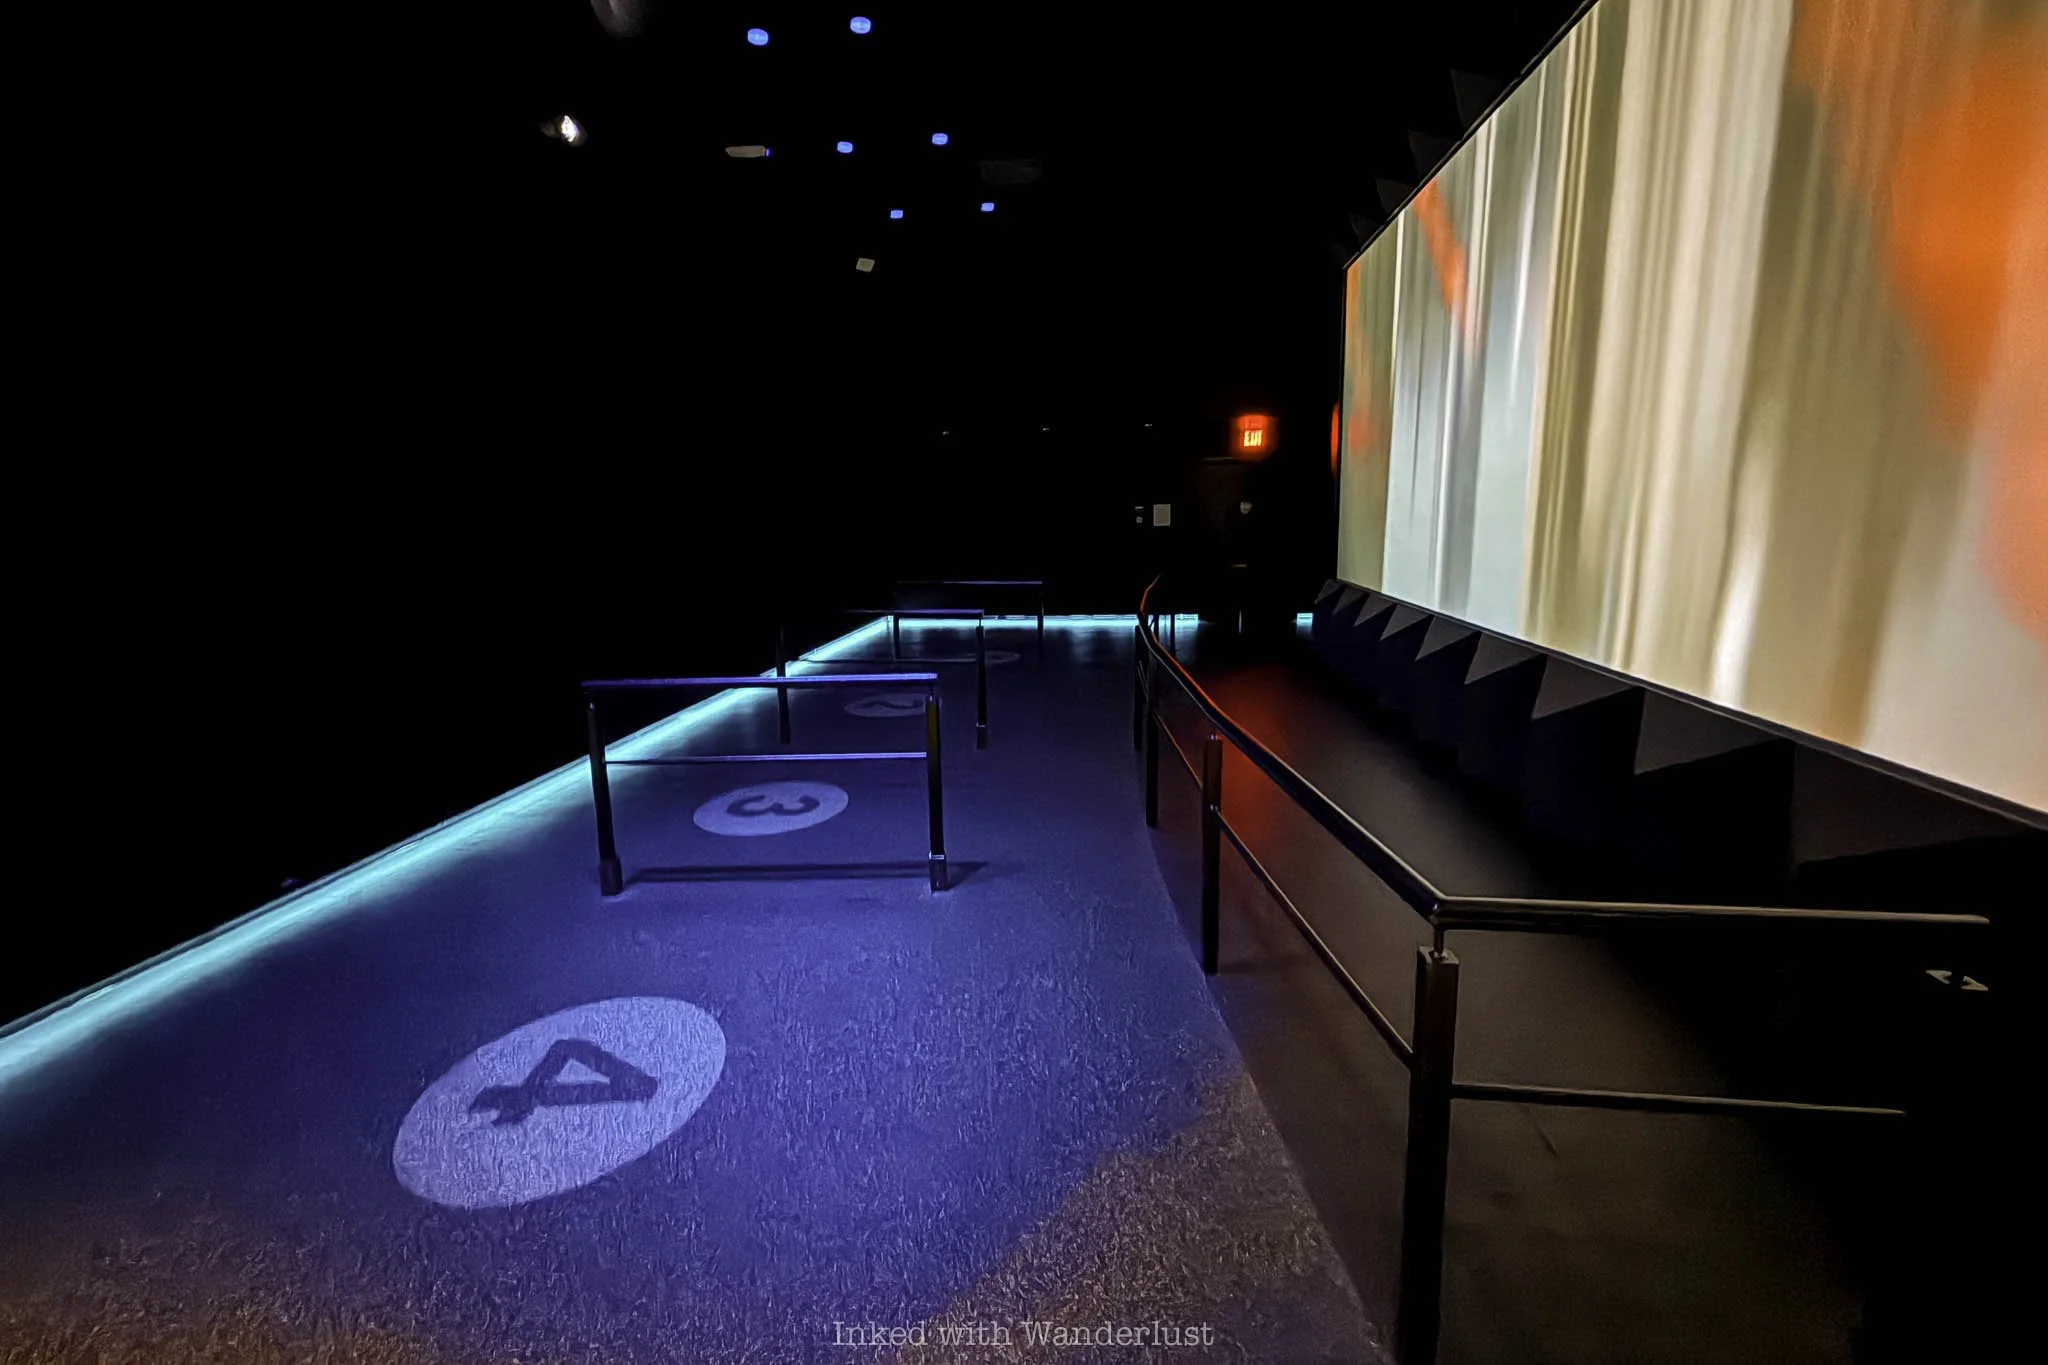
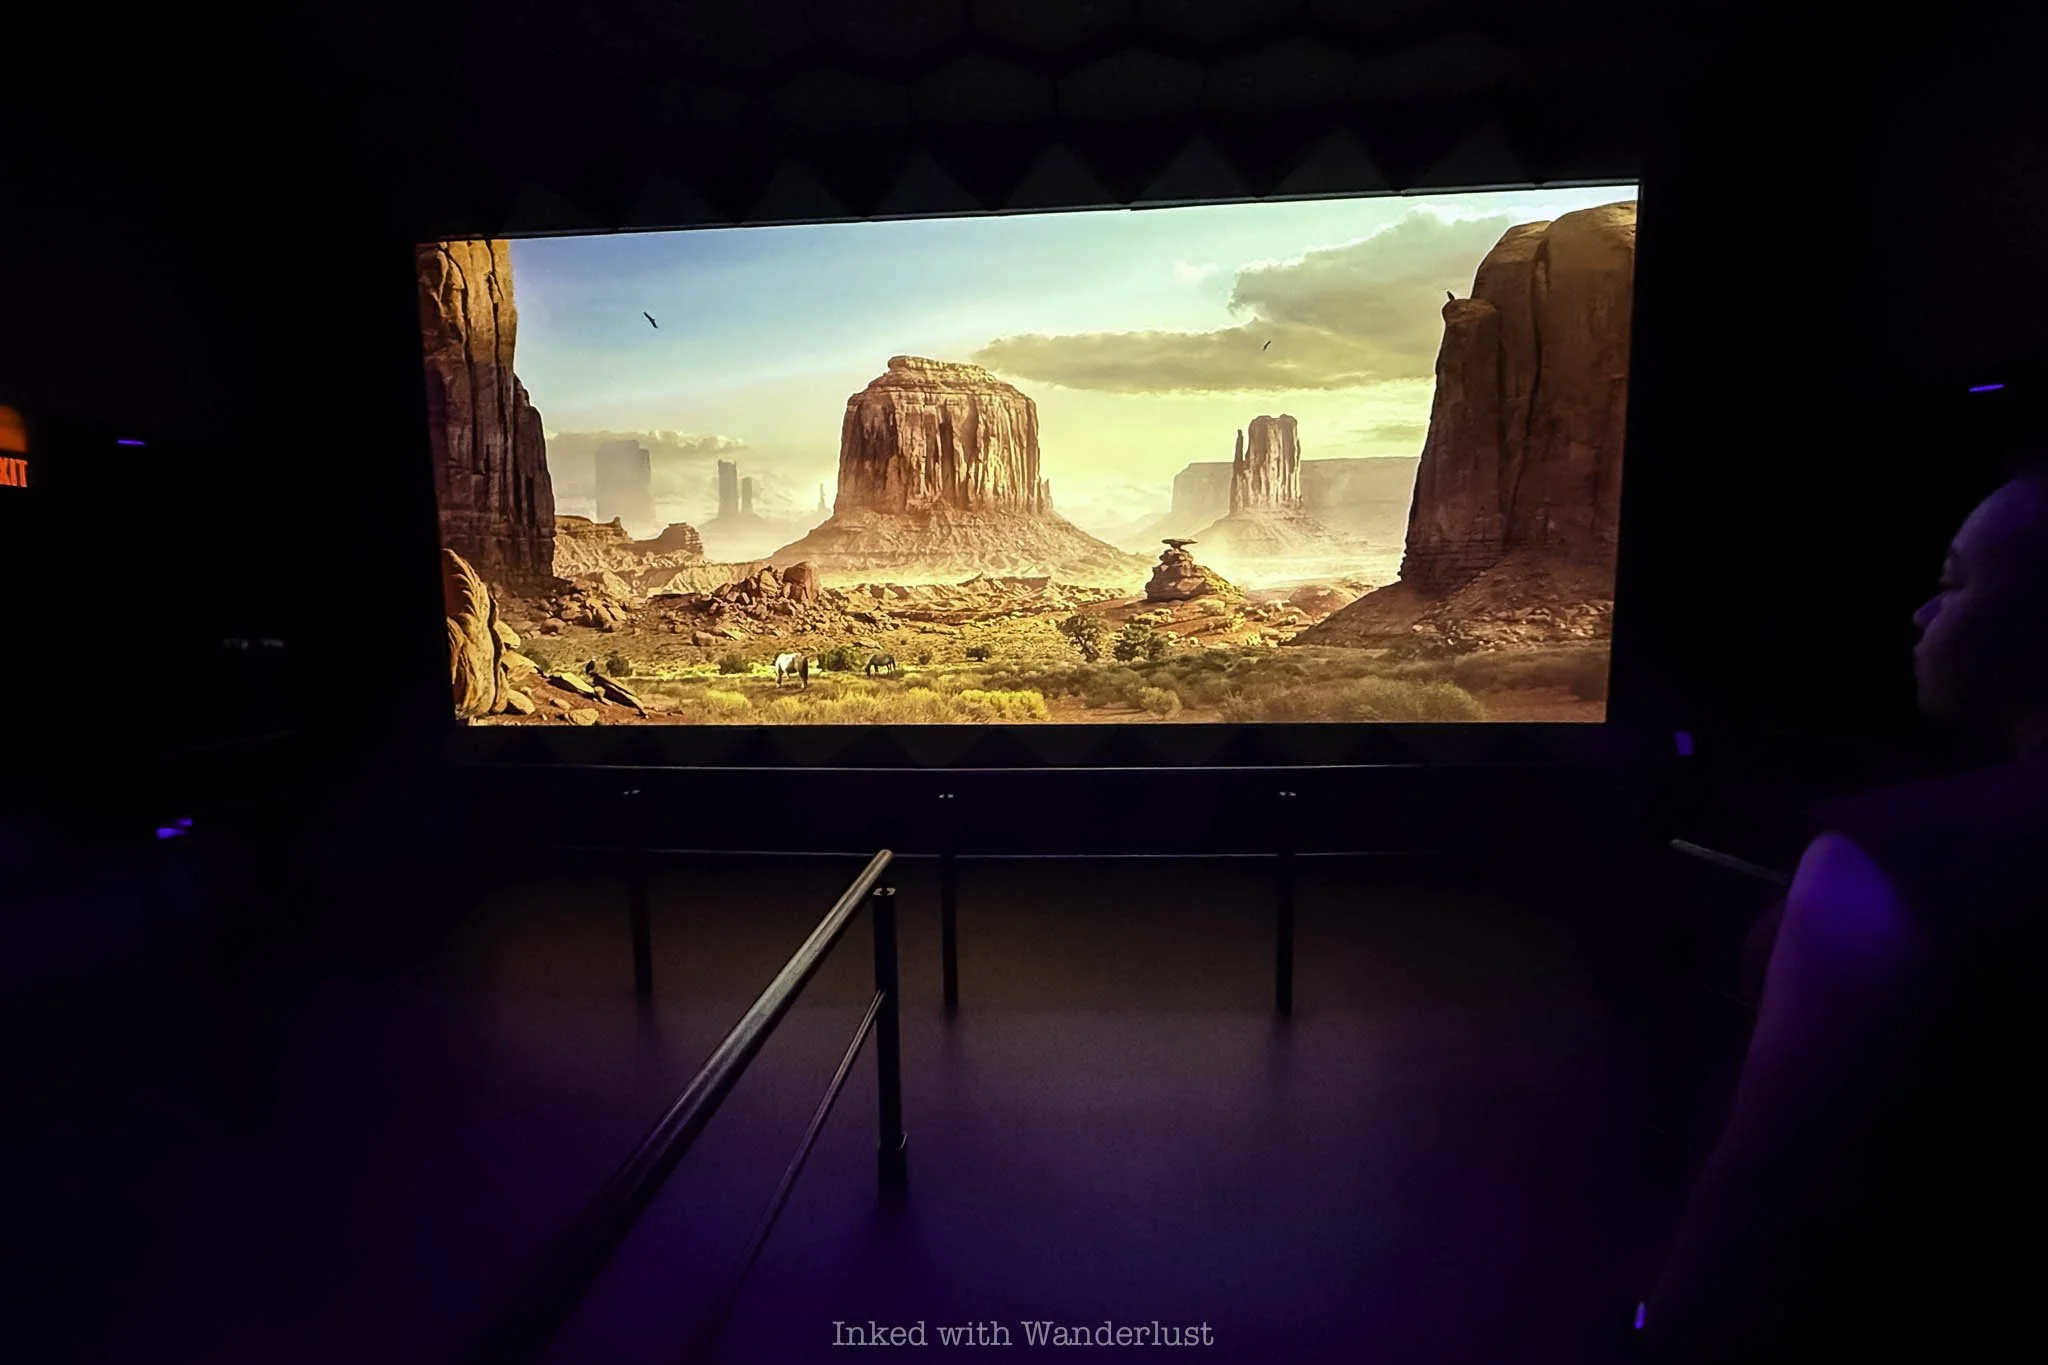
When you come into the room you’ll take notice of the numbers on the ground and rails between them. A staff member will assign you a number and you’ll then go to that space. According to our bartender, if it’s busy, they’ll put up to ten people in each space.
This is where we watched the first of two presentation videos, the content of which will depend on your choice of ride theme. For our “Double Experience” ticket, we chose “Wonders of the American West” and “Believe Chicago”.
In this case, our first ride was the former. You’ll be given basic safety instructions and be shown examples of scenes you’ll be flying through. I don’t remember the video’s exact length, but it couldn’t have been more than five minutes.
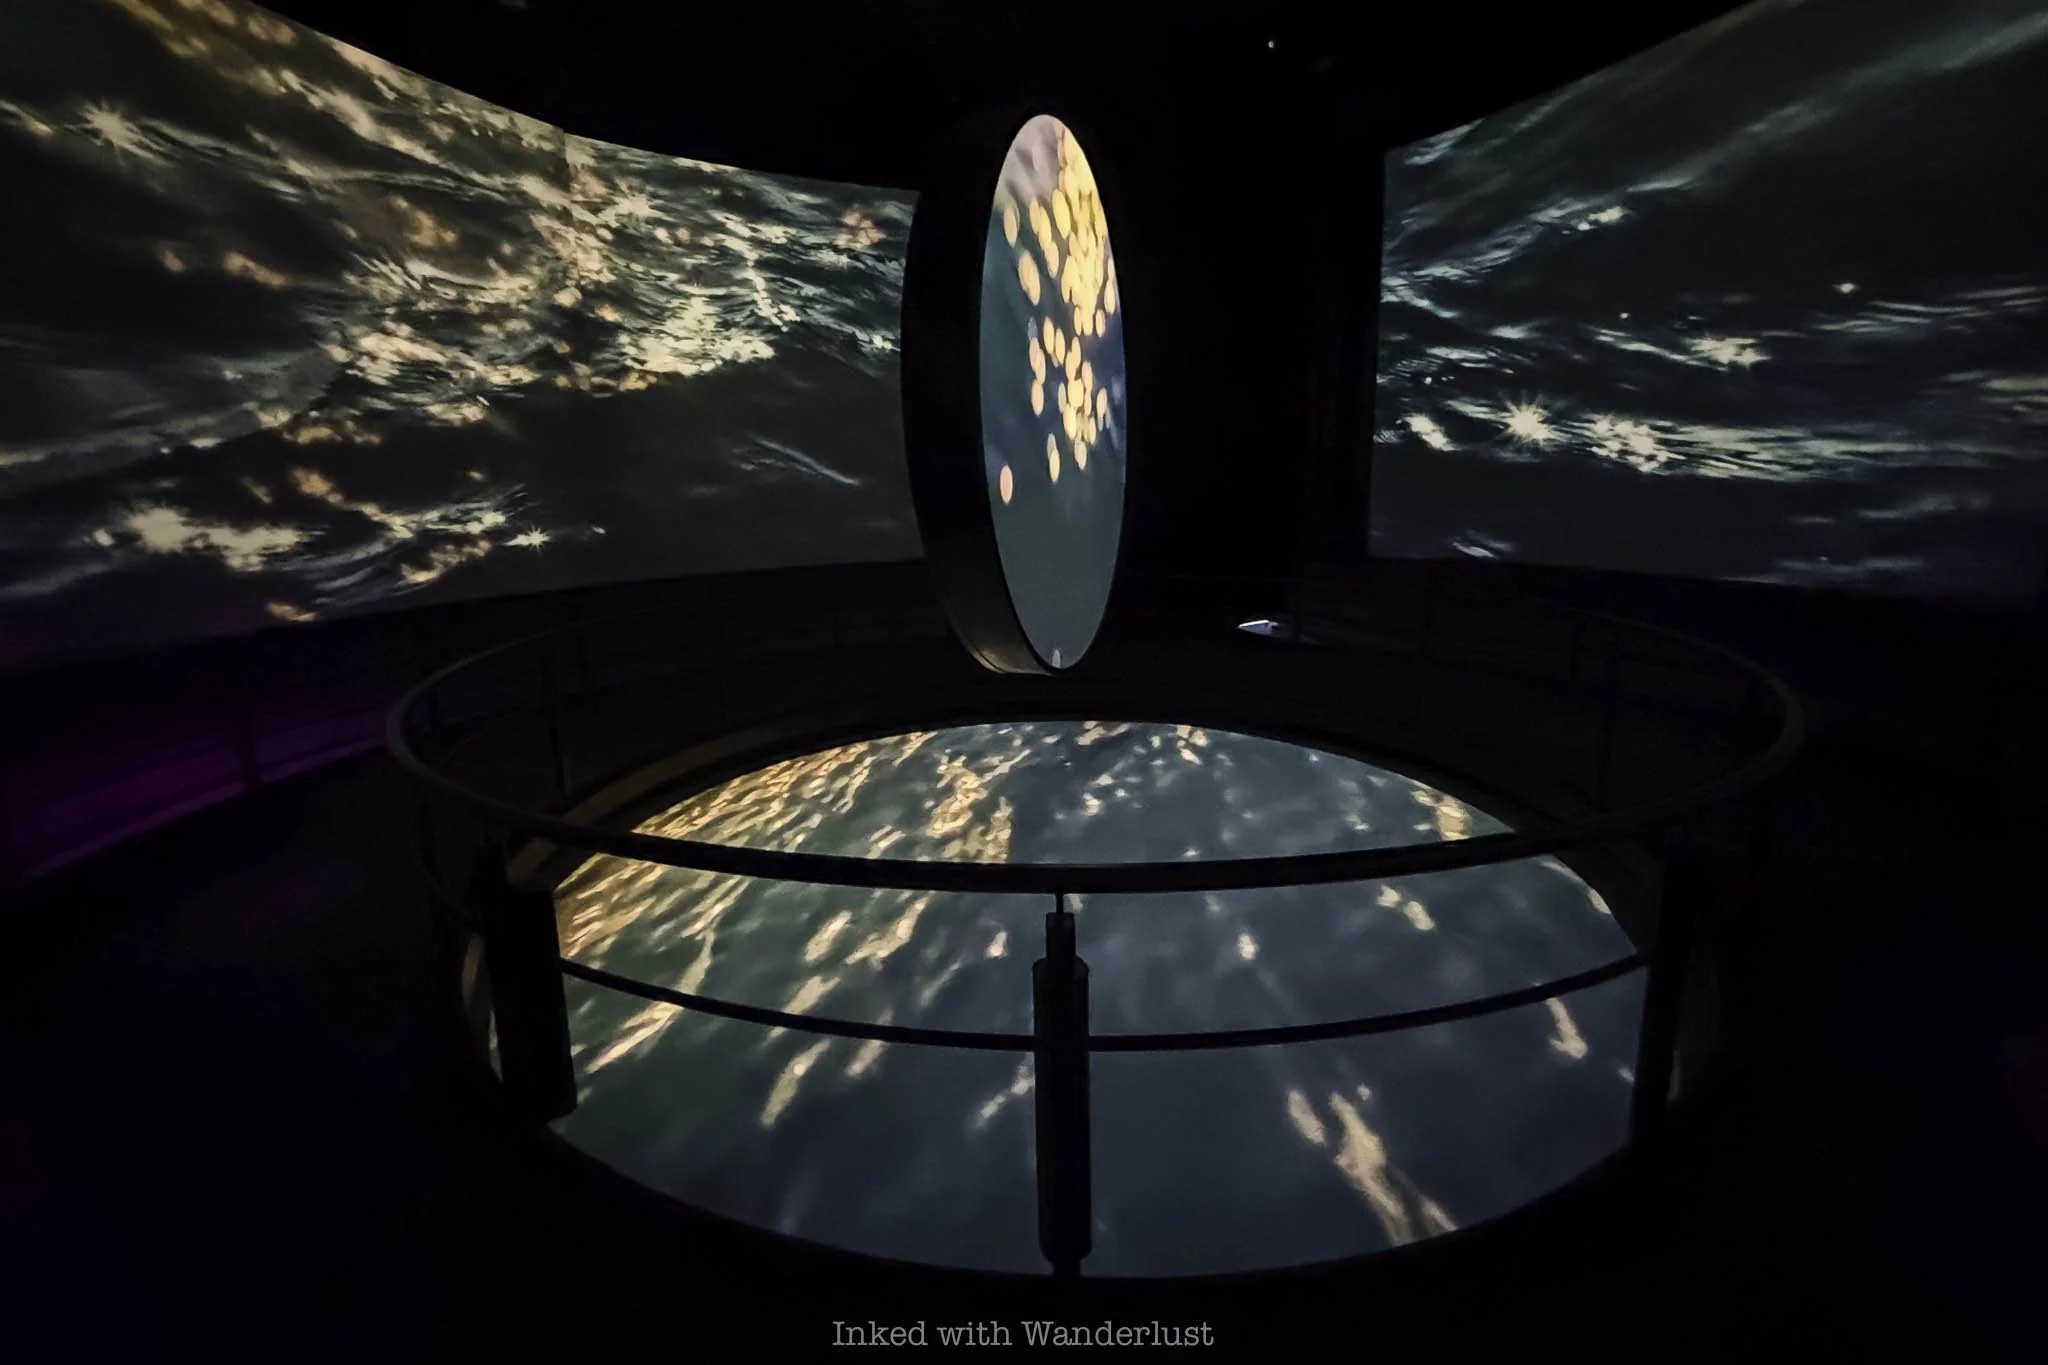
At the conclusion of the first video, we were lead into yet another showroom, this one with more screens and a central oval-shaped screen display. This video is longer (roughly ten or twelve minutes). It articulates the history, development and highlights of the theme you selected.
After a brief safety spiel by a staff member, we were then taken into the theatre where the ride vehicle is located. If you’ve ridden Disneyland’s “Soarin” attraction, you’ll undoubtedly recognize the ride vehicle as it’s virtually the same thing.
In fact, the creative director behind Flyover is former Disney imagineer Rick Rothschild, who developed the films used in the original Soarin’ attraction. Mark Sumner, who invented the ride mechanics for Soarin’ using an old Erector set, is not involved with Flyover.
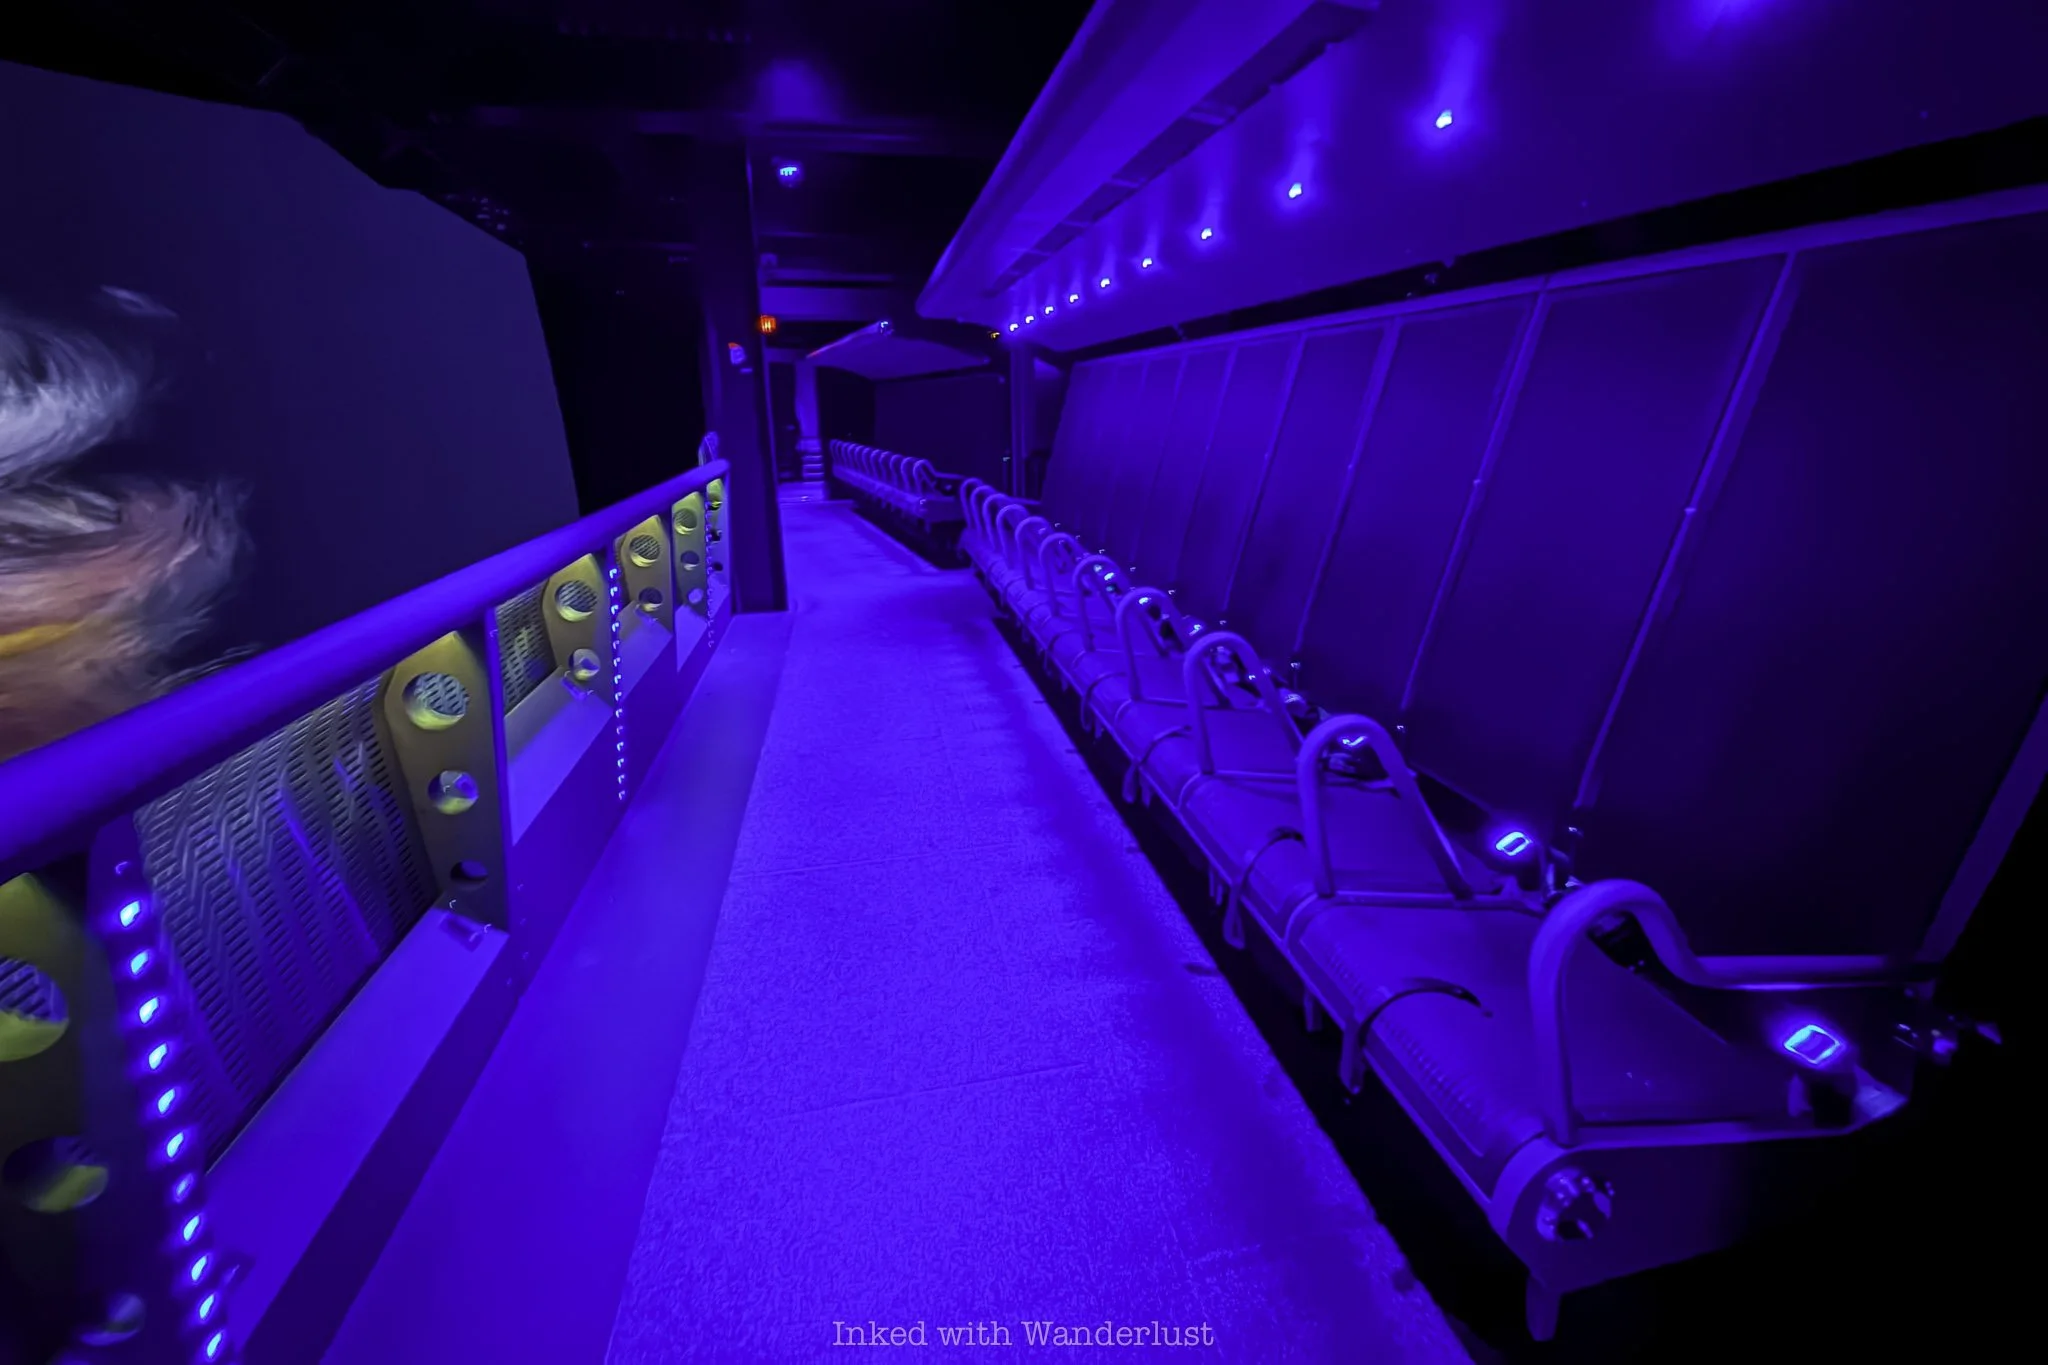
There is no recording or photos allowed while the ride is in progress, thus, I don’t have any to show you. Therefore, I’ll do my best to articulate the ride and what to expect while you’re on it. Again, if you’ve ridden Soarin’ at Disneyland or Epcot, you’ll need no help from me.
Once you’ve been strapped in and checked by a staff member, you’re lifted into the air in front of a massive spherical screen. You’re not lifted very high, maybe thirty to forty feet off the ground. However, it feels much higher once the video begins.
The ride mechanics give you a sense of gliding in the air over multiple locations using several sensory tricks. The weightless feeling comes from the motion-based mechanics above you while synchronized wind effects, misters, scents and audio complete the sensation rather convincingly.
I cannot recall, nor did I recognize, every scene we glided through. There were twenty-two scenes all together. However, a handful of a few I can recall include:
California Coast (Big Sur, Monterey, etc)
Las Vegas Strip
Bonneville Salt Flats
Grand Canyon
Zion National Park
Yellowstone National Park
Monument Valley
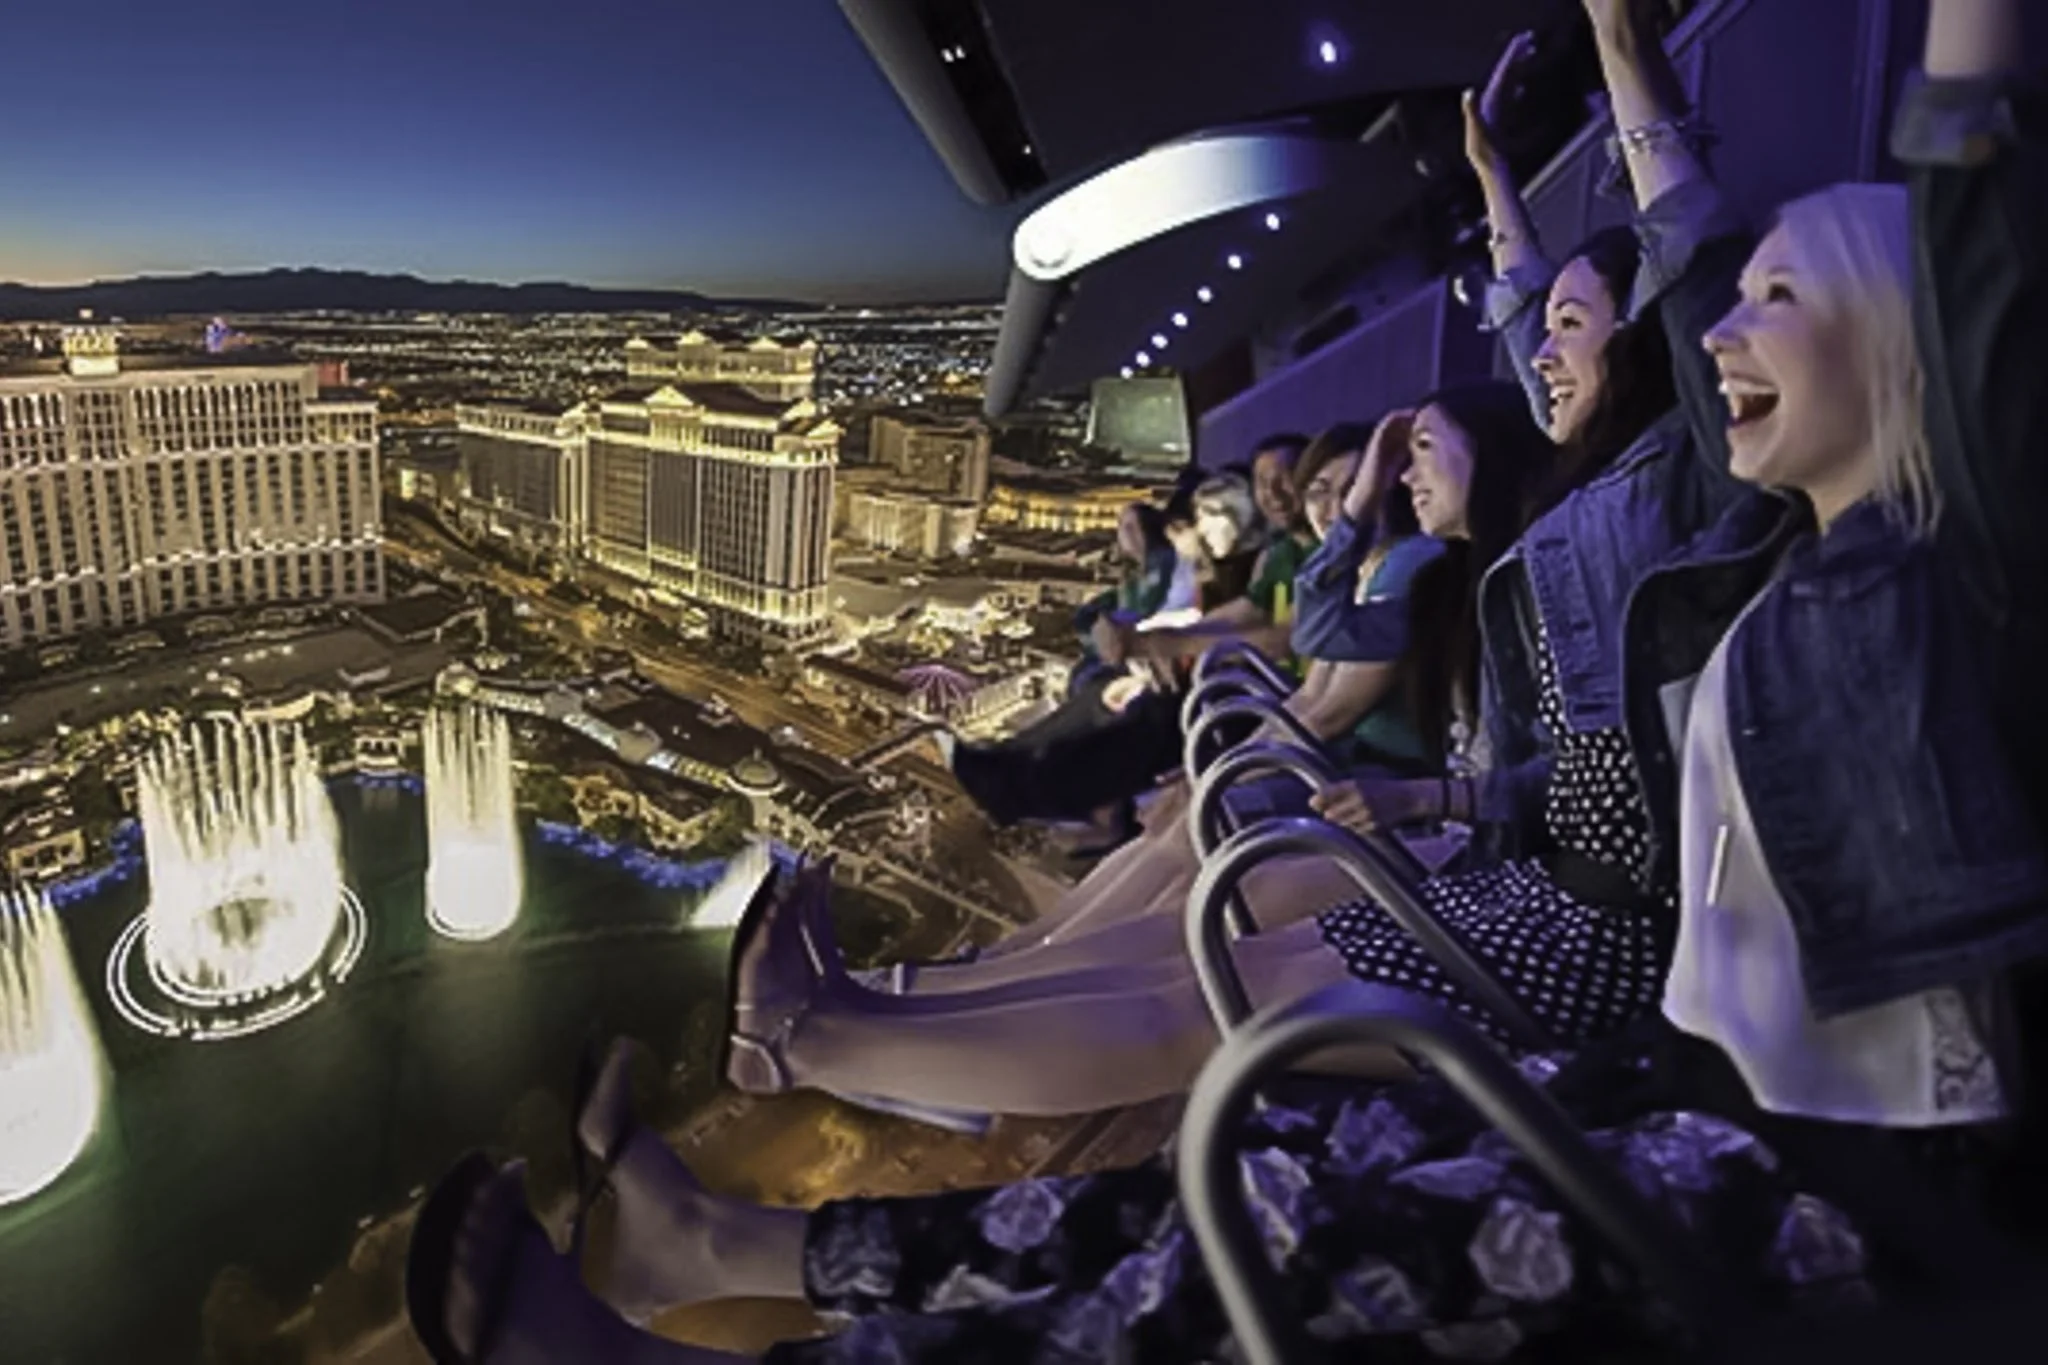
Unlike their counterpart at Disneyland, there’s a bit of a thrill element at Flyover. It’s nothing extreme, but during one scene we were “gliding” above the Nevada desert aside several military jets. When the jets began to barrel roll, we seemingly followed suit.
Now, we didn’t actually go upside down (this is a family-friendly attraction). However, using the motion platform above our chairlift-style seats and a vibration effect, as well as the video itself, we were excellently and convincingly given the feeling that we were, in fact, barrel rolling.
Both of the rides we took were between nine and ten minutes in length, nearly double that of Disney’s. When your ride is finished, you’ll simply head out the exit and through the photo station and gift shop. If you’re riding again, check with the attendant on when your ride starts.
There are many other attractions, shops, restaurants and lounges nearby if you’re looking for more to do. A short walk from Flyover is one of my favorite pizzas on the strip, “How ya Dough’n”, which is on the top level of the BLVD complex.
The M&M and Coca Cola stores are both nearby, as well as "Titanic: The Artifact Exhibition” museum at the Luxor (one of my personal favorites). Or you can take the short walk across the strip to the Cosmopolitan and enjoy a drink or two at the “Ski Lodge” speakeasy.
Is Flyover Worth it for Kids?
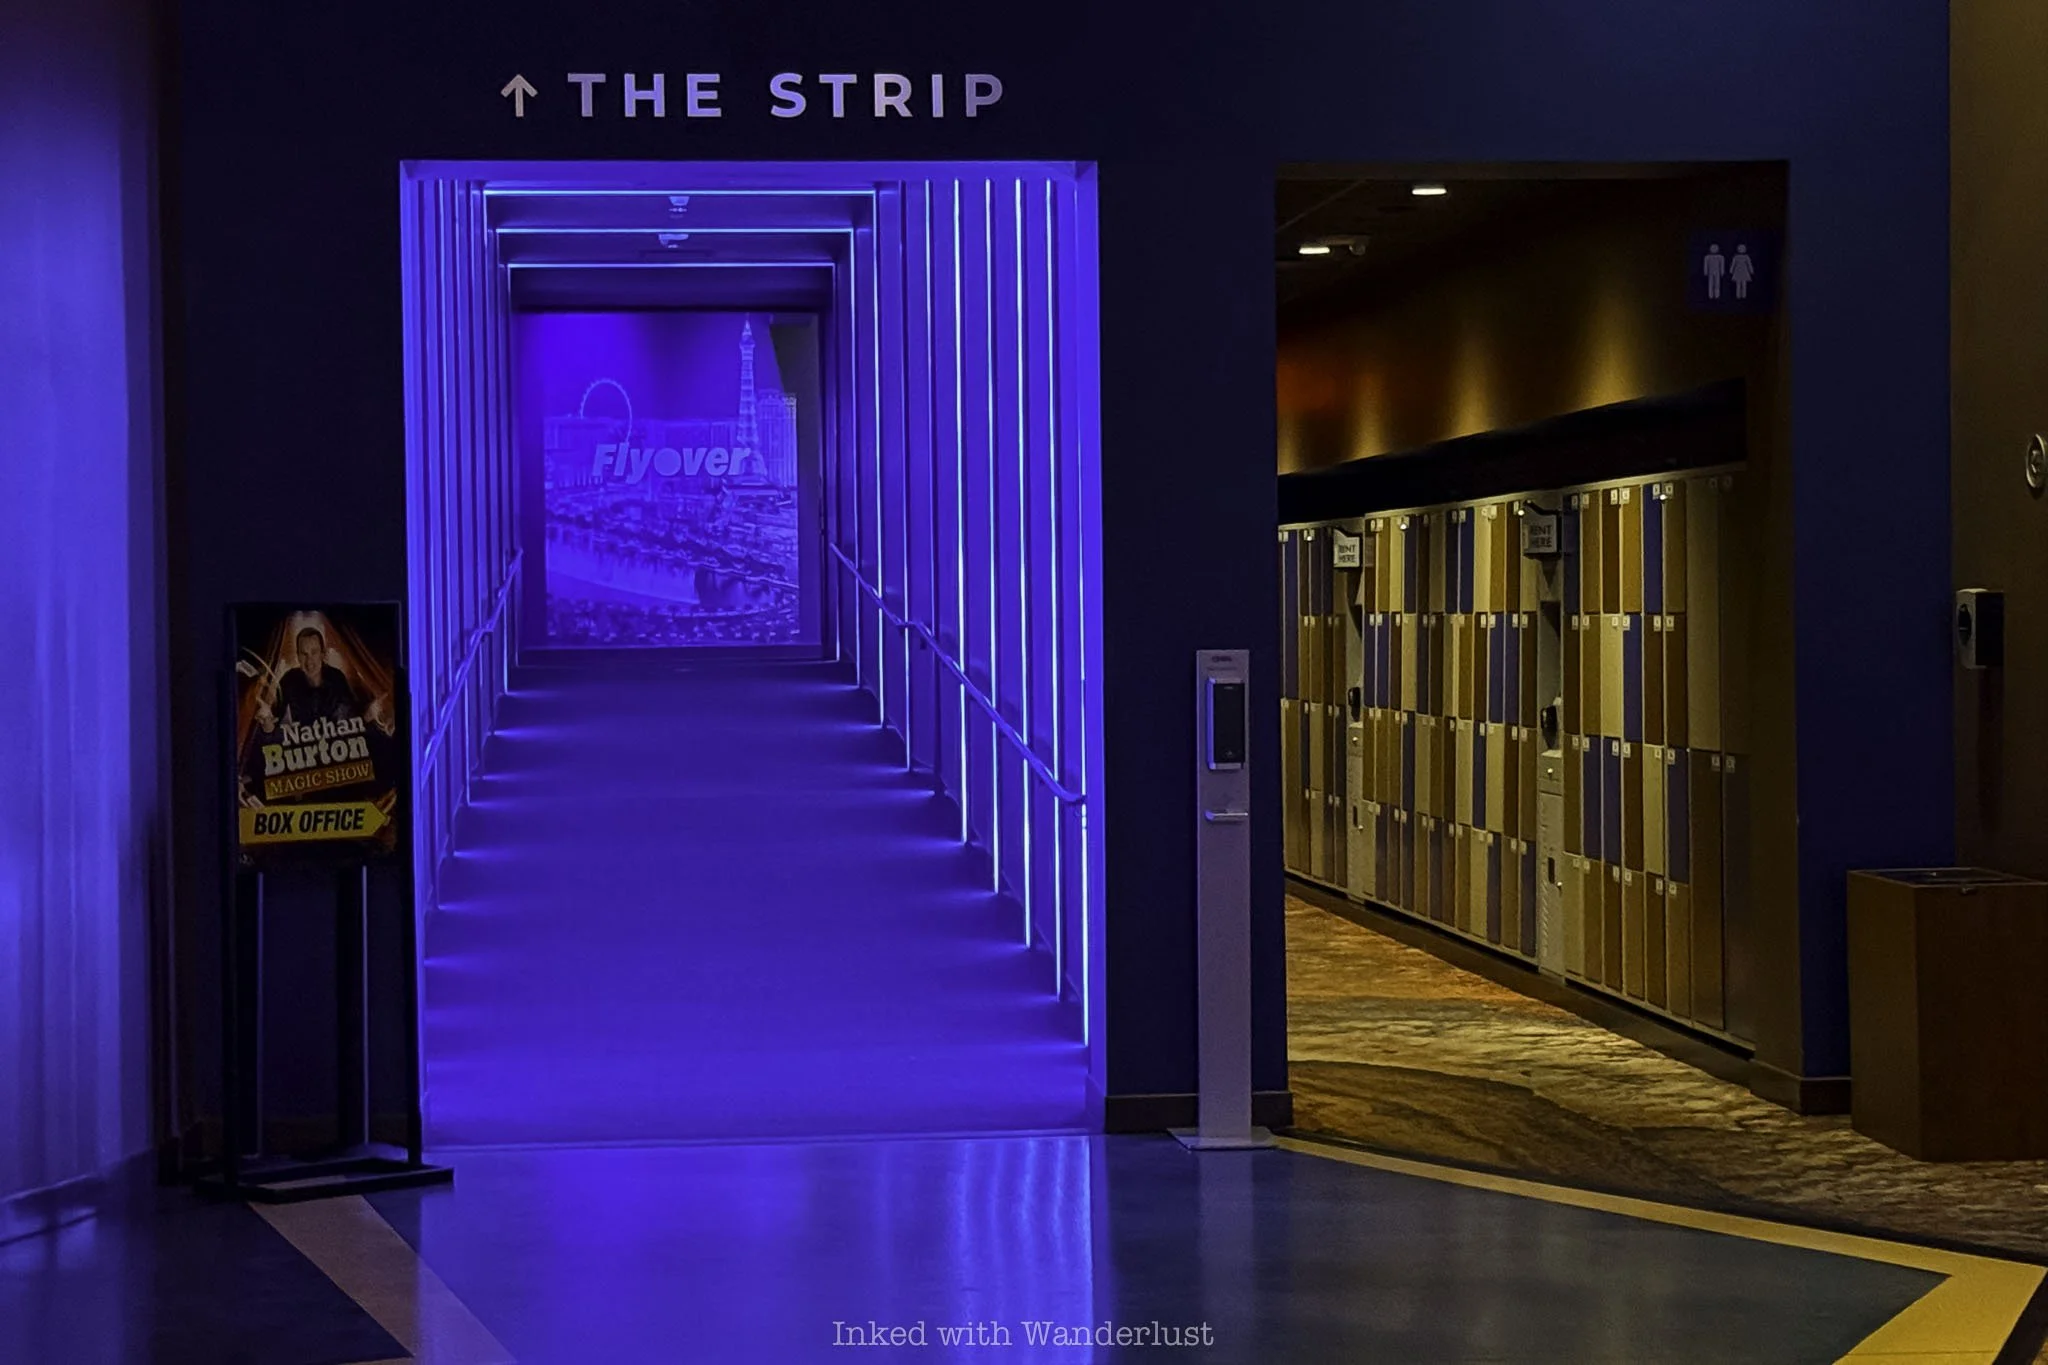
In short - absolutely. Flyover is one of the premiere family-friendly attractions on the Las Vegas strip. The only caveat to that is your child must be at least 40’’ tall to ride.
If their height doesn’t meet a certain benchmark on the ride vehicle, a secondary safety feature will be used to secure them. Basically, their seatbelt will need to be looped into the strap in the middle of their seat.
If they don’t meet the 40’’ height requirement, they unfortunately cannot ride. This is for safety reasons and the staff members will not bend this rule for any reason.
If they don’t meet this height requirement, head over to the Linq Promenade and take a ride on High Roller. At 550-feet, it’s the tallest in North America. Or test your courage at Universal Horror Unleashed at Area 15 or explore the wonderfully weird Meow Wolf Omega Mart.
***If you found this review helpful, please consider leaving a tip by clicking/tapping the “Buy me a Coffee” button above. These tips help to pay for expenses such as gas, food, coffee, parking fees, admission fees, etc. Thank you!

Hike the Fire Wave Trail at Valley of Fire State Park
Located in the northern section of Valley of Fire State Park along White Domes Road lies one of the park’s most fascinating and photographed formations - Fire Wave…
Disclosure: This post contains affiliate links. If you make a purchase through these links, I may earn a small commission at no additional cost to you. I only recommend products or services that I believe will add value to my readers.
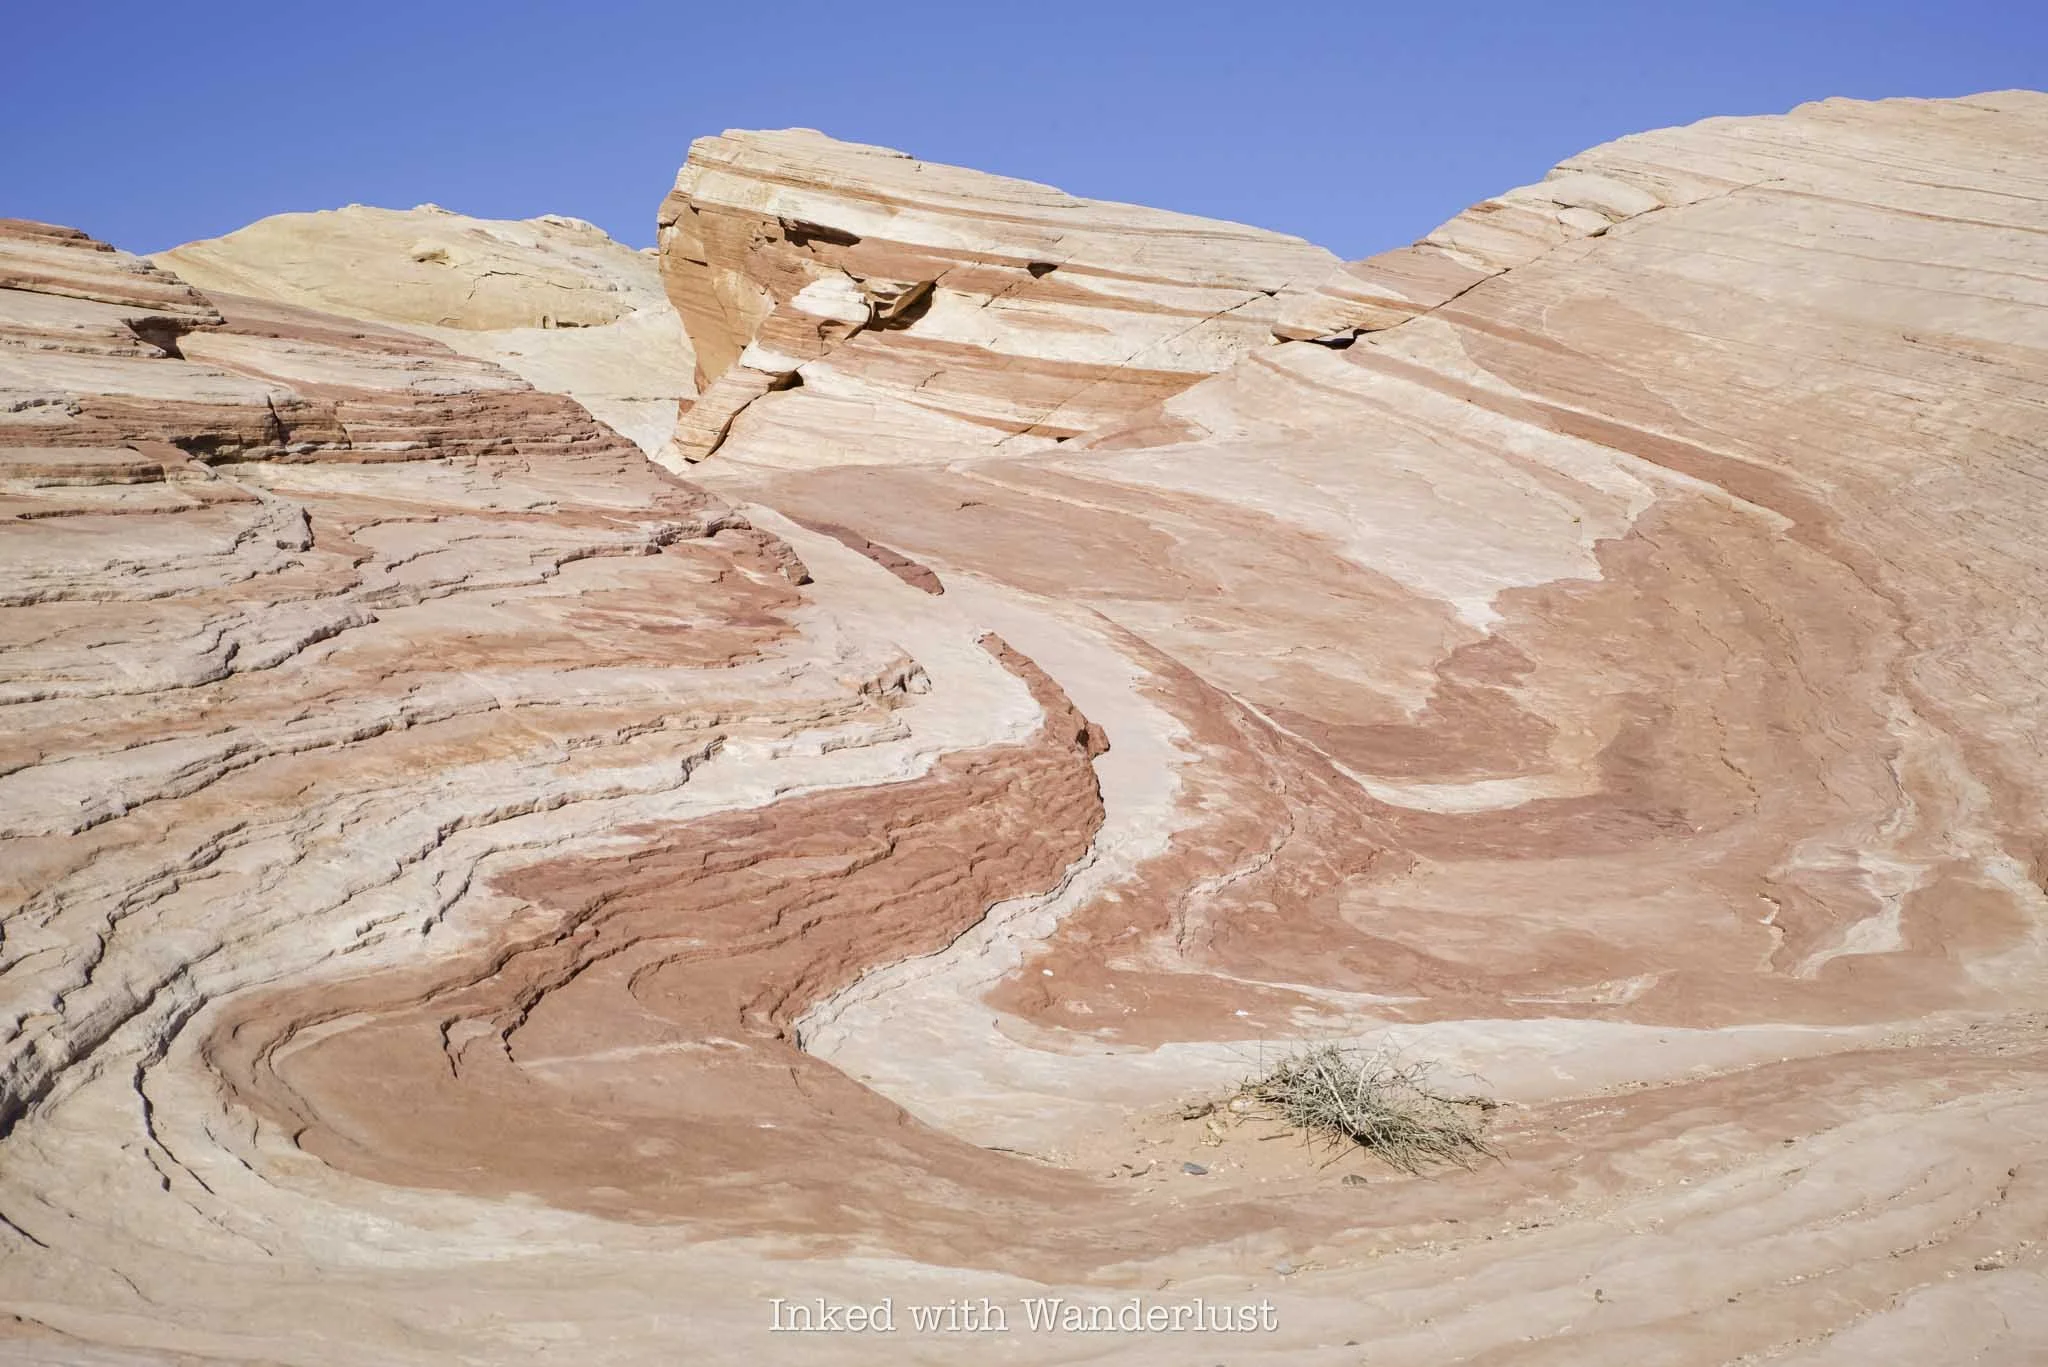
Located in the northern section of Valley of Fire State Park along White Domes Road lies one of the park’s most fascinating and photographed formations - Fire Wave. Best of all, it doesn’t require a whole lot of effort to see!
Known for its ultra-colorful swirls of red, white, and orange Aztec sandstone out-crops, Fire Wave offers park goers a picturesque, wavy formation resembling a fiery sunset. Due to this, it’s become one of the most popular attractions in the park.
If you’re heading out to Valley of Fire, Fire Wave should most definitely be on your list. There are a few things you’ll need to know before going, however. In this post, I’ll cover topics such as trail closures, parking, what to expect and more. Let’s get into it!
Trail Stats
Location: Valley of Fire State Park (north section)
Fee: None for the trail, but standard park entry fees apply
Open: Between October and mid-May
Family Friendly: Yes
Cell Service: Spotty (based on Verizon service)
Restroom: None (nearest is at White Domes Day Use Area to the north or Rainbow Vista to the south)
Parking: Two lots at the trailhead
EV Stations: None
Difficulty: Easy to moderate (depending on temperature)
Popularity: High
Mileage: 1.3 miles, out and back
Time: 30 minutes to one hour
Condition: Maintained and easy to follow
Features: Colorful sandstone formations
Best Viewed: Either sunrise or sunset
Pets: Not allowed
Drones: Not allowed
Hazards: Heat exposure, potential wildlife encounters, and rolled ankles
My Visit(s): November 2024
Is Fire Wave Trail Open?

The temperature at Valley of Fire State Park often exceeds tripe digits, necessitating the need to close select trails during parts of the year. This is done to protect visitors from heat-related illness and/or death, as the affected trails are exposed and pose significant danger to hikers. Fire Wave is one of them.
Even though it’s one of the shorter hiking trails in Valley of Fire, it’s mostly all rock and radiates heat like you wouldn’t believe. Thus, Fire Wave is on the annual list of closures, which take place between mid-May and the beginning of October.
If your visit coincides within that timeframe, you won’t be able to see Fire Wave, unfortunately. There is still plenty more to see and do, though. You can read my posts about how to spend a few hours at the park during summer and my pick of ten Valley of Fire short hikes, many of which are open year-round.
Fire Wave Parking and Getting There

Getting to Fire Wave trailhead (and around the park in general) is easy. There are only two entrances (west and east) and two main roads in the park. Valley of Fire Scenic Byway, the park’s main artery, runs between the two entrances.
To the north is Mouse Tank Road, which itself becomes White Domes Road just beyond Rainbow Vista Trailhead. This road dead ends at White Domes Day Use Area, which is also the trailhead for White Domes Loop, another hugely popular trail.
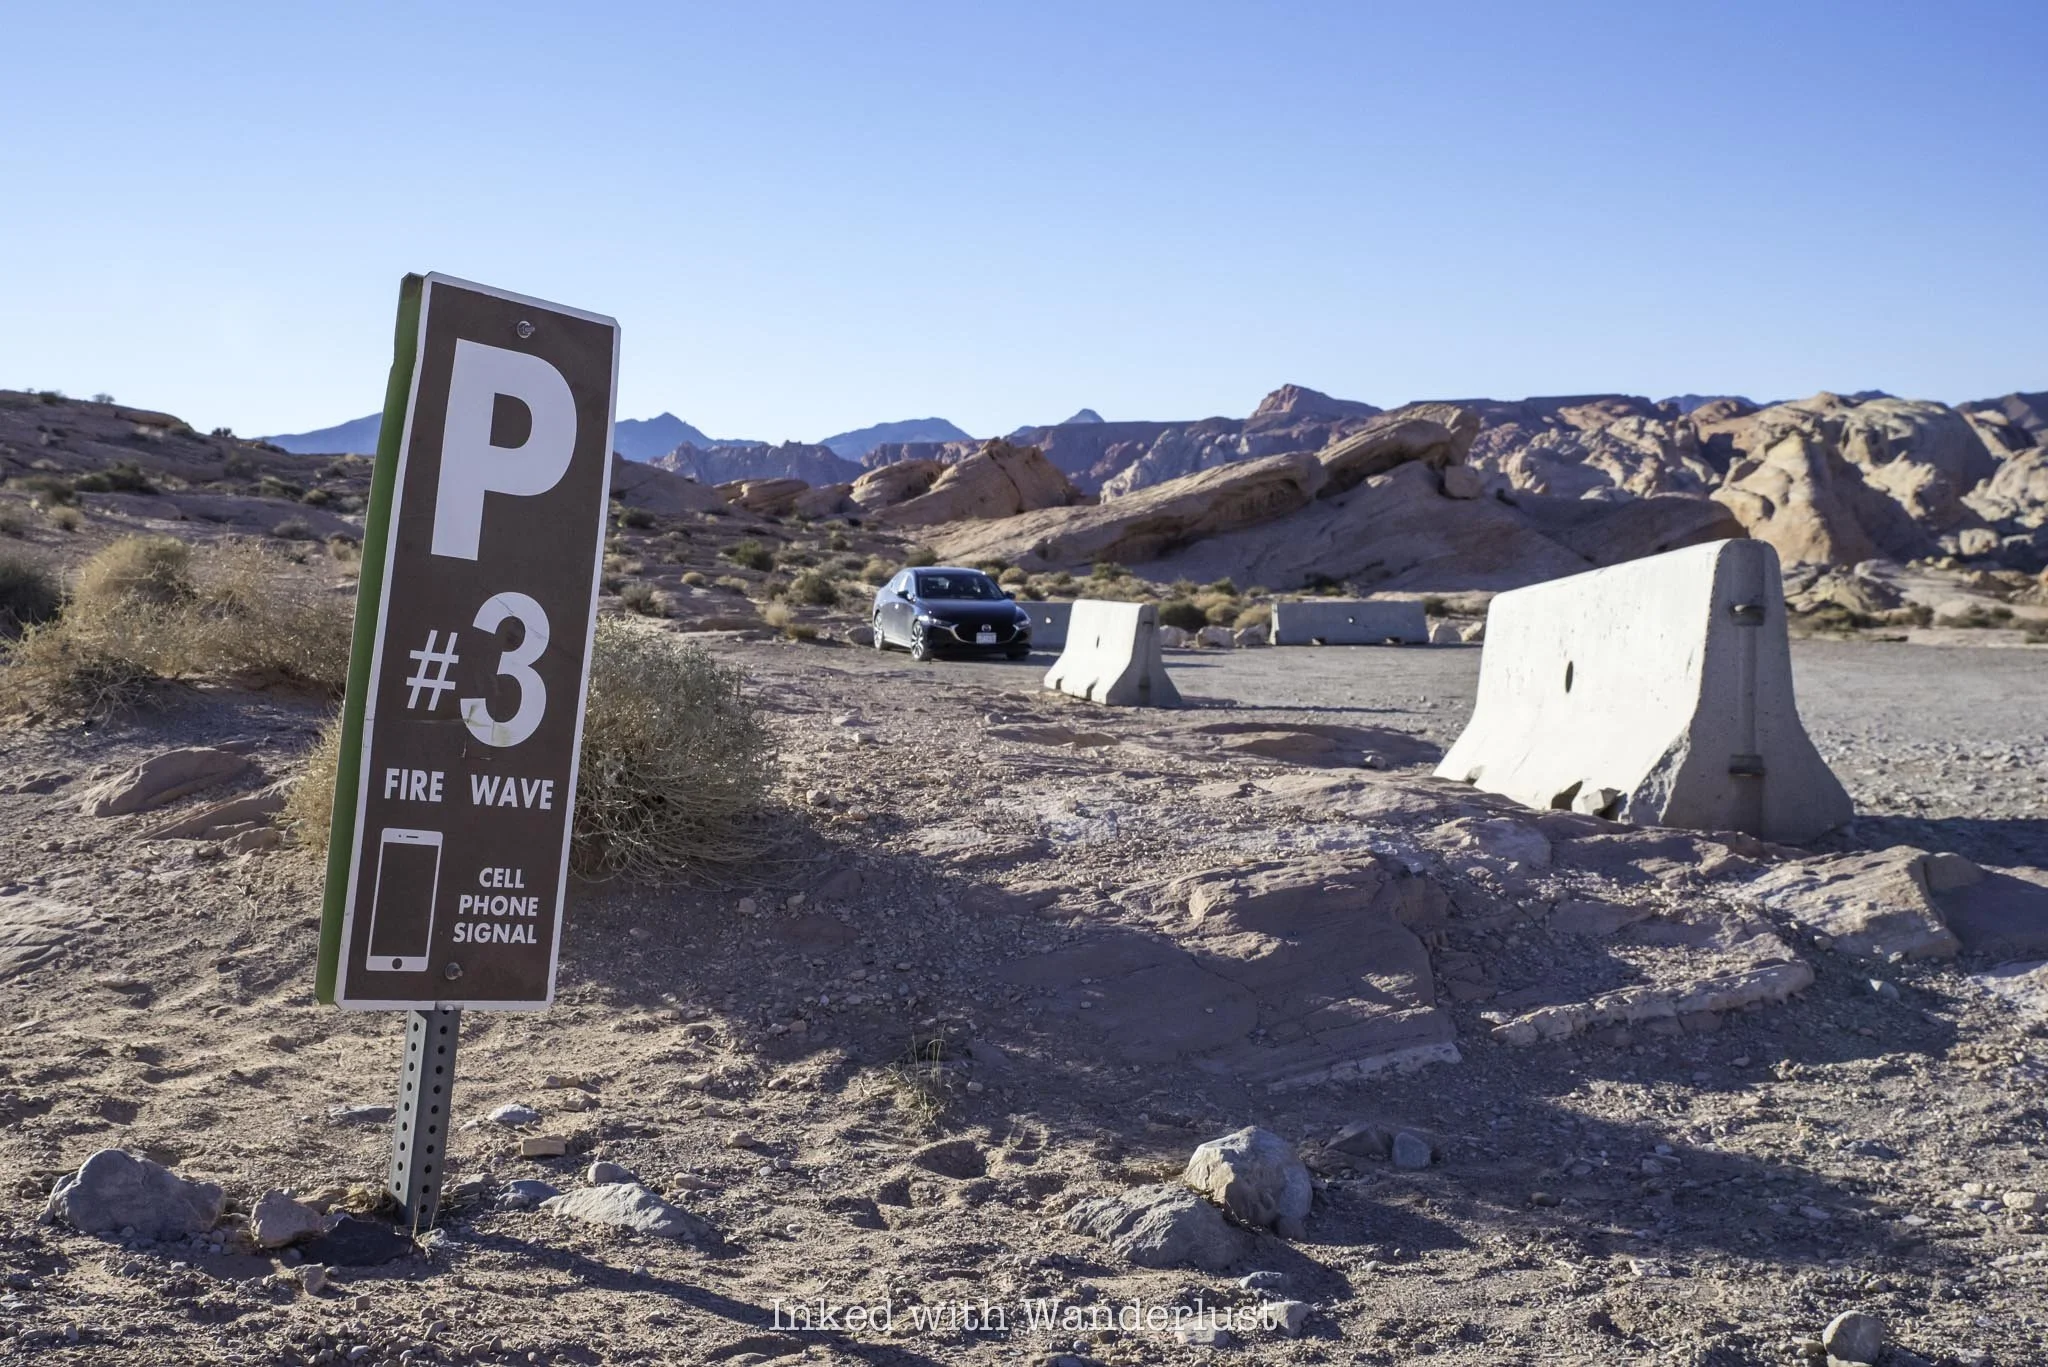
No matter which entrance you use, simply keep driving until you reach the turnoff for Mouse Tank Road and continue straight. A couple miles after it becomes White Domes Road, you’ll arrive to the parking lot on the left side of the road.
There are two gravel lots where you can park for Fire Wave, one on either side of the road. They’re both gravel and dirt, and are large enough to accommodate many vehicles. Sunrise and (especially) sunset are times when parking can be most competitive, as those are Fire Wave’s most popular times.
Even though the lots are large, it’s best to arrive early, especially during the trail’s peak visitation timeframe of October through mid-May. As the day progresses and the park gets busier, Fire Wave and nearby White Domes are usually the first lots to fill.
Fire Wave Trail
To find the start of the Fire Wave Trail, look for the huge sandstone rock in the picture above and head towards it. You’ll start out in a field condensed in sagebrush, with a sandy trail cutting through it.
The trail is mostly maintained, but does have spots where it seemingly vanishes. Don’t fret, though, as there are also trail markers indicating the correct path. So even in the spots where there doesn’t appear to be a trail, it’s still easy to follow.
As you get up against the huge sandstone rock, the trail turns to dirt and begins a slight descent to the right. You’re still cutting through heavy sagebrush fields, but you’ll also start to see more of the unique sandstone rock formations Valley of Fire is famous for.
When the trail flattens out again, it’ll become sandy once more and will be lined with rocks, making it incredibly difficult to get lost. You’ll now see far more sandstone rock than sagebrush and the first teasers of Fire Wave and its color patten will become visible.
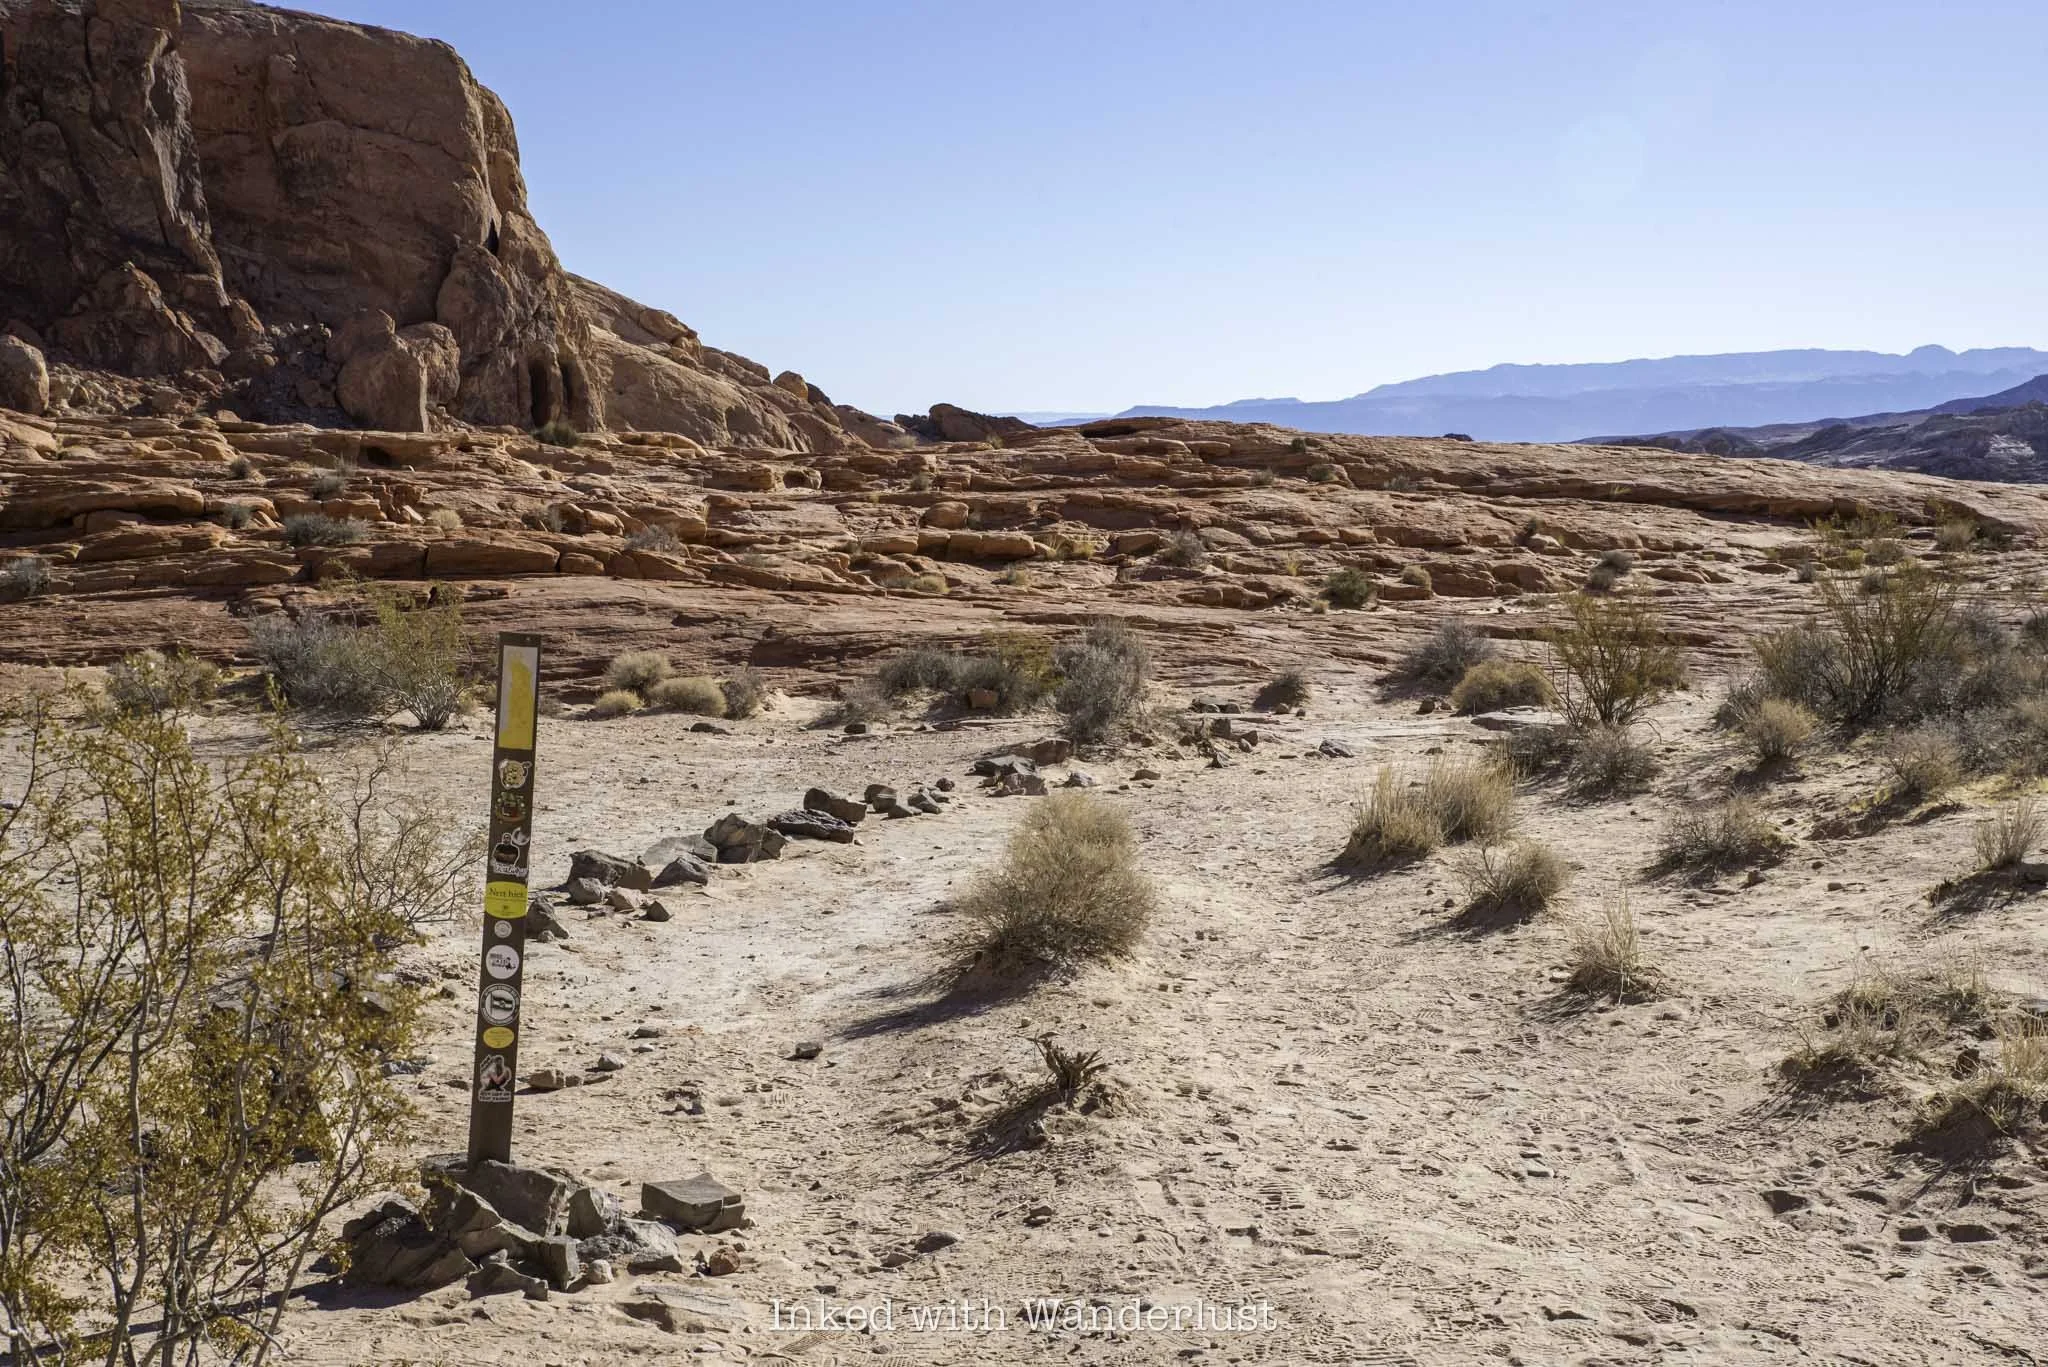
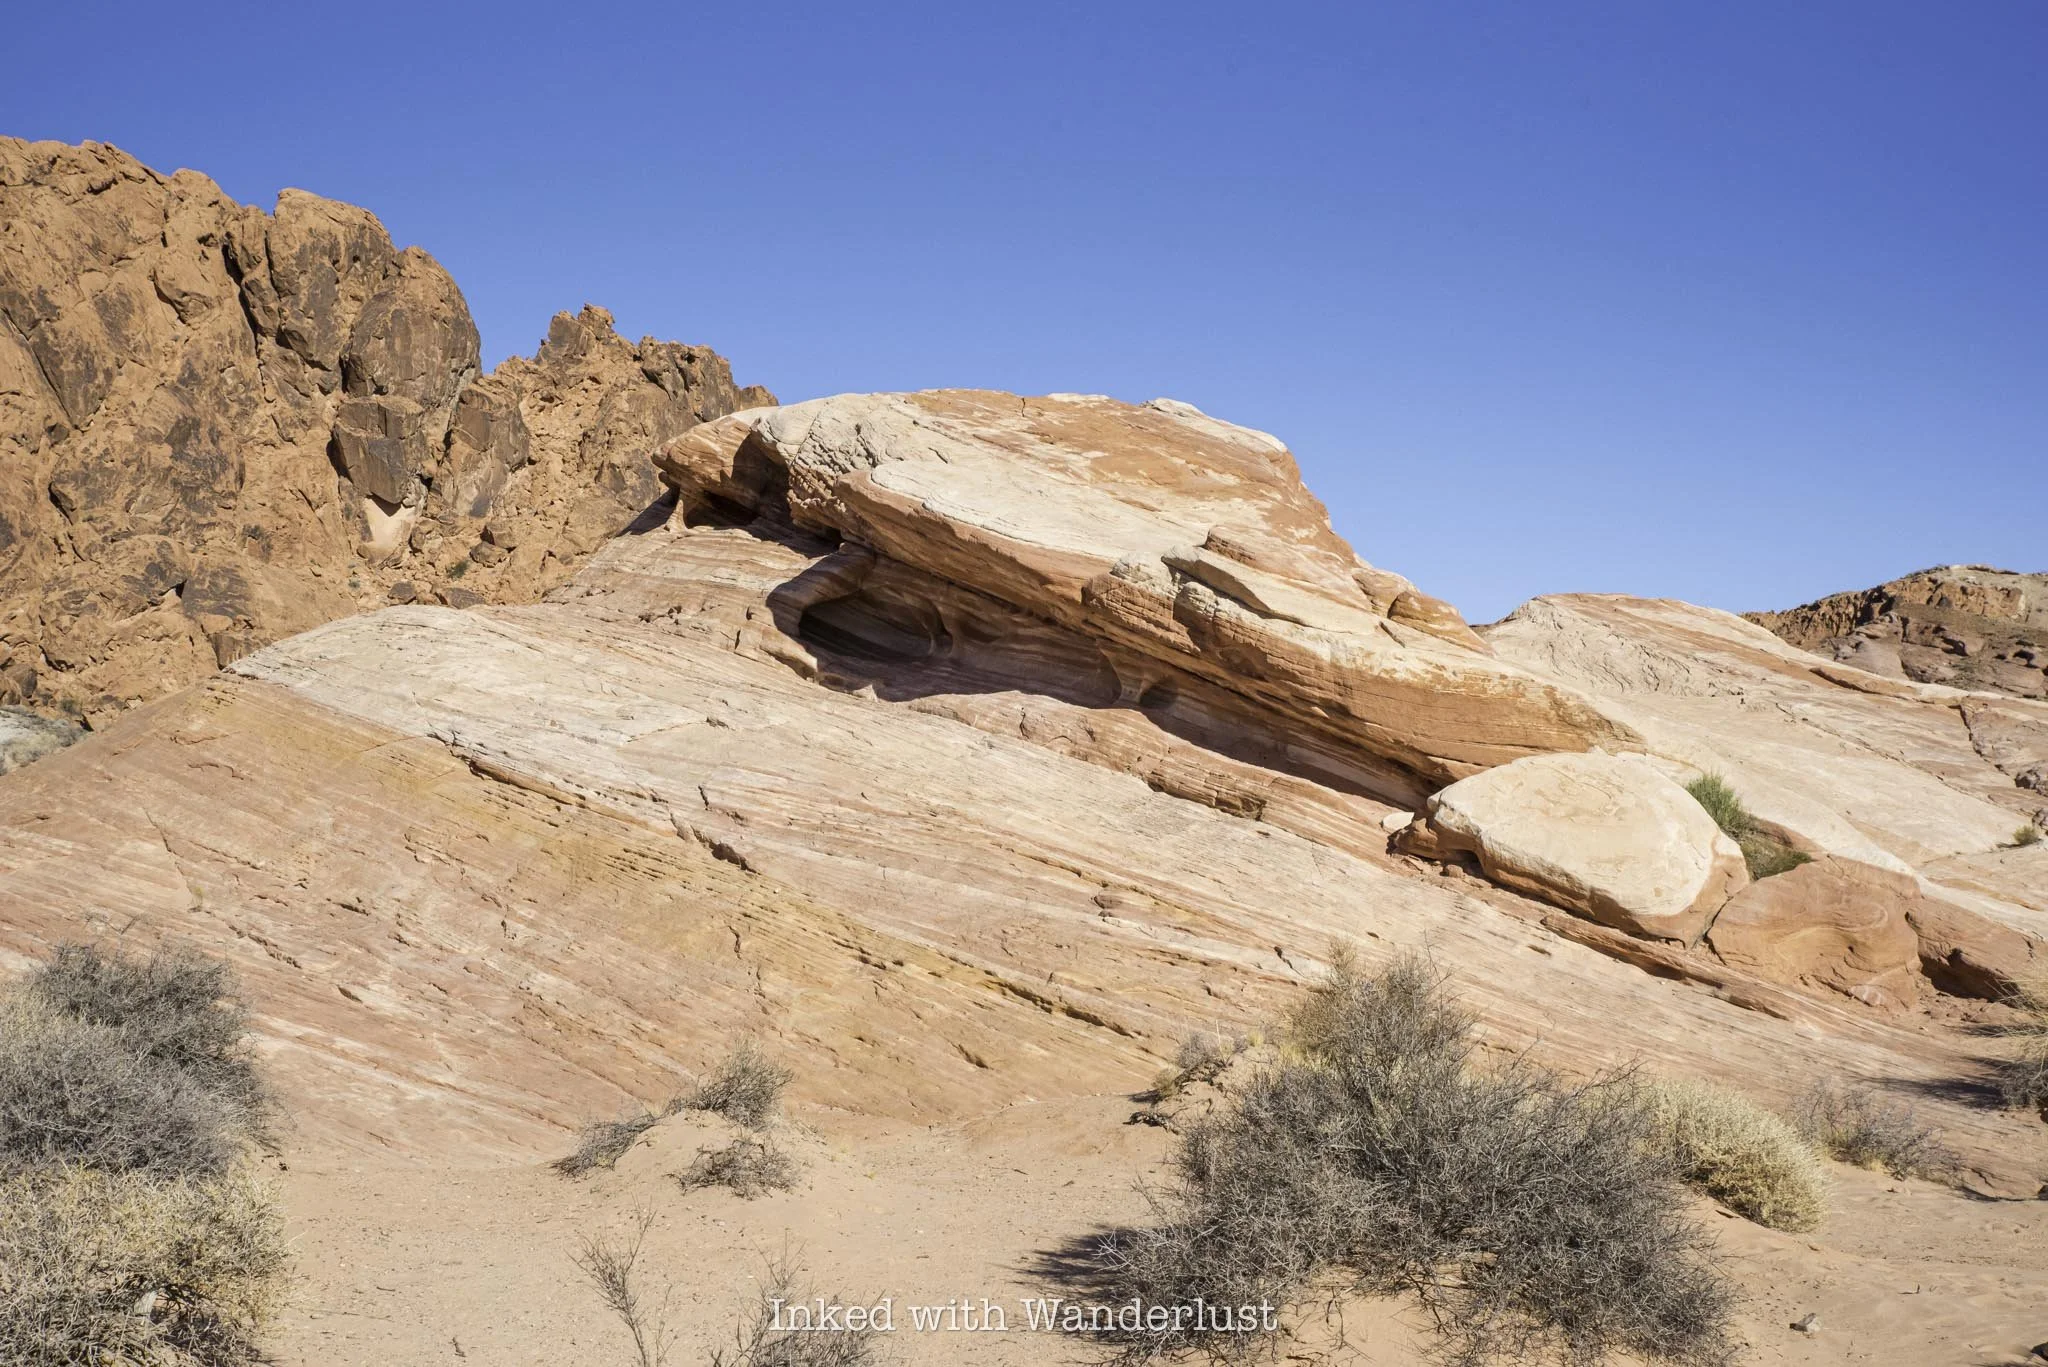
As you start seeing those wavy colors on the rocks, the trail will go from sand/dirt to pure sandstone. From here, there’s no proper trail and you’ll simply keep an eye out for the trail markers and follow them. Don’t worry, each one is easy to spot from the first.
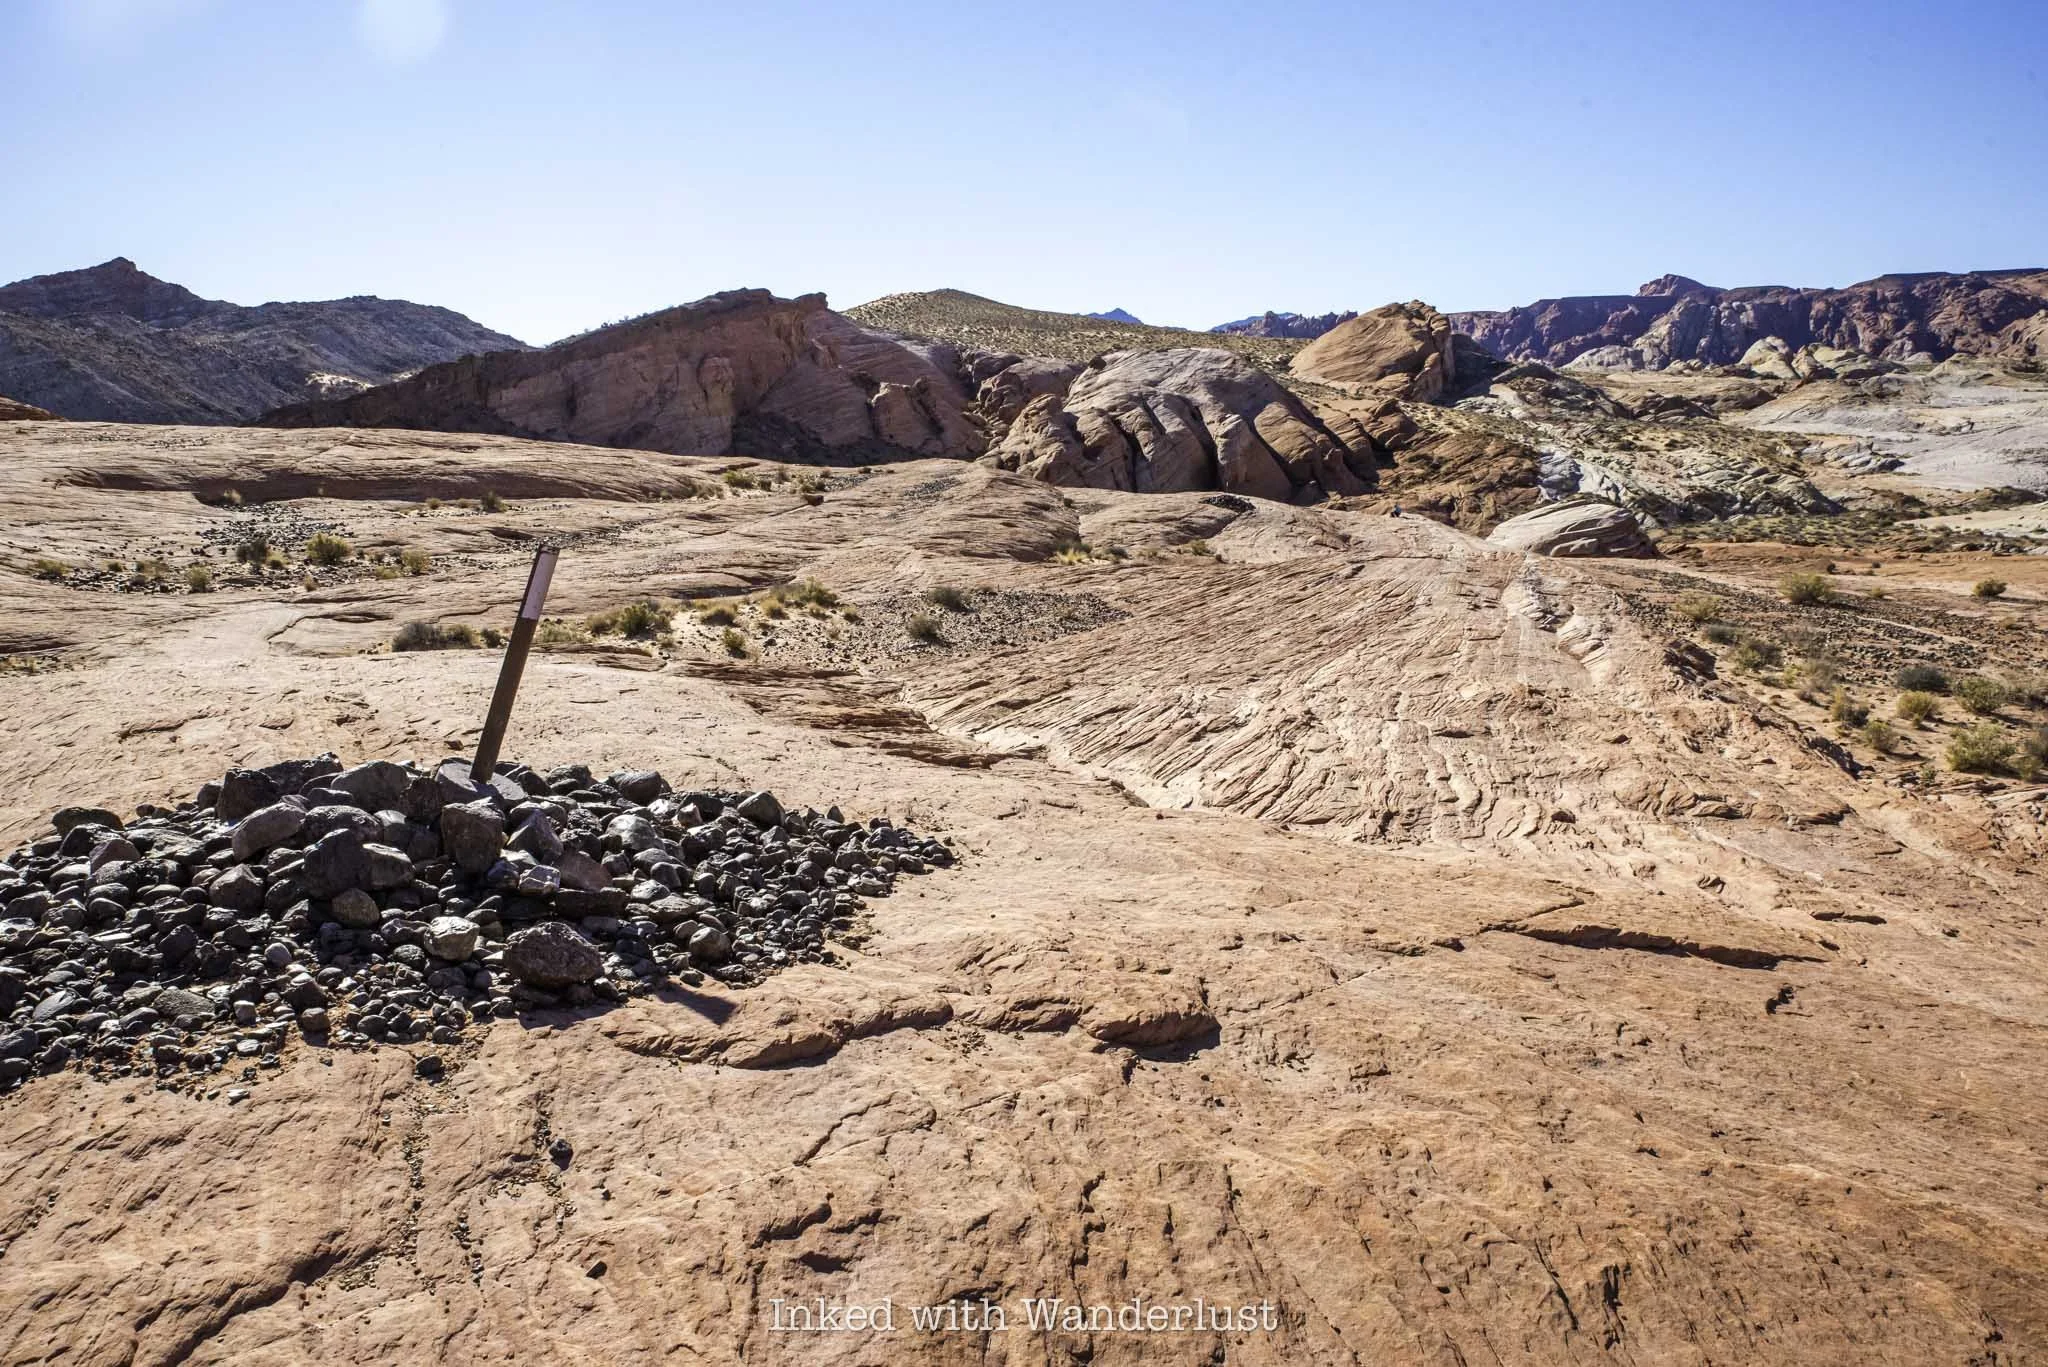
From the last trail marker is where you’ll get your first glimpse of Fire Wave. Simply keep descending on the sandstone rock until it comes into full view. Once you’re there, you’re free to explore at your leisure.

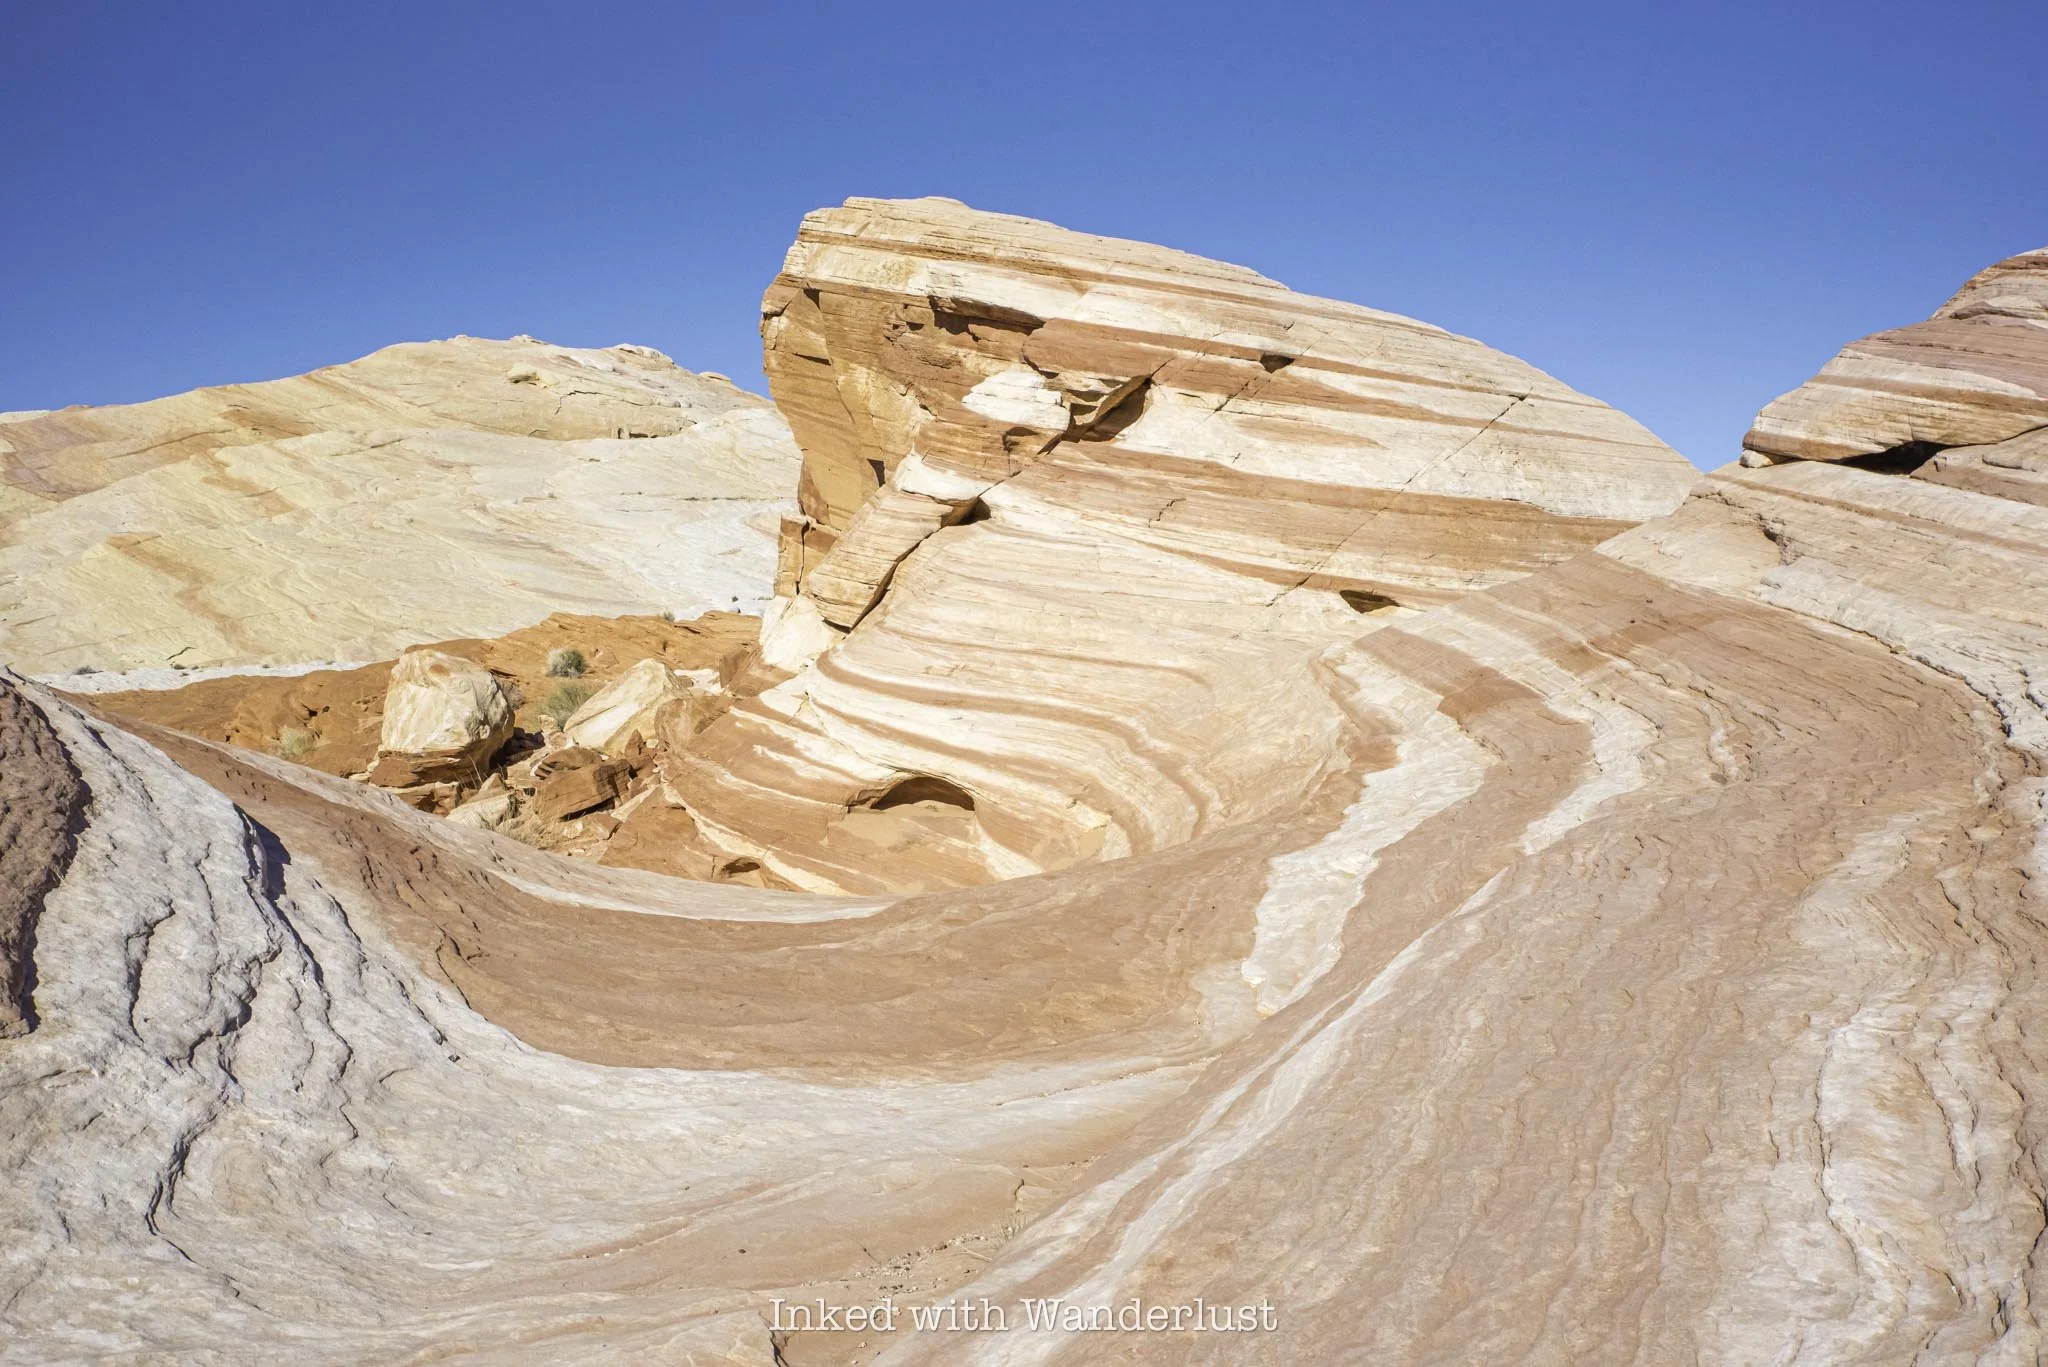
Pictures do no justice to how beautiful Fire Wave is. As stated above, sunrise and sunset are the best times to view it, as that’s when its colors really pop. Even during mid-day, though, like when I went, it’s still a sight to behold.
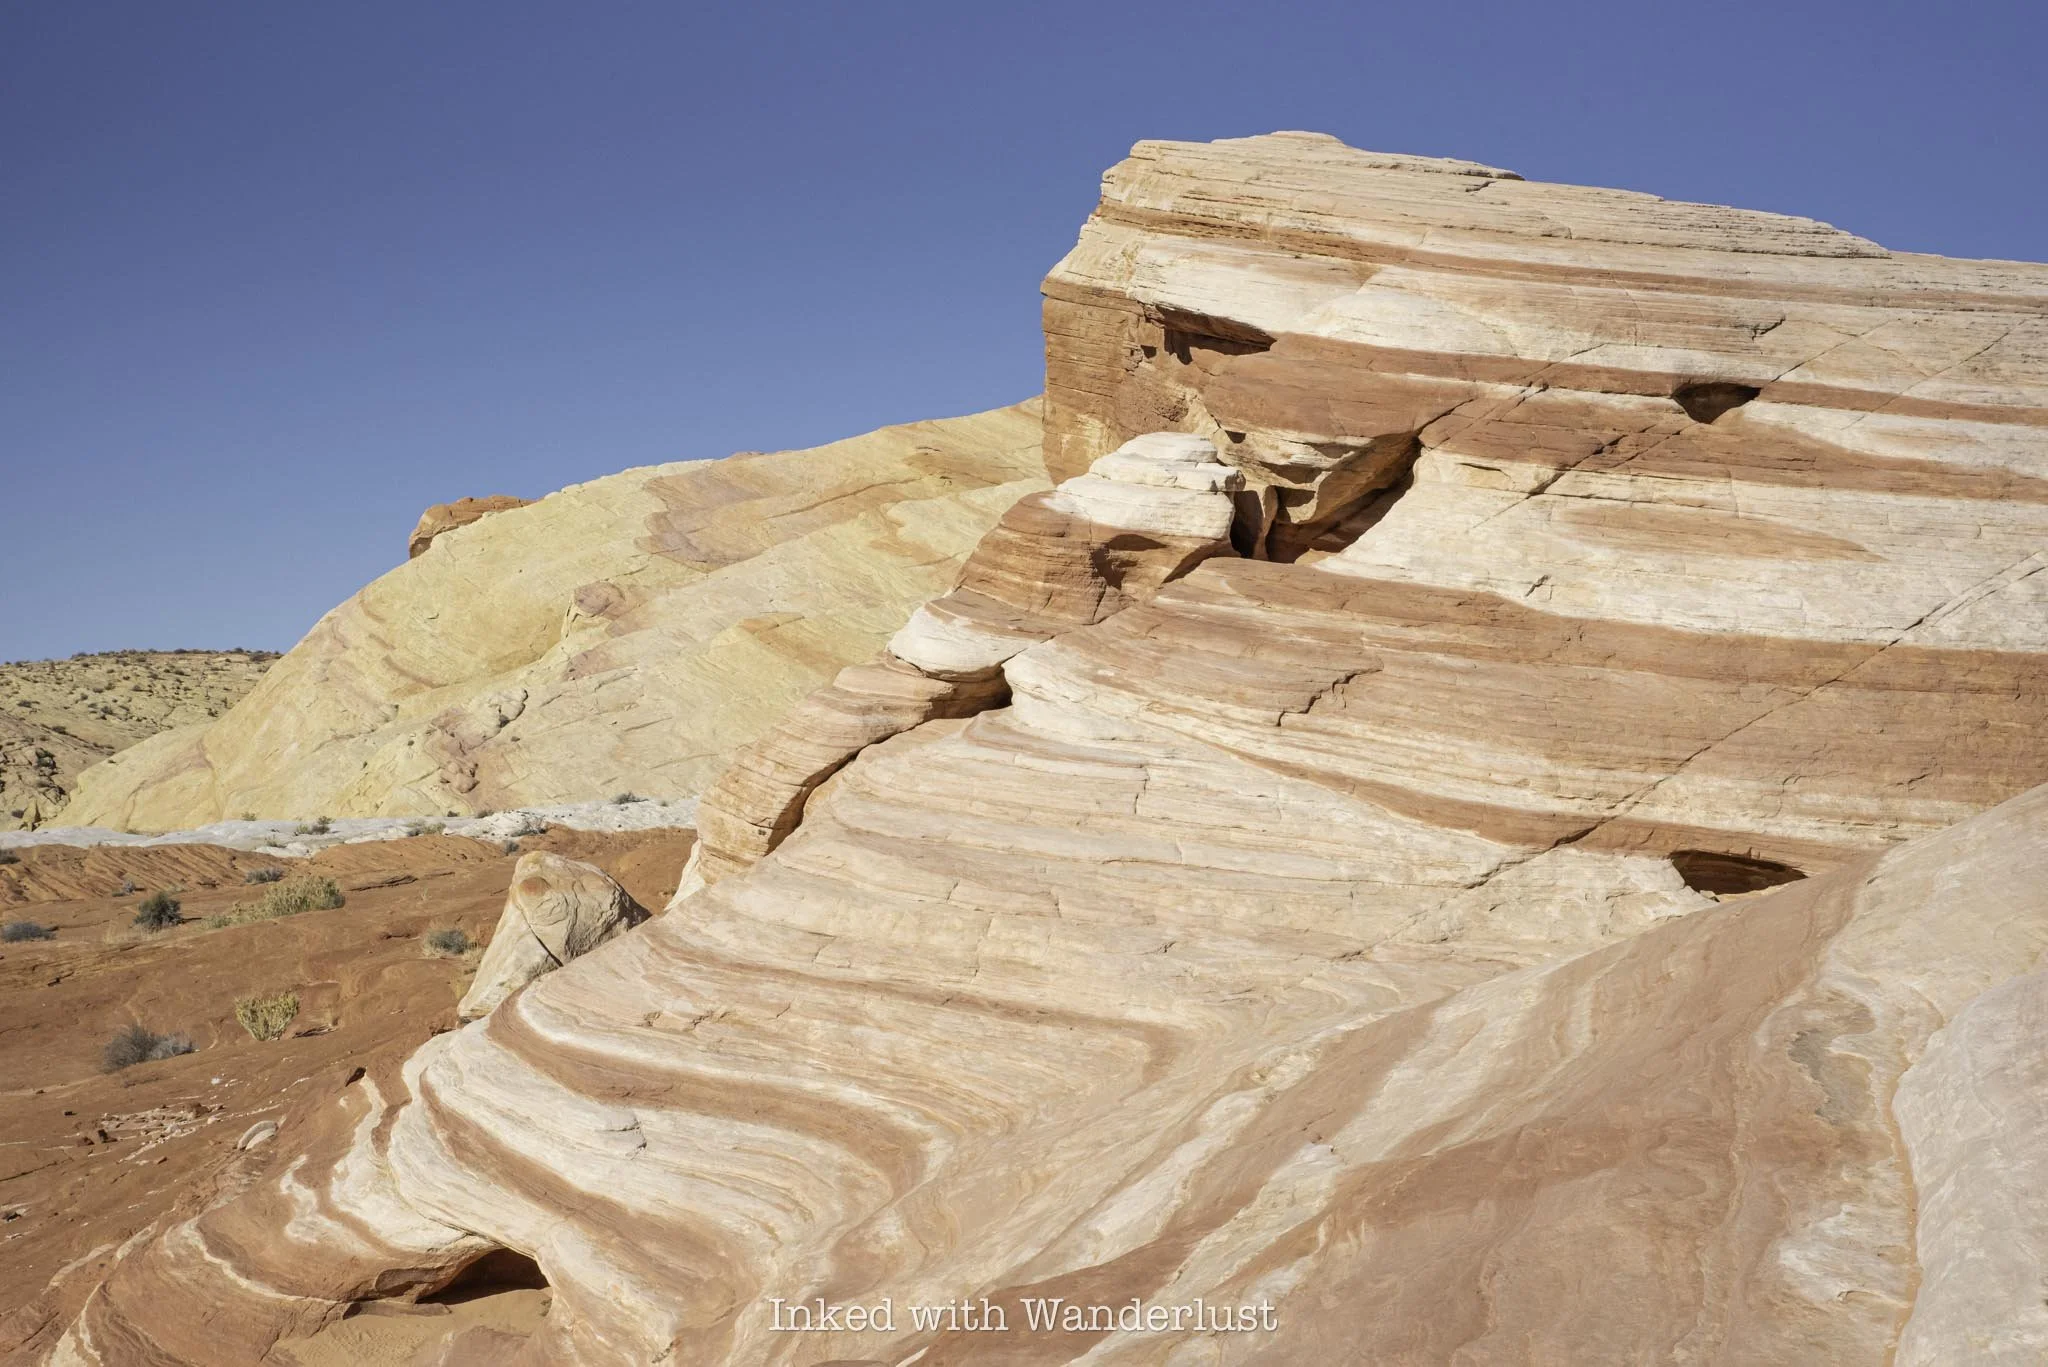
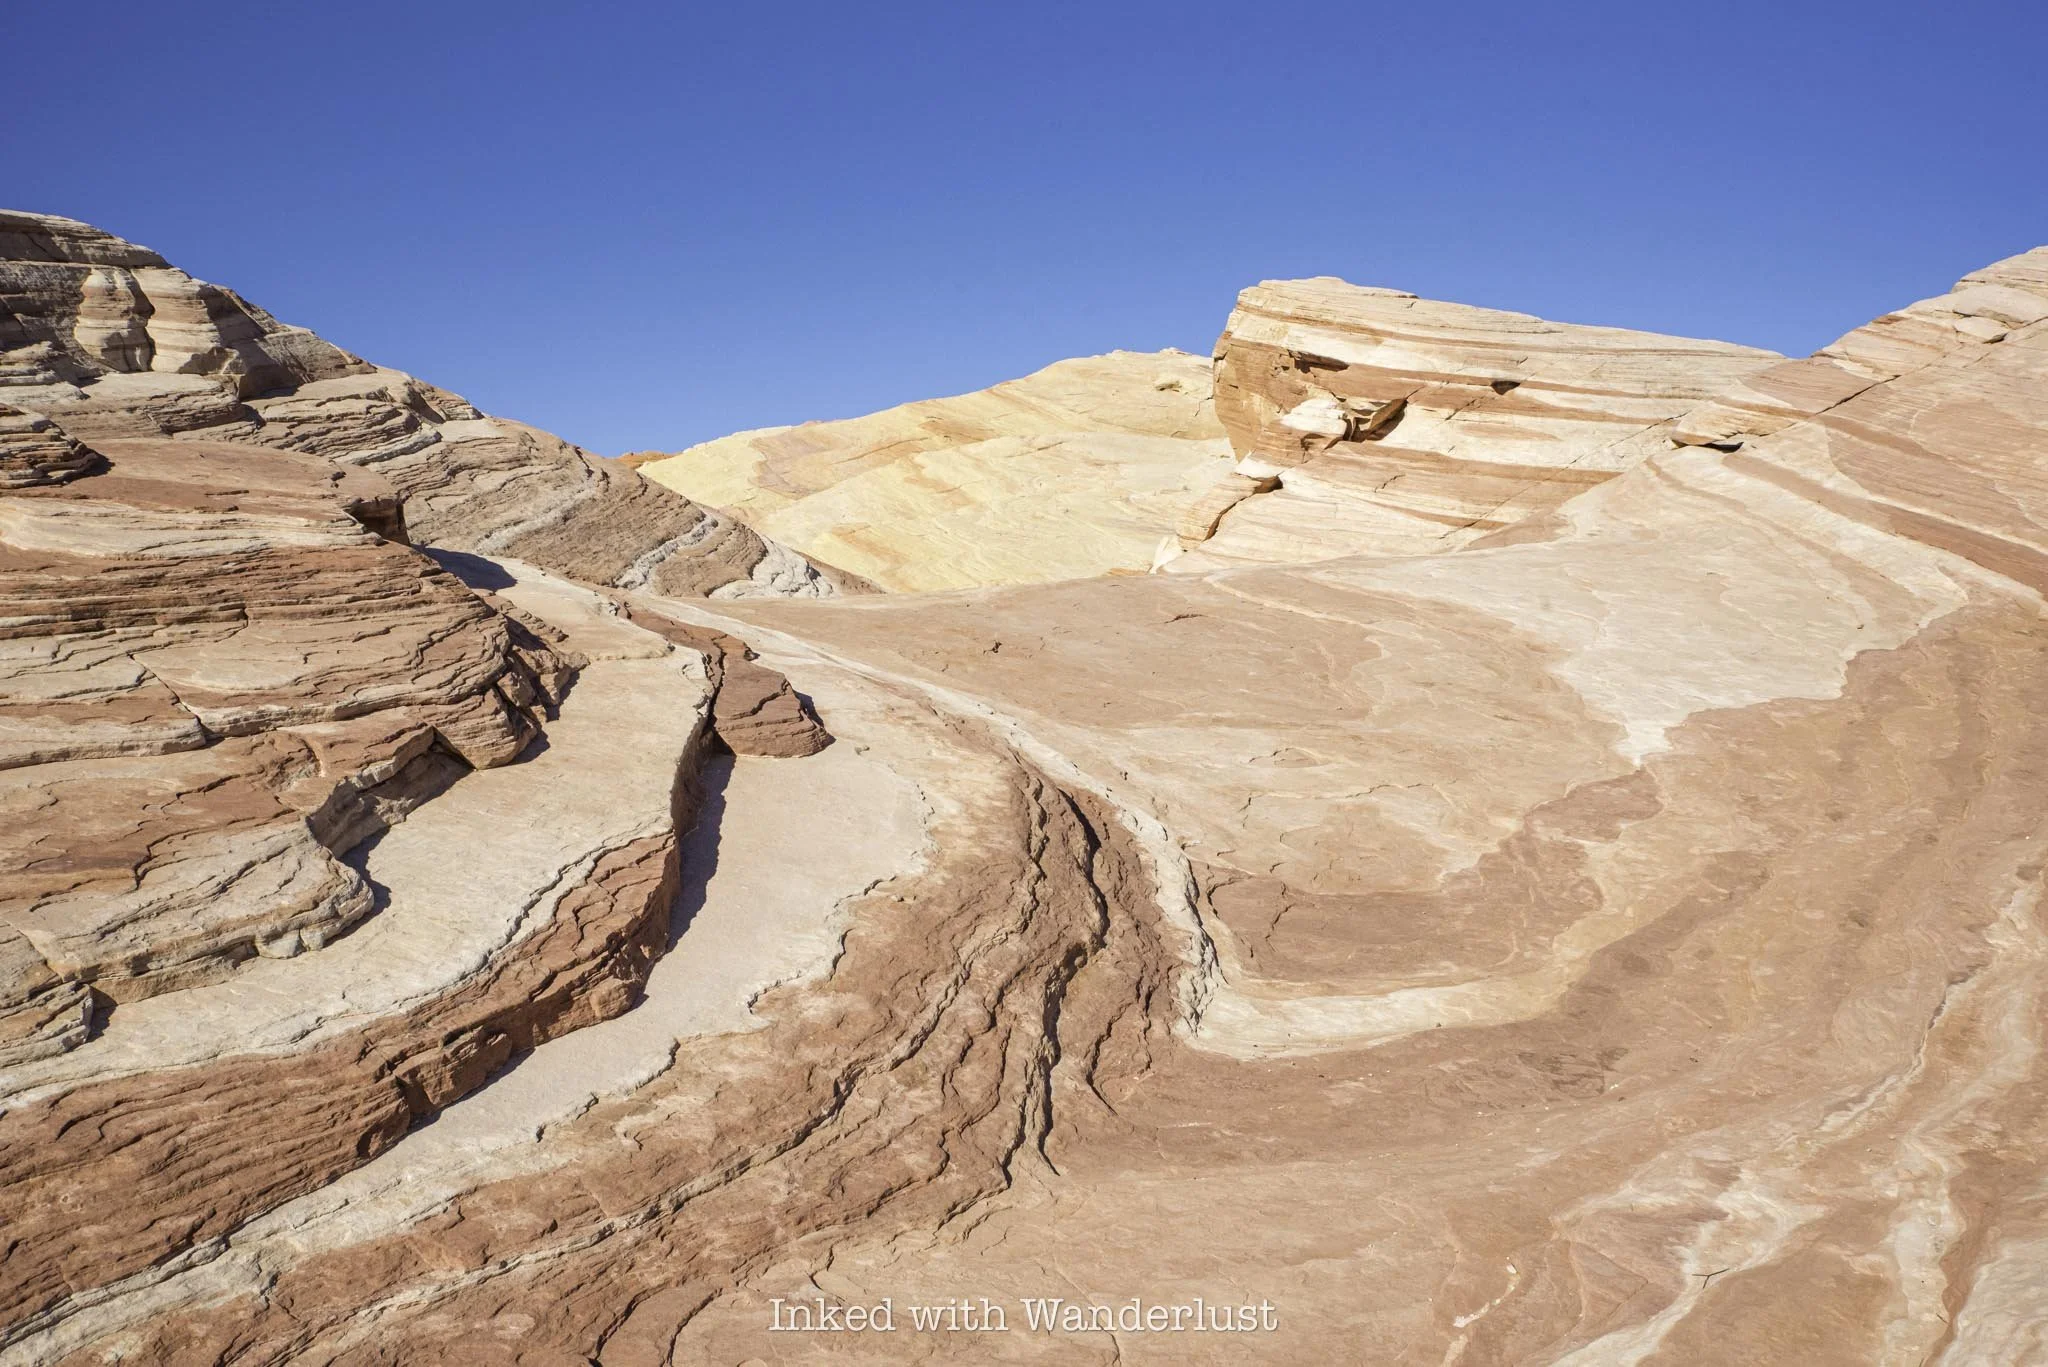
The swirling reds, oranges, and whites blend so perfectly with one another. The leading lines make it a wonderful photography subject, or to simply stare at in admiration. Either way, you need to see Fire Wave in person.
At Fire Wave is where the official trail ends. Simply turn back around and head in the same direction you came to your car. From there, continue driving north to hike White Domes Loop, an equally beautiful trail, or drive south to Mouse’s Tank Trail through Petroglyph Canyon. Or…
Seven Wonders Loop Extension

Just beyond Fire Wave, you’ll notice a pile of rocks with a sign atop indicating the end of the Fire Wave Trail. That same sign also marks the extension of the Seven Wonders Loop, if you have energy left over, that is.
Continuing will add another mile or so to your hike and will take you on a complete loop that’ll eventually spit you out to where you’ve parked. It’s definitely worth doing, provided it isn’t scorching that day and you’ve come prepared.
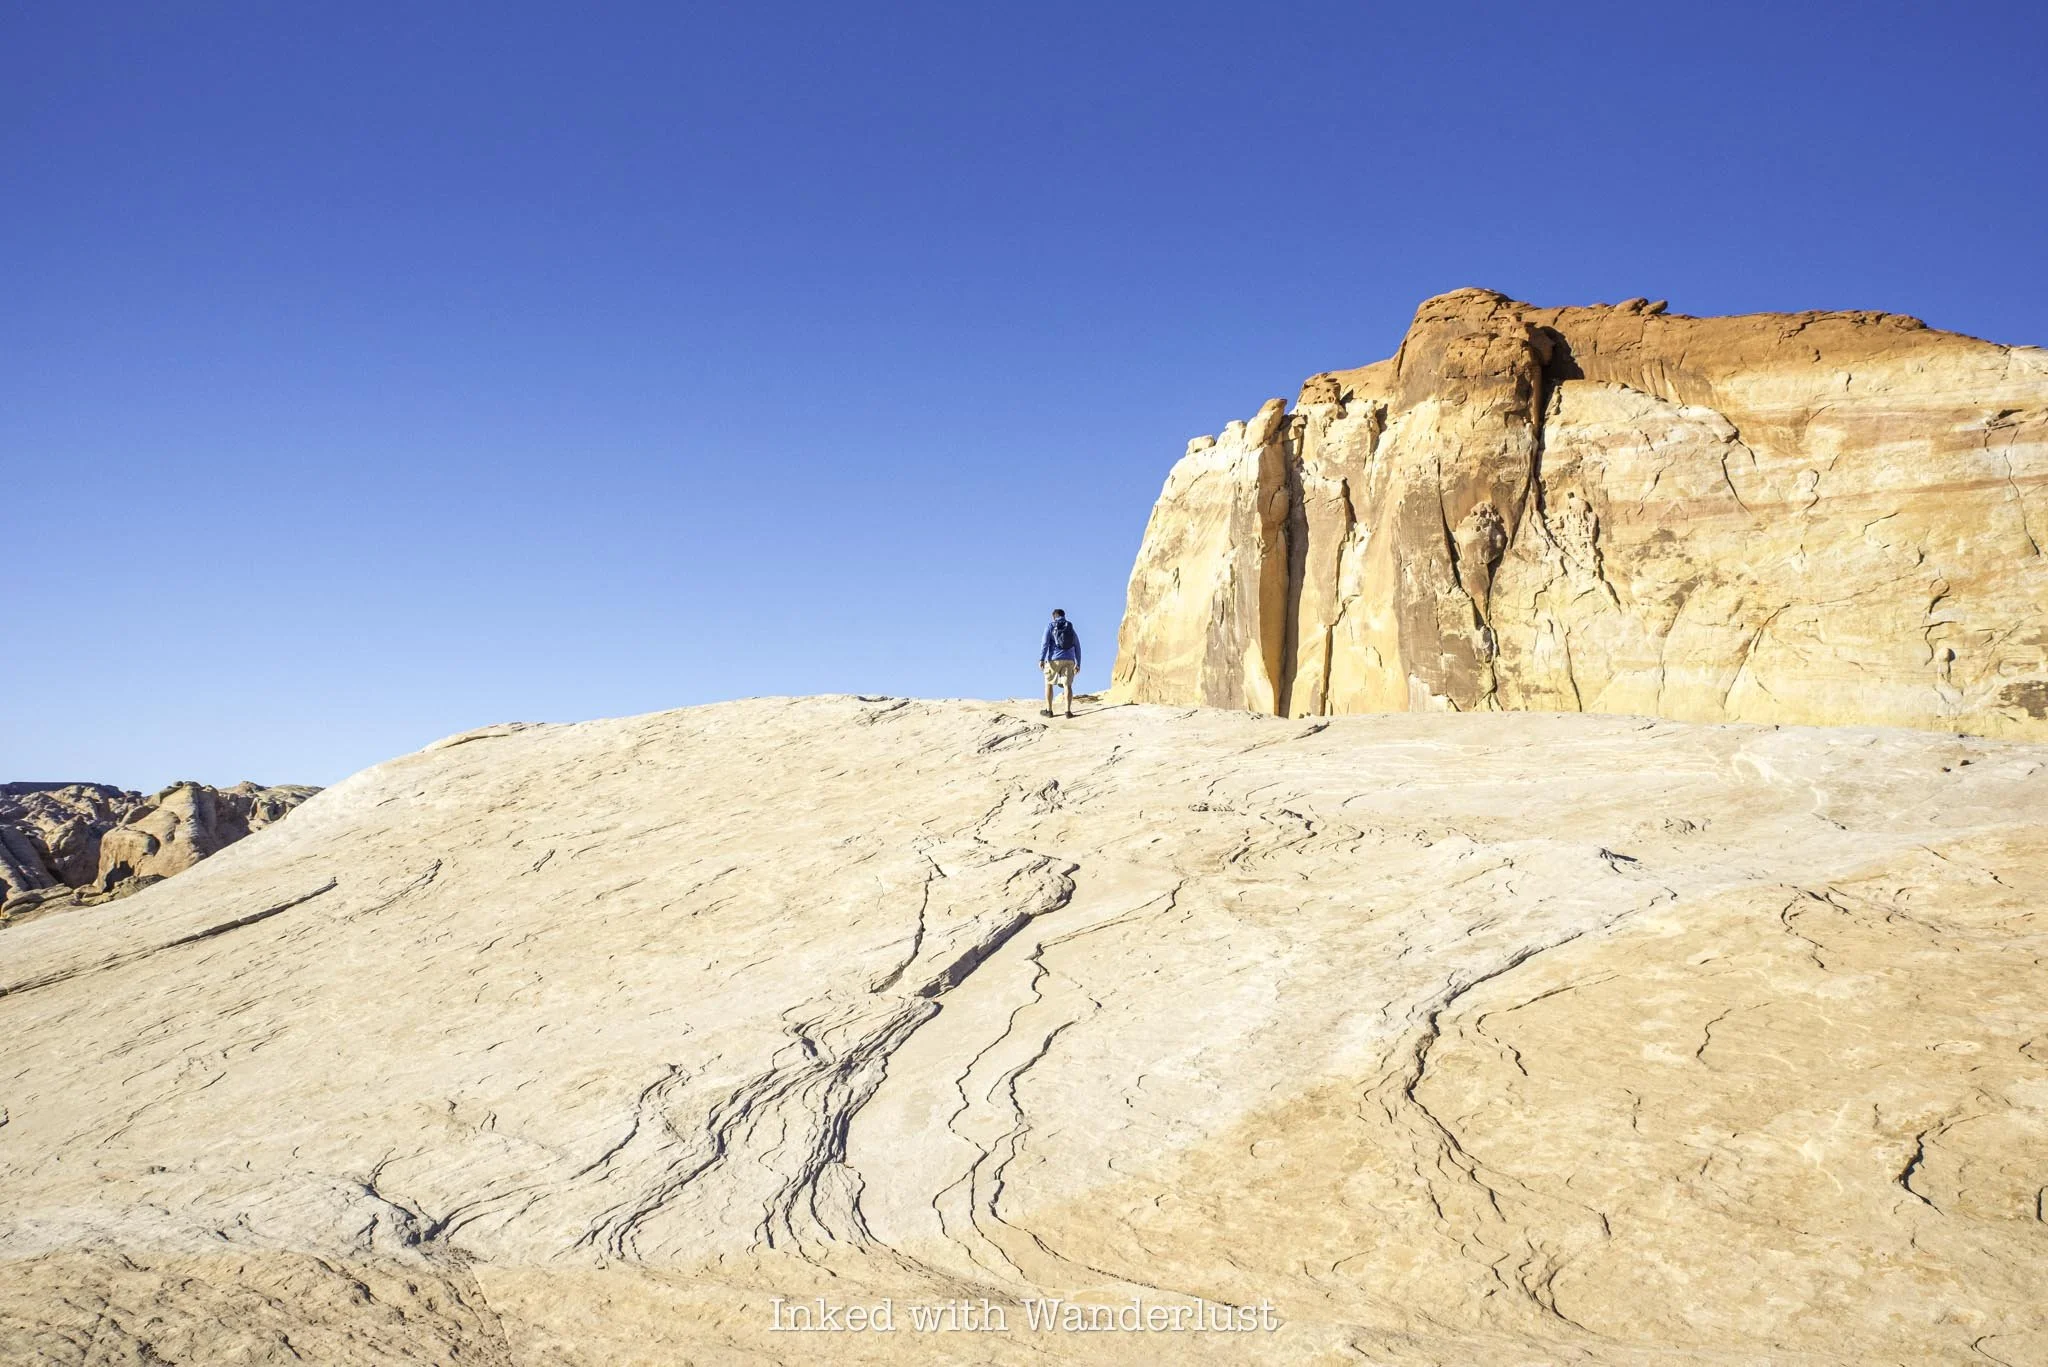
It’s a moderate-level trail and can be easy to lose at times. Due to that, I recommend coming prepared with a downloadable GPS map, like what AllTrails provides. Along the way, you’ll see several Valley of Fire attractions, such as Pastel Canyon, Crazy Hill, Thunderstorm Arch, and more.
Whether you do the full loop or just stick with Fire Wave, you’re sure to have a great time either way. Just remember to steer clear of this trail during the summer months and adhere to the trail closures. It isn’t worth the risk.
If you do find yourself here during the closure period, check out the following trails and attractions listed below, as they’re open all year:


6 Best Northern Nevada Pumpkin Patches and Corn Mazes (Reno, Sparks, and Beyond)
There are quite a few aspects of fall people love - cooler temperatures, beautiful gold and orange colors taking over the foliage…
Disclosure: This post contains affiliate links. If you make a purchase through these links, I may earn a small commission at no additional cost to you. I only recommend products or services that I believe will add value to my readers.

There are quite a few aspects of fall people love - cooler temperatures, beautiful gold and orange colors taking over the foliage, and pumpkin spiced-flavored everything, to name a few. The biggest, however, seem to be pumpkin patches and corn mazes.
Throughout Northern Nevada, there are numerous popular farms that open their properties to the general public every fall season. They each offer several activities aside from pumpkin picking, including corn mazes, tracker rides, haunts and more.
In this post, I’m going to list six of the best pumpkin patches in Northern Nevada. In each listing, I’ll discuss their locations, operating dates/hours, prices, activities offered, parking situation, and other pertinent information. Let’s get into it!
1) Renner Farm - Smith Valley

Location: 2493 NV-208, Smith Valley, NV
Price: None listed
Operating: Tuesday - Sunday beginning September 27, 2025
Parking Available: Yes
Renner Farm in Smith Valley, which is just a short drive from Yerington or Gardnerville, respectively, is open year round and typically features a variety of fresh produce, honey and farm-raised eggs. In the fall, however, this family-operated farm opens its pumpkin patch and themed corn maze to the public.
The corn maze has a different theme every year and usually has some kind of challenge or mystery involved. They don’t list prices on their website but I have been there more than a few times and it’s typically just a few bucks per person. Corn maze hours are as follows:
Tuesday - Thursday: 12-5pm
Friday - Saturday: 12-9pm
Sunday: 12-7pm
Aside from the corn maze and pumpkin patch, Renner Farm also offers hay rides, baked goods for sale, an annual harvest party and in the past, they’ve offered an evening haunt version of the corn maze. No word on if that’s happening this year, though. Afterwards, be sure to stop and hike through nearby Wilson Canyon.
2) Corley Ranch - Gardnerville

Location: 859 US Highway 395 North, Gardnerville, NV
Price: $8 - $12 per person
Operating: Daily beginning September 27, 2025
Parking Available: Yes
The annual harvest festival at Corley Ranch officially begins on September 27 and runs daily between 10am and 5pm throughout the month of October, before concluding on October 31. General admission is $8 on weekdays and $12 on weekends.
Included with your admission is the corn maze, farm animal petting zoo, 9-hole mini golf, straw maze, pig races, hay slide and hay wagon ride. It does NOT include the giant sling shot ($1), train rides ($2), and pumpkins (costs vary by size).
Corley Ranch is one of the stand-out pumpkin patches in Northern Nevada as they offer several unique activities that most don’t. They also offer a variety of food vendors on the weekends, negating the need to leave early.
3) Lattin Farms - Fallon

Location: 1955 McLean Road, Fallon, NV
Price: $15.23 per person (combo ticket)
Operating: September 27 and select dates throughout October 2025
Parking Available: Yes
Lattin Farms’ festival harvest has been held in Fallon annually for years. They’re specifically known for their frustratingly challenging corn maze, where you could spend hours (maybe that’s just me) trying to find your way out.
Other than the corn maze (which is worth the visit all its own), Lattin Farms offers a huge selection of pumpkins, cow train rides, hayrides, and a craft fair. Unlike the other Northern Nevada pumpkin patches on this list, their fall festival is only on select dates in 2025. They are:
9/27
10/4
10/11
10/18
10/24
10/25
The majority of the activities are offered between 10am and 6pm, with the corn maze remaining open until 8pm. The craft fair features a variety of vendors offering unique and hand-crafted goods and food. You can pre-purchase combo tickets at their website.
4) Ferrari Farms - Reno

Location: 4701 Mill Street, Reno, NV
Price: Varies by activity
Operating: Daily beginning September 27, 2025
Parking Available: Yes
Nestled along the Truckee River, Ferrari Farms is a Reno landmark and are known for their pumpkin patch, sunflower fields, corn maze and seasonal events. Their pumpkin patch runs daily from September 27 to October 31, 10am-8pm (Sun - Thurs) and 10am-10pm (Fri and Sat).
Ferrari Farm doesn’t charge an admission fee. Rather, you simply pay per activity you choose. Prices are as follows:
Corn Stalks: $10
Hayride: $6 or $25 for up to five people
Corn Maze: $10
Corn Walk: $6
Additionally, food vendors are featured at the farm on select dates (you can view those and other events here). This includes Grindz, a popular coffee vendor which serves handcrafted, seasonal drinks. They’ll be present at Ferrari Farm every weekend throughout the season.
5) Andelin Family Farm - Sparks

Location: 8100 Pyramid Highway, Sparks, NV
Price: $13 - $18 per person (base price)
Operating: Wednesday - Saturday, beginning September 24, 2025
Parking Available: Yes
Andelin Farm is the mecca of Northern Nevada pumpkin patches, with over 30 attractions included with your general admission ticket. When you include their premium experiences, there’s literally something for everyone here.
Base price tickets are priced between $13 and $18, dependent on day, and include access to the pumpkin patches (yes, plural), wagon rides, bumpy buggies ride, mini zip line, slide mountain, digging sand pit, petting farm, straw bale maze, duck race, and more.
For an additional charge, you can also take part in their nighttime activities, which include Zombie Paintball and Corn Creepers, their haunted corn field, touted as Nevada’s largest haunted attraction with over a half-mile of scares!
Zombie Paintball starts at $15 and tops out at $27, dependent on day. Corn Creepers also starts at $15, but tops out at $32. Tickets for both (as well as general admission) can be purchased ahead of time online.
6) Pumpkin Patch Express - Virginia City

Location: 166 F Street, Virginia City, NV
Price: $8 - $26, per person
Operating: On select dates throughout October 2025
Parking Available: Yes
Every year, the Virginia and Truckee line offers visitors train rides to a pumpkin patch in Virginia City, which is considered one of the most haunted cities in all of Nevada. Don’t worry, there won’t be any frightening spirits on this family-friendly outing.
Tours begin at the historic 1870 Train Depot. You can purchase tickets on site but to not risk the disappointment of them being sold out, it’s best to purchase them online (which you can do here). Tours depart at 11:20am, 1:20pm, and 3pm on the following dates:
10/11
10/12
10/18
10/19
10/24 (5pm only)
10/25
10/26
This is a great activity in Virginia City that kids and adults alike will enjoy. While you’re in Virginia City, be sure to complete your visit by taking tours of Mackay Mansion and the historic Chollar Mine!


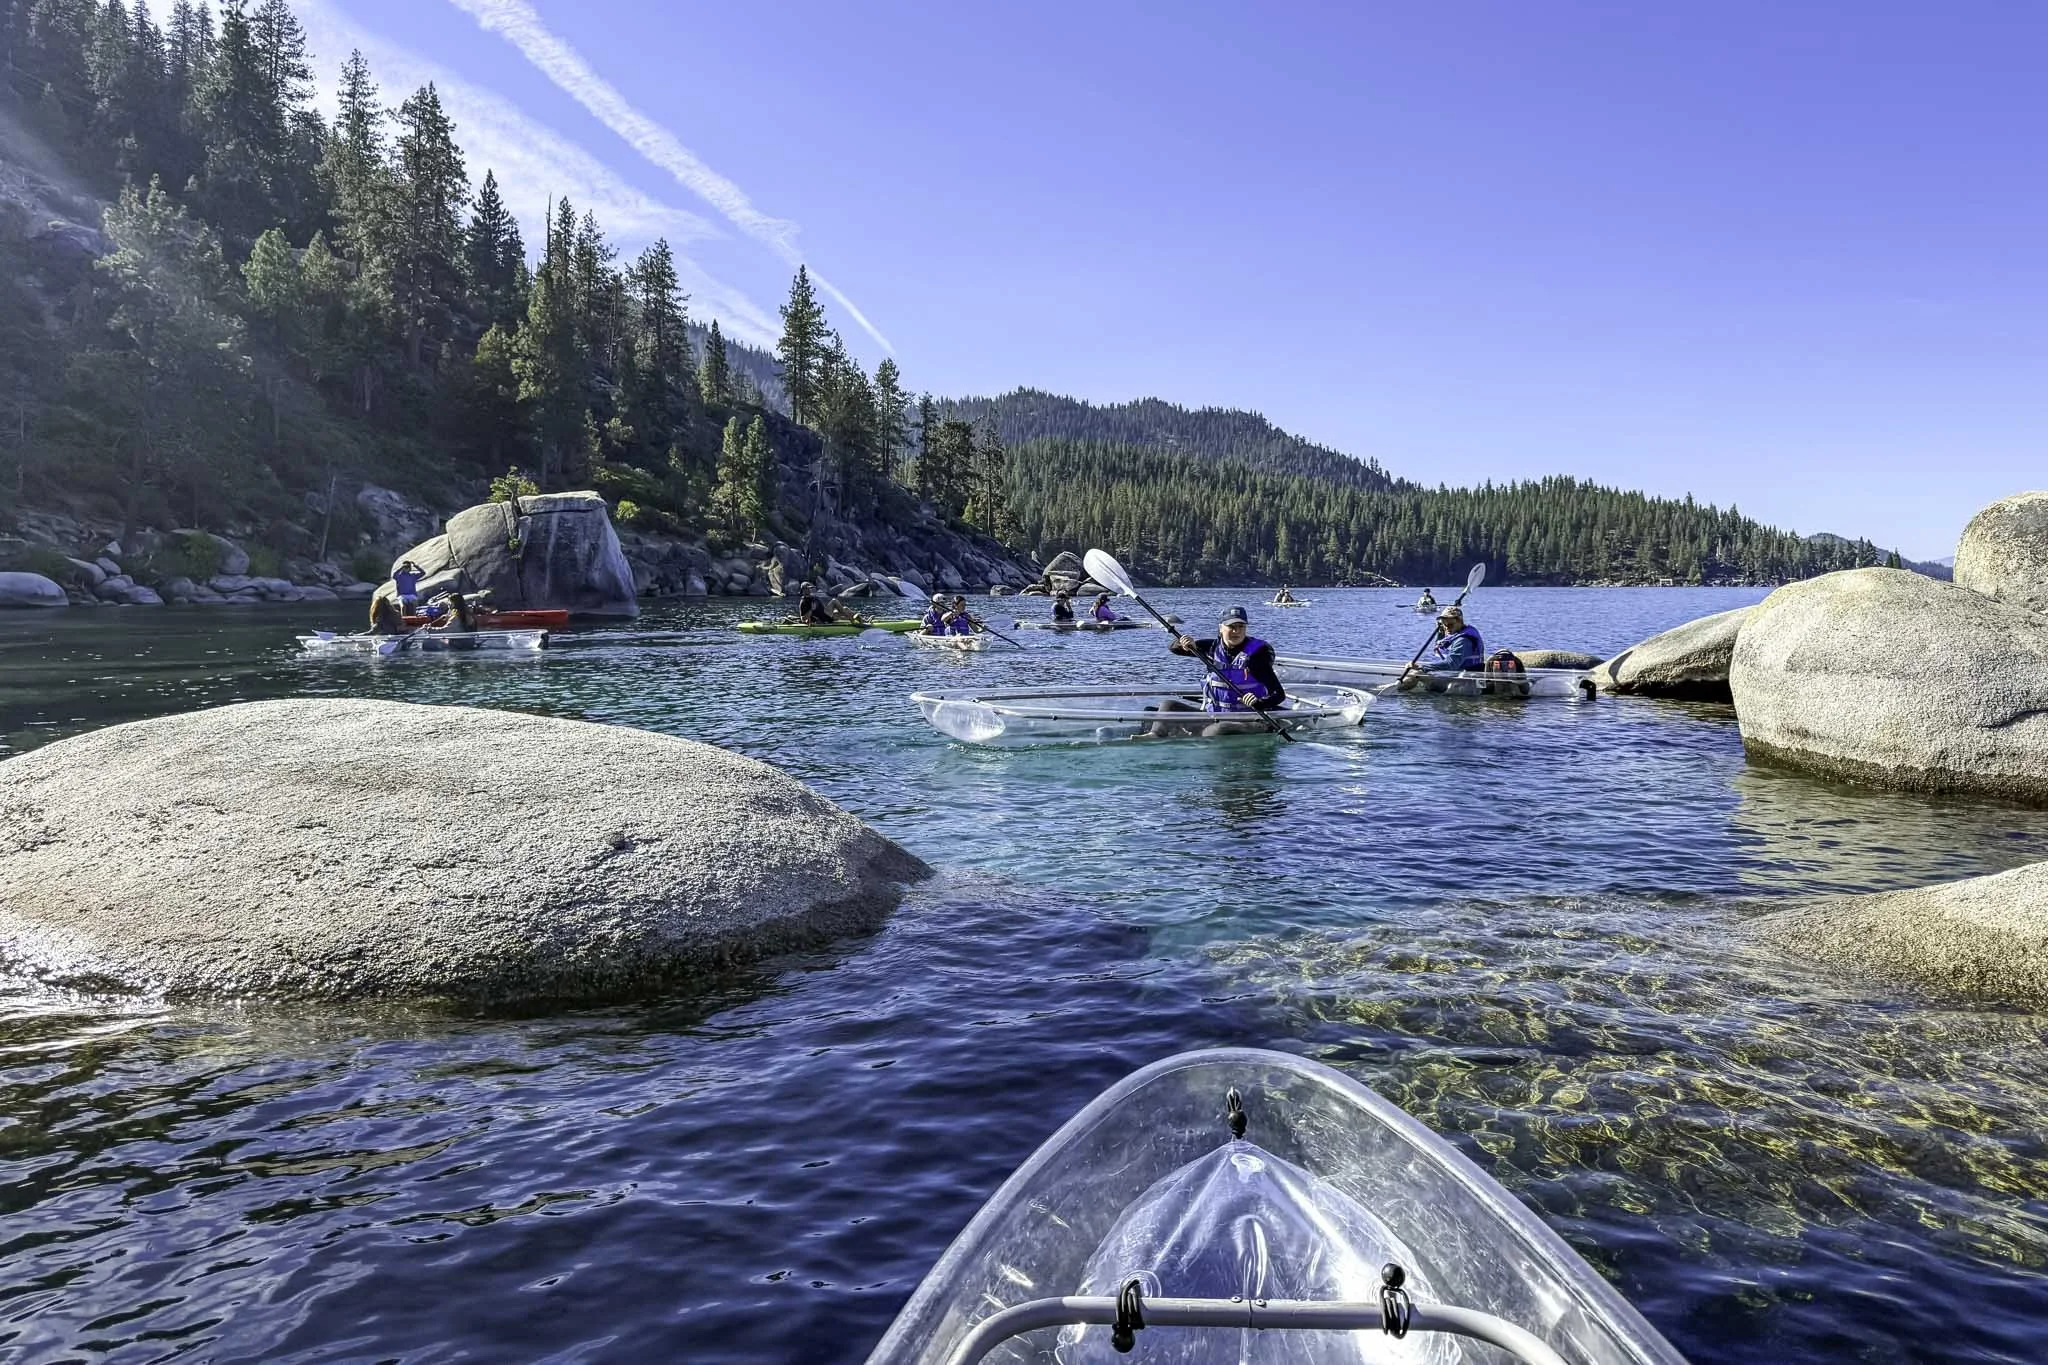


REVIEW: Clear Kayak Tour to Bonsai Rock with Clearly Tahoe
After conducting my research, I settled on booking with the ‘Clearly Tahoe’ outfit, specifically their clear kayak tour to Bonsai Rock…
Disclosure: This post contains affiliate links. If you make a purchase through these links, I may earn a small commission at no additional cost to you. I only recommend products or services that I believe will add value to my readers.
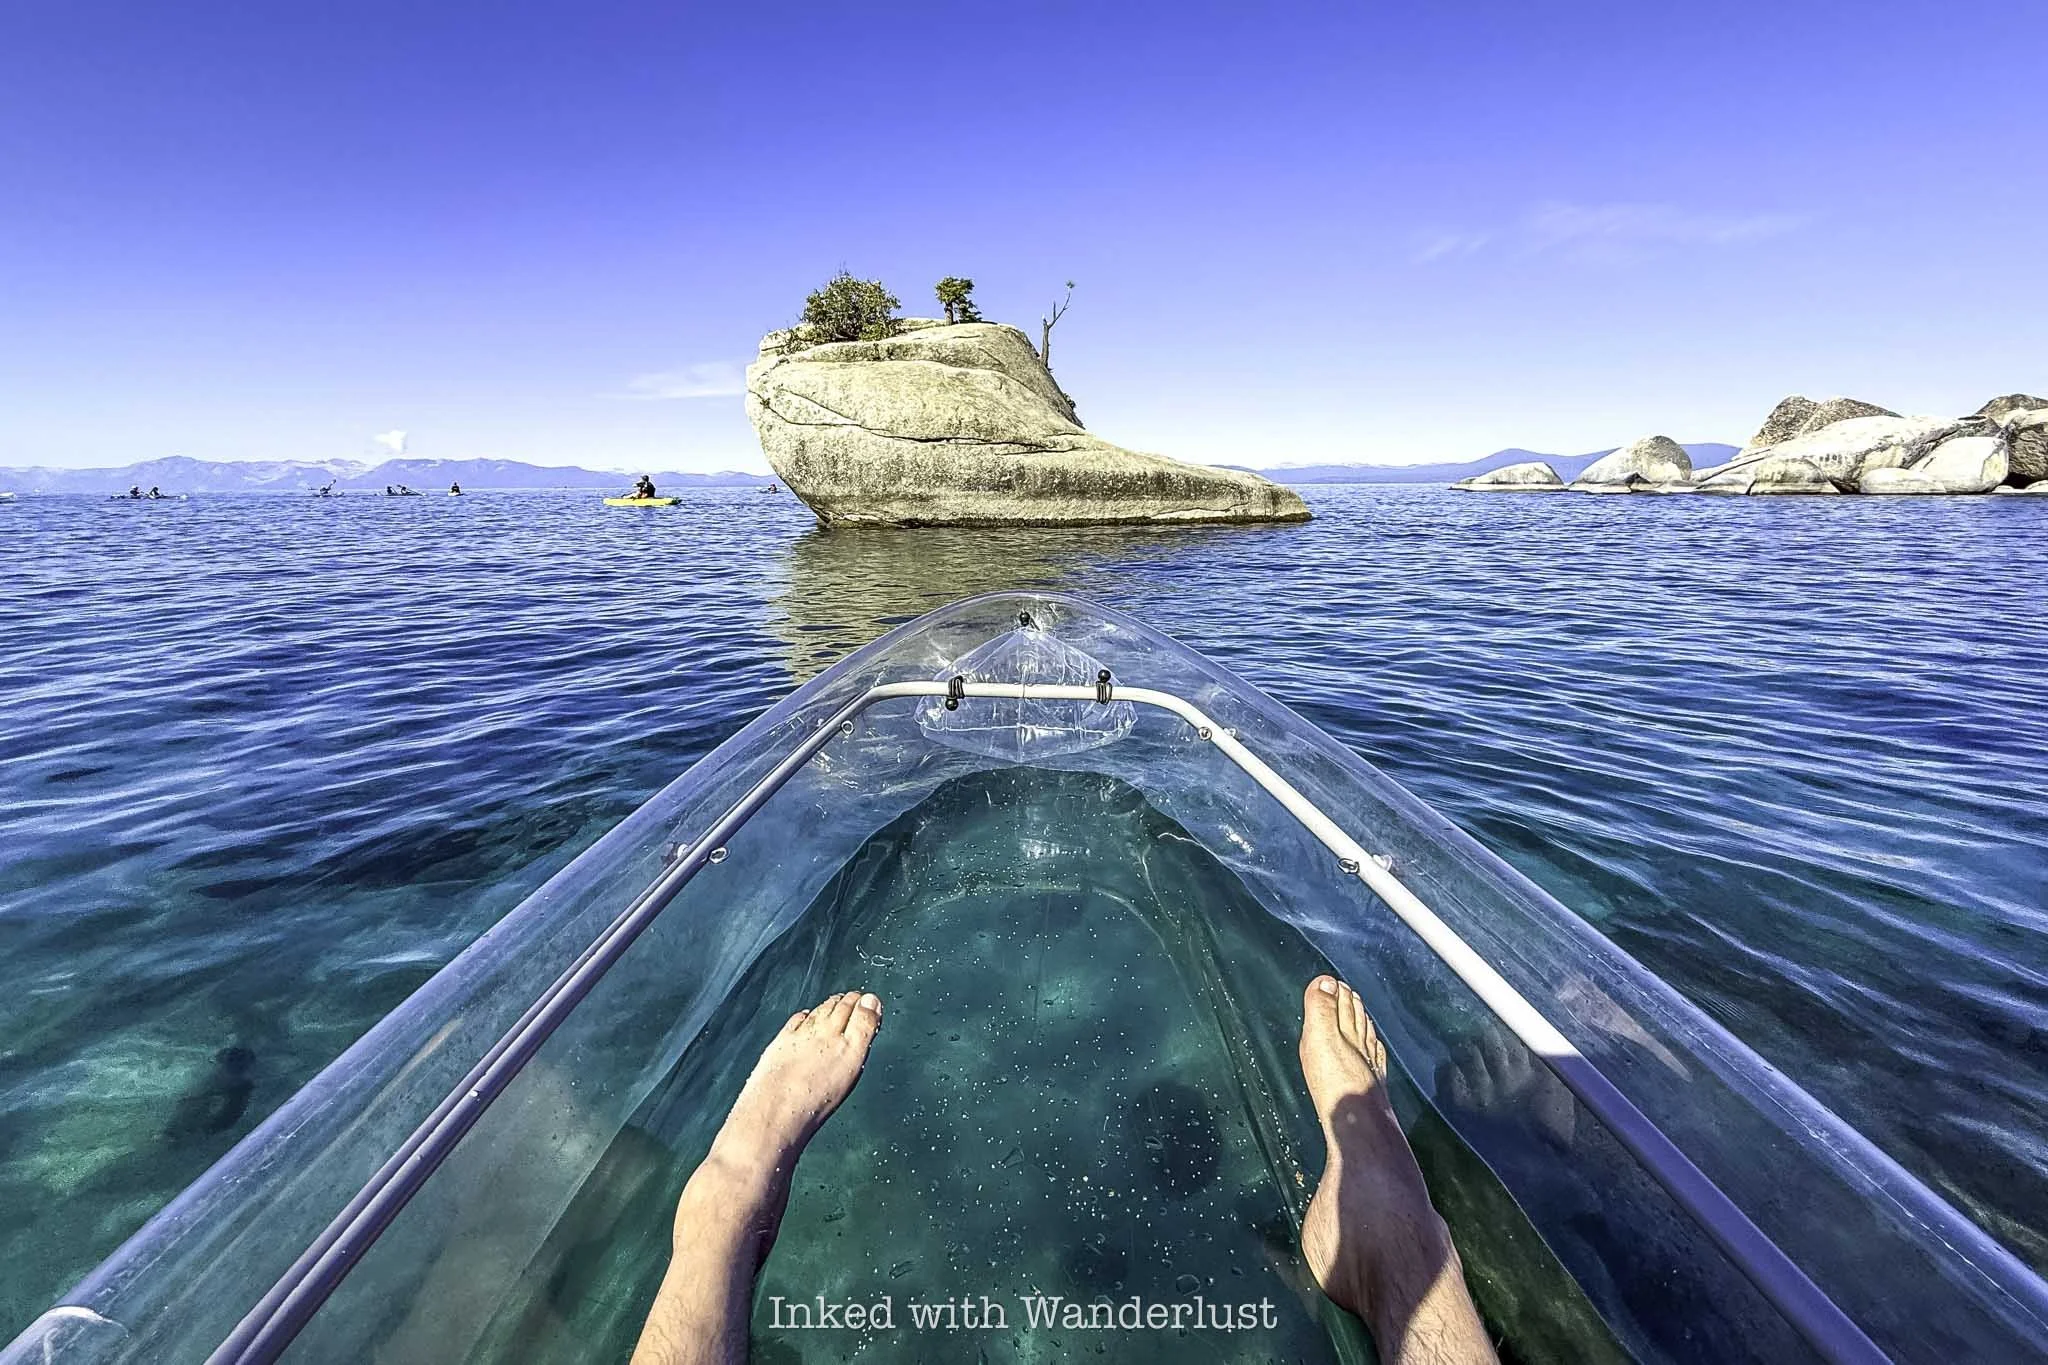
In recent years, my wife and I have been into giving experiences to our family and friends as gifts versus physical items. For Father’s Day last year, I took my Dad to a Billy Joel concert in Las Vegas. This year, I decided to book us a kayak tour, as we’ve always talked about doing that.
After conducting my research, I settled on booking with the ‘Clearly Tahoe’ outfit, specifically their clear kayak tour to Bonsai Rock. They’ve been in business since 2016, have an impeccable safety record and are the originators of the “clear kayak” concept.
In short, the tour was amazing! In this review, I’ll cover information such as the price, where you leave from, what to expect, and other pertinent information like who’s the tour for, requirements, etc. Let’s get into it!
Tour Information
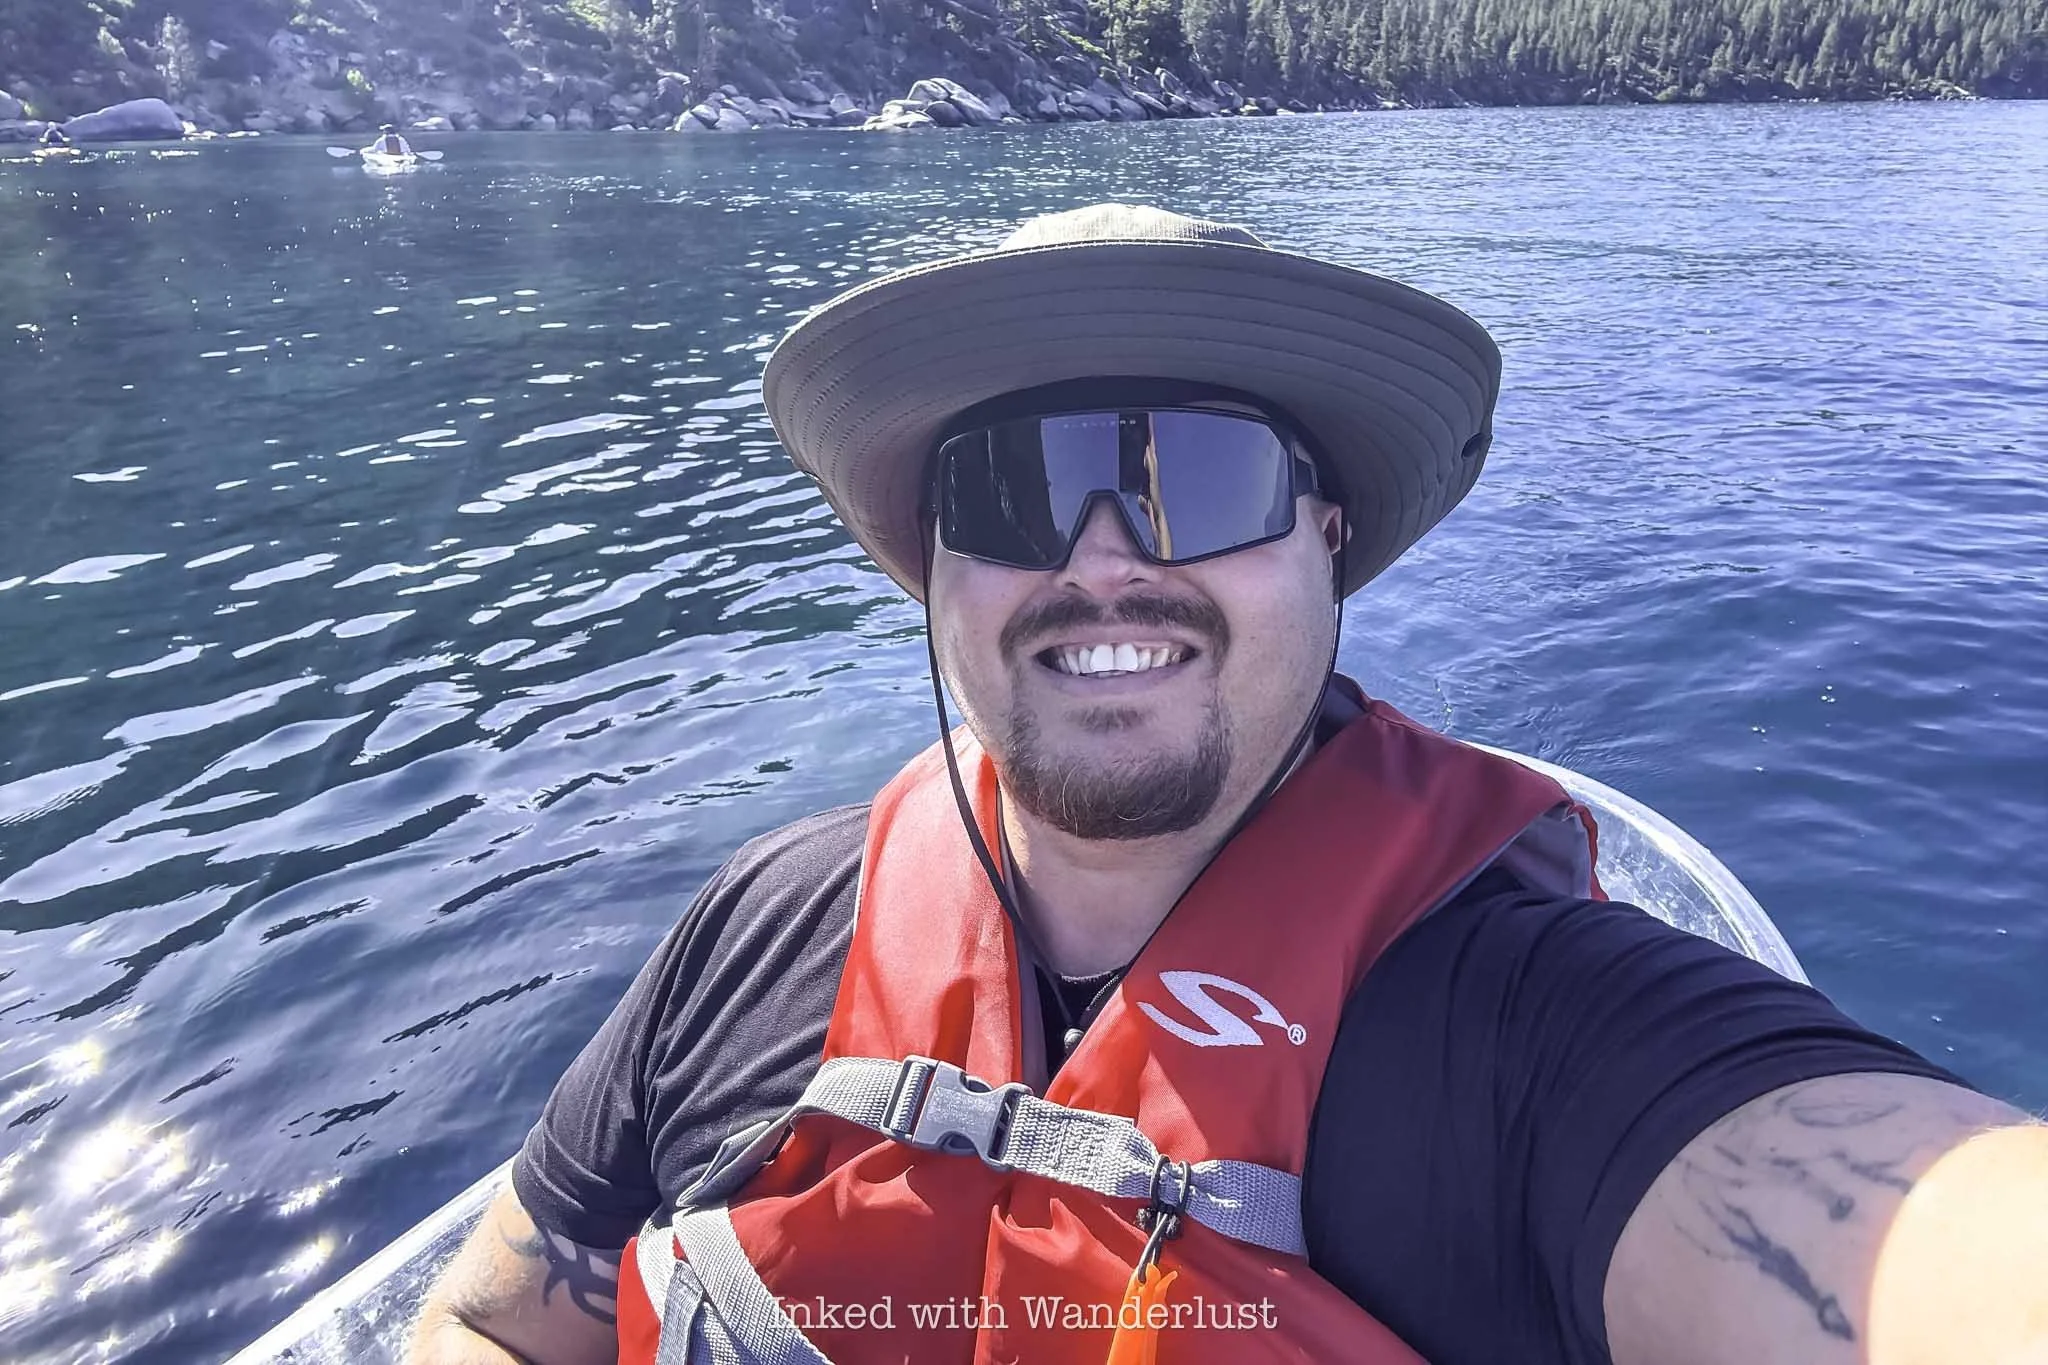
As stated above, I booked their Bonsai Rock clear kayak tour. My Dad and I, combined, exceeded their weight requirement for the double kayak so I booked us two singles at a cost of $134 each (you can view current pricing here).
This tour is suitable for total beginners, which is good because my Dad had no kayaking experience prior to this and the only experience I had was when I kayaked to Fannette Island in Emerald Bay, also in Lake Tahoe.
This is a guided tour conducted at what I felt was a reasonable pace and is around 2.5 total hours, with about 1.5 hours of that being spent in the kayak. It is NOT pet friendly (though they do offer a pooch-friendly version), the minimum age is six, and the weight limit is 375 pounds per kayak.
Items to Consider Bringing
Clearly Tahoe Meet-Up Location & Parking
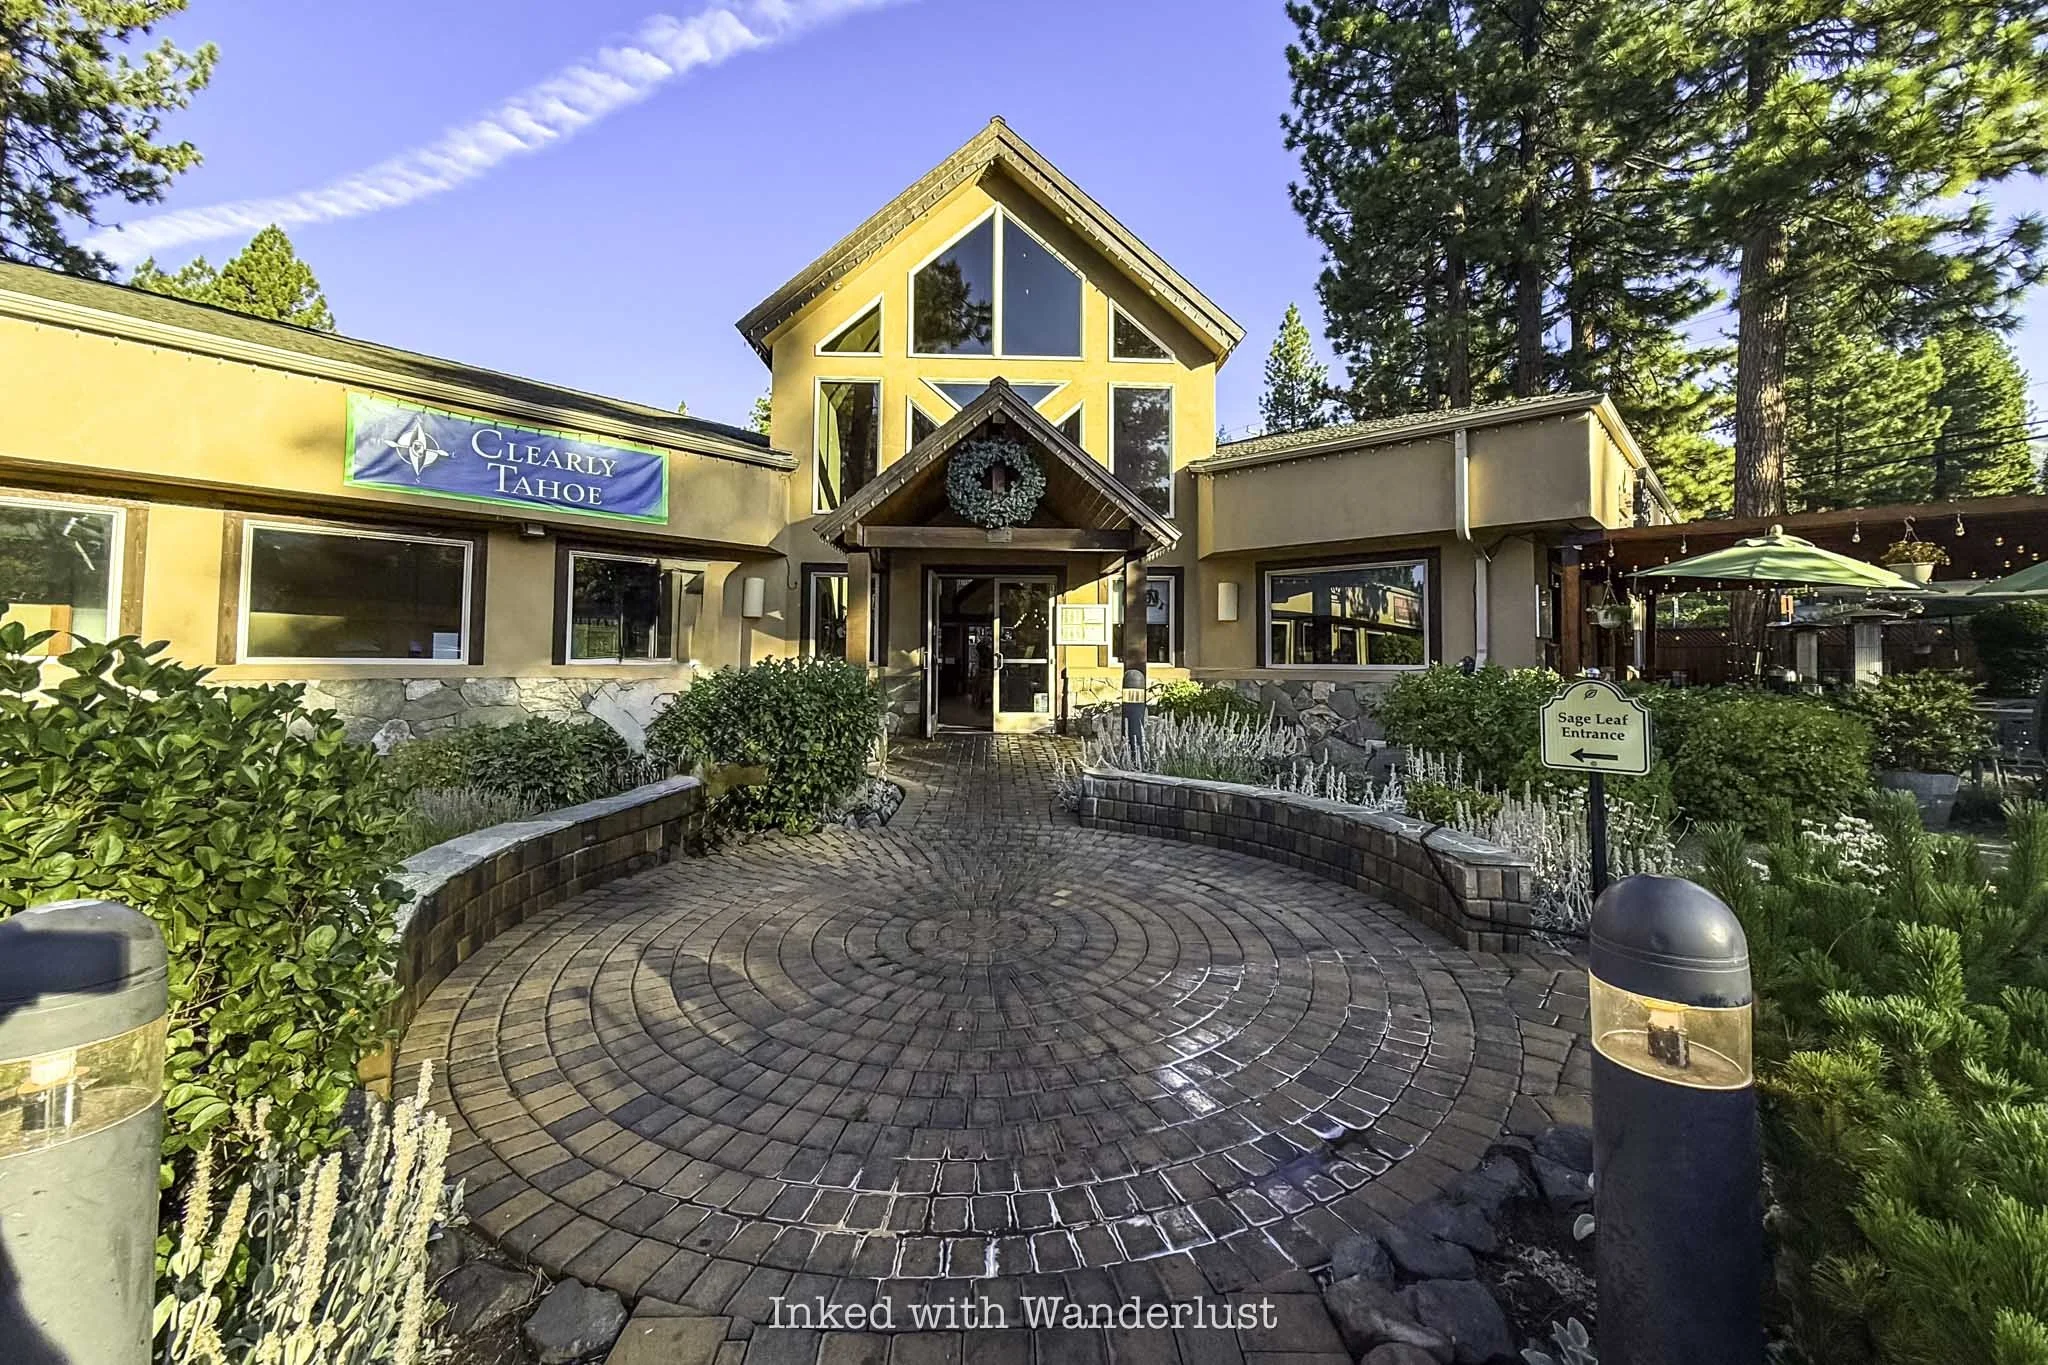
Regardless of which tour you book, you’ll meet up with the group at one of Clearly Tahoe’s offices. For the Bonsai Rock tour, you’ll meet at their Incline Village location (pictured above) at the following address:
893 Tahoe Blvd. Suite 800 (across from Starbucks)
Group members must meet at the office thirty minutes prior to the start of the tour. Tours leave promptly and will not wait, so make sure you’re on time. Also be sure to fill out the waivers online when they’re emailed to you, as this helps to expedite the check-in process.
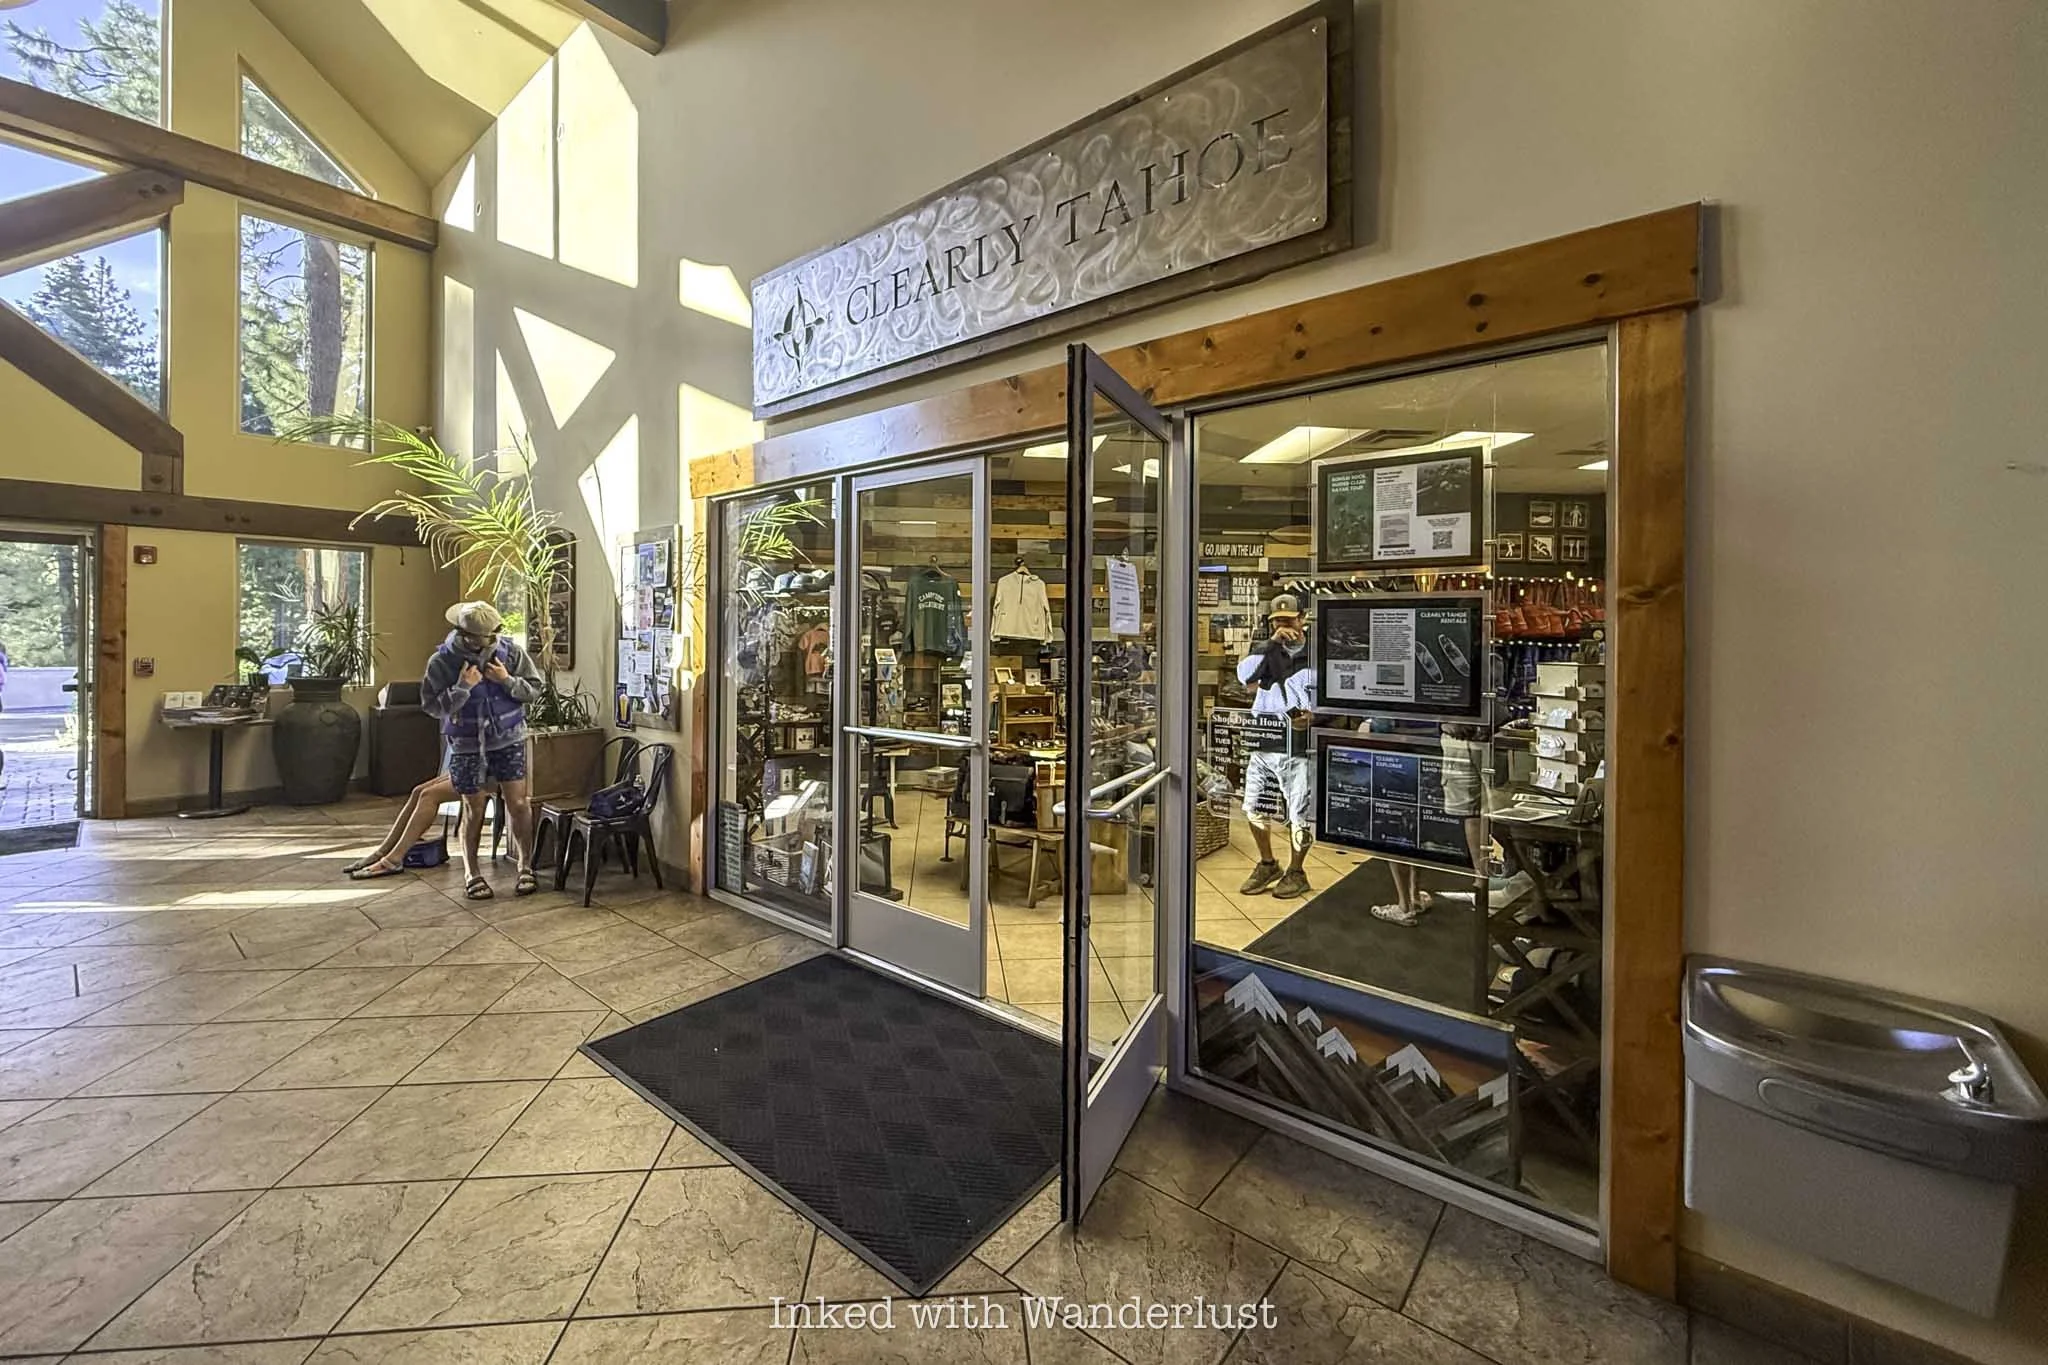
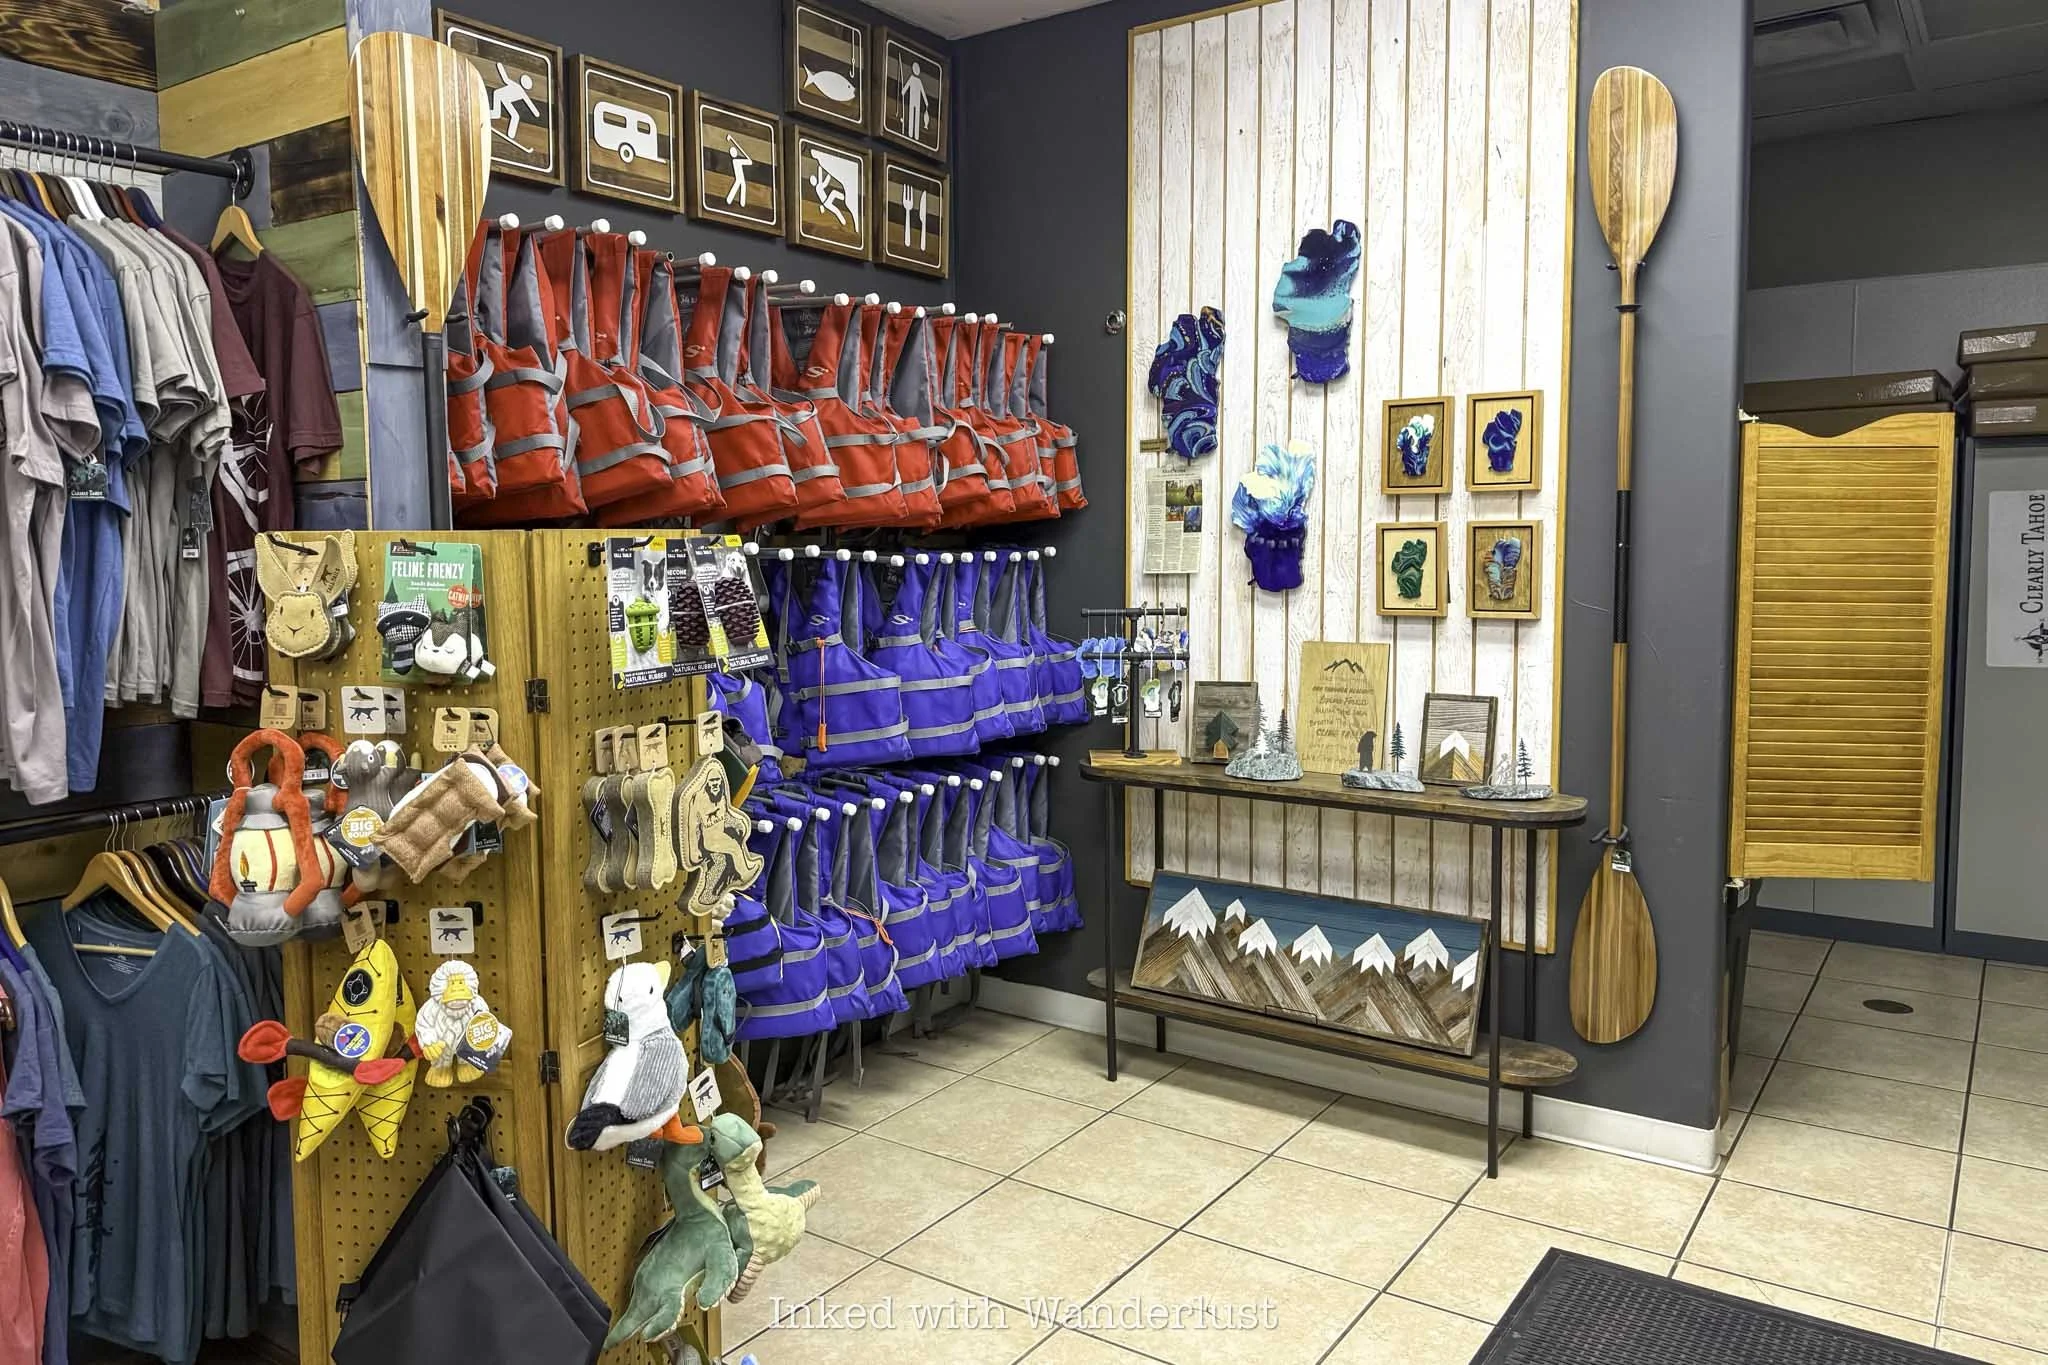
There’s a parking garage behind the building they encourage you to park in, but I was also told it wasn’t a problem to park in the lot out front. Just know it gets hectic here in the summer so if your tour is for later in the day, just park in the garage to save yourself a battle.
The Clearly Tahoe office is located just across from Starbucks and is in the same building as the Sage Leaf Cafe restaurant. When you arrive, you’ll fill out your waiver (if you haven’t already), be given a goodie bag, a dry bag, and be fitted for a life vest.
In the goodie sack you’re given you’ll find two boxes of water, a couple Nature Valley granola bars, and a towel to use to wipe the sand out of your clear kayak. Not sure if these are the exact items given every time, but that’s what was given to my Dad and me.
Speaking of water, make sure you’re hydrated going into the tour and stay hydrated throughout it. You’re in a higher elevation in Tahoe and thus, more susceptible to dehydration, sunburn, etc. I found out the hard way when my calf cramped up badly while getting out of the kayak. It’s no joke.
Once everybody has checked in, your driver (ours was Dave) will escort the group to the Clearly Tahoe shuttle van to take you to Sand Harbor Beach State Park - where your tour officially begins. There was 8 in our group and there was just enough room in the shuttle for us.
Our driver, Dave, got us there safely and without incident. The whole trip took about ten minutes. On the way, he showed us properties owned by big names such as Steve Wynn and Larry Ellison.
Sand Harbor - Where Your Tour Begins
The clear kayak tour to Bonsai Rock begins at the main beach at Sand Harbor State Park. You will NOT need to make reservations to access Sand Harbor, as Clearly Tahoe takes care of this for you as part of your tour.
You’ll be dropped off in the parking area, near the beach access. This is also where your tour guide(s) will meet you. Ours was Julia and while we didn’t find out until after the tour, we were her very first tour group ever.
After the initial introduction, you’ll be given a final opportunity at using a restroom and be shown where to meet afterwards. There’s a rug-type-thing leading to the water’s edge. The end of which is where you’ll meet.
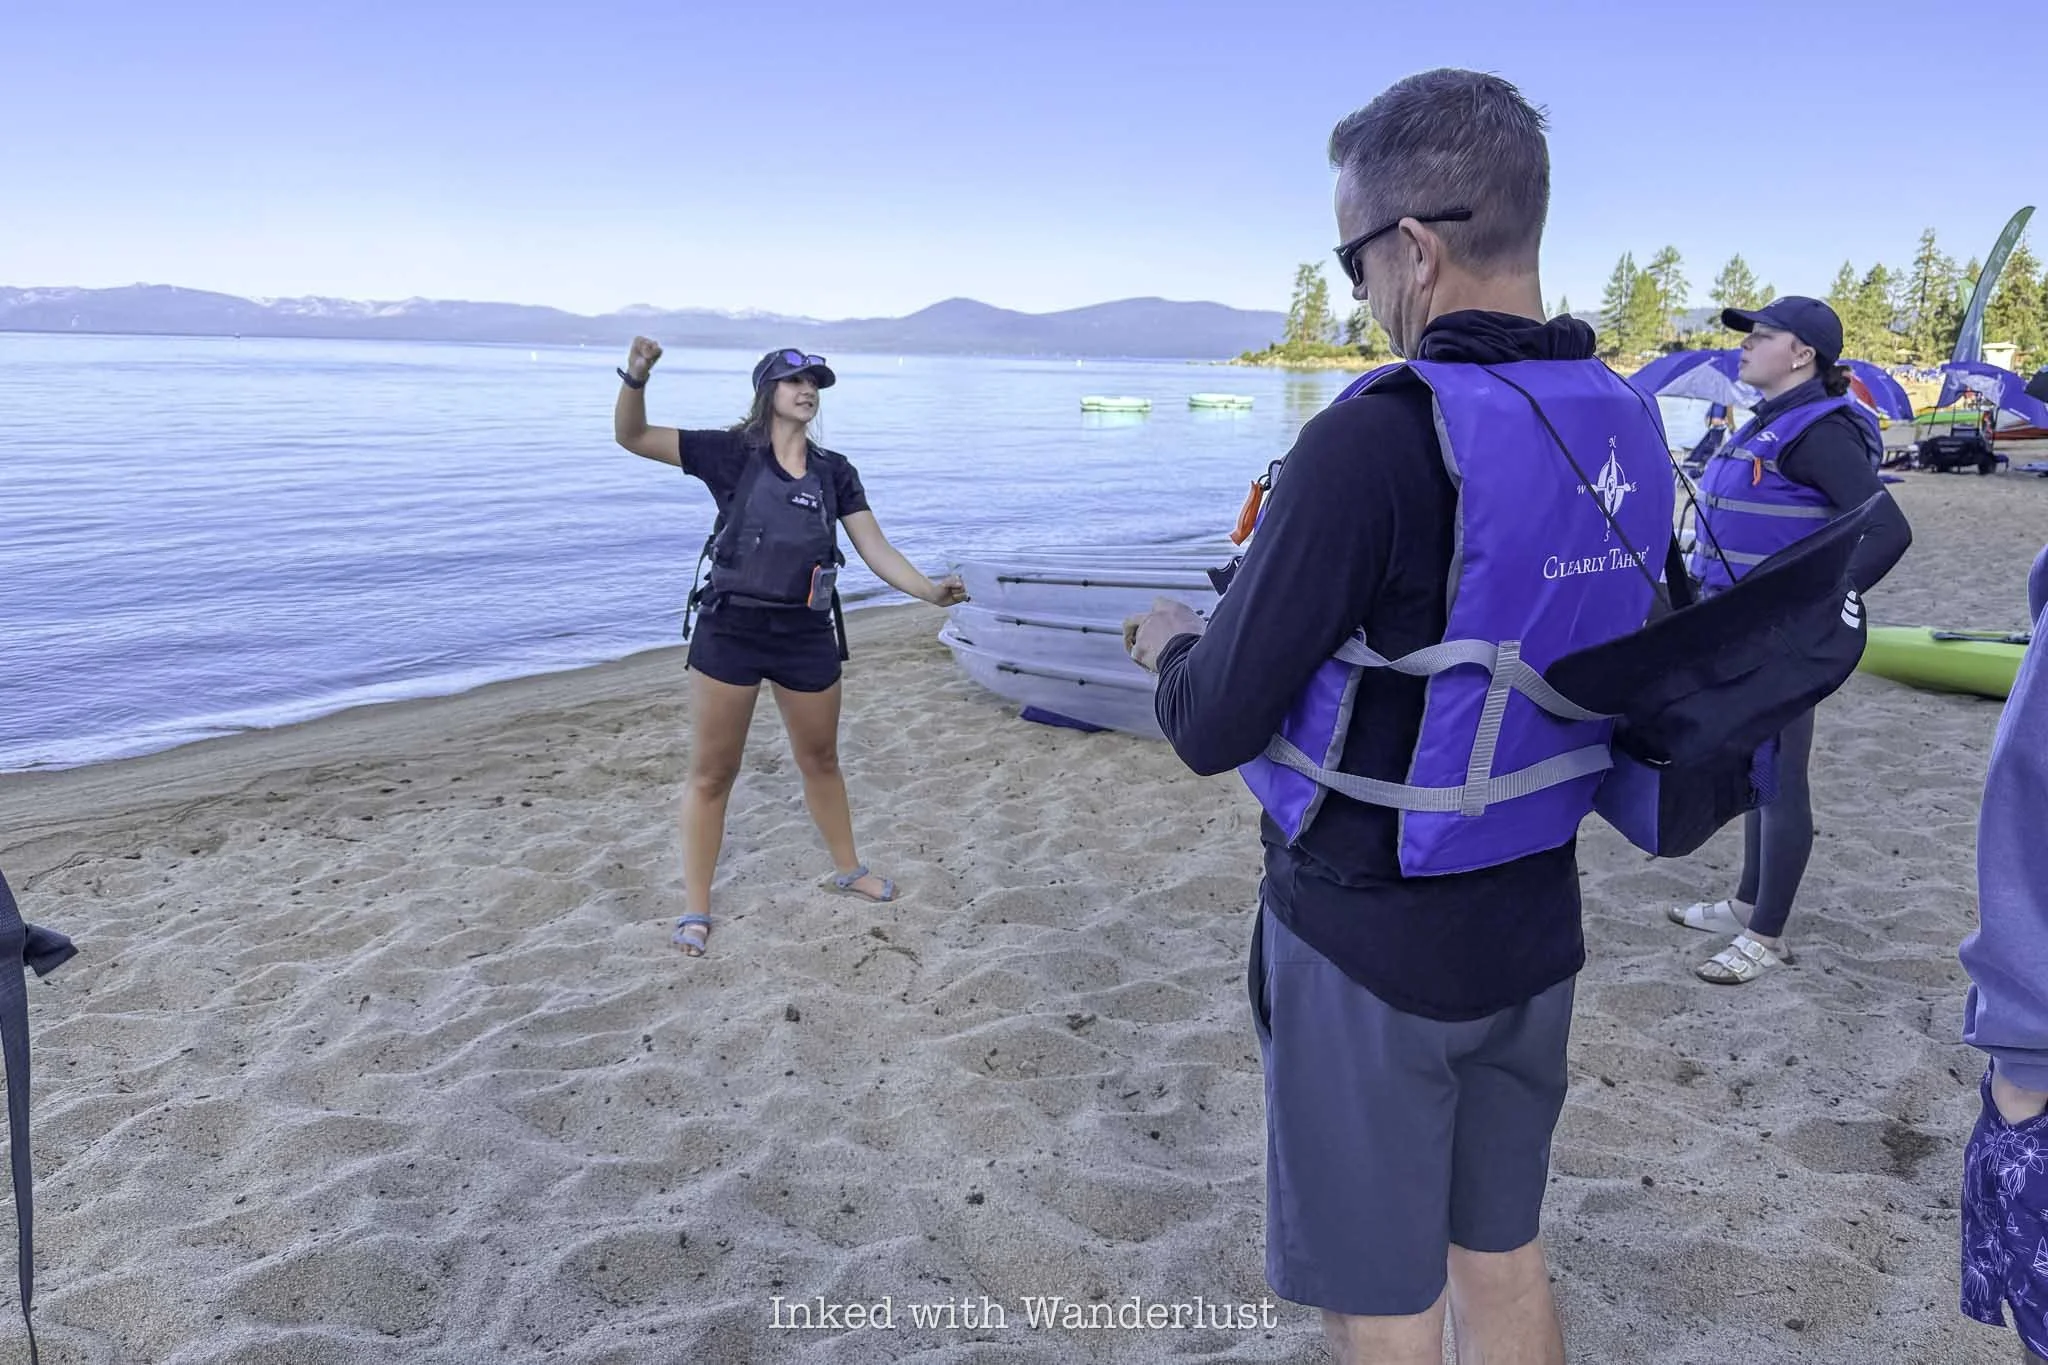
There, you’ll be given a quick rundown on how to operate your kayak. If you’re a total beginner, you won’t have much of an issue. My Dad didn’t have any experience at all and picked up on it quickly. It’s simple - paddle left to go right, and paddle right to go left. Alternate left and right to go straight and paddle in reverse to go backwards.
Getting into and out of the kayaks was probably the trickiest part of the whole experience, but even that wasn’t bad. The guides will assist you to a point, but you’ll need to be able to lower and raise yourself.
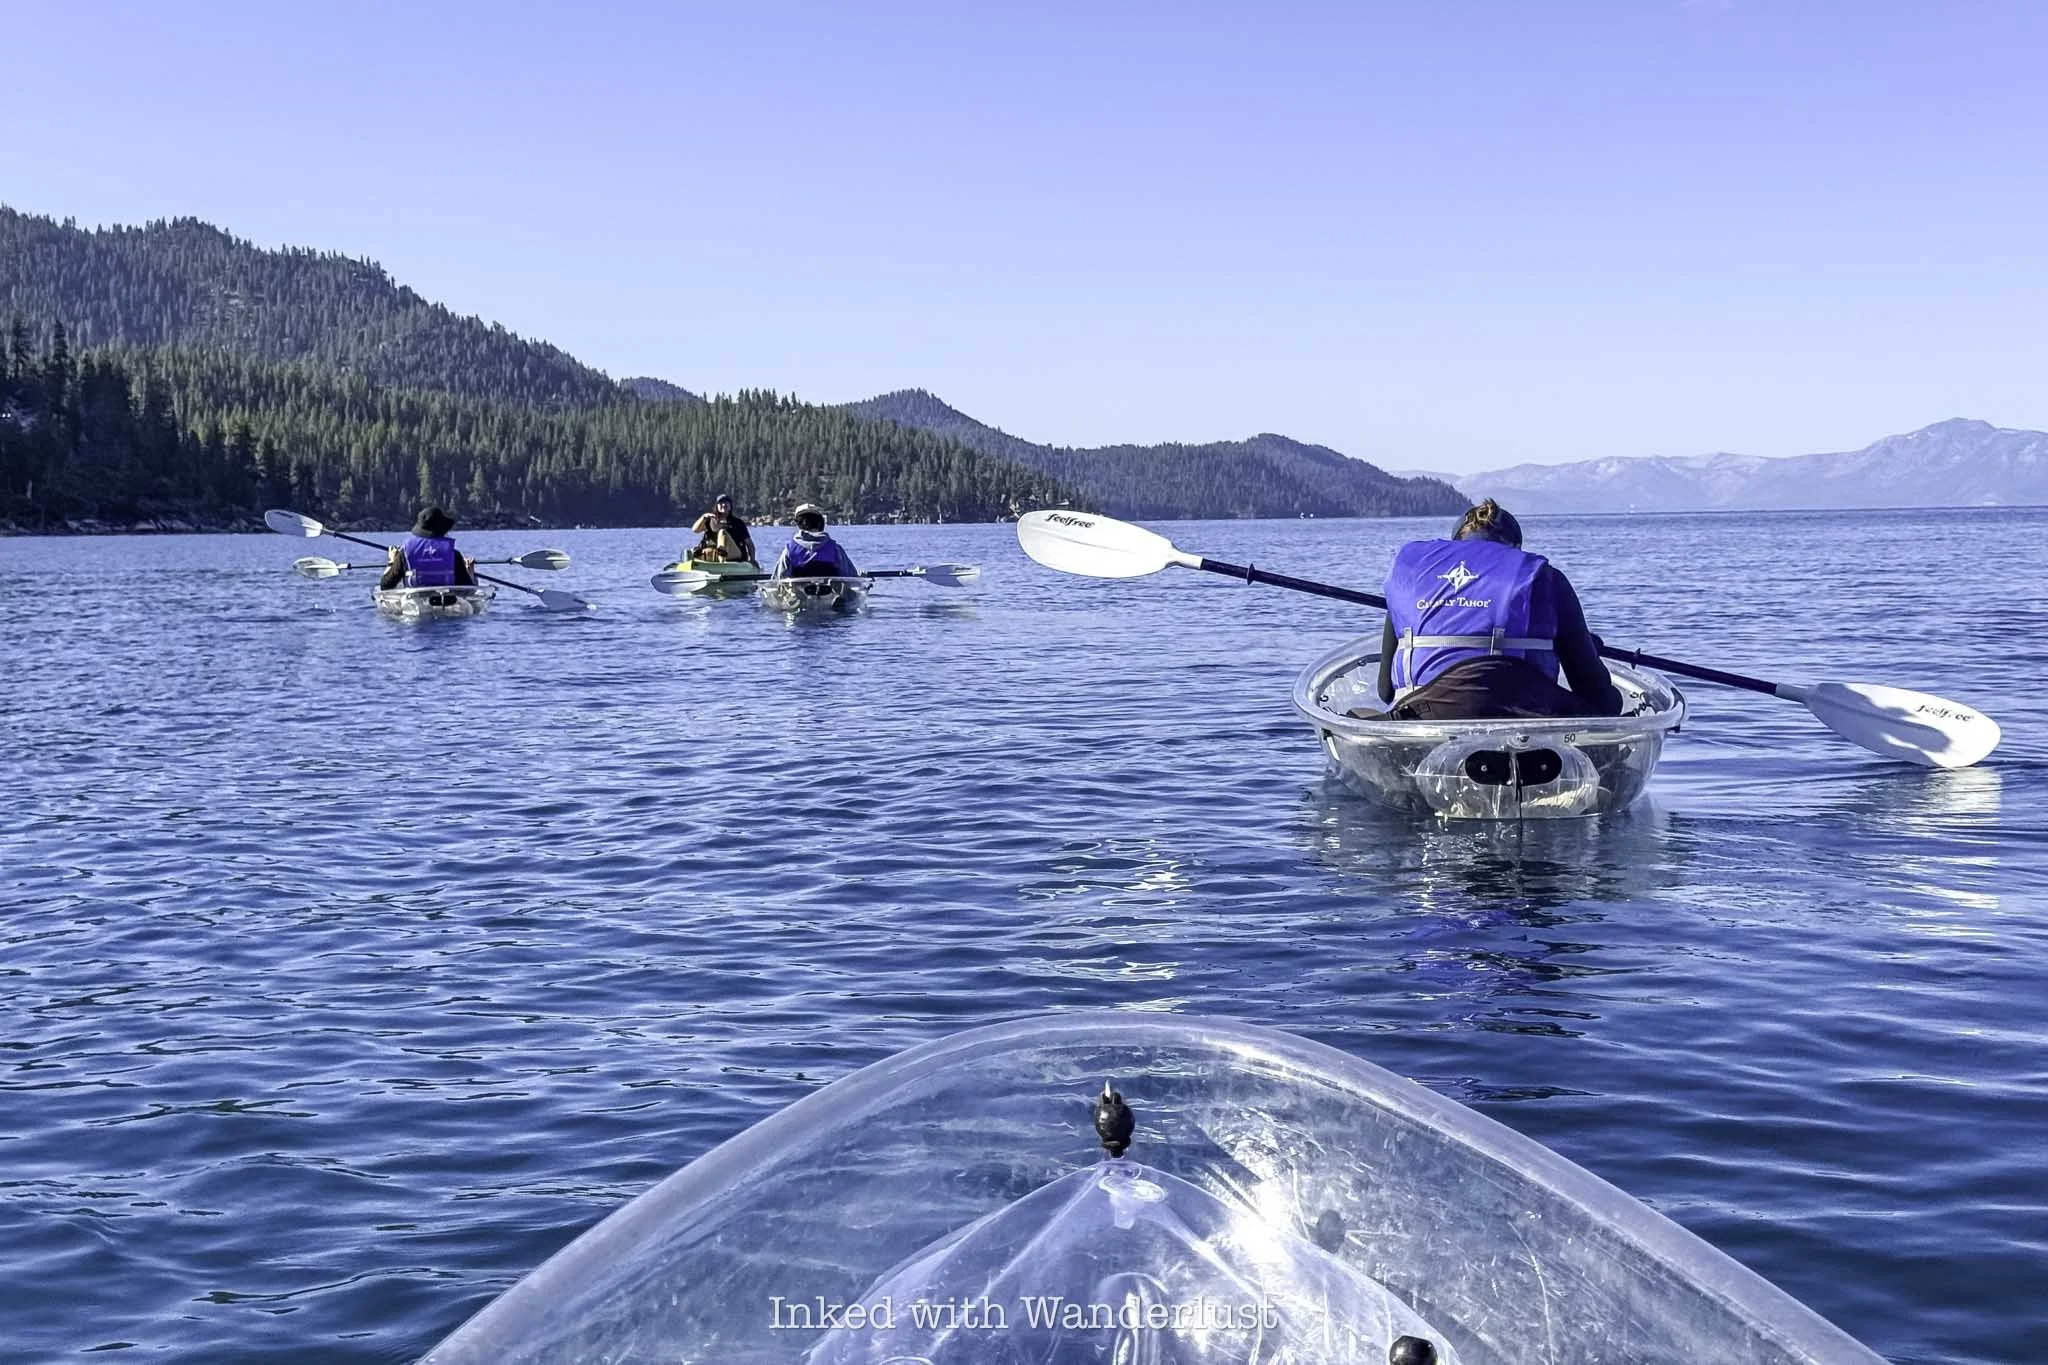
Within a few minutes, everyone in our group had the basics down. Seasoned pros we were not, but everyone was able to keep a steady pace and not lag behind too much. Julia set the pace in front on her peddle-kayak while another guide remained in the back of the group for support.
The kayaks were closer to a canoe than a traditional kayak and were touted by the guides as “extremely difficult” to tip over. I lightly tested this claim by moving around somewhat aggressively and while the kayak did rock a bit, it remained mostly steady.
I booked the first tour of the day (8am) so there wasn’t much boat traffic on the lake. Which was nice, as it kept the waves to a minimum and enabled us to fully appreciate that glass-like clarity Lake Tahoe is known for. If it’s your first time kayaking, I recommend doing the same.
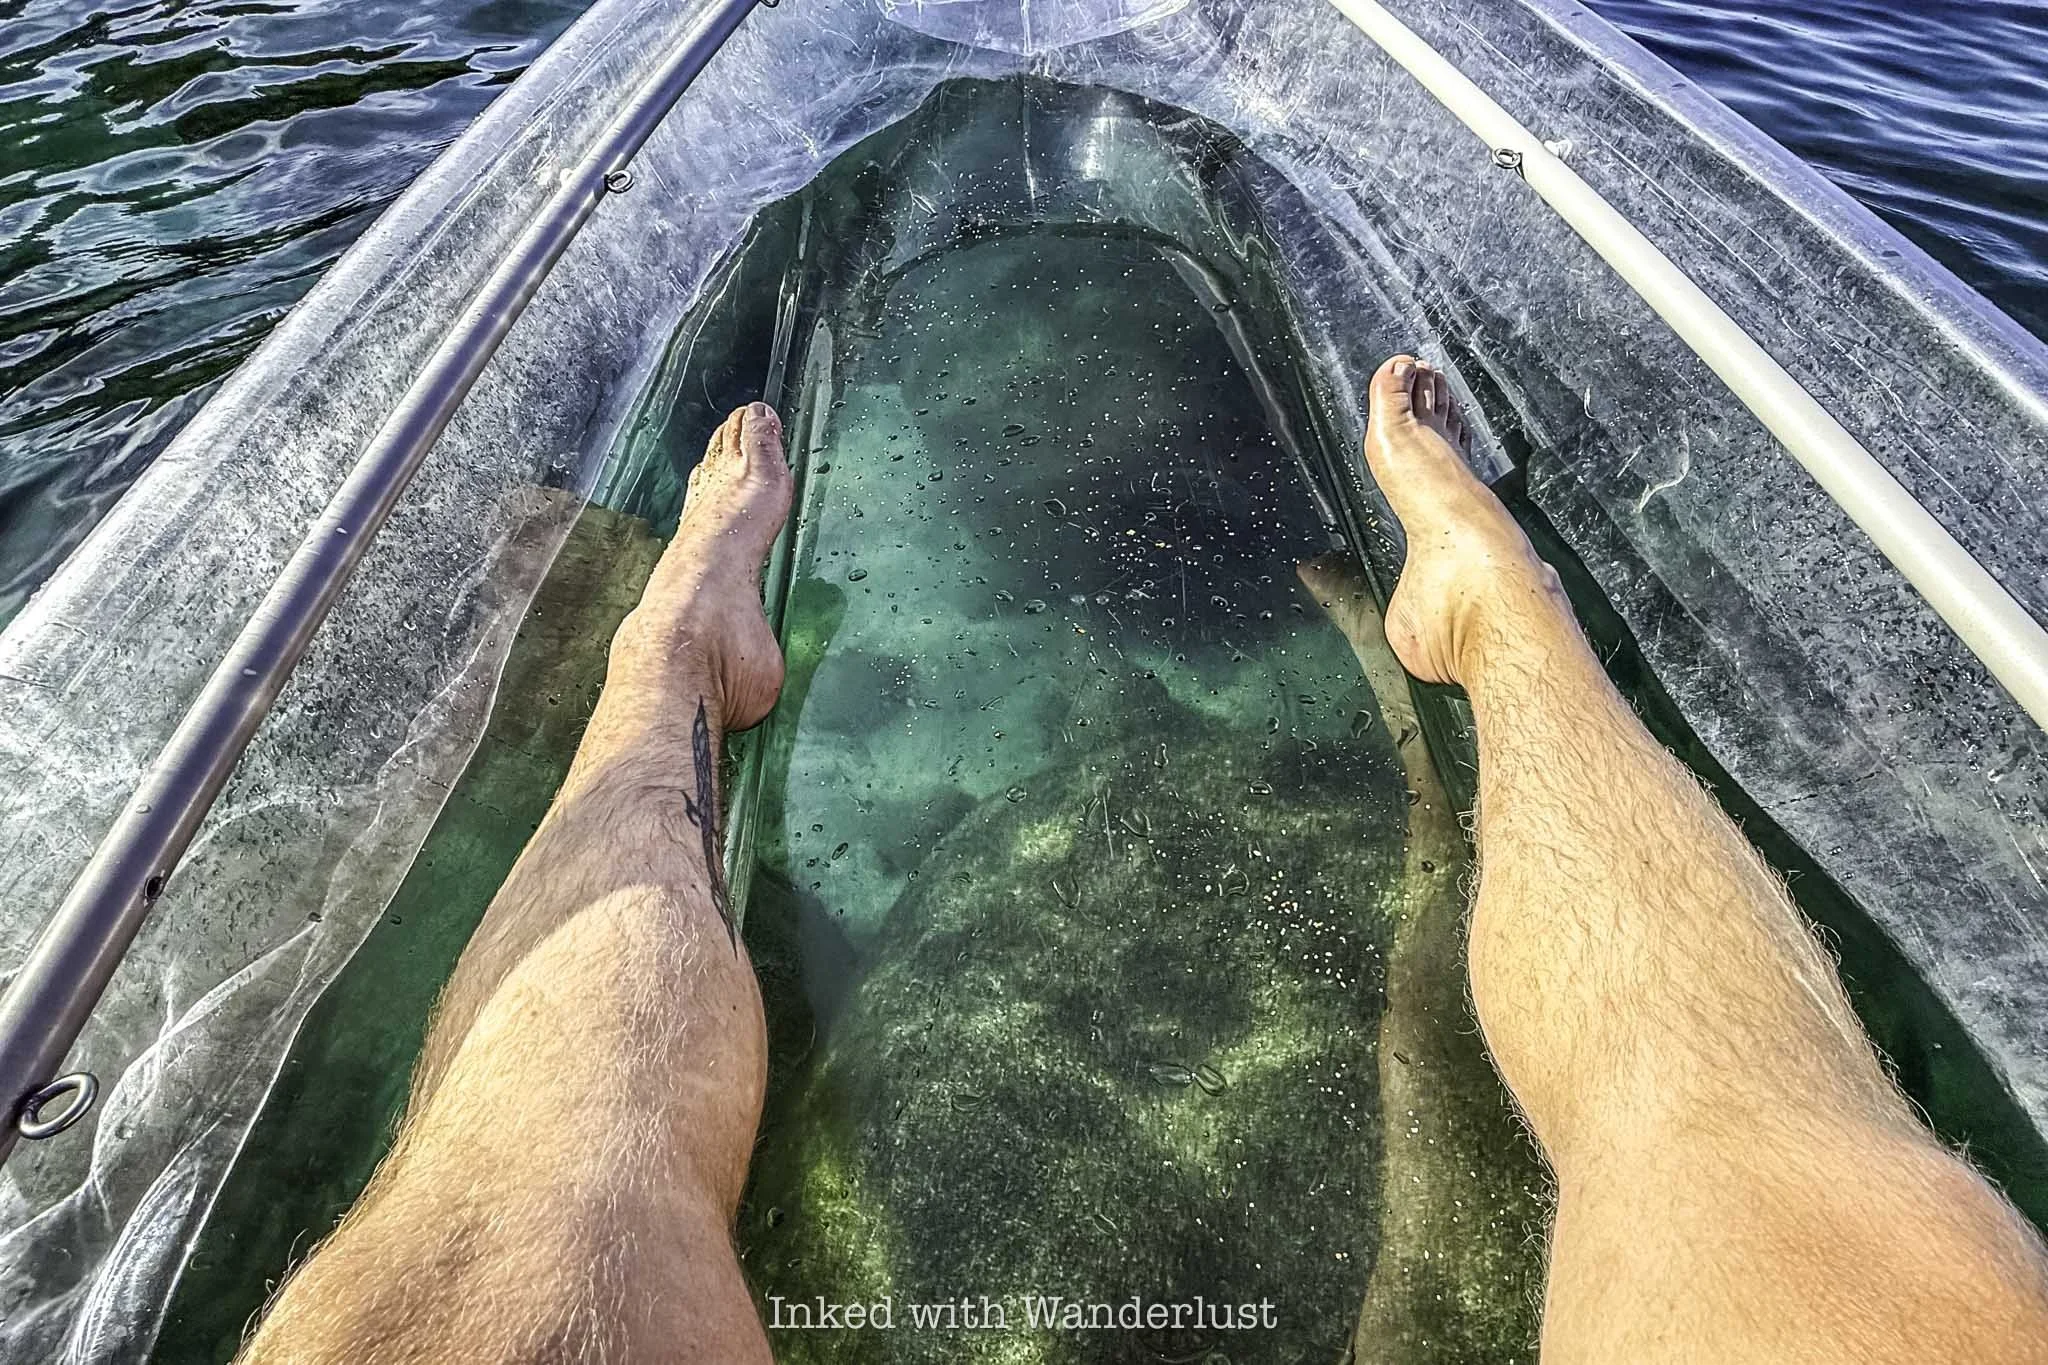
On this tour, you’ll be kayaking along Tahoe’s infamously serene east shore. For now, the water perspective is the only way to fully view this specific section of the east shore. The Tahoe East Shore Trail currently ends at Sand Harbor, but will eventually run through the entire stretch.
About 10-15 minutes into your tour is when the underwater granite boulders will start coming into view through your clear kayak. Some are dozens of feet beneath you while others appear to be right underneath the surface.
As you approach Bonsai Rock, you’ll come to a cluster of huge granite boulders you’ll need to negotiate. Here, your tour guide will take “action photos” of you as you pass through the boulder field.
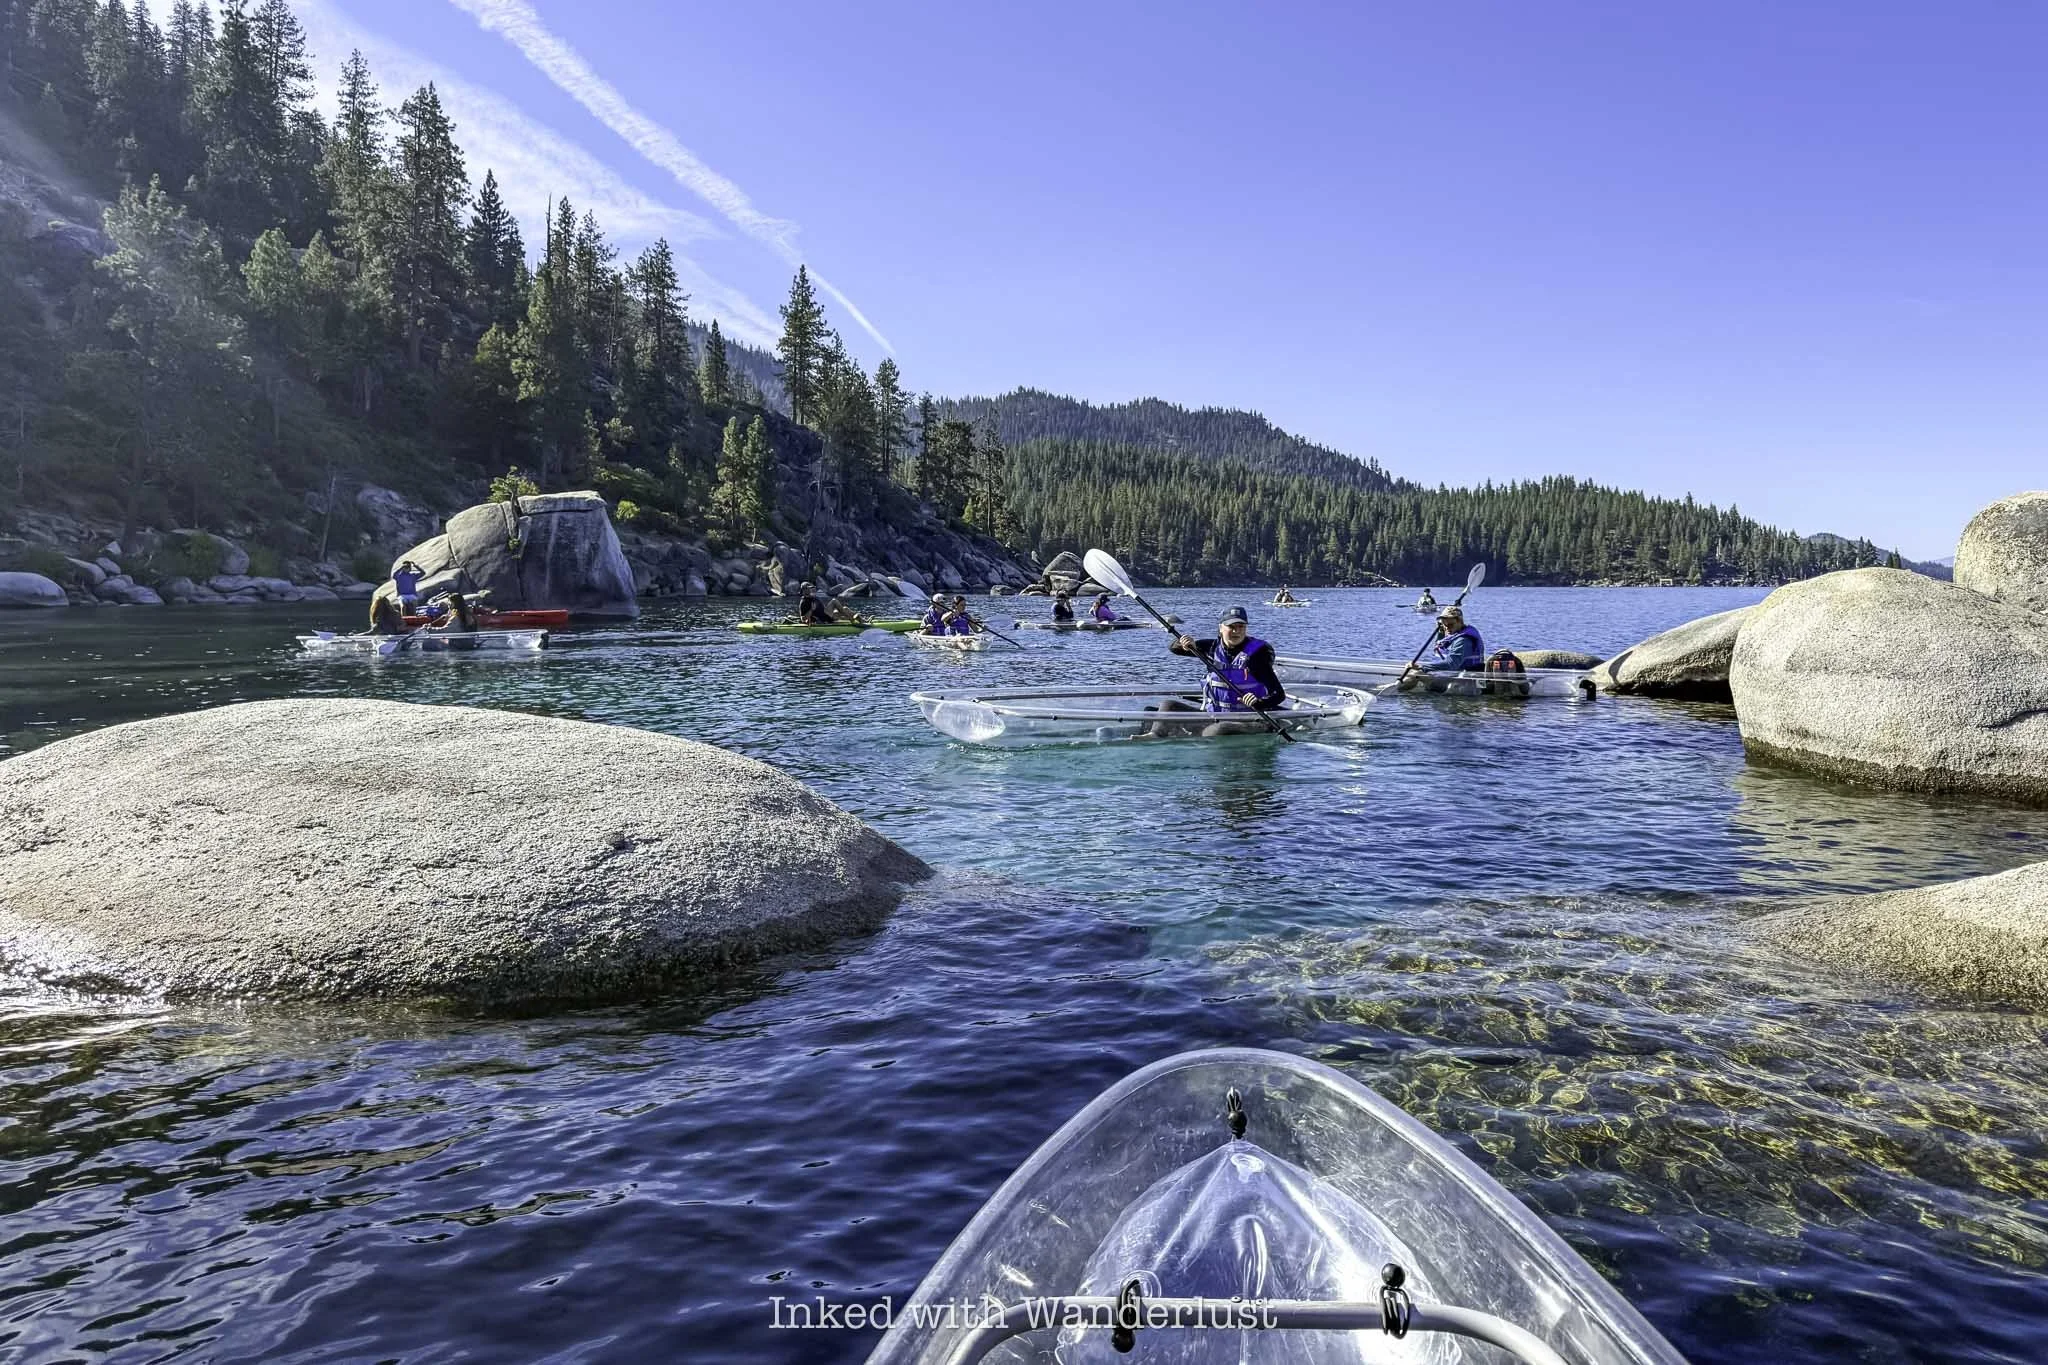
Getting through the boulder field is easy, though you will likely scrap the bottom of your kayak on one. Don’t sweat it if you do, as it’s nearly impossible to crack or puncture them (according to our tour guide, anyway).
When you get through the small boulder field, Bonsai Rock will come into view on your left. You’ll immediately notice it, as it’s distinguished by several trees growing out of various cracks at and near the top.
You’ve likely seen Bonsai Rock on Tiktok and Instagram as it’s currently the second most photographed spot in all of Lake Tahoe (in case you were interested, Emerald Bay is the most photographed spot on the lake).

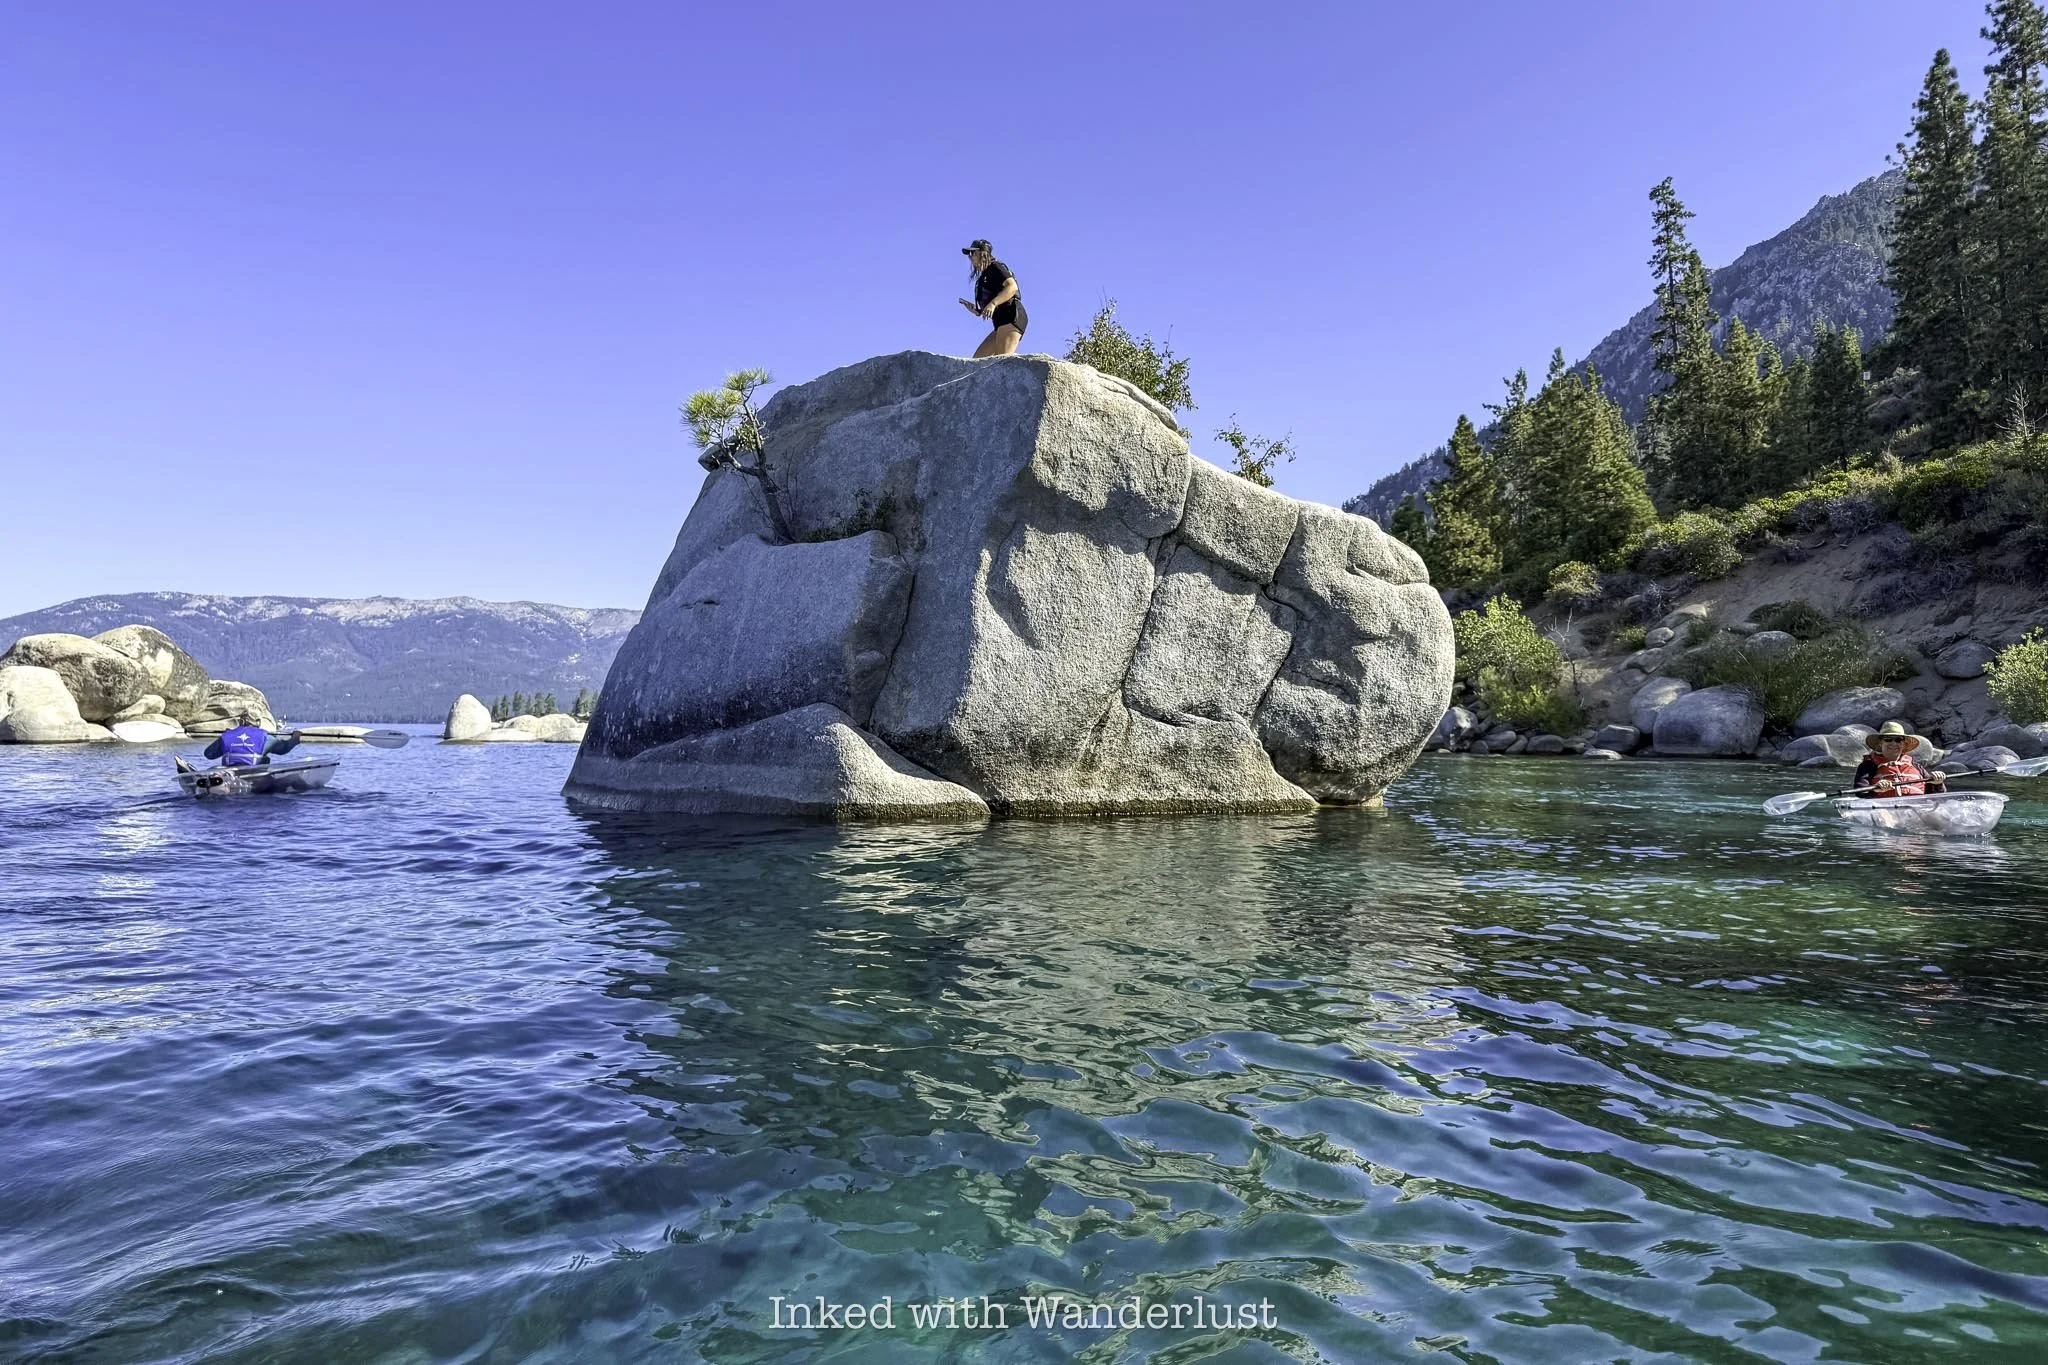
The group lingered around Bonsai Rock for several minutes, allowing time for light exploring and photo taking. Julia, our guide, climbed on top of the rock and took “from above” photos of each person in the tour group.
Once everyone had gotten their photo taken, the tour continued slightly past Bonsai Rock to a beautiful unnamed cove. It was here that I wish we had time to swim around because that cove looked so peaceful.
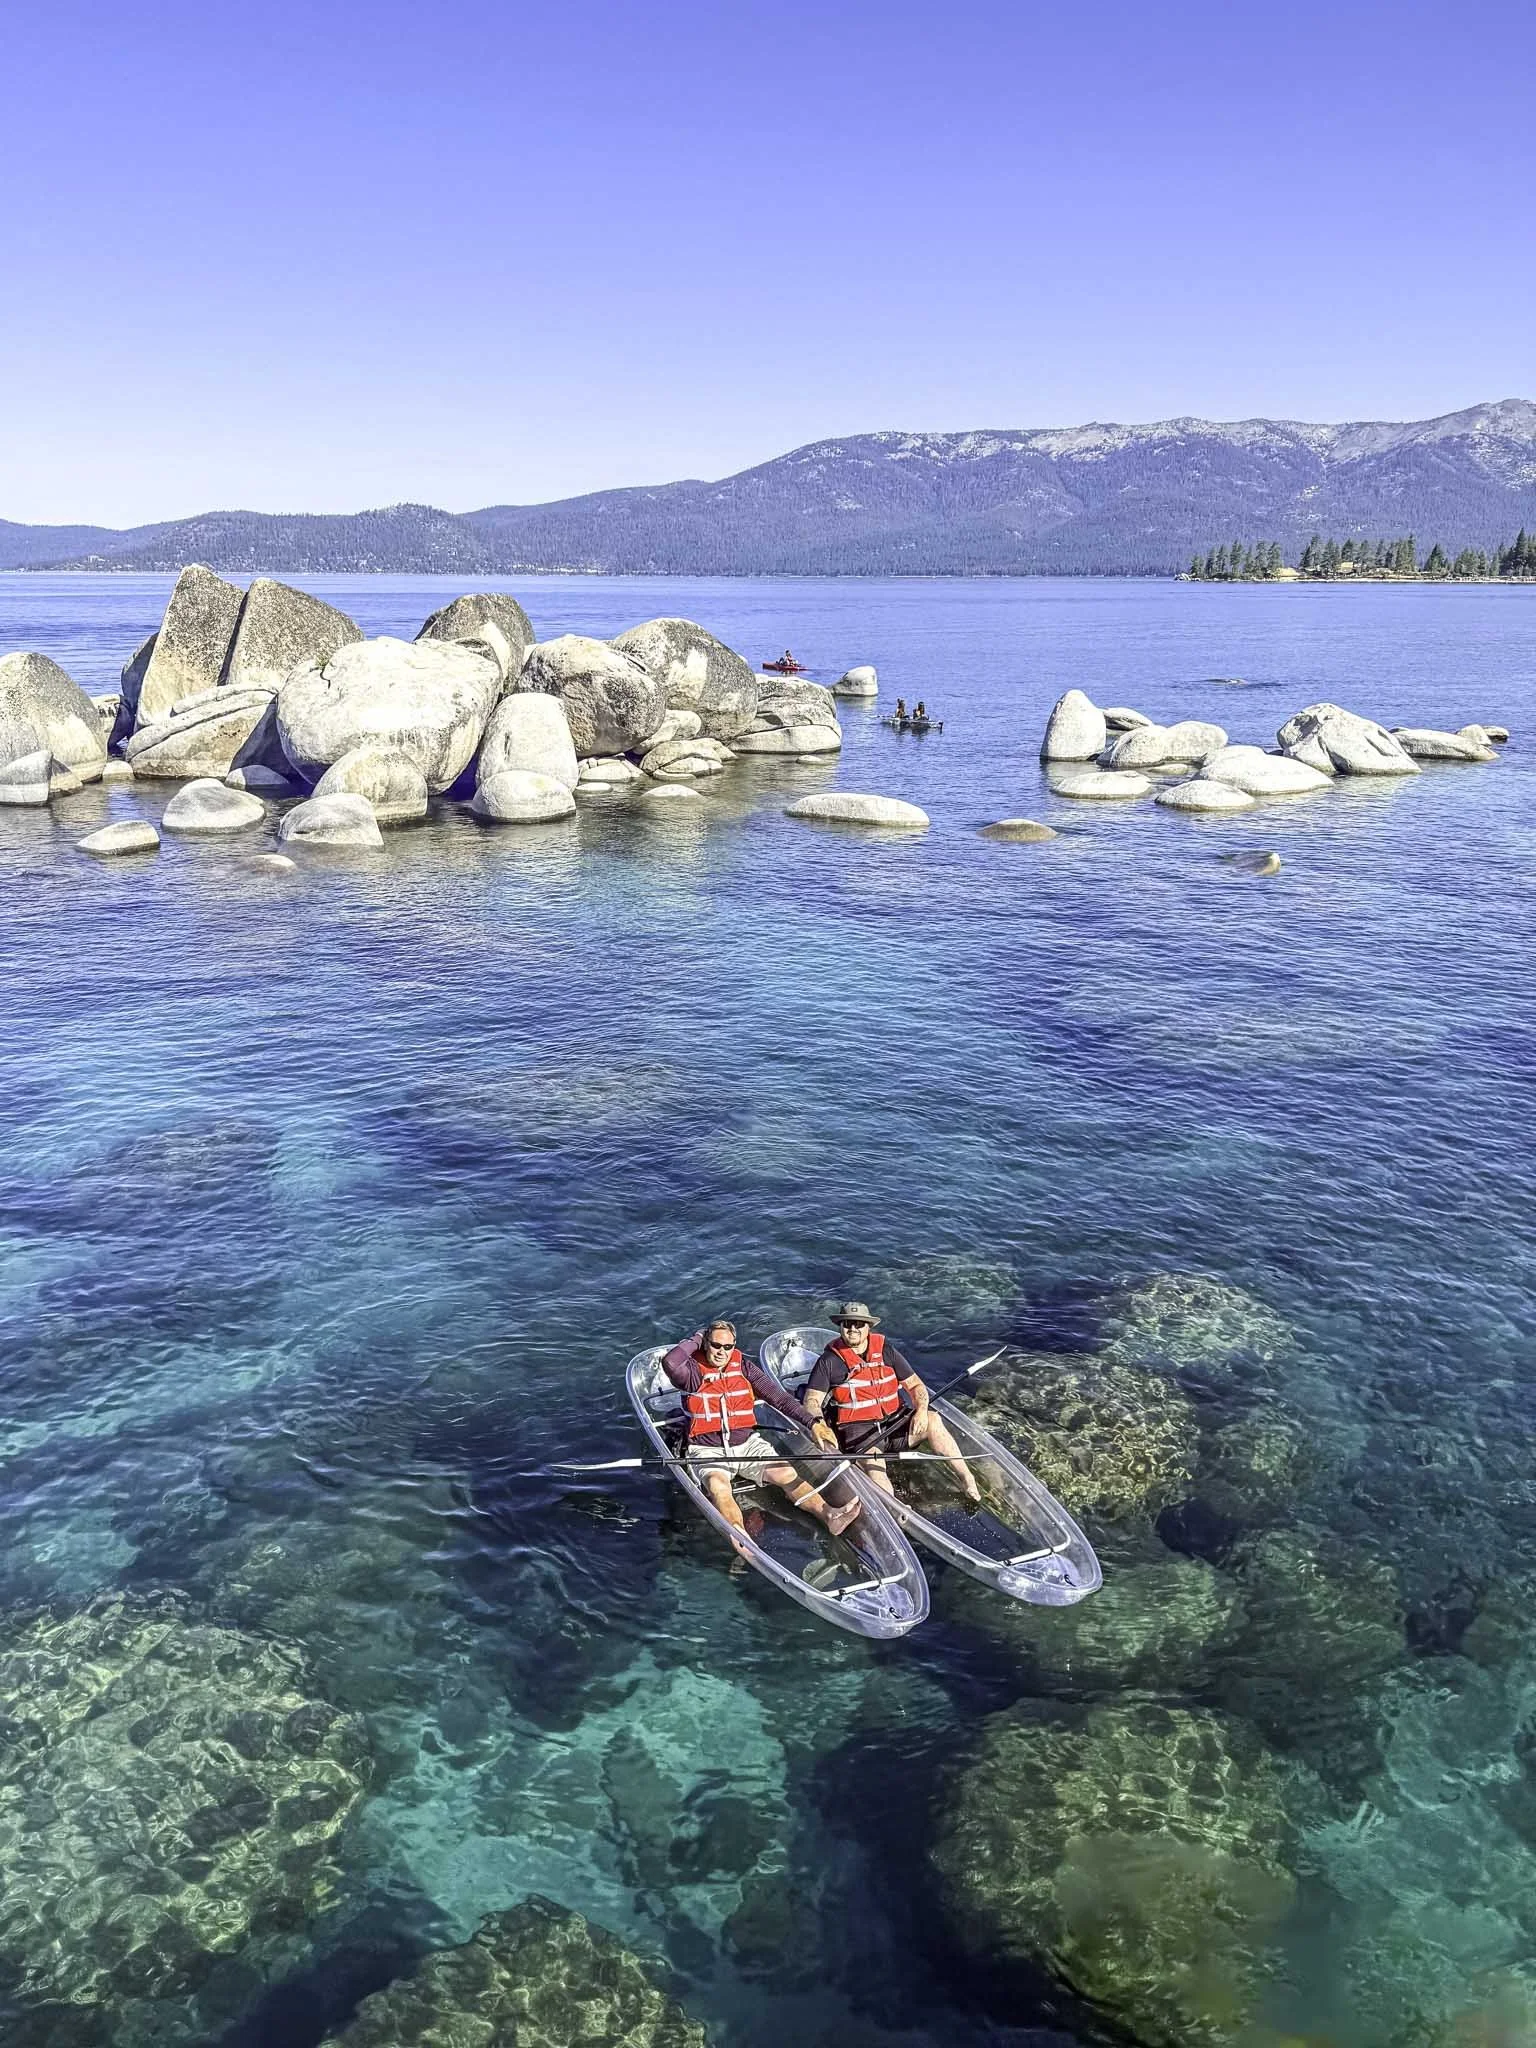
After a few more minutes of exploring, we were guided back to the beach at Sand Harbor. From the beach to Bonsai Rock was about one hour of kayak time. This included time for pictures and exploring the area around Bonsai Rock and that cove.
From that cove back to the beach, it took me just shy of thirty minutes of kayaking at an even pace, with a couple of stops here and there for water. As a beginner, I didn’t feel like this tour was too much. In fact, it was about the right amount of time to get my technique and pace down without overdoing it.
When we got back to the beach, Julia air-dropped the photos she took from her phone to ours. This was included in the tour price, by the way. Most places charge you extra for photos/video. It was nice to not get nickel-and-dimed by an outfit.
Final Thoughts…
I never got the sense that I was being rushed through the tour, but I do wish we had more free time to explore around Bonsai Rock (this is literally the only negative I can think of). I did hang back for a few minutes on my own and no one said anything, though.
For a beginner, I believe there is no better kayak tour to sign up for. The tour guides did a fantastic job helping everyone nail down the basics and help them keep pace. If Julia ever did get annoyed with those who were slagging behind, she never showed it.
The price is steep, sure, but the value is there. You’re led by experienced and patient guides, get to experience Lake Tahoe’s clarity up-close-and-personal, and you’ll get unmatched views of Tahoe’s gorgeous east shore and Bonsai Rock.
If you’re considering doing a clear kayak tour in Lake Tahoe, I highly recommend Clearly Tahoe. Be sure to tell them I said hello when you do! If you’re looking for more to do after your kayak tour, consider the nearby hike to Monkey Rock or take a beach day at Round Hill Pines!
***To book a clear kayak tour for your group, consider booking with my preferred ticket vendor, Viator, by clicking/tapping the “book now” tap in the ad below or through my link here.
Doing so helps to support Inked with Wanderlust and it doesn’t cost you anything extra. Any commission I may get comes directly from Viator.

How to Visit and Tour Hidden Cave in Fallon
Hidden Cave, located within Grimes Point Archaeological Area on the outskirts of Fallon, is a prehistoric archaeological site containing thousands…
Disclosure: This post contains affiliate links. If you make a purchase through these links, I may earn a small commission at no additional cost to you. I only recommend products or services that I believe will add value to my readers.
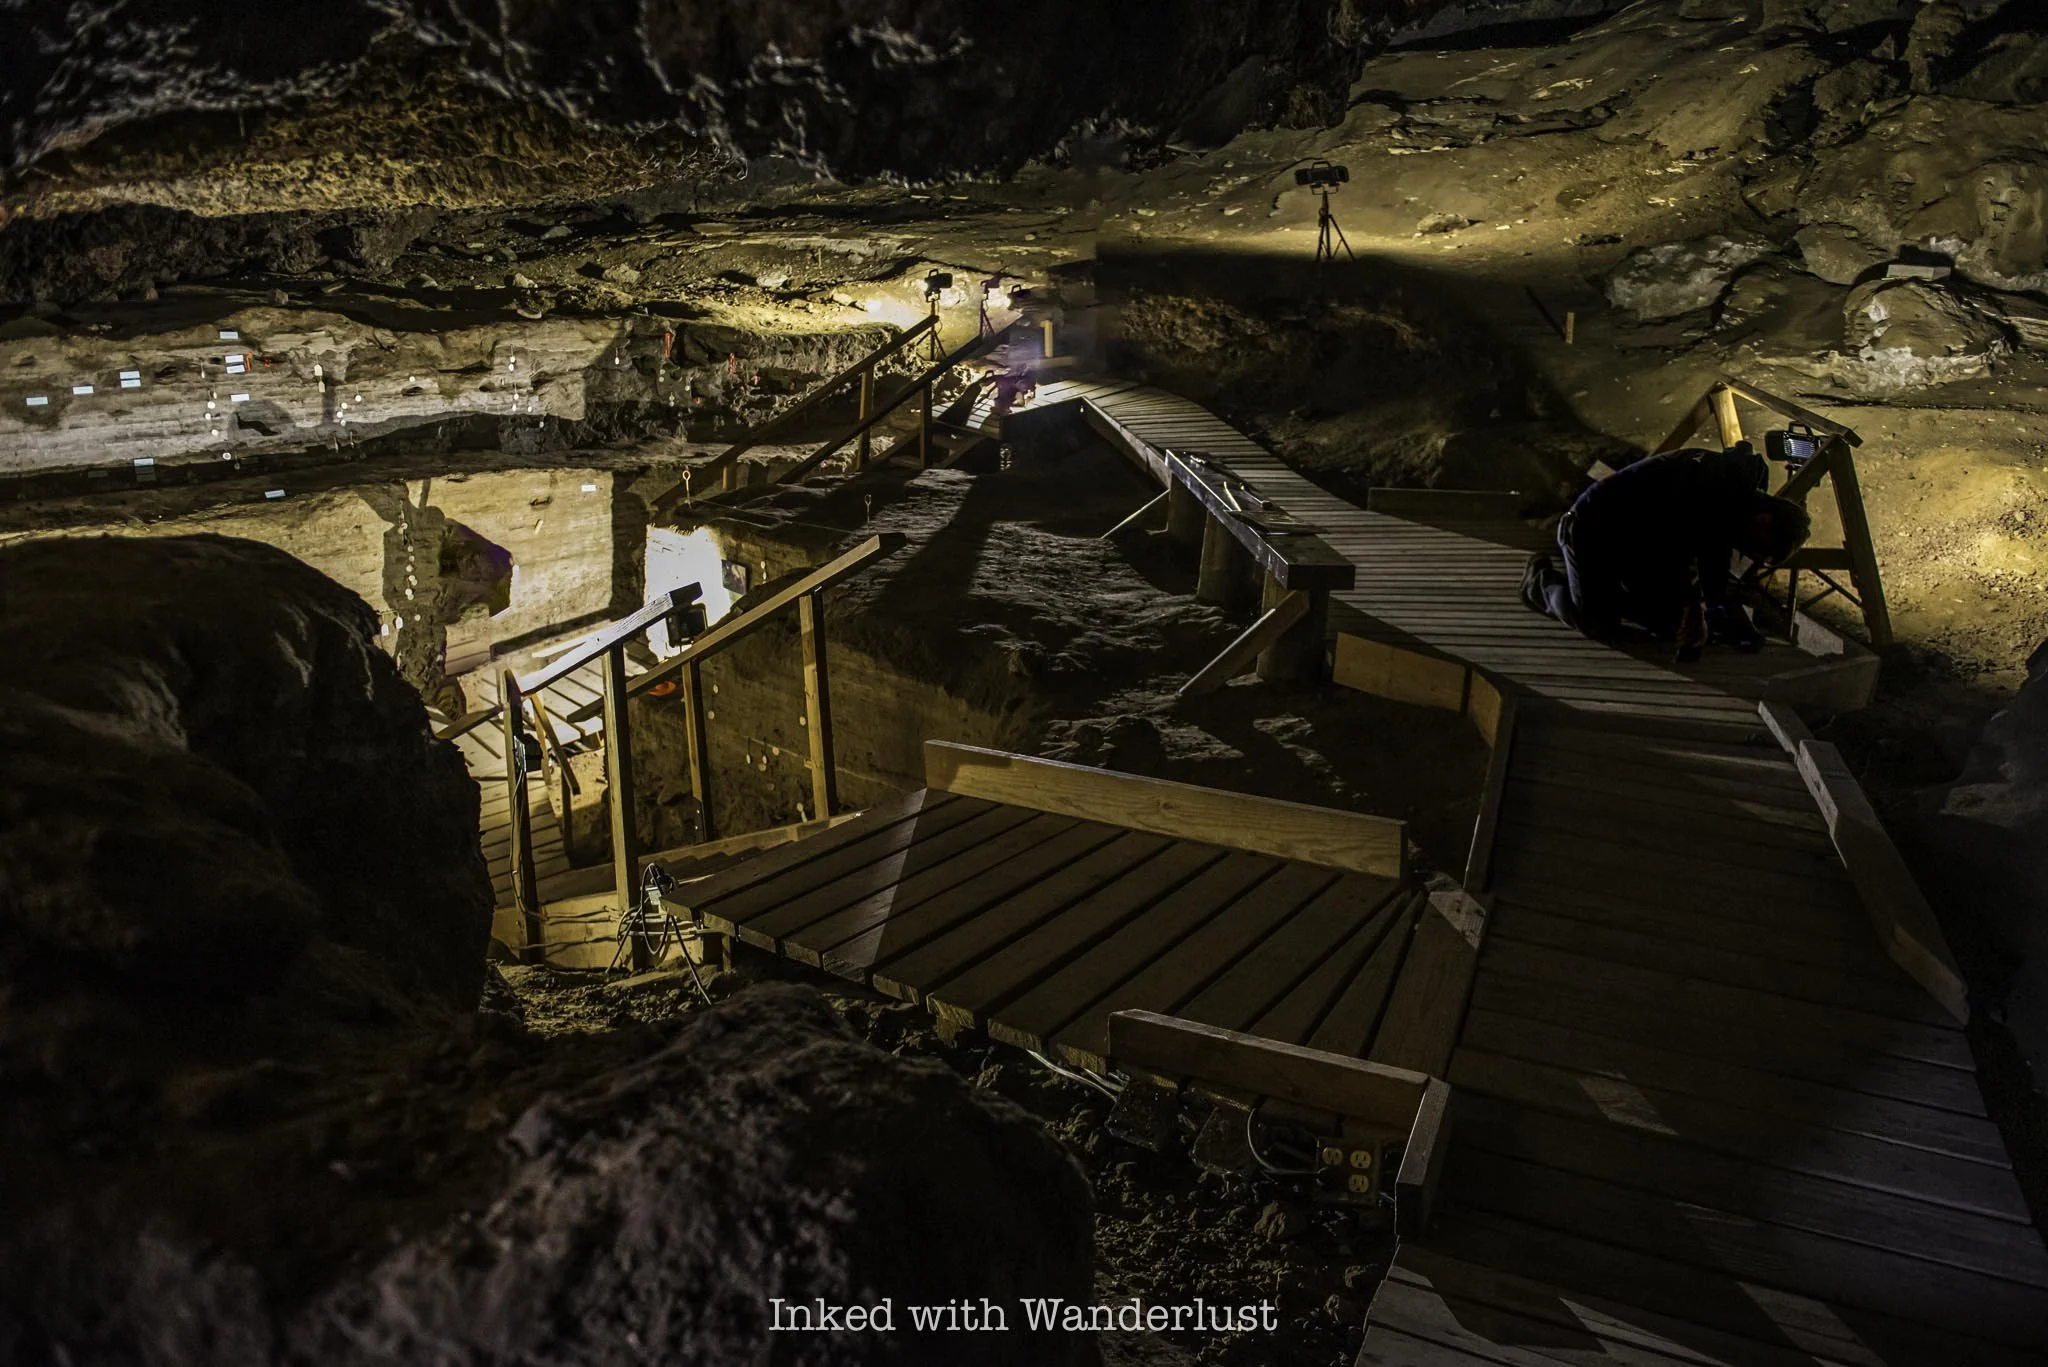
Hidden Cave, located within Grimes Point Archaeological Area on the outskirts of Fallon, is a prehistoric archaeological site containing thousands of years of human and geological history.
Pounding waves from ancient Lake Lahontan, a massive body of water in the last ice age, carved and developed the cave some 20,000 years ago. As the lake receded, the cave became exposed and started being used by animals.
Around 3,800 years ago, human activity began in the cave, as the Toi-Ticutta peoples used the cave not as a dwelling, but as a cache site. Pits were created, storing a variety of tools and supplies for safe keeping.
Today, the cave is open to the public for twice-monthly guided tours. During the tour, your guide educates you on the cave and area, taking you along a trail pointing out petroglyphs, additional caves, tufa formations and more.
Trail Stats
Location: Fallon, Nevada
Fee: None
Open: Trail is open year-round. Hidden Cave only accessible via guided tour, every 2nd and 4th Saturday of each month
Family Friendly: Yes
Cell Service: Good (Verizon)
Restroom: At the visitor center and trailhead
Parking: Large dirt/gravel lot
EV Stations: None
Difficulty: Easy to moderate
Popularity: Low to moderate
Mileage: 0.7 mile loop (not counting optional spur trails)
Time: Two hour tour
Elevation: 6,700 feet
Condition: Well maintained and easy to follow
Features: Multiple prehistoric caves, hundreds of tufa formations and ancient petroglyphs
Best Viewed: Spring or fall
Pets: Allowed on trail, but not inside Hidden Cave
Drones: Allowed in area
Hazards: Potential rattlesnake encounters, head injuries in the cave and exposed trail
My Visit(s): April 2025
Churchill County Museum - Hidden Cave Tour

All public tours to Hidden Cave begin at the Churchill County Museum in downtown Fallon. Tours are guided by a Bureau of Land Management (BLM) representative on the 2nd and 4th Saturday of each month, with the exception for holiday weekends. You can view current dates here.
You’ll want to arrive by 9:15am, as orientation begins promptly at 9:30am. There is no fee to enter the museum or to take the tour, nor are there any parking fees. The address for the museum is:
1050 South Main Street, Fallon, Nevada


If you can, I recommend arriving to the museum even early than 9:15 to give you more time to explore the it. For being a small museum, it’s packed with exhibits of Native American and pioneer history.
I believe they open at 9am on tour days, which gives you time to check out the exhibits (though not enough to see it all). If you don’t arrive early, consider heading back to the museum after the Hidden Cave tour.

When orientation begins, your tour guide will make their introduction and give you a brief breakdown of what to expect on the tour and provide some historic context of what you’ll see.
Then, you’ll watch a roughly 20-minute video which dives deeper into the Native American history of the cave, how it formed and what archeologists eventually discovered in the cave.
At the conclusion of the video, your guide will answer any final questions from the group and provide everyone time to use the restroom. You’ll then return to your vehicle and caravan to the cave.
Hidden Cave Trail

You can follow your tour guide there or simply punch “Hidden Cave” into your GPS of choice and go. The cave is about 15-minutes from the museum. When you turn left onto the dirt road, keep left at the junction. Going right will take you to Grimes Point.
The dirt/gravel road is riddled with potholes, but my sedan made it through just fine. Just take it slow if you need to. You’ll soon arrive at the trailhead. There, you’ll find a restroom (vaulted) and informational signs.

Once everyone in the group has arrived, your guide will again explain what to expect. To avoid the rocky portion of the trail, you can opt to head up the direct path to the cave and wait for the rest of the group there.
However, if you can, I recommend doing the entire trail. It is rocky, but only at certain points and is easily navigable, in my opinion. You’ll go right at the trailhead and the first feature you’ll see are petroglyphs on multiple rocks.
Petroglyphs

Your guide will explain the history of petroglyphs in the area and what ancient Indians may have been trying to convey with them. You’ll find many more at nearby Grimes Point, which I highly suggest stopping there after the tour.

From here, you’ll continue up the trail. Feel free to take your time and stop to take as many pictures as you want. The tour guide was good about waiting for everyone to get the next point before speaking.
Picnic Cave
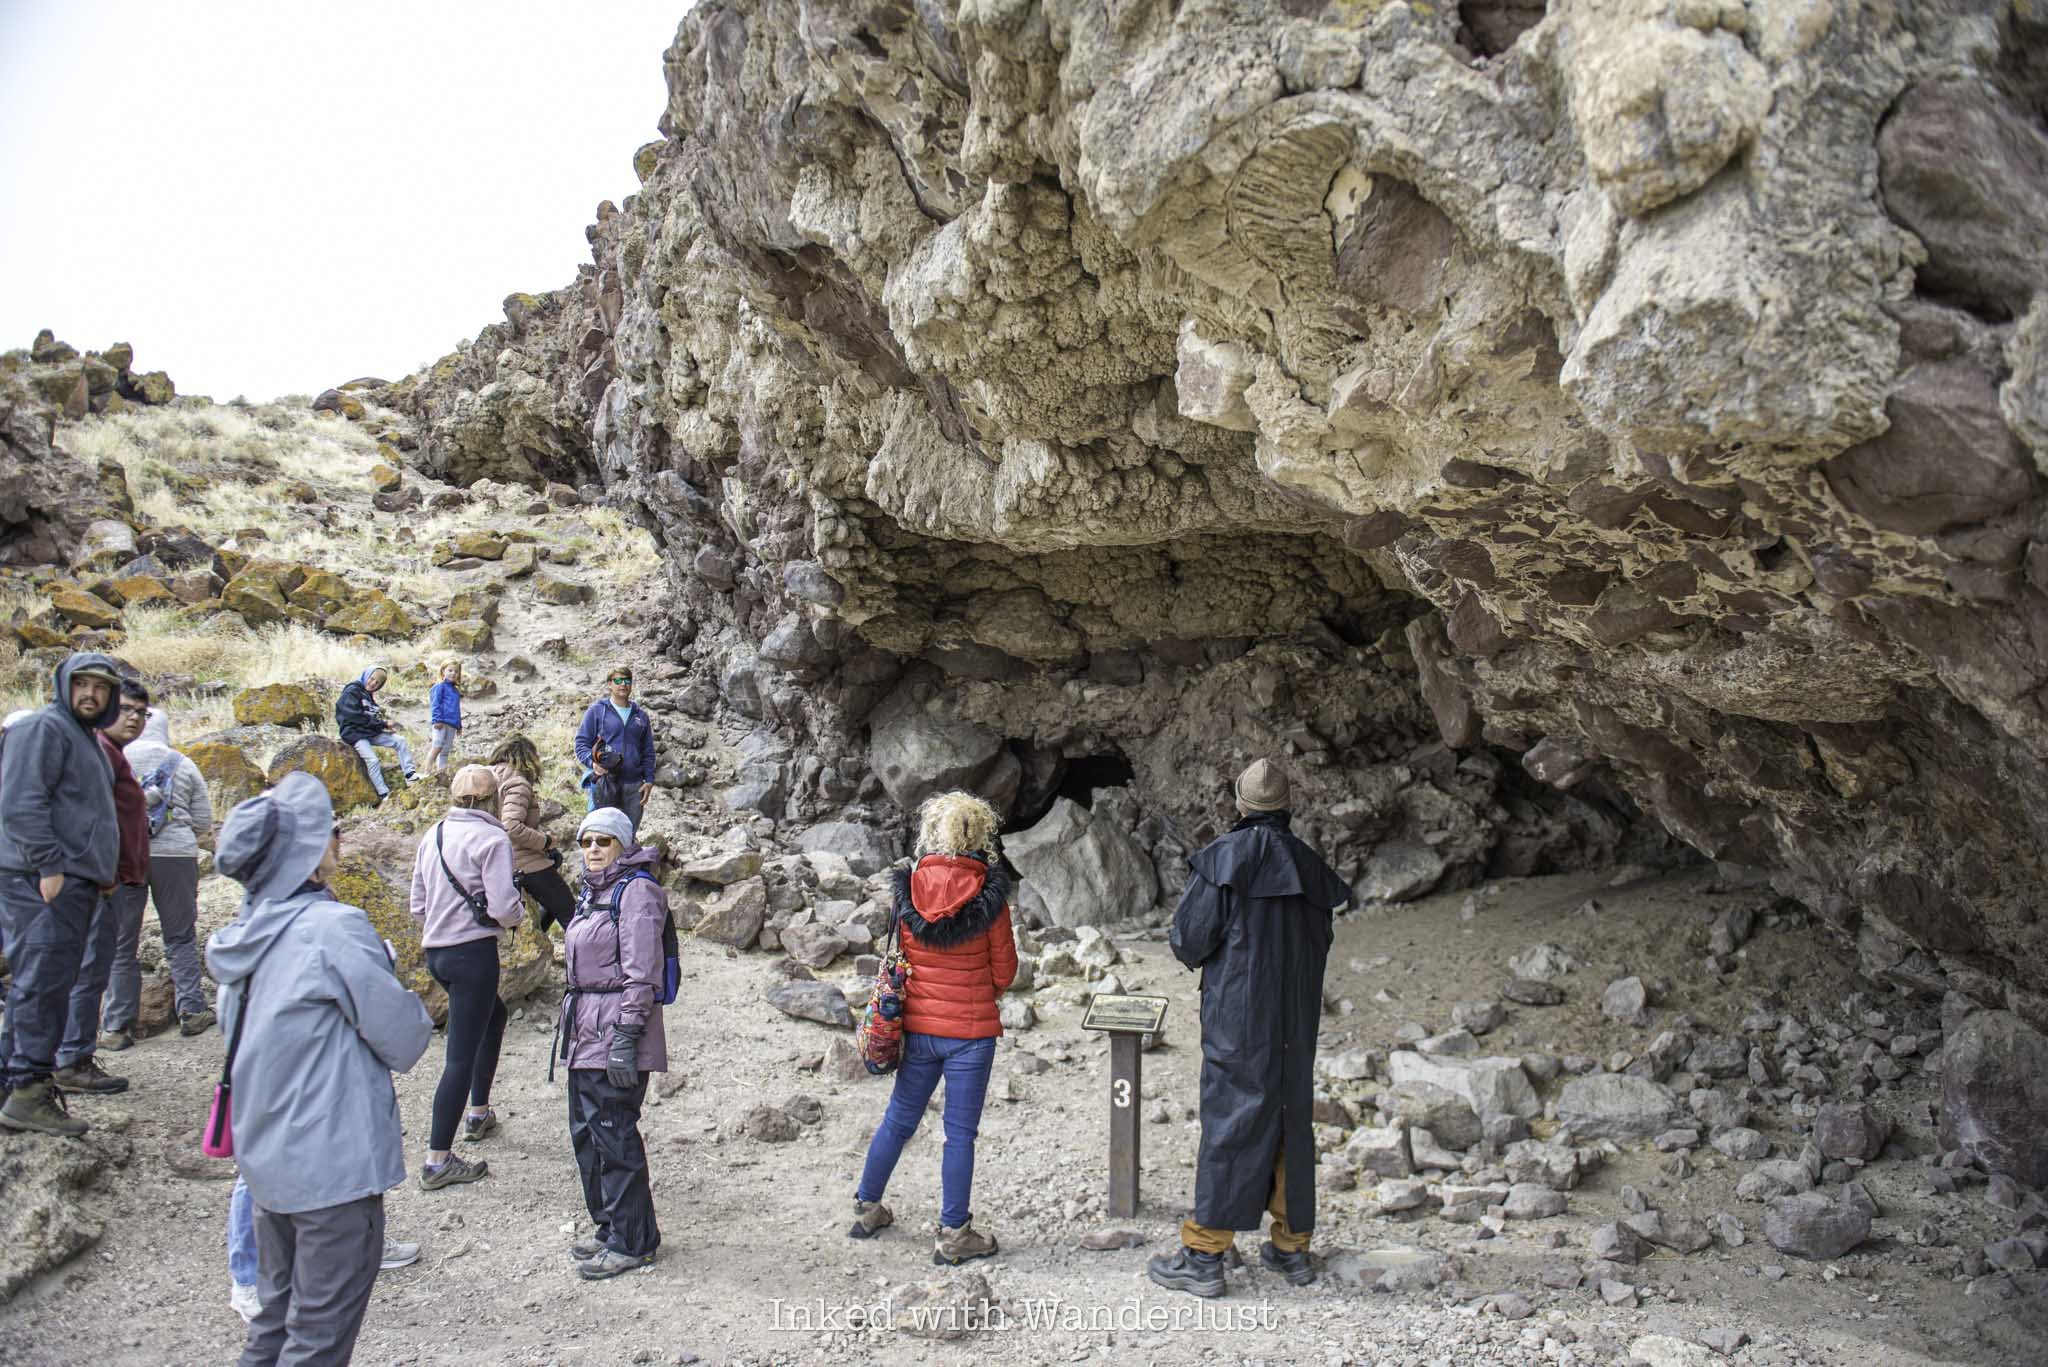
The next stop on the Hidden Cave trail is another cave called Picnic Cave. This cave isn’t closed off like Hidden Cave is and you can visit it anytime you like, with or without a tour guide.
The best feature of this cave is the large amount of tufa formations around the entrance and roof. If you don’t know, tufa is a porous sedimentary rock composed of calcium carbonate or silica, and is formed under water.


In this case, the tufa in this area formed when Lake Lahontan covered this entire region. Keep in mind, Hidden Cave is at 6,700 feet elevation. Picnic Cave isn’t much lower. Literally all of this was submerged at one point.
Another great example of tufa formations is a couple hours away in Lee Vining, California, at the Mono Lake Tufa Natural Reserve. However, the examples here are more in abundance, covering nearly the entire cliffs and mountainsides around you.
A Quick Rest with a Great View

After Picnic Cave, it’ll be an uphill slog until you reach the entrance to Hidden Cave. Due to this, the tour guide will stop the group a couple times to allow time for rest. At the second stop, you’ll have a commanding view of what was once marsh land.
Take a look around you when you’re up here. You’re at around 6,500 feet elevation at this point. You’ll notice the cliffs above you that are easily 7,000 feet and up with more tufa formations on them.
Remember, tufa only forms under water with the right amount of minerals. Photos can’t do it justice, but getting that perspective from here really shows just how massive and deep Lake Lahontan was.
Hidden Cave

After a brief rest, the group will continue up another incline until you reach the entrance to Hidden Cave. The entrance is small, requiring all but small children to crotch down to get through it.
For context, I’m 5’9 and I had get down pretty low to get in. For anyone six feet or taller, I would imagine this being challenging for them. When you get through the entrance, keep your head down for a few feet as there are low-hanging rocks.

Once you get past the first few feet, you’ll arrive to an open chamber on a wooden boardwalk. As you can see in the photo above, you’ll be able to fully stand once inside, no matter your height.
In the video at the museum, it was stated you could fit two NBA-sized courts in the cave and have room for spectators on the side. I’m not so convinced of that, as it didn’t appear to be that roomy. It was still impressive, though.

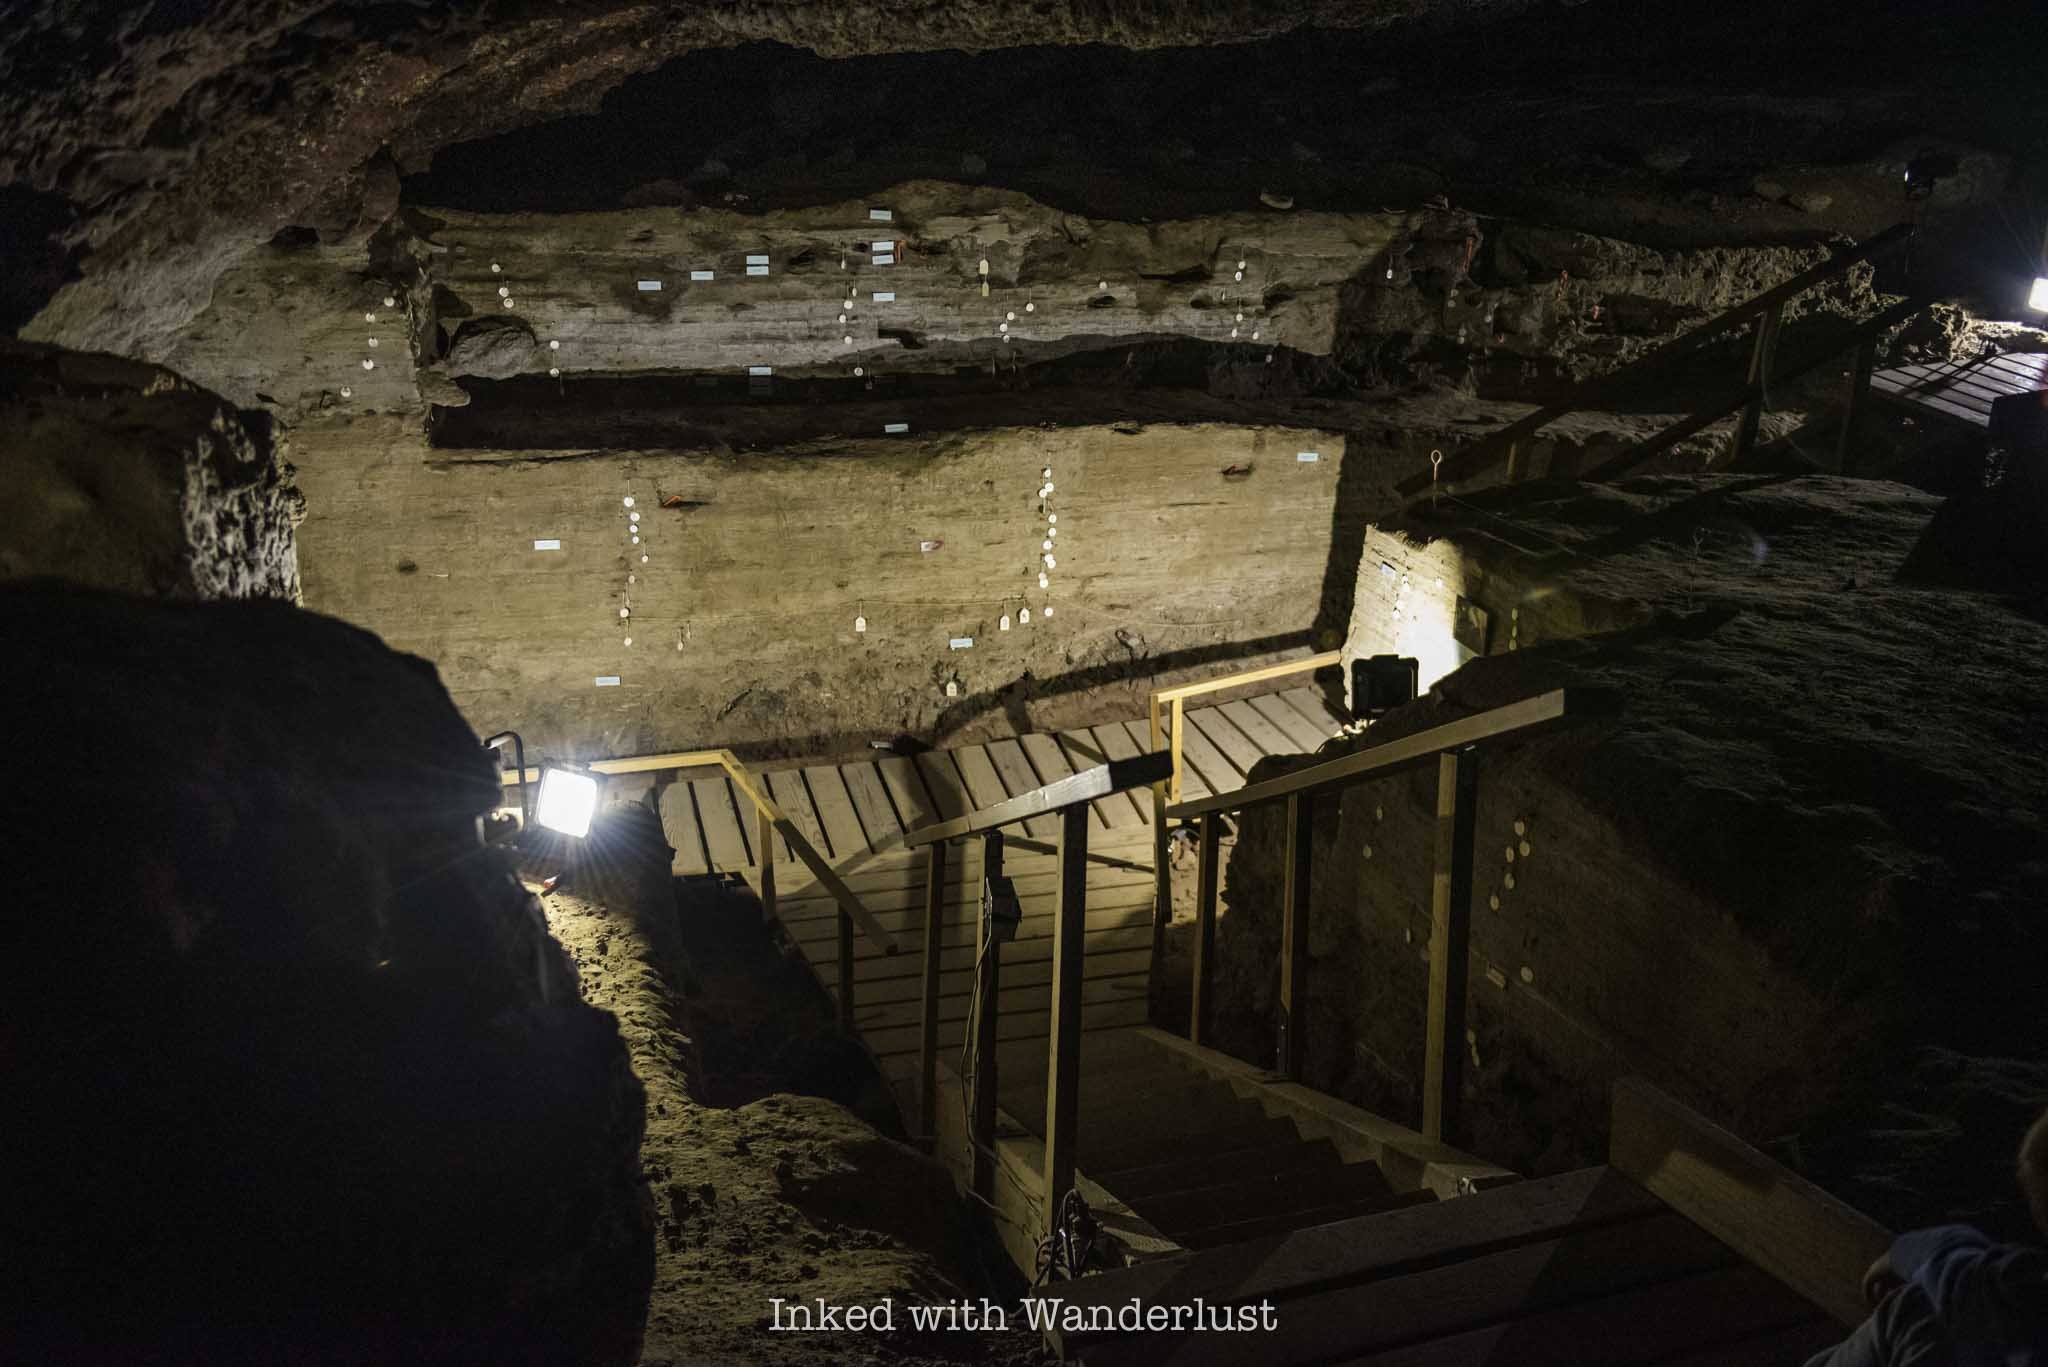
The amount of walkable space on the boardwalks is small and you cannot walk on the cave floor at all. So if you’re part of large or even semi-large group (like I was), it can be tough to navigate.
Once folks start leaving, though, you’ll have more elbow room to explore. My tour guide said he would stay for as long as anyone wanted to explore, so there was no rush. I simply waited for most of the group to leave to look around.


On the walls in the lower portion of the cave are markers. Some mark the age of each layer of rock you’re looking at and others indicate where certain animal fossils were found and their age.
Spend some time looking at these markers and getting photos, then make your way out of the cave. The entrance is also the exit. From here, the tour is over and you’re free to explore on your own.
Side Quest - Burnt Cave

When the tour was over, our guide tipped me off to another cave to check out that also had pictographs on the walls. To get there, head back down the trail until you reach the junction you see in the photo above.
Going right (where you just came from) will take you back to Hidden Cave. Take the trail on the left. You’ll start winding your way back down the mountain and see more examples of tufa formations and dramatic cliffs on the way.

After about a quarter-mile, at trail marker twelve, you’ll see a series of wooden steps leading up an incline. When you get to the top, Burnt Cave will come into view. It’s more an indent into the mountain than a cave, but still cool to see.
This cave was excavated in 1971. Looking at the cave, you’ll notice the red pictographs that were unfortunately partially covered by modern vandalism. By the way, Hidden Cave is locked behind a gate now for that very reason. It was also vandalized back in 2014.
Go a little further up the trail to the other side of Burnt Cave to see even more tufa formations. The ones over here are even crazier than those at Picnic Cave. One almost looks like a mushroom-like formation.

The trail keeps going from here, but I didn’t go any further. To get back to your vehicle, simply head back down the trail. You won’t need to climb back up to Hidden Cave as the trail splits again towards the parking lot. Take a right at the junction to get there.
From here, I recommend driving down the road to Grimes Point and taking time to explore that. The amount of petroglyphs along that short trail is mind boggling. For places to eat, I recommend Pho, The Slanted Porch, and Middlegate Station.
If you’re on a road trip heading towards Interstate-80 east, you can make another stop at Lovelock Cave (near Lovelock) and Thunder Mountain Monument in Imlay. Heading towards Yerington? Consider stopping at Fort Churchill or hike the Wilson Canyon Loop.
JEREMIAH 29:11

The 6 Best Hotel Resorts in Reno in 2025 (From a Local)
More and more, Reno, long known as the biggest little city in the world, has been seeing a steady rise in visitation rates in recent years….
Disclosure: This post contains affiliate links. If you make a purchase through these links, I may earn a small commission at no additional cost to you. I only recommend products or services that I believe will add value to my readers.

More and more, Reno, long known as the biggest little city in the world, has been seeing a steady rise in visitation rates in recent years. While Reno has always hosted a decent amount of annual travelers, it has traditionally been the casino crowd and those on their way to either Las Vegas or nearby Lake Tahoe.
With its recent push to clean up its image and to offer visitors more than just gambling, Reno has slowly been becoming a destination in its own right and not just a stopover or a place to spend a quick weekend. The city now offers family-friendly activities such as museums, hiking trails, an array of festivals, delicious local eateries, a river walk, and more.
In order to host its millions of visitors, Reno also offers an array of hotels. They range from your standard one or two level motels and all the way up to resort-style casino hotels. This post aims to provide you with my top six recommendations for the latter.
I've lived in the Reno area for the last 17 years and have stayed in many of Reno's best (and not-so-best) hotels. If my family or friends were going to visit Reno for a few days, these are the six I would recommend to them.
1. Atlantis Casino Resort Spa

With more than 800 guest rooms between its three hotel towers, the Atlantis Casino Resort Spa has been one of the top ranked and best resorts in Reno since opening in 1996. The property features a variety of amenities, such as award-winning restaurants, table games, hundreds of slot machines, a wonderful spa, fitness center, indoor pool, and more.
However, the Atlantis shines in presentation, with its exterior showcasing a harmonious blend of modern architecture and tropical-themed design elements. The three hotel towers, with their sleek lines and expansive glass facades, are complimented by Greco-Roman columns. The iconic Sky Terrace, an enclosed walkway spanning Virginia Street below, adds a striking visual highlight.
The interior spaces are adorned with warm woods, plush carpeting and rich marble accents, creating a welcoming and upscale atmosphere. Additional, there's no shortage of dining options, as the Atlantis features a buffet and a number of traditional sit-and-serve restaurants, including the Atlantis Steakhouse, which earned the prestigious AAA Four Diamond designation.
The rates at Atlantis tend to be higher than the remaining four resorts on this list, which has always surprised me given the fact that Atlantis is a fair distance away from downtown Reno, where many of the city's most popular attractions are located.
If you're in town for an event at the Reno-Sparks Convention Center, Atlantis should be your go-to as it's one of the closest luxury hotel at just under an easily-walkable half-mile away. Additionally, they offer free airport transfers to and from the nearby Reno-Tahoe International Airport.
2. Grand Sierra Resort

The Grand Sierra Resort has remained a prominent fixture in Reno's skyline since opening in 1978. Its towering 27-story structure, with white walls and golden windows, along with the distinctive "GSR" red emblem, reflects a modern design that exudes elegance and grandeur.
While a fair distance from the heart of downtown Reno, Grand Sierra's relative remote location gives it a feeling of being on an island of its own. With an array of dining options, expansive gaming options (including sports book), bars, concert hall, shopping opportunities, spa, fitness center, movie theatre, arcade facility, and bowling alley, leaving may not be necessary.
The room rates are often reasonable, but can jump at times if there's an on-site concert with a big name artist or some other area event going on, such as Hot August Nights.
I've stayed here quite a few times and have never had an issue with cleanliness or service from the staff. The staff here are generally friendly and go out of their way to ensure a flawless guest experience.
Those traveling with kids will appreciate the lower level of the property, which features an extensive arcade-game facility, in addition to a movie theatre, bowling ally, brand-familiar eateries, an escape room, and more.
3. Whitney Peak Hotel

Located in the heart of downtown Reno and mere steps from the infamous Reno Arch, the Whitney Peak Hotel takes a refreshing step away from the traditional casino-heavy environment of downtown Reno by not having one. That's right, there isn't a single table game or slot machine on property.
Some may view that as a negative but those with small children will likely appreciate their quiet and smoke-free lobby. One major downside, though, is that the Whitney Peak Hotel doesn't feature a pool. That's the unfortunate trade-off.
Even without a pool, Whitney Peak is more than worth staying at. The property's location is unmatched, placed just steps away from the Reno Arch and within walking distance of several downtown favorites, including the National Automobile Museum, Truckee River Walk, Reno Events Center, Greater Nevada Field and more.
The hotel leans heavily into the active lifestyle (obvious, given its Mount Whitney namesake). One of their main amenities is their indoor rock climbing facility and fitness center, but most immediately take notice of the 164-foot tall exterior climbing wall, which ascends the side of the 16-story hotel tower.
Unlike other resorts on this list, Whitney Peak Hotel isn't exactly flush with dining options but don't fret, you're within walking distance of several amazing local restaurants (including a few of my personal favorites). These include Sierra Street Kitchen, Pine Street Biscuits, and the Depot Craft Brewery & Distillery.
4. Silver Legacy Resort Casino

If your goal is to stay in the heart of Reno in a hotel that's quintessential downtown, then Silver Legacy Resort Casino is for you. It's located just steps from the infamous Reno arch, offers nearly 90,000 square feet of gaming space, and lights up the downtown area with its signature green and gold hues.
Together with the El Dorado and Circus Circus, known collectively as THE ROW, Silver Legacy offers many dining options in-house, with others included with the neighboring properties. These include a Ruth's Chris Steakhouse and not one, but two, restaurants by famed chef Gordon Ramsay.
Accommodations at the Silver Legacy are designed with comfort in mind. Guests can choose from a variety of rooms and suites, each featuring modern furnishings, plush bedding, and flat-screen TVs. Many rooms offer stunning views of the Sierra Nevada Mountains or the bustling cityscape, providing a serene retreat after a day of exploration.
Rates fluctuate wildly here, more-so than most hotels in the area (this also includes its neighboring properties making up THE ROW) but unless there's a big name performing that weekend or there's a city-sponsored event taking place, nightly rates generally remain under $150.
5) J Resort

J Resort is the newest resort-style hotel offering in Reno. Its parent company, Jacob Entertainment, purchased the now former property of the Sands Regency last year and committed millions of dollars worth of upgrades and additions to not only the hotel, but its surrounding area as well.
Aside from the amenity and dining upgrades, the best one yet is the installment of the Neon Line. The Neon Line is an outdoor art-walk displaying several art installations once featured at the popular Buring Man event. You can walk it any time, but at night is where the art pieces truly come to life with lighting and musical effects.
As far as rooms go, J Resort offers guests spacious and thoughtfully designed rooms. Each accommodation features contemporary furnishings, including pillow-top mattresses and floor-to-ceiling windows that provide stunning views of the city or surrounding mountains. Modern amenities such as flat-screen TVs, USB charging stations and kitchens (in select rooms) ensure a comfortable stay.
This is most recent property my wife and I stayed at. We had an overall pleasant stay, but since the property's renovation was still in progress we weren't able to enjoy the pool or partake in all of the dining options (they have another restaurant opening sometime this year).
However, we paid less than $100 a night (the resort fee included) for our room and the dining options we did experience, which included their cafe "Hanna's Table" and their signature steakhouse, "J Paul's", were nothing short of stellar.
READ ALSO: “My Honest Review of J Resort: A Downtown Reno Hotel”
6. Peppermill Resort Spa Casino

Nestled in the heart of Reno, Peppermill Resort Spa Casino exudes a blend of modern luxury and classic elegance. Its interior is adorned with rich, warm tones, intricate mosaics, and Roman-inspired architecture. The resort's design seamlessly integrates artistic elements, featuring the "Windows of the World," a collection of high-definition displays showcasing exotic landscapes and vibrant imagery.
Accommodations at the Peppermill are thoughtfully designed to cater to a range of preferences, offering everything from well-appointed guest rooms to lavish suites. Each room is equipped with modern amenities, ensuring a comfortable and convenient stay. Guests can unwind at the resort's two geothermally-heated swimming pools, as well as their award-winning Spa Tuscana.
Fine dining options include Bimini Steakhouse, renowned for its hardwood-grilled steaks and seafood and Romanza, which offers exquisite Italian cuisine in a romantic setting. Casual dining venues such as Biscotti's present an expansive menu to please all palates, while Oceano features the freshest seafood and all-you-can-eat sushi.
Room rates at the Peppermill vary depending on the season and accommodation type, but the resort consistently offers competitive pricing for its range of luxury and comfort. Given its comprehensive amenities, diverse dining options, and exceptional service, the Peppermill Resort Spa Casino stands out as a premier destination in Reno.

Hike Petroglyph Canyon via Mouse’s Tank Trail in Valley of Fire
One such hike is Petroglyph Canyon via Mouse’s Tank Trail. It’s less than a mile (0.7 mile, to be exact) roundtrip along relatively flat…
Disclosure: This post contains affiliate links. If you make a purchase through these links, I may earn a small commission at no additional cost to you. I only recommend products or services that I believe will add value to my readers.

Valley of Fire State Park in Southern Nevada is a recreational paradise and escape from the noise and chaos of the Las Vegas Strip. In fact, it’s only a one hour drive (or less) from Vegas!
The park is chock-full of shorter hikes, giving families with small children and those who’re less experienced a chance to witness epic landscapes, mind-boggling geology, and a serene environment.
One such hike is Petroglyph Canyon via Mouse’s Tank Trail. It’s less than a mile (0.7 mile, to be exact) roundtrip along relatively flat and sandy ground through a canyon dotted with hundreds of ancient petroglyphs.
What are petroglyphs, you ask? Petroglyphs are images created by carving, etching, or scraping designs into rock surfaces. This form of rock art is often associated with Native American tribes. Which is the case here.
The petroglyphs in this canyon, much like at nearby Atlatl Rock, are believed to be between 2,000 and 4,000 years old and are associated with the Basketmaker and Early Pueblo cultures.
So what can you expect on this hike? Where in the park is it located? Is it worth it? I answer all of these questions and more in the post below. Let’s get into it!
At A Glance…
Location: Valley of Fire State Park
Fee: Standard park day-use fee
Open: Year-round
For: Hikers and families
Cell Service: None
Restroom: At the trailhead
Parking: Large gravel/dirt lot
EV Stations: None
Difficulty: Easy
Popularity: Moderate
Trail Condition: Easy to follow / soft sand
Elevation: 2,024 feet
Stoller Friendly: No
Kid Friendly: Yes
Mileage: 0.7 mile, out and back
Features: Ancient petroglyphs, visually striking rock formations, and natural water basin
Best Viewed: Spring and fall months
Pets: Allowed on leash
Drones: Prohibited
Hazards: Sun exposure and extreme heat (especially in the summer months), potential wildlife encounters
My Visit(s): August 2023 and November 2024
Petroglyph Canyon Trailhead and Parking

The parking lot and trailhead for Mouse’s Tank Trail is located just off of the park’s infamous Mouse’s Tank Road. To get there, you’ll need to drive through either the west or east entrance on the Valley of Fire Scenic Byway and make your way to the visitor center.
Once there, continue up Mouse’s Tank Road for just over a mile, at which point the parking lot for Mouse’s Tank Trail will be on your right. The parking lot is of the dirt/gravel variety and is rather large. There are restrooms here.


The official trailhead is just to the left of the restroom. Keep in mind that while this trail is open year-round, the extreme heat of the summer at Valley of Fire can make this otherwise easy hike a potentially dangerous one.
If you are here in the summer, it might be a good idea to do this one in the morning or later in the evening, as the canyon walls provide a decent amount of shade from the sun at these times.
Petroglyph Canyon

The trail begins via a short descent into the mouth of the canyon on a paved ramp. At the end said ramp, you’ll be hiking on soft sand, which will continue throughout the remainder of your hike.
After a short distance, you’ll soon be surrounded by those reddish/orange rock canyon walls Valley of Fire is famous for. There isn’t much in the way of trees or greenery, just the usual desert brush.

The petroglyphs start popping up almost immediately. There are no signs pointing the way and they’re fairly easy to miss if you’re not paying attention. That said, they’re literally all over the canyon walls.
The first set of petroglyphs I spotted were just a few minutes into the hike. When you come to the sign in the photo above, look for an unmarked path on your left (right about where my Dad is standing in the photo).

Facing that unmarked path, you’ll notice a large rock in front of you and on the left side of that rock you’ll notice what looks like a large burn mark. That’s actually patina and in that patina is where you’ll find petroglyphs.


This is the largest concentration of petroglyphs on one rock that I’ve seen on this trail. The patina-heavy area of the rock is literally covered in them. I wasn’t able to spot any more in the area, but that doesn’t mean they’re not there.
Continue down the trail and keep your eyes peeled for patina on the canyon walls. Whenever you see patina, there will likely be petroglyphs there. However, there are some on non-patina’d rocks as well, so look out for those.


Before long, you’ll come upon a sign stacked onto a pile of stones pointing left, indicating the end of the trail. Turn left here and walk for about 100 feet to a natural basin of water, otherwise known as the “Mouse Tank”.

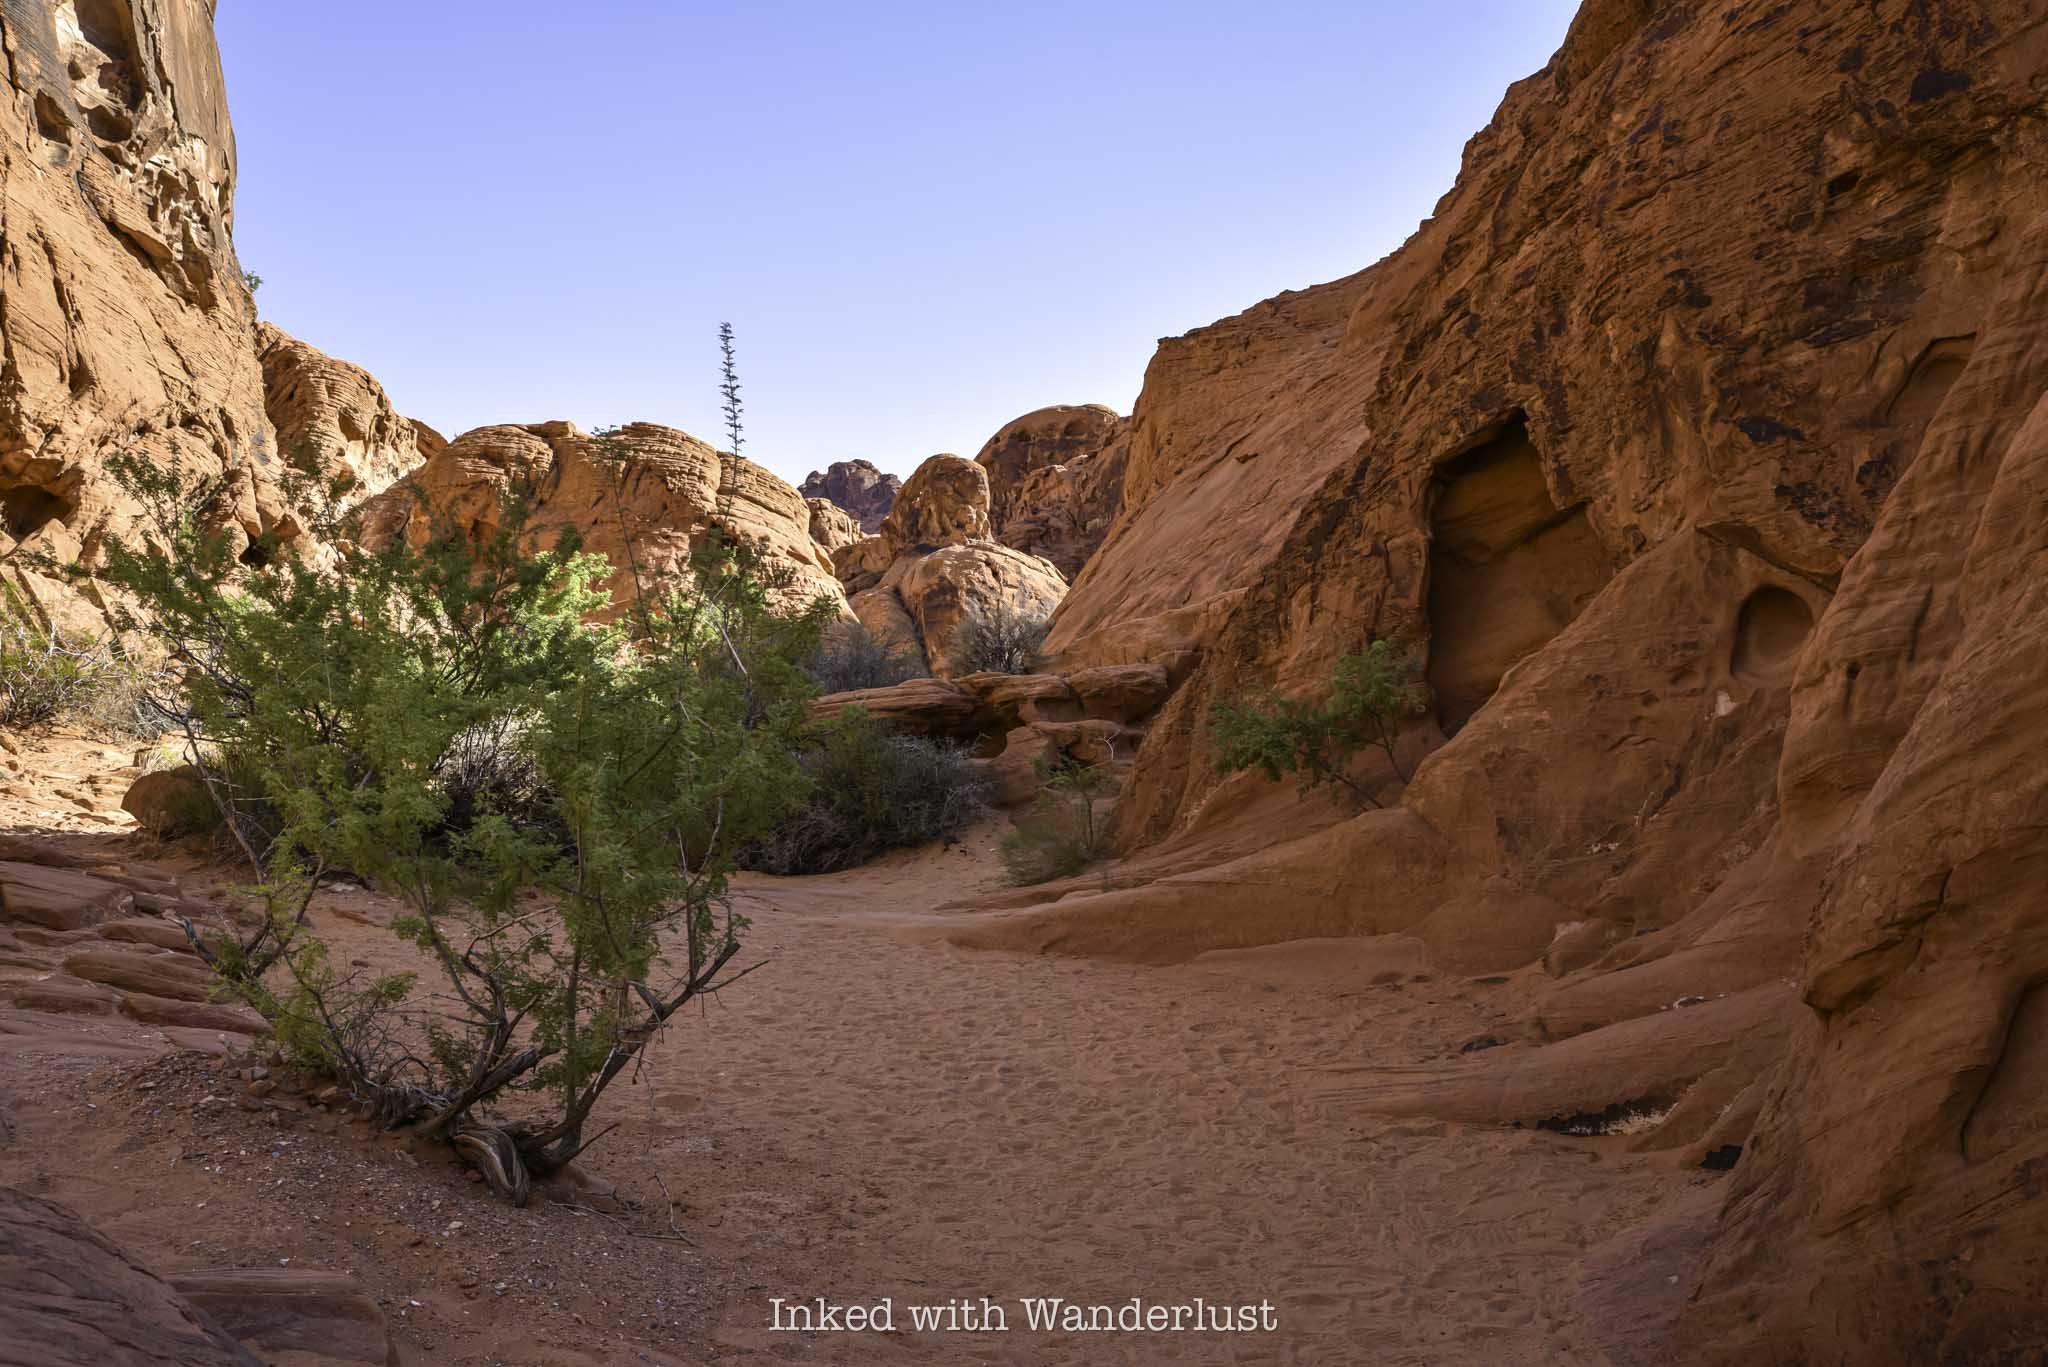
The “Mouse Tank” is a natural feature in the rocks that collects water after rainfall. It forms a natural basin where water collects. There are a few of these in the park, but this one is named for an Indian outlaw who hid out in this area named, Little Mouse (more on him momentarily).
Walk down to the end of the trail to view the tank. There isn’t always water in it, and sometimes you’ll need to lean over a fair amount to see it. Watch your footing, as it wouldn’t be fun to fall into that…water or not.

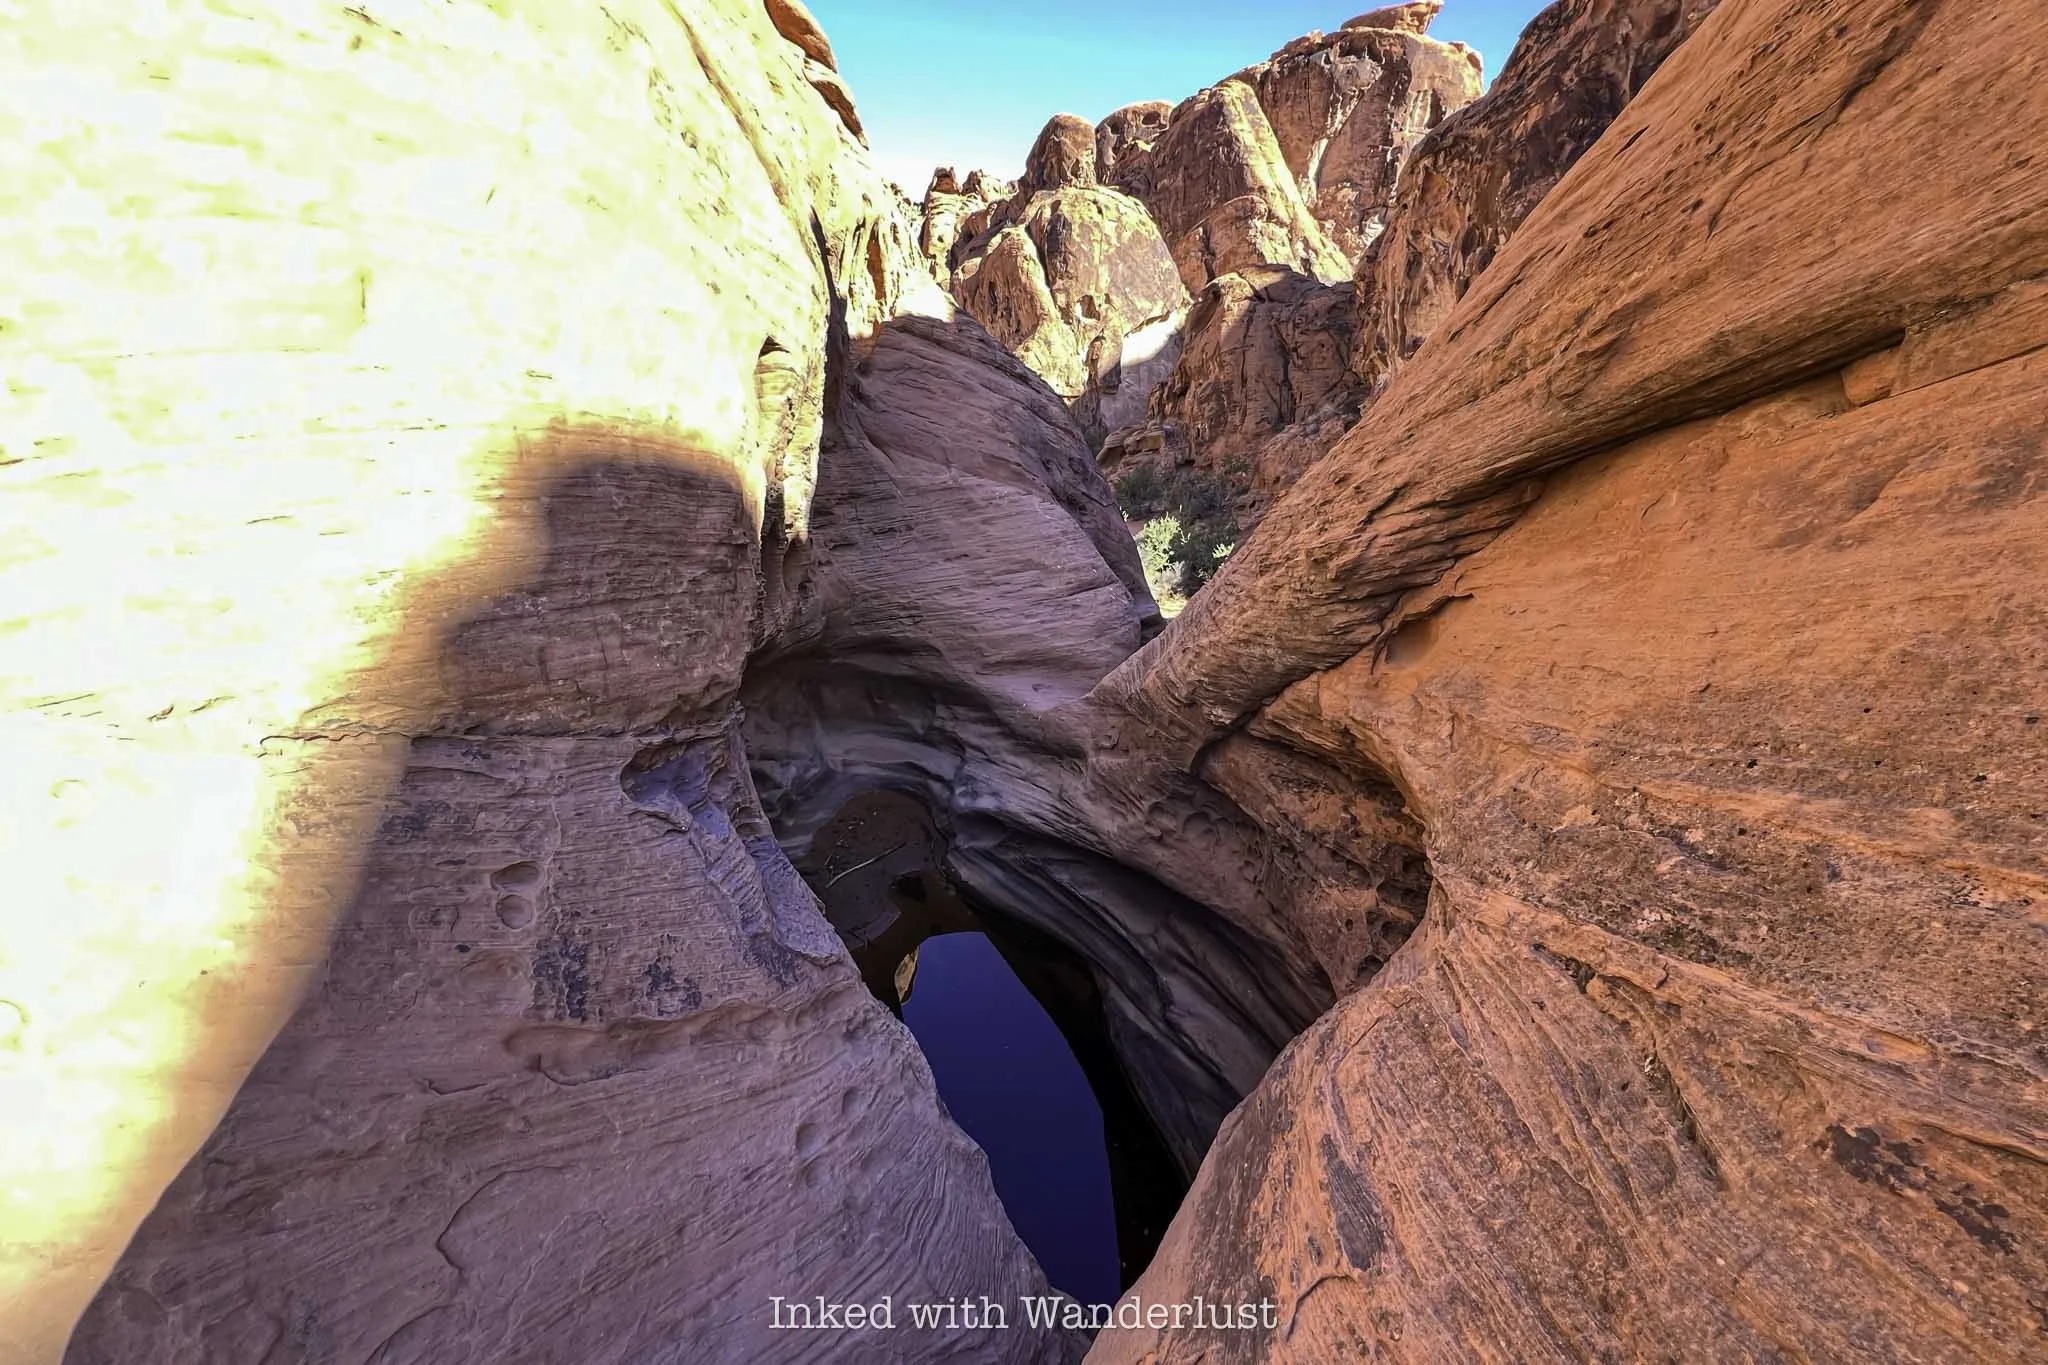
In addition to the water tank, there are more petroglyphs in this area. Some are high up on the rocks, so they’ll be a bit difficult to see. There are plenty others at eye level as well, though.
Throughout this post, you may have been wondering why they named this trail “Mouse’s Tank”. It’s named for a Southern Paiute Indian outlaw by the name of “Little Mouse” who hid in this area after being accused of and wanted for a number of crimes.
The Story of Little Mouse - A Southern Indian Paiute Outlaw

It’s said that Little Mouse - or simply, Mouse - hid in this area of the park after being implicated in the murders of two white prospectors (among other crimes). A posse gathered to find him, but they weren’t as familiar with the area as he was.
Walking through Petroglyph Canyon reveals many potential hiding spots in the walls. Whether or not Little Mouse used any of these spots is up for debate, but the sheer possibility is fascinating.


Little Mouse managed to successfully evade capture by hiding in this canyon for several years, utilizing the tank at the end of the canyon as a water source. How exactly he did that without falling is beyond me.
The posse did end up catching up to Little Mouse, though several miles away from this location near the Muddy River. He was surrounded and killed by the posse. Little Mouse’s guilt of the murder of those prospectors was never fully proven.

I hope this post inspired you to hike Mouse’s Tank Trail and explore all of the petroglyphs. When you’re done here, there are many other hiking trails nearby I recommend. White Domes Loop, Fire Wave and Elephant Rock, just to name a few.
Additionally, you can read this post to see a full list of 10 short hikes in Valley of Fire that I recommend. Additionally, if you have extra days and want to see more petroglyphs, check out nearby Atlatl Rock and the historic Petroglyph Wall in Red Rock Canyon.

Hike the Wilson Canyon Loop Trail near Yerington
Situated between the small town of Yerington and the even smaller community of Smith Valley, Wilson Canyon is a recreational paradise with something for everyone. Hiking…
Situated between the small town of Yerington and the even smaller community of Smith Valley, Wilson Canyon is a recreational paradise with something for everyone. Hiking, horse riding, river tubing, camping, motor sports, fishing, etc. You name it, you can do it.
Even though there are plenty of activities to take part in, this article is going to focus on the 3.5 mile interpretive loop trail on the west side of the canyon. If you want to use your dirt bike, quad, etc, you can do so on the opposite side of the highway at the dunes.
The trail is considered moderate in difficulty. The very beginning and end (where you climb in and back out) are short but steep sections. The rest is mostly flat with the occasional gradual ascent/descent that’ll ultimately lead you to an epic payoff at the viewpoint.
At the end of the article I’ve included a screenshot of the route we took that was recorded by my watch. That combined with the included images will give you a pretty good idea of what you’ll be dealing with.
Wilson Canyon Trail Trailhead

The interpretive loop trail begins and ends in the small parking lot located at the west end of the canyon. The decently maintained dirt lot can hold a couple dozen vehicles and features two shaded picnic tables. The trail begins just behind these.
If you’re coming from Yerington, the lot will be at the end of the canyon on your left. If you’re coming from Gardnerville or Topaz, the lot will be on your immediate right as you’re coming into the canyon (shortly after passing the rest stop).
The Loop

This first section of the trail leading up to the ridge of the canyon is the second steepest of the whole thing (the first being the opposite side coming back out, but more on that later). It isn’t difficult by any means, but if you’re not used to hiking at higher elevations, you may have a slow go at it.

When you get to the top of the ridge, be sure to turn around and take in the views. In a single frame of view you’ll see a portion of the west fork of Walker River with Mount Siegel and the Pine Nut Mountain Range providing the backdrop.
From here, you have two choices. You can go further up the ridge to the left and check out the vertigo inducing views of the river below or, once you’ve gotten your fill of the views, you can continue down the trail proper leading into the canyon.

Going down this section of the trail will mean you’re going to lose all the elevation you just gained. It’s frustrating, I know, but it’s the only way in. On your way down, you’ll get a vast view of the desert valley below that was once an ancient lake.
If you look closely to the upper left of the image above you’ll faintly see a sign along the trail just before it veers to the right. This sign indicates that you would be under water at that point had the lake still been there.

At the bottom of the trail you’ll reach a dry river bed that cuts through the trail you’re on. You’ll also see two pointed signs with one directing you to the left and another directing you forward. This is where the actual loop begins.
You could go in either direction and end up at the same spot. Going left will take you along the river before turning into and up the canyon. After reaching the viewpoint above, you’ll descend back into the canyon and here is where it’ll ultimately spit you out at. In our opinion, this is the better way to go.


After turning left at the juncture, you’ll follow the dry river bed for a short time before before running into Walker River. At the right time of year, this section of the river doesn’t move very fast. So if you brought your swimsuit, this would be a great spot to take a dip or maybe partake in some fishing.

The trail continues to the right and follows the river for about a quarter mile before finally cutting back into the canyon. When we did this hike it was still early spring, so the trees that dot the river weren’t yet blooming, unfortunately. When they do, it’s a sight to behold (especially in the fall).
Shortly after turning right into the canyon (roughly one mile into the hike), you’ll come across your first of only two opportunities for shade during this stretch of the trail. The next one is 3/4’s of a mile further. So if you’re feeling the need to rest for a bit, do it here.
This stretch of the trail starts from the time you leave the river to the time where you reach the viewpoint at the top and is almost exactly one mile in length. It is very exposed and as stated above, has only two opportunities for shaded rest breaks.
At first glance, you might think there isn’t much to look at here, but you’d be wrong. Thanks to the volunteers that maintain this trail, small informative signs dot the trail pointing out the several examples of desert flora, rock formations, and petrified wood.

Not long after the second shaded area of the trail, you’ll begin your ascent to the viewpoint. This ascent, while still requiring a fair amount of effort, is nowhere near as steep as the one you took to get into the canyon at the beginning.


At the top of the viewpoint, you’ll see a large informative sign detailing the history of the area and what you’re looking at. On your far right, you’ll see Mount Wilson, Singatse Range, and Shamarak Hill. Toward the middle and left you’ll see Ancient Lake Wellington, the Pine Nut Mountain Range, and Mount Siegel.
Once you’ve gotten your fill of the views and took your pictures, you’ll continue down the trail as you descend back into the canyon. This section of the trail is my personal favorite as you go from sweeping mountain views to feeling like you’ve stepped into a scene out of Star Wars.
READ ALSO: Visit Dayton State Park and Rock Point Mill

If you’ve ever seen the tufa’s at Mono Lake in California, the canyon walls that surround you will look similar to that environment. After all, all of what you see here was formed over millions of years of volcanic activity and water movement.
Towards the end, you’ll see examples of what are called, “Hoodoos”. Hoodoos are rock formations that were once solid pieces of land that were carved out by rain, snow melt, and wind leaving the pieces you see today. One of them, as pictured below, resembles a dragon.


Near the end of the Wilson Canyon trail.

The climb out of Wilson Canyon.
As you make your way through the canyon walls and Hoodoos, you’ll come out into an opening signaling the near the end of the hike. You’ll eventually reach a sign (similar to the one at the beginning) stating that you would be under water had the ancient lake still been here. At this point in the hike, you’re at the 3-mile mark.
From here, simply continue on the trail until it spits you out at that same junction you came to at the beginning. Now that you've completed the loop, you can either head back towards to the river to recreate in there or you can go straight up and over the ridge back to your vehicle. Remember the very beginning of this article when I stated the hardest part of the whole hike is the climb out? Well, there it is pictured above. Prepare yourself.
Wilson Canyon Trail - Things to Know

This is an all season trail. Rain and/or snow can make this trail incredibly muddy and hard or even dangerous to traverse. However, this area doesn’t receive a lot of either so it is accessible anytime of year. I do recommend checking the weather before heading out, though.
Wildlife hazards are present. As with any venture into the wilderness, potential conflicts with wildlife are possible. While I have never seen anything more menacing than deer out here, others have spotted both Cougars and Rattlesnakes. As with anything, use common sense, be prepared, pay attention to your surroundings, and know what to do in case you cross paths with one of them.
The majority of the trail is rocky. The volunteers who maintain this trail do a great job, but they can only do so much. At certain points at both ends of the trail it does get rather rocky and the potential of rolling an ankle is ever present. Watch your step, keep to steady surfaces as much as possible, and you’ll be fine.
The trail is very sun exposed. The descent back into the canyon from the viewpoint has more shade than the way up does. It’s a 3.5-mile trail and for the first two or so, you’re only going to have a couple opportunities for shade. If you’re doing this trail in the summer, we highly recommend getting an early AM start and as always, bring plenty of water and salty snacks with you.
We would rate this hike as family friendly. While it does have steep sections, the trail is mostly flat with occasional gradual inclines/declines. It is our opinion that everyone from adults to children can do this hike. If your kid has never hiked before, it would be a great way to introduce them to it.

See Burning Man Art on the J Resort Neon Line in Reno
Located on the west end of downtown Reno, just steps from the J Resort, is an urban trail called the Neon Line featuring a vast and growing collection…
Disclosure: This post contains affiliate links. If you make a purchase through these links, I may earn a small commission at no additional cost to you. I only recommend products or services that I believe will add value to my readers.
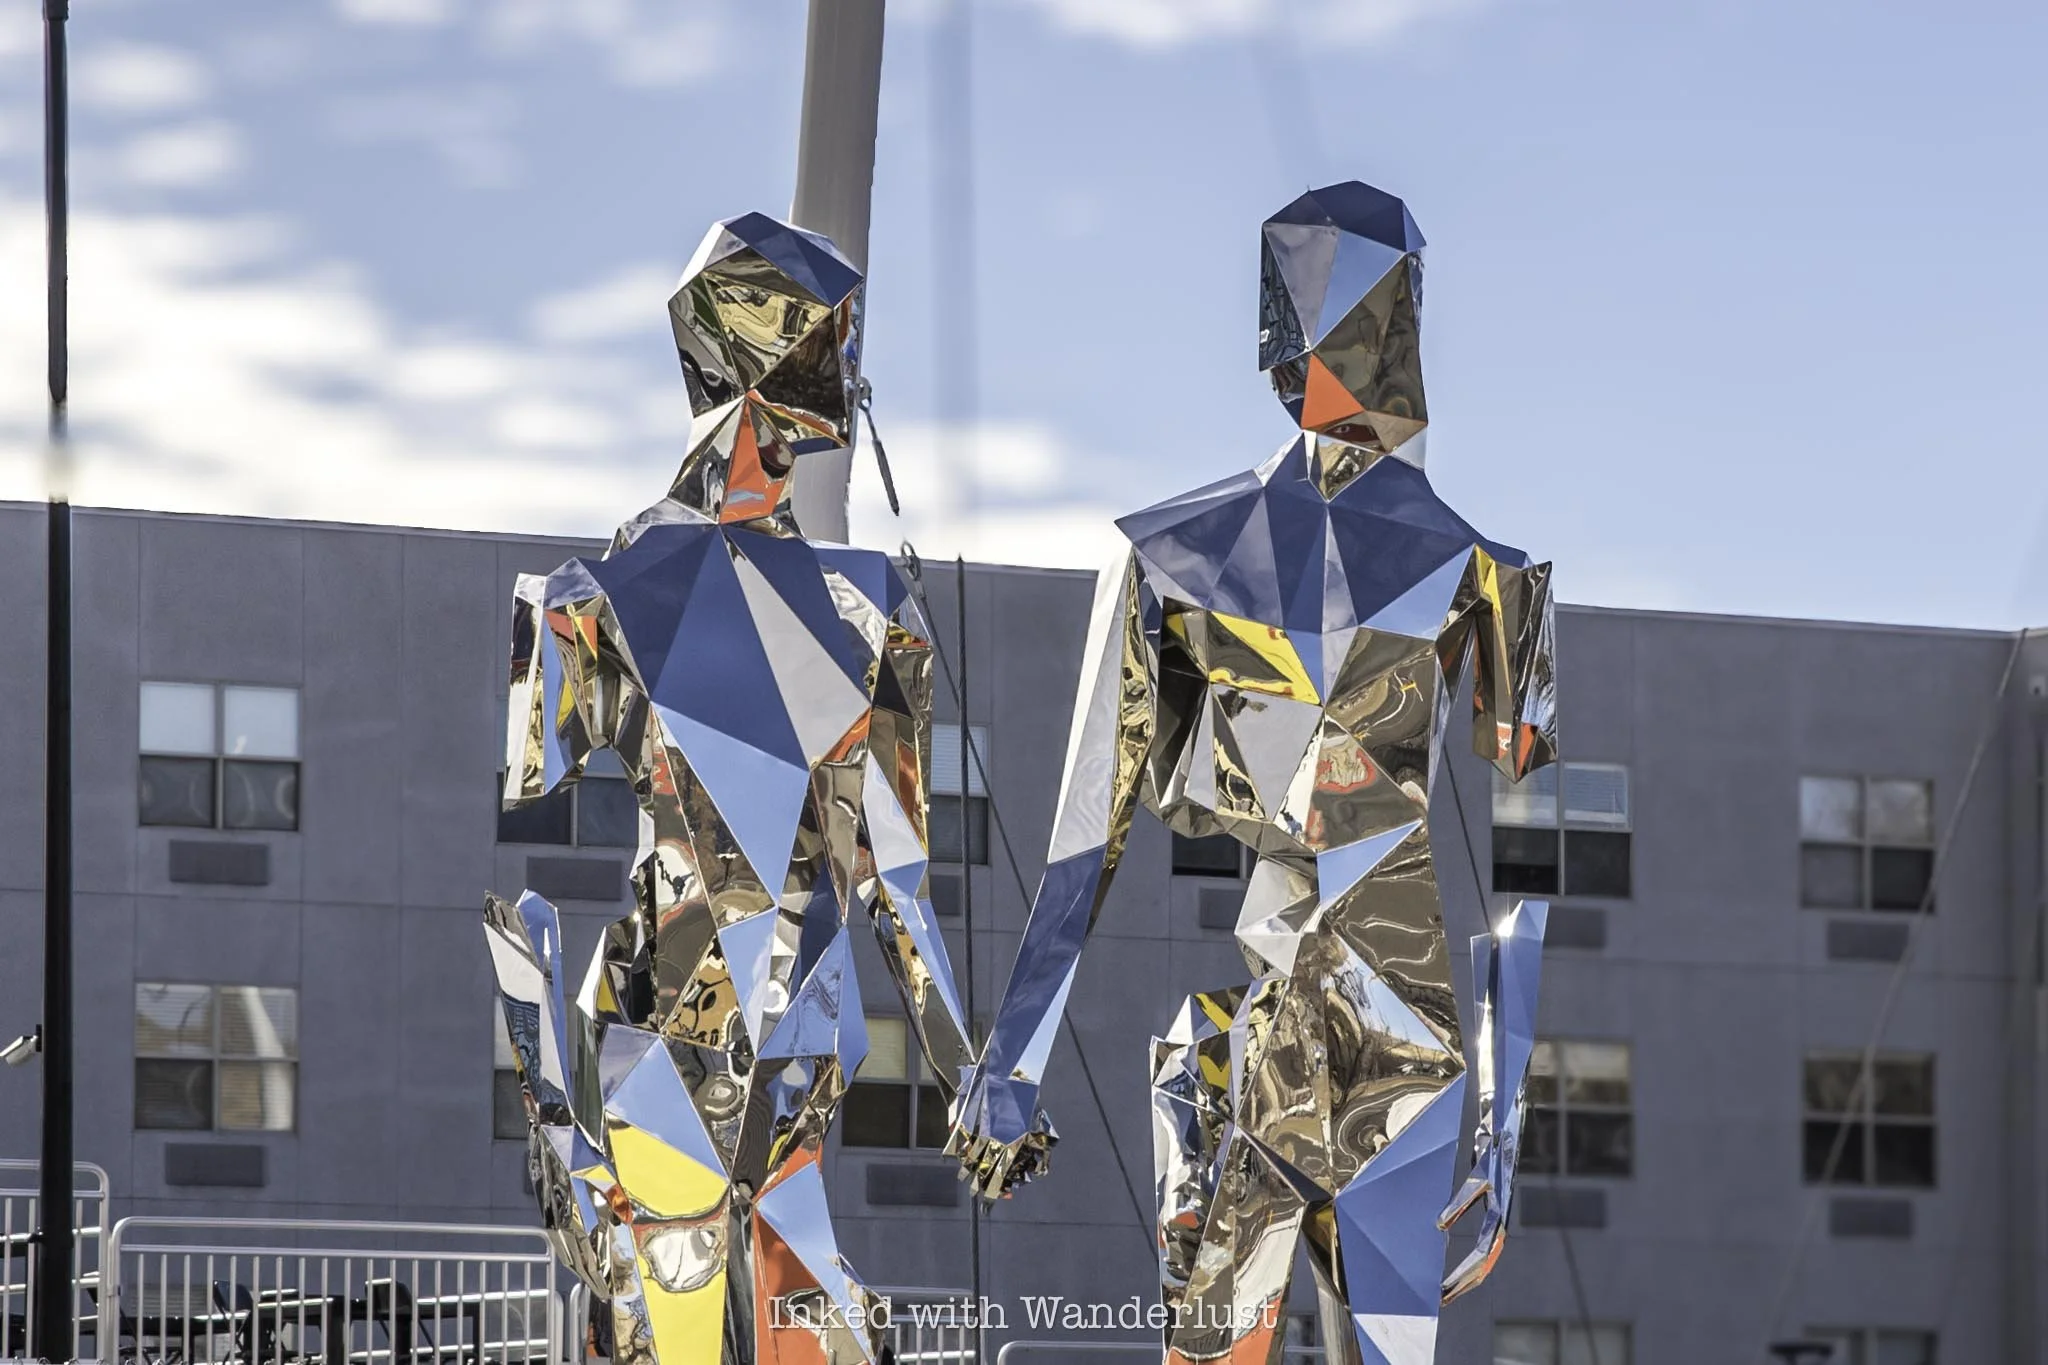
About the J Resort Neon Line
Located on the west end of downtown Reno, just steps from the J Resort, is an urban trail called the Neon Line featuring a vast and growing collection of art sculptures, once featured at the famed Burning Man festival, dotted along the path.
The Neon Line, which came about with the recent transformation of the Sands Regency into J Resort, is one aspect of a multi-phase revitalization project of West 4th Street and the surrounding area.
The best part is it’s completely free to take part in and you don’t need to be a guest of the J Resort Reno Hotel. The art sculptures are located along public sidewalks, making them accessible to everyone, day and night.
There’s no official beginning and end, and accessing the Neon Line from the downtown area is easy, as the sculptures begin just steps away from other popular attractions like The Row and the famous Reno Arch.
Neon Line at Night vs. Day

The J Resort Neon Line can be experienced at both night and during the day. Both have their positives and drawbacks, but they also offer their own unique perspectives that can’t be experienced during both.
Clearly, nighttime would be the preferential time to walk it, as that’s when all the sculptures are lit up. Additionally, some of the sculptures feature special effects and music, giving onlookers the full experience.
Conversely, there are some sculptures that have an immense amount of details which are difficult to see when it’s dark. So day time would be the best time for that. Additionally, some may feel safer in this area during the day (we’ll discuss that later into the post).
No matter which time of day your choose to walk the Neon Line, you’ll still be able to see and appreciate the art sculptures. My wife and I walked it at night and during the day and I’ll display photos of the sculptures under both conditions below.
J Resort Neon Line Art Sculptures and Path
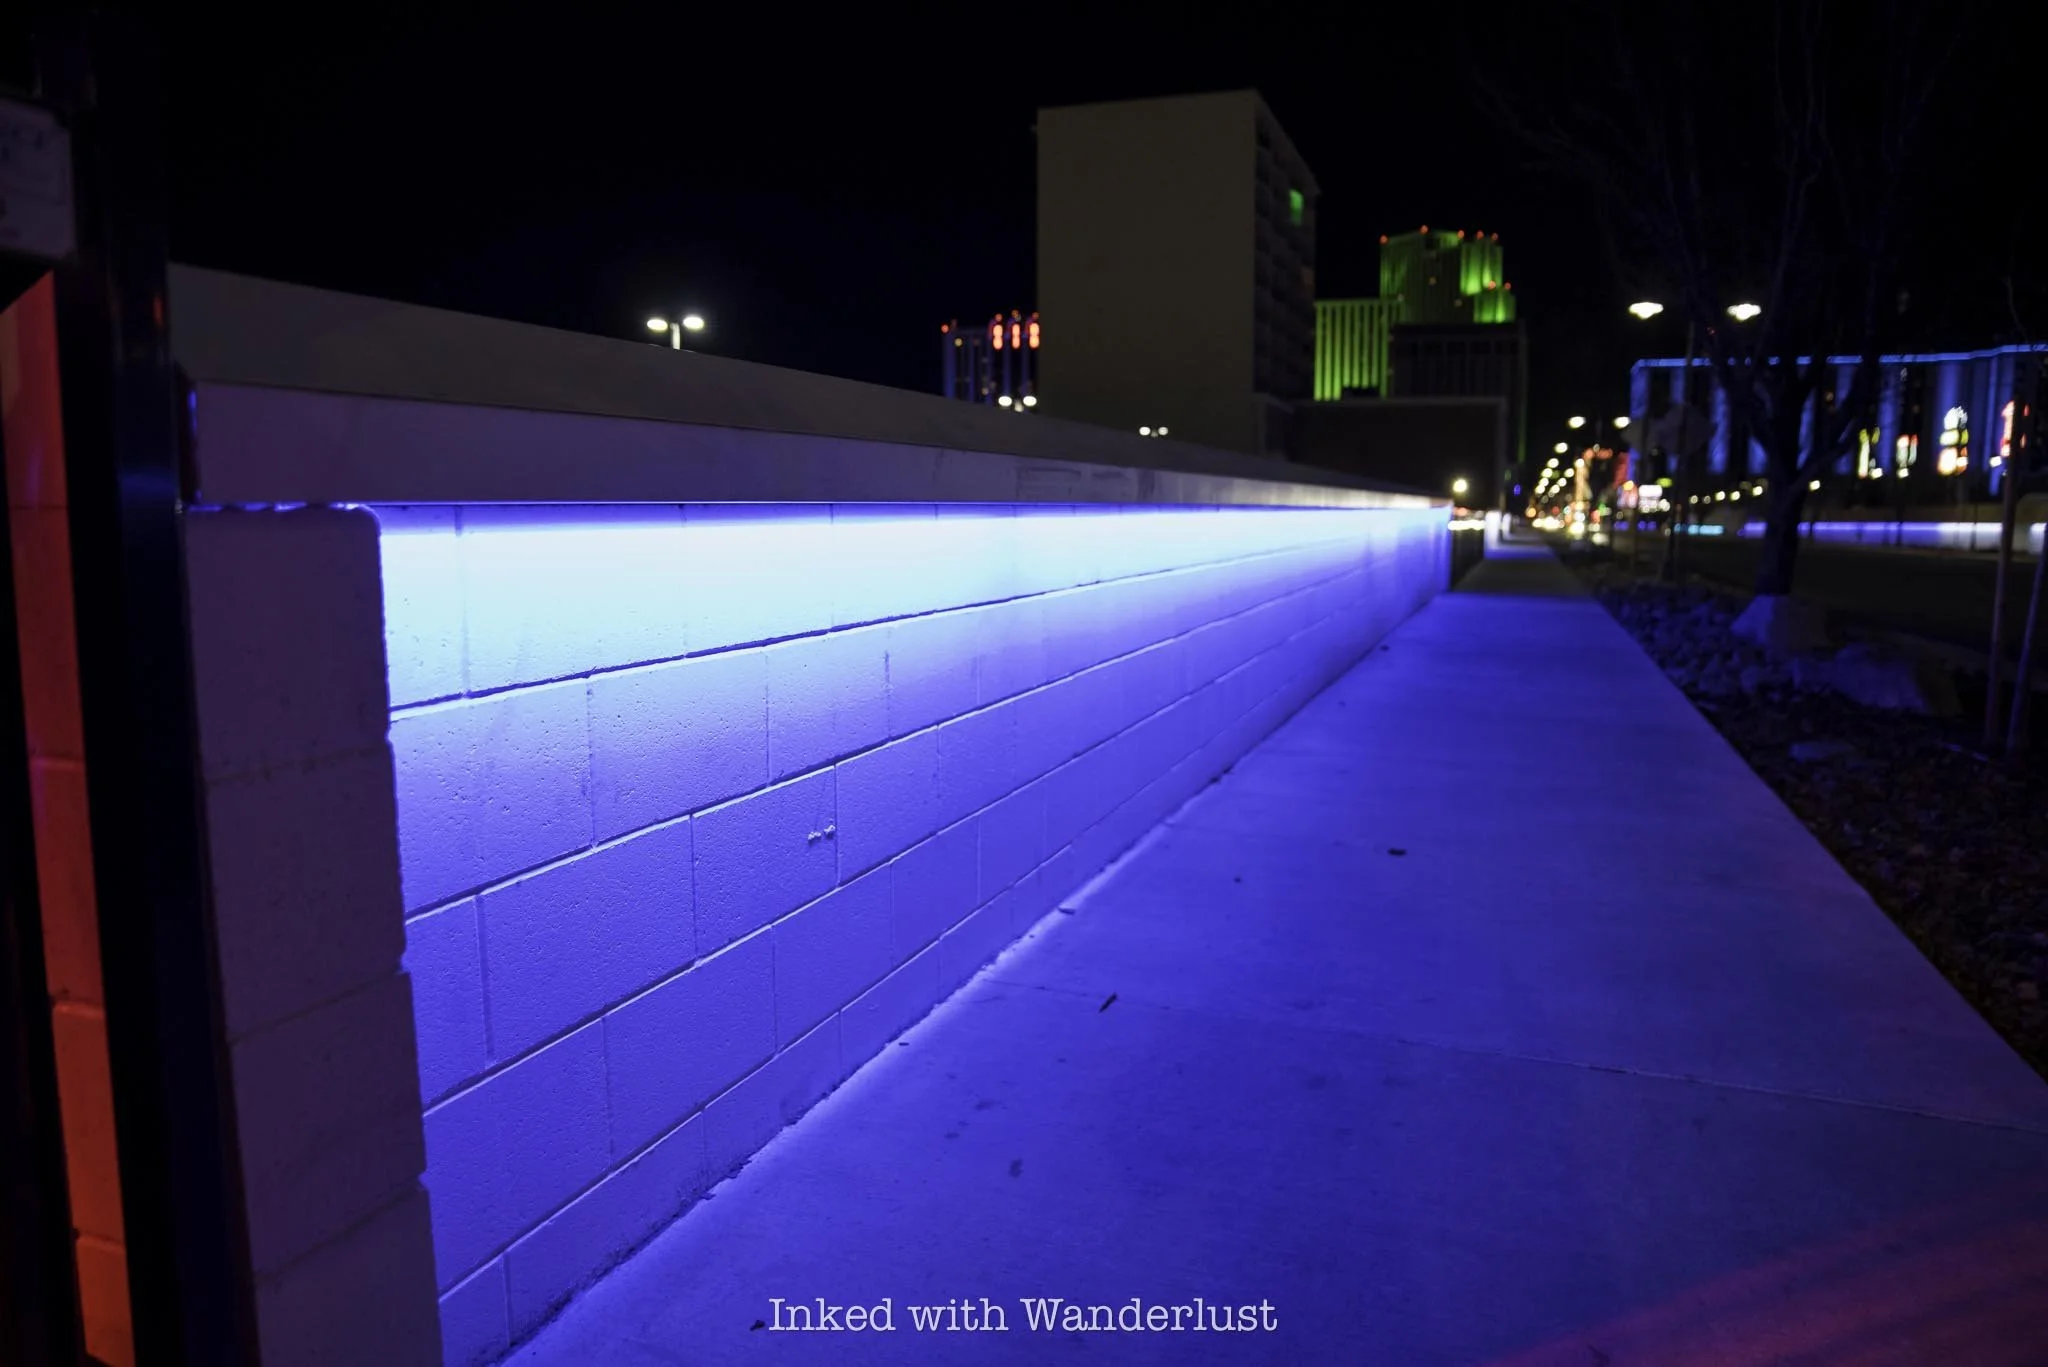
The Neon Line is easy to follow, particularly at night. All along the path is a literal blue neon light throughout the sidewalks. As long as you see the light, you’re on the Neon Line. There’s no official beginning or end, so just start walking.
If you’re driving here specifically to walk the Neon Line, I suggest parking in the small lot at the J Resort on the Ralston Street side and crossing the street from there. If you’re coming from the area of The Row or the Reno Arch, simply start walking up West 4th Street.

My wife and I found out about the Neon Line during our stay at J Resort Reno (check out my honest review here), and we accessed it from Ralston Street. If you do the same, the first art sculpture you’ll walk up on is The Rearing Horse.
It was featured at Burning Man 2018 and is nearly entirely made up of repurposed machinery parts found in junk piles. Also, it’s one of the only sculptures that are interactive, as you can make its legs, mane, tail, neck, and ears move via the various cranks.


From the Rearing Horse, make your way north up West 4th Street towards the Gold West Casino. Here, you’ll walk adjacent to J Resort’s Glow Plaza, and check out the numerous neon signs and a huge Polar Bear sculpture towering above you.
Just past this block, you’ll pass Chapel of the Bells on your left, which is one of the oldest chapels in Reno. Just past that will be the next sculpture, Bee Dance. We only saw this one at night and I couldn’t see it’s description, but when you see it, it’s pretty self-explanatory.

Head a bit further up West Fourth Street until you reach the intersection with Vine Street. For reference, you’ll see the Gold and Silver Inn restaurant on your left. Past here, there are two more art installations across Vine Street, which essentially resemble fancy light posts.
If you decide to skip these, simply cross the street to other side of West Fourth (towards Gold Dust West casino). The first piece you’ll come upon here is the Lincoln Bear. This piece pays tribute to the President Lincoln memorial, and its “fur” is made up of 127,000 pennies, collectively weighting 5,200 pounds.


From here, continue down West Fourth Street going back towards J Resort. Between Lincoln Bear and the J Resort, you’ll come upon several more art pieces, including Desert Guard, Neptune’s Luminous Dance, Odyssey, and Jibaro Soy.
The Desert Guard piece stands out from the pack. It was inspired by the armor of the ruthless Mongolian ruler, Genghis Khan, and towers over onlookers at nearly fifty feet and weighs over ten tons. It’s truly a sight to behold up close. I liked daytime, better, as I was able to see more of the detail in the armor.
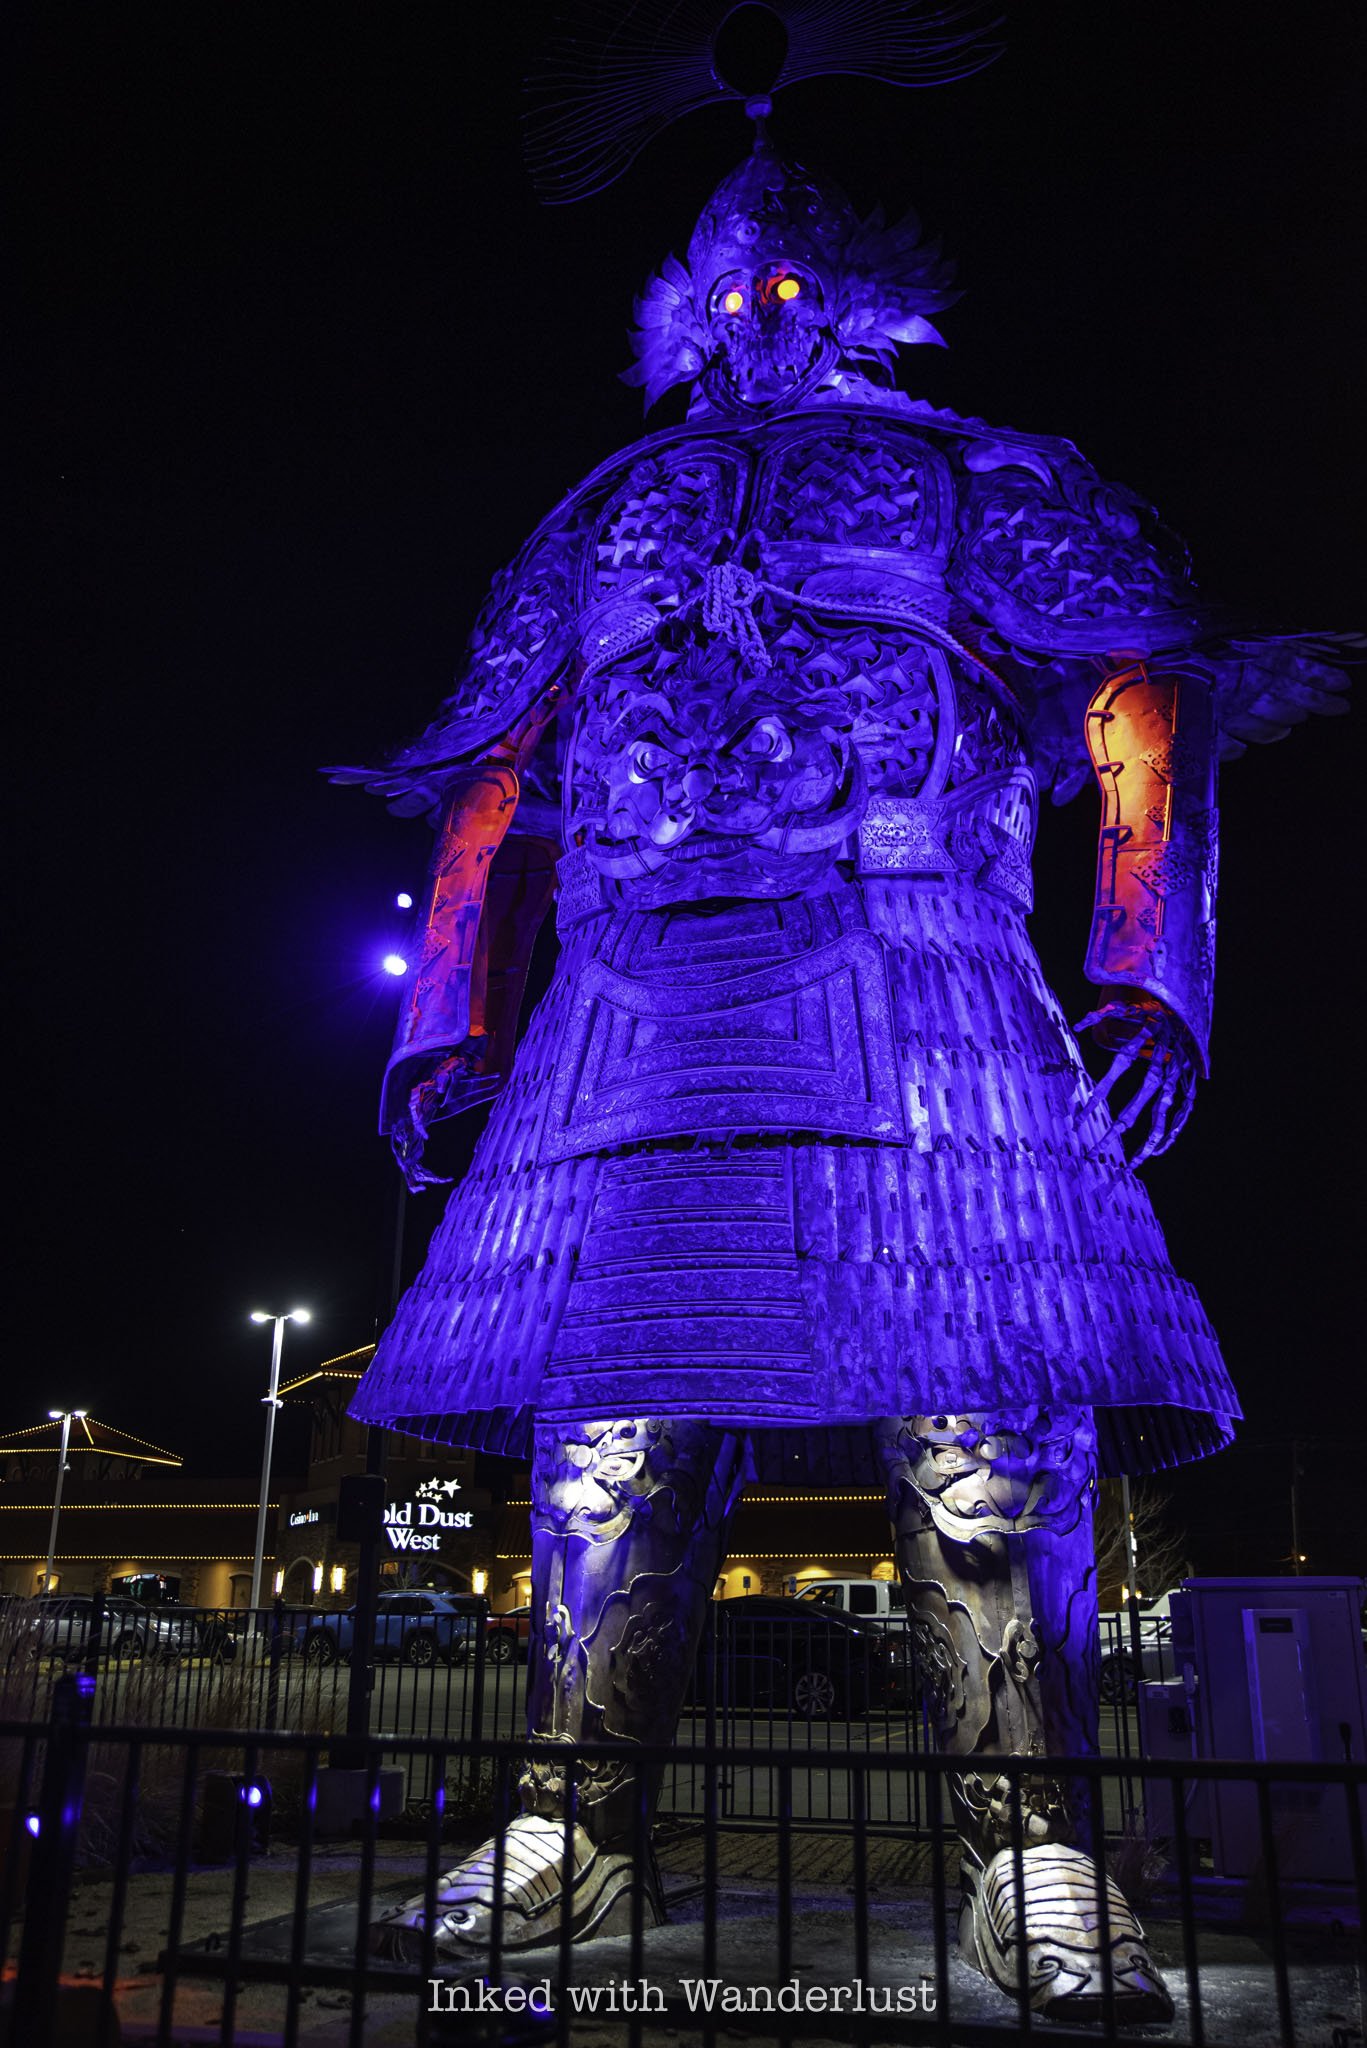


Beyond the West Fourth Street and Ralston Street intersection is the Jibaro Soy piece. This piece was right up there with Lincoln Bear as one of our favorites. “Jibaro” is a Puerto Rican word describing the humble working class throughout the island.
The piece is meant to be a symbolic image of a shameless Jibaro, representing the demand of respect and dignity of preserving the culture. The details within the sculpture are amazing, as you can see the resemblance of a Puerto Rican barrio (neighborhood). The song in which it was inspired by, “Esta mi barrio y yo soy del”, translates to, “This is my neighborhood, and I’m from…”.


Past Jibaro Soy, there are three more art pieces and you’ll need to cross the street once again to see them. The first crosswalk is near Jibaro Soy, but there are no lights and people tend to fly through here. For safety, your best bet is to walk a bit down the road to the second crosswalk with stoplights.

From here, you’ll find yourself on the other side of J Resort, closest to the Silver Legacy and El Dorado Hotels. Over here, the final three pieces on the neon line (for now) include Squared (pictured above), Tara Mechani, and Bloom (pictured below).
These are their order if viewed coming from the direction listed above. If you’ll be starting the Neon Line from downtown, simply reverse the order.
Tara Mechani, another favorite of ours, was inspired by the ancient female Buddha, Tara. It’s made with 80% recycled, non-traditional materials like bike chains, hinges, machine parts, keyholes, and hardware. It’s the most beautiful of the collection.


It’ll be interesting to see if J Resort will add any additional Burning Man art to the Neon Line. The most recent additions include Jibaro Soy, Lincoln Bear, and Odyssey pieces, which were all from the 2023 event. Neptune’s Luminous Dance was commissioned in 2024, but wasn’t featured at Burning Man.
There appears to be two addition plots just past the Bloom piece that could hold more sculptures, in addition to several more spots along West Fourth Street. Burning Man 2024 just concluded last August, so it’s possible that another sculpture could be on the way.
Is the Neon Line Safe?

It’s no secret that downtown Reno has long struggled with image issues. The downtown and West Fourth Street areas, like many cities, have historically seen rapid homelessness and drug use. I won’t lie to you, those issues are still ever present but I’ve personally never had a problem.
As a local, I have explored downtown Reno on foot, during day and night, lugging around an expensive camera many times and I’ve never had an issue. No one’s ever bothered or threatened me in any way. This is also true for cities like Seattle, Portland, San Francisco, Las Vegas, and Inglewood.
That’s not to say you’re 100% safe. Anything could happen to anyone at any time or place. From downtown Reno to Mayberry, there’s always a risk. Keep your wits about you, keep your head on a swivel, and don’t flaunt expensive looking jewelry or tech.
Many times, simply making eye contact with folks and giving a friendly “hello” is all it takes to ward off a potential unwanted interaction. It lets people know you’re paying attention and you’re not going to be an easy target. Just be street-smart and you’ll be fine.
Neon Line Recap

To recap, here are the names of the art sculptures you’ll see if starting across the street from J Resort Reno on the Ralston Street side and circling back:
The Rearing Horse
Broken but Together
Various old neon signs
Longview the Polar Bear
Bee Dance
Sprouts (across Vine Street)
Lincoln Bear
Desert Guard
Neptune’s Luminous Dance
Odyssey
Jibaro Soy
Squared
Tara Mechani
Bloom

10 Must-Do Short Hikes in Valley of Fire State Park
The beautiful rock formations and colors, in addition to being packed with short day hikes, make Valley of Fire State Park a place you could easily spend a whole day (or two) exploring. Best of all, most…
Disclosure: This post contains affiliate links. If you make a purchase through these links, I may earn a small commission at no additional cost to you. I only recommend products or services that I believe will add value to my readers.
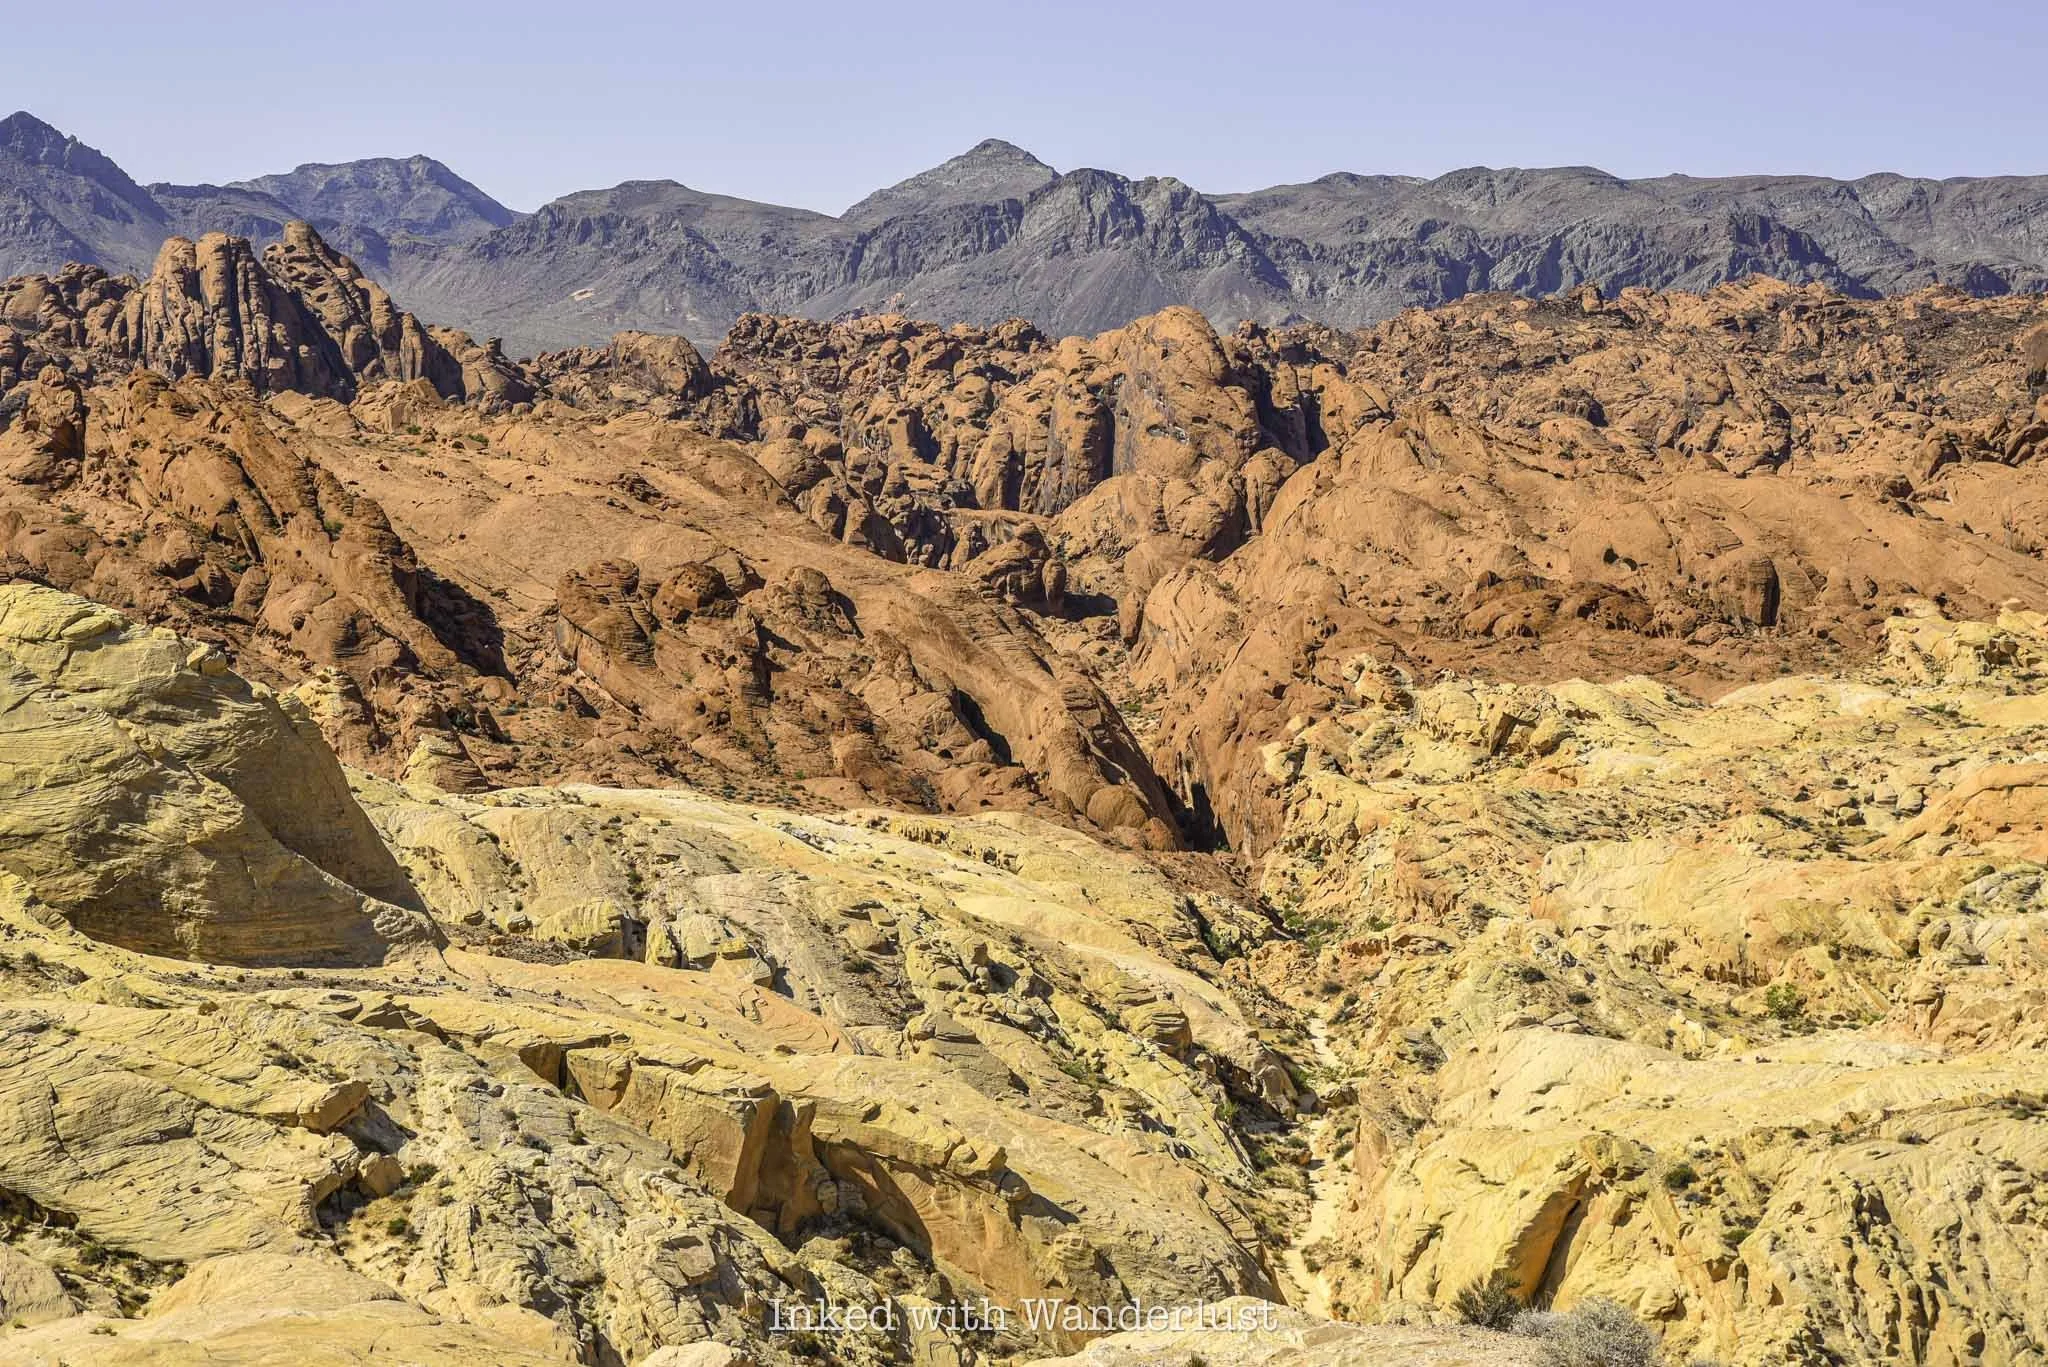
Valley of Fire became Nevada's first state park in 1934 and since then, it's developed into one of the state's most sought after destinations and is one of the best things to do when visiting Las Vegas, often rivaling nearby Red Rock Canyon.
The beautiful rock formations and colors, in addition to being packed with short day hikes, makes Valley of Fire State Park a place you could easily spend a whole day (or two) exploring. Best of all, most of the park’s most popular hikes are short and easy, making them family-friendly.
In this post, I'm going to present to you 10 must-do short hikes in Valley of Fire. If you plan correctly and not visit on a day where the heat reaches dangerous levels, it's totally possibly to do all of these in a single day visit, dependent on your conditioning.
That said, there is one caveat to this list, and that's the seasonal trail closures discussed below...
Valley of Fire Seasonal Trail Closures

While the park itself is open daily, between the months of May and September, when temperatures at Valley of Fire State Park often reach dangerous levels, park officials enact trail closures at several popular hiking trails to prevent needless deaths.
There have been quite a few exposure-related deaths over the years, including in 2023 when two hikers were found dead on the Prospect Trail on a day when high temperatures reached a scorching 118-degrees.
Unfortunately, several of the hiking trails listed below are included on the closure list. So if you're going to visit between May and September, please respect these closures and don't risk it. It isn't worth the chance of a hefty fine or even worse...death.
These are the trails affected by seasonal closures:
White Domes Loop
Fire Wave/Seven Wonders/Pastel Canyon/Pink Canyon
Pinnacles Loop
Prospect Trail
Arrowhead Trail
Natural Arch Trail (excludes Arch Rock)
Charlie's Spring

West Entrance vs. East Entrance
There are only two entrances to Valley of Fire State Park. If you’re coming from Utah, Arizona, or any state east of Nevada, you’ll likely be entering through the east entrance. If you're like most people and you're coming from the Las Vegas Strip area, you'll want to head towards the west entrance.
For some reason, Google Maps likes to take people coming from the strip to the east entrance, which is further away. It has tried doing that to me twice now. So make sure that whichever navigation system you use that you specify the west entrance.
Entrance Fees
In 2025, the fees to enter Valley of Fire are:
$15 (non-Nevada vehicles)
$10 (Nevada vehicles)
Fees are payable, at either entrance, with cash via the iron ranger/envelope or with credit cards at the self-pay digital kiosk. Note that the digital kiosk doesn't always work, so it's best to bring exact cash as a back up.
1) Atlatl Rock

SEASONAL CLOSURE: NO
TRAIL LENGTH: 0.1 MILES
Atlatl Rock is one of the most popular attractions in the entire park. It isn't much of a hiking trail, as the stairwell and rock face are located a very short distance from the parking area. Where Atlatl Rock shines is its historical significance.
At the top of the stairwell, you'll reach a platform in front of a smooth rock face. On that rock face are several old petroglyphs which are believed to be up to 4,000 years old. Atlatl Rock isn't the only spot in Valley of Fire where you can see petroglyphs, but it's the easiest (aside from the stairwell, that is).
You can read more details about Atlatl Rock in this featured post.
2) Fire Wave Trail

SEASONAL CLOSURE: YES
TRAIL LENGTH: 1.3 MILES
The Fire Wave is a stunning sandstone rock formation located at the backside of the park along White Domes Road. Over millions of years, shifting sand dunes compressed, creating the wavy swirls of red, white and pink stripes we see today.
Fire Wave is easy to get to via a short, well maintained trail that leaves from a fairly large parking area. Shortly after descending for about 6/10's of a mile, the Fire Wave will come into view. Getting there during the early morning light is good, but sunset is when Fire Wave comes to life.
3) Seven Wonders Loop

SEASONAL CLOSURE: YES
TRAIL LENGTH: 1.9 MILES
While not an official hiking trail at Valley of Fire, you can extend your hiking time by continuing past Fire Wave and see many other infamous Valley of Fire attractions. Hiking Seven Wonders will take you past Fire Wave and through pink rock formations at Pink Canyon.
You'll then cross White Domes Road and go through a stunning slot canyon, before heading onto additional sights like Crazy Hill, Fire Cave and Thunderstorm Arch. The loop will eventually take you back to where you parked for Fire Wave.
Since it's not an official trail, I suggest downloading the AllTrails map. While it isn't inherently difficult to follow, there are a few spots where the trail is easy to lose.
4) Mouse’s Tank Trail
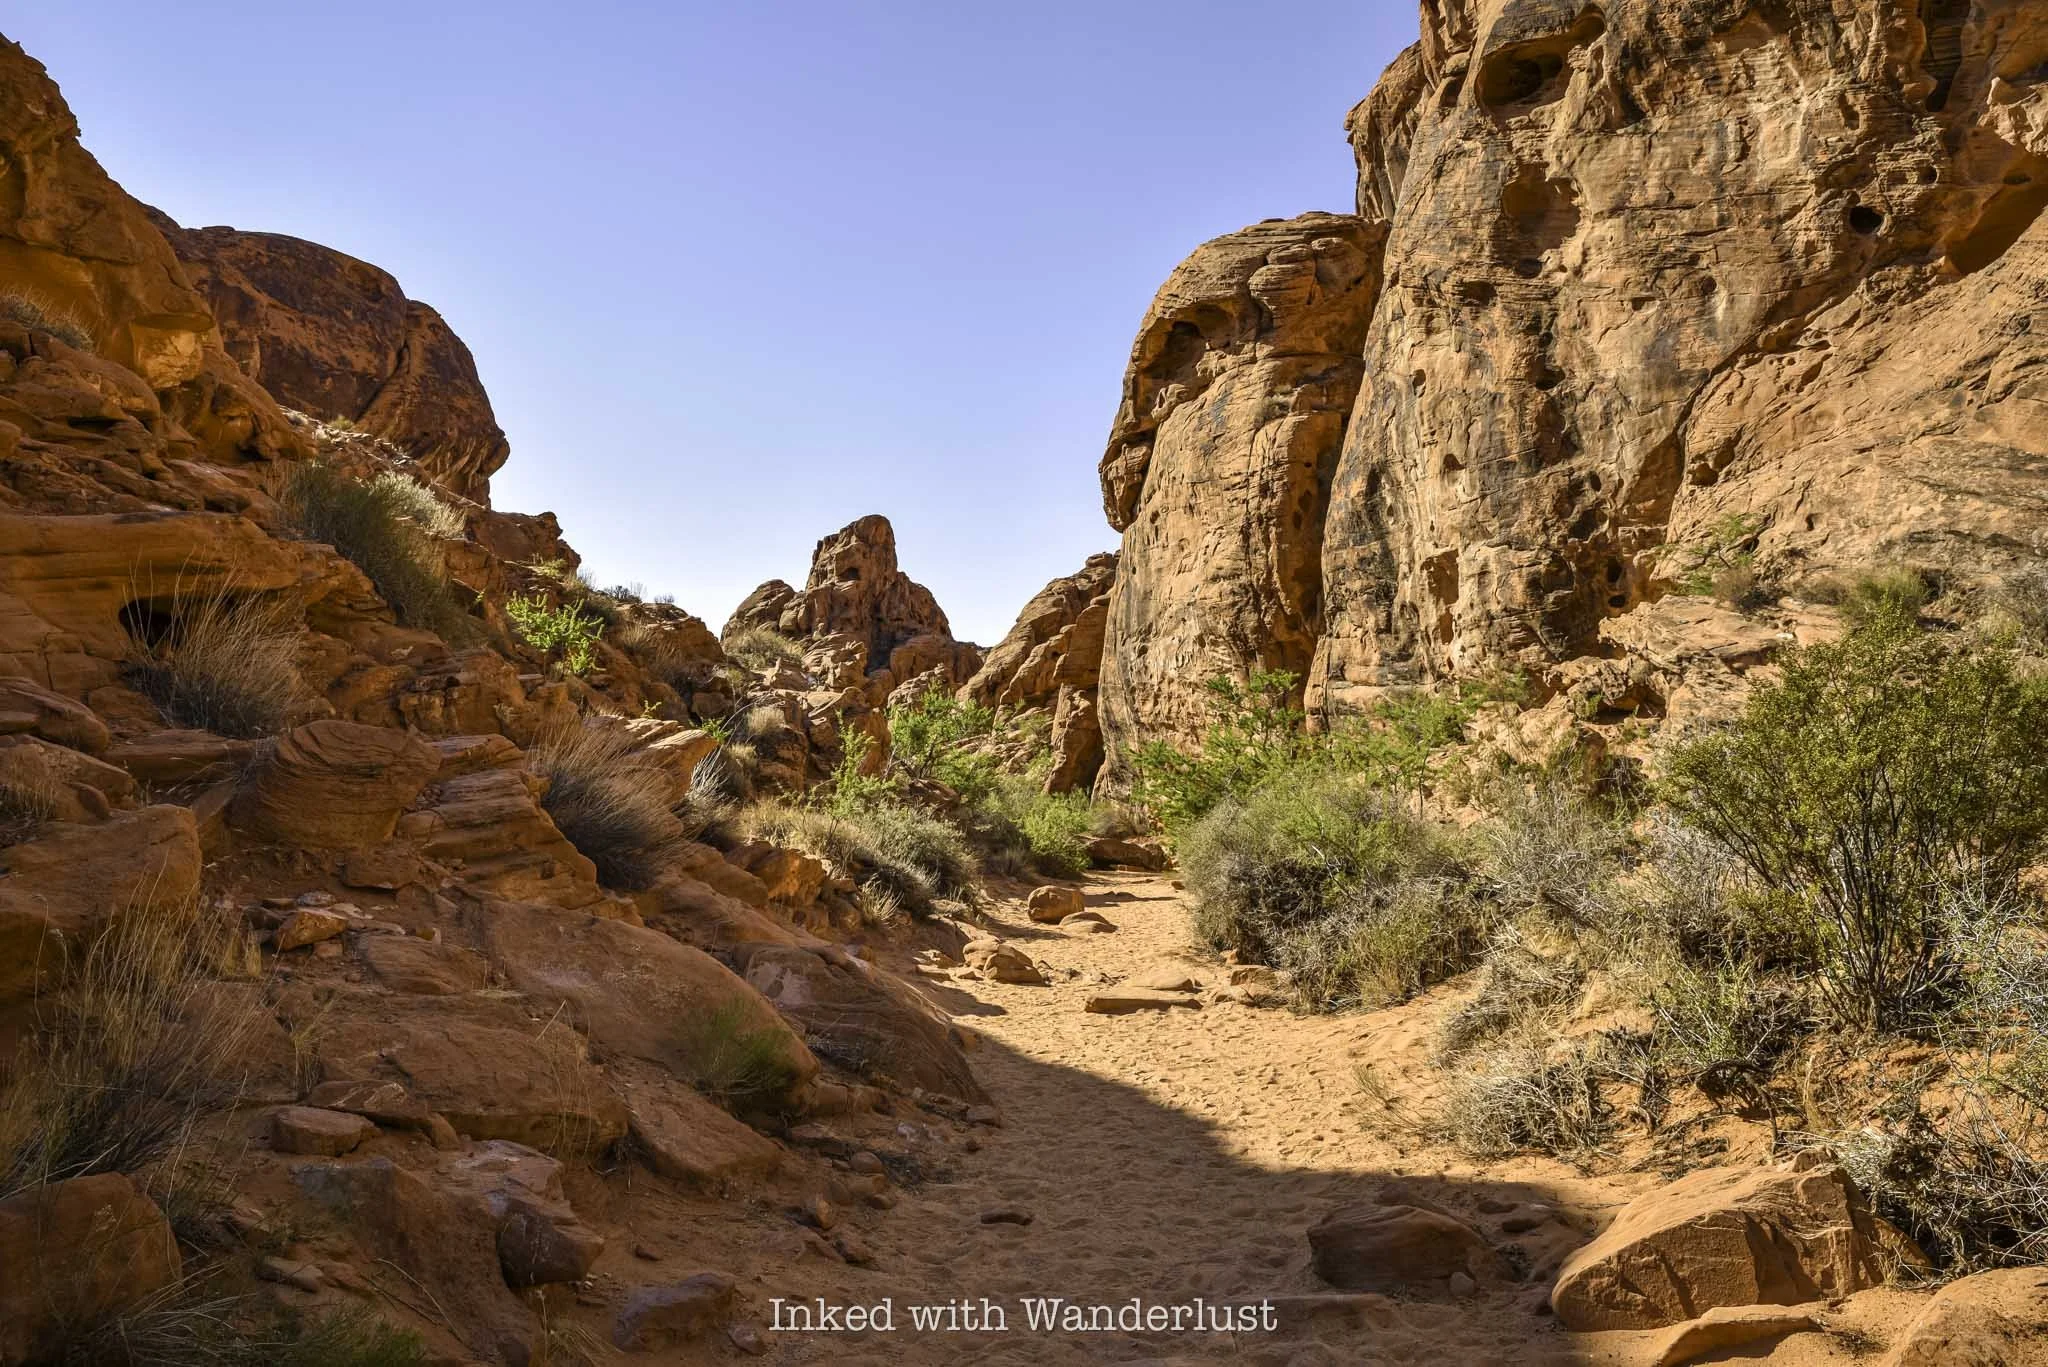
SEASONAL CLOSURE: NO
TRAIL LENGTH: 0.7 MILES
Mouse's Tank Trail is one of my favorites in the park because of the story behind it. The canyon you hike through is one of the places where a Southern Paiute Indian, named "Little Mouse", took refuge after being accused of and wanted for the murders of two prospectors (and other crimes) in the late 1800's.
Additionally, the canyon walls are littered with old petroglyphs dating back thousands of years. They're easy to miss if you're not looking for them but once you spot them, they're easy to view. At the end of the canyon, you'll come across "Mouse's Tank", a natural rock basin which collects rain water.
The whole trail is less than a mile but you'll be traversing along loose, fine sand the entire time. Still, it's one of the park's most intriguing hikes with a great backstory, tons of history, and features numerous incredible rock formations. It can be found directly off of Mouse's Tank Road.
5) Petrified Log Loop
SEASONAL CLOSURE: NO
TRAIL LENGTH: 0.3 MILES
The Petrified Log Loop is an easy 0.3-mile loop trail that passes several examples of real petrified wood logs, as well as many informative displays detailing the history of the logs and how they came to be.
If you don't know, petrified logs are fossilized tree trunks that have been replaced by minerals. The process in which this is done - petrification - is essentially the process of turning wood into stone. It's a great trail for kids, as it has educational value in combination with outstanding views.
6) Elephant Rock

SEASONAL CLOSURE: NO
TRAIL LENGTH: 0.3 MILES
The trail to Elephant Rock is also an easy, 0.3-mile walk to and from the car. There's a slight amount of elevation involved, but you'll barely notice it. The trail leads to an amazing, orange-sandstone rock formation that strikingly resembles an elephant.
If you come into the park via the east entrance, the parking lot will be on your right as soon as you drive through. You'll ascend a short walk up a small hill and when you reach the top, Elephant Rock will come into view.
Additionally, Elephant Rock is clearly visible from the Valley of Fire Scenic Drive, but you cannot stop on this road to take pictures. Elephant Rock is a mega-popular attraction in Valley of Fire, so arrive early to beat the crowds.
7) Balancing Rock Trail

SEASONAL CLOSURE: NO
TRAIL LENGTH: 0.3 MILES
There's no way to classify the path to Balancing Rock as a "hike". The pathway is located on the left side of the visitor center parking lot and it's maybe a tenth of a mile to the viewing area. However, that doesn't make Balancing Rock any less impressive and worth checking out.
Balancing Rock is a stunning red rock formation where a large rock appears to precariously balance itself on top of a smaller, thinner rock resembling a pedestal. It's a visually intriguing rock formation, and a favorite amongst photographers.
8) Silica Dome/Fire Canyon

SEASONAL CLOSURE: NO
TRAIL LENGTH: 0.9 MILES
Silica Dome is a visually striking viewpoint in the northern section of Valley of Fire, right about where Mouse's Tank Road turns into White Domes Road. In the summer, it's the final spot in this area of the park where you explore on foot, as everything north of Silica Dome is closed in the summer months.
You can choose to just walk out onto the viewing platform and gaze at the stunning contrasting colors of red, white, and brown rocks seemingly stacked on top of one another, or you can take the trail into the canyon below.
Fans of Star Trek may find Silica Dome familiar, as it's the location of Captain Kirk's gravesite from the movie, Star Trek Generations. Many "trekkies" make the pilgrimage to this sight every year. However, you don't need to be into Star Trek to appreciate the visually striking views and formations.
9) Rainbow Vista Trail
SEASONAL CLOSURE: NO
TRAIL LENGTH: 1.0 MILE
The Rainbow Vista Trail, which is also located along Mouse's Tank Road, clocks in at just over a mile in length and features some of the best views in a short hike. In fact, this area of the park is where you have the best chance of seeing herds of Bighorn Sheep, as they're often found grazing near the parking lot and along the road.
This short and easy trail is known for its colorful red rock formations, as well as stunning views of neighboring Fire Canyon from the viewpoint at which the trail ends. While it doesn't close in the warmer months, it is mostly exposed. So if you're here in the summer, I would avoid this trail mid-day.
10) White Domes Loop

SEASONAL CLOSURE: YES
TRAIL LENGTH: 1.1 MILES
White Domes Loop, located at the northernmost point you can drive in the park, is my personal favorite Valley of Fire hike. To get to it, drive north on Mouse's Tank Road from the Valley of Fire Scenic Byway. After a couple miles, the road will become White Domes Road (just past Rainbow Vista). From there, drive another four miles until you reach the road's terminus at the White Domes day-use area.
Along this 1.1-mile loop, you'll encounter a variety of red, orange, and white sandstone formations, as well as an old movie set, slot canyon, and the white dome rocks for which the trail is known. If you're up for a longer hike, you can extend it another 7-miles or so by combining it with the Prospect Trail.
White Domes Loop is one of the most popular short hikes in Valley of Fire, so arrive early to beat the crowds. Additionally, this trail is on the seasonal closure list, so you'll need to visit between the months of November and April in order to experience it. You can read my comprehensive post on White Domes Loop here.
Do you plan to visit Valley of Fire this year? If so, let me know in the comments below. If you have any questions, you can leave them there or ask me on my Facebook page.

My Honest Review of J Resort: A Downtown Reno Hotel
In early 2023, Jacob’s Entertainment completed the purchase of one of Reno’s oldest hotels, the Sands Regency. After promptly changing…
Disclosure: This post contains affiliate links. If you make a purchase through these links, I may earn a small commission at no additional cost to you. I only recommend products or services that I believe will add value to my readers.

In early 2023, Jacob’s Entertainment completed the purchase of one of Reno’s oldest hotels, the Sands Regency. After promptly changing its name to J Resort, the company announced a nine-figure upgrade to the property, including an arts district, new pool, room and suite upgrades, restaurants, and more.
While the changes are ongoing, as it’ll take a couple more years for the project to reach completion, I recently had the opportunity to spend a weekend at J Resort and experience the changes made thus far.
Many people search for cheap hotels in Reno, you may be one of them. If so, I believe J Resort Reno is a solid option as its nightly rates are reasonable and is in an up-and-coming location near many attractions, including the Riverwalk, Reno Arch, and more.
Full transparency, J Resort did not offer me any kind of incentive to write this. I paid for my room and meals out of pocket. This is to ensure that I give you the most honest and unbiased review to help you decide if this property is what you and your family are looking for.
Buy me a coffee?
If you found this blog helpful, consider leaving a tip through the Buy Me A Coffee button below! Whether it’s $1 or $5, every bit helps offset small travel costs like coffee, water, lunch, parking, or park entry fees. Your support means the world—thank you!
J Resort Reno Location, Parking and Rates

J Resort Reno’s main parking lot and entrance is located on Arlington Ave., but other entrances include the West 4th Street and Ralston Street sides as well. When it comes to parking, J Resort isn’t lacking what-so-ever. There are multiple parking lots around the property, in addition to a multi-story garage.
As is the case with most casino hotels in Reno, parking is free of charge for both registered guests and visitors, regardless of where you choose to park. For those who prefer valet, you can find that service at the main entrance off of Arlington.

If you’re coming from the parking garage, you’ll likely use the elevator attached to the Aspen Tower (more on those later). You’ll find the check-in desk straight ahead coming off said elevator. From the main entrance, walk straight through the casino and head up the short stairwell to reach it.
Compared to photos I’ve seen of the Sands online, J Resort has definitely upgraded the interior. Gone is the dated reflective paneling, as well as the reds and yellows that scream 1980’s Reno. They’ve been replaced with a more modern approach of cream-colored ceilings, with touches of blue and gold throughout.
You can still tell it’s an aged property, but the effort is just as noticeable. The casino is largely made up of slot machines, but they also have a walled-off high limit area and a few blackjack tables across from the check-in desk.
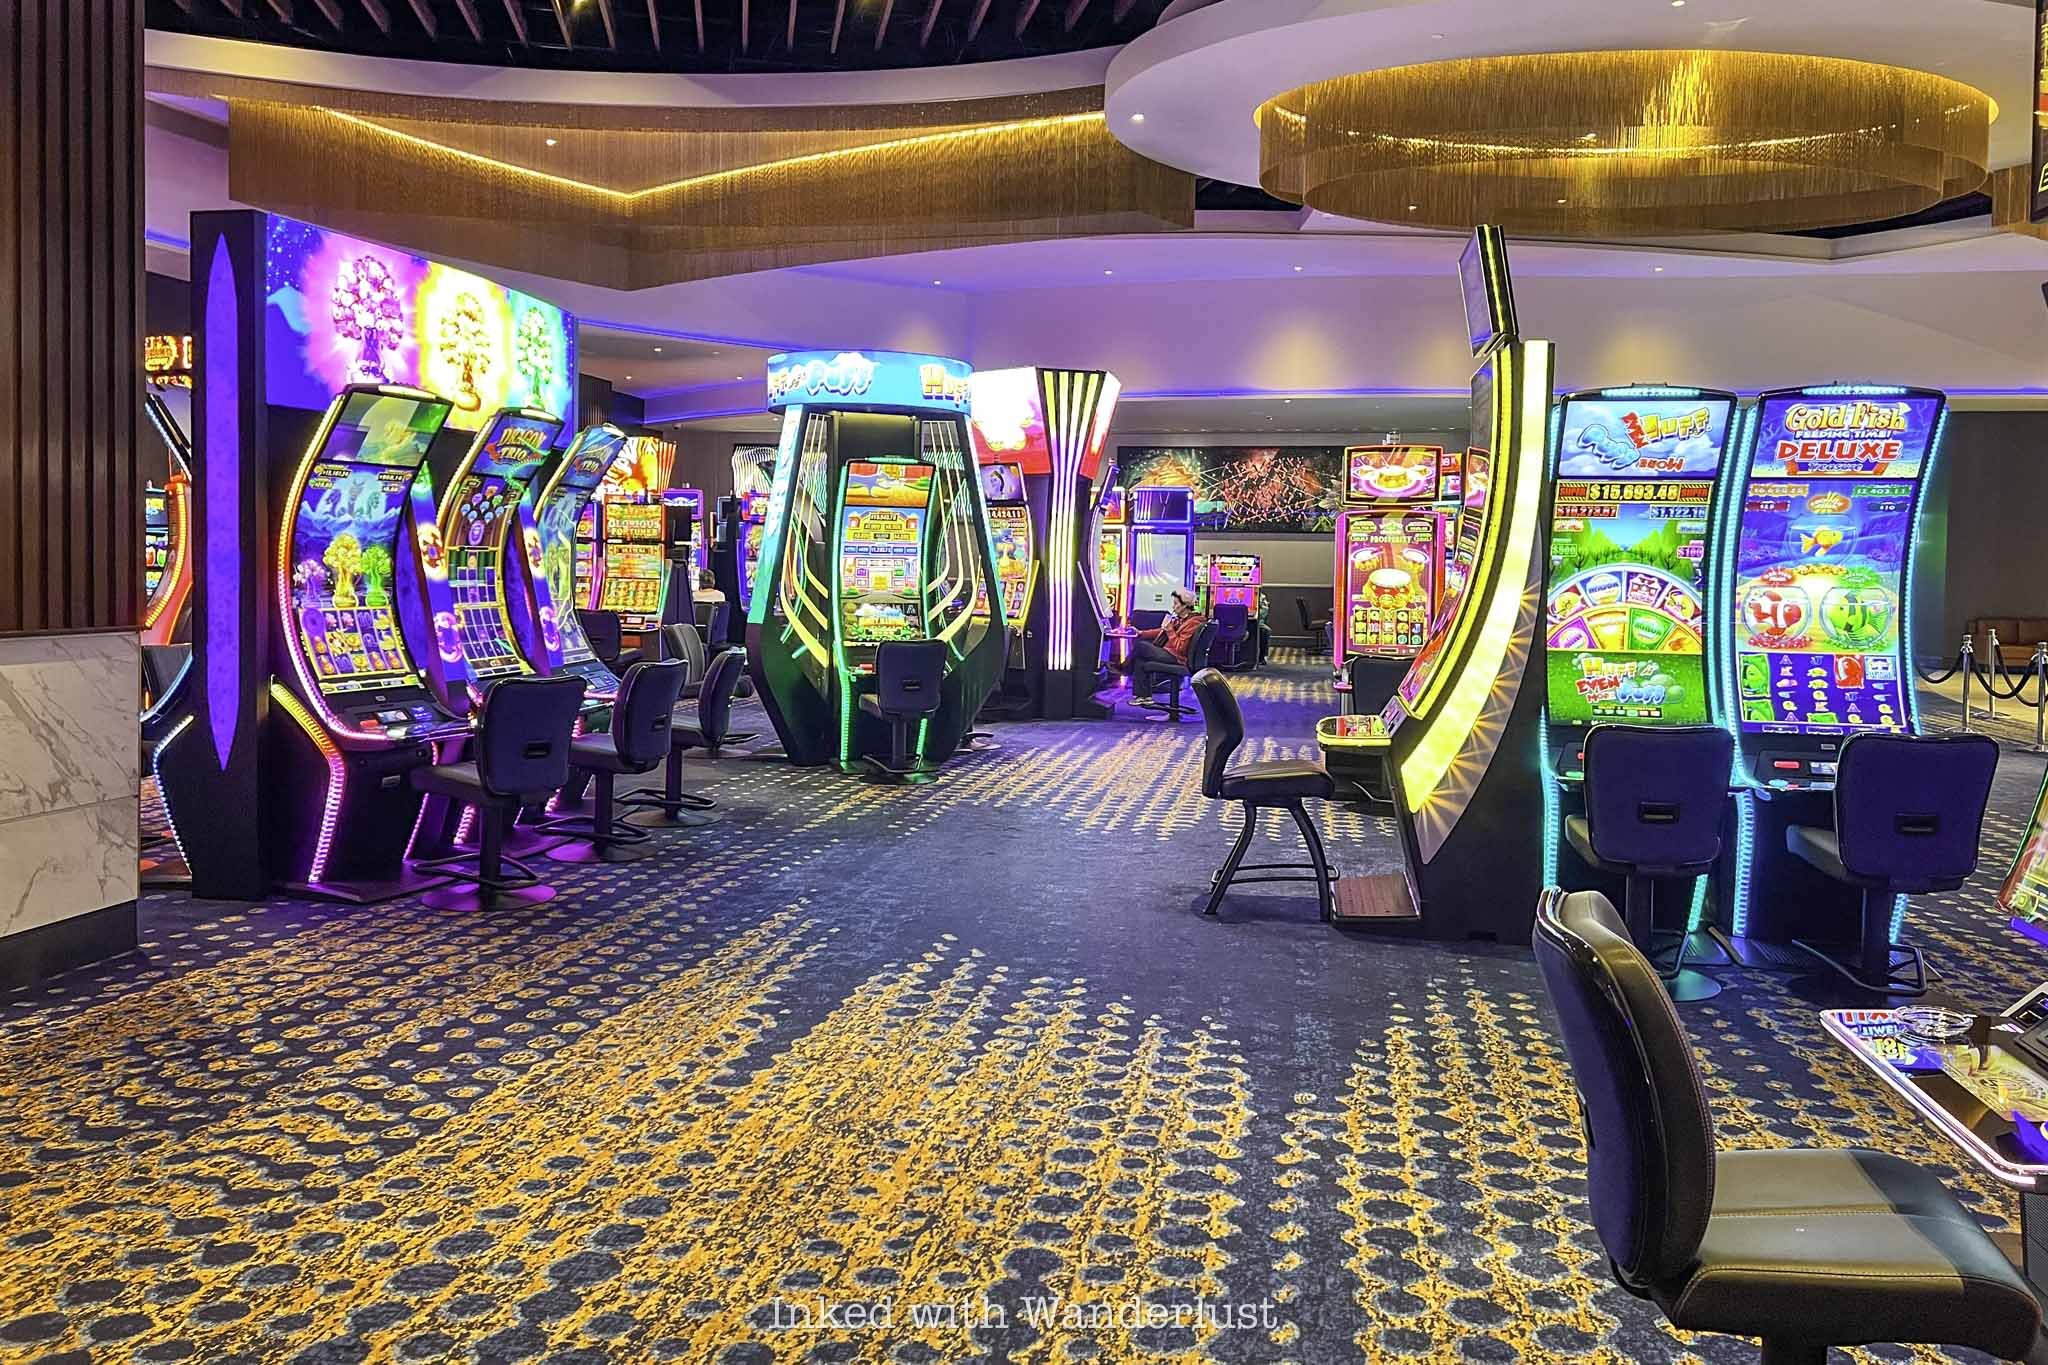
In my experience, checking in was a breeze. They have self-check in kiosks, but both were out of commission. We had a bit of a wait, but the giant screen behind the desk featuring rotating photos of area attractions kept us occupied. I snapped a photo right as a photo of Emerald Bay, one of my most favorite places, popped up.
Once my credit card was approved, I was given my room keys and a quick break down of the property. All in all, checking in took about fifteen minutes (including waiting in line). That’s good, especially for a Saturday.
I booked our stay through Expedia and paid a total of $215 for two nights in an Aspen Tower king room, which included tax and the $30 per night resort fee. So not accounting for tax, I paid less than $100 per night. Looking at averages throughout the year, their rate tends to hover under that mark. If you’re looking for cheap hotels in Reno, I would consider starting here.
J Resort Reno Towers

There are three towers that make up J Resort Reno. They are the Aspen, Birch, and Cedar Towers. As of January 2025, Birch Tower and its room are under renovation and not available to book. Rooms in the Aspen and Cedar Towers are currently available, though.
Depending on which tower you’re staying in and the amenities you care most about, each tower offers its own set of locational advantages. For example, staying in the Birch Tower would put you close to the main hotel entrance, Hanna’s Table restaurant, the buffet and the smoke free area of the casino.
The Cedar Tower is the newest, but offers the least amount of advantages to guests. All you’re close to is the hotel entrance, a slot machine-heavy area of the casino, a small bar and the gift shop.
Conversely, the Aspen Tower is the only tower with rooms featuring kitchenettes and quick access to the 16th floor fitness center. Additionally, you’ll be closest to the check-in desk, J Paul’s Italian Steakhouse, the blackjack tables, and Afterglow Lounge.
J Resort Reno Aspen Tower King Room

My wife and I booked a king room in the Aspen Tower and were pleasantly pleased with the upgrades. Each wall featured a different color in a mixture of creams and browns, with the main wall featuring a patterned design. The flooring is carpeted, which I look at as a negative as I personally prefer hard floor.
Aside from the king size bed, the room featured a bed bench, small work space, flatscreen TV, ironing board with iron, hair dryer, small array of toiletries, walk in-style shower, an abundance of USB ports and standard plugs, and a kitchenette with microwave, mini-fridge, and coffee maker.


The bathroom was much smaller than it looked in photos, but it was well appointed and made good use of the space. The walk in-style shower was a nice touch, though I can see this being a negative to families with littles who prefer bathtubs. Based on Expedia photos, it looked like the Cedar Tower rooms have bathtubs.
I loved the vanity lighting around the wall-sized mirror, though there is still direct lighting you can’t get around. I’m a huge proponent of indirect lighting, so I’m glad to see more and more hotels heading in this direction.

Both the shower and bathroom floor were made of white marble tiles with a black design pattern (probably faux, to be honest, but it still looks nice). The shower was amazing, as it had the best water pressure of any cheap hotel in Reno I’ve stayed in.
I’m one of those people who inspects my room no matter the hotel. I don’t care if it’s Motel 6 or a Westin. Initially, this room appeared impeccable. To be fair, the bathroom, bed, carpet, and most of the kitchenette were clean. No signs of bed bugs, nothing left over in the bathroom, and no food particles in the microwave.

On the flip side, there were black marks and dust all over the A/C unit, mystery stains on the walls, and not-so-mystery stains on the bed bench. The biggest offender, though, was the inside of the coffee maker’s water compartment. It looked like it’s never been cleaned.
These findings didn’t affect us enough to change rooms, nor did they damper our stay. However, they’re worth mentioning. The rooms may have been upgraded, but this is still an old property dating back to the 70’s. There’s no way they would catch everything, but there needs to be more attention to detail when cleaning.

Another negative was the severe lack of seating. The only options were the single office-style chair and the bed bench, which was out for us due to the visible stains discussed above. There was definitely room near the window to add a love seat or small couch, so I’m baffled as to why they omitted this.
On the flip side, there was an abundance of USB ports and standard plugs throughout the room, which is something a lot of hotels can’t say. There were two of each on each side of the bed, along with additional ports and plugs on the work desk, kitchenette and in the bathroom.
J Resort Reno Amenities

The changes at J Resort Reno are still ongoing, so a few of the typical amenities you’d find at hotels like this aren’t available at the moment. For example, they’re expected to open a new spa sometime in 2025 and they’re working on a new rooftop pool, among other amenities.
The current pool is seasonal as it’s unheated, so it was drained and unavailable to us during our stay. From what I’ve gathered from employees, it may not reopen at all as they’ll just wait to debut the upgraded one.
J Resort Reno Dining and Drink Options

The high end dining offering at J Resort Reno is J Paul’s Italian Steakhouse. During our stay, my wife and I opted to dine here, as we’ve been to a number of Reno steakhouses and have yet to try this newest one. In short, our experience was simply stellar all the way through.
Of course, you have a hearty selection of cuts of both beef and bison. In addition, J Paul’s offers hand crafted Italian fare and seafood classics for those who wish to avoid red meat. They also feature specialty cocktails, offered in both the steakhouse itself and the neighboring lounge.
Their secondary dining option is Hanna’s Table, which is akin to a diner experience. Here, you’ll find typical dishes found at many restaurants, including smash burgers, pan-seared chicken, grilled ribeye, salmon, and a variety of breakfast options in the morning.
If you’ve been to Cafe Milano at the Peppermill, you’ll find it similar to that. Unlike Cafe Milano, though, it isn’t open 24/7 (as of now, at least). Hanna’s is currently open for breakfast, lunch, and dinner. After hours, you can get coffee and quick grabs at neighboring Hanna’s Express (though it was frustratingly never open during my stay).

My wife and I dined here for Linner (our term for a lunch + dinner combo) and were pleasantly surprised at the quality of the food. My wife ordered sliders while I ordered a barbecue bacon smash burger. Was it the greatest burger I’ve ever had? No. However, it was flavorful, cooked perfectly, and they didn’t charge me an arm and a leg.
The final dining option at J Resort Reno is The Buffet which is, you guessed it, a buffet. We didn’t partake, as I’m usually not a fan of buffets. However, the online reviews indicate it’s decent and it’s currently the only buffet option in the downtown area.
Afterglow Lounge

The main lounge at J Resort Reno is Afterglow Lounge. The lounge/bar area is lit with bright neon pinks, yellows, greens, and ambers. I can’t say for sure how popular it is, as we were the only ones here on a Saturday night. If it does get crowded, I can see it being problematic with the lack of seating options.

There’s a small stage near the main entrance of the lounge where musical acts perform. This typically occurs on Fridays and Saturdays at 9pm, though I was told those performance nights expand during the summer.
Additionally, there’s a small bar just off the casino near the elevators to the Cedar Tower. Beyond that, the only other option is the lounge at J Paul’s Italian Steakhouse. You do not need a reservation to sit at the bar and if desired, you can order food as well.
J Resort Reno Recreation

As stated earlier in this post, the spa at J Resort Reno won’t be opening until later in 2025 and they’re working on an upgraded rooftop pool. So as of now, recreational opportunities are limited. Thankfully, there are a couple of ways to get your steps in.
On the 16th floor of the Aspen Tower is where you’ll find the fitness center. It’s fairly small, especially considering they advertise is as “world class” on their website. It does the job, though. You’ll find cardio equipment, weight machines, dumbbells, flat screen TVs, and a water bottle refill station.
J Resort Reno Neon Line

Outside of J Resort Reno is the Neon Line, which features a vast and growing collection of art installations from Burning Man. You can view the pieces during the day, but at night is where they truly shine.
Each piece has its own story and some even have interactive elements. At night, they’re lit up and play music. During regular intervals, each piece stops playing the generic music and puts on a show, complete with lighting effects and movements.
There’s no real beginning and end but for context, we began at the Rearing Horse piece on the corner of Ralston and West 4th Streets. From there, we walked up West 4th to Vine Street, then crossed the street and worked our way back down West 4th to the corner of West Street.

Clearly, J Resort is leaning heavily into Reno’s sprawling arts culture and I’m here for it. It helps J Resort to stand out from the other downtown area hotels. Honestly, exploring the Neon Line was my favorite aspect of our weekend here.
If you’re looking for cheap hotels in Reno, I’d recommend J Resort. Rates are cheap right now due to the ongoing construction and currently unavailable amenities, but in my opinion there’s still enough to keep you busy.
In addition, J Resort is a short walk from THE ROW in downtown, Reno Arch, Riverwalk, National Automobile Museum, Bicentennial Park, City Plaza, Nevada Museum of Art and more. To see more recommendations for best resort hotels in Reno, read my post here.
Buy me a coffee?
If you found this blog helpful, consider leaving a tip through the Buy Me A Coffee button below! Whether it’s $1 or $5, every bit helps offset small travel costs like coffee, water, lunch, parking, or park entry fees. Your support means the world—thank you!

Sorry Not Sorry Creamery in Las Vegas
With temperatures often getting close to and even into the three digits fairly often, Las Vegas is the one of the few places with an ice cream shop could flourish all year…
Disclosure: This post contains affiliate links. If you make a purchase through these links, I may earn a small commission at no additional cost to you. I only recommend products or services that I believe will add value to my readers.

With temperatures often reaching three digits fairly often, Las Vegas is the one of the few places where an ice cream shop could flourish all year long. With several locations in the area, Sorry Not Sorry Creamery had long ago earned a reputation as a shop that serves the best ice cream in Las Vegas.
Using quality ingredients, including dairy from grass-fed and hormone-free cows, Sorry Not Sorry Creamery serves several creative ice cream flavors made up of the highest percentage of butterfat legally allowed (16%).
It may not be the healthiest thing you’ll ever eat (quite the opposite, actually), but this ice cream in Vegas is not to be missed. No matter the weather, a visit to try a scoop (or several) of ice cream at Sorry Not Sorry is a must.
Sorry Not Sorry Creamery on Flamingo

The chain has several locations, but the closest to the Las Vegas Strip is their shop on Flamingo. This is the one I went to and it was about a twenty-five minute drive away. There’s a way to avoid that lengthy Uber ride, though.
Sorry Not Sorry offers delivery through app services like DoorDash and UberEats. The downside to this (aside from the inflated cost), is you can only order pints. If you had your heart set on trying multiple flavors, it could get expensive.
The other way is to go to Fremont Street to a place called We All Scream, which is an ice cream themed nightclub. There’s a Sorry Not Sorry walk up window located on the right of the club’s entrance. Otherwise, the Flamingo location is your best bet if you’d rather visit a proper shop.

The Flamingo location opens daily at noon and closes at 11pm on most days, except on Fridays and Saturdays when they close at midnight. Time your visit strategically to avoid crowds, because it isn’t unheard of for a massive line to form, causing a wait upwards of an hour to order. This is particularly true on weekends.
I came on a weekday and arrived shortly after they opened. I was able to walk right up to the counter with no wait. Fifteen minutes later, though, it started to get packed as a line began forming. So be sure to arrive early to avoid the crowds.
Sorry Not Sorry Creamery Ice Cream Flavors

Sorry Not Sorry Creamery features many unique flavors. Their menu advertises sixteen classic favorites that are always offered, in addition to four additional flavors that rotate based on season (they also vary by location as well).
In addition to the traditional dairy-based ice cream, Sorry Not Sorry also offers a handful of flavors made with an oat milk base and vegan ingredients, making them vegan friendly.
The sixteen classic flavors you can enjoy throughout the year are:
Bumbleberry Cheesecake Crumble
Campfire S’mores
Cinnamon Snikerdoodle Cookie (vegan)
Coffee and Doughnuts 2.0
Cookie Butter Swirl
Double-Stuffed Cookies n’ Cream
Honey Lavender
Milk & Cereal
Mint Chocolate Chunk
O.G Buttercake
Rocky Road (vegan)
Salted Pistachio Brittle
Sea Salt + Caramel
Strawberry Shortcake (vegan)
Triple Chocolate Chunk Brownie
Ube Honeycomb
Blackberry Basque Cake (Downtown Las Vegas location exclusive)

Their wide variety of unique, creative flavors help to maintain their status as the best ice cream in Las Vegas. Just like at other ice cream shops, you can order their flavors in single or double scoops in a freshly made cone or cup, or go with a pint size if you favor a specific flavor.
If you’re new to Sorry Not Sorry and can’t decide on a single flavor, you can order the flight and receive four scoops in any combination of the classic or seasonal flavors. This option is also good for those who came with a group and wish to split their order.


Since it was my first time at Sorry Not Sorry, I decided to go with the four scoop flight ($14). In my flight, I went with the Ube Honeycomb and Bumbleberry Cheesecake Crumble flavors (pictured above in order) and the Cream Cheese Cinnamon Roll (fall seasonal flavor) and Double-Stuffed Cookies and Cream flavors pictured below in order.


Of the four, the cinnamon roll flavor, which was a fall seasonal exclusive, was my least favorite as I found it to be way too sweet. My favorite was the Ube Honeycomb, with the Bumbleberry Cheesecake Crumble coming in at a close second.
You will definitely taste the difference. I found their ice cream to be rich, creamy, and thicker than any other ice cream I’ve ever tried. This is due to the high amount of butterfat content, which Sorry Not Sorry touts as the, “highest legally allowed”, at 16%.
If you’re looking for the best ice cream in Las Vegas, look no further than Sorry Not Sorry Creamery. It may be a lengthy Uber ride away from the strip, but you could always head to the Fremont Street pick-up window for quicker access to it. You won’t regret trying it.
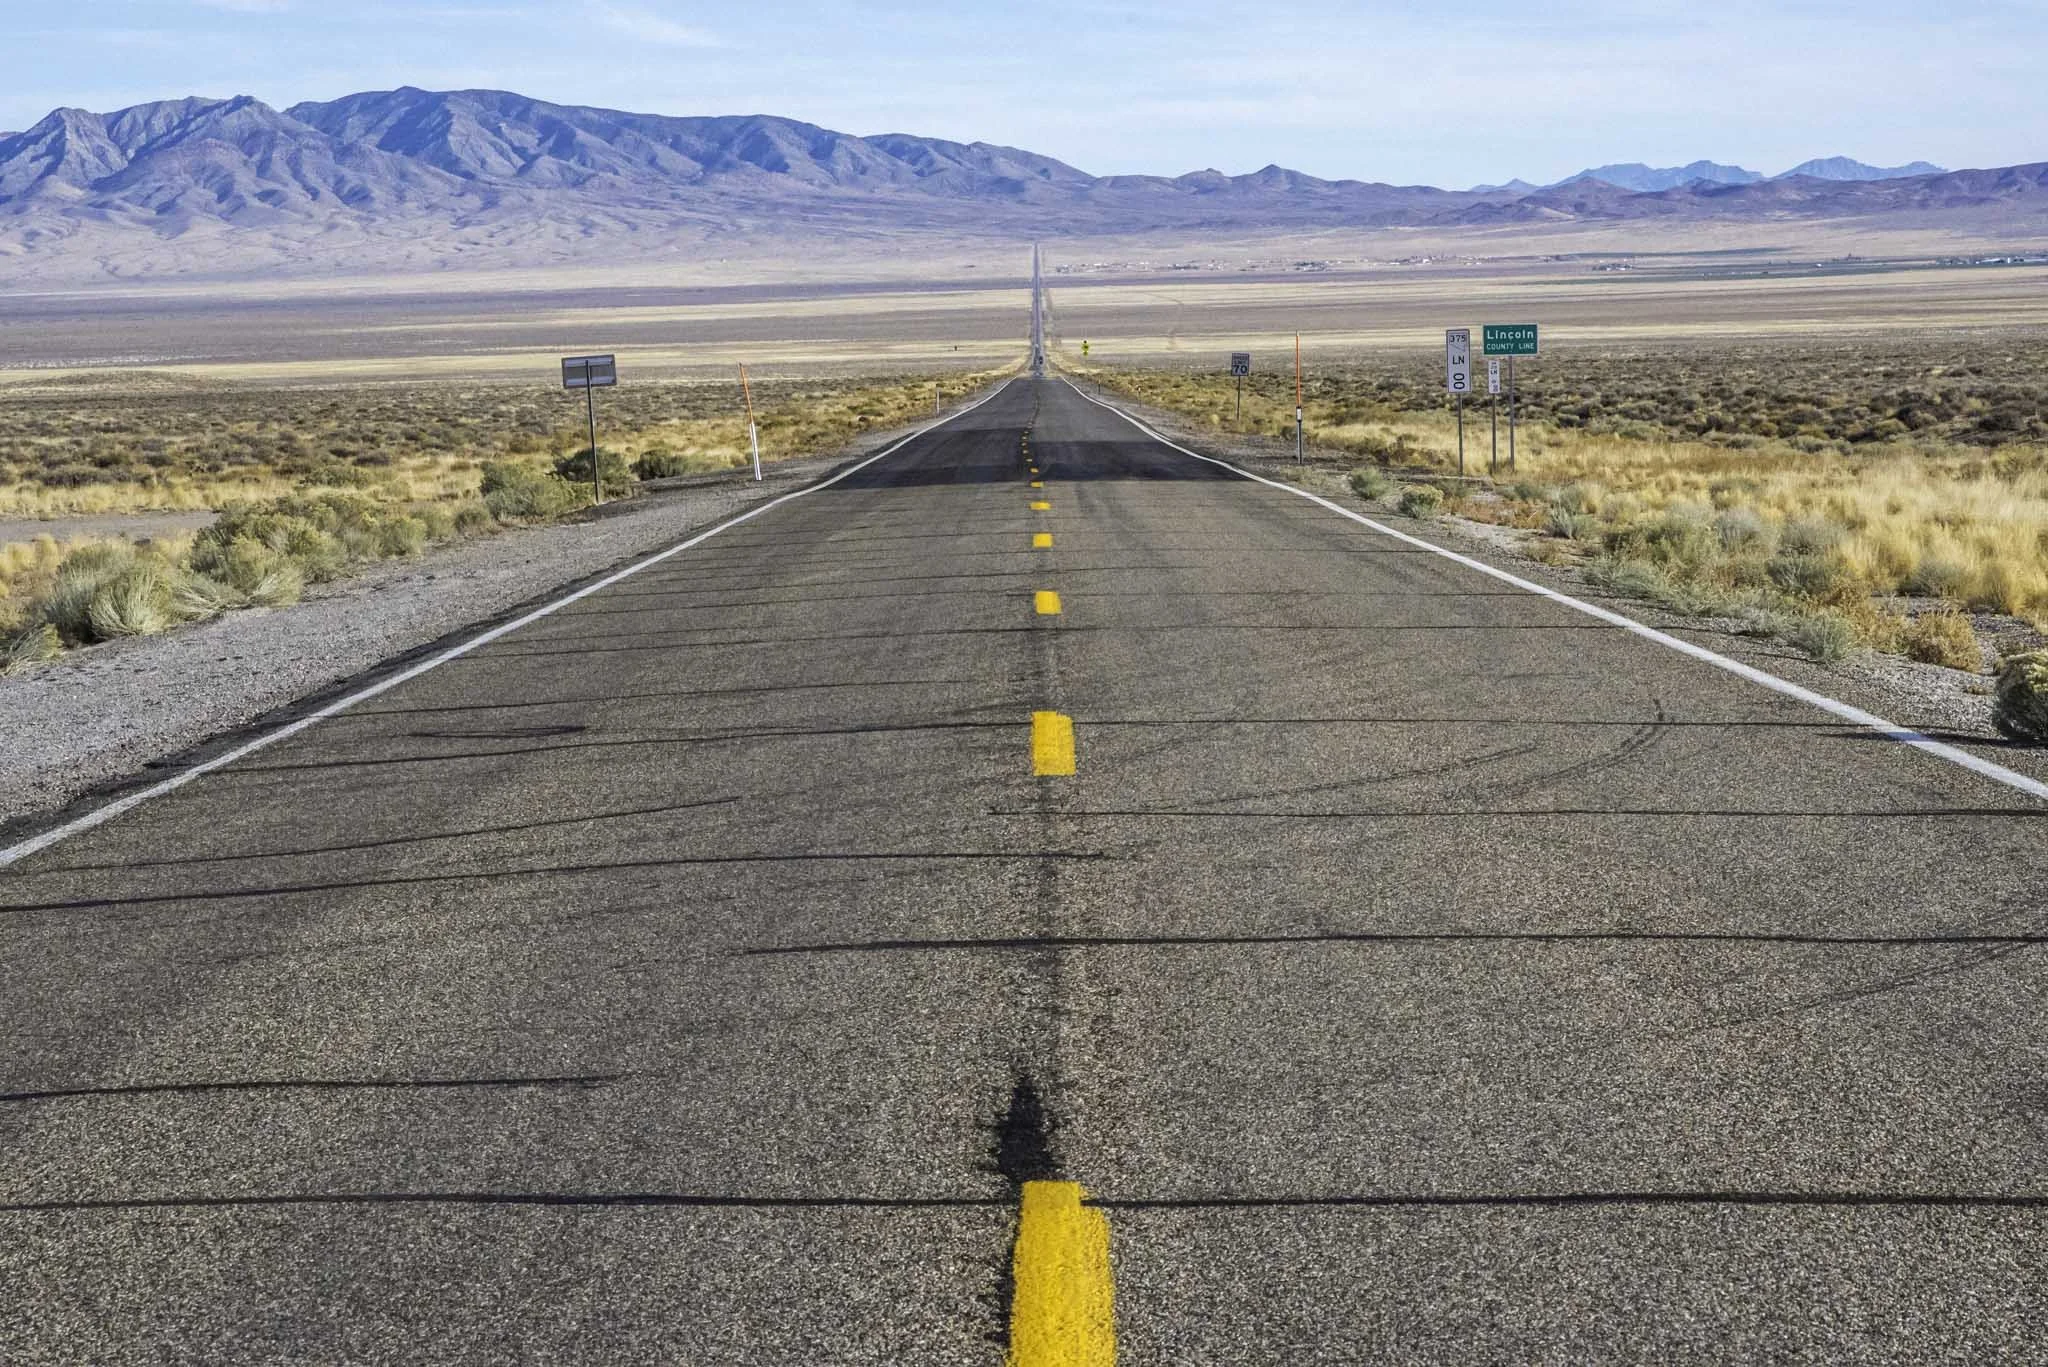
10 Unique Places to Visit in Nevada
When thinking about Nevada, if you’re like most people, you’ll generally think of labels like “weird” or “haunted” when describing its wide variety…

When thinking about Nevada, if you’re like most people, you’ll generally think of labels like “weird” or “haunted” when describing its wide variety of destinations. However, us locals tend to prefer referring to our state as “unique”, more than anything.
Don’t get me wrong, we do have some arguably weird things here. Additionally, with our history being intertwined with the pioneer days, wild west, and early mining efforts, we definitely have our fair share of haunted buildings.
In my opinion, though, those myths or beliefs (whatever you want to call them) only add to the overall uniqueness of this state. If you look outside of Las Vegas and Reno, I believe you’d be genuinely surprised at all of what Nevada has to offer (I know I was when I first moved here nearly twenty years ago).
If you’re eyeballing Nevada for your family travel plans but want to go outside of the box, read on to discover my recommendations for ten unique places to visit in Nevada. This list is by no means exhaustive, but it’s a great place to start. Let’s get into it!
1) Berlin-Ichthyosaur State Park

Located 20 miles up the road from the small town of Gabbs, the abandoned ghost town of Berlin gives visitors a glance of what life was like in Nevada’s gold rush era. Many of the original buildings, including the mill, still remain.
The other awesome feature of the park is the large concentration of Ichthyosaur fossils on display inside the fossil house. The fossils were first discovered in 1928 and excavations continued until the mid-60’s. All told, 40 near complete fossils were found here.
READ ALSO: “How to Visit Berlin-Ichthyosaur Historic State Park”
2) Wilson Canyon
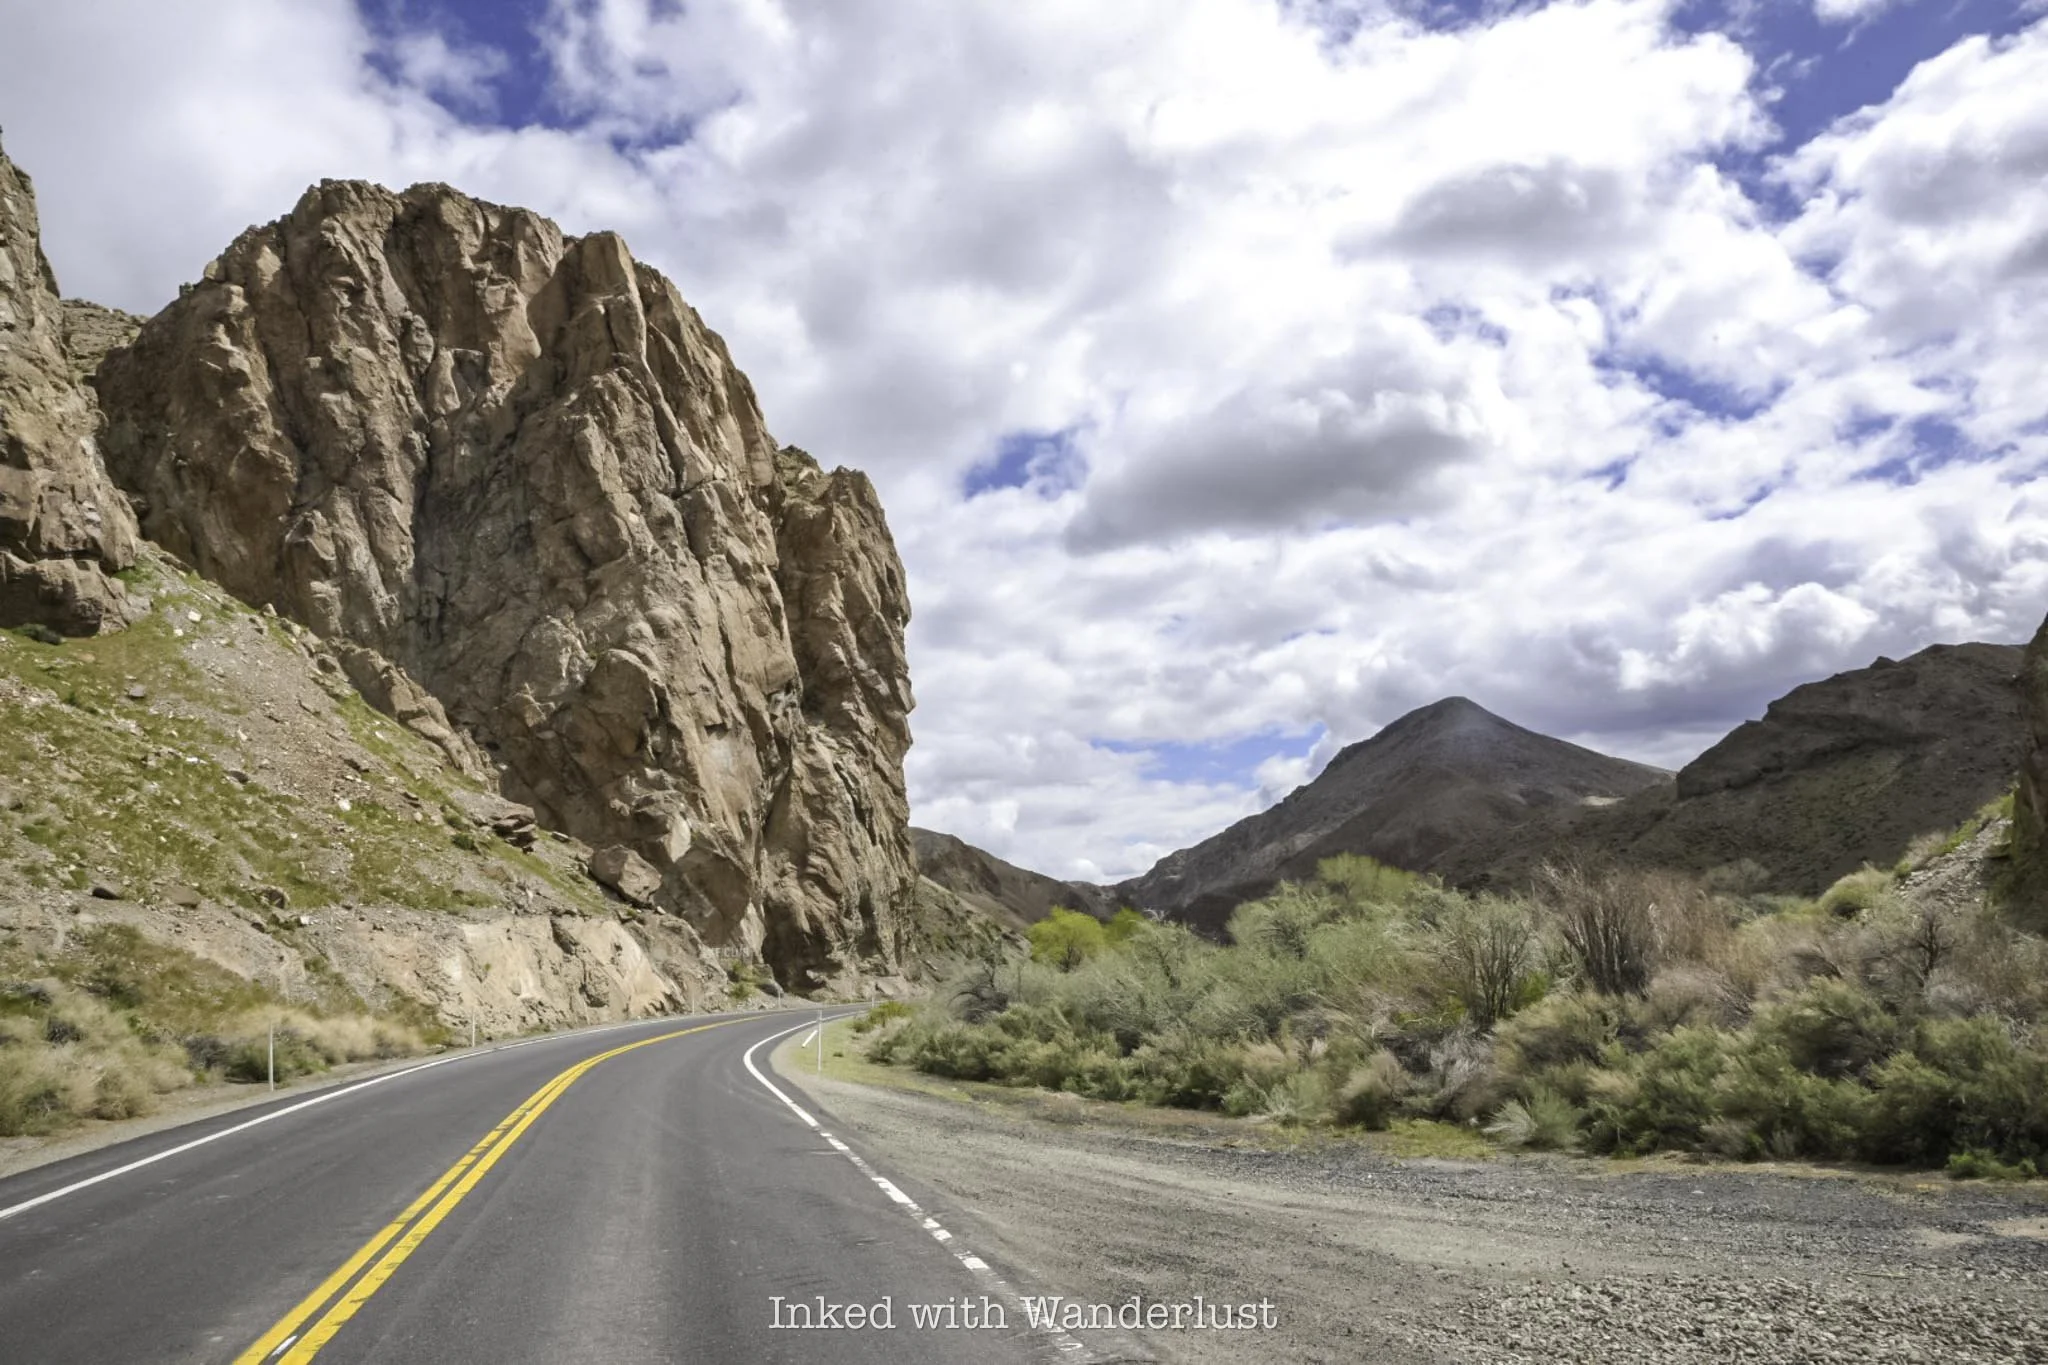
At first glance, Wilson Canyon may seem like it offers nothing more than a beautiful section of Walker River to gaze at. That couldn’t be further from the truth as the canyon offers hiking, camping, fishing, and motor bike opportunities.
Wilson Canyon can be found roughly 12 miles from the town of Yerington. There are plenty of pull outs for you to use and towards the end of the canyon just before and after the bridge are large dirt lots. Coming from Yerington, the left side of the canyon is for hikers while the right side is where you can use your motorbikes and ATV’s.
READ ALSO: “Hiking Wilson Canyon: A Hidden Gem in The Nevada Desert”
3) Fly Geyser
It doesn’t get much more unique than Fly Geyser. Situated right outside the tiny town of Gerlach (near where the annual Burning Man Festival is held), is an ever evolving, sulphuric formation that was initially and accidentally created by humans, but over time has been formed and perfected by nature.
Currently, Fly Geyser is only accessibly via a tour with the Friends of Black Rock, a local non-profit. Included in your tour is a visit to historic Fly Ranch, which has numerous art installations from Burning Man on display. You can read more about the tour in the post below.
READ NEXT: “The Ultimate Guide to Visiting Fly Geyser in Gerlach”
4) Pyramid Lake

If you’re an avid fisherman, there’s a good chance you’ve at least heard of Pyramid Lake. Located on Paiute Tribe land, and not very far from Reno and Carson City, this beautiful desert lake is home to some of the best fishing in the state.
If fishing isn’t your thing, then it’s gorgeous landscape, captivating sunsets, and eye-catching geology will leave you wanting to return again and again. Photographers, drone operators, kayakers, history buffs, and more, will love recreating here.
5) Historic Genoa

When it comes to Genoa, an argument could be made that it’s the most historically significant site in the entire state. After all, Genoa is the location of the very first settlement in Nevada. It was founded with the opening of the Mormon Station in 1851, which was a full thirteen years before Nevada earned statehood.
These days, visitors of Genoa can explore a full scale replica of the aforementioned Mormon Station, the town’s preserved courthouse and jail at the Courthouse Museum, enjoy a drink at Nevada’s oldest operating thirst parlor, enjoy a family meal at The Pink House, and more.
6) Rhyolite & Goldwell Open Air Museum

When it comes to unique places to visit in Nevada, Rhyolite and the Goldwell Open Air Museum are up there with the best. After the discovery of high grade ore in 1905, Rhyolite stood out among the rest of the mining camps of the time. Even attracting the attention of Charles M. Schwab in 1907. Despite its success, the town’s quick decline was just as impressive as it’s rise. By 1920, all but 14 people had moved on.
The Goldwell Open Air Museum was established in the 1980’s as a direct result of the increase in tourism at nearby Death Valley. Artist Albert Szukalski created the museum’s most famous sculpture, a ghostly take on the, “The Last Supper”, painting. Both of these attractions are located just a few miles outside the town of Beatty.
READ ALSO: “Visit Rhyolite Ghost Town and Goldwell Open Air Museum in Beatty”
7) Extraterrestrial Highway

Officially known as Nevada State Route 375, the Extraterrestrial Highway is a near 100-mile stretch of desolate road between State Road 318 in Crystal Springs and U.S Route 6 in Warm Springs. The highway was given its official nickname in 1996, following the success of the Hollywood blockbuster, Independence Day, which was partially filmed in the area.
There isn’t much in the way of sights, aside from the dramatic landscapes and various mountain passes. The main attraction, the tiny town of Rachel, features a motel called Little A’Le’Inn, various Alien-related art, a monument given to the town by the producers of ID4, and more.
8) Lovelock Cave

While not big and expansive by any means, the cave near the tiny town of Lovelock is both easy to get to and rich in history. It doesn’t seem like much at first glance, but read about its history before visiting and you’ll see it in a whole new perspective.
It was once home to Northern Paiute American Indians and during an archaeological dig in 1912, skeletal remains of ancient giants and artifacts were discovered, making this cave popular with historians, scientists, and history buffs alike.
READ ALSO: “How to Visit the Historic Lovelock Cave”
9) International Car Forest of the Last Church

The International Car Forest of the Last Church (mouthful, isn’t it?) in Goldfield is a collection of dozens of vehicles, most of which are planted halfway into the ground, covered in a variety of painted art and general graffiti.
The car forest can be accessed right off of Highway 95 and there are no entry or parking fees, but they do accept donations if you feel inclined. It’s a great way to stretch your legs during a road trip. If you or someone with you is an artist of any skill level, you’re invited and encouraged to leave your own mark here.
READ ALSO: “How to Visit the International Car Forest in Goldfield”
10) Valley of Fire State Park

Of all the unique places to visit in Nevada, Valley of Fire should be at the top of every traveler’s “must-see” lists. Valley of Fire became the first state park in Nevada in 1935 for its captivating landscapes of red and white sandstone rock, creating stunning formations and insane color swirls of red, white, and even pink hues.
There are many popular attractions and hiking trails to experience at Valley of Fire, including Atlatl Rock, Mouse Tank Road, White Domes Loop, Fire Wave, Elephant Rock, and more. If you’re considering visiting for the first time and are short on time, see my itinerary below on how to see many of the above attractions in just a few hours.
READ ALSO: “10 Must-Do Short Hikes in Valley of Fire State Park”