
REVIEW: Clear Kayak Tour to Bonsai Rock with Clearly Tahoe
After conducting my research, I settled on booking with the ‘Clearly Tahoe’ outfit, specifically their clear kayak tour to Bonsai Rock…
Disclosure: This post contains affiliate links. If you make a purchase through these links, I may earn a small commission at no additional cost to you. I only recommend products or services that I believe will add value to my readers.
In recent years, my wife and I have been into giving experiences to our family and friends as gifts versus physical items. For Father’s Day last year, I took my Dad to a Billy Joel concert in Las Vegas. This year, I decided to book us a kayak tour, as we’ve always talked about doing that.
After conducting my research, I settled on booking with the ‘Clearly Tahoe’ outfit, specifically their clear kayak tour to Bonsai Rock. They’ve been in business since 2016, have an impeccable safety record and are the originators of the “clear kayak” concept.
In short, the tour was amazing! In this review, I’ll cover information such as the price, where you leave from, what to expect, and other pertinent information like who’s the tour for, requirements, etc. Let’s get into it!
Tour Information
As stated above, I booked their Bonsai Rock clear kayak tour. My Dad and I, combined, exceeded their weight requirement for the double kayak so I booked us two singles at a cost of $134 each (you can view current pricing here).
This tour is suitable for total beginners, which is good because my Dad had no kayaking experience prior to this and the only experience I had was when I kayaked to Fannette Island in Emerald Bay, also in Lake Tahoe.
This is a guided tour conducted at what I felt was a reasonable pace and is around 2.5 total hours, with about 1.5 hours of that being spent in the kayak. It is NOT pet friendly (though they do offer a pooch-friendly version), the minimum age is six, and the weight limit is 375 pounds per kayak.
Items to Consider Bringing
Clearly Tahoe Meet-Up Location & Parking
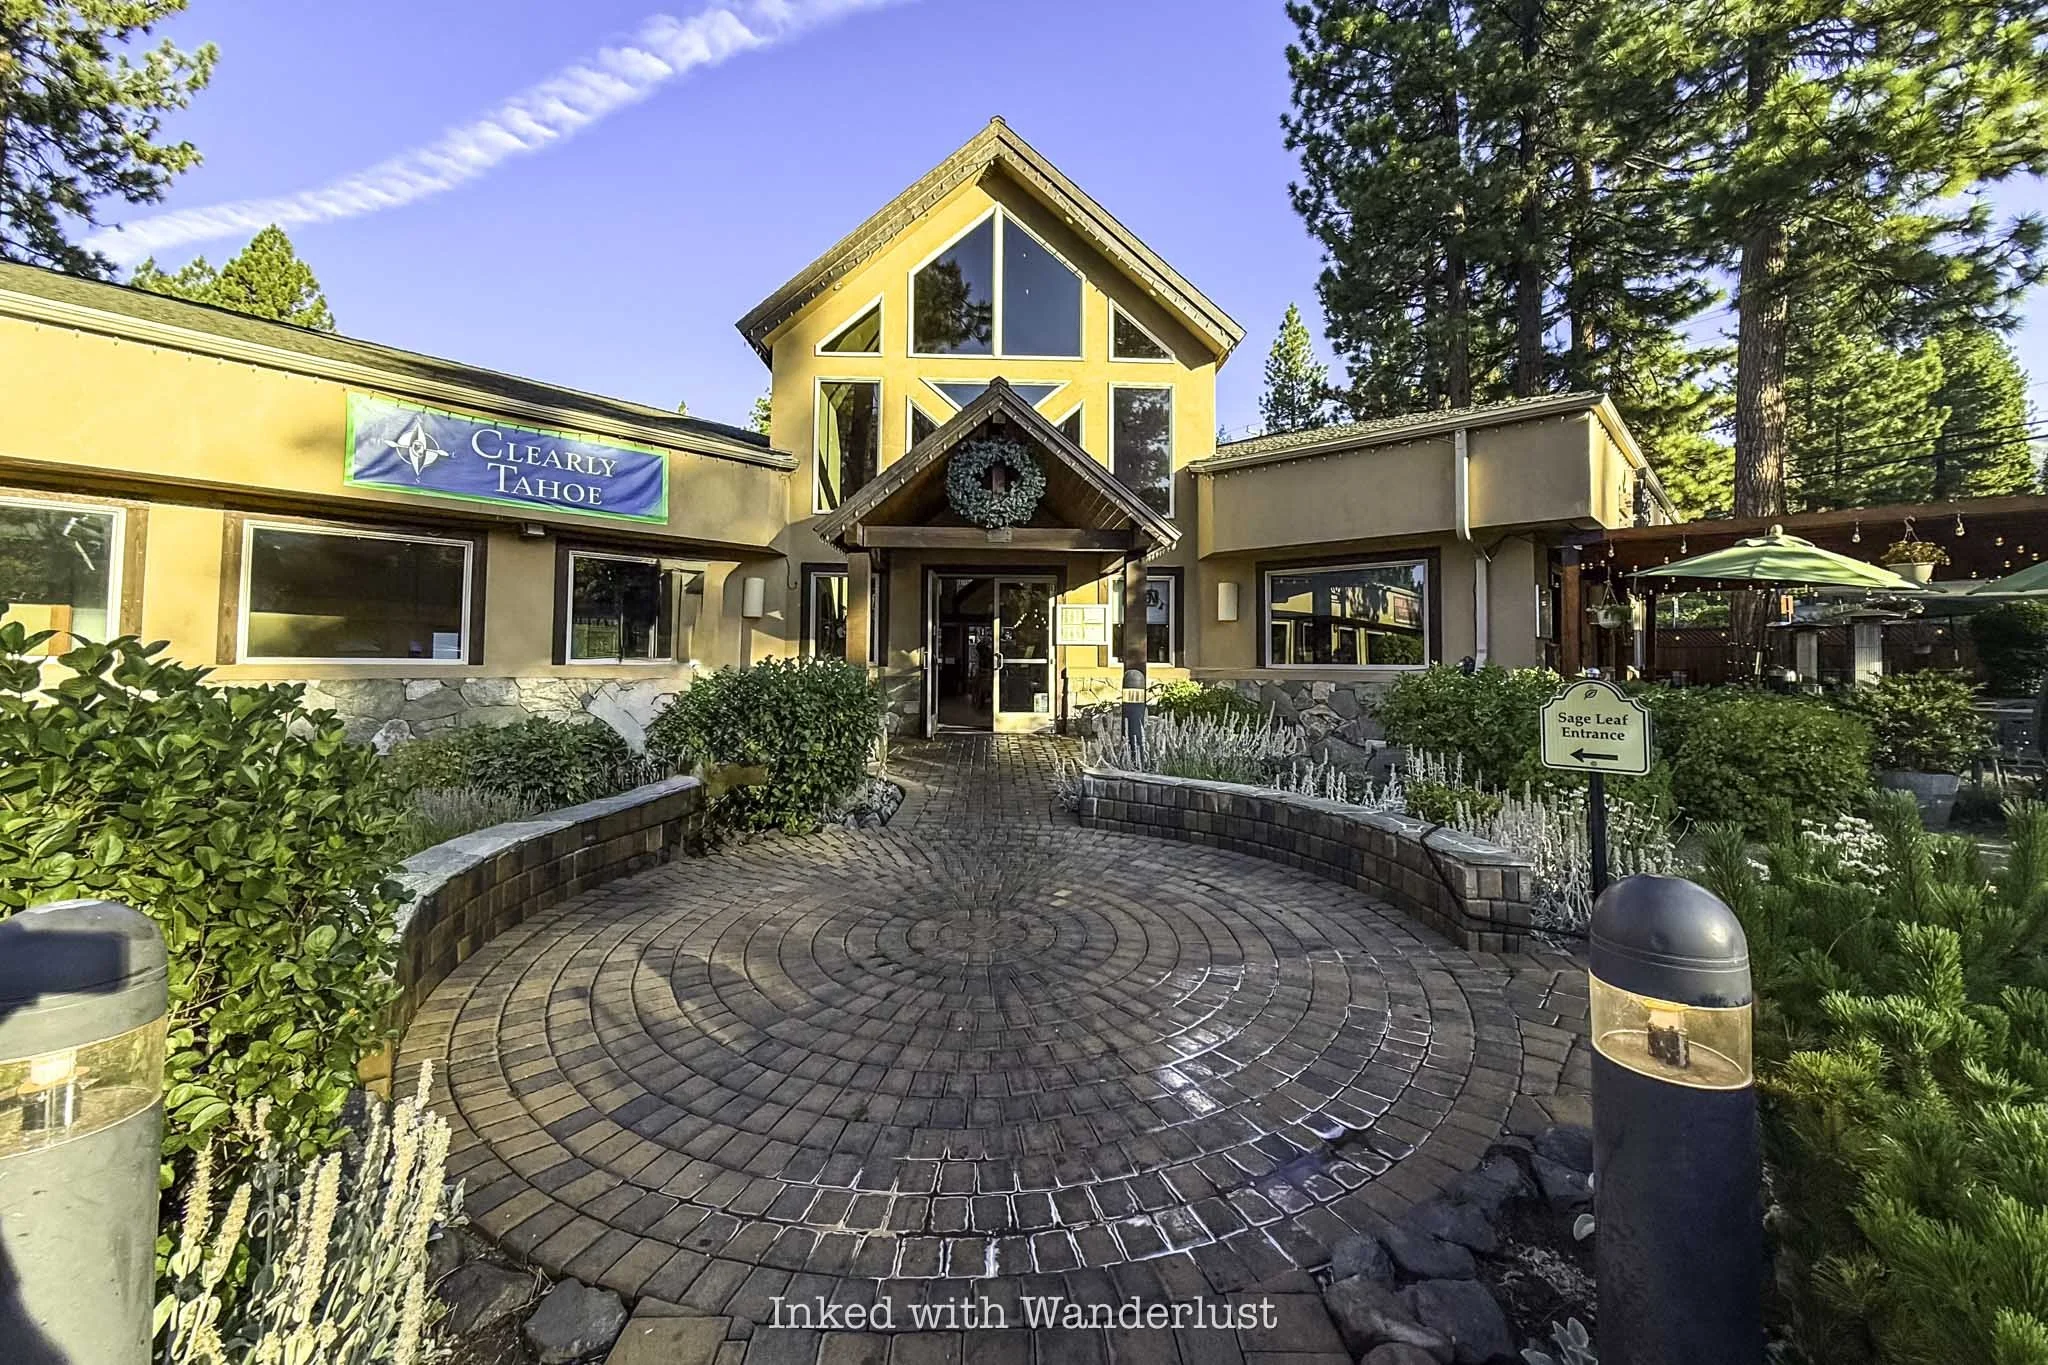
Regardless of which tour you book, you’ll meet up with the group at one of Clearly Tahoe’s offices. For the Bonsai Rock tour, you’ll meet at their Incline Village location (pictured above) at the following address:
893 Tahoe Blvd. Suite 800 (across from Starbucks)
Group members must meet at the office thirty minutes prior to the start of the tour. Tours leave promptly and will not wait, so make sure you’re on time. Also be sure to fill out the waivers online when they’re emailed to you, as this helps to expedite the check-in process.
There’s a parking garage behind the building they encourage you to park in, but I was also told it wasn’t a problem to park in the lot out front. Just know it gets hectic here in the summer so if your tour is for later in the day, just park in the garage to save yourself a battle.
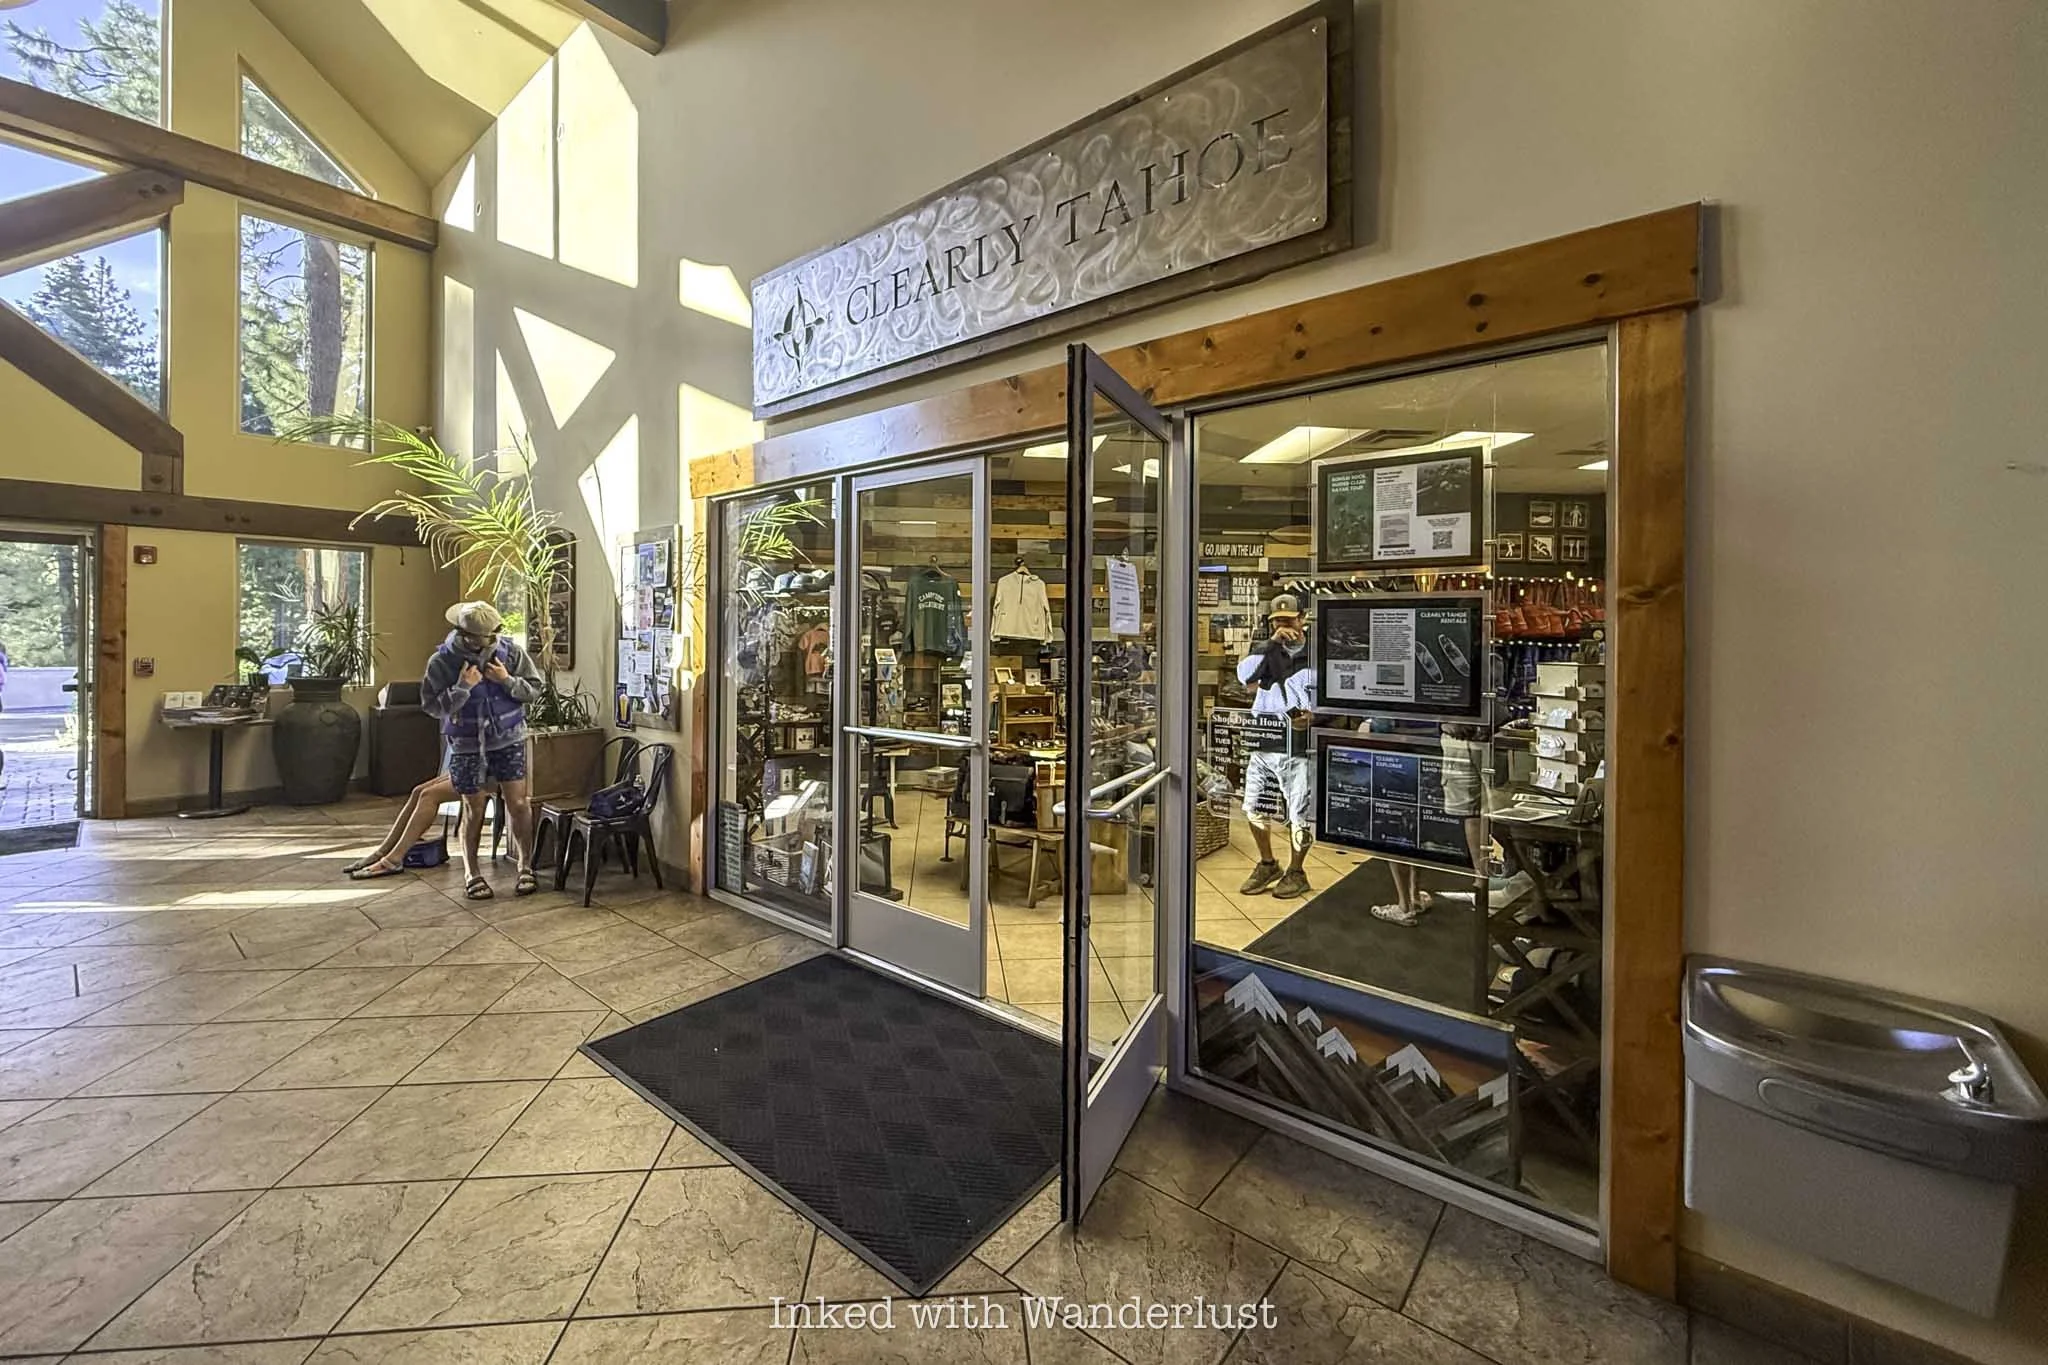
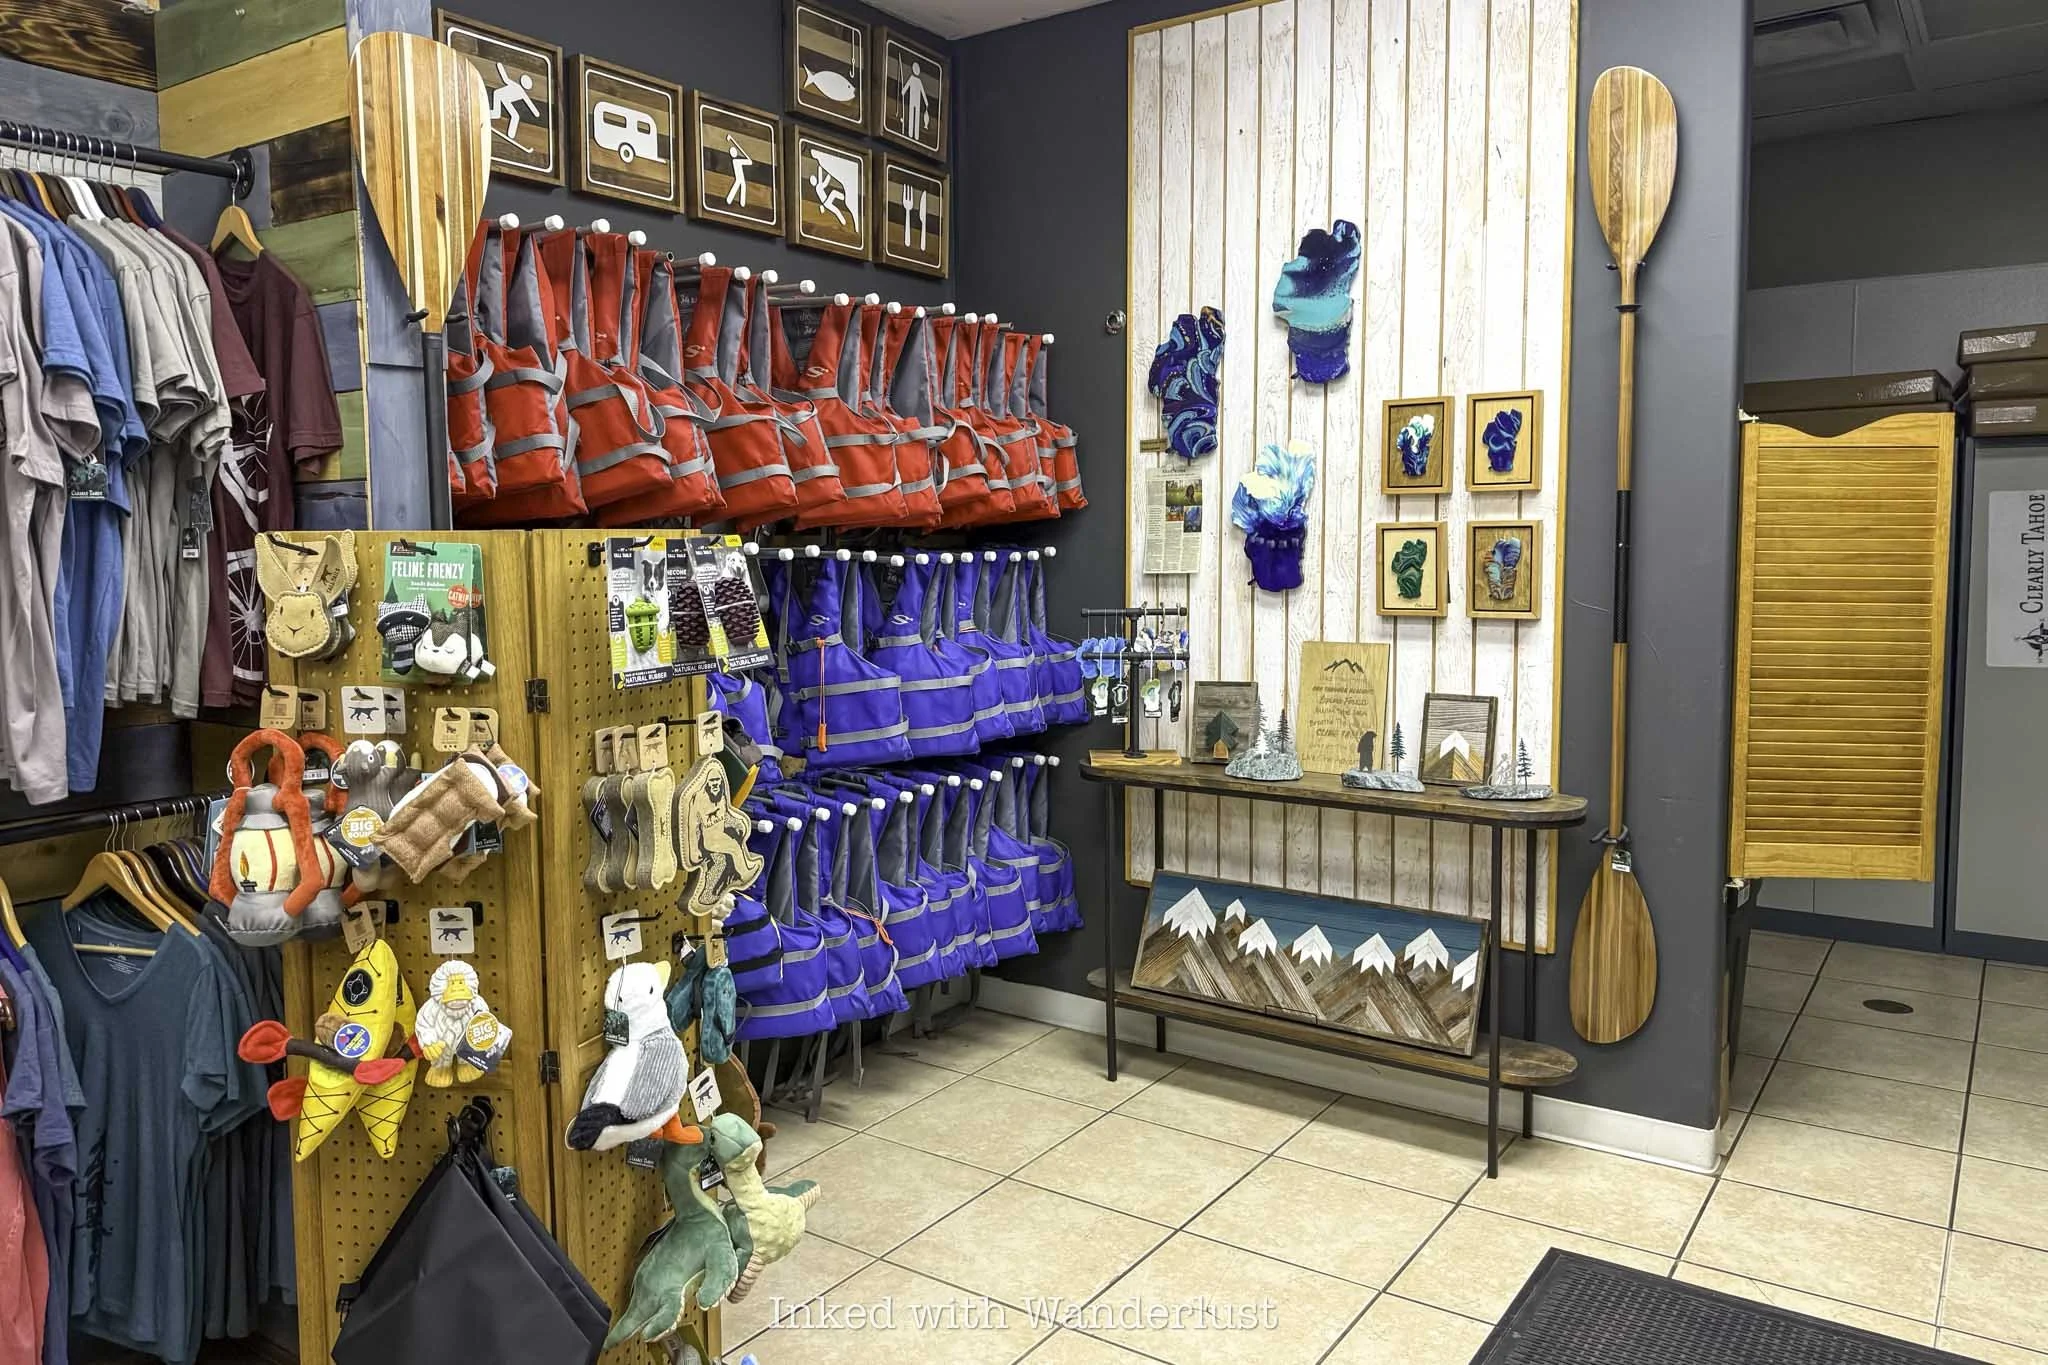
The Clearly Tahoe office is located just across from Starbucks and is in the same building as the Sage Leaf Cafe restaurant. When you arrive, you’ll fill out your waiver (if you haven’t already), be given a goodie bag, a dry bag, and be fitted for a life vest.
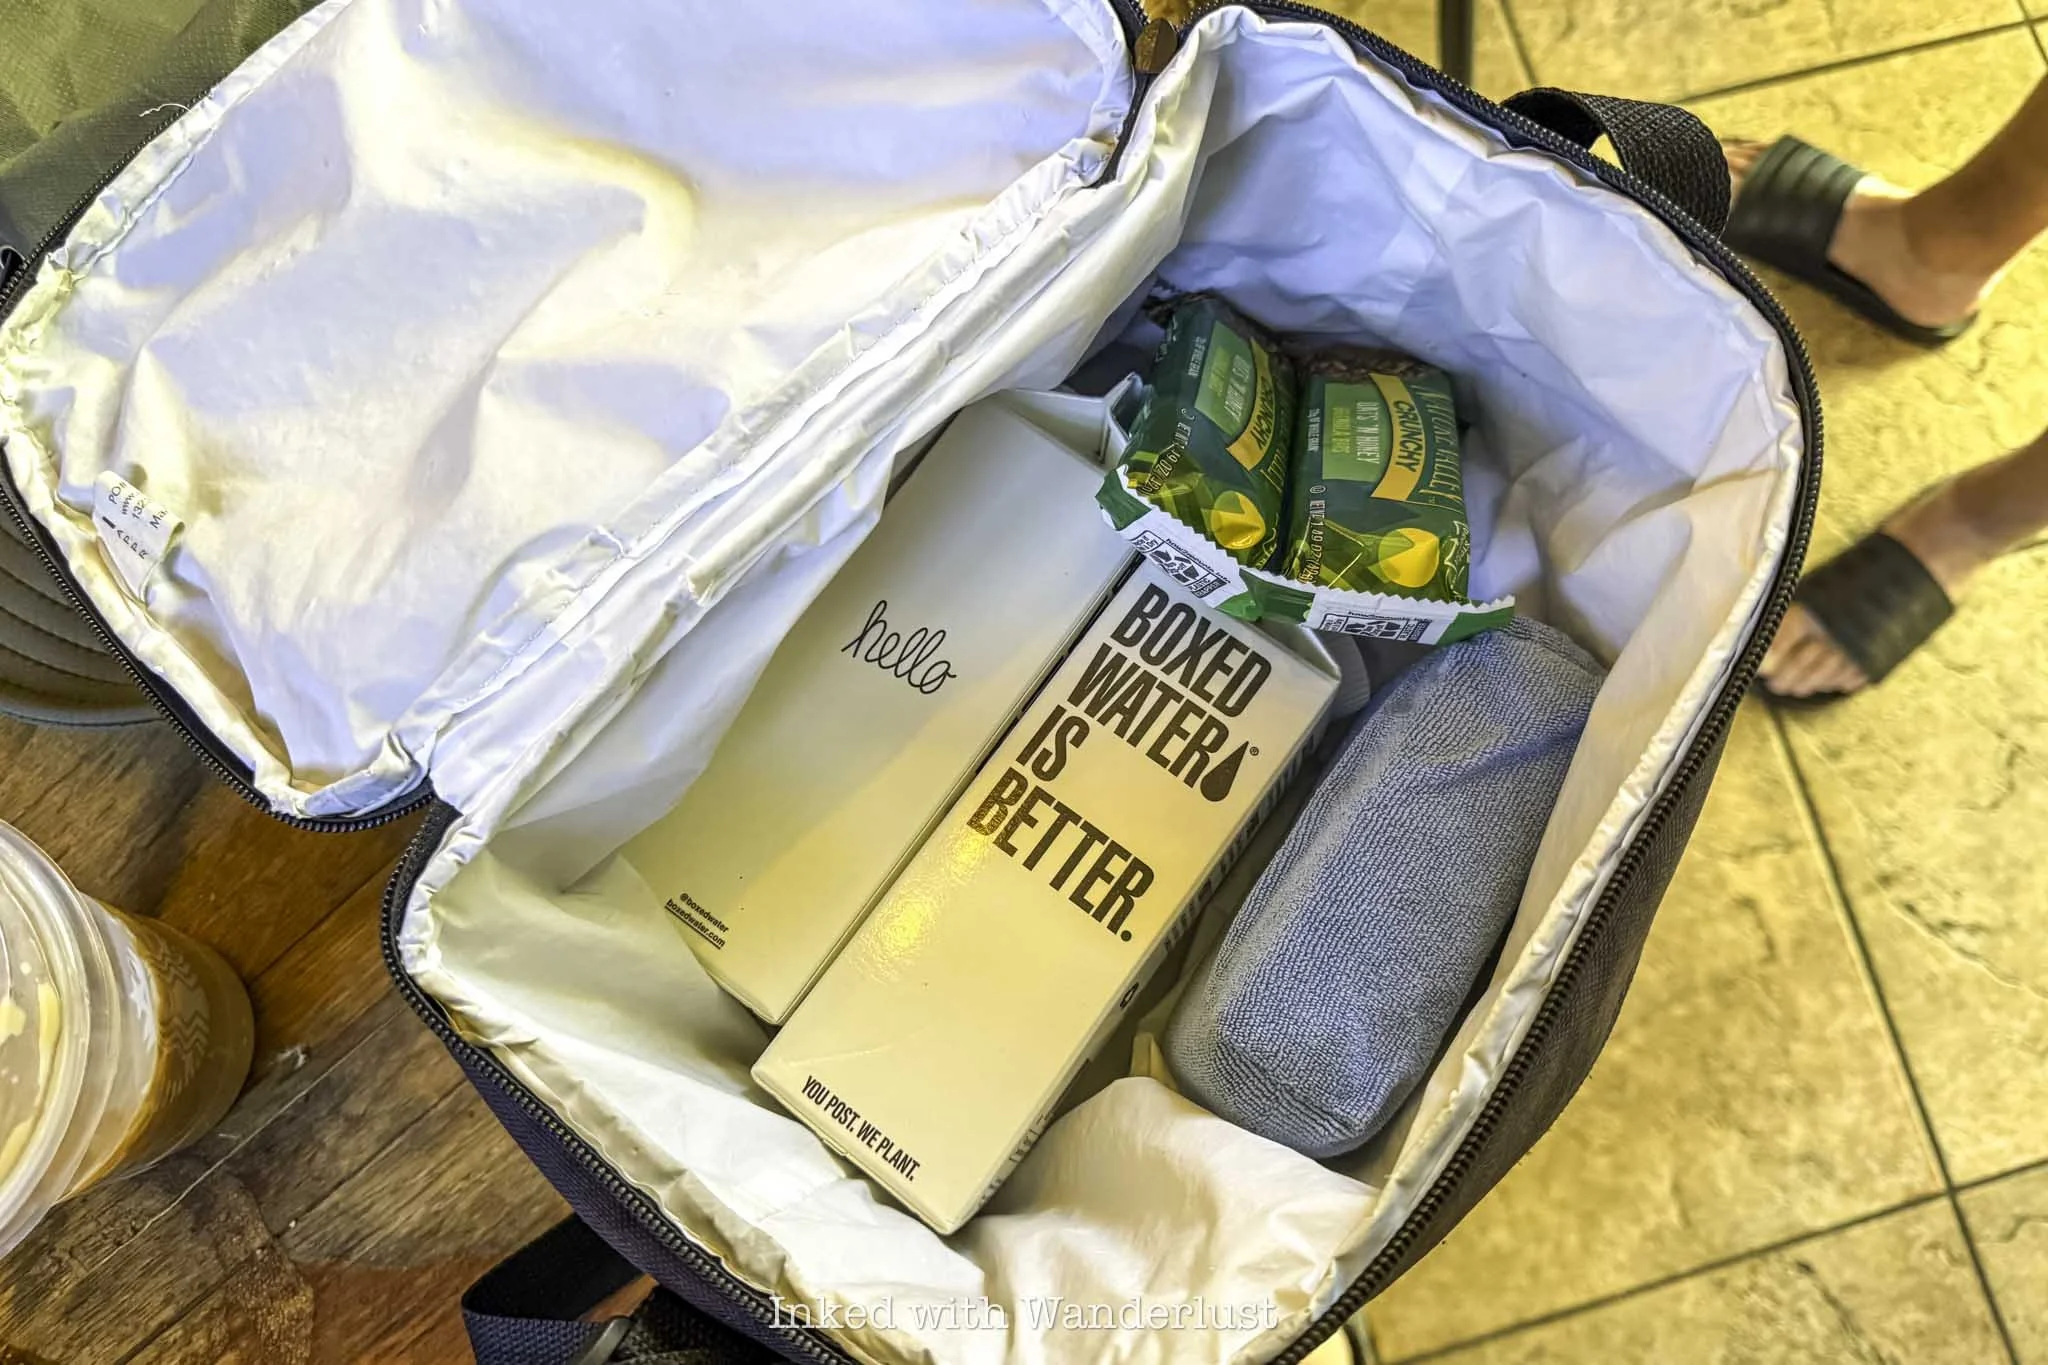
In the goodie sack you’re given you’ll find two boxes of water, a couple Nature Valley granola bars, and a towel to use to wipe the sand out of your clear kayak. Not sure if these are the exact items given every time, but that’s what was given to my Dad and me.
Speaking of water, make sure you’re hydrated going into the tour and stay hydrated throughout it. You’re in a higher elevation in Tahoe and thus, more susceptible to dehydration, sunburn, etc. I found out the hard way when my calf cramped up badly while getting out of the kayak. It’s no joke.
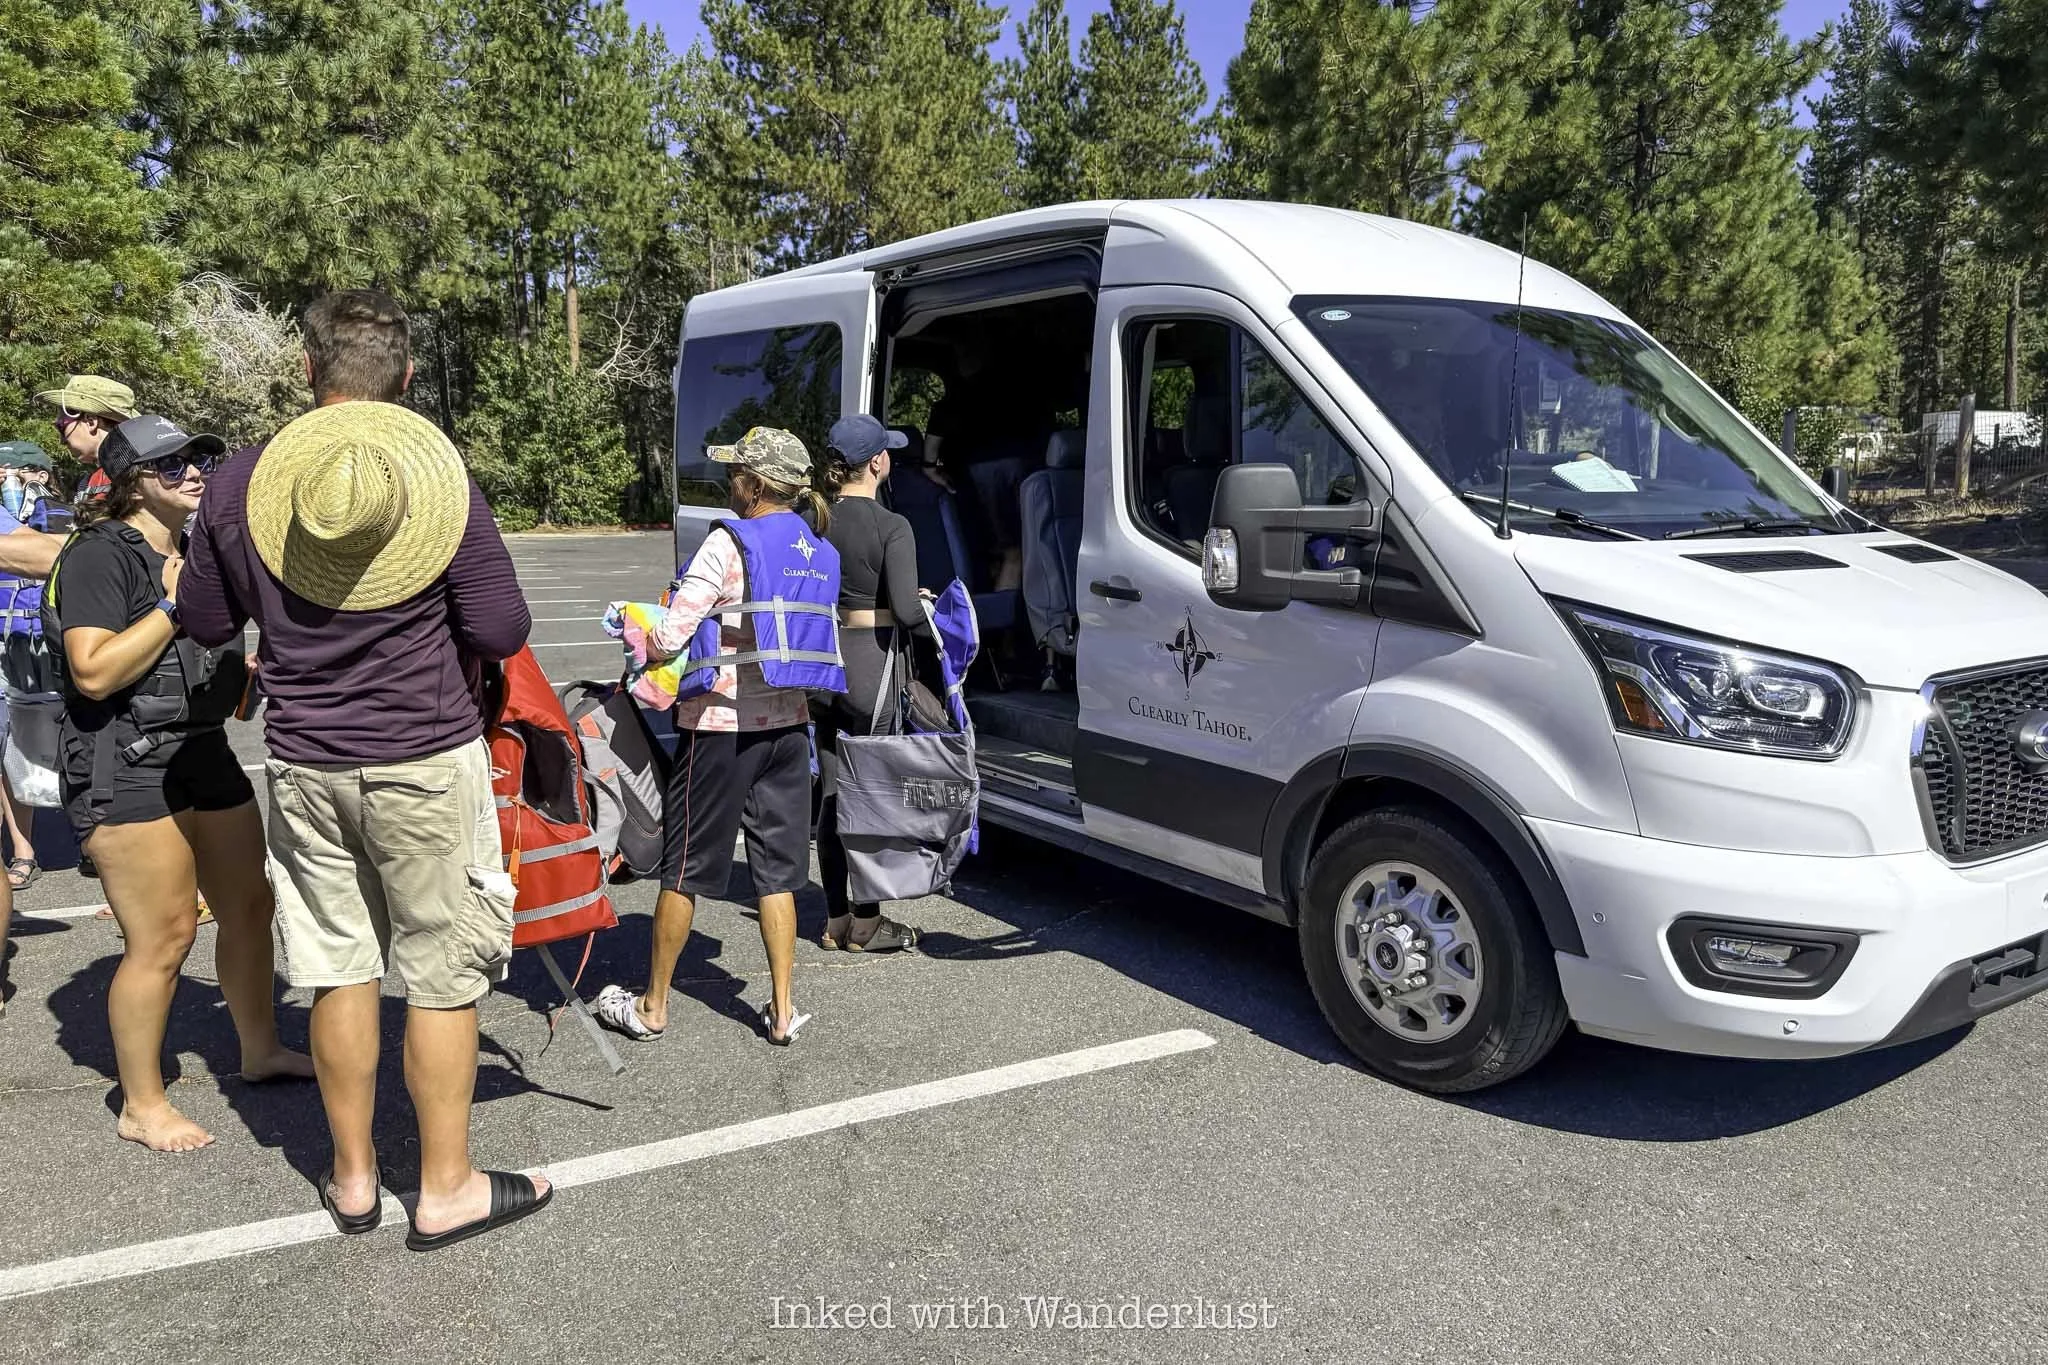
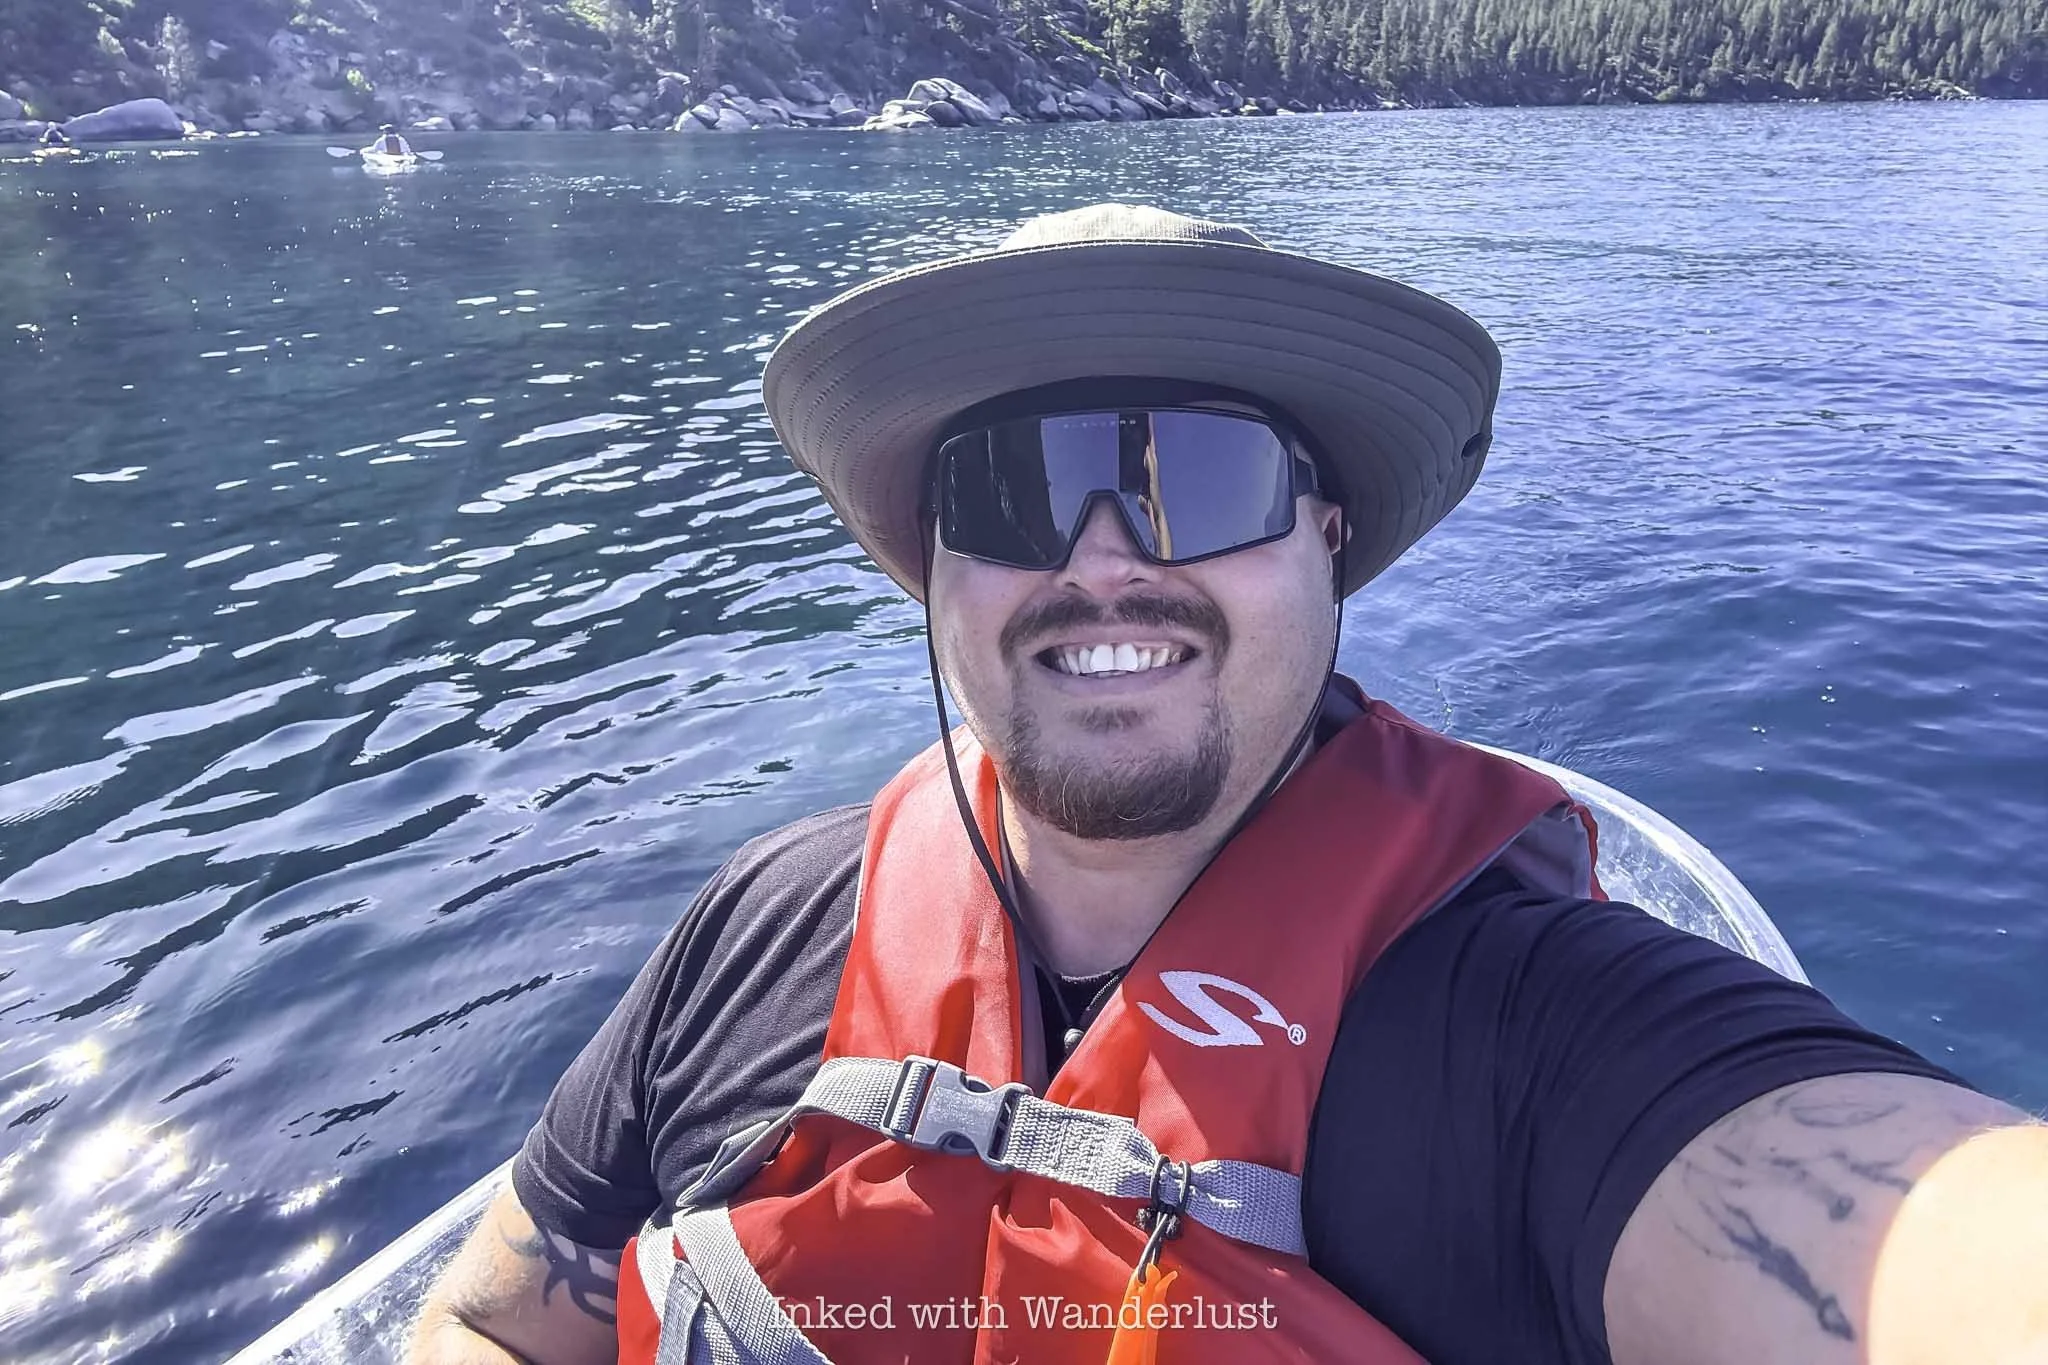
Once everybody has checked in, your driver (ours was Dave) will escort the group to the Clearly Tahoe shuttle van to take you to Sand Harbor Beach State Park - where your tour officially begins. There was 8 in our group and there was just enough room in the shuttle for us.
Our driver, Dave, got us there safely and without incident. The whole trip took about ten minutes. On the way, he showed us properties owned by big names such as Steve Wynn and Larry Ellison.
Sand Harbor - Where Your Tour Begins
The clear kayak tour to Bonsai Rock begins at the main beach at Sand Harbor State Park. You will NOT need to make reservations to access Sand Harbor, as Clearly Tahoe takes care of this for you as part of your tour.
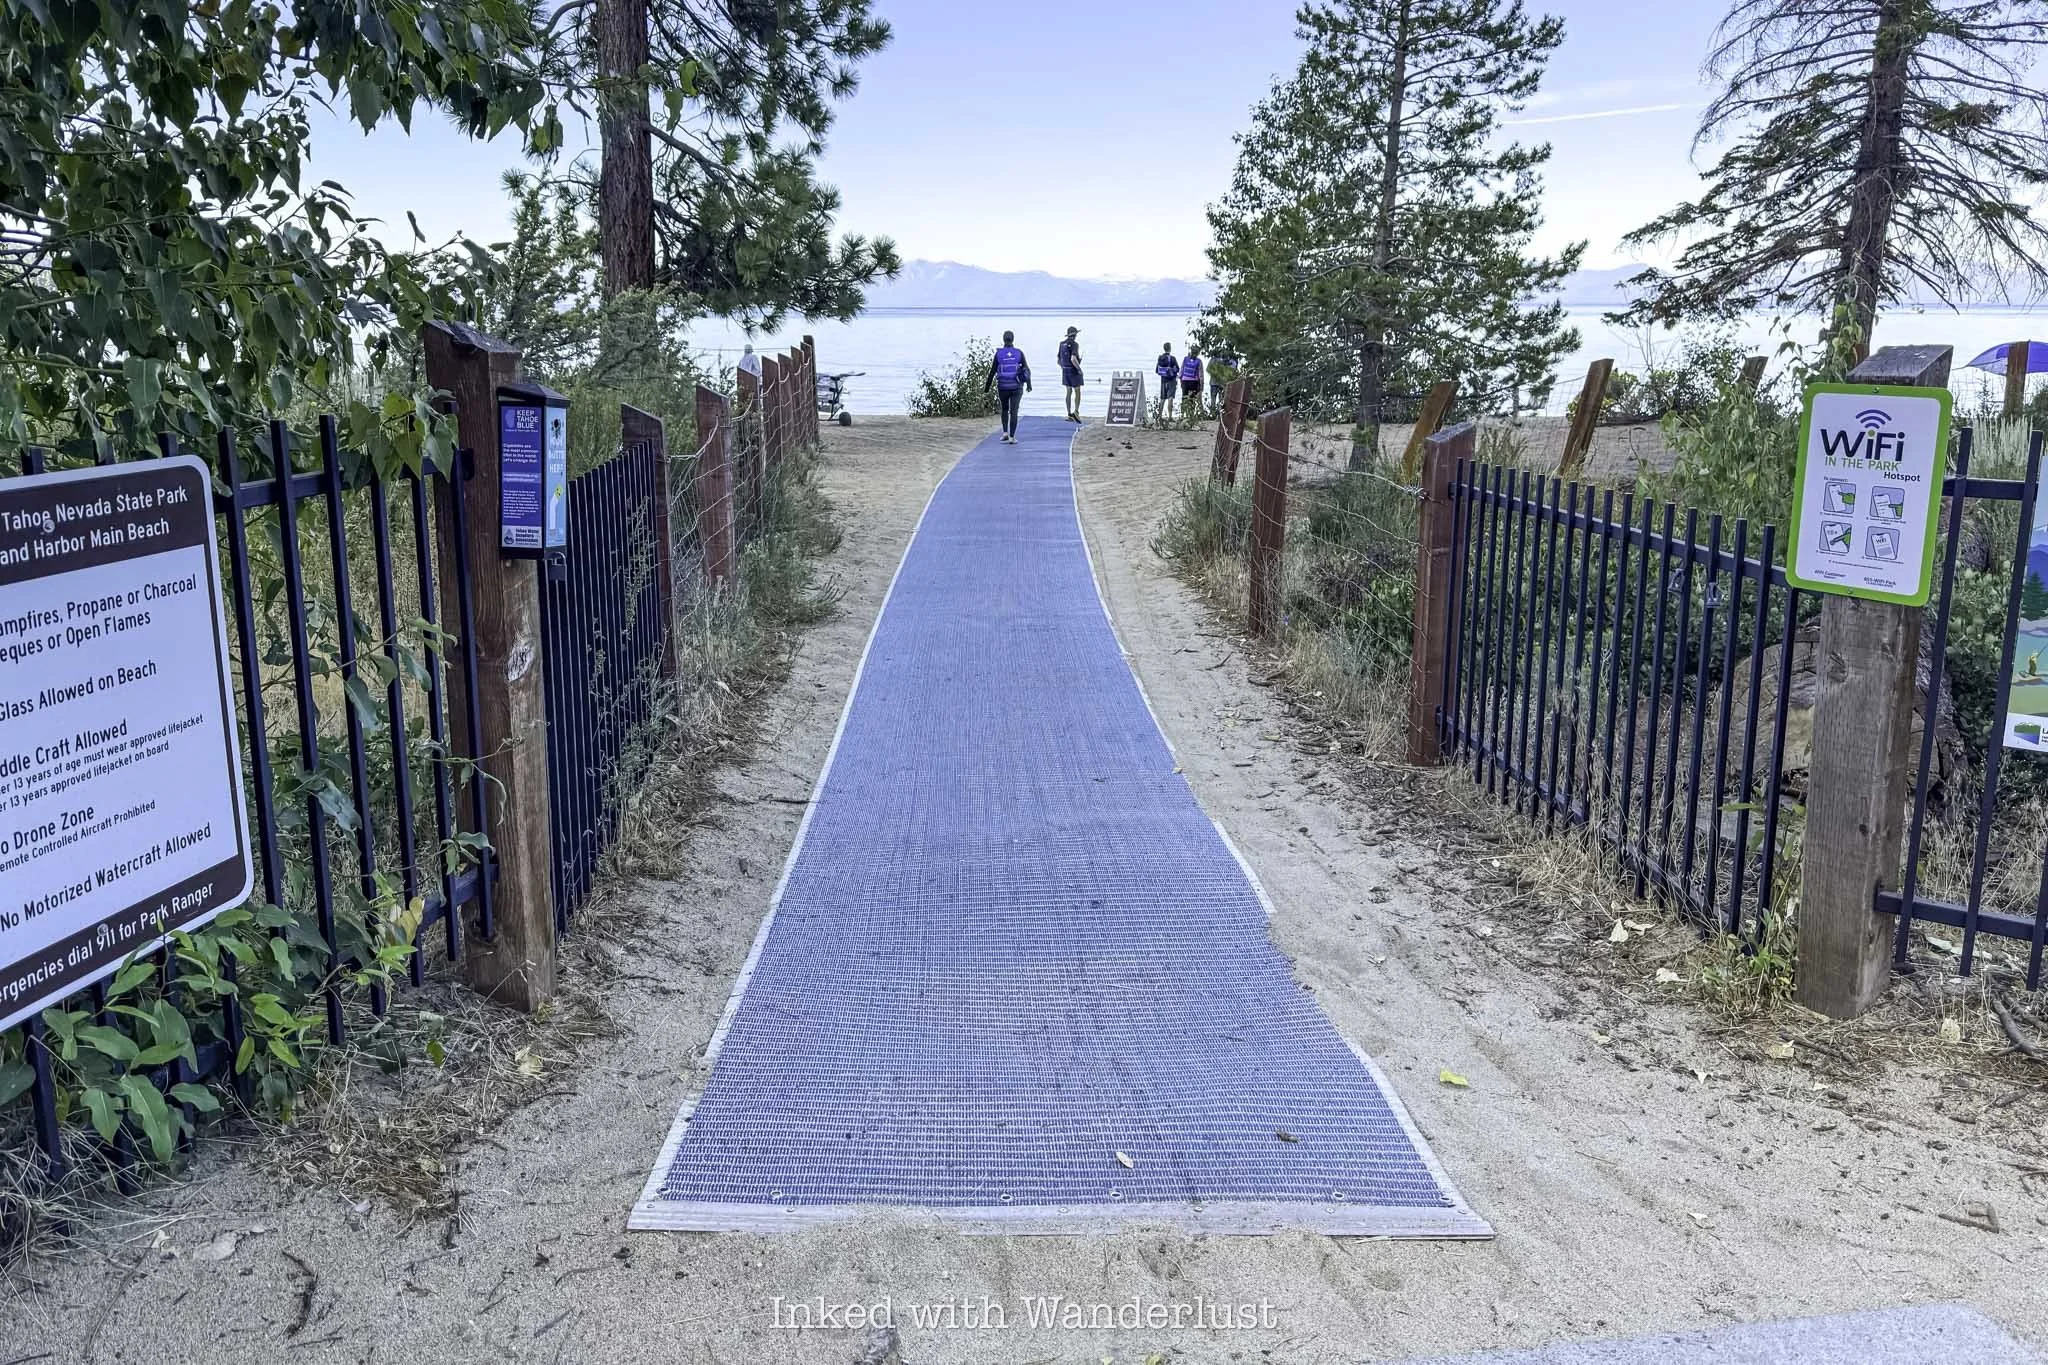
You’ll be dropped off in the parking area, near the beach access. This is also where your tour guide(s) will meet you. Ours was Julia and while we didn’t find out until after the tour, we were her very first tour group ever.
After the initial introduction, you’ll be given a final opportunity at using a restroom and be shown where to meet afterwards. There’s a rug-type-thing leading to the water’s edge. The end of which is where you’ll meet.
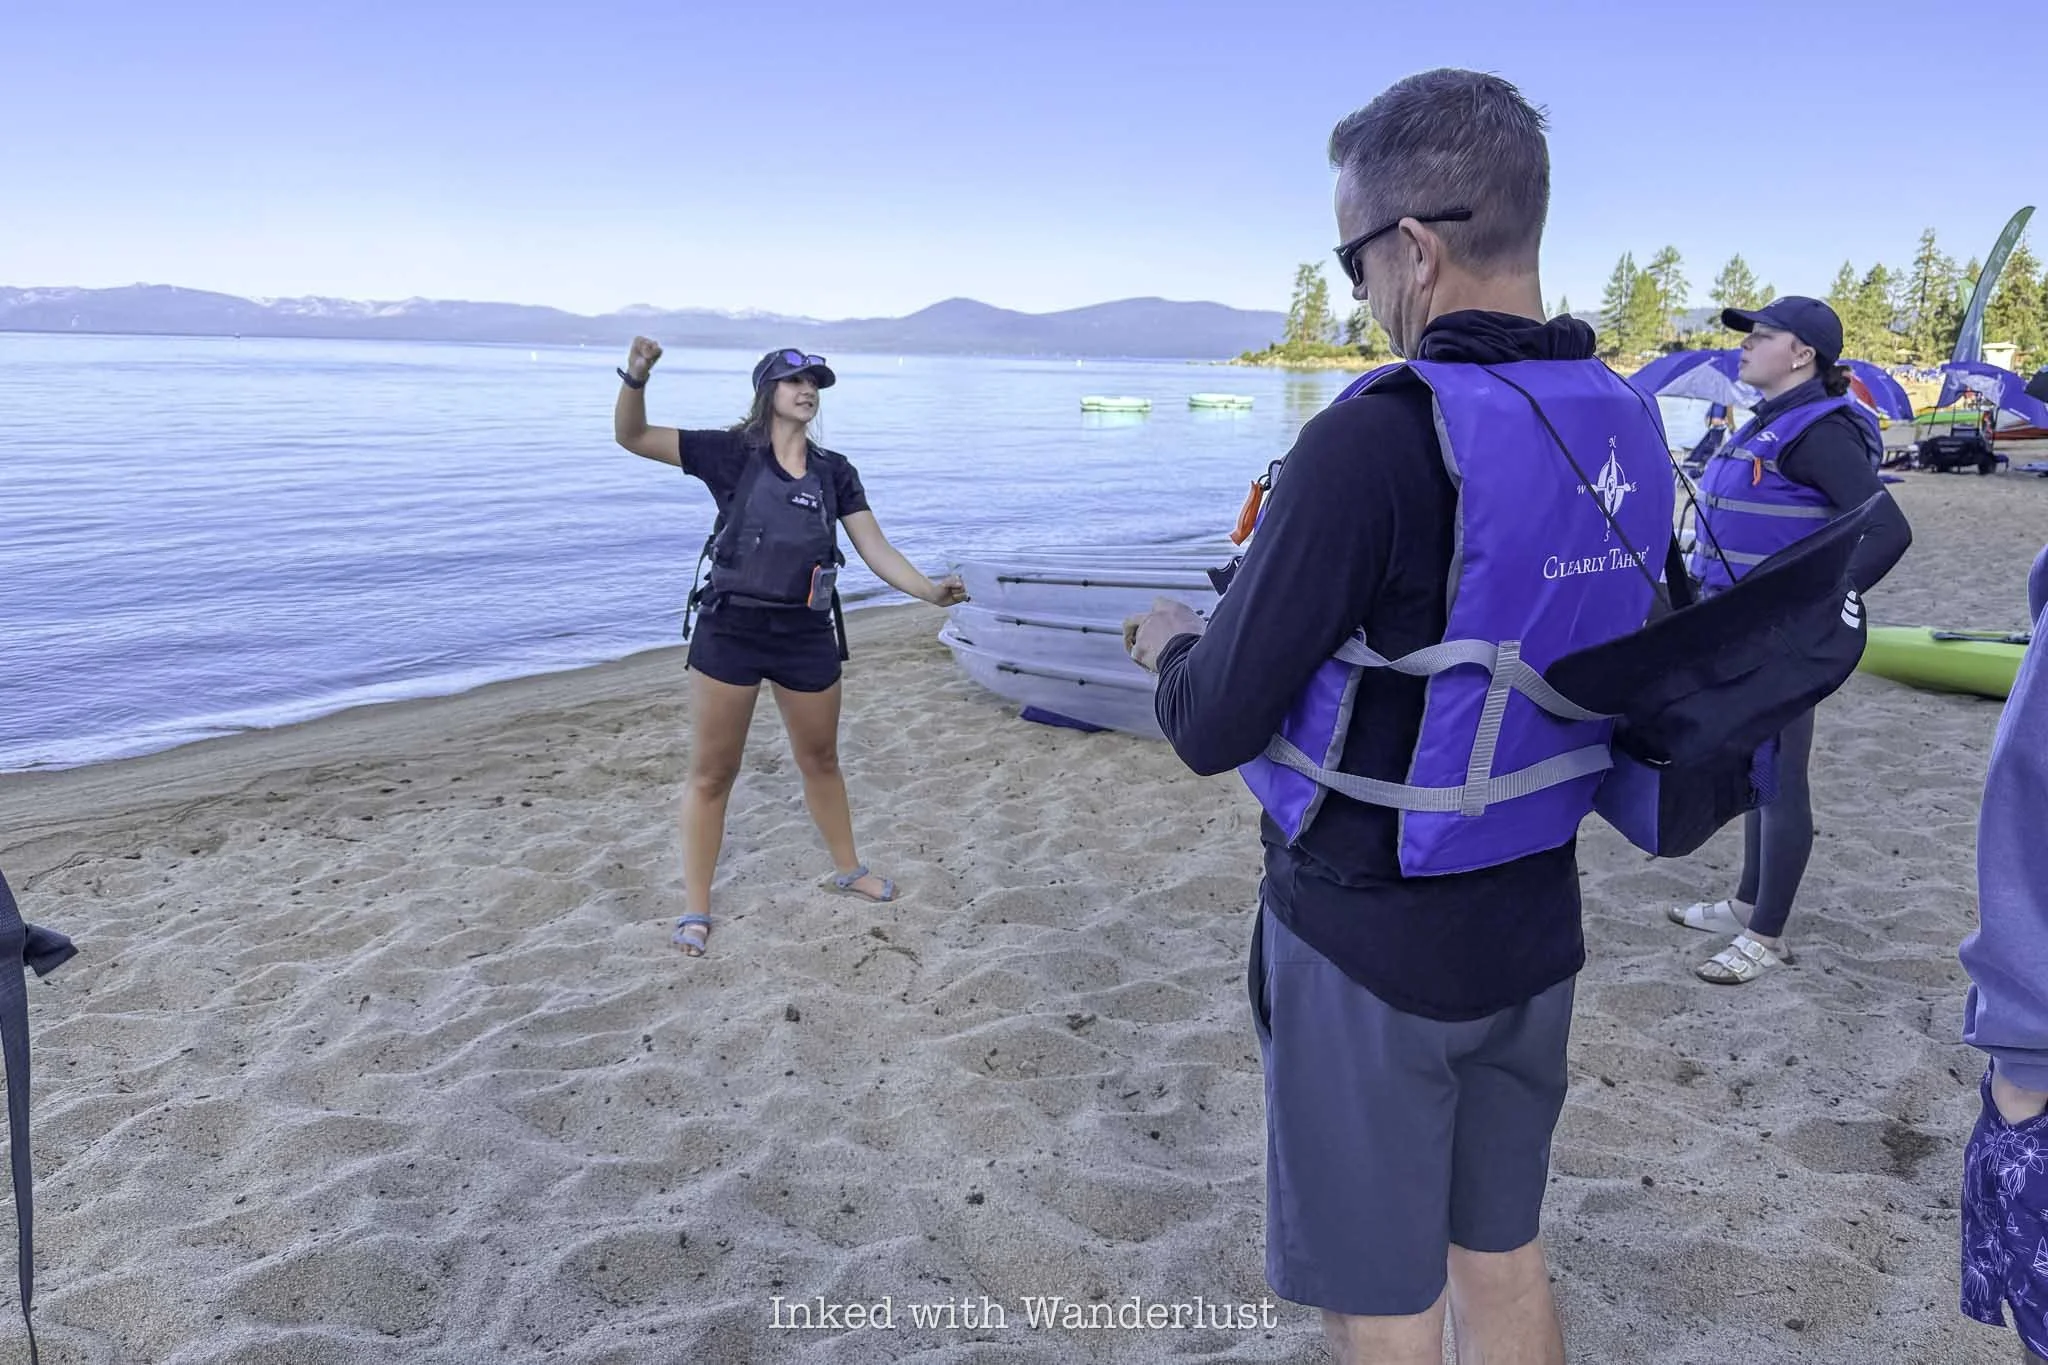
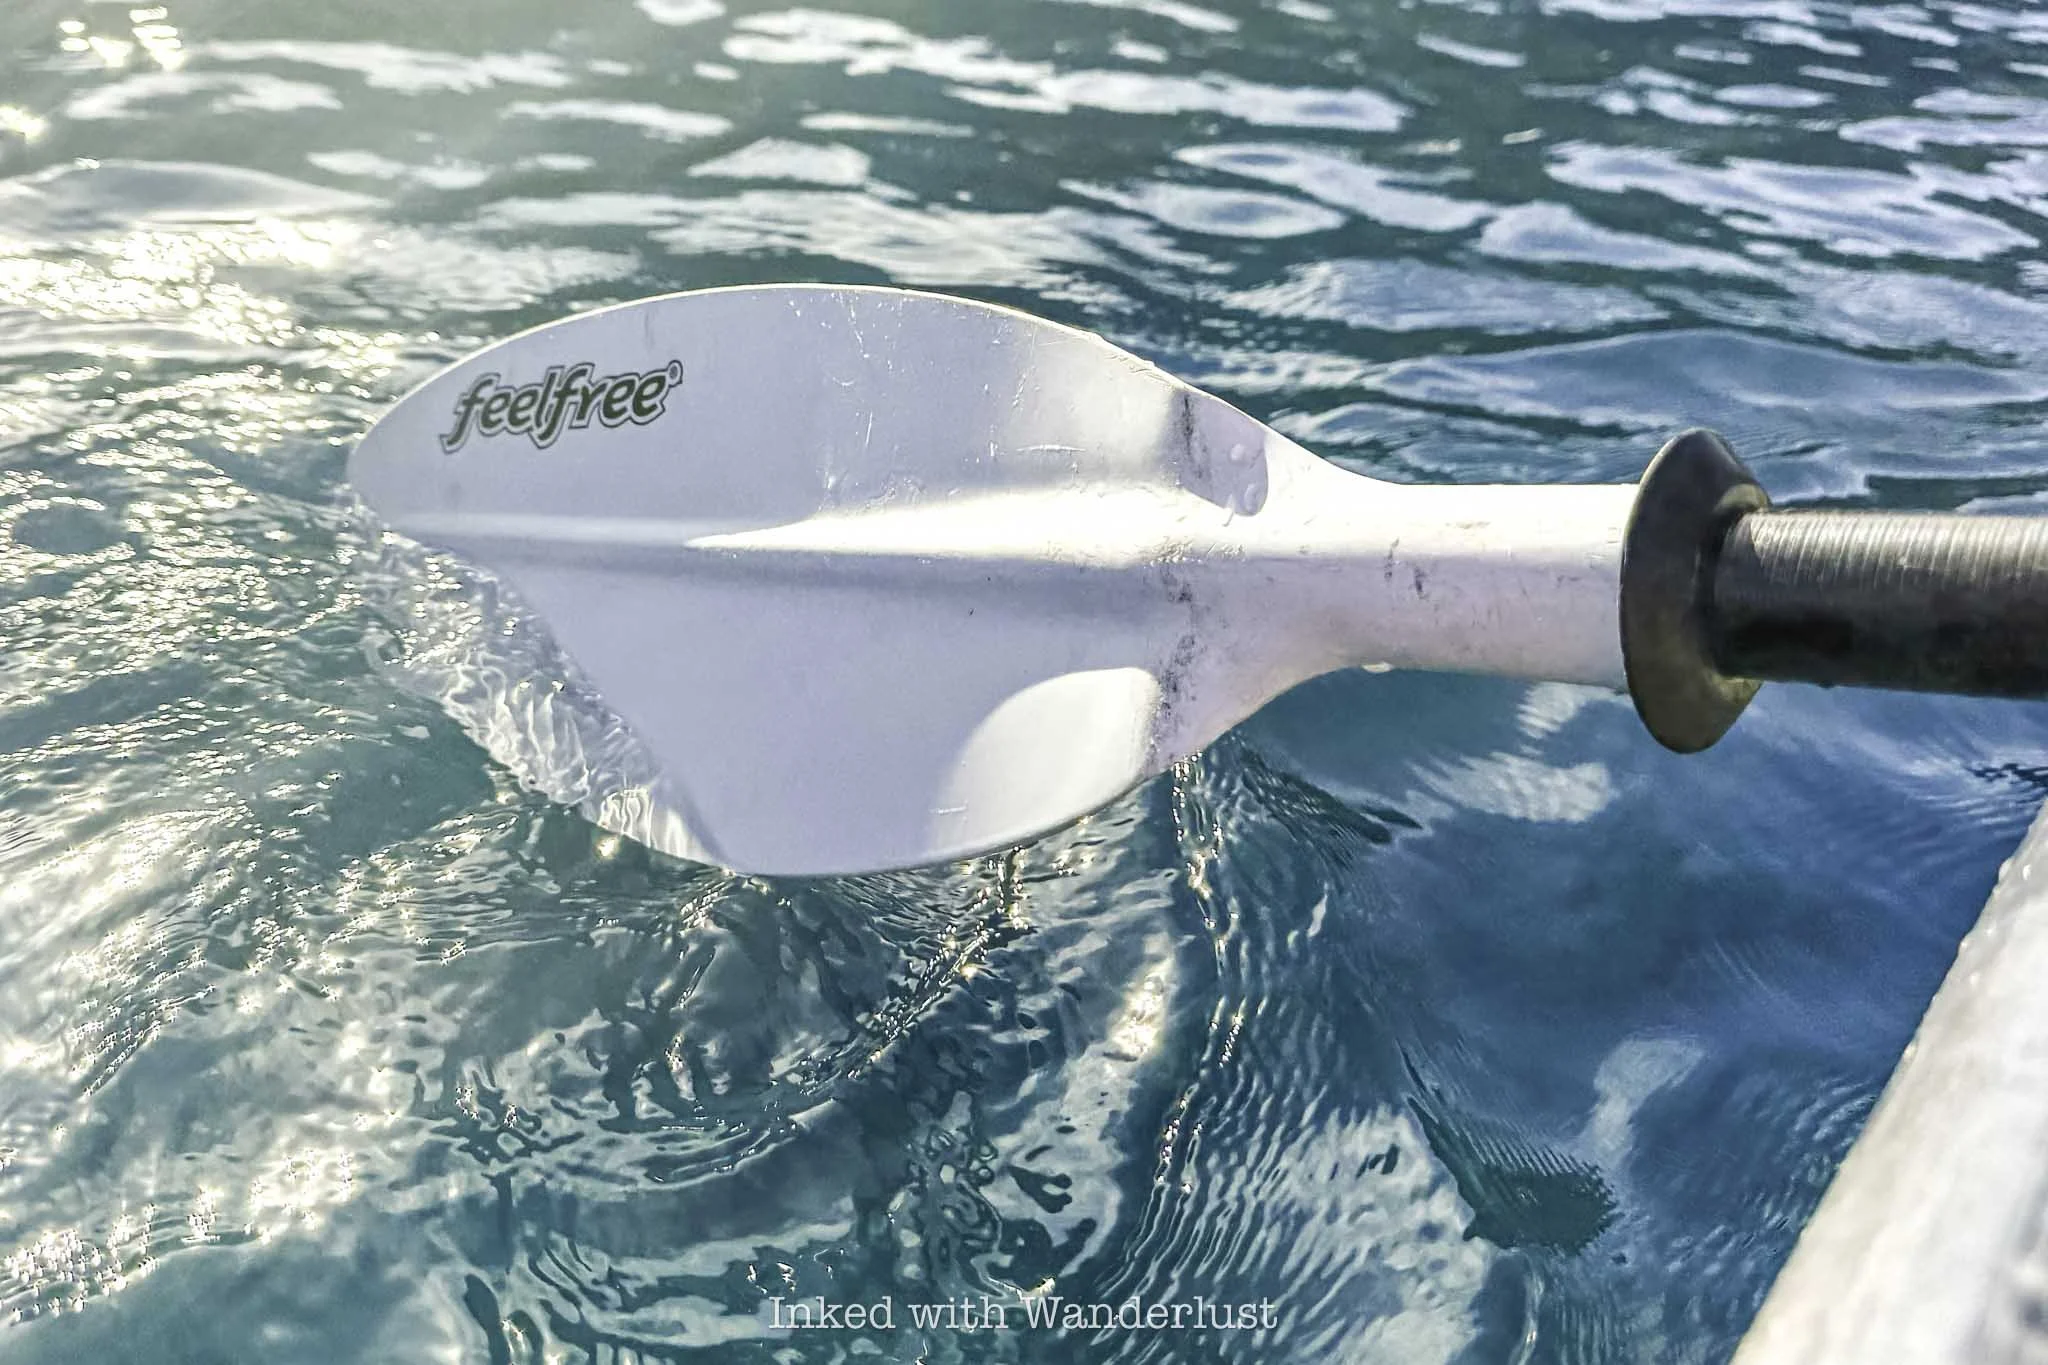
There, you’ll be given a quick rundown on how to operate your kayak. If you’re a total beginner, you won’t have much of an issue. My Dad didn’t have any experience at all and picked up on it quickly. It’s simple - paddle left to go right, and paddle right to go left. Alternate left and right to go straight and paddle in reverse to go backwards.
Getting into and out of the kayaks was probably the trickiest part of the whole experience, but even that wasn’t bad. The guides will assist you to a point, but you’ll need to be able to lower and raise yourself.
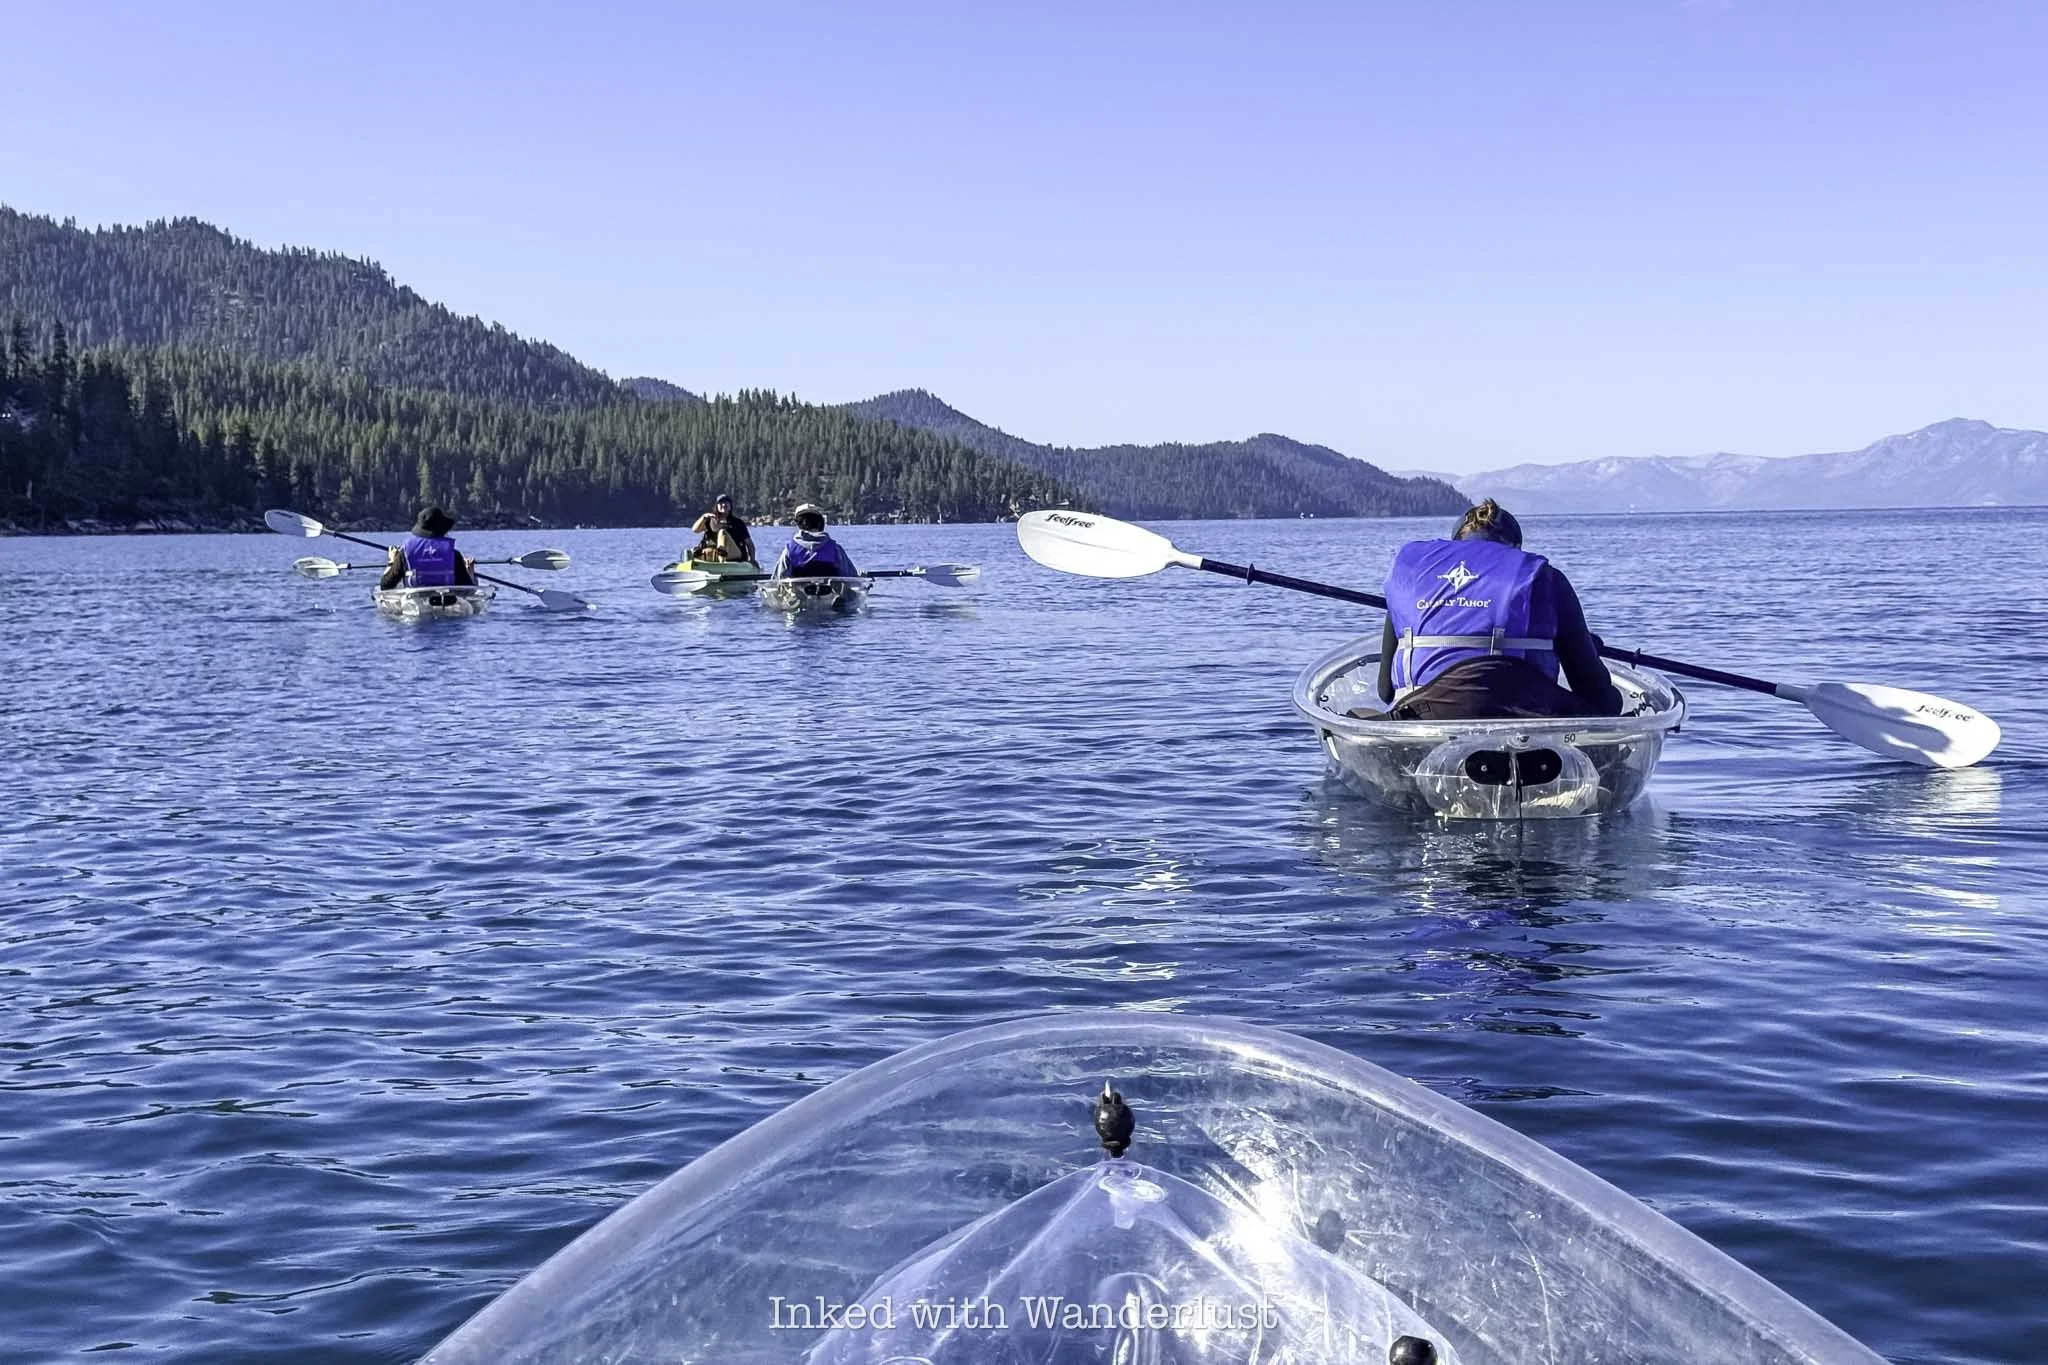
Within a few minutes, everyone in our group had the basics down. Seasoned pros we were not, but everyone was able to keep a steady pace and not lag behind too much. Julia set the pace in front on her peddle-kayak while another guide remained in the back of the group for support.
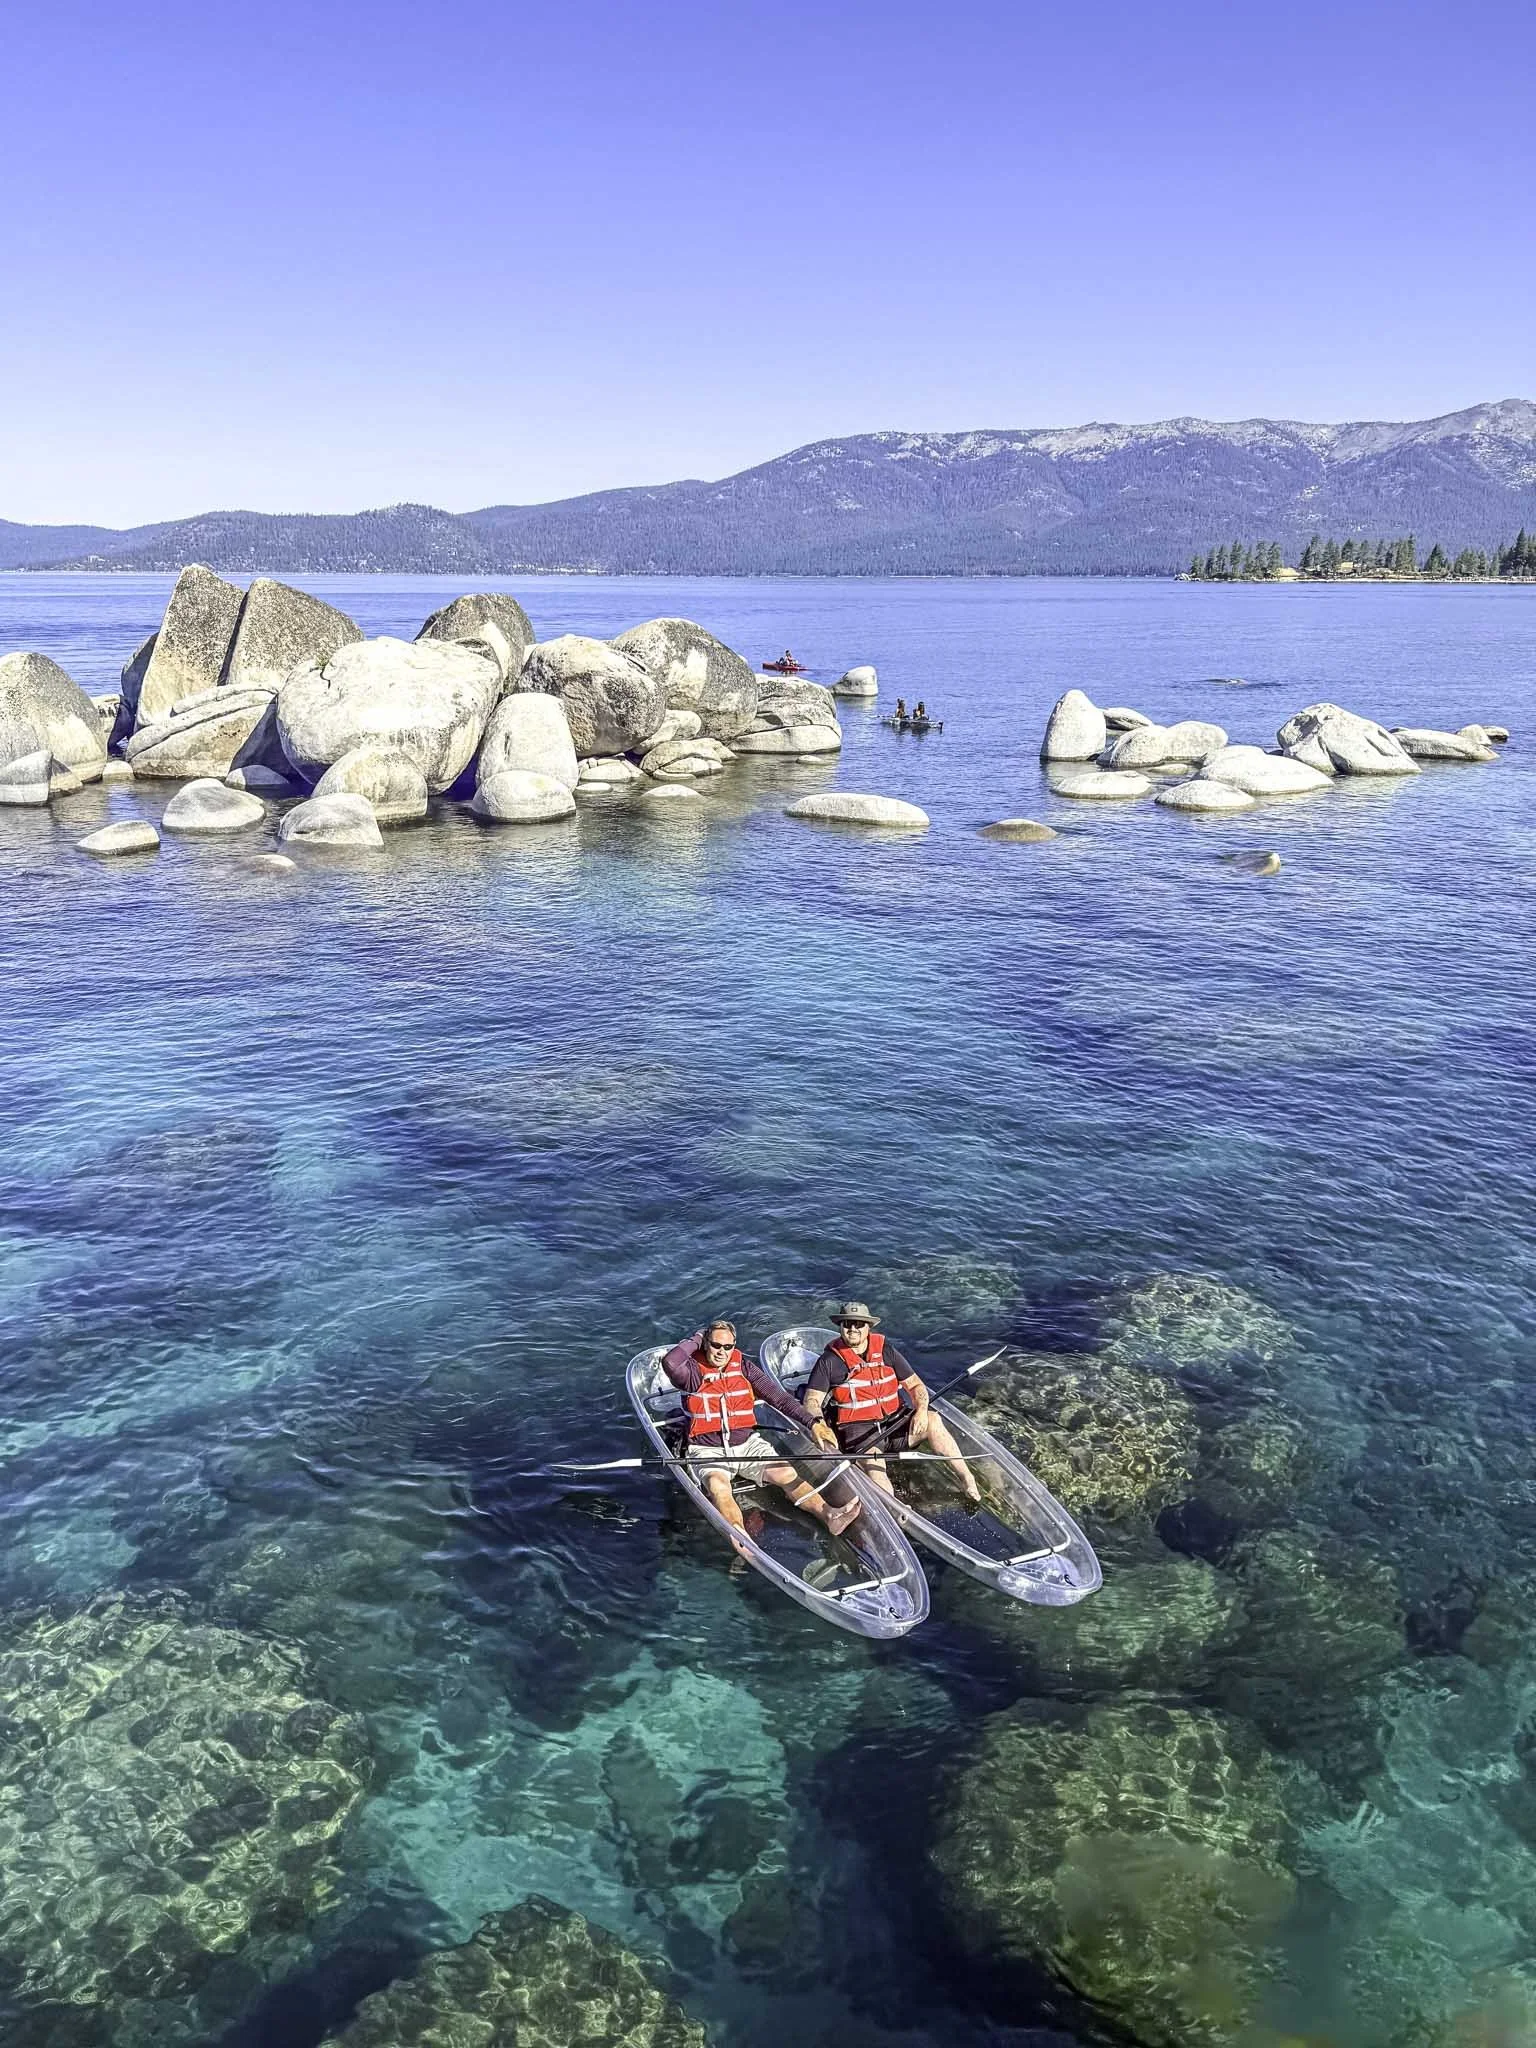
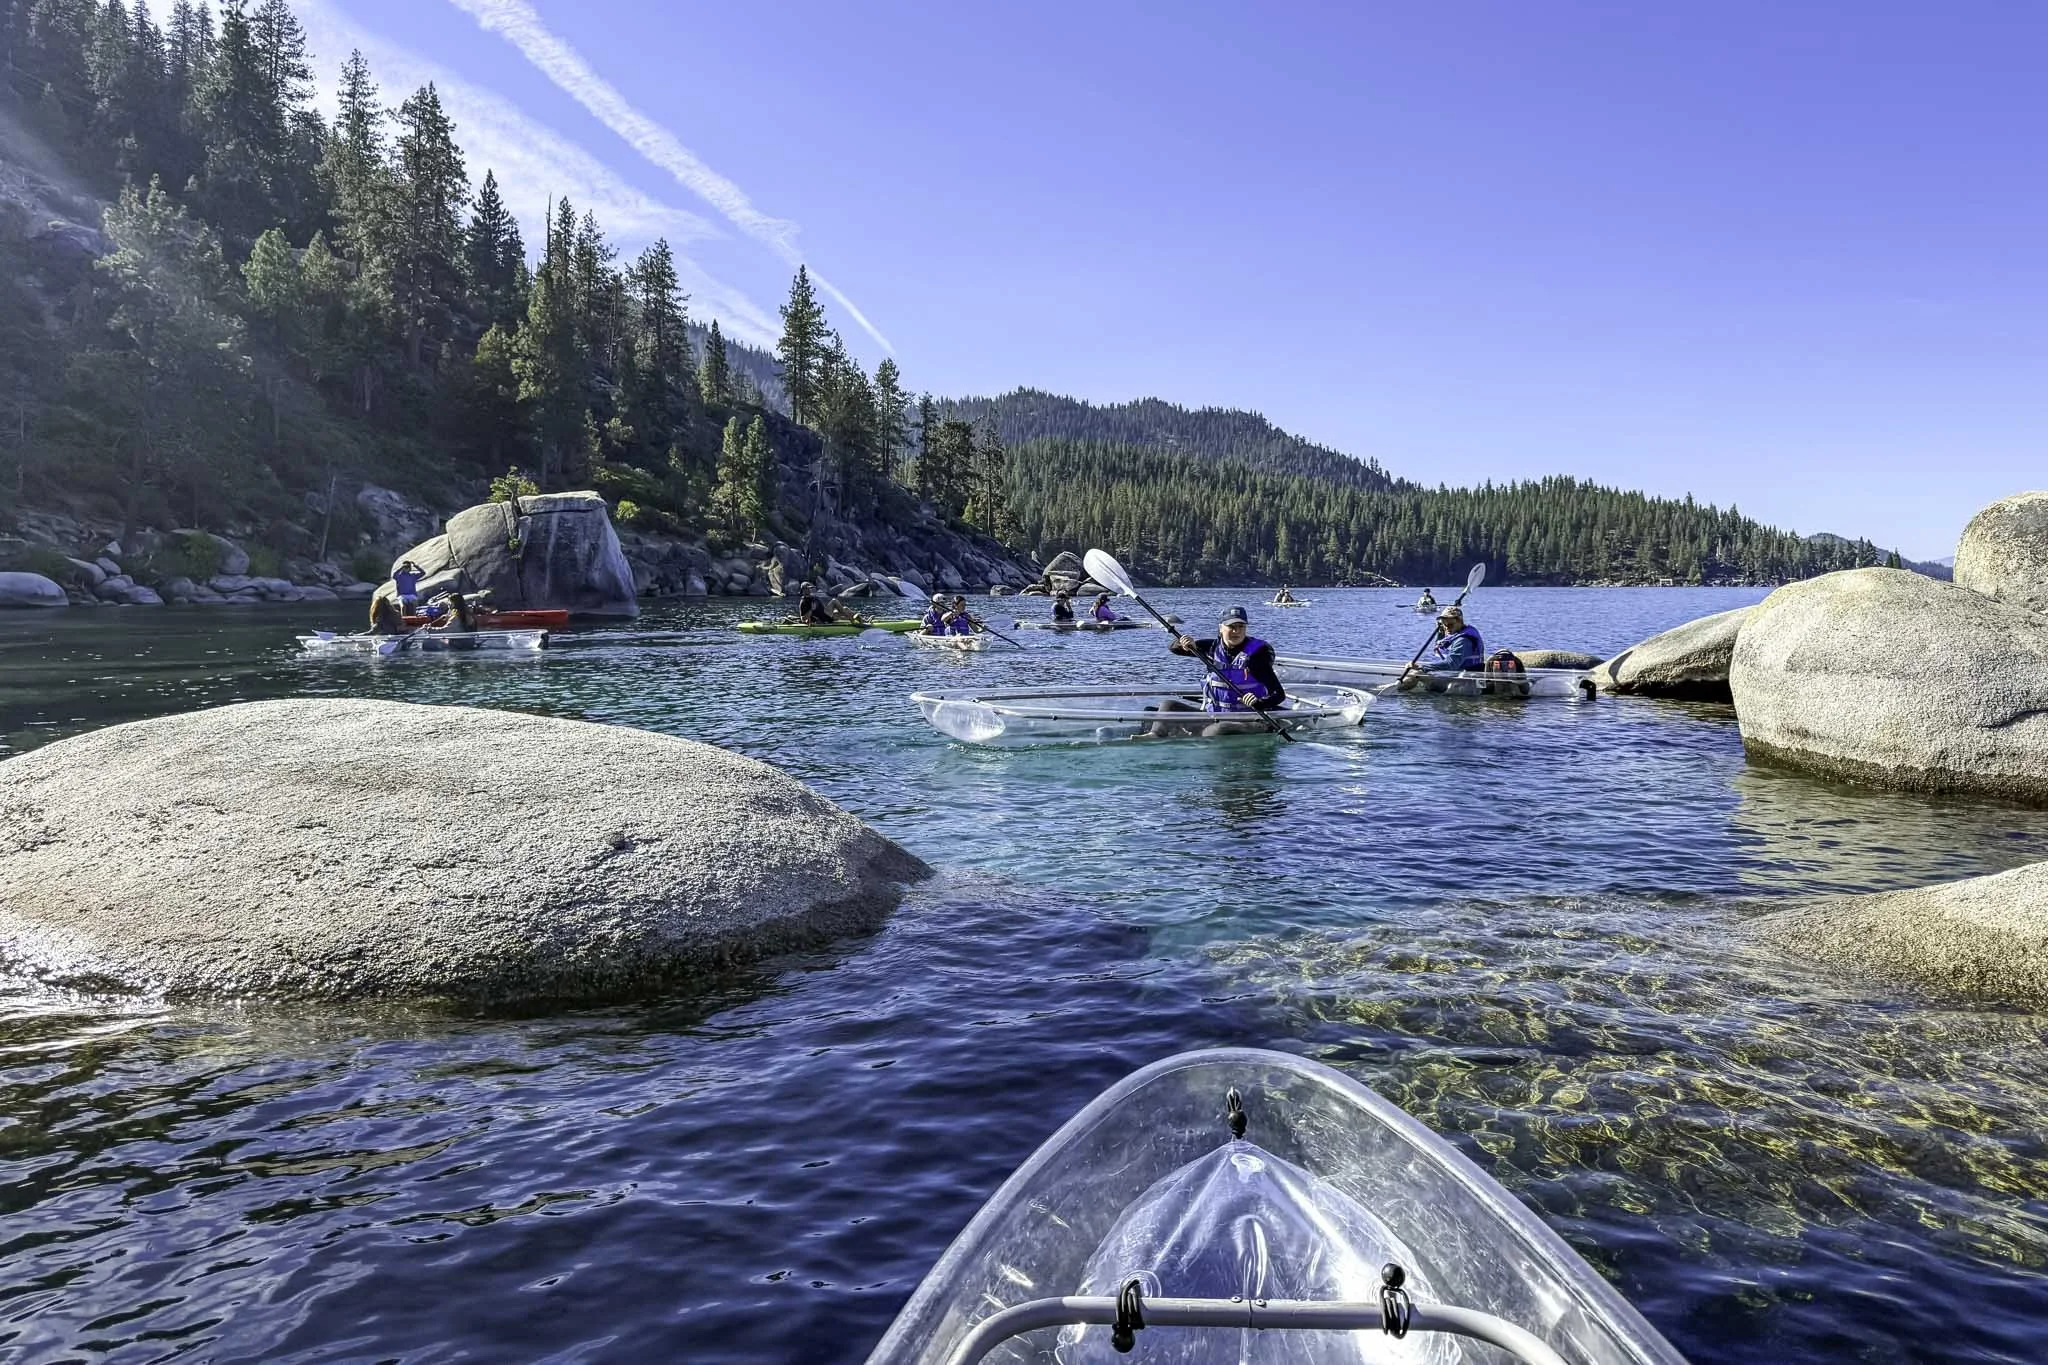
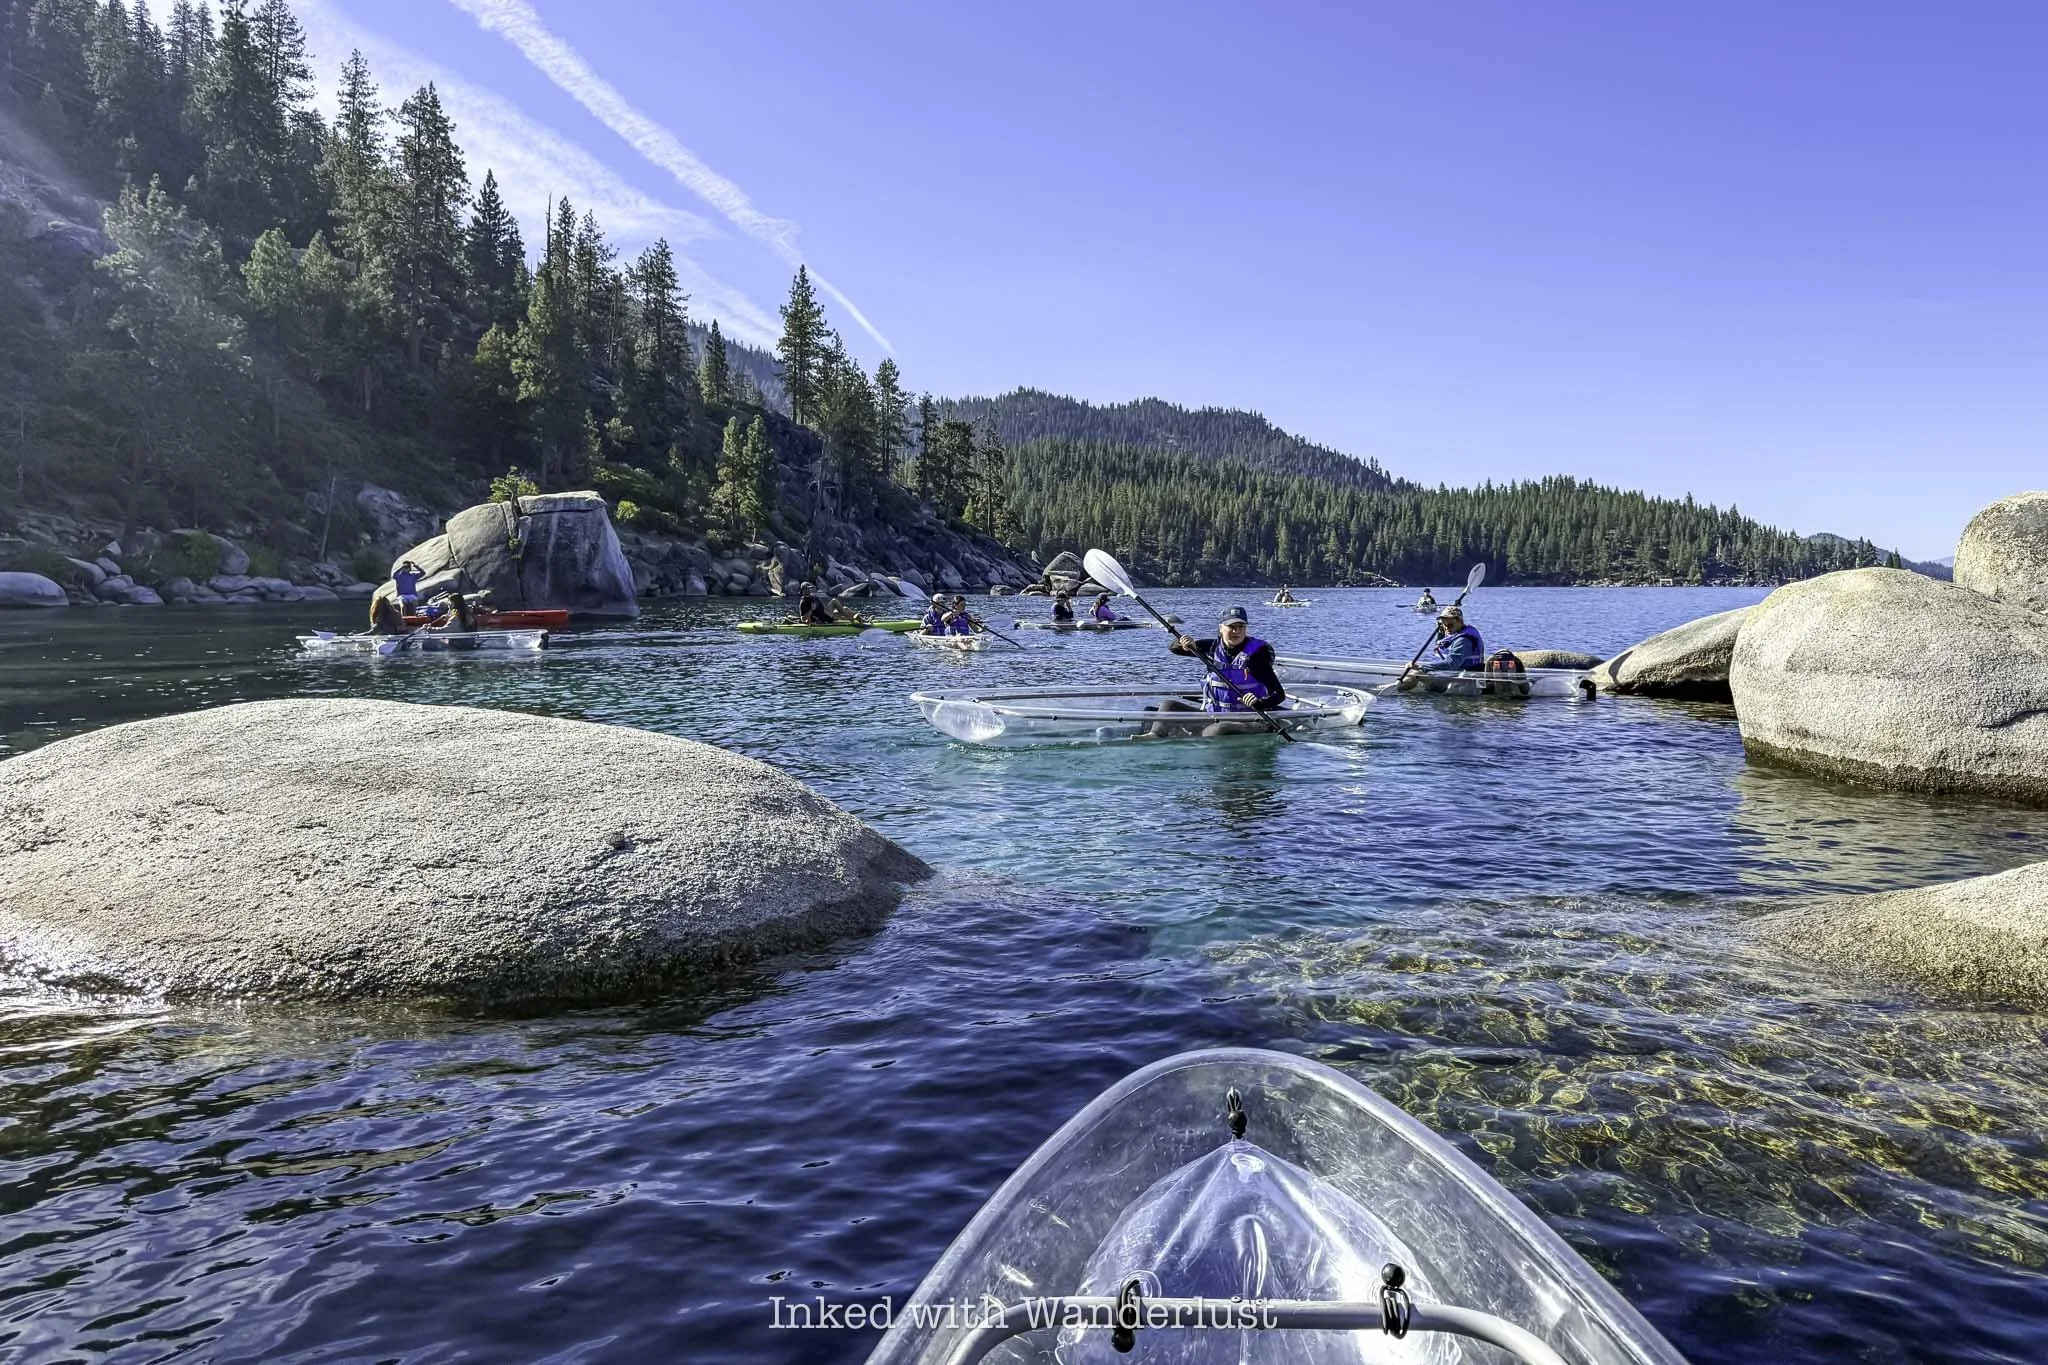
The kayaks were closer to a canoe than a traditional kayak and were touted by the guides as “extremely difficult” to tip over. I lightly tested this claim by moving around somewhat aggressively and while the kayak did rock a bit, it remained mostly steady.
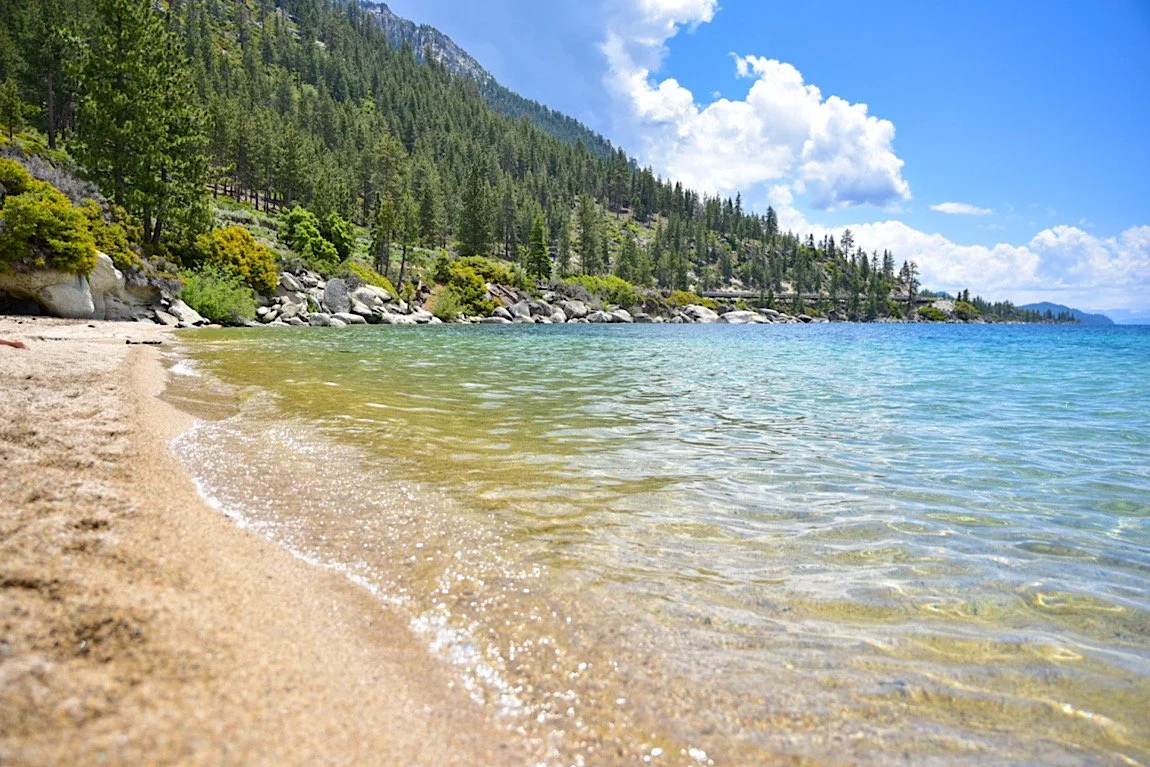
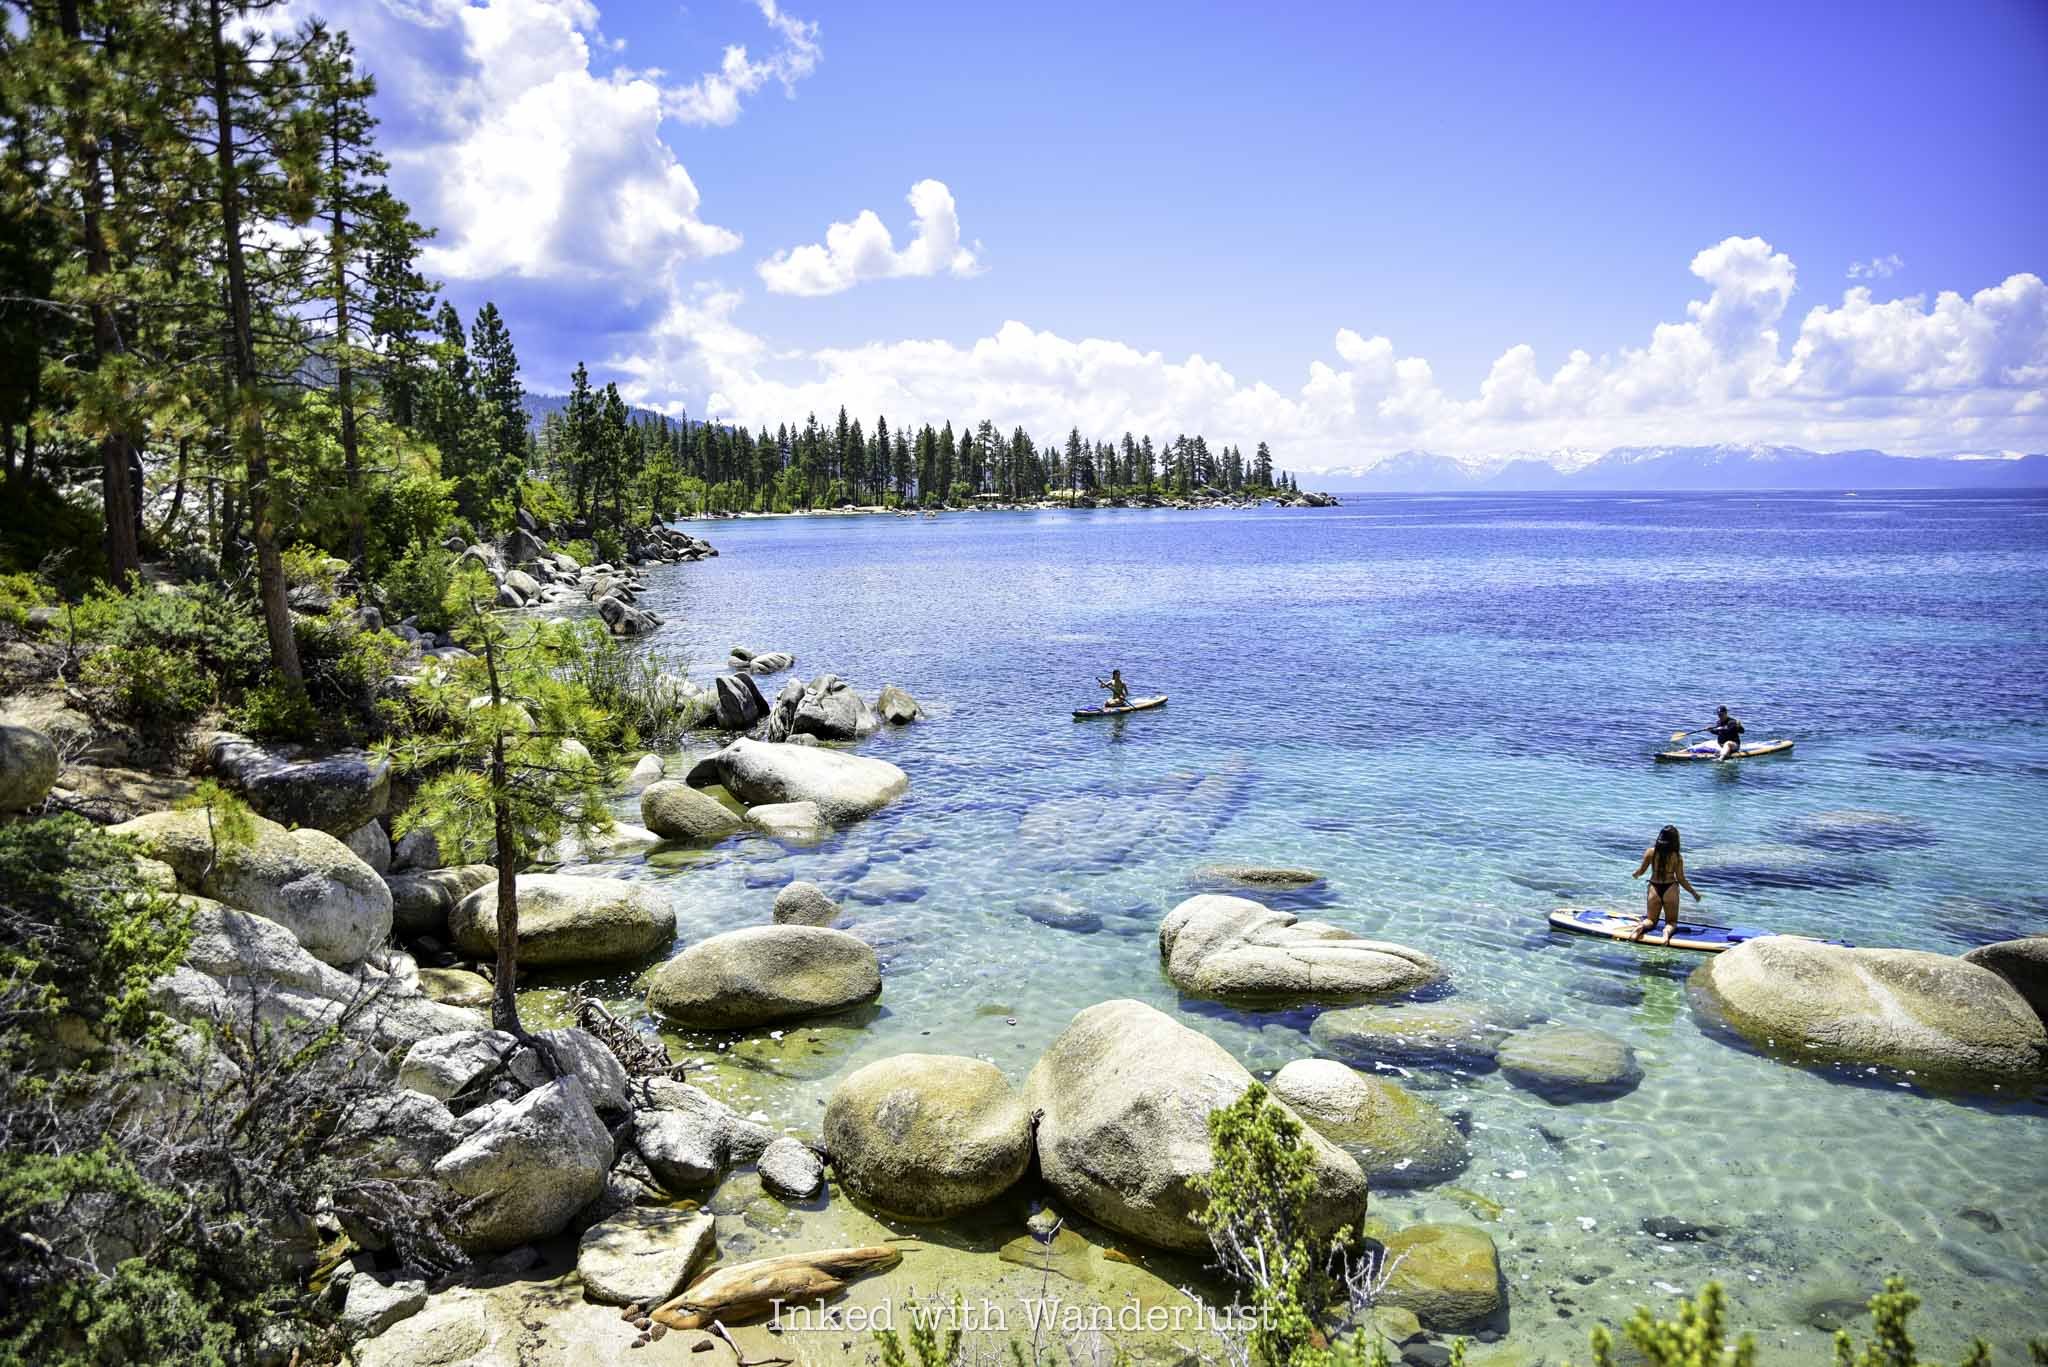
I booked the first tour of the day (8am) so there wasn’t much boat traffic on the lake. Which was nice, as it kept the waves to a minimum and enabled us to fully appreciate that glass-like clarity Lake Tahoe is known for. If it’s your first time kayaking, I recommend doing the same.
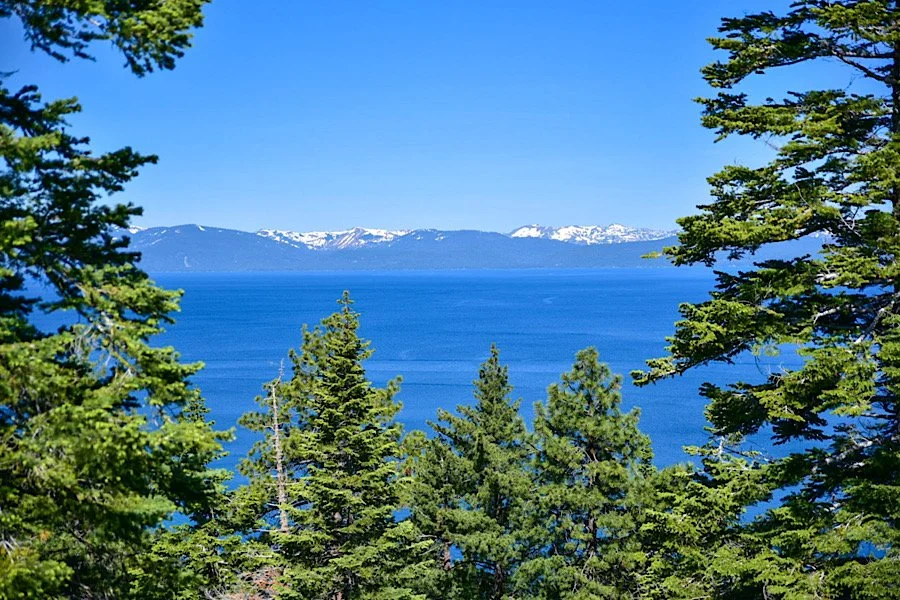
On this tour, you’ll be kayaking along Tahoe’s infamously serene east shore. For now, the water perspective is the only way to fully view this specific section of the east shore. The Tahoe East Shore Trail currently ends at Sand Harbor, but will eventually run through the entire stretch.
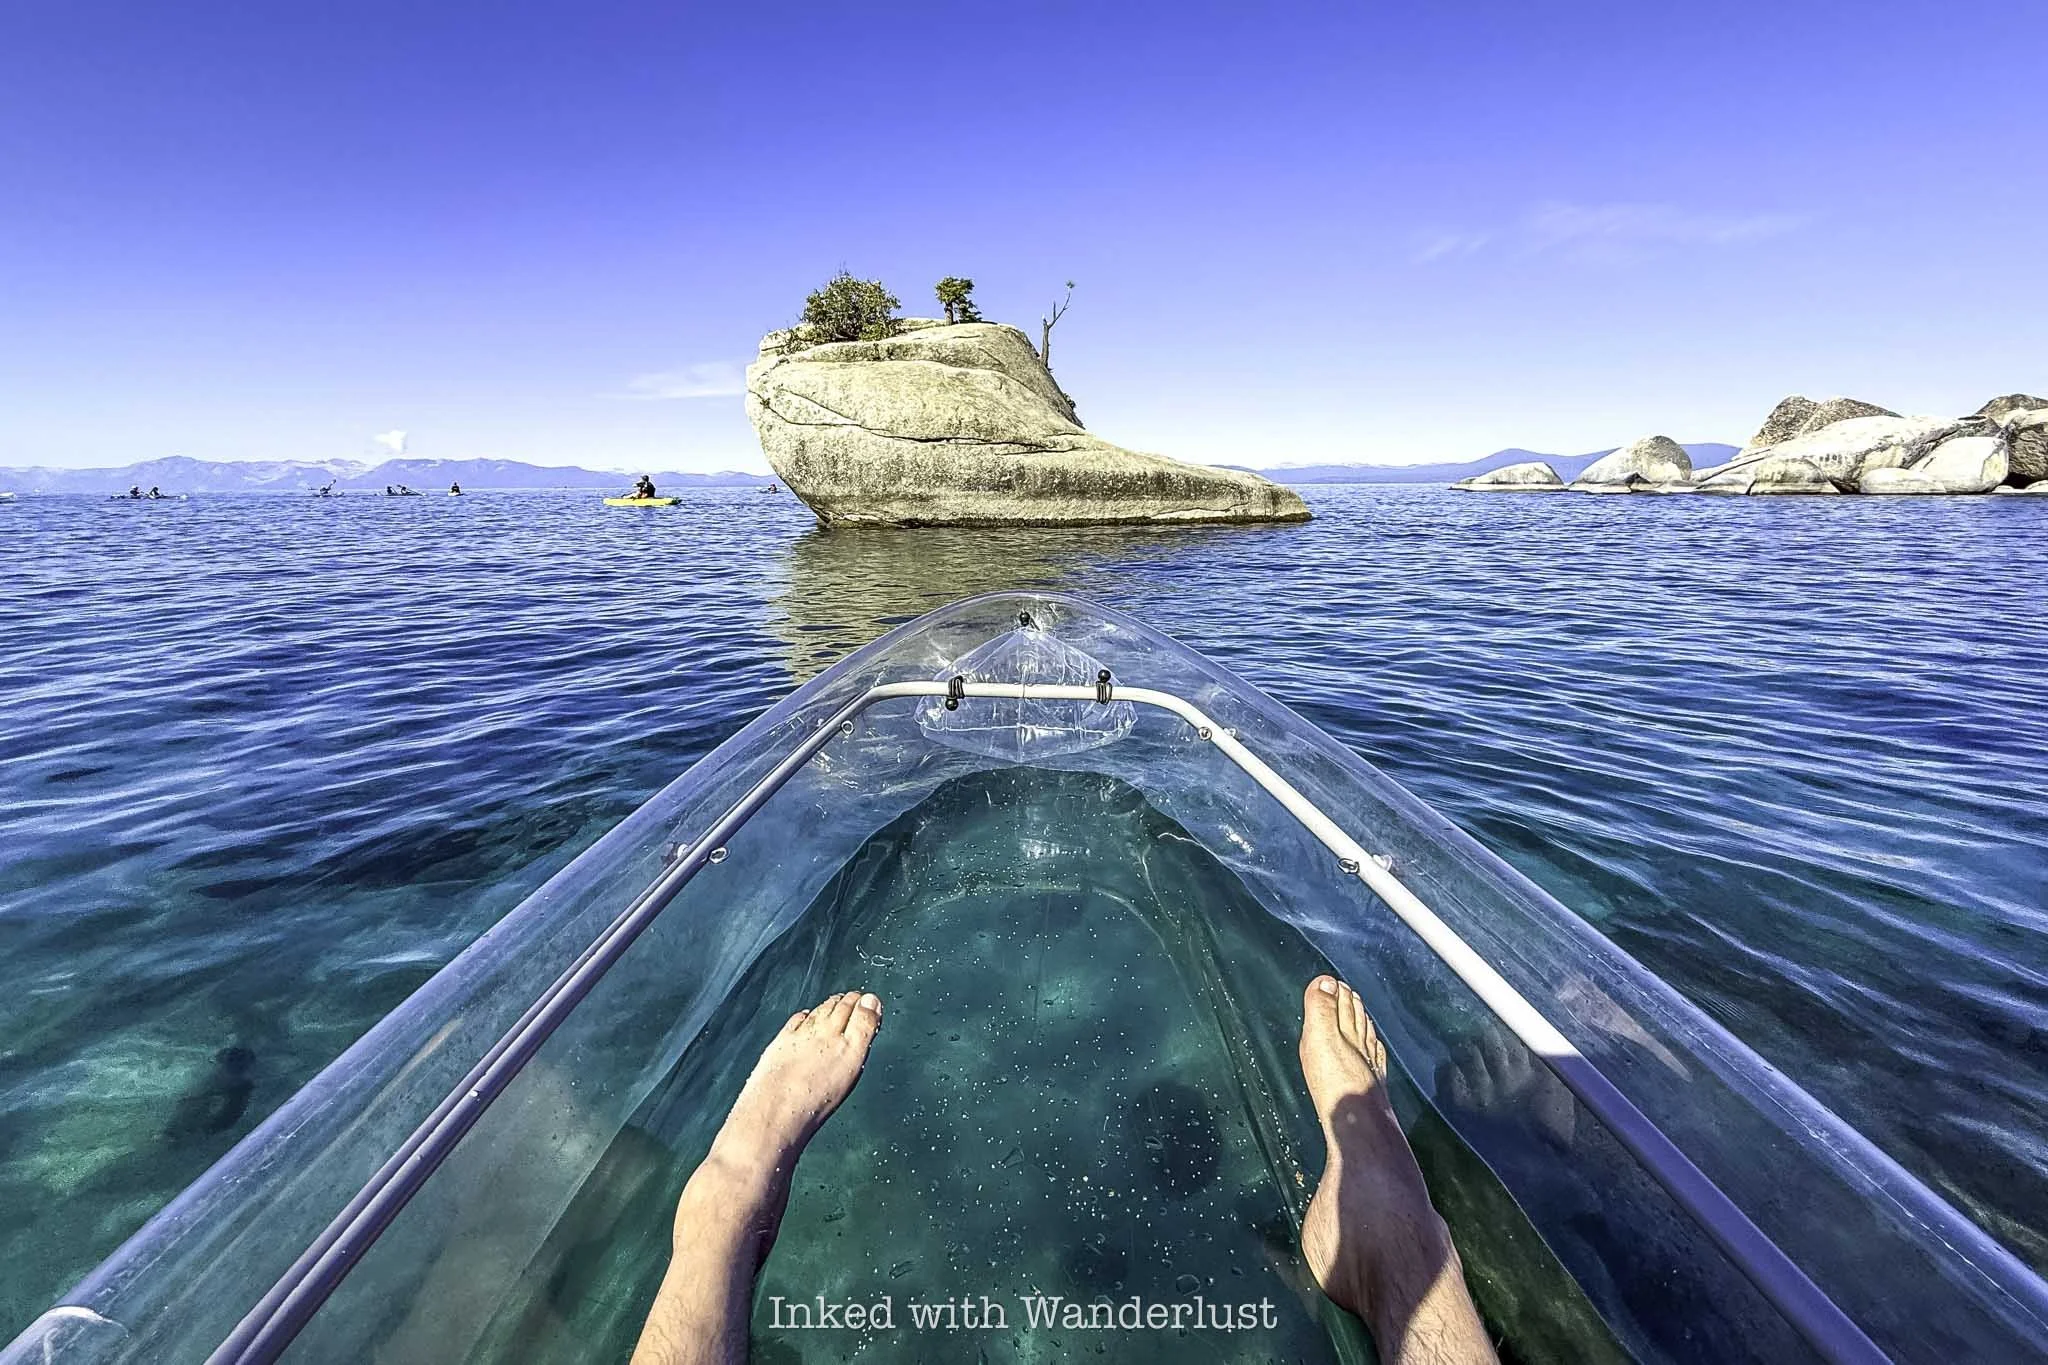
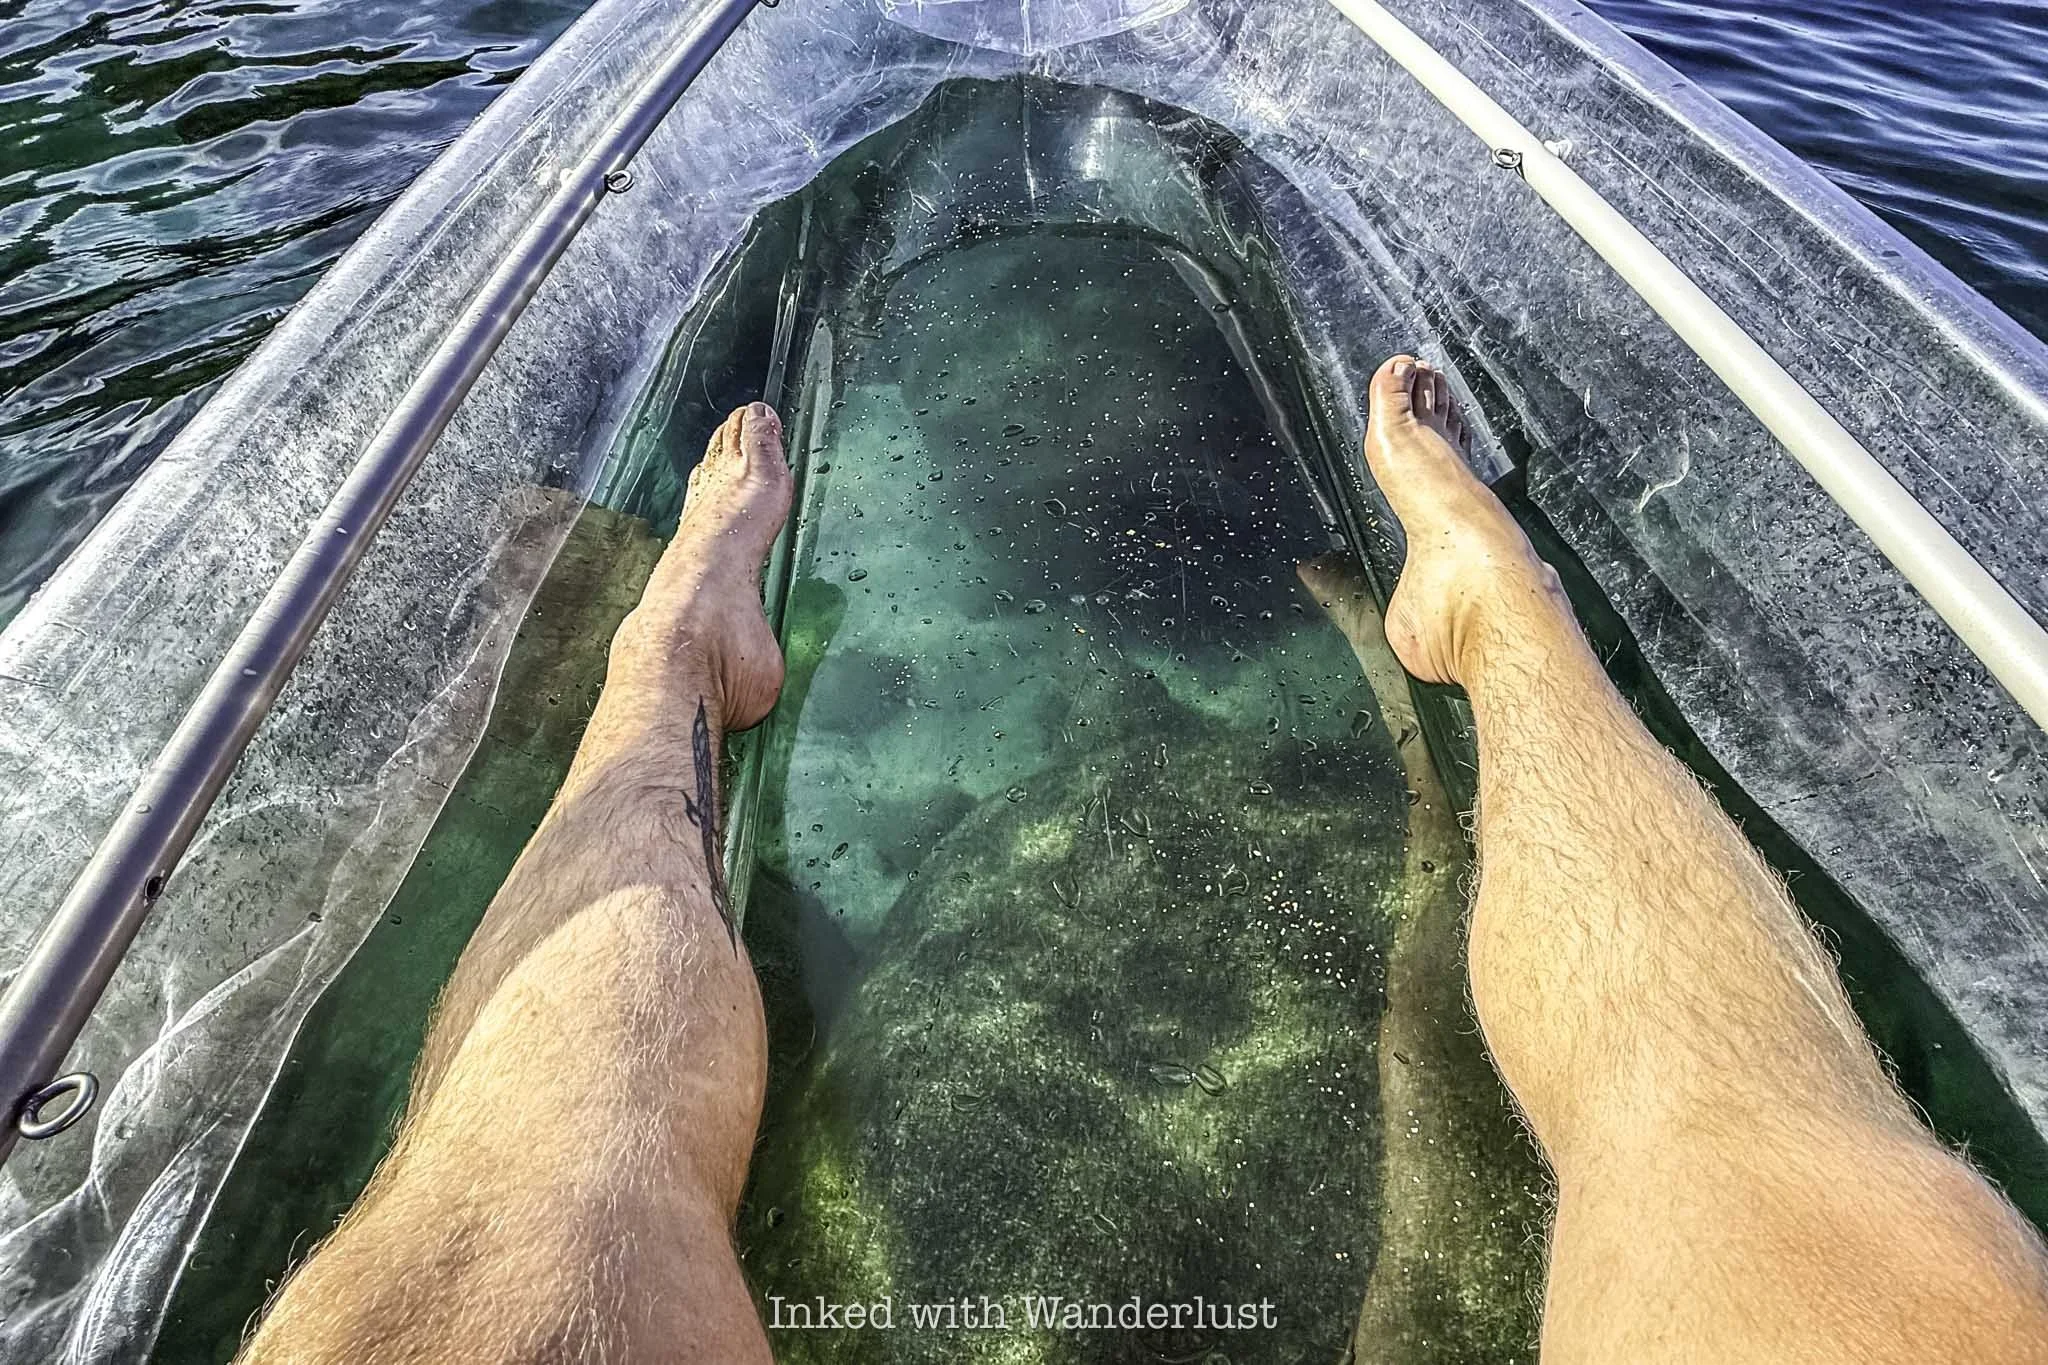
About 10-15 minutes into your tour is when the underwater granite boulders will start coming into view through your clear kayak. Some are dozens of feet beneath you while others appear to be right underneath the surface.
As you approach Bonsai Rock, you’ll come to a cluster of huge granite boulders you’ll need to negotiate. Here, your tour guide will take “action photos” of you as you pass through the boulder field.

Getting through the boulder field is easy, though you will likely scrap the bottom of your kayak on one. Don’t sweat it if you do, as it’s nearly impossible to crack or puncture them (according to our tour guide, anyway).
When you get through the small boulder field, Bonsai Rock will come into view on your left. You’ll immediately notice it, as it’s distinguished by several trees growing out of various cracks at and near the top.
You’ve likely seen Bonsai Rock on Tiktok and Instagram as it’s currently the second most photographed spot in all of Lake Tahoe (in case you were interested, Emerald Bay is the most photographed spot on the lake).
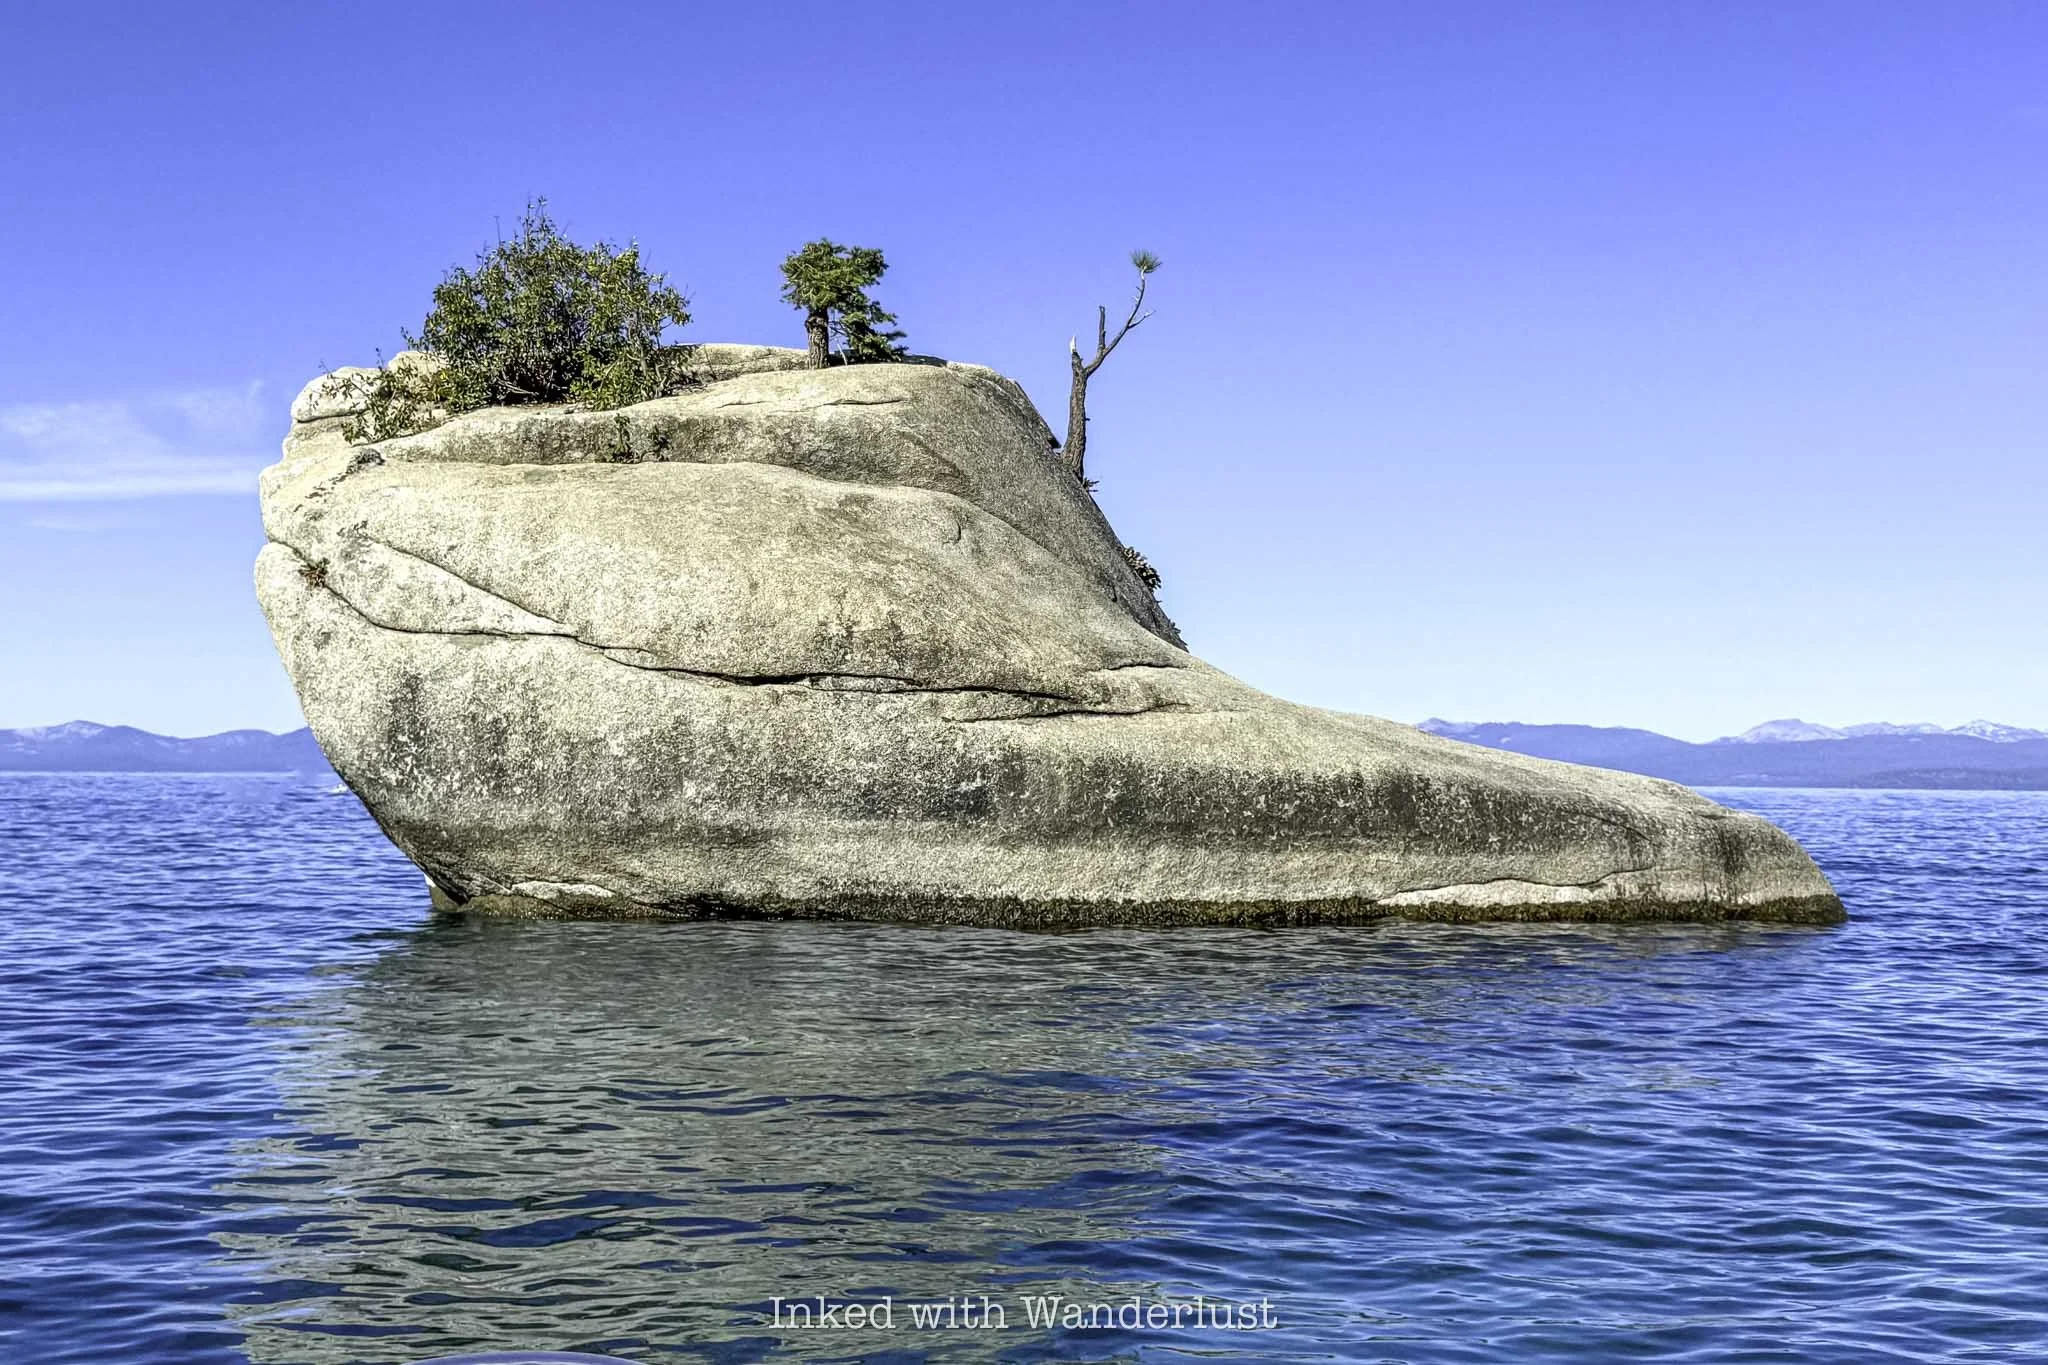
The group lingered around Bonsai Rock for several minutes, allowing time for light exploring and photo taking. Julia, our guide, climbed on top of the rock and took “from above” photos of each person in the tour group.
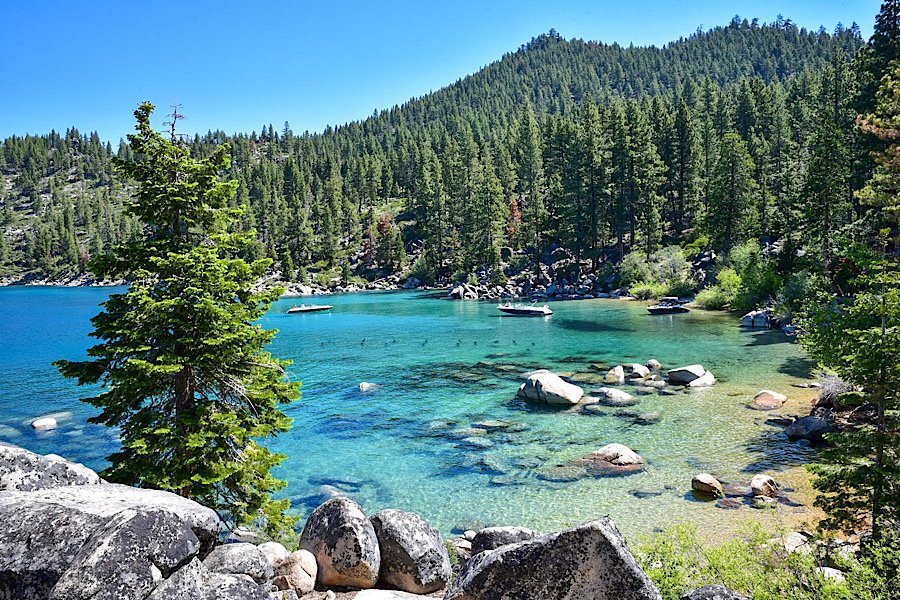
Once everyone had gotten their photo taken, the tour continued slightly past Bonsai Rock to a beautiful unnamed cove. It was here that I wish we had time to swim around because that cove looked so peaceful.
After a few more minutes of exploring, we were guided back to the beach at Sand Harbor. From the beach to Bonsai Rock was about one hour of kayak time. This included time for pictures and exploring the area around Bonsai Rock and that cove.
From that cove back to the beach, it took me just shy of thirty minutes of kayaking at an even pace, with a couple of stops here and there for water. As a beginner, I didn’t feel like this tour was too much. In fact, it was about the right amount of time to get my technique and pace down without overdoing it.
When we got back to the beach, Julia air-dropped the photos she took from her phone to ours. This was included in the tour price, by the way. Most places charge you extra for photos/video. It was nice to not get nickel-and-dimed by an outfit.
Final Thoughts…
I never got the sense that I was being rushed through the tour, but I do wish we had more free time to explore around Bonsai Rock (this is literally the only negative I can think of). I did hang back for a few minutes on my own and no one said anything, though.
For a beginner, I believe there is no better kayak tour to sign up for. The tour guides did a fantastic job helping everyone nail down the basics and help them keep pace. If Julia ever did get annoyed with those who were slagging behind, she never showed it.
The price is steep, sure, but the value is there. You’re led by experienced and patient guides, get to experience Lake Tahoe’s clarity up-close-and-personal, and you’ll get unmatched views of Tahoe’s gorgeous east shore and Bonsai Rock.
If you’re considering doing a clear kayak tour in Lake Tahoe, I highly recommend Clearly Tahoe. Be sure to tell them I said hello when you do! If you’re looking for more to do after your kayak tour, consider the nearby hike to Monkey Rock or take a beach day at Round Hill Pines!
***To book a clear kayak tour for your group, consider booking with my preferred ticket vendor, Viator, by clicking/tapping the “book now” tap in the ad below or through my link here.
Doing so helps to support Inked with Wanderlust and it doesn’t cost you anything extra. Any commission I may get comes directly from Viator.


5 Best Things to Do in Incline Village (Summer)
Incline Village, an upscale area located on the north shore of Lake Tahoe, often gets overshadowed by the south shore of the lake…
Disclosure: This post contains affiliate links. If you make a purchase through these links, I may earn a small commission at no additional cost to you. I only recommend products or services that I believe will add value to my readers.
Incline Village, an upscale area located on the north shore of Lake Tahoe, often gets overshadowed by the south shore of the lake. Many don’t realize that Lake Tahoe is actually located within two states, California and Nevada.
While the California side often gets the lion’s share of the attention, the Nevada side of Tahoe is more than worthy of your vacation time as well. Incline Village, which is on the Nevada side, has many popular activities to keep you busy. Some argue that it even rivals the California side.
So what are the top things to do in Incline Village during summer? There’s plenty of hiking trails, water activities, beaches, and local restaurants to choose from, but which ones are the top attractions? In this post, I’ll present to you five activities that I feel you would enjoy most.
Products I recommend for a visit to Incline Village
1) Hit the Hiking Trails

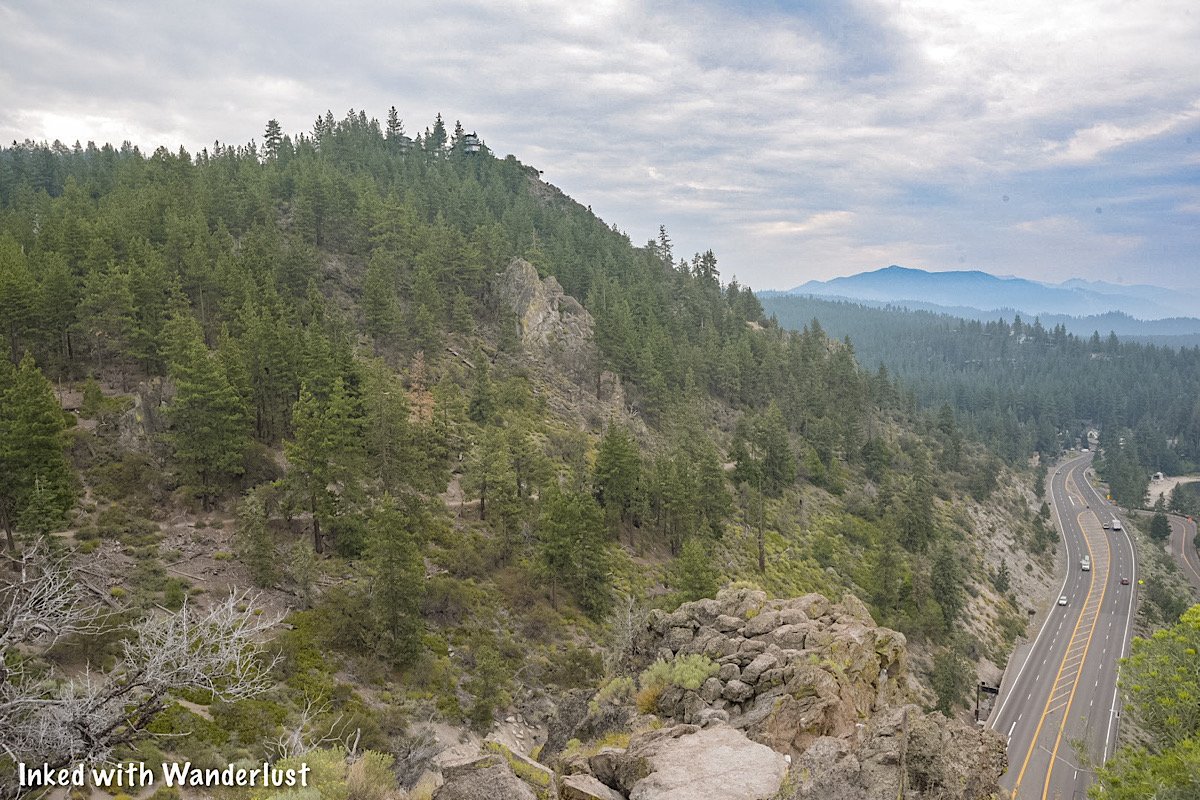
If there’s one thing any shore of Lake Tahoe isn’t lacking, it’s hiking trails. Many regard Incline Village, and the north and east shore of Tahoe in general, as the “hikers sides” of the lake since they have a heavy concentration of trails.
A few of these include the historic Stateline Lookout, Folsom Camp Loop, and Mount Rose Peak (just a ten minute drive from Incline Village). The most popular hiking trail in Incline Village proper, though, has to be Monkey Rock.
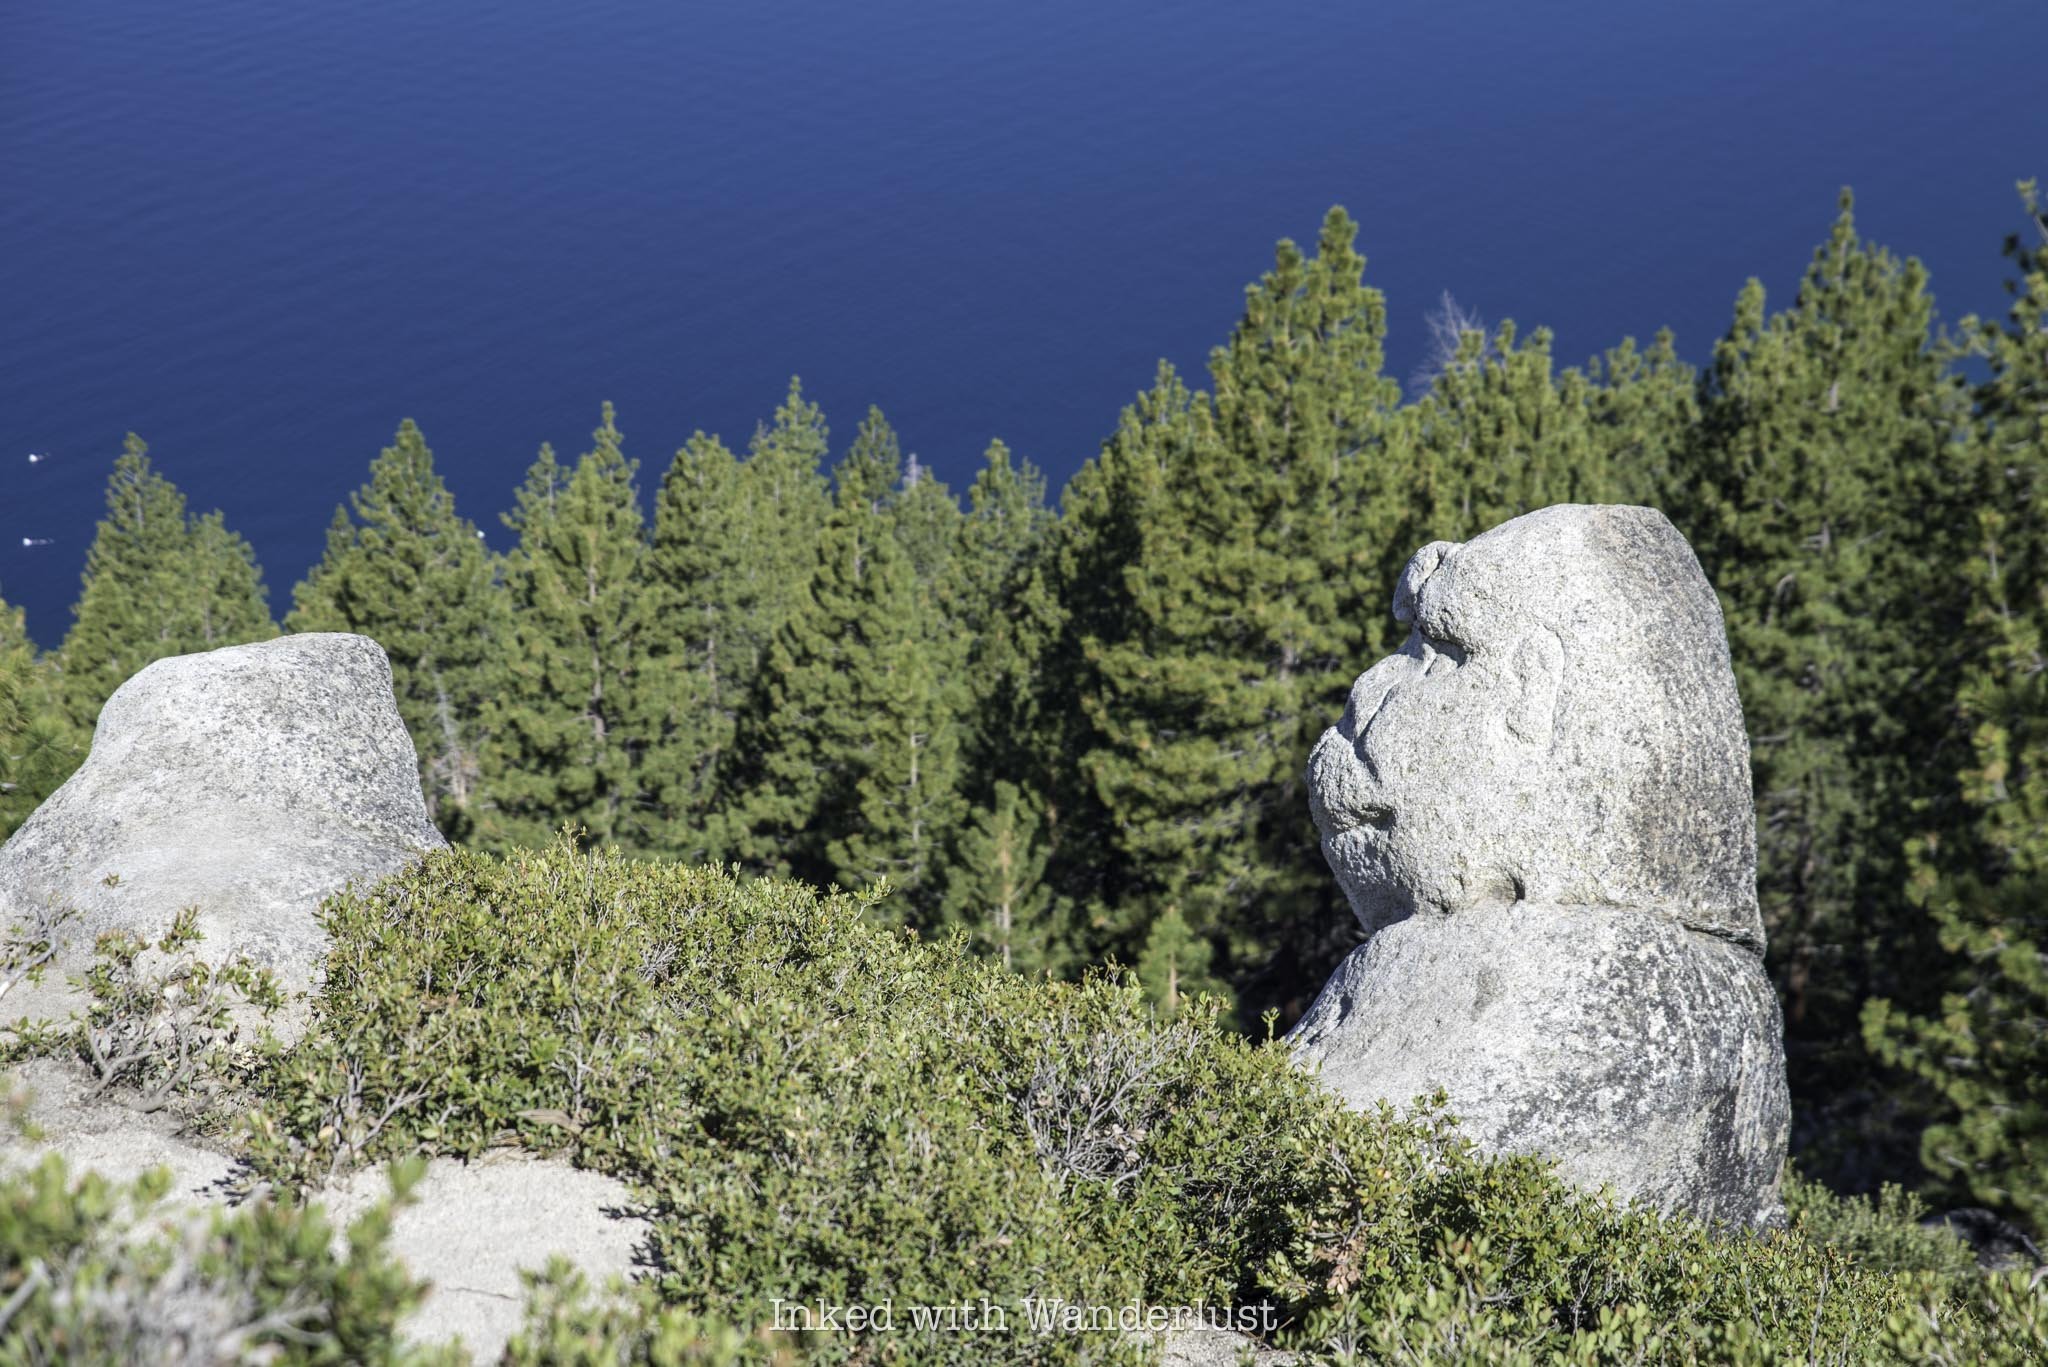
Monkey Rock is a relatively short trail, clocking in at just 2.6 miles, out and back, that leads to a granite rock that strongly resembles that of a monkey. Additionally, the views of the north and east shores of the lake from there are outstanding.
The trail isn’t difficult but because of the incline segment of the final push, I would rate it as moderate for some, but easy for those who hike a lot. If you’ll be visiting Incline Village, hiking to Monkey Rock is a must as it’s one of the premiere hikes in the area.
READ ALSO: Hike to Monkey Rock for Incredible Views of Lake Tahoe
2) Enjoy a Tasty Meal at Several Local Restaurants
While not generally known as a culinary mecca, Incline Village does have its fair share of wonderful, locally-owned restaurants. Many of which are directly next to many hiking trails, beaches, and the like.
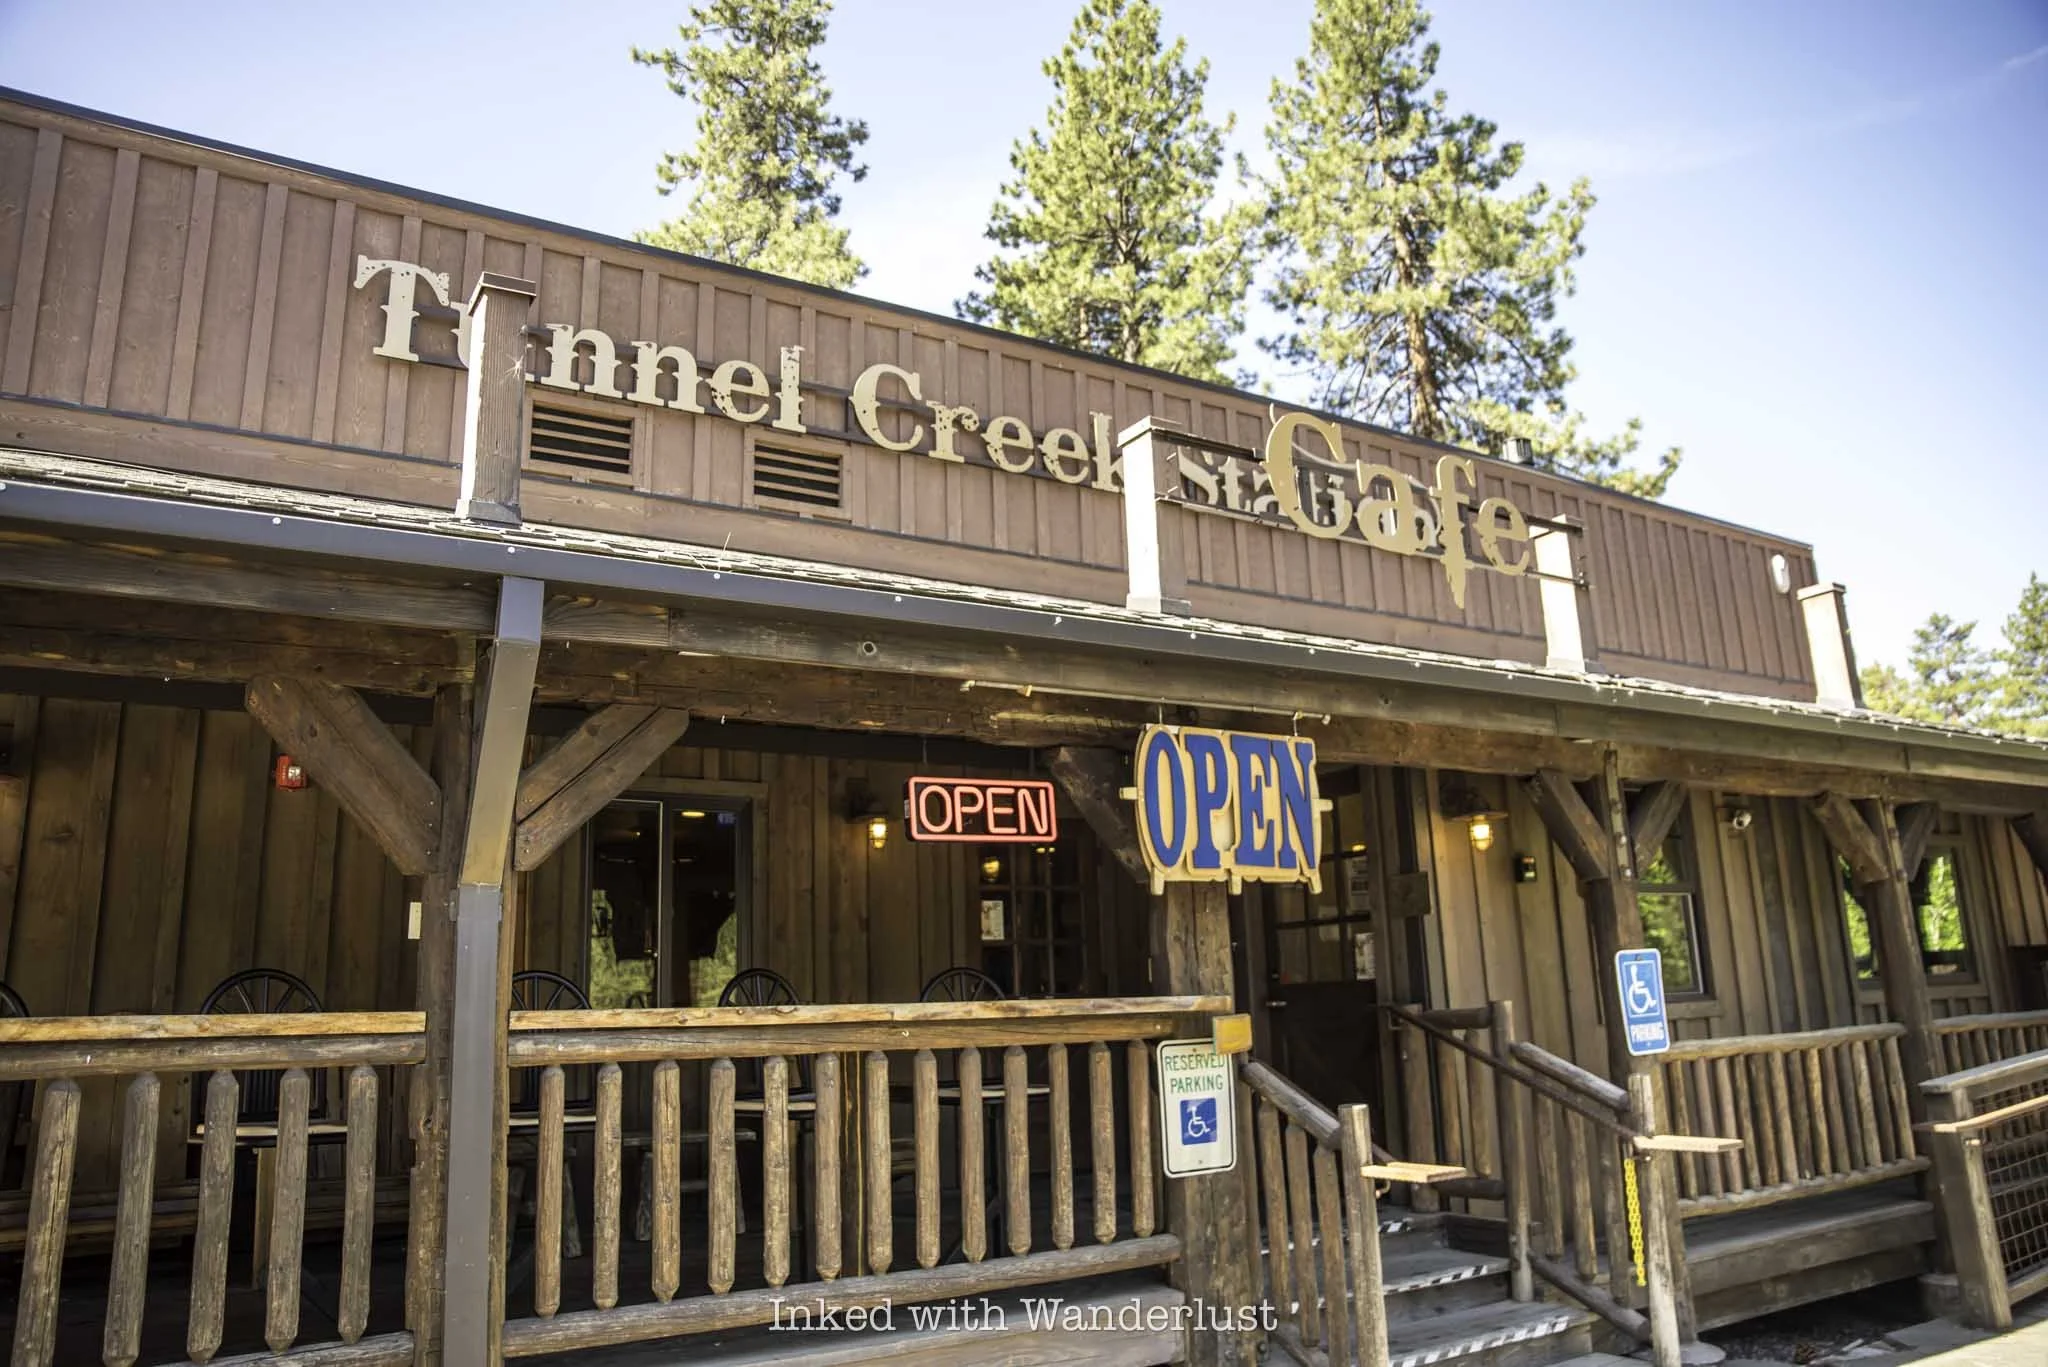
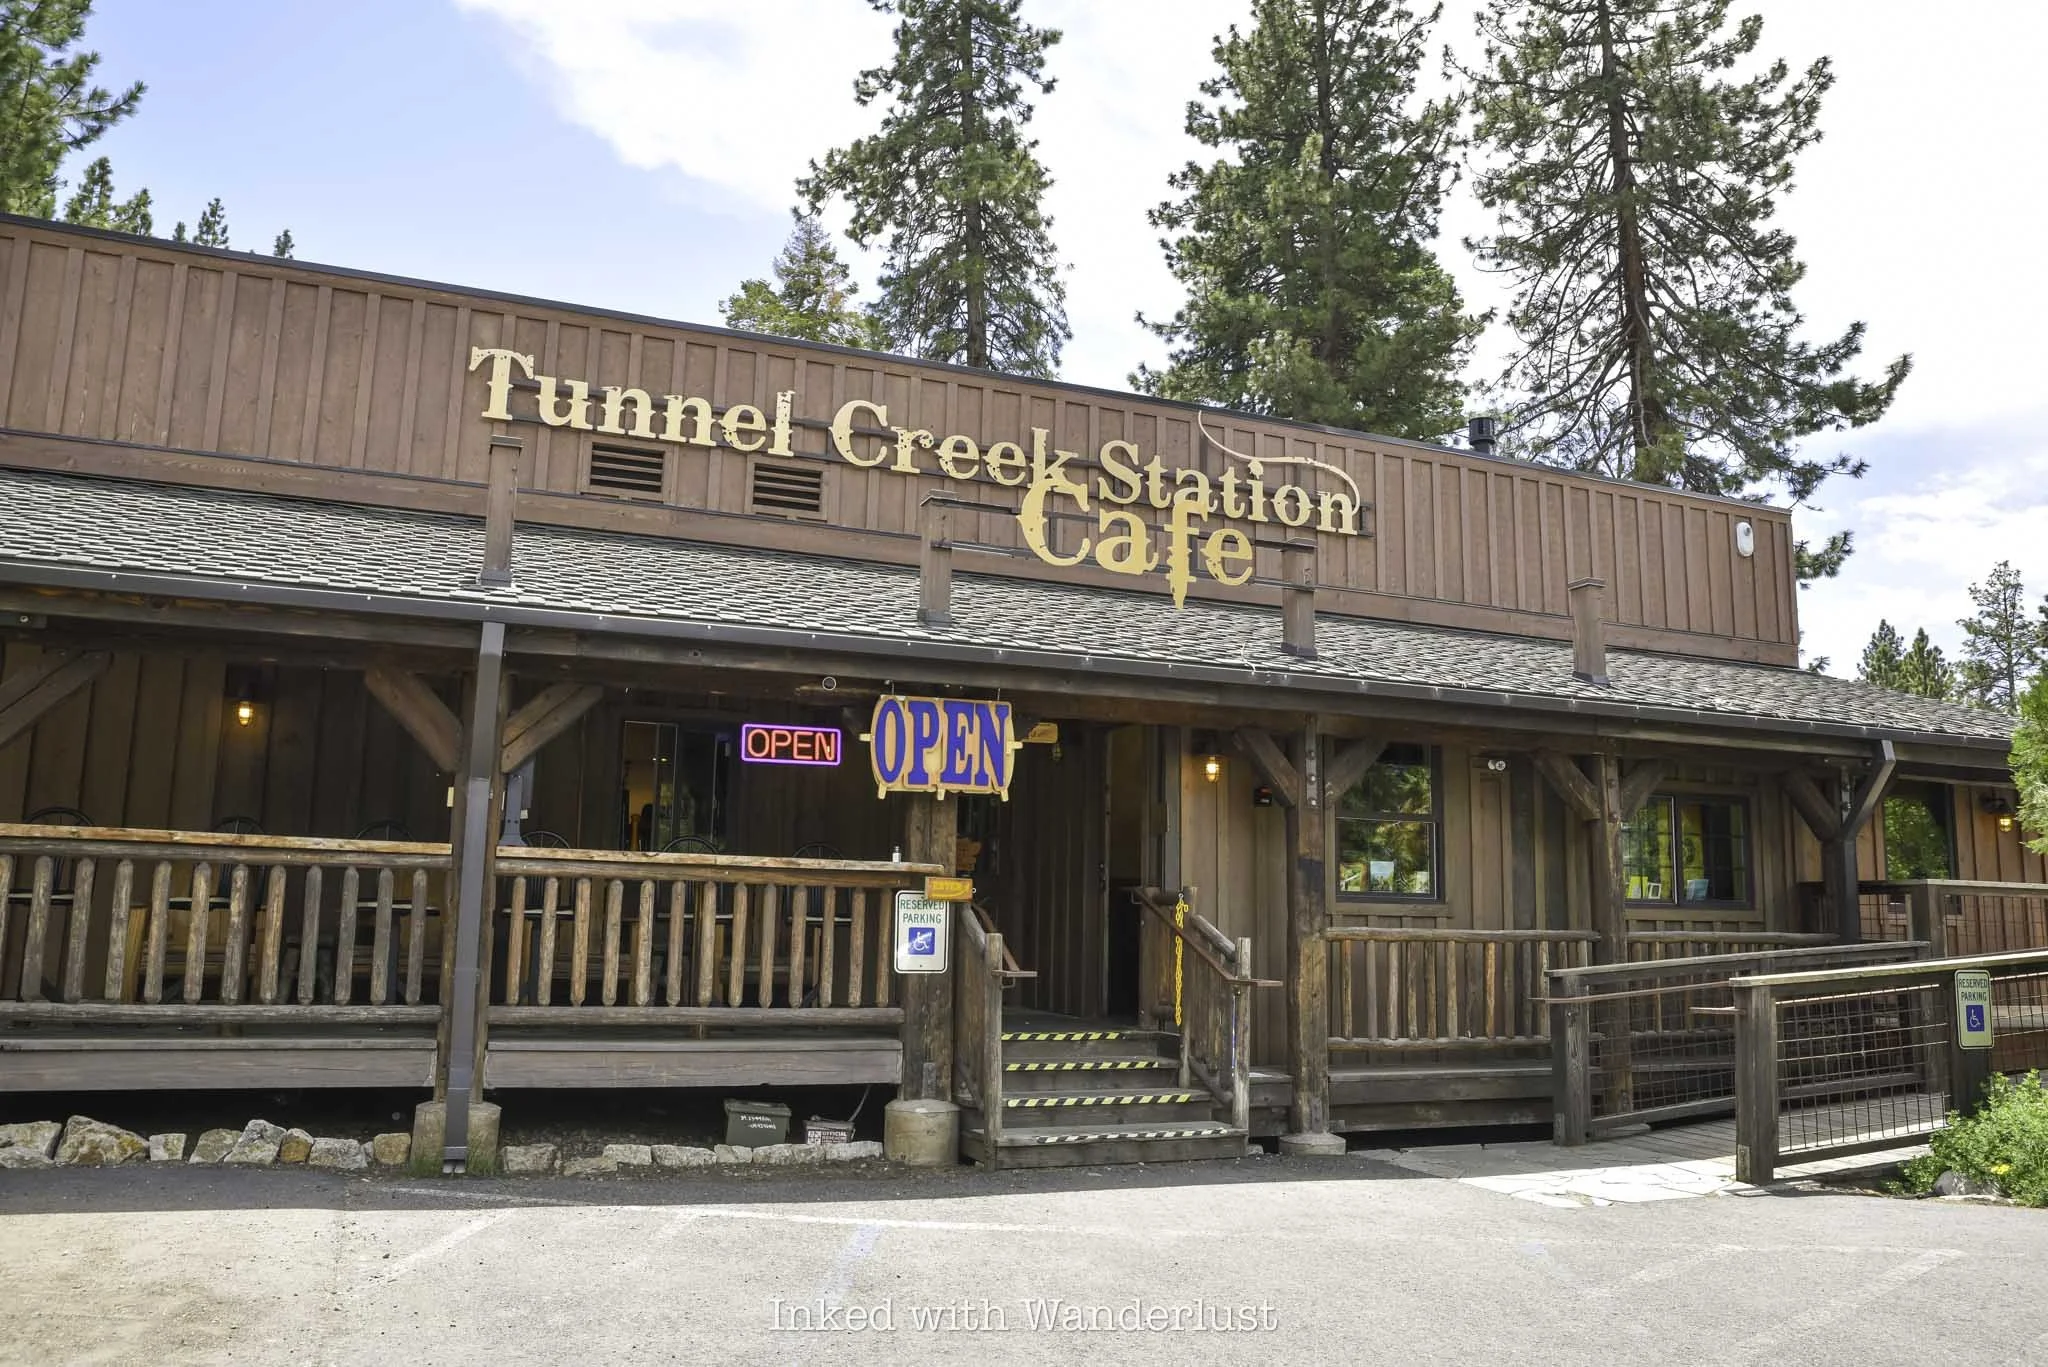
A few that receive high praise from visitors and locals alike include FUMO Cafe, Crosby’s Tavern, Inclined Burgers and Brews, Sage Leaf, and Tunnel Creek Cafe. The latter of which is a personal favorite of mine, due to its relaxed atmosphere, service, and tasty food.
It’s located next to two insanely popular trails in Incline Village, the above mentioned Monkey Rock and the soon-to-be-discussed Tahoe East Shore Trail. This alone makes it a super convenient spot to grab a pre or post-hike meal.
READ ALSO: Enjoy a Post-Hike Meal at Tunnel Creek Cafe
3) Take a Clear Kayak Tour to Bonsai Rock

Kayaking has always been a popular activity in Lake Tahoe. In fact, I had my first experience doing so kayaking out to the Fannette Island Tea House in Emerald Bay. In recent years, what’s known as “clear kayaking” has grown in popularity, particularly on the lake’s east shore.
Clear kayaking enables you to fully enjoy the lake’s crystal clear waters by looking straight down through your kayak. A company called Clearly Tahoe conducts regular tours from Incline Village, leading kayakers through the popular east shore of the lake and out to famed Bonsai Rock.
I recently had the pleasure taking this very tour with Clear Kayak and I had a great time. You can read my comprehensive review of my experience here.
4) Spend a Beach Day at Sand Harbor State Park
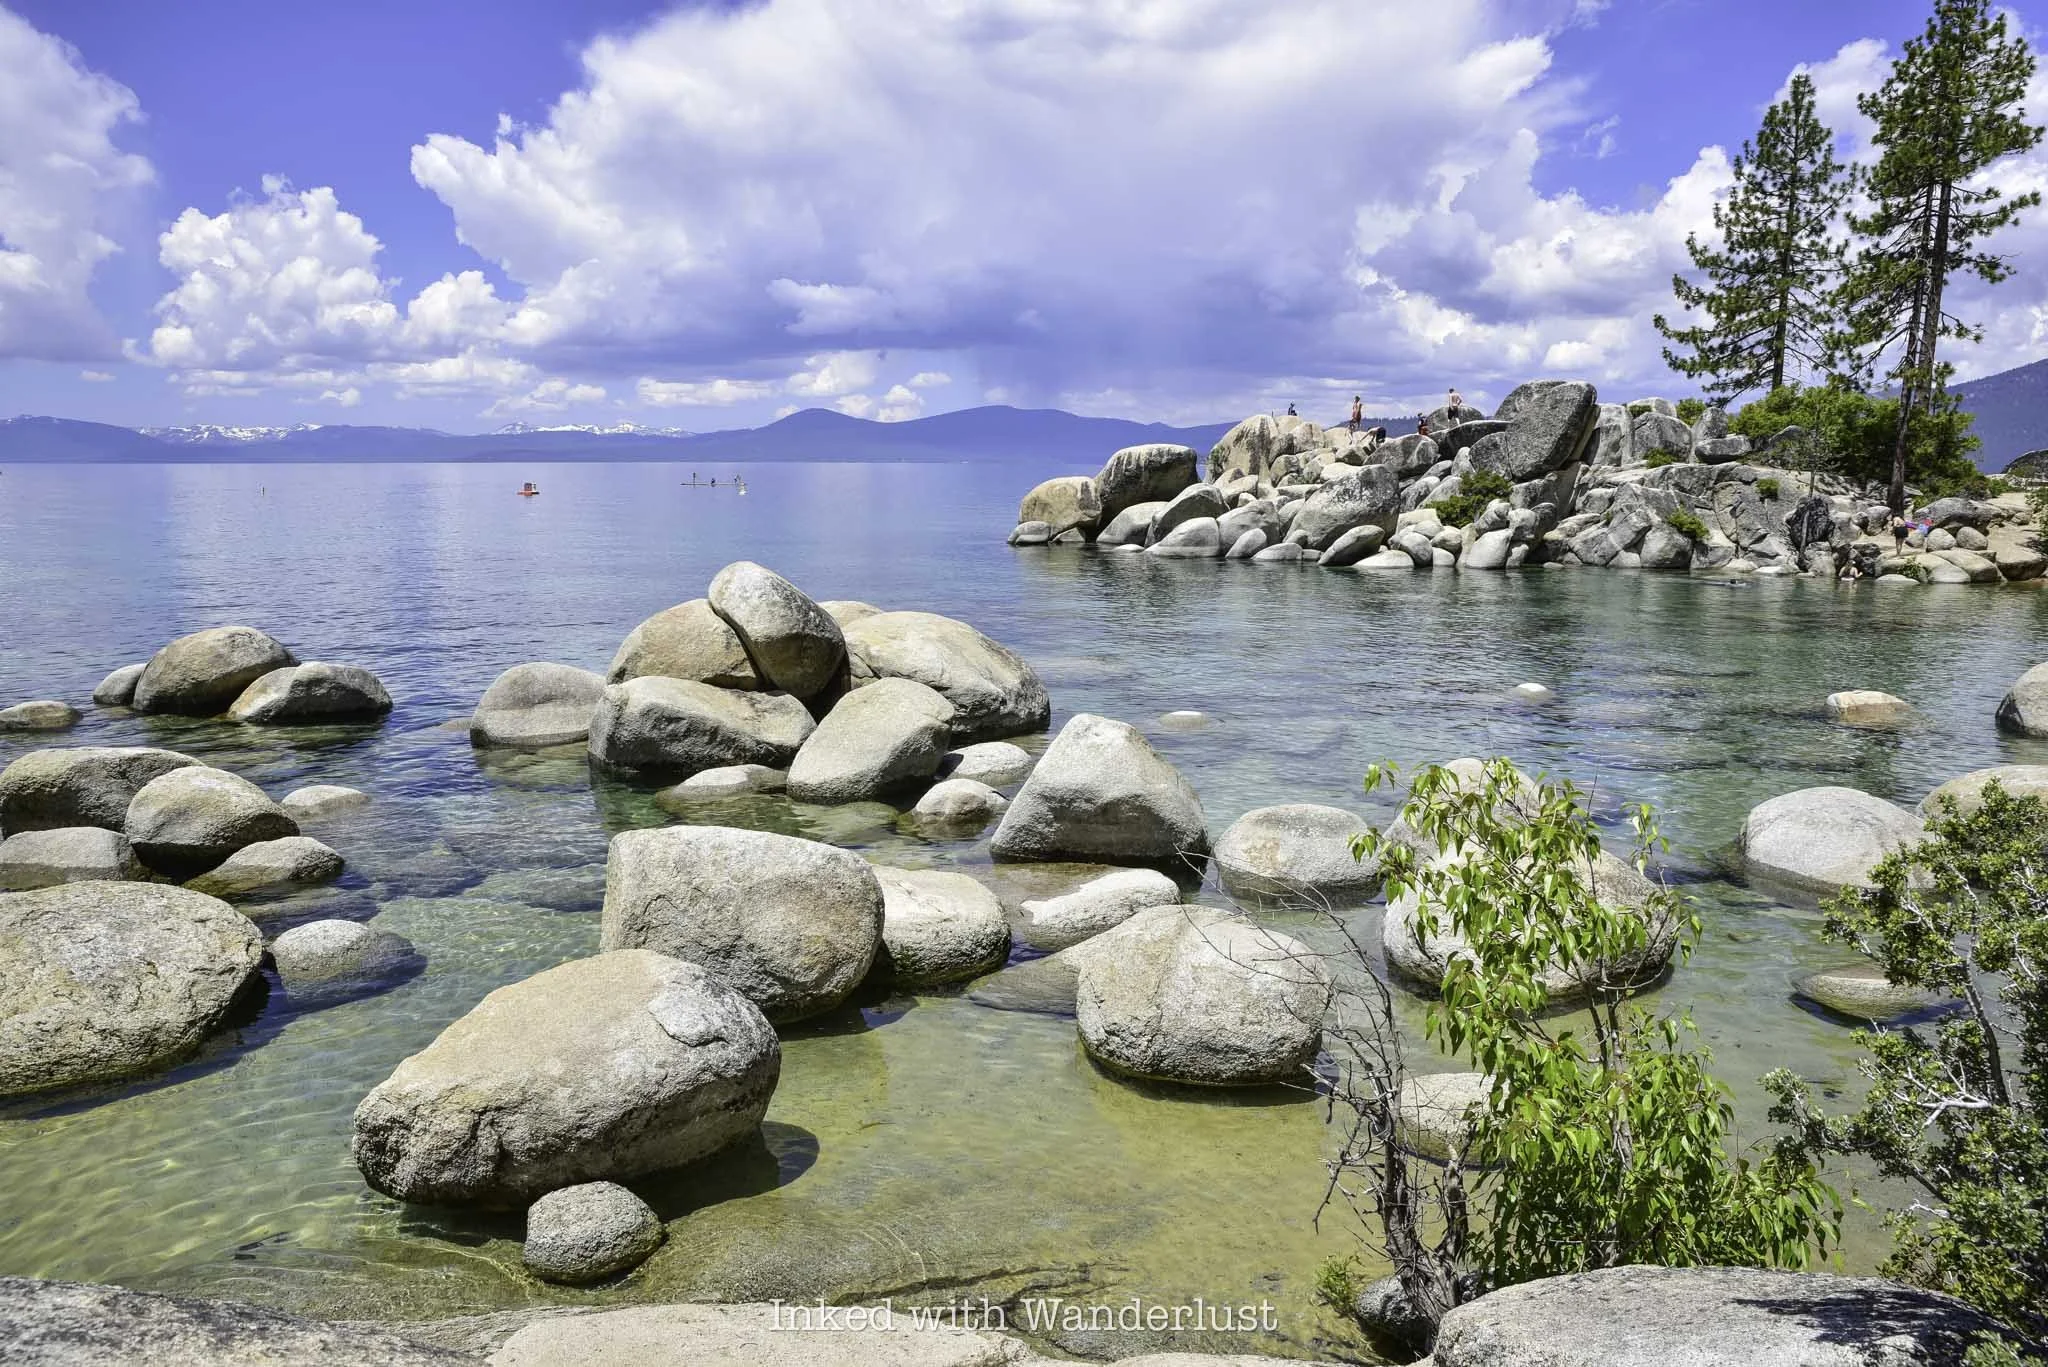
Just a five-mile drive from the center of Incline Village, Sand Harbor State Park is the crown jewel of the Nevada State Park system and is easily one of the top destinations in all of Lake Tahoe. So much so, that it’s often in contention with California’s Emerald Bay in terms of popularity.
You could carve out an entire day to spend at Sand Harbor since there’s so much to do there. Most people set up their beach tents or umbrellas and just relax, jumping in and out of the cobalt blue waters to cool off. There’s also an on-site restaurant, a nature trail, and boating opportunities.
Since Sand Harbor is mega-popular destination, the park will often close due to full capacity within a couple hours of opening, particularly during the summer months. Due to this, a new reservation policy was implemented in 2024 for weekends, with the full, daily requirement rolling out in 2025.
Given its popularity, reservations are going to be competitive. To avoid having to worry about it, simply take the East Shore Express shuttle, which picks up in Incline Village and drops off at Sand Harbor. If you go this route, you won’t have to worry about obtaining a reservation.
5) Walk or Bike the Tahoe East Shore Trail
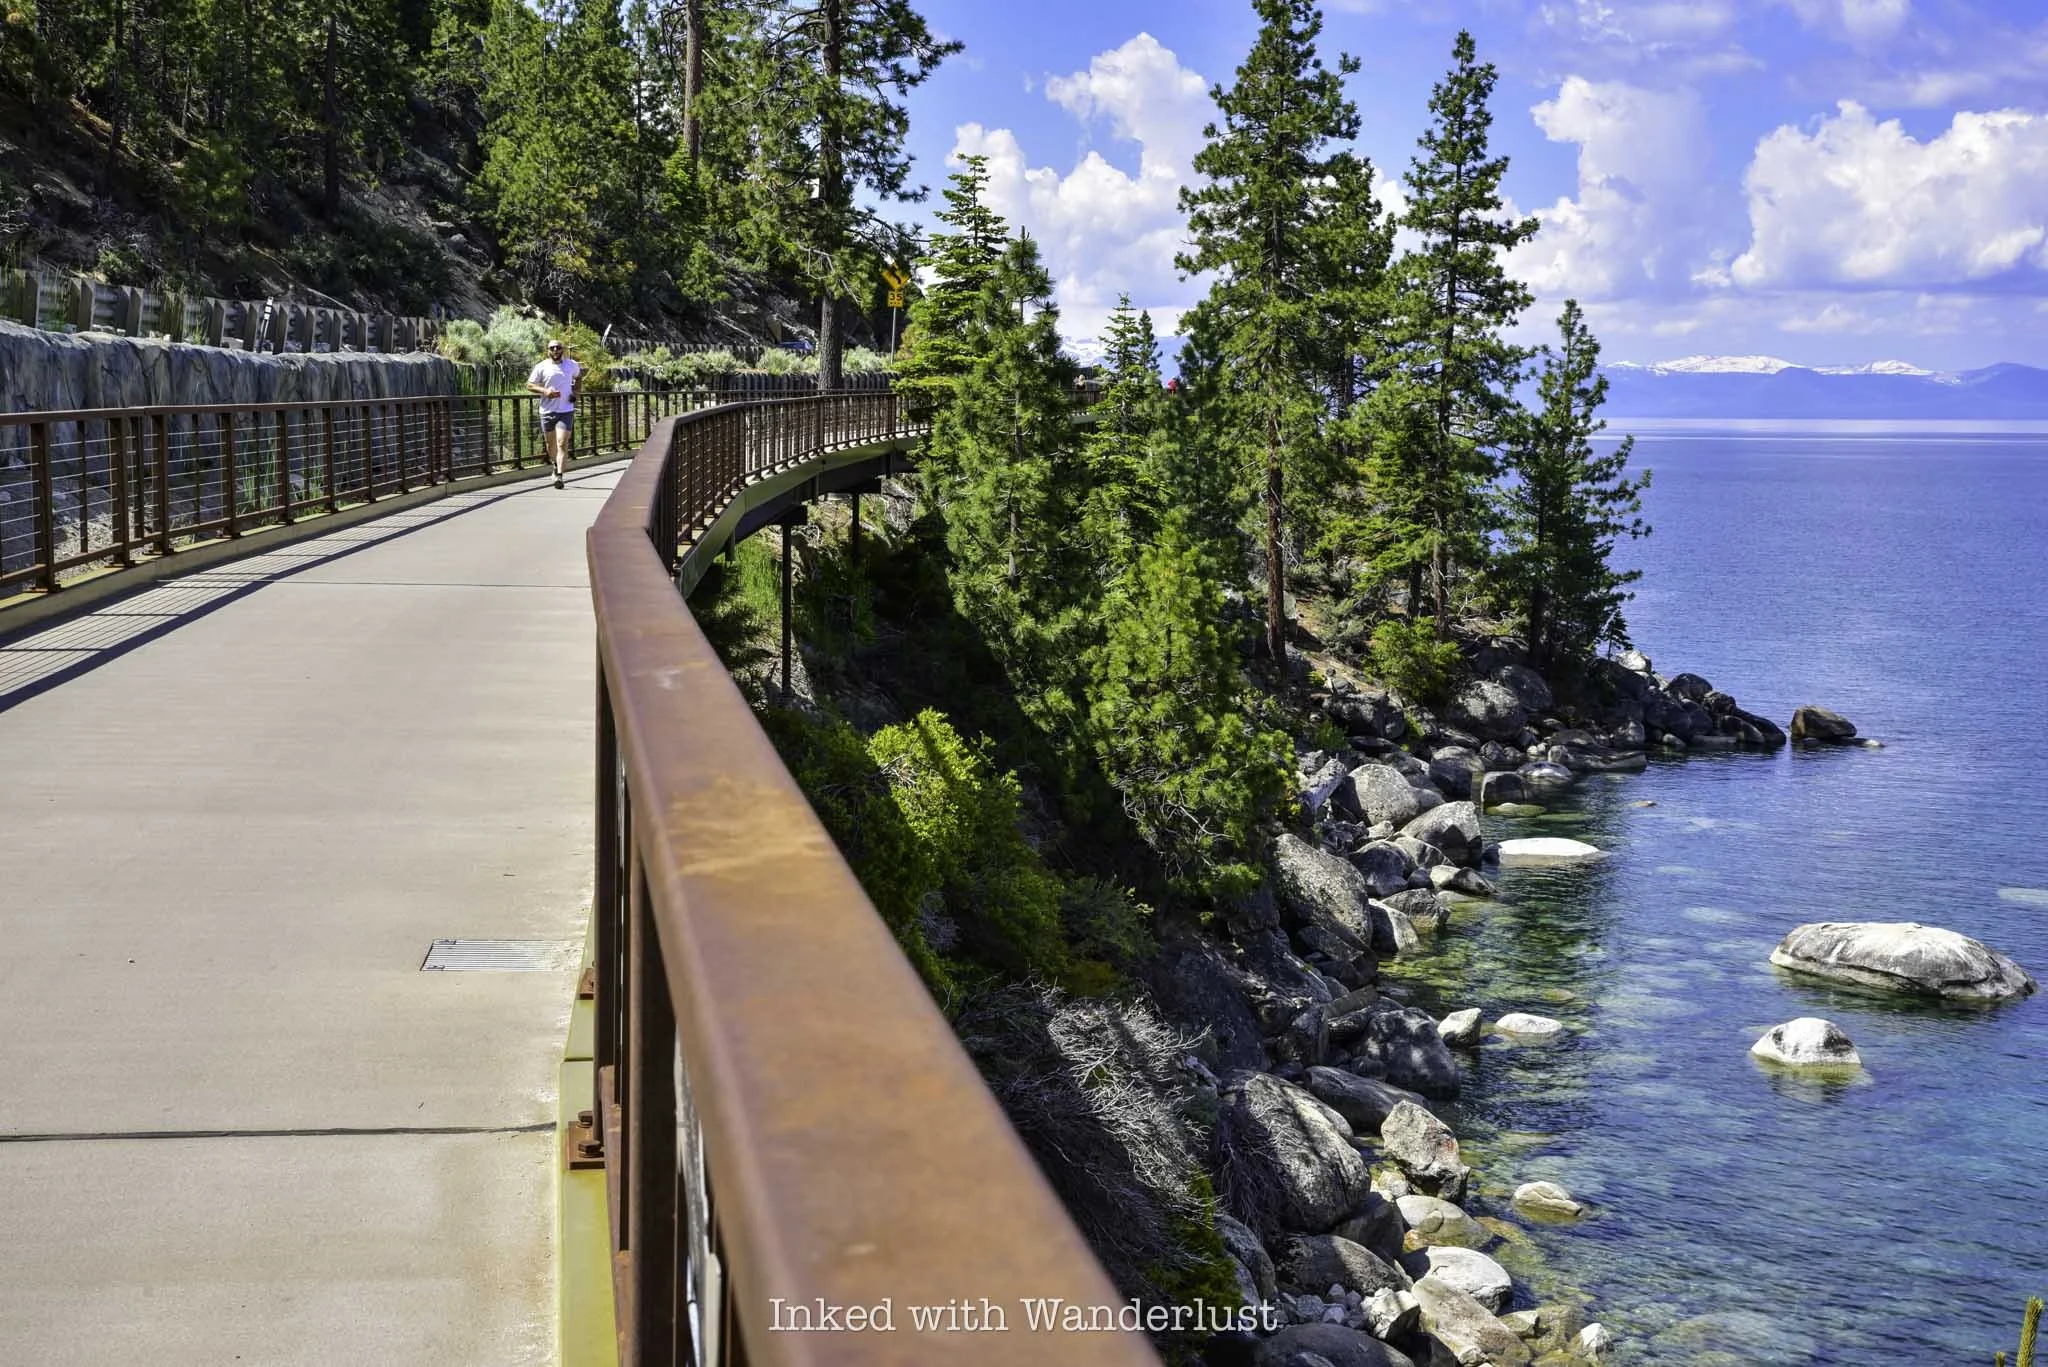
Just a few miles outside of Incline Village proper is the trailhead for the Tahoe East Shore Trail. It’s a three-mile long, paved trail that hovers above the gorgeous east shore stretch of Lake Tahoe, and terminates at Sand Harbor (though there is currently construction underway to expand the trail beyond Sand Harbor).
Visitors of the trail can walk or bike this path, and along the way to Sand Harbor are many offshoot trails leading to several coves and beaches that were once difficult to dangerous to access. Some of these include Hidden Beach, Granite Cove, Mountain Vista, and Sunset Cove.
In addition to the shuttle mentioned above, walking this path into Sand Harbor is another way to avoid the reservation policy. Though it is a three mile trek from the parking lot to Sand Harbor so to save time (and energy), you can purchase a bike rental at Flume Trail Bikes. They have regular pedal bikes in addition to e-bikes.
No visit to Incline Village would be complete without experiencing this gorgeous trail. Even if you don’t walk or bike the entire thing, it’s an experience all its own and it’s always one of my top recommendations for things to do in Incline Village, and Lake Tahoe in general.
READ ALSO: How to Hike the Tahoe East Shore Trail
PROVERBS 3:23


Enjoy a Post-Hike Meal at Tunnel Creek Cafe
When searching for the best places to eat in Lake Tahoe, many will point you to the south shore. To be fair, there are a lot of solid options on that side. However, there are many delicious...
Disclosure: This post contains affiliate links. If you make a purchase through these links, I may earn a small commission at no additional cost to you. I only recommend products or services that I believe will add value to my readers.
When searching for the best places to eat in Lake Tahoe, many will point to the south shore and for good reason, there are a lot of solid options over there. However, there are many delicious options on the north shore near Incline Village as well.
One such option is the Tunnel Creek Cafe. It’s the sole restaurant situated near near two mega-popular hiking trails on the Nevada side of the lake. Those two trails are Monkey Rock and the Tahoe East Shore Trail.
If you’re planning to hike one of these trails during your visit to Lake Tahoe, and depending on when you plan to start and finish, Tunnel Creek Cafe is an excellent option for a pre or post-hike meal, as the food will fill you with the carbs needed to crush your hike and you can enjoy said meal in a relaxing, forest atmosphere.
Tunnel Creek Cafe Location and Parking

As stated above, Tunnel Creek Cafe is located in Incline Village on the Nevada side of Lake Tahoe. If you’re coming from the direction of Mount Rose Highway, you’ll turn left onto Highway 28 to reach it. From Carson City or South Lake Tahoe, travel south on Highway 28.
When you get to Tunnel Creek Cafe, you’ll notice two sets of parking lots located right off of the highway. These lots are for the hiking trails and there’s a fee to use them. Tunnel Creek Cafe has its own, rather large (and free) lot you can use since you’ll be dining there.
People who use their lot to access the hiking trails are subject to being towed. I’m not sure if they’ll allow you to leave your car there to go hiking after your meal. You can ask, but if you are planning to hike before or after your meal, it’s best to play it safe and use the Tunnel Creek lots.
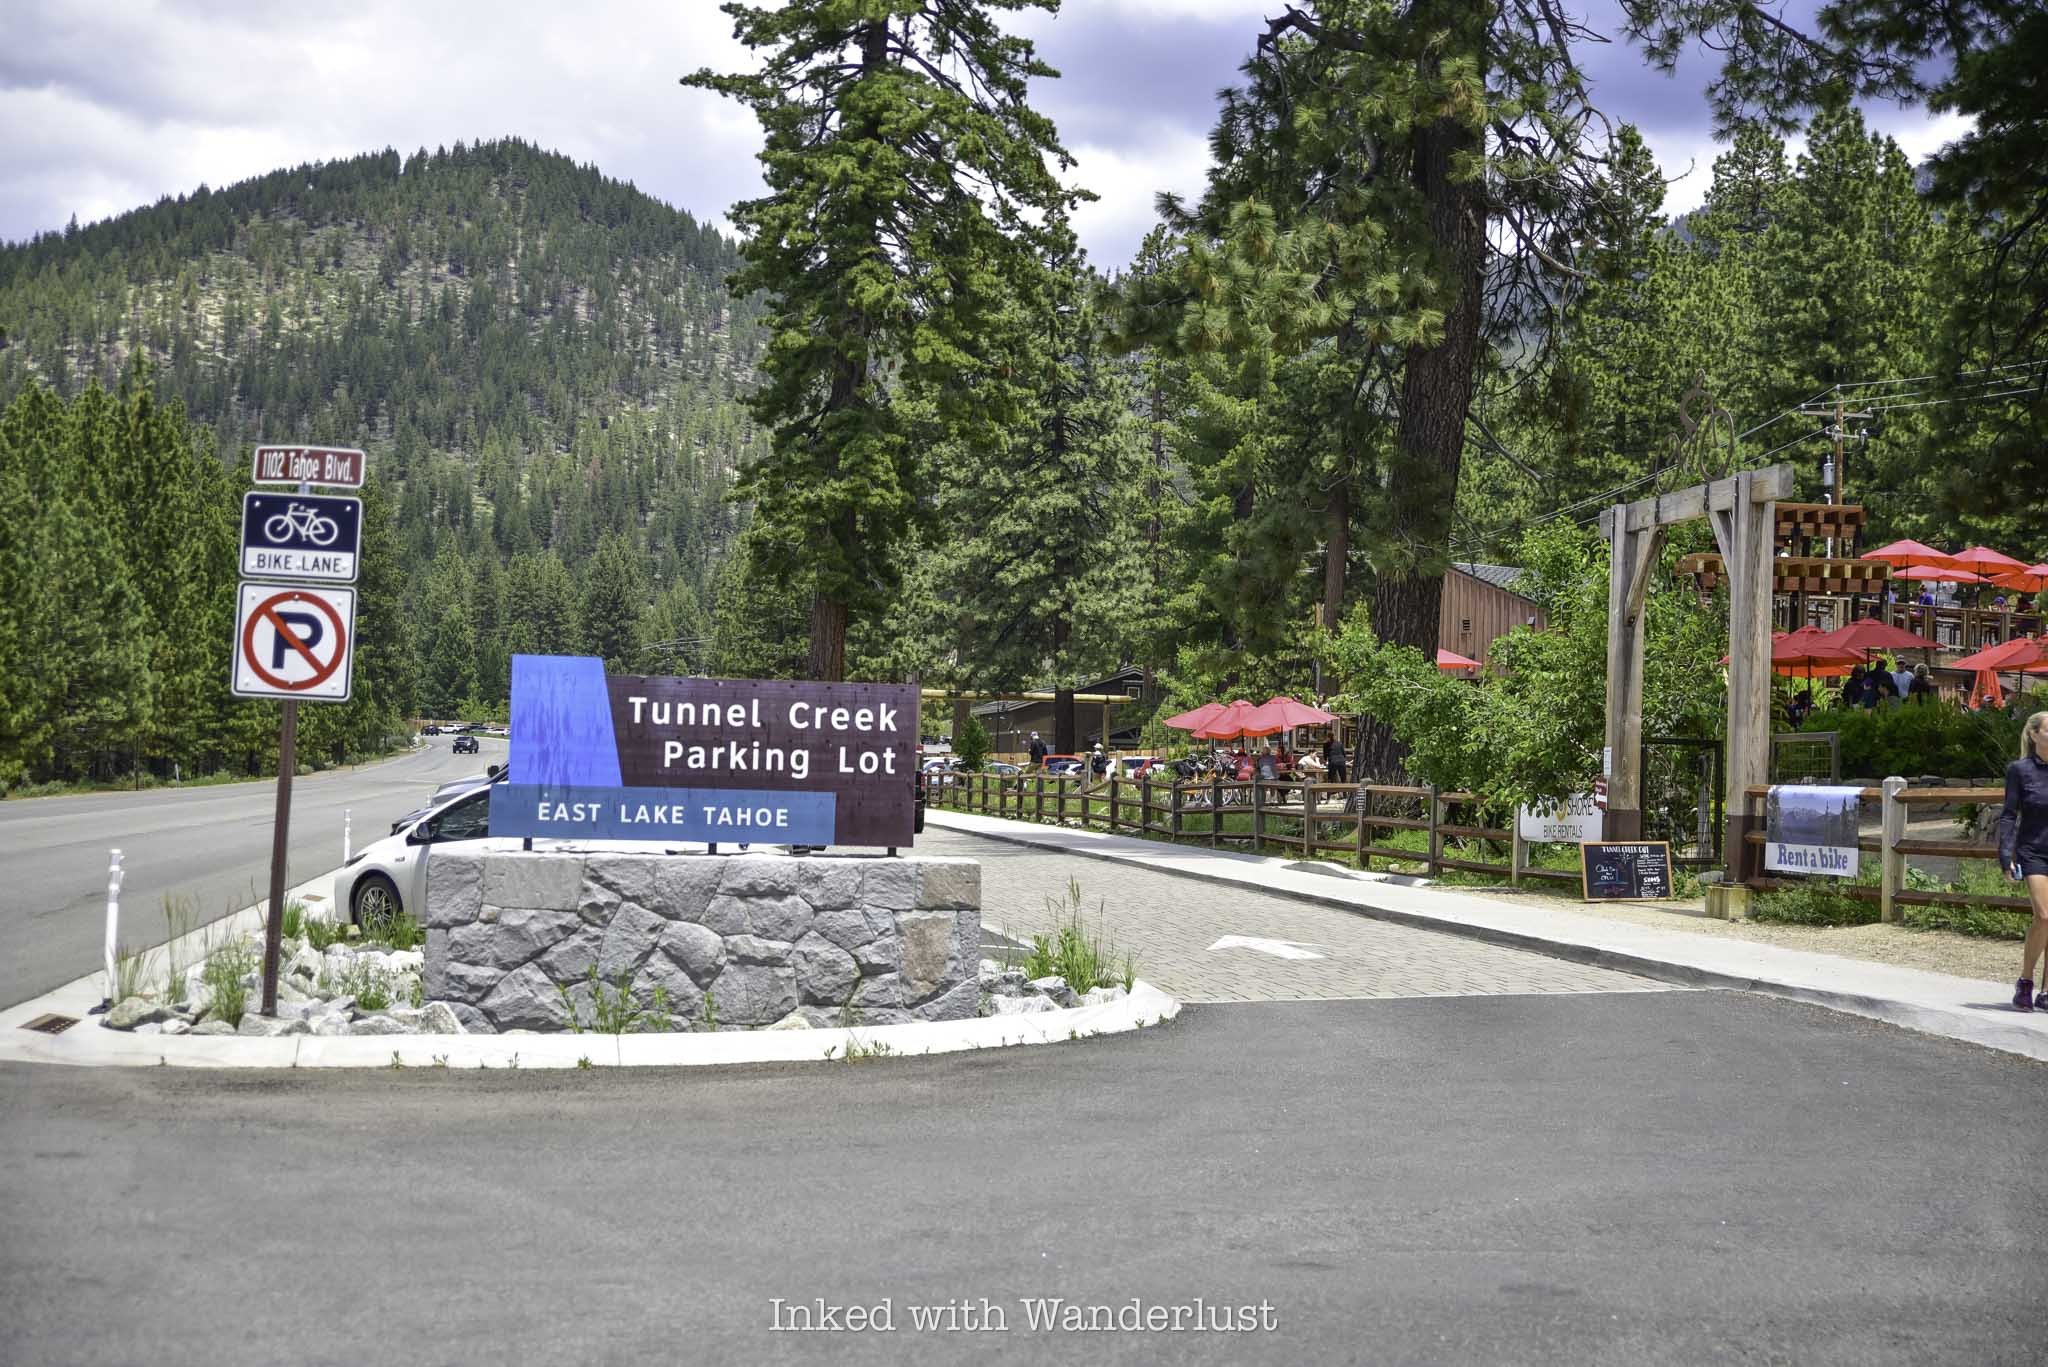
Parking here is charged by the hour and the amount changes according to day of week, time of day, etc. You can view current rates here. As stated above, you can access the Monkey Rock trail, which begins behind Tunnel Creek Cafe and the famed Tahoe East Shore Trail.
From the paid parking lots, there’s a side entrance near the bicycle rental place to the restaurant that provides quick access to the many outside seating options.
The Restaurant

The restaurant sits on a quiet edge of Incline Village and Lake Tahoe, surrounded by towering pines. It gives the feeling of dining in an old lakeside cabin and blends in with its surroundings quite nicely.

They have both indoor and outdoor seating. The interior portion is minimal and honestly, feels a bit cramped. However, between the multi-leveled decks and ground-level tables, outside seating is not only plentiful, but preferred by most (based on what I’ve observed).
This is one of those restaurants where you order and pay first, and then find a seat. They’ll assign you a number to place on your table and your food will be brought out to you. You’ll queue up through the main entrance and order from the sole register.
Tunnel Creek Cafe Menu

I’ve been to Tunnel Creek Cafe a few times and each time I’ve gone, I’ve always found the food to be pretty good. I wouldn’t rate it as amazing or anything like that, but it does the job. This is especially true if you’ve been hiking and need to replenish.
For the most part, you’ll find a number of burger, sandwich and salad options for lunch. For breakfast, I can personally recommend either the breakfast burrito or the Creme Brulee French Toast. Both of these are solid choices.
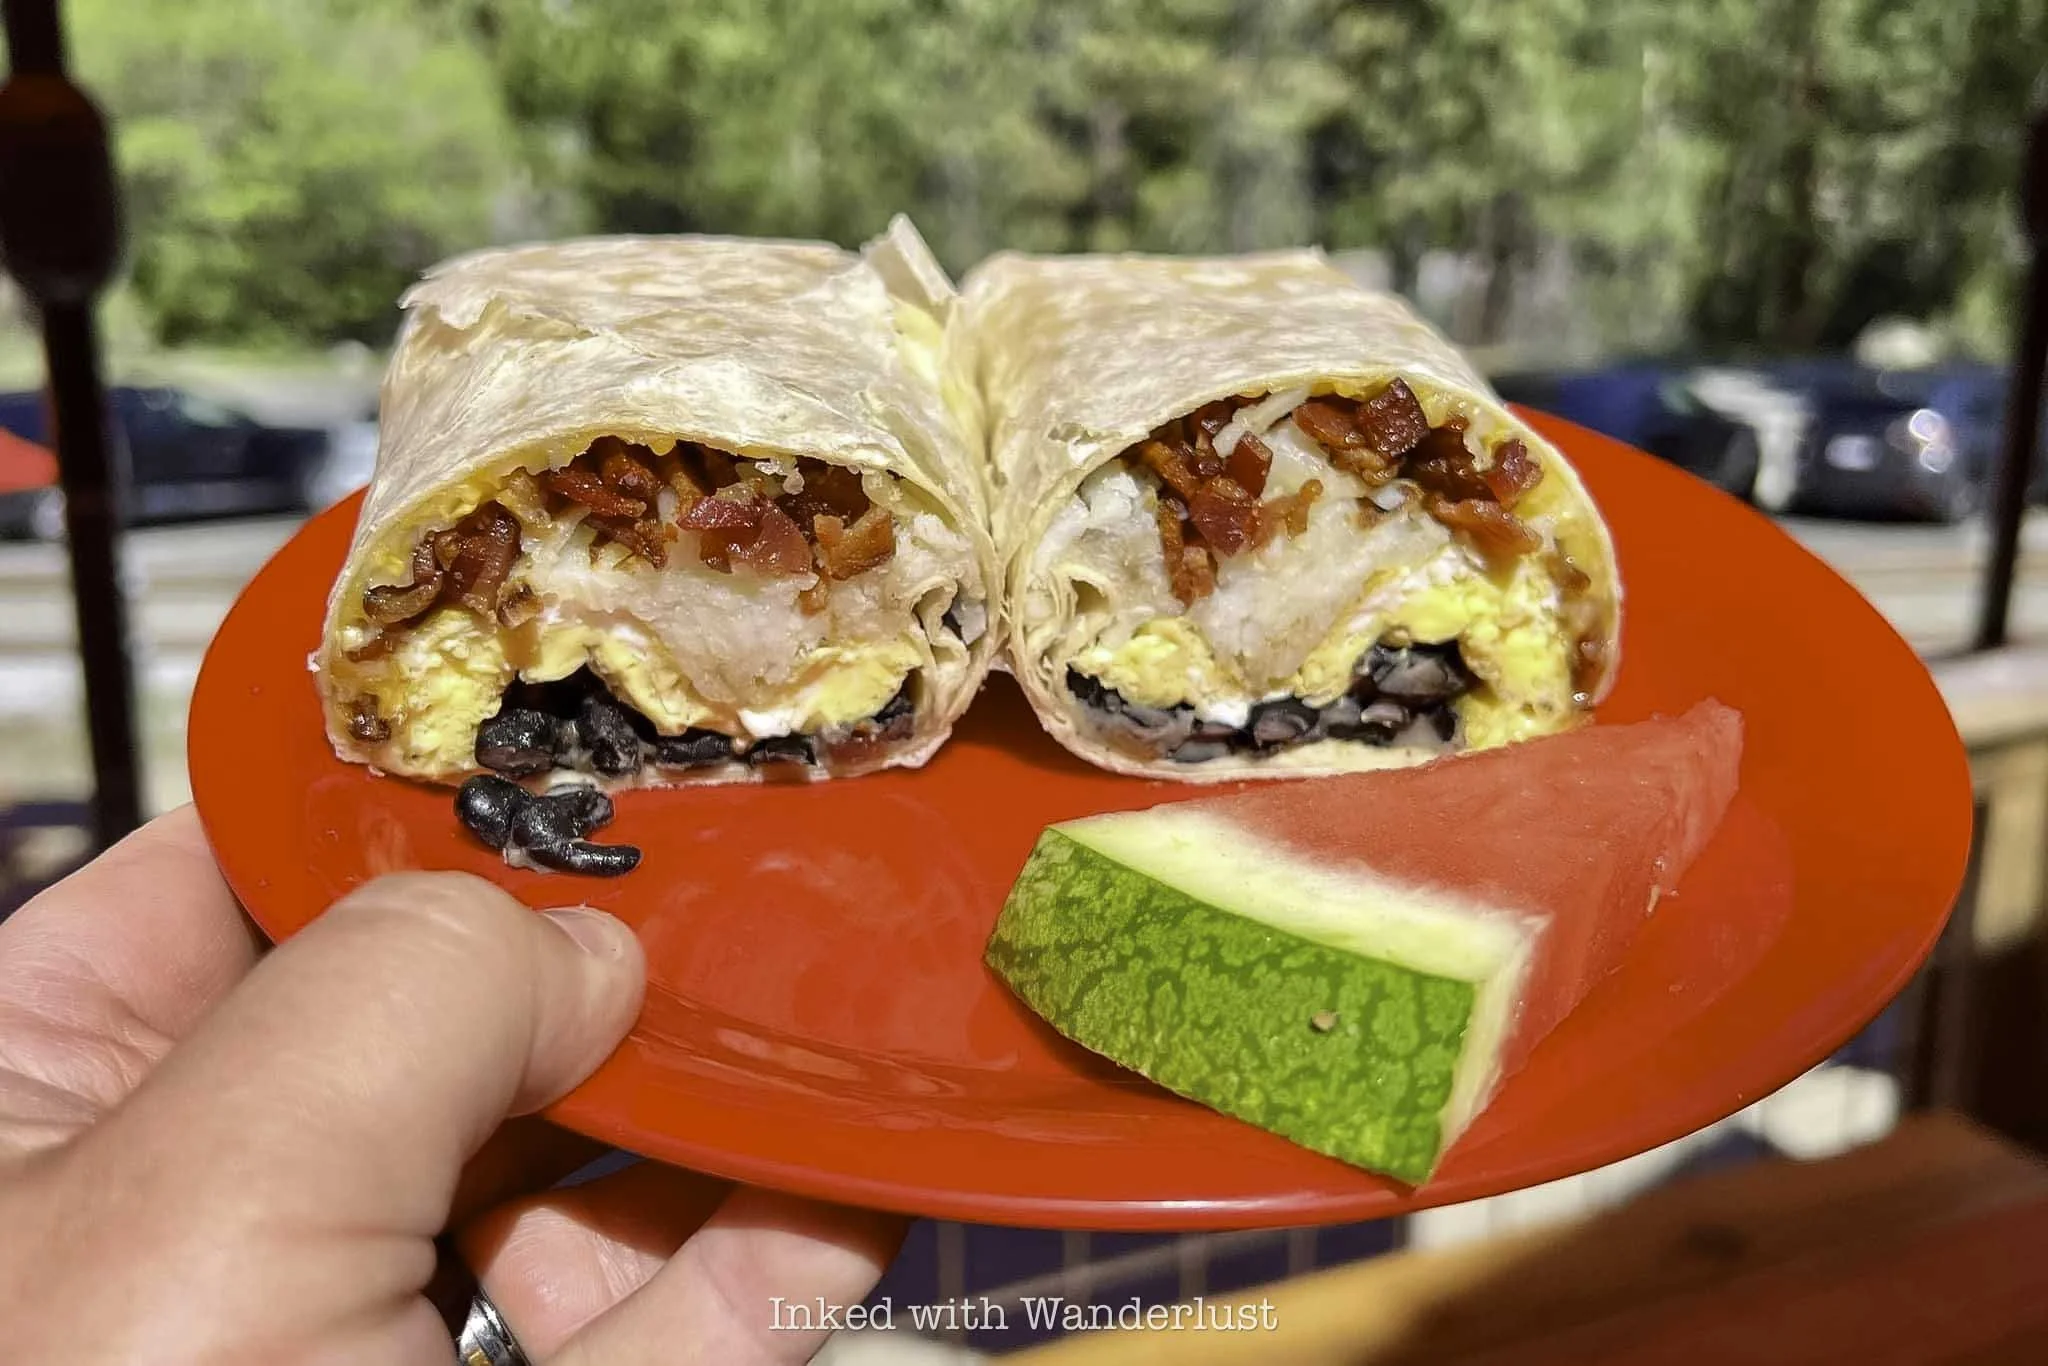
The breakfast burrito is decently sized and is filled with your choice of protein (I went with bacon), two eggs, hashbrowns, black beans, and cheese with a side of salsa and piece of watermelon. It’s filling for sure, but I wish it had more flavor.
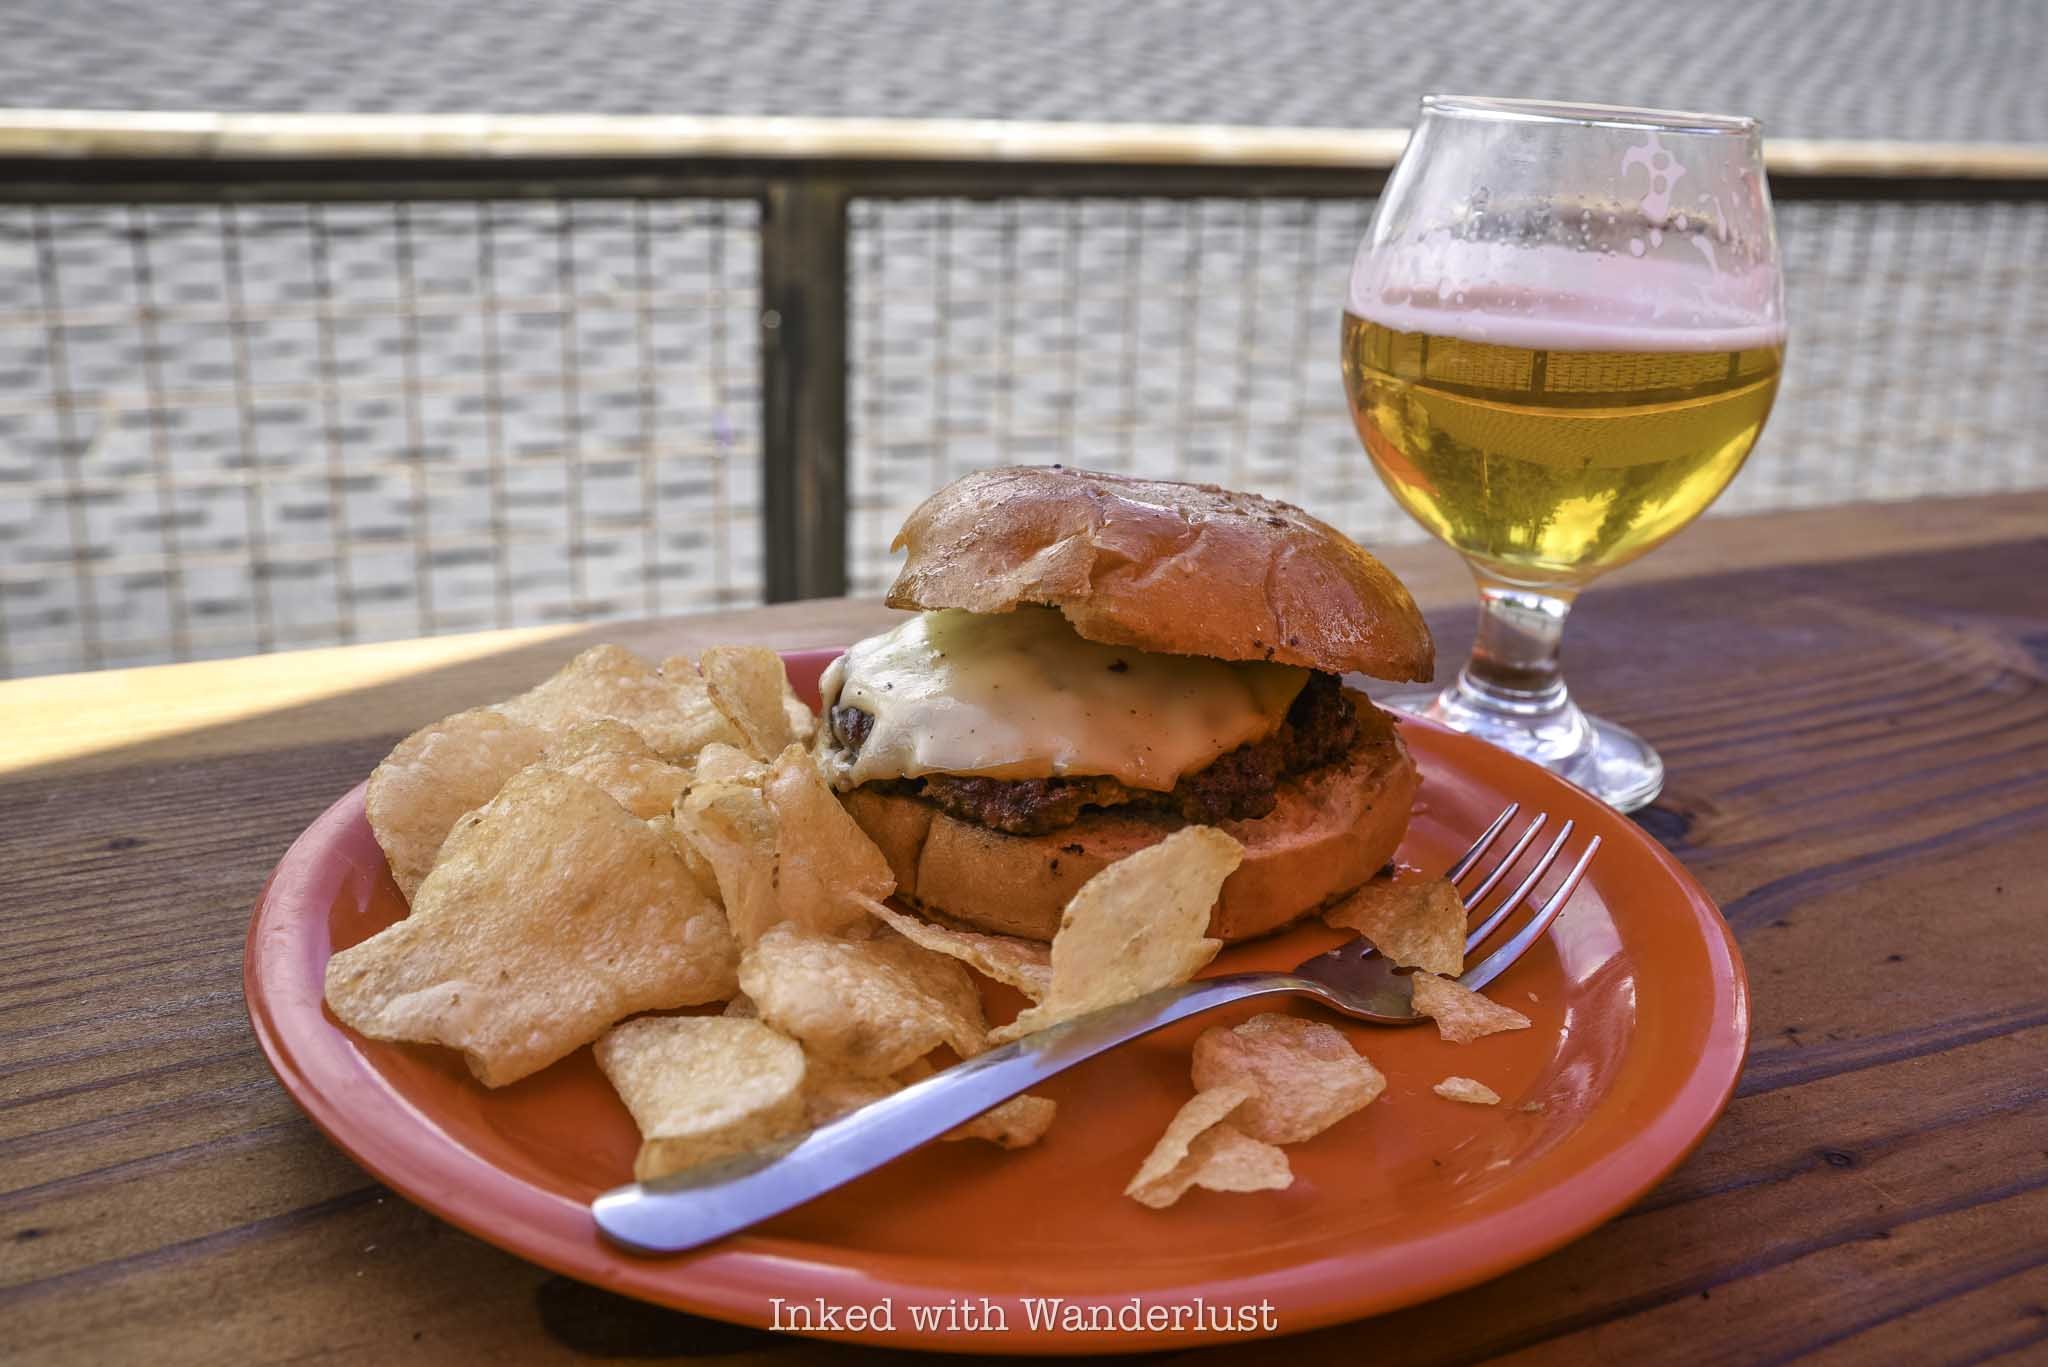
During my lunch visit, I ordered a cold beer (they have a variety on tap) and their Hoss Burger, which was topped with gouda cheese. Interestingly, fries were not an option as a side. However, you do get a serving of their house-made potato chips, which are delicious.
The burger itself was decent, as the gouda cheese gave it a distinct flavor from the usual American or cheddar cheeses. Unfortunately, the patty was a bit overcooked, though this seems to be the exception and not the rule as past reviews give their burgers high praise. You can view the full menu here.
In conclusion, Tunnel Creek Cafe is a great place to eat on this side of the lake. It’s hard to beat its convenient location next to numerous hiking trailheads and its serene environment. Be sure to give it a shot.
Planning a visit to Lake Tahoe? If so, read my comprehensive guide on Emerald Bay to help ensure a smooth visit. For fantastic pizza on the California side of the lake, read about my experience at Base Camp Pizza. If you’re visiting in spring or early summer, check out these 5 beautiful waterfalls. Lastly, if you’re looking for a beach day, consider Round Hill Pines Beach Resort.
PROVERBS 3:23

Round Hill Pines: An Excellent South Lake Tahoe Beach
When researching the best beaches in Lake Tahoe, popular options such as Sand Harbor, Baldwin Beach, and Emerald Bay often come up. While those are all solid options worth…
Disclosure: This post contains affiliate links. If you make a purchase through these links, I may earn a small commission at no additional cost to you. I only recommend products or services that I believe will add value to my readers.

When researching the best beaches in Lake Tahoe, popular options such as Sand Harbor, Baldwin Beach, and Emerald Bay often come up. While those are all solid options worth exploring, there’s another beautiful beach you may want to consider - Round Hill Pines.
Located on the famed south shore of Lake Tahoe (on the Nevada side), Round Hill Pines offers its visitors a pristine beach, the same incredibly clear water Tahoe is known for, a beach-side bar, an on-site restaurant, water vessel rentals, and more.
My wife and I recently spent the day at Round Hill Pines for her birthday. I wasn’t planning on posting about this place, so I left my camera at home. I ended up liking it so much I ended up scrambling to get photos with my cell phone so I could share it with you.
In this post, I’ll discuss topics such as how to get to Round Hill Pines, how it costs to visit, the food/drink situation, and more. Let’s get into it.
Getting to Round Hill Pines and Parking Prices

Getting to Round Hill Pines is fairly straight forward, as the entrance to the parking lot is right off of Highway 50 and is well signed. If you’re coming from the Sand Harbor or Carson City area, the entrance will on your right, just a few miles after passing Zephyr Cove.
From the direction of Sacramento or Emerald Bay, you’ll arrive to the exit on your left about 8-10 minutes after crossing the state line into Nevada.

Round Hill Pines’ parking lot is fairly large and multi-tiered, with spaces for many vehicles. The day-use/parking fee is $12, cash only (as of our visit in August 2024). That fee covers your parking and beach access only. Note that if you arrive after 5pm, the parking fee is waived.
As is the case with most things in Lake Tahoe, the earlier you arrive, the better. We arrived right at 8am (when they open) and were one of just a few vehicles. When we left around 2pm, the parking lot was nearly full. This was in August, which is a busy time for Tahoe. If you’re here during the outside months, you’ll have more leeway.
Round Hill Pines Restaurants and Bar

Round Hill Pines has an on-site restaurant called Beach Bums Bar and Grill and Rum Bar on the Beach, a beachside bar. Beach Bums is situated to the left of the main path leading to the beach from the parking lot and Rum Bar is to the left of the stairwell, in front of the restaurant.
The restaurant is walk-up and order style, where they’ll then bring your food out to you. There’s ample seating in the restaurant’s outdoor deck, but if you prefer, they’ll also bring your food to you at your spot on the beach. Simply tell them and they’ll give you a numbered flag to place at your spot.
Rum Bar on the Beach Drinks

Both of the establishments open at 11am. While Beach Bums closes at sunset, Rum Bar doesn’t have a specified closing time. The website states that hanging out at Rum Bar during sunset is can’t-miss (I’m paraphrasing), so it likely stays open well past that.
While Rum Bar serves many specialty cocktails and classic drinks, their two most popular choices are the Pain Killer and Rum Rummer drinks. The Pain Killer is a slushy concoction of pineapple and coconut, topped with a variety of rums and fresh nutmeg.

The Rum Runner is a unique blend of tropical fruit juices, rum, and Round Hill Pines’ signature rum floater. They’re both fantastic and stand out from one another. The Rum Runner packs more of a punch with rum flavor, while the Pain Killer’s flavor favors more of the sweetness from the pineapple and coconut.
Personally, my favorite was the Pain Killer (I ended up downing a few of these). If you’re someone who likes your drink on the stronger side, you’ll likely favor the Rum Rummer. Honestly, you couldn’t go wrong with either option. They’re both great.
Beach Bums Bar and Grill Menu and Food

Unfortunately, the great drinks at Rum Bar is where my excitement ends as it pertains to the food and drink options. The resort’s on-site restaurant, Beach Bums, offers many selections for all sorts of palettes but the items we tried left much to be desired.
For starters, we ordered the chicken wings with guava habanero sauce ($11.75). I have to be honest, these were the worst wings we’ve ever had. The chicken itself was so bland the sauce couldn’t save it. There was no seasoning at all, and it tasted as if the chicken was boiled, instead of baked or fried.

For our entrees, I ordered the Smoked BBQ Bacon Burger ($24.75) and my wife ordered the Mahi-mahi Tacos ($21.75). The burger came doused in bbq sauce and topped with applewood-smoked bacon, white cheddar, muenster, and an onion ring.
It was decent, but nowhere near worth $25 and had way too much cheese on it. Additionally, the bun was practically worthless as the burger itself was more than twice its size. Additionally, I paid an extra $2.00 for sweet potato fries that were bland and soggy.


My wife said her Mahi-mahi tacos were just ok, as the fish had decent flavor, but there were two different sauces on the tacos and way too much of it. So much so, that the sauces practically drowned out the flavor of the seasoned fish.
Of the three offerings, the tacos were the winner, but only by a slight margin. As stated above, my burger was decent, but definitely not worth $25. The soggy fries only made it worse. They deliver your food to you in these plastic containers which to be fair,, does trap the heat, but often results in soggy food.
Your milage may vary, but my recommendation is to pack a picnic and enjoy that with a Pain Killer (or two) on the beach. My opinion of the taste of the food is my own and a matter of perspective, but the prices are far and away what I would consider “par for the course”…even by Tahoe standards.
Round Hill Pines Beach and Rentals

There are many activities to partake in at Round Hill Pines. The favorite among many being just hanging on the beach itself. In comparison to other South Lake Tahoe beaches, it’s on the smaller side, but spacious nonetheless. Sand Harbor has it beat as far as visual standards go, but that’s about it.
As stated earlier in this post, we arrived early (8am) to secure our choice of beach space. There was only one other person here when we arrive but as the morning progressed, it became more and more populated. In the photos below, the first one was shortly after we set up (about 8:30) and the second was around 10am.


While this fairly minor by Lake Tahoe standards, it just goes to show how quickly the crowds at these beaches get dense. I forgot to take another photo of the same angle, but the below photo was from the dock and was taken shortly after 12pm. Again, I stress to you the importance of arriving early. Especially in July or August.

Aside from hanging out on the beach, there’s a hut near the marina where you can rent a variety of water vessels. Round Hill Pines recommends securing your rentals online ahead of time. You can do at this link. Rentals include:
Boats
Sea Doos
Kayaks and SUP Boards
Pedal Boats
and more
Additionally, you can book a cruise around Lake Tahoe (including Emerald Bay) on a 63-foot yacht, called the Tahoe Serenity. Cruises are 2.5-hours long and include snacks and beverages. If you place an order ahead of time from Beach Bums, you can enjoy an onboard lunch. You can book cruises here.

Lastly, further down the beach is a volleyball net available for all guests to use. Pretty sure you’ll need to bring your own volleyball, but it doesn’t hurt to ask one of the employees if they have any on-hand. By the way, the photo below showcases our beach set-up. I’ve provided Amazon links to nearly everything in the photo if you’re interested.

OOFOS Sandals (the most comfortable sandals I’ve ever worn)
Citronella Spray (a DEET-free way to keep bugs away - bees are everywhere in Tahoe)
Round Hill Pines Common Questions

Does Round Hill Pines Beach allow dogs?
No, dogs (or any pet) are not allowed.
Is there a lifeguard on the beach?
No.
Can I BBQ on the beach?
For the protection of the surrounding environment, gas and charcoal grills are not allowed on the beach.
PROVERBS 3:23

Hike To Monkey Rock For Incredible Views Of Lake Tahoe
In an area with many landmarks, Monkey Rock stands as one of Lake Tahoe’s most iconic and sought after. Its popularity has exploded over…
Disclosure: This post contains affiliate links. If you make a purchase through these links, I may earn a small commission at no additional cost to you. I only recommend products or services that I believe will add value to my readers.
In an area with many landmarks, Monkey Rock stands as one of Lake Tahoe’s most iconic and sought after. Its popularity has exploded over the last few years due to its status on social media sites such as TikTok and Instagram.
This short and sweet Lake Tahoe hiking trail takes hikers above Incline Village, the Nevada side of Lake Tahoe, to a rock formation that, when observed at the right angle, looks an awful lot like a monkey sitting on the hillside taking in the views.
Many, however, would argue that Monkey Rock is only a bonus to this hike, as the real payoff is in the views of the lake you’ll get once you reach it. As much as I love odd and interesting rock formations, I’d be hard-pressed to disagree with that statement.
If you’re looking for a family-friendly hiking trail in Lake Tahoe, or you’re traveling to the lake and want to see as many of the highlights as possible, Monkey Rock is one trail you definitely do not want to pass up. There’s a few things you’ll need to know, though. Let’s get into it.

Trail Stats
Location: Incline Village, NV (Lake Tahoe)
Fee: Parking fees apply
Permit: None
Open: All year, but difficult to access in winter
For: Hikers
Cell Service: Good throughout most of the trail
Restroom: In the parking lot
Parking: Two large lots near Tunnel Creek Cafe
EV Stations: None
Difficulty: Moderate
Popularity: High
Mileage: 2.6 miles, out and back
Time: Two hours or less
Elevation Gain: 479 feet
Condition: Well maintained and easy to follow
Features: Rock formation in the shape of a monkey/epic views of the lake
Pets: Allowed on leash
Drones: No signage stating you can’t
Hazards: None, other than usual wilderness hazards
My Visit(s): May 2024
Monkey Rock Lake Tahoe Parking

The trailhead for Monkey Rock can be found in Incline Village, which is in the Nevada side of Lake Tahoe. Parking for Monkey Rock is located at the Tunnel Creek and Deer Creek parking lots, which are both adjacent to the Tunnel Creek Cafe. They’re located just a few miles from the Sand Harbor turn off.
These parking lots are the only available parking for Monkey Rock and the adjoining Tahoe East Shore Trail. There is no legal parking at the trailhead proper. There’s a private residence up there and they make their disdain for those trying to illegally park perfectly clear.

You can refer to the above photo for current parking fees. They’re based on several elements, such as time of year, time of day, day of week, etc. For reference, I arrived on a Tuesday at 7:30am and paid for three hours. My total was $6.00. You’ll need to know your license plate number and it only accepts plastic for payment.
Due to this area’s popularity, you’ll want to arrive as early as possible. When I got there at 7:30am it was just me and a couple other vehicles. By the time I finished with the hike (about (9:30am) both lots were nearly full.
To make your way to the actual trailhead to Monkey Rock, make sure you’re walking in the direction away from Tunnel Creek Cafe if you parked in the Tunnel Creek lot. There’s a road that runs adjacent and above the cafe (Tunnel Creek road). Take this road up to the trailhead.
If you get turned around, there are many red signs in the area to point you in the correct direction. Just remember, if the road is going above Tunnel Creek Cafe, then you’re going in the correct direction. You’ll also pass a blue sign warning you of wildlife being present in the area.
When you get to the top of the road, you’ll see a private residence on your right and trail signage on your left. Up ahead will be the official trailhead for Monkey Rock. During my visit, there was construction happening shortly into the trail on the right.
The Monkey Rock (Tunnel Creek) Trail

Once you’re past Tunnel Creek road, the trail becomes sandy and remains that way throughout the entirety of the hike. If you’ve done any hiking in Tahoe, you would know how infamously rocky many of its hiking trails are. I’m happy to report that the Monkey Rock trail is probably the least rocky trail in Tahoe I have been on.
Initially, the trail is mostly flat with only a slight, barely noticeable incline. If you have started early, you’ll enjoy a lot of shade on this stretch of the trail from all the tall trees. Down below you, you’ll notice you are hiking parallel with and above the Tahoe East Shore Trail, which I define as more of an urban hike in a forrest setting.


About a third of a mile into the hike you will come to a green gate with a spur trail heading off to the right. Keep straight past the gate. The spur trail eventually connects you to the Tahoe East Shore Trail, which would be an excellent extension to your hike on the way out. This is also where you’ll start getting those epic Lake Tahoe views.
You’ll see other spur trails on both sides of the trail. Just continue straight on the wide sandy path. Shortly after the green gate you’ll come to two wooden pillars on each side of the trail with, you guessed it, another spur heading off to Hidden Beach.
After these wooden pillars is when the trail begins to climb and it will remain that way until just before you reach Monkey Rock. The incline is a slog, but it isn’t difficult. If needed, there are plenty of rocks to sit on and compose yourself. From here, you’re only a quarter mile or so away.

One thing to note is the side trail that spurs off to the left from the main trail (pictured above). You won’t be able to miss it. Shortly after those wooden pillars and across from a community water bowl for dogs is where it’s located.
This trail will take you to Monkey Rock, but it is much steeper than what lies ahead of you. Additionally, based on other reports I’ve read, it isn’t much shorter than the actual trail and thus, not worth the extra effort.
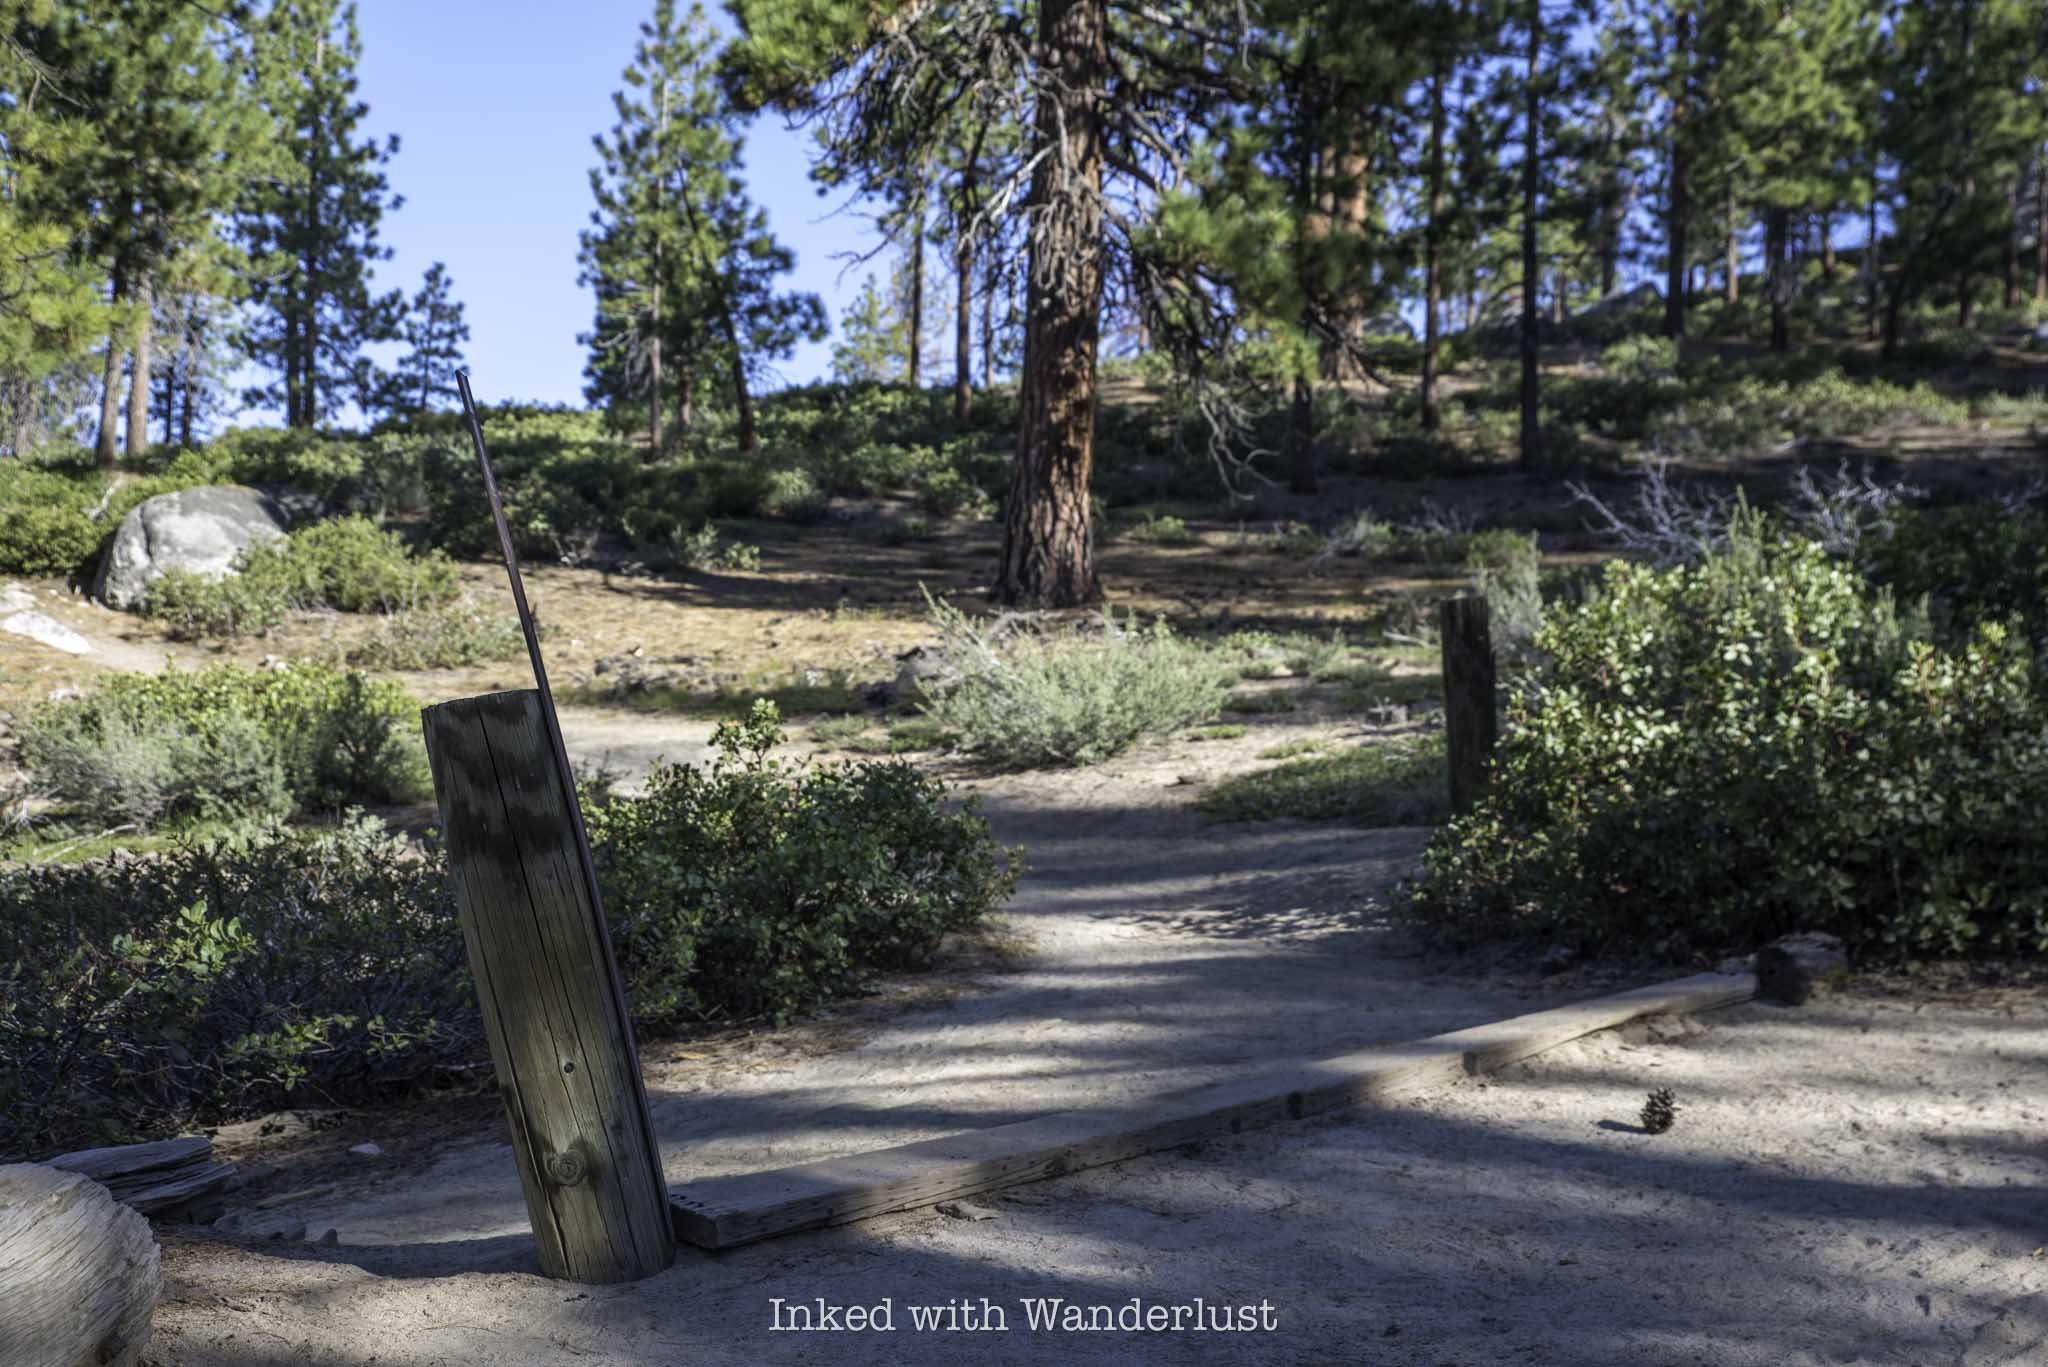
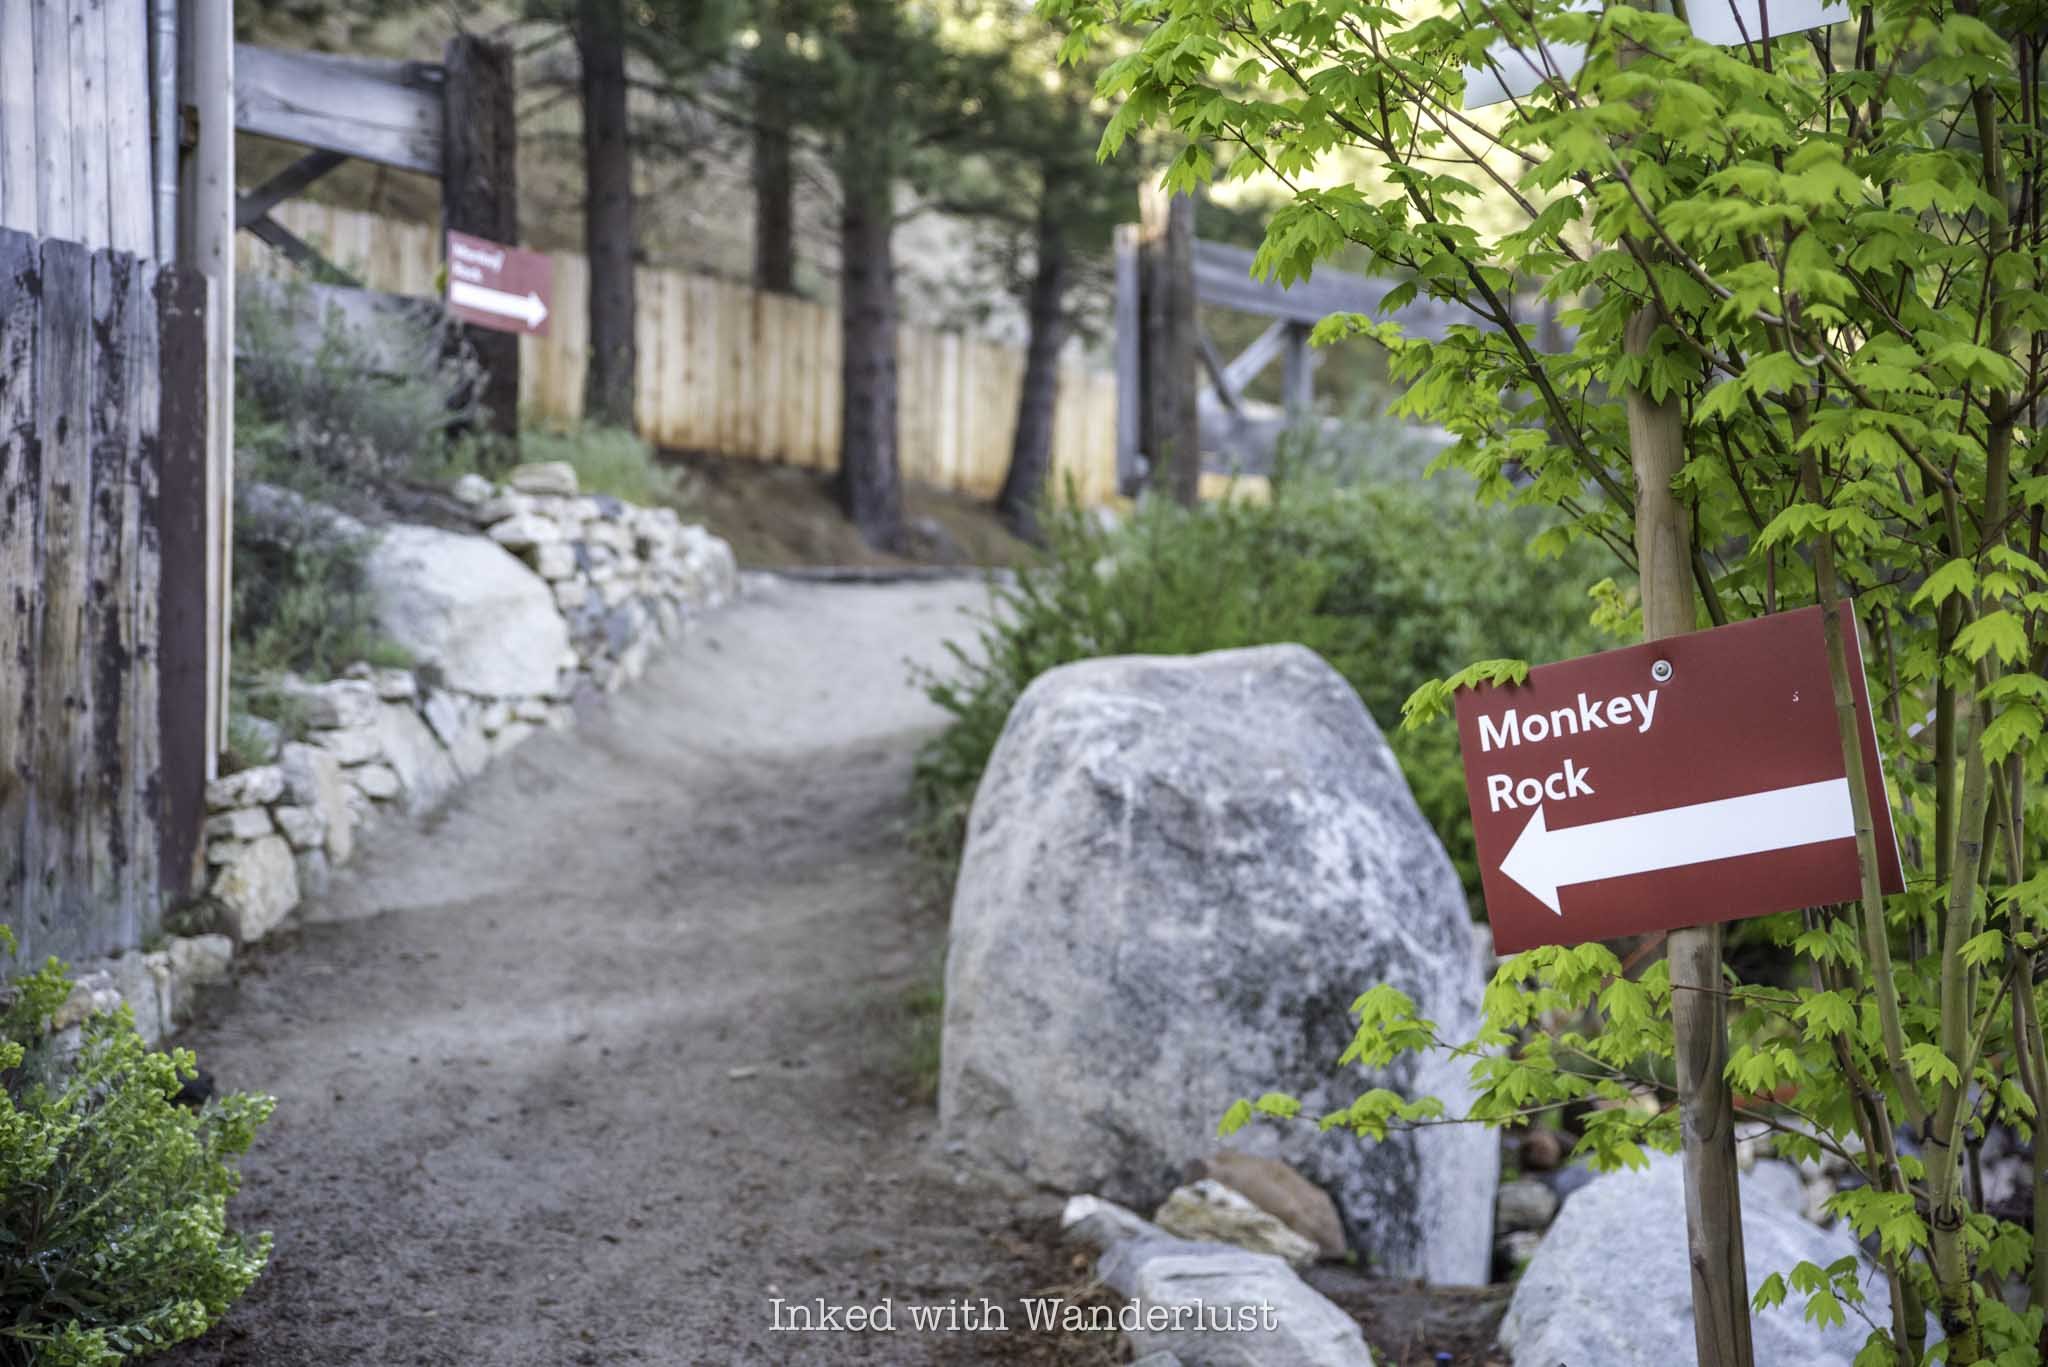
At right about the 1.3-mile mark of the hike, you’ll come across two more wooden pillars with a wooden board running across the ground between them on your left (pictured above). There’s an easily missed sign with an arrow on it. Take this trail to the left to continue to Monkey Rock.
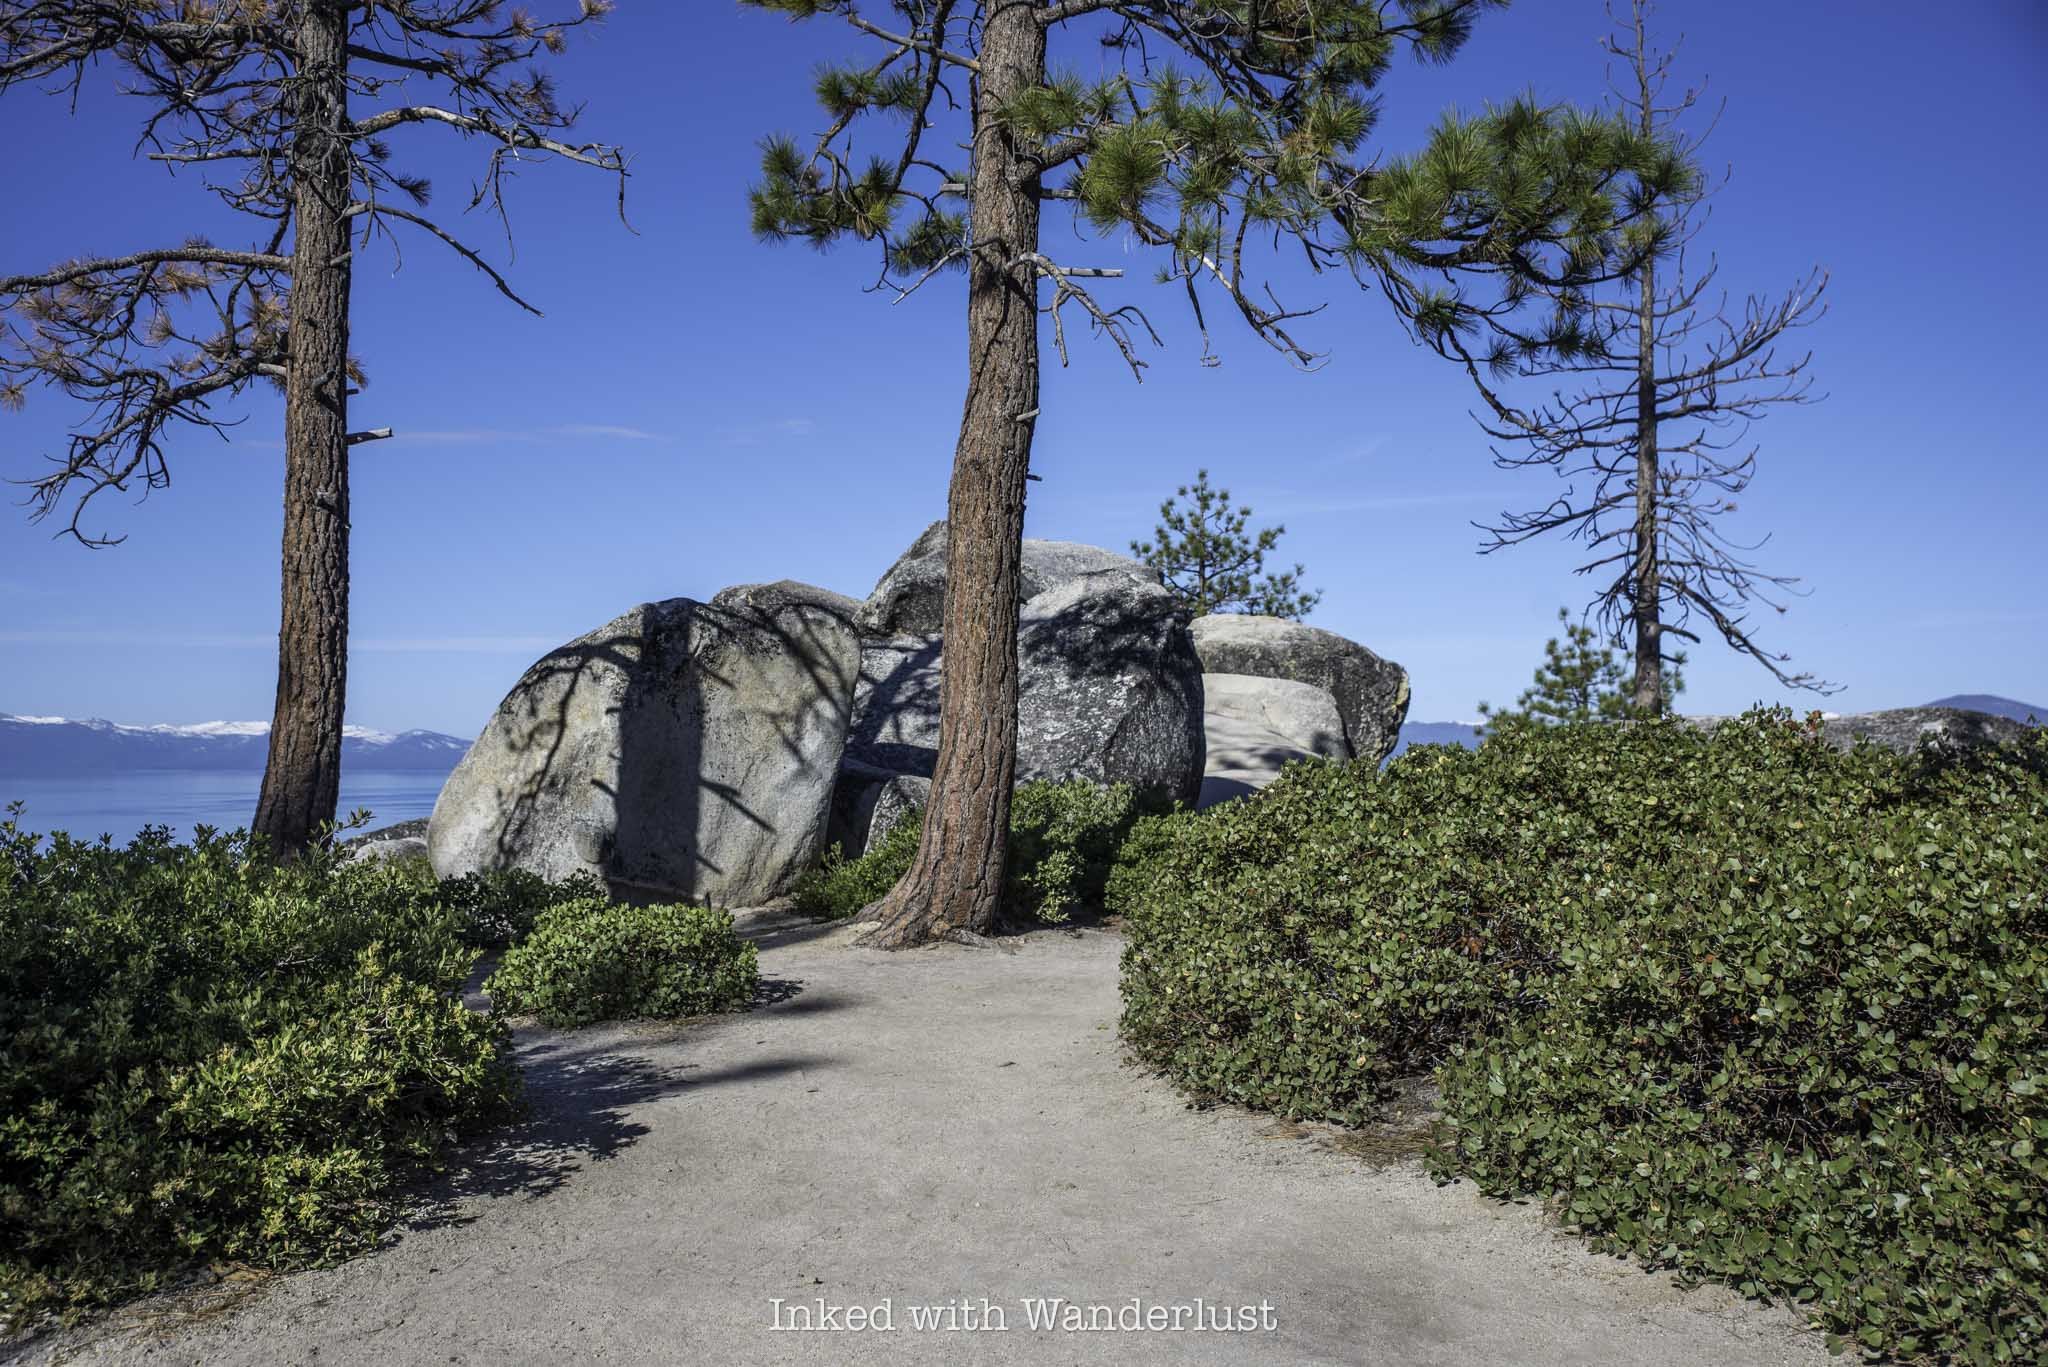

Shortly after turning onto this section of trail and heading up a short and sweet incline, you’ll see a boulder pile in front of you (pictured above). To get to Monkey Rock, stay to the right of the boulder pile. Eventually, Monkey Rock will come into view just off the sandy path.
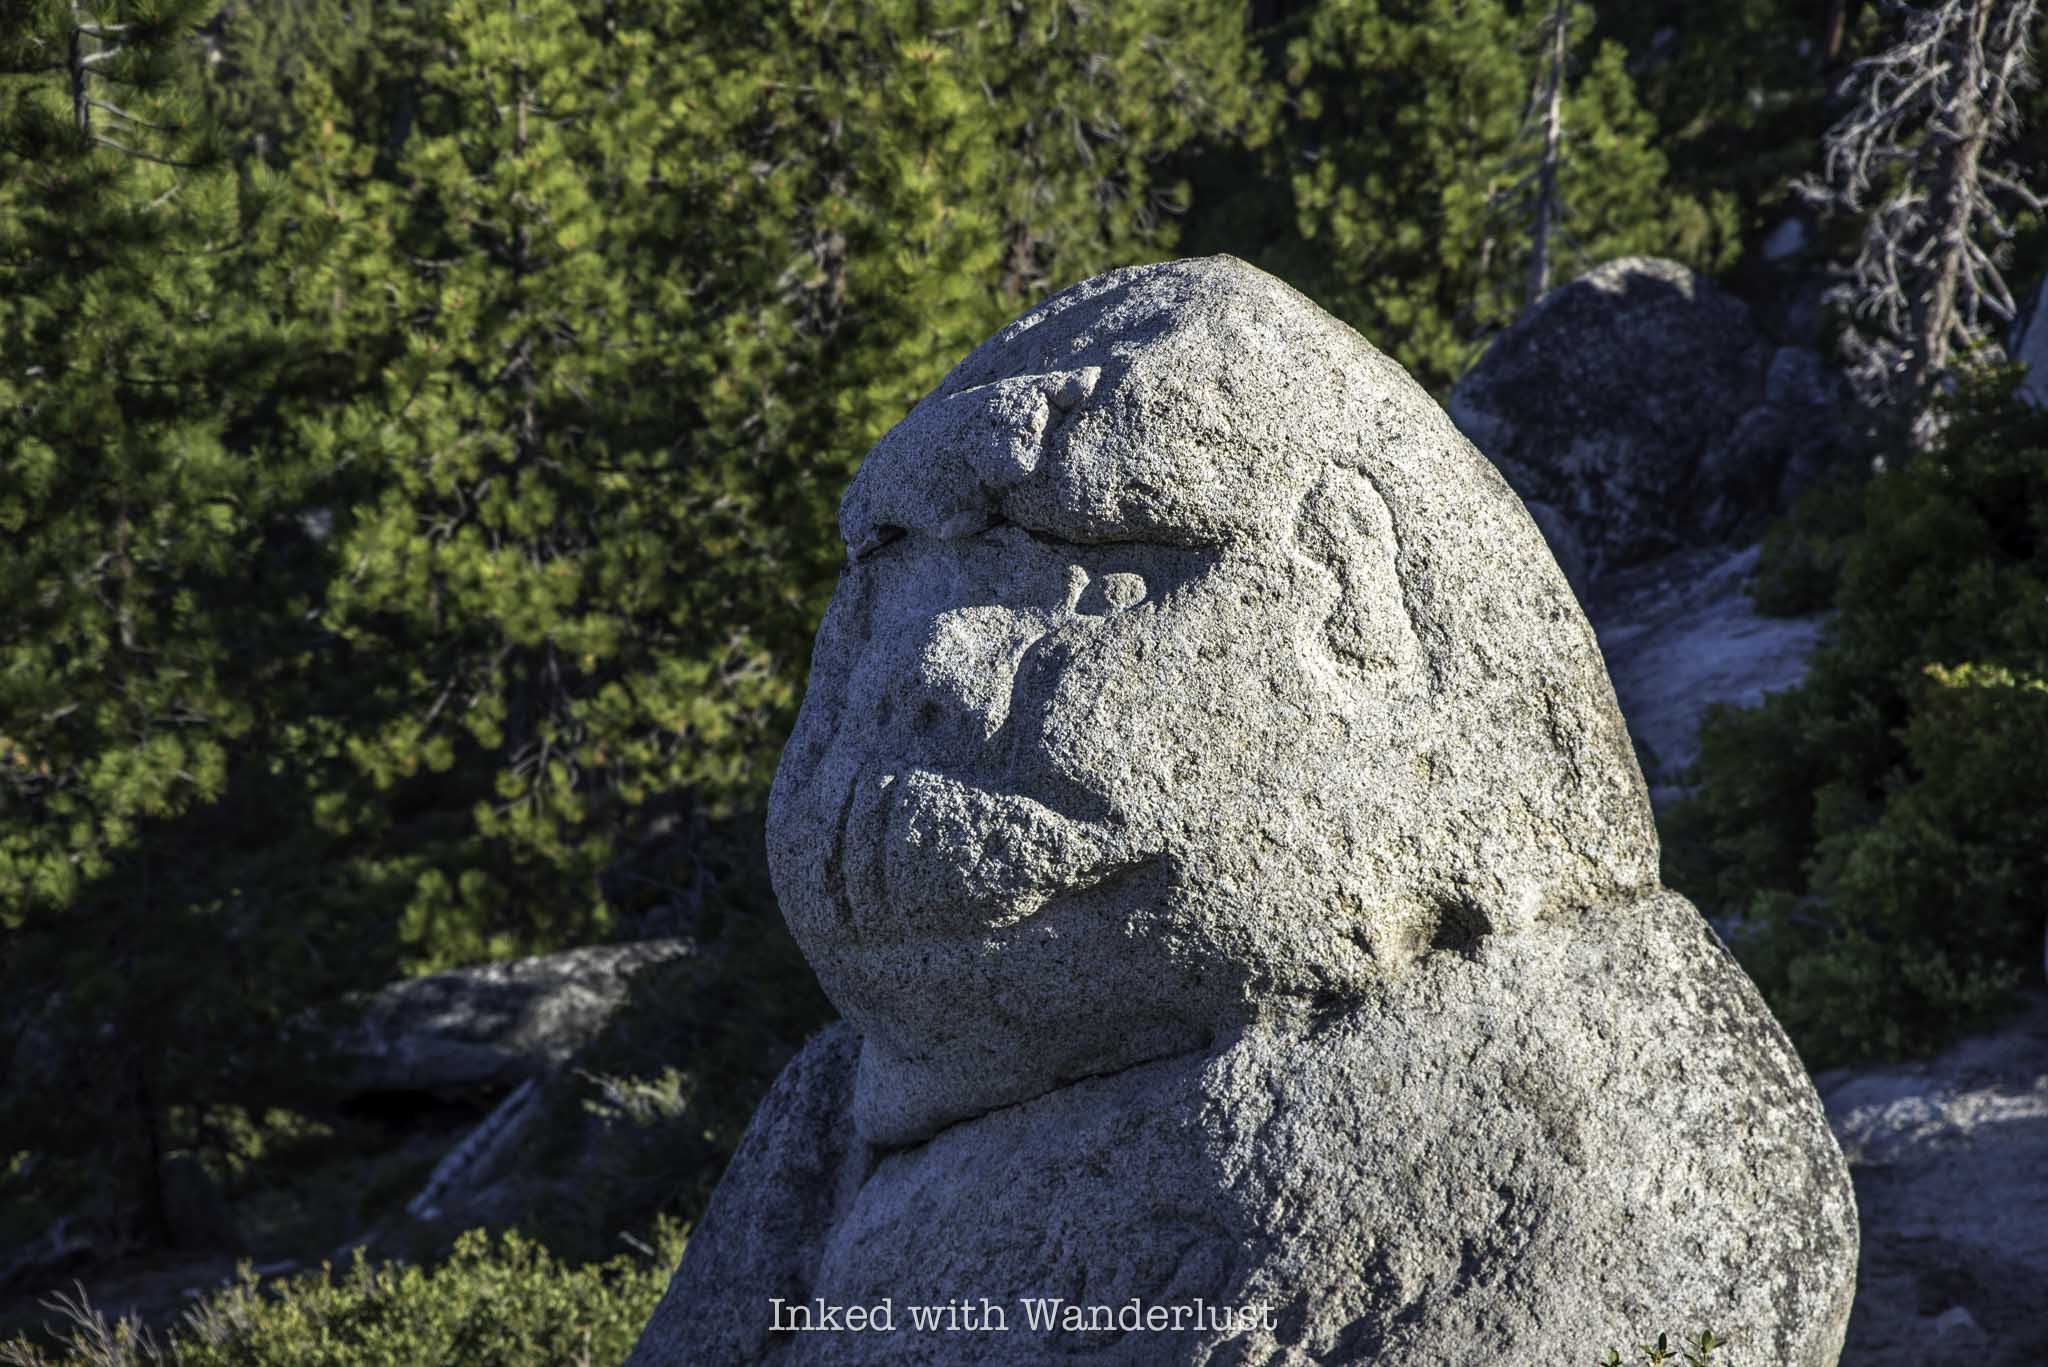
If you’re like me and you’re fascinated with interesting rock formations, Monkey Rock will surely leave you in awe, as it does resemble a monkey relatively closely. Do know, though, that while the rock has always looked like a monkey, it did receive a little help in attaining its current form.

Monkey Rock is easily viewed and photographed from the path. If you feel inclined, there’s another path that’ll take you down to it. Though if you have any kind of zoom on your camera, it’ll likely be unnecessary to do so.
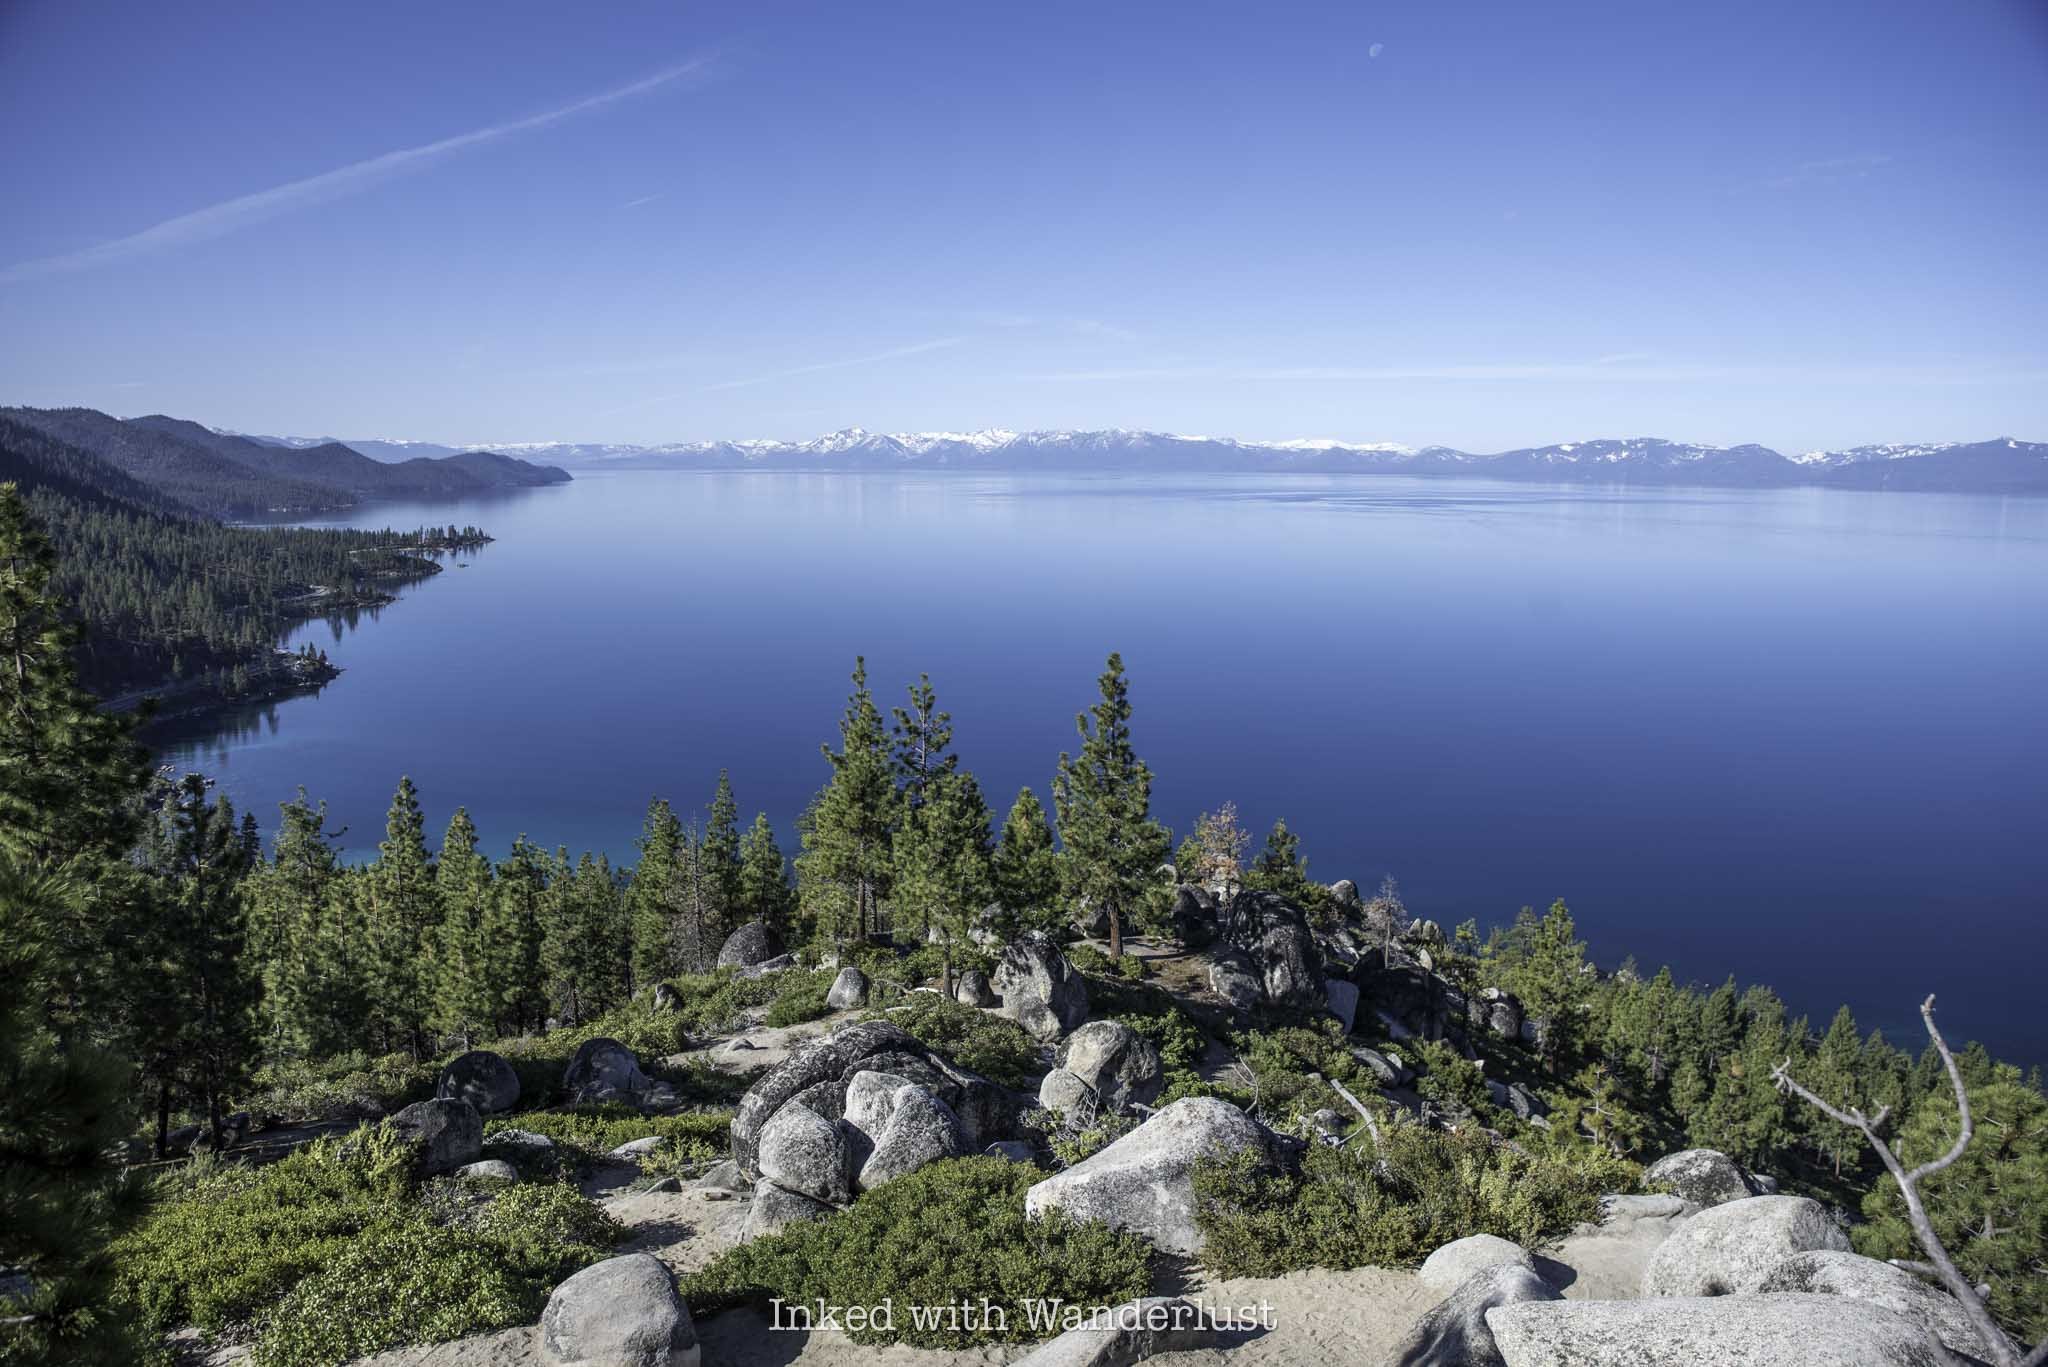
On the other side of the boulder pile, there’s an excellent view of the lake awaiting you. From there, you can faintly see Sand Harbor State Park, sections of the Tahoe East Shore Trail, and parts of the east and north side of the lake.

When you’re done taking in the views and getting your photos of Monkey Rock, simply head back the same way you came in. Since it’s all downhill from here, you should be able to get back to your vehicle in about twenty minutes or so.
Keep in mind the spur trails you saw coming in that led to the Tahoe East Shore Trail. If you have time on your parking slip, it would be an excellent extension of your hike. Or simply head to Hidden Beach and cool off with a dip in the lake. You can read about the TEST here and Hidden Beach here.
Common Questions About Monkey Rock

Where does the Monkey Rock trail start?
Unofficially, it begins on Tunnel Creek road, just behind Tunnel Creek Cafe on the east side of Lake Tahoe. Officially, the actual trail begins at the end of Tunnel Creek road.
Is Monkey Rock a hard hike?
That’s totally subjective, but I wouldn’t classify it as hard. Distance wise, it’s on the easy side, but the final push near the end could make it difficult to some. Overall, I’d rate it as easy for some and moderate for most.
Is Monkey Rock natural?
Yes and no. Yes in the sense that it’s an actual granite rock that highly resembles a monkey, but no in the sense that it did receive some help to give it more definition.
How long is the hike to Monkey Rock?
Based on the GPS on my apple watch, it’s 2.6-miles, all in.
How can I see Monkey Rock?
The only way to see Monkey Rock is by either hiking or biking up to it. It is not visible from the road.
What elevation is Monkey Rock?
Monkey Rock is roughly 500 feet above the Tunnel Creek parking lot.
Planning a trip to Lake Tahoe? To get information on camping and recreational activities, read my 2024 Emerald Bay State Park guide. Also, to read more about the Tahoe East Shore Trail, go here. If you’re into kayaking, read my Kayaking to Fannette Island post. Lastly, chase waterfalls in my 5 Best Lake Tahoe Waterfalls post.
PROVERBS 3:23

Enjoy Relative Seclusion at Hidden Beach Near Incline Village
Welcome to our ultimate guide on exploring a hidden treasure on Lake Tahoe's eastern shore - Hidden Beach…
2 minute read | may contain affiliate links
Welcome to our ultimate guide on exploring a hidden treasure on Lake Tahoe's eastern shore - Hidden Beach!
Nestled amidst the captivating beauty of the Sierra Nevada mountains, this secluded gem offers an enchanting escape for nature enthusiasts and beach-goers alike.
In this article, we'll take you on a virtual journey to this picturesque oasis, unveiling its breathtaking views, turquoise waters and the myriad of experiences it has to offer.
Get ready to embark on an unforgettable lakeside adventure that will leave you in awe. Let's dive in and discover the hidden paradise of Hidden Beach.
Disclosure: This post contains affiliate links. If you click through and make a purchase, I may earn a commission at no additional cost to you. Thank you for supporting us!
Getting To and Parking For Hidden Beach

Hidden Beach doesn’t get nearly as crowded as those nearby, like Sand Harbor and Crystal Bay. A big reason for that is you can’t drive up to it.
To access it, you’ll need to park at the Tunnel Creek or Bullwheel lots at the north end of highway 28 near the Tunnel Creek Cafe.

Parking fees are associated with these lots and are hourly (the rates for 2023 are pictured above). If the lots are full, you can get there with the East Shore Express Shuttle.

To reach Hidden Beach, you’ll need to hike for about a mile on the Tahoe East Shore Trail.
The trail is paved and the grade never exceeds 8%, making it easy to push a stroller or pull a wagon (to haul all of your lake day essentials with).

At first, the trail runs along the opposite side of the highway, but will eventually take you to the shore side via a tunnel.


Beautiful murals, each depicting different perspectives of Lake Tahoe, adorn the walls and ceiling of the tunnel.

When you get to the opposite end of the tunnel, you’ll want to bear left to get to Hidden Beach. Shortly thereafter, you’ll see the shore access sign on your right.
Hidden Beach

Hidden Beach is reached via the shoreline access trail (pictured above). The trail is short, taking less than a minute to reach the sand.
The beach is roughly 750 feet long and features rocky alcoves and an abundance of granite boulders dotting the shore.

As stated above, Hidden Beach doesn’t get all that crowded. People mostly pop-in and pop-out while hiking the Tahoe East Shore Trail.
Hidden Beach may not be as popular or even as scenic as nearly Sand Harbor, but the relative seclusion you’ll enjoy more than makes up for it.
If you have an inflatable SUP (paddle board) or kayak, you’re allowed to use them here. You can also bring your dogs as long as they’re leashed.

I hope you’ll consider spending a beach day at Hidden Beach. It’s one of the most tranquil Lake Tahoe beaches I’ve ever been to and I have no doubt you'd enjoy it too.
If you’re interested, check out a few more of my posts about nearby attractions:
Also, if you’re considering a trip to Lake Tahoe (or any lake/beach for that matter) consider reading my list of 25 lake day essentials:
Please support this website by subscribing to the newsletter below.
Thank you for reading.

How to Hike To Skunk Harbor In Lake Tahoe
You may be asking why I’m making a post about Lake Tahoe and putting it in the “Nevada” section. Many people don’t actually…
2 minute read | contains affiliate links
Welcome to my comprehensive guide on visiting Skunk Harbor, a hidden(ish) gem nestled along the picturesque shoreline of Lake Tahoe.
Skunk Harbor offers a unique combination of breathtaking scenery and a tranquil hiking trail that’ll leave you in awe of its natural splendor.
Located on the eastern side of Lake Tahoe, Skunk Harbor is a welcomed break from the hectic, overly touristy southern portion of Tahoe.
As you arrive, you’ll be greeted by a sense of serenity, surrounded by towering pine trees, crystal-clear turquoise water and panoramic views of the Sierra Nevada mountains.
In this guide, I’ll cover many topics such as parking, the hiking trail, the cove itself and what to expect along the way. Let’s get into it!

Exciting news for our readers!
We’re excited to introduce the all-new "Inked with Wanderlust" online store!
We're thrilled to bring you a fantastic collection of wanderlust-inspired merchandise. Celebrate your love for travel and exploration with our stylish apparel and accessories, designed to ignite your sense of adventure.
Discover a range of unique designs that capture the spirit of wanderlust, from cozy hiking-themed t-shirts to charming accessories that make your wanderlust spirit soar!
Visit our online store today and start your journey of style and adventure. Happy exploring!
Trail Stats
Location: Lake Tahoe (east shore)
Fee: None
Permit: None
Open: All year, but difficult to access in winter
For: Hikers
Restroom: None
Parking: Two small pull-out style lots along the highway
EV Stations: None
Difficulty: Easy going in, moderate going out
Popularity: Medium to high
Mileage: 2.8-miles, RT
Time: 2-3 hours
Elevation Gain: 567 feet
Condition: Maintained, easy to follow
Features: A cove with clear waters and a historic cabin
Pets: Allowed, but must be leashed
Drones: Allowed, per the B4UFLY App
Hazards: Hike out is steep and sun exposed
Our Visit(s): 2016, 2017, 2019 and July 2023
Skunk Harbor Parking
Lake Tahoe in general is notorious for its parking issues, but the eastern shoreline along Highway 28 is in a league all its own.
There are two small, pull-out style lots along the side of Highway 28 specifically for Skunk Harbor. However, they’re difficult to spot as they’re not signed.
Your best bet is to utilize a GPS device to locate them. That way you’ll know when they’re coming up.

If you’re coming from Carson City or the south shore, keep an eye out for the gate pictured above. Just past that gate is the first lot with a second, slightly larger one further up.
If you’re coming from Incline Village, you’ll know you’ve gone too far if you’ve reached Spooner Lake. Turn around a try again.
There is no parking fee (yet) but as of June 2023 and for the foreseeable future, construction on Highway 28 could damper, or even block your ability to park here.
There is ongoing efforts to improve the parking situation along this stretch of the lake. I’d wager that once they're done, there will be parking fees implemented.
The Trail To Skunk Harbor

If you parked in the lot near the gate, the trail begins past the gate along a forest service road. If you parked in the second one, the trail is a semi-steep descent on a dirt path that’ll soon intersect with the main trail.
For a short time the trail is gravel but soon turns to dirt. It’s much wider than your standard hiking trail, though. So it’s perfect for groups and pets.
Before the trail descends towards Skunk Harbor, you’ll be presented with a fork in the trail. Take a slight left to continue on the trail proper (don’t take the sharp left down the forest road).
Shortly after this fork, you’ll walk between a couple of boulder stacks. Here, you’ll get a commanding view of Lake Tahoe and the mountains. Past here, you’ll begin your descent.
You’ll hit a few switchbacks before reaching the bottom. The initial half loop to the first switchback is steep, but they become more level after that.
As you approach the cove, you’ll see a stone stairwell with a trail marker indicating the correct path. You’ll know you’re in the right spot if you see a small wooden bridge ahead of you.
Skunk Harbor

If you get an early start, you’ll likely have Skunk Harbor largely to yourself. If you come later in the day, though, the cove and its beach will likely be inundated with anchored boats and beach goers.
Early in the season, there won’t be much a beach but as snowmelt eases, it’ll become more exposed. The boulders near the mouth will be accessible as well.

SEE MY TOP RECOMMENDATION FOR AN INFLATABLE STAND-UP PADDLE BOARD!
To the right of where you came in is a old stone cabin that was built in the early 1920’s by a wealthy family who purchased Skunk Harbor.
The interior of the cabin isn’t accessible but can be viewed through the grating in the window. You can explore all angles of the exterior, though.

Behind the cabin is a dirt path that’ll lead you to an overlook of Skunk Harbor. There are a lot of downed trees and boulders here, so you’ll need to navigate those.

From here, you’re able to better see the remains of the cabin’s boating dock submerged in the water.
CHECK OUT THIS GREAT CAMERA TO DOCUMENT YOUR OWN TRAVELS WITH!
I hope you’ll consider hiking to (or boating into) Skunk Harbor during your visit to Lake Tahoe. Get there early and you’re guaranteed to spend a serene morning in nature.
Disclosure: This post contains affiliate links. If you click through and make a purchase, I may earn a commission at no additional cost to you. Thank you for supporting us!
Please support this website by subscribing to my bi-weekly newsletter below.
Thank you for reading.

Hike the Tahoe East Shore Trail to Sand Harbor
Nestled amidst the picturesque Sierra Nevada Mountains, Lake Tahoe is a natural gem that beckons adventurers with its awe-inspiring…
Disclosure: This post contains affiliate links. If you make a purchase through these links, I may earn a small commission at no additional cost to you. I only recommend products or services that I believe will add value to my readers.
Nestled amidst the picturesque Sierra Nevada Mountains, Lake Tahoe is a natural gem that beckons adventurers with its awe-inspiring beauty. Known for its crystal-clear waters and stunning alpine landscapes, this iconic destination offers an abundance of outdoor activities for nature enthusiasts.
Among the many trails that wind their way through this pristine wilderness, the Tahoe East Shore Trail stands out as an enchanting path that leads hikers on a captivating journey to Sand Harbor State Park.
Stretching along the eastern shoreline of Lake Tahoe, the East Shore Trail is a remarkable testament to the region's commitment to preserving its natural wonders.
Spanning approximately three miles, this meticulously crafted trail offers an unparalleled immersiveness into the splendor of the surrounding environment.
The pinnacle of this remarkable journey lies at the destination—Sand Harbor State Park. This iconic gem is renowned for its pristine sandy beaches, hidden coves, and dramatic rock formations that emerge from the lake's depths.
Whether you're a solo adventurer or a family looking to create memories, hiking the Tahoe East Shore Trail to Sand Harbor State Park promises an escape from the day-to-day normalities.
In this guide, I’ll cover many must-know topics such as where to find parking, the length of the trail, which offshoot trails are the best and more!


Trail Stats
Location: Incline Village, NV
Fee: None for the trail, but there are variable parking fees and entry fees to Sand Harbor
Permit: None
Open: All year, but can be icy in winter
Restroom: At the Tunnel Creek parking lot, multiple throughout the trail and multiple at Sand Habor
Parking: Large(ish) paved lot at the Tunnel Creek parking lot and a huge lot at Sand Harbor
EV Stations: None
Difficulty: Easy
Popularity: High
Mileage: 2.5 miles (one-way) but can add more with the many offshoot trails
Time: 2-3 hours
Condition: Meticulously maintained
Features: The eastern shoreline, many coves/beaches and Sand Harbor State Park
Pets: Dog friendly, but must be leashed
Drones: No signs stating you can’t. The Nevada side of the lake is fairly drone friendly. No drone use allowed in Sand Harbor, though
Our Visit(s): June 2023
Trailhead, Parking & Fees

Construction on the Tahoe East Shore Trail took decades to complete, but officials knew right away how popular it would become. So ample parking was a major focus of the project.
On the north end of the trail are the Tunnel Creek and Bullwheel parking lots. They’re right off highway 28 and are adjacent to the Tunnel Creek Cafe and Monkey Rock trailhead.
In peak season, these lots tend to fill quickly. I arrived at 9:30 am and found only a few open spaces. So plan for an early arrival.
If the lots are full, you can drive to and park at the old Incline Elementary School and take the East Shore Express shuttle in. Fares are $3 per person (half that for seniors and those with disabilities).
Also during peak season, you’ll need to pay to park. Fees are charged per hour and depend on timeframe, day, month, etc. For reference, the photo below shows the fees as of June 2023.

You can pay via one of the digital pay stations or by texting the phone number in the picture below. If you intend to use the pay station, these are the steps:
Enter your license plate number
Insert your card (you’ll be charged an initial one-hour fee)
Select the amount of hours you want (go with more than what you’ll think you’ll need)
You’ll be charged upfront for the amount of hours selected and be given a receipt
If you’re not feeling up to hiking the trail, there’s a vendor called Flume Trail Bikes located adjacent to the parking lot where you can rent bicycles from. Additionally, if you’re feeling hungry, the Tunnel Creek Cafe is also right next to the parking lot.
Also at the trailhead is your first opportunity at using a restroom. It’s a port-o-potty set up and wasn’t maintained all that well, so come prepared.
SEE MY TOP RECOMMENDATION FOR THIS COMMON PROBLEM! (you’ll thank me later)
You’ll find the official start of the trail just past the informational display. I highly suggest giving it a read before heading out. It details the history of the trail, its construction and future plans.
The Tahoe East Shore Trail

You’ll start out on the opposite side of highway 28 (or the, “Mountain Side”). This section of the trail is the only one where there’s some elevation change.
When you get up the hill, you’ll be treated to epic views of the north side of the lake. This section is still wheelchair and stroller friendly as the grade never exceedes 8%.
This section is only a half mile or so, but the views are outstanding. It’s also the only section that has some shade provided by the tall pine trees.
As you reach the peak, you can look out ahead of you and get a glimpse of Sand Harbor State Park in the distance. From here, you’ll dip down and realign with the highway.


The second half of the trail continues along the shoreline on the other side. You won’t need to cross the highway, though, as the trail was built to go underneath.
The interior walls of the tunnel are covered in beautiful murals, each side depicting Lake Tahoe and its surrounding mountains.
Coming out of the tunnel you’ll arrive to a clearing where there’s more informational signage, views of the lake and another restroom.
If you’ll be taking the above mentioned shuttle to the trail, this is where they’ll drop you off. So you’ll effectively save yourself a half mile by doing so.

From the tunnel, you’re about 1.5 miles from Sand Harbor. To continue along the trail, go left coming out of the tunnel. This is also where you’ll come across your first offshoot trail.
There are many offshoots leading to a variety of beaches and coves that were once not as easily accessible as they are now. Each one only takes a minute or less to reach.
The first of which is the ever popular Hidden Beach. It’s small in comparison at just 750 feet, but it sees far less people than nearby Sand Harbor.
It’s also dog friendly and aside from parking, there are no fees associated with it. I highly recommend spending some time here.

Continue further down the trail and arrive to the next offshoot; Balancing Rock. There are two entry/exit points here so there’s no need to go back up the same way you came in.
The main feature here is the flat(ish) granite boulder balancing on a smaller pile of granite boulders beneath it in the water. It’s nothing spectacular but still worth a look.

Past Balancing Rock, the next few offshoots I either skipped or simply viewed from the trail (there was a storm coming in that afternoon and I wanted to beat it). Those offshoots include:
Granite Cove
Artist’s Point
Mountain Vista
Dipper Point
At Artist’s Point is another opportunity at using a restroom. This one is shared between trail users and people traveling on highway 28. From Artist’s Point, you’re about a half mile from Sand Harbor.
There are two more offshoots before you arrive to Sand Harbor, both of which I highly recommend visiting as I feel they both rival Sand Harbor in terms of beauty. They are Sunset Cove and Emerald Cove. Both are similar in that they’re dotted with granite boulder shorelines, have crystal clear turquoise water and require a hike down a quick trail.

CHECK OUT THIS HIGHLY RATED INFLATABLE STAND UP PADDLE BOARD ON AMAZON!
If you must choose, I recommend Sunset Cove as it’s much easier to access and has an actual beach, whereas Emerald Cove was lined with boulders.
From here, continue down the trail for another 2/10’s of a mile before getting your first glimpse of the mega popular and beautiful Sand Harbor State Park. As you approach the entrance to Sand Harbor, you’ll start seeing signs stating as such and the fees associated with entering.
To walk or bike into Sand Harbor you’ll need to pay the $2 per person fee. You can pay cash or utilize the digital pay station near the ranger shack. If you’re paying with a card, be sure to select “other” rather than the “day-use” option to avoid over paying. The ranger helped me to avoid that mistake.

Once in the park, you can stay for as long as you like. Your ticket is good until one hour past sunset. There are many beaches and coves to explore.
Sand Harbor has many restrooms available and an on-site restaurant. The larger beach is located at the far end of the park from where you’ll enter.
From here, simply head back in the same way you came. If you like, you can utilize the above mentioned shuttle to take you most of the way back. You’ll still need to walk the final half mile, though.

Your Thoughts…
Since this trail is popular and follows highway 28, this isn’t a peaceful hike through the woods. On the flip side, this shoreline is perhaps the most beautiful in all of Tahoe and is a must-see for any visitor.
Up until Sand Harbor, the entire trail is wheelchair accessible and is pet, stroller, bicycle and family friendly.
Does this sound like something you and your family would enjoy? Are you planning a trip to Tahoe soon? Let us know in the comments and in the meantime, check out our other Tahoe related posts below!

Cave Rock Trail: A Short Hike To An Epic View Of Lake Tahoe
Located on the Nevada side of the lake, the Cave Rock trail may seem uneventful at first, but the mind-blowing view…
3 minute read | contains affiliate links
Located on the Nevada side of the lake, the Cave Rock trail may seem uneventful at first, but the mind-blowing view at the end will prove that assumption wrong.
This trail is great for hikers, families and everyone in between. If you happen to be driving through on a trip, it’s an excellent way to stretch your legs for an hour or so.
Note that this post is about the actual trail to the top of Cave Rock and not the state park on the other side of the highway. Those are two different things.
In this post, we’ll cover topics such as parking, how to find the trailhead, what to expect along the trail and more. Let’s get into it!
Here’s some great hiking products we recommend…

Quick Stats
Location: Stateline, NV (Tahoe)
Fee: None
Permit: None
Open: Year round
For: Everyone
Restroom: None
Parking: Tiny lot with enough room for 4-5 vehicles
EV Stations: None
Difficulty: Easy (though there’s some scrambling involved)
Popularity: Medium to high
Mileage: Less than a mile, roundtrip
Time: One hour
Elevation Gain: 137-feet
Condition: Maintained (not signed)
Features: Cave Rock & view of Lake Tahoe
Pets: Allowed on leash
Drones*: Allowed on the trail and Cave Rock itself (not within the state park boundaries, though)
Hazards: You’ll need to scramble up Cave Rock to get to the top. It’s nothing too difficult, though.
Our Visit(s): 2016 & 2022
*We refer to the app, “B4UFLY”, to help determine if we’re legally allowed to launch our drone from a particular location. We suggest you do the same to ensure you’re flying responsibly.
Cave Rock Trailhead & Parking

When looking for the parking lot and trailhead for the Cave Rock trail, many people mistakingly go to Cave Rock State Park along the shore of the lake.
Unfortunately, there is no access to the trail from there. That area is for swimming, kayaking and other types of recreating.
For the trail to the top of Cave Rock, you’ll need to drive up Cave Rock road, just off the highway. You’ll see a, “Cave Rock Estates”, sign indicating the correct road.
About a quarter-of-a-mile up the road (as it elbows), you’ll see a tiny, pull-out style lot on the left side of the road. This is the parking lot for the trail (pictured above).

As you can see, there isn’t a whole lot of room. It’s a stretch to even call it a parking lot. There’s room for maybe four or five vehicles.
On top of that, there’s no parking allowed along the street (you could get towed). If there’s no space, you may have to circle around a couple times.
Due to this, we recommend getting here early. We arrived at around 8am and there was just one other couple at the rock.
Cave Rock Trail

The trail is a well maintained, compacted dirt path that’s less than a mile, out and back. You will be walking at an incline but it’s barely noticeable.
Along the way, you’ll be treated to periodic views of Cave Rock and the lake itself. There’s a few spots to get creative with your camera by using the trees to frame the rock.

As you get further up the trail, you’ll see a large set of boulders on the right side of the trail (pictured below).

Shortly after these boulders, you’ll come to an unsigned junction. Keep left (in the direction of Cave Rock) to remain on the trail.
Almost immediately after bearing left, the base of Cave Rock will come into view.


If you or someone in your group isn’t up for scrambling up the rock, you can get a similar view as the one up top.

For an even better view, though, you’ll want to get to the top. To begin, make your way around the rock-wall to begin your climb.
Scrambling Up Cave Rock

There’s no actual trail or path to the top. Take a minute to scan the boulders around you, use common sense and scramble your way up.
If we had to rate it, we’d both say it’s an easy, beginner level scramble. Or the lower end of moderate, at worst. It only took us about five minutes.


The views from the top are simply jaw-dropping, no matter which direction you look. Being up here for sunrise or sunset would be even more amazing.
There isn’t a lot of room up here. So if you’re here on a particular busy day, expect it to be a bit cramped. In our experiences, though, its never been an issue.

When you’re done taking in the views, safely scramble back down the rock and head back to your car. If you’re up for more adventures, see our posts below for a few other Lake Tahoe hikes.
“Hike To Eagle Falls and Eagle Lake In Lake Tahoe”
“Hiking To Cascade Falls Near Emerald Bay”
“How To Kayak To Fannette Island Tea House In Emerald Bay”
Your Thoughts…
Does this sound like a trail you and your family would enjoy doing? Have you been to the top of Cave Rock? Let us know in the comments below. We love hearing from our readers!
Please support our website by sharing it with your family and friends.
Thank you for reading.