My Experience at Flyover Las Vegas (Review)
In Las Vegas, a city densely packed with over-the-top-attractions, one sets itself apart from the neon lights, slot machine noise and…
Disclosure: This post contains affiliate links. If you make a purchase through these links, I may earn a small commission at no additional cost to you. I only recommend products or services that I believe will add value to my readers.
In Las Vegas, a city densely packed with over-the-top-attractions, one sets itself apart from the neon lights, slot machine noise and packed streets - Flyover Las Vegas.
This immersive flying attraction lifts you over sweeping landscapes, dramatic coastlines and iconic cities without ever leaving the strip.
With its combination of motion seating, curved screen, wind effects, mist and scent technology, it creates the feeling of true flight while only lifting you mere feet from the ground.
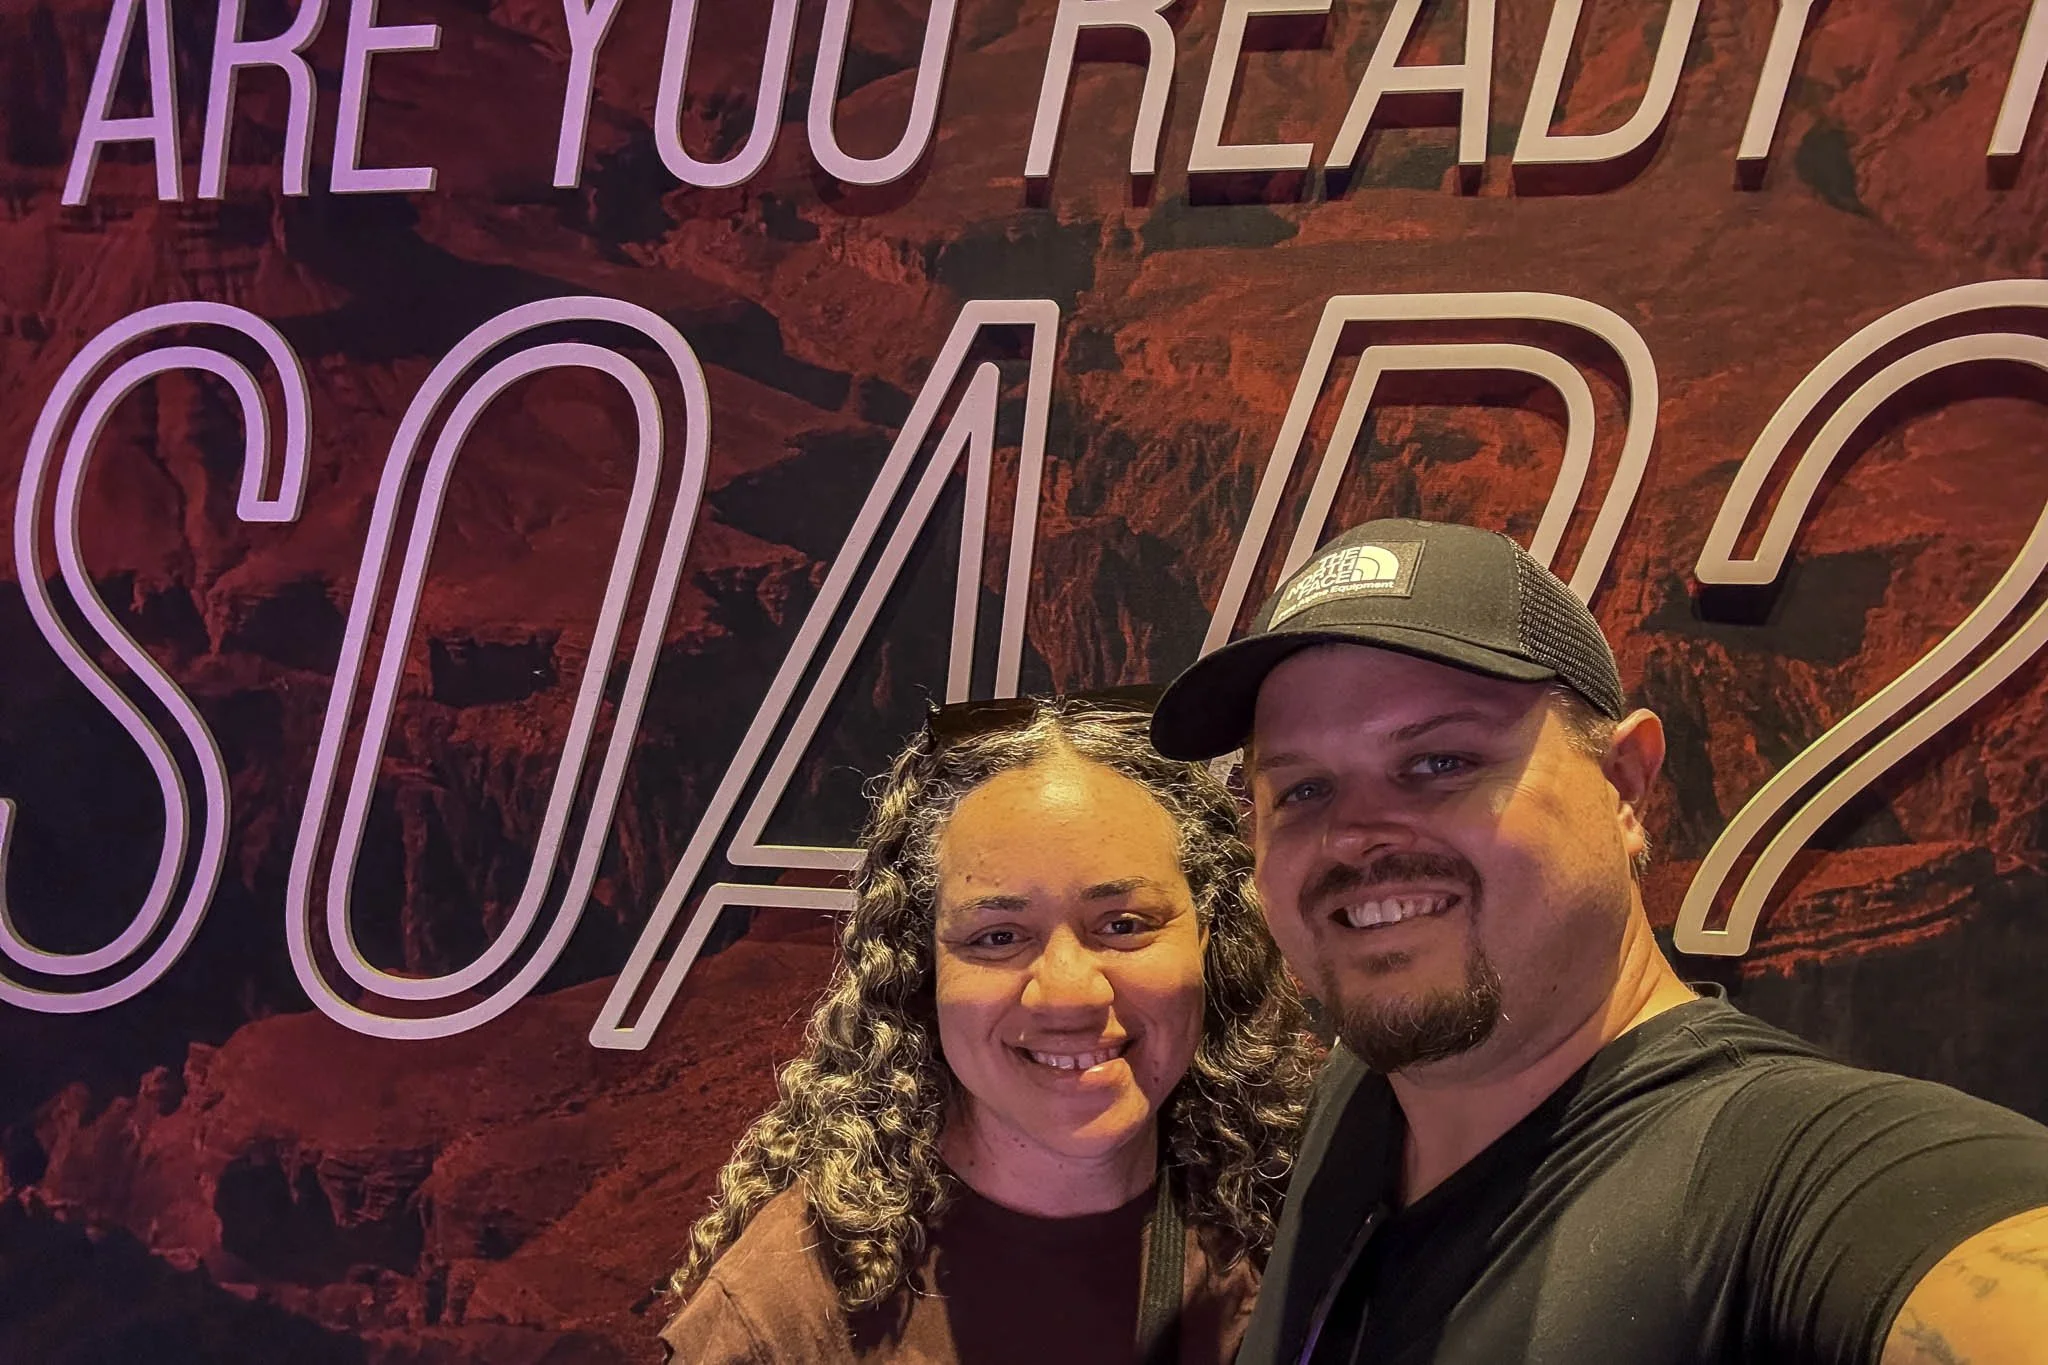
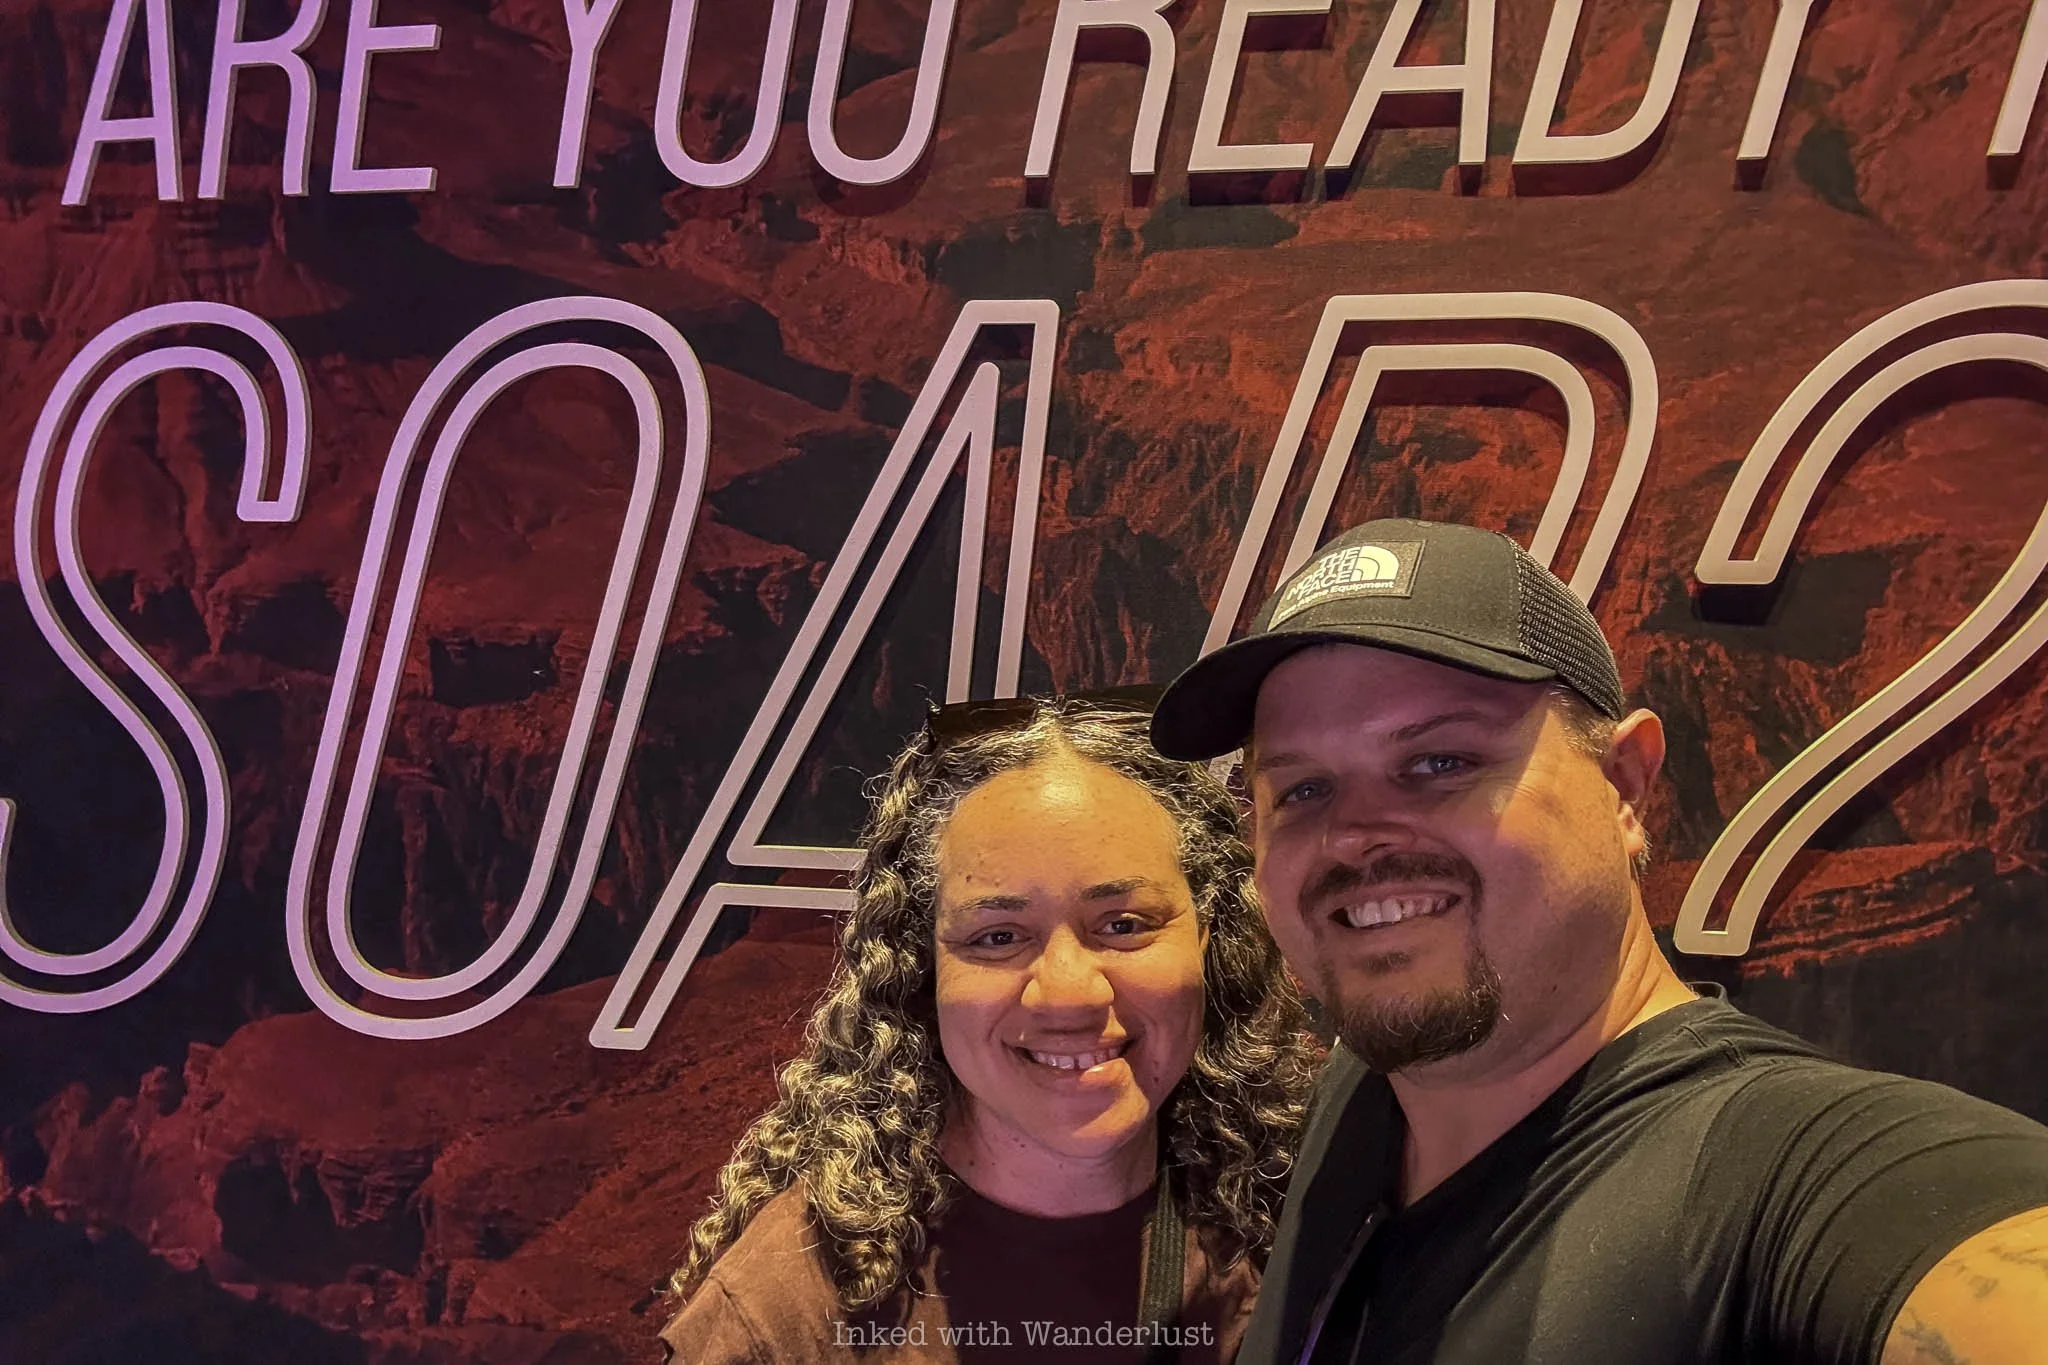
In this post, I’m going to detail my and my wife’s experience at Flyover during our visit. I’ll also cover topics such as location, ticket pricing, tips and more. Let’s get into it!
Location, Parking and Tickets
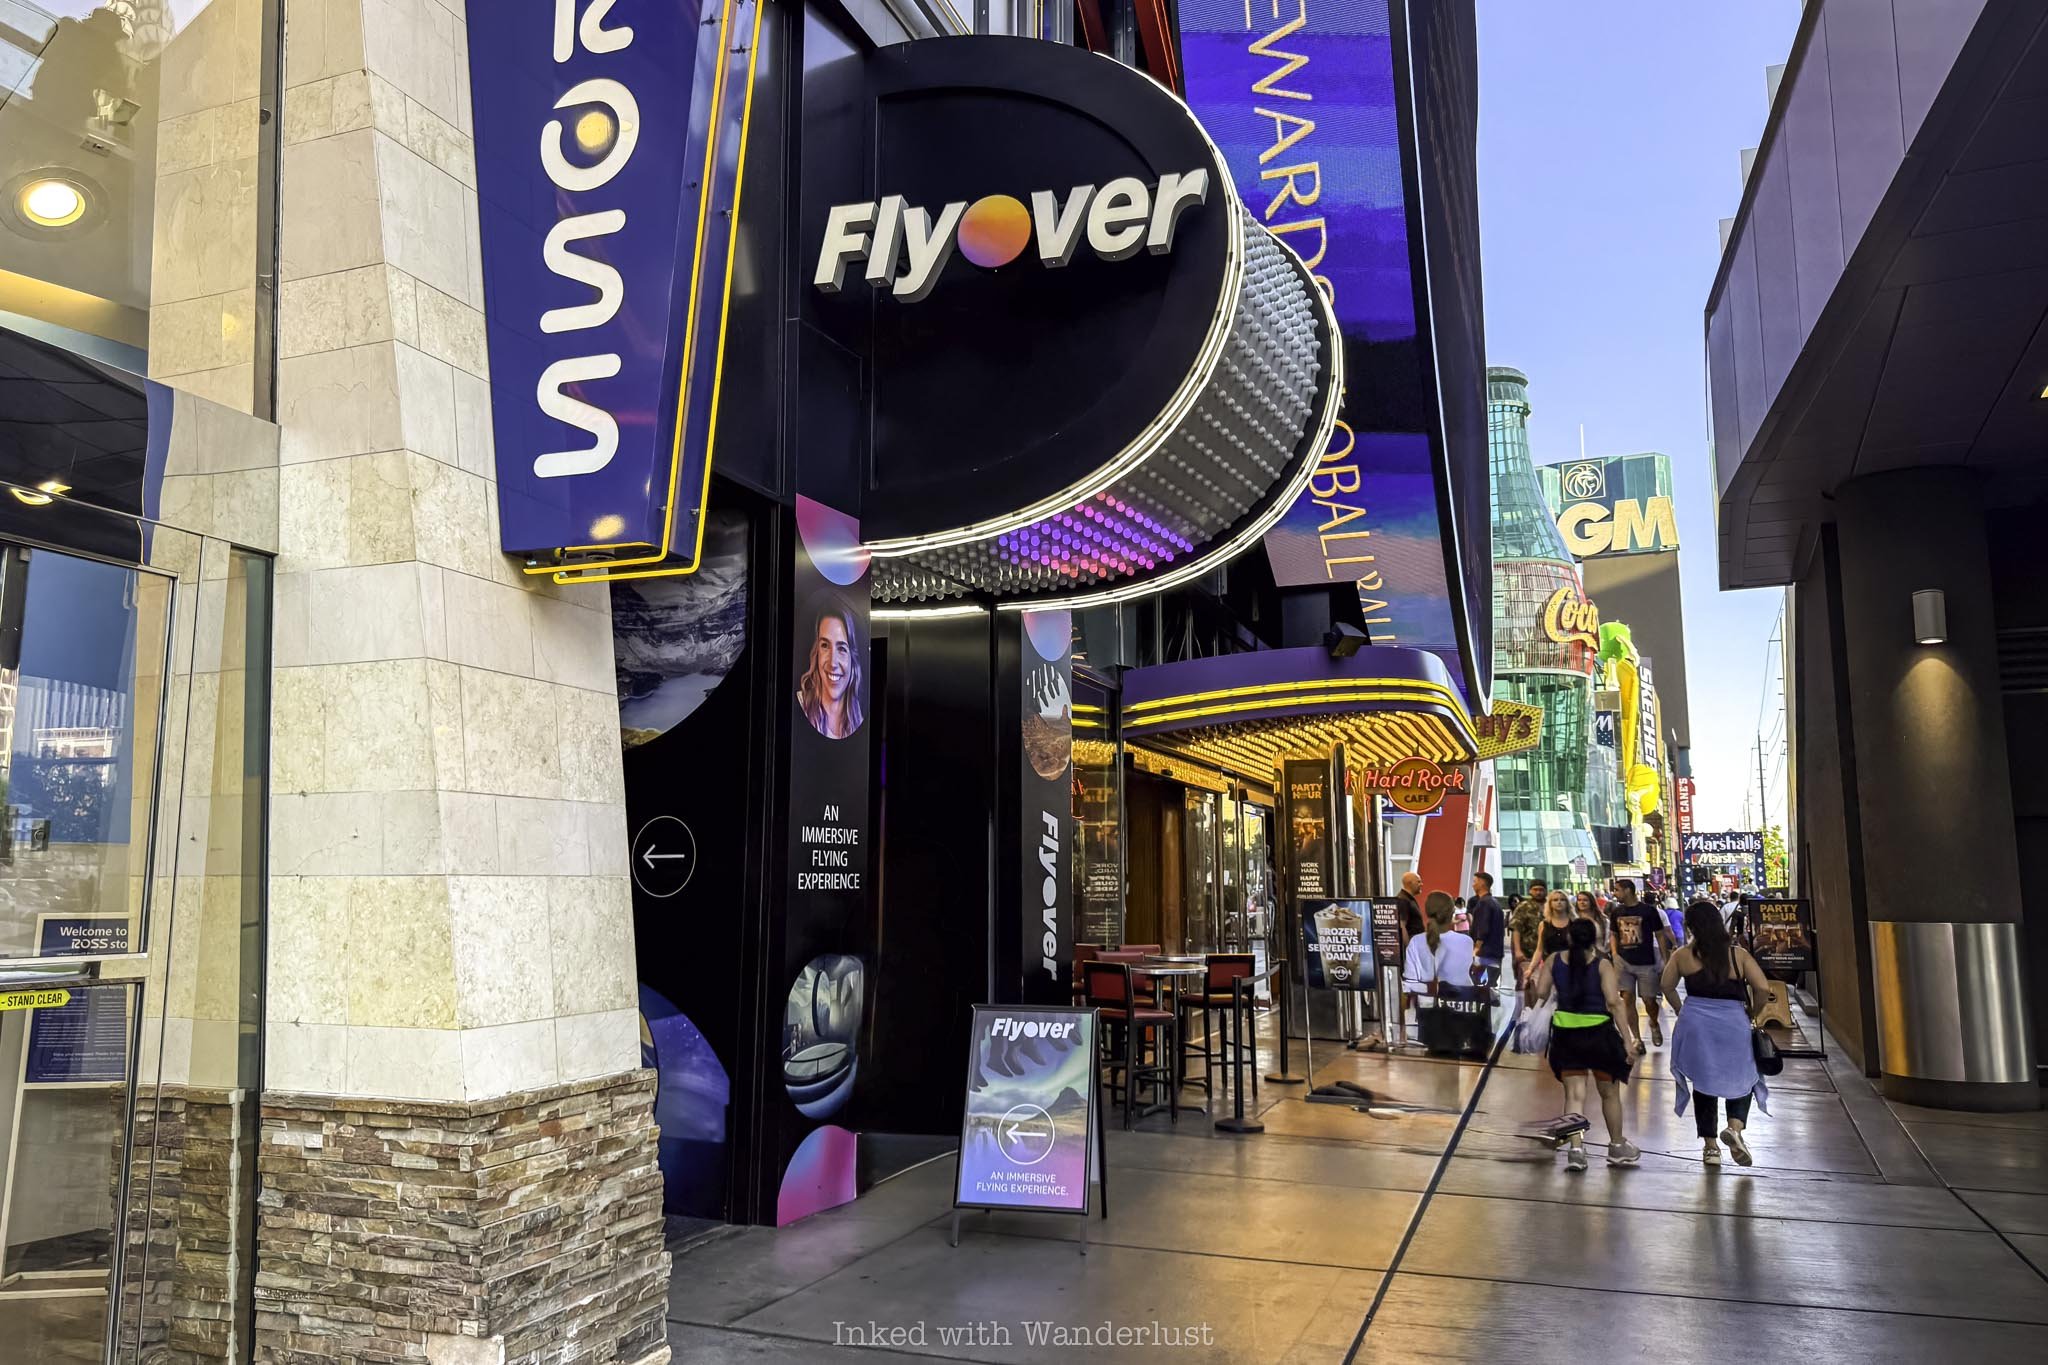
Flyover Las Vegas is located directly on the strip along its eastern side. It’s sandwiched between a Ross store and a Hard Rock Cafe, with MGM Grand being the closest resort and across the street from the New York, New York and Park MGM resorts.
This makes it closest to the southern end of the strip, but within a fairly easy walk from mid-strip. To contextualize, my wife and I were staying at the Flamingo Hotel (almost exactly at the strip’s mid-point) and it took us about twenty minutes to walk there.
From the northern end, it would be a hefty walk. If you’re staying there, I would suggest hopping on the monorail to the MGM Grand and walk from there. Of course, taxies, ride sharing, or driving and parking yourself are also options.
Parking is located in the Showcase Mall parking garage. It’s paid parking, so be prepared. Parking fees depend on several variables, including day of week, time of day, etc. Expect to pay between $15 and $23 per hour.
Tickets can be purchased through several resources, but I recommend booking directly on Flyover’s website. Unfortunately, there are several scammy sites that claim to sell legitimate tickets to many Vegas attractions but ultimately just take your money.
A few legitimate companies do sell Flyover tickets, though. A few include Viator, Vegas.com, Groupon (yes, it does still exist) and Undercover Tourist. You can purchase standalone tickets or as part of a bundle with other area attractions.
Myself, I purchased directly from Flyover and opted for their “Double Experience” ticket. There are several films to choose from and by going with this deal, you save 30%. For example, a single ride costs $39 (online) but with this ticket I paid $54 for two.
Your options for films are:
Legendary Iceland
Wonders of the American West
Believe Chicago
Call of the Canadian Rockies

Additionally, you’ll receive an additional discount ($10 or so) by being a Nevada resident. Don’t end up paying more at the gate by taking advantage of this option and NOT being a resident. They do check identification when you check in.
Another way to pay less is to purchase your tickets online ahead of time. Flyover offers discounts to those who purchase ahead of time rather than purchasing at the gate. Additionally, you can opt for their VIP option, which also includes two rides but offers one drink and skip-the-line privileges as well.
Furthermore, when purchasing your tickets, you’ll have to select your preferred arrival time as rides only begin at certain times. Be sure you’re on time. You can always arrive early and enjoy a drink at their on-site bar.
My Experience at Flyover
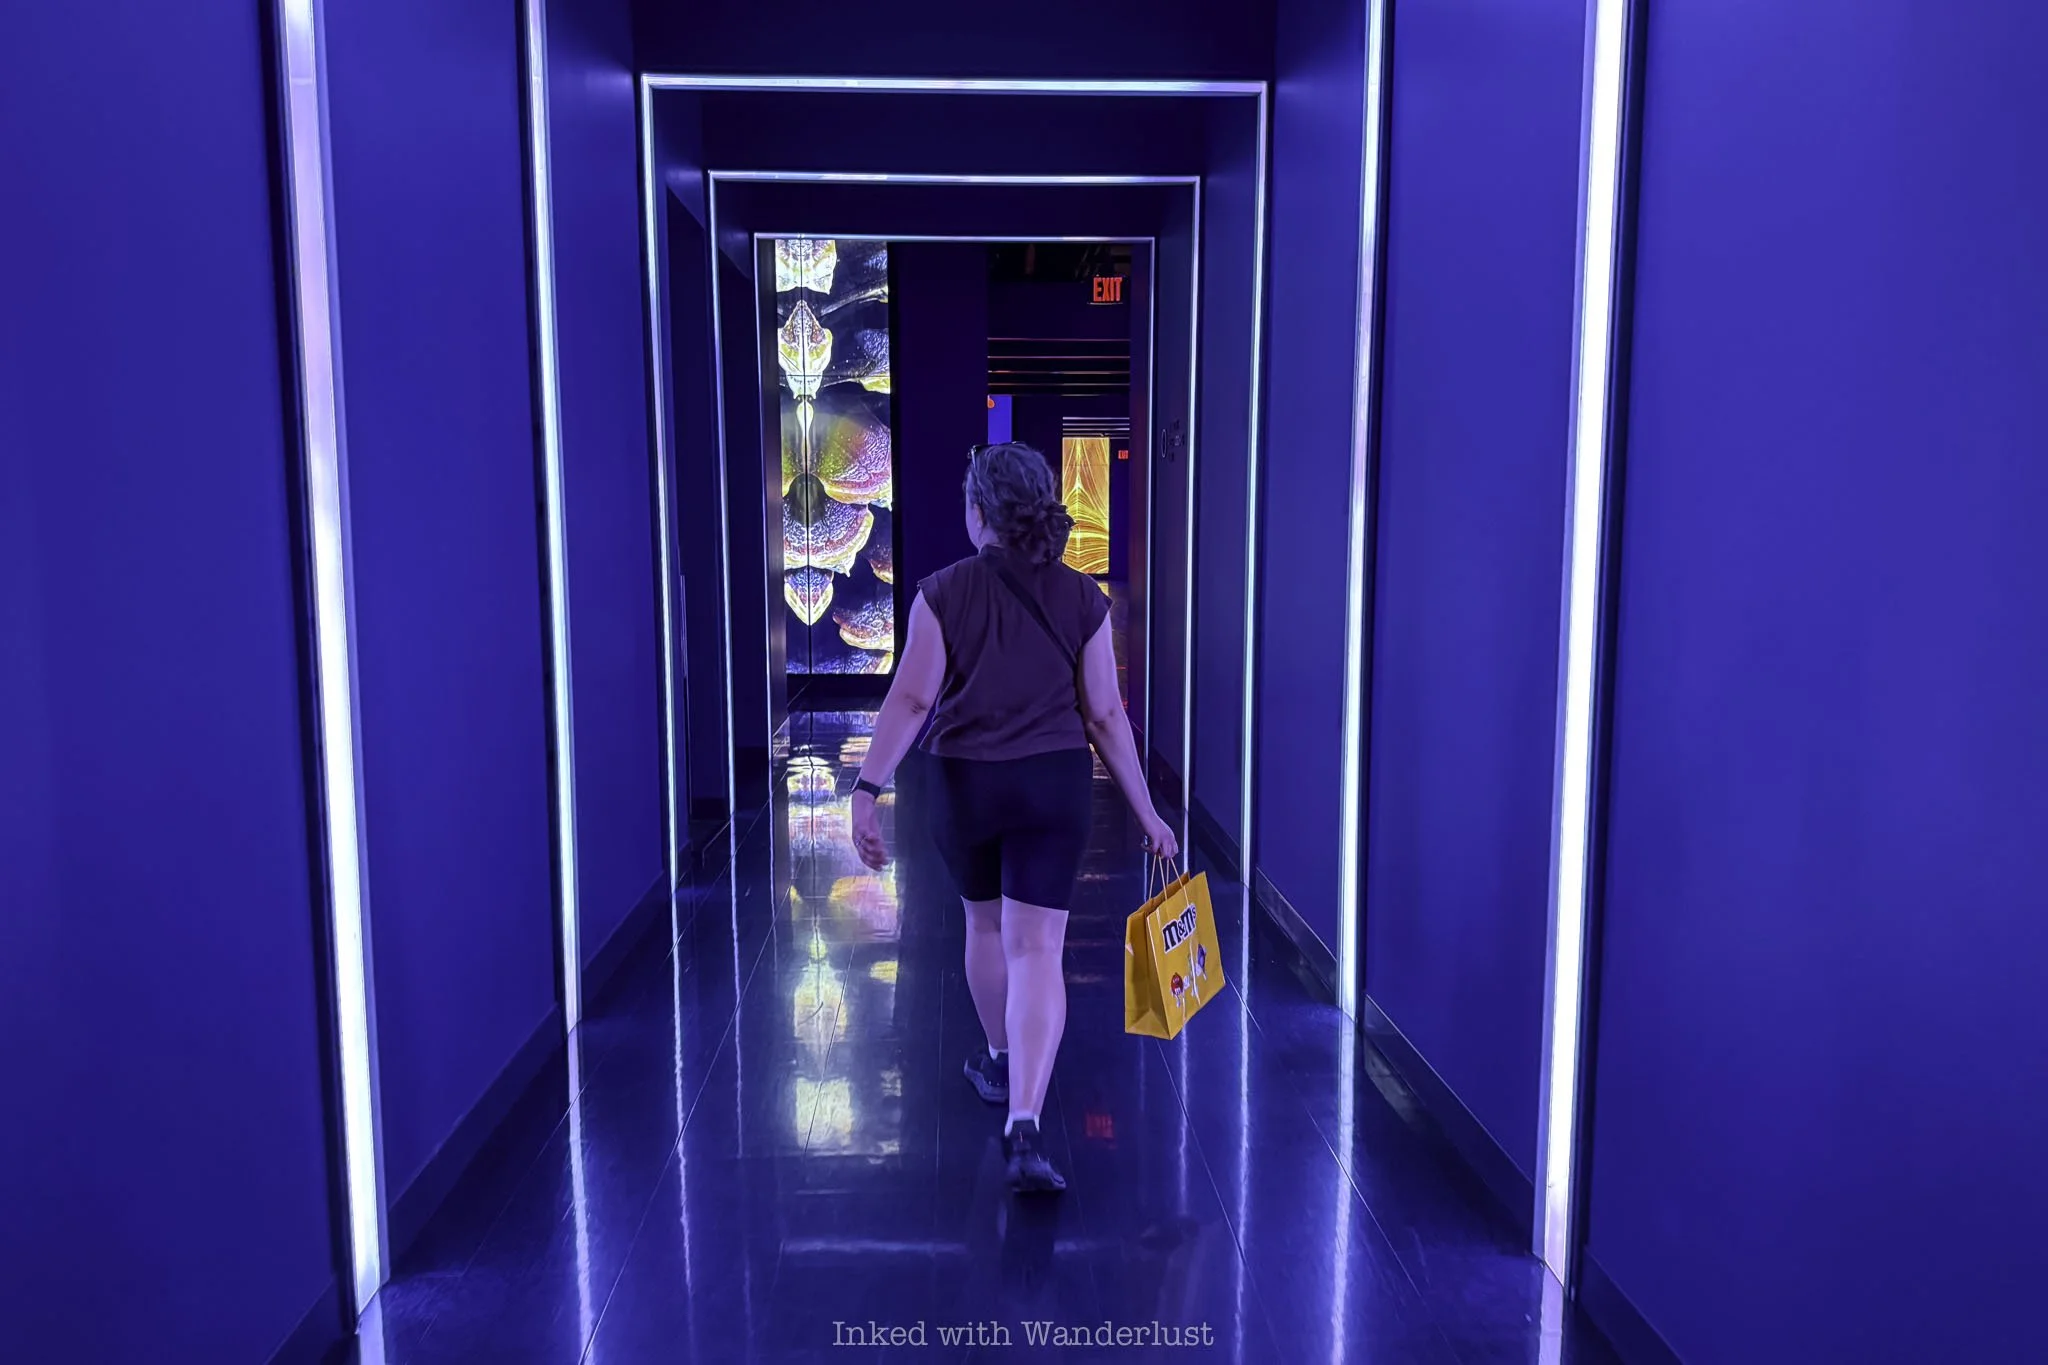
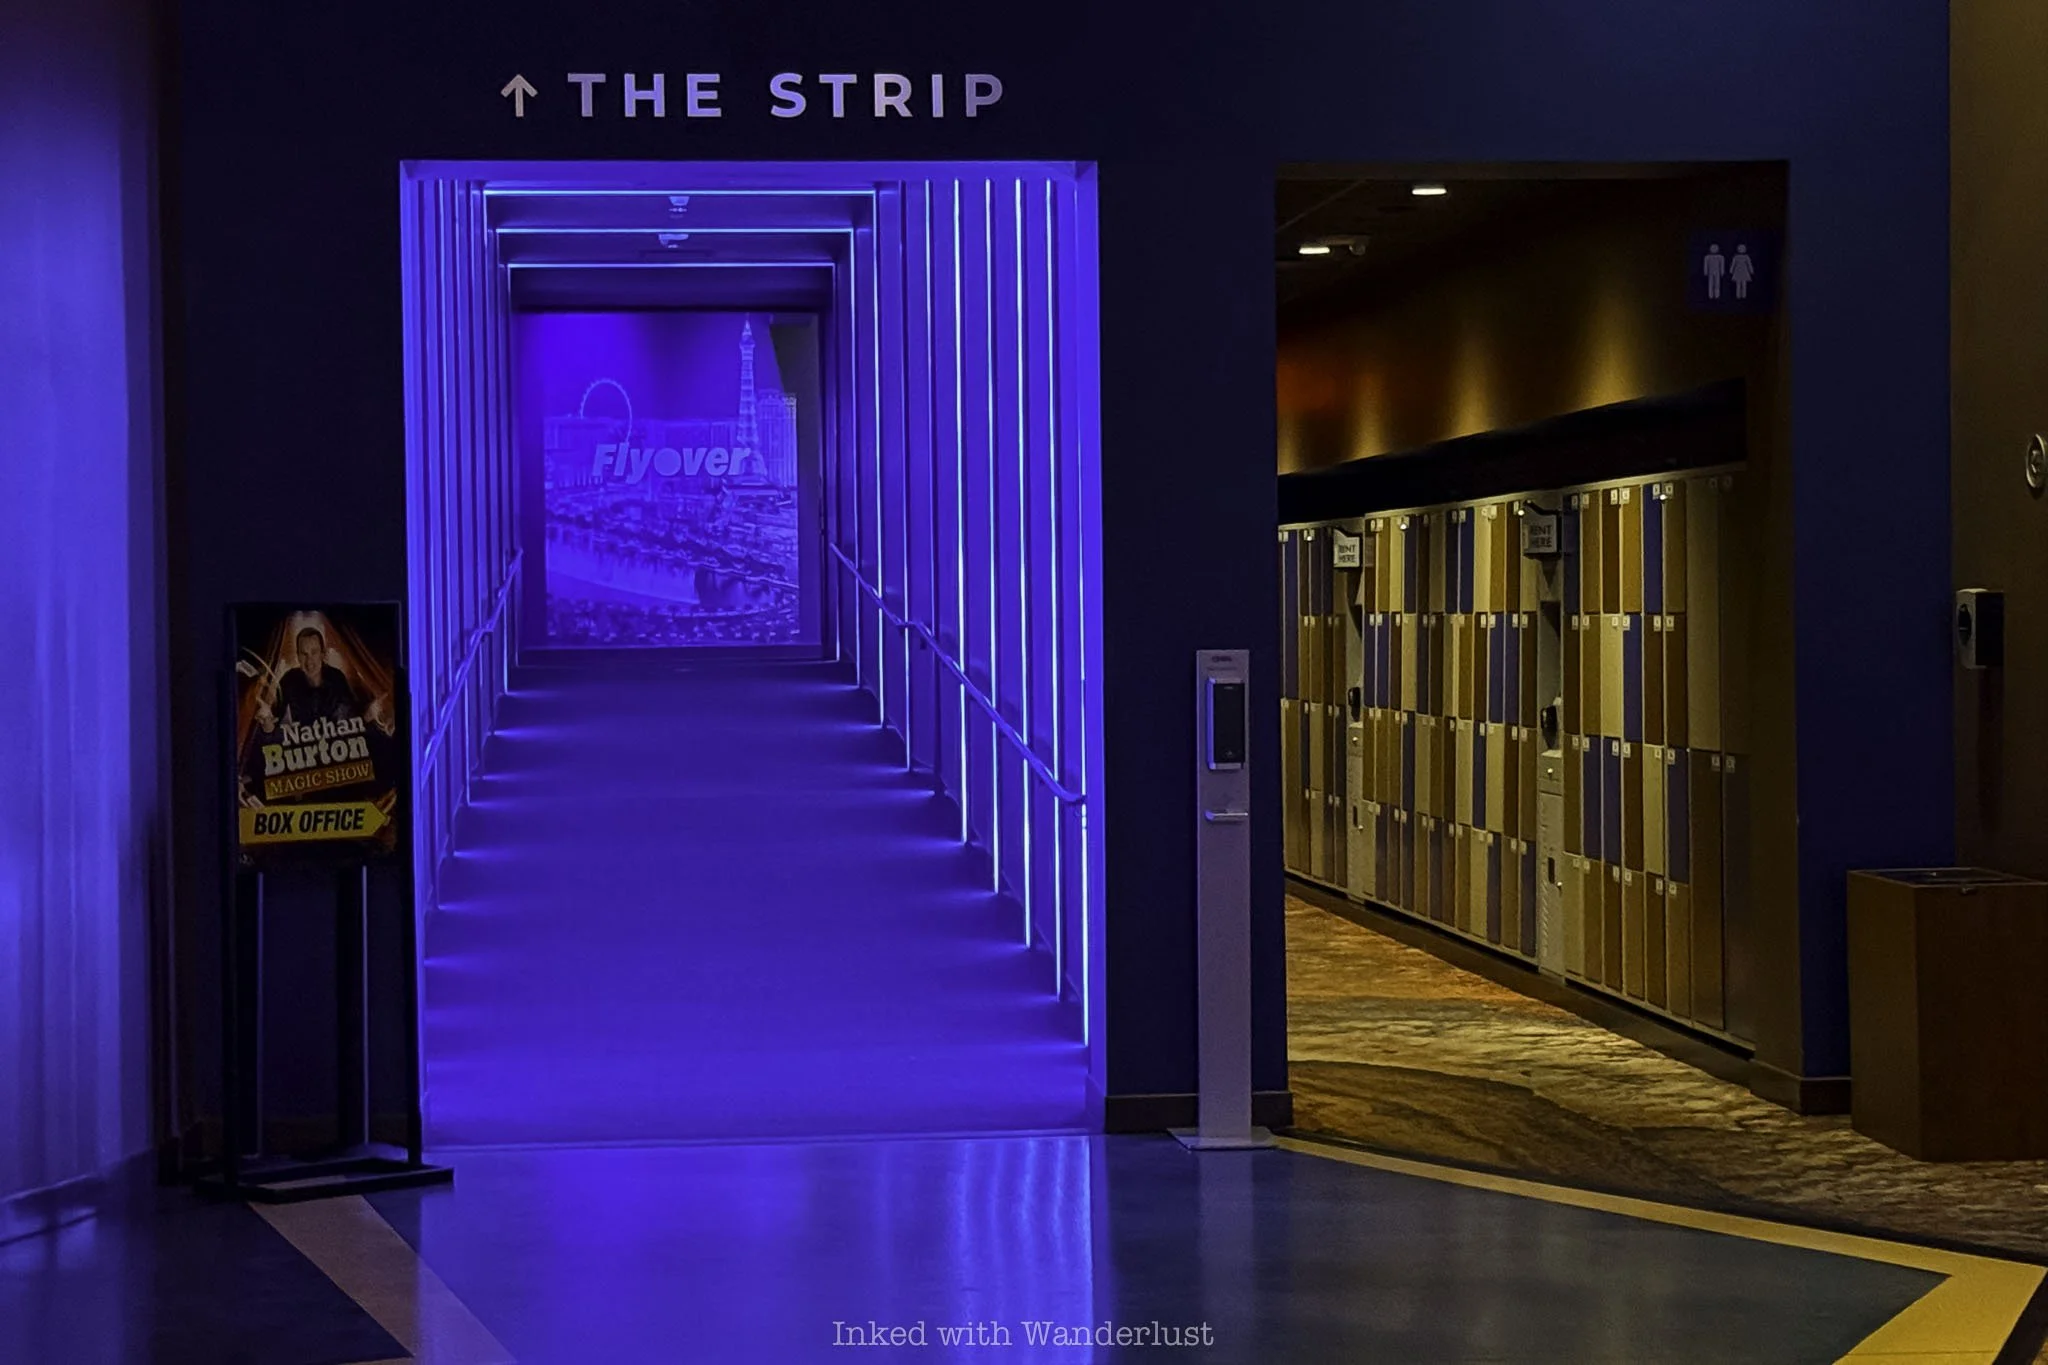
My wife and I arrived about fifteen minutes before our first scheduled ride. We entered through the strip-facing entrance and walked through a series of color-illuminated hallways before coming into the building’s atrium.
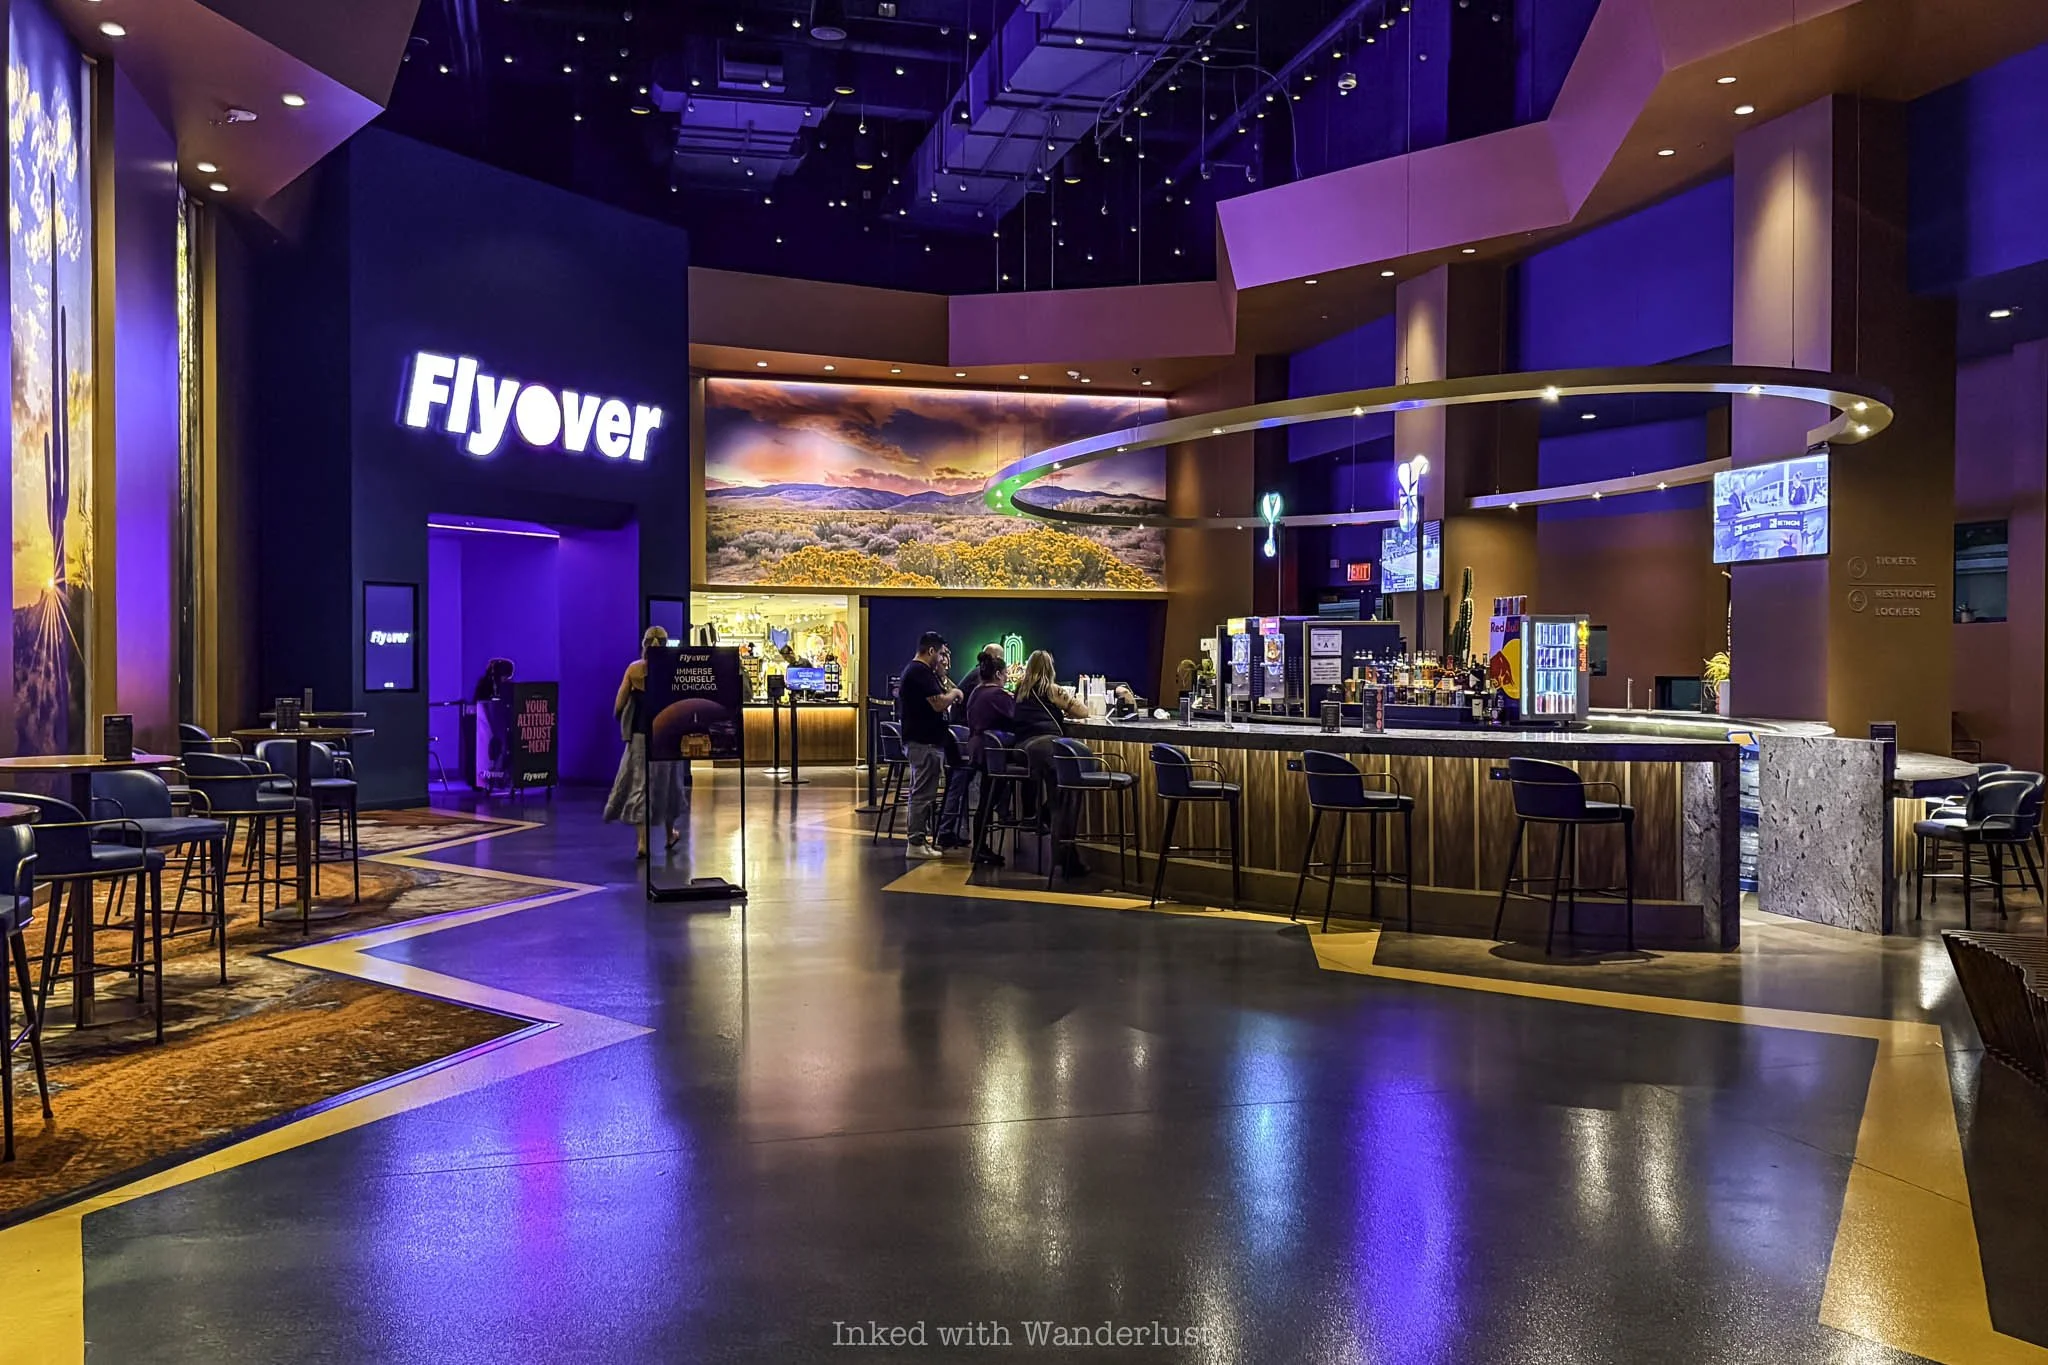
The first notable feature was the on-site bar. To the left of the bar is the entrance to the ride’s queue. Just beyond the bar is the gift shop and also where you can purchase tickets, if needed. Directly to your left will be lockers where you can store your belongings (not mandatory).
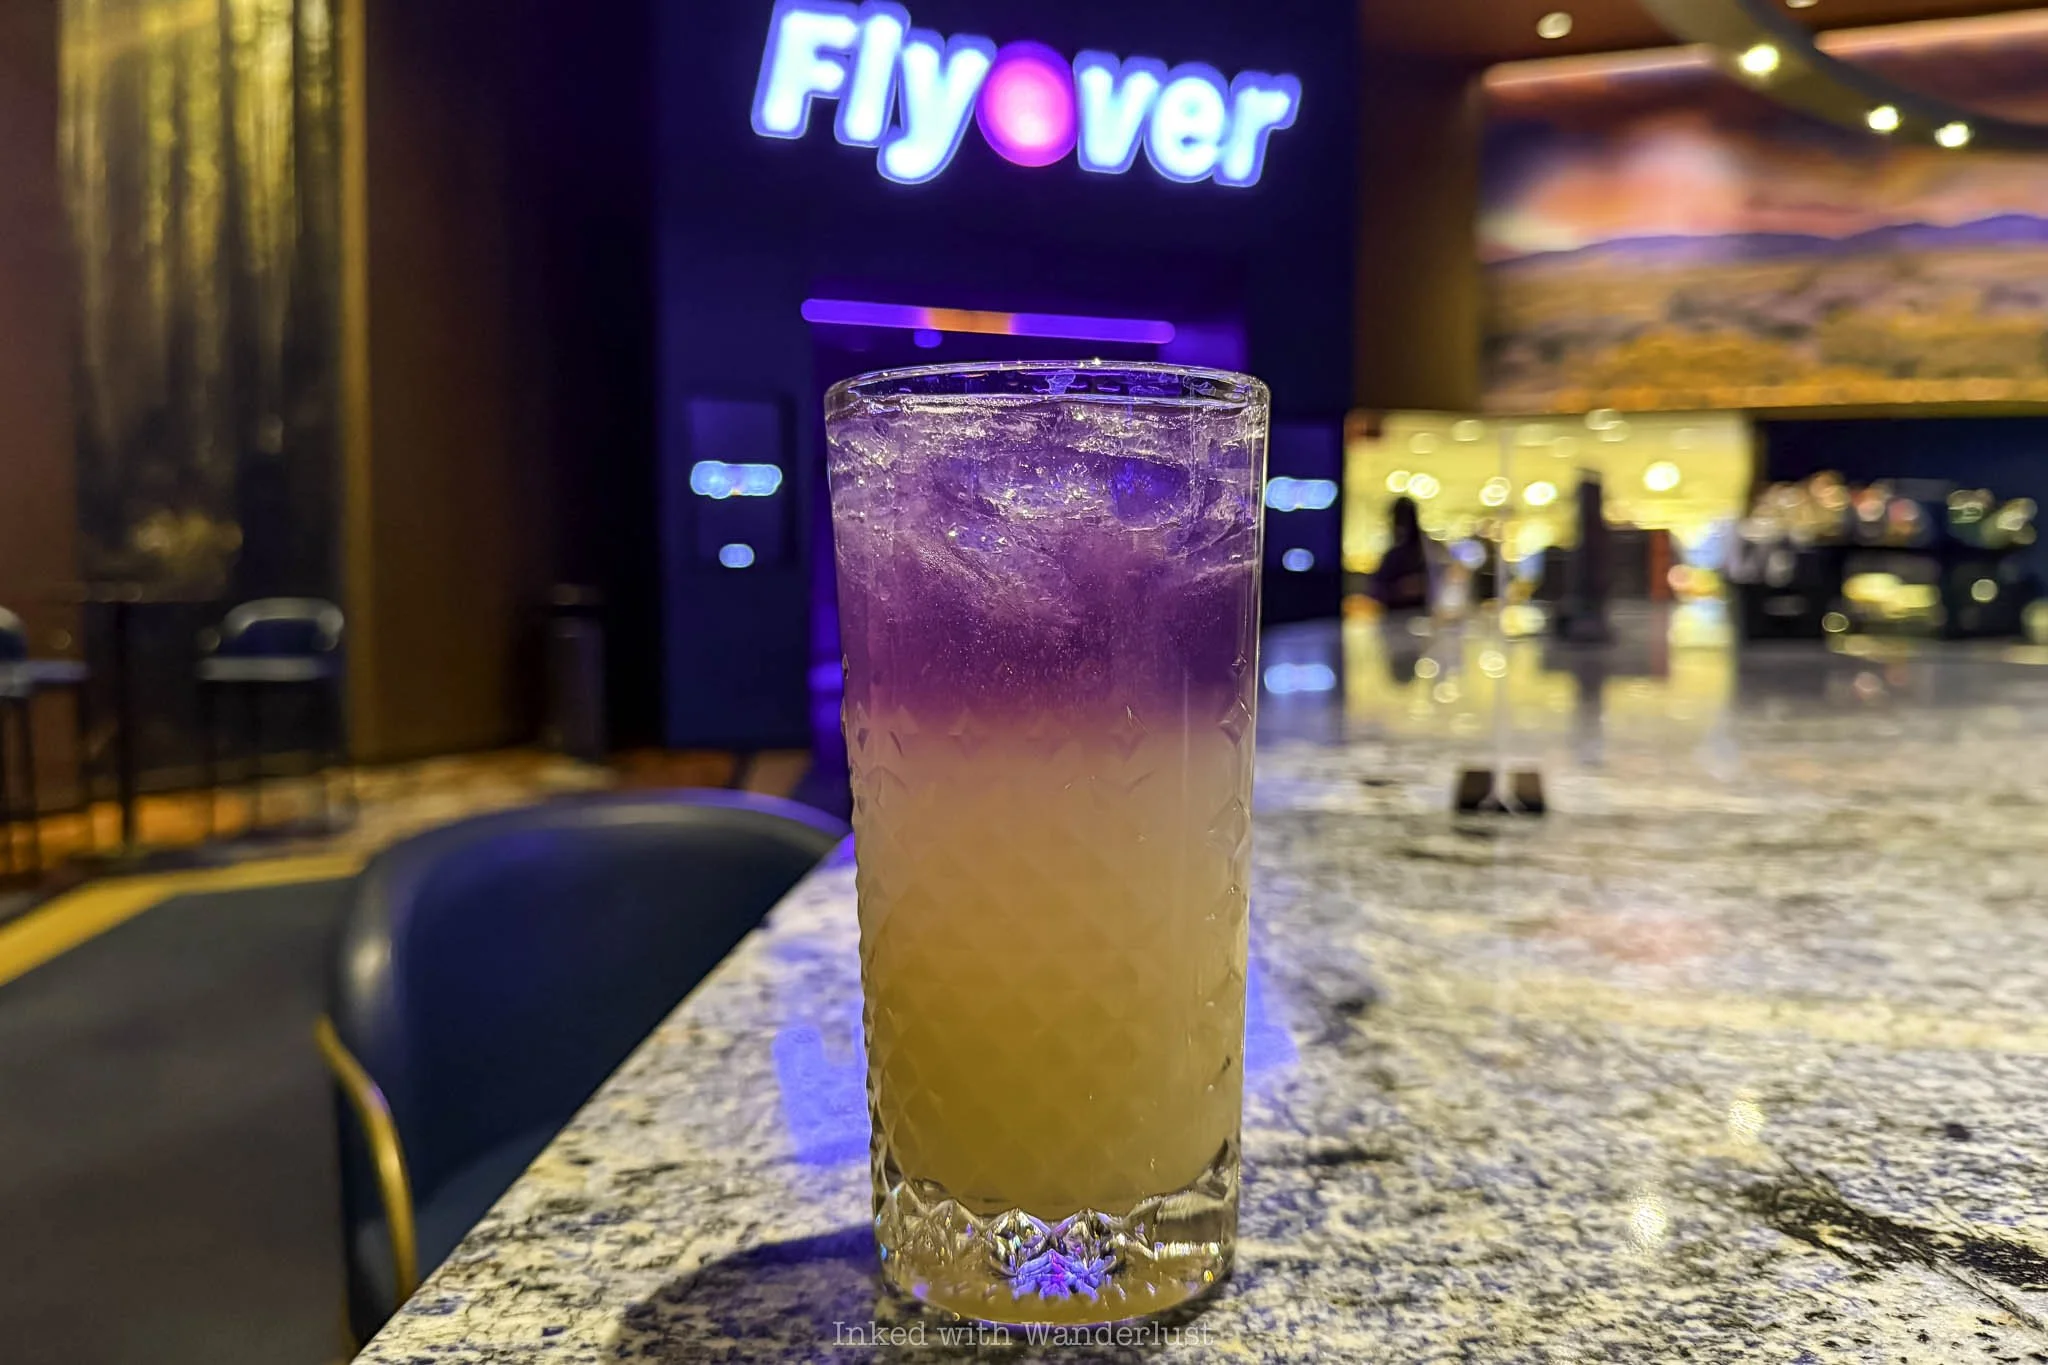
If you’re driving yourself here, this is where you’ll enter via the elevator (to the right of the bar) from the parking garage. We had some time to kill before our ride so my wife and I enjoyed a drink and some hilarious conversation with the friendly bartender.
I was in Las Vegas in early May for punk band No Doubt’s residency performance at The Sphere. This time of year is a pretty good time to go, crowd and weather-wise. As a result, we were two of just half a dozen or so people at Flyover.
When it came time for our first ride, we paid our tab and headed over to the queue. There, the friendly staff member scanned our tickets and explained to us what to expect. We then began a lengthy walk through an empty queue to the first holding area.
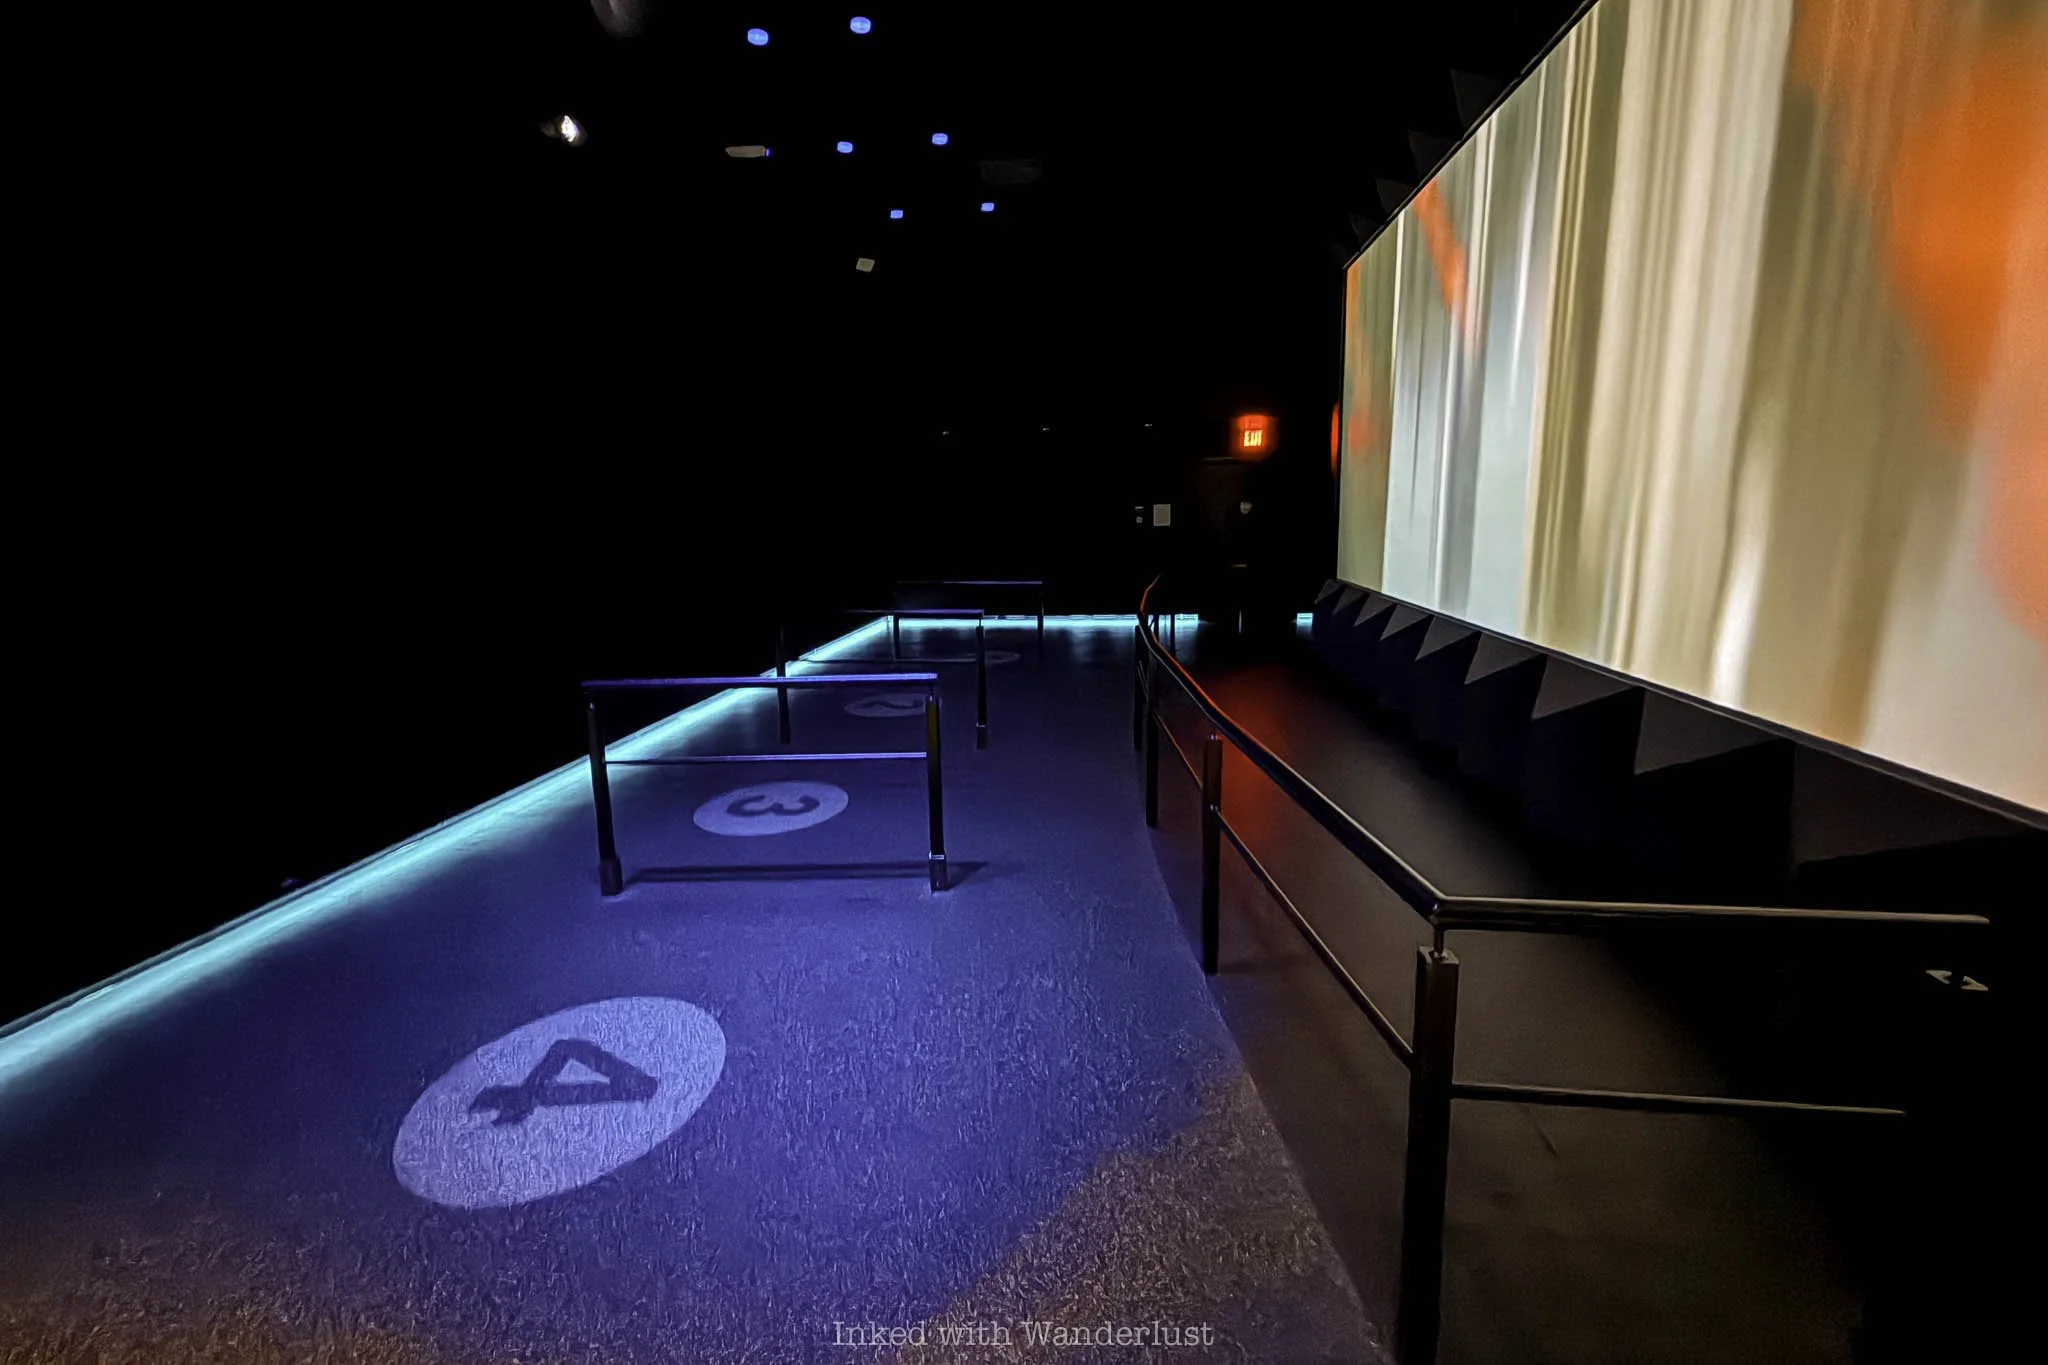
When you come into the room you’ll take notice of the numbers on the ground and rails between them. A staff member will assign you a number and you’ll then go to that space. According to our bartender, if it’s busy, they’ll put up to ten people in each space.
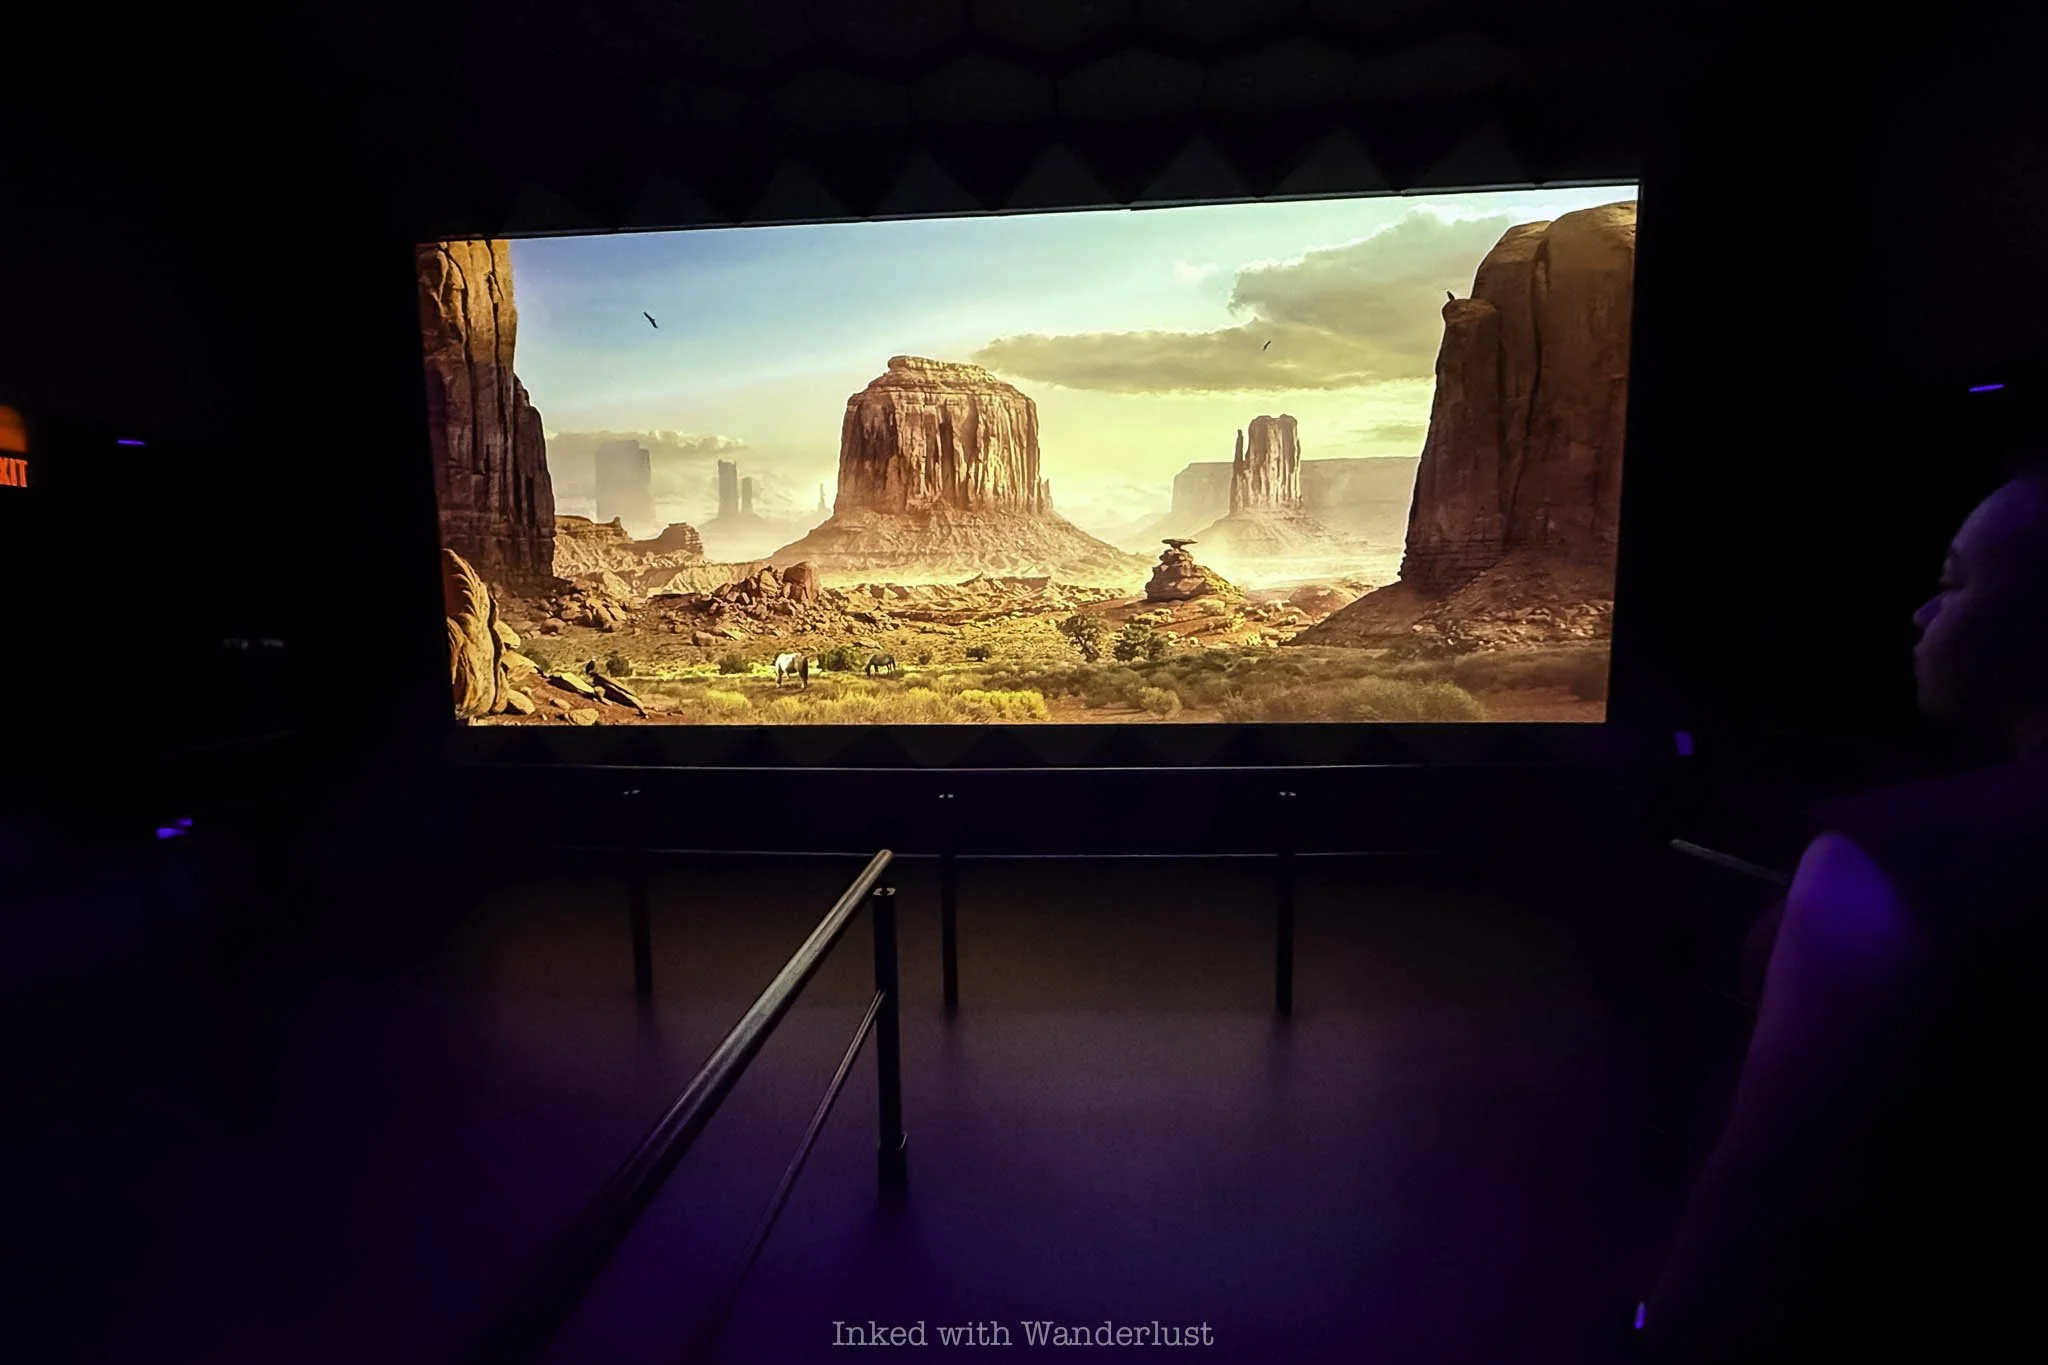
This is where we watched the first of two presentation videos, the content of which will depend on your choice of ride theme. For our “Double Experience” ticket, we chose “Wonders of the American West” and “Believe Chicago”.
In this case, our first ride was the former. You’ll be given basic safety instructions and be shown examples of scenes you’ll be flying through. I don’t remember the video’s exact length, but it couldn’t have been more than five minutes.
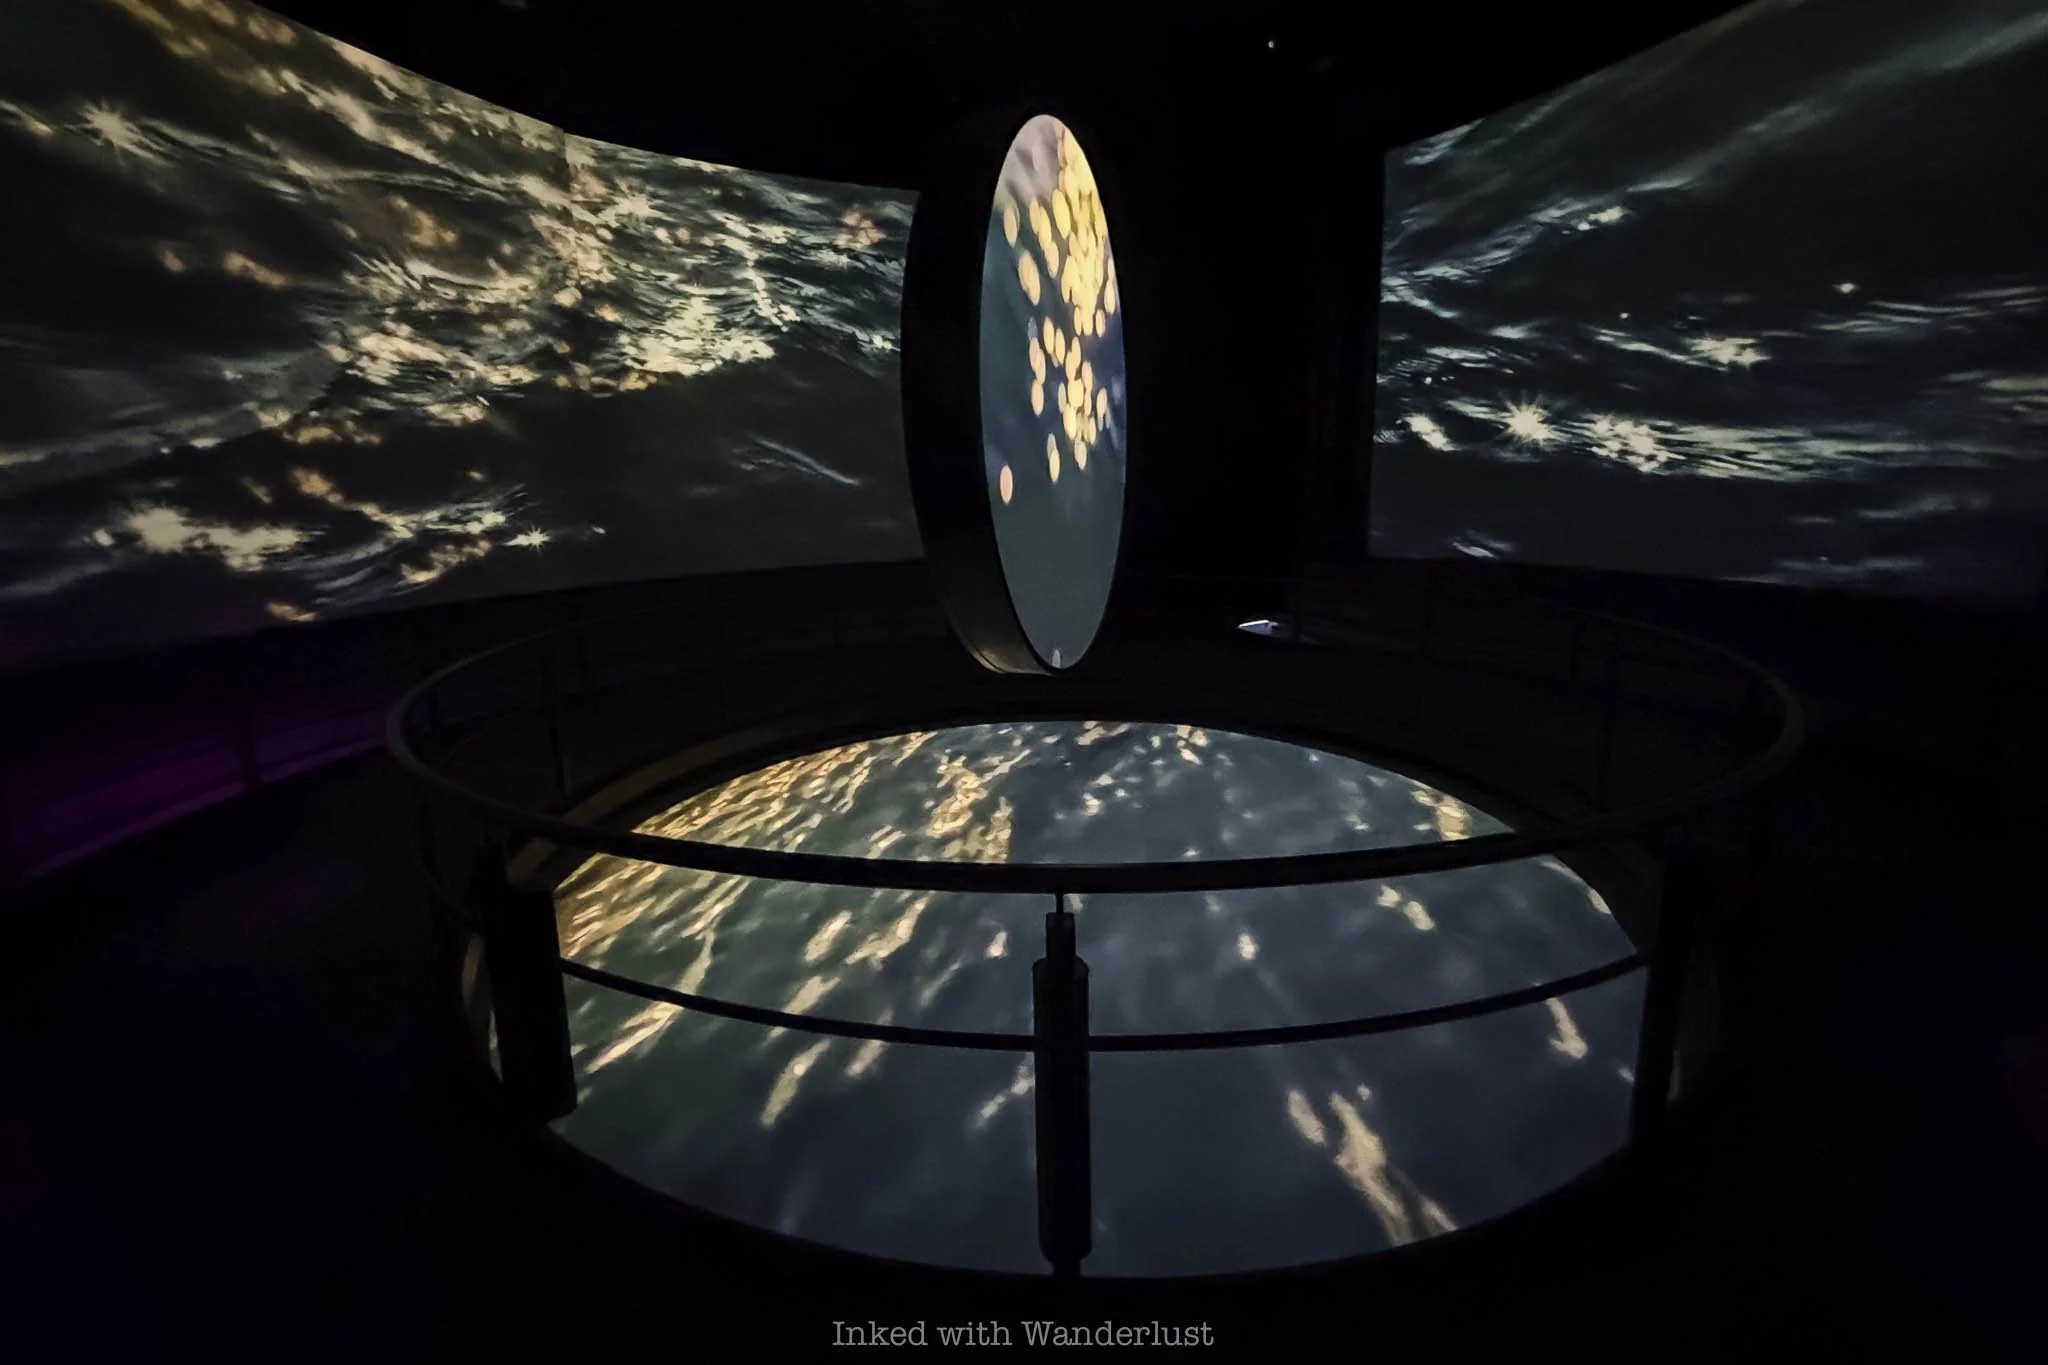
At the conclusion of the first video, we were lead into yet another showroom, this one with more screens and a central oval-shaped screen display. This video is longer (roughly ten or twelve minutes). It articulates the history, development and highlights of the theme you selected.
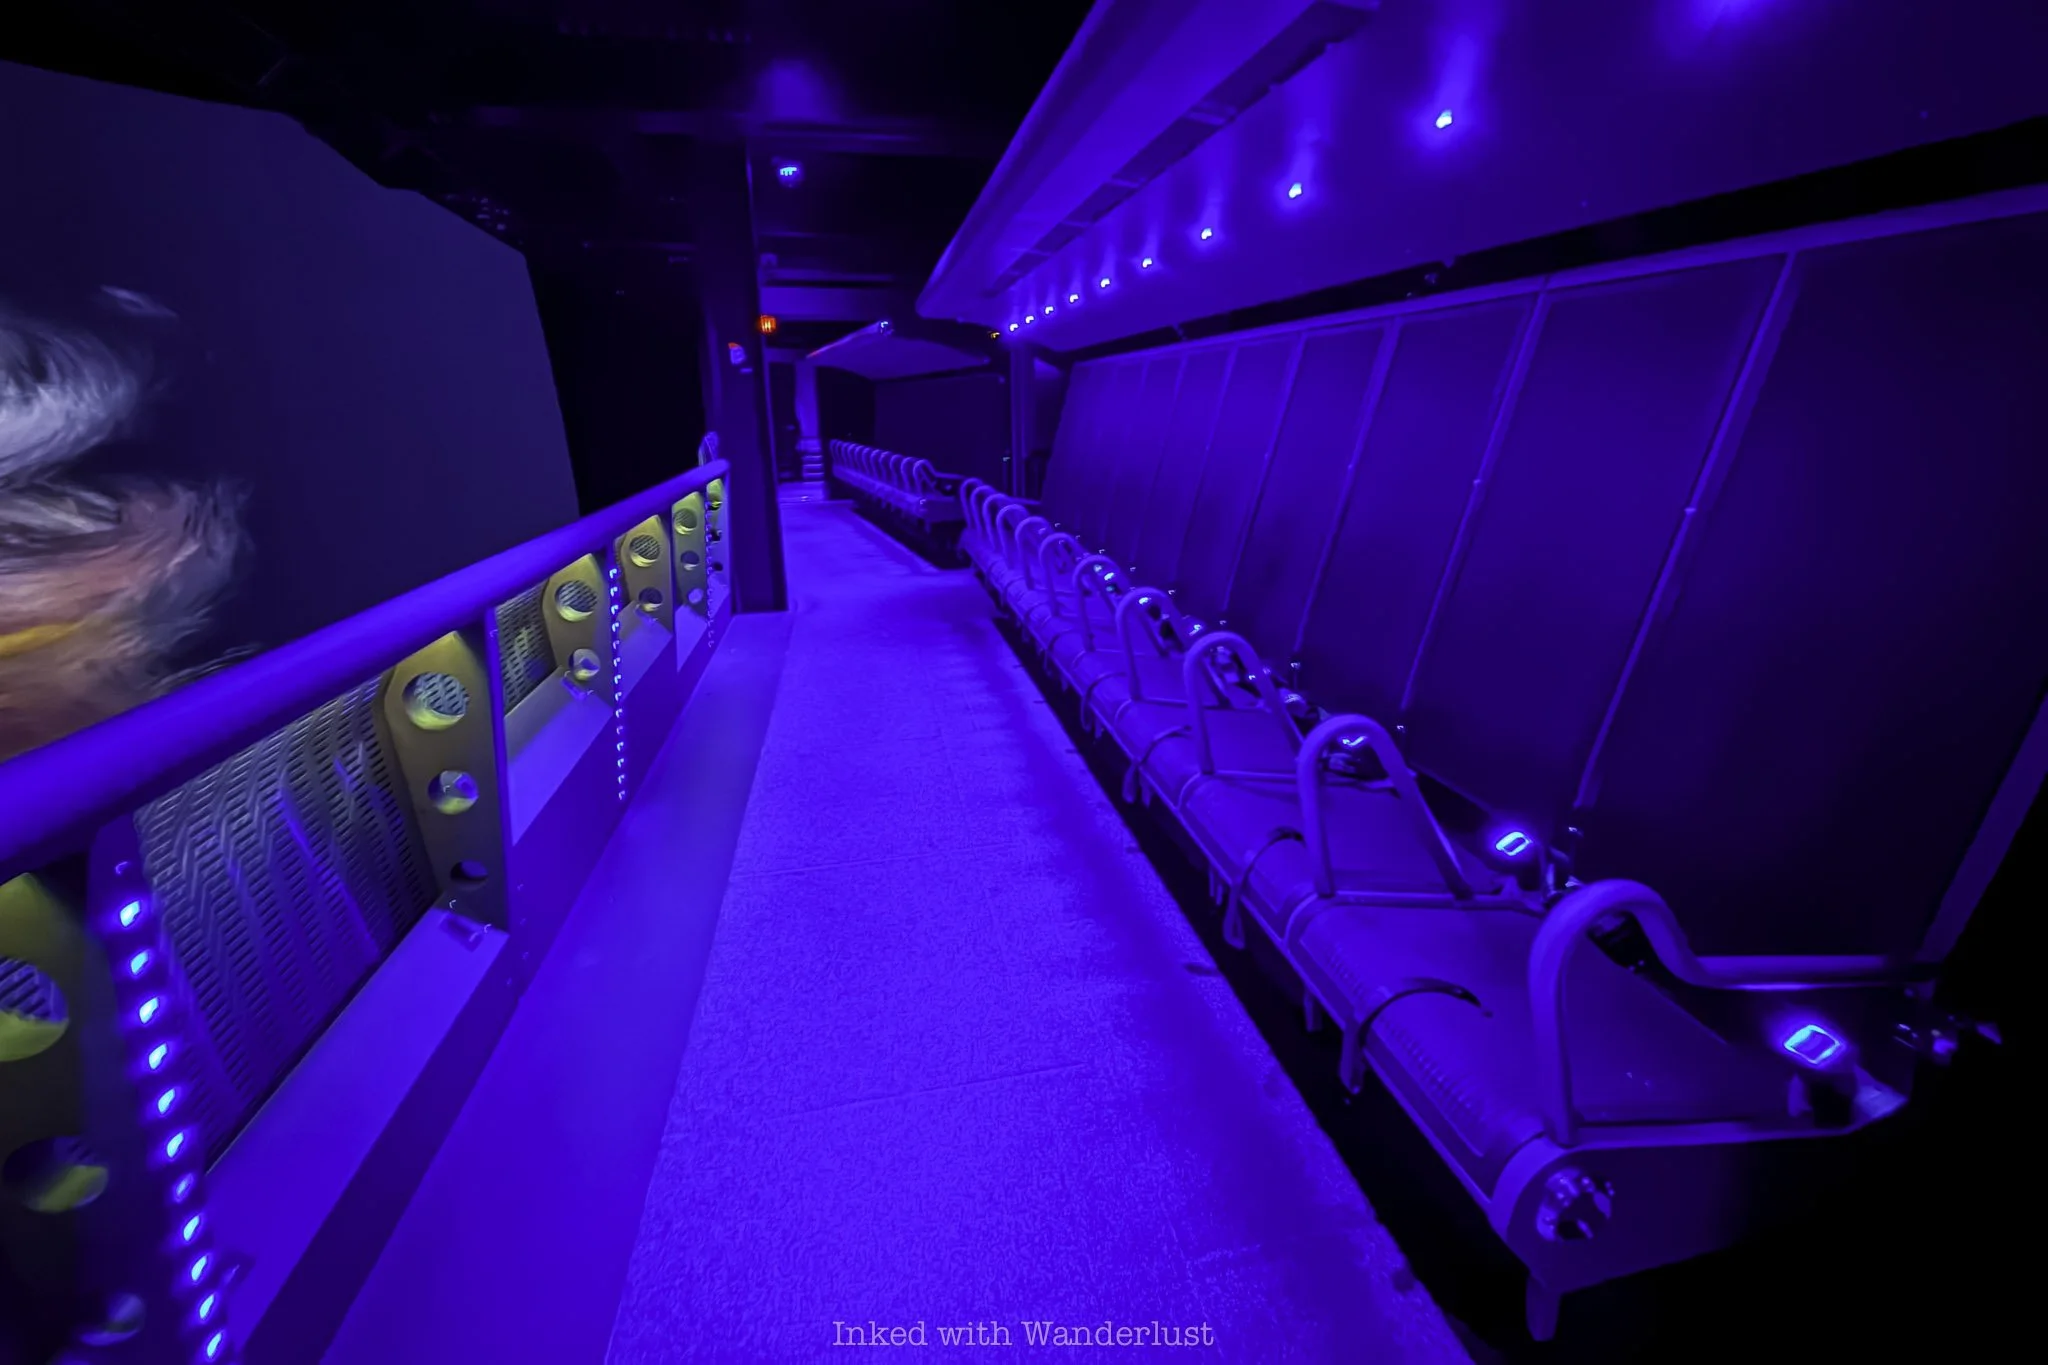
After a brief safety spiel by a staff member, we were then taken into the theatre where the ride vehicle is located. If you’ve ridden Disneyland’s “Soarin” attraction, you’ll undoubtedly recognize the ride vehicle as it’s virtually the same thing.
In fact, the creative director behind Flyover is former Disney imagineer Rick Rothschild, who developed the films used in the original Soarin’ attraction. Mark Sumner, who invented the ride mechanics for Soarin’ using an old Erector set, is not involved with Flyover.
There is no recording or photos allowed while the ride is in progress, thus, I don’t have any to show you. Therefore, I’ll do my best to articulate the ride and what to expect while you’re on it. Again, if you’ve ridden Soarin’ at Disneyland or Epcot, you’ll need no help from me.
Once you’ve been strapped in and checked by a staff member, you’re lifted into the air in front of a massive spherical screen. You’re not lifted very high, maybe thirty to forty feet off the ground. However, it feels much higher once the video begins.
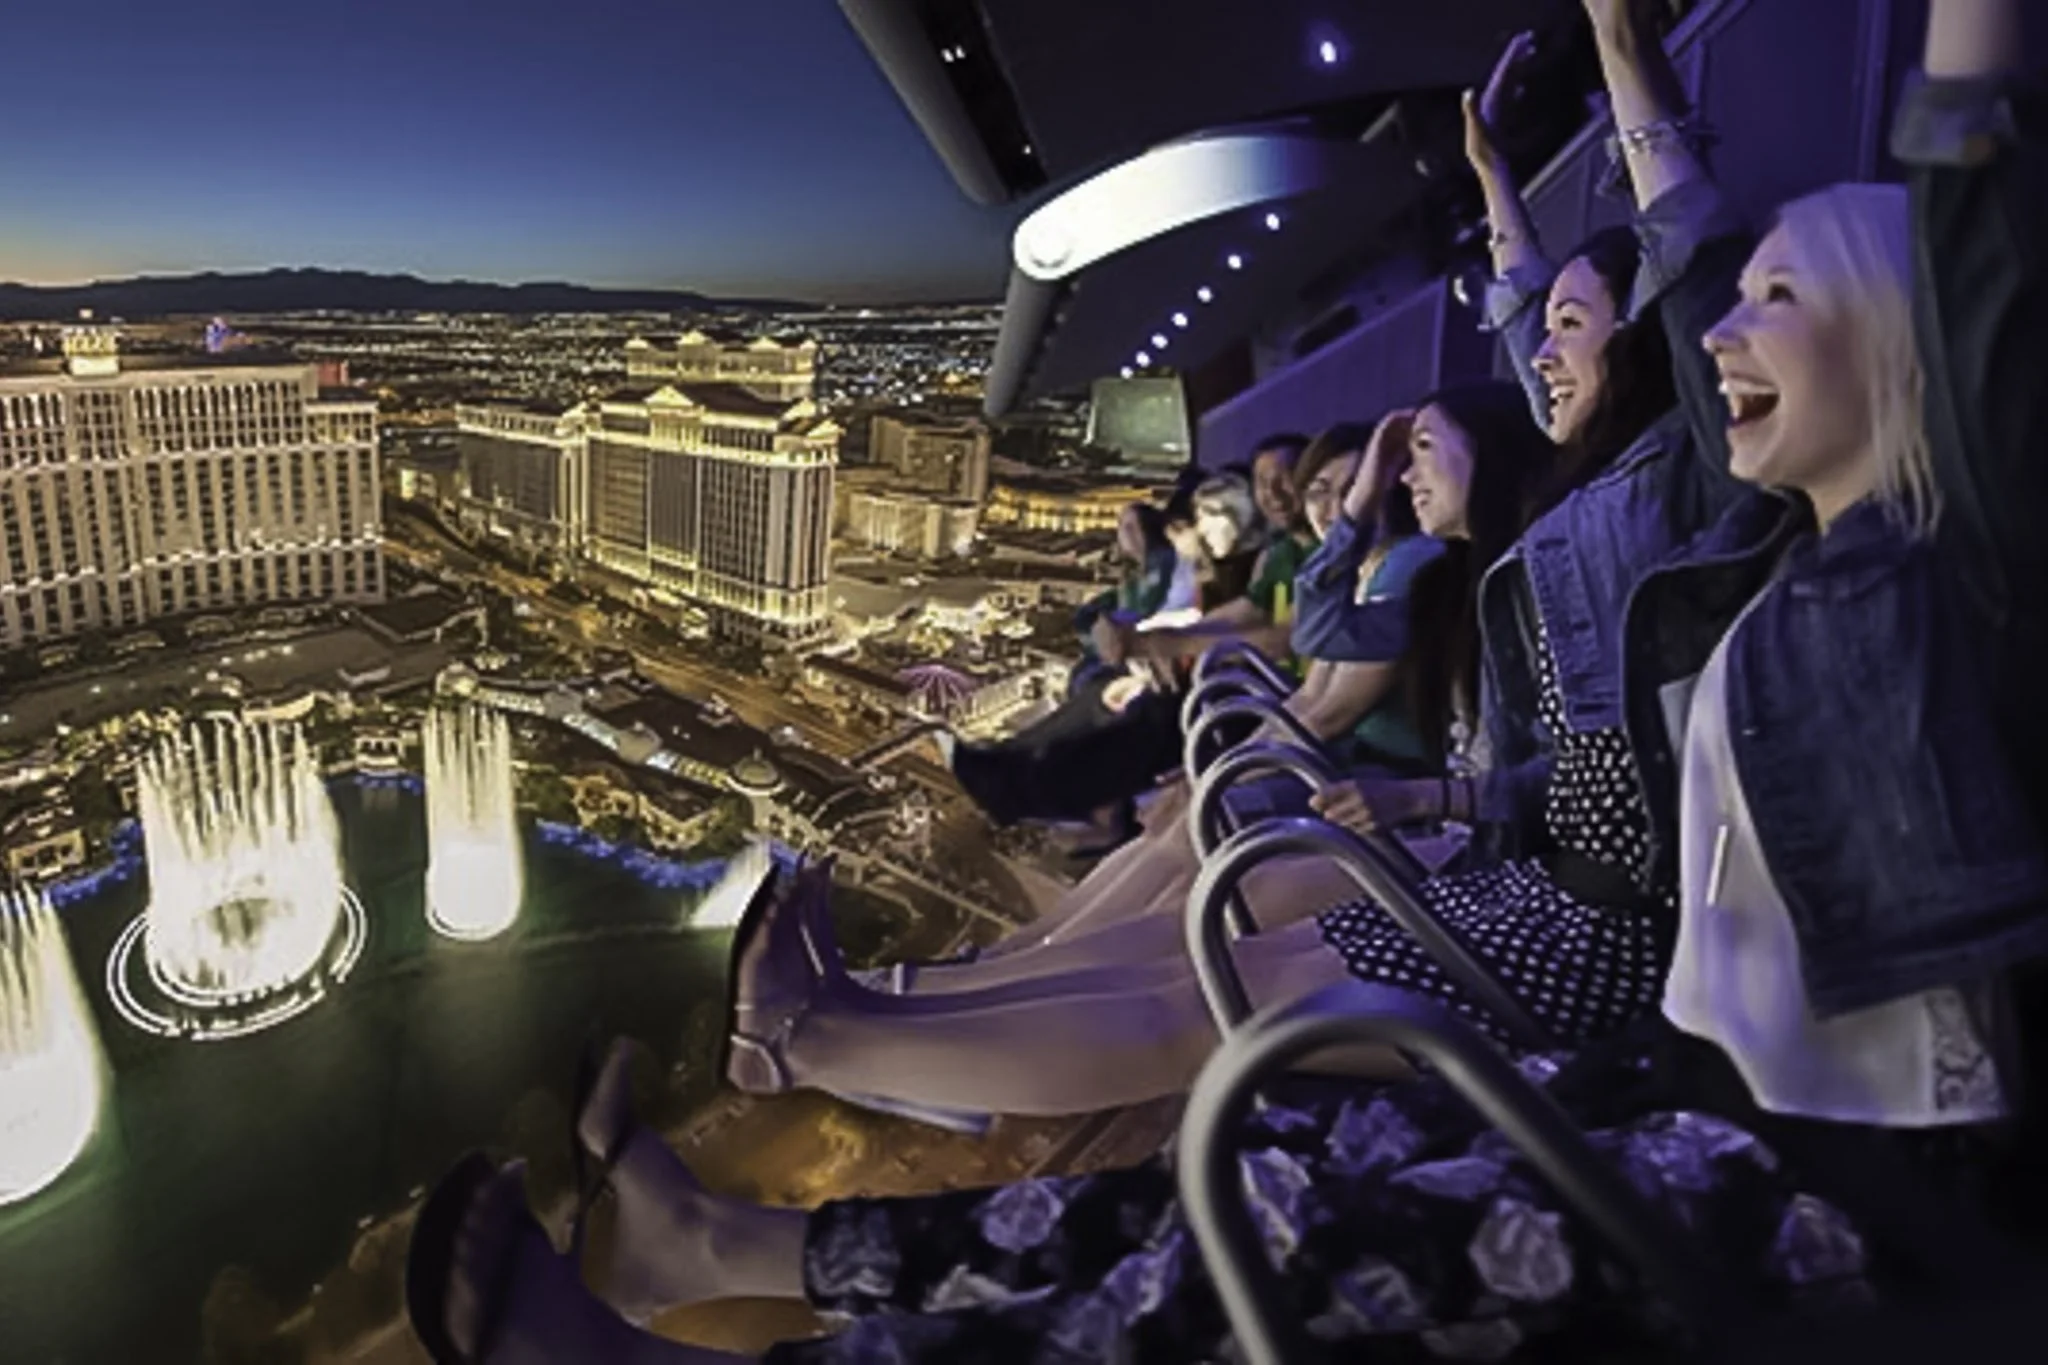
The ride mechanics give you a sense of gliding in the air over multiple locations using several sensory tricks. The weightless feeling comes from the motion-based mechanics above you while synchronized wind effects, misters, scents and audio complete the sensation rather convincingly.
I cannot recall, nor did I recognize, every scene we glided through. There were twenty-two scenes all together. However, a handful of a few I can recall include:
California Coast (Big Sur, Monterey, etc)
Las Vegas Strip
Bonneville Salt Flats
Grand Canyon
Zion National Park
Yellowstone National Park
Monument Valley
Unlike their counterpart at Disneyland, there’s a bit of a thrill element at Flyover. It’s nothing extreme, but during one scene we were “gliding” above the Nevada desert aside several military jets. When the jets began to barrel roll, we seemingly followed suit.
Now, we didn’t actually go upside down (this is a family-friendly attraction). However, using the motion platform above our chairlift-style seats and a vibration effect, as well as the video itself, we were excellently and convincingly given the feeling that we were, in fact, barrel rolling.
Both of the rides we took were between nine and ten minutes in length, nearly double that of Disney’s. When your ride is finished, you’ll simply head out the exit and through the photo station and gift shop. If you’re riding again, check with the attendant on when your ride starts.
There are many other attractions, shops, restaurants and lounges nearby if you’re looking for more to do. A short walk from Flyover is one of my favorite pizzas on the strip, “How ya Dough’n”, which is on the top level of the BLVD complex.
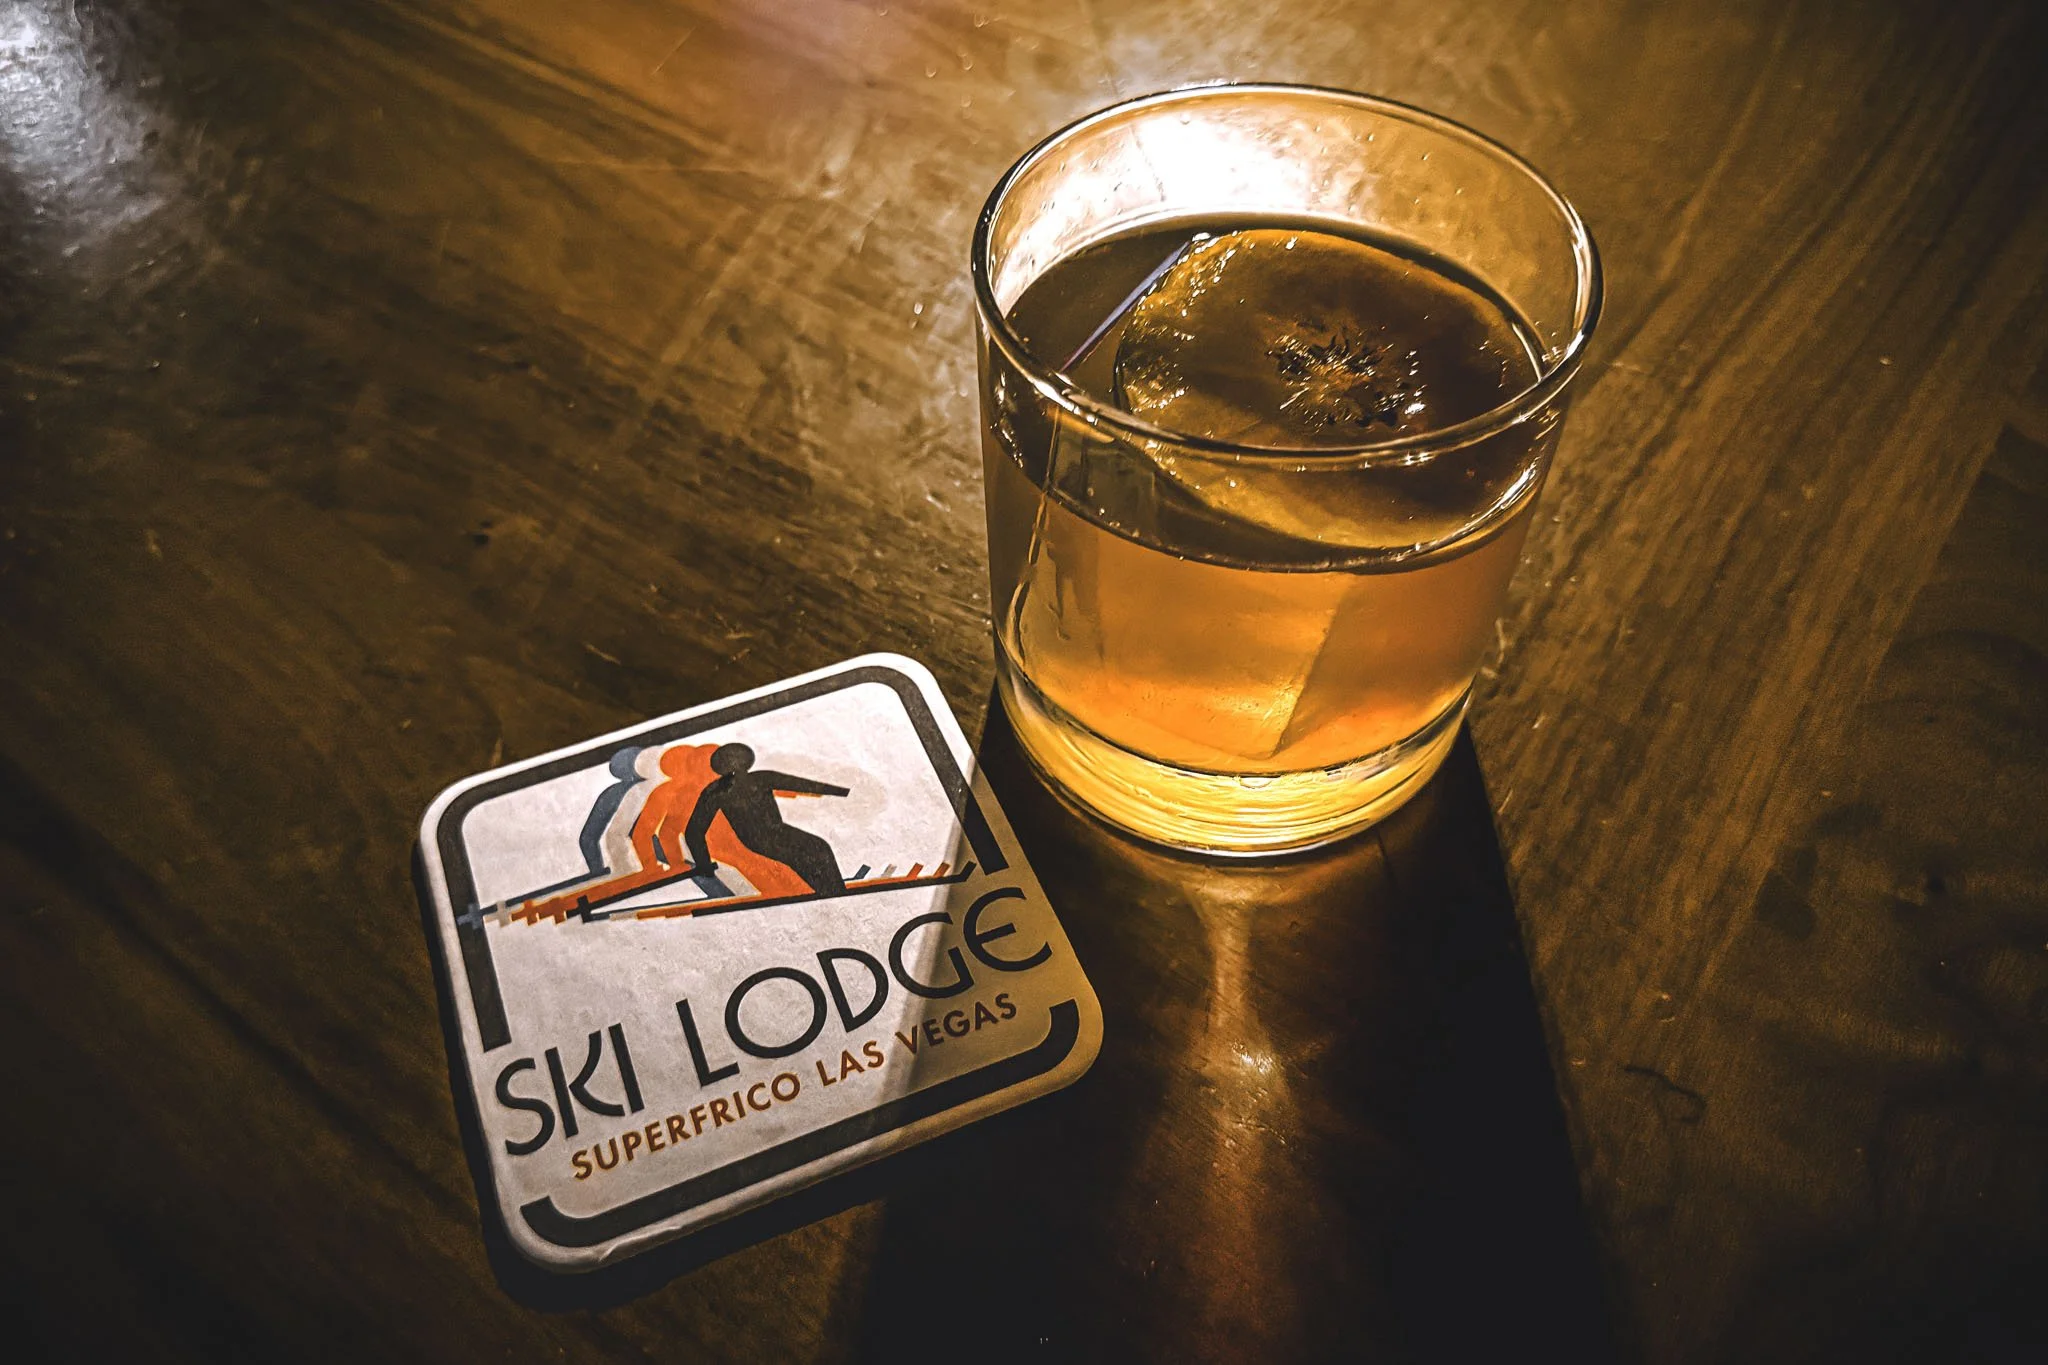
The M&M and Coca Cola stores are both nearby, as well as "Titanic: The Artifact Exhibition” museum at the Luxor (one of my personal favorites). Or you can take the short walk across the strip to the Cosmopolitan and enjoy a drink or two at the “Ski Lodge” speakeasy.
Is Flyover Worth it for Kids?
In short - absolutely. Flyover is one of the premiere family-friendly attractions on the Las Vegas strip. The only caveat to that is your child must be at least 40’’ tall to ride.
If their height doesn’t meet a certain benchmark on the ride vehicle, a secondary safety feature will be used to secure them. Basically, their seatbelt will need to be looped into the strap in the middle of their seat.
If they don’t meet the 40’’ height requirement, they unfortunately cannot ride. This is for safety reasons and the staff members will not bend this rule for any reason.
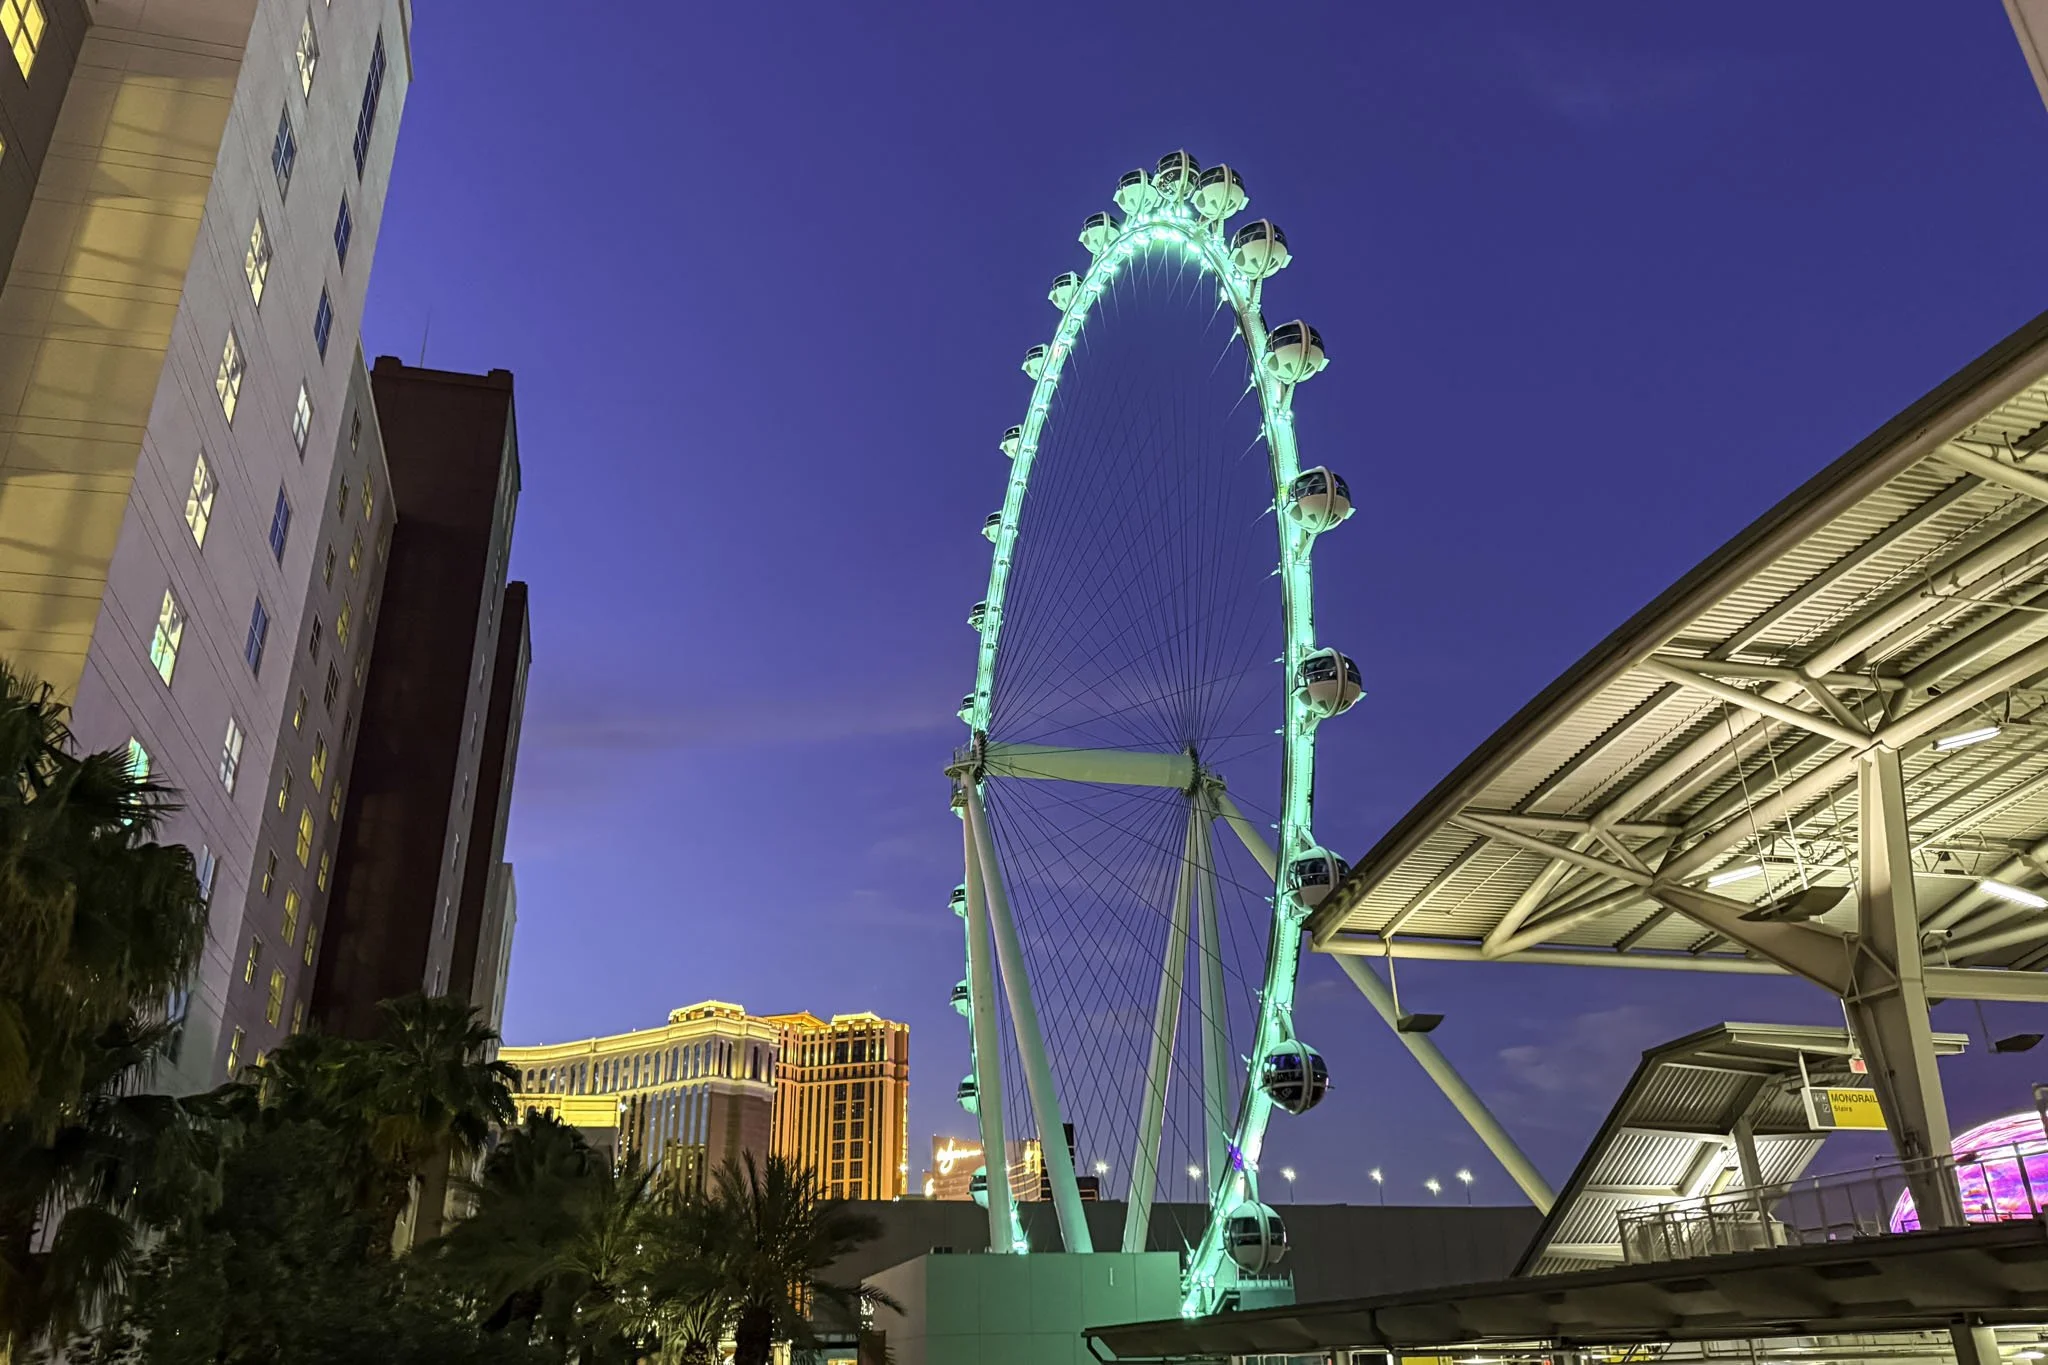
If they don’t meet this height requirement, head over to the Linq Promenade and take a ride on High Roller. At 550-feet, it’s the tallest in North America. Or test your courage at Universal Horror Unleashed at Area 15!
If you found this review helpful, please consider leaving a tip by clicking/tapping the “Buy me a Coffee” button below. These tips help to pay for expenses such as gas, food, coffee, parking fees, admission fees, etc. Thank you!


6 Best Northern Nevada Pumpkin Patches and Corn Mazes (Reno, Sparks, and Beyond)
There are quite a few aspects of fall people love - cooler temperatures, beautiful gold and orange colors taking over the foliage…
Disclosure: This post contains affiliate links. If you make a purchase through these links, I may earn a small commission at no additional cost to you. I only recommend products or services that I believe will add value to my readers.

There are quite a few aspects of fall people love - cooler temperatures, beautiful gold and orange colors taking over the foliage, and pumpkin spiced-flavored everything, to name a few. The biggest, however, seem to be pumpkin patches and corn mazes.
Throughout Northern Nevada, there are numerous popular farms that open their properties to the general public every fall season. They each offer several activities aside from pumpkin picking, including corn mazes, tracker rides, haunts and more.
In this post, I’m going to list six of the best pumpkin patches in Northern Nevada. In each listing, I’ll discuss their locations, operating dates/hours, prices, activities offered, parking situation, and other pertinent information. Let’s get into it!
1) Renner Farm - Smith Valley

Location: 2493 NV-208, Smith Valley, NV
Price: None listed
Operating: Tuesday - Sunday beginning September 27, 2025
Parking Available: Yes
Renner Farm in Smith Valley, which is just a short drive from Yerington or Gardnerville, respectively, is open year round and typically features a variety of fresh produce, honey and farm-raised eggs. In the fall, however, this family-operated farm opens its pumpkin patch and themed corn maze to the public.
The corn maze has a different theme every year and usually has some kind of challenge or mystery involved. They don’t list prices on their website but I have been there more than a few times and it’s typically just a few bucks per person. Corn maze hours are as follows:
Tuesday - Thursday: 12-5pm
Friday - Saturday: 12-9pm
Sunday: 12-7pm
Aside from the corn maze and pumpkin patch, Renner Farm also offers hay rides, baked goods for sale, an annual harvest party and in the past, they’ve offered an evening haunt version of the corn maze. No word on if that’s happening this year, though. Afterwards, be sure to stop and hike through nearby Wilson Canyon.
2) Corley Ranch - Gardnerville

Location: 859 US Highway 395 North, Gardnerville, NV
Price: $8 - $12 per person
Operating: Daily beginning September 27, 2025
Parking Available: Yes
The annual harvest festival at Corley Ranch officially begins on September 27 and runs daily between 10am and 5pm throughout the month of October, before concluding on October 31. General admission is $8 on weekdays and $12 on weekends.
Included with your admission is the corn maze, farm animal petting zoo, 9-hole mini golf, straw maze, pig races, hay slide and hay wagon ride. It does NOT include the giant sling shot ($1), train rides ($2), and pumpkins (costs vary by size).
Corley Ranch is one of the stand-out pumpkin patches in Northern Nevada as they offer several unique activities that most don’t. They also offer a variety of food vendors on the weekends, negating the need to leave early.
3) Lattin Farms - Fallon

Location: 1955 McLean Road, Fallon, NV
Price: $15.23 per person (combo ticket)
Operating: September 27 and select dates throughout October 2025
Parking Available: Yes
Lattin Farms’ festival harvest has been held in Fallon annually for years. They’re specifically known for their frustratingly challenging corn maze, where you could spend hours (maybe that’s just me) trying to find your way out.
Other than the corn maze (which is worth the visit all its own), Lattin Farms offers a huge selection of pumpkins, cow train rides, hayrides, and a craft fair. Unlike the other Northern Nevada pumpkin patches on this list, their fall festival is only on select dates in 2025. They are:
9/27
10/4
10/11
10/18
10/24
10/25
The majority of the activities are offered between 10am and 6pm, with the corn maze remaining open until 8pm. The craft fair features a variety of vendors offering unique and hand-crafted goods and food. You can pre-purchase combo tickets at their website.
4) Ferrari Farms - Reno

Location: 4701 Mill Street, Reno, NV
Price: Varies by activity
Operating: Daily beginning September 27, 2025
Parking Available: Yes
Nestled along the Truckee River, Ferrari Farms is a Reno landmark and are known for their pumpkin patch, sunflower fields, corn maze and seasonal events. Their pumpkin patch runs daily from September 27 to October 31, 10am-8pm (Sun - Thurs) and 10am-10pm (Fri and Sat).
Ferrari Farm doesn’t charge an admission fee. Rather, you simply pay per activity you choose. Prices are as follows:
Corn Stalks: $10
Hayride: $6 or $25 for up to five people
Corn Maze: $10
Corn Walk: $6
Additionally, food vendors are featured at the farm on select dates (you can view those and other events here). This includes Grindz, a popular coffee vendor which serves handcrafted, seasonal drinks. They’ll be present at Ferrari Farm every weekend throughout the season.
5) Andelin Family Farm - Sparks
Location: 8100 Pyramid Highway, Sparks, NV
Price: $13 - $18 per person (base price)
Operating: Wednesday - Saturday, beginning September 24, 2025
Parking Available: Yes
Andelin Farm is the mecca of Northern Nevada pumpkin patches, with over 30 attractions included with your general admission ticket. When you include their premium experiences, there’s literally something for everyone here.
Base price tickets are priced between $13 and $18, dependent on day, and include access to the pumpkin patches (yes, plural), wagon rides, bumpy buggies ride, mini zip line, slide mountain, digging sand pit, petting farm, straw bale maze, duck race, and more.
For an additional charge, you can also take part in their nighttime activities, which include Zombie Paintball and Corn Creepers, their haunted corn field, touted as Nevada’s largest haunted attraction with over a half-mile of scares!
Zombie Paintball starts at $15 and tops out at $27, dependent on day. Corn Creepers also starts at $15, but tops out at $32. Tickets for both (as well as general admission) can be purchased ahead of time online.
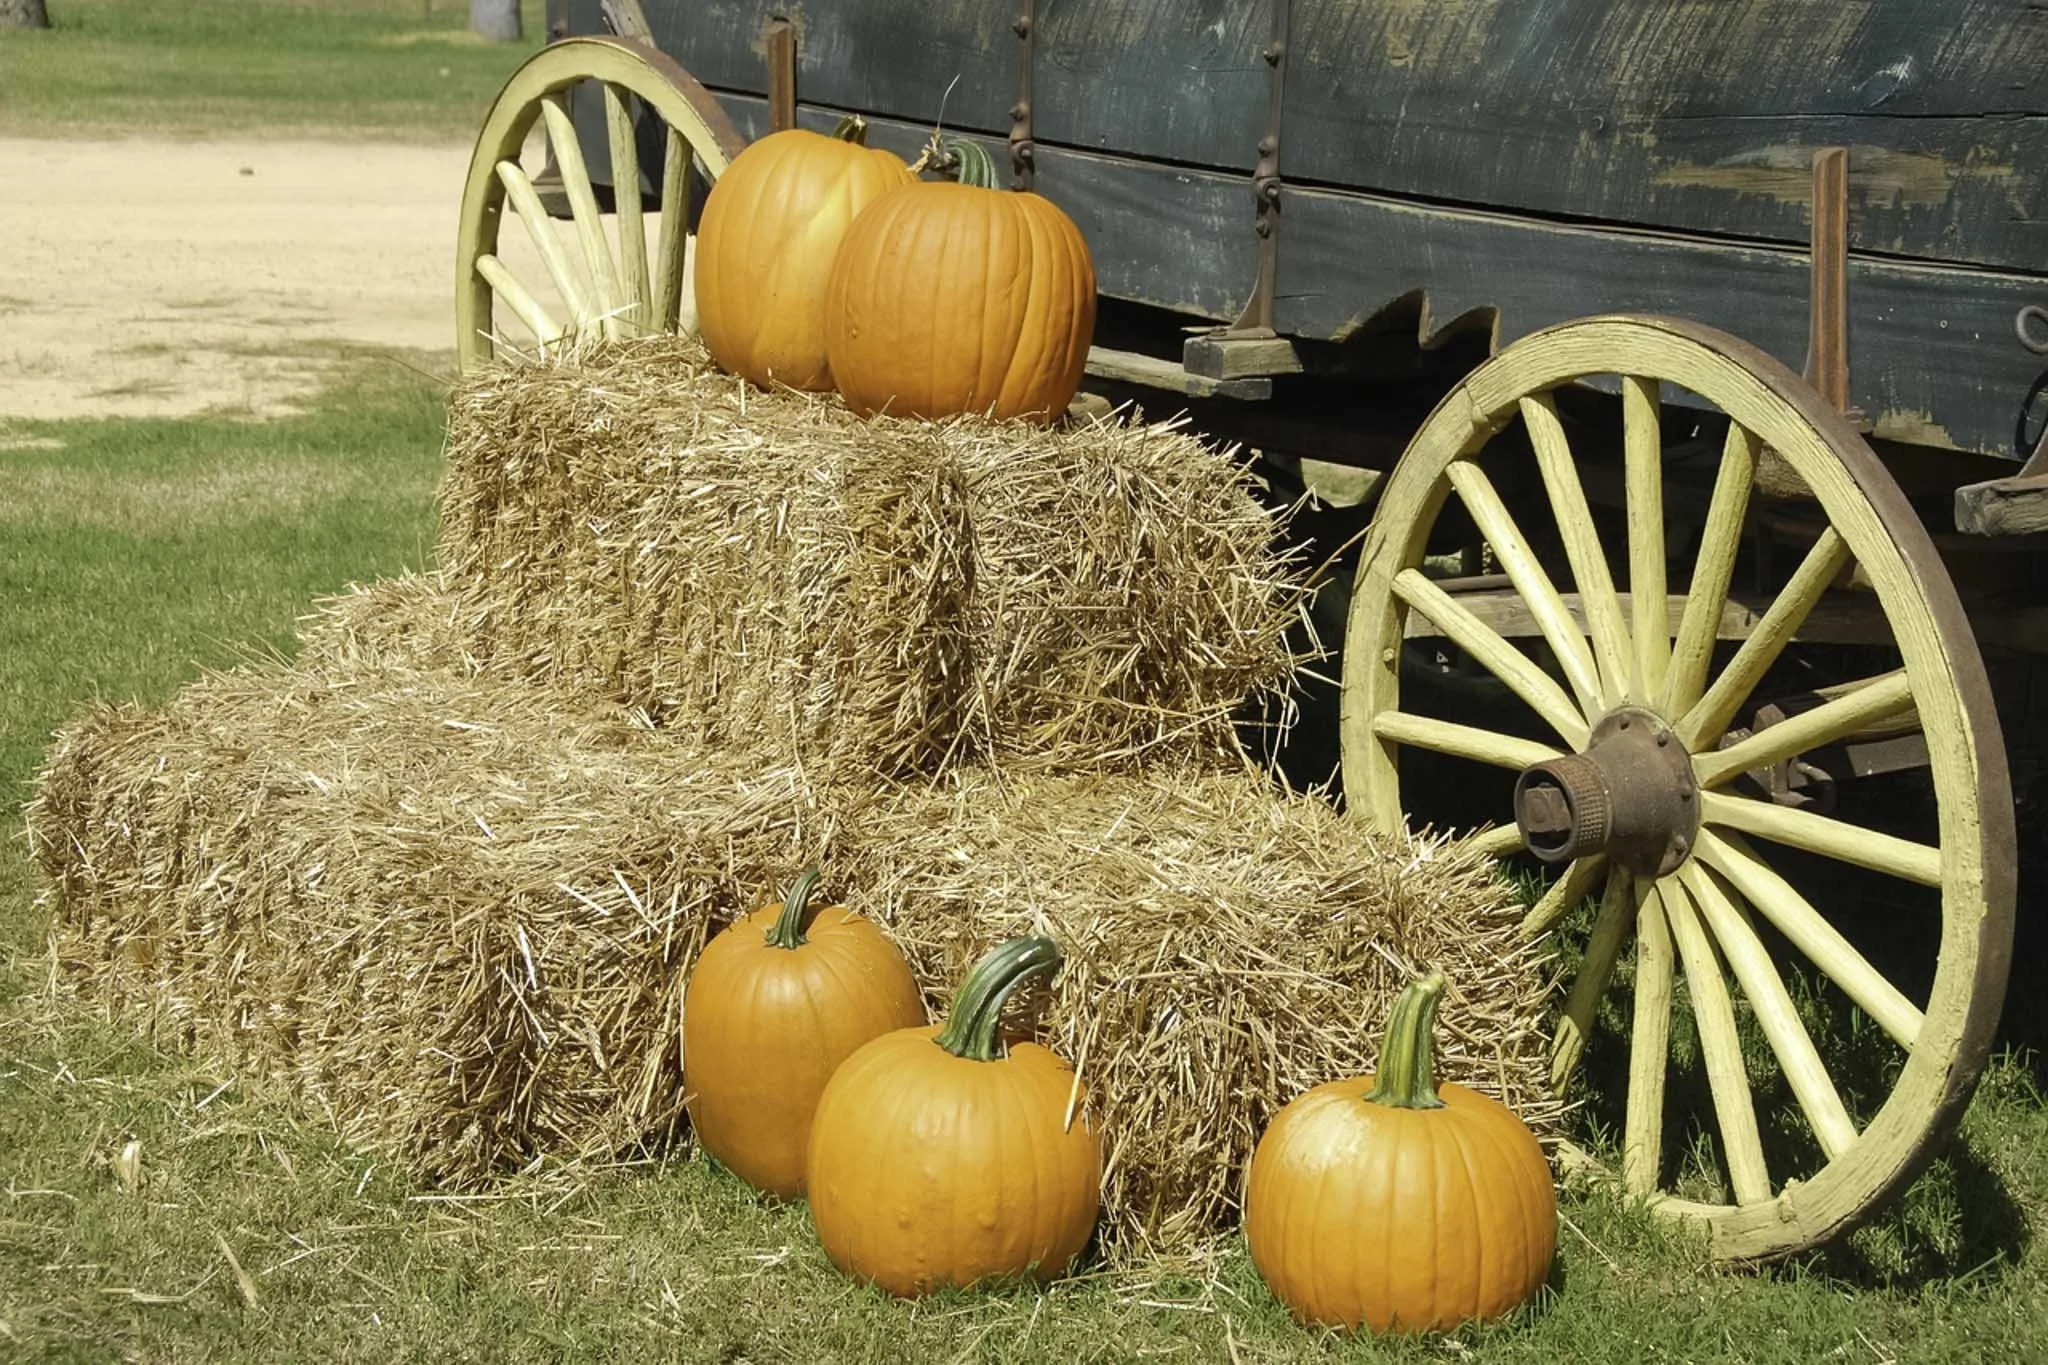
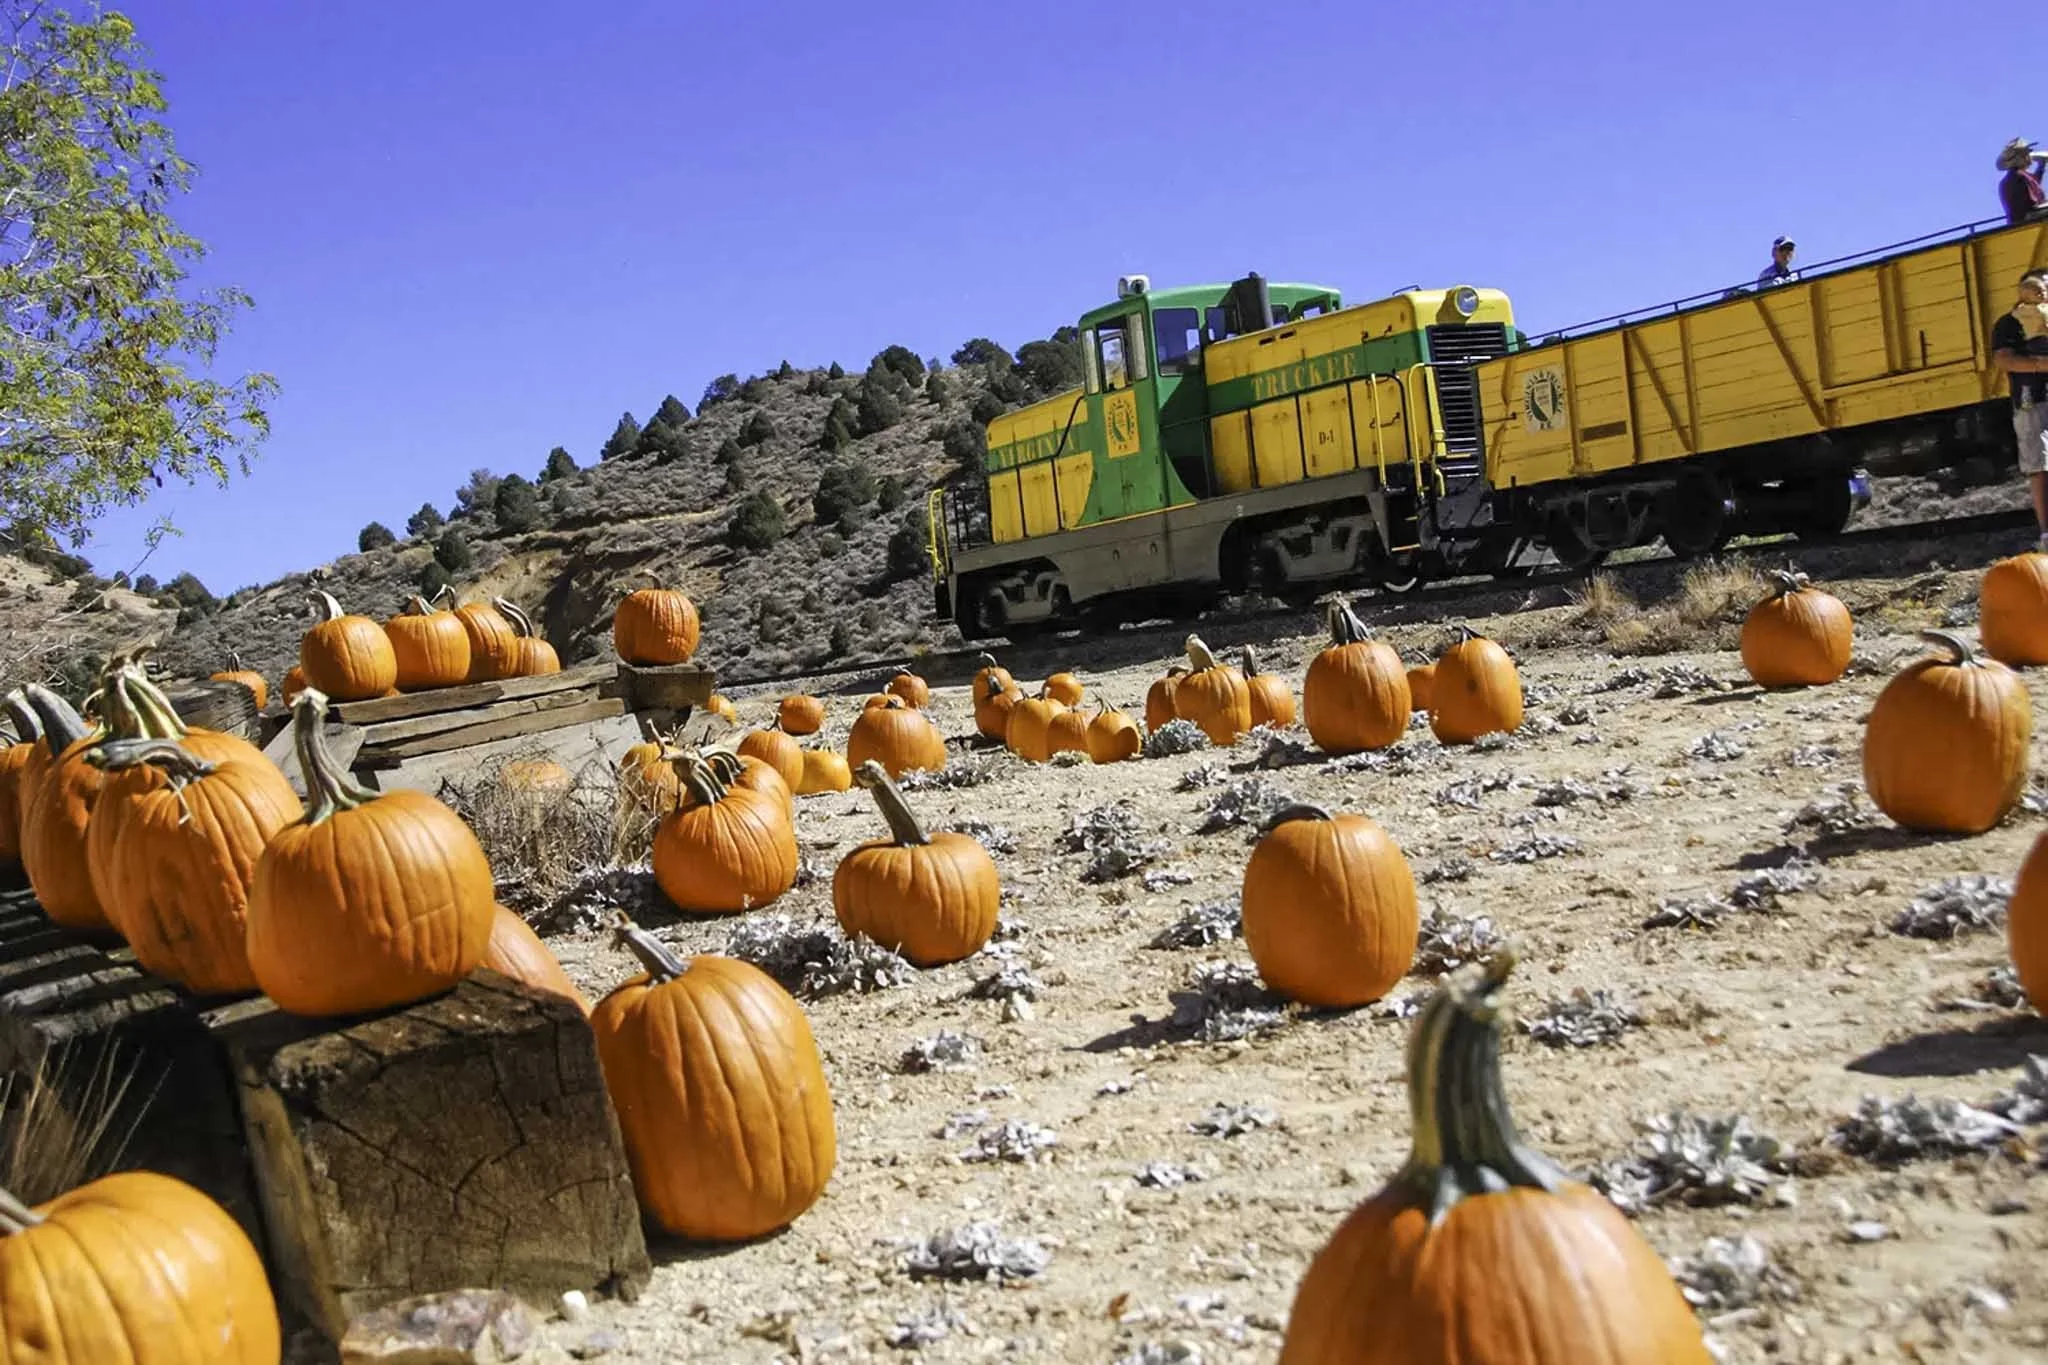
6) Pumpkin Patch Express - Virginia City
Location: 166 F Street, Virginia City, NV
Price: $8 - $26, per person
Operating: On select dates throughout October 2025
Parking Available: Yes
Every year, the Virginia and Truckee line offers visitors train rides to a pumpkin patch in Virginia City, which is considered one of the most haunted cities in all of Nevada. Don’t worry, there won’t be any frightening spirits on this family-friendly outing.
Tours begin at the historic 1870 Train Depot. You can purchase tickets on site but to not risk the disappointment of them being sold out, it’s best to purchase them online (which you can do here). Tours depart at 11:20am, 1:20pm, and 3pm on the following dates:
10/11
10/12
10/18
10/19
10/24 (5pm only)
10/25
10/26
This is a great activity in Virginia City that kids and adults alike will enjoy. While you’re in Virginia City, be sure to complete your visit by taking tours of Mackay Mansion and the historic Chollar Mine!


REVIEW: Clear Kayak Tour to Bonsai Rock with Clearly Tahoe
After conducting my research, I settled on booking with the ‘Clearly Tahoe’ outfit, specifically their clear kayak tour to Bonsai Rock…
Disclosure: This post contains affiliate links. If you make a purchase through these links, I may earn a small commission at no additional cost to you. I only recommend products or services that I believe will add value to my readers.
In recent years, my wife and I have been into giving experiences to our family and friends as gifts versus physical items. For Father’s Day last year, I took my Dad to a Billy Joel concert in Las Vegas. This year, I decided to book us a kayak tour, as we’ve always talked about doing that.
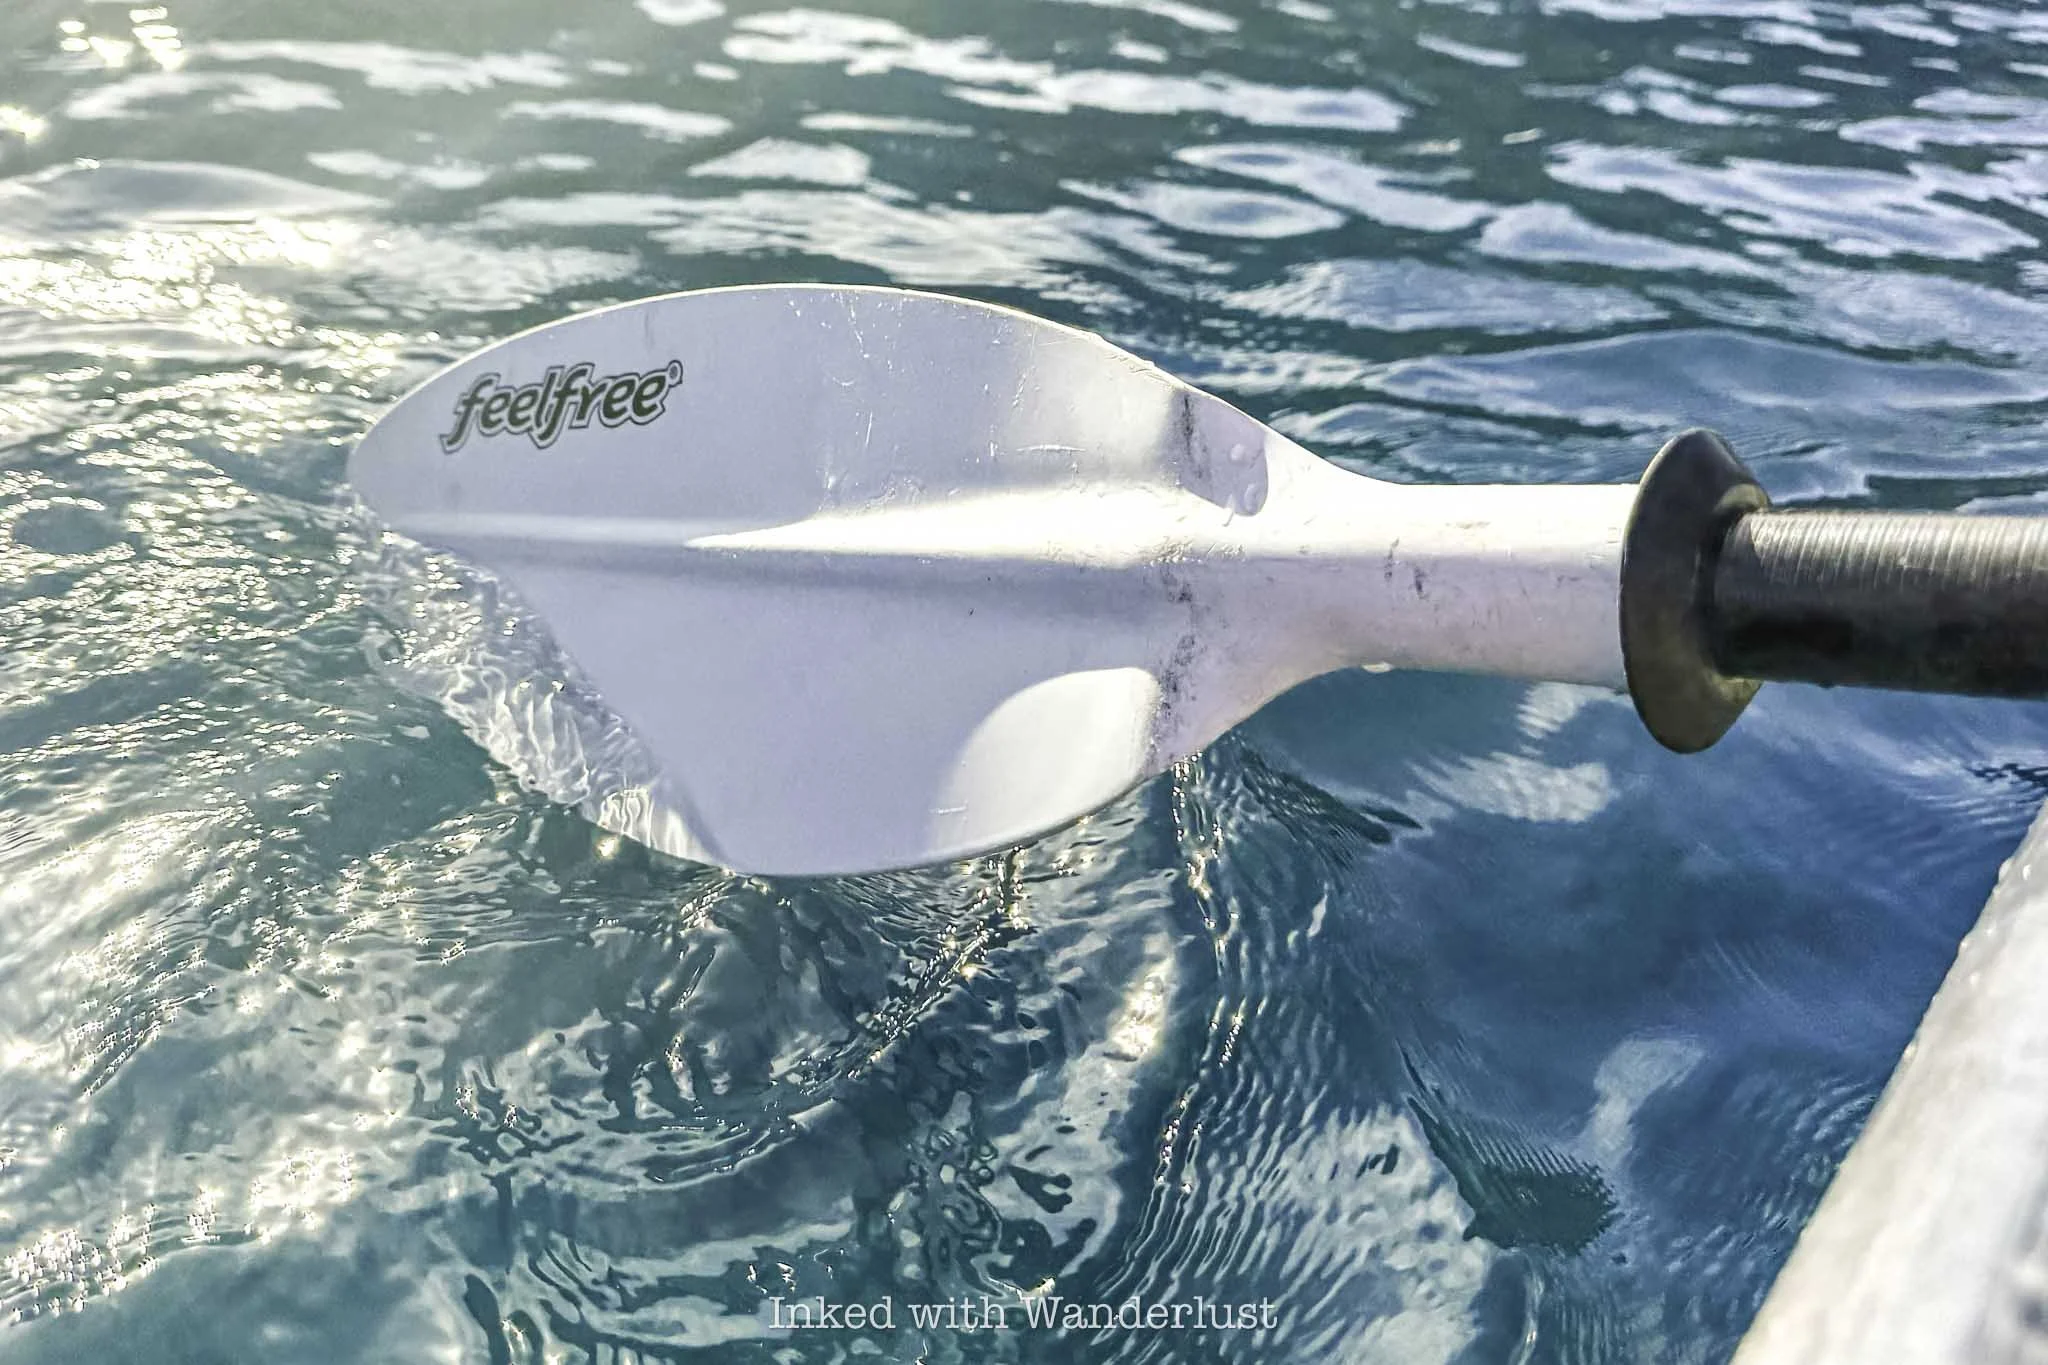
After conducting my research, I settled on booking with the ‘Clearly Tahoe’ outfit, specifically their clear kayak tour to Bonsai Rock. They’ve been in business since 2016, have an impeccable safety record and are the originators of the “clear kayak” concept.
In short, the tour was amazing! In this review, I’ll cover information such as the price, where you leave from, what to expect, and other pertinent information like who’s the tour for, requirements, etc. Let’s get into it!
Tour Information
As stated above, I booked their Bonsai Rock clear kayak tour. My Dad and I, combined, exceeded their weight requirement for the double kayak so I booked us two singles at a cost of $134 each (you can view current pricing here).
This tour is suitable for total beginners, which is good because my Dad had no kayaking experience prior to this and the only experience I had was when I kayaked to Fannette Island in Emerald Bay, also in Lake Tahoe.
This is a guided tour conducted at what I felt was a reasonable pace and is around 2.5 total hours, with about 1.5 hours of that being spent in the kayak. It is NOT pet friendly (though they do offer a pooch-friendly version), the minimum age is six, and the weight limit is 375 pounds per kayak.
Items to Consider Bringing
Clearly Tahoe Meet-Up Location & Parking
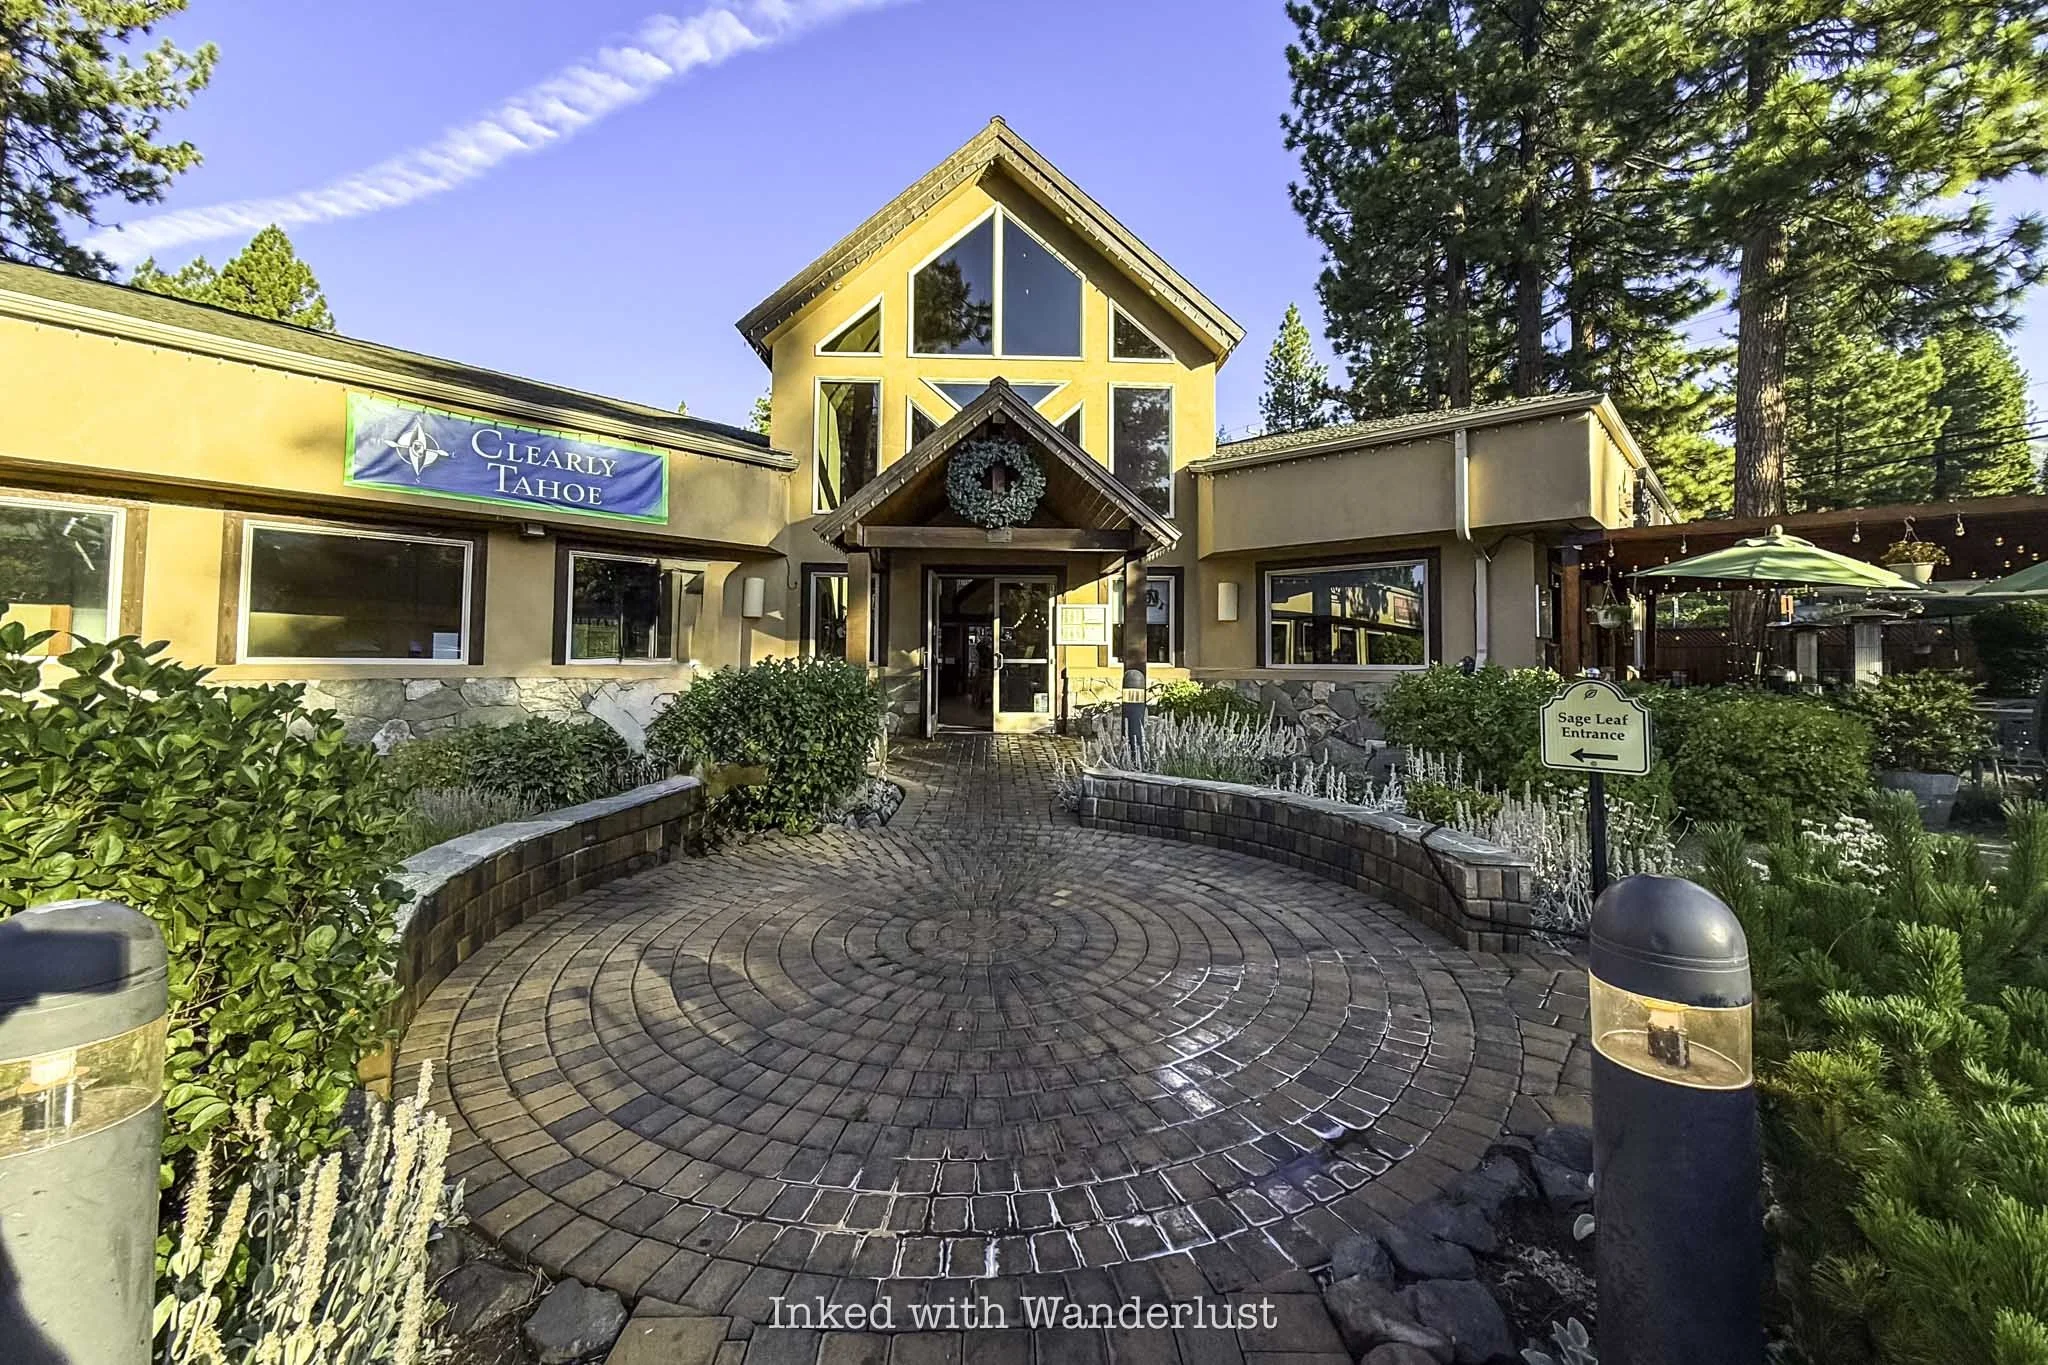
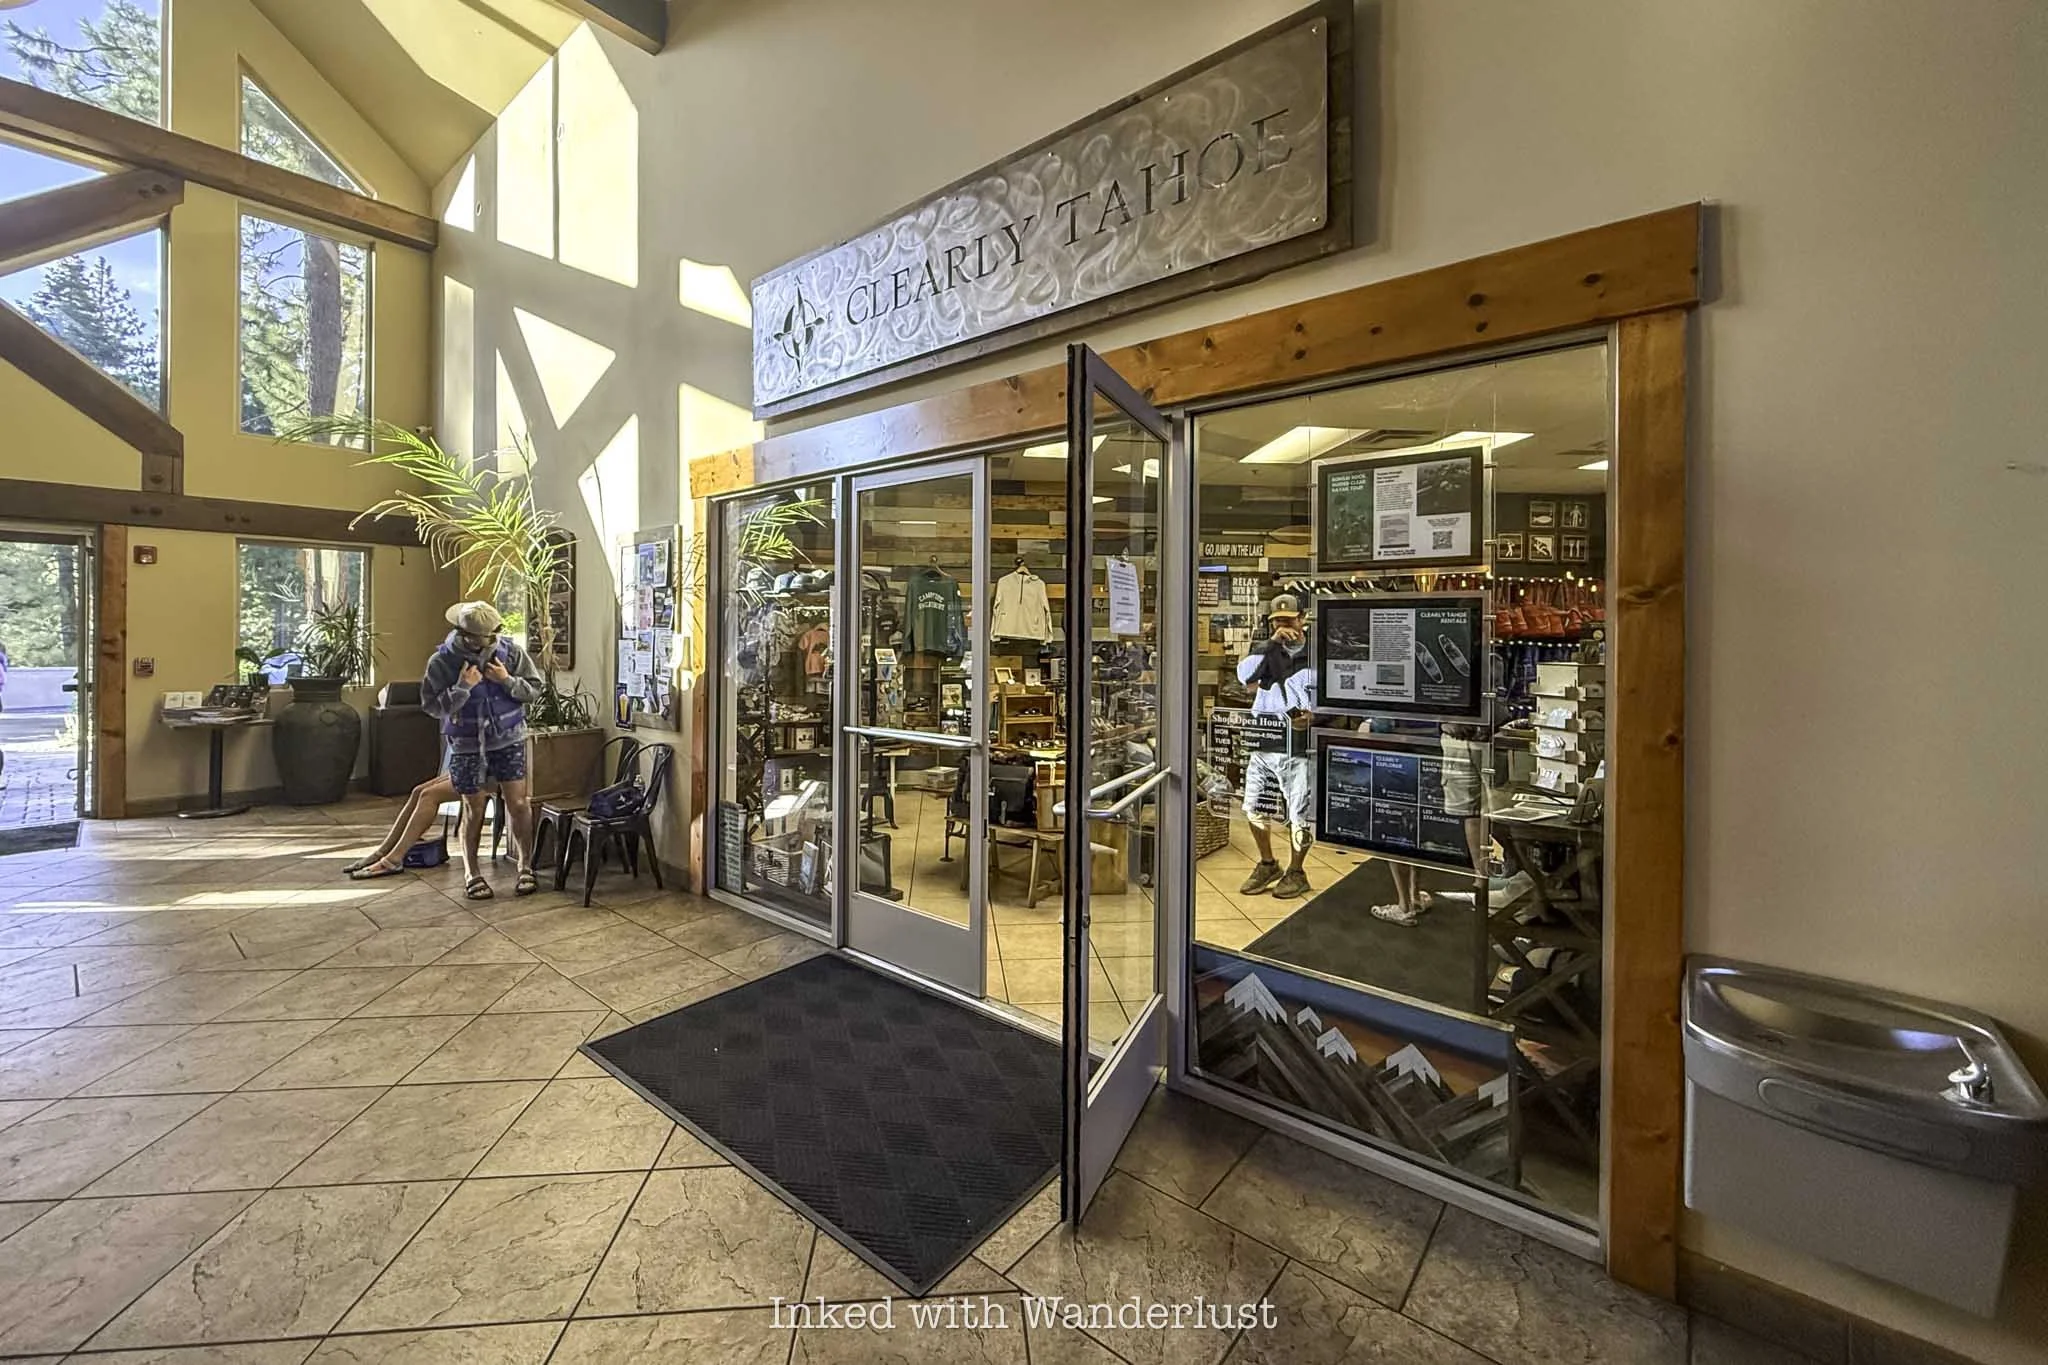
Regardless of which tour you book, you’ll meet up with the group at one of Clearly Tahoe’s offices. For the Bonsai Rock tour, you’ll meet at their Incline Village location (pictured above) at the following address:
893 Tahoe Blvd. Suite 800 (across from Starbucks)
Group members must meet at the office thirty minutes prior to the start of the tour. Tours leave promptly and will not wait, so make sure you’re on time. Also be sure to fill out the waivers online when they’re emailed to you, as this helps to expedite the check-in process.
There’s a parking garage behind the building they encourage you to park in, but I was also told it wasn’t a problem to park in the lot out front. Just know it gets hectic here in the summer so if your tour is for later in the day, just park in the garage to save yourself a battle.
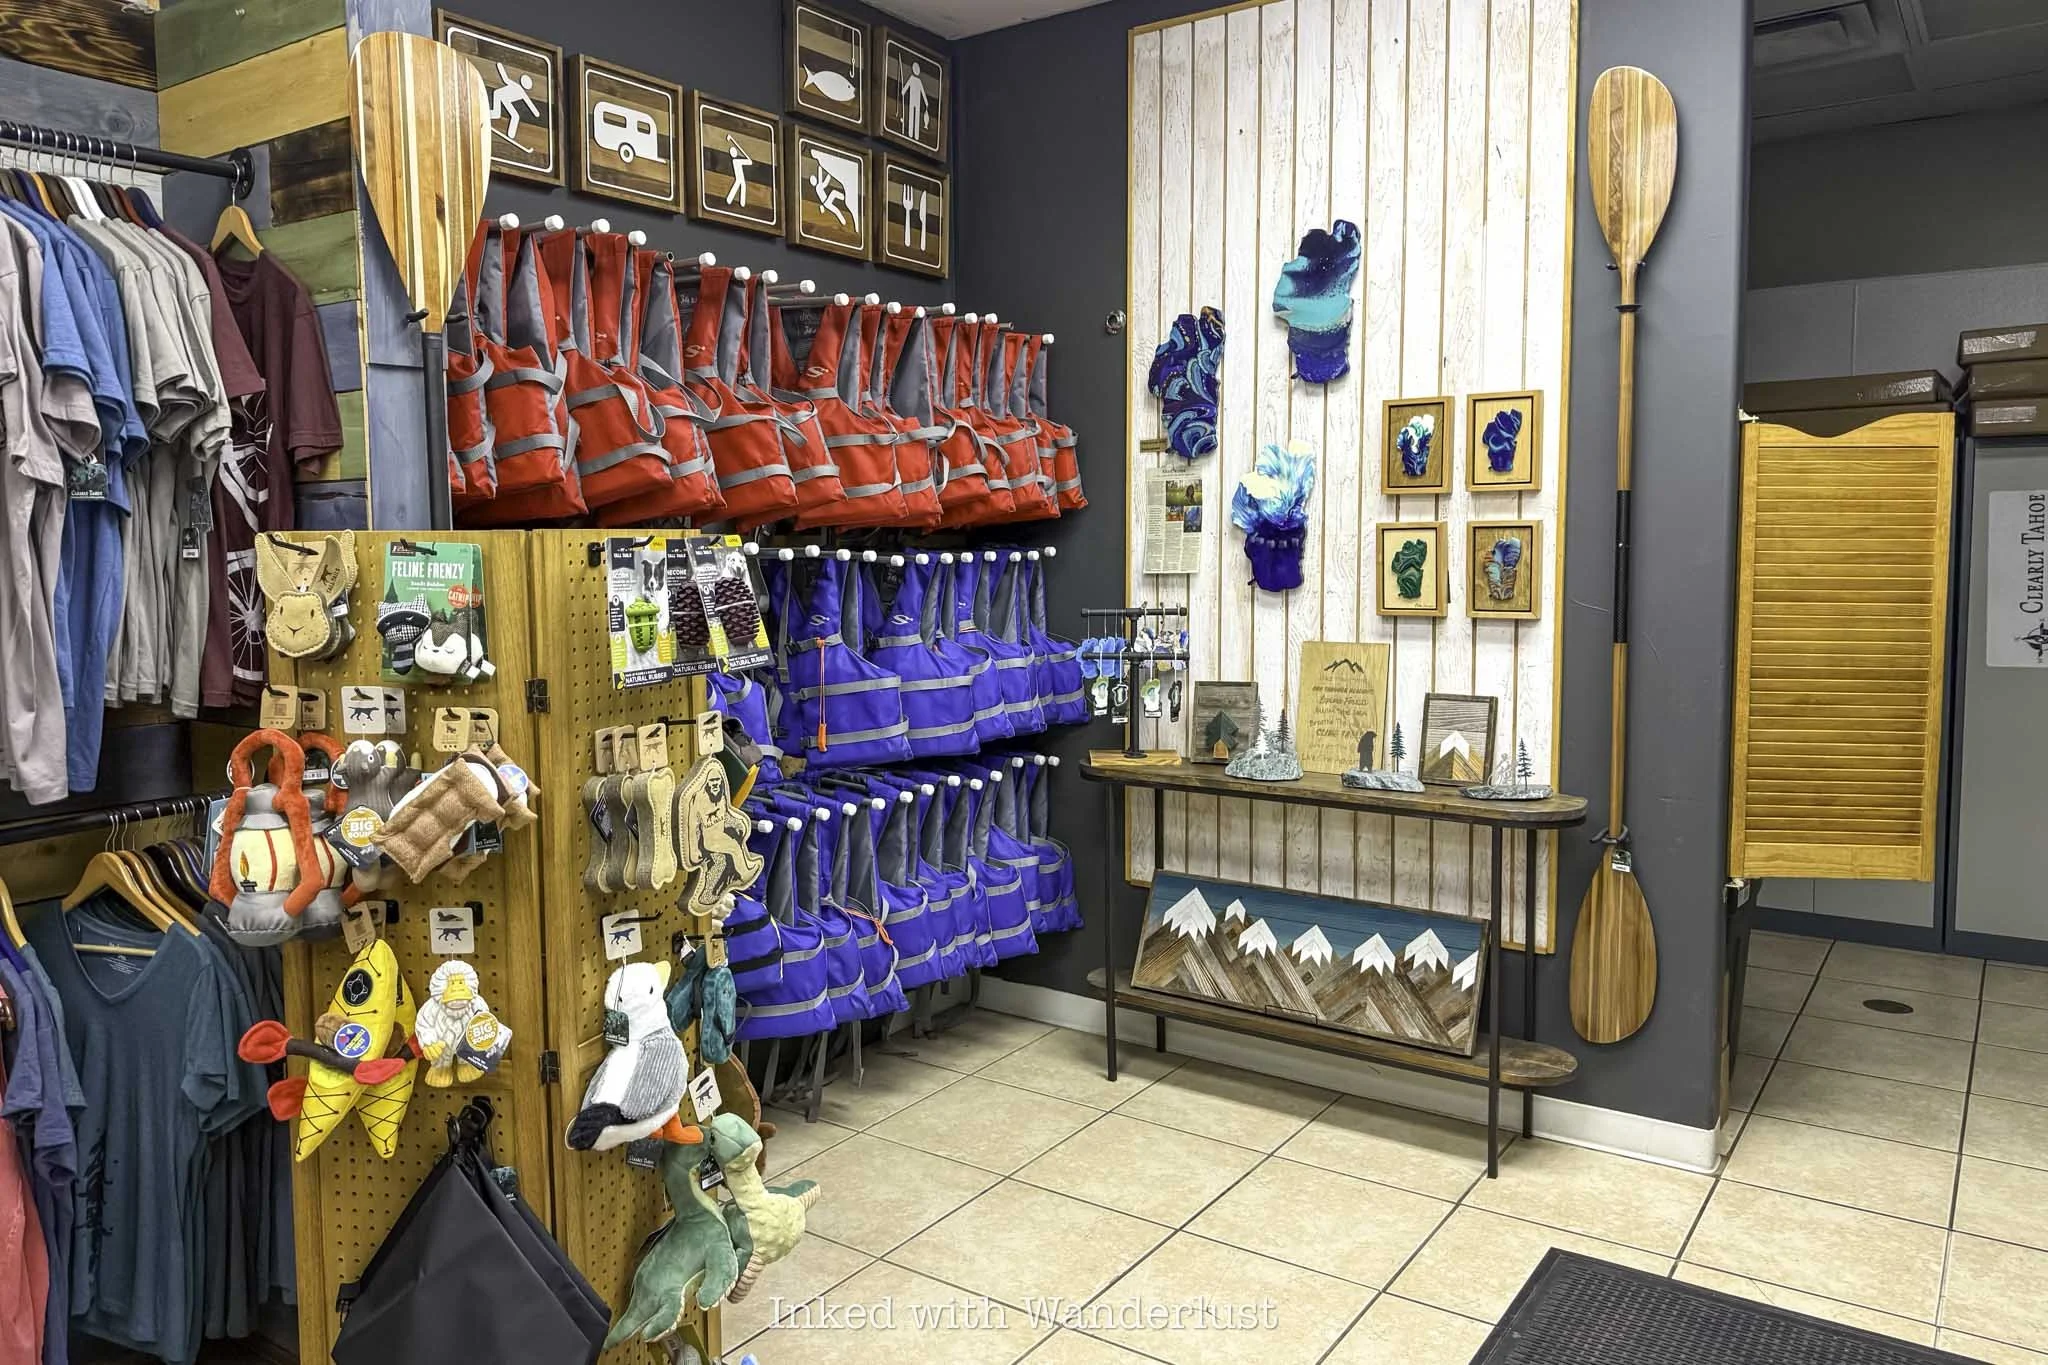
The Clearly Tahoe office is located just across from Starbucks and is in the same building as the Sage Leaf Cafe restaurant. When you arrive, you’ll fill out your waiver (if you haven’t already), be given a goodie bag, a dry bag, and be fitted for a life vest.
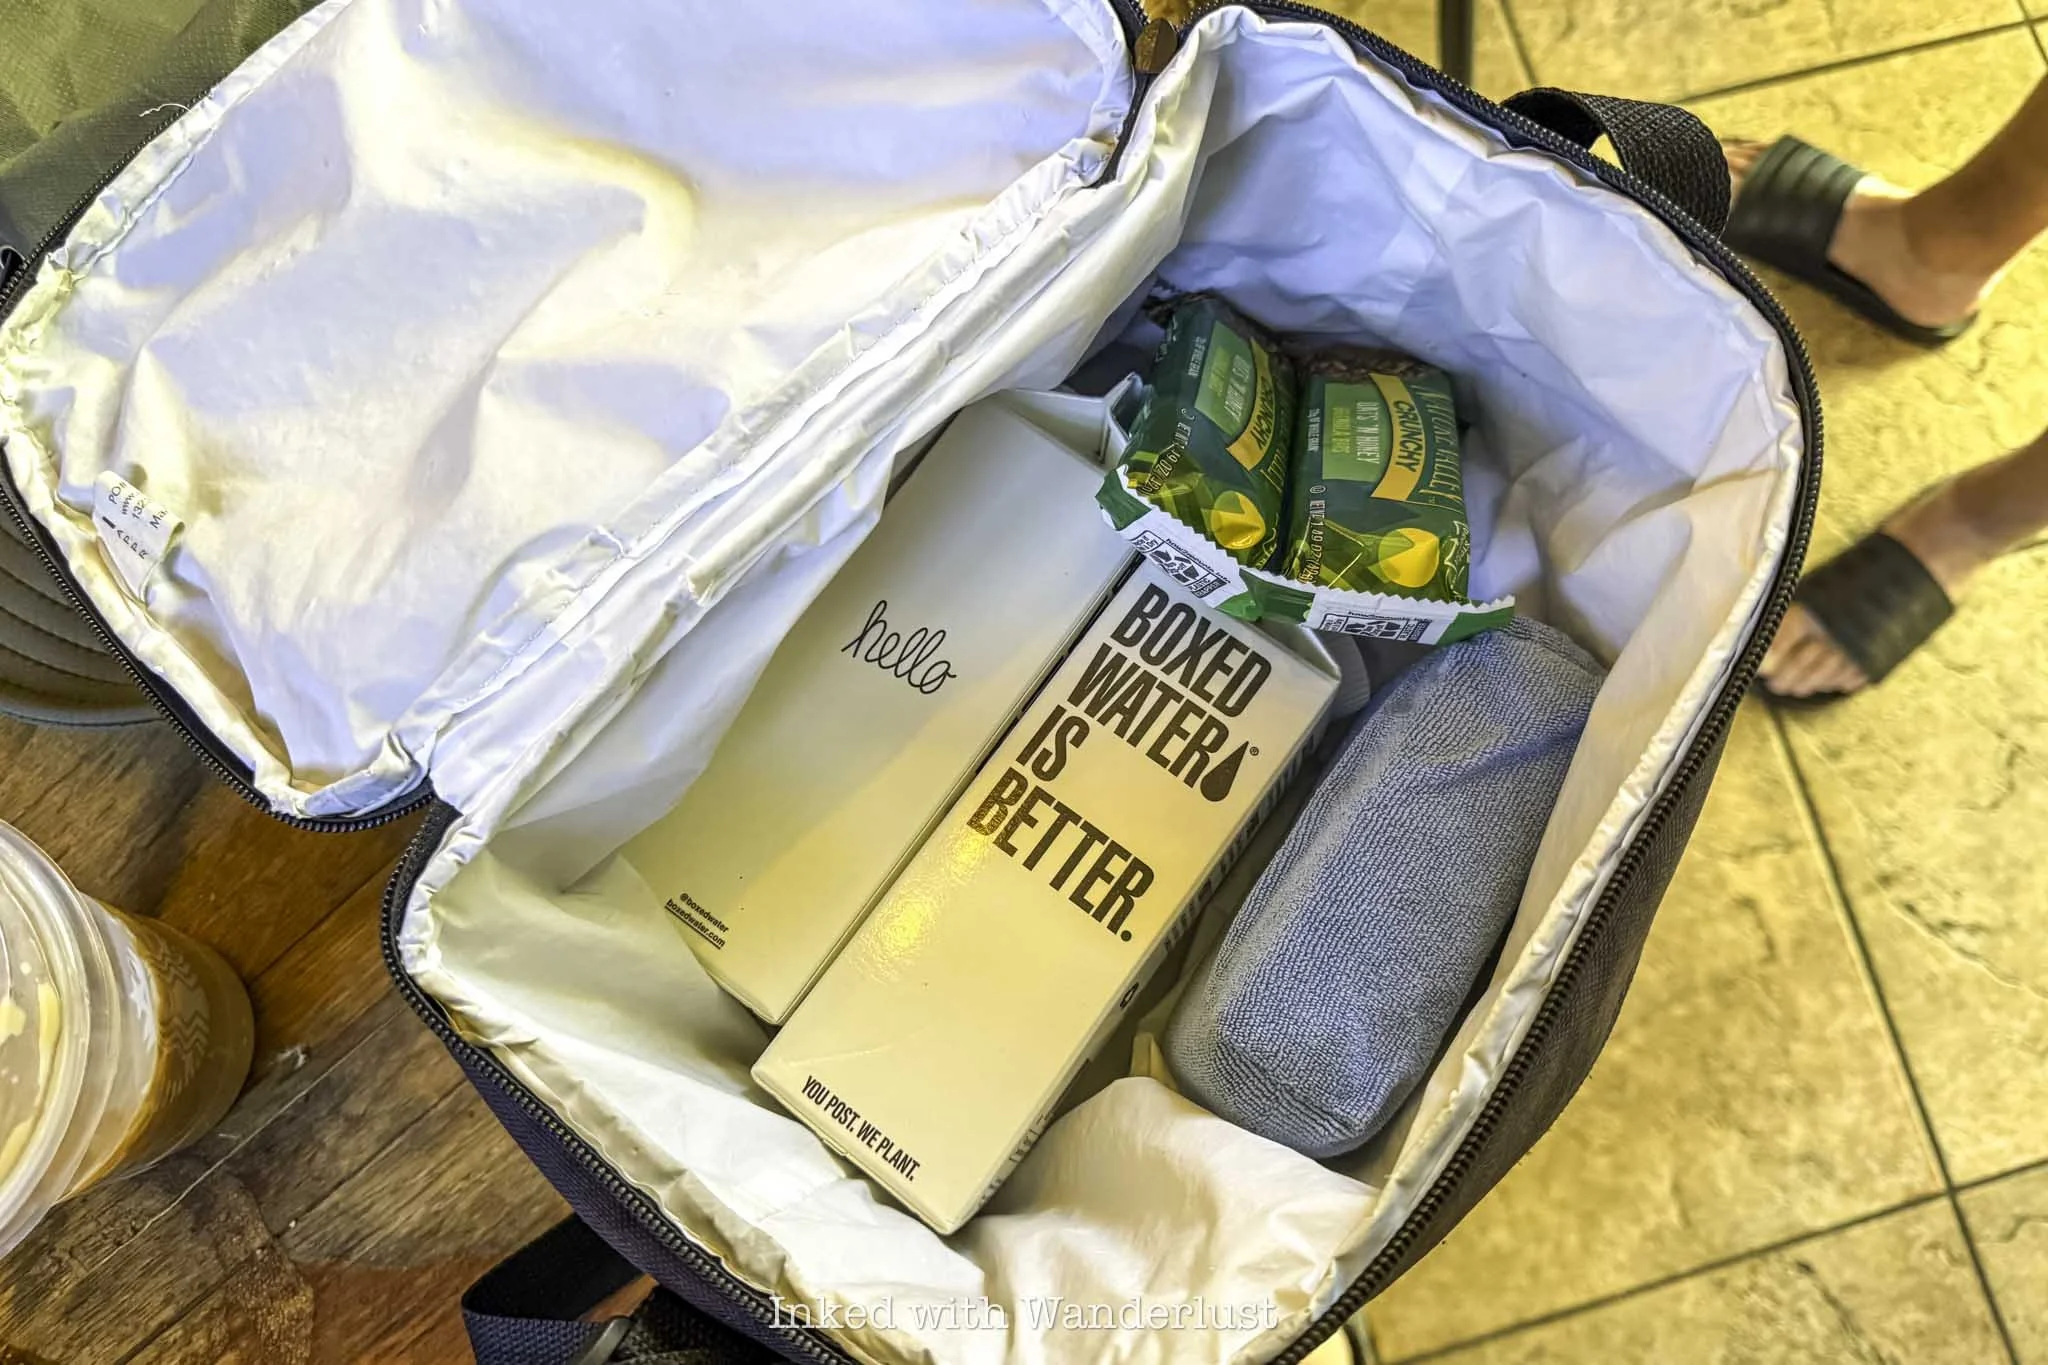
In the goodie sack you’re given you’ll find two boxes of water, a couple Nature Valley granola bars, and a towel to use to wipe the sand out of your clear kayak. Not sure if these are the exact items given every time, but that’s what was given to my Dad and me.
Speaking of water, make sure you’re hydrated going into the tour and stay hydrated throughout it. You’re in a higher elevation in Tahoe and thus, more susceptible to dehydration, sunburn, etc. I found out the hard way when my calf cramped up badly while getting out of the kayak. It’s no joke.
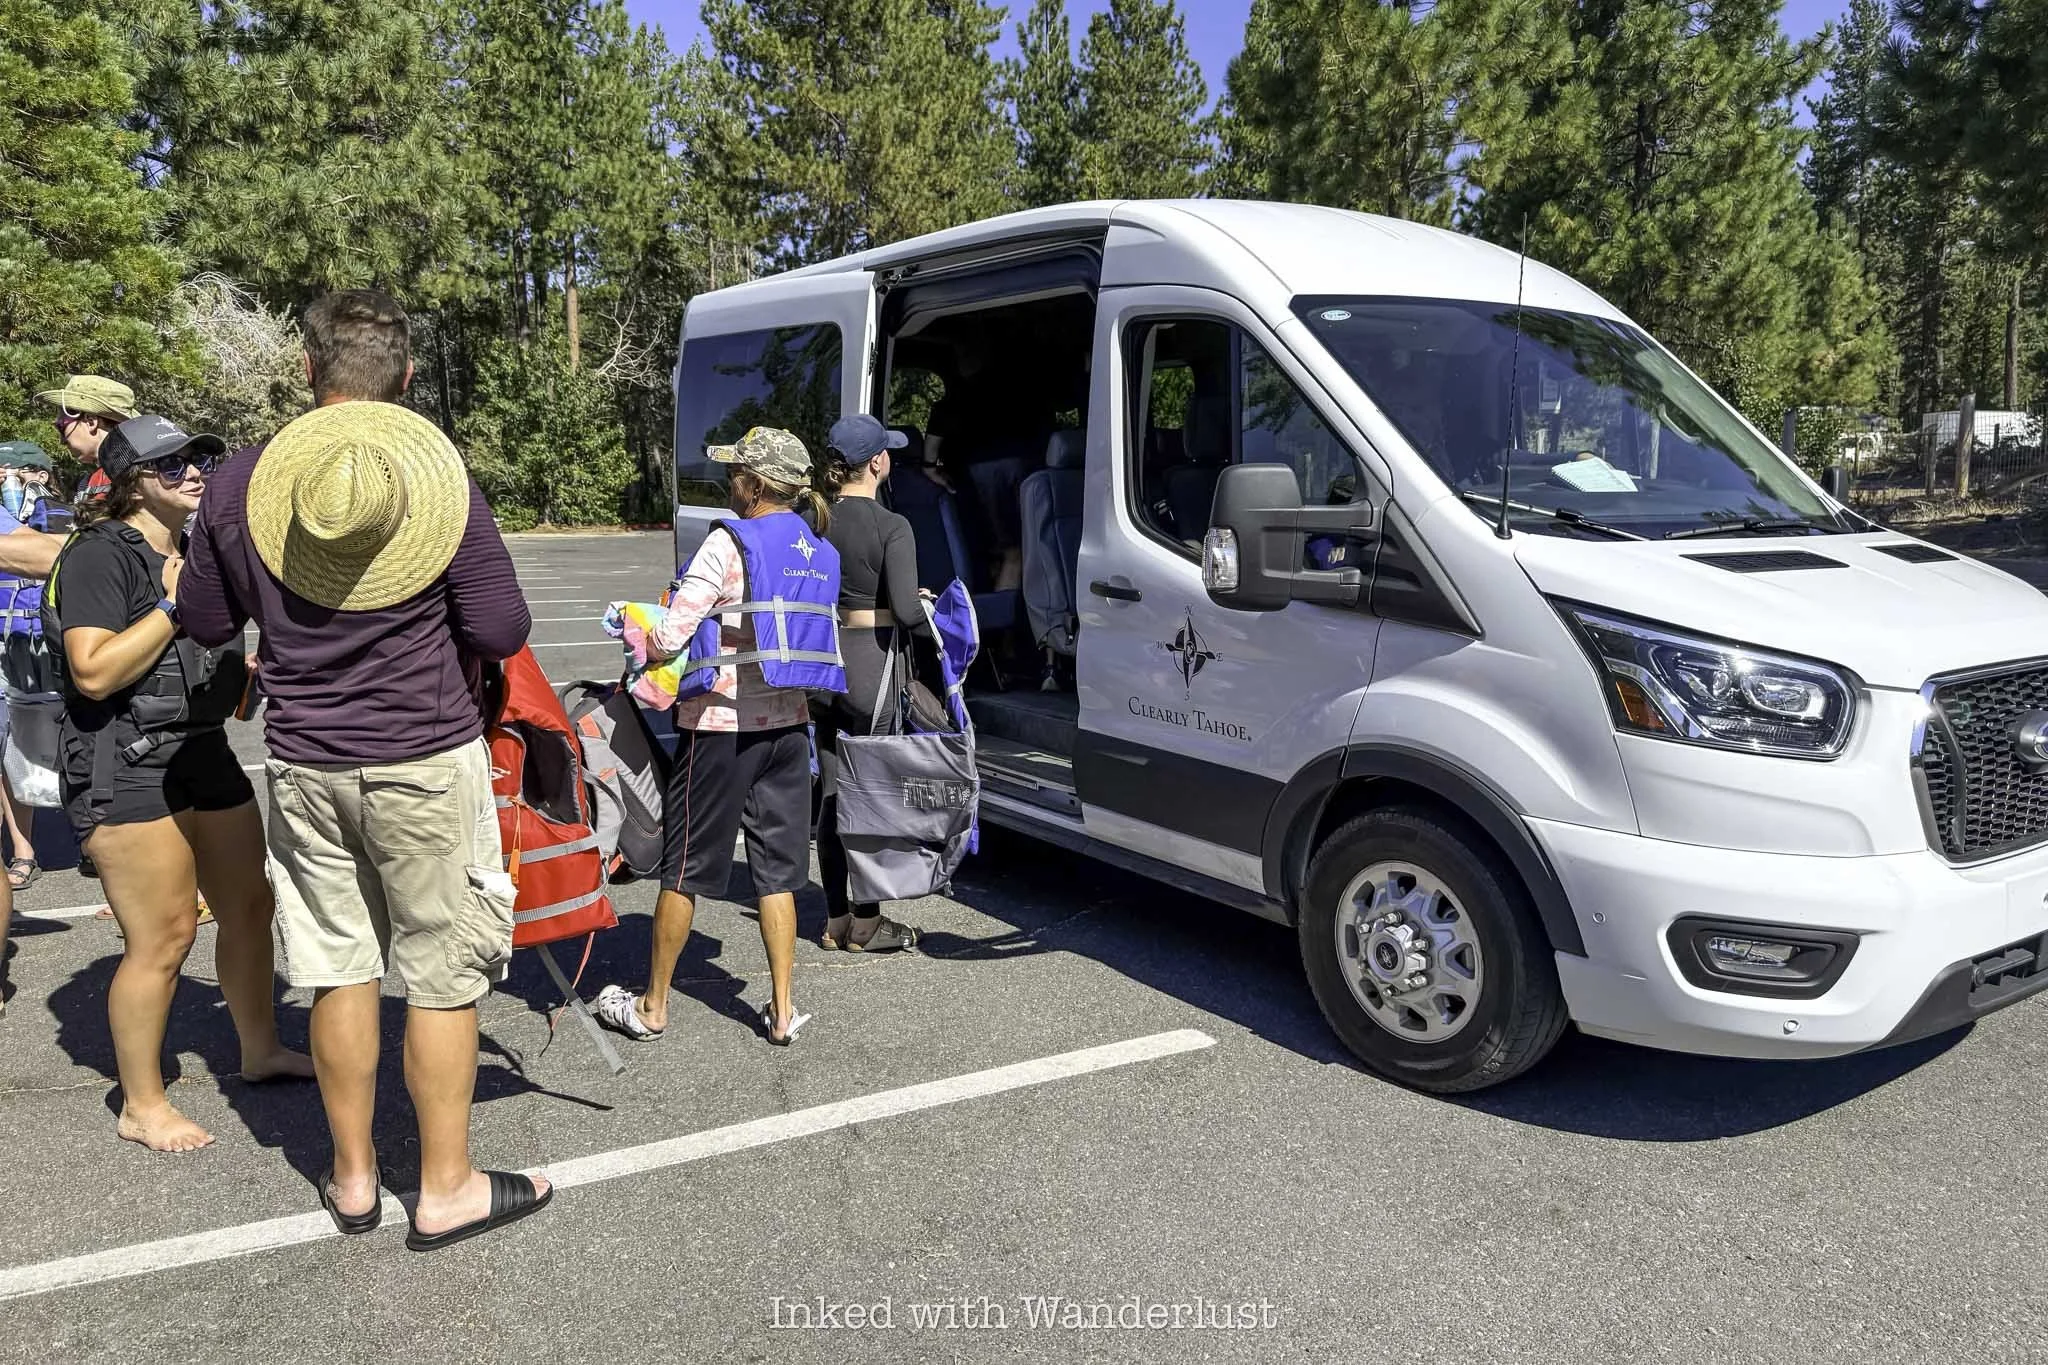
Once everybody has checked in, your driver (ours was Dave) will escort the group to the Clearly Tahoe shuttle van to take you to Sand Harbor Beach State Park - where your tour officially begins. There was 8 in our group and there was just enough room in the shuttle for us.
Our driver, Dave, got us there safely and without incident. The whole trip took about ten minutes. On the way, he showed us properties owned by big names such as Steve Wynn and Larry Ellison.
Sand Harbor - Where Your Tour Begins
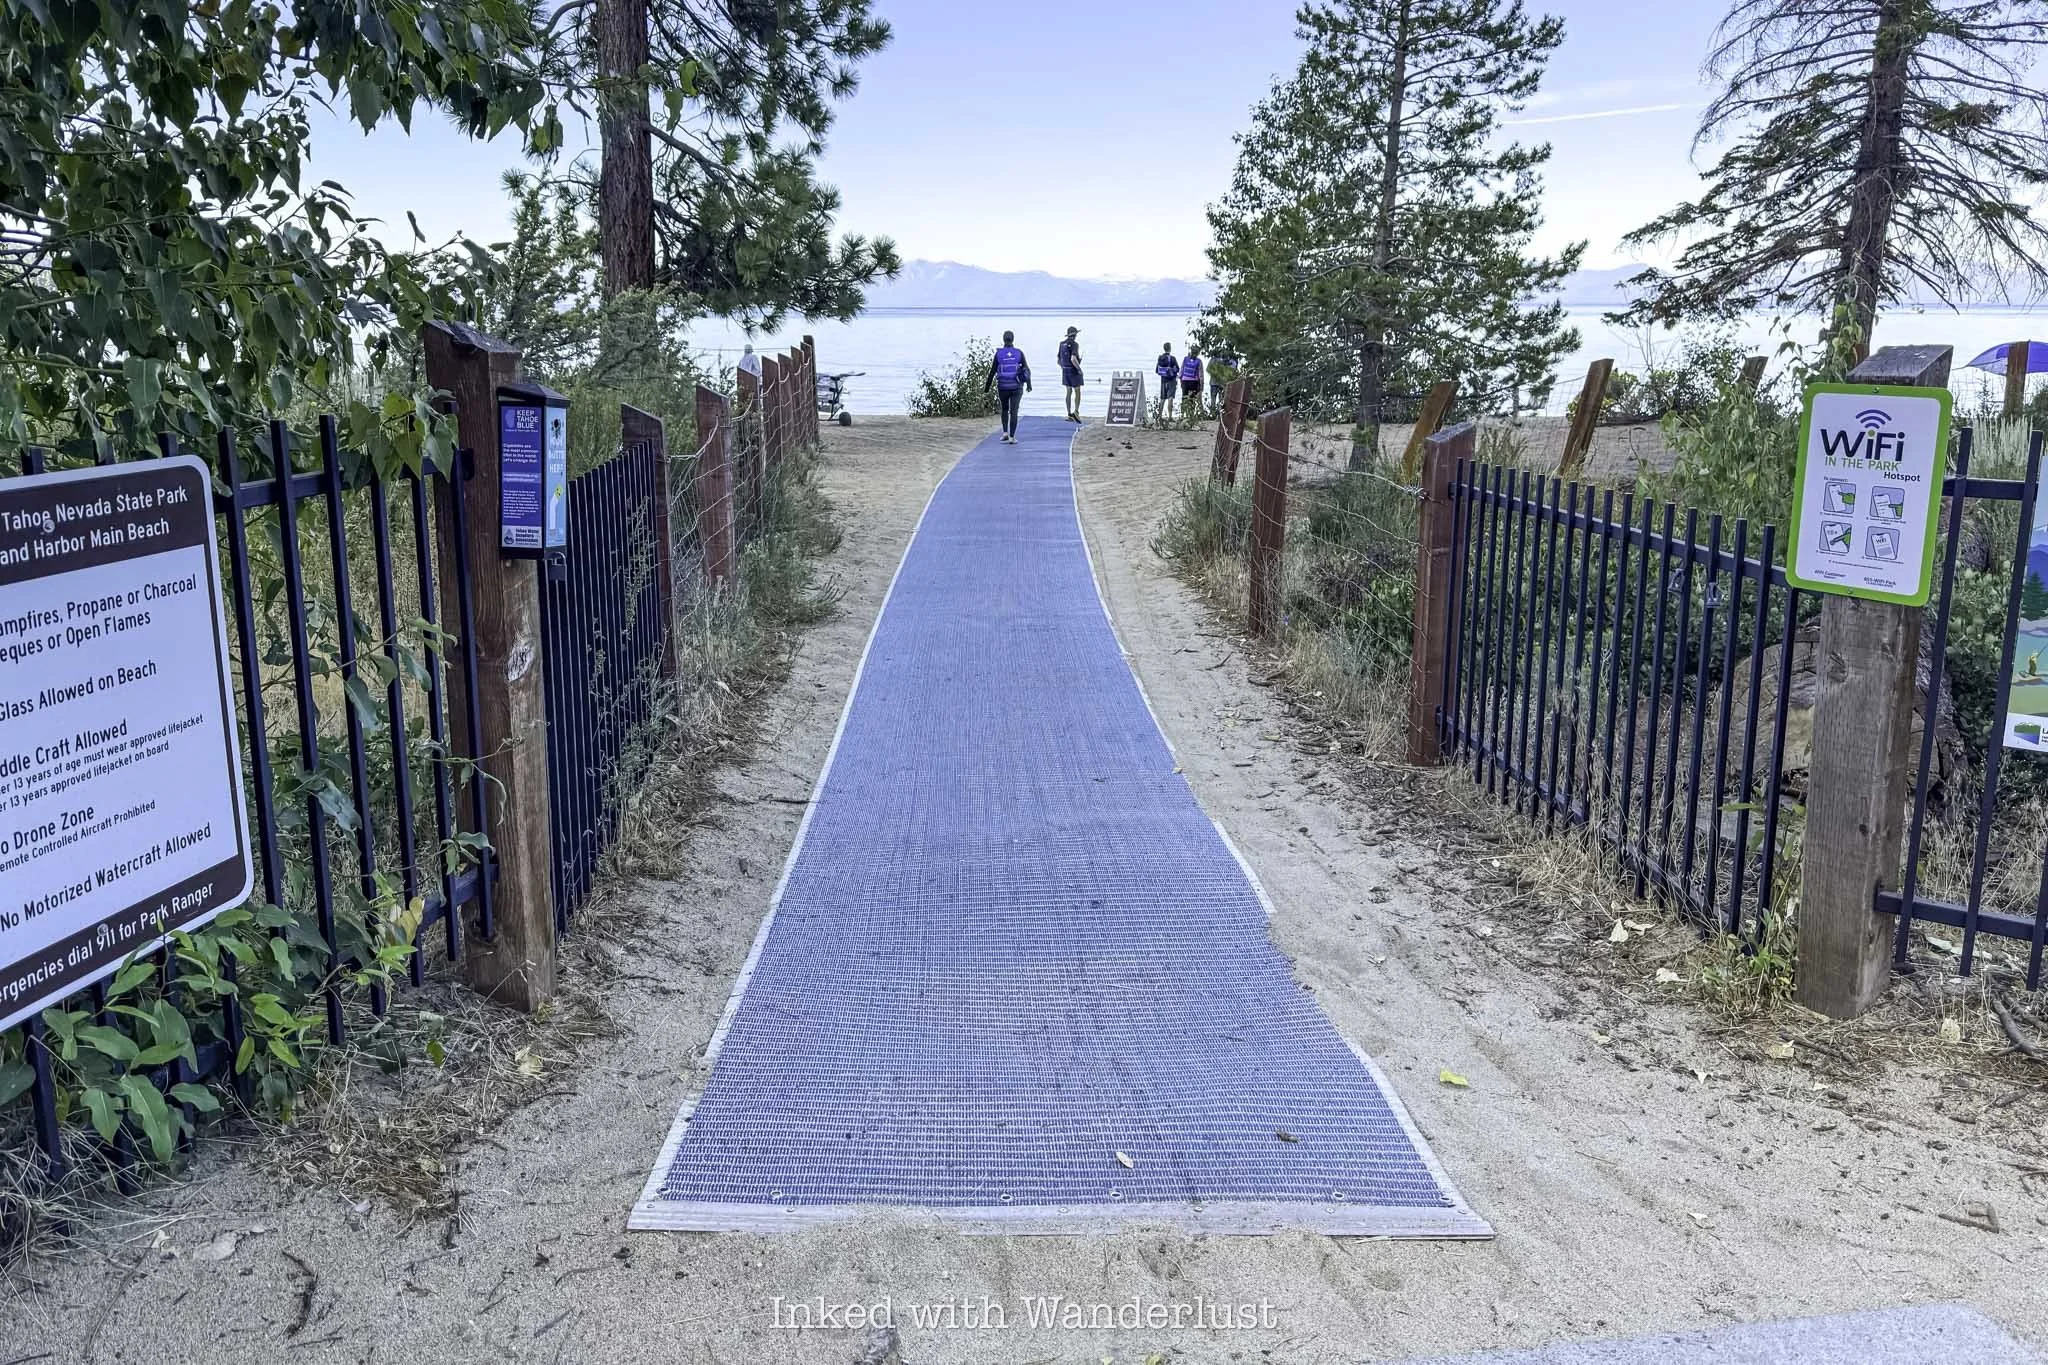
The clear kayak tour to Bonsai Rock begins at the main beach at Sand Harbor State Park. You will NOT need to make reservations to access Sand Harbor, as Clearly Tahoe takes care of this for you as part of your tour.
You’ll be dropped off in the parking area, near the beach access. This is also where your tour guide(s) will meet you. Ours was Julia and while we didn’t find out until after the tour, we were her very first tour group ever.
After the initial introduction, you’ll be given a final opportunity at using a restroom and be shown where to meet afterwards. There’s a rug-type-thing leading to the water’s edge. The end of which is where you’ll meet.
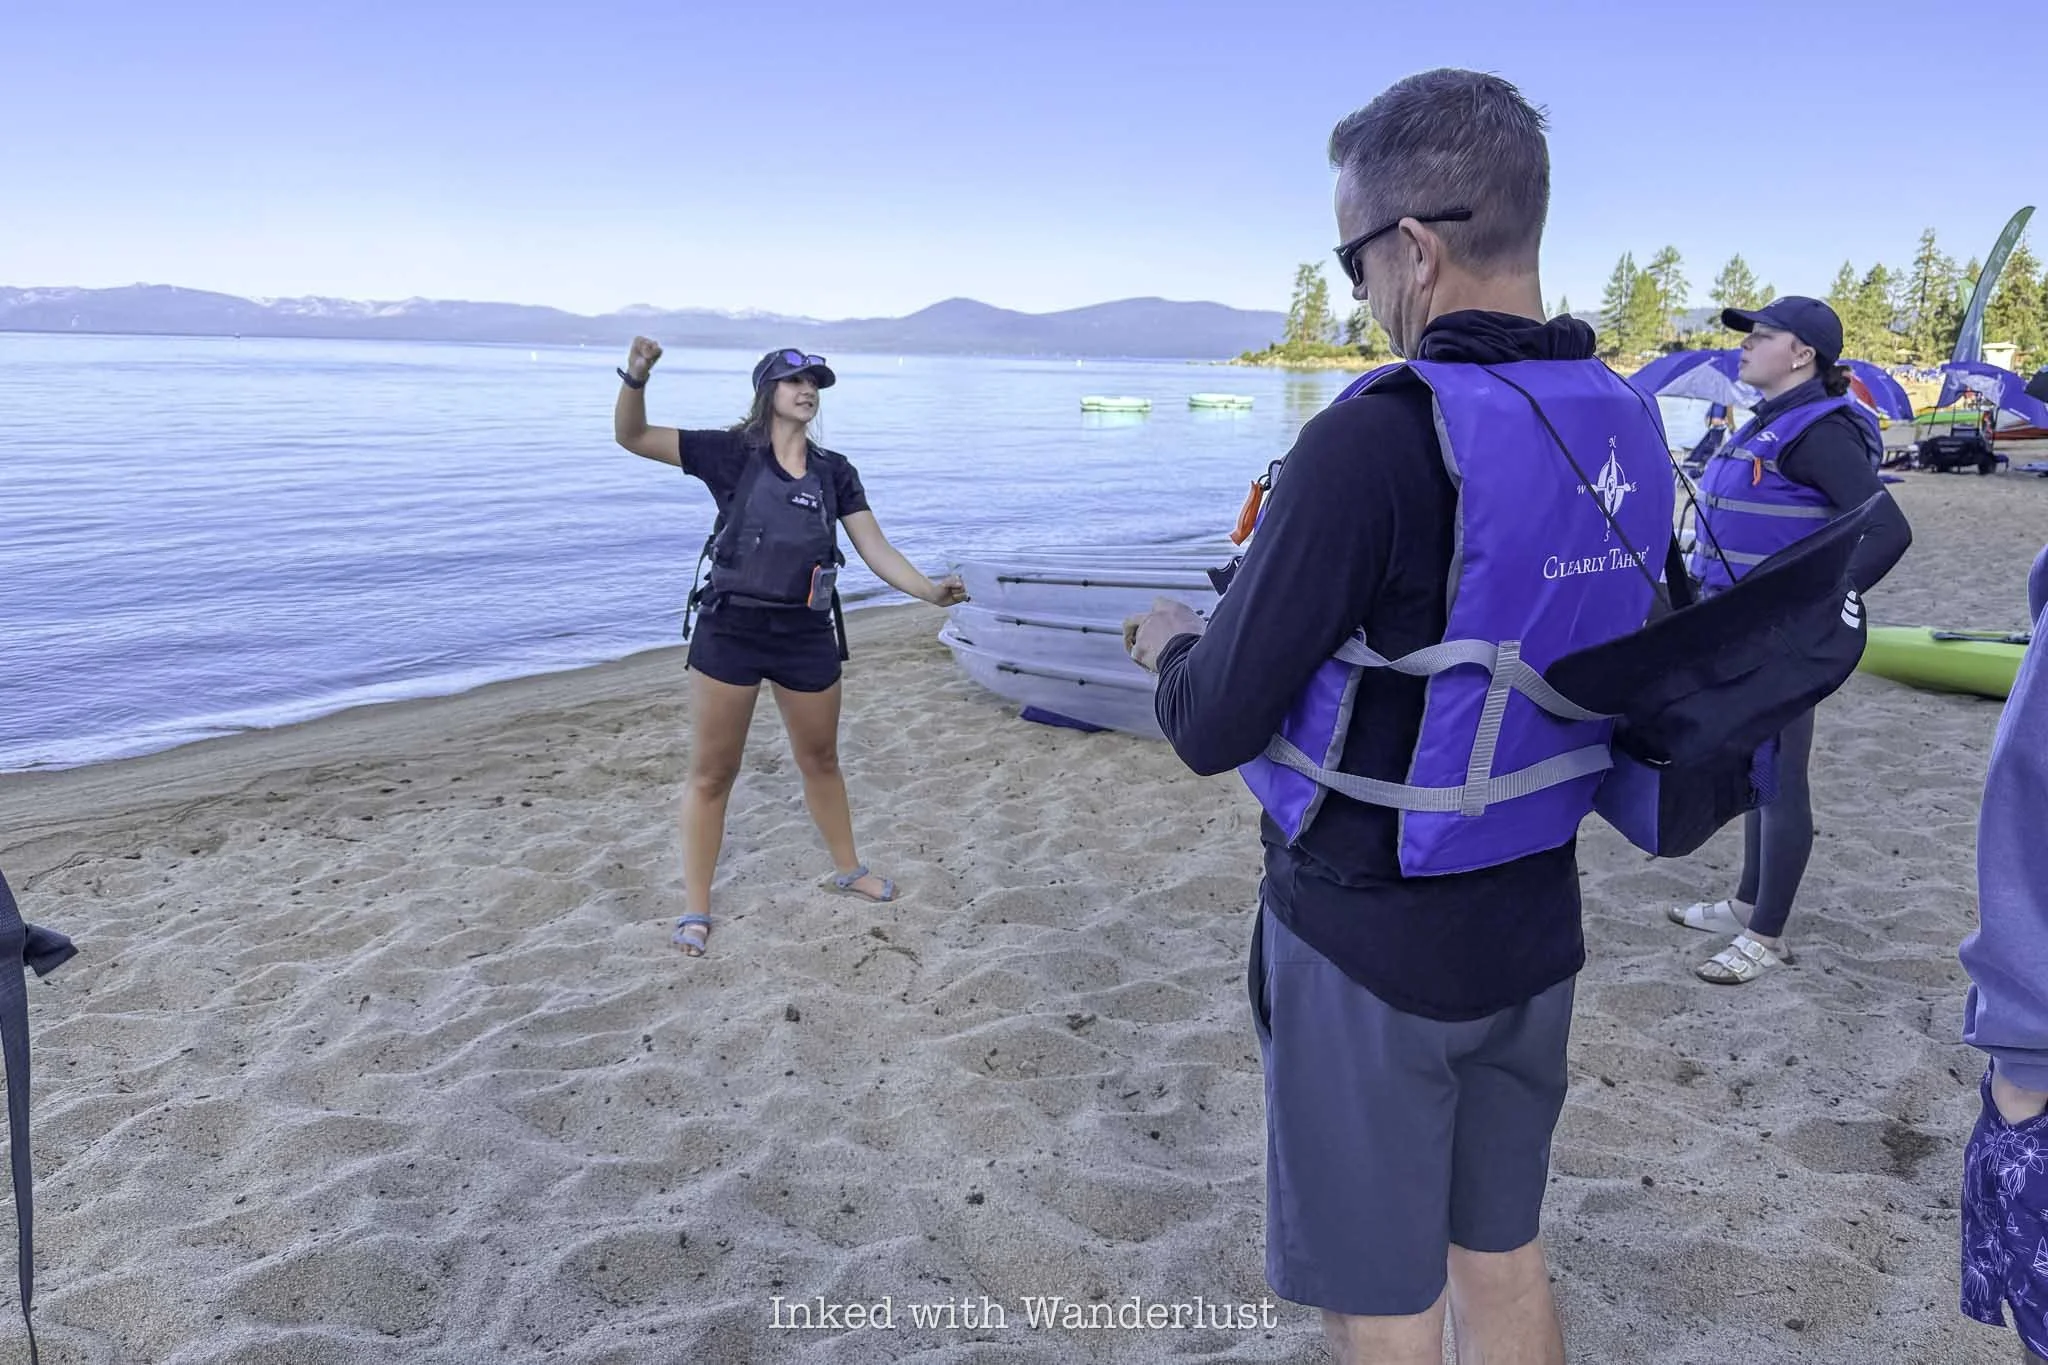
There, you’ll be given a quick rundown on how to operate your kayak. If you’re a total beginner, you won’t have much of an issue. My Dad didn’t have any experience at all and picked up on it quickly. It’s simple - paddle left to go right, and paddle right to go left. Alternate left and right to go straight and paddle in reverse to go backwards.
Getting into and out of the kayaks was probably the trickiest part of the whole experience, but even that wasn’t bad. The guides will assist you to a point, but you’ll need to be able to lower and raise yourself.
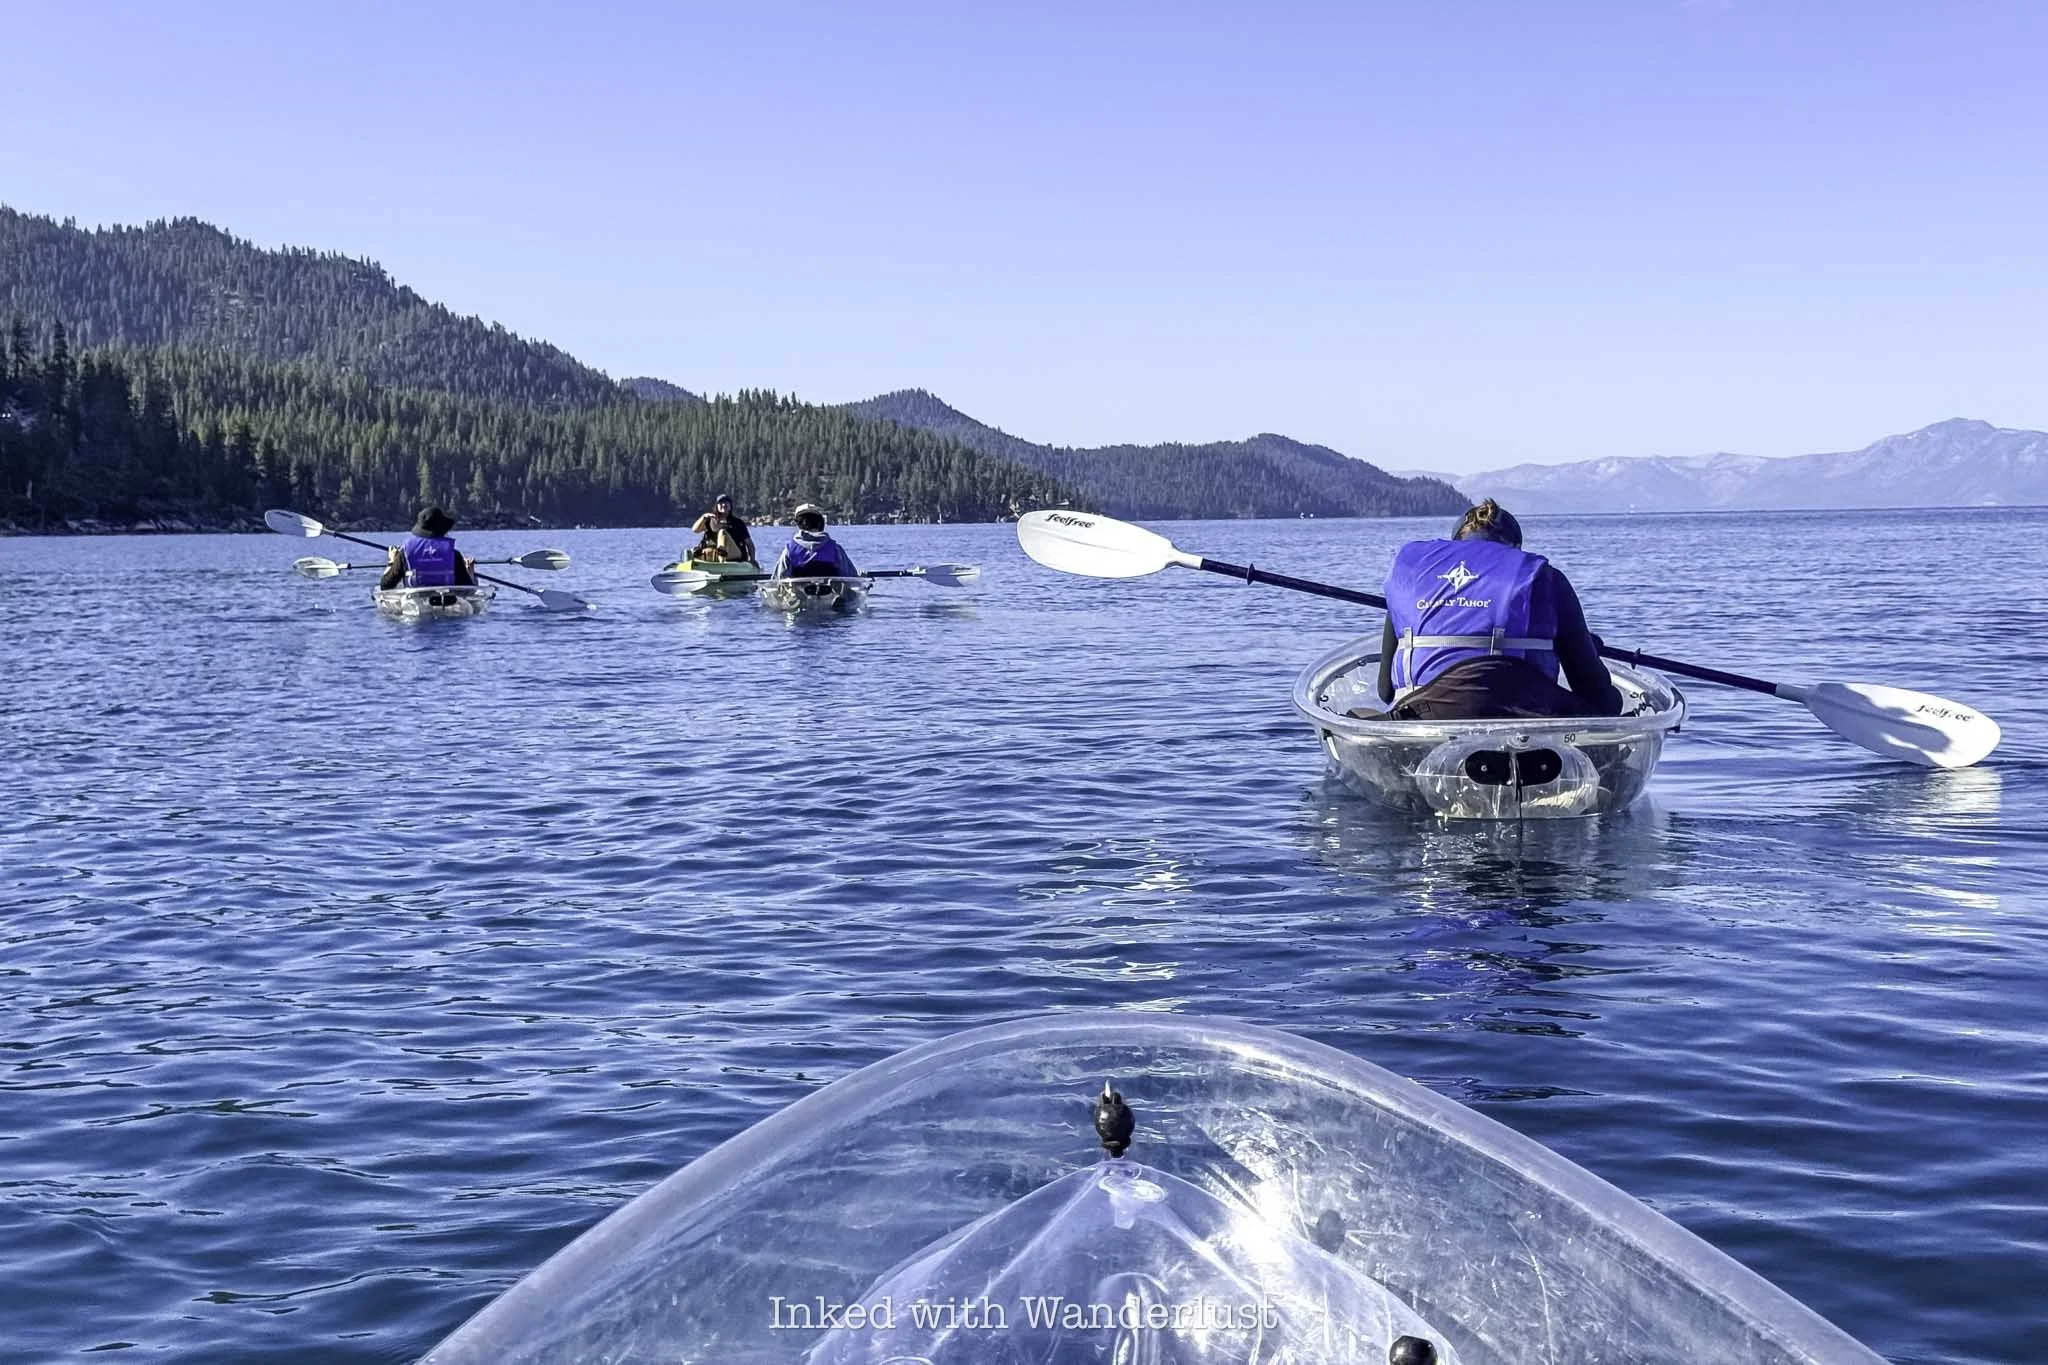
Within a few minutes, everyone in our group had the basics down. Seasoned pros we were not, but everyone was able to keep a steady pace and not lag behind too much. Julia set the pace in front on her peddle-kayak while another guide remained in the back of the group for support.
The kayaks were closer to a canoe than a traditional kayak and were touted by the guides as “extremely difficult” to tip over. I lightly tested this claim by moving around somewhat aggressively and while the kayak did rock a bit, it remained mostly steady.
I booked the first tour of the day (8am) so there wasn’t much boat traffic on the lake. Which was nice, as it kept the waves to a minimum and enabled us to fully appreciate that glass-like clarity Lake Tahoe is known for. If it’s your first time kayaking, I recommend doing the same.
On this tour, you’ll be kayaking along Tahoe’s infamously serene east shore. For now, the water perspective is the only way to fully view this specific section of the east shore. The Tahoe East Shore Trail currently ends at Sand Harbor, but will eventually run through the entire stretch.
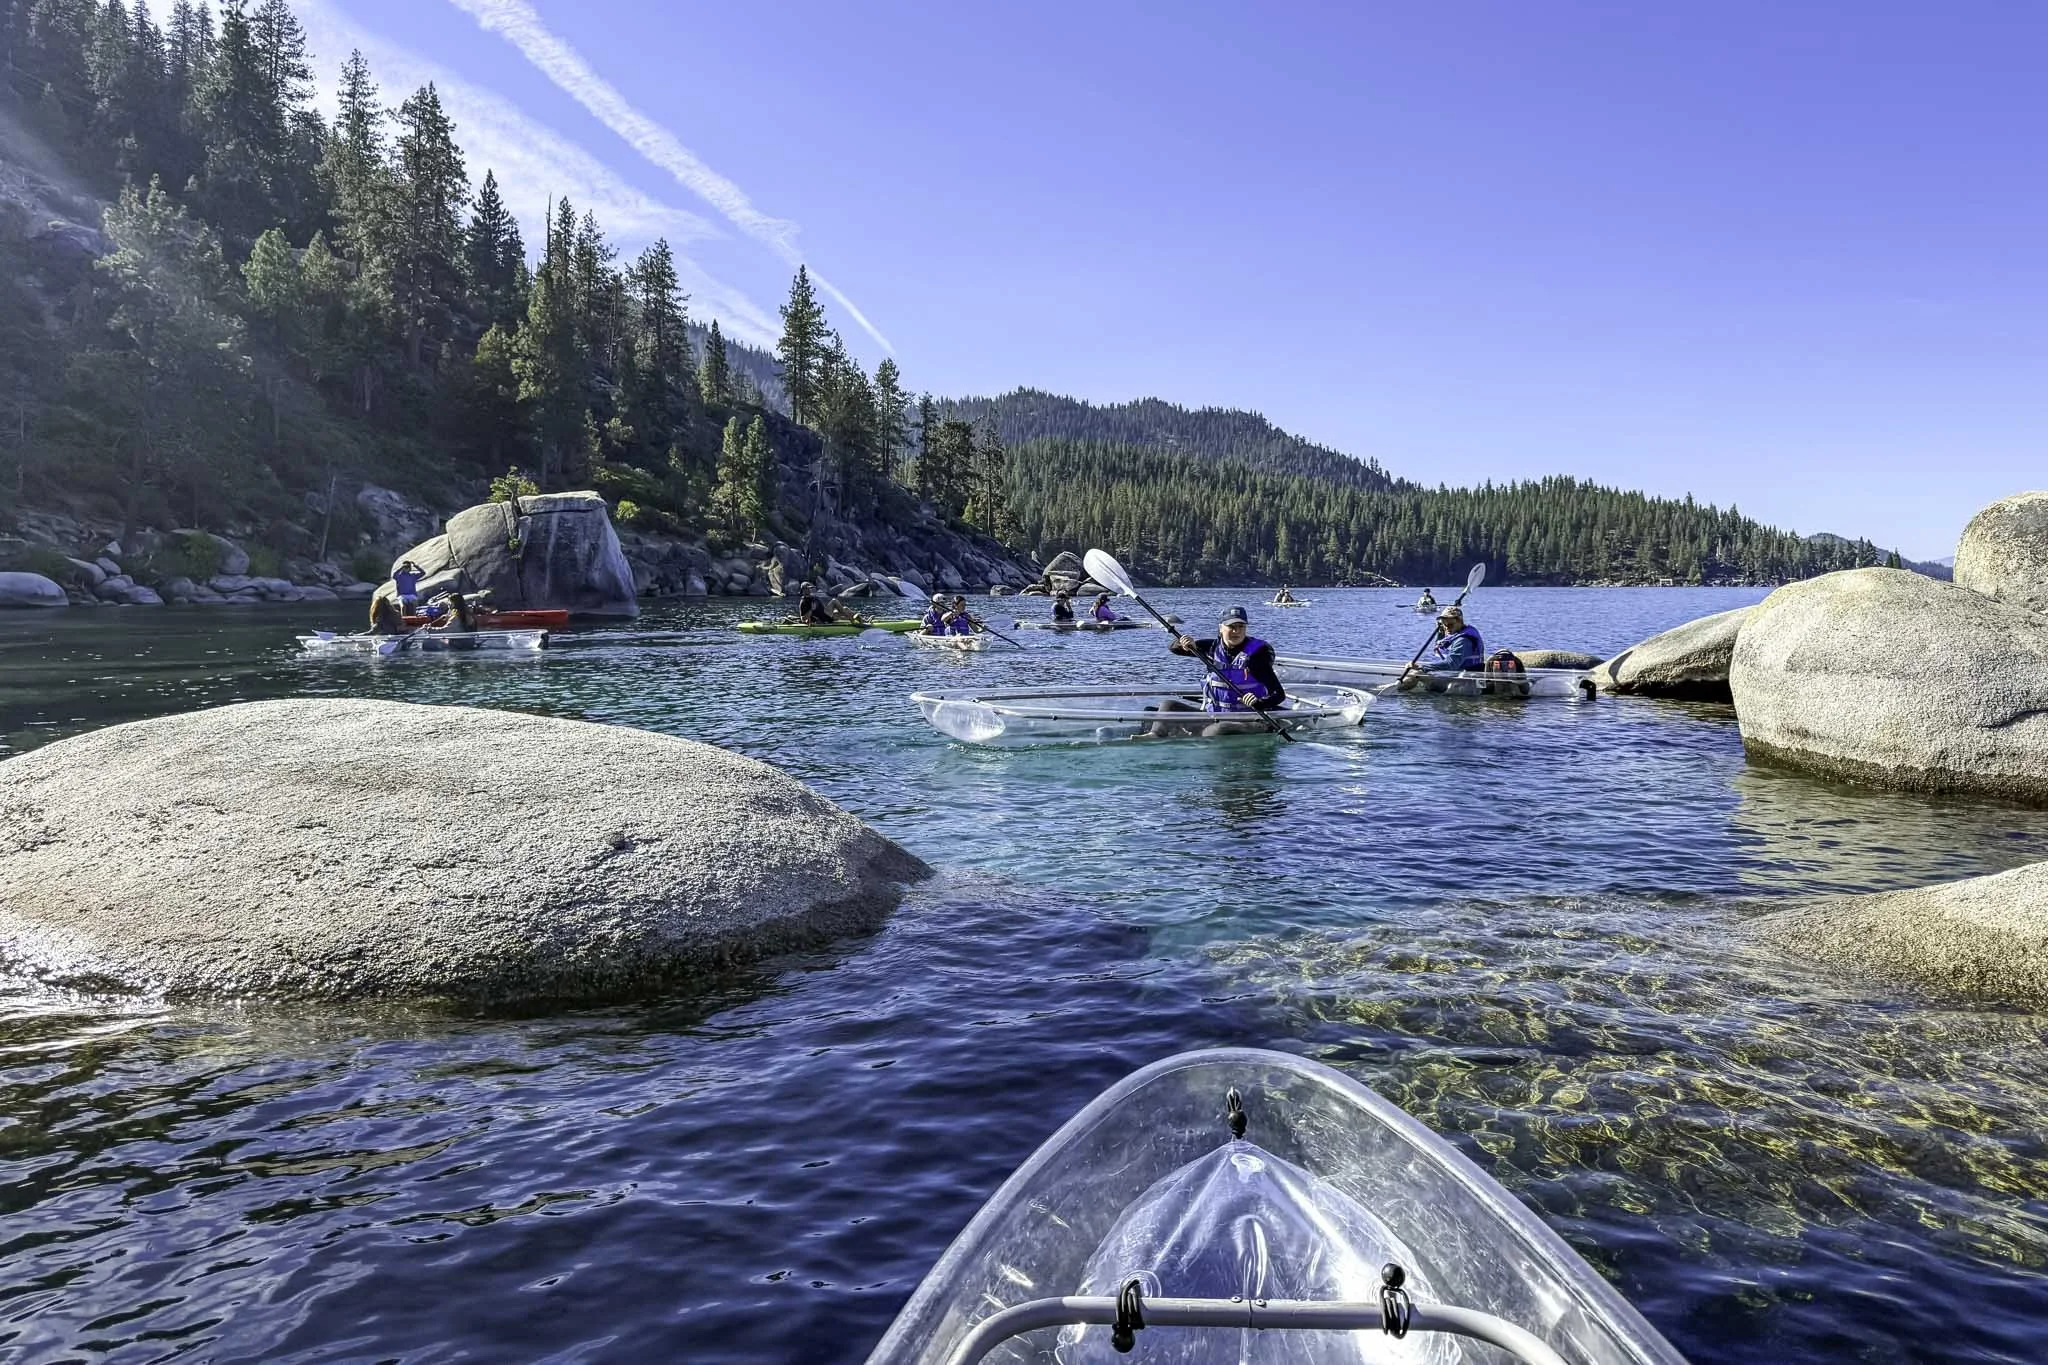
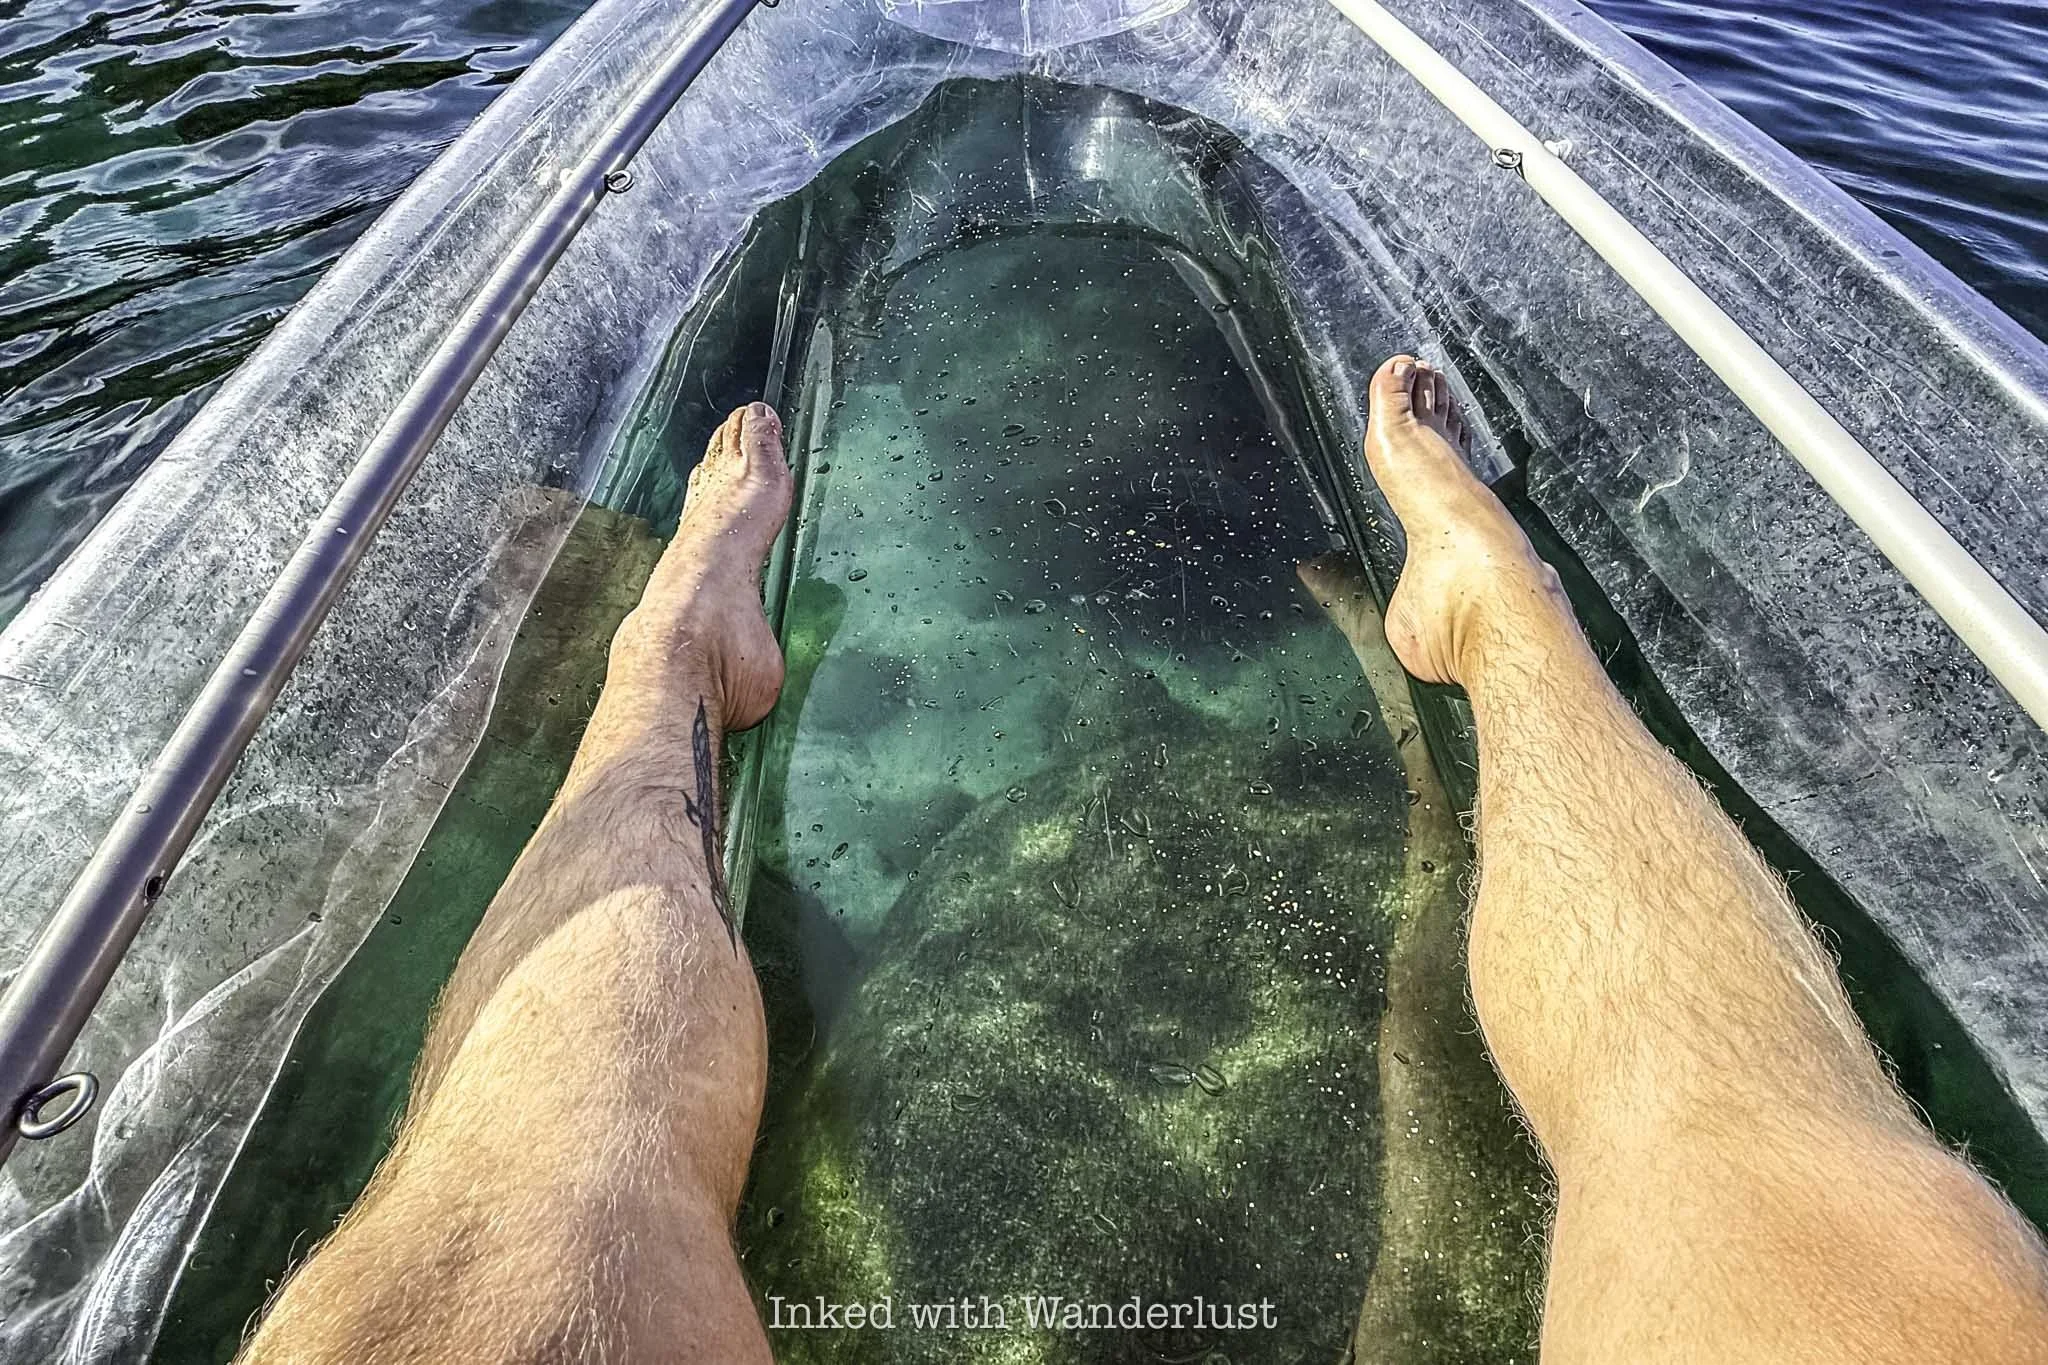
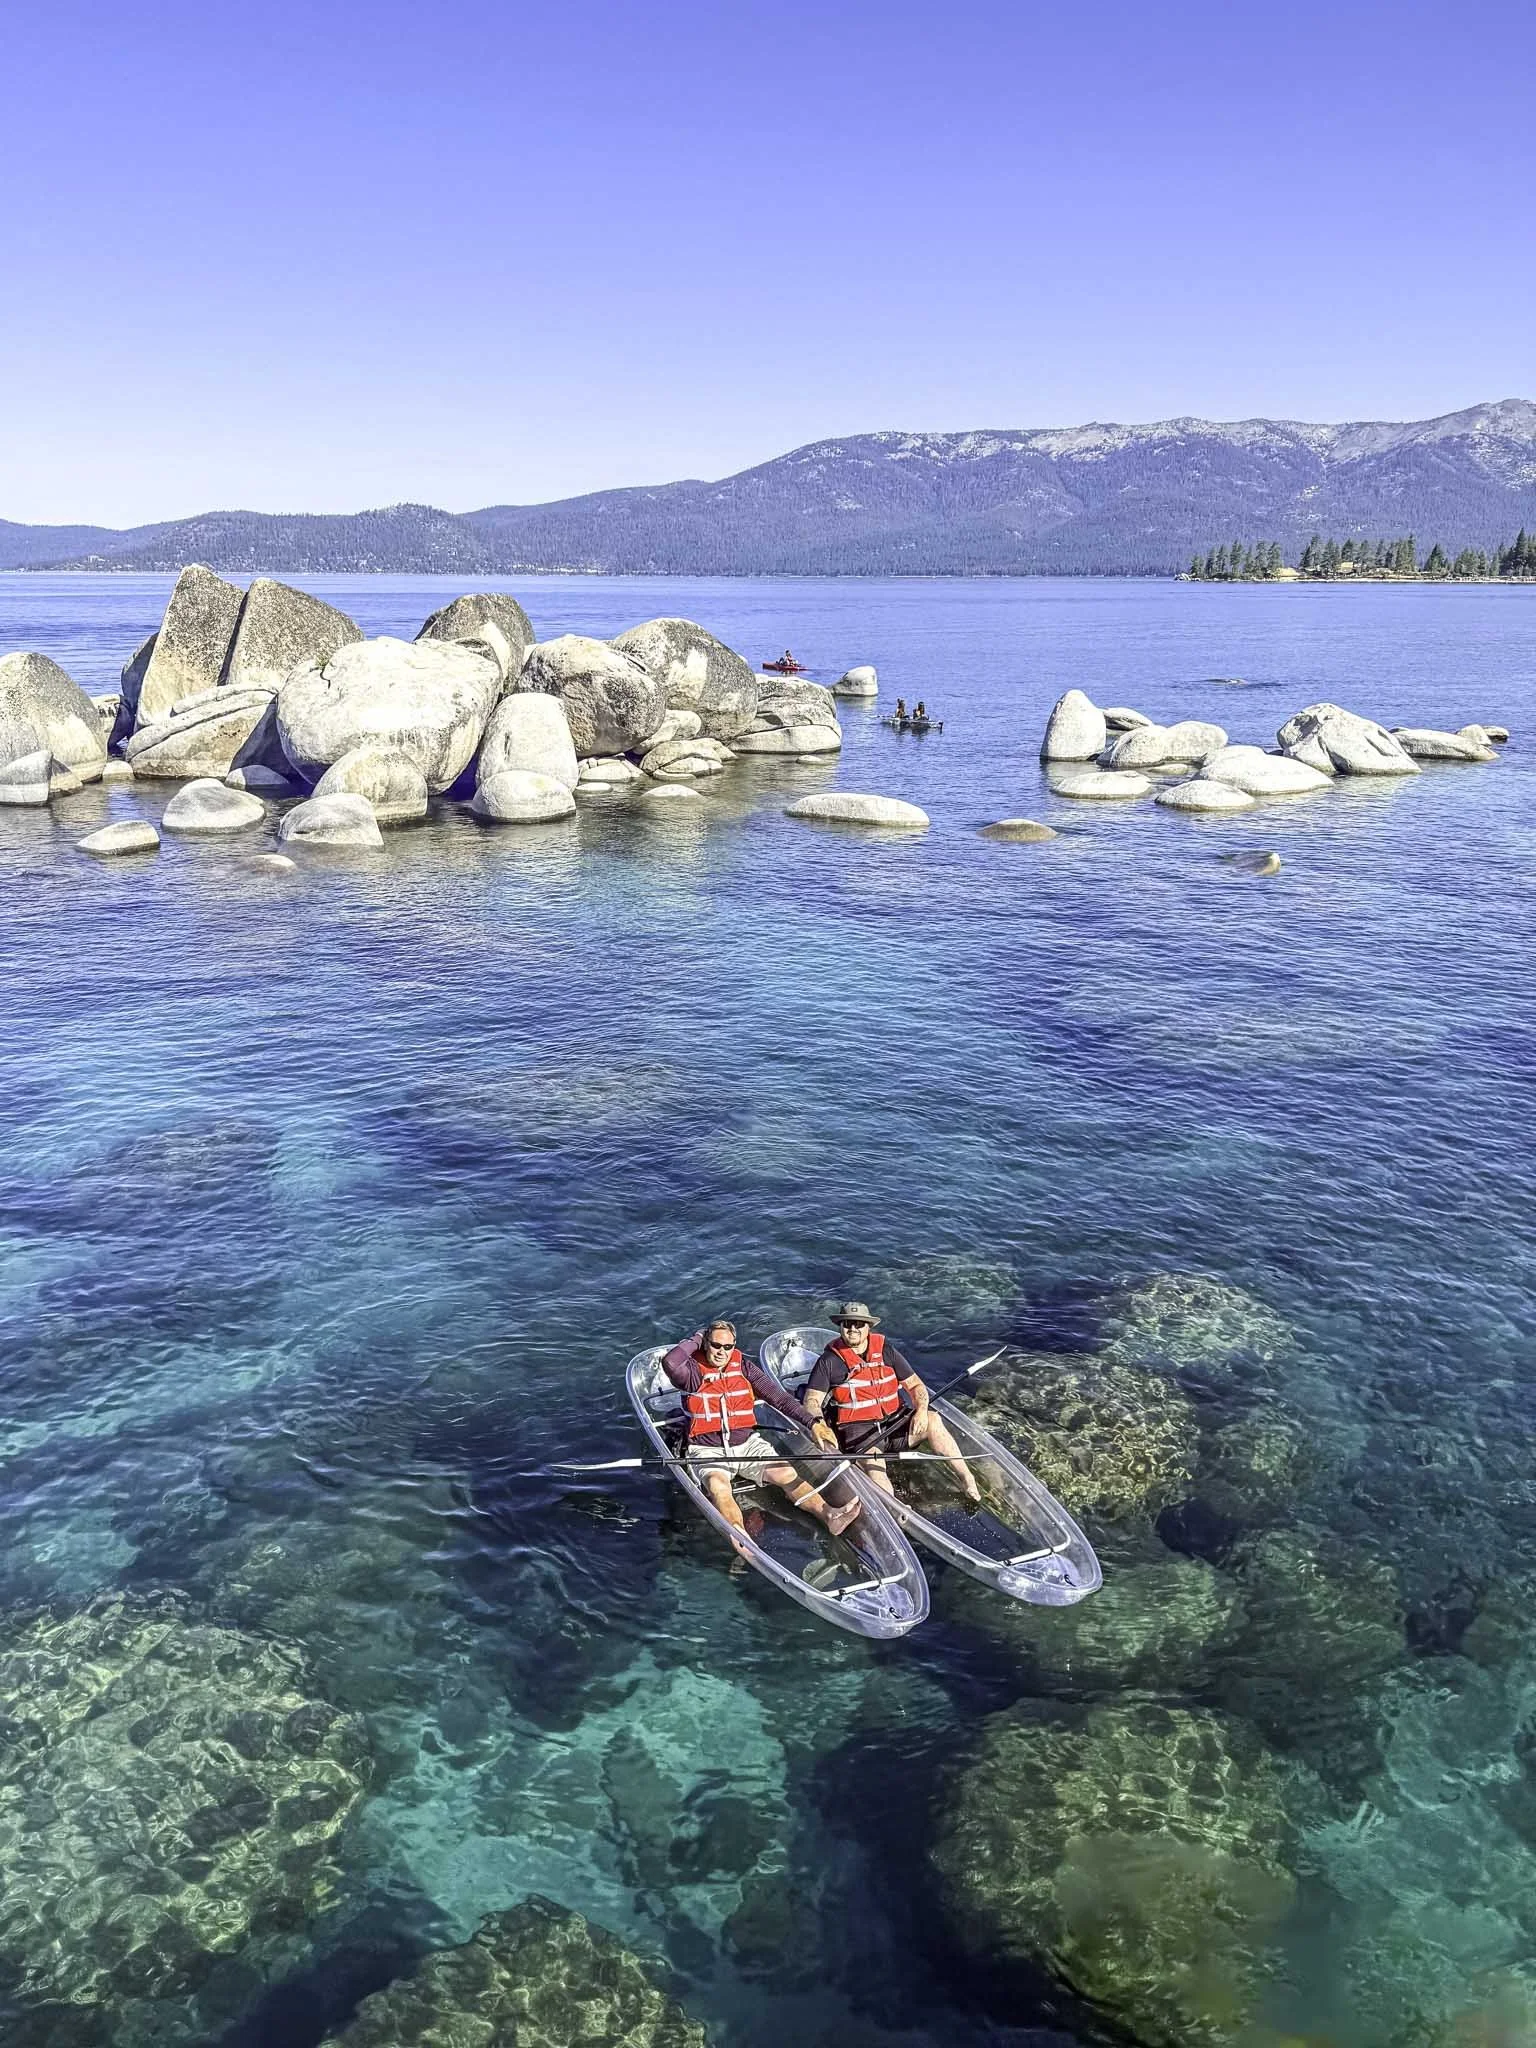
About 10-15 minutes into your tour is when the underwater granite boulders will start coming into view through your clear kayak. Some are dozens of feet beneath you while others appear to be right underneath the surface.
As you approach Bonsai Rock, you’ll come to a cluster of huge granite boulders you’ll need to negotiate. Here, your tour guide will take “action photos” of you as you pass through the boulder field.
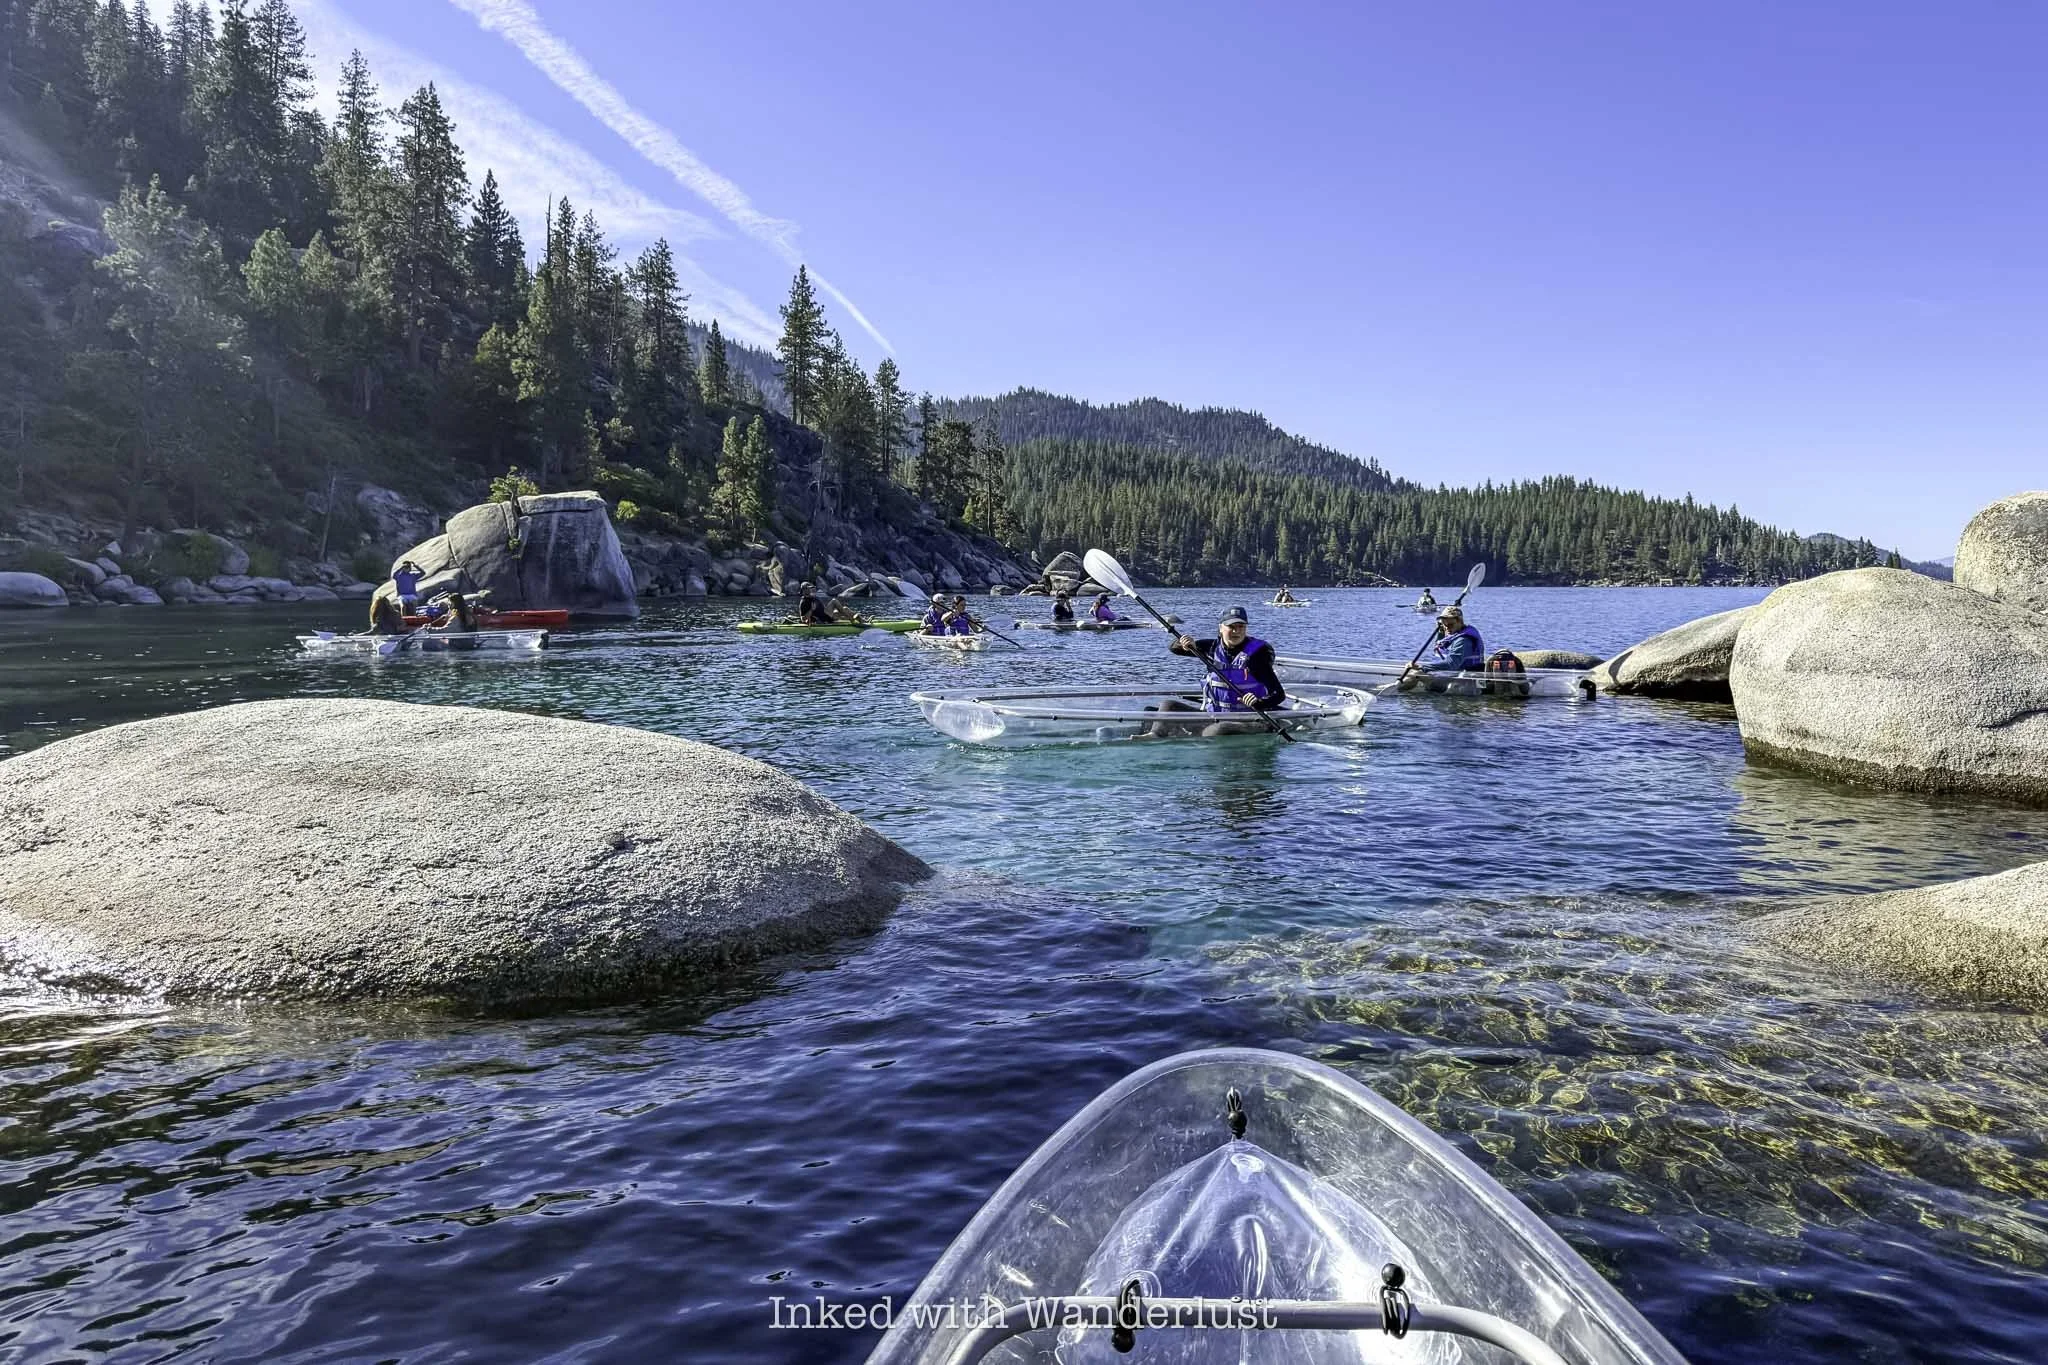
Getting through the boulder field is easy, though you will likely scrap the bottom of your kayak on one. Don’t sweat it if you do, as it’s nearly impossible to crack or puncture them (according to our tour guide, anyway).
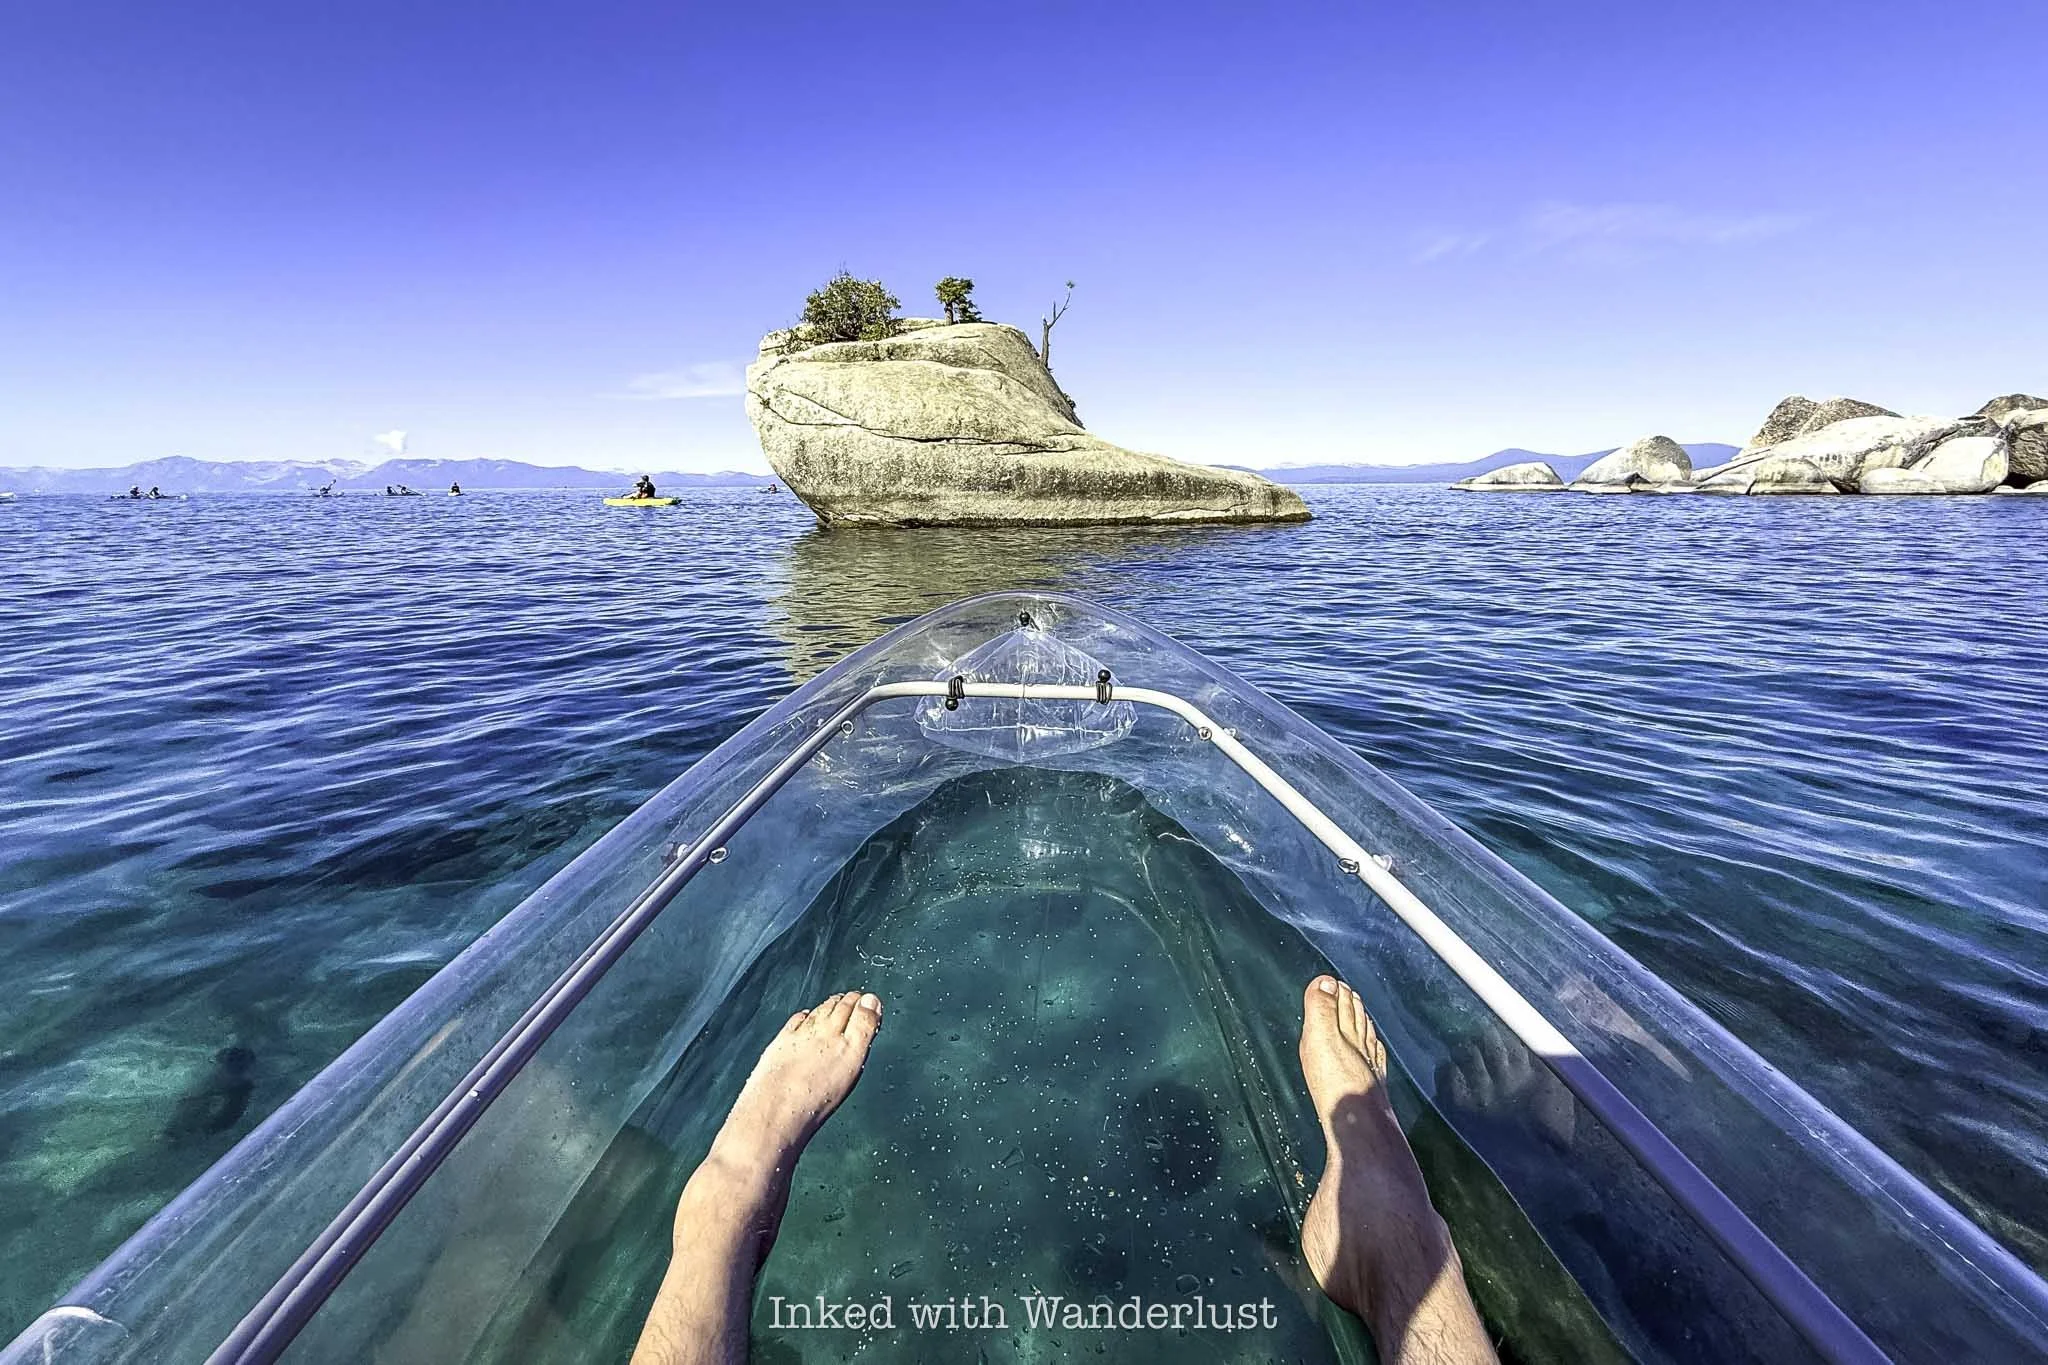
When you get through the small boulder field, Bonsai Rock will come into view on your left. You’ll immediately notice it, as it’s distinguished by several trees growing out of various cracks at and near the top.
You’ve likely seen Bonsai Rock on Tiktok and Instagram as it’s currently the second most photographed spot in all of Lake Tahoe (in case you were interested, Emerald Bay is the most photographed spot on the lake).
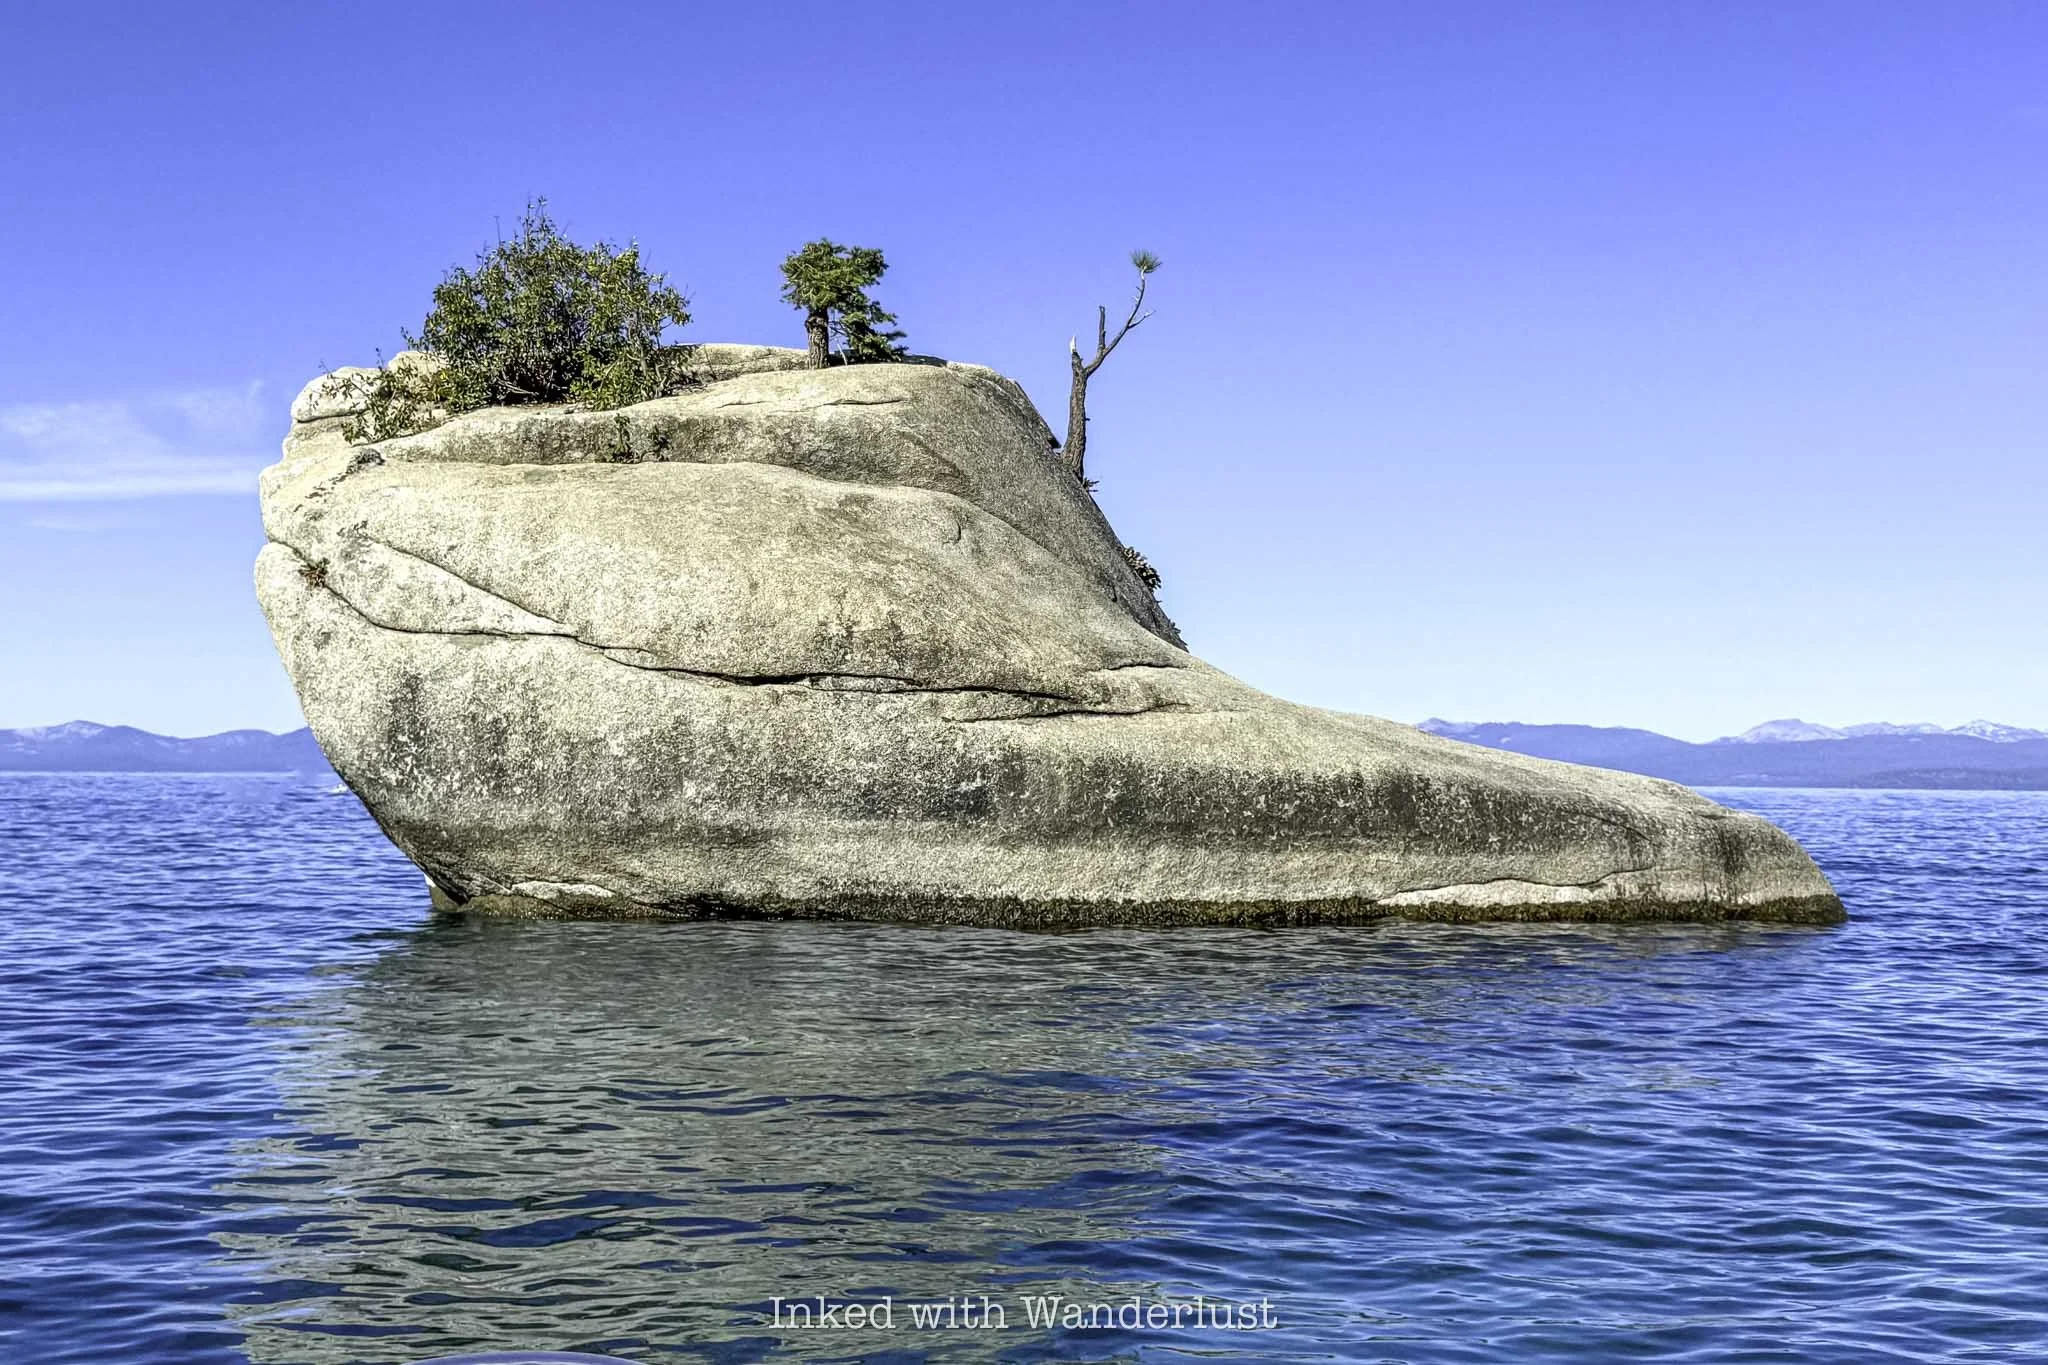
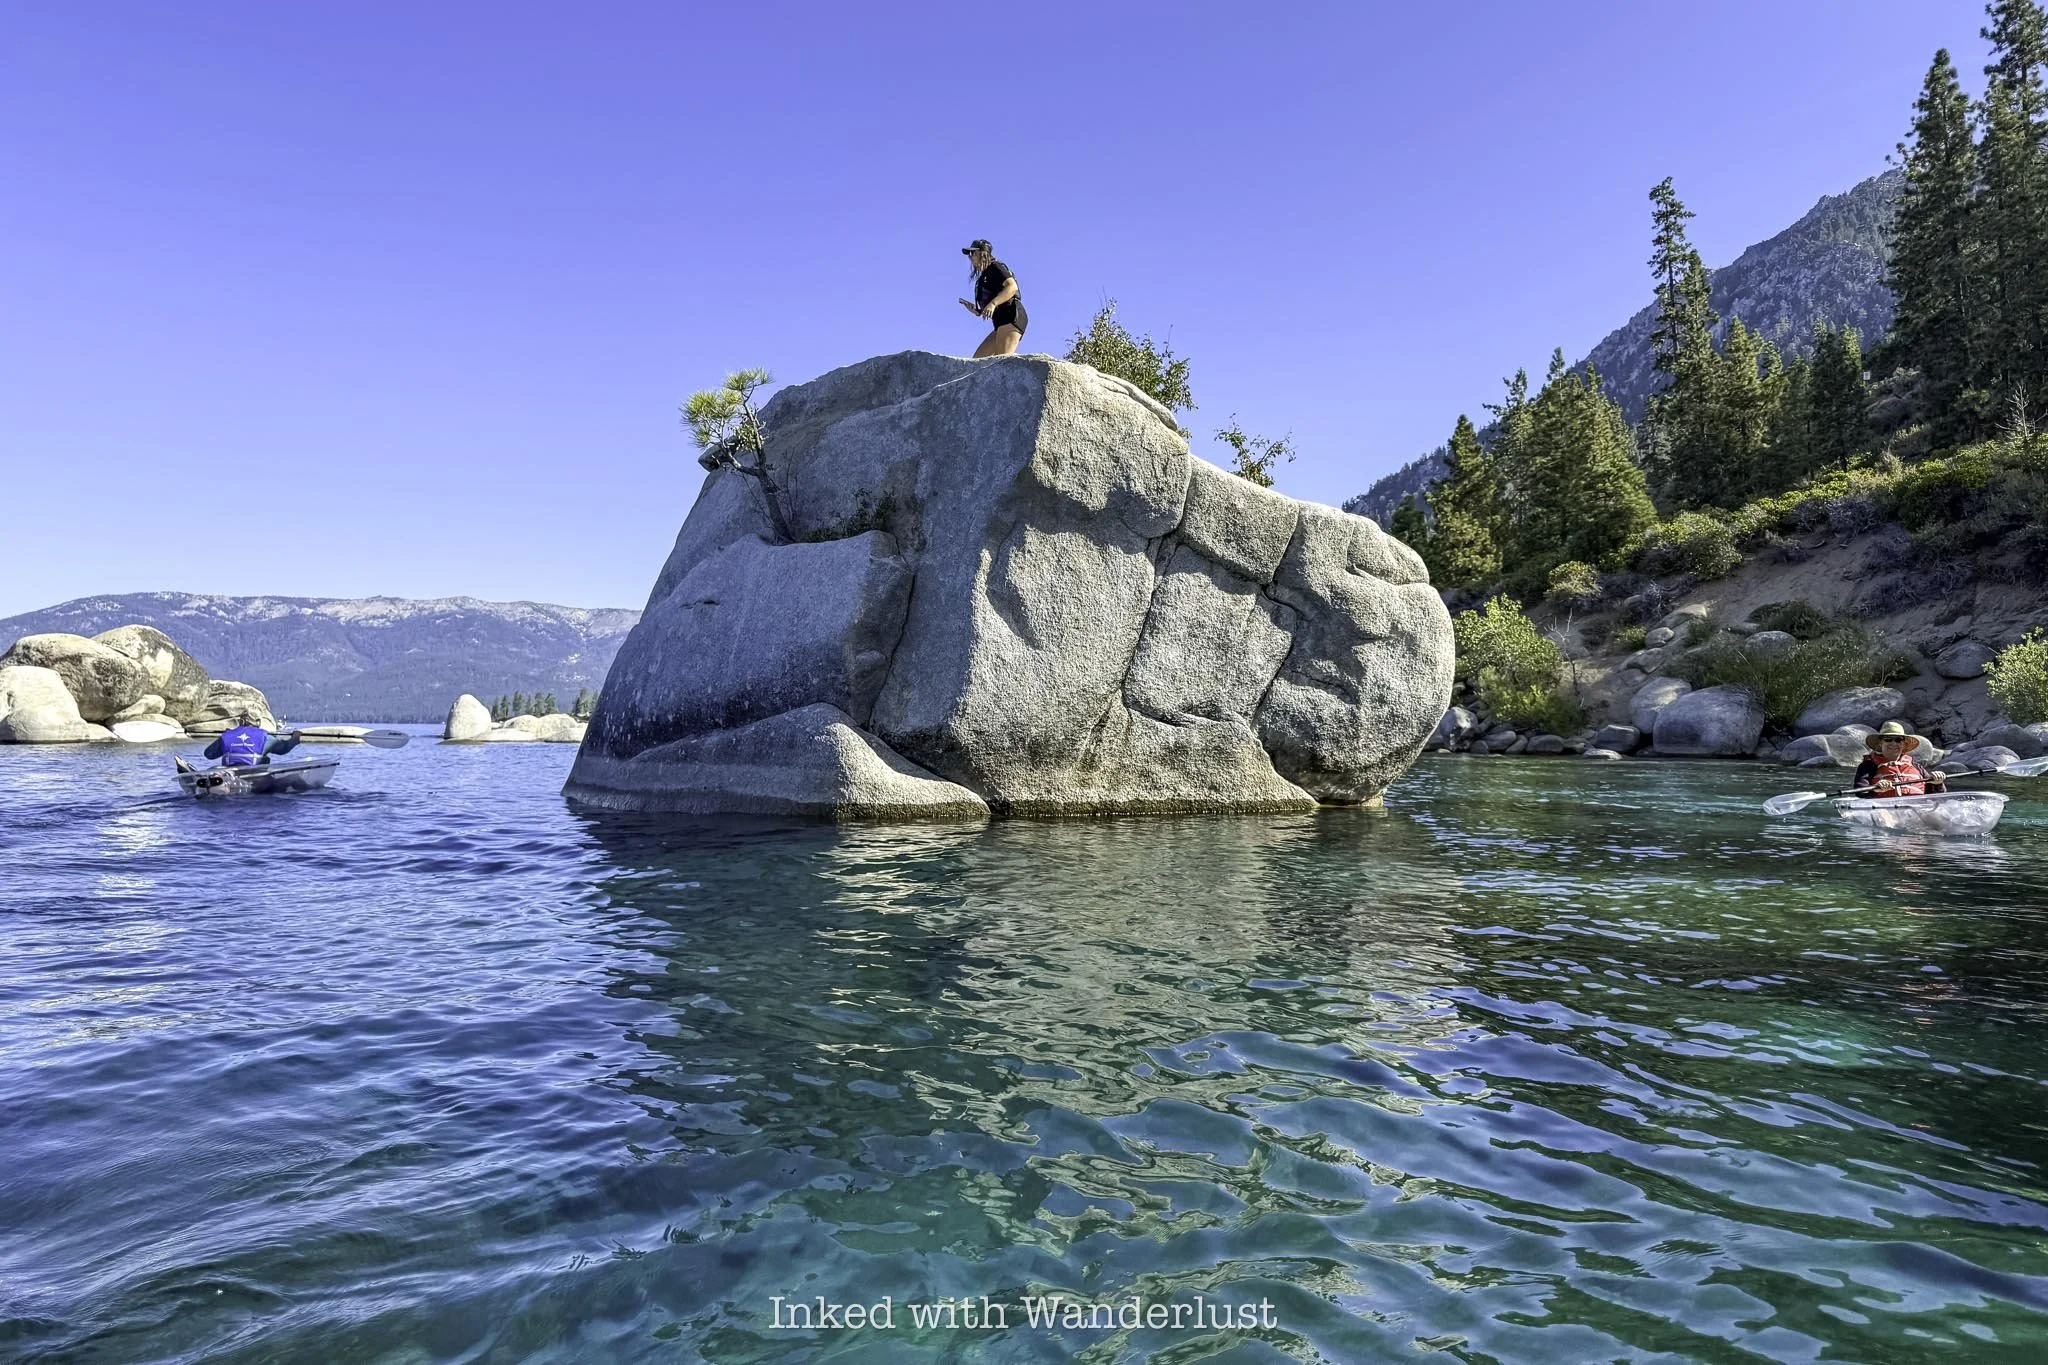
The group lingered around Bonsai Rock for several minutes, allowing time for light exploring and photo taking. Julia, our guide, climbed on top of the rock and took “from above” photos of each person in the tour group.
Once everyone had gotten their photo taken, the tour continued slightly past Bonsai Rock to a beautiful unnamed cove. It was here that I wish we had time to swim around because that cove looked so peaceful.
After a few more minutes of exploring, we were guided back to the beach at Sand Harbor. From the beach to Bonsai Rock was about one hour of kayak time. This included time for pictures and exploring the area around Bonsai Rock and that cove.
From that cove back to the beach, it took me just shy of thirty minutes of kayaking at an even pace, with a couple of stops here and there for water. As a beginner, I didn’t feel like this tour was too much. In fact, it was about the right amount of time to get my technique and pace down without overdoing it.
When we got back to the beach, Julia air-dropped the photos she took from her phone to ours. This was included in the tour price, by the way. Most places charge you extra for photos/video. It was nice to not get nickel-and-dimed by an outfit.
Final Thoughts…
I never got the sense that I was being rushed through the tour, but I do wish we had more free time to explore around Bonsai Rock (this is literally the only negative I can think of). I did hang back for a few minutes on my own and no one said anything, though.
For a beginner, I believe there is no better kayak tour to sign up for. The tour guides did a fantastic job helping everyone nail down the basics and help them keep pace. If Julia ever did get annoyed with those who were slagging behind, she never showed it.
The price is steep, sure, but the value is there. You’re led by experienced and patient guides, get to experience Lake Tahoe’s clarity up-close-and-personal, and you’ll get unmatched views of Tahoe’s gorgeous east shore and Bonsai Rock.
If you’re considering doing a clear kayak tour in Lake Tahoe, I highly recommend Clearly Tahoe. Be sure to tell them I said hello when you do! If you’re looking for more to do after your kayak tour, consider the nearby hike to Monkey Rock or take a beach day at Round Hill Pines!
***To book a clear kayak tour for your group, consider booking with my preferred ticket vendor, Viator, by clicking/tapping the “book now” tap in the ad below or through my link here.
Doing so helps to support Inked with Wanderlust and it doesn’t cost you anything extra. Any commission I may get comes directly from Viator.

Titanic: The Artifact Exhibition in Las Vegas
Located on the second level promenade of the Luxor Hotel, the Titanic museum features dozens of real artifacts recovered from the Titanic’s wreckage…
Disclosure: This post contains affiliate links. If you make a purchase through these links, I may earn a small commission at no additional cost to you. I only recommend products or services that I believe will add value to my readers.
If you’re a fan of the Titanic and you’re planning a vacation to Las Vegas, you’ll want to make your way to the southern end of the strip and tour Titanic: The Artifact Exhibition.
Located on the second level promenade of the Luxor Hotel, this Las Vegas museum features dozens of real artifacts recovered from the Titanic’s wreckage site, 2.5 miles below the surface of the Atlantic Ocean.
The museum’s most famous artifact, the “Big Piece”, is an actual section of the Titanic’s hull, formally located near the center of the ocean liner. It hangs in one of the final rooms of the museum, along with several other displayed pieces.

If you’re not aware, Titanic, formally referred to as the, “Unsinkable Ship”, indeed sunk during its maiden voyage across the Atlantic after striking a rouge iceberg. More than 1500 people lost their lives either during the sinking or by freezing to death in the bitterly cold water.
As a long-time Titanic aficionado, I’ve always wanted to tour this museum and see the artifacts for myself. I did so recently, along with my Dad, and it was a somber, yet epic experience. In this post, I’ll discuss what it costs, where to find it, what to expect during the tour, the museum rules, and more.
Quick Stats
Location: Inside the Luxor Hotel in Las Vegas
Fee: $27 - $34 per person
Open: Seven days a week, even on holidays
Family Friendly: Yes
Cell Service: Yes
Restroom: Outside the museum
Parking: Paid parking at the Luxor
EV Stations: Yes
Popularity: Moderate
Features: Numerous artifacts recovered from the wreckage site
Pets: Not allowed
Cameras: Allowed, but a few off-limit areas (explanation below) and no video or live feeds
My Visit(s): November 2024
Titanic Exhibit Las Vegas Price, Location & Hours

To find the Titanic museum, you’ll need to make your way to the Luxor Hotel, which is the big black pyramid-shaped hotel on the southern end of the strip. Trust me, you can’t miss it. There’s plenty of parking available, though you’ll likely have to pay.
Current parking rates are $18 to $40, dependent on where and when you park. If you’re a Nevada resident, you can get free parking for three hours by showing the attendant your Nevada drivers license. If you’re an MGM Rewards member with a ranking of Pearl or higher, you’ll receive free self-parking. Otherwise, you’ll have to pay.
Once inside the Luxor, take the escalators to the second level promenade. This is where you’ll find the Titanic museum, Bodies exhibition, restaurants, and more. The escalators are located to the right of the giant Egyptian statues and across from the check-in desk.

When you get to the second level, you should have no problem spotting the museum’s entrance. Look to your right and you’ll spot a giant, billboard-like sign with a huge mural of the Titanic indicating the correct spot.
To the right of this sign is where the ticket booth is. If you’ve purchased your tickets online, simply get in the queue and they’ll scan your phone. If not, head to the ticket booth first. Ticket prices to the Titanic Artifact Exhibition are currently:
$34 - General Admission
$32 - Seniors (65+)
$27 - Military (w/ ID)
$27 - Nevada Residents (w/ ID)
$26 - Child (4 - 12)
$0 - Child (0 - 3)
Additionally, you can purchase combo tickets, which include access to the Titanic Artifact Exhibition and Bodies..The Exhibition. The combo tickets are only available at the booth. My Dad and I passed on “Bodies”, but if you’re interested, combo ticket prices are $44 for adults and $38 for children.
Also, you can opt for the recording device for an additional $5. It includes headphones and a narrator who guides you through the museum, explaining things along the way. It’s not a requirement, though, as there’s plenty of signage you can read in the museum.
Titanic Artifact Exhibition Photography Rules

Photo copyright - Titanic Artifact Exhibition, Las Vegas, Nevada
To answer the question on if cameras are allowed in the museum, the answer is “yes”, but with a few caveats. For starters, you are allowed to bring your cell phone and/or DSLR to capture photos of the exhibits. However, there’s no video and/or live streaming allowed.
The only area inside the museum “off-limits” to photos is the replica of the Grand Staircase. I put “off-limits” in quotations because it’s only “off-limits” to your camera. The only way to get a photo of or with the staircase is through their photographer, and you’ll have to pay for it. No, the photographer won’t take your picture with your camera.
Turning to commentary, I never participate in these, as I view them as cash grabs for something that should be included with the money you’ve already spent. Conveniently, they don’t advise you of this until after you’ve purchased your ticket. I declined the employee’s request to take my photo and continued on. If you want your photo here, though, they’ll happily oblige.
Titanic: The Artifact Exhibition in Las Vegas

After they’ve scanned your ticket, they’ll have you go through the obligatory photo opp, where one of their employees takes your photo in front of a giant green screen. At the conclusion of your tour, these photographs will be available to purchase.
Normally, when I do things like this on my own, I decline the photo and move on. However, my Dad was me and he actually had a great idea for photo of the two of us, so we opted to do it. If you don’t want to, simply advise the employee of such.

Additionally, you’ll be given a card that resembles a boarding pass. On the flip side of the pass will be the name and details of a real-life Titanic passenger. Hang on to this because at the end, you’ll discover the fate of that passenger.
The first room you’ll enter is lined with burnt-orange walls and features numerous artifacts from Titanic’s boiler room, as well as information about the doomed ship’s construction and the people who worked on it. You’ll then walk down a short hallway before turning into a re-creation of the third-class level of the ship.
Third-Class Level

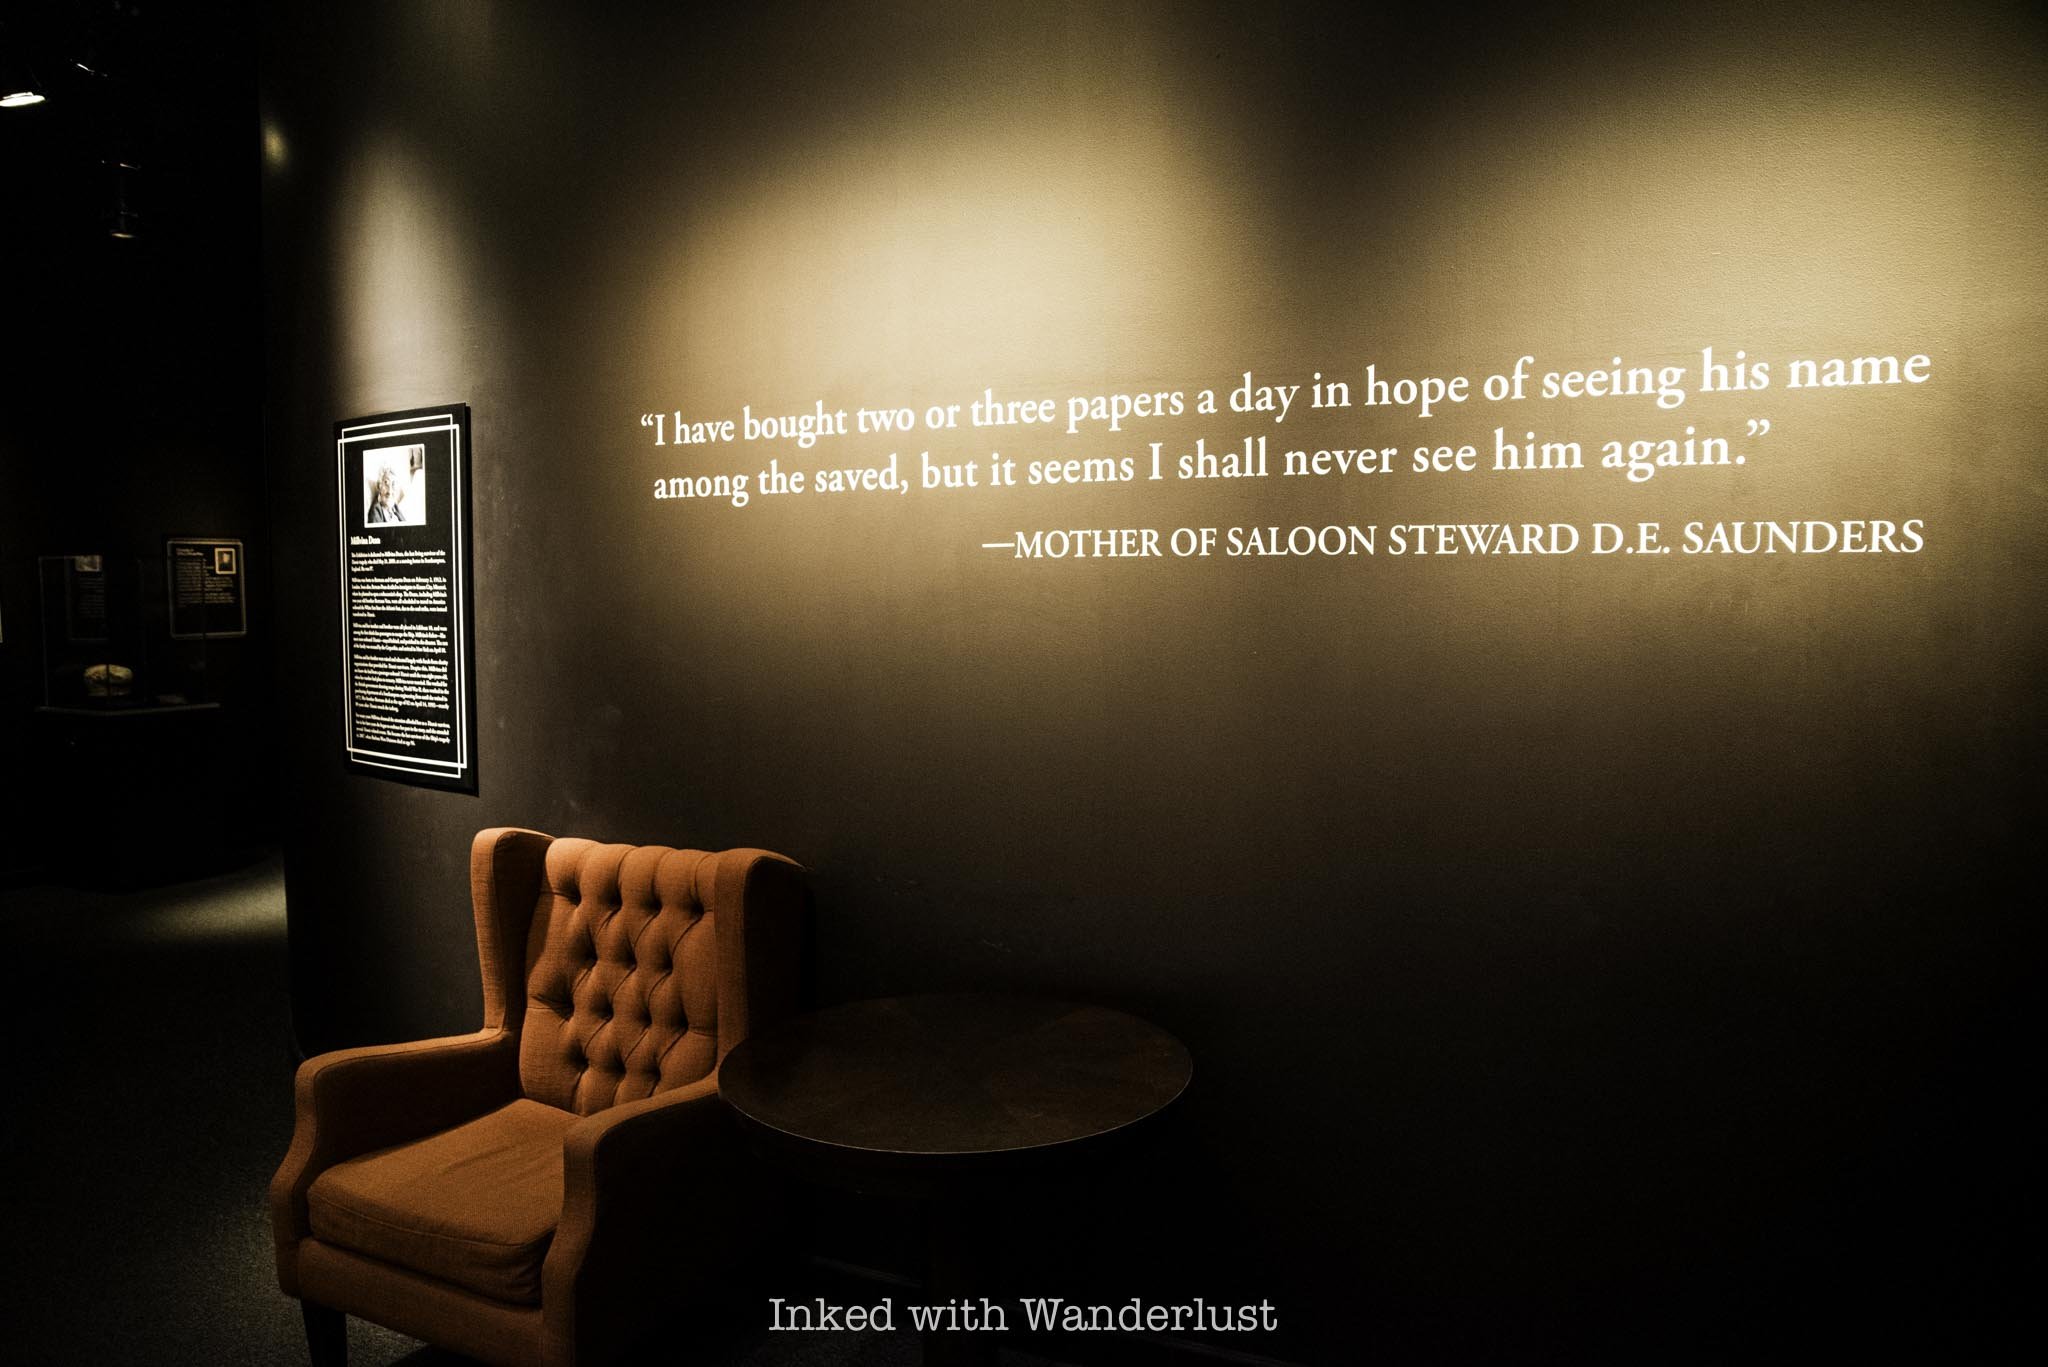
Along the hallway, you’ll see signs with details on individual passengers. This will be a common theme throughout the museum that I thought was a great way to honor their memories. Learning how they ended up on the Titanic, some by pure chance, stirred up emotions at times.
At the end of the hallway, there’s a re-creation of a third-class passenger stateroom. It’s small, no bigger than a walk-in closet, and contains four bunk-style beds. It wasn’t uncommon for ships in this era to place complete strangers together in the same room.
Second-Class Level

In the next room, you’ll see recovered artifacts from the second-class level of the Titanic. The stark differences between third-class and second-class quickly becomes apparent just by looking at the dish ware. You won’t see a re-creation of any staterooms here, as they were starkly similar to first-class, which you’ll see up ahead.
One of the featured passengers you’ll learn about is the Laroche family. The Laroche’s initially booked a passage on the steamship France, however, due to that ships’ policy of not allowing children in the dining room, they were transferred to second-class accommodations on the Titanic. While his wife and children survived the sinking, unfortunately, Joseph Laroche did not.

After the second-class room, you’ll enter a white-walled hallway with a quote from the shipbuilder on the wall. At the end of this hallway through the exit on the right, you’ll come up on the museum’s replica of the grand staircase.
As mentioned above, there are no photos or video allowed here, unless their employee does it. There are also two or three artifacts on display in this room but unless you’re wanting to take the photo, bypass the queue and head straight into the first-class room.
First-Class Level

In the first-class room, opulence is the name of the game. In the re-created first-class stateroom, you’ll immediately notice the size difference from its third-class counterpart. I didn’t measure, but it appears as though you could fit three or four third-class staterooms in just one first-class room.

One of the featured artifacts in this room is a gold-plated chandelier that once hung from the ceiling of the first-class men’s Smoking Room. Additionally, there’s a wall-sized display case showcasing many of the first-class dish ware and eating utensils recovered.
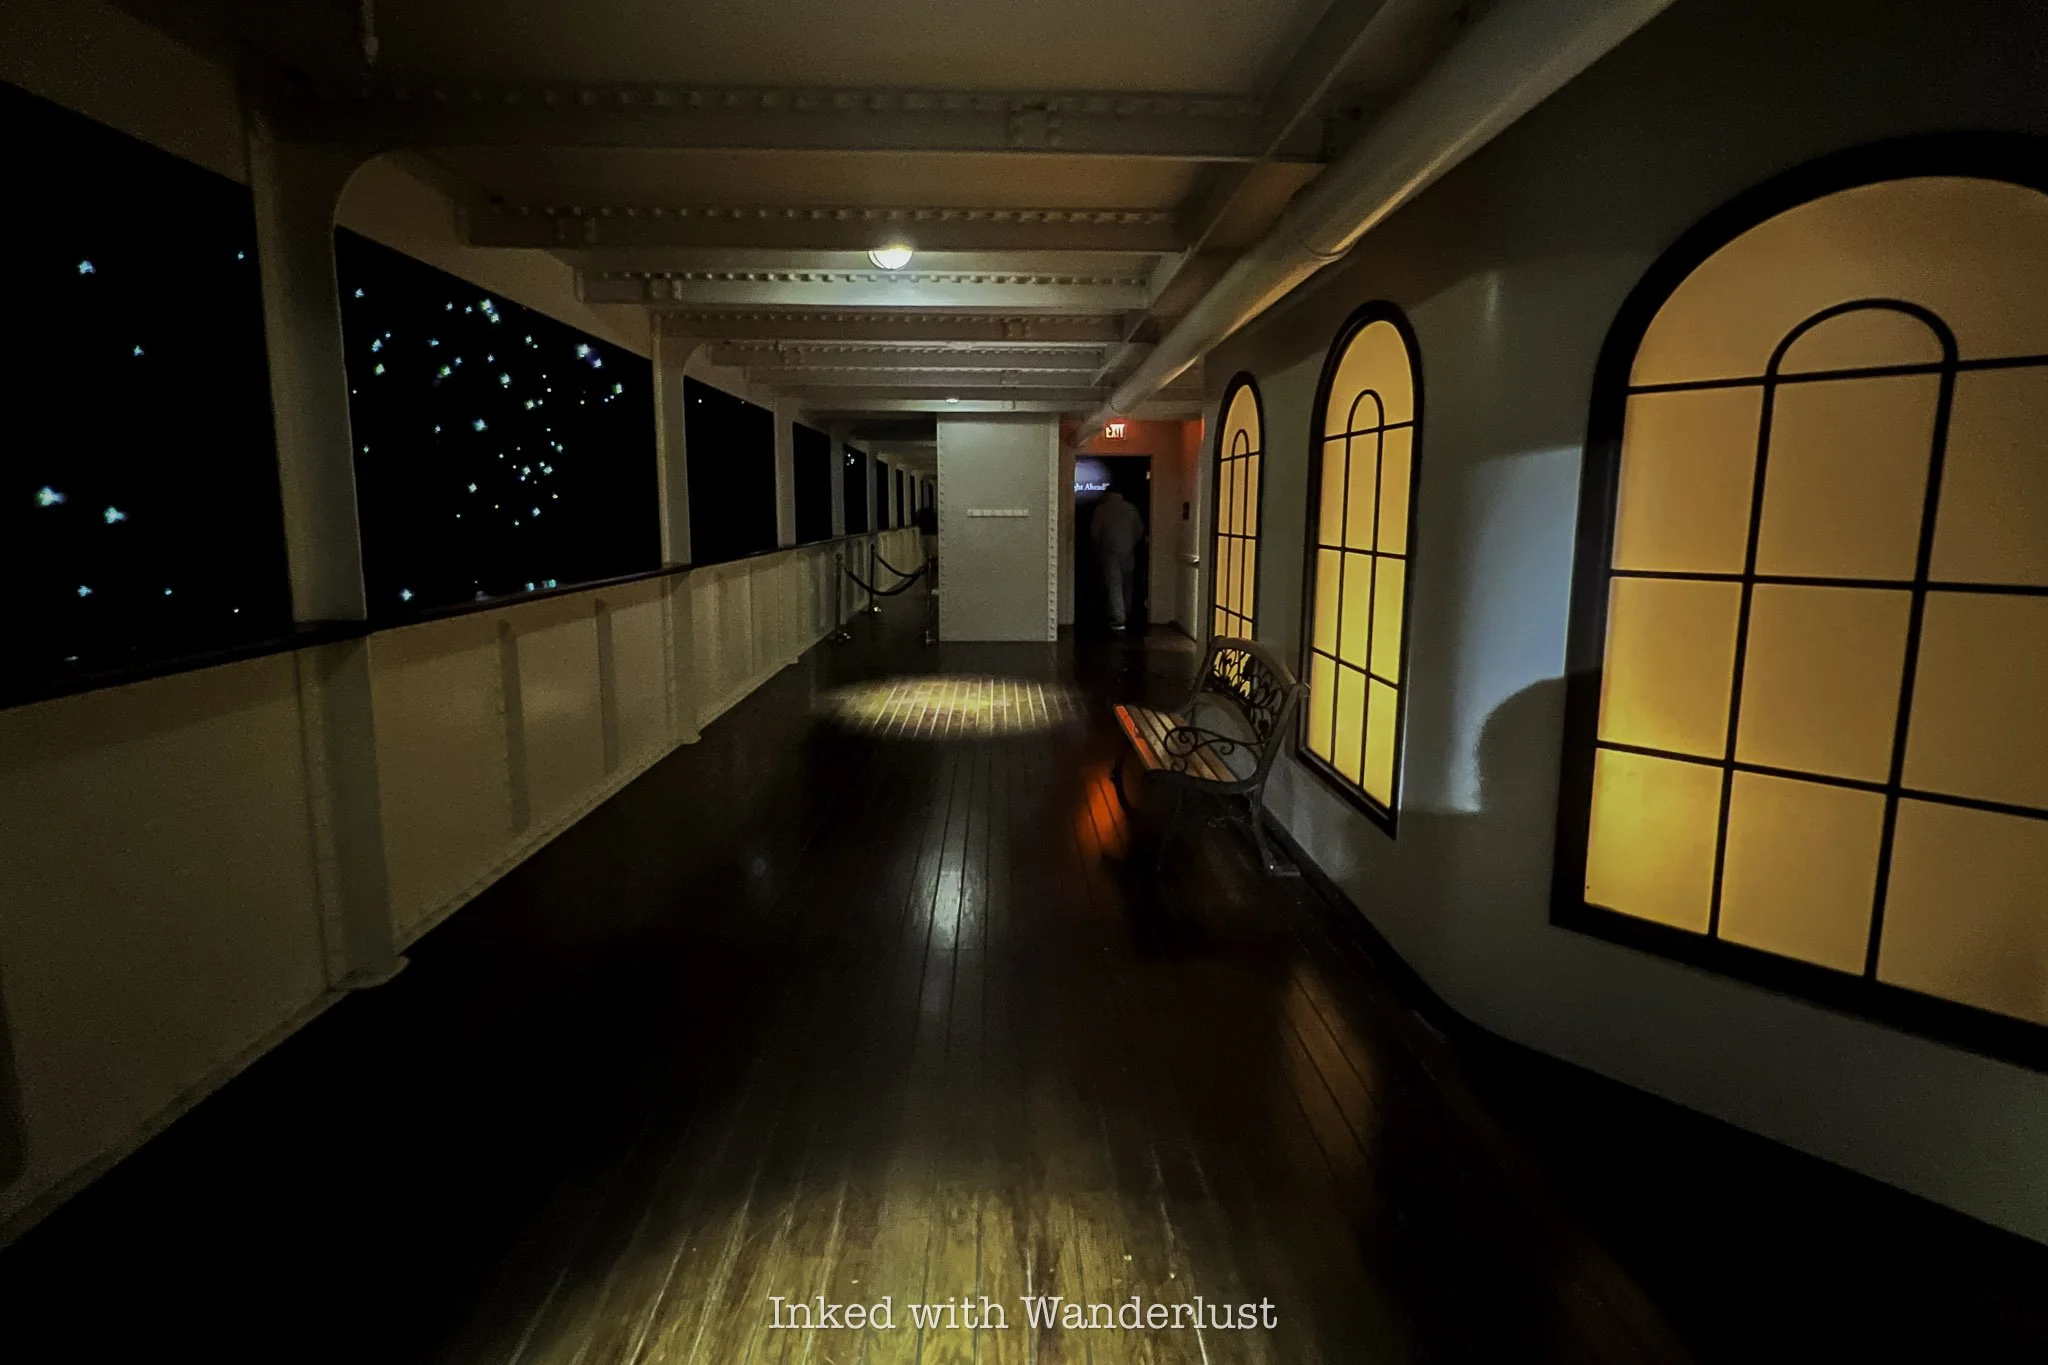
Beyond the first-class room, you’ll step out onto a re-creation of the outdoor promenade, complete with a view similar to what passengers would’ve seen that fateful night. Looking out beyond the guardrail, all passengers would’ve seen is pure darkness in the middle of the Atlantic.
After the promenade, you’ll enter a darkened, chilly room, meant to mimic the sound and feel of a windy evening on the ocean. On the wall to your immediate right are a few signs with the timestamped words of several iceberg warnings sent to the Titanic the day it sunk.
April 14, 1912 - The Fateful Day

Up to this point, you’ve been shown examples of the various levels of Titanic’s accommodations and amenities. No matter the class, the first four days of the ship’s maiden voyage had been nothing short of spectacular for her passengers. Marking what should’ve been a happy memory for all.
However, the evening of that fourth (and final) day would warp feelings of happiness and excitement into those of horror and panic. Shortly before midnight on April 14, 1912, Titanic struck an iceberg, forever changing the course of its brief history.
The next series of rooms are dedicated to the events between the collision and the ship’s eventual sinking. Despite Titanic’s false reputation as unsinkable, it took less than three hours from the time it struck the iceberg to smash into the ocean floor.
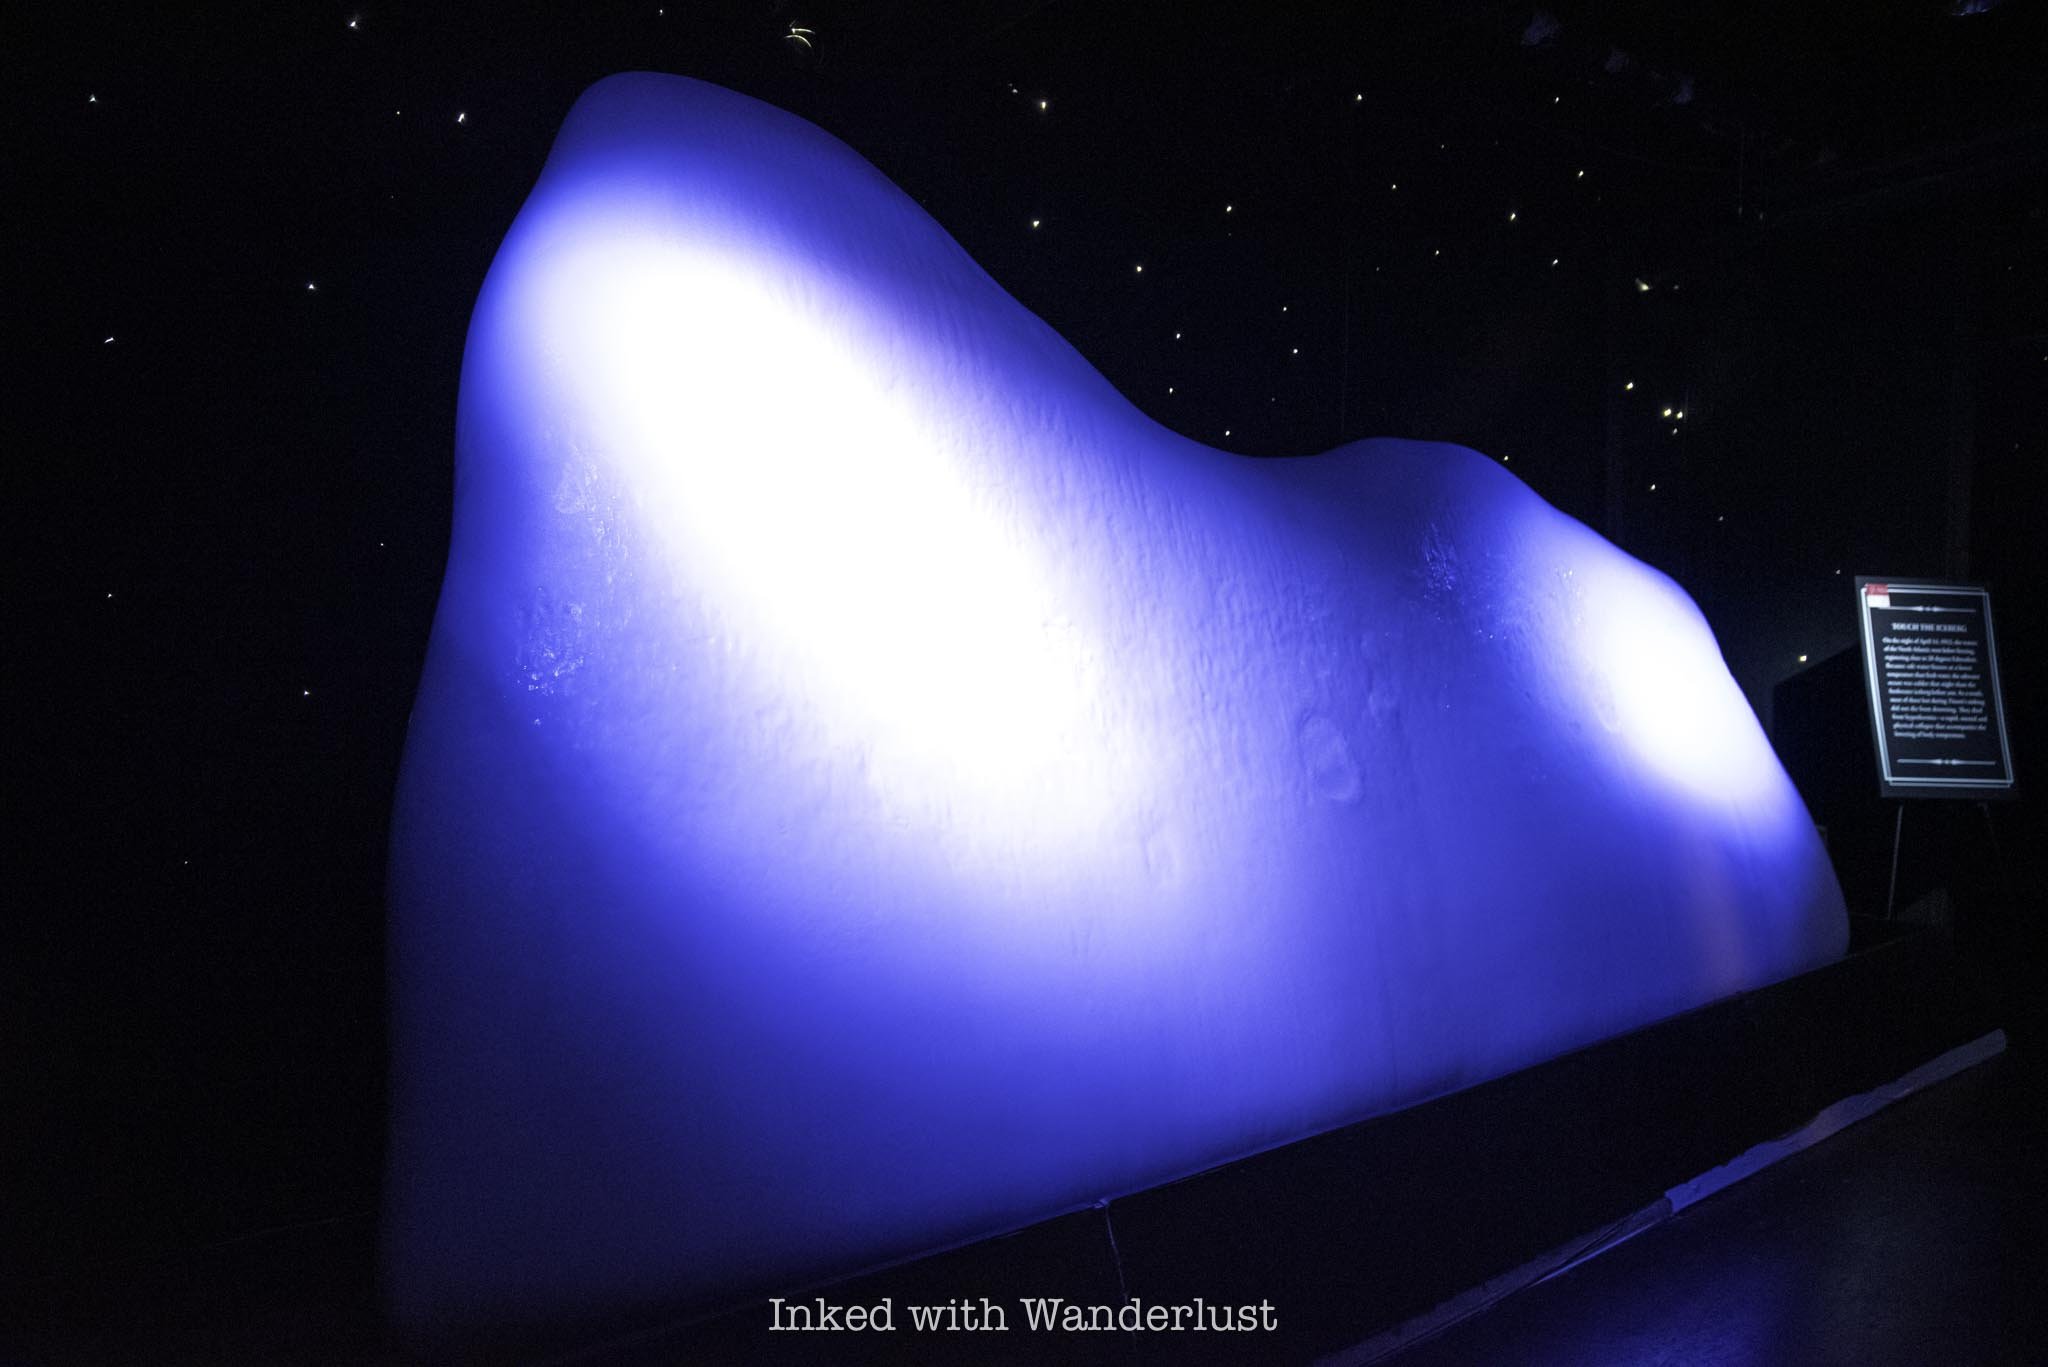
In one of the rooms, the main attraction is an example of an iceberg made of actual ice, maintained at a temperature similar to the stinging cold of the water passengers experienced when they jumped in to escape, or worse yet, unexpectedly fell into.
Unlike the other exhibits, you’re allowed to touch it. In fact, they encourage you to do so in order to get an idea of what passengers went through. It was so cold, I could only keep my hand pressed against it momentarily. Knowing the water that night was even colder than that really put things into perspective.

You’ll then walk down a dark hallway, illuminated by several display cases, each showcasing a single artifact. At the end of that hallway, you’ll enter another room. This one features several more artifacts, such as a few dozen au gratin dishes.
These dishes were discovered stacked neatly together in the sand, much like they appeared in the case. This happened when the cabinet they were stored in remained intact after hitting the ocean floor, but rotted away over the years, leaving the dishes almost perfectly in place.

Another featured display in the same room is a scale-sized model of the bow (front) half of Titanic as it appears on the ocean floor. During the sinking, Titanic was going down by the bow but before going near vertical, the stern (back) split, leaving the two halves only loosely connected.
After the split, the stern crashed back into the water, before being lifted again by the still sinking bow. This time, the ship went completely vertical. The bow, now completely submerged, broke free of the stern and began its descent. The stern would bob around momentarily before it too sunk.
This left the Titanic with two wreck sites 2,000 feet (600 meters) apart, roughly 12,500 feet (or nearly 2.5 miles) beneath the surface. At some point, a sizable chunk of the ship’s hull would break off and eventually, would go on to become the largest piece of the Titanic ever recovered.
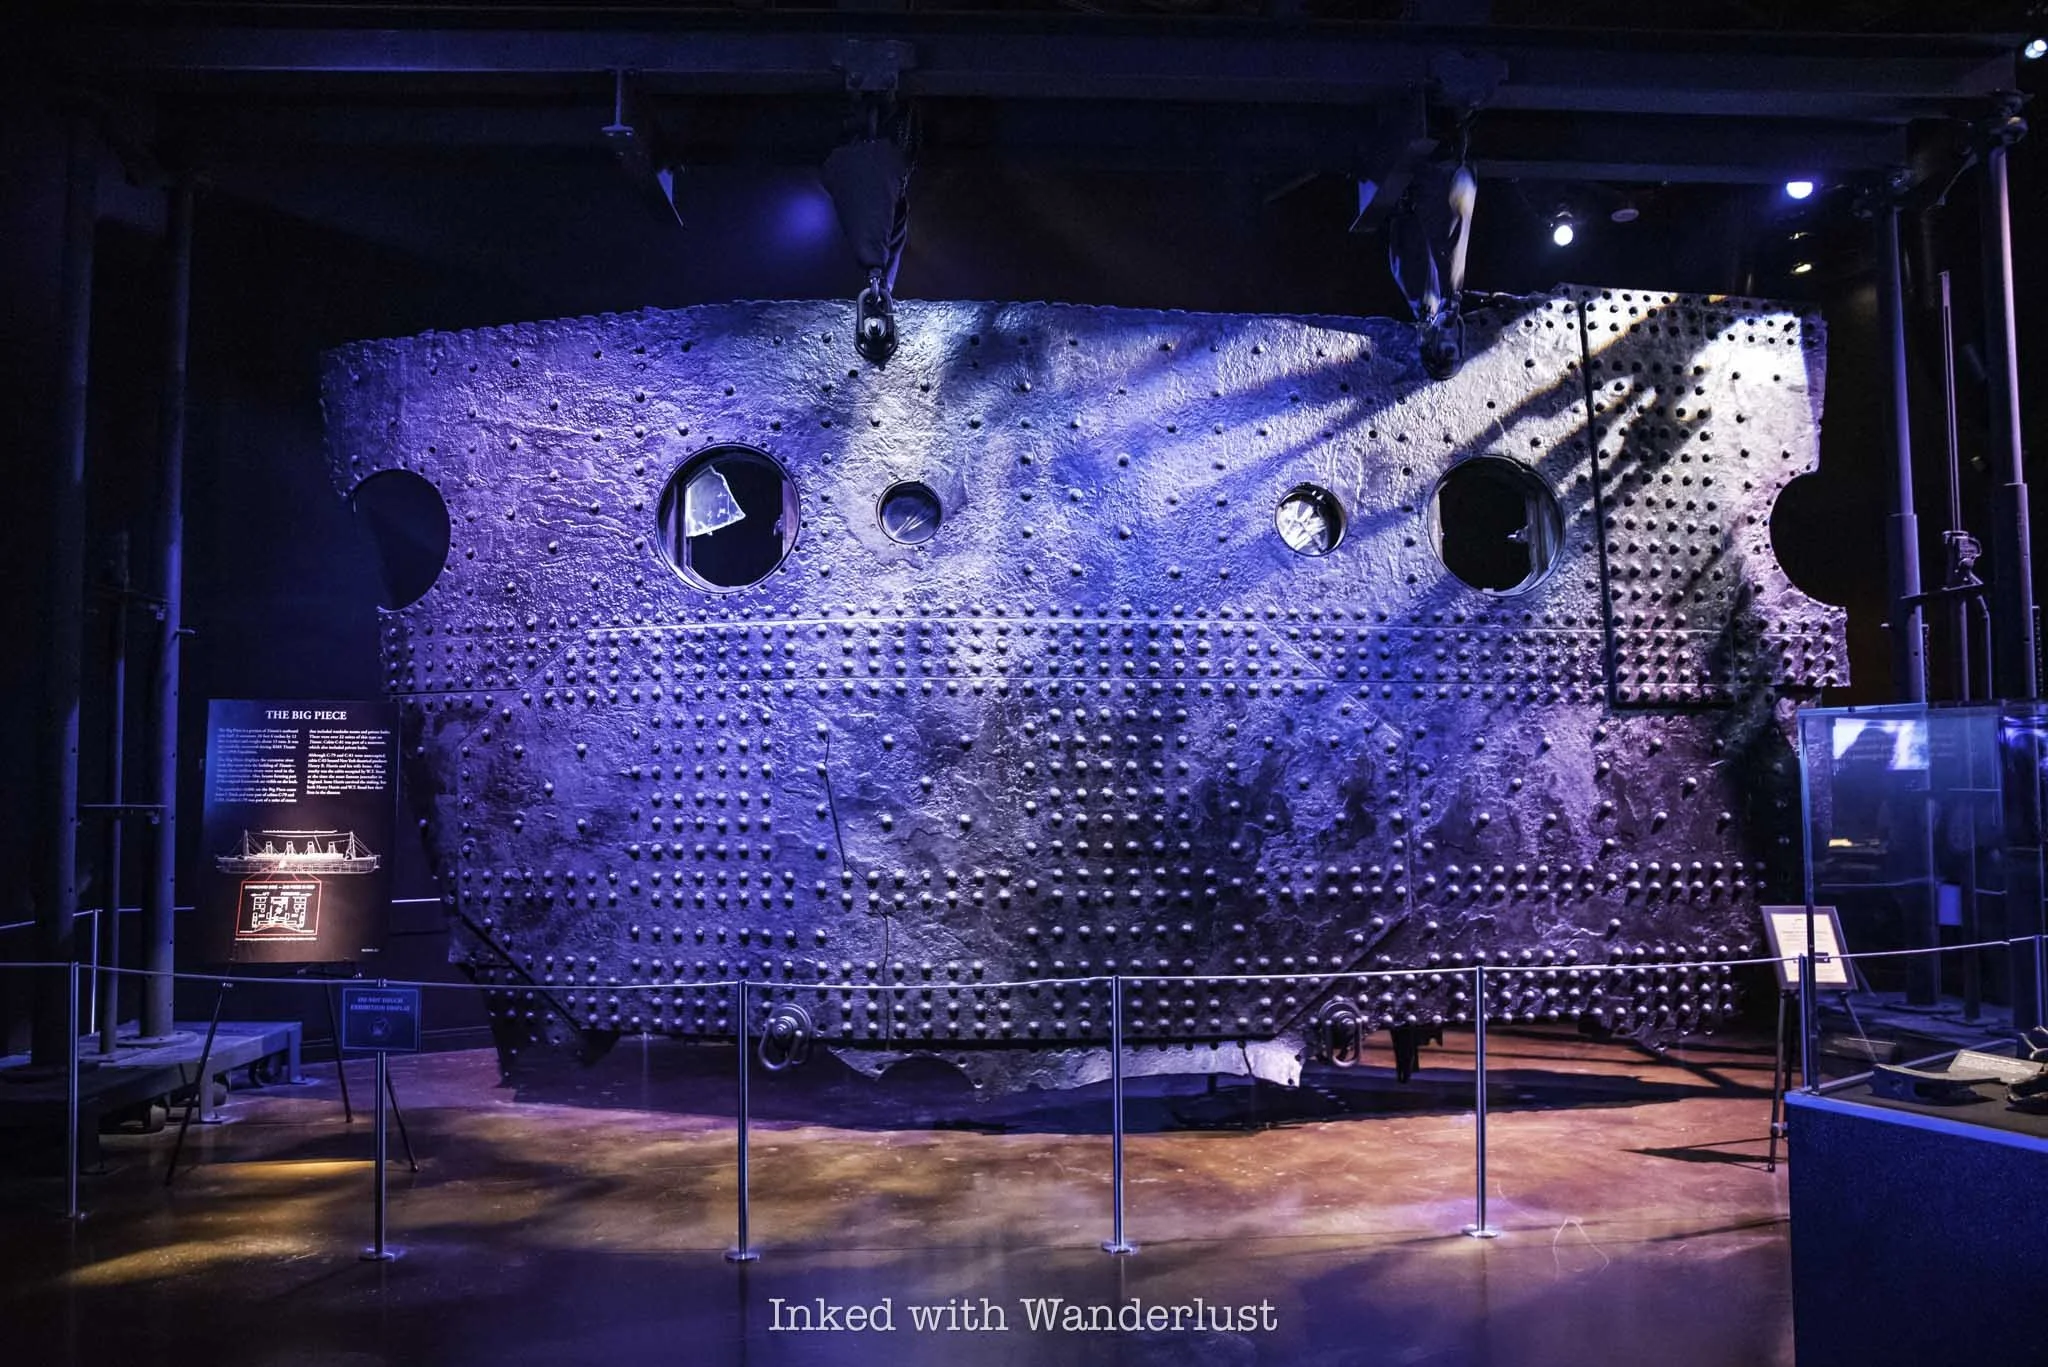
The Big Piece
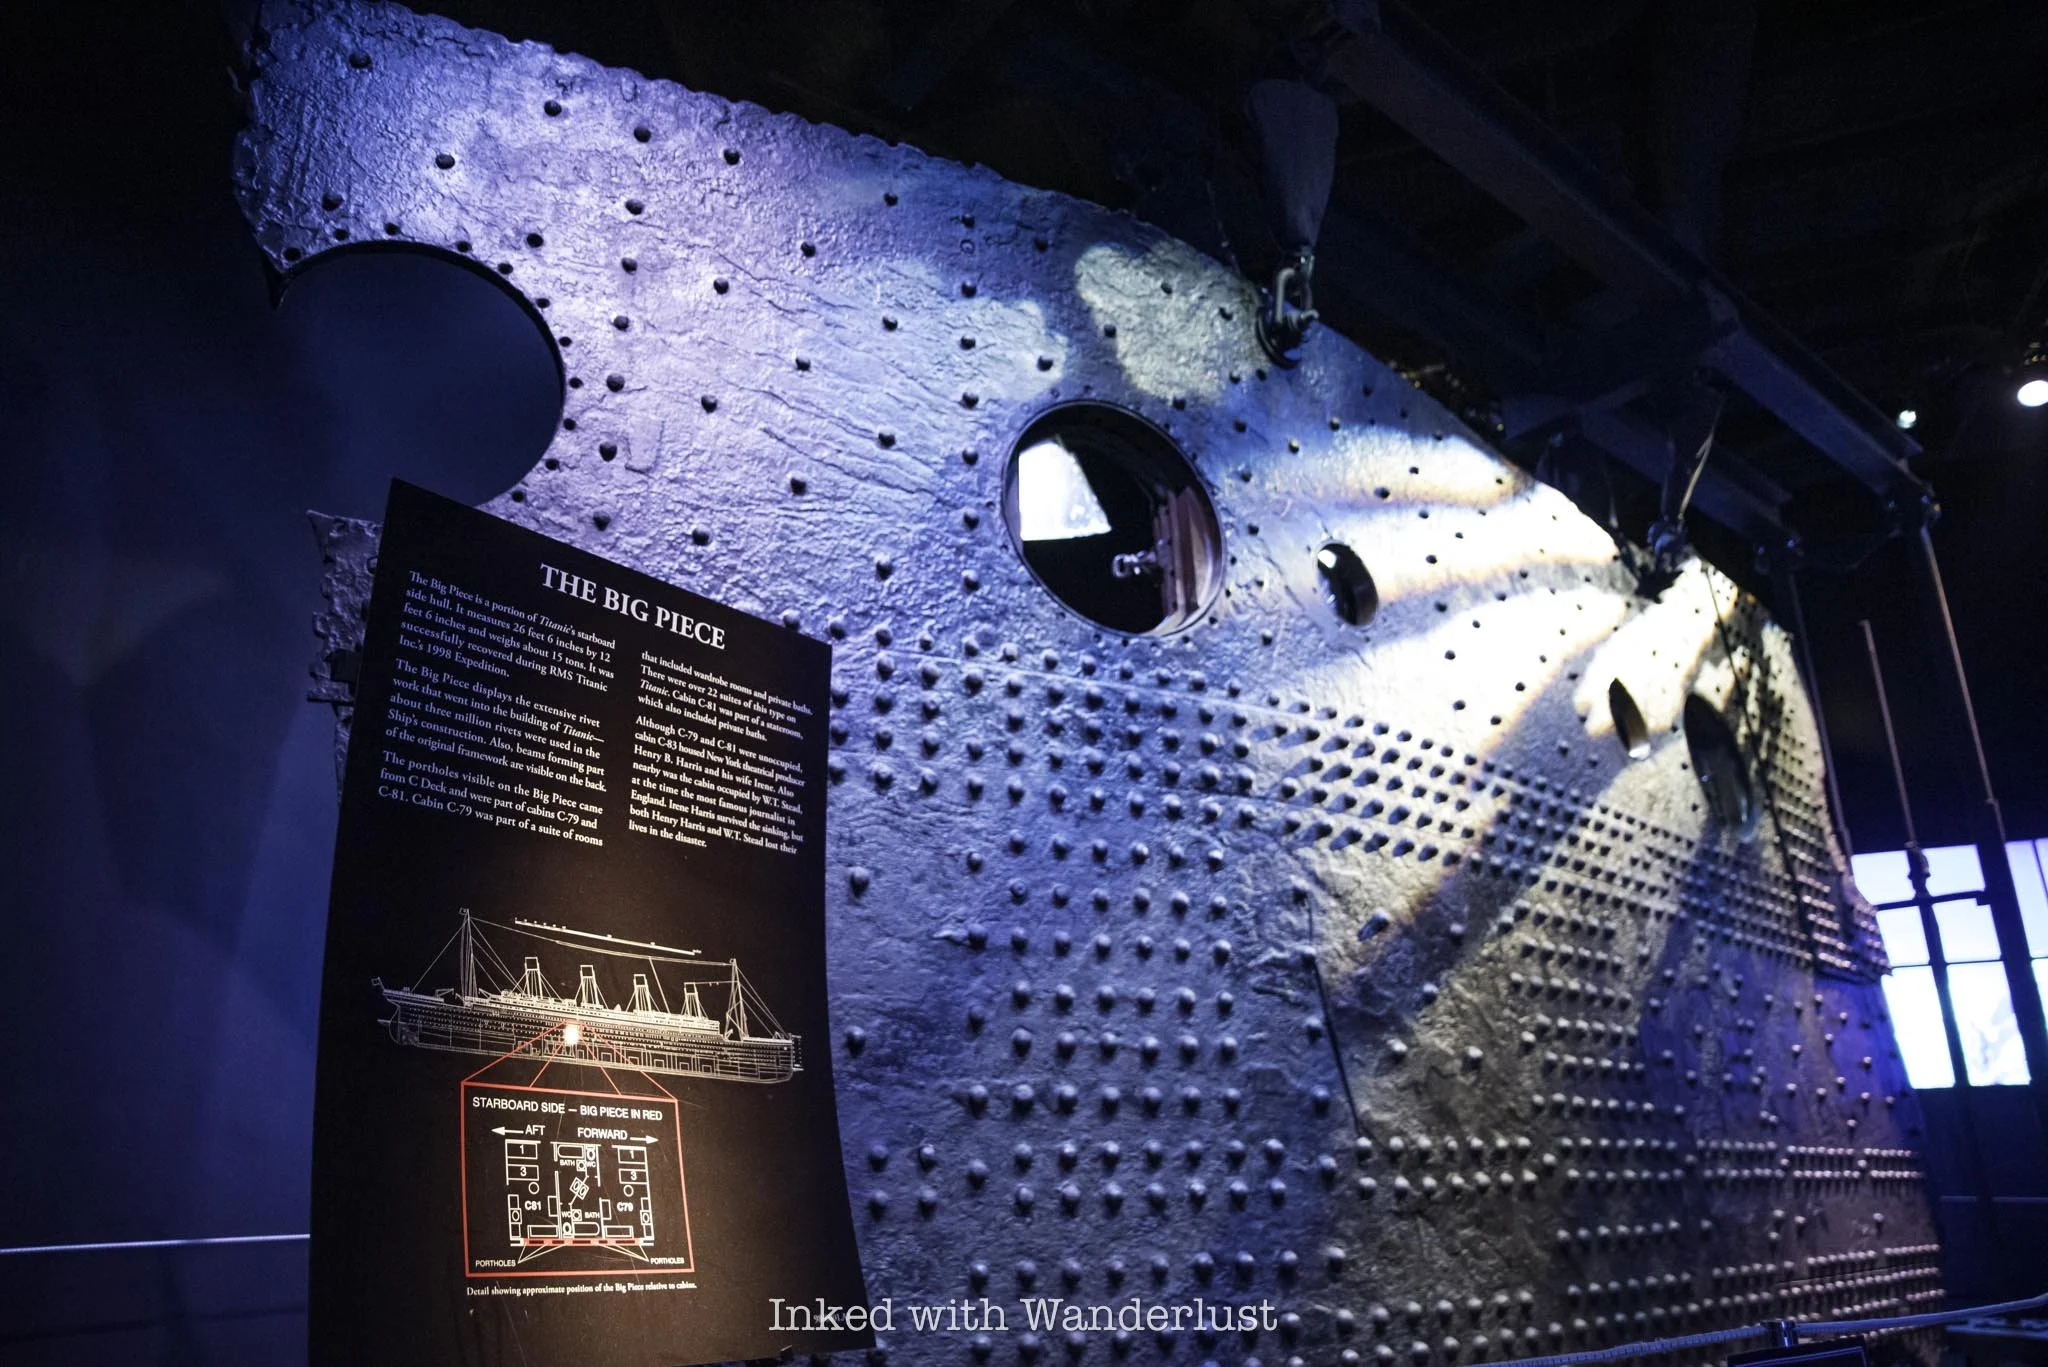
First discovered in 1994, nine years after Titanic’s wreck site was first discovered, the Big Piece was brought to the surface in 1998 after several failed attempts, with the intention of making it the centerpiece for a planned exhibition.
The piece, formally located around the mid-point of Titanic’s starboard side hull, weighs fifteen tons and is twenty-six feet, six inches across and twelve feet, six inches high. The extensiveness of the rivet work is on full display, showing a mere fraction of the three million rivets used to build the Titanic.

The portholes on the Big Piece came from C deck and were part of cabins C-79 and C-81, both of which were suites (presumably second class). Both of these suites were unoccupied but the neighboring suite, C-83, was occupied by Henry B. Harris, a famous New York theatre producer. He did not survive the sinking.
To date, the Big Piece is the largest artifact ever recovered from Titanic’s wreck site. Given the quickly deteriorating state of the ship, it’ll likely remain as such. Due to strong currents and rust-eating bacteria, it is estimated that the Titanic will completely collapse by 2030.
Titanic’s Death Toll

In the final exhibit room will be a giant wall-sized display. On this display will be the names of every Titanic passenger and crew member, separated by class and whether or not they survived. As you can see in the photo above, Titanic’s crew suffered the greatest loss with 701 perishing. Interestingly, they also had the most survivors at 209.
Of the passengers, third-class suffered the greatest loss at 529, with only 181 surviving. In stark contrast, the overwhelming majority of the Titanic’s first-class passengers survived, with about 200 surviving and 125 perishing, most of those being men. This was largely due to the “women and children first” rule of the time.
Remember the “boarding pass” you’re given at the start of your tour with a passenger’s name on it? Here is where you’ll scan the back of it to discover the fate of your passenger. Mine was a man named Johannes Joseph Van de Velde, a native of Belgium.

Not much is known about him, but we do know he did not survive. We only know this because a survivor named Theodor De Mulder visited Johannes’ family and relayed to them the final days he spent with him.
While the exact number varies, it is believed that over 1,500 passengers and crew lost their lives in the early morning hours of April 15, 1912. Many, including the ship’s captain, went down with the ship, but the vast majority was due to drowning or freezing to death in the icy Atlantic waters.
Perhaps the largest contribution to the high death toll was an insufficient amount of life boats. Titanic had only twenty, capable of holding only 1,178 of the 2,240 passengers and crew, if filled to capacity (and none of them were).
Of the 1500 victims, most were third-class passengers and/or men, as well as crew. As mentioned above, Captain Smith was thought to have given the order of “women and children” first.
It is now believed that first officers mistook this as, “no men until all women and children are off the ship”. Consequently, the lifeboats were lowered with plenty of room available, some at just half capacity.
Additionally, many third-class passengers were largely prevented access to top deck, where the lifeboats were located, to allow the wealthier passengers to board them first. This delay meant that many in third-class were doomed from the start. May they all rest in peace.
PSALM 23:3-4

7 Historical Sites in Genoa You Should Explore
The small community of Genoa, Nevada, set in the beautiful Carson Valley, is one of, if not the, most historically significant sites in the state...
Disclosure: This post contains affiliate links. If you make a purchase through these links, I may earn a small commission at no additional cost to you. I only recommend products or services that I believe will add value to my readers.

The small community of Genoa, Nevada, set in the beautiful Carson Valley, is one of, if not the most historically significant sites in the state. This is because the town was founded as the first pioneer settlement in Nevada in 1851, a whopping thirteen years before it even gained statehood.
This happened when the John Reese Party, a group of Mormons from Utah, emigrated to what was then an area within the territory of Utah to set up a trade post to sell much needed goods and services to pioneers before they begin the final, most challenging leg of their journey to riches in the gold-dense California mountains.
That trade post would eventually become what we know today as “Mormon Station”. Prior to Reese establishing his trade post, pioneers were forced to stock up at the former final trade post before California’s infamous Sierra Nevadas in Salt Lake City, a hearty 500 miles away. You can see how it became so popular and successful.

As time went on, and especially with Nevada completing its statehood campaign in 1864, more and more of the town began to develop with additional residents moving here to stake their own claims with varying businesses and accolades. Some of which would stand the test of time and remain to this day, though many aren’t operating as they did in the 1800’s and early 1900’s.
If you’re a fan of Nevada history, a visit to Genoa is a must. There are many historical sites within Genoa, Nevada itself that are worthy of your time and in this post, I will discuss and recommend seven of them, and provide some context as to their historical significance. Let’s get into it.
1) Mormon Station Historic State Park

We’ll begin with the most historically significant site in Genoa - Mormon Station Historic State Park. As stated above, this is the site where it all began for Genoa and no visit to this charming town would be complete without it.
You’ll find it on the corner of Genoa Lane and Jacks Valley Road shortly after driving into town. There’s ample (and free) parking and best of all, the exterior portion of the former stockade is free to explore, while the accompanying museum only charges a paltry $1 to enter.
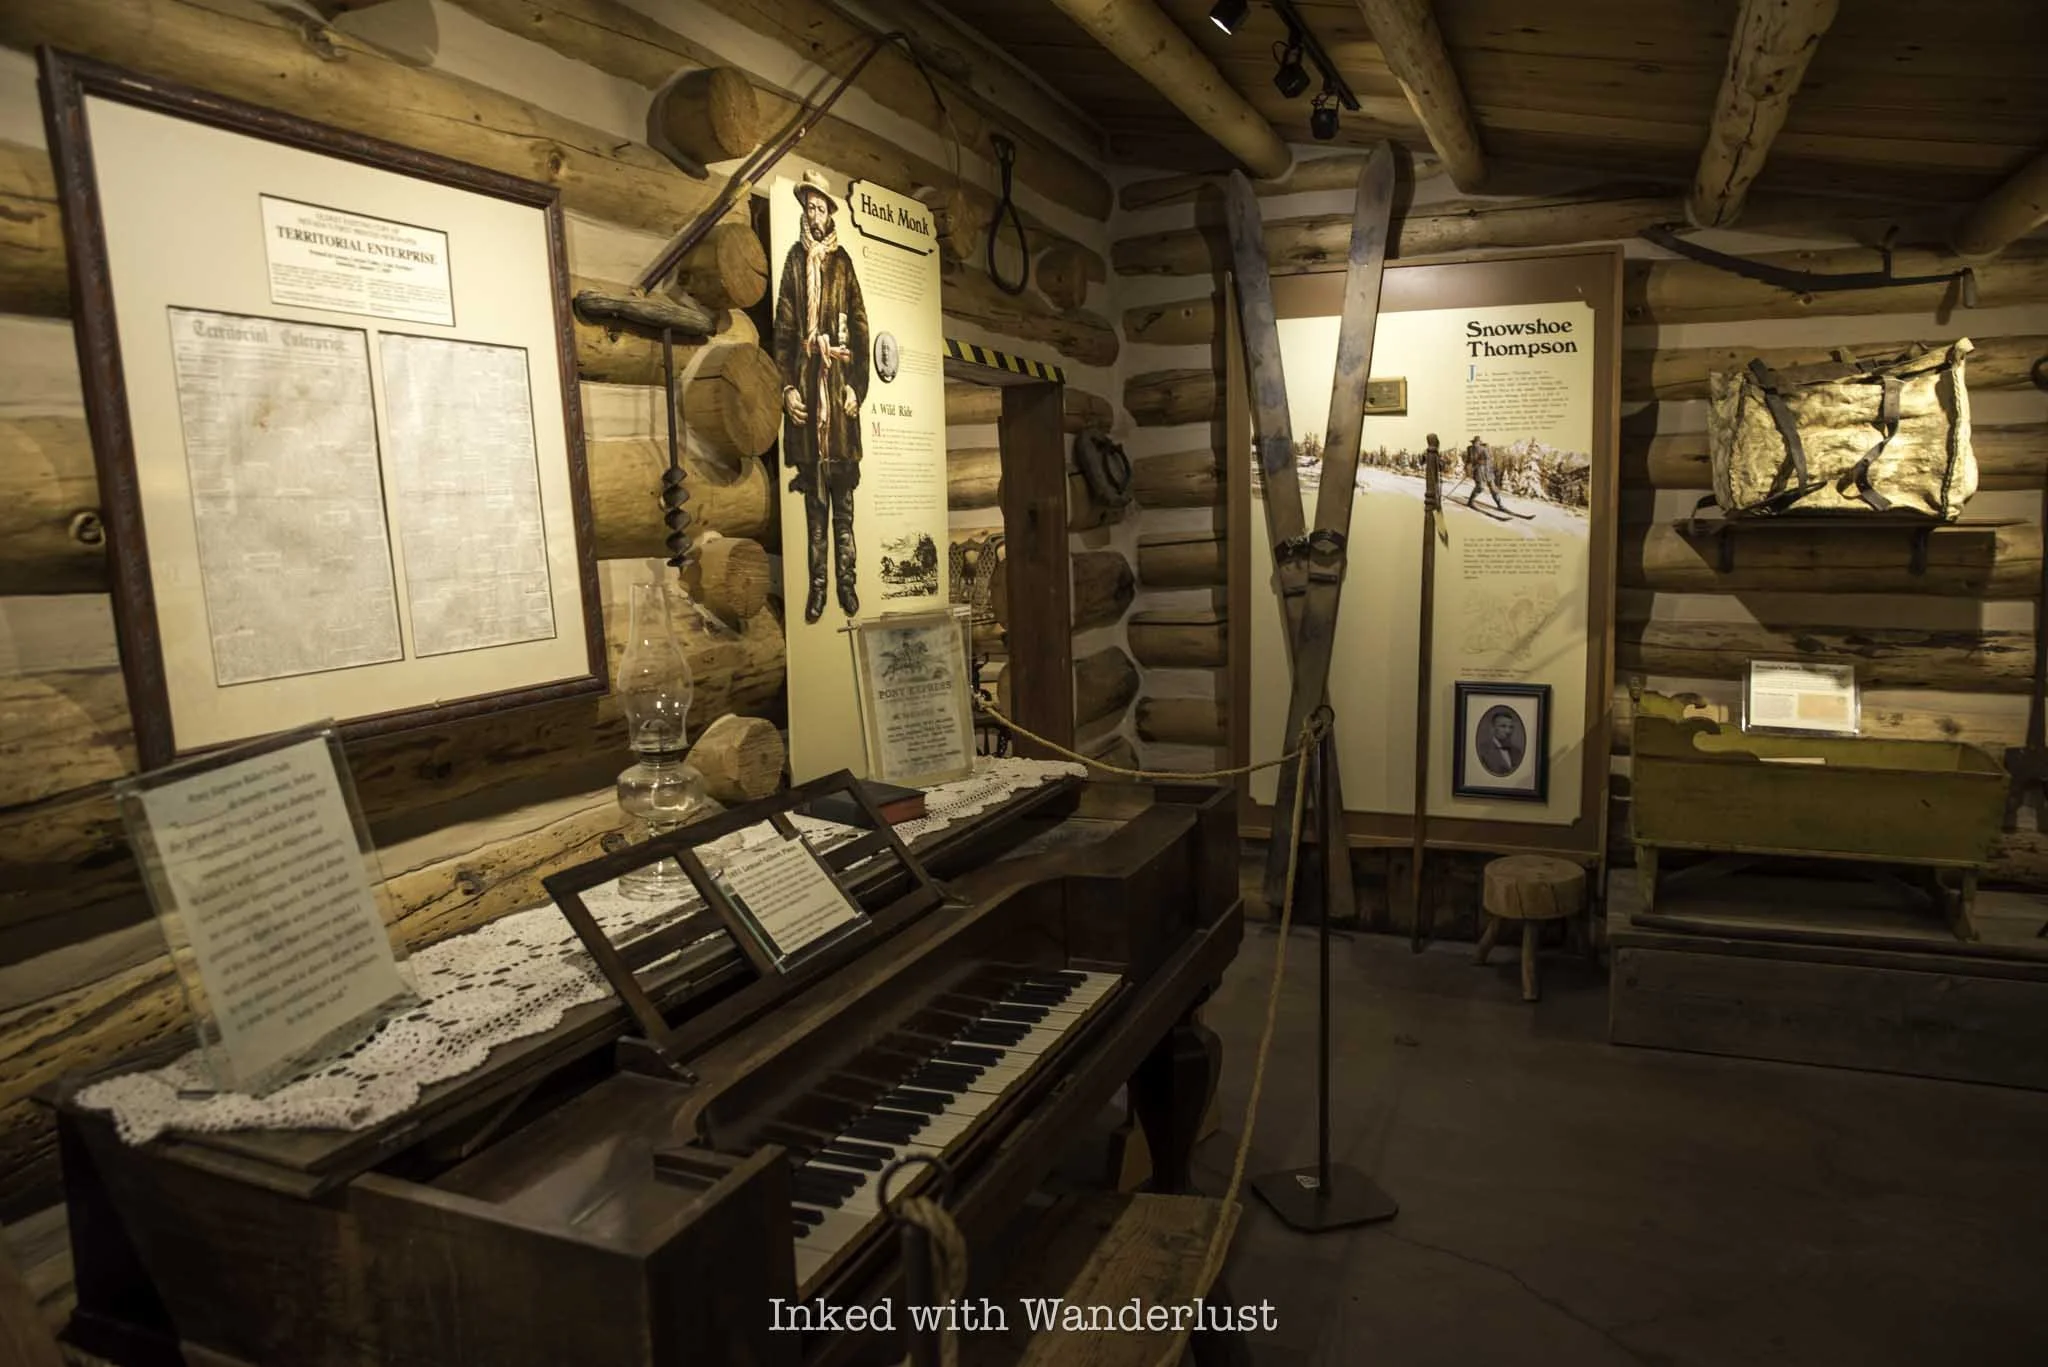
The museum is small, but packed with historical items germane to the site and area. A few items include wooden skis used by Snowshoe Thompson to traverse the California mountains, actual makeshift escape keys used by prisoners of the jail, a burnt piece of log from the original stockade, and more. The museum’s structure is a replica of a cabin, similar to the one lived in by Mormon Station’s founder, John Reese.
Throughout the grounds, you’ll also see the original structures of a former blacksmith’s shop and chicken coop, as well as examples of pioneer-era wagons, tools, a memorial statue of Snowshoe Thompson, numerous informational boards detailing the area’s history, and more.
READ MORE: “Visit the Historic Mormon Station in Genoa”
2) Snowshoe Thompson’s Grave Site

John A. “Snowshoe” Thompson, also known as the, “Mailman of the Sierras”, was an important figure in mid-to-late 1800’s Genoa, Nevada. When no one else would (or even could) Thompson, without ever being formally compensated, delivered the mail over the Sierras between Genoa, Nevada and Placerville, California through the heavily snow-packed mountains, using nothing but homemade skis (known as “snowshoes” back then).
This journey took him an average of three days when traveling west to California, and about two days when going back to Nevada. He was uniquely skilled to complete this demanding task, as Thompson was a native of Norway, and traversing mountains in this manner came naturally to him. In fact, on one occasion, Thompson was credited for saving the life of a man who was stranded in this portion of the Sierras.
Thompson passed away on May 17, 1876 after a brief illness and was buried in what is now the historic Genoa cemetery, a half mile north of town, in a shared plot with his family. His grave has become a tourist attraction of sorts, with signs pointing the way as soon as you drive into the cemetery grounds. Fittingly, a plastic toy of a USPS truck remains at his tombstone, a subtle nod to his sacrifice and service to a community in need.
3) Genoa Bar - The Oldest Bar in Nevada

You may not be into bars, I’m not either, but there’s no way you can pass up the chance to enjoy a drink at the oldest bar in Nevada. Genoa Bar opened in 1853, not long after Genoa was first settled and a full eleven years before Nevada was granted statehood.
Many celebrities and dignitaries frequented this bar, including the likes of Mark Twain, Teddy Roosevelt, John Wayne, Raquel Welch, Snowshoe Thompson, and more. The interior walls are adorned in quirky items, such as buffalo heads, old photographs, bottle caps, paintings, and more.
They feature a menu consisting of specialty cocktails, including their world-famous Bloody Mary. However, they do have a full bar and can make you just about anything you’d want if you’d rather have something simpler. There’s no food service inside, but there’s usually a food truck parked outside during the peak travel season.
READ MORE: “Enjoy a Drink at Genoa Bar: The Oldest Bar in Nevada”
4) The Hanging Tree

The Hanging Tree in Genoa Nevada is a morbid, yet historically significant site. Known as the “blackest day in Nevada history”, it is where Adam Uber, a drifter from California, was hung after shooting and killing local teamster Hans Anderson during a drunken fight at a local bar (not Genoa Bar discussed above).
Uber was taken into custody and thrown in a jail cell at the Genoa Courthouse that night. However, locals weren’t happy with the way Uber’s trial was going and instead, decided to take matters into their own hands.
Roughly a week or so after the killing, a drunken mob of vigilantes stormed the jail in the middle of the night, removed Uber from his cell, marched him down what is now Genoa Lane, and strung him from the tree you see in the photo above. To ensure he was dead, a vigilante then shot Uber in the head.
Just prior to his hanging, Uber was said to have cursed those in the crowd for, “several generations”. This was rumored to have actually come to fruition, as those who took part in the hanging began to die in suspicious ways. In an effort to quell the curse, locals cut down the branch Uber was hung from. The tree, however, remains standing to this day and a plaque was placed near the stump of the cut branch.
5) David Walley’s Hot Springs Resort

In the late 1850’s, a young New Yorker by the name of David Walley came to Genoa to do what many came here to do - strike it rich. However, his luck didn’t come from the golden hills of California or the Comstock Lode in Virginia City, like it did for so many others. Instead, it came from the earth’s mantle just a mile and half from town.
While digging a tunnel nearby, Walley stumbled upon the hot springs. Once he took a dip and experienced the benefits of the springs for himself, he purchased the land and began charging folks fifty cents to experience it for themselves. Later, in the early 1860’s, an opulent 40-room resort hotel was built on the property, playing host to numerous celebrities and dignitaries over the years.
The property has had numerous owners throughout its history, including the current owner, IHG Resorts and Hotels. Today, a few original aspects of the resort remain, including one of the stone pools. Additional rooms and suites have been added, in addition to an on-site restaurant, 1862 Restaurant and Saloon. You can find rates and booking information here.
6) The Pink House

This Gothic Revival-style house was built in 1855 and was home to many Genoa families, the most notable of which include the Reese family, who were the founders of the original settlement. The most known resident, however, was Lillian Finnegan, who went on to found the annual Candy Dance festival.
Today, the former house serves as a restaurant, offering guests a variety of tasty dishes, including pizzas, burgers, sandwiches, steaks, and more. There’s plenty of seating throughout the property, including on the front porch, in the living room, and outside in the side yard.
There are a few notable places to eat in Genoa, but The Pink House is the only one listed on the National Register of Historic Places for its significance and importance to Genoa and Nevada as a whole. It’s a great place to eat after working up an appetite exploring the area.
7) Genoa Courthouse Museum

In my opinion, one of the best things to do in Genoa, Nevada is exploring the many exhibits at the Genoa Courthouse Museum. It’s easy to get to as it’s right across the street from Mormon Station State Park and just down the street from The Pink House.
Entrance fees to the museum are minimal and include access to both levels. A few of the exhibits include a recreation of Snowshoe Thompson’s cabin with items actually owned by him, the refurbished Genoa courthouse, and the downstairs jail, with the original cells included.
In case you’re wondering, yes, one of the cells you’ll see here is where Adam Uber, the drifter from California discussed above, was taken from by the group of vigilantes and hung at the Hanging Tree. It was an eerie feeling stepping inside those cells.
I thoroughly enjoyed my time in the Genoa Courthouse and have no doubt you would as well. Keep in mind that they’re only open seasonally and even then, their hours are minimal. Check out my post about the Genoa Courthouse Museum for all of those details.
READ ALSO: “Step Back in Time at the Genoa Courthouse Museum”

Visit the Historic Mormon Station in Genoa
When searching for historic places in Nevada to visit, it doesn’t get much more historical than visiting the site of the first settlement in the state, Mormon Station Historic State...
Disclosure: This post contains affiliate links. If you make a purchase through these links, I may earn a small commission at no additional cost to you. I only recommend products or services that I believe will add value to my readers.

Mormon Station History
When searching for the best historic places in Nevada to visit, it doesn’t get much better than the site of the first settlement in the state, Mormon Station Historic State Park in the charming town of Genoa city, Nevada.
It was here in 1851 where the John Reese Party emigrated from Utah to construct the Mormon Station. While often referred to as a “fort”, it, in fact, never served as such. There was never a military presence, nor did any battles take place here.
Instead, it was actually a stockade, which is defined as an enclosure of walls built with logs placed vertically, side by side. Instead of cannons and officer’s quarters, you would often see grazing oxen, stable sheds, bails of hay, and a small vegetable garden. In addition to the stockade, John Reese also built a hotel and blacksmith shop near the stockade.

The purpose of the stockade was to house oxen and other farm animals, in hopes to sell them to other emigrants traversing the trail. Additionally, the stockade provided protection from thieves, as these animals were highly valuable, while also providing refuge in the event of an attack.
In addition to the stockade, John Reese and party cultivated about thirty acres of land and planted many fruits, vegetables, and grains. Many emigrants coming through were astounded to see fresh crops, as many claimed it was the first bit of cultivated land they’ve seen since leaving the Missouri River - a distance of nearly 2,000 miles!
Thanks to James Marshall and his discovery of gold in California in 1848, the rush was on, and Mormon Station served as an important supply stop for those braving the mighty Sierra Nevada Mountains with gold in their eyes. The station was badly needed as the final supply station prior to Mormon Station was in Salt Lake City, nearly 500 miles away.
Mormon Station Fees and Parking

Parking is both plentiful and free at Mormon Station Historic State Park. There’s a small gravel lot in front of the side entrance, just off of Genoa Lane. If this is full, additional parking can be found along Jacks Valley Road in front of the museum and/or the Snowshoe Thompson memorial statue.
If on the off-chance both of these areas are full, you can park across the street on either Genoa Lane or Jacks Valley Road, or in a small parking area adjacent to the Genoa Bar and Saloon. From the saloon, it’s a quick walk to the station.
The only fee you’ll have to pay is the meager price of $1 per person to enter the museum. Entry into the exterior portion of the station is free, though. So if all you want to do is walk the path and check out the displays, you can do so free of charge. Though I do recommend popping into the museum, as there is a lot to look at in there.
Mormon Station Exterior Path and Displays

The exterior pathway and its displays can be accessed from either side of the log-built wall, in addition to the main entrance adjacent to the museum. Again, access to this portion of the park is free. One thing to keep in mind is that, unfortunately, the station you see today isn’t original, but a replica.
In 1910, a massive fire ripped through Genoa city, Nevada, and destroyed many of the original structures in town. There wasn’t much left of the original station so in the late 1940’s, the replica was built in order to honor and help preserve what is essentially the birthplace of Nevada.
*Fun Fact: Nevada didn’t become a state until 1864, thirteen years after Mormon Station was built. Since Nevada became a state during the Civil War, it earned the moniker, “Battle Born State”

That shouldn’t stop you from visiting, though, as there are many artifacts on display that were used during that period, as well as those actually owned by John Reese and Snowshoe Thompson, Genoa’s mailman who traversed the Sierras using skis to deliver the mail between Genoa and Placerville, California.
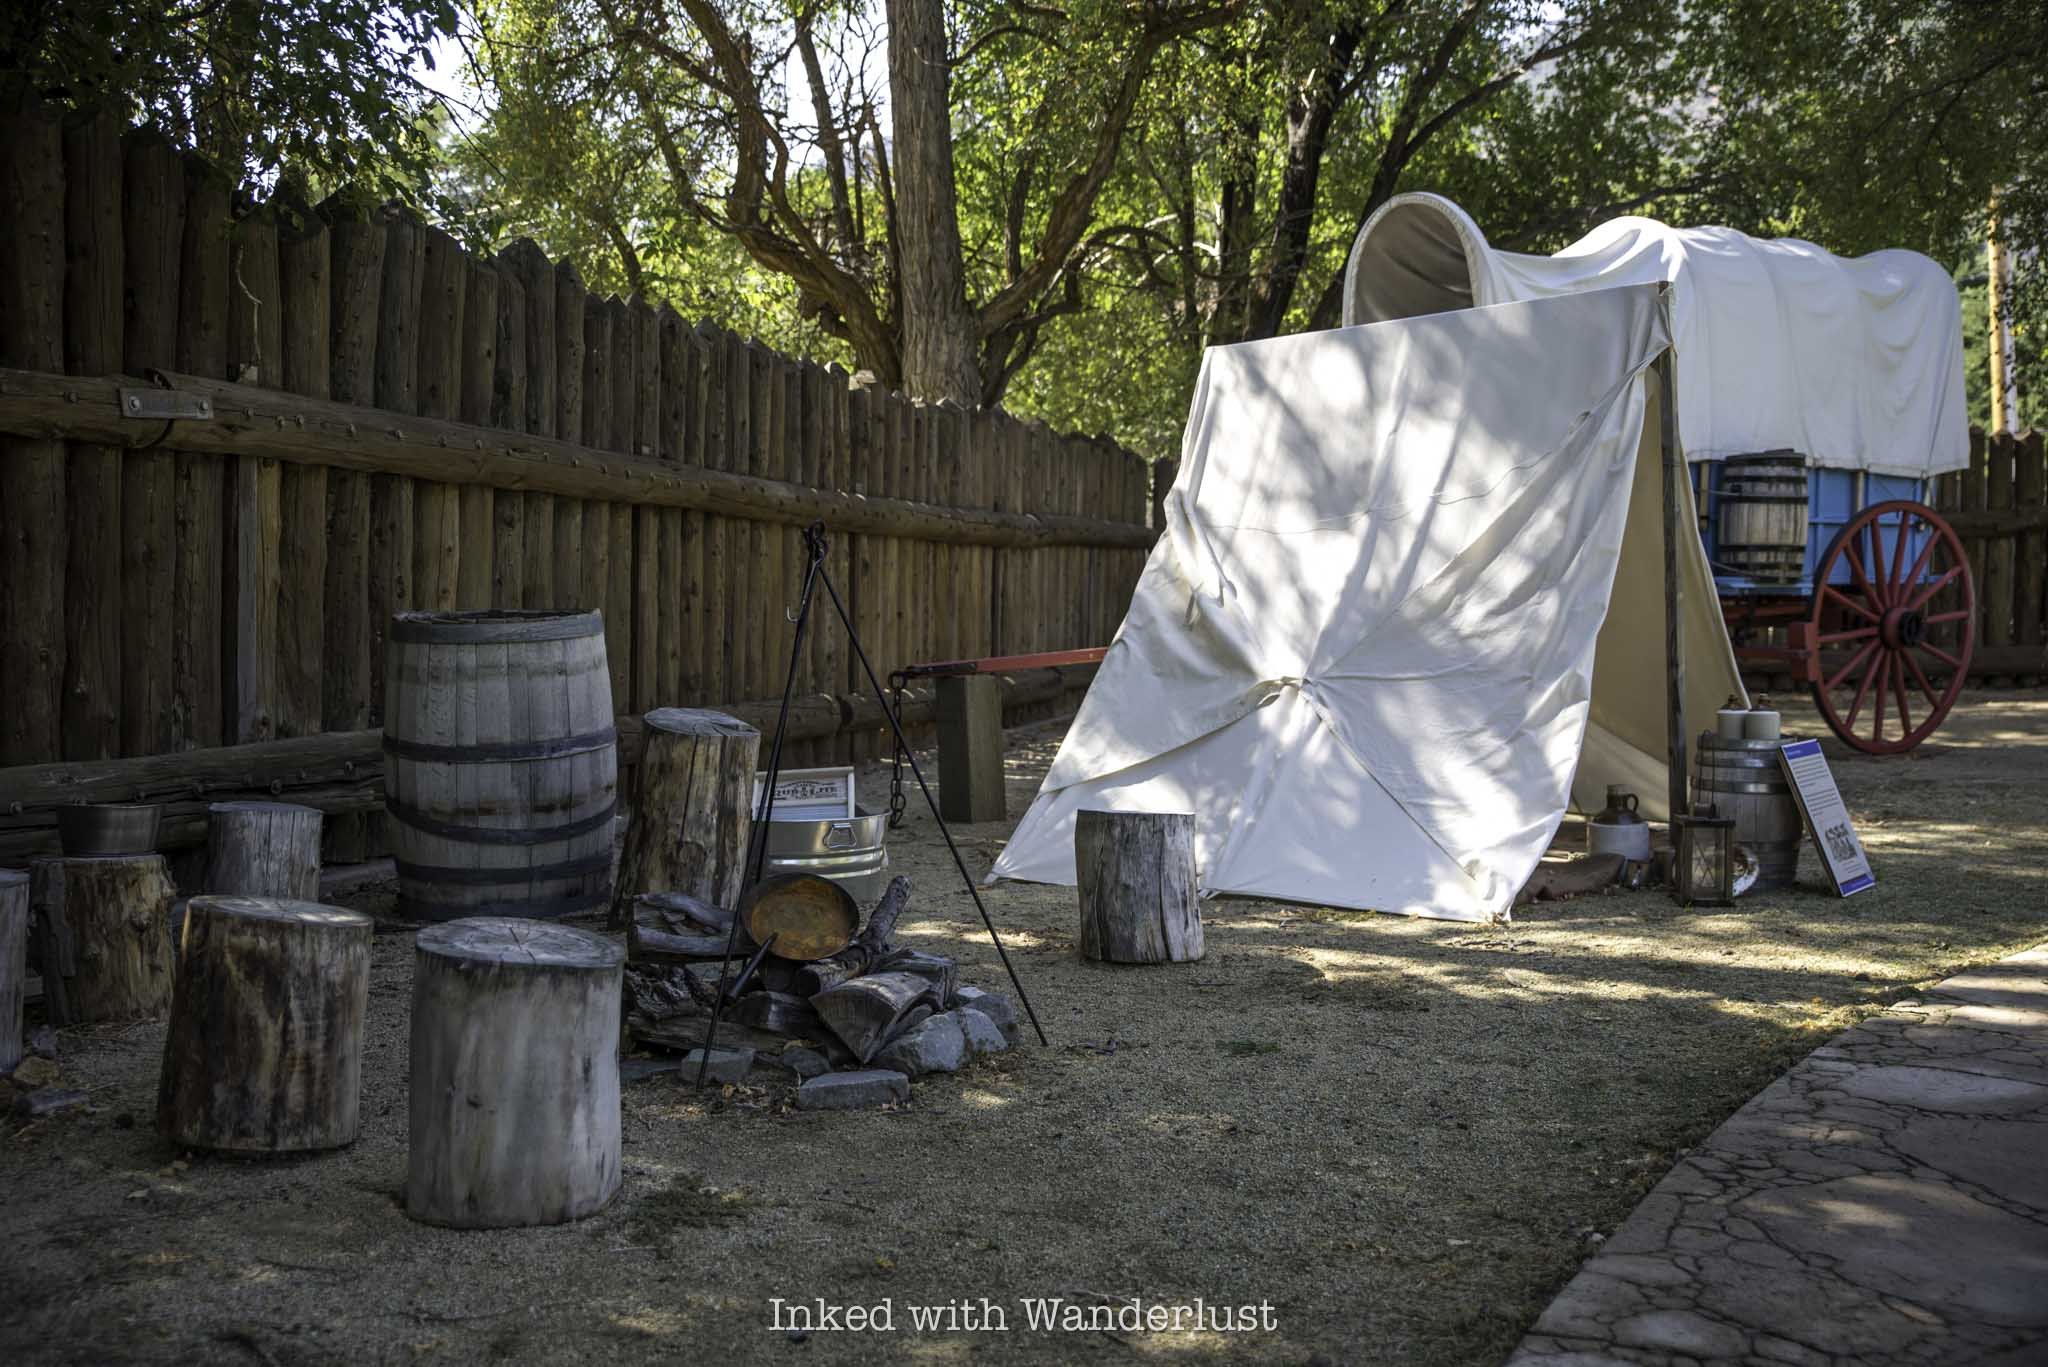
The paved pathway within the log-built walls of the former trade post leads around the beautiful green grounds and features numerous informative boards that detail the history of both the station and the area. You’ll also see an example of a pioneer camp set up, a replica of a covered wagon, and a stagecoach used by pioneers.

On the other side of the station in the wagon shed, near the official entrance closest to the museum, are more examples of wagons and tools used at the station and elsewhere. The wagon on the left side of the photo below was actually used to traverse the Sierra Nevada Mountains. You must see it in person to truly appreciate how hard the pioneers had it as it pertained to travel.

To continue to tour the grounds, keep on the paved pathway and walk beyond the walls towards the other side of the grounds. On that side is a historical home, that was built on the site once occupied by the hotel John Reese built, and an early 1900’s chicken coop and blacksmith’s shop.


This isn’t the blacksmith’s shop that John Reese built, rather it was built and owned by a man named, Nels Morrison, who in 1908 used material from the former White House Hotel, which sat on the site where the shop is now, to build the structure.
By the time Nel’s shop opened, the days of Genoa being a transportation hub for pioneers were finished. Instead of repairing wagons and stagecoaches, his work typically involved repairing a variety of farm machinery, horse shoeing, and forging branding irons.

As far as the exterior grounds area of the park is concerned, that’s about it as far as things to see. Once you’ve checked everything out, now would be a good time to head over to the Mormon Station Museum and explore the exhibits inside.
Mormon Station Museum
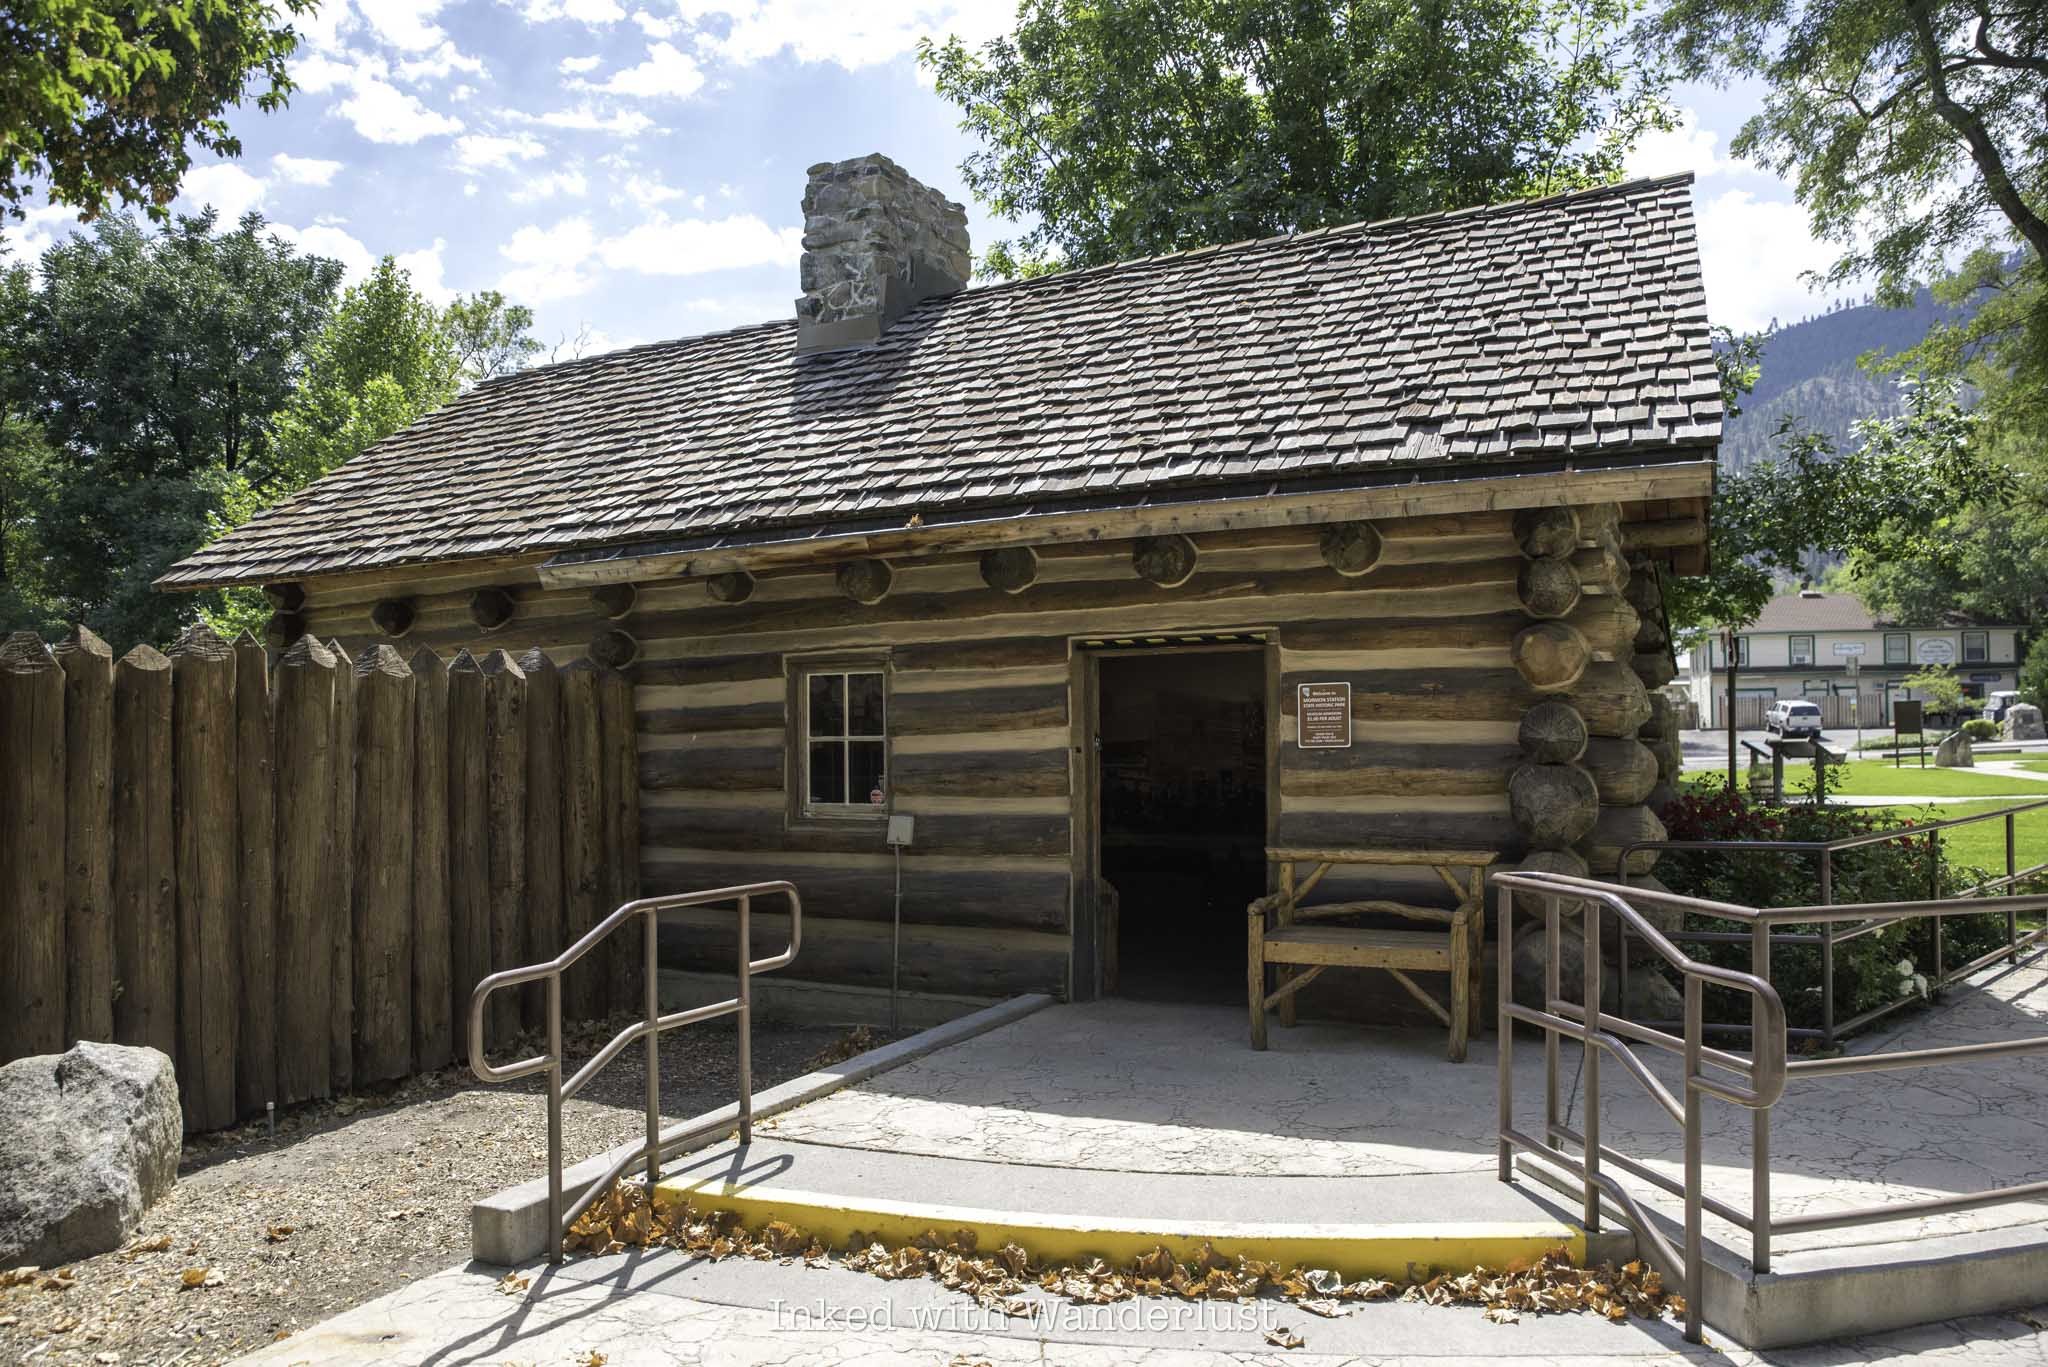
The Mormon Station museum is a near exact replica of the log cabin built and lived in by John Reese and his family. While the park itself is always open, the museum’s hours vary by day and season. They are:
May - September: 10am - 4pm, daily
October - April: 11am - 3pm, closed Tuesdays and Wednesdays
As stated above, the cost to enter the museum is only $1 per person and I highly encourage you to visit it. When you first walk inside, you’ll immediately see a full-size replica of Reese’s rock-built fireplace and next to it, the sole surviving piece of wood from the original stockade lost by the 1910 fire.

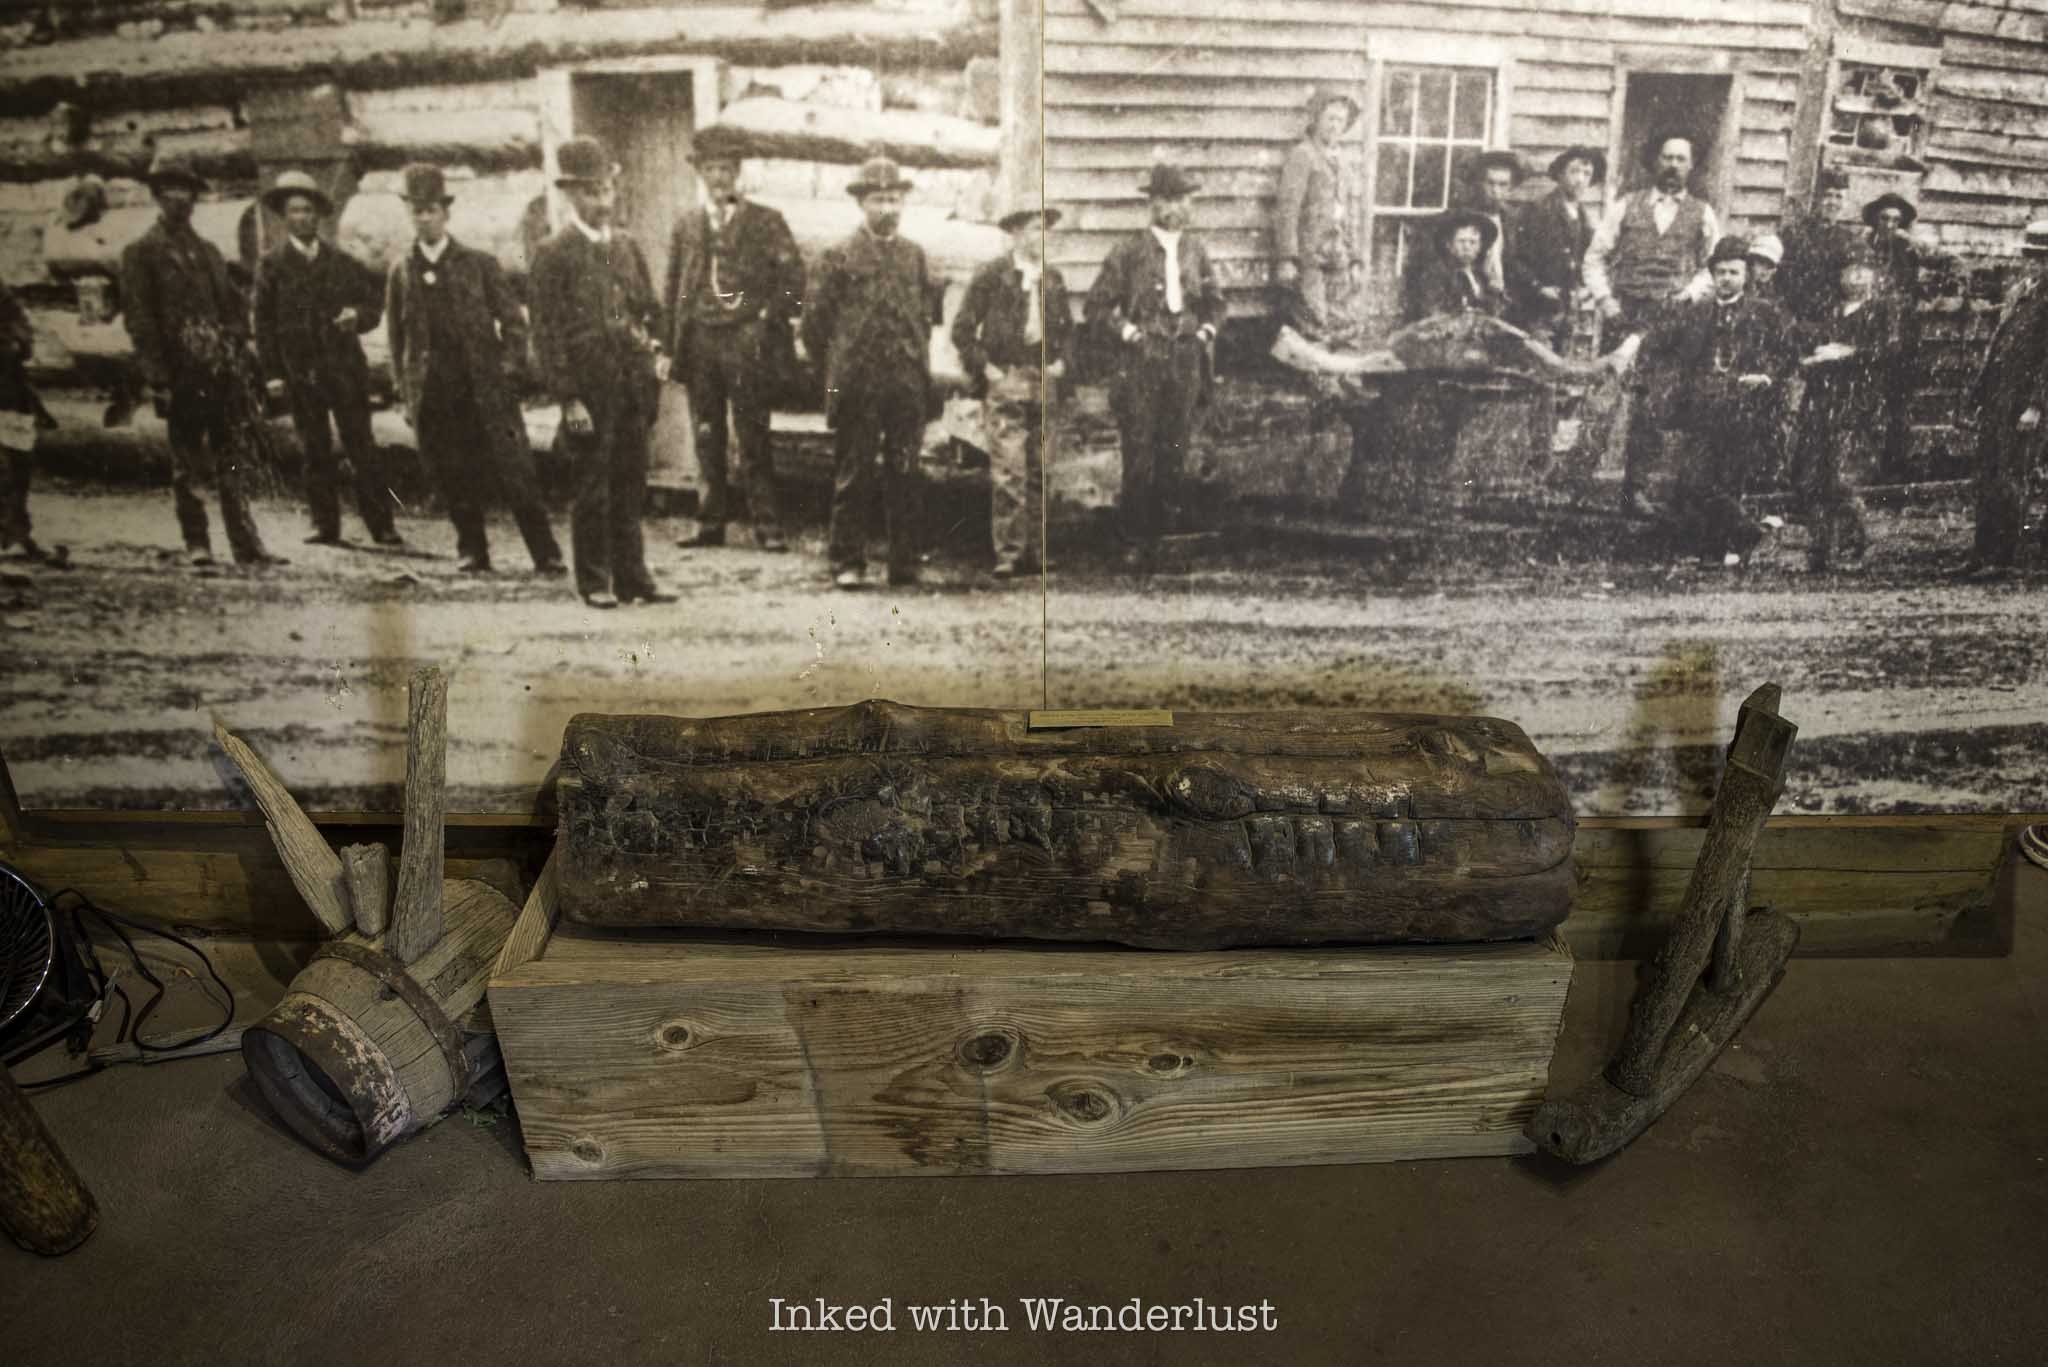
There about four rooms in the museum, each with a variety of artifacts ranging from the actual skis used by Snowshoe Thompson to deliver the mail over the Sierra Nevadas to California and his mail bag, to an interesting range of keys used by prisoners to escape their cells at the old Genoa jail.

Once you’re finished looking around the museum, head outside and take a look at the memorial statue of Snowshoe Thompson and read the two or three historical markers that detail the founding of Mormon Station and Genoa, in general.

If you look at the statue from the right angle, it almost appears as though Thompson is looking out towards Genoa Canyon, which is fitting as that was one of the routes he would take to work his way to California with his mail bag in tow.
From here, continue your history tour of Genoa by crossing the street and taking a self-guided tour of the Genoa Courthouse Museum. When finished there, walk a few minutes down Jacks Valley Road and enjoy a drink at the historic Genoa Bar and Saloon, the oldest bar in Nevada. Then, walk a couple minutes down Genoa Lane and enjoy lunch at The Pink House.
PSALM 91

Round Hill Pines: An Excellent South Lake Tahoe Beach
When researching the best beaches in Lake Tahoe, popular options such as Sand Harbor, Baldwin Beach, and Emerald Bay often come up. While those are all solid options worth…
Disclosure: This post contains affiliate links. If you make a purchase through these links, I may earn a small commission at no additional cost to you. I only recommend products or services that I believe will add value to my readers.

When researching the best beaches in Lake Tahoe, popular options such as Sand Harbor, Baldwin Beach, and Emerald Bay often come up. While those are all solid options worth exploring, there’s another beautiful beach you may want to consider - Round Hill Pines.
Located on the famed south shore of Lake Tahoe (on the Nevada side), Round Hill Pines offers its visitors a pristine beach, the same incredibly clear water Tahoe is known for, a beach-side bar, an on-site restaurant, water vessel rentals, and more.
My wife and I recently spent the day at Round Hill Pines for her birthday. I wasn’t planning on posting about this place, so I left my camera at home. I ended up liking it so much I ended up scrambling to get photos with my cell phone so I could share it with you.
In this post, I’ll discuss topics such as how to get to Round Hill Pines, how it costs to visit, the food/drink situation, and more. Let’s get into it.
Getting to Round Hill Pines and Parking Prices

Getting to Round Hill Pines is fairly straight forward, as the entrance to the parking lot is right off of Highway 50 and is well signed. If you’re coming from the Sand Harbor or Carson City area, the entrance will on your right, just a few miles after passing Zephyr Cove.
From the direction of Sacramento or Emerald Bay, you’ll arrive to the exit on your left about 8-10 minutes after crossing the state line into Nevada.

Round Hill Pines’ parking lot is fairly large and multi-tiered, with spaces for many vehicles. The day-use/parking fee is $12, cash only (as of our visit in August 2024). That fee covers your parking and beach access only. Note that if you arrive after 5pm, the parking fee is waived.
As is the case with most things in Lake Tahoe, the earlier you arrive, the better. We arrived right at 8am (when they open) and were one of just a few vehicles. When we left around 2pm, the parking lot was nearly full. This was in August, which is a busy time for Tahoe. If you’re here during the outside months, you’ll have more leeway.
Round Hill Pines Restaurants and Bar

Round Hill Pines has an on-site restaurant called Beach Bums Bar and Grill and Rum Bar on the Beach, a beachside bar. Beach Bums is situated to the left of the main path leading to the beach from the parking lot and Rum Bar is to the left of the stairwell, in front of the restaurant.
The restaurant is walk-up and order style, where they’ll then bring your food out to you. There’s ample seating in the restaurant’s outdoor deck, but if you prefer, they’ll also bring your food to you at your spot on the beach. Simply tell them and they’ll give you a numbered flag to place at your spot.
Rum Bar on the Beach Drinks

Both of the establishments open at 11am. While Beach Bums closes at sunset, Rum Bar doesn’t have a specified closing time. The website states that hanging out at Rum Bar during sunset is can’t-miss (I’m paraphrasing), so it likely stays open well past that.
While Rum Bar serves many specialty cocktails and classic drinks, their two most popular choices are the Pain Killer and Rum Rummer drinks. The Pain Killer is a slushy concoction of pineapple and coconut, topped with a variety of rums and fresh nutmeg.

The Rum Runner is a unique blend of tropical fruit juices, rum, and Round Hill Pines’ signature rum floater. They’re both fantastic and stand out from one another. The Rum Runner packs more of a punch with rum flavor, while the Pain Killer’s flavor favors more of the sweetness from the pineapple and coconut.
Personally, my favorite was the Pain Killer (I ended up downing a few of these). If you’re someone who likes your drink on the stronger side, you’ll likely favor the Rum Rummer. Honestly, you couldn’t go wrong with either option. They’re both great.
Beach Bums Bar and Grill Menu and Food

Unfortunately, the great drinks at Rum Bar is where my excitement ends as it pertains to the food and drink options. The resort’s on-site restaurant, Beach Bums, offers many selections for all sorts of palettes but the items we tried left much to be desired.
For starters, we ordered the chicken wings with guava habanero sauce ($11.75). I have to be honest, these were the worst wings we’ve ever had. The chicken itself was so bland the sauce couldn’t save it. There was no seasoning at all, and it tasted as if the chicken was boiled, instead of baked or fried.

For our entrees, I ordered the Smoked BBQ Bacon Burger ($24.75) and my wife ordered the Mahi-mahi Tacos ($21.75). The burger came doused in bbq sauce and topped with applewood-smoked bacon, white cheddar, muenster, and an onion ring.
It was decent, but nowhere near worth $25 and had way too much cheese on it. Additionally, the bun was practically worthless as the burger itself was more than twice its size. Additionally, I paid an extra $2.00 for sweet potato fries that were bland and soggy.


My wife said her Mahi-mahi tacos were just ok, as the fish had decent flavor, but there were two different sauces on the tacos and way too much of it. So much so, that the sauces practically drowned out the flavor of the seasoned fish.
Of the three offerings, the tacos were the winner, but only by a slight margin. As stated above, my burger was decent, but definitely not worth $25. The soggy fries only made it worse. They deliver your food to you in these plastic containers which to be fair,, does trap the heat, but often results in soggy food.
Your milage may vary, but my recommendation is to pack a picnic and enjoy that with a Pain Killer (or two) on the beach. My opinion of the taste of the food is my own and a matter of perspective, but the prices are far and away what I would consider “par for the course”…even by Tahoe standards.
Round Hill Pines Beach and Rentals

There are many activities to partake in at Round Hill Pines. The favorite among many being just hanging on the beach itself. In comparison to other South Lake Tahoe beaches, it’s on the smaller side, but spacious nonetheless. Sand Harbor has it beat as far as visual standards go, but that’s about it.
As stated earlier in this post, we arrived early (8am) to secure our choice of beach space. There was only one other person here when we arrive but as the morning progressed, it became more and more populated. In the photos below, the first one was shortly after we set up (about 8:30) and the second was around 10am.


While this fairly minor by Lake Tahoe standards, it just goes to show how quickly the crowds at these beaches get dense. I forgot to take another photo of the same angle, but the below photo was from the dock and was taken shortly after 12pm. Again, I stress to you the importance of arriving early. Especially in July or August.

Aside from hanging out on the beach, there’s a hut near the marina where you can rent a variety of water vessels. Round Hill Pines recommends securing your rentals online ahead of time. You can do at this link. Rentals include:
Boats
Sea Doos
Kayaks and SUP Boards
Pedal Boats
and more
Additionally, you can book a cruise around Lake Tahoe (including Emerald Bay) on a 63-foot yacht, called the Tahoe Serenity. Cruises are 2.5-hours long and include snacks and beverages. If you place an order ahead of time from Beach Bums, you can enjoy an onboard lunch. You can book cruises here.

Lastly, further down the beach is a volleyball net available for all guests to use. Pretty sure you’ll need to bring your own volleyball, but it doesn’t hurt to ask one of the employees if they have any on-hand. By the way, the photo below showcases our beach set-up. I’ve provided Amazon links to nearly everything in the photo if you’re interested.

OOFOS Sandals (the most comfortable sandals I’ve ever worn)
Citronella Spray (a DEET-free way to keep bugs away - bees are everywhere in Tahoe)
Round Hill Pines Common Questions

Does Round Hill Pines Beach allow dogs?
No, dogs (or any pet) are not allowed.
Is there a lifeguard on the beach?
No.
Can I BBQ on the beach?
For the protection of the surrounding environment, gas and charcoal grills are not allowed on the beach.
PROVERBS 3:23
How to Spend a Few Hours at Valley of Fire in the Summer
Valley of Fire offers a variety of hiking trails, a visitor center with informative exhibits and many historical sites. There’s…
Disclosure: This post contains affiliate links. If you make a purchase through these links, I may earn a small commission at no additional cost to you. I only recommend products or services that I believe will add value to my readers.
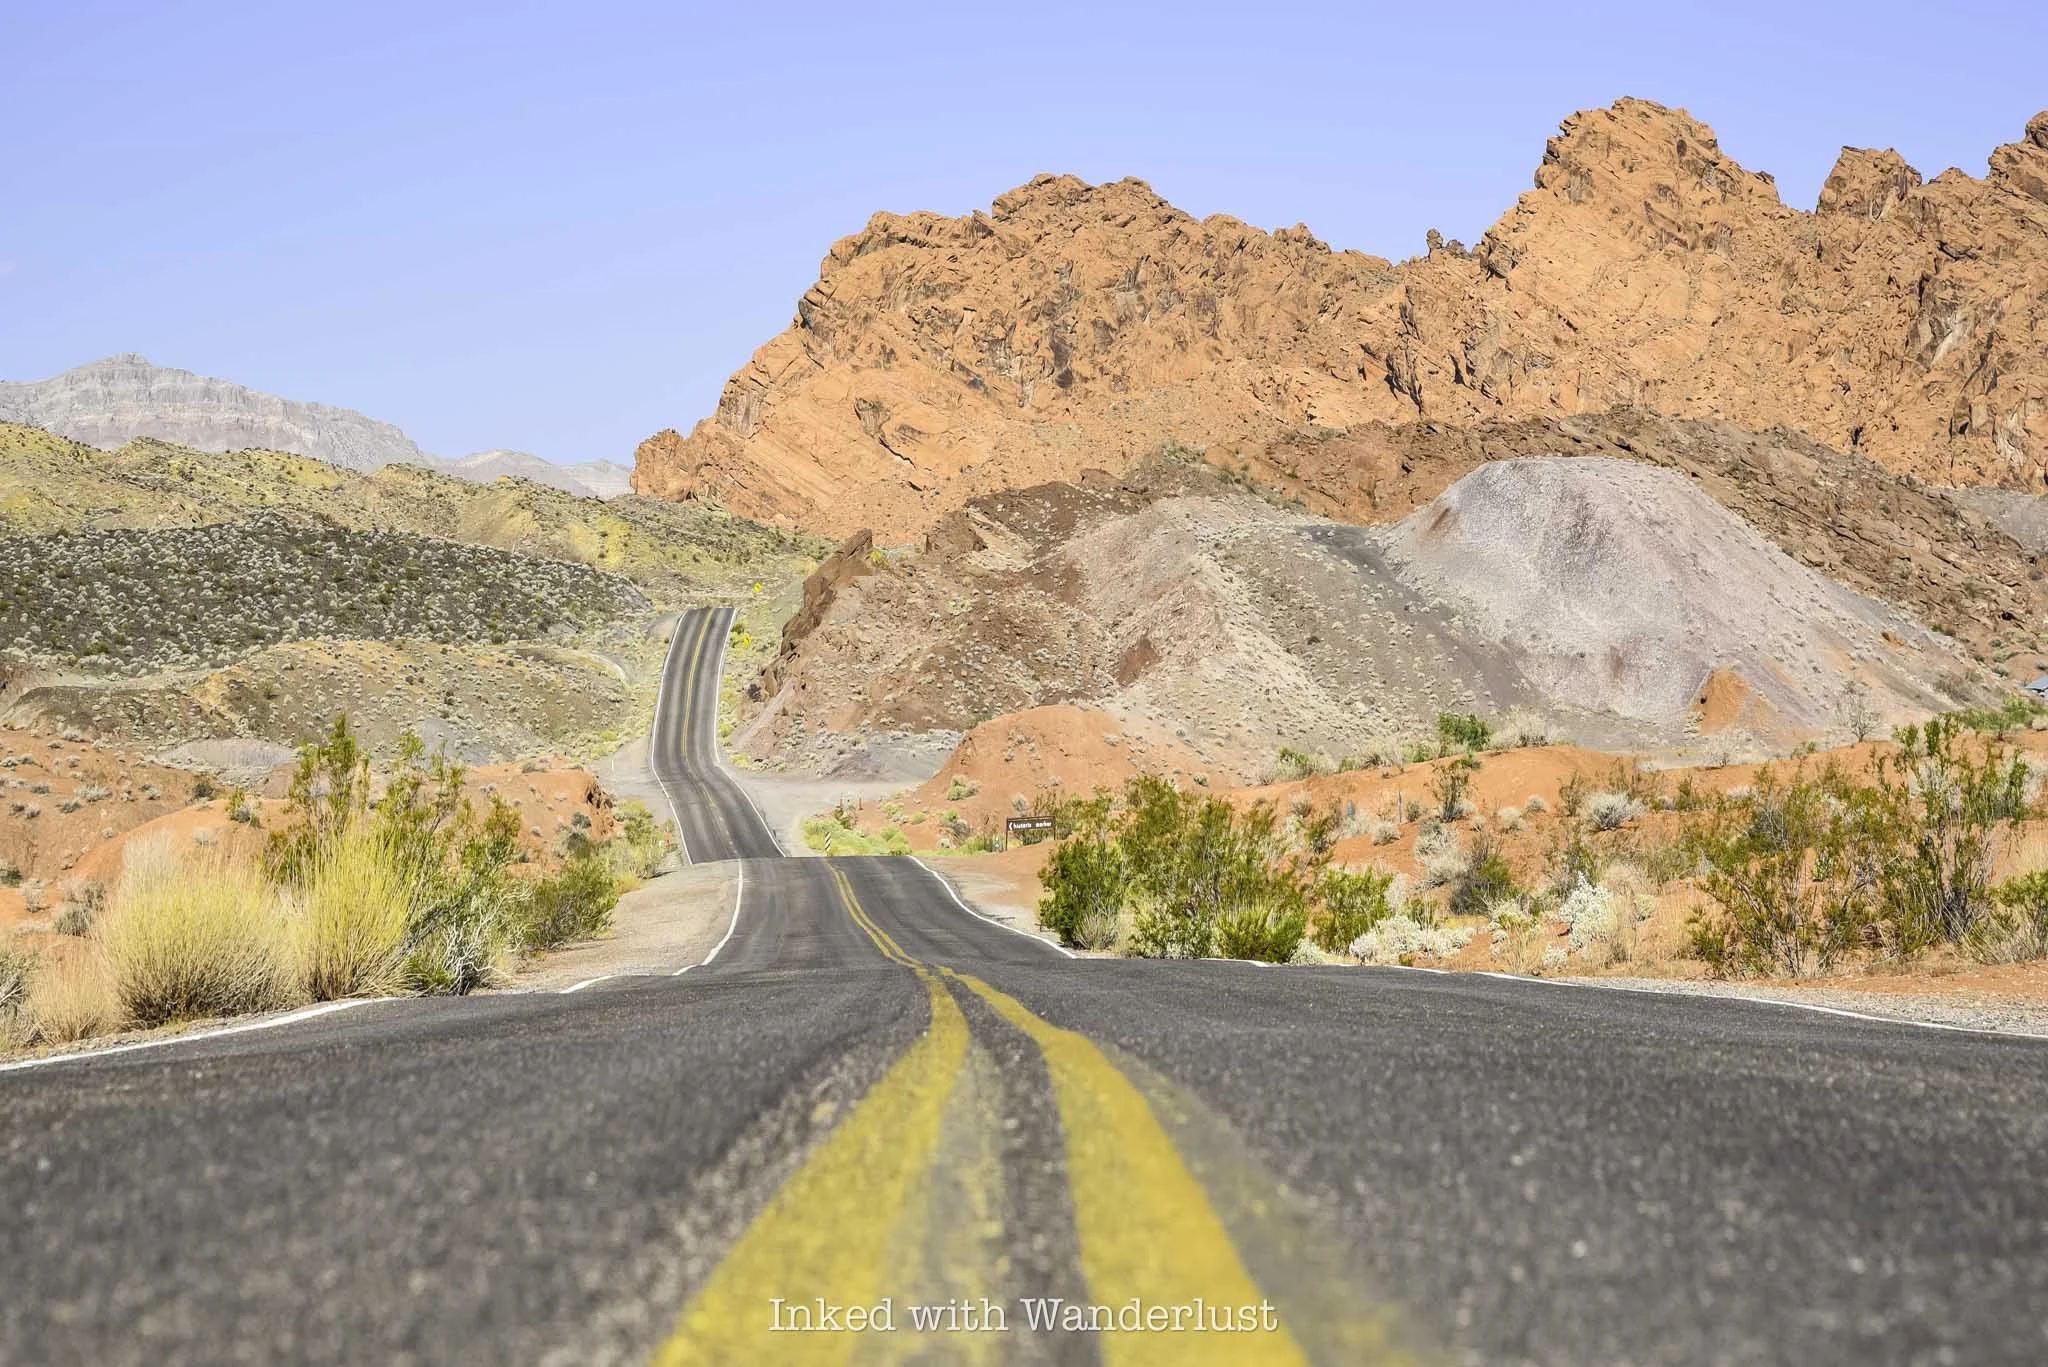
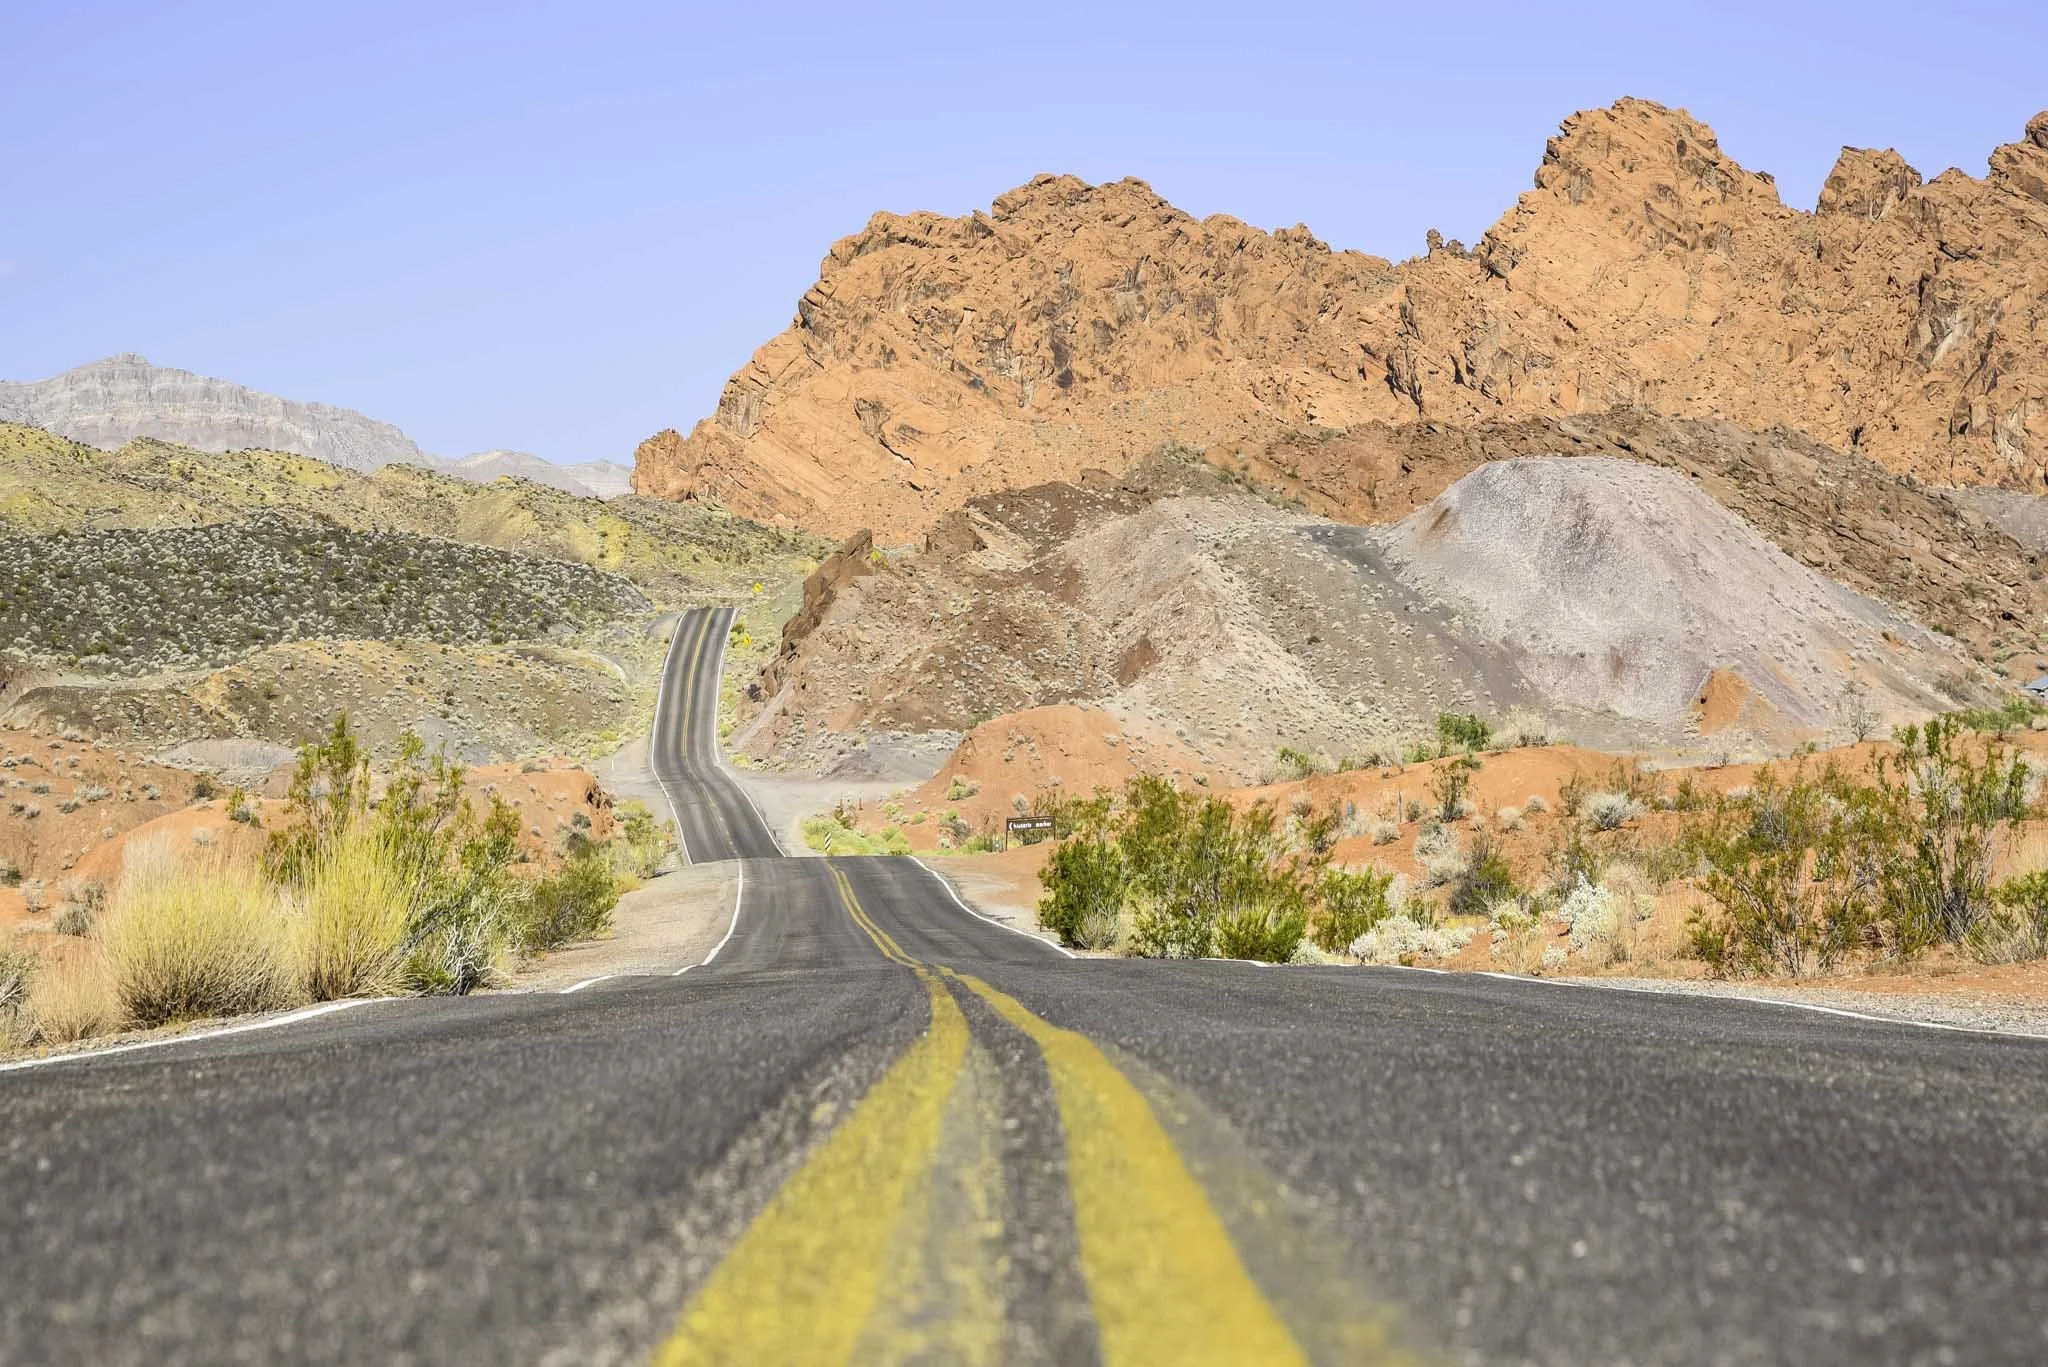
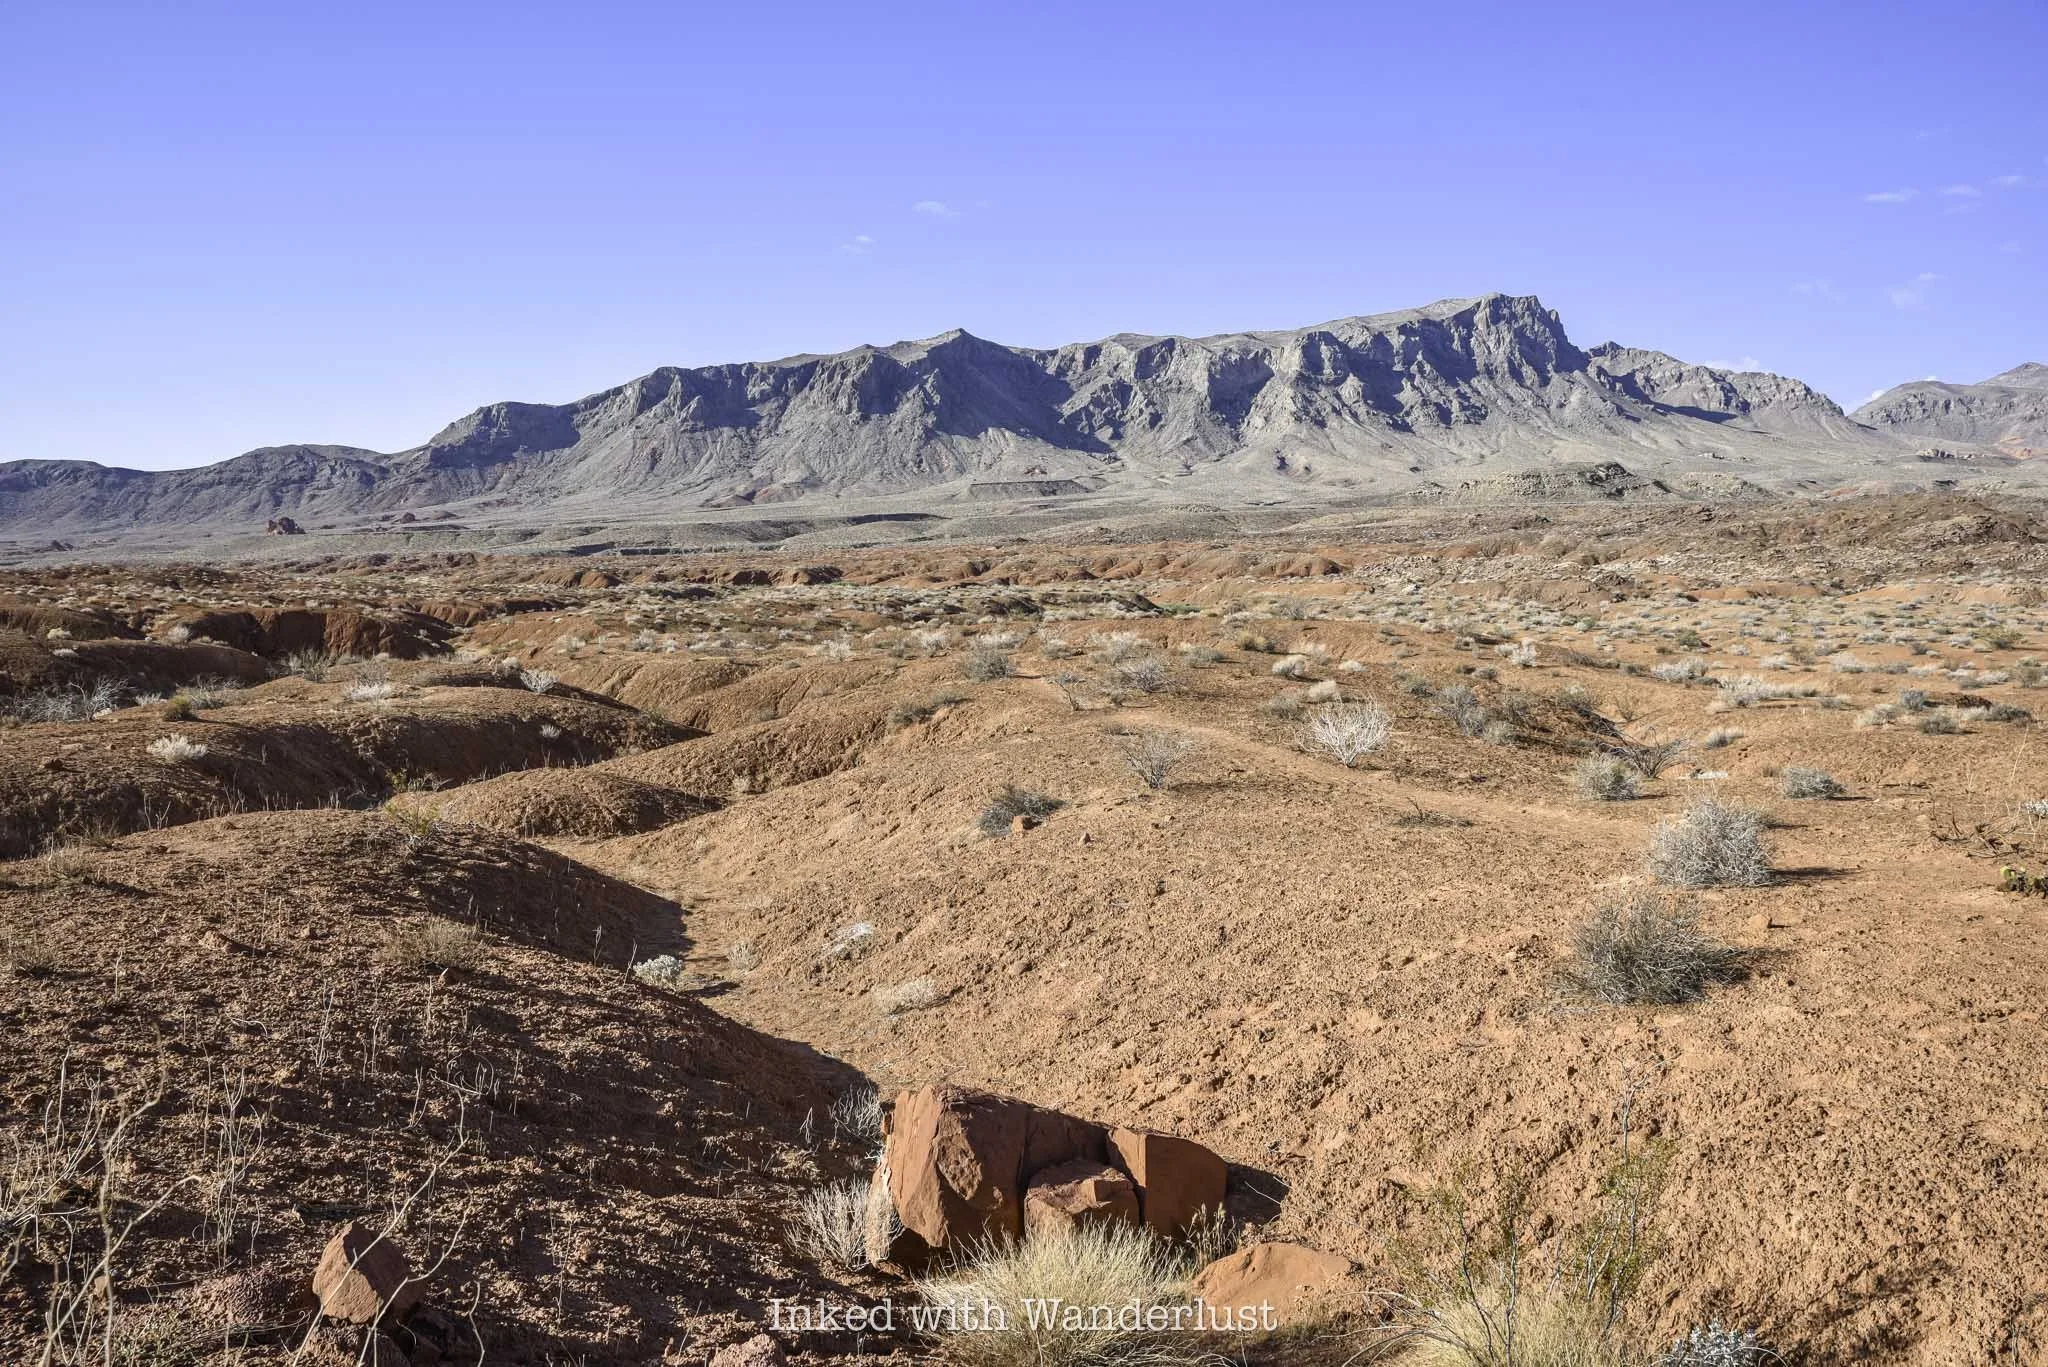
Established in 1935 as Nevada’s first state park, Valley of Fire attracts thousands of hikers, photographers and overall nature enthusiasts annually. It’s located in southern Nevada, just an hour so from the bright lights of the strip and is one of the most popular things to do near Las Vegas.
Valley of Fire offers a variety of hiking trails, a visitor center with informative exhibits and many historical sites. There’s literally something for everybody in this geological wonderland.
While I always recommend spending at least a full day at the park, the reality is, the extreme heat that Valley of Fire sees in the summer is simply too much for many people. It’s quite common to see high triple digits consistently.
Thankfully, Valley of Fire offers many attractions that are easy to see, with most only requiring a small commitment of thirty minutes or less, allowing you to see many of the highlights in a short amount of time.
So if you’re thinking about visiting Valley of Fire in the summer, but you can’t stand the heat and only have a few hours to spend, you’ve come to the right blog. Let’s get into it!
Valley of Fire Entrances, Fees & Reservations
Before we get into the fun stuff, there are a few things you need to know before traveling to Valley of Fire. For starters, no, day-use reservations are NOT required at Valley of Fire at this time. However, with the recent launch of the Reserve Nevada website, I wouldn’t be surprised to see it happen eventually as it’s the most popular state park in the state.
On the flip side, yes, you will have to pay an entrance fee. Thankfully, the fees aren’t all that high and if you’re driving a car with a Nevada license plate, you’ll get a discount! As of 2024, day-use entry fees are as follows:
$15 - Non-Nevada vehicles
$10 - Nevada vehicles
You can pay with a credit/debit card or cash. If the ranger booths aren’t staffed when you arrive, simply pull into the parking lots to the right to pay. If paying with cash, insert cash into the provided envelope and slip that into the iron ranger.
Conversely, you can still pay with a credit or debit card at the digital self-pay stations. Keep in mind that there’s always a chance that those pay stations will be offline, so it’s best to bring cash with you just in case (it happens more than you think).

There are two entrances at Valley of Fire; the east entrance and the west entrance. If you’re coming from Las Vegas, you’ll likely drive through the west entrance. Conversely, if you’re driving from Lake Mead/Hoover Dam, Arizona or Utah, you’ll likely go through the east entrance.
Additionally, there are only two main roads in the park; the Valley of Fire Highway (or, Valley of Fire Scenic Byway) which runs east to west, and Mouse’s Tank Road (or, White Domes Road) which takes you to the northern section of the park.
Navigating the park is easy, so you don’t need to rely on GPS too much. Keep in mind that cell service in the park is spotty to non-existent in most areas of the park. There are roadside signs all along the road announcing which attractions you’re approaching, though.
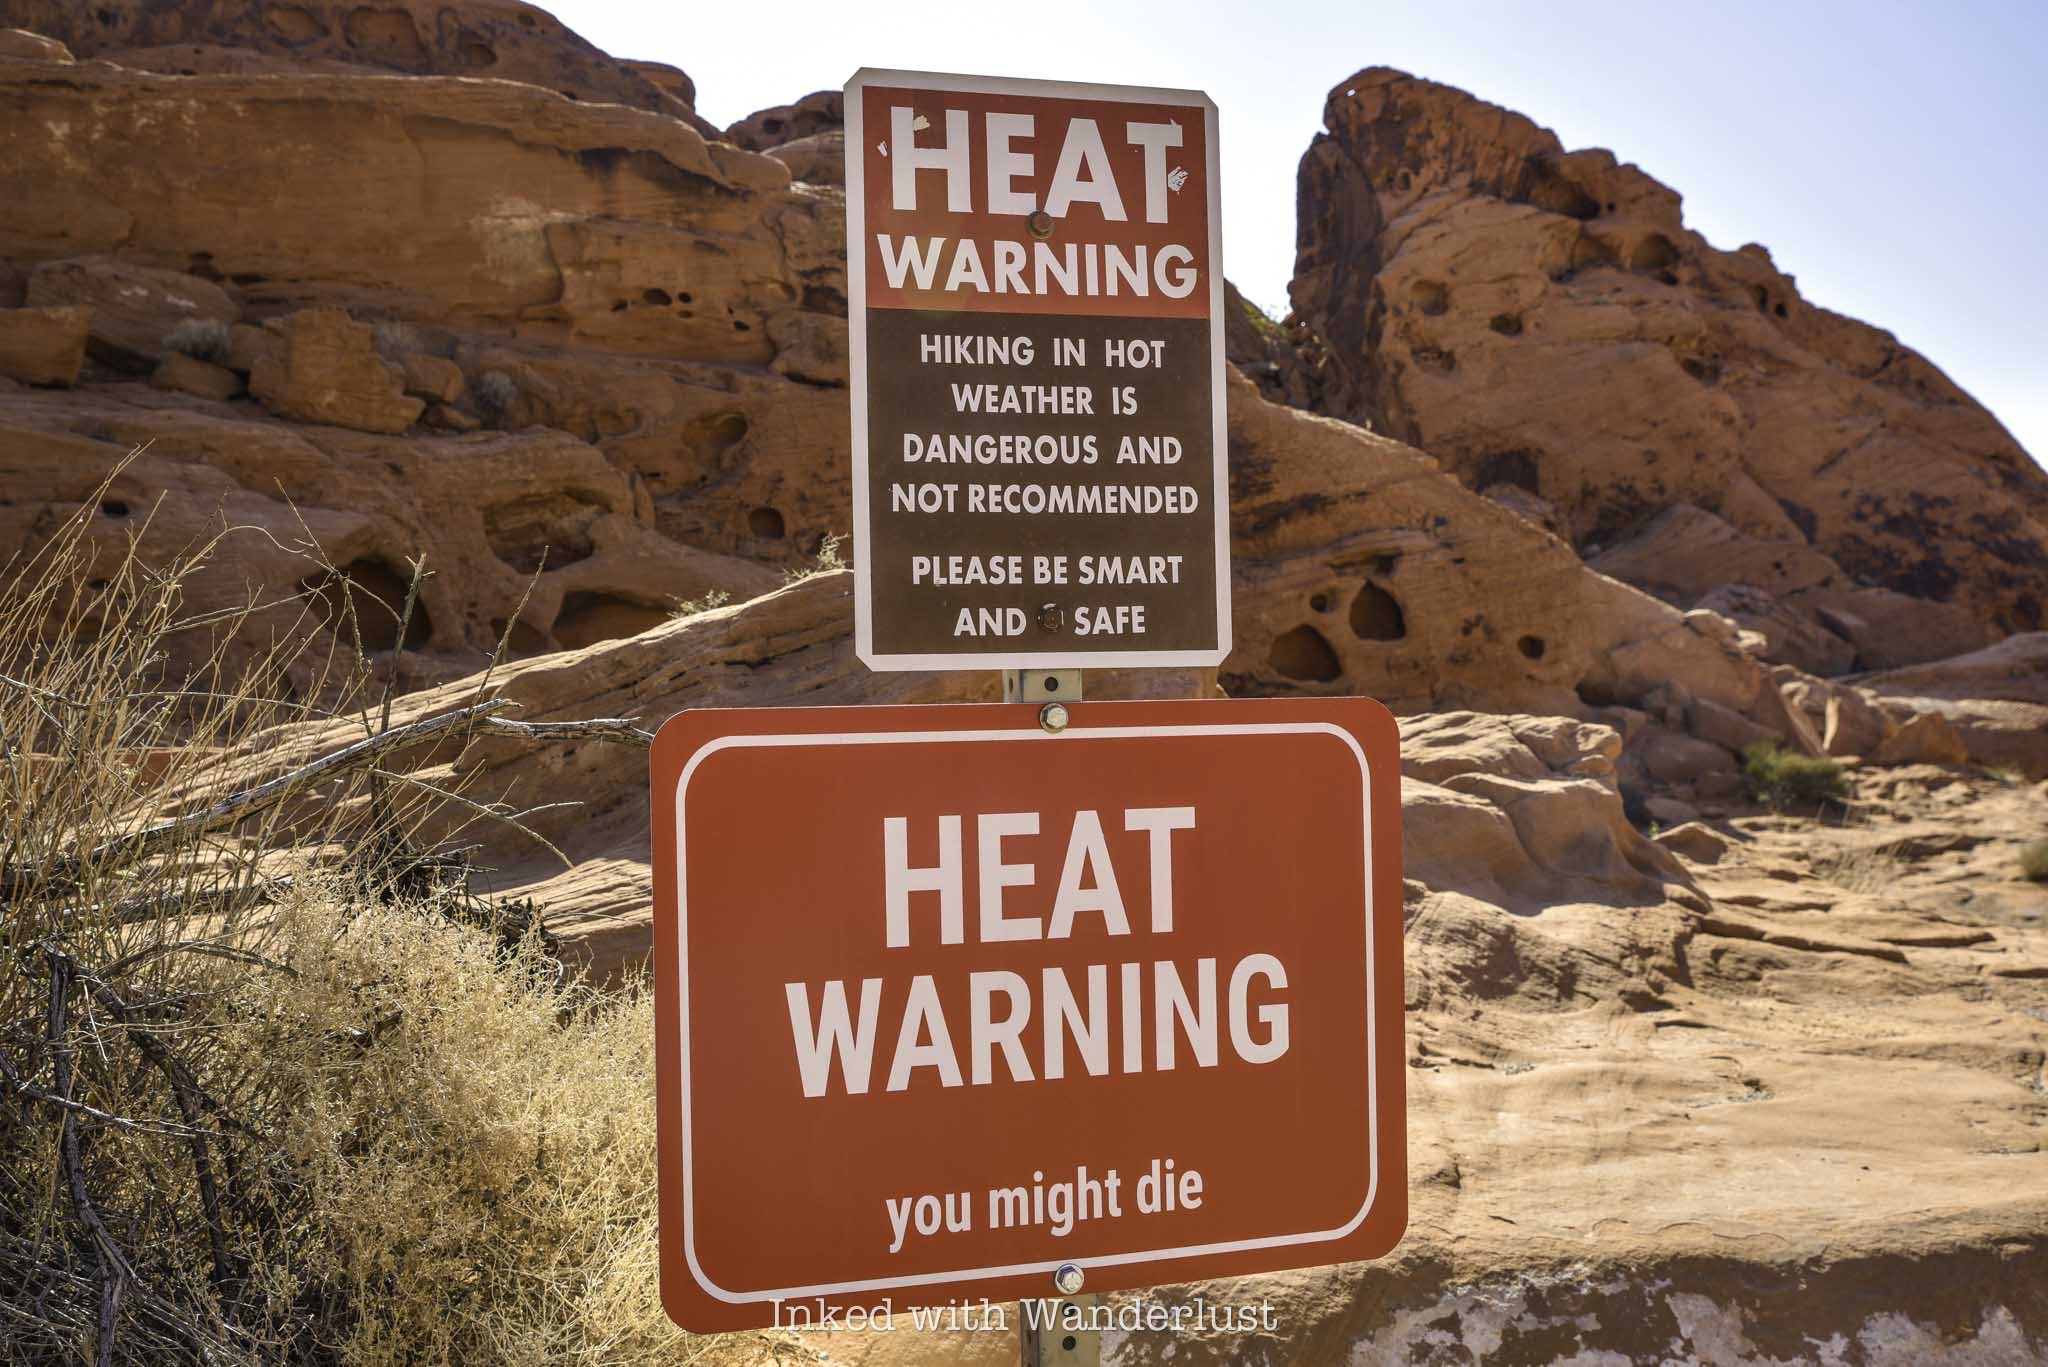
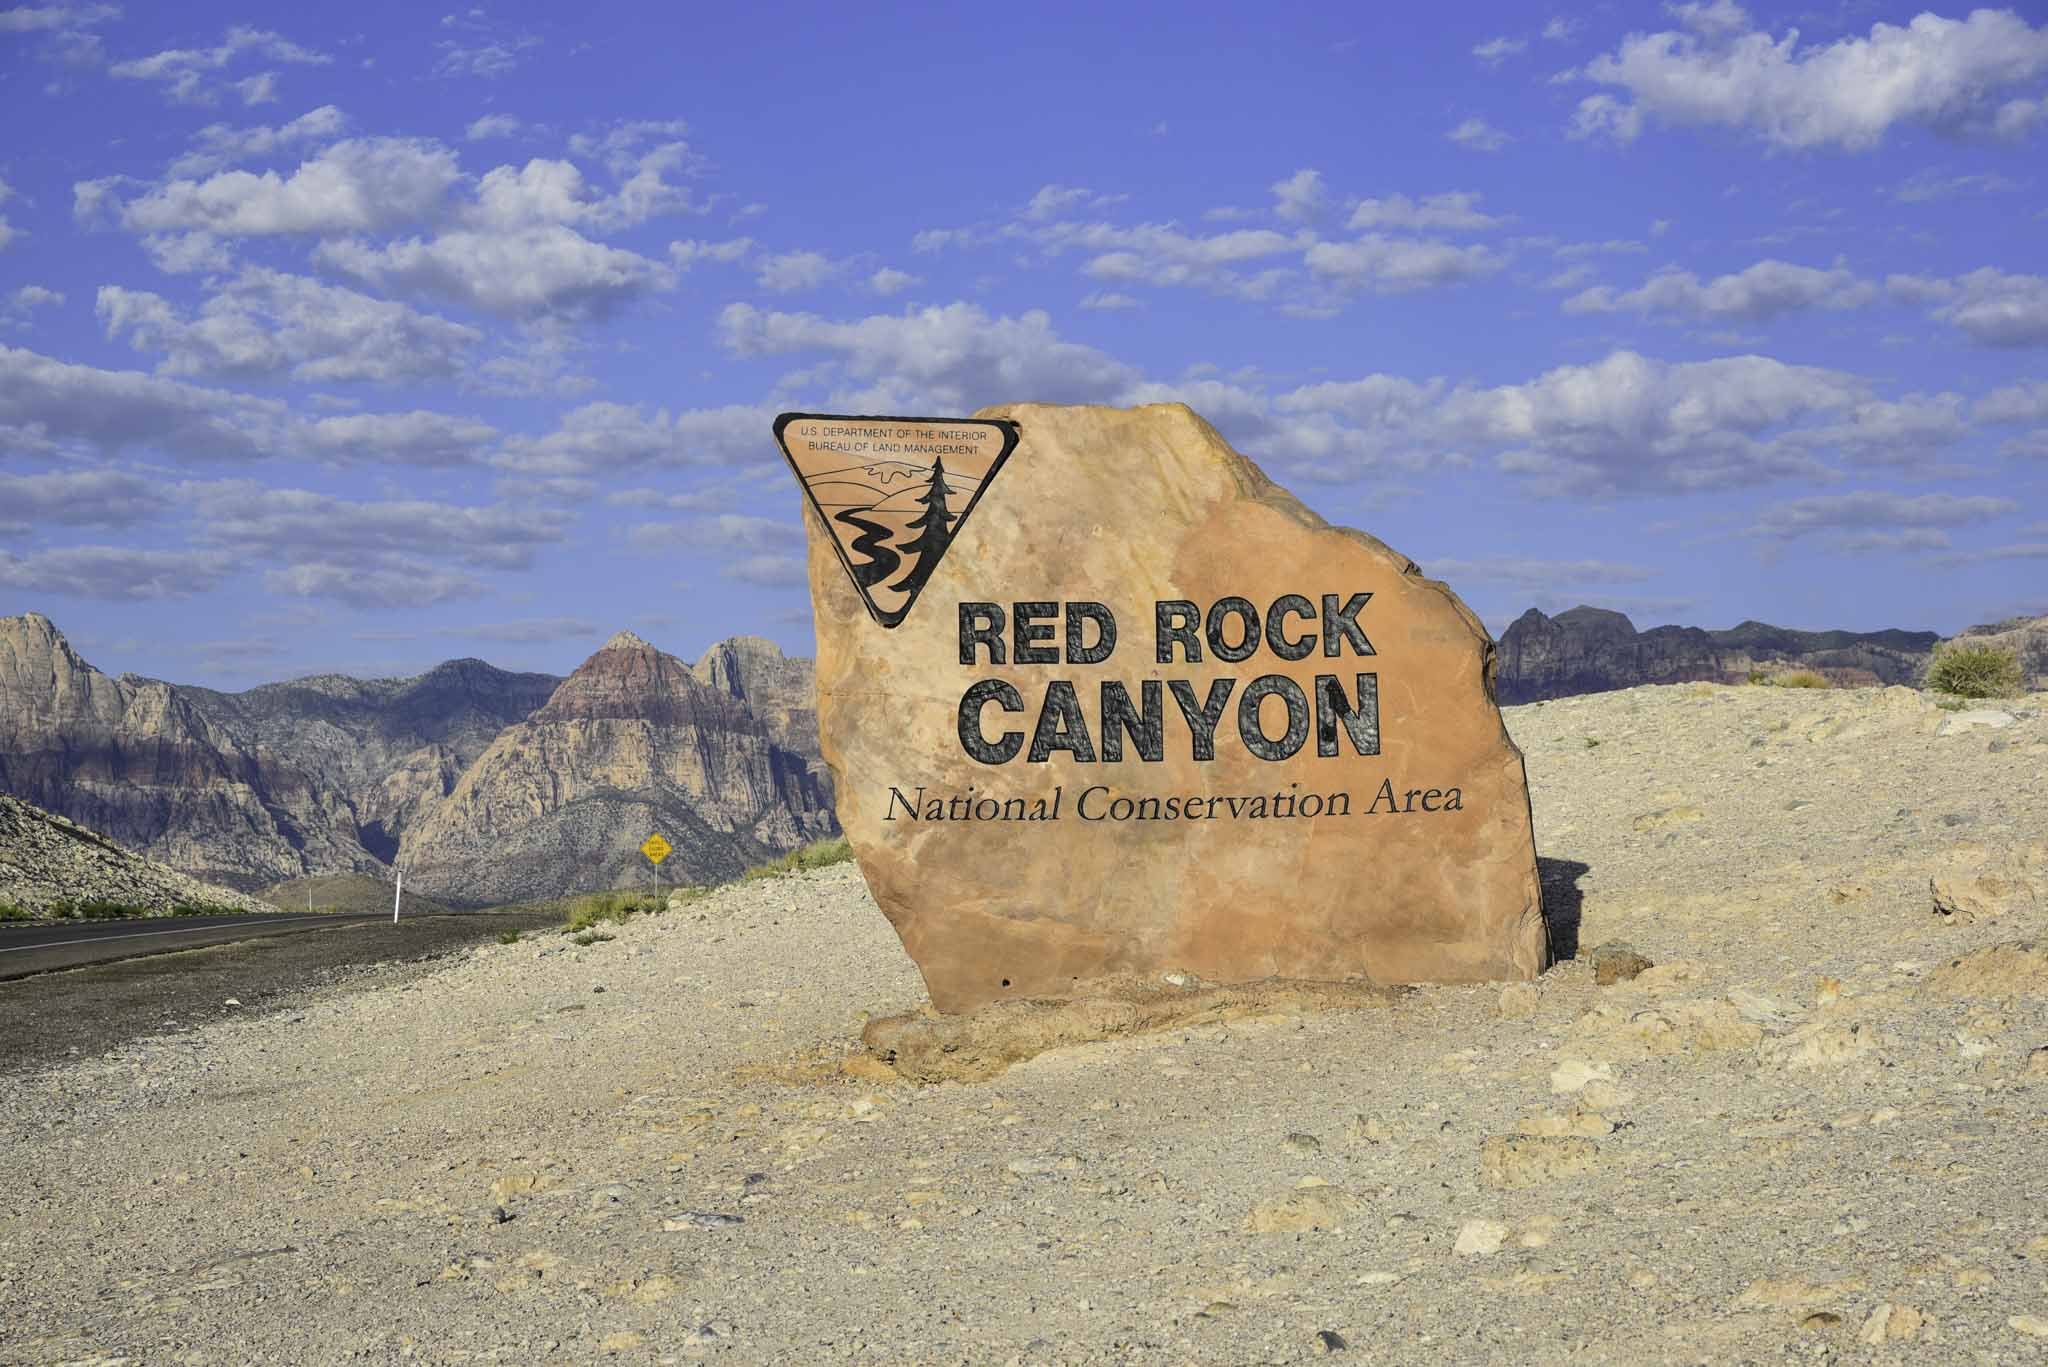
Lastly, be sure to heed the ominous signs at the park’s trailheads. They may seem dramatic, but many heat-related deaths have occurred in the park over the years. There isn’t much shade on any of the trails. I had my own scary experience while hiking in Red Rock Canyon, making me a believer.
For pleasant, somewhat cooler weather, early October to April are the best times to visit Valley of Fire. Though fall and spring sees the biggest crowds for that very reason.
If your aim is to visit with the least amount of people around as possible, then the summer months are your best bet. You will be contending with peak temperatures, though, so an early arrival is paramount to an enjoyable experience in the summer.
Here are some products that I recommend bringing to the park with you to help combat the heat:
Things to See at Valley of Fire in a Few Hours
While it would be easy to spend two or three days at this beautiful park, you can just as easily spend a few hours due to the park’s many easily accessible attractions. Below, I’m going to provide a list of things to see and do in Valley of Fire that will allow you to see many of the highlights in a relatively short amount of time.
This itinerary will list the attractions in the order that they appear in the park and will assume you’ll be driving in from Las Vegas, through the west entrance (if you’ll be driving in through the east entrance, just complete this itinerary in reverse order).
Remember, the goal is to arrive at the park as close to sunrise as possible. This will allow you to see everything listed below and be out of the park by 11am or so, when the heat and crowds are at their worst.
Keep in mind that certain trails are closed in the summer months due to extreme heat, so in respect to responsible travel, I will be omitting those from the list. For informational purposes only, the following trails are closed from mid-May to October:
Seven Wonders Loop
Pinnacles Loop
Prospect Trail
Arrowhead Trail
Natural Arch Trail (excluding Natural Arch itself)
Charlie’s Spring
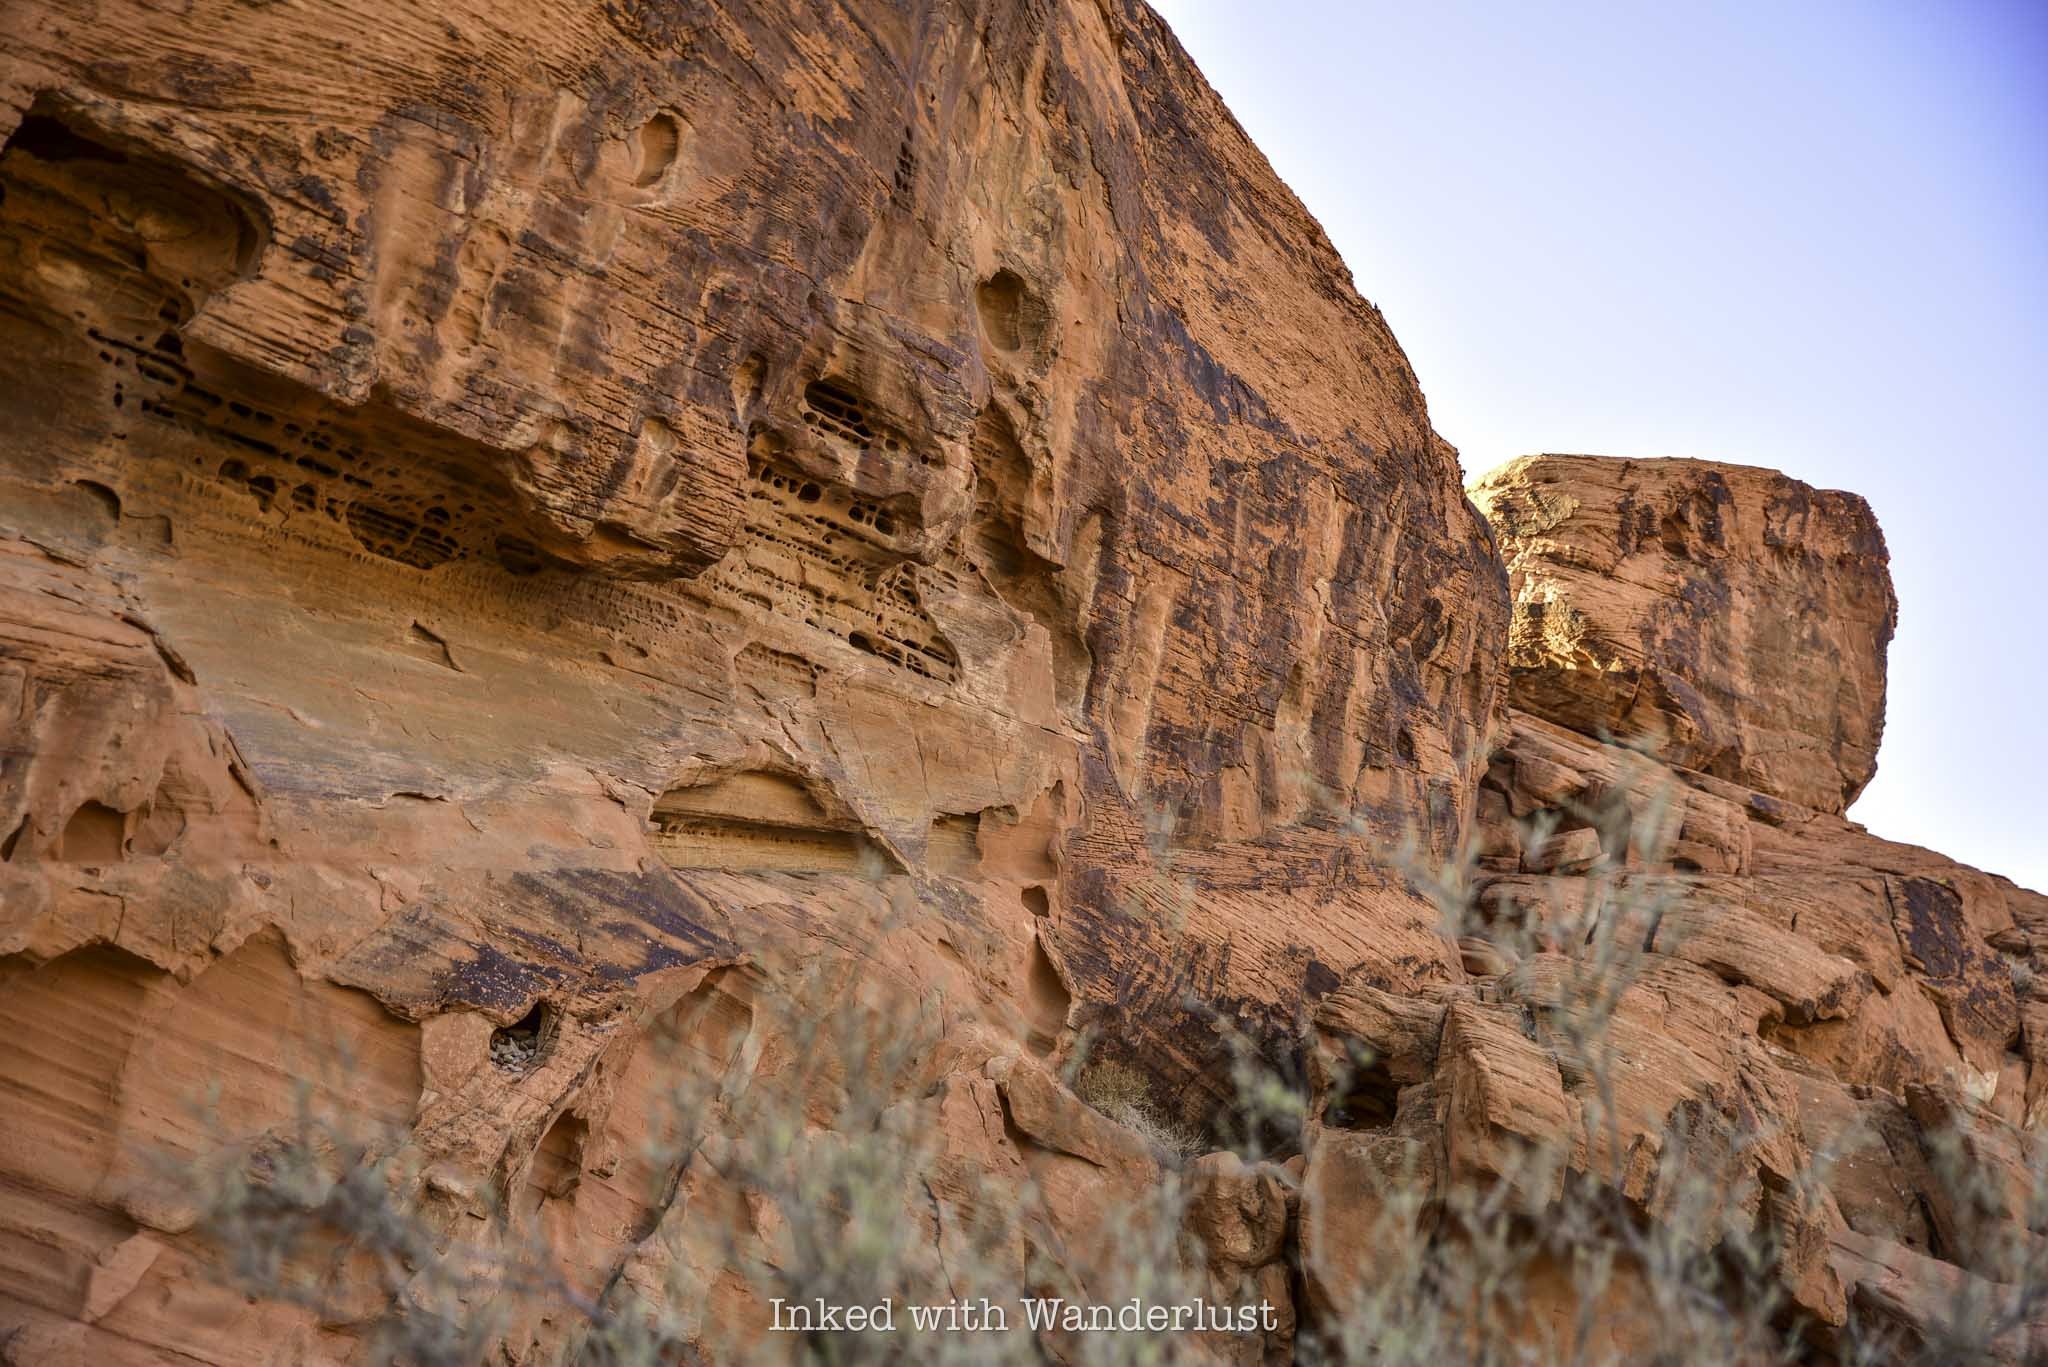
The Beehives
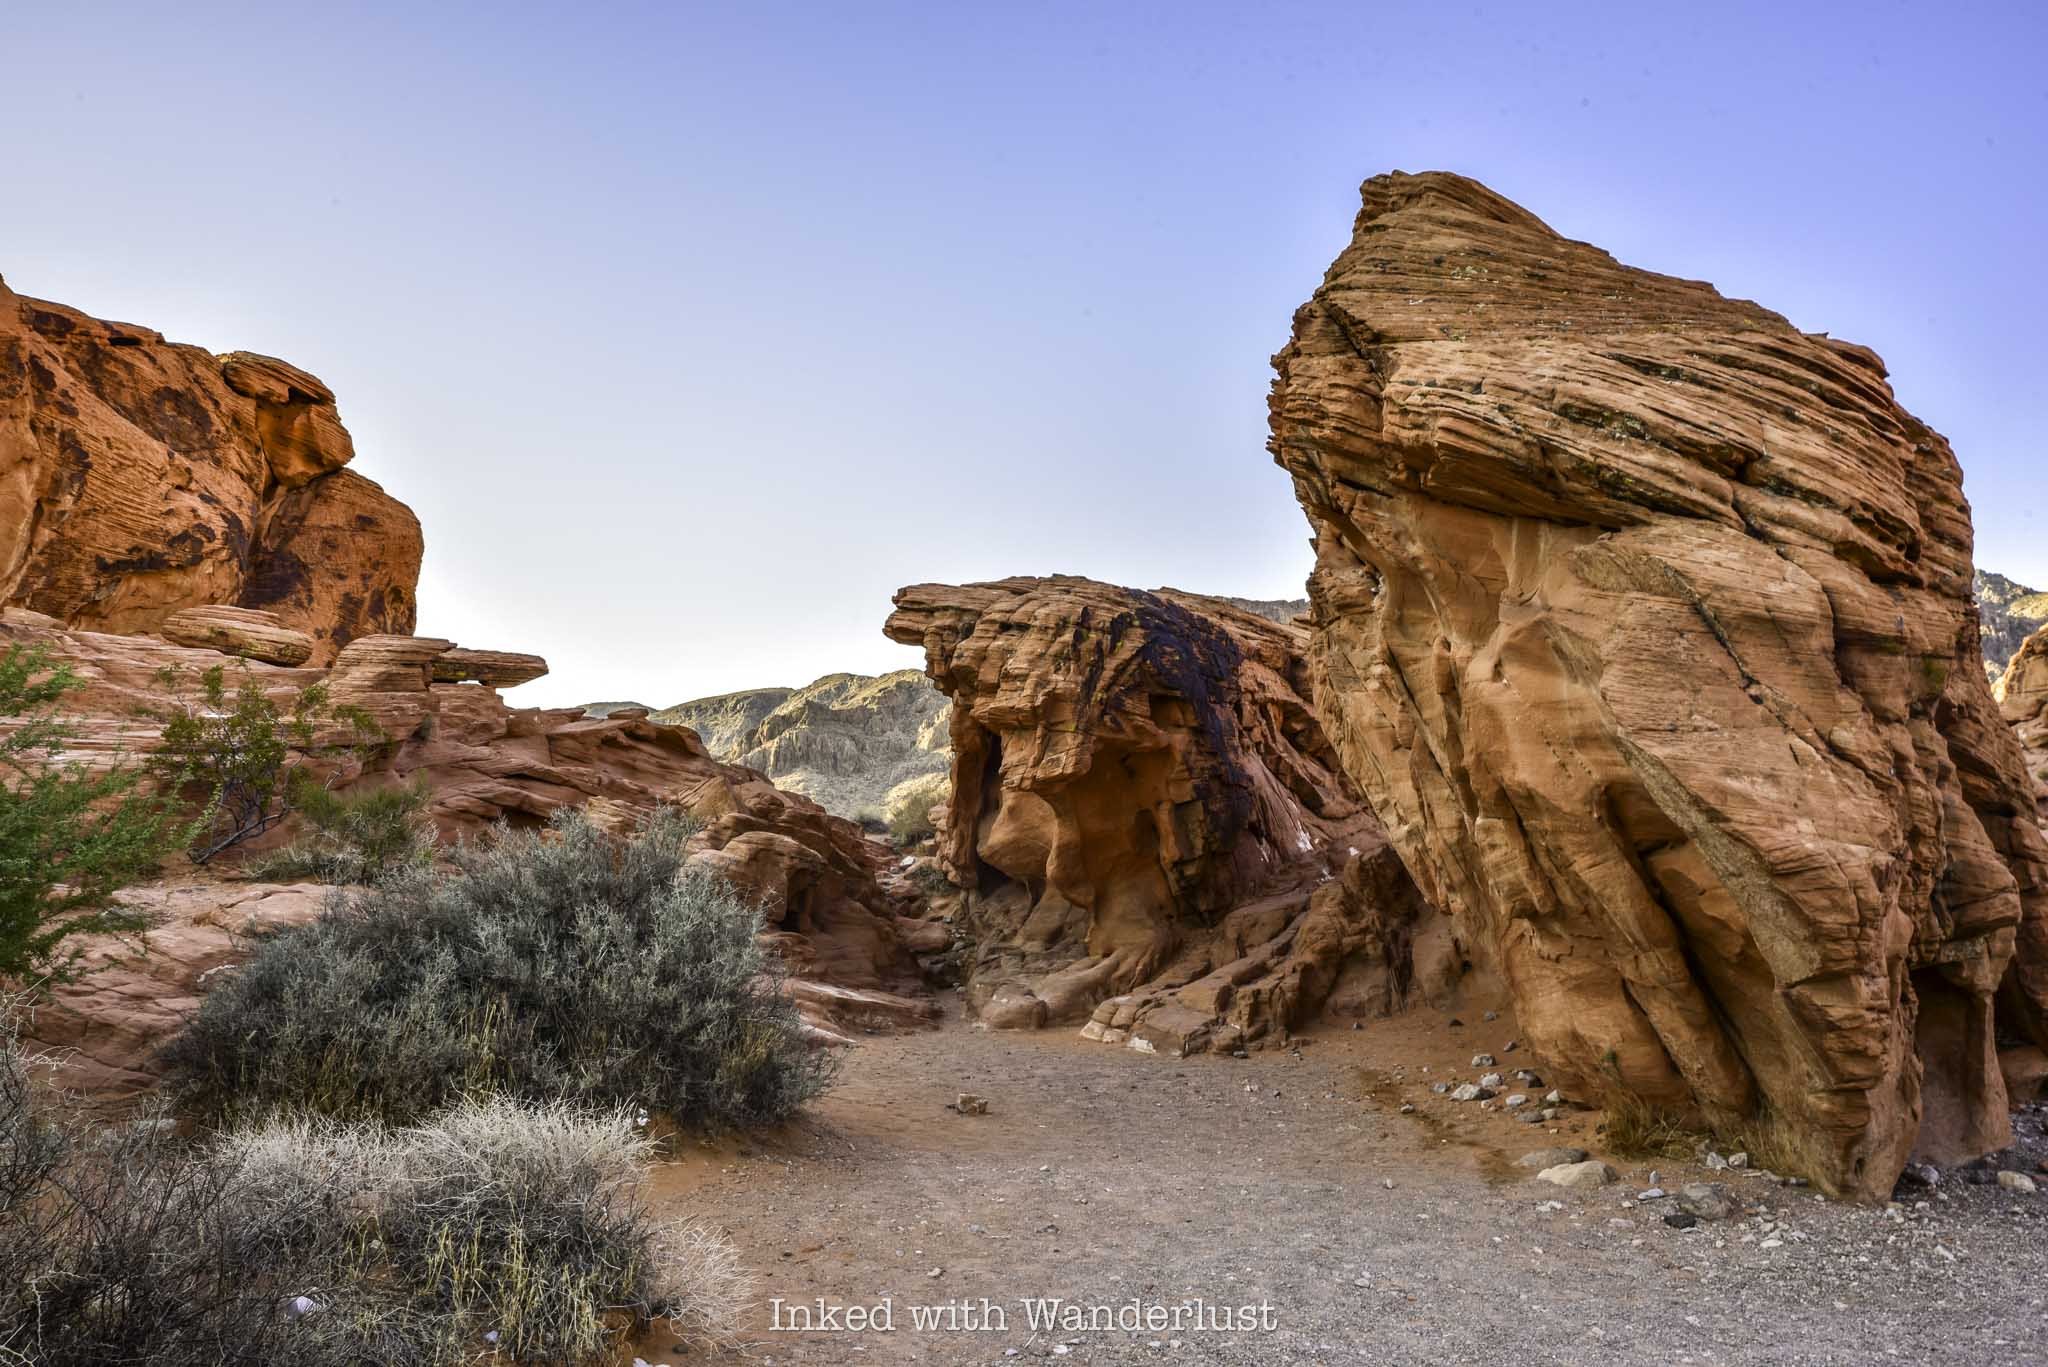
After driving in through the west entrance, the Beehives will be the first major attraction you’ll see and the large parking lot will be on your right.
The Beehives themselves are located right off the parking lot. There’s no designated path to follow, so feel free to explore them at your leisure.
You’ll quickly realize why they were named, “Beehives”, as you’ll see many honeycomb-like formations in the sandstone rocks. I feel that they’re the perfect introduction to Valley of Fire and a great place to watch the sunrise.
Atlatl Rock
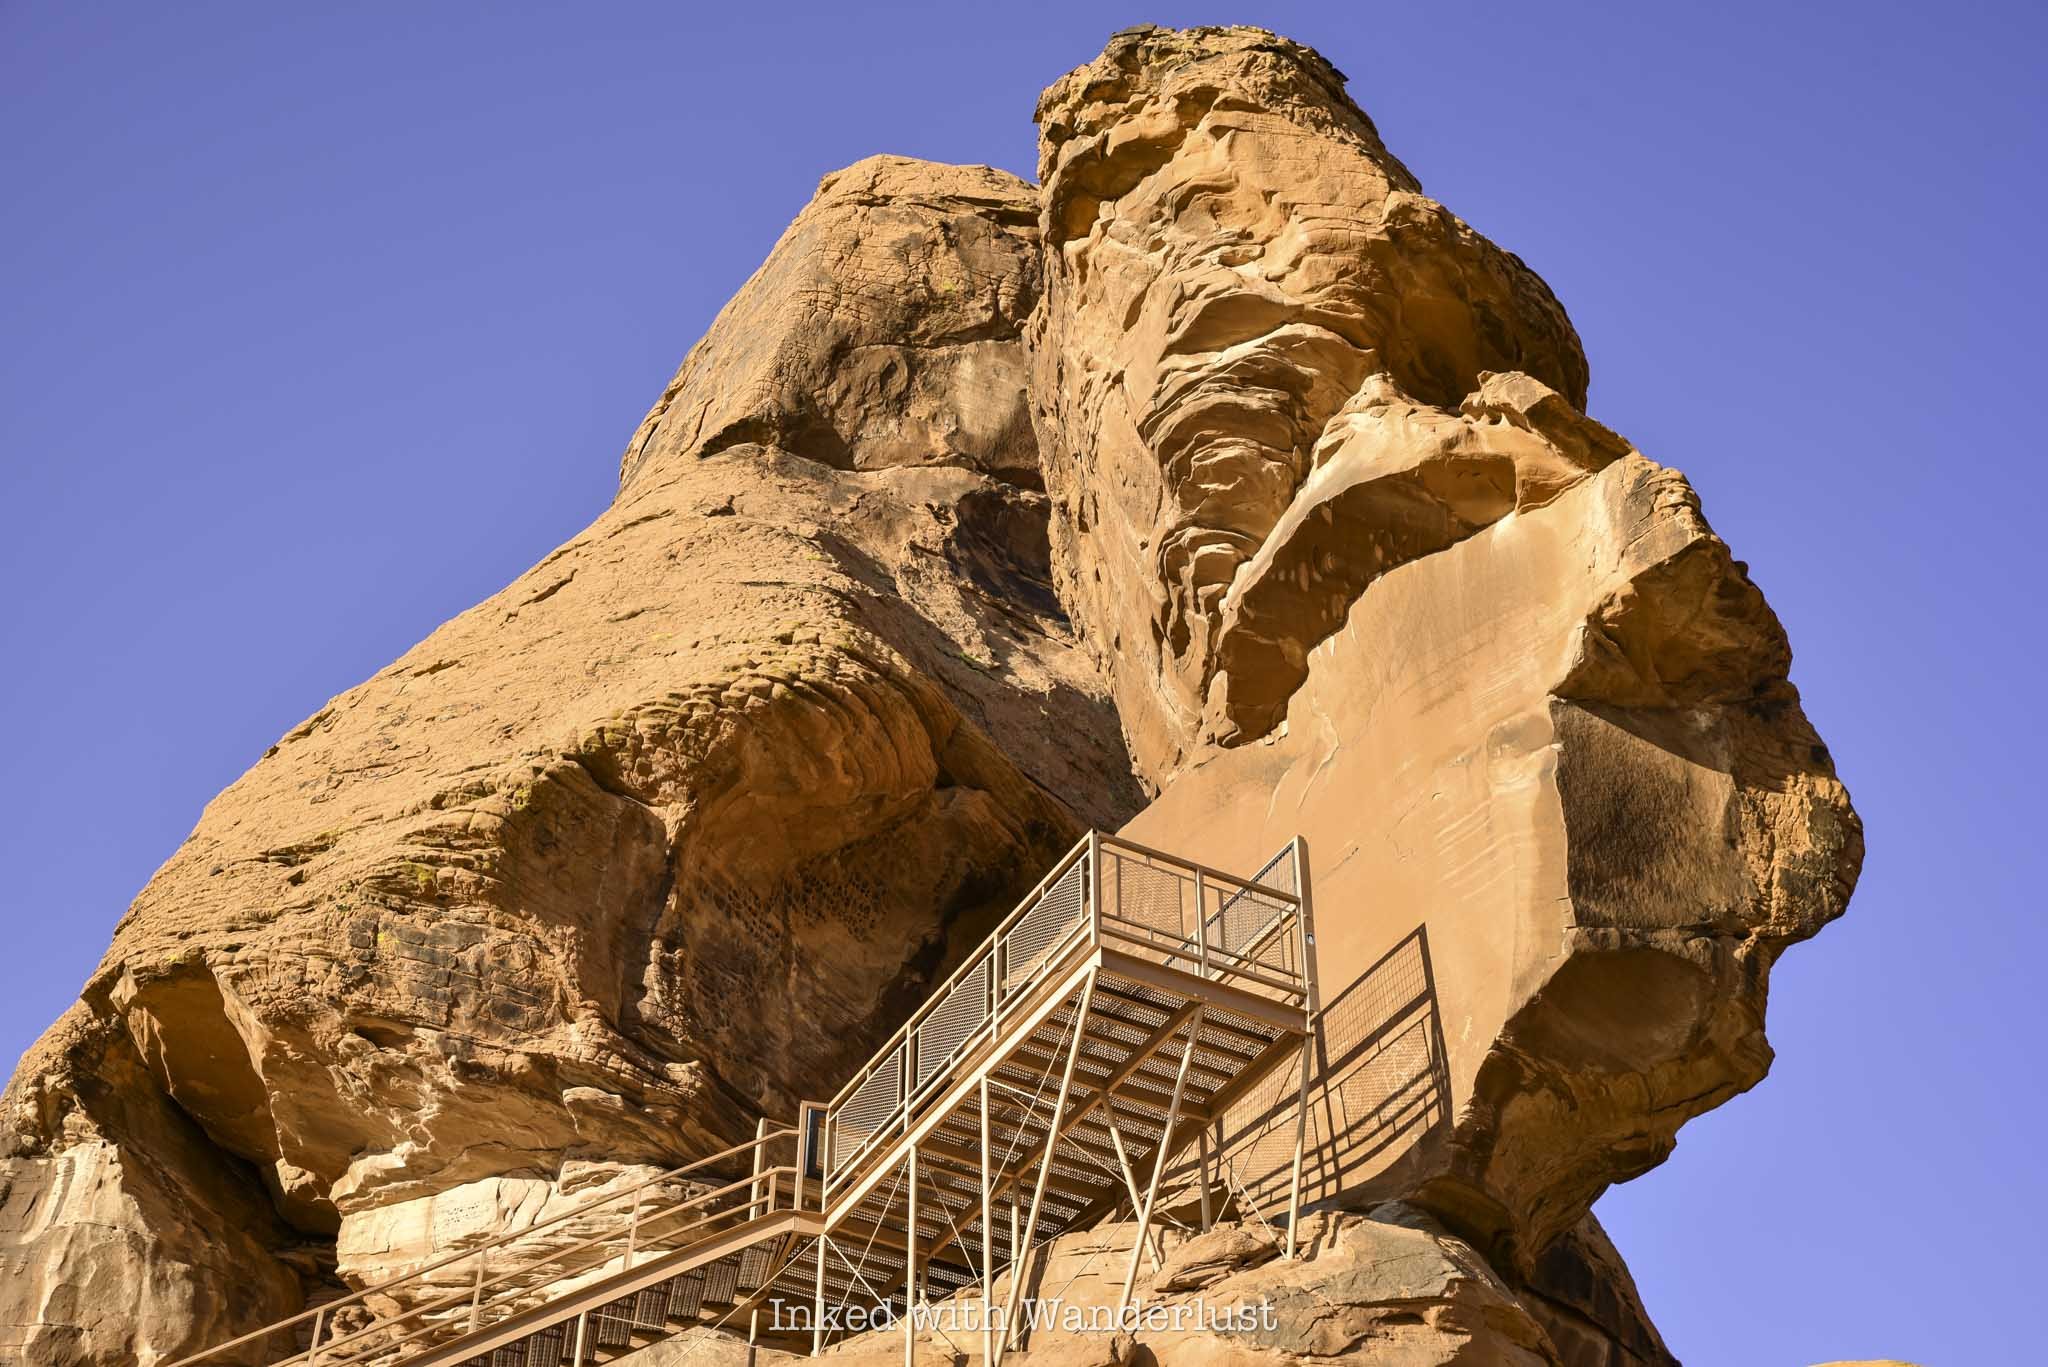
From the Beehives parking lot, drive east for a couple of miles until you see the turn-off for Campground road on your left. You can see Atlatl Rock from the highway but as you get closer, its commanding presence becomes more and more clear.
Aside from the large rock itself, the main draw to Atlatl Rock are the petroglyphs on the smooth rock face near the top. Simply take the steel staircase to the viewing deck above to see them.
The parking lot is fairly large, located just off the road, and features a restroom as well as a half a dozen or so shaded picnic tables. This makes Atlatl Rock an ideal spot for a quick break.
Atlatl Rock doesn’t take long to explore, as most of the petroglyphs are located in one central location. Though there are others scattered through the neighboring campground as well.
For more information, read my comprehensive guide on Atlatl Rock here.
Natural Arch
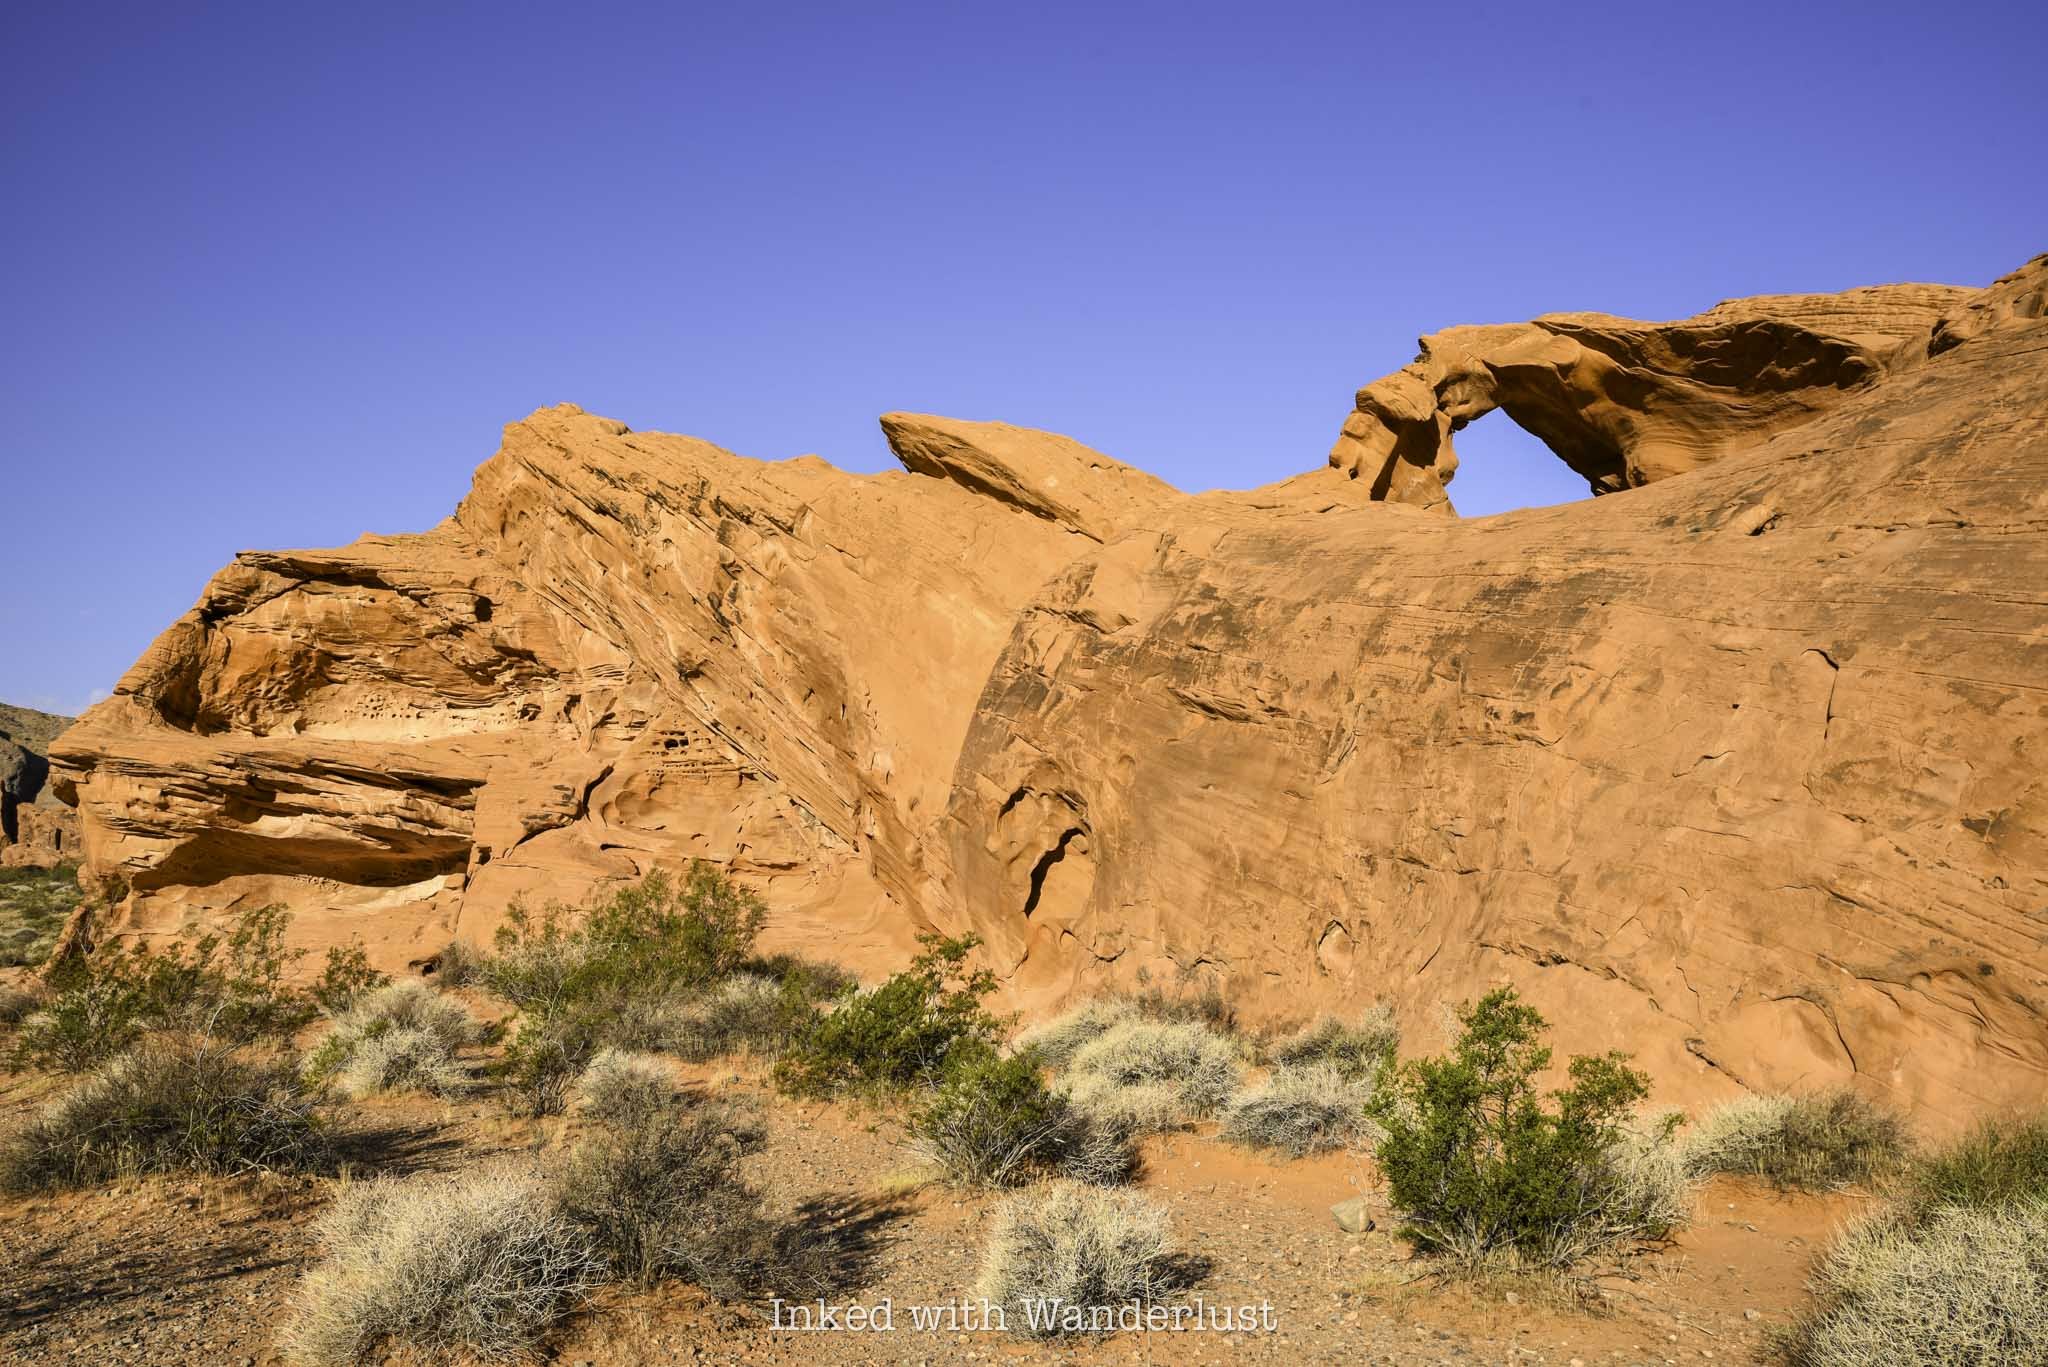
To see Natural Arch, turn left onto Campground road going out of the Atlatl Rock parking lot and follow it for about a mile. It’ll be on the left side of the road.
There’s no real parking lot, just a small pull-out style, dirt and gravel lot. In the morning, the view from the roadside will be dulled by the shade but if you walk behind it, you’ll discover a brilliantly lit Natural Arch in front of you.
Natural Arch isn’t the most impressive sight you’ll see at the park, but there aren’t many of them here and this one is the easiest to access. It’s small, but a sight to behold nonetheless.
To continue on your journey, simply turn back towards Atlatl Rock and the Valley of Fire Highway. If you continue down the road in the opposite direction, the road will become harder to pass as it isn’t well maintained (or even paved).
There are other formations down that road, such as Piano Rock, that are worth seeing but as stated above, the road becomes difficult (though not impossible) for those without high clearance. If you do go that way, the road will eventually loop you back to the highway, just before the Beehives. Turn left to continue.
Historic Cabins
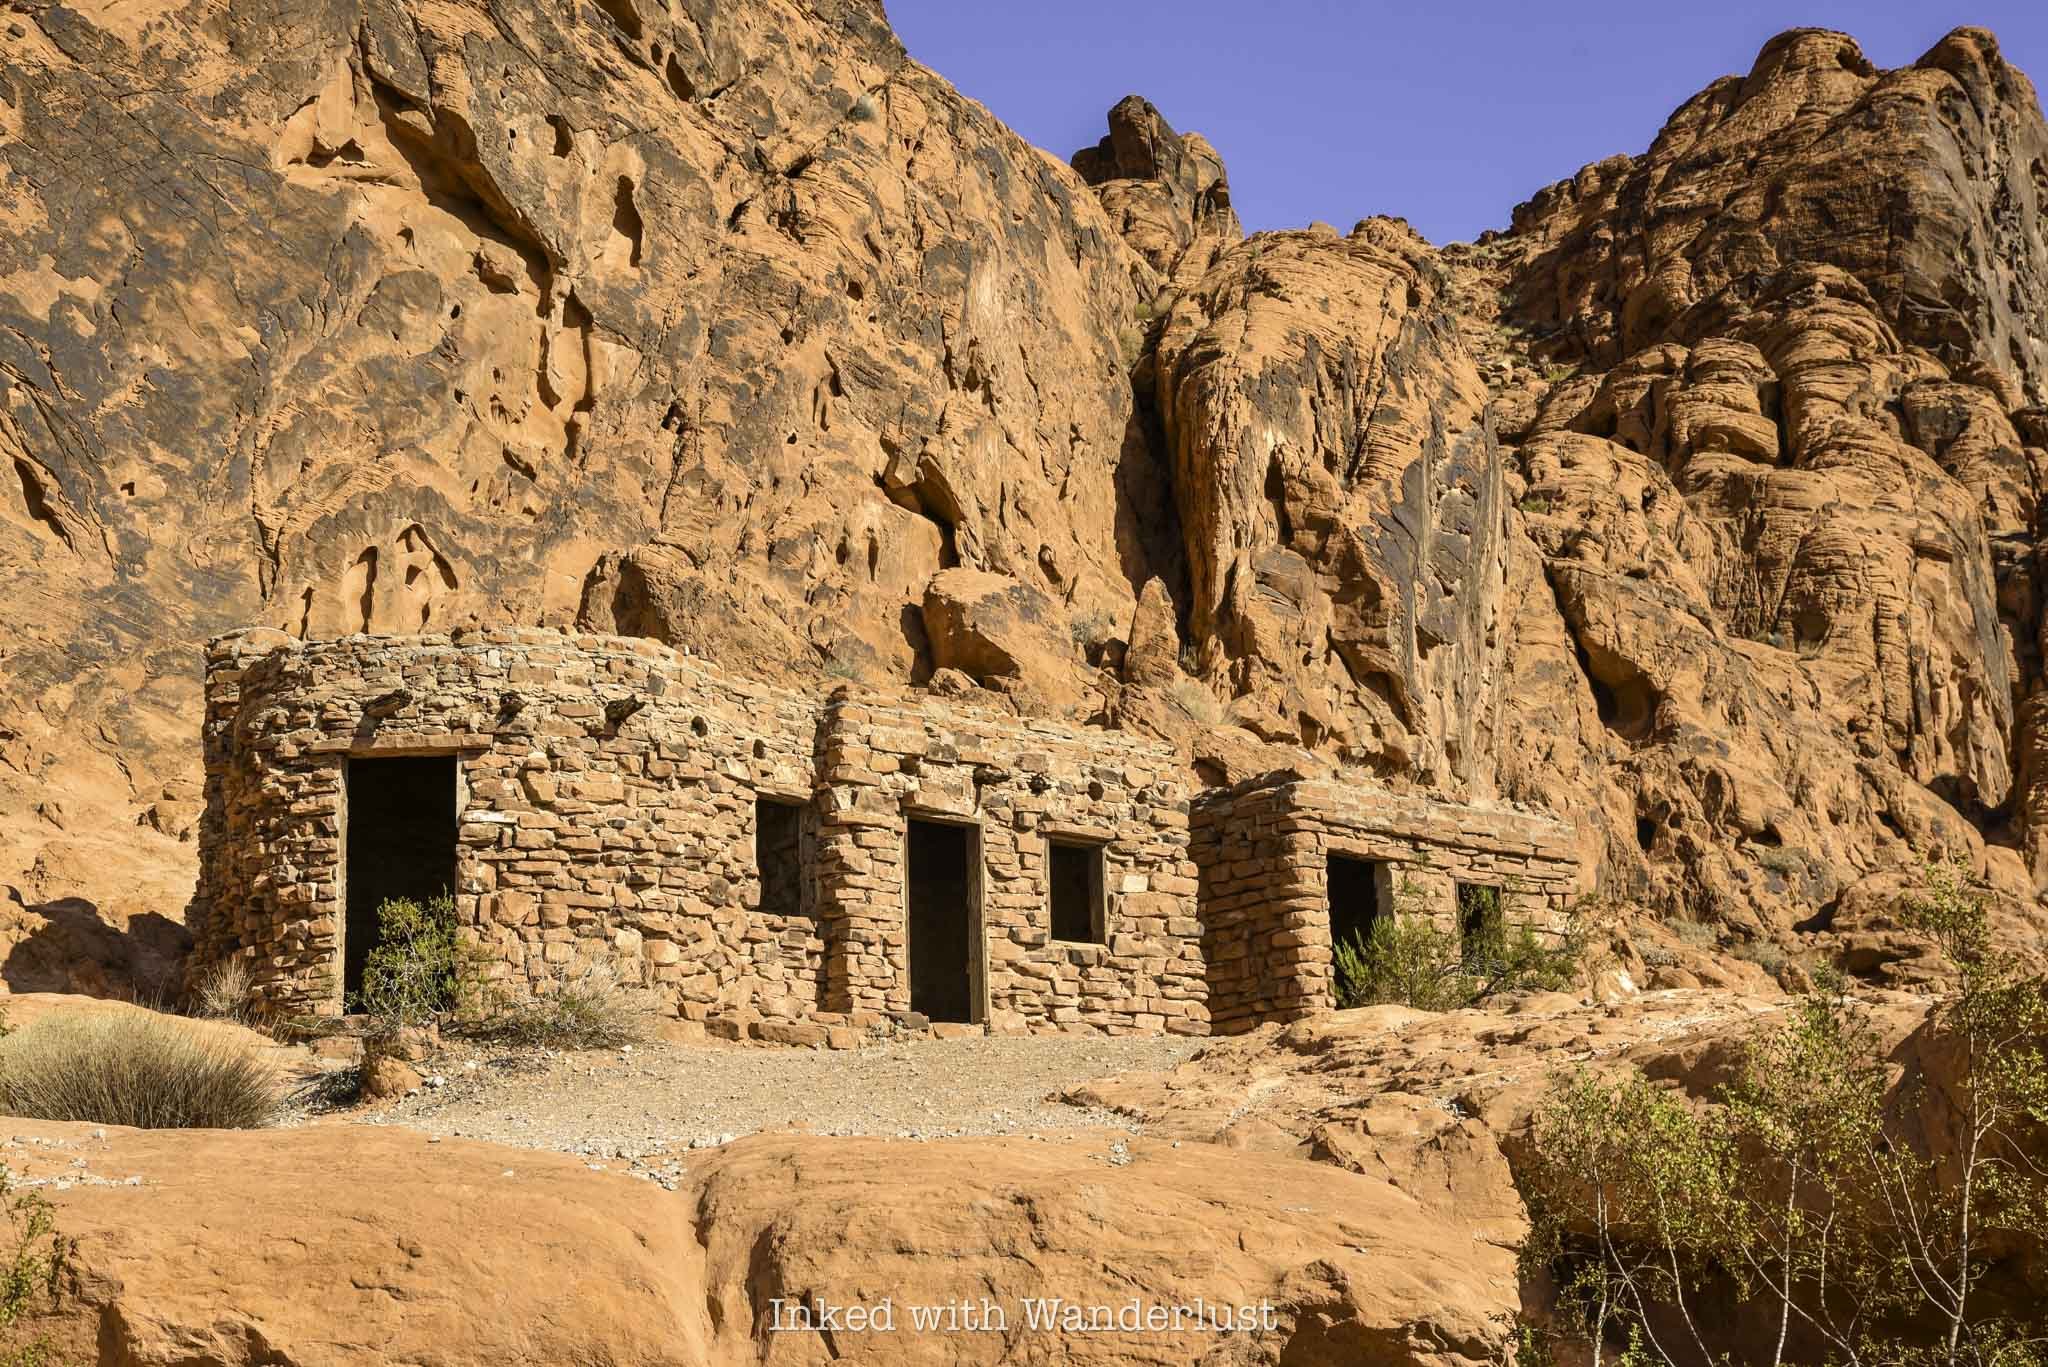
After leaving Natural Arch, turn left to get back onto Valley of Fire Highway to continue onto next attraction; the Historic Cabins. You’ll travel another five miles or so until you reach an un-named road on your left that leads to the cabins (there will be sign indicating the cabins are down that road).
The well maintained road will terminate at an eventual dead end lot, with the cabins out in front of you. There will also be another restroom and picnic area.
The cabins were built by the Civilian Conversation Corps (C.C.C) shortly after Valley of Fire became a state park in 1935 and were made with native sandstone. Their intended use was to provide shelter to travelers.
You can explore the exterior and interior of the preserved cabins. You’ll take notice of the built-in fireplaces and windows overlooking the valley in the distance.
Elephant Rock

Elephant Rock is one of the most infamous, Instagram worthy rock formations in Valley of Fire. Seeing it in person, it won’t take you long to make out the shape of the trunk, head, body and legs.
From the cabins, turn left onto the highway and follow it for a few more miles until you see the east entrance ahead of you. The parking lot for Elephant Rock is to your left, just before the exit.
The trail to Elephant Rock is a short, 0.3-mile jaunt that leads you right up to it. From there, you can scramble your way up for a closer look (but don’t climb on it).
To read more about Elephant Rock, read my comprehensive guide here.
Visitor Center and Balanced Rock
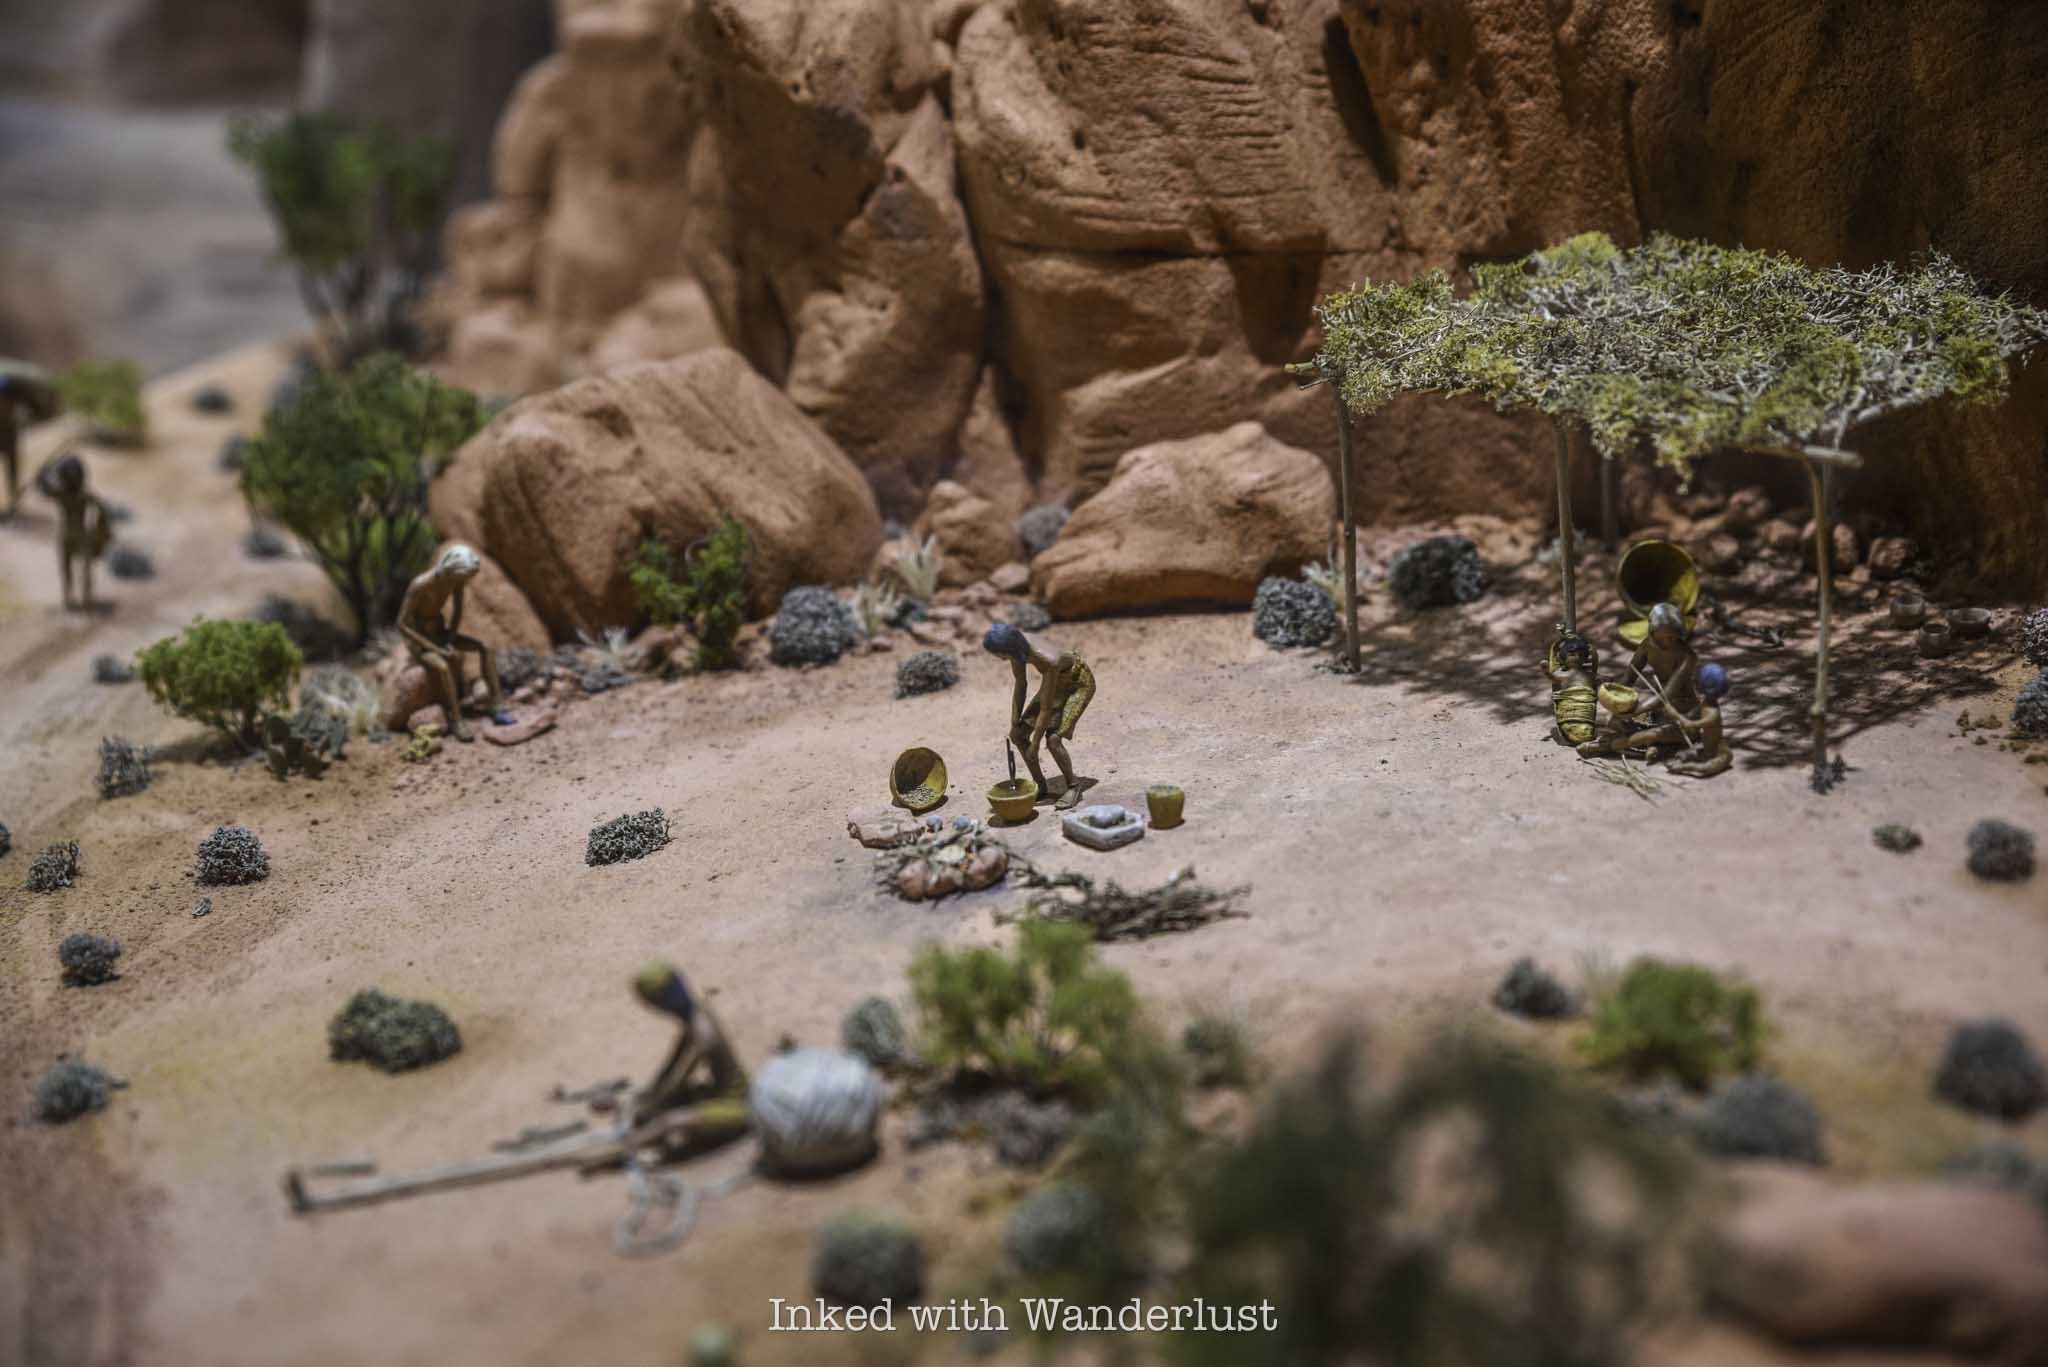
By now, you’ve undoubtedly worked up a sweat. It’s time to get out of the sun and head to the Visitor Center. To get there, travel west from Elephant Rock (the way you came) for three and a half miles. You’ll eventually come up upon Mouse’s Tank road on your right. Turn here and keep straight at the fork to get to the parking lot.
The Visitor Center is a great way to escape the heat for a bit. While the A/C is great, the best part about it are the exhibits that detail the extensive history of Valley of Fire. From Native American artifacts and geological education, to examples of native flora and fauna, there’s much to learn here.
Once you’ve cooled off, head back outside to the short but sweet trail to Balancing Rock. Facing the Visitor Center, you’ll find the trailhead on the left side of the parking lot. As stated above, the trail is short, even more so than Elephant Rock’s trail. It’ll terminate at a small viewing area that puts you front and center to Balancing Rock.
Much like Natural Arch, Balancing Rock isn’t the most impressive thing you’ll see at Valley of Fire, but it’s so easy to see that it would be a crime not to check it out. When you’re done, head back to your car and drive north on Mouse’s Tank road.
Mouse’s Tank Trail
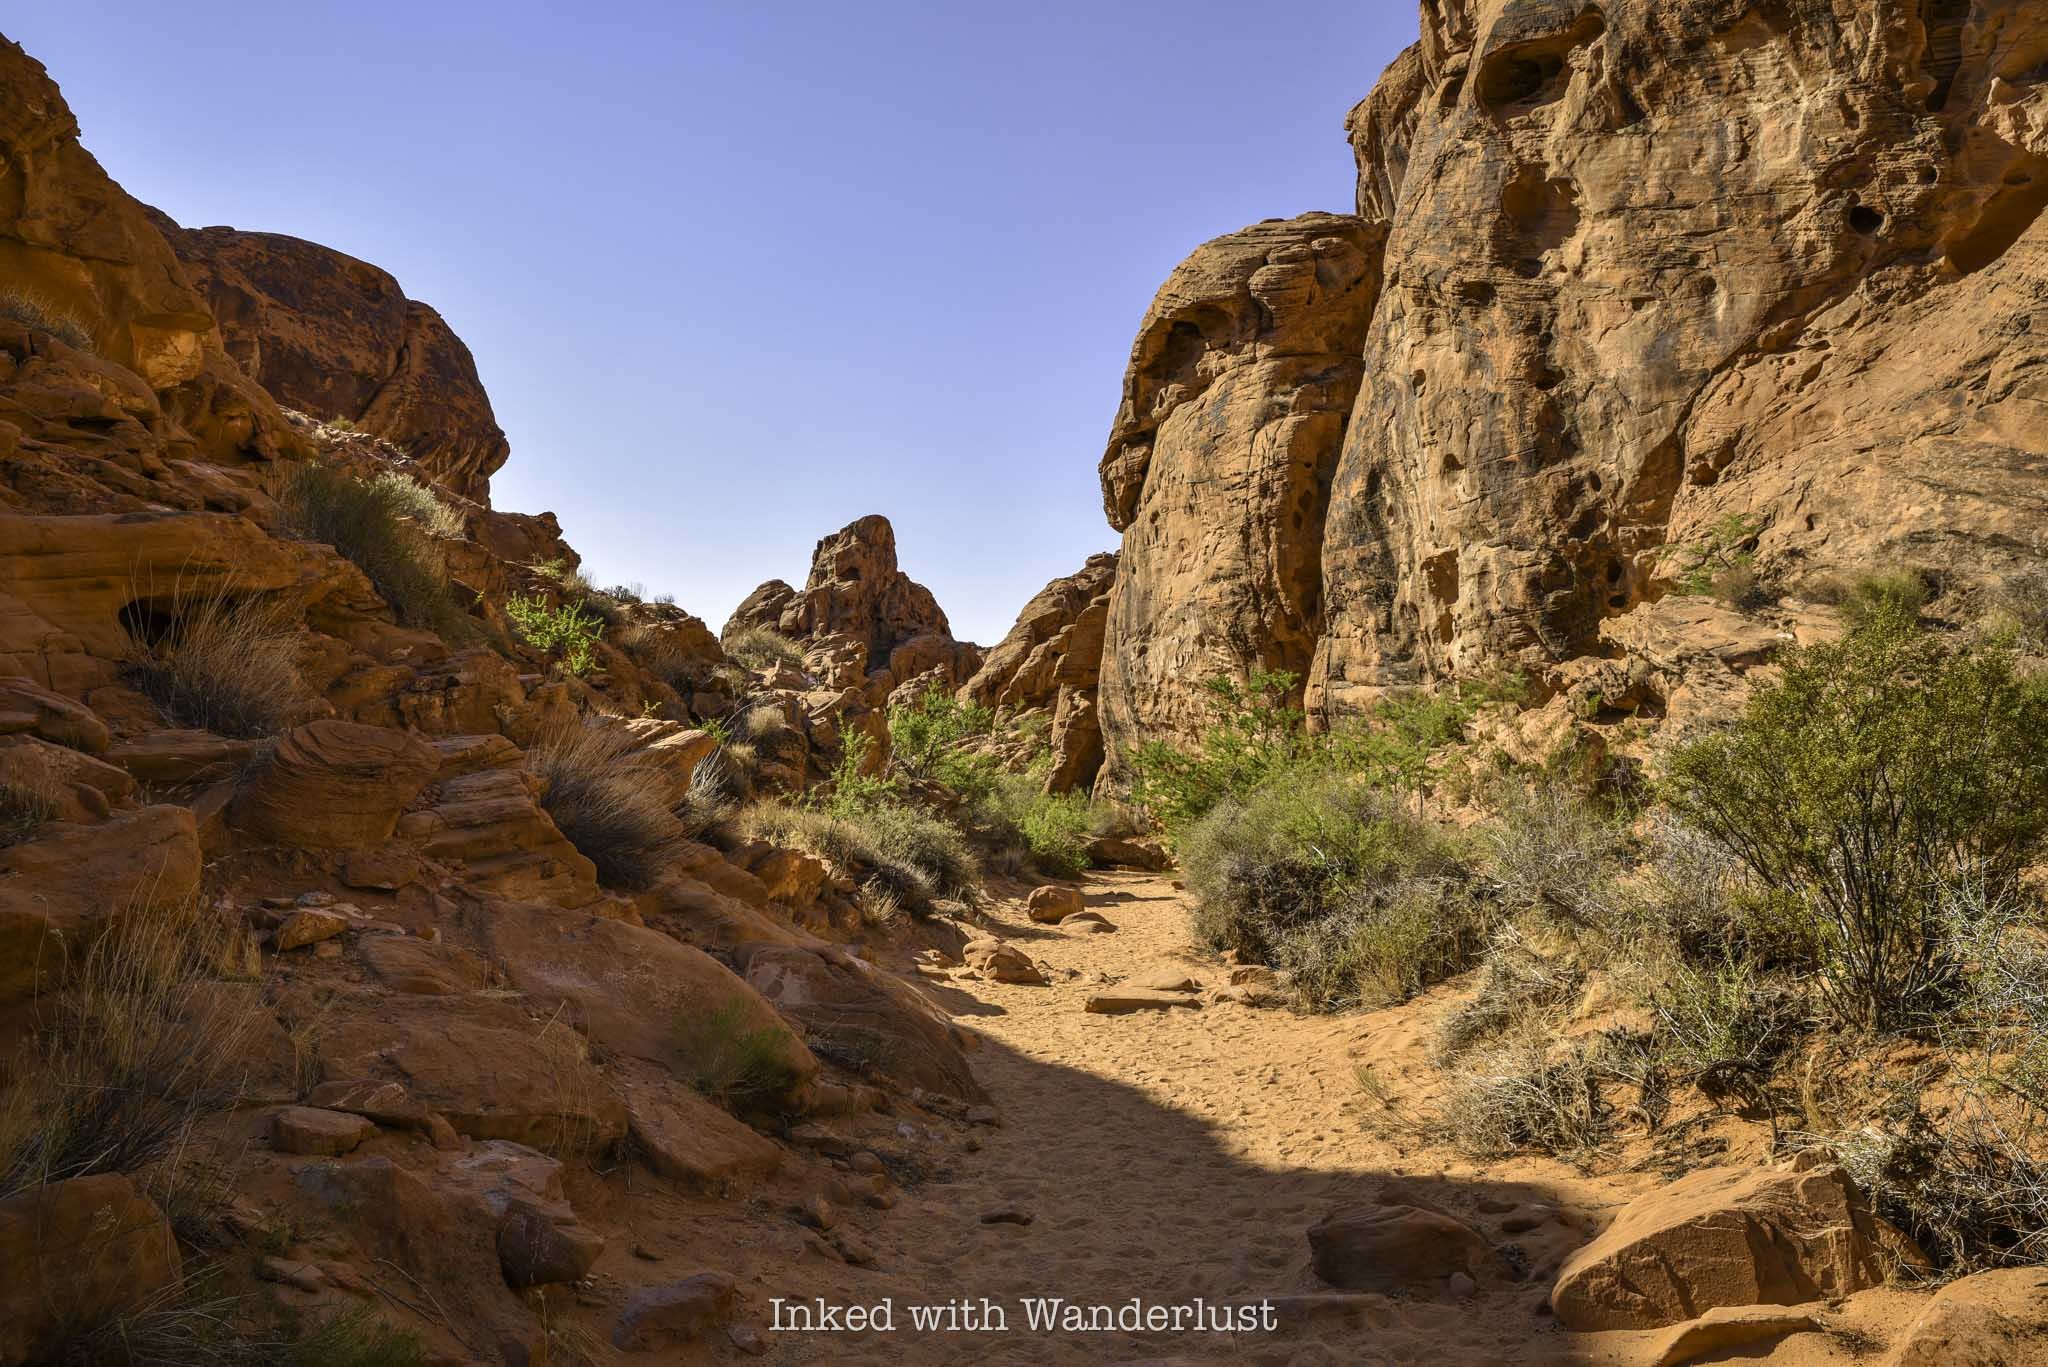
The trailhead for Mouse’s Tank Trail (or, Petroglyph Canyon) is located just off of Mouse’s Tank road on your right. I found more shade on this trail than any other I went on during my visit.
Mouse’s Tank Trail (along with the road) is named after, “Little Mouse”, a Southern Paiute Indian renegade who hid in areas of Valley of Fire after being accused of the murders of two prospectors (among other crimes).
The trail takes you through a canyon, with walls loaded with prehistoric petroglyphs. It terminates at Mouse’s Tank, which is a natural basin inside the rock that collects water after each rainfall.
Mouse’s Tank Trail is only half a mile, roundtrip, and if you get on the trail prior to 11am like I did, you’ll have plenty of shade throughout much of it.
The ‘Instagram View’ of Mouse’s Tank Road
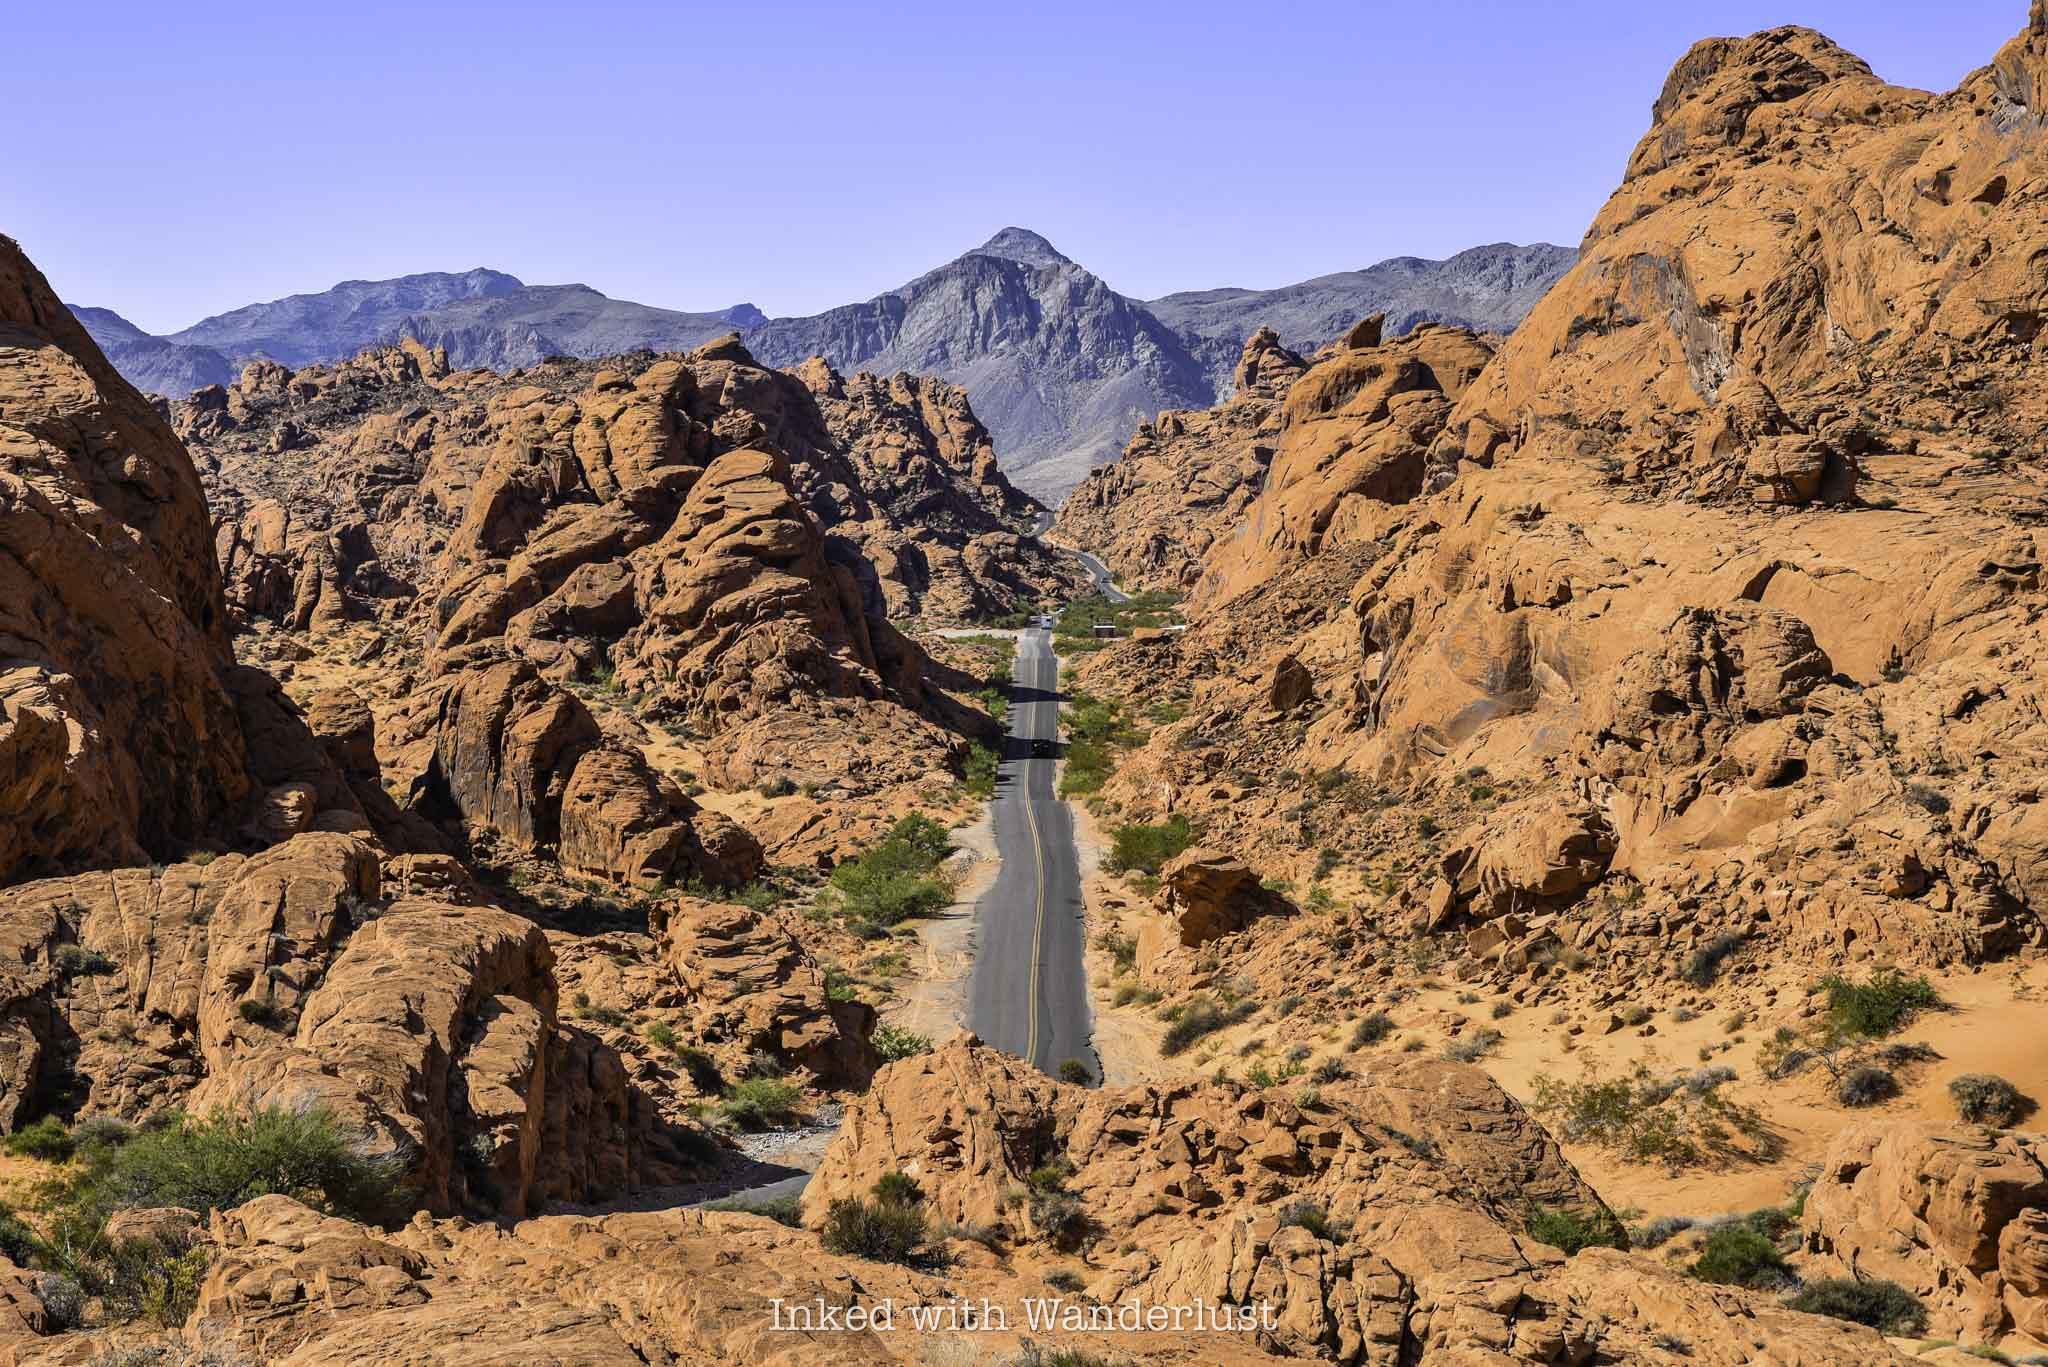
Mouse’s Tank road is undoubtedly one of the most scenic roads in all of Nevada. You’ve seen it all over social media, Instagram specifically, and it’s been plastered all over ads on TV, casino wall posters, etc.
If you’re wanting to get your own photo of this magnificent sight, there’s a much simpler way to do it than what other websites specify. You won’t need coordinates or have to pull over into one of the narrow slots on the side of the road.
Simply drive along Mouse’s Tank road until you see the parking lot for the Rainbow Vista Trail on your right (you can’t miss it). Park your car here, cross the road and walk along the rock until you reach the overlook perch at the end. Voila, you’re there.
Other sites I’ve seen overcomplicate it way too much. Doing it this way is way easier and it’s mostly the exact same view, albeit a bit higher. I feel it’s superior to other angles I’ve seen,
Fire Canyon/Silica Dome Viewpoint

To get to the next stop, head north from the Rainbow Vista parking lot (turn right). Shortly thereafter, you’ll make a right turn onto Fire Canyon road and follow it to its terminus at the parking lot.
There are a number of trails that begin here but for my money, the main attraction is the view. In front of you are examples of sandstone and silica rock. The multi-layer, contrasting reds of the sandstone on top of the yellow/tan tint of silica with the browns of the mountain range in the distance make a stunning sight.
You can walk out onto the dirt path that leads to a viewing area or simply take a gander from the parking lot. Either way, it doesn’t take much time to enjoy the sights at this lookout.
Drive the Remainder of Mouse’s Tank Road and Take in the Views
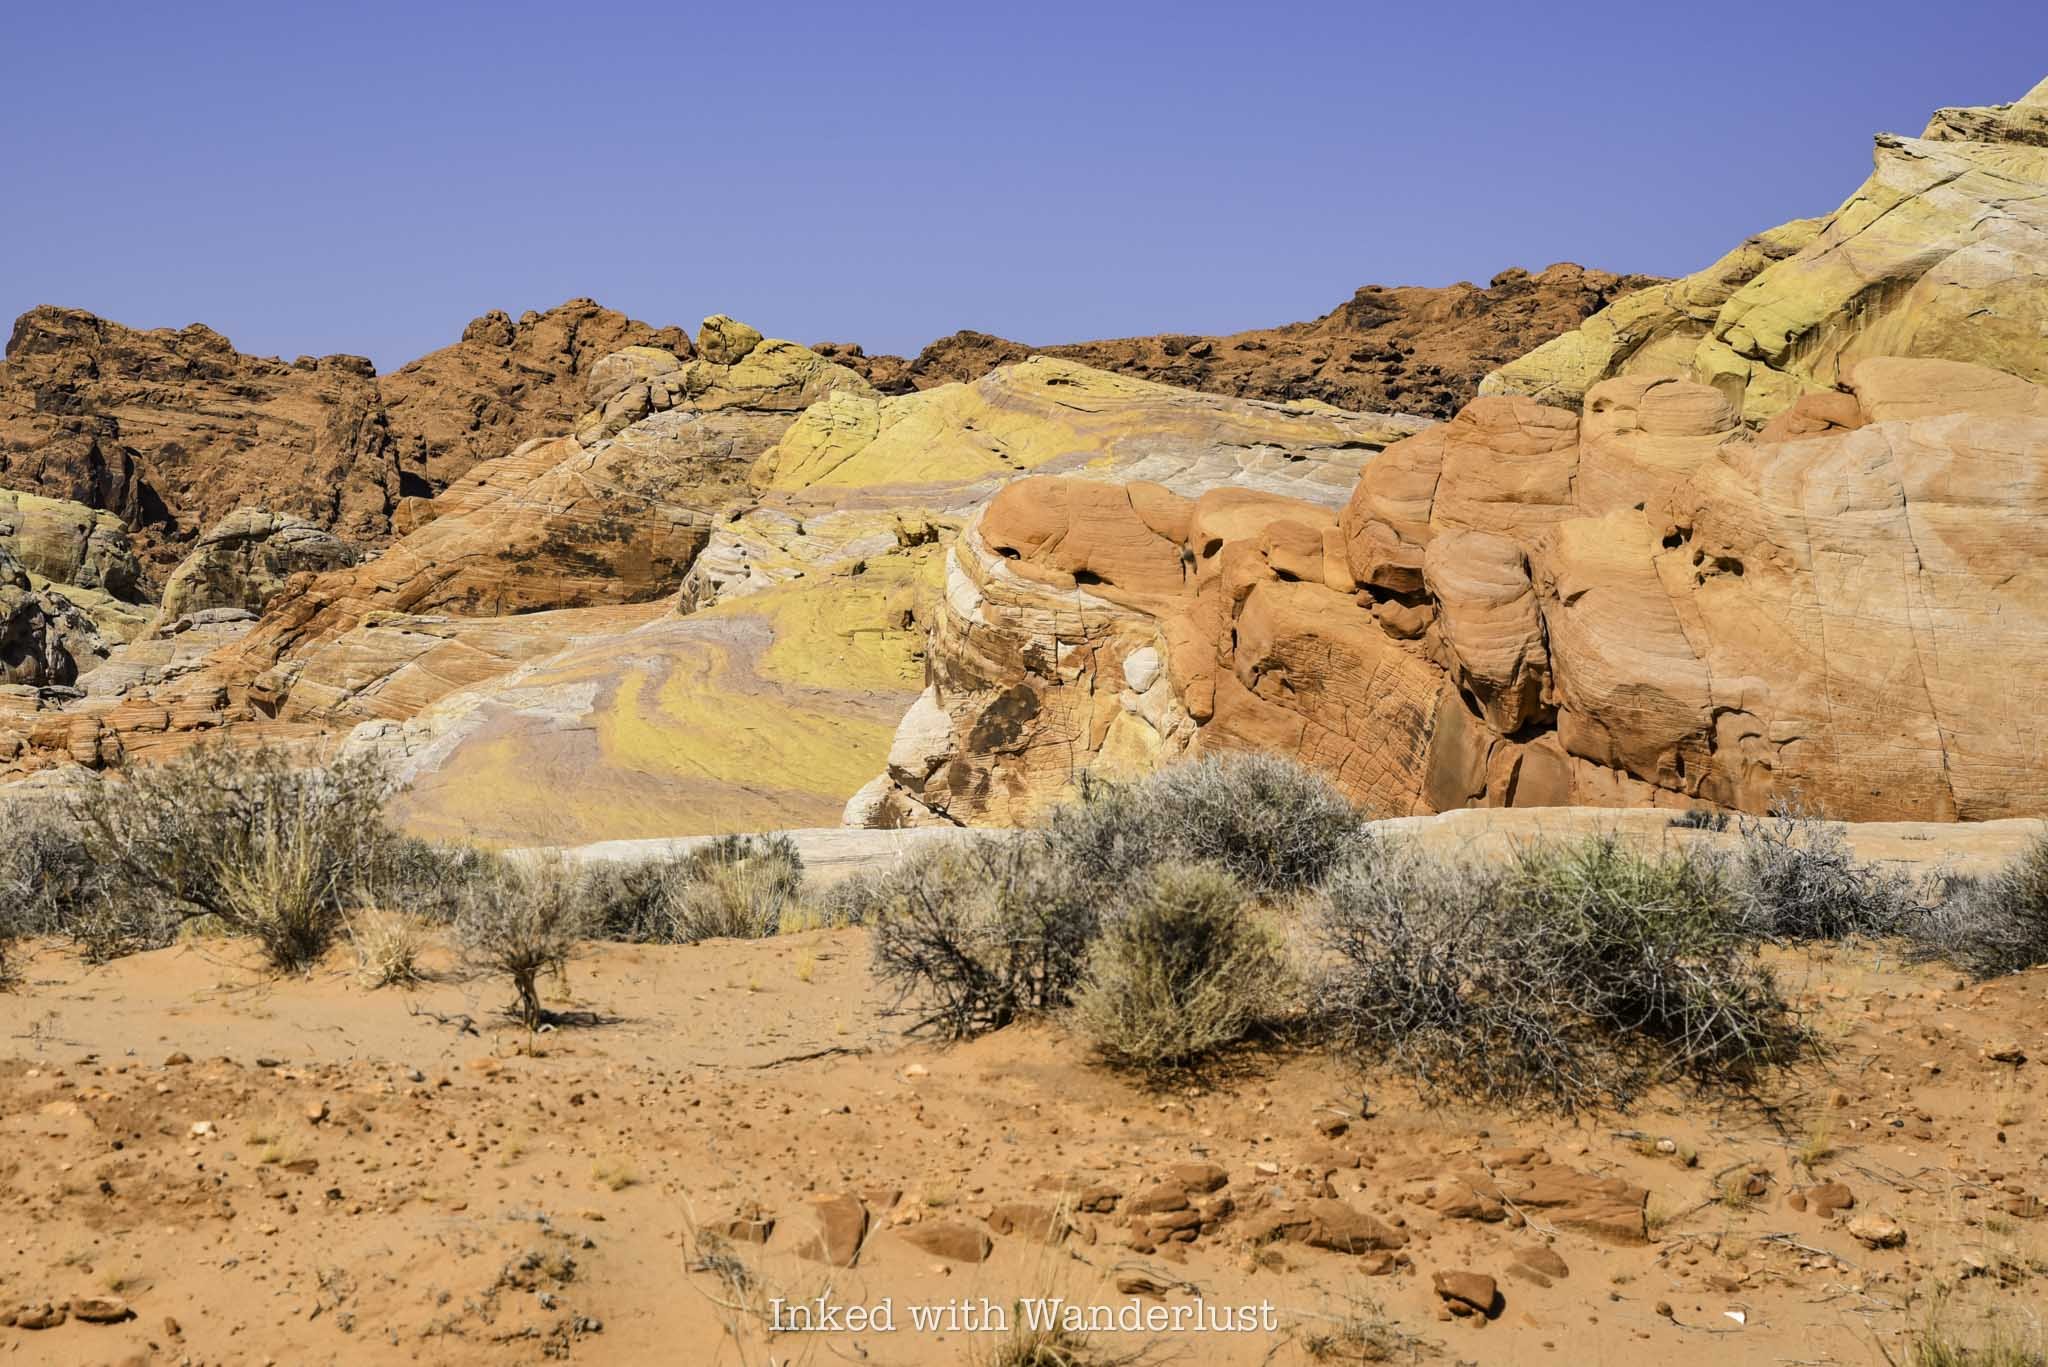
To complete your visit, turn right onto Mouse’s Tank road and drive it for 4.5-miles to its terminus at the White Domes parking lot. The trails in this area of the park are closed in the summer, mind you, but you can still drive the highly scenic road.
From the road, you’ll see teasing glimpses of Pastel Canyon, White Domes and Fire Wave. You cannot park alongside of the road on this stretch, but there are multiple parking lots dotted along the road where you can stop to take pictures.
From here, simply head back towards whichever exit you need to leave from. Remember, this itinerary is assuming you’re driving in through the west. If coming in through the east, simply begin at Elephant Rock and end at The Beehives, before making your way up Mouse’s Tank road.
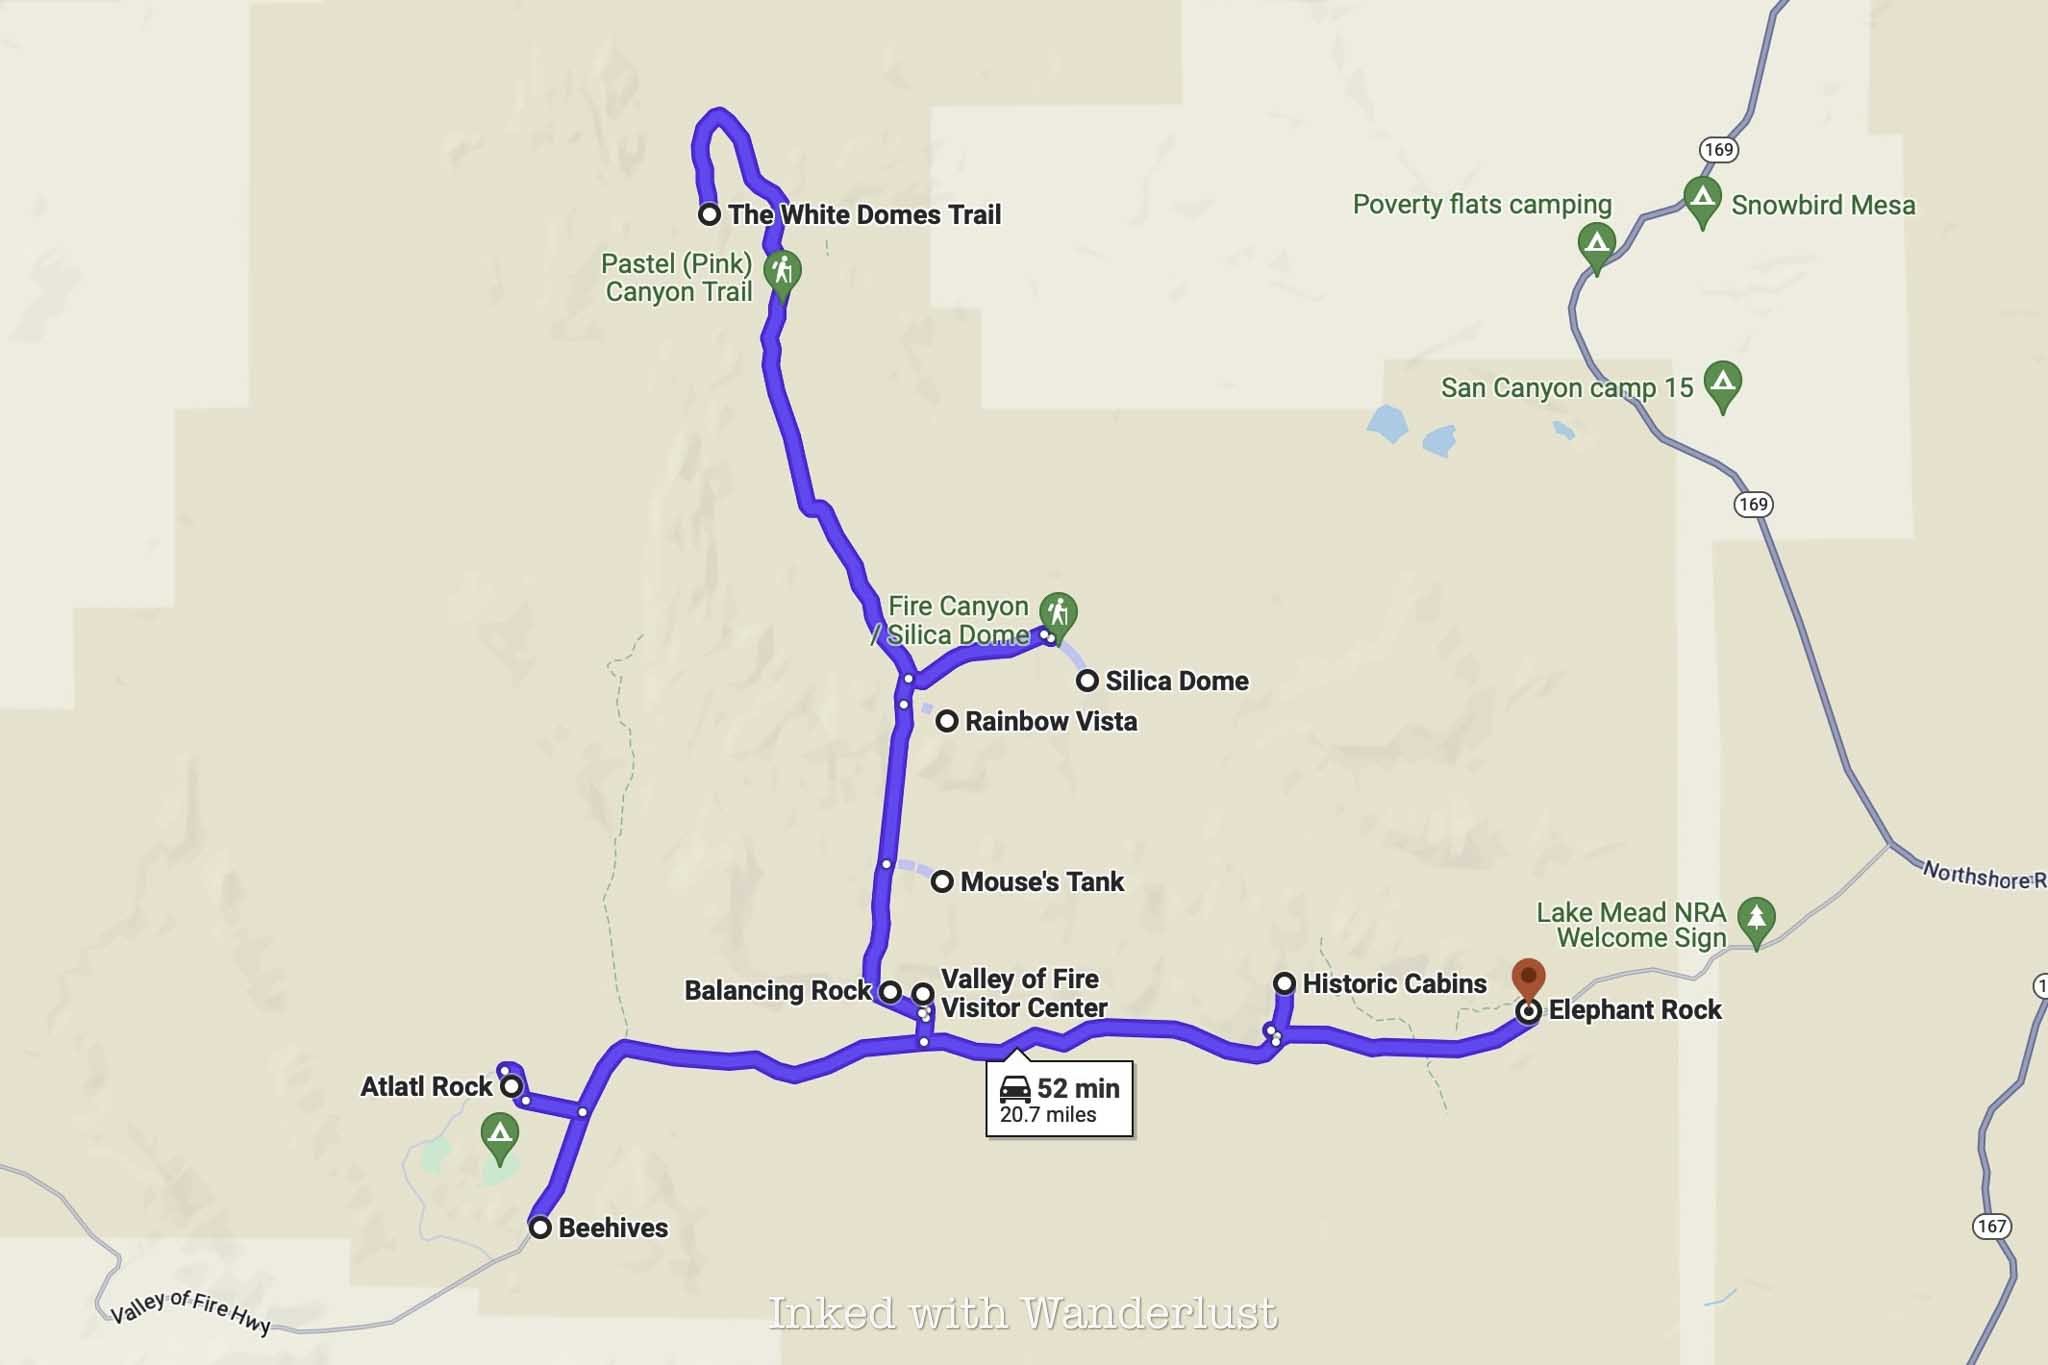
Conversely, if you’re driving in through the west entrance but exiting the east, simply knock out the sights along Mouse’s Tank road after visiting Natural Arch and then work your way east to the cabins and Elephant Rock.
The route above is the one I followed during my first visit. I was able to see and do everything listed above, while being out of the park by noon. Good thing, because it got up to 113 degrees that day (I went in August).
Your milage will vary depending upon how much time you spend at each site. In general, though, you shouldn’t have much of an issue. If you need to shave even more time, I recommend skipping Natural Arch, Balancing Rock and perhaps even the Visitor Center.

How to See Elephant Rock at Valley of Fire
Located on the east side of Valley of Fire State Park, just inside the entrance, sits a sandstone formation so unique…
Disclosure: This post contains affiliate links. If you make a purchase through these links, I may earn a small commission at no additional cost to you. I only recommend products or services that I believe will add value to my readers.
Located on the east side of Valley of Fire State Park, just inside the entrance, sits a sandstone formation so unique that it has become one of the most popular in the park - Elephant Rock.
From nearly any angle, you can make out the shape of the trunk, head and body of an elephant. When using your imagination, you’ll start to notice the outline of legs in the rock. It’ll make you question if you’re actually looking at a formation, or an actual mammoth encased in rock.
Elephant Rock is a must-see when visiting Valley of Fire for the first time. It’s easily accessible and something the whole family can participate in.
So how do you get to Elephant Rock? What is the trail like? What’s the parking situation? I answer all of these questions and more below. Let’s get into it.
Click/tap the ad to see offer details.
Trail Stats
Location: Valley of Fire State Park, Southern Nevada
Fee: $15 per vehicle day use fee ($10 for Nevada plates)
Permit: None
Open: All year
Cell Service: Spotty
Restroom: At the trailhead
Parking: Small, paved lot at the trailhead
EV Stations: None
Difficulty: Easy
Popularity: High
Mileage: 0.3 miles, RT
Time: 30 minutes to 1 hour
Elevation Gain: About 50 feet
Condition: Maintained
Features: Sandstone formation in the shape of an Elephanet
Best Viewed: Early morning for low crowds, late afternoon for best light
Pets: Not allowed
Drones: Not allowed
Hazards: Heat can be extreme and little-to-no shade
Our Visit(s): August 2023
Parking at Elephant Rock & Getting There
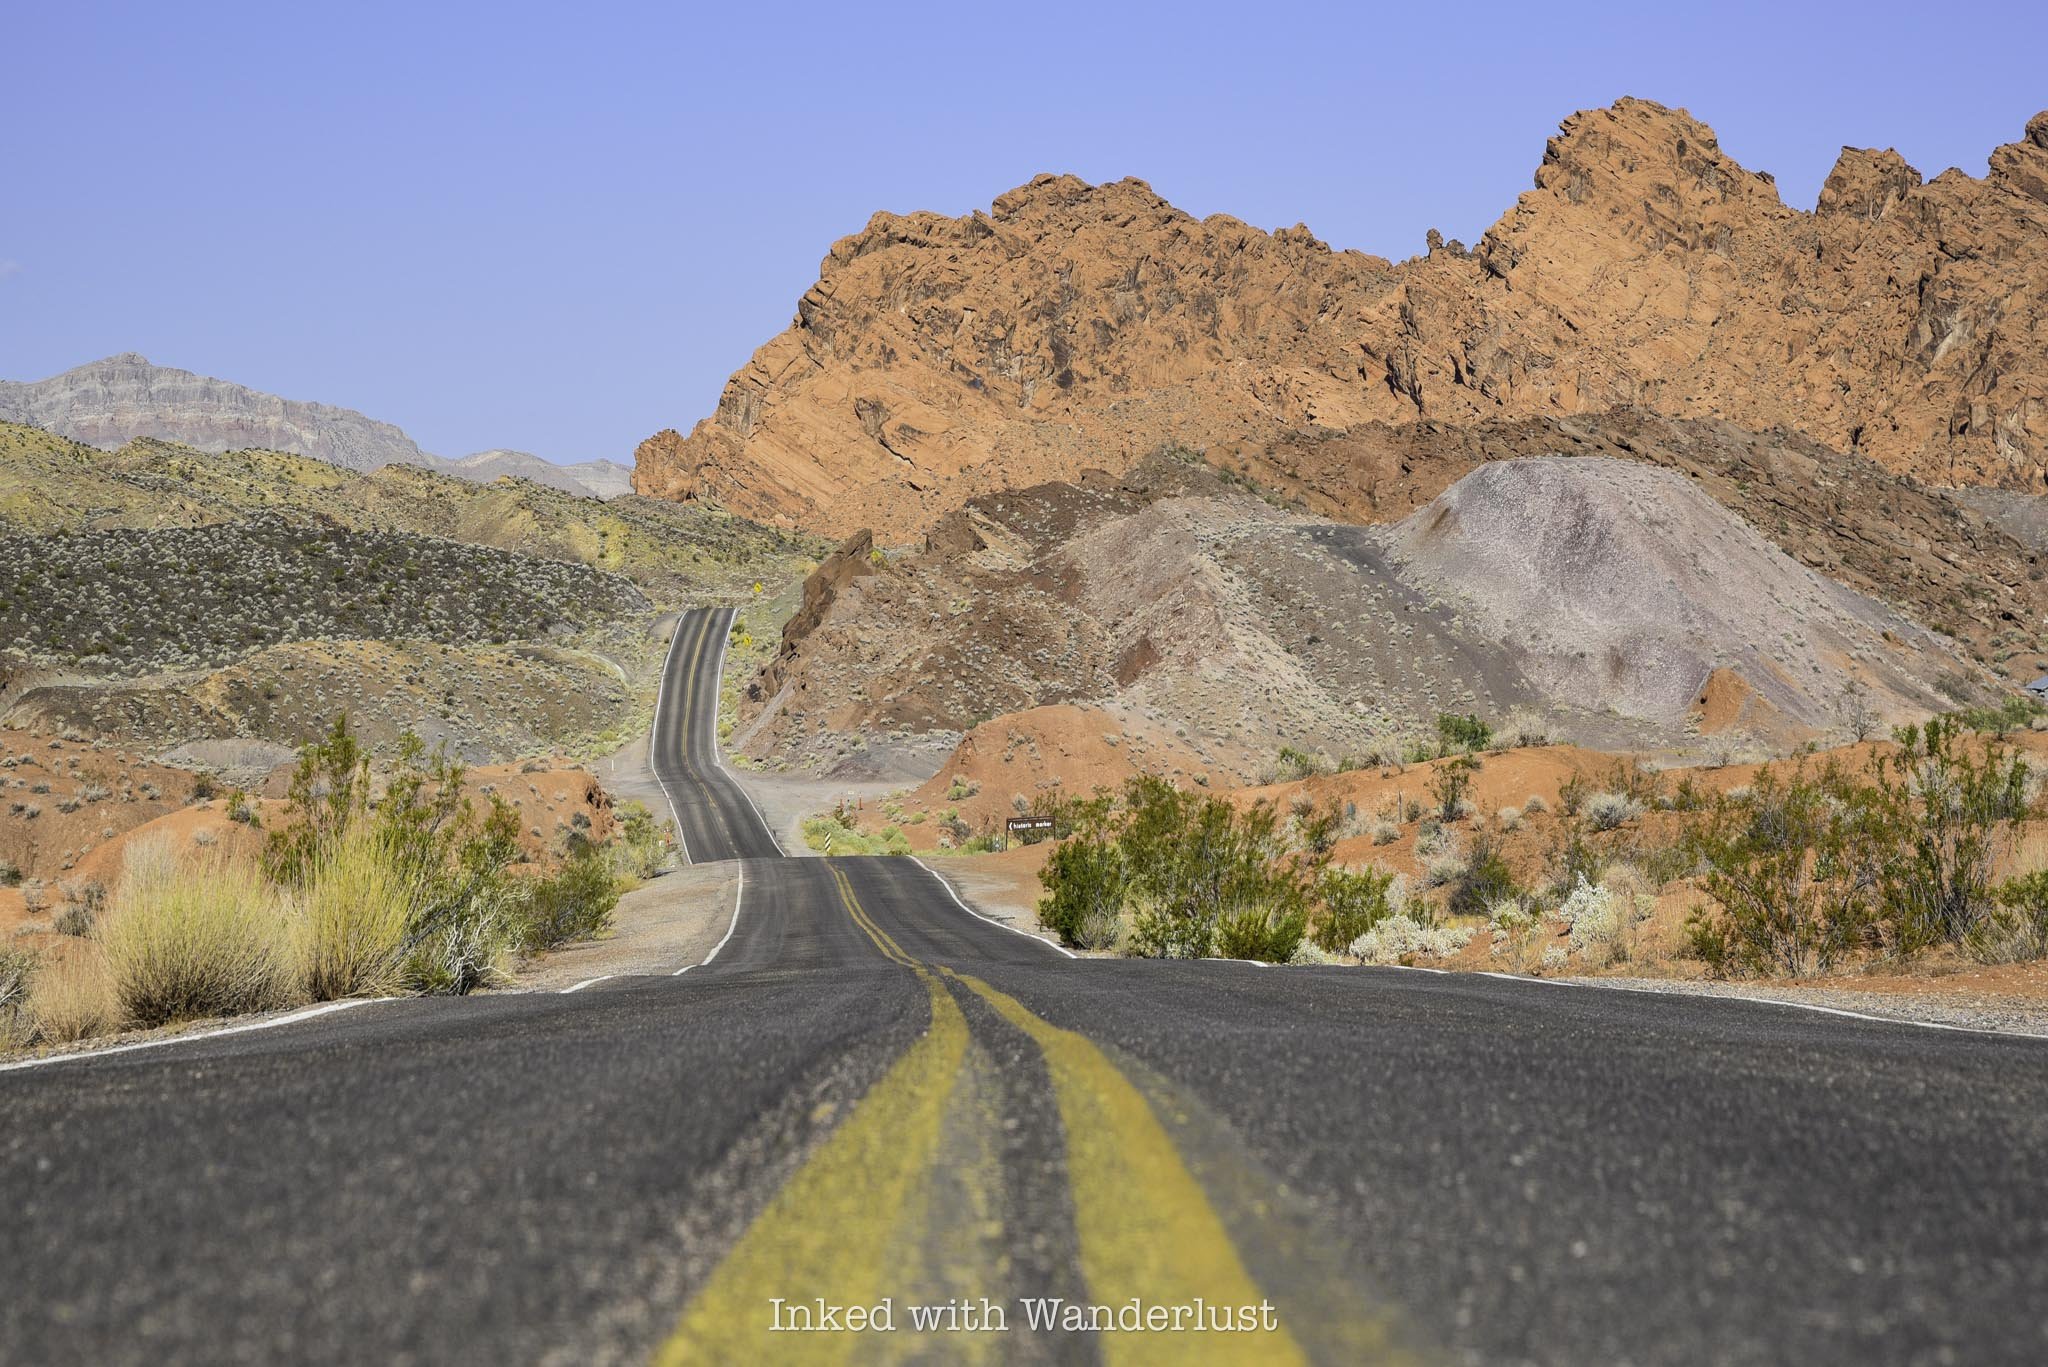
The ease of getting to Elephant Rock highly depends on which entrance you’re entering the park through. Elephant Rock is just past the east gate, on the right. So if you’re driving in on this side, you’re already there.
If you’re entering through the west gate, though, you’ll need to drive for eleven miles on the Valley of Fire Scenic Byway to the east gate, passing other attractions along the way, such as; The Beehives, Atlatl Rock and Mouse’s Tank Road.
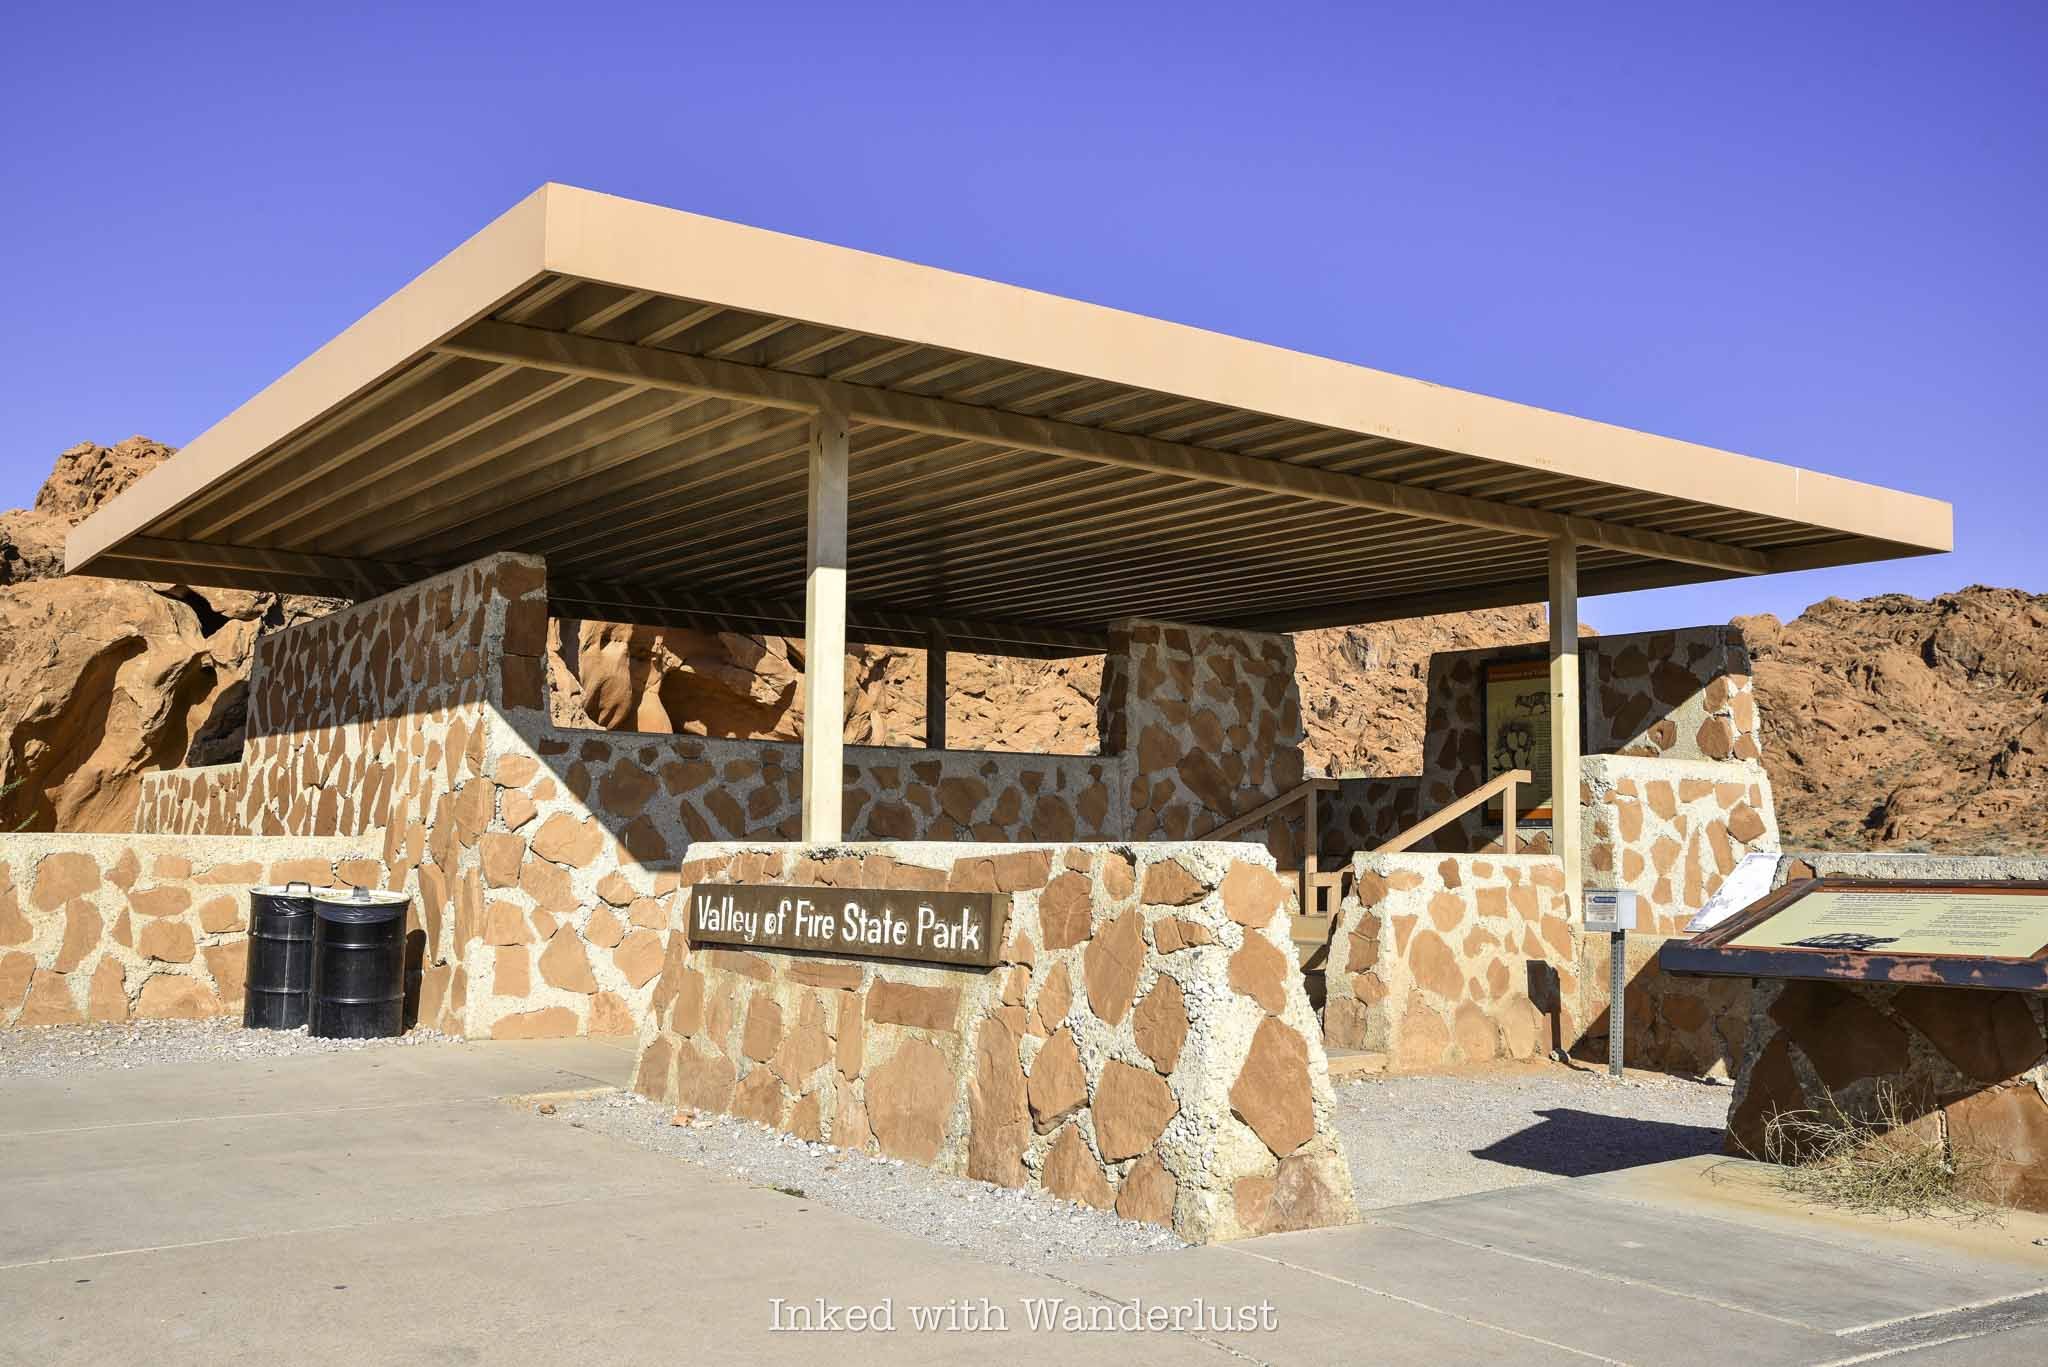
The parking lot for Elephant Rock is fairly small and paved, capable of holding a fair amount of vehicles. When the gate is unstaffed, this lot doubles as a place to park for visitors to pay their entry fees.
When I was here in August, my vehicle was the one of only two in the lot. Due to extreme heat, summer isn’t an ideal time to visit Valley of Fire, so visitation was low on this day.
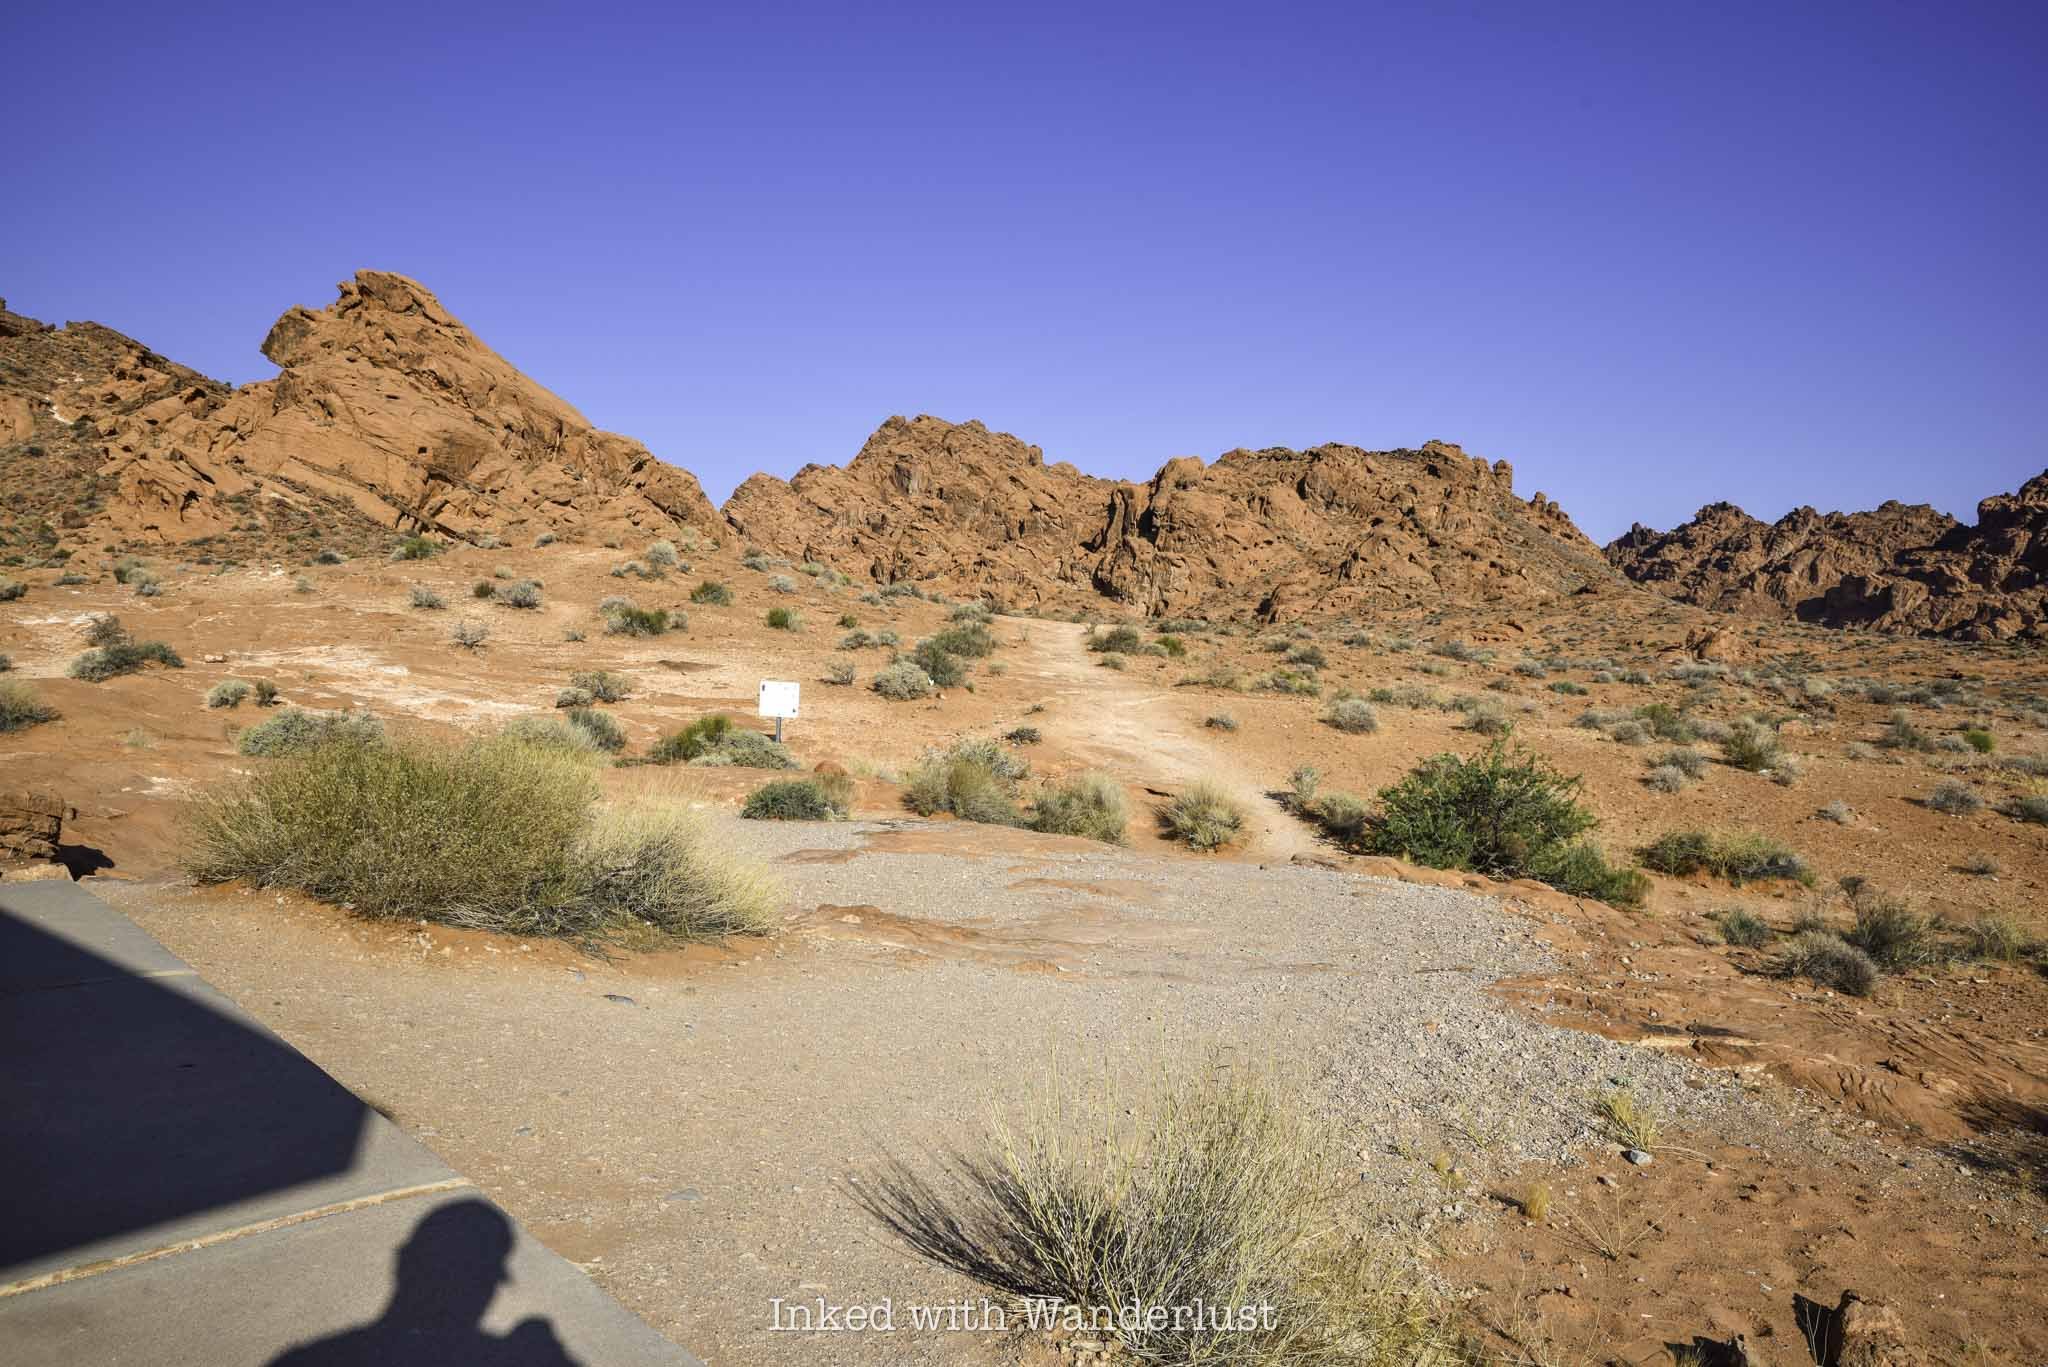
If you come during the peak season, which is October through April, that’ll likely be different. On a particularly busy day, I can see this lot filling up early and quickly. So arrive as early as possible.
To find the trailhead, simply walk between the brick structure and the Valley of Fire photo opp sign on the right. You’ll find the trail behind the structure leading towards the sandstone ridge in the distance.
The Trail to Elephant Rock
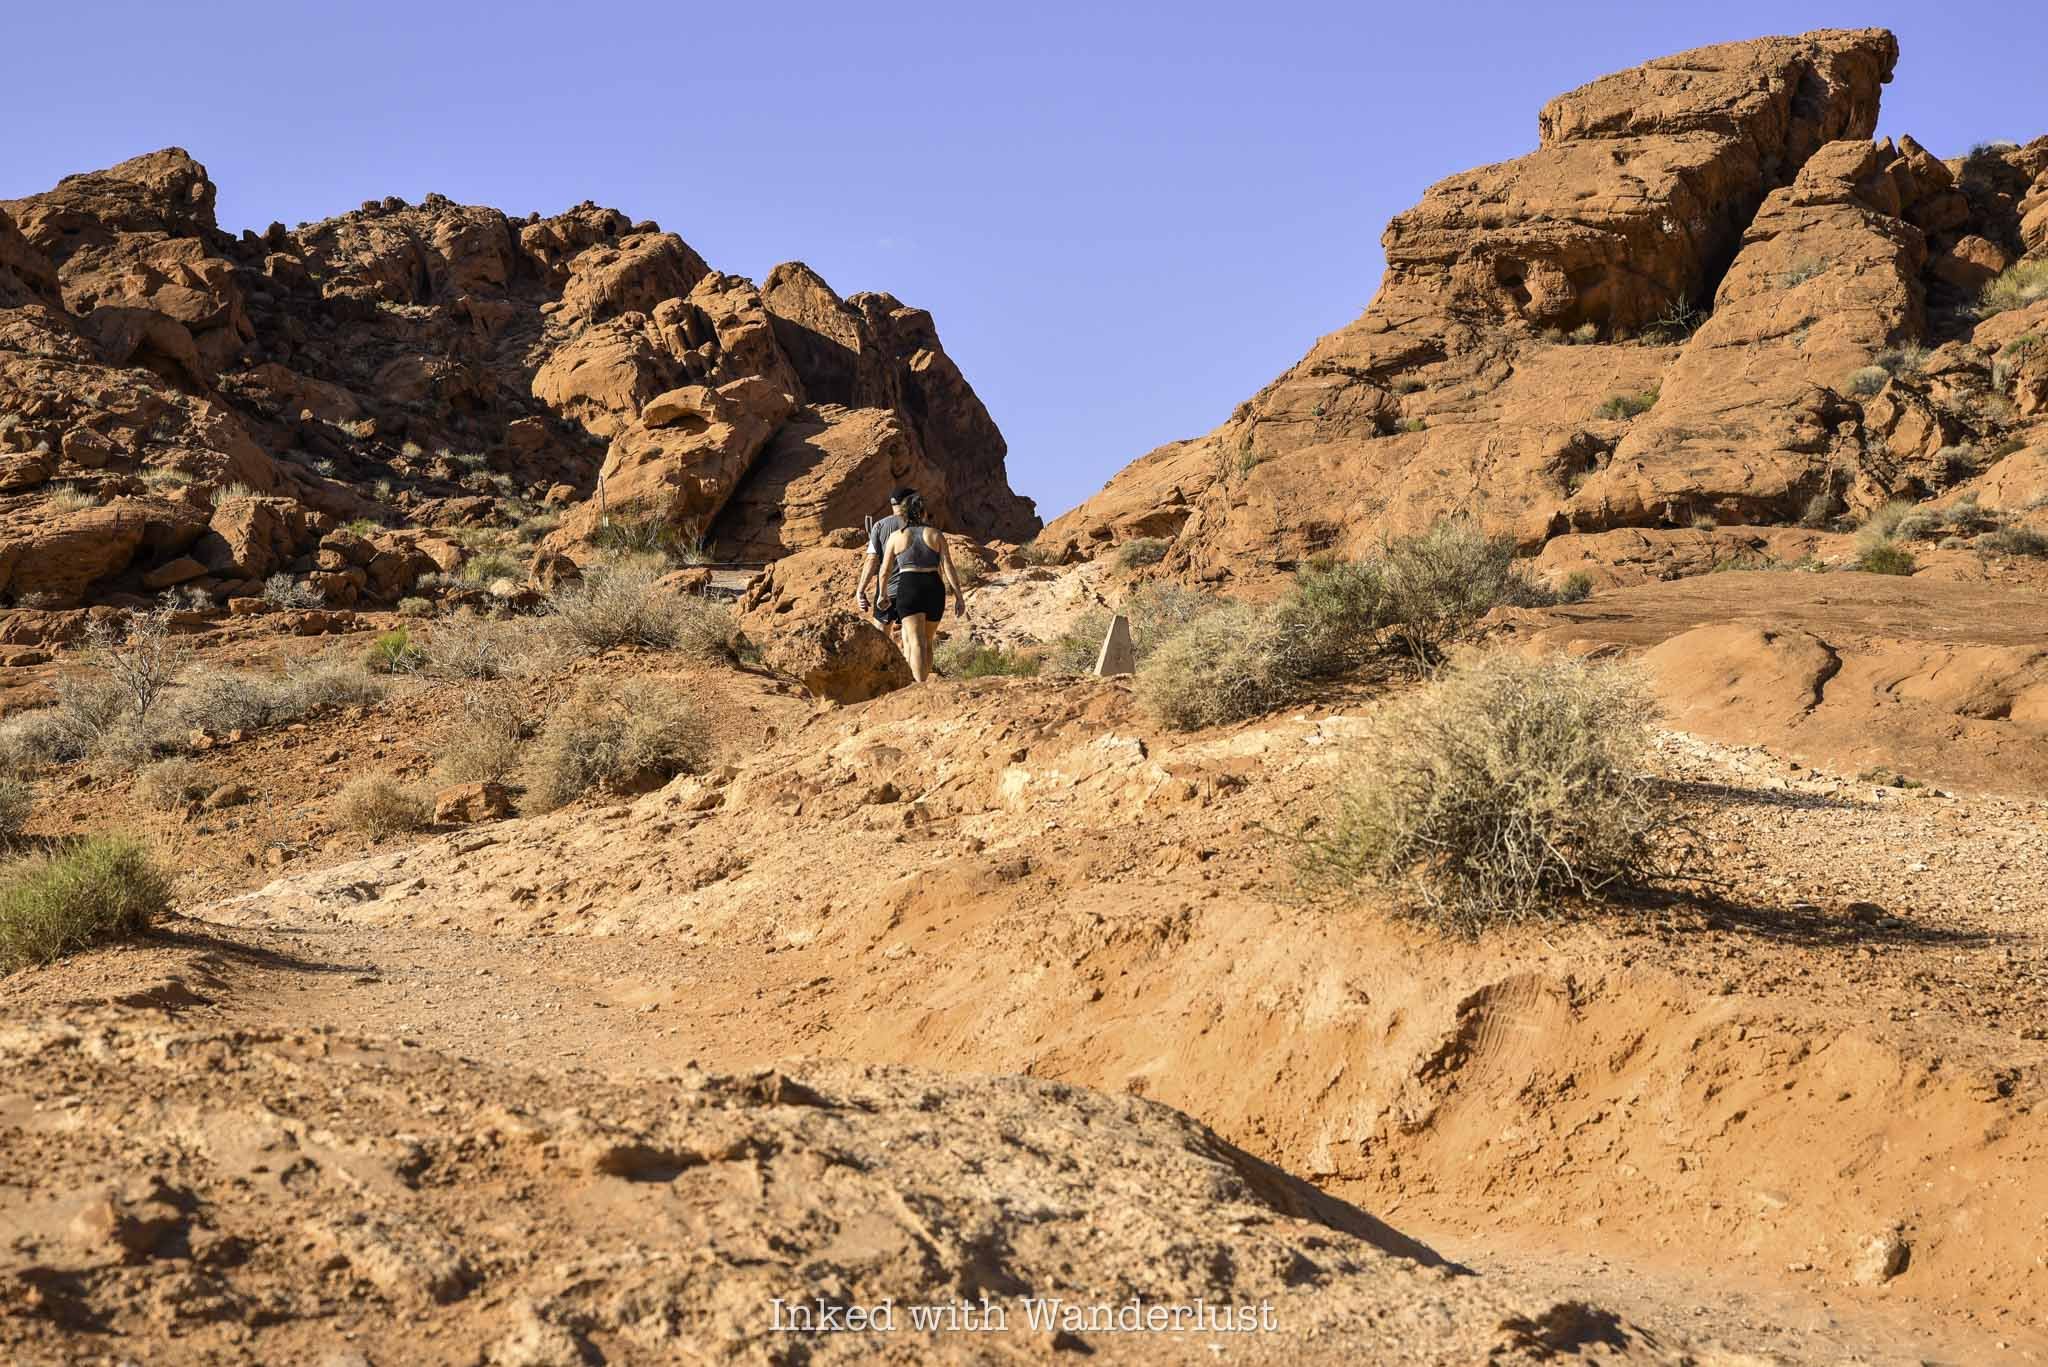
The trail is short and sweet with very little elevation gain. You’ll be walking uphill nearly the entire way but it’s nothing difficult. In fact, until you get close to Elephant Rock, it’s barely noticeable.
There’s only one trail junction. You will find it at around the halfway mark. Going right will place you on the 1.2-mile Arrowhead Trail. To keep to Elephant Rock, continue left.
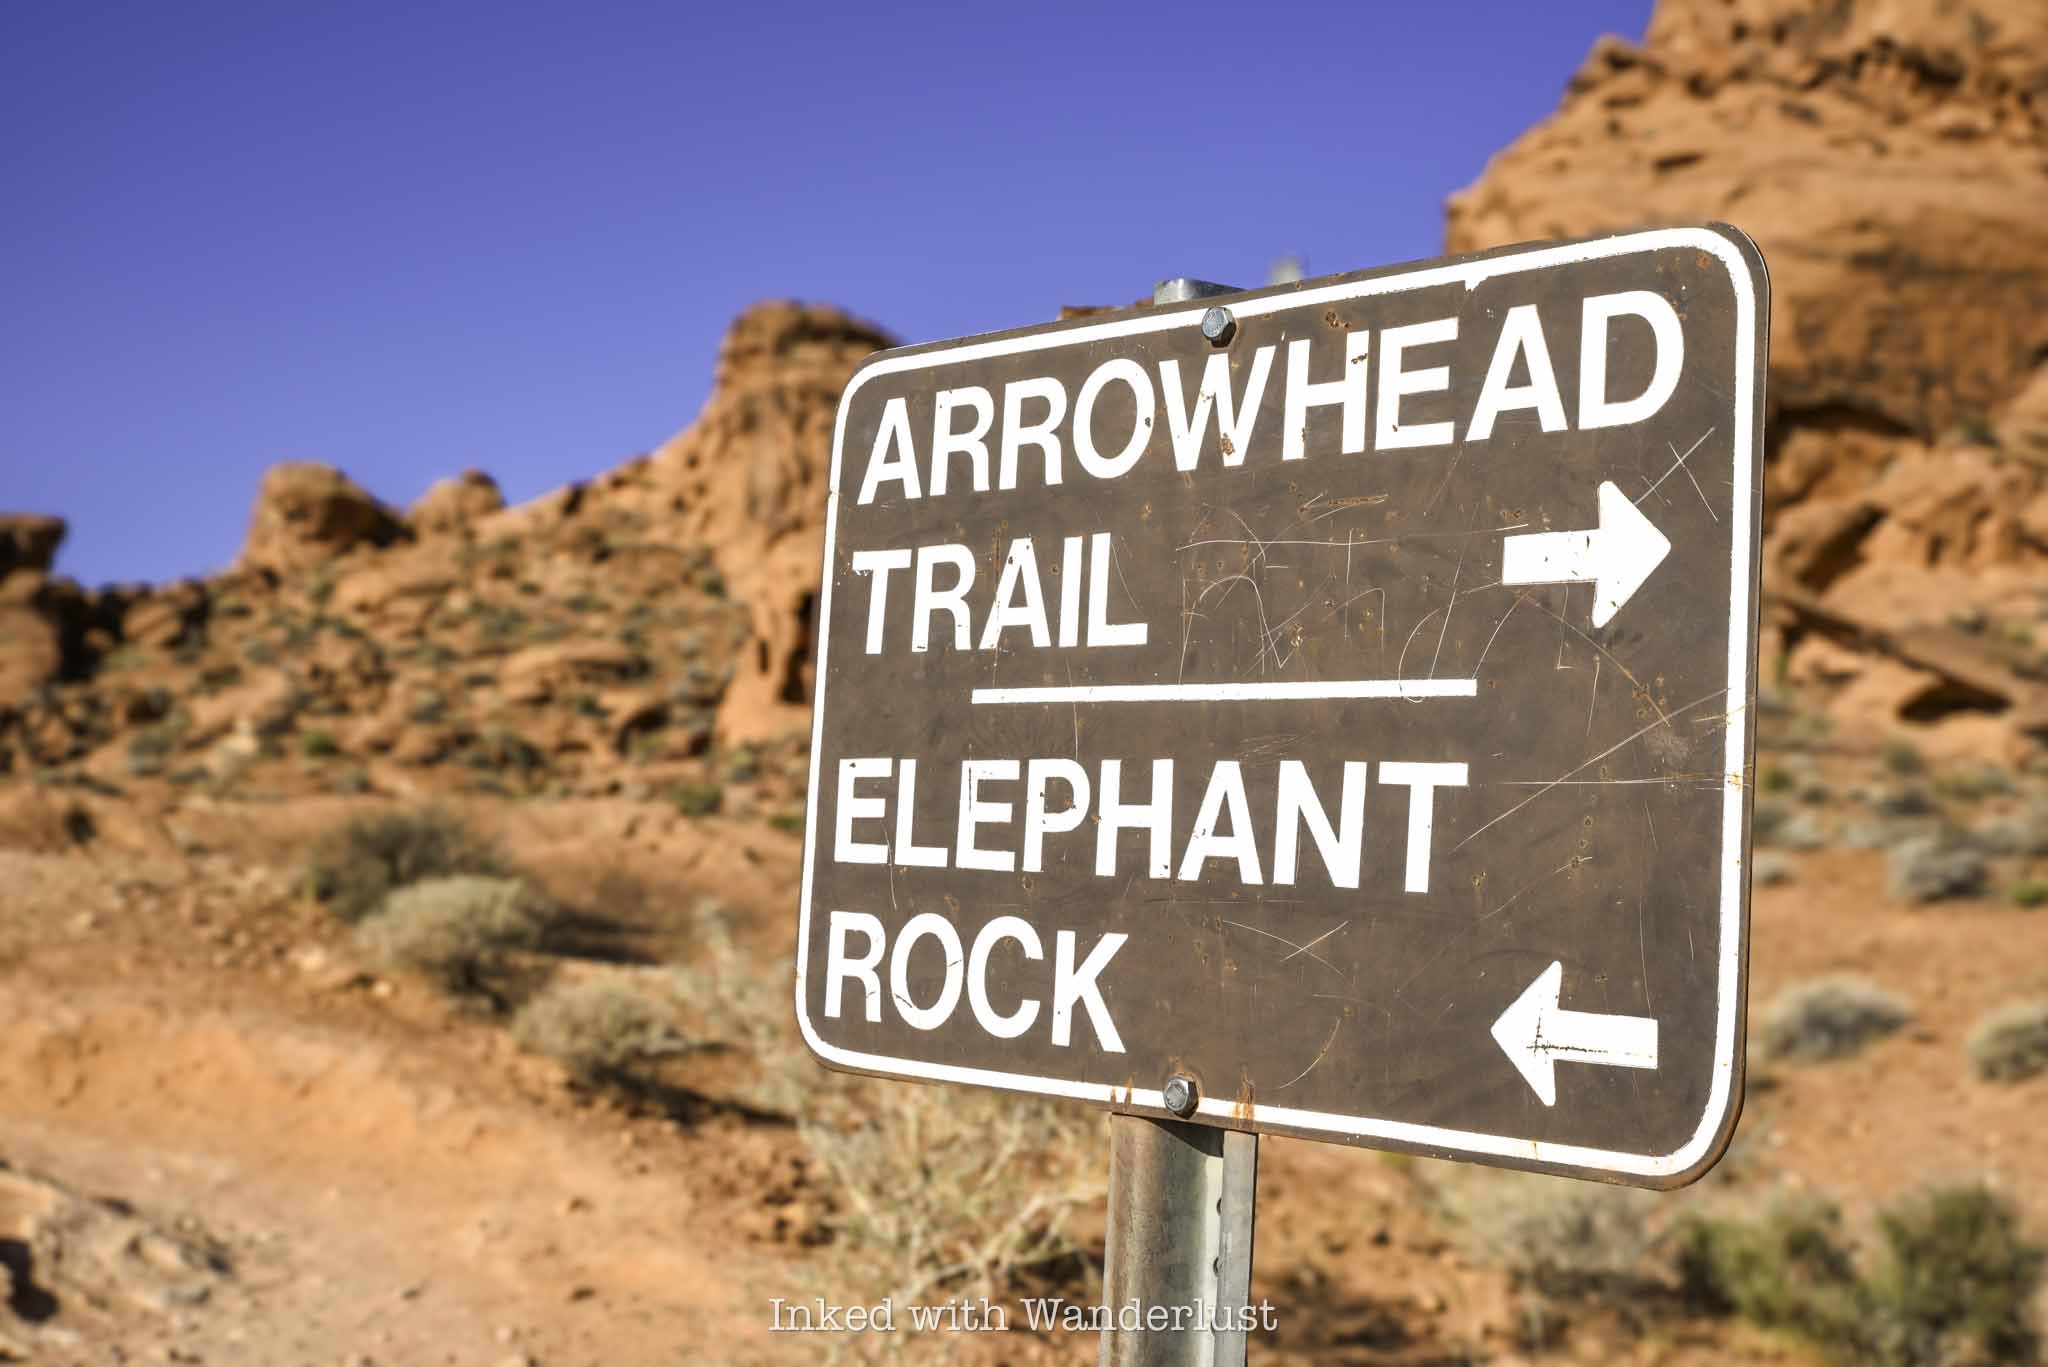
Shortly after the trail junction, you’ll notice the trail is leading you back towards the road. Once you are aligned with the road, you’ve reached the end of the trail. Elephant Rock will be to the right of the road, looking up.
Do keep in mind to stay off the road. Visibility of this area from the vehicle perspective isn’t very good, as they’ll be coming up a hill towards you.
Elephant Rock

Elephant Rock is easily viewed from below, with no real reason to force yourself to climb up to it. There are a number of paths leading the way if you choose to do so, though.
There is a sign stating there’s no climbing allowed. I asked a park ranger for clarification and she advised that it is ok to go up to Elephant Rock, but NOT to actually climb on it, as it could cause irreversible damage.
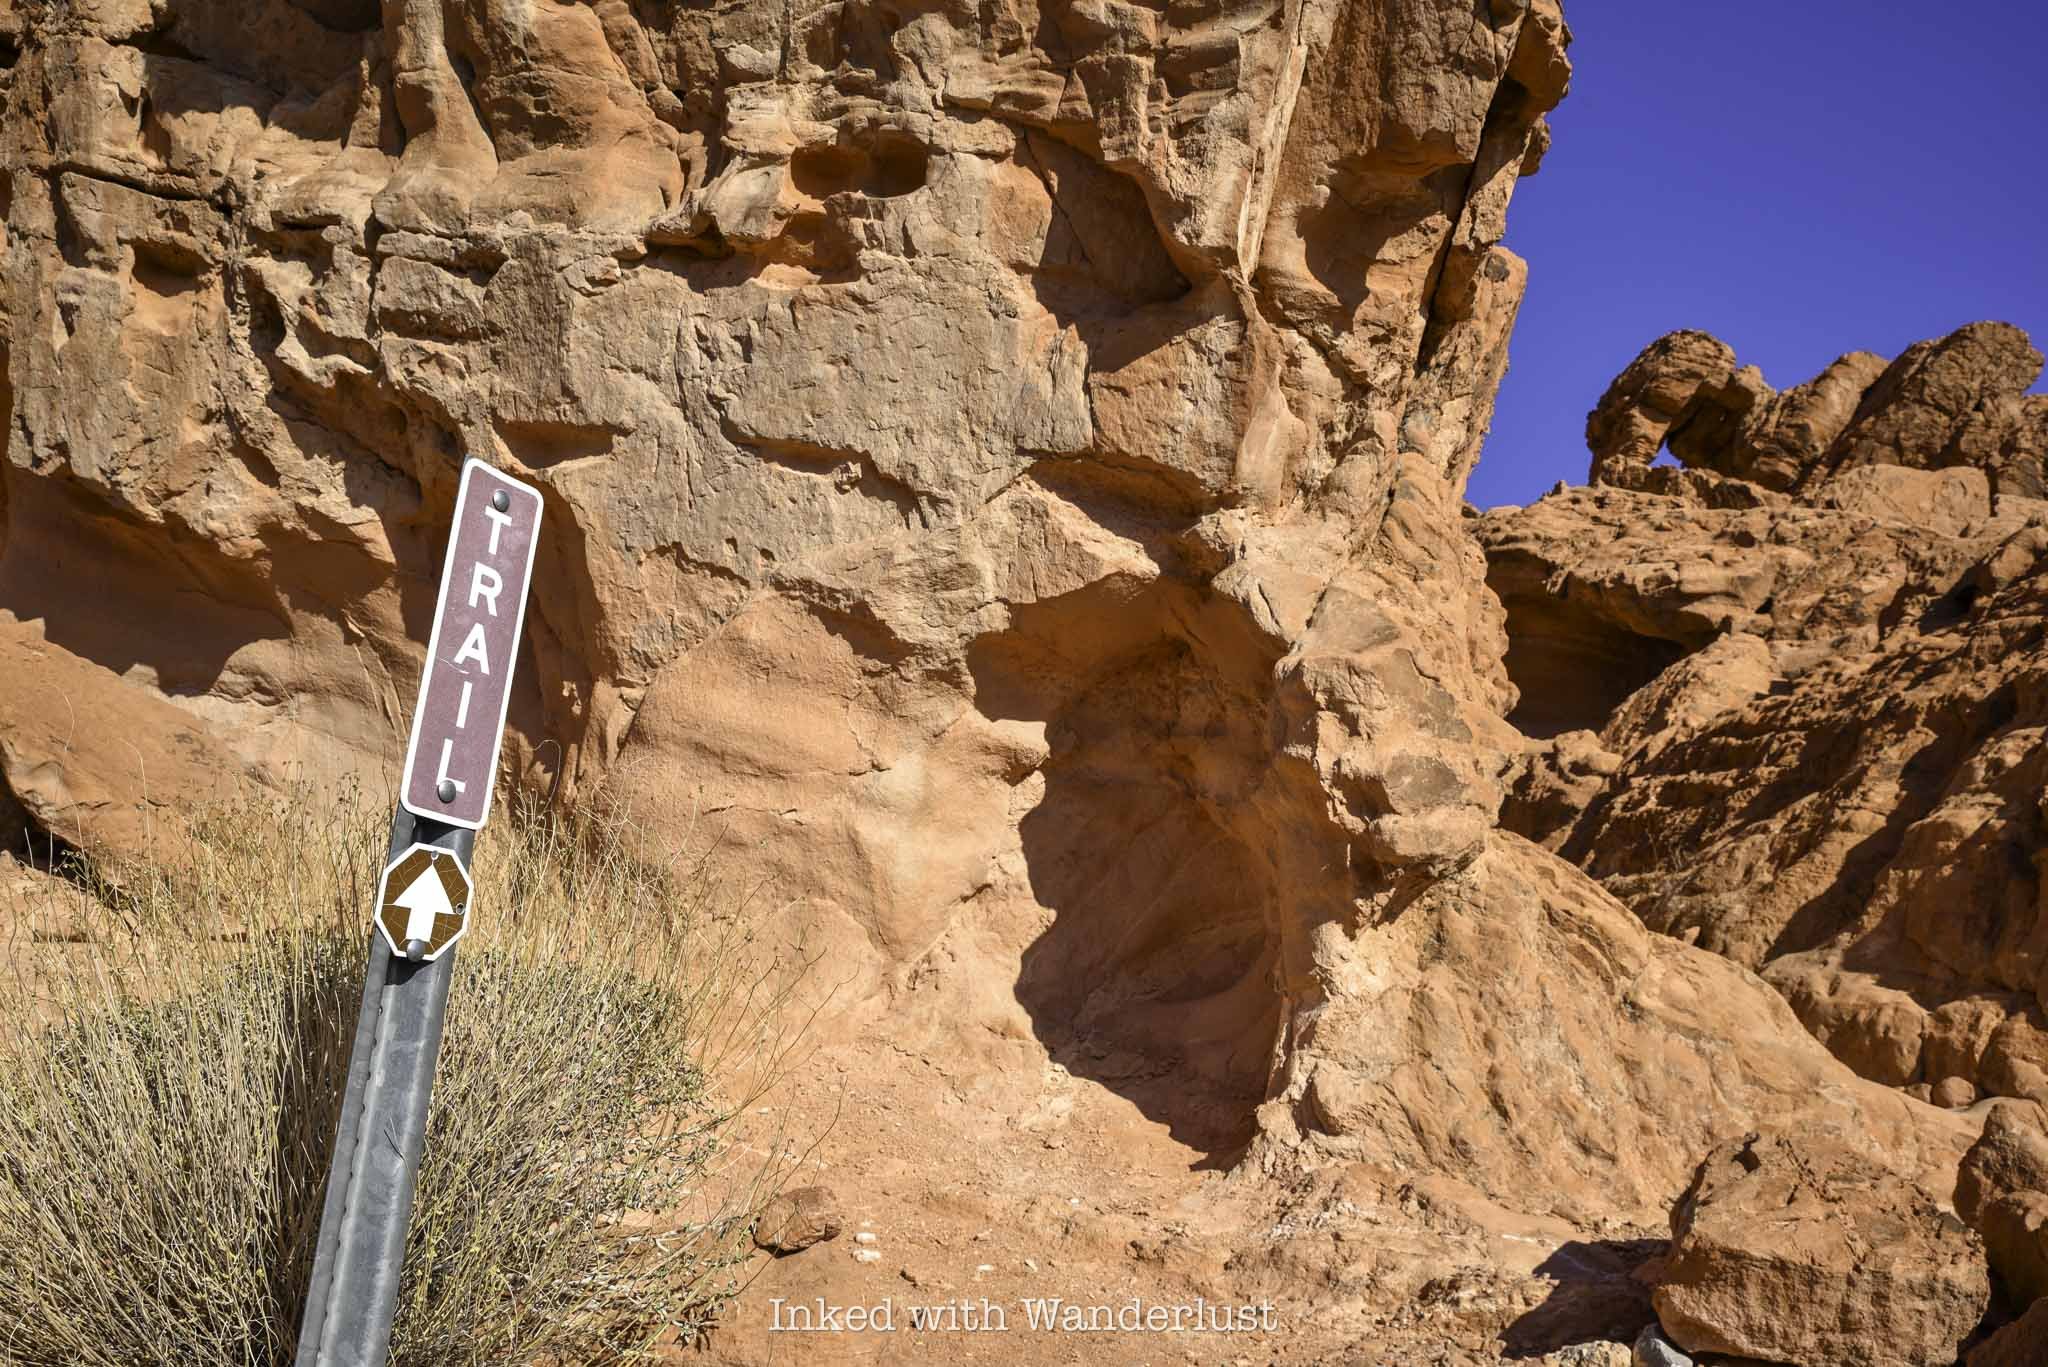
As stated above, there are several paths leading towards the formation, but the one I took (and appeared to be the easiest) was the one located just to the right of the sign pictured above.
It’s a quick jaunt to the top of Elephant Rock. Once you’re up there, you will have views of the mountains and valley in the distance.

Seeing Elephant Rock from this angle made the “Elephant” formation appear more clearly to me. So if you’re having a difficult time picturing it from below, try it from up here.
When you’re done, simply head back the same way you came in on the trail. Please do not walk along the road as park rangers will cite you if you’re caught.
From here, I recommend making your way to one of the most historic locations in the park, Atlatl Rock. You can read my post about it here.

How To See Atlatl Rock in Valley of Fire
Valley of Fire is one of the most popular parks in the entire Nevada state park system, and for good reason. This beautiful…
2 minute read | may contain affiliate links
Valley of Fire is one of the most popular parks in the Nevada state park system, and for good reason. This beautiful park is littered with fire-red sandstone rocks that, with the help of erosion, have formed mind-boggling shapes and formations.
There are many attractions within Valley of Fire, but the one that stands out from the pack due to its historical value is Atlatl Rock. It’s one of the first things you’ll see if you’re driving in from the west entrance and is easily seen from the main road.
Aside from its unique formation, the big draw to Atlatl Rock are the petroglyphs located on the smooth rock face at the top of the stairwell and others scattered around the base of the rock. These petroglyphs are believed to over 4,000 years old!
So how do you get to Atlatl Rock? What’s the parking situation like? Are there any fees involved? I cover all of this and more below.
Trail Stats
Location: Valley of Fire State Park in Southern Nevada
Fee: $15 per vehicle ($10 for Nevada residents). This is to enter Valley of Fire
Permit: None
Open: All year
For: Anyone
Cell Service: Spotty
Restroom: In the parking lot
Parking: Medium sized paved lot
EV Stations: None
Difficulty: Easy
Popularity: High
Mileage: Walk-up
Time: At least 30 minutes
Condition: Well maintained and easy to follow
Features: Petroglyphs and unique rock formations
Best Viewed: In the morning (less crowded)
Pets: Not allowed
Drones: Prohibited
Hazards: No shade on the stairwell or platform.
Our Visit(s): August 2023
What is an Atlatl?
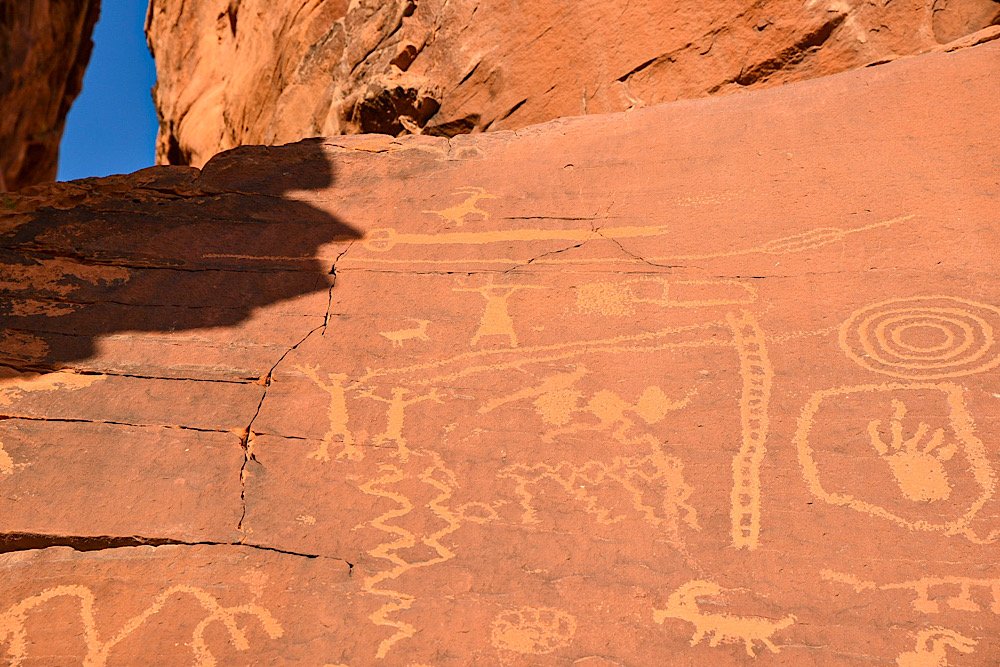
An atlatl, the namesake of this location, was an tool used by ancient tribes as a throwing stick or dart thrower. It allowed the user to employ more force to their spears or darts.
An atlatl was usually made of wood, about two feet long and had a handhold on one end with a hook on the other. A slot cut into the tail end of the dart was set against the nook enabling the dart to lie along the atlatl so that both could be grasped midway.
There was no signage explaining why this rock was named after this ancient tool, but one reason could be that there are multiple petroglyph illustrations of the tool on the rock.
Getting There & Parking
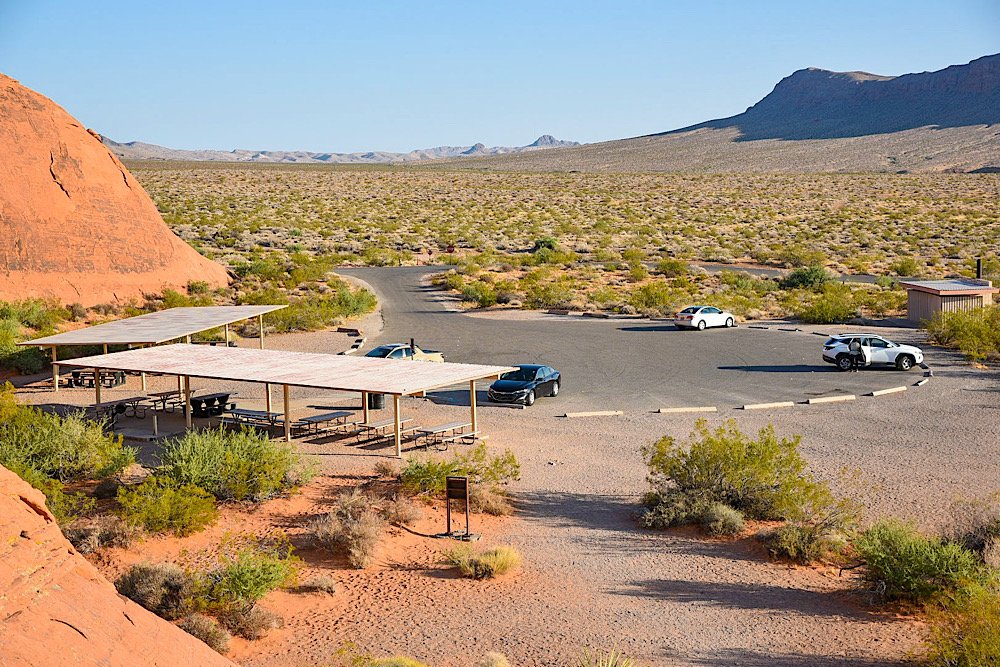
Getting to Atlatl Rock is easy, as it’s located just off the main road in the park. It’s closest to the west entrance of the park, but getting there from the east entrance is just as easy.
From the west entrance, drive for about 4 miles before turning left onto Campground road. You’ll keep straight for about a half mile before turning left into the parking lot. The directions are virtually the same coming from the east entrance. Though you’ll drive a few more miles.
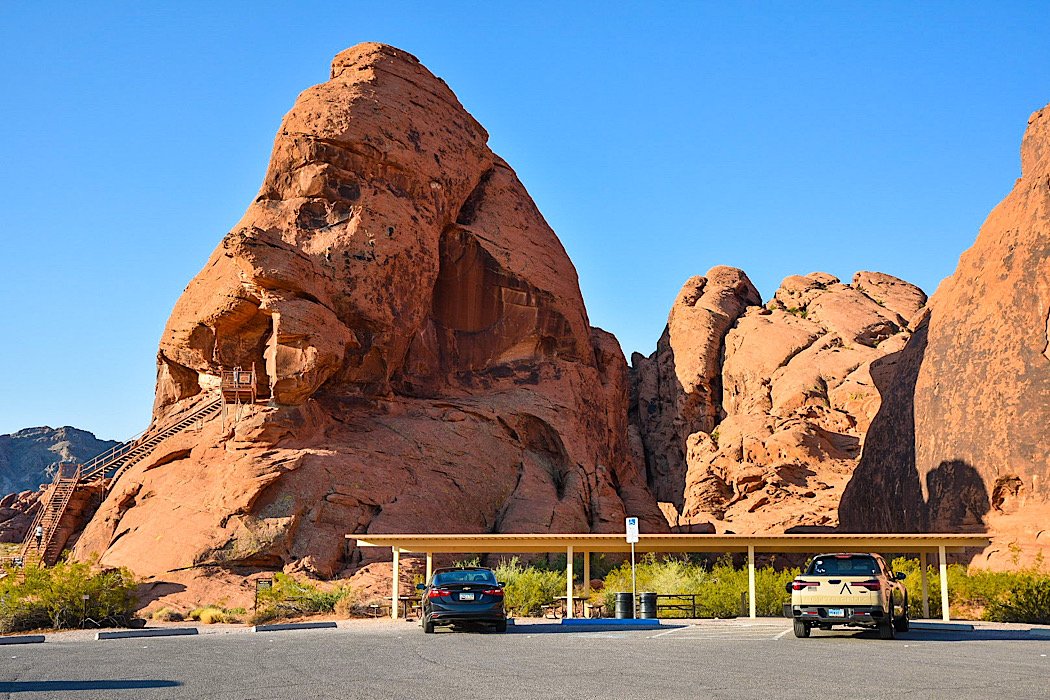
The parking lot is decently sized, but it will fill quickly as the day progresses. Your best bet is to arrive early in the morning. I was here about an hour after sunset and there were just a few others at the rock.
There are covered picnic tables near Atlatl Rock you can use, as well as a restroom at the far end of the lot. From what I could see, there was only one spot designated for disabled parking.
Atlatl Rock Petroglyphs
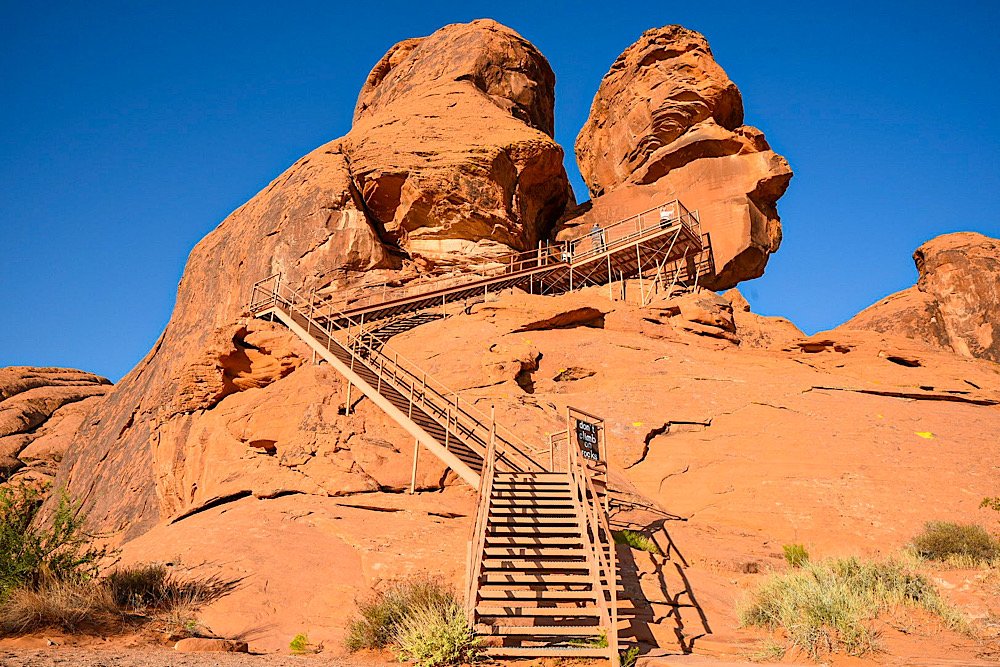
To reach the main petroglyphs on the smooth rock face at the top, you’ll need to go up the stairwell. There are three sets of stairs, totaling about 100 steps or so.
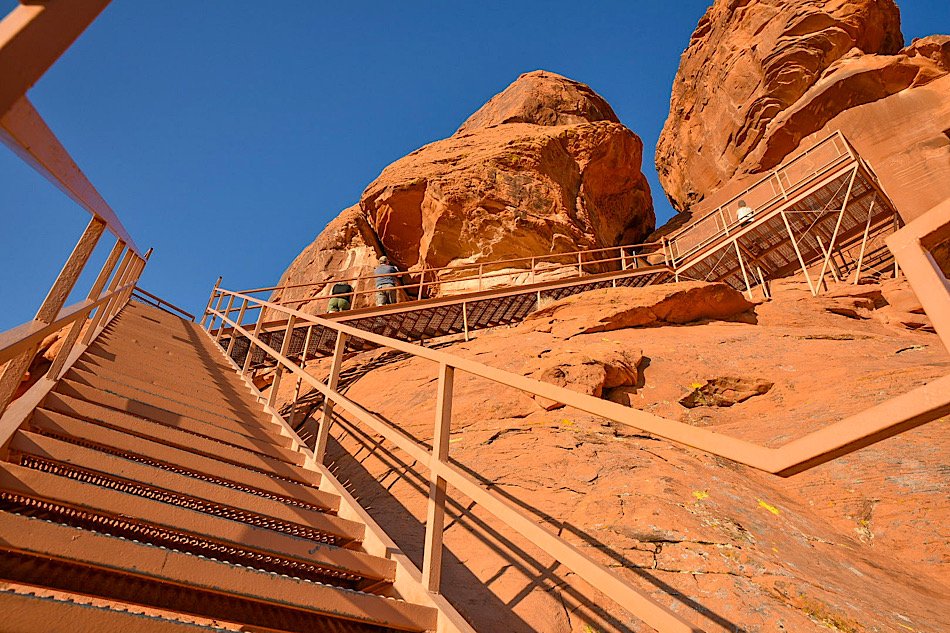
The downfall to being here early in the morning is you’ll be hit by the sun full-blast as it’s rising. There’s no real cover from the sun on the stairwell or on the viewing platform up top.
The upside is as the sun hits the rock, you get the full color show those fire-red sandstone rocks put on. It’s an amazing sight to behold.
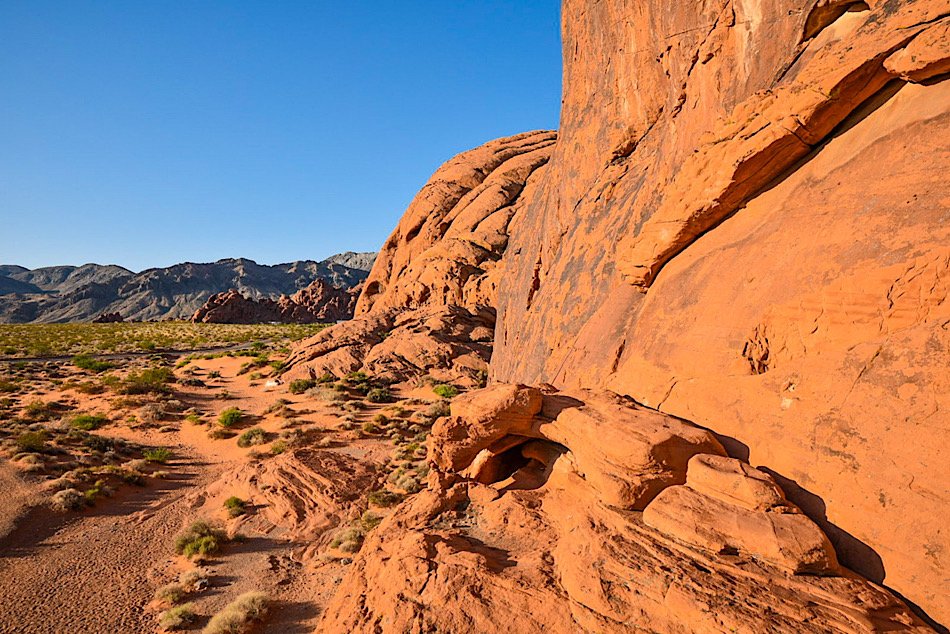
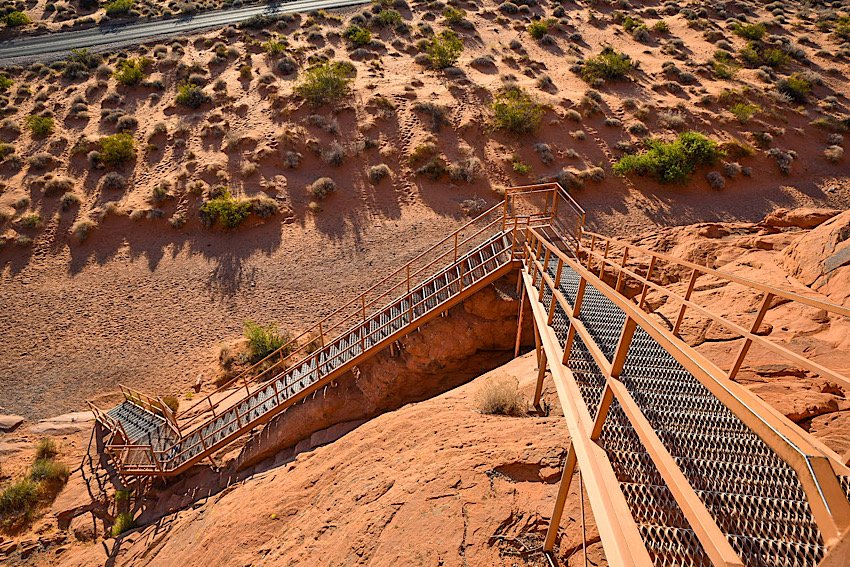
Before long, the petroglyphs come into view. From what I could see, the smooth rock face is the only location (at the top) where petroglyphs can be found.
Just above the smooth rock face on the bottom side of a rocky lip are dinosaur tracks. Unfortunately, the close up shot I got of them was lost, but you can see them in the photo below from further out.


As stated in the beginning of this post, these petroglyphs are over 4,000 years old. As such, there’s no way for us to know exactly what the ancient tribes were trying to convey, but you can see a mixture of illustrations of presumed animals, possible portraits of tribal members and other symbols.
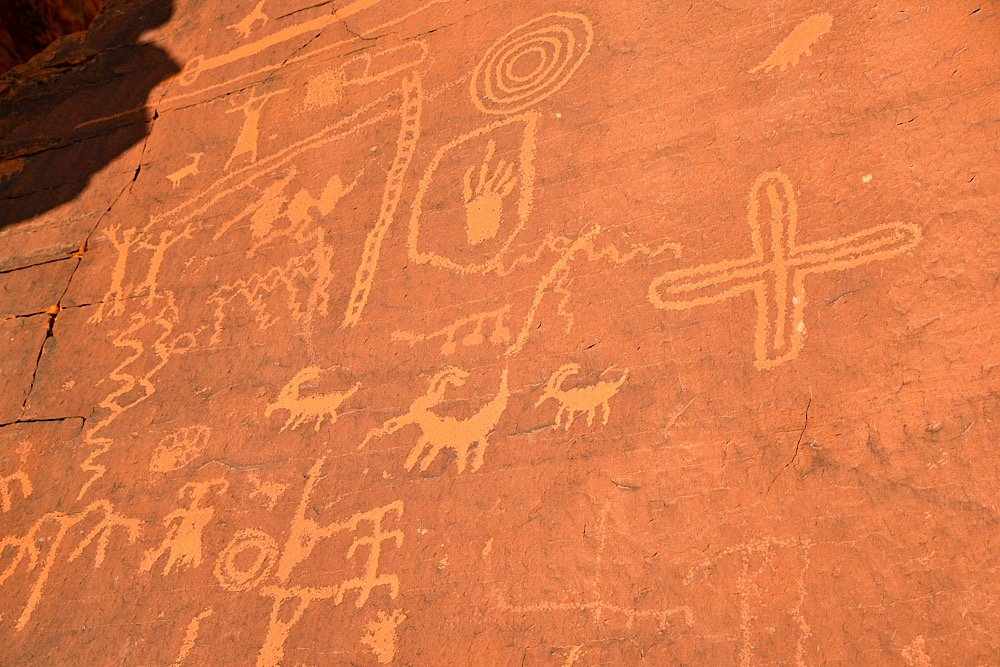
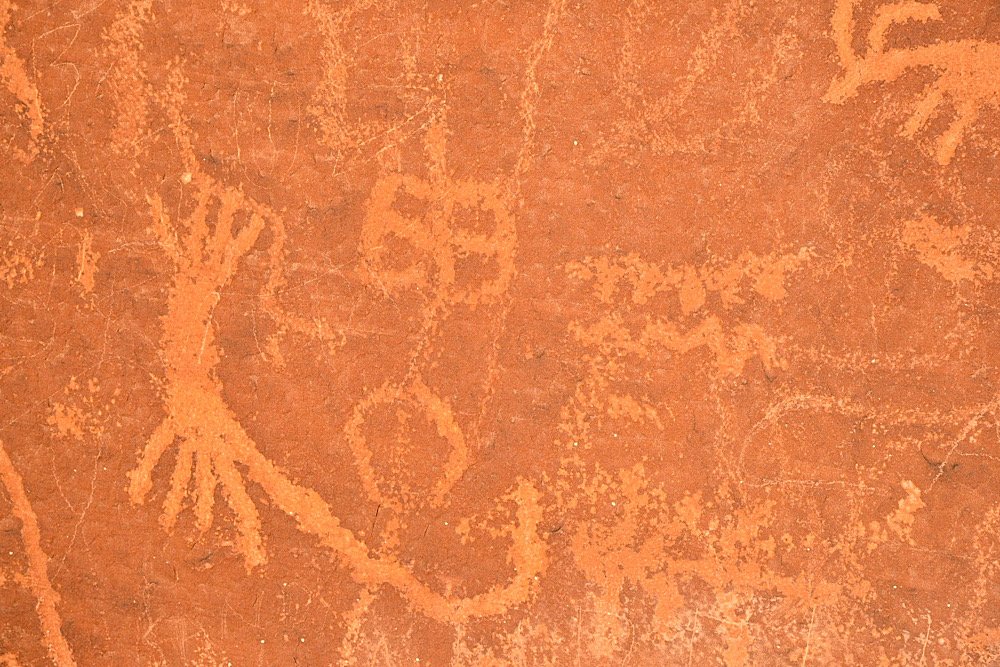
I stood and stared at these petroglyphs for a while, trying to come up with possible meanings or subjects behind them. There was one that looked like a goat. The squiggly lines, to me, indicate flowing water and another appeared to be the sun.
There was another near the top of the rock face that looked like a tribal member, possibly a warrior, holding what looks like an atlatl or some kind of weapon above their head in celebration.

Before leaving, be sure to explore the base of the rock to see more petroglyphs. Most people just go up the stairwell, come back down and leave. Don’t be one of those.
While it’s definitely one of the touristy areas of the park, these’s so much history on display in this single location that it would be a crime to skip it. Be sure to put Atlatl Rock on your ‘things to do’ list for your visit to Valley of Fire.
Please support this website by subscribing to the newsletter below.
Thank you for reading.

Enjoy Relative Seclusion at Hidden Beach Near Incline Village
Welcome to our ultimate guide on exploring a hidden treasure on Lake Tahoe's eastern shore - Hidden Beach…
2 minute read | may contain affiliate links
Welcome to our ultimate guide on exploring a hidden treasure on Lake Tahoe's eastern shore - Hidden Beach!
Nestled amidst the captivating beauty of the Sierra Nevada mountains, this secluded gem offers an enchanting escape for nature enthusiasts and beach-goers alike.
In this article, we'll take you on a virtual journey to this picturesque oasis, unveiling its breathtaking views, turquoise waters and the myriad of experiences it has to offer.
Get ready to embark on an unforgettable lakeside adventure that will leave you in awe. Let's dive in and discover the hidden paradise of Hidden Beach.
Disclosure: This post contains affiliate links. If you click through and make a purchase, I may earn a commission at no additional cost to you. Thank you for supporting us!
Getting To and Parking For Hidden Beach

Hidden Beach doesn’t get nearly as crowded as those nearby, like Sand Harbor and Crystal Bay. A big reason for that is you can’t drive up to it.
To access it, you’ll need to park at the Tunnel Creek or Bullwheel lots at the north end of highway 28 near the Tunnel Creek Cafe.

Parking fees are associated with these lots and are hourly (the rates for 2023 are pictured above). If the lots are full, you can get there with the East Shore Express Shuttle.

To reach Hidden Beach, you’ll need to hike for about a mile on the Tahoe East Shore Trail.
The trail is paved and the grade never exceeds 8%, making it easy to push a stroller or pull a wagon (to haul all of your lake day essentials with).

At first, the trail runs along the opposite side of the highway, but will eventually take you to the shore side via a tunnel.


Beautiful murals, each depicting different perspectives of Lake Tahoe, adorn the walls and ceiling of the tunnel.

When you get to the opposite end of the tunnel, you’ll want to bear left to get to Hidden Beach. Shortly thereafter, you’ll see the shore access sign on your right.
Hidden Beach

Hidden Beach is reached via the shoreline access trail (pictured above). The trail is short, taking less than a minute to reach the sand.
The beach is roughly 750 feet long and features rocky alcoves and an abundance of granite boulders dotting the shore.

As stated above, Hidden Beach doesn’t get all that crowded. People mostly pop-in and pop-out while hiking the Tahoe East Shore Trail.
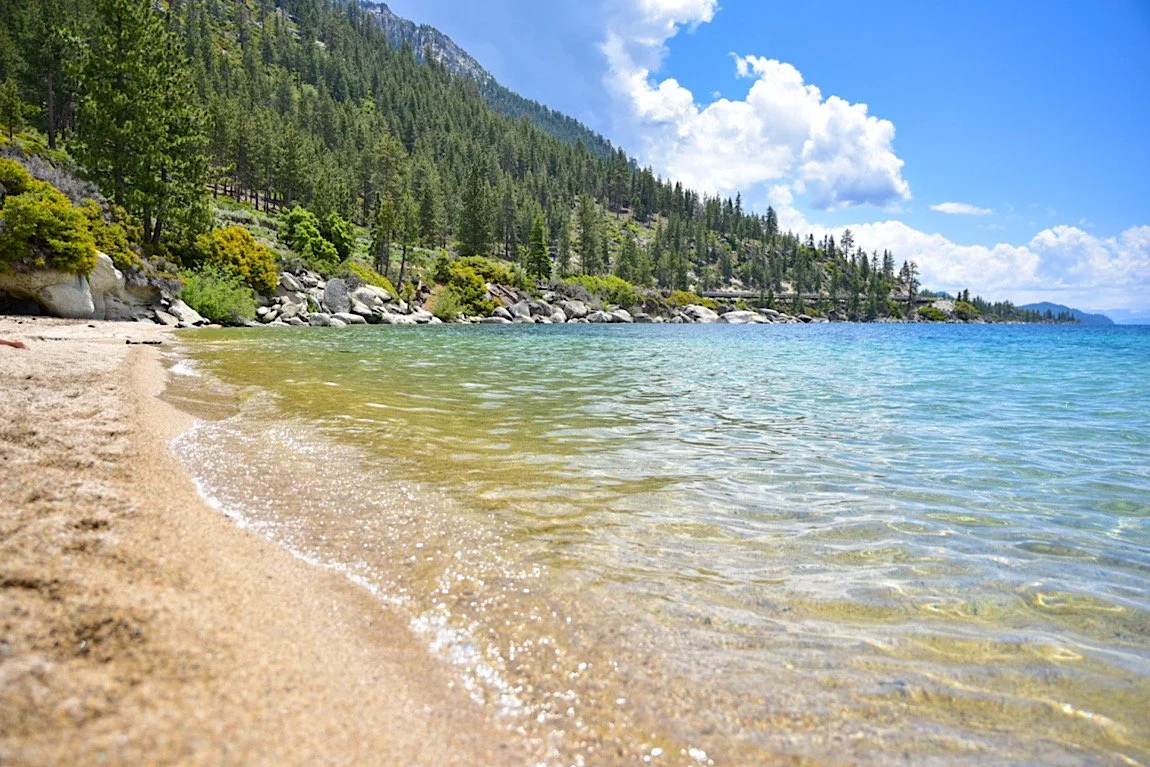
Hidden Beach may not be as popular or even as scenic as nearly Sand Harbor, but the relative seclusion you’ll enjoy more than makes up for it.
If you have an inflatable SUP (paddle board) or kayak, you’re allowed to use them here. You can also bring your dogs as long as they’re leashed.

I hope you’ll consider spending a beach day at Hidden Beach. It’s one of the most tranquil Lake Tahoe beaches I’ve ever been to and I have no doubt you'd enjoy it too.
If you’re interested, check out a few more of my posts about nearby attractions:
Also, if you’re considering a trip to Lake Tahoe (or any lake/beach for that matter) consider reading my list of 25 lake day essentials:
Please support this website by subscribing to the newsletter below.
Thank you for reading.

Hike the Tahoe East Shore Trail to Sand Harbor
Nestled amidst the picturesque Sierra Nevada Mountains, Lake Tahoe is a natural gem that beckons adventurers with its awe-inspiring…
Disclosure: This post contains affiliate links. If you make a purchase through these links, I may earn a small commission at no additional cost to you. I only recommend products or services that I believe will add value to my readers.
Nestled amidst the picturesque Sierra Nevada Mountains, Lake Tahoe is a natural gem that beckons adventurers with its awe-inspiring beauty. Known for its crystal-clear waters and stunning alpine landscapes, this iconic destination offers an abundance of outdoor activities for nature enthusiasts.
Among the many trails that wind their way through this pristine wilderness, the Tahoe East Shore Trail stands out as an enchanting path that leads hikers on a captivating journey to Sand Harbor State Park.
Stretching along the eastern shoreline of Lake Tahoe, the East Shore Trail is a remarkable testament to the region's commitment to preserving its natural wonders.
Spanning approximately three miles, this meticulously crafted trail offers an unparalleled immersiveness into the splendor of the surrounding environment.
The pinnacle of this remarkable journey lies at the destination—Sand Harbor State Park. This iconic gem is renowned for its pristine sandy beaches, hidden coves, and dramatic rock formations that emerge from the lake's depths.
Whether you're a solo adventurer or a family looking to create memories, hiking the Tahoe East Shore Trail to Sand Harbor State Park promises an escape from the day-to-day normalities.
In this guide, I’ll cover many must-know topics such as where to find parking, the length of the trail, which offshoot trails are the best and more!


Trail Stats
Location: Incline Village, NV
Fee: None for the trail, but there are variable parking fees and entry fees to Sand Harbor
Permit: None
Open: All year, but can be icy in winter
Restroom: At the Tunnel Creek parking lot, multiple throughout the trail and multiple at Sand Habor
Parking: Large(ish) paved lot at the Tunnel Creek parking lot and a huge lot at Sand Harbor
EV Stations: None
Difficulty: Easy
Popularity: High
Mileage: 2.5 miles (one-way) but can add more with the many offshoot trails
Time: 2-3 hours
Condition: Meticulously maintained
Features: The eastern shoreline, many coves/beaches and Sand Harbor State Park
Pets: Dog friendly, but must be leashed
Drones: No signs stating you can’t. The Nevada side of the lake is fairly drone friendly. No drone use allowed in Sand Harbor, though
Our Visit(s): June 2023
Trailhead, Parking & Fees

Construction on the Tahoe East Shore Trail took decades to complete, but officials knew right away how popular it would become. So ample parking was a major focus of the project.
On the north end of the trail are the Tunnel Creek and Bullwheel parking lots. They’re right off highway 28 and are adjacent to the Tunnel Creek Cafe and Monkey Rock trailhead.
In peak season, these lots tend to fill quickly. I arrived at 9:30 am and found only a few open spaces. So plan for an early arrival.
If the lots are full, you can drive to and park at the old Incline Elementary School and take the East Shore Express shuttle in. Fares are $3 per person (half that for seniors and those with disabilities).
Also during peak season, you’ll need to pay to park. Fees are charged per hour and depend on timeframe, day, month, etc. For reference, the photo below shows the fees as of June 2023.

You can pay via one of the digital pay stations or by texting the phone number in the picture below. If you intend to use the pay station, these are the steps:
Enter your license plate number
Insert your card (you’ll be charged an initial one-hour fee)
Select the amount of hours you want (go with more than what you’ll think you’ll need)
You’ll be charged upfront for the amount of hours selected and be given a receipt
If you’re not feeling up to hiking the trail, there’s a vendor called Flume Trail Bikes located adjacent to the parking lot where you can rent bicycles from. Additionally, if you’re feeling hungry, the Tunnel Creek Cafe is also right next to the parking lot.
Also at the trailhead is your first opportunity at using a restroom. It’s a port-o-potty set up and wasn’t maintained all that well, so come prepared.
SEE MY TOP RECOMMENDATION FOR THIS COMMON PROBLEM! (you’ll thank me later)
You’ll find the official start of the trail just past the informational display. I highly suggest giving it a read before heading out. It details the history of the trail, its construction and future plans.
The Tahoe East Shore Trail

You’ll start out on the opposite side of highway 28 (or the, “Mountain Side”). This section of the trail is the only one where there’s some elevation change.
When you get up the hill, you’ll be treated to epic views of the north side of the lake. This section is still wheelchair and stroller friendly as the grade never exceedes 8%.
This section is only a half mile or so, but the views are outstanding. It’s also the only section that has some shade provided by the tall pine trees.
As you reach the peak, you can look out ahead of you and get a glimpse of Sand Harbor State Park in the distance. From here, you’ll dip down and realign with the highway.


The second half of the trail continues along the shoreline on the other side. You won’t need to cross the highway, though, as the trail was built to go underneath.
The interior walls of the tunnel are covered in beautiful murals, each side depicting Lake Tahoe and its surrounding mountains.
Coming out of the tunnel you’ll arrive to a clearing where there’s more informational signage, views of the lake and another restroom.
If you’ll be taking the above mentioned shuttle to the trail, this is where they’ll drop you off. So you’ll effectively save yourself a half mile by doing so.

From the tunnel, you’re about 1.5 miles from Sand Harbor. To continue along the trail, go left coming out of the tunnel. This is also where you’ll come across your first offshoot trail.
There are many offshoots leading to a variety of beaches and coves that were once not as easily accessible as they are now. Each one only takes a minute or less to reach.
The first of which is the ever popular Hidden Beach. It’s small in comparison at just 750 feet, but it sees far less people than nearby Sand Harbor.
It’s also dog friendly and aside from parking, there are no fees associated with it. I highly recommend spending some time here.

Continue further down the trail and arrive to the next offshoot; Balancing Rock. There are two entry/exit points here so there’s no need to go back up the same way you came in.
The main feature here is the flat(ish) granite boulder balancing on a smaller pile of granite boulders beneath it in the water. It’s nothing spectacular but still worth a look.

Past Balancing Rock, the next few offshoots I either skipped or simply viewed from the trail (there was a storm coming in that afternoon and I wanted to beat it). Those offshoots include:
Granite Cove
Artist’s Point
Mountain Vista
Dipper Point
At Artist’s Point is another opportunity at using a restroom. This one is shared between trail users and people traveling on highway 28. From Artist’s Point, you’re about a half mile from Sand Harbor.
There are two more offshoots before you arrive to Sand Harbor, both of which I highly recommend visiting as I feel they both rival Sand Harbor in terms of beauty. They are Sunset Cove and Emerald Cove. Both are similar in that they’re dotted with granite boulder shorelines, have crystal clear turquoise water and require a hike down a quick trail.

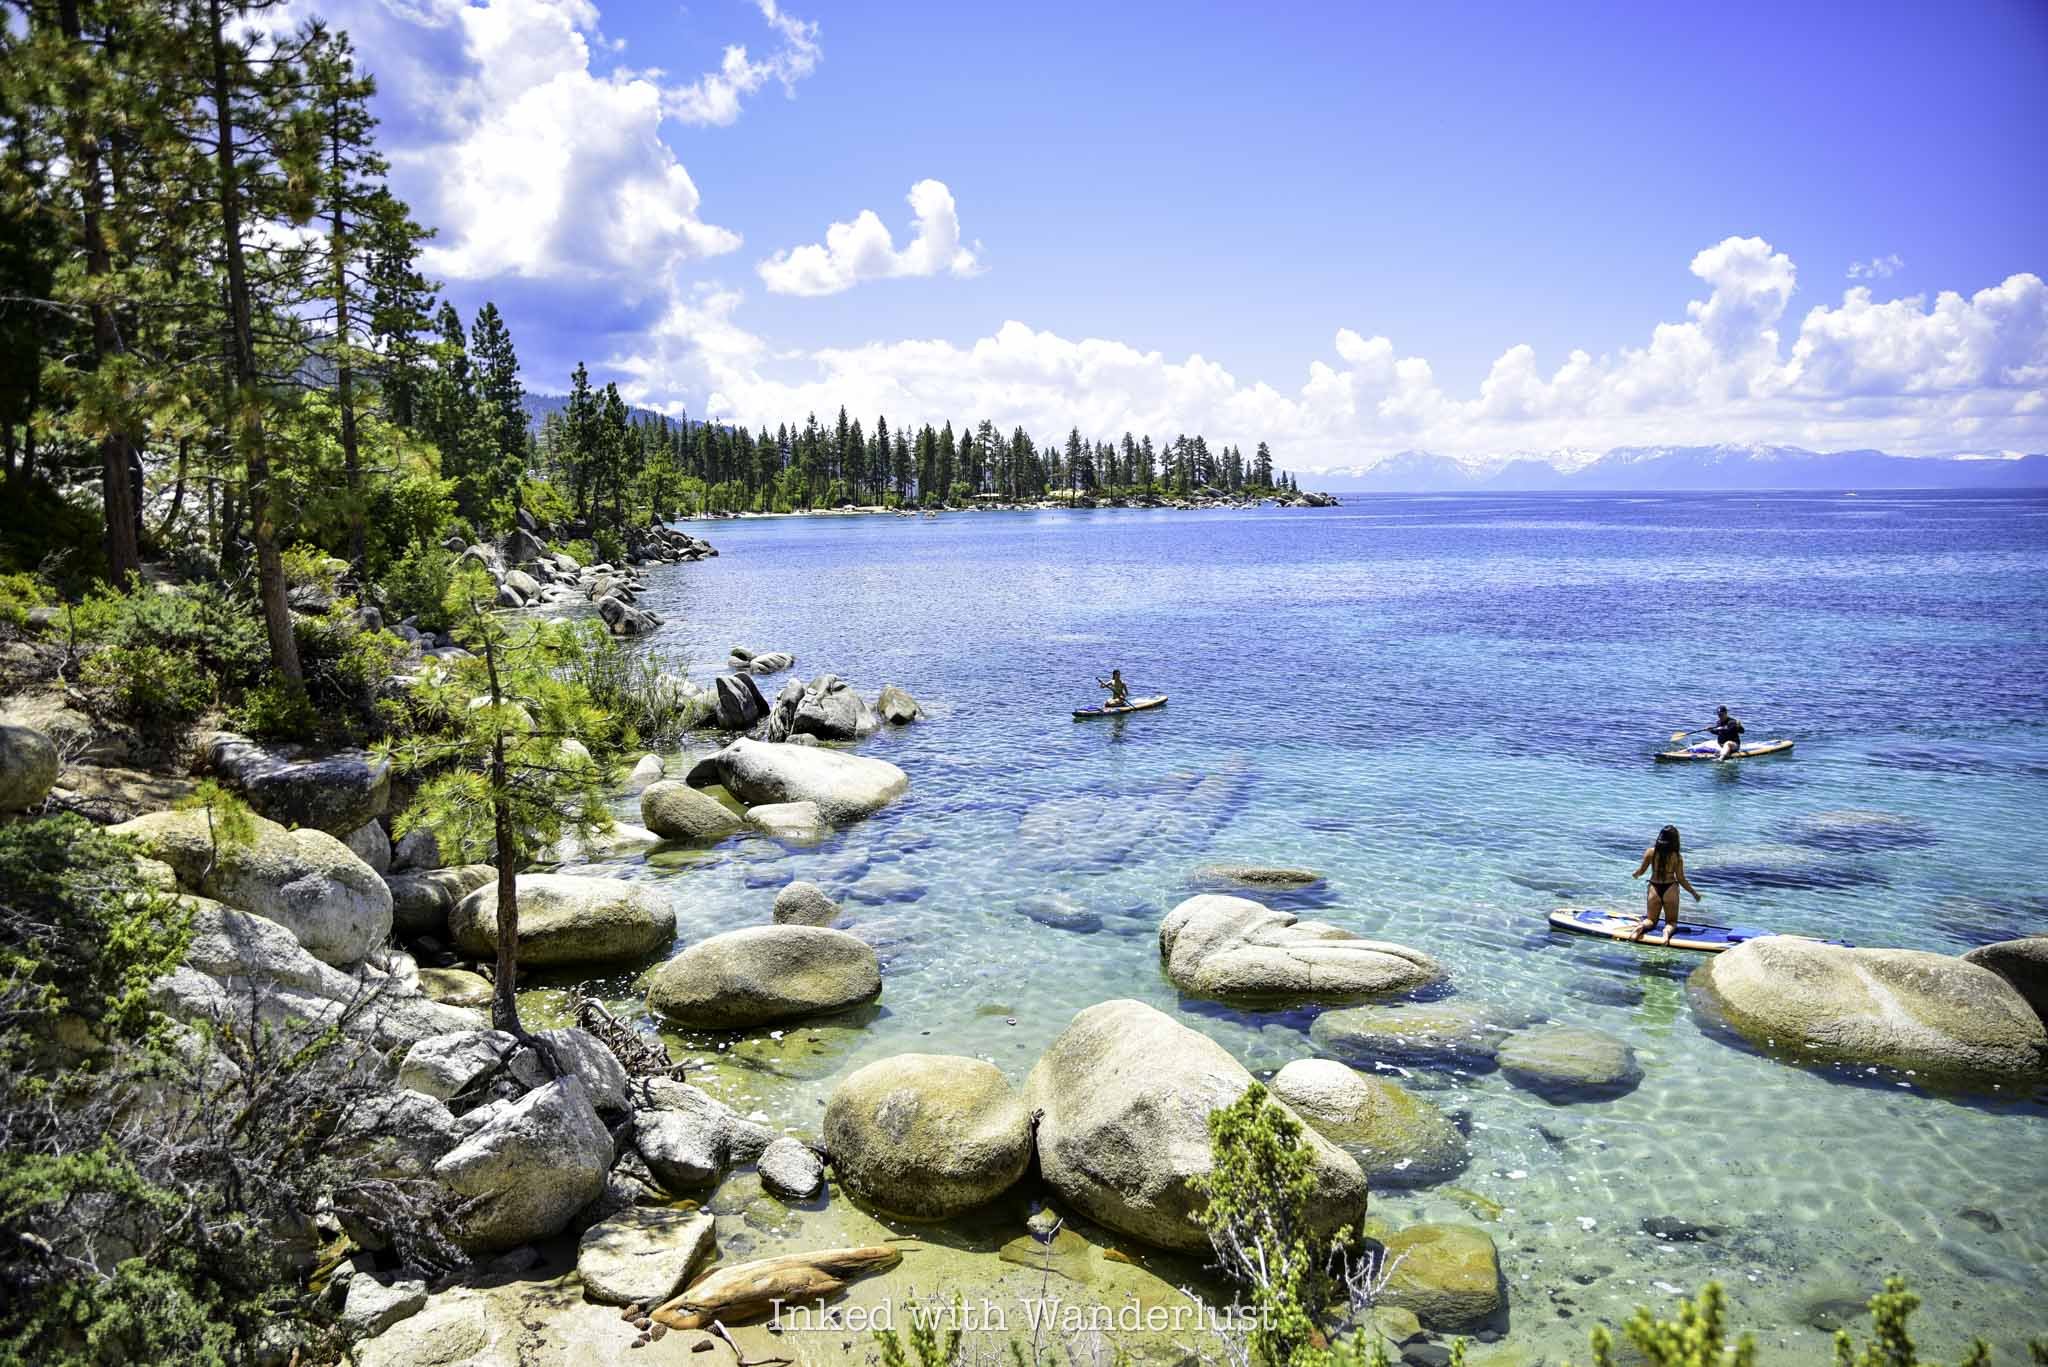
CHECK OUT THIS HIGHLY RATED INFLATABLE STAND UP PADDLE BOARD ON AMAZON!
If you must choose, I recommend Sunset Cove as it’s much easier to access and has an actual beach, whereas Emerald Cove was lined with boulders.
From here, continue down the trail for another 2/10’s of a mile before getting your first glimpse of the mega popular and beautiful Sand Harbor State Park. As you approach the entrance to Sand Harbor, you’ll start seeing signs stating as such and the fees associated with entering.
To walk or bike into Sand Harbor you’ll need to pay the $2 per person fee. You can pay cash or utilize the digital pay station near the ranger shack. If you’re paying with a card, be sure to select “other” rather than the “day-use” option to avoid over paying. The ranger helped me to avoid that mistake.

Once in the park, you can stay for as long as you like. Your ticket is good until one hour past sunset. There are many beaches and coves to explore.
Sand Harbor has many restrooms available and an on-site restaurant. The larger beach is located at the far end of the park from where you’ll enter.
From here, simply head back in the same way you came. If you like, you can utilize the above mentioned shuttle to take you most of the way back. You’ll still need to walk the final half mile, though.

Your Thoughts…
Since this trail is popular and follows highway 28, this isn’t a peaceful hike through the woods. On the flip side, this shoreline is perhaps the most beautiful in all of Tahoe and is a must-see for any visitor.
Up until Sand Harbor, the entire trail is wheelchair accessible and is pet, stroller, bicycle and family friendly.
Does this sound like something you and your family would enjoy? Are you planning a trip to Tahoe soon? Let us know in the comments and in the meantime, check out our other Tahoe related posts below!

How To Visit Walker River State Recreation Area: Camping, Fishing, and More
This gorgeous stretch of the East Walker River is made up of four historic ranches; Pitchfork Ranch, Flying M Ranch, Rafter 7 Ranch, and…

On September 22nd, 2018, Nevada unveiled its newest State Park, Walker River State Recreation Area (mouthful, isn’t it?) This gorgeous stretch of the East Walker River is made up of four historic ranches; Pitchfork Ranch, Flying M Ranch, Rafter 7 Ranch, and Nine Mile Ranch.
Thanks to these acquisitions, the nearly 30-miles of river and picturesque 12,856 acres of rangeland will be open for the public to enjoy for generations to come. Of the four, Pitchfork is the only one developed and open to the public. The Elbow at Nine Mile, while publicly accessible and popular with Fishermen, isn’t developed. The others will be developed in phases.
Walker River is an outdoorsman’s paradise, offering many recreational opportunities such as hiking, fishing, hunting, camping, photography, and more! In this guide, we’ll go over topics such as where you can camp, park fees, nearby attractions and restaurants, and how to get there.
Park Information

Directions
Getting to Walker River State Park is relatively simple. The turn-off is right off Highway 208 just 10-miles or so from the town of Yerington.
From Downtown Yerington, head west on highway 208 for 10-miles and turn left onto E. Walker road for 4-miles until you reach the park entrance.

E. Walker road is a 4-mile, well maintained dirt road. It’s the road you’ll be on after turning off the highway and will take you to the park.
Our Chevrolet Cruz made it just fine, so a truck or some other high clearance vehicle isn’t required. RV’s can also navigate it easily.
While it is maintained, if wet weather recently happened, you may experience some difficulty. It would be best to call the park ahead of time to check road conditions.
Pitchfork Ranch


Pitchfork is the main area of the park and is an outdoorsman’s paradise. You’ll know you’ve arrived when you see the giant arch entrance. Turn right here.
About half a mile after turning right you’ll see your first right turn into a huge dirt parking lot. This is the group-use area with picnic tables, restrooms, and handicap parking.
Parking & Park Fees

As with most state parks, there are fees associated with visiting. The pay stations can be found on the left side of the visitor center in the smaller parking lot. *The pay station has recently been moved to just off the main road before reaching the visitor center.
There are two ways you can pay your fee:
Cash: You’ll slip the cash into the provided yellow envelope, fill out the necessary information, and drop it in what’s called the, “Iron Ranger” (Don’t forget to tear off the receipt section of the envelope).
Debit/Credit Card: Adjacent to the cash station you’ll see an electronic pay station. Here, you’ll select your fee amount, swipe your debit/credit card, and take the printed ticket. You’ll then place this ticket on your dashboard.
Park fees are as follows:

Nevada Resident
Day Use: $5.00 per vehicle
Camping: $15.00 per vehicle, per night plus $10.00 per night for sites with RV hook-ups
Non-Nevada Residents
Day Use: $10.00 per vehicle
Camping: $20.00 per vehicle, per night plus $10.00 per night for sites with RV hook-ups
Also, if you bike in (non-motorized), it’s a $2.00 day-use for no matter your state residency.
Visitor Center

The visitor center is centered in the Pitchfork Ranch entrance of the park in a beautiful, Spanish style building with western flare.
Inside, you’ll find the staff office where a Park Ranger is often stationed and a mini museum featuring multiple exhibits detailing the park’s history and local wildlife.
Unfortunately, during our visit, it had closed for the day. The Ranger did offer to let us in to look around but we left our masks in the car (this was before the mandate was lifted).

Visitor Center Hours
While the park itself is open 24/7/365, the visitor center is not. The hours for the visitor center are as follows:
9am to 5pm - Monday - Friday
10am - 2pm - Saturday & Sunday
*Note - Despite the hours listed above, the visitor center has not been open the last three to four times I have gone, despite being there during the listed hours. Your milage may vary.
Exterior Features

Outside the rear entrance of the visitor center is a rentable event space featuring picnic tables, a propane grill, and fireplace.
Adjacent to the event space is a beautiful grassy area with many trees and a man-made pond (not filled in the winter).
Camping at Walker River State Recreation Area

Camping at Walker River State Park is a wonderful, hassle-free experience. Unlike other parks, there isn’t a whole lot of red tape to jump through to camp here.
Some things you’ll need to know are:
Camping sites, both RV and primitive, are first-come, first-serve. They cannot be reserved ahead of time.
You’re limited to 14-days in a 30-day period. This policy is strictly enforced.
If you’re using an RV site, you’ll pay an additional $10 per night. This is true for Nevada residents and non-residents alike.
The RV sites include shaded picnic tables, grills, a communal restroom, and dump site.
Campground Locations
There are three designated campgrounds (so far) in the park. They are:
Riverbend Campground: There are 16 sites able to accommodate RV’s, Motorhomes, or tents. Sites come with shaded ramada, fire ring, and table. No hook-ups available.
Quail Run Campground: Site features include everything above, but come with power hook-ups.
Bighorn Campground: This campground is located up the load in the unspoiled Nine Mile section of the park. Sites include a table and fire-ring. This campground is primitive and has only a pit-toilet (BYO TP).
Squeeze Chute River Access

An additional three miles up the road from Pitchfork Ranch is where you’ll find a quaint, quiet area of the park known as, Squeeze Chute.
You’ll need to keep your eyes open for the turnout as it isn’t obvious. You’ll see a sign on your left pointing the way through a small entrance on your right. Turn here.

At Squeeze Chute, there’s a small parking area with a sole, uncovered picnic table. From here, you can access the river for fishing, swimming, etc.
As you drive in, take note of the gate on your right. This is the start of a hiking trail and follows the river through a beautiful tree-covered meadow.

Just keep in mind that cows do graze this area. So be sure to give them plenty of space and watch your footing (if you know, you know).
Walker River State Recreation Area Fishing
Fishing is the undisputed king of activities at the park. If you’re from out-of-state or a resident, you will need to have a Nevada fishing license.

If you don’t have one, you can scan the QR code near the pay station at the park with your smart device and purchase one.
Keep in mind that cellular service at the park can be spotty at best. To avoid disappointment, it would be wise to purchase one prior to arriving.
River Access

There are multiple river access points throughout the park, specifically in Pitchfork Ranch and The Elbow. You can swim and float to your heart’s content.
The Squeeze Chute area offers free, fly fishing introductory classes (you just need a fishing license). You can check this link for available dates.
Photography

Our personal favorite! Photographers of all kinds will love this photogenic oasis. For maximum results, definitely come during sunset.
River and mountainous landscapes plus ample wildlife such as; Deer, Antelope, Big Horn Sheep, Water Fowl, and Chukar provide endless photographic opportunities.
Nearby Attractions & Restaurants

Attractions
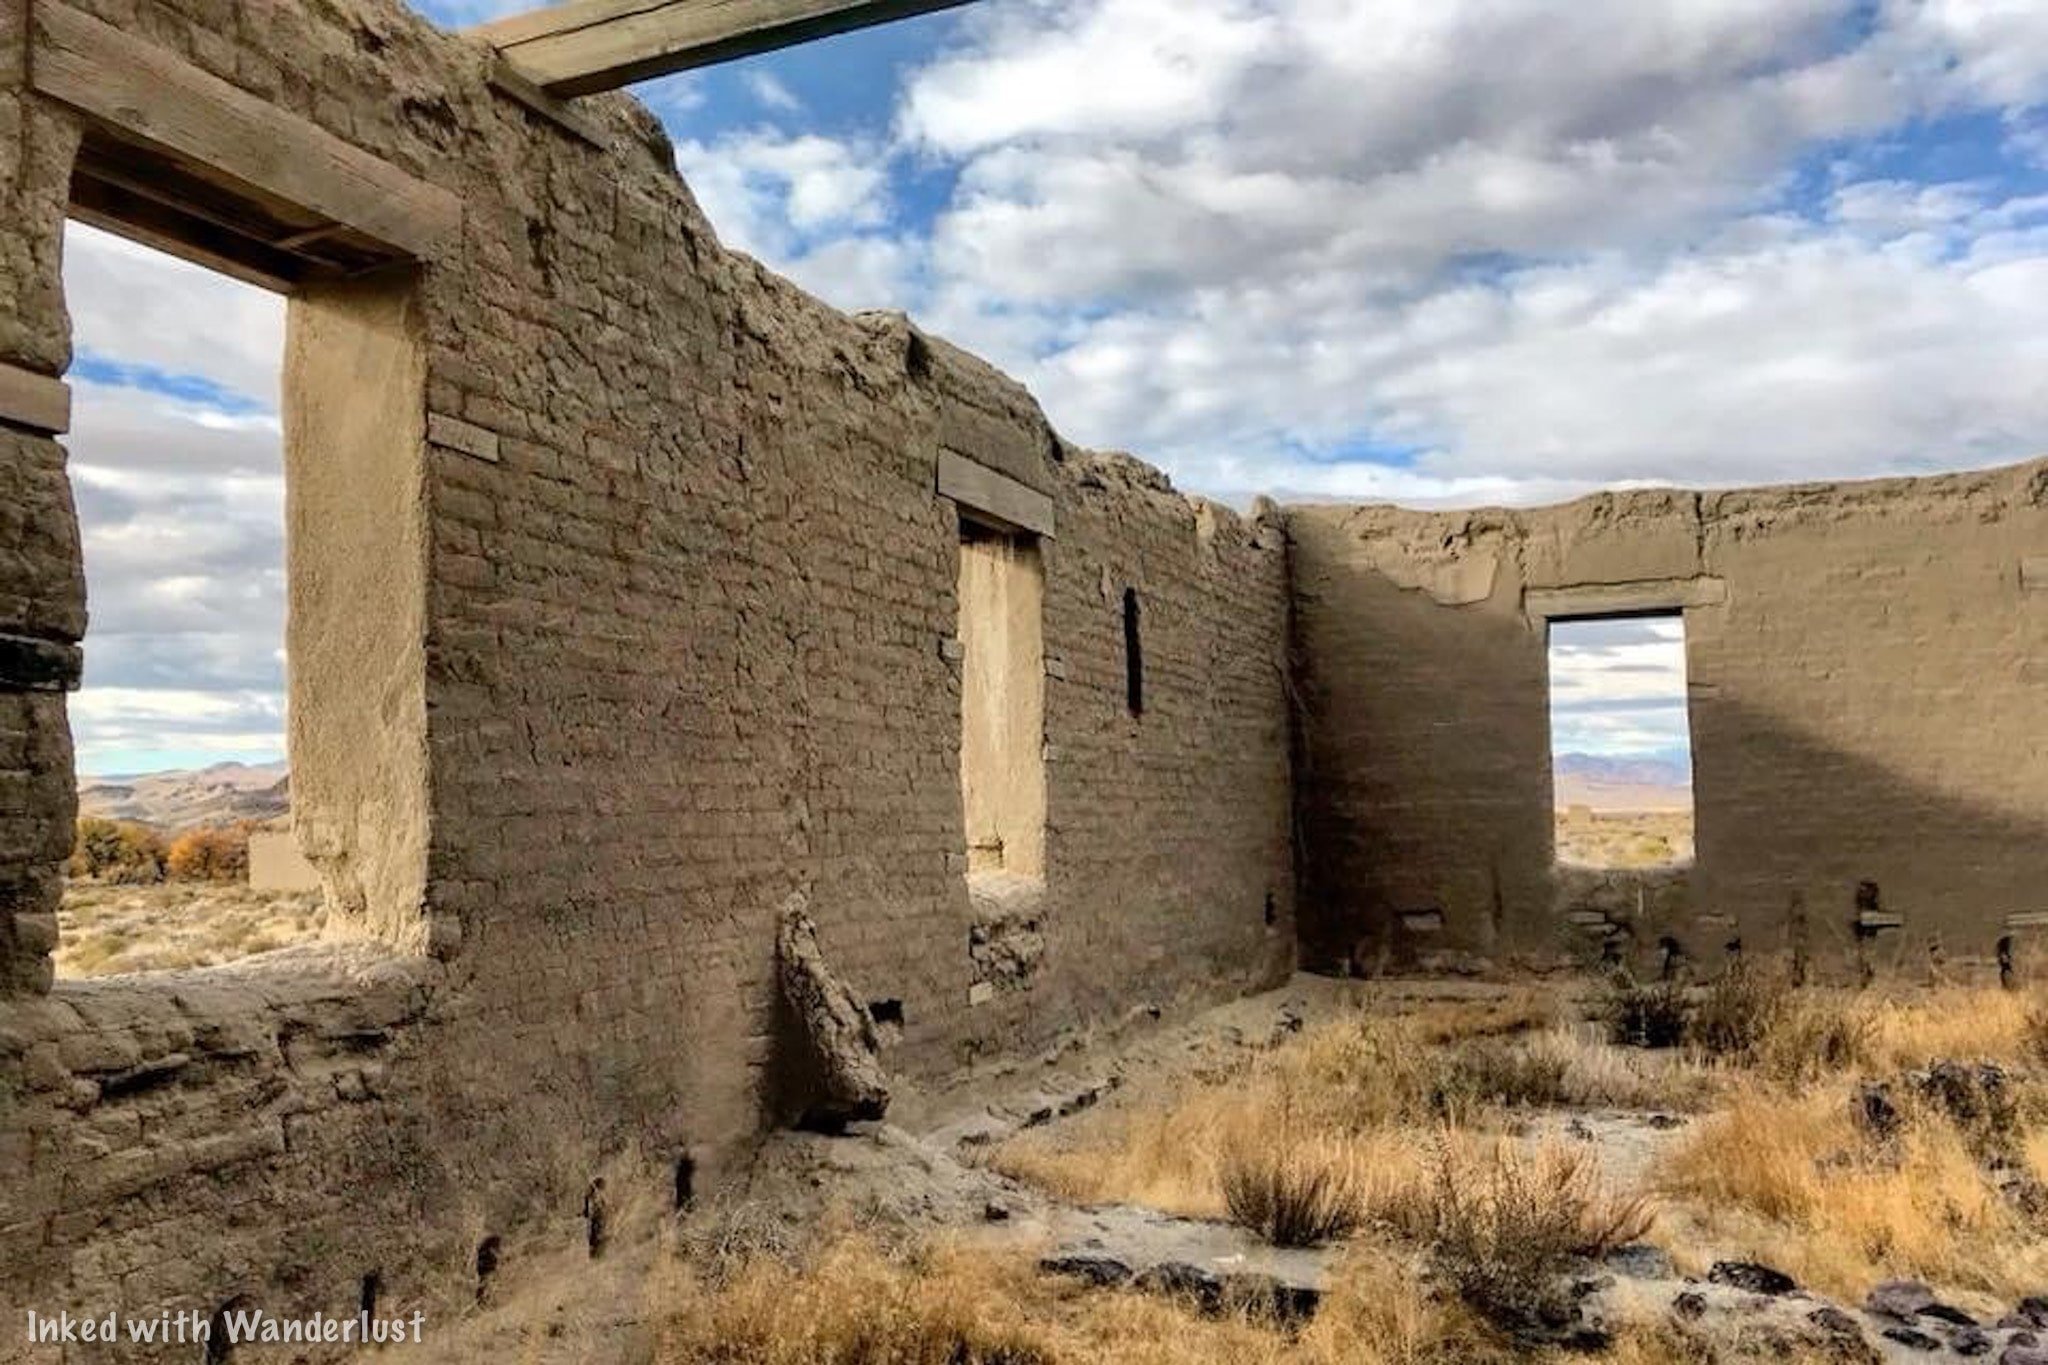
While the park itself offers plenty of fun activities all its own, if you’re planning on an extended stay, you may want to know what else the area offers.
Thankfully, there are many wonderful parks and destinations to visit that are within an easy drive from Walker River:
Berlin-Ichthyosaur State Historic Park: This one is the furthest away at about 2 hours (one-way). However, it’s more than worth the effort. It’s a preserved, mining ghost town and is also the site with the most Ichthyosaur fossils in the state. To read more about it, check out our article here.
Fort Churchill State Historic Park: If you’re into military history, this park is mandatory. Located just 30-minutes or so from Walker River, this state park features the ruins of an old military post. It also features a museum and campground all its own. You can read our article about it here.

Wilson Canyon: Wilson Canyon is a recreation destination all its own. Since it’s BLM land, camping is free and plentiful. You can hike, fish, and use motorized vehicles such motorbikes, side-by-sides, and more! You can read our article on its hiking trail here.
Bridgeport, CA: Bridgeport is a charming town in eastern California right next to the mighty Sierra Nevada Mountains. It’s our favorite town in California due to its proximity to amazing hiking trails, Yosemite, lakes, hot springs, and more! Check out our article about Bridgeport here.
Virginia City: About an hour from the park is the famed mining town, Virginia City. Step back in time and explore this wonderfully preserved and highly historical place. You can tour awesome attractions like MacKay Mansion , Chollar Mine , and more! Check out our article here.
Restaurants & Supplies
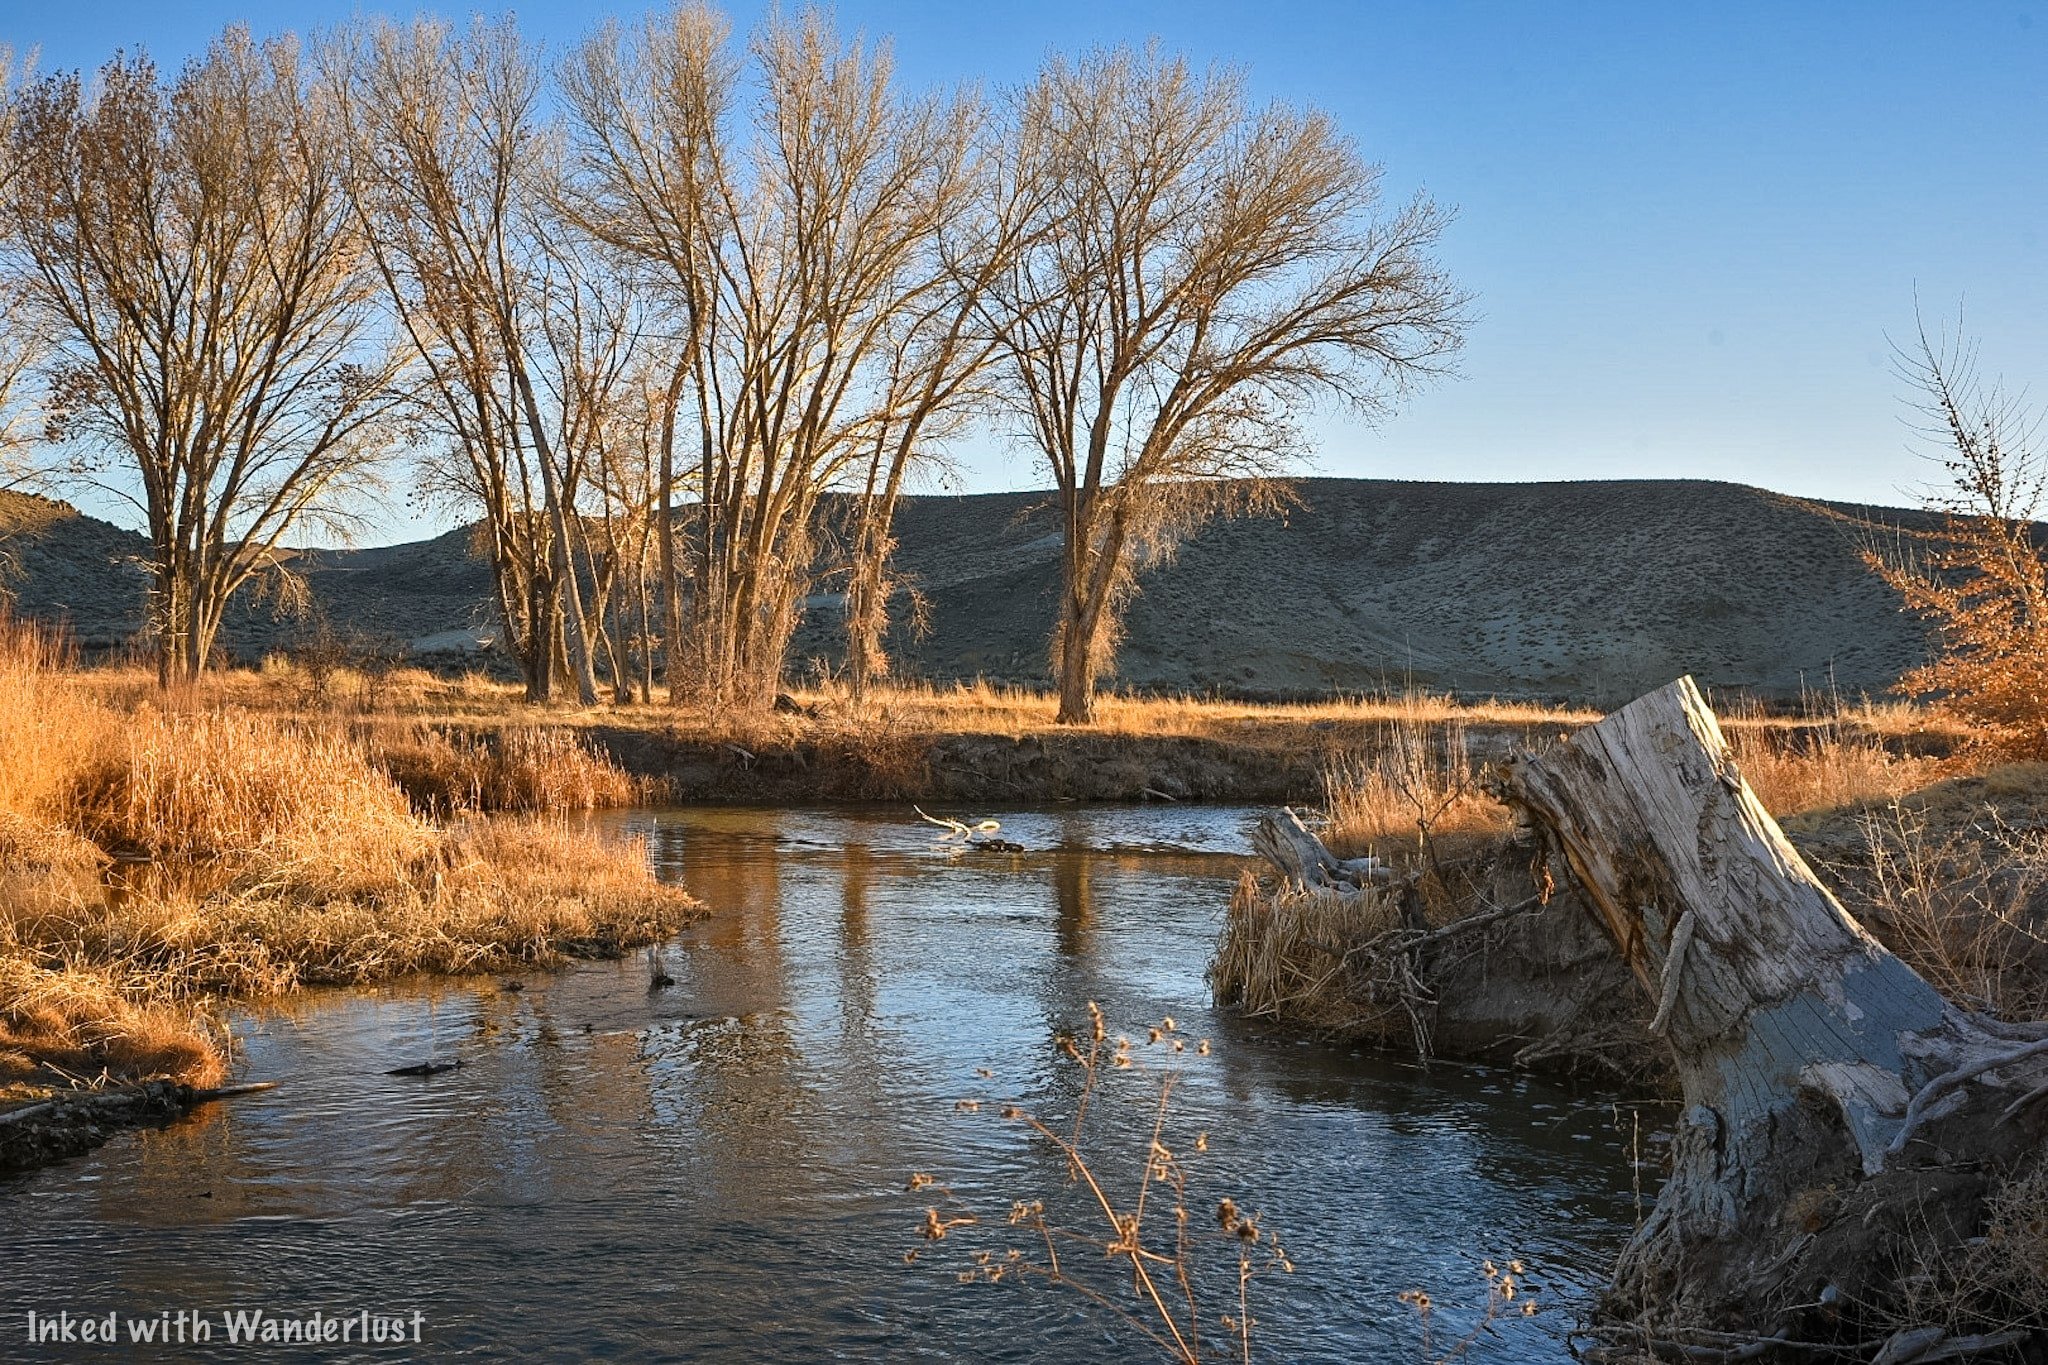
The small town of Yerington is a short drive away from the park and is a great place to pick up supplies or get something to eat. When camping, it’s always preferable to eat your meal over a fire but in the case of an extended stay, you may want to sit down at a restaurant.
For supplies, the one and only traditional grocery store is Raley’s. There’s also a Dollar General located on Main Street that offers limited grocery supplies. As far as restaurants go, there are three fast food joints if all you’re looking for is a quick bite. They are:
McDonalds
Port of Subs
Subway
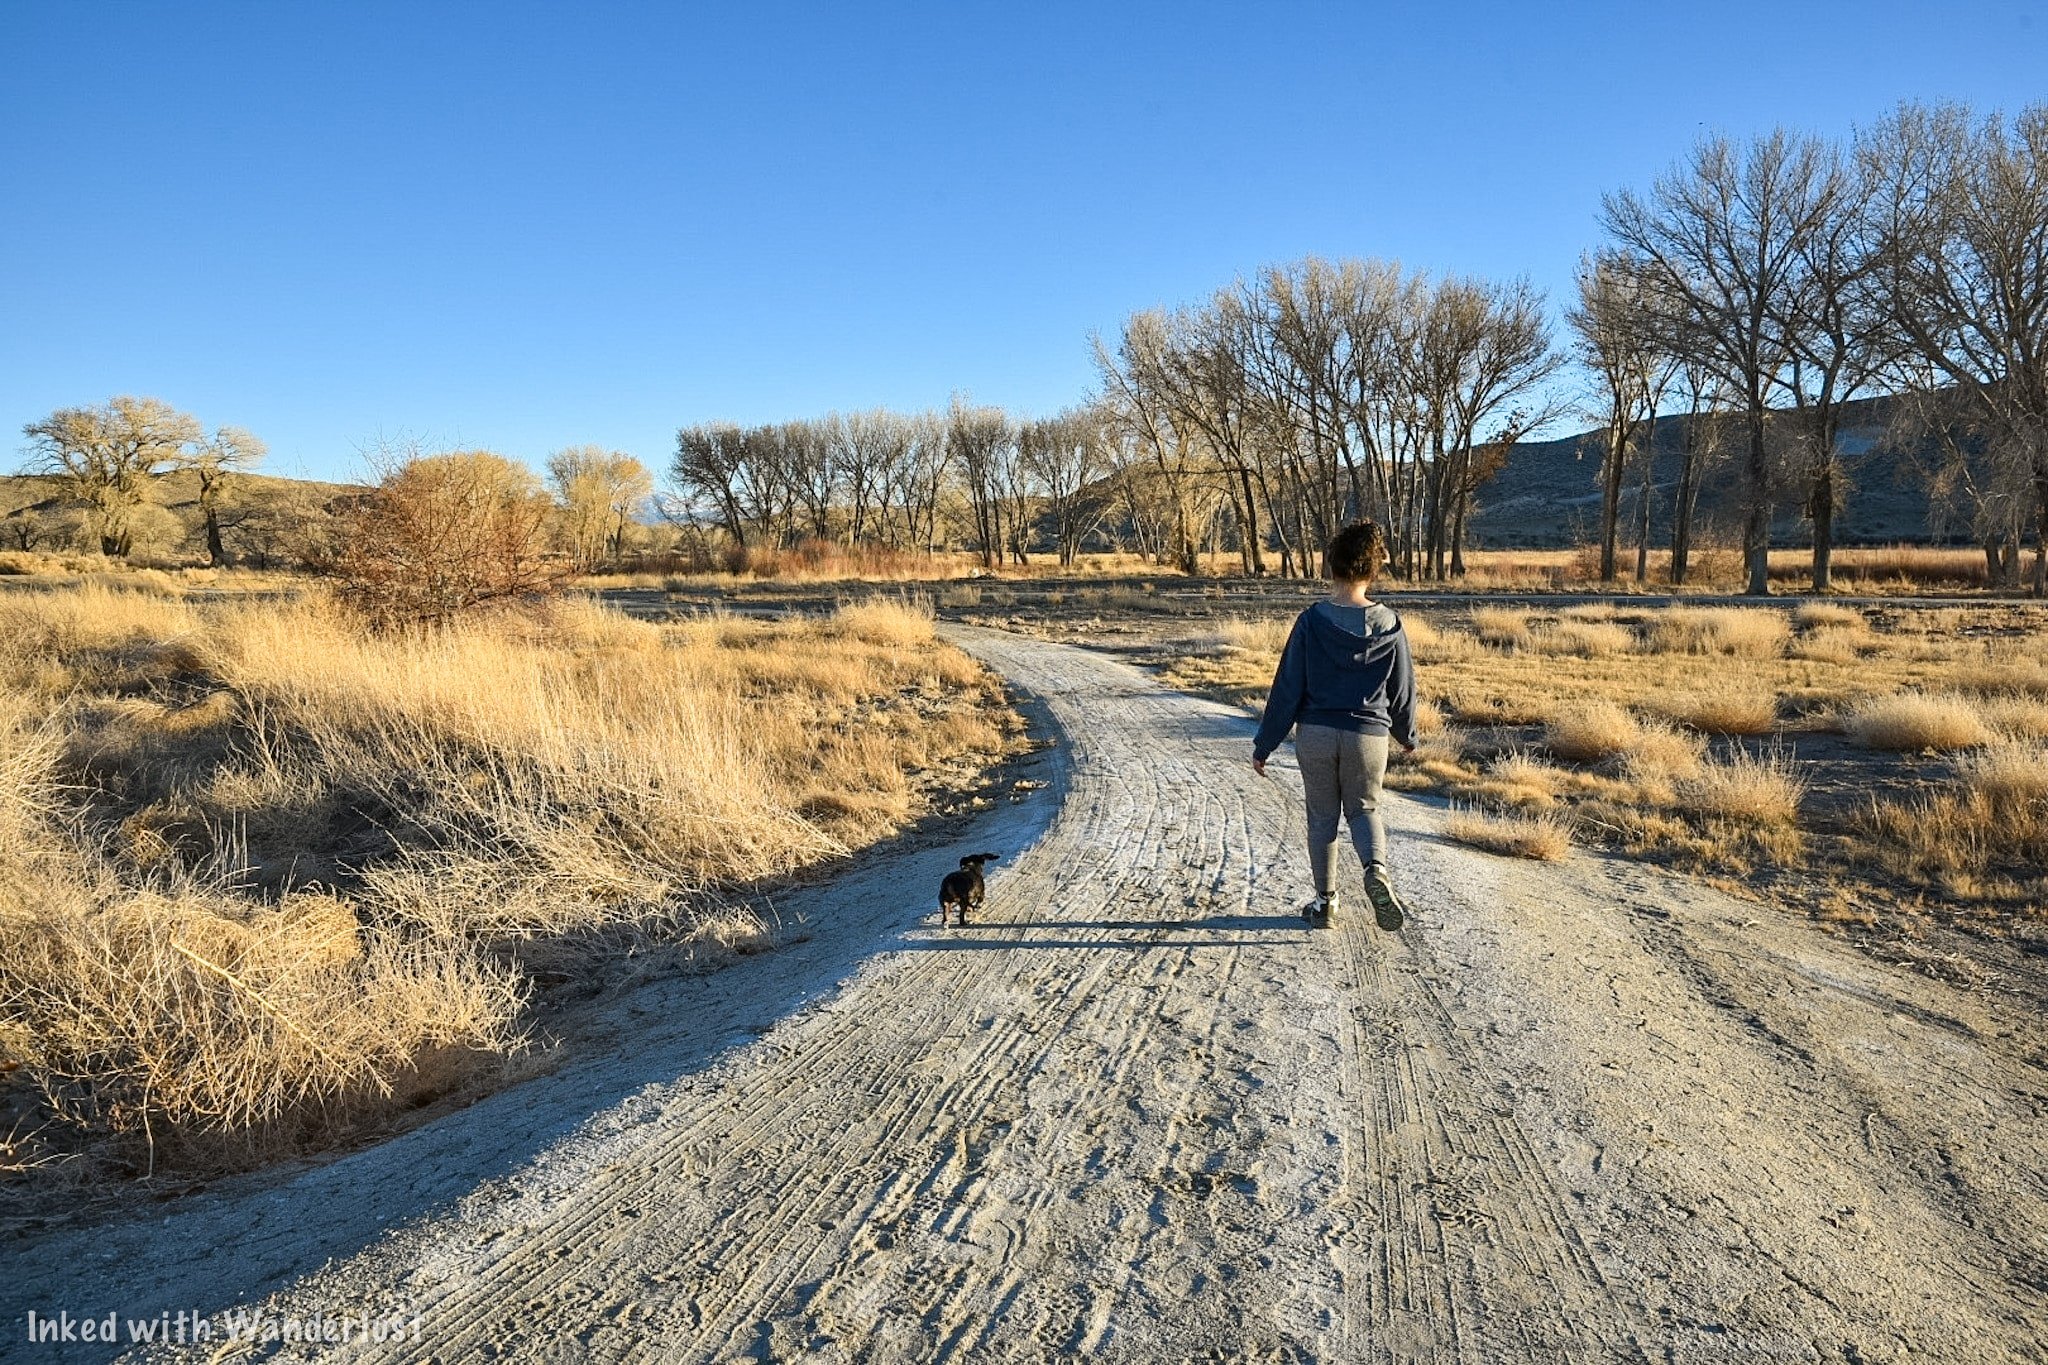
If you’d rather support a local business and sit down to eat, there are a few local places we can personally recommend. They are:
Country Sunflower: It’s slightly out of town but this small, charming, local spot serves up amazing breakfast and lunch. It’s our personal favorite in the area.
Tailgaters Sports Bar: Open for lunch and dinner, Tailgaters offers traditional fare like cheeseburgers, sandwiches, pizza, salads, and more in a sports themed setting.
El Alteno: If you’re craving hot and fresh Mexican food, head to El Alteno. It’s the closest restaurant to the park and has great food and service (Note: They are closed on Saturdays and close at 6pm on Sundays).
Additionally, Yerington has a Raley’s, Dollar General, and Family Dollar where you can pick up supplies like ice, firewood, s’mores kits, and more. Of the three, I would recommend Raley’s, as the two other stores are often cluttered and dirty.

National Automobile Museum: A Huge Classic Car Collection in Reno
Situated in Downtown Reno and just a stone’s throw from the river walk, the National Automobile Museum showcases a massive collection of over 200 classic…
Situated in Downtown Reno and just a stone’s throw from the Riverwalk, the National Automobile Museum showcases a massive collection of over 200 classic vehicles, most of which were once owned by Bill Harah (Founder of the former Harrah’s Casino).
We recently visited during a rainy, gloomy day in Reno. A lot of local businesses took a beating during the 2020 pandemic (and continue to) so we wanted to support them and showcase this awesome museum on our website.
You don’t have to be a car person to enjoy yourself here. On top of Harrah’s massive collection, the museum also showcases many cars that were used in movies and TV shows such as; Titanic, Batman & Robin, Back to the Future, and more!
Additionally, you’ll also see the vehicles that celebrities drove such as; Elvis Presley, Frank Sinatra, and John F. Kennedy! Whether you’re a local with an appreciation for the classics or a family on a Reno vacation, the National Automobile Museum is the perfect activity for you.
Let’s get into it!
Visitor Information

Directions
The National Automobile Museum is conveniently located near Downtown Reno. It’s just an 11-minute walk (or 4-minute drive) from the Reno Arch and is literally down the street from the Truckee River Walk. To get there from the Reno Arch (walking):
Head south away from the arch.
Go left on E. 2nd Street
Go right on Lake Street
Go left on the Tahoe - Pyramid Bikeway (you’ll see the old Reno Archway ahead of you and the Renaissance Hotel on your right).
Go right on Museum Drive and look for the entrance on your right.
Driving from the Reno Arch has similar directions with just two minor differences:
Instead of turning left at the old archway, you’ll go straight through it and turn left on Mill Street.
Shortly thereafter, you’ll turn left on Museum Drive and pull into the parking lot.
For those of you who just want your GPS to do the work for you, the museum’s is as follows:
10 South Lake Street. Reno, NV 89501
There’s also the option of taking a Taxi or Uber from your hotel. Most drivers know exactly where this popular attraction is so you won’t have to worry about it.

Parking & Admission
The parking lot can accommodate quite a few vehicles and the best part? Parking is included in your admission! Just select any available space and head towards the entrance (pictured above).
Admission prices for the museum are as follows:
Adult: $15
Senior: $13
Active Military: $10
Youth (6 - 15): $10
Children (5 or younger): Free
Admission tickets can be purchased upon arrival. Online tickets are not yet available. Your ticket comes with in and out privileges for the day of purchase. So if you get board later and want to go back, just show them your ticket and you’re good.
Tours

Guided Tour
Guided tours of the museum are offered daily (based on volunteer availability) at 1:30pm and are 90-minutes in length. Your knowledgeable guide will tell you unique stories about some of the amazing antiques you’ll be seeing and learn little-known facts along the way as well.
The guided tours are included in the price of admission, so no worries there. If you have your heart set on one of these, you can call the museum and ask if they have volunteer availability for that day.
Self-Guided Tour
If you’d rather go it yourself (like us) you can take part in the self-guided tour and go at your own pace. There are a total of four rooms to explore, each featuring unique vehicles in specific eras. To start the tour, simply head down the hallway to the left of the ticket counter.

The first exhibit at the end of the hall is where they put their temporary, special exhibits. On display through December 31st, 2021 is the, “America and the Motorcycle: 1900 - 1990”, exhibit. You get real-life examples, in order, how motorcycles have evolved throughout the century.
Special Note - If you’re an AMCA member, show your membership at the ticket counter for a $3 discount on your admission.

Gallery #1 - Turn of the Century (1890’s - 1910’s)
This is where it can get a little hard to follow the correct path. My first time here, I was all over the place. I was going through doors I wasn’t supposed to and doing the tour out of order. This time around, I actually looked at the map, which made it much easier to navigate.
We highly recommend downloading the app to your phone. There’s a QR code you can scan with your phone at the ticket counter and on sporadic signs throughout the tour. Once you reach the end of the hallway, you’ll see the Blacksmith Building (pictured above). This is the first gallery and features cars from the years 1900 to around 1912 or so.

You’re in for quite a treat in this room. A few examples of classics you’ll find here are a 1908 Franklin, 1912 Rambler, and a 1910 Rolls-Royce. Each vehicle has an informative display in front of it describing its history, its original price, and interesting facts.
Our favorite was seeing the 1907 Thomas Flyer. It’s registered as a National Historic Vehicle for being the winner of the 1908 New York - Paris Race. The Rolls-Royce, our other favorite, was originally sold for $7500 in 1910. That would be north of $250,000 today.


You’ll also see the very vehicle that was used in one of the first scenes of the blockbuster movie, Titanic. It’s truly an awesome mix of classic vehicles….and you still have three more rooms to go! Once you’re ready for the next room, exit out onto 1930’s Street.
1930’s Street


1930’s street serves as a buffer between rooms one and two and has a 1932 Lincoln and a 1938 Packard on display, among other vehicles. They’re parked outside a recreated movie theatre facade with Gone with the Wind as the feature film.
The theming of this exhibit was awesome to me. For me, it was the most photogenic of any exhibit in the museum and the cars were beautiful.

Once you feel ready to move onto room two, walk down the street and hang a left on Main Street. Here, you will see the one and only vehicle you’re allowed to get into for a photo opportunity (I was asked to take pictures for a couple and by the time I was done, I completely forgot to get one for myself. You can’t miss it, though).
Gallery #2 - The Roaring Twenties (1920’s - 1930’s)

To find the entrance to the second gallery, look out for the Hardware Store. Immediately to the right of it (pictured above) is the entrance. By the way, you can and should go inside the store. The theming and detail inside is very reminiscent of old time Mom & Pop shops.
After checking out the hardware store, head through the short hallway into the next gallery which showcases cars made during the 1920’s (that said, we did see quite a few cars on display that were made prior to the 20’s).

A few examples of vehicles you’ll see here are a:
1920 Ford converted to an RV (considered to be the first iteration of the RV)
1921 Sheridan
1921 Rolls-Royce
1924 Wills St. Claire


You’ll also see an exhibit of an early day used-car dealership towards the back of the room cheekily titled, “Honest John’s”. Pictured below is the (very expensive) 1921 Rolls-Royce fully decked out in copper.

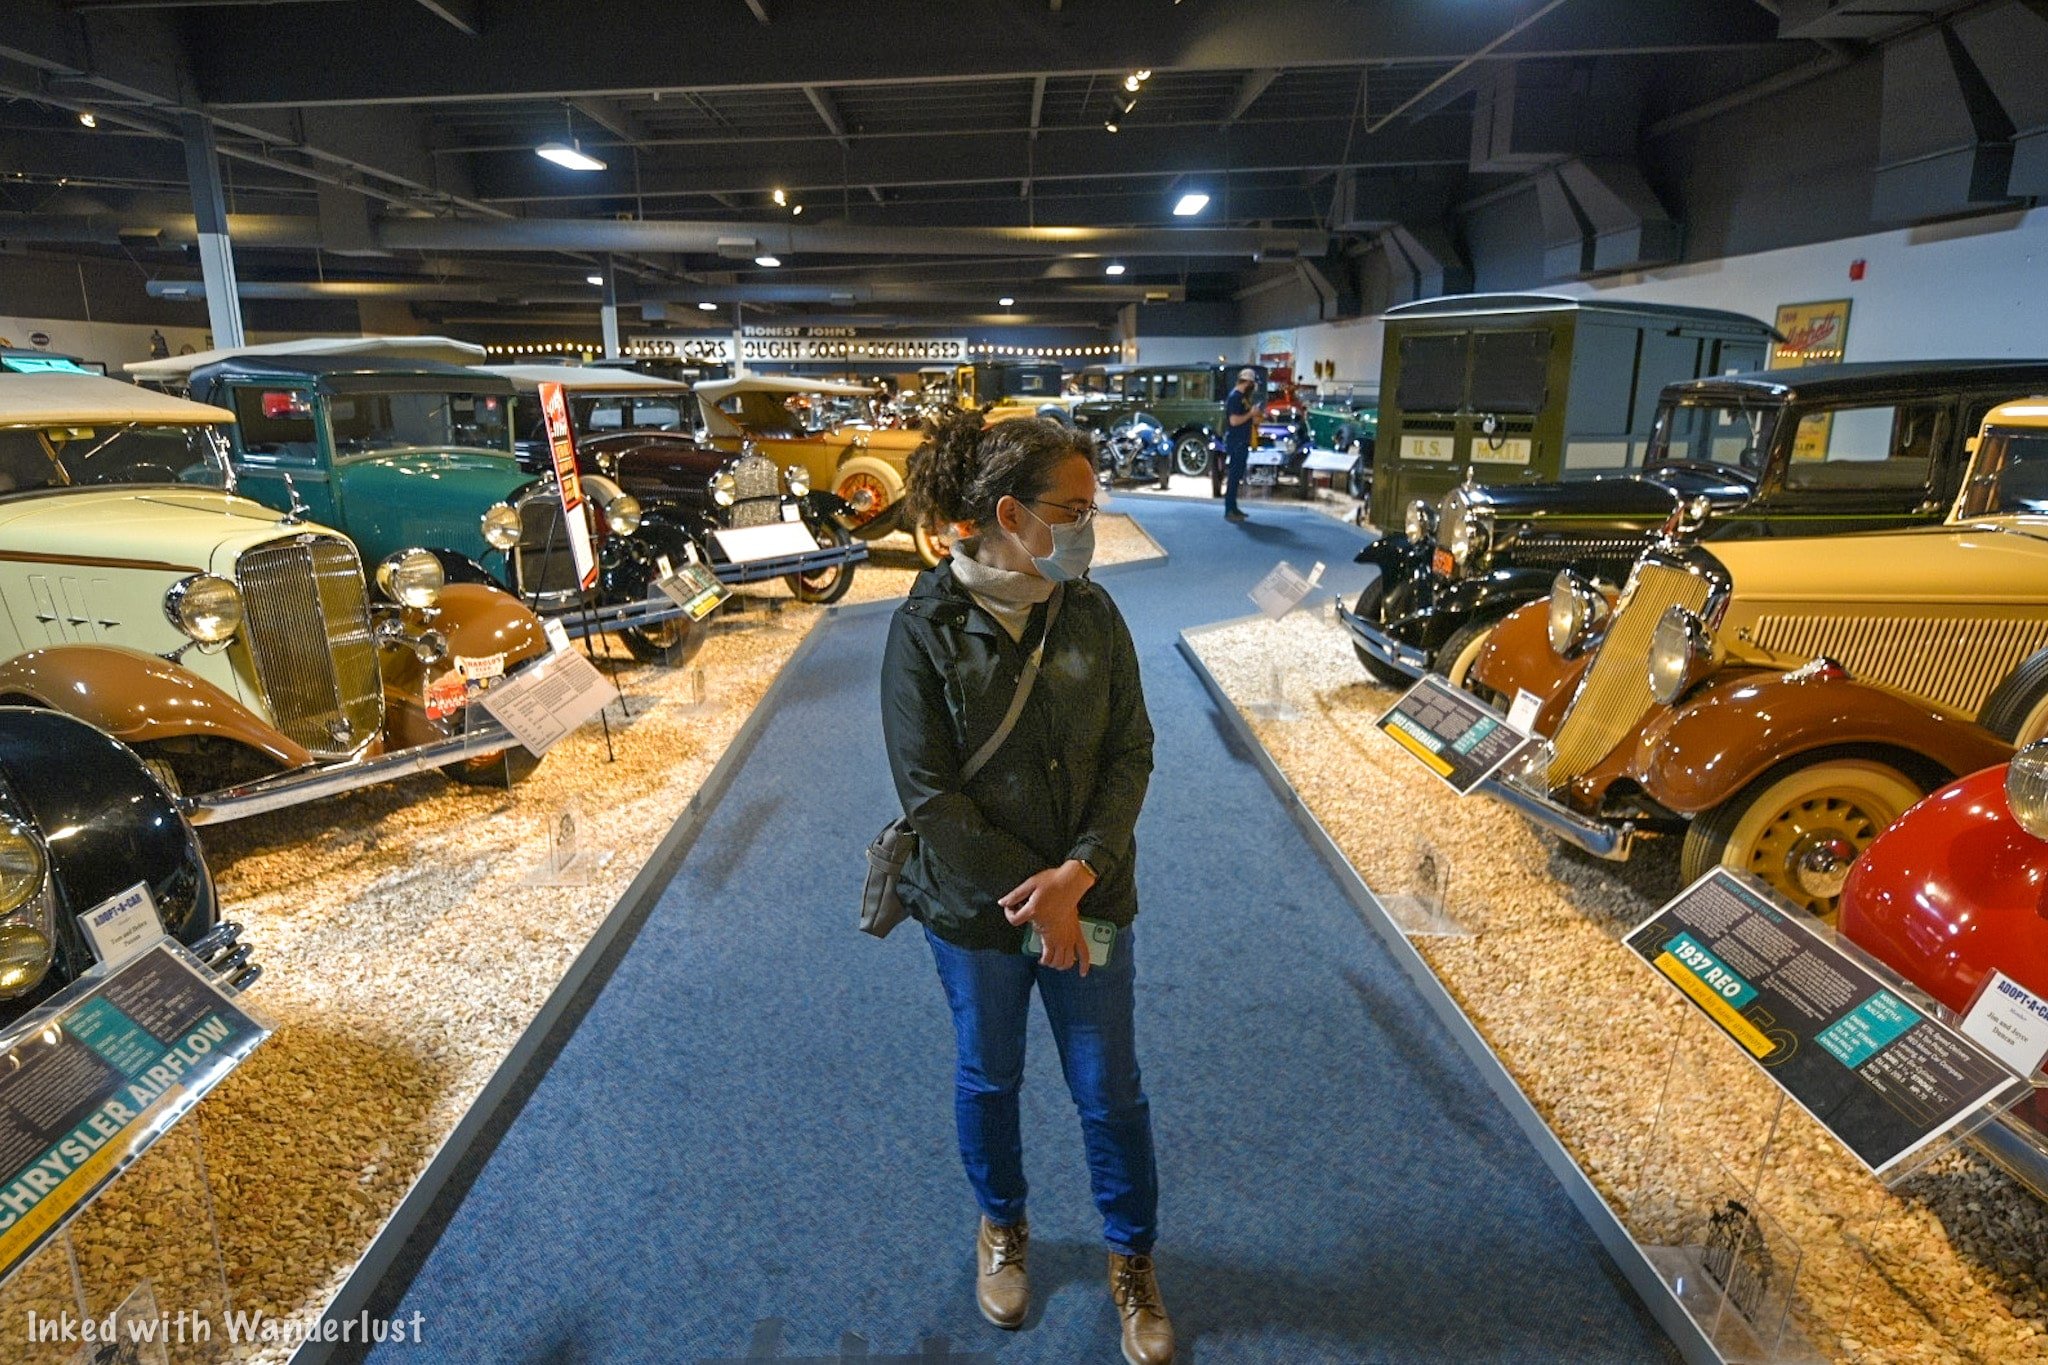
As you head away from the dealership you’ll see the first interactive displays. There’s two display cases with working motors inside. If you press the button, the motor runs. Showing you up close how motors worked back then (and largely still do today).
Once you’ve finished looking around, head out the exit ahead of you (you’ll know you’ve gone the right way if you’ve made a horseshoe lap around the room). Exit back onto Main Street by the Hardware Store and head left towards the next gallery.
Gallery #3 - The Classic Collection (1930’s - 1950’s)
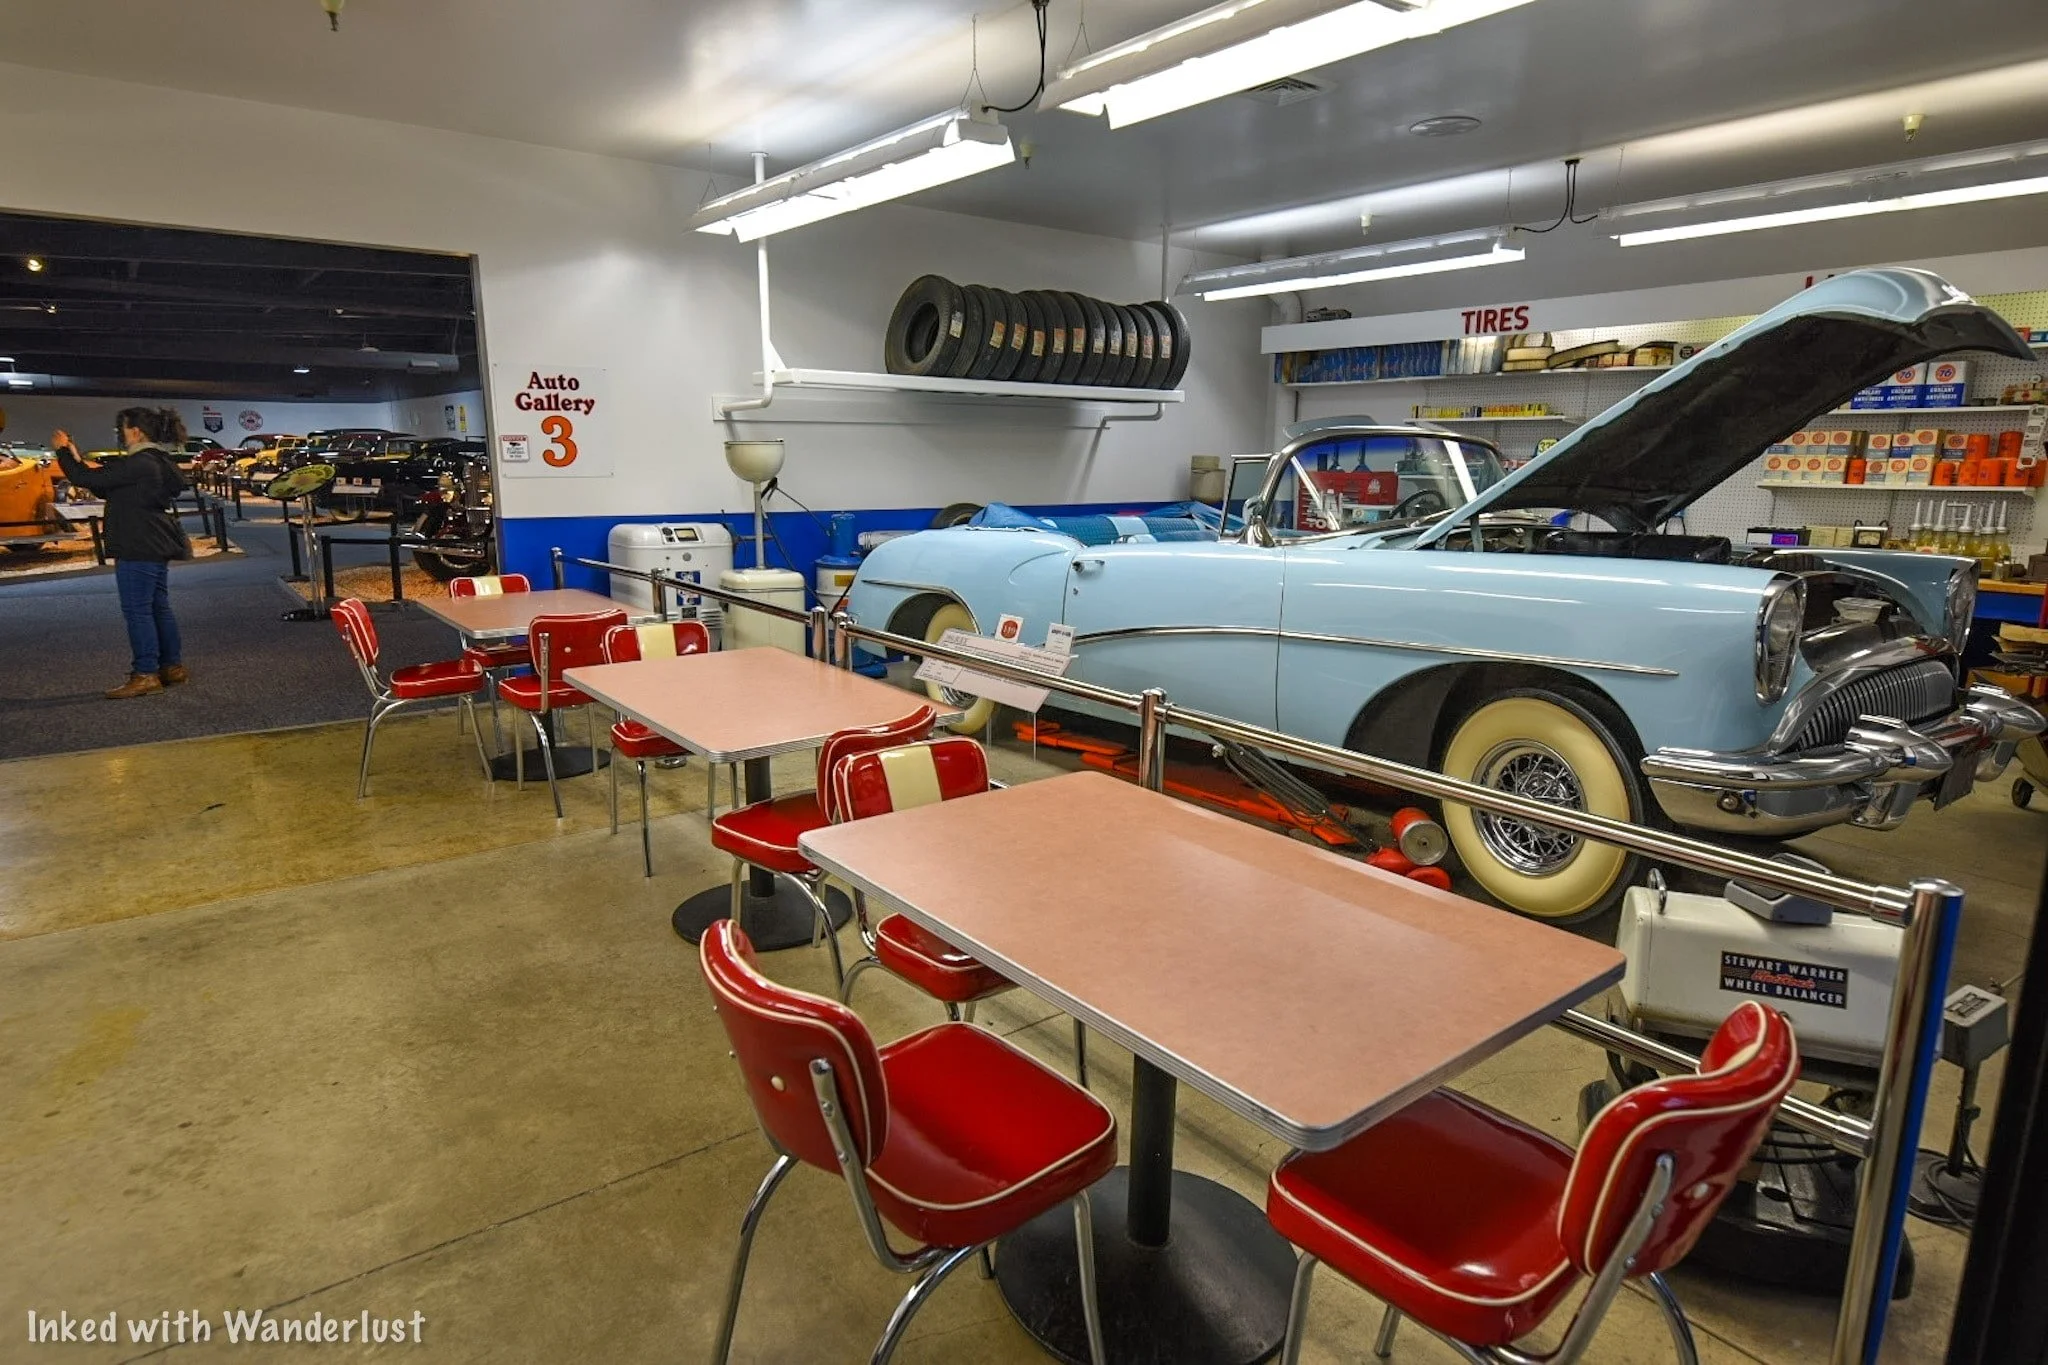
As you exit Gallery #2, turn left and you’ll see the entrance to Gallery #3. The facade is made to look like you’re walking into a mechanic’s garage. You’ll see a light blue 1954 Buick with white wall tires on your right. As you enter the gallery proper, you’ll notice a miniature NASA Mission Control exhibit on your left (NASA was founded in 1958).

This gallery is the final one featuring a permanent collection and is named after Ranson & Norma Webster (the former sits as the Chairmen on the Board of Trustees for the museum). A few examples of cars you’ll see in this room are a:
1933 Auburn
1938 Phantom Corsair
1939 Ford
The 1938 Phantom Corsair is the only one of its kind and is the creation of Rust Heinz (Heinz Ketchup). The car was praised for being ahead of its time due to its futuristic design aesthetics but due to Rust’s death in 1939, it never entered mass-production. Making this prototype the only one in existence.


Much like the other rooms, you’ll do a half circle around the room at your leisure. At the end of the loop, you’ll end up near where you entered at the NASA exhibit. Here, there are multiple interactive elements for kids (or you) to enjoy. Due to the ongoing pandemic, many of these are closed right now.


When you’re done, simply walk through the NASA exhibit and out through the same way you came in (through the garage). To find the fourth and final gallery, take a right turn out of the exit and walk past the Speedway exhibit. You’ll see a facade of a home garage with a Basketball hoop above it (pictured below). Just walk on through.
Gallery #4 - Cars of the Stars (1950’s & Beyond)

Gallery four is the room that doesn’t have a full, permanent collection inside. It’s essentially a revolving door of themed exhibits (much like the Motorcycle exhibit at the beginning). It does feature cars that were driven by a variety of celebrities that are always there, but the other part of the room displays special exhibits.
The first car you’ll see as you walk through the garage is the infamous 1981 Delorean from the Back to the Future move franchise. If you’re a fan of the films, you’ll certainly appreciate this. Immediately afterwards on your right is a 1973 Cadillac driven by Elvis Presley.
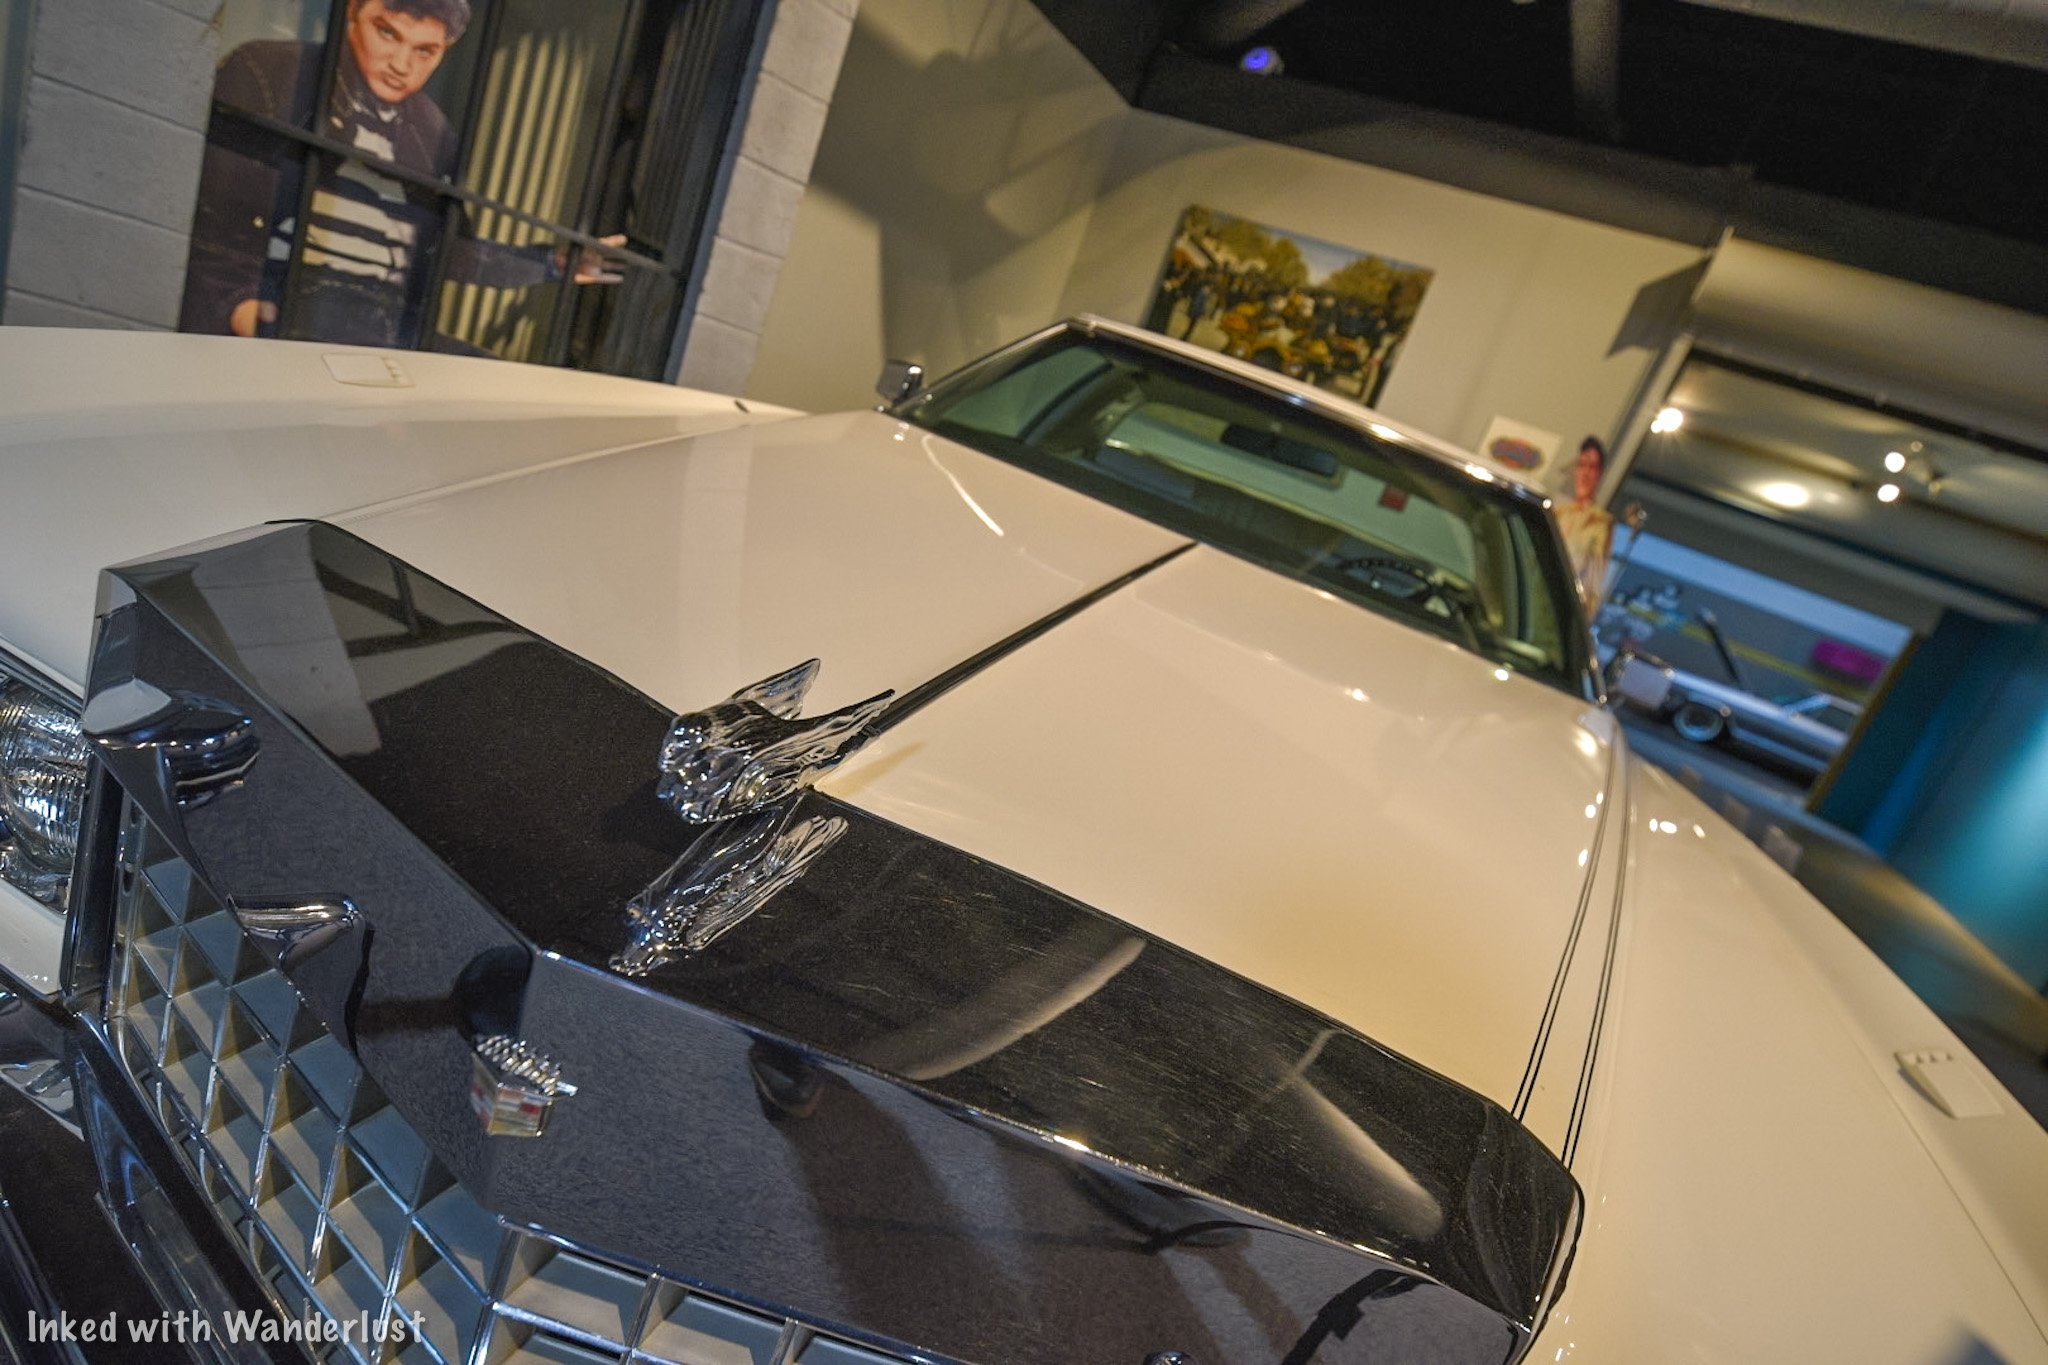
To your left, there’s more examples of celebrity classic cars. You’ll see a 1953 Chevrolet driven by John Wayne, a 1961 Ghia driven by Frank Sinatra, and a 1949 Mercury driven by James Dean, among others.

This room is also an event space. Meaning you could rent it out for a variety of reasons. Due to this, the gallery may not be open during your visit but in all the times we’ve been here, it has never been an issue. You could always call ahead to confirm.
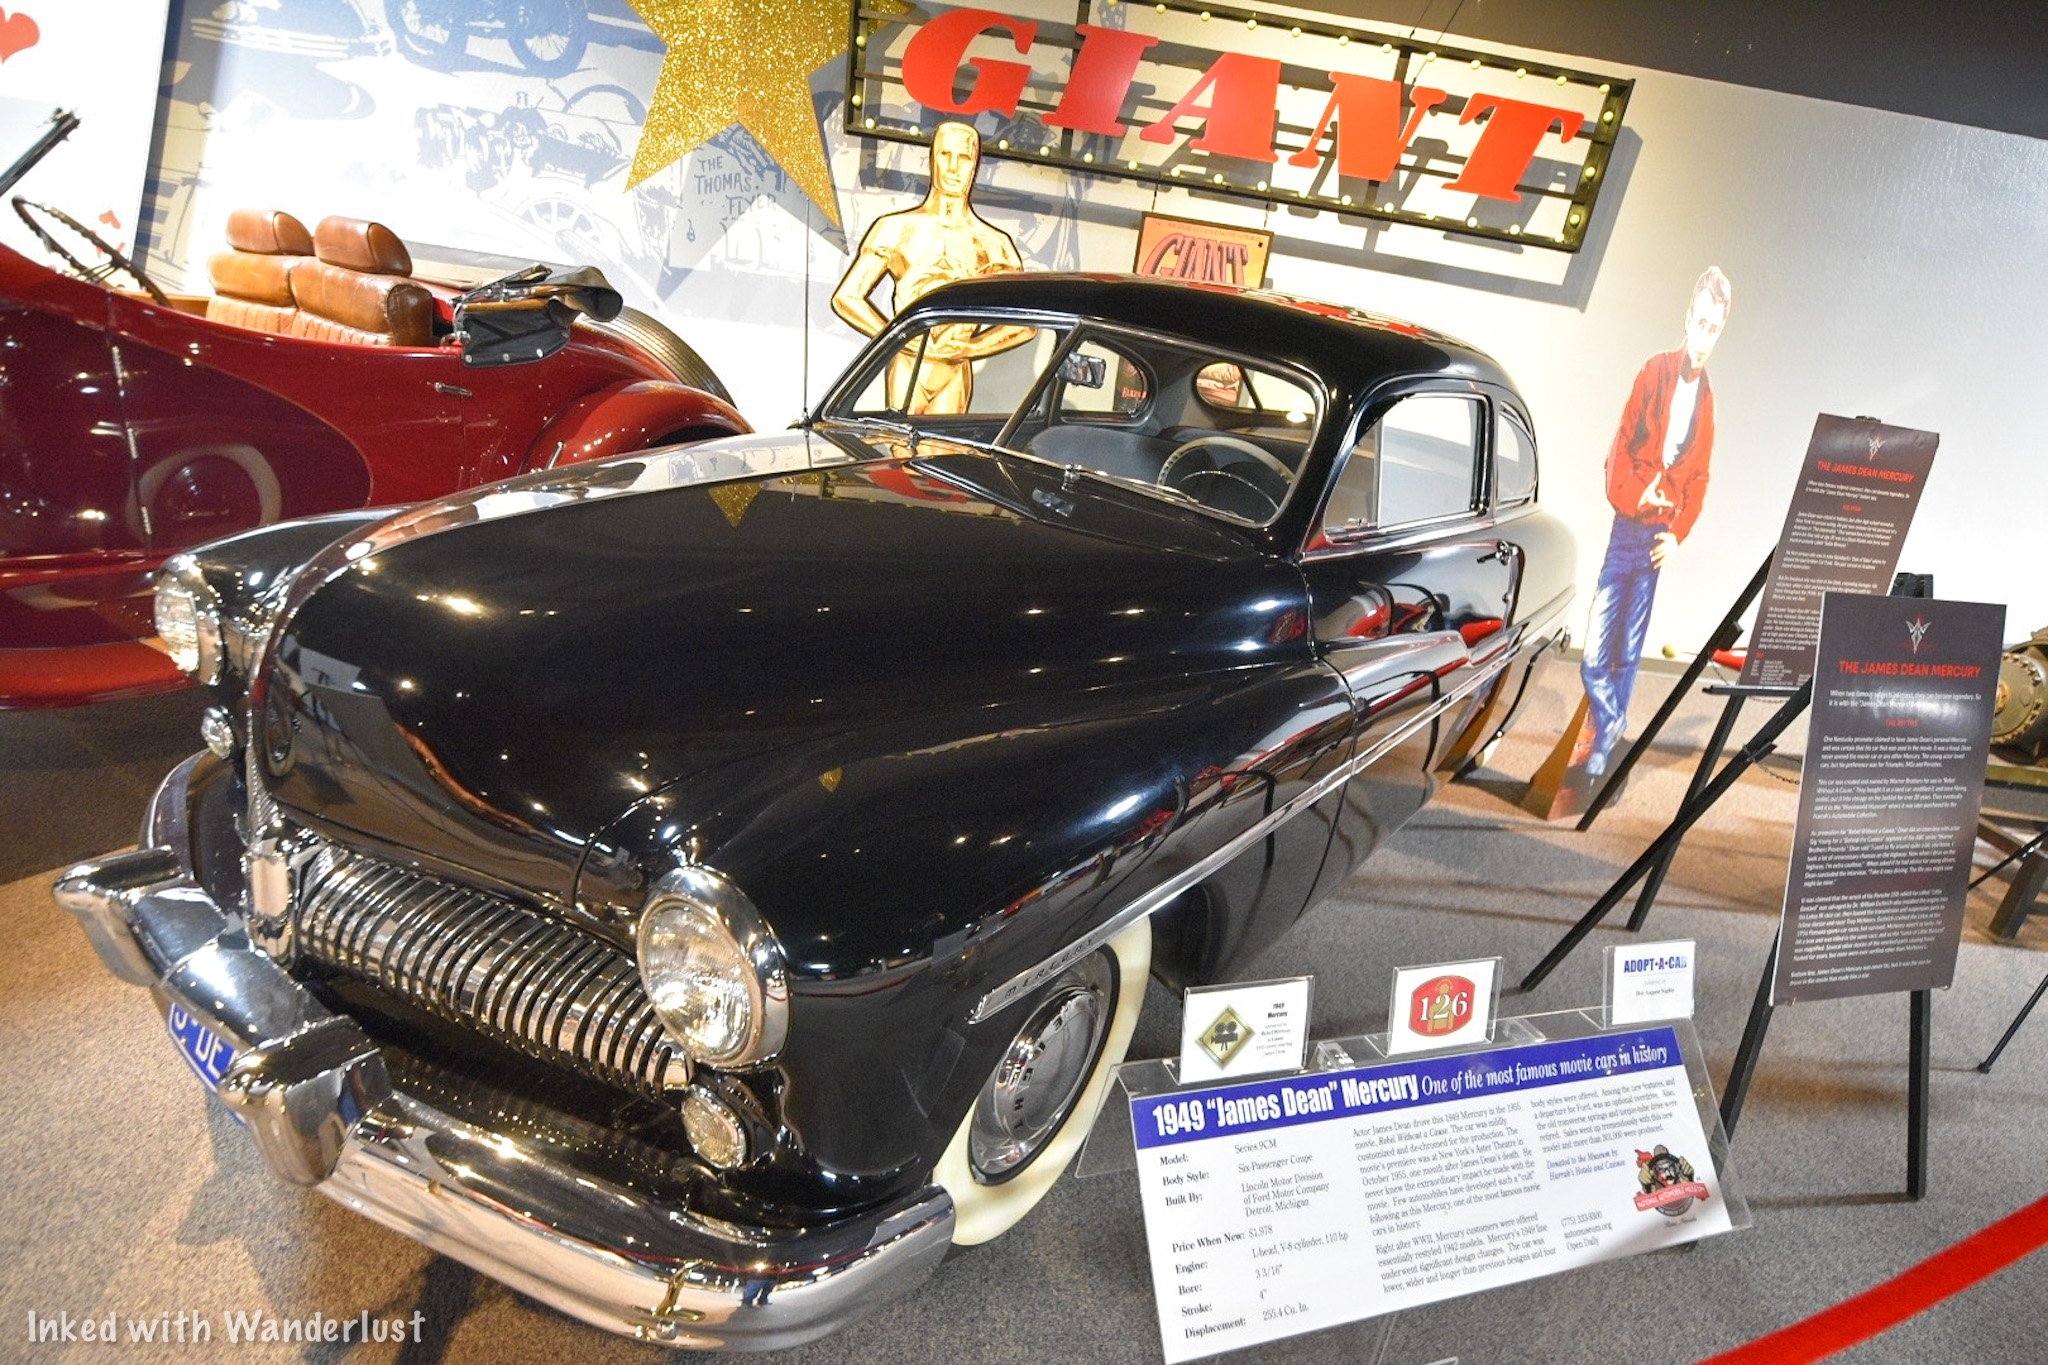
Unlike the prior three galleries, there’s no clear-cut path. It’s all open floor. So feel free to bounce back and forth between vehicles before making your exit. During our most recent visit, there was a first model Tesla on loan to the museum. It is right next to the exit. If you’re done, simply turn right out of the exit and head down “Speed Ally”. On display is a variety of race cars and their evolution throughout the years.

Conclusion
From here, you’re welcome to go back to any one of the galleries or streets to check out the cars again or you can call it a day. To find the exit, head back towards to gallery #3 (the one with the mechanic’s garage). Facing the entrance, the door to the museum lobby is on your right (look for the bathroom sign).
We hope you enjoyed this article and it inspired you to visit this awesome place for yourself. If so, please support our website by sharing it with your friends and family on Facebook, Pinterest, or your favorite social media site. You can further show support by staying on and reading one or more of the related articles above.
Thanks for reading and safe travels!
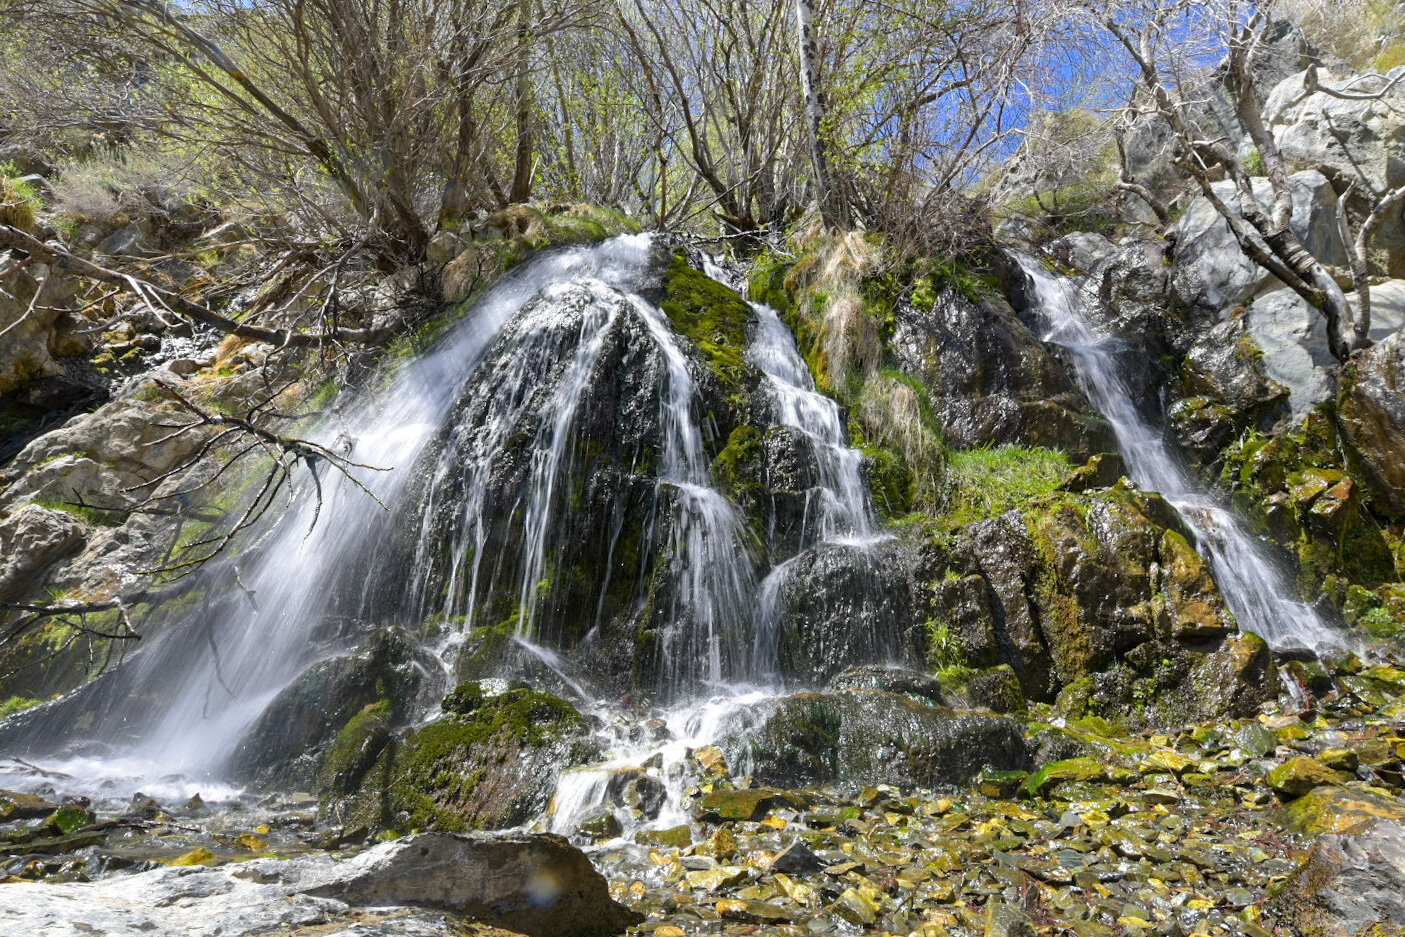
Take An Easy Hike To King’s Canyon Falls in Carson City
Located in Carson City at the end of King’s Canyon road, this 25-foot cascading waterfall offers families and solo hikers alike easy access to a natural oasis
Located in Carson City at the end of King’s Canyon road, this 25-foot cascading waterfall offers families and solo hikers alike easy access to an oasis away from the hustle and bustle of downtown.
We have been here numerous times and have almost always had the falls to ourselves at least part of the time. It is known mostly to locals, so your chances of not having to deal with hoards of tourists are decent.
If you’re planning a trip to Carson City or Reno, we highly recommend adding this place to your list of must-do activities. Below, you’ll find the information you’ll need for your visit.
The Trailhead

Kings Canyon Falls trailhead.
Getting to the trailhead from the downtown area is straightforward and simple. From the capital, you’ll do the following:
Turn onto East Musser street
Turn left onto N. Division street
Turn right onto W. King street
Continue on King’s Canyon road for about two miles
Keep left to stay on King’s Canyon road for about a third of a mile until you hit the dead end.
At the dead end, you’ll see a small dirt lot ahead of you with informative signage on both sides. This is the lot you’ll use. It can comfortably hold around 6-8 vehicles but if it’s full, you can simply park on the side of the road.

Kings Canyon Falls trailhead.
After you park, you’ll see a dirt road heading off to the left and a set of stairs leading up to some signage on your right. You’ll want to take the latter as that’s the most direct route to the falls.
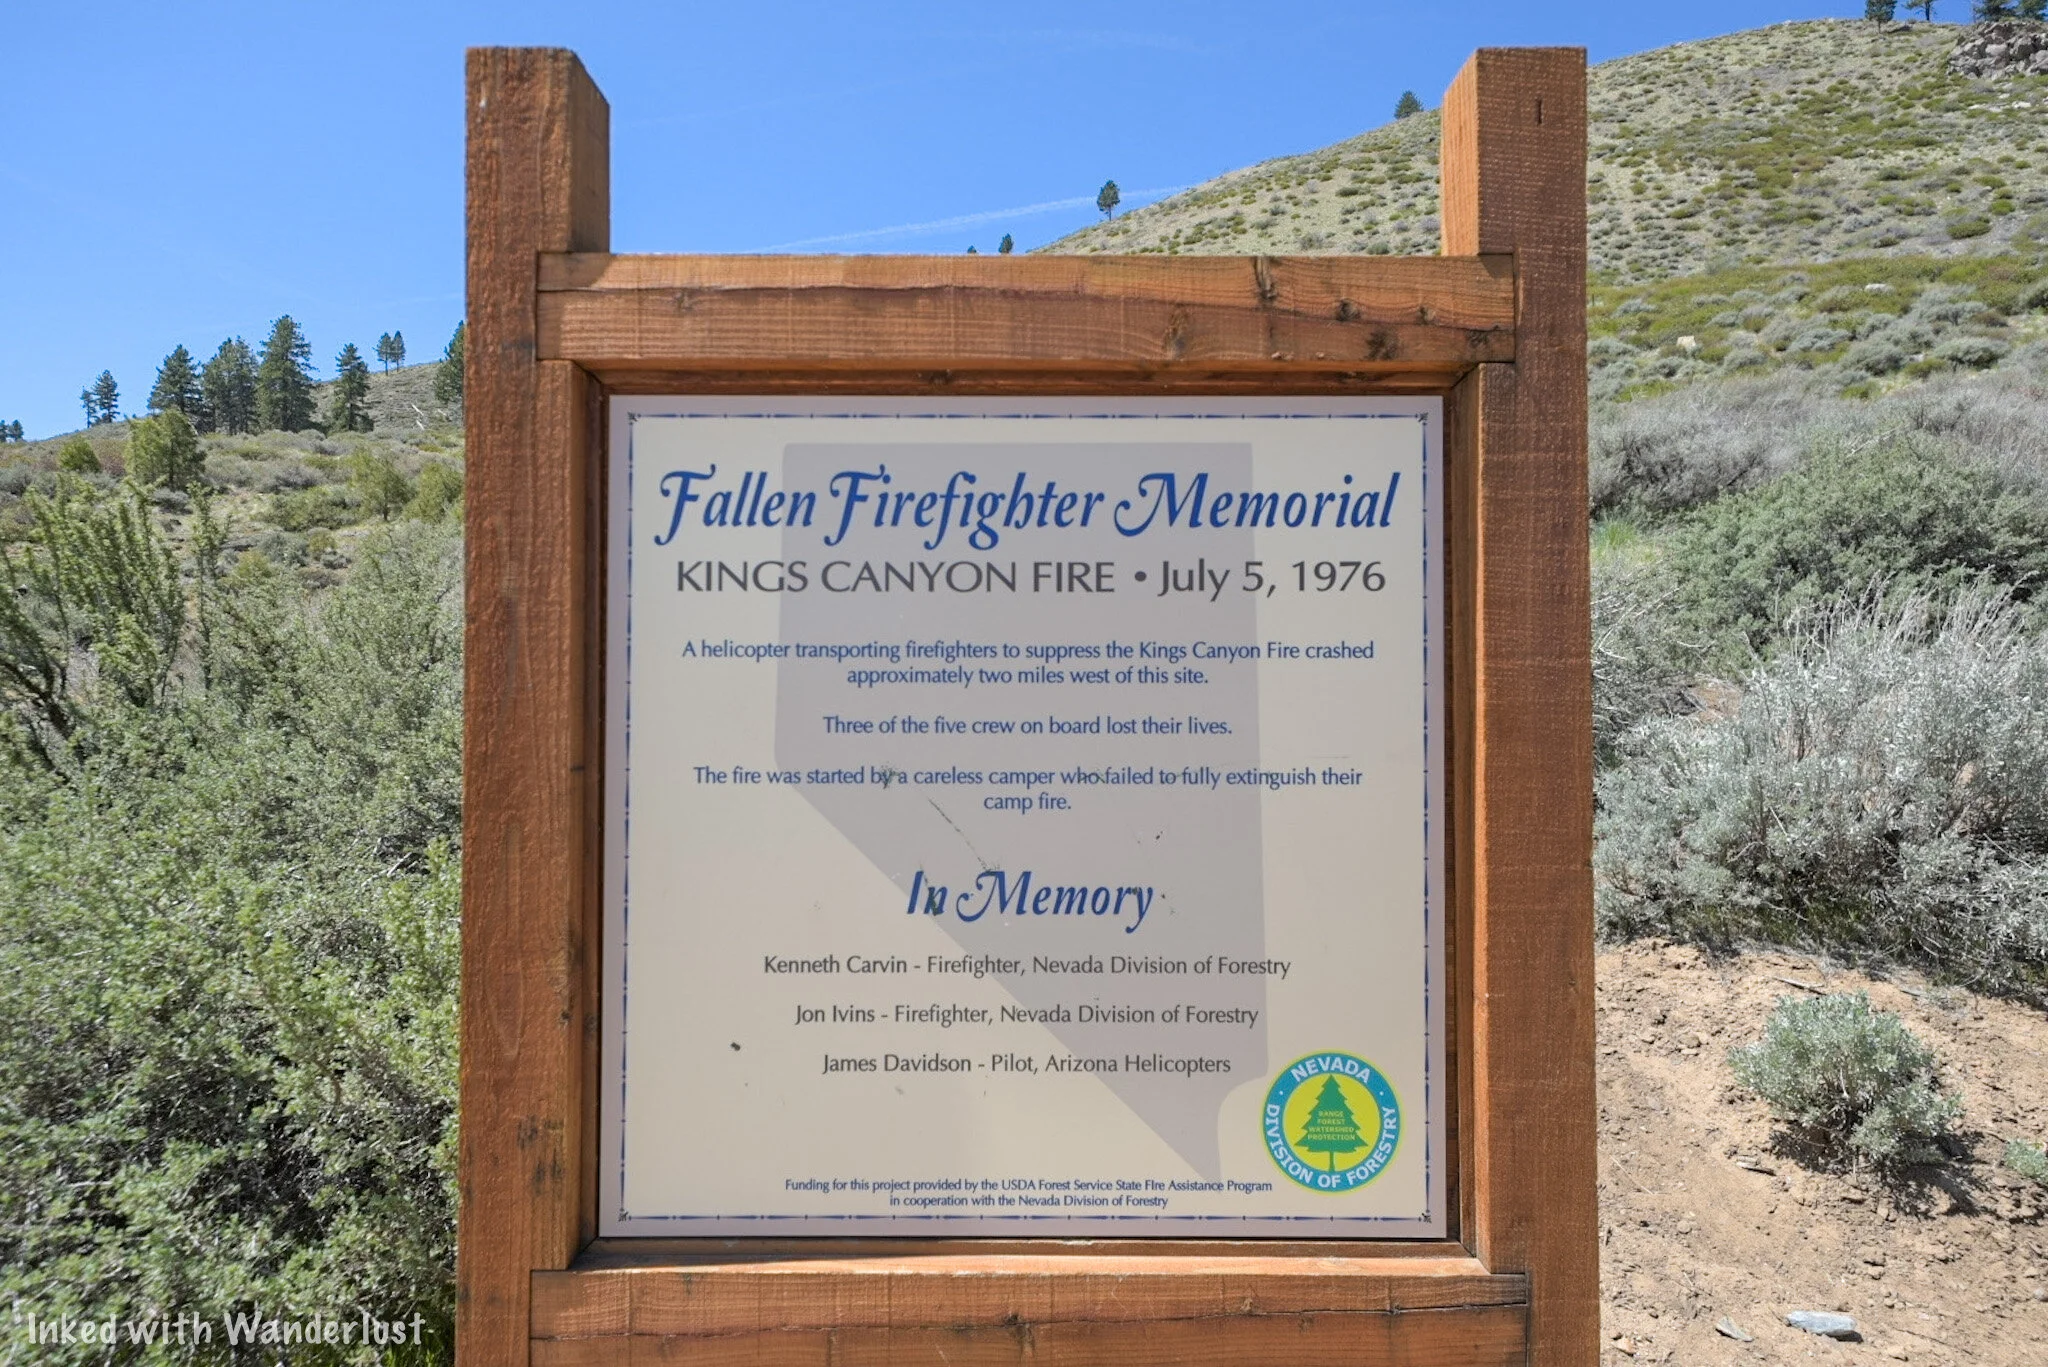
Firefighter memorial. Kings Canyon Falls.
You’ll also want to take note that this trail is for hikers only. Equestrians and biking are not permitted. If you’re looking for a trail that can accommodate one or both of those activities, check here.
Be sure to stop at the sign and read about the fire that took place in this area in 1976 and the resulting deaths of three Firefighters who bravely fought it. There’s a memorial plaque on the left of the trailhead listing the names of those of perished.
The Trail

As stated in the title, this would be considered an easy trail just based on length alone. From the trailhead to the falls, it’s just about a quarter mile over just two quick sets of switchbacks.
Don’t be fooled, though, because it is deceptively steep in some sections. It isn’t hard, but if you’re not in decent shape or you’re not used to the elevation, you’ll definitely feel it.

Trail to King’s Canyon Falls.

Kings Canyon Falls trail.
Along the trail you’ll see sporadic signs asking you to remain on the trail and not cut through. It may be tempting in some spots but please obey the signs and stay on the trail. There’s been a lot of effort in recent years to restore the area.

View of Carson Valley from the trail.
As you near the top of the trail you’ll be rewarded with sweeping views of Carson Valley below. This view is also an indication that you’re close to the falls and that the “hard” part of the trail is over with.
Also around this part of the trail is where you’ll see the junction (on your left) that leads to the 1.8-mile North Kings Loop. This trail goes over and around the falls, not to it. So you’ll want to continue straight on the trail.
The Falls

Kings Canyon Falls.

Kings Canyon Falls.
As you turn the corner into the canyon, you will run right into the falls. In fact, like most waterfalls, you’ll hear it before you see it. As you arrive, you’ll notice boulders off to the left that make for the perfect spot to get off your feet.
The falls flow year round, but spring time is when it’s at its best while getting reduced greatly in the fall. Winter is the one season we haven’t been up here but from what I hear, there is water flowing and the trail, while snow covered and icy in some spots, is still accessible.
READ ALSO: Your Complete Guide To Visiting Burney Falls

Kings Canyon Falls.

Kings Canyon Falls.
If you’re here during a particularly heavy flow, the pool at the base of the falls will be around ankle deep, at best. Prior visitors have set up rocks to step on to get across to the other side so you can avoid stepping into the water.
If you’re feeling particularly adventurous, there are boulders off to the right of the falls that you could use to scramble up to the top. From what I hear, there are small cascades you could check out up there. We have yet to do this so I can’t vouch for it, unfortunately.

Kings Canyon Falls.

Kings Canyon Falls.
Take as long as you like to hang out. People will come and go but if you’re patient, chances are good you’ll have it to yourself at some point. When you’re ready, simply turn around and head back in the same direction you came.
On the way back, you’ll again be presented with the opportunity to extend your hike via the North Kings Loop. This will add 1.8 miles to the overall hike. This is something I plan to do on my next visit so I’ll be sure to update this post when that happens.
Conclusion
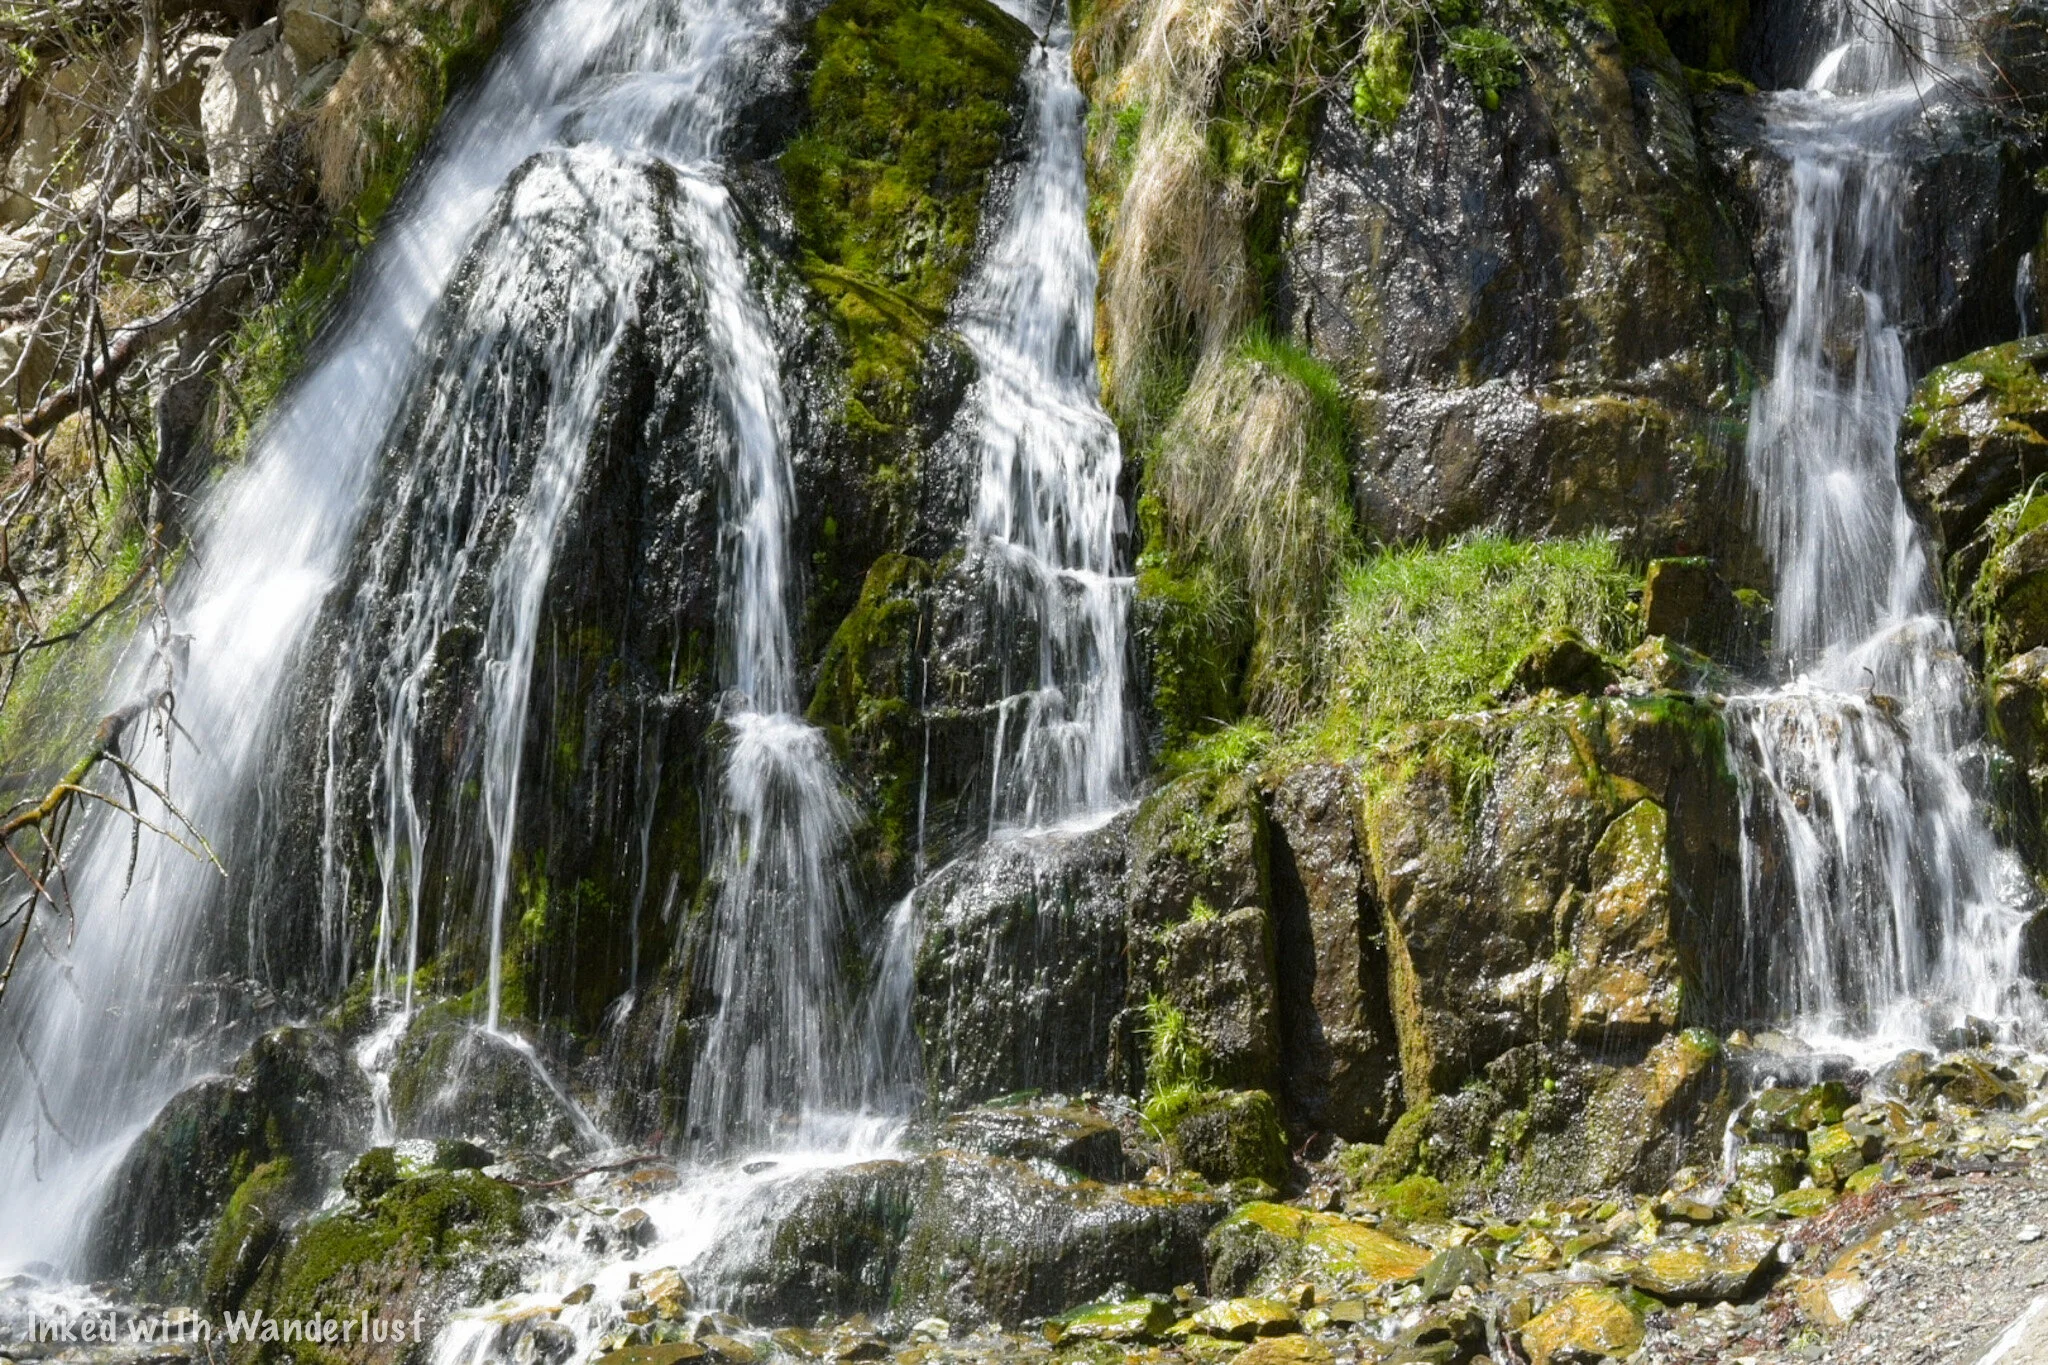
Kings Canyon Falls.
We hope you’ve found this article useful for planning out your adventures. If you enjoyed it, please support us by sharing this article with your friends and family on Facebook, Pinterest, or your favorite social media site.
You can further show your support by staying on and reading one or more of the related article above. You can also subscribe to our newsletter below. Thanks!
Safe travels.
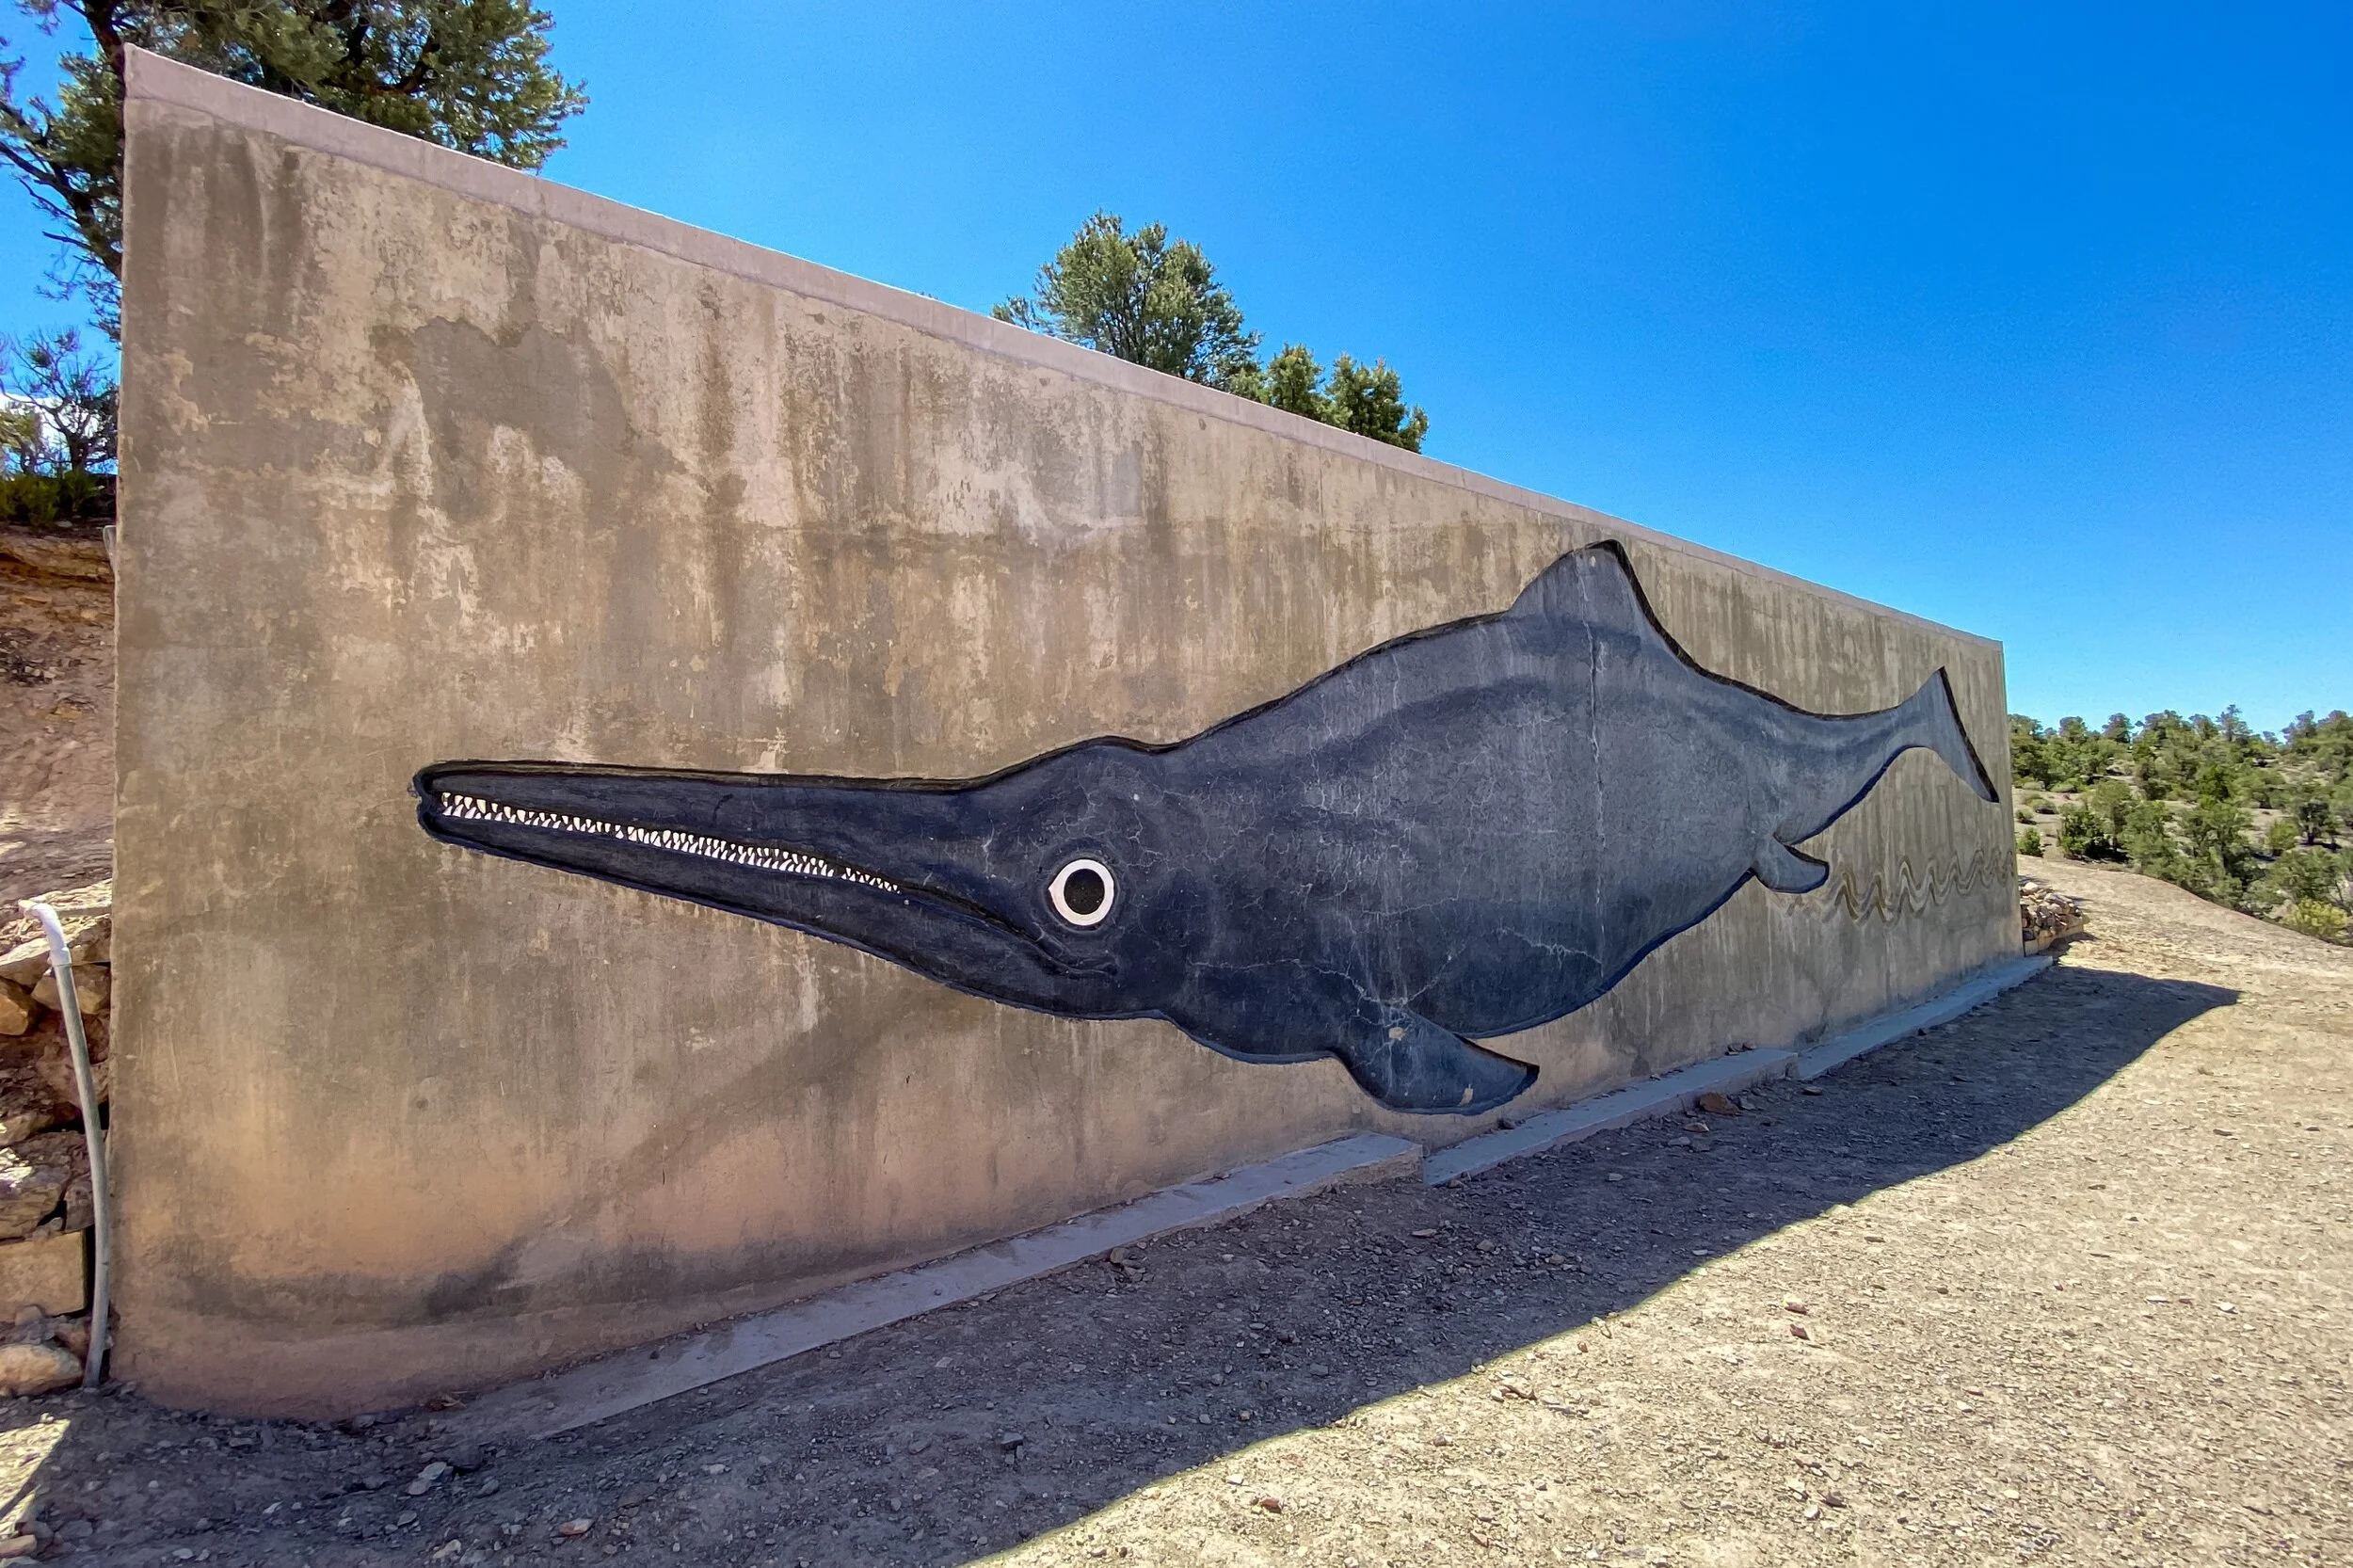
How to Visit Berlin - Ichthyosaur Historic State Park
If you love ghost towns and dinosaurs then you need to head out to this little known town in Nevada’s expansive catalogue of State Parks. Berlin-Icthyosaur (say that 10 times fast) is located
If you love ghost towns and dinosaurs then you need to head out to this little known town in Nevada’s expansive catalogue of State Parks. Berlin-Icthyosaur (say that 10 times fast) is located just outside the (very) small town of Gabbs, NV. It has been dubbed as the, “Bodie”, of Nevada and not only contains remnants of an old mining town (Berlin), but it’s also the site of some of the largest Ichthyosaur fossils ever discovered.
Berlin can be a difficult park to find as it is tucked away deep into the Shoshone Mountain Range and doesn’t receive a lot of publicity as some of the other state parks, but it is more than worthy of your efforts to get out and explore it. So read on and discover how you too can visit Berlin-Ichthyosaur State Park.
How to Get There
Berlin-Ichthyosaur State Park sign.
As stated above, Berlin is a bit out of the way and takes some effort to get to from either direction. It is located in Nye County and the nearest anything to it is the small, unincorporated town of Gabbs (population 155 as of this writing). If you’re coming from:
Reno: Take I-80 east towards Fernley. You’ll then take U.S 50 east for about 70 miles before turning right onto highway 361 and follow that for about 35 miles before finally arriving in Gabbs. From this direction, you’ll take a left on NV-844 east for 16 miles. This road will take you directly to Berlin.
Las Vegas: Make your way to U.S 95 north and follow that for roughly 215 miles. You’ll then veer right onto Route 89 to Gabbs and once there, you’ll follow the same directions above. The only difference is you’ll turn right on NV-844 to the park.
Salt Lake City: You’ll get onto I-80 west and follow that for 300 miles. You’ll then take the exit for NV-305 south heading for the town of Austin. Once in Austin, you’ll briefly turn left on the Lincoln Highway before exiting to NV-722 (you’ll pass the Austin airport). Then, turn left on NV-21 before turning right onto Forrest Developed Road 024 (this will be the back way into Berlin).

Berlin-Ichthyosaur State Park entrance.
As you can see, no matter which direction you are coming from, it’s going to be an adventure just getting to Berlin. So whichever way you’re coming from, be sure to stop at one of the bigger towns and fuel up before arriving in Gabbs or Berlin as there are no services in either. It also wouldn’t hurt to make sure your tires are properly inflated and all your fluids are good.
With the exception of the final few miles and coming in through the back way, all roads leading to Berlin are paved and well maintained. The last stretch is on a maintained gravel road. My Chevrolet Cruze made it up there perfectly fine. Potholes and dips were minimal. Keep in mind that if you’re using GPS, it may or may not have you go right at the split. Don’t. Keep to the left road and that will take you straight to the main entrance.
The Fossil House

The Fossil House.
It’s totally up to you on where you want to start. Once you’ve paid your entry fee, you’re free to enjoy the park at your leisure. However, we visited during the covid-19 crisis and one of the ways they were trying to prevent the spread at this particular location was to close the Fossil House. Thankfully, we were one of only two cars that came through this day so the Ranger was kind enough to open it up for us to check out. So we started our day here.
To get to the Fossil House, simply stick to the main road. You’ll eventually pass by the campground and will see a narrow road on your right with a sign pointing the way. Take this road. Be warned, this road is VERY narrow and there isn’t a whole lot of room for two vehicles to pass each other. At the top of the hill, you’ll come to the road’s terminus at the parking lot for the Fossil House. You’ll see a giant mural of an Ichthyosaur to the right of the lot to make it fairly obvious that you’re in the right spot. This mural represents the actual size of the largest, intact fossil inside the house.

Mural of an actual sized Ichthyosaur.
As you can see from the above photo, Ichthyosaurs were known to get huge. Some coming in at over fifty feet in length. The fossils found at this location were discovered in 1928 with excavations beginning in 1954 and running through the 1960’s. After it was all said and done, there were 40 near-complete Ichthyosaurs found at various locations throughout the park.
Tours of the Fossil House are 40 minutes in length and offered during the following times:
Daily, Memorial Day through Labor Day at 10am and 2pm with an additional noon tour offered on Saturdays and Sundays.
From March to Memorial Day and Labor Day to late November, there is no noon tour.
FOR THE REMAINDER OF 2020 AND UNTIL FURTHER NOTICE, TOURS OF THE FOSSIL HOUSE ARE CANCELED! I will update this once official information from park officials are provided. There are viewing windows at the Fossil House that you are free to use.
There is a fee to take this tour. It is $5.00 per person while kids 12 and under are free.

The excavation site inside the fossil house at Berlin State Park.
Inside the Fossil House, there’s a small loop trail and takes you around the excavation site with actual fossils in the middle of it. There are numbered, white markers next to certain sections of the fossil that explain which part of the Ichthyosaur you’re looking at. At first, it won’t make any sense but eventually you’ll see it and that “ah hah” moment will hit you.
I’m grateful to the Ranger that opened the house and allowed us to explore it at our leisure. Normally, as stated above, this is part of a tour. The Ranger gave us the booklet he uses during the tour that matches up to the markers on the fossils and explains everything. Once we were done, we chatted with him a bit and then left to explore Berlin proper.
To the Ranger that did this for us; If you’re reading this, thank you so much.
Berlin: A True Nevada Ghost Town

Berlin-Ichthyosaur State Park.
Once we got our fill of Ichthyosaurs, it was now time to explore the ghost town portion of the park. We drove back down to the town proper and found a small parking space near the visitor center and flag pole. In case you’re here during a particularly busy day, just know that parking can be a little scarce here. You may have to get creative.
Berlin was a true, turn-of-the-century mining town. The height of its peak ran from 1898 to its death in 1911. However, mining activity began in the area as early as 1863 when silver was discovered in Union Canyon resulting in the formation of the Union Mining District and included the towns of Berlin, Grantsville, Ione, and of course, Union. A few years later in 1896, the Berlin Mine was established.
By the time mining concluded in 1911, the estimated total production of Berlin was $849,000 with a price of $20 per ounce of gold. Around 250 people including Miners, Wood-Cutters, Charcoal Makers, a Doctor, Nurse, Forest Ranger, and Prostitute made up the town. The cool thing about this abandoned town is that not some, but MOST of the original buildings are still standing and there are even some original residents still buried in the town cemetery.
Here are a few of the highlights you’re able to check out on this self-guided tour:

The Machine Shop
This was what we know now to be a Maintenance Shop. Here, Blacksmiths and Mechanics worked to keep the machinery of the mine in working order.
Every so often, a passer-by would have his vehicle towed here to be worked on after breaking down.

The Assay Office
Here, samples of rock, ore, and concentrates from the mill would be sent for processing (assayed) to determine the values they contained.
The furnace used charcoal because it was the only clean burning fuel available locally. The night watchmen would use this office to keep warm and eat their meals.
The Stage Station
This is where the stage driver and his horse would live…together. A partition inside separated the living quarters from the barn section of the building.
The men who drove stage during this time was John Mullin, Ed Dieringer, and Alex Dyer.

Company Store
There’s nothing much left now, but this was once the site of the company store. Here, they sold everything from mining equipment, clothing, groceries, and drugs to locals and workers.
During labor troubles in 1905, the store also served as a jail. The building you see in the background was a storage warehouse.

Superintendent Home
This was the home of the mine’s superintendent and now serves as a small welcome center.
During a labor strike in 1907 when the miners wanted a raise from $3.50 to $4.00 per day Mr. Bowen, the Super, shut the mine down.
To counter, the miners teamed up and forcefully escorted Mr. Bowen off property. He then drove to the town of Tonopah and brought back a Sheriff to help re-gain control.

The Berlin Mill
During the heyday of Berlin’s production, you’d see a beehive of activity here.
One man would be operating the crusher, another tended the 30 stamps and concentration tables, while another looked after the boilers and steam engines.
This is by no means an exhaustive list of features found in Berlin. Other cool things to check out include the town cemetery, mine foreman’s house, miner’s dugout, entrance to the Berlin mine, doctor’s house, and more! As you can see, you could easily spend a full day or more checking everything out in Berlin.
Lodging & Fees

The nearest hotels and/or Airbnb’s you’ll find are in the bigger towns nearby. These include Fallon, Austin, and Hawthorne. If you want to stay in the park, they have an established campground you could utilize. It contains 14 well-spaced units, some being able to accommodate RV’s up to 25 feet long. Each unit comes with a fire pit, BBQ grills, covered picnic tables, and drinking water (outside of winter). Restrooms and an RV dump station are located nearby.
The fee to camp is $15.00 per night with a 14 night maximum (30-day window). Keep in mind that this per night fee is in addition to your entry fees which are:
$5.00 per vehicle
$2.00 per bike (motorcycle)
When you arrive, someone may or may not be at the gate collecting entry fees. We arrived just before the Ranger was about to take off so he was kind enough to take our money and fill out the envelope for us. If there is no one there, simply stop at the gate to fill in the envelope and drop it into the red deposit pole (with your fee included, of course). Much like most Nevada State Parks, only cash is accepted for entry fees.
There are also no restaurants or vending machines in the park. So be sure to bring snacks and water with you. There is one restaurant in Gabbs (the gateway town to Berlin). It is called, “R&D’s Bar”, and serves up burgers, fries, hot dogs, chicken wings, and similar fare. Aside from that, you’ll need to get to the bigger towns listed above.
Directly adjacent to the pay station at the main entrance is a restroom of the pit toilet variety. I must admit that of all State and National Parks I’ve been to, Berlin had THE cleanest restroom of its kind. There is another restroom located near the campground.
Conclusion

Berlin Mill. Berlin-Ichthyosaur State Park.
Berlin is perhaps Nevada’s most intriguing and unique state park. The combination of an abandoned mining town and the discovery of a massive amount of Ichthyosaur fossils should put Berlin at or near the top of any traveler’s list of places to explore. It’s also a great place to shoot dark sky photographs if you have the gear. I highly recommend and encourage you to visit this amazing place for yourself. Thanks for reading!
Safe Travels.
Have you visited Berlin? Do you plan to? Tell me about it in the comment section below!
Support this site by sharing this article with your friends and family on your favorite social media page.