
10 Best Spots for Scenic Views of the Golden Gate Bridge
Consistently ranked as the number one most popular attraction in San Francisco, the Golden Gate Bridge is an awe-inspiring symbol of human en…
Disclosure: This post contains affiliate links. If you make a purchase through these links, I may earn a small commission at no additional cost to you. I only recommend products or services that I believe will add value to my readers.

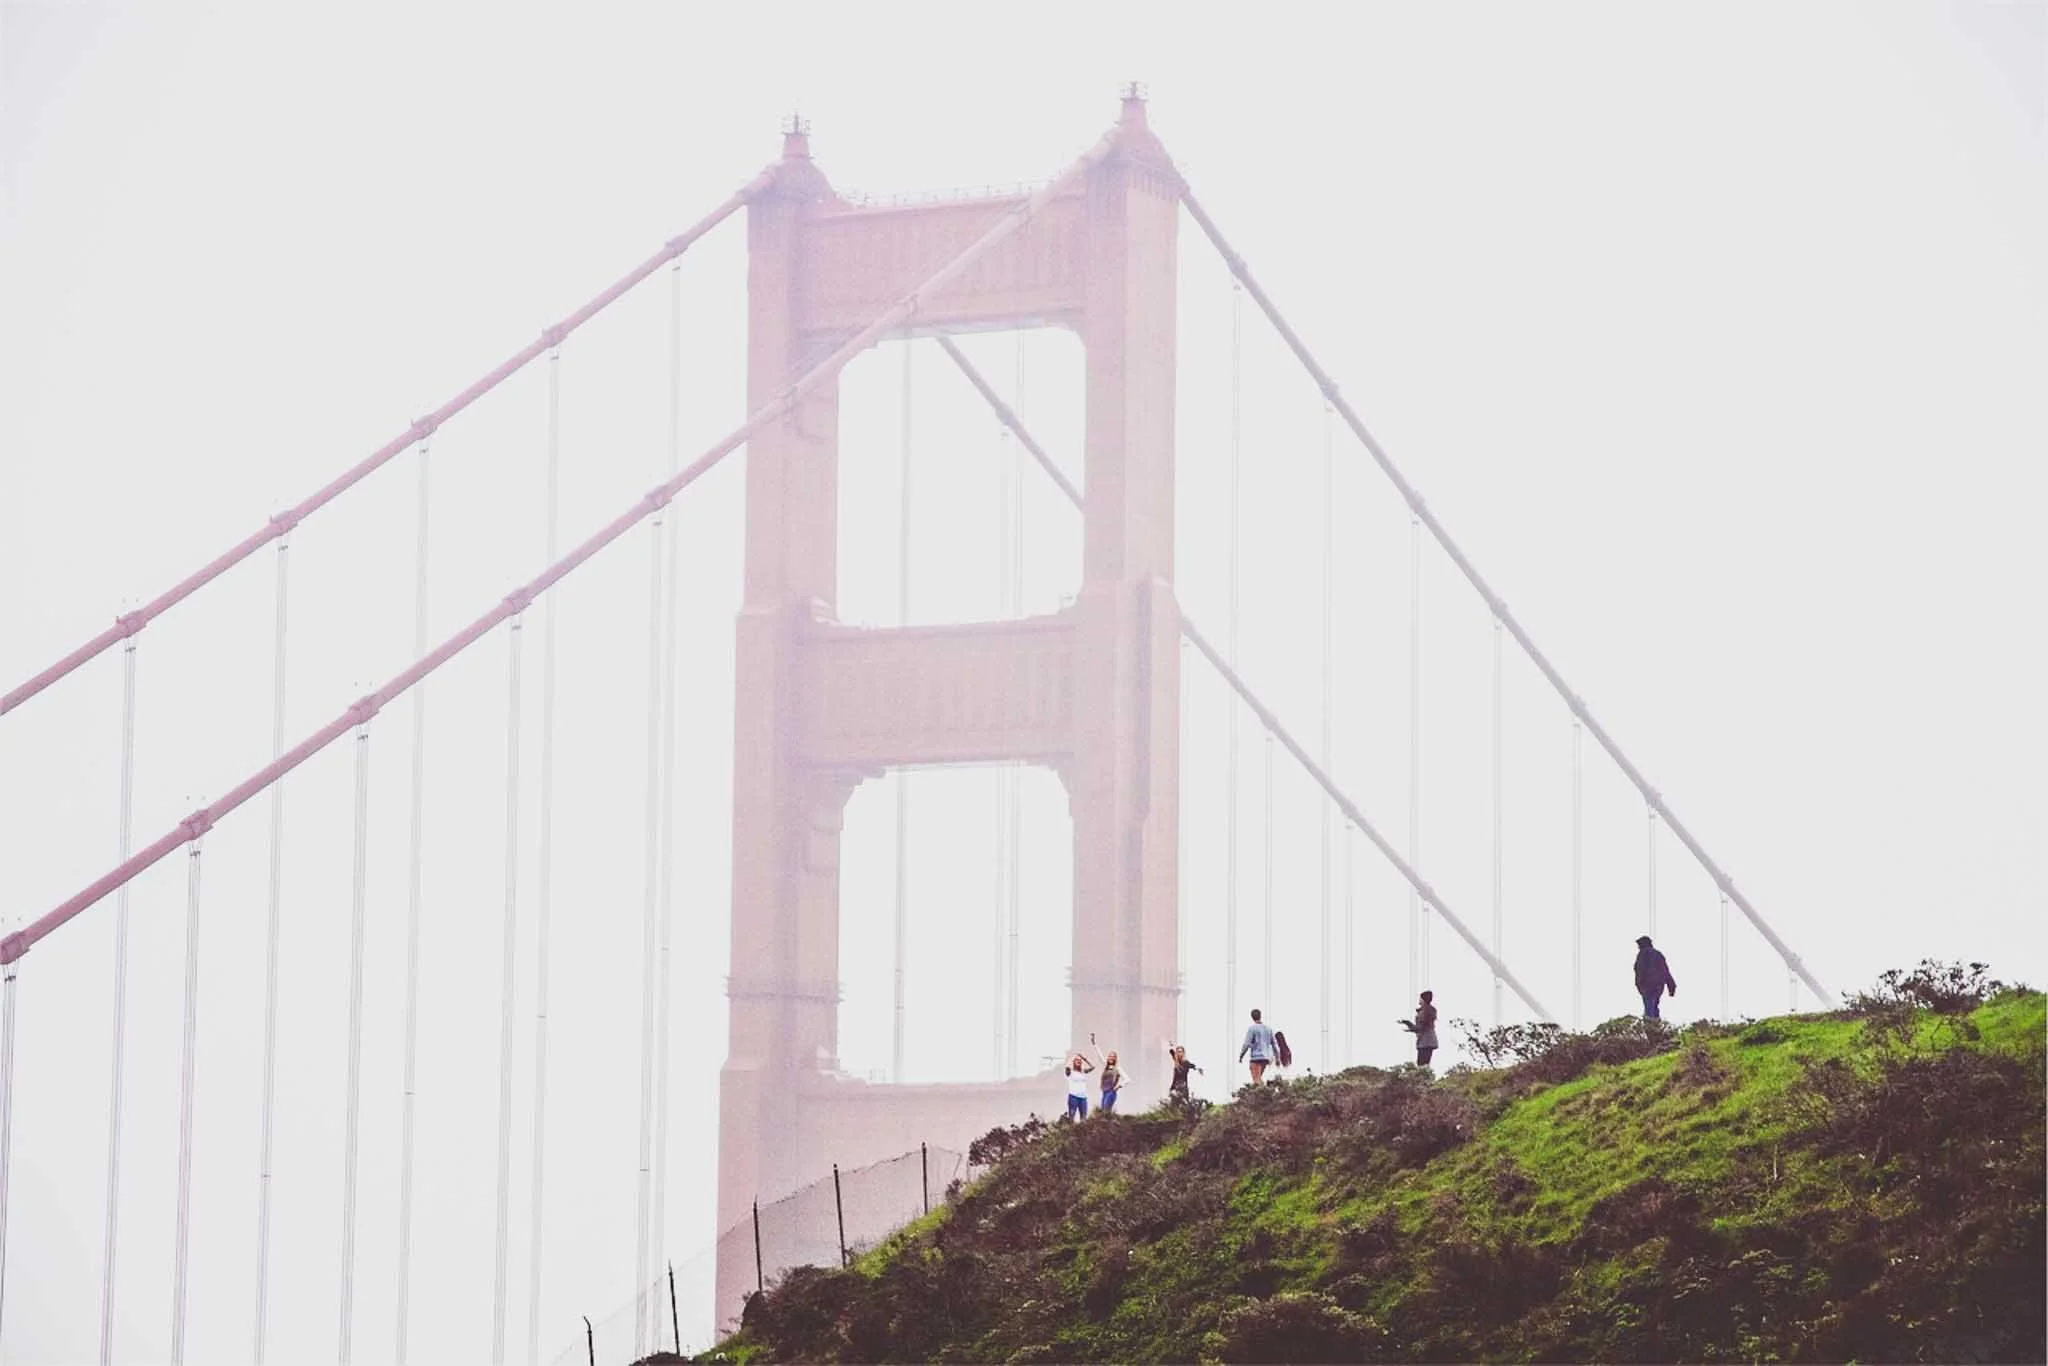
Consistently ranked as the number one most popular attraction in San Francisco, the Golden Gate Bridge is an awe-inspiring symbol of human engineering and thanks to it being one of the most photographed bridges in the United States, it's well known throughout the world and is often sought after by domestic and foreign visitors alike.
There are many spots in and around the city that offer great views of the bridge. From craggy bluff-lined beaches to historic batteries, all the way to walking on the bridge itself, a great view isn't hard to find…you just need to know where to look. There are a handful of classic, well known spots, along with a hidden gem or two.
I grew up in and spent a good chunk of my life in the San Francisco Bay Area. I've walked this iconic bridge numerous times and seen/photographed it from various vantage points. While I feel there isn't a single, absolute best view of the Golden Gate Bridge, I do have my favorite spot or two (or ten) to share with you. Each offer unique perspectives and are easily accessible to most. Let's get into it!
Buy me a coffee?
If you’ve found this blog helpful, please consider leaving a tip through the Buy me a Coffee button below. Whether it’s $1 or $5, every bit helps to offset small travel costs such as coffee, meals, and parking/entrance fees. Your support means a lot—thank you!
First, a Few Things to Note…
First and foremost, I highly recommend either bringing your own vehicle or getting a rental. Utilizing ride share is possible with many of these spots, though it's gotten expensive in recent years, particularly in big cities such as San Francisco. Joining a tour group would get you to most of these, but you'd be tied down to their timeframe, itinerary and pace.
Having your own vehicle provides ultimate freedom to visit and explore as many spots on this list as you wish. Though I do feel a responsibility to warn you about San Francisco's vehicle break-in epidemic. It's gotten better in the last couple years now that local officials are taking a stricter stance on this sort of thing, but it still occurs.
Never leave anything of value in sight in the car or in the trunk. If you do, you'll likely return to your vehicle to find smashed-out windows and your belongings gone. Additionally, camera theft, specifically the DSLR and mirrorless variety, has been a problem as well. Multiple photographers, often in broad daylight in populated tourist areas, have been robbed of their camera gear.
I don't say this to deter you from visiting. Both of these issues have waned in recent years, but you never know. Keep your wits about you, keep your gear out of sight when you're not using it, and pay attention to your surroundings. I've used my expensive and noticeable DSLR throughout the city multiple times and have never been bothered. Be street smart and you'll be fine.
1) Lands End Trail
Lands End is a fair distance from the bridge, but from its hiking trail of the same name, you'll have an expansive view of it with the Pacific Ocean providing the beautiful foreground along with craggy bluffs on your right. Additionally, Lands End contains the ruins of the historic Sutro Baths that you can (and should) explore, along with the iconic Cliff House.
Know that if Carl is present (the locals pet name for San Francisco's infamous fog) you'll likely have no view of the bridge. Therefore a visit to Lands End is best on a clear day. Not just for the view, but also so you can safely explore the baths and hike the beautiful Lands End Trail. To read more about it, check out my Lands End post here.
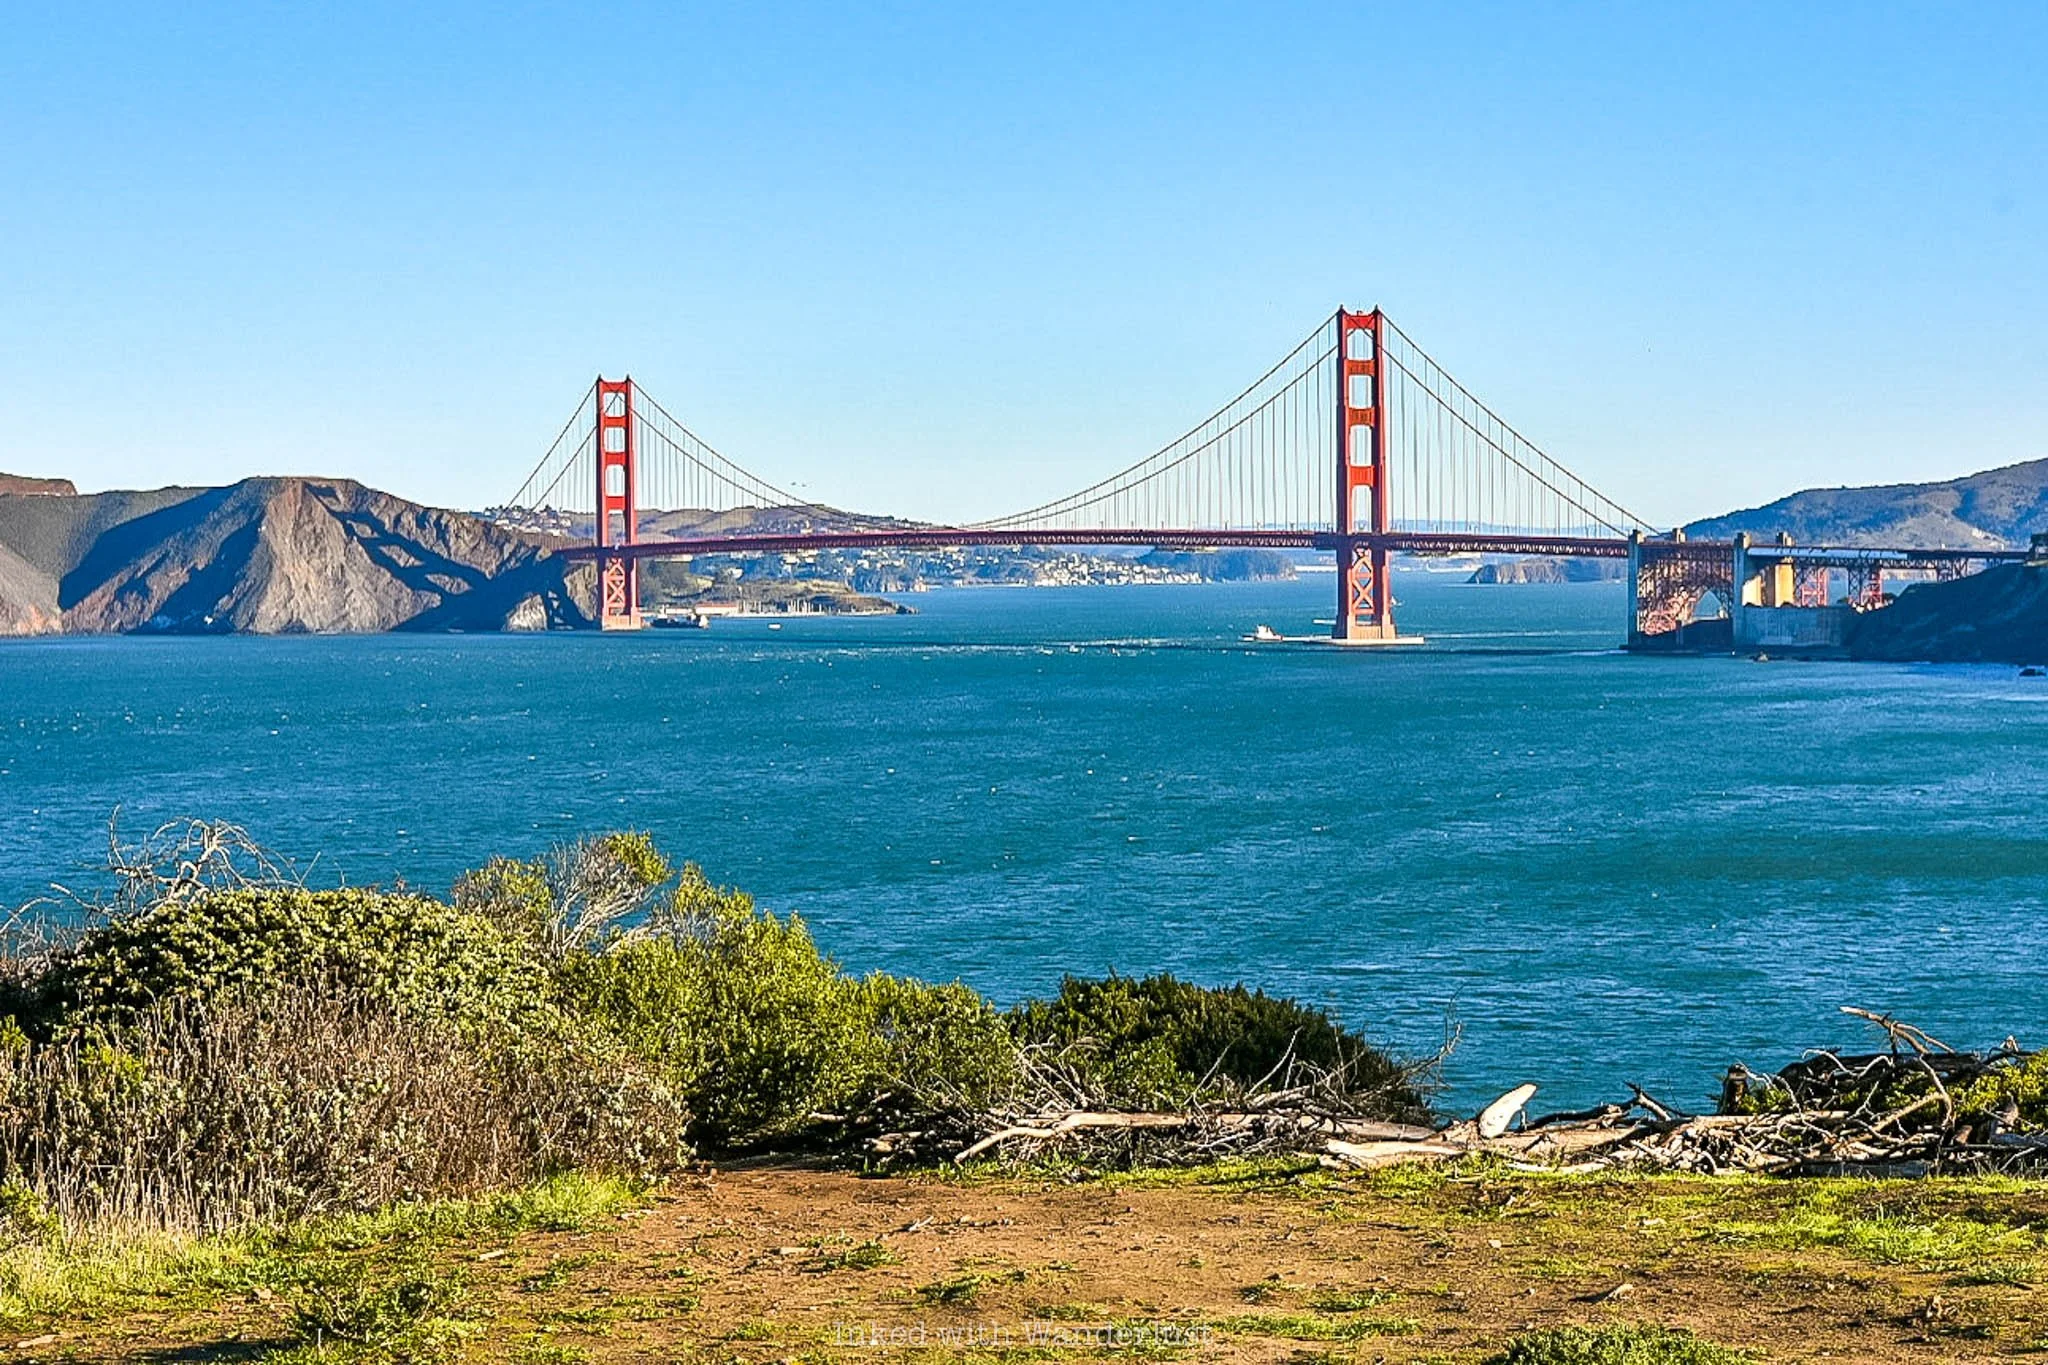
2) Battery Spencer
When it comes to Golden Gate Bridge views, this vantage point is one of the most iconic as you've likely seen tons of photos of it throughout the interweb and in various films. To get there from the city, you'll need to drive to the north side of the bridge. There, you'll be outside of San Francisco and in the Marin Headlands, which is a treasure-trove of exploration all its own.
The view is nearly 500 feet up, offering a commanding view of the bridge, the ocean, and the San Francisco skyline in the distance. On it sits the ruins of a civil war-era artillery battery where soldiers once stood guard over the Golden Gate Straight, watching for potential incoming enemy combatants. Parking and accessing Battery Spencer is free.
Since it's a popular spot, early mornings would be the best time of day to visit to beat the crowds. This epic view is hard to beat but further up Conzelman Road is Hawk Hill, which offers an amazing view of the bridge from an even higher vantage point.
3) Marshall’s Beach
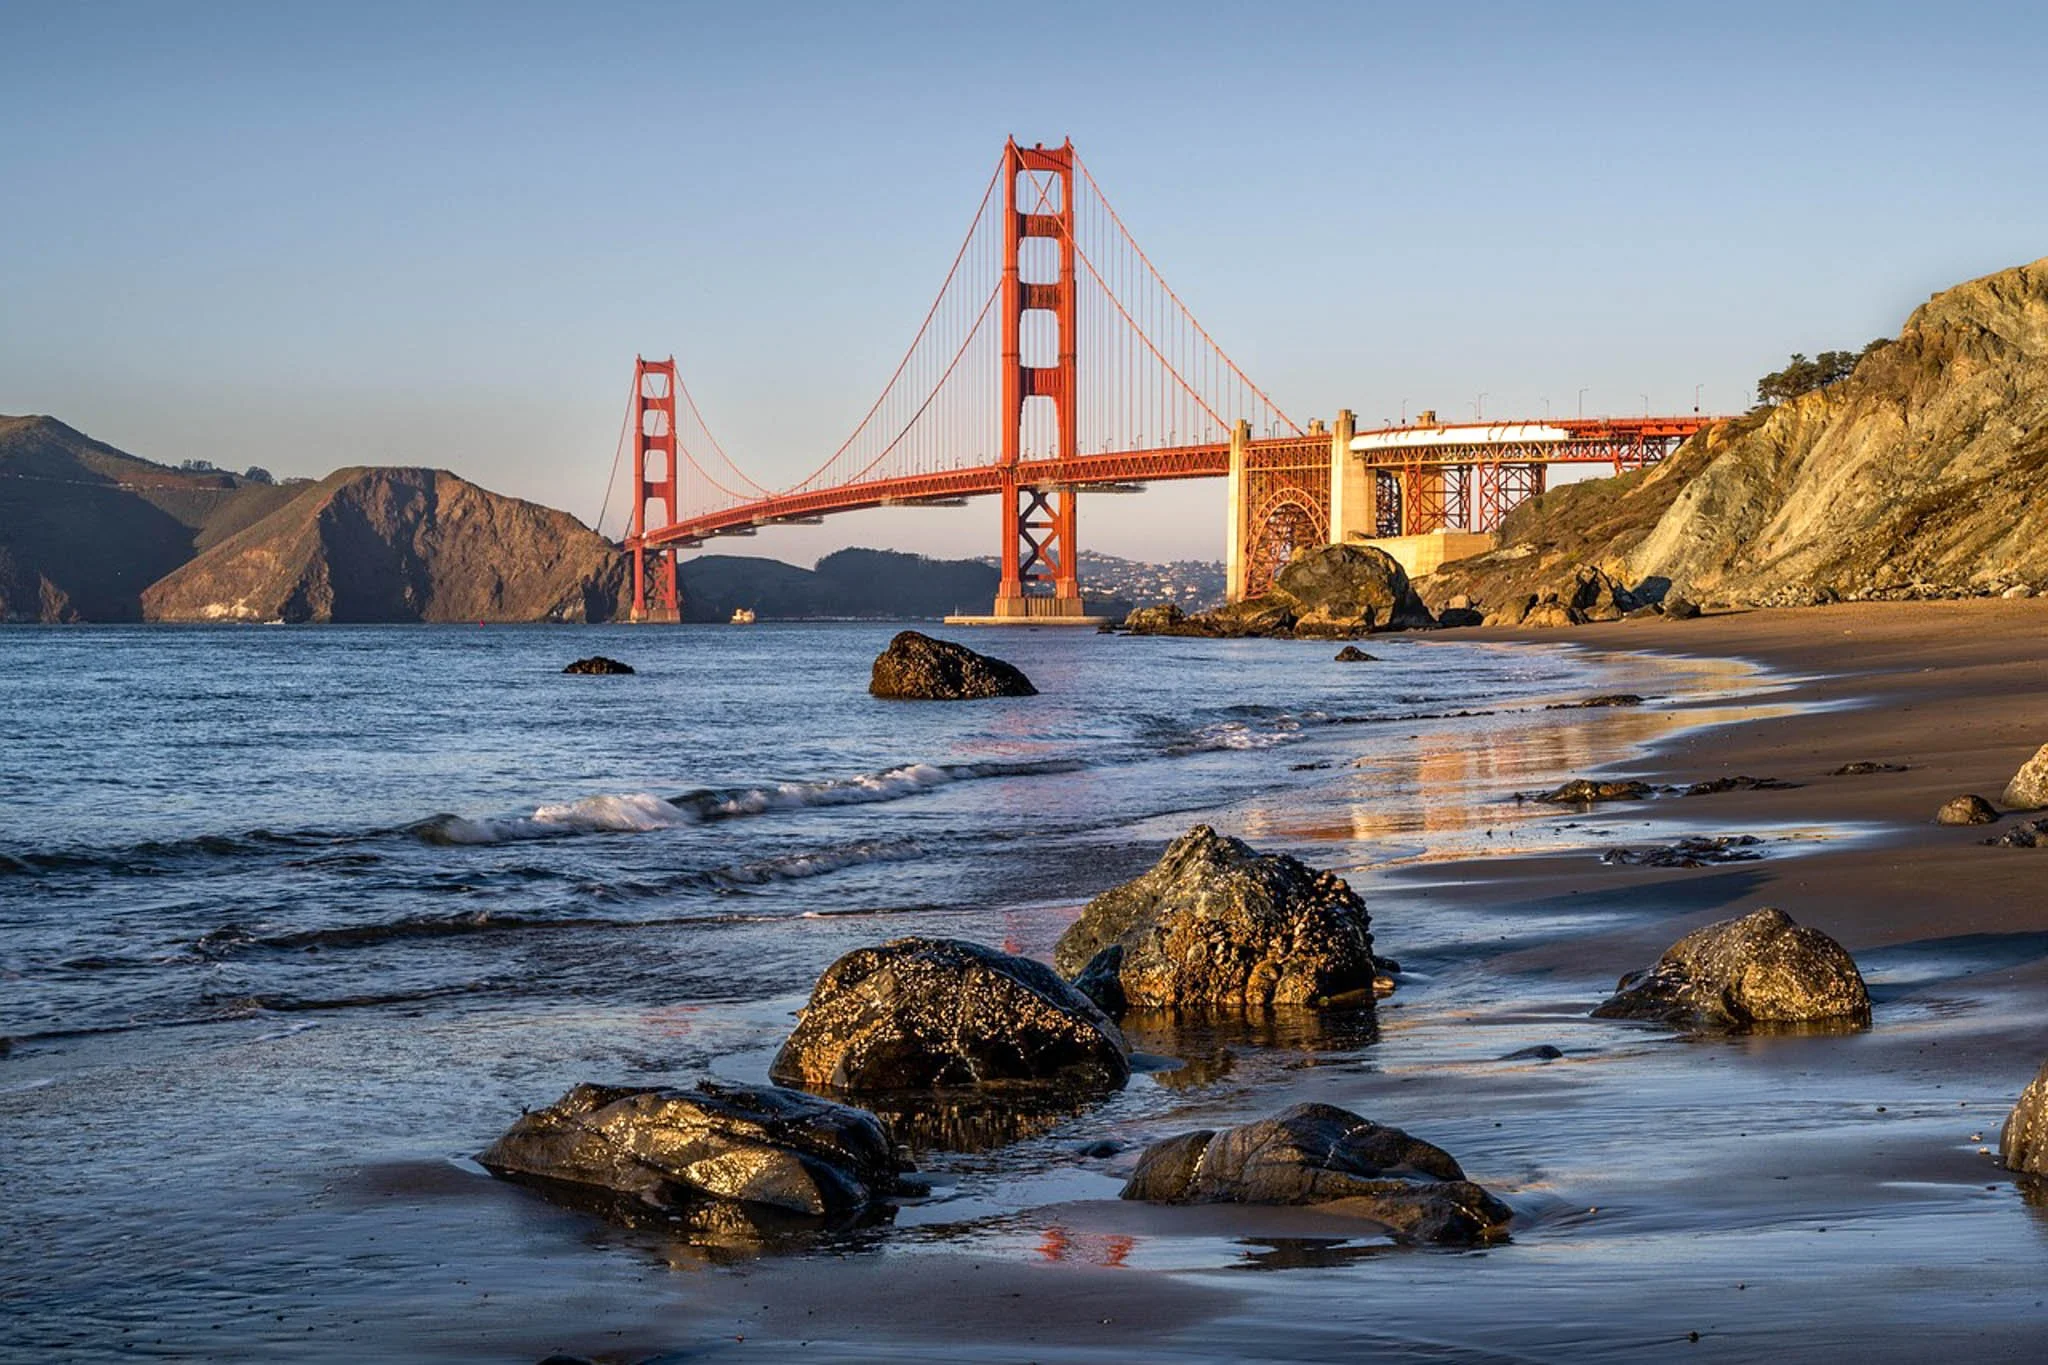
Back to the city side of the bridge, Marshall's Beach offers a remarkable view of the Golden Gate Bridge and is often cited as one of the best. It offers a from-the-ground perspective, which differs greatly from the aforementioned Battery Spencer lookout. You won't be able to see the city skyline from here, but you will be able to see the headlands across the ocean.
One important notation to Marshall's Beach is it can be a bit spicy given its designation as a nude beach. However, its rise in popularity in recent years has caused many to abandon it in favor of greater privacy elsewhere. Still, that designation holds, so be prepared for that possibility. If you have small children in tow, it would probably be best to skip this one.
4) From the Water
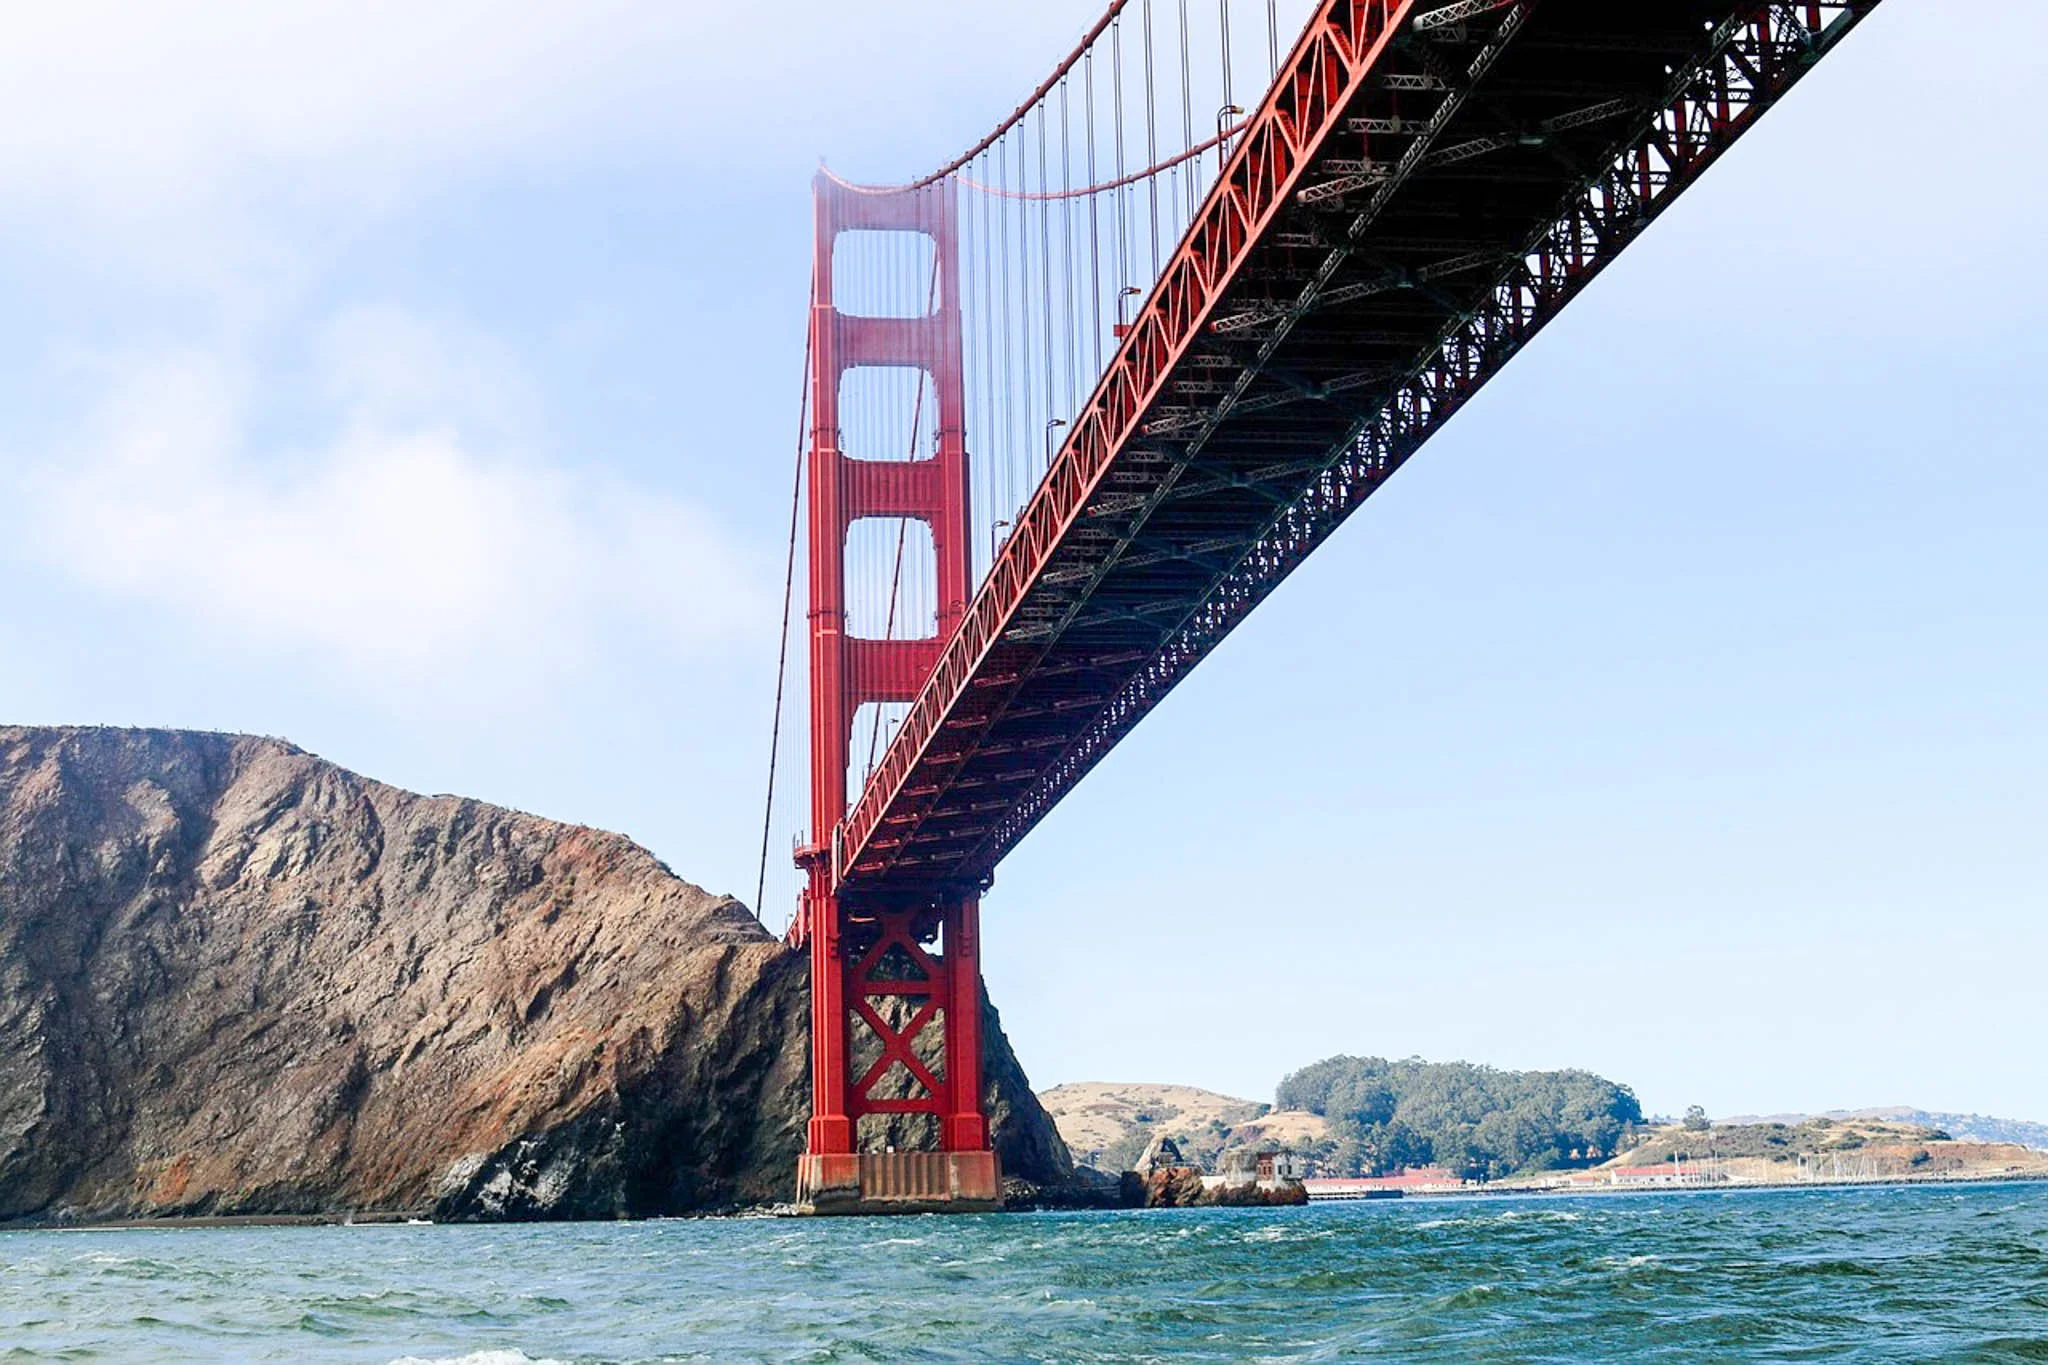
For a completely different perspective of the Golden Gate Bridge, take a cruise of the Golden Gate Straight by booking a bay cruise through a variety of operators (check out the offerings from my affiliate partner, Viator, at the links below). Nearly all of them cruise underneath and around the famed bridge and include other sights such as Marine Headlands, Alcatraz Island, and more.
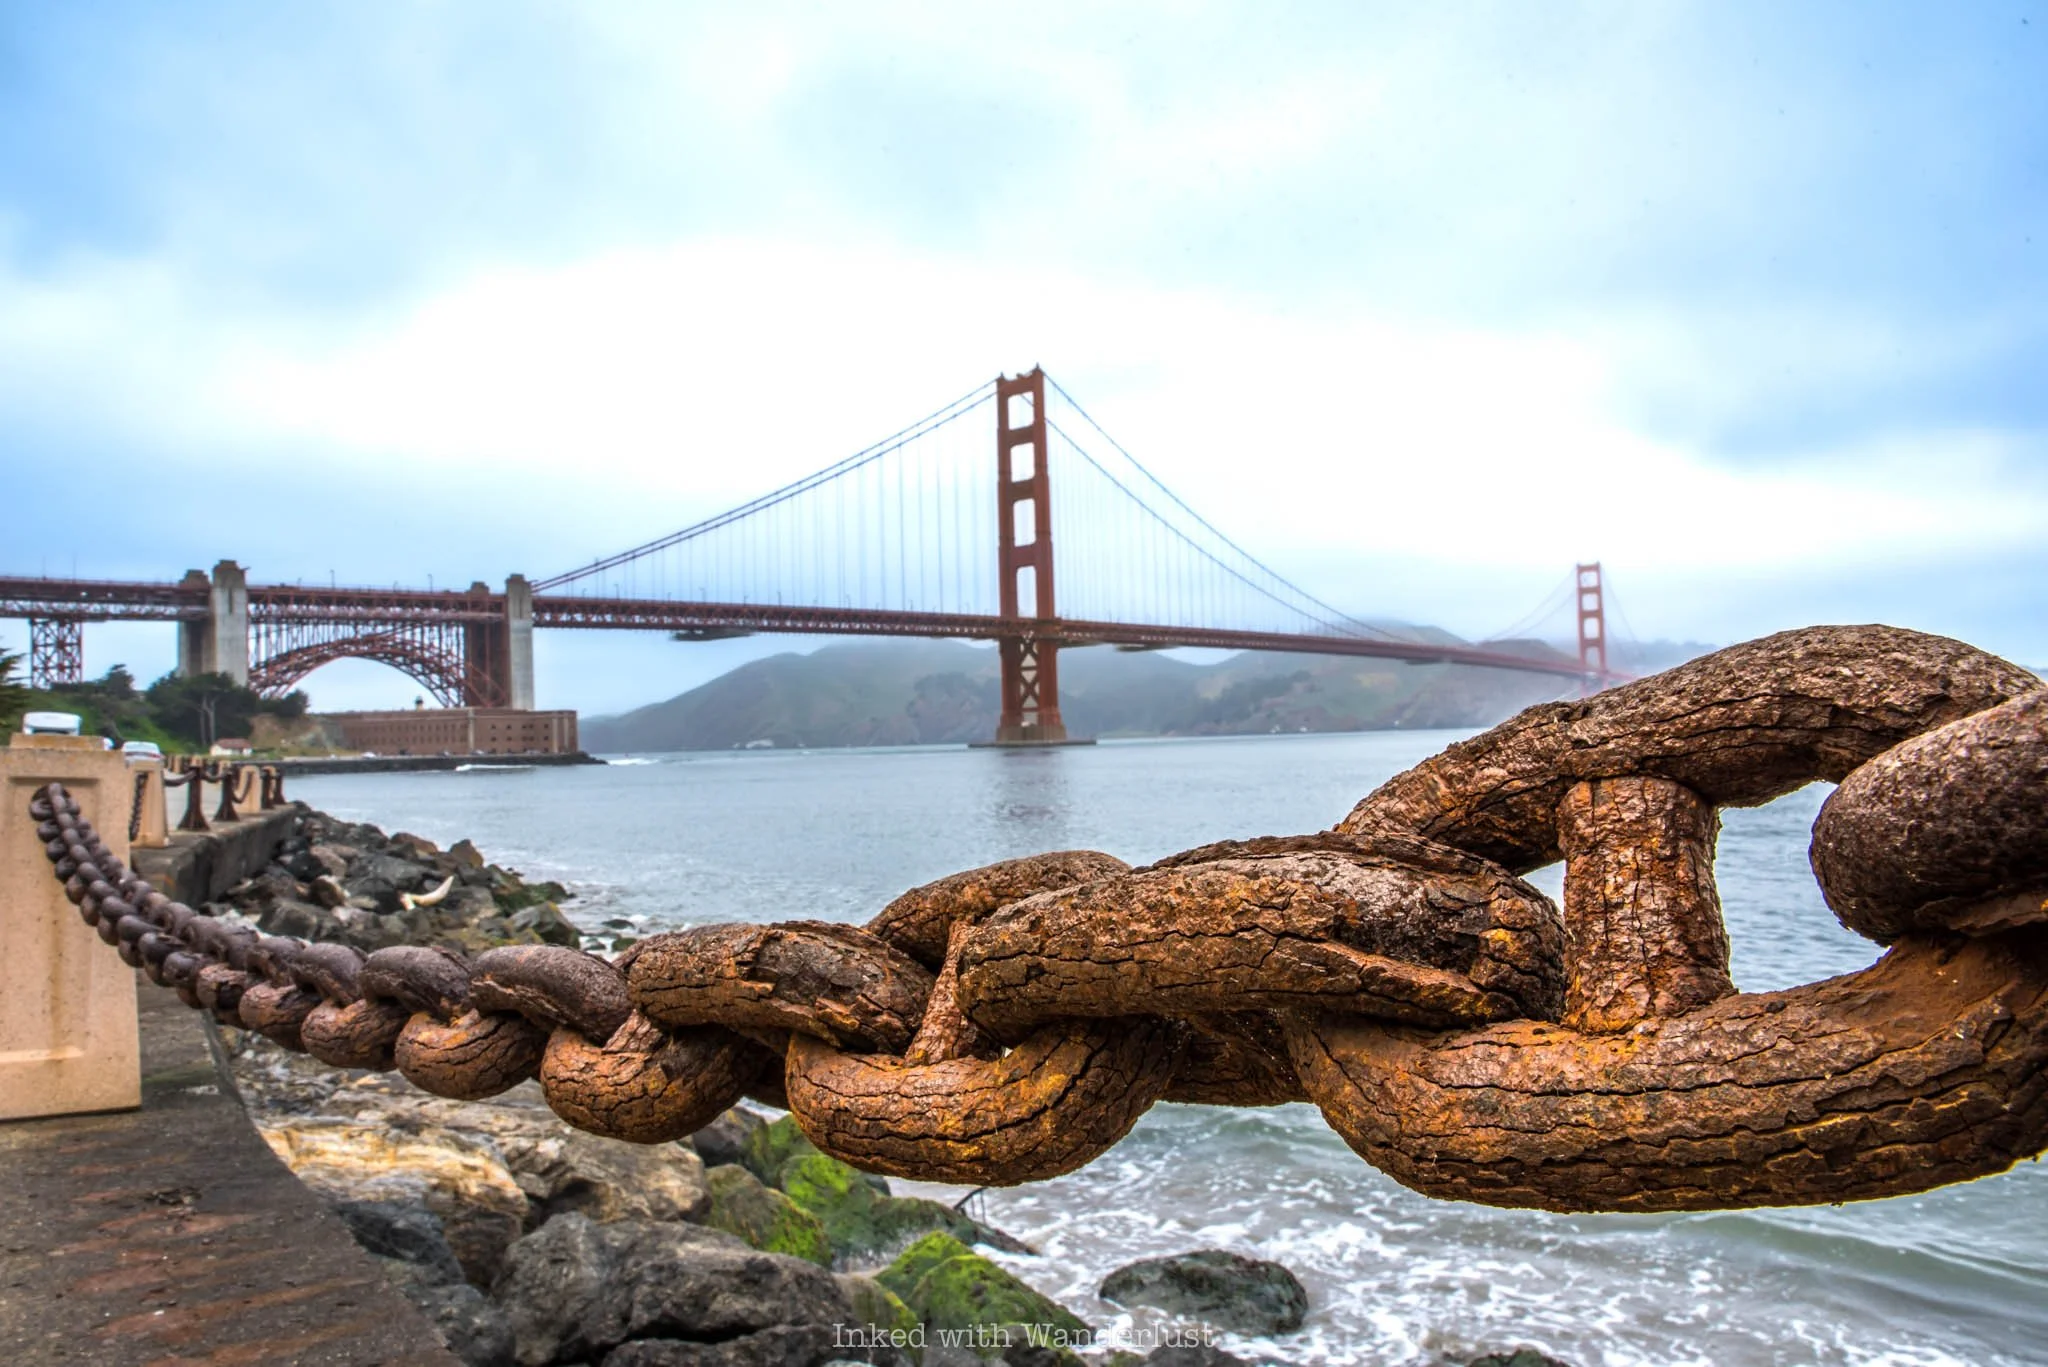
5) Battery East Trail
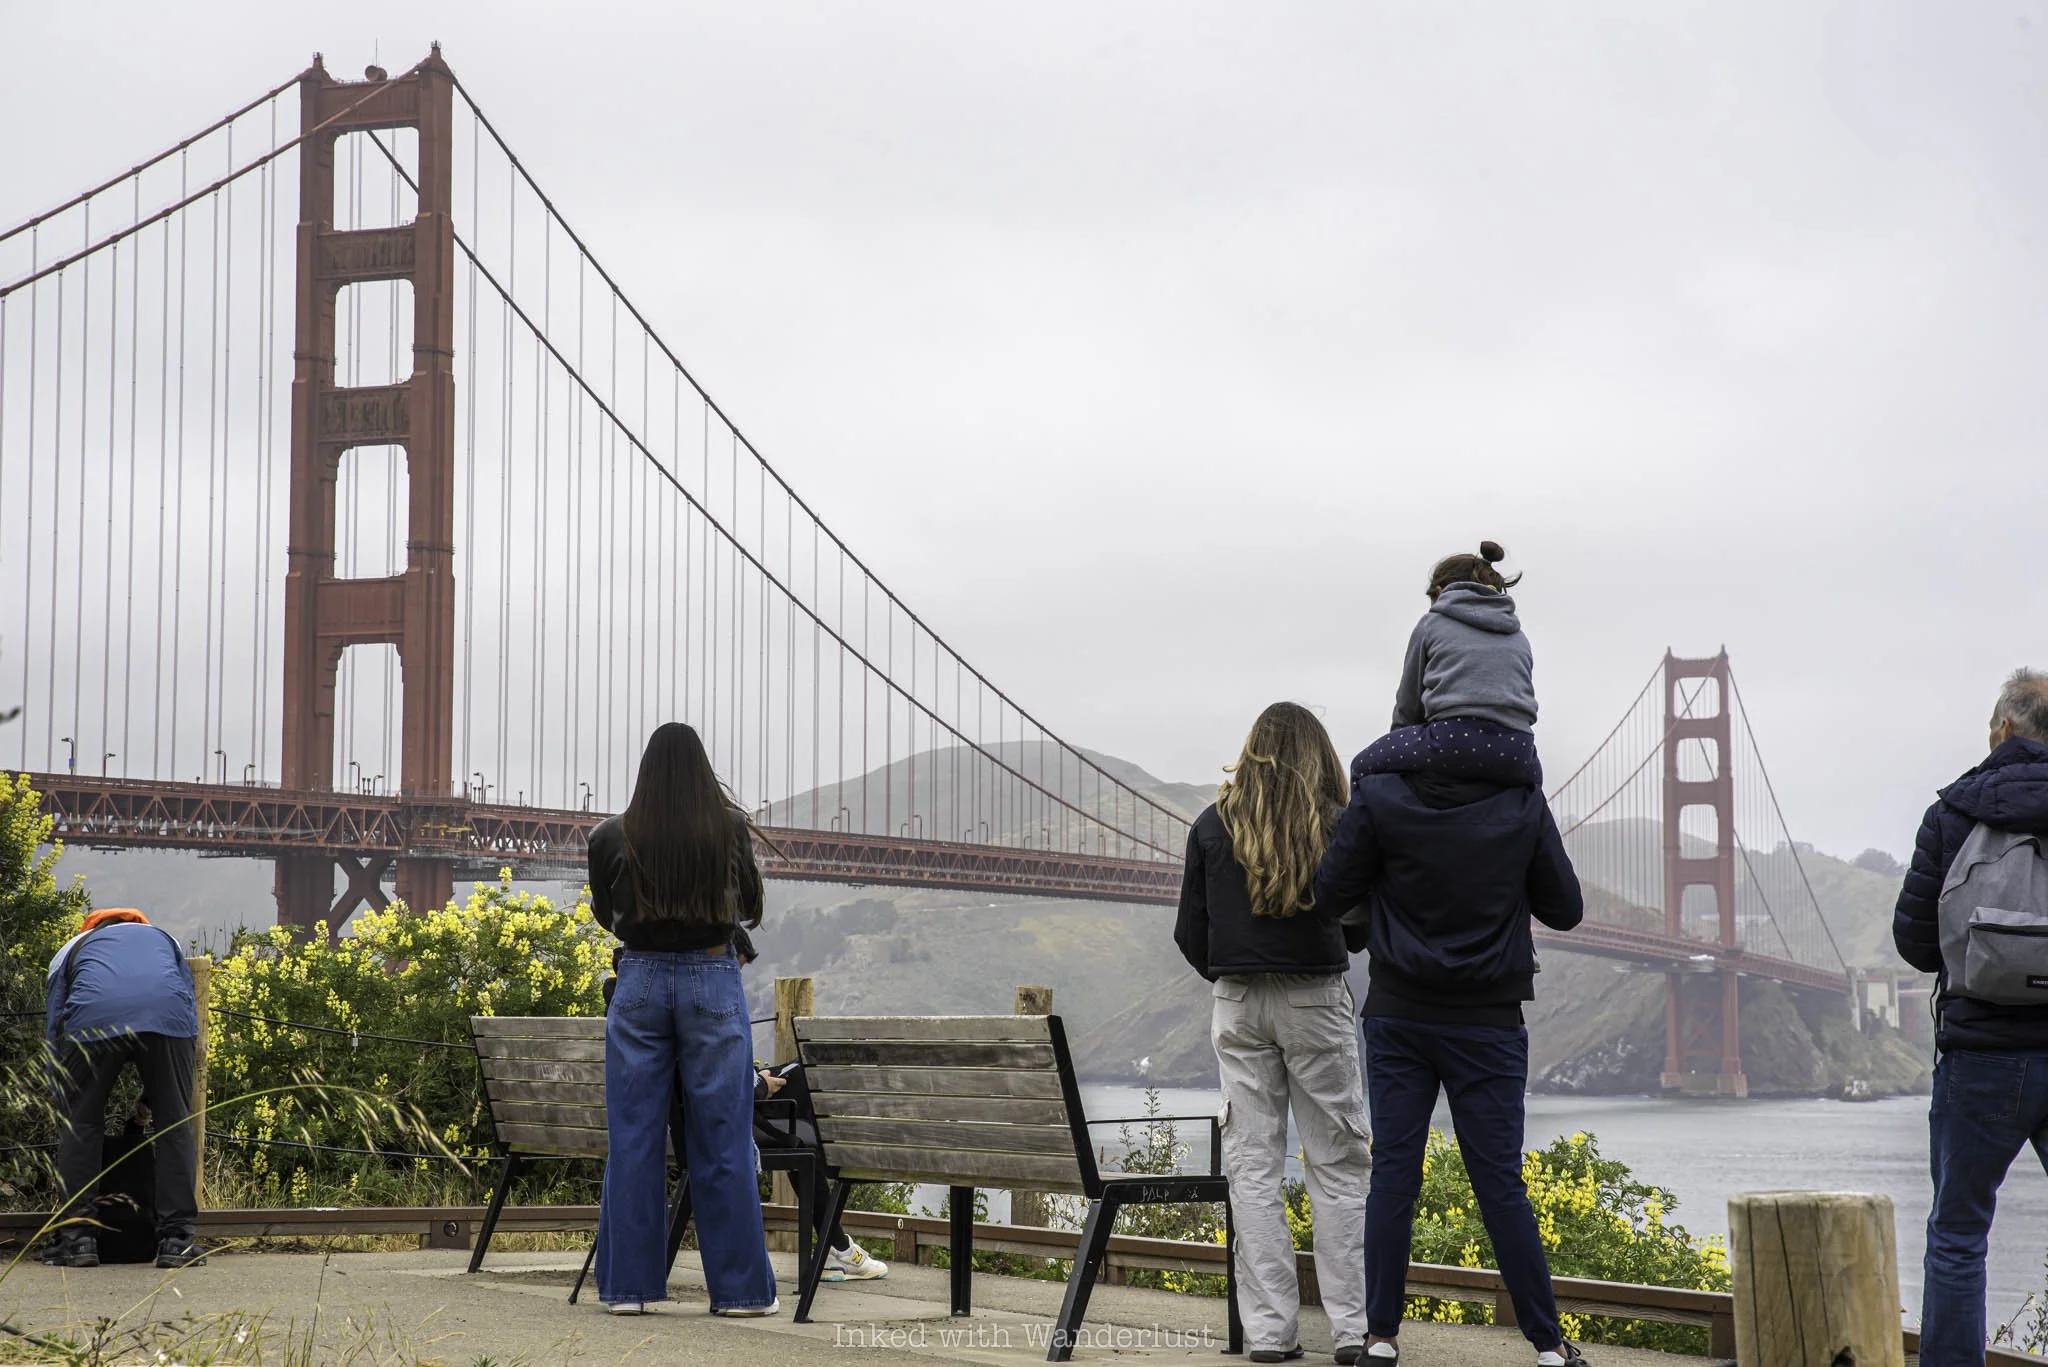
Battery East Trail is a multi-use trail connecting many popular San Francisco destinations as well as offering eye-popping views of the bridge. You won't have to go far either, as the views begin within a one minute walk from the parking lot, as indicated by the photo above that I took. You can stop there or continue along the trail for one unique perspective after another.
You can walk this trail east all the way to nearby Crissy Field and the beautiful Palace of Fine Arts (among other spots) or continue towards the bridge to access the historic civil war-era Fort Point (more on that later). You won't have a panoramic view of the bridge from here, as its southern end dominates the view. It's particularly wonderful in spring when many colorful flowers, including the California Poppy, are in full bloom.
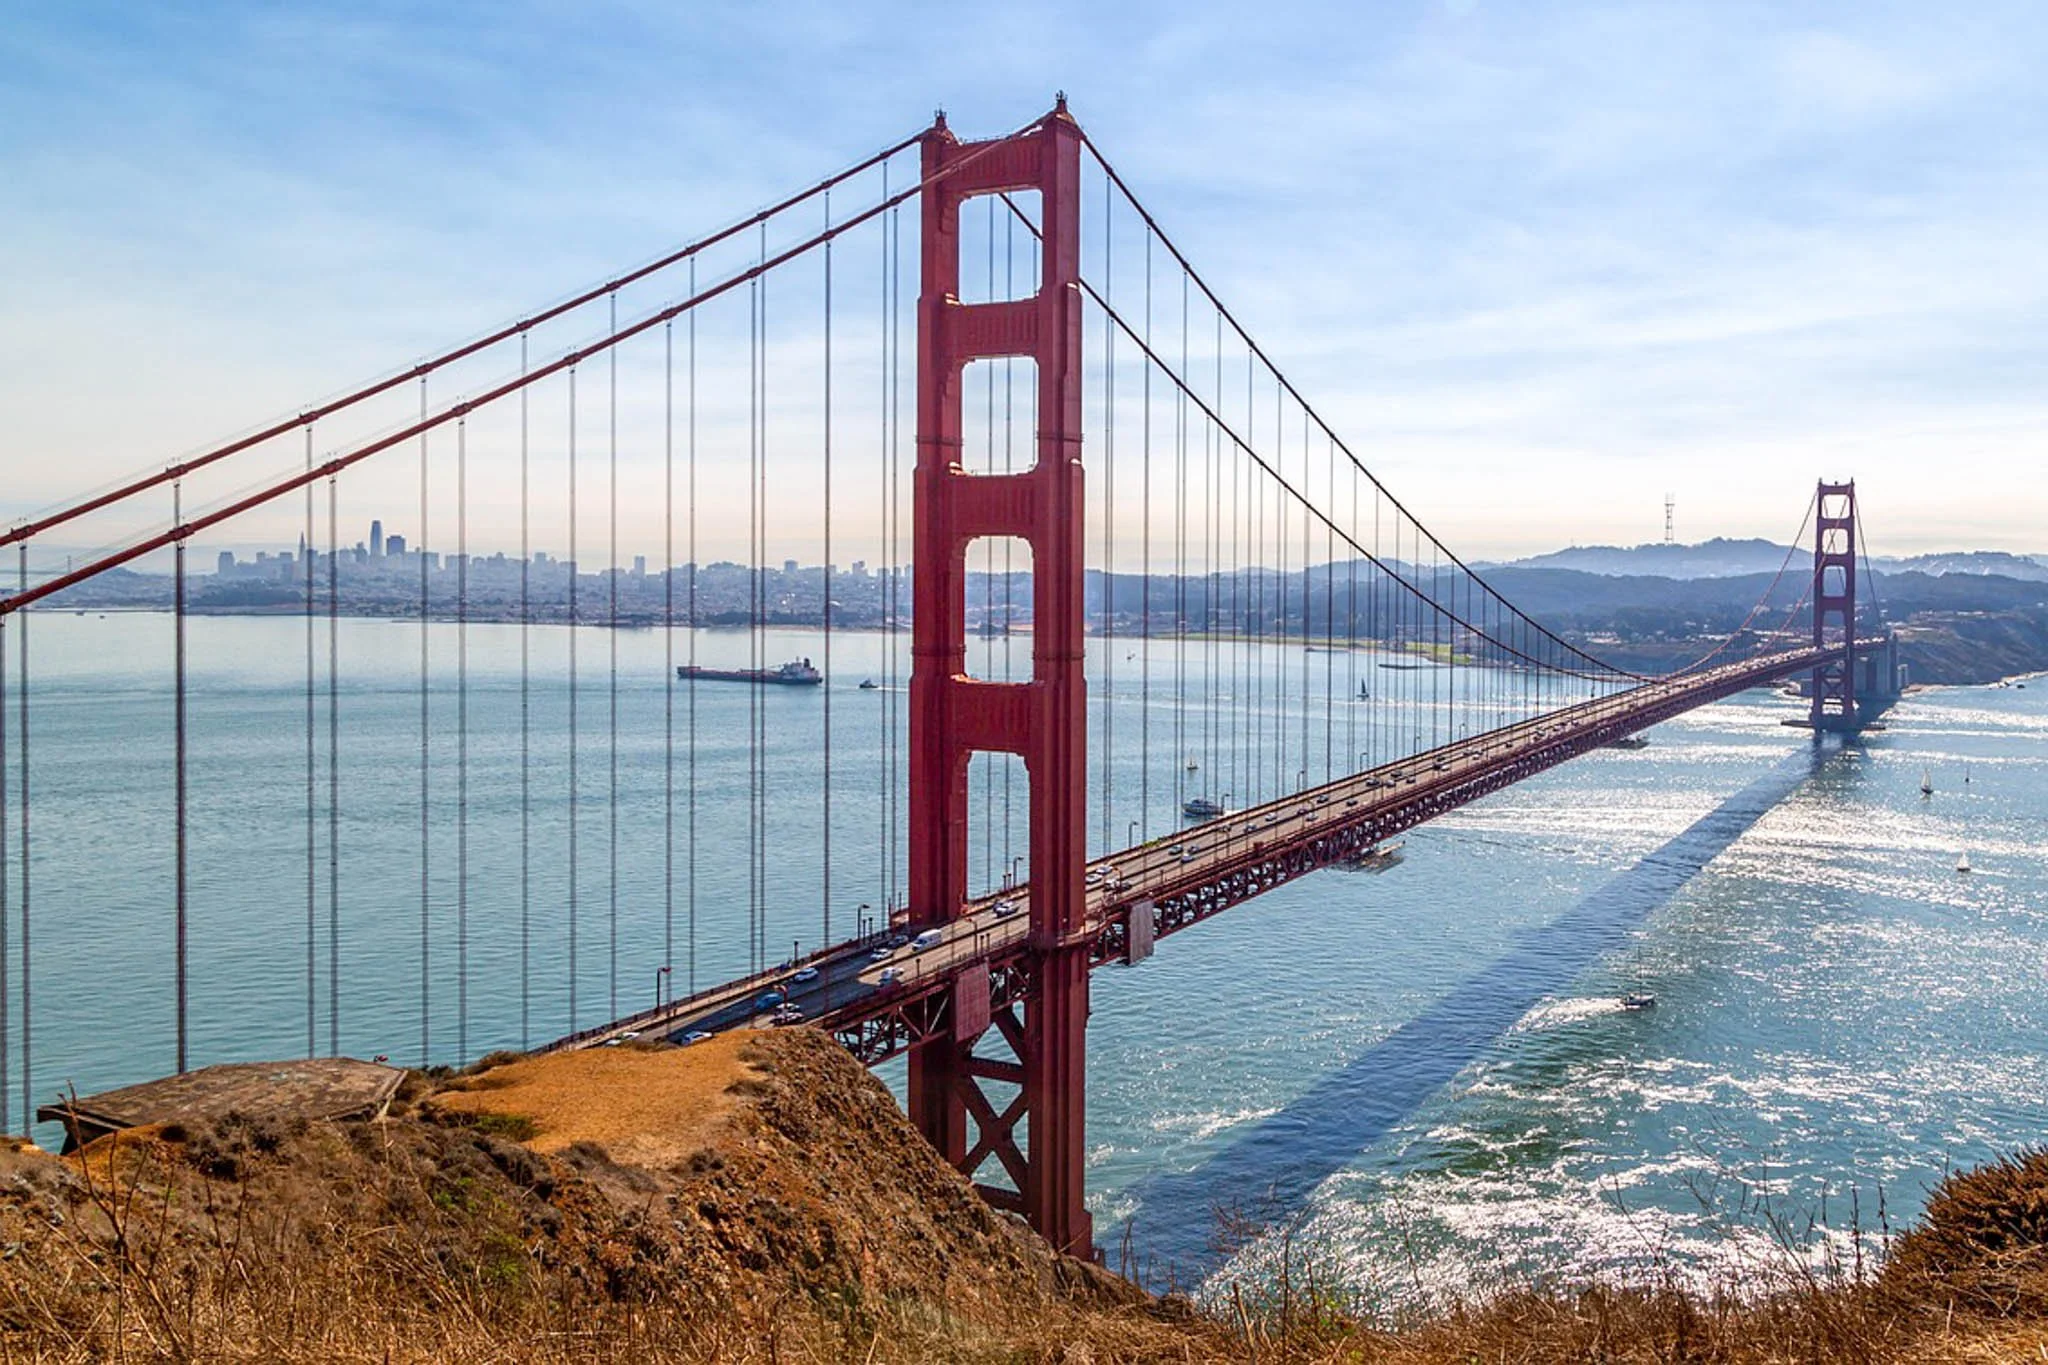
6) Crissy Field
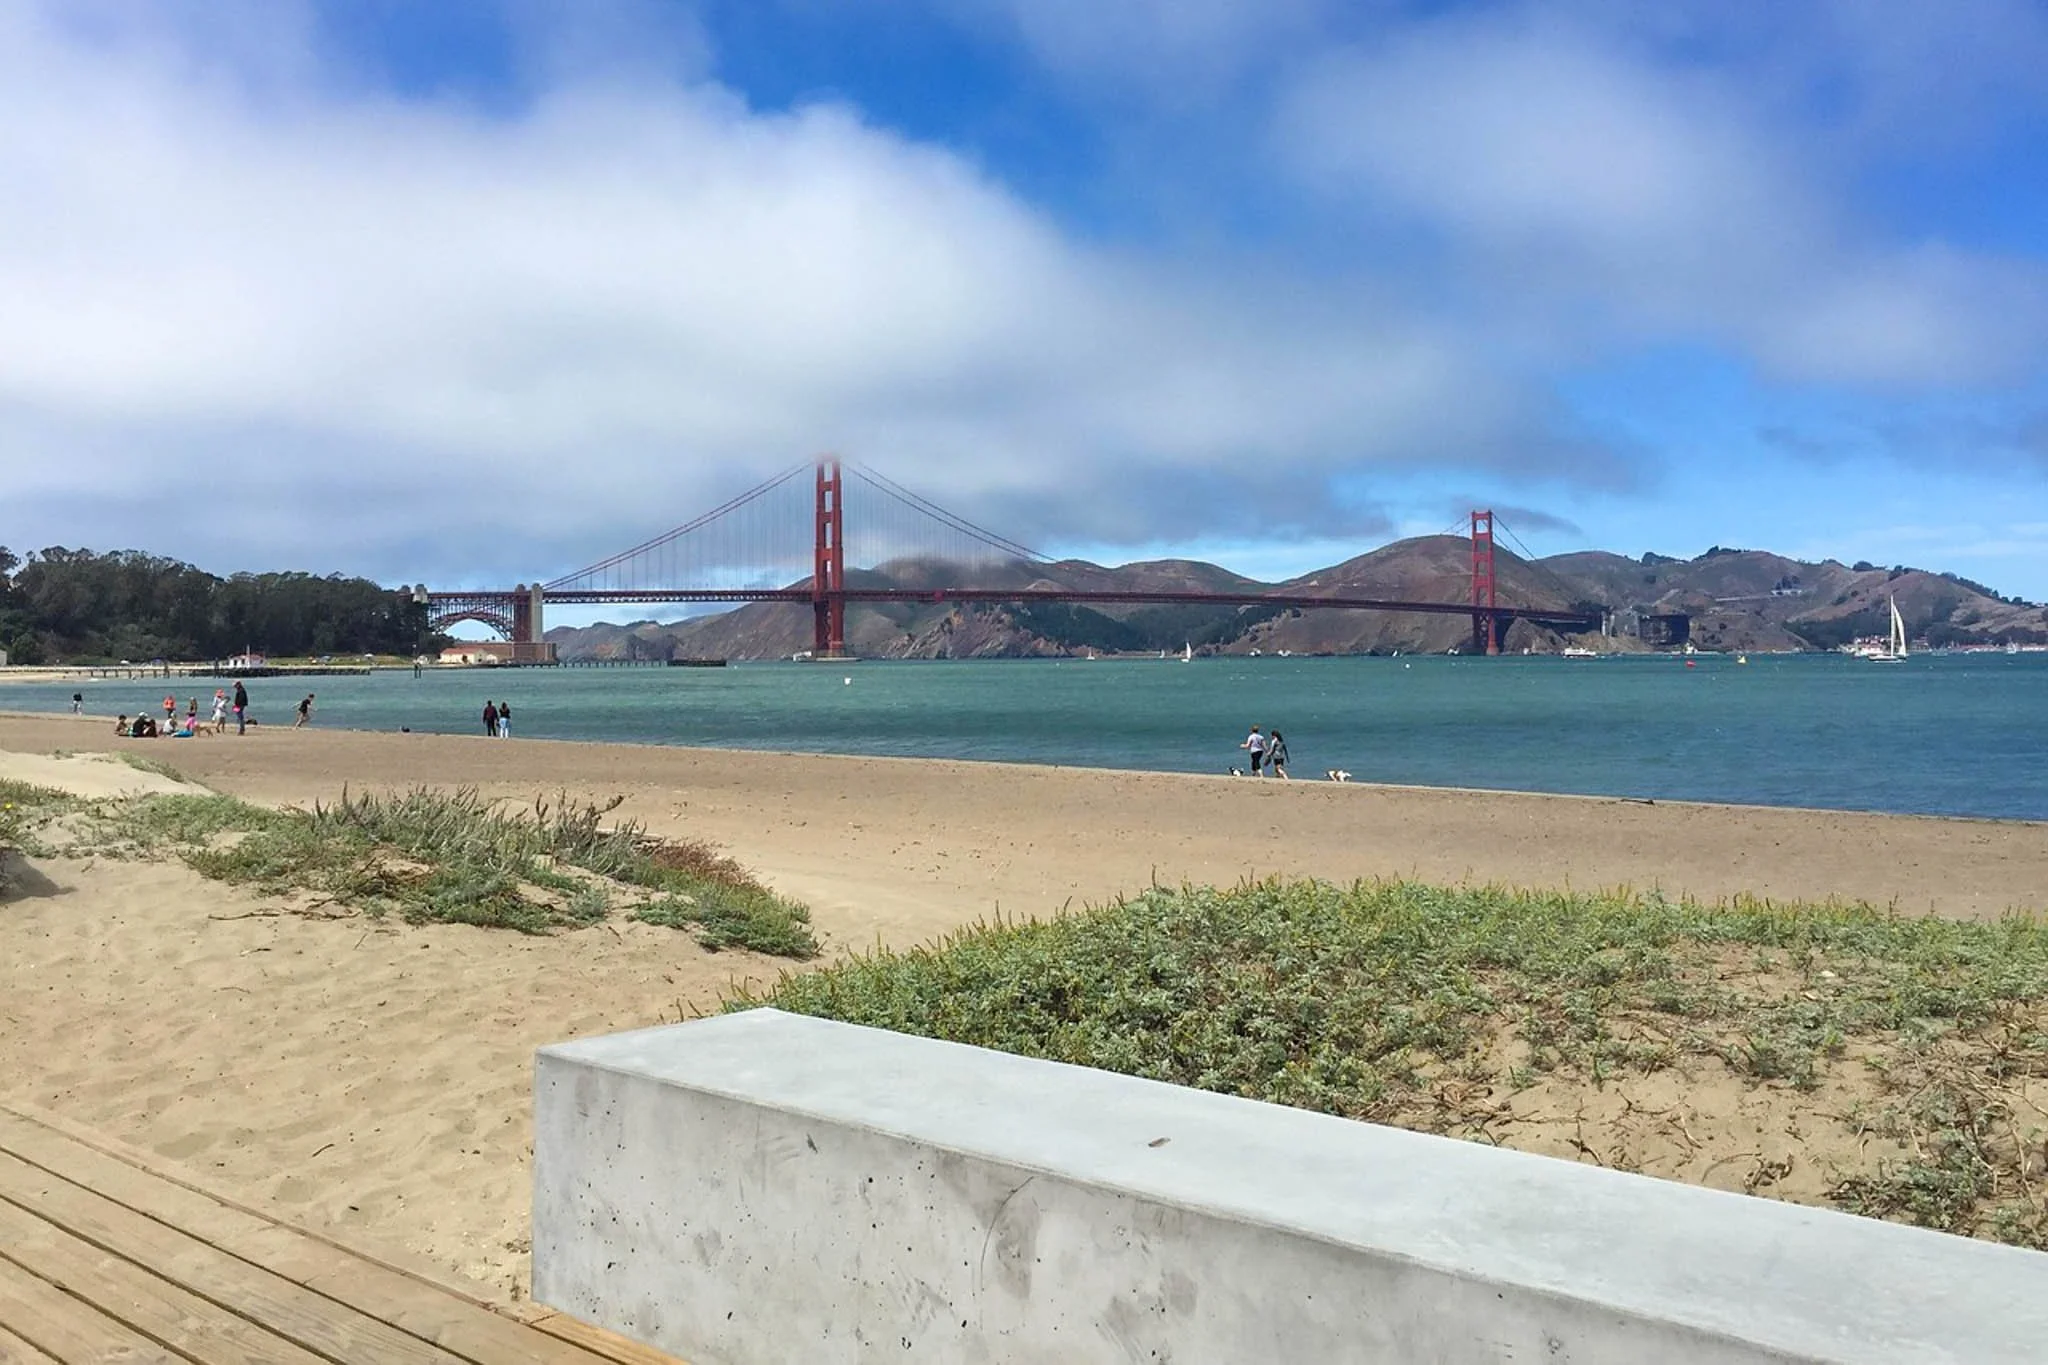
Located just a short ways away from the southern end of the Golden Gate Bridge, Crissy Field is a popular spot for tourists and locals alike looking to unwind, relax at the beach, take in the views, or get in some exercise. The bridge is completely visible from just about every vantage point at Crissy Field. So much so that you've likely seen it on various movies and TV shows, such as the comedy classic Mrs. Doubtfire, starring the late (and great) Robin Williams.
7) Kirby Cove
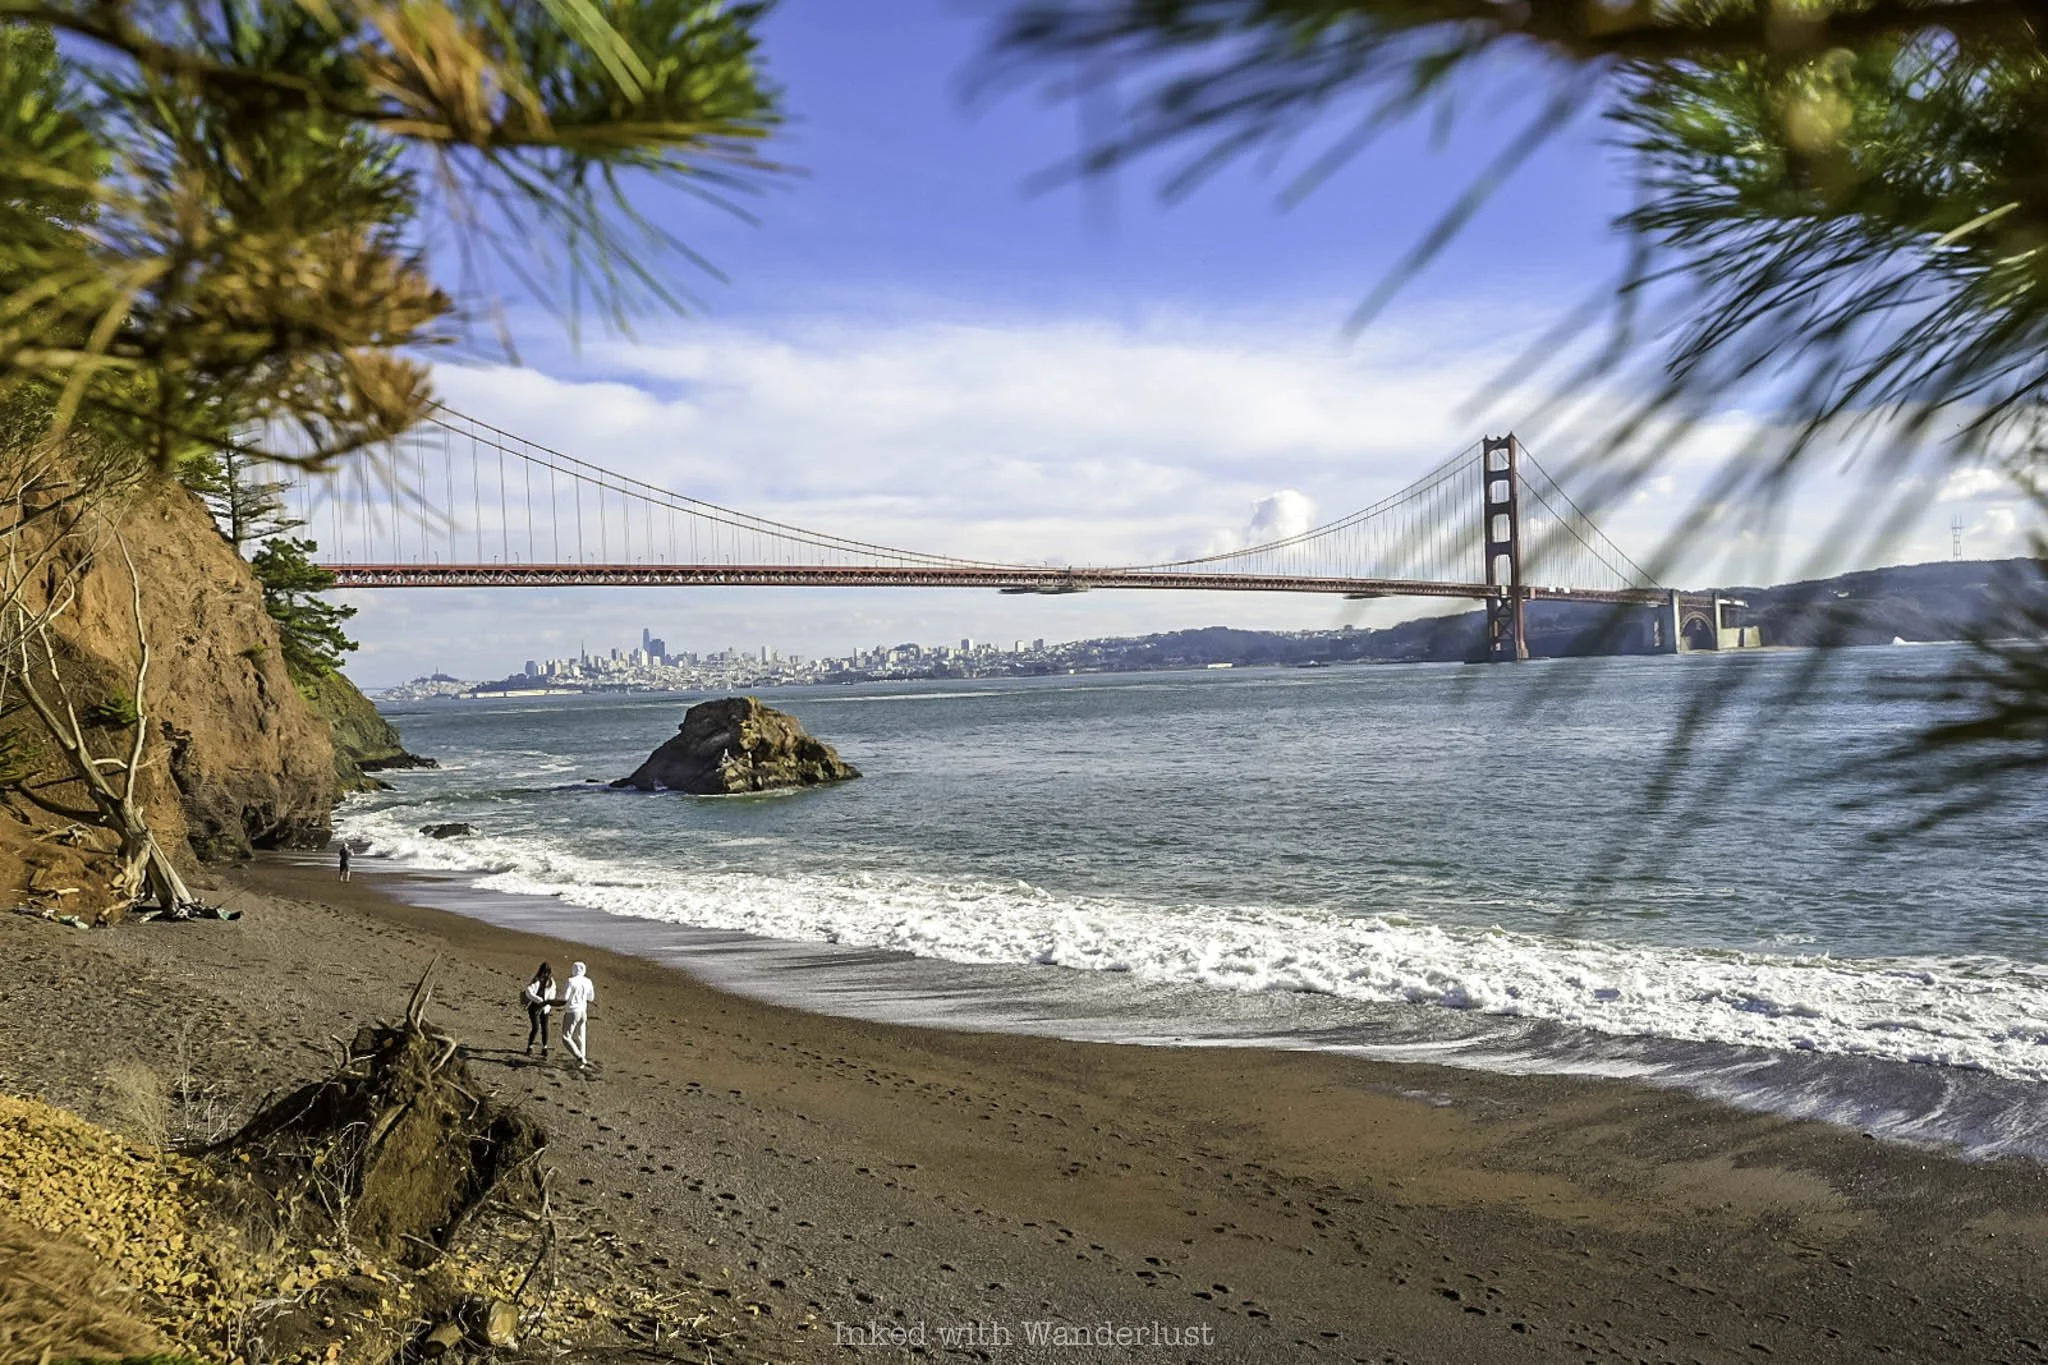
I may be a bit biased here, as Kirby Cove is my hands-down favorite place in the Bay Area and I always recommend it to people I know who are looking for things to do in San Francisco. Kirby Cove is a small enclave in the Marin Headlands and features various sea caves, picnic area, Battery Kirby (a post-civil war defense post), and a bombastic view of the bridge and parts of the city skyline.
From Kirby Cove you'll have what I feel to be one of the best views of the Golden Gate Bridge. You'll have to earn it, though, as you'll need to hike a couple miles to reach it. It's totally worth it, though. Similar to Battery Spencer, you'll want an early morning start to this one, as parking along Conzelman Road gets rather scarce as the day progresses. To read more about Kirby Cove, check out my post here!
8) Fort Baker
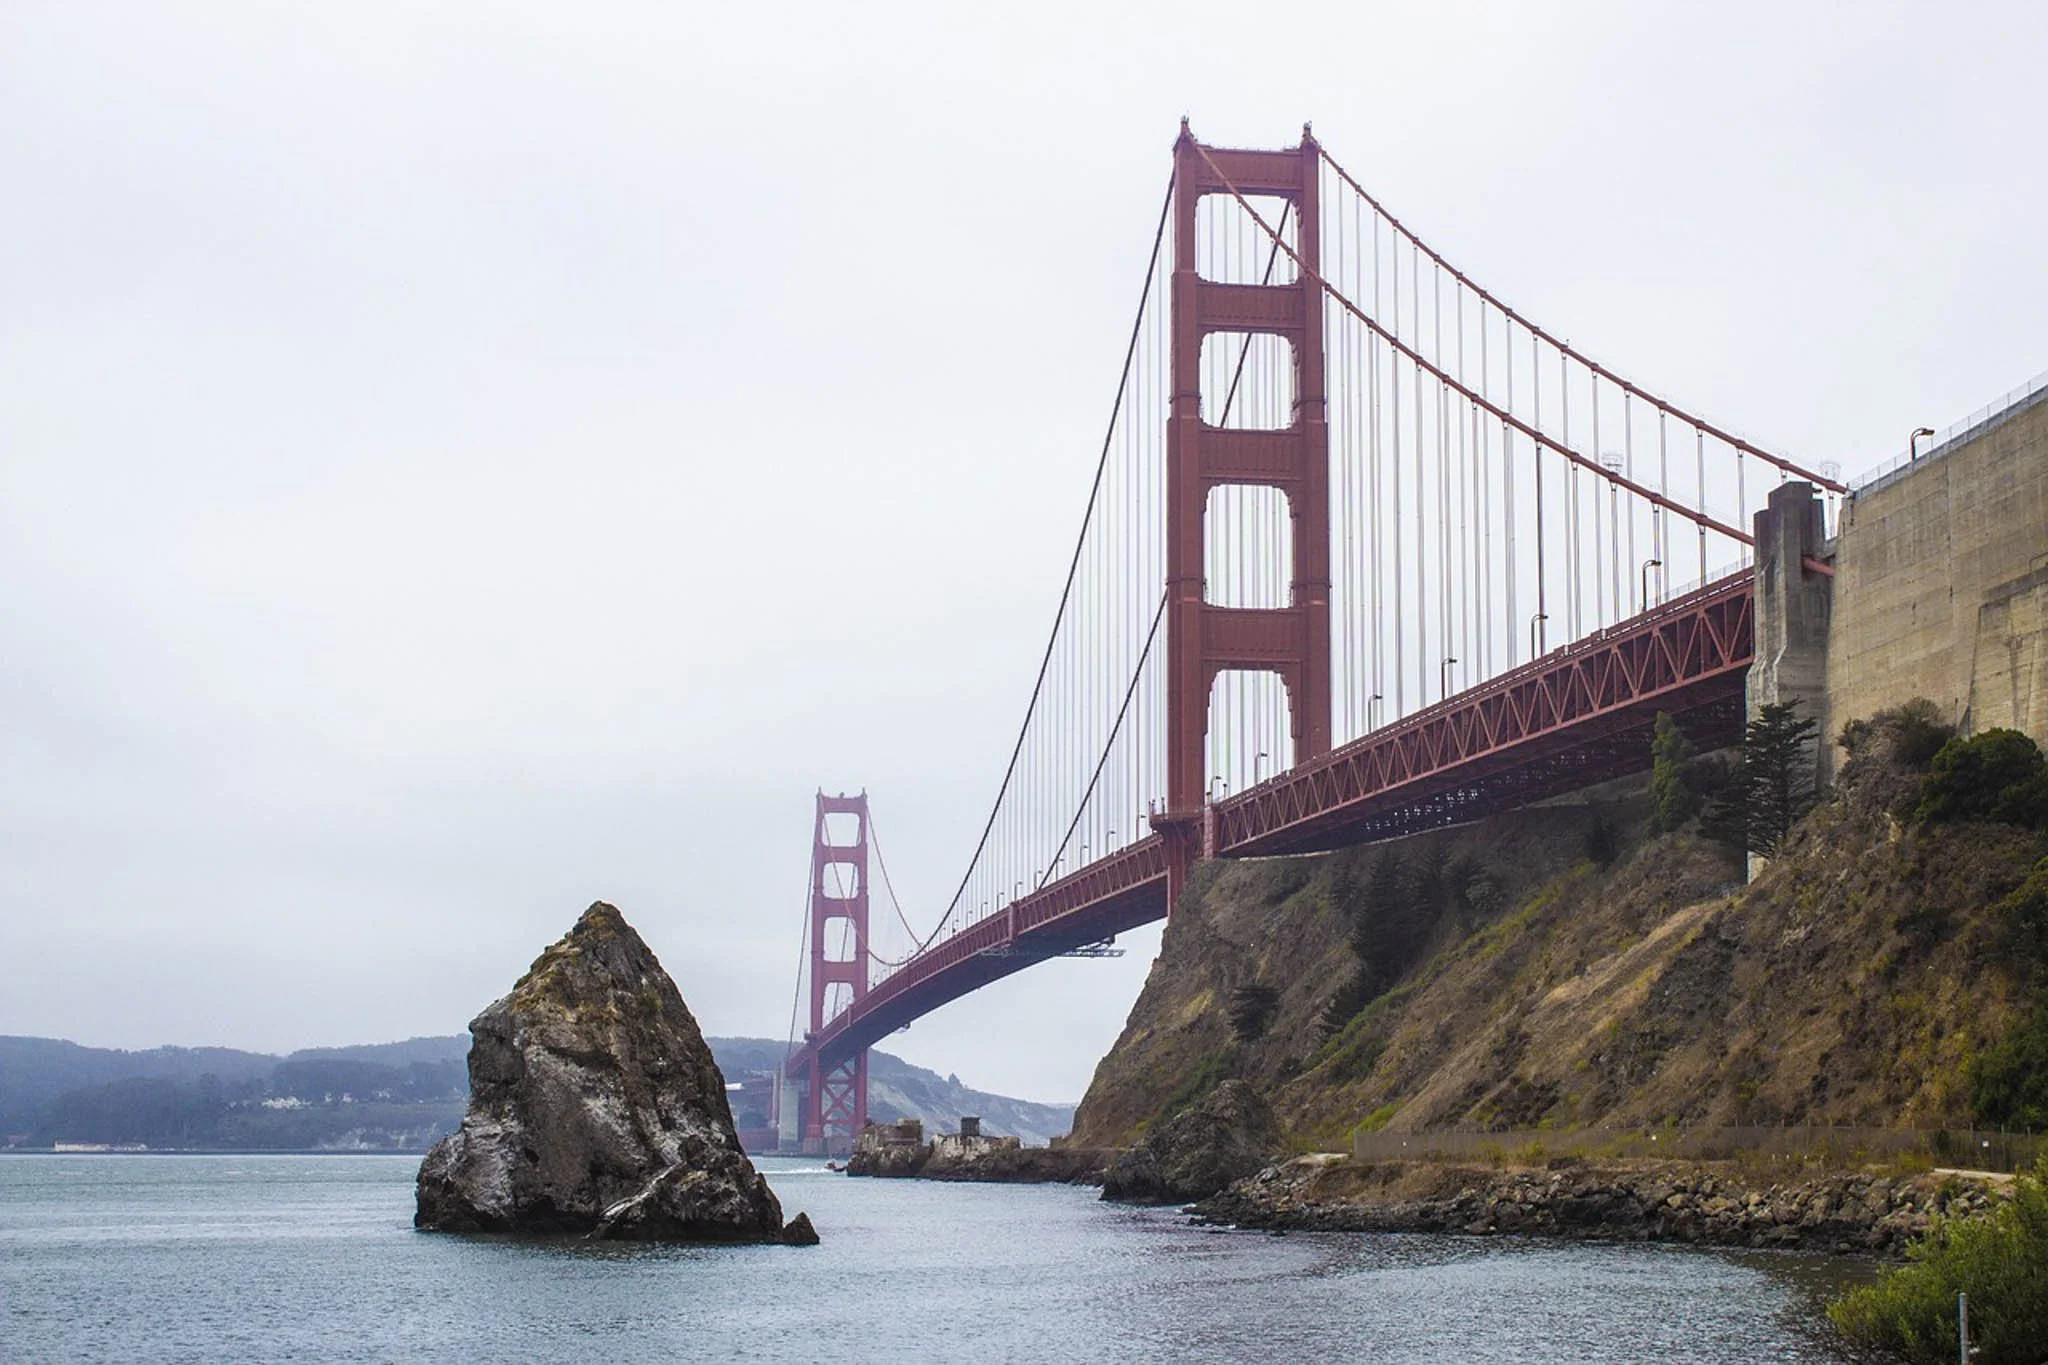
Also on the north side of the bridge, but on the opposite side from Battery Spencer and Kirby Cove, is Fort Baker, a preserved early 1900's United States Army post. You'll have multiple angles of the bridge to see and photograph from here, but I recommend the rocky shoreline just off of the pier. It's far from the best view of the Golden Gate Bridge, but it's a hidden gem with a unique perspective nonetheless.
9) On the Bridge Itself
Wanting a more up-close-and-personal experience with the bridge? Lace up your best walking shoes or grab a bicycle and traverse it for yourself. There are parking lots on both ends of the bridge with immediate pedestrian access. I would recommend the southern end of the bridge (city side) as it also offers a visitor center, food/drink options, and a bit more parking.
You don't need to walk the entire thing. Most folks walk to the middle point or so and turn around. Some, though, go from one end to the other and back. It's roughly a 3.5-mile trek roundtrip and there's no shuttle service to take you back to the other side, so be sure of your intentions before committing to it. Nothing beats being on the bridge and the views you'll see from it, so definitely make this part of your San Francisco itinerary.
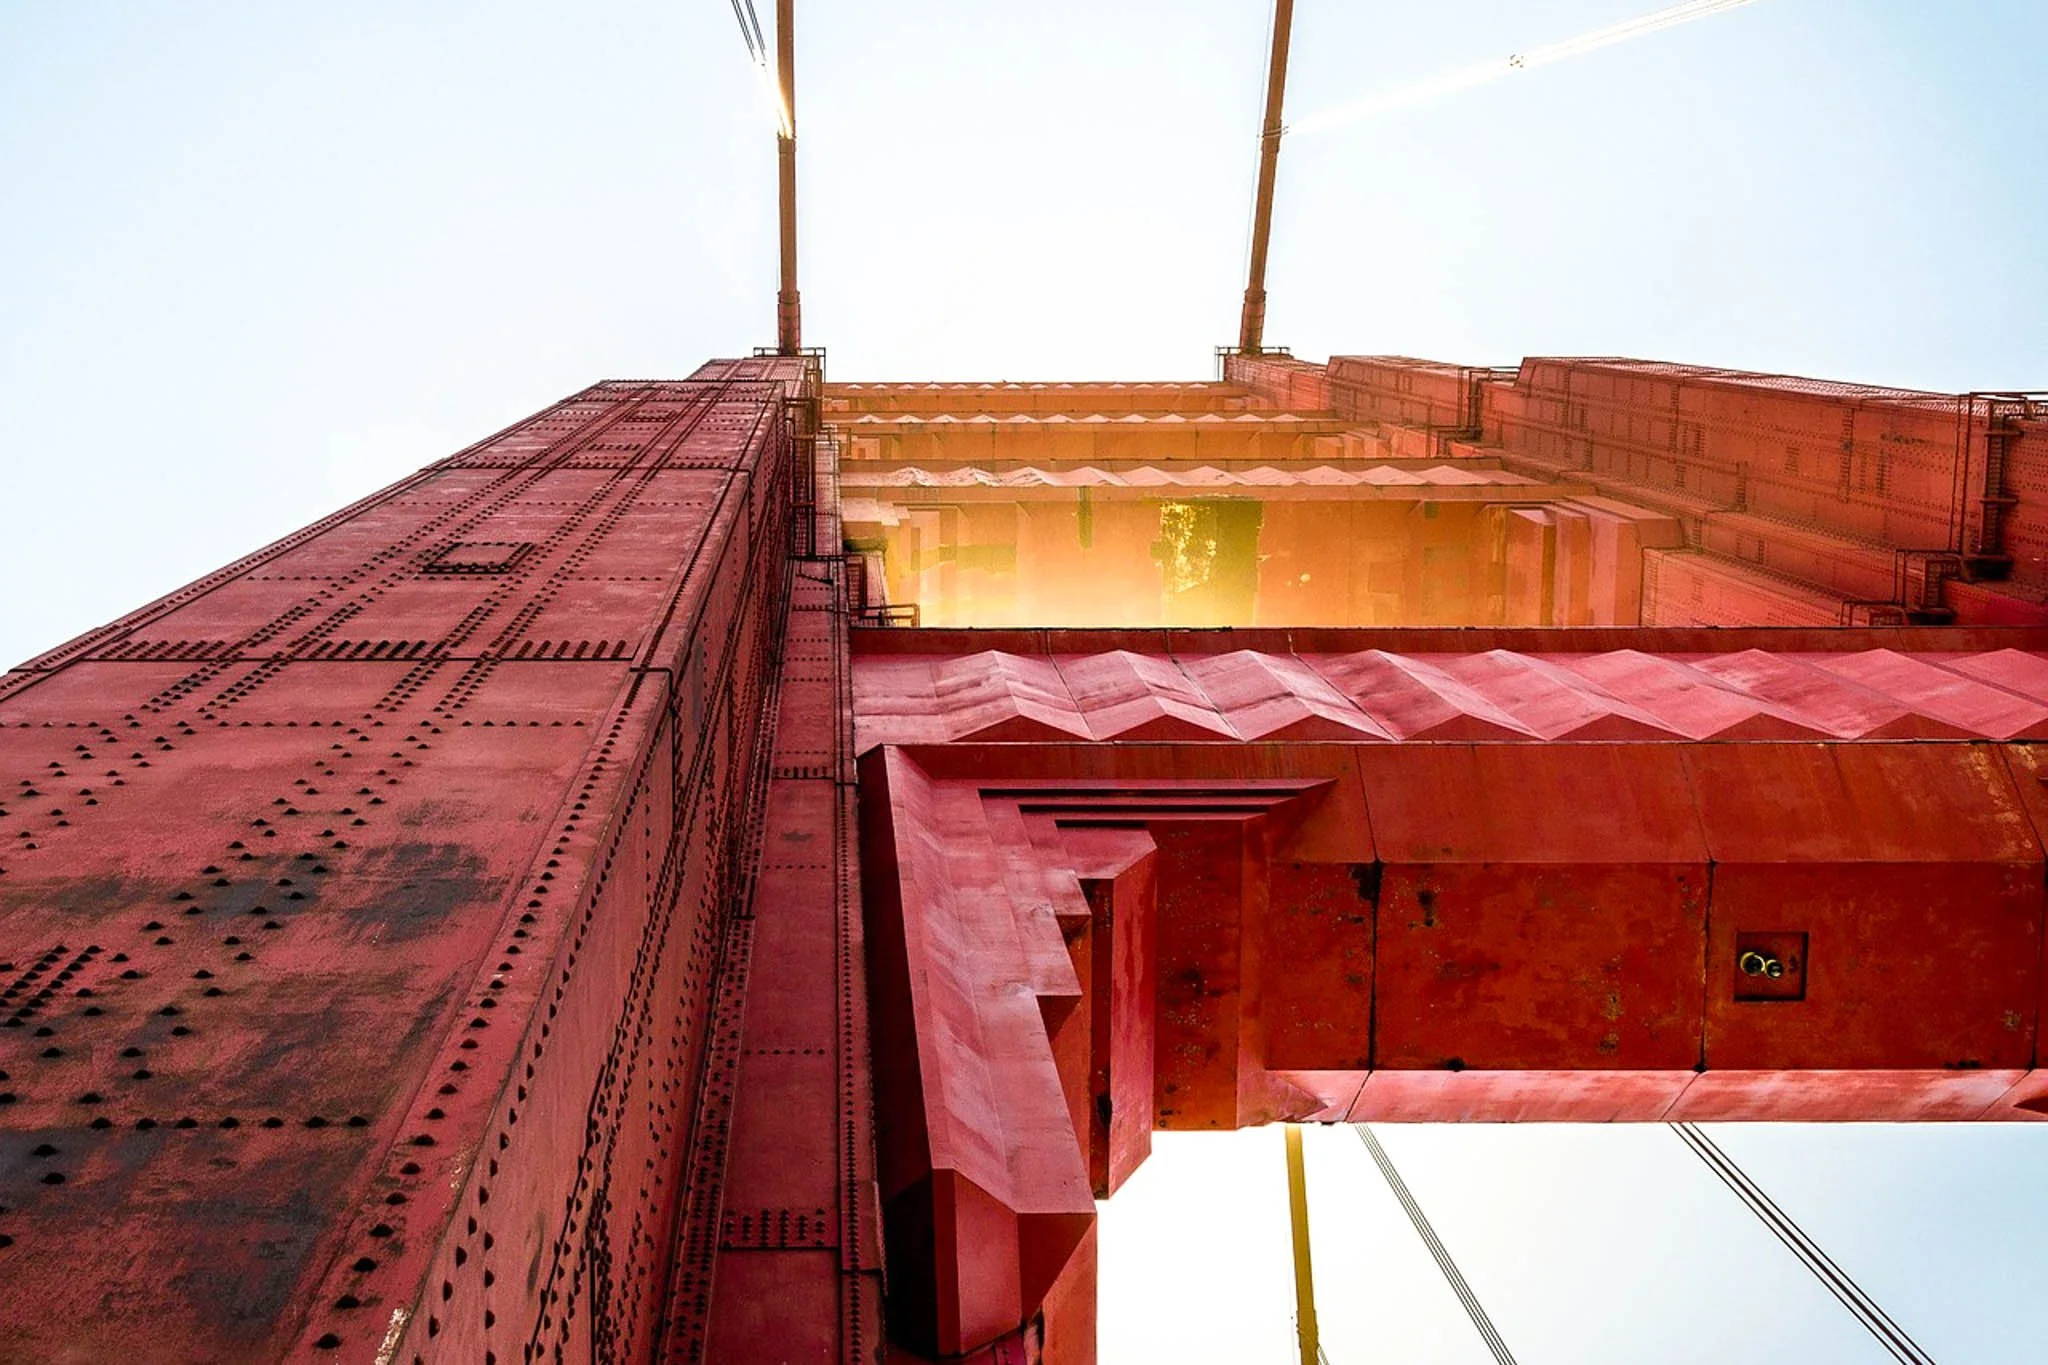
10) Fort Point National Historic Site
Fort Point is a preserved civil war-era fort originally built in the mid-1800's to defend San Francisco Bay as part of a coastal fortification system. It was heavily staffed with U.S Army servicemen, including with some of the first African-American soldiers. The fort never saw any conflict with enemy combatants, though it was fully prepared with hundreds of canons and other artillery.
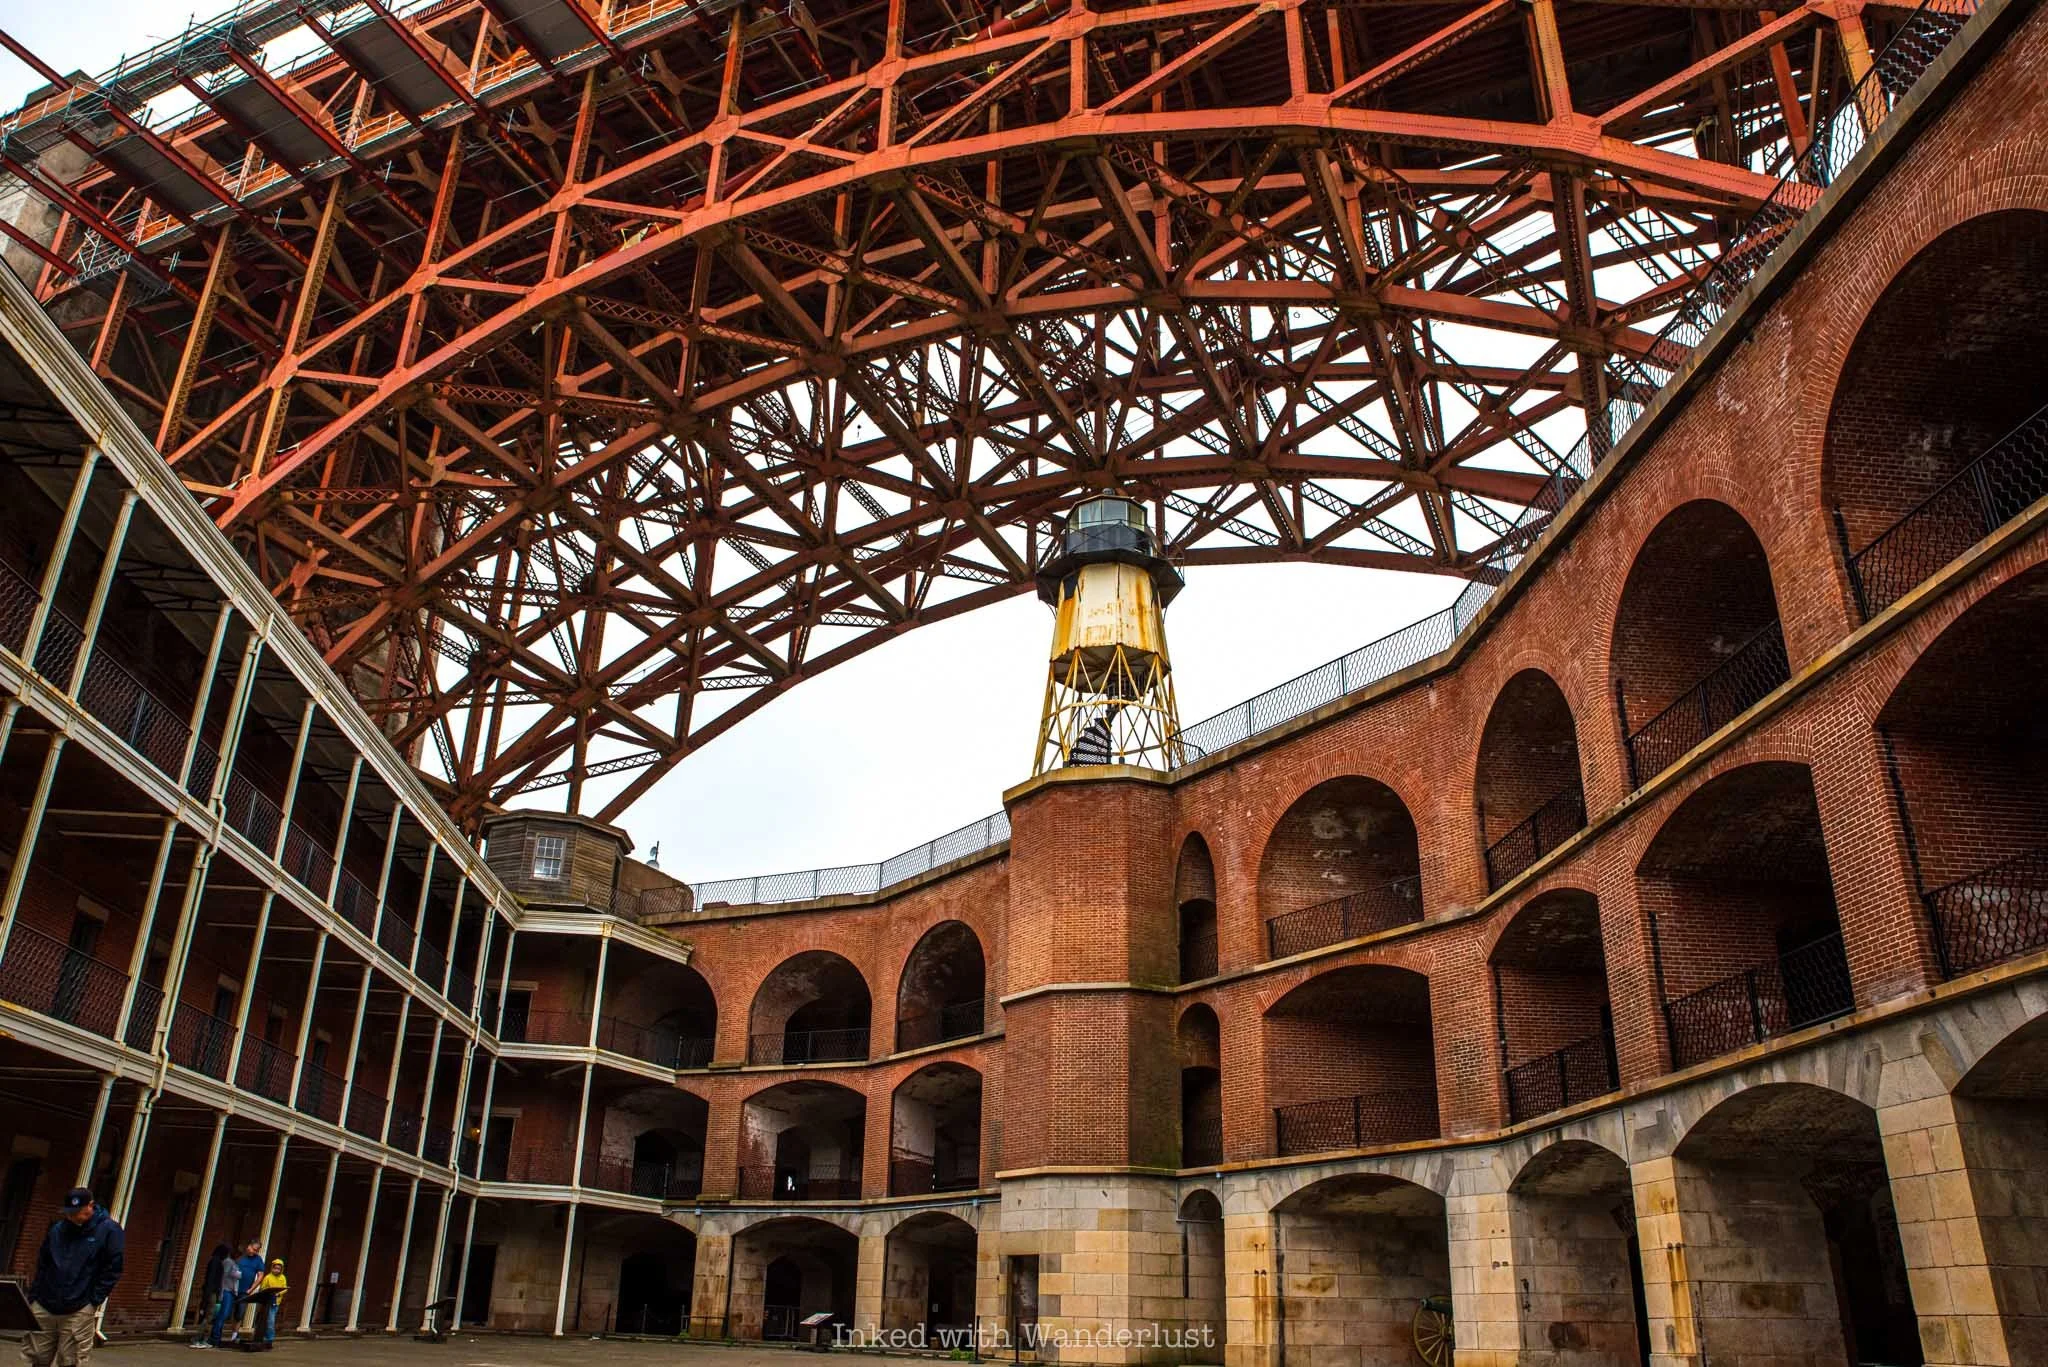
The fort pre-dates the Golden Gate Bridge by about 72 years, as construction was completed on the fort in 1861 and the bridge was finished in 1933. At the time of the bridge's construction, builders were keen on destroying the fort, as it was placed in the exact span path of the bridge (as you can see in the photo below).
However, Chief Engineer Joseph Strauss was a big proponent of its preservation and saved the fort by re-designing the bridge to include the massive arch you see above Fort Point today. Without his willingness to redesign that section, the fort would've been lost to history. That sacrifice in design offers visitors not only the ability to explore history, but also provides what many consider to be some of the best views of the Golden Gate Bridge.
Can You See All of These Viewpoints in One Trip?
Honestly...probably not. It entirely depends on how long you're visiting for and how many other attractions you're wanting to see. If you're visiting for just one day (see my one day San Francisco itinerary here) you definitely won't be able to see them all. You would need two to three days, at minimum, and go outside of the busy tourist season, as many of these spots are popular.
If you're short on time, or just looking to do two or three of these, I'll provide my recommendations to help you narrow it down. If you're short on time, I recommend:
Walking the bridge
Fort Point view
Battery Spencer view
To me, these are the quintessential best views of the Golden Gate Bridge that visitors, especially first-timers, should see and what I would suggest to family and friends. With these, you'll see the bridge from a few different perspectives, won't have to contend with parking fees and will have a short walk to each from the car.
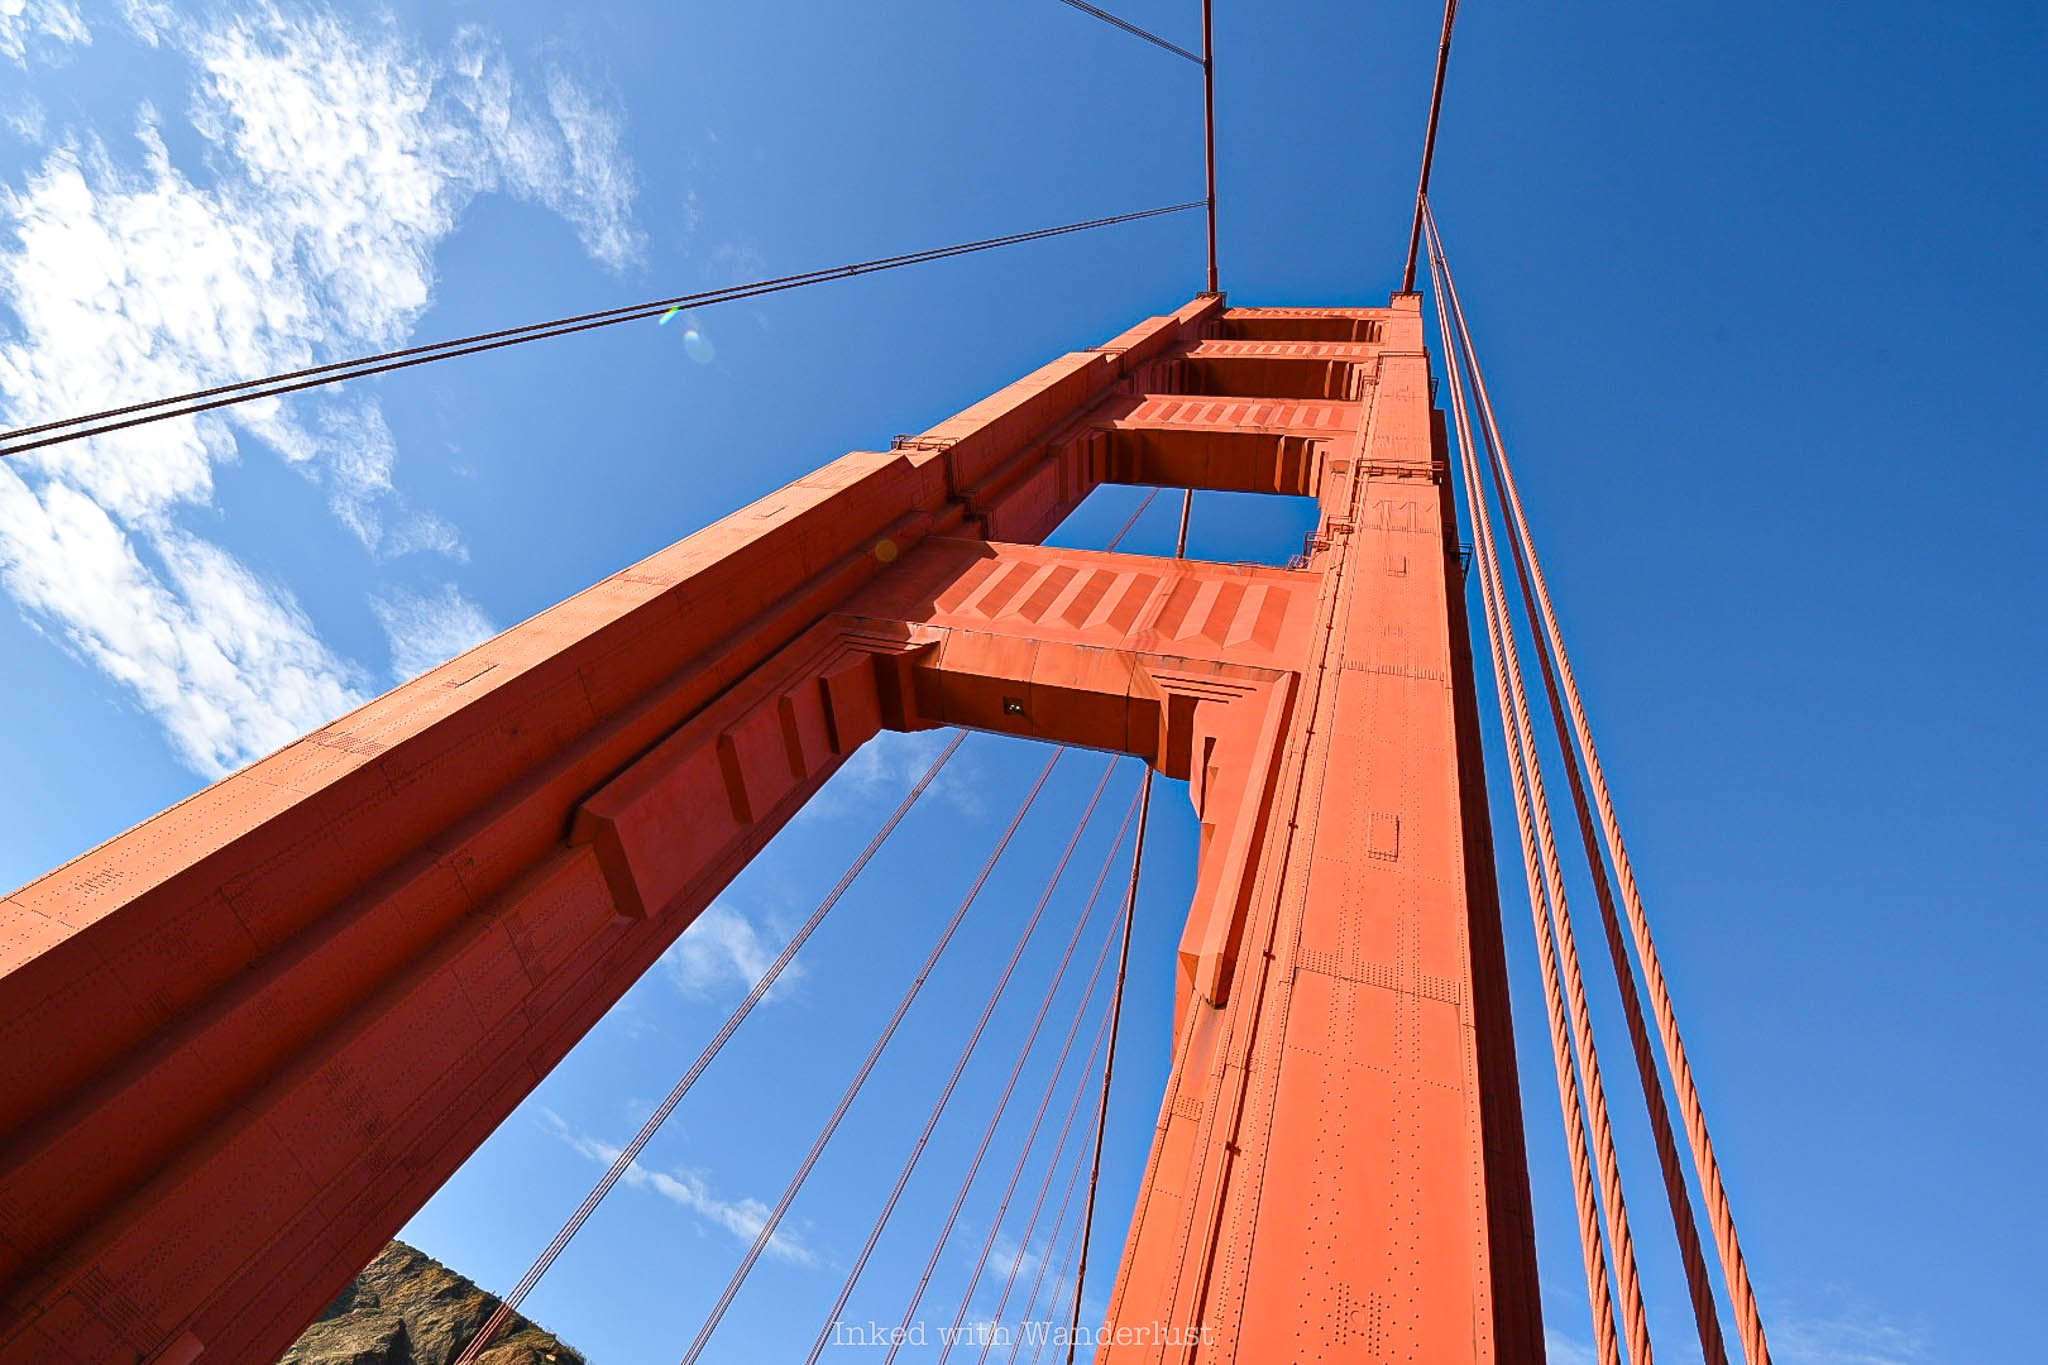
Additionally, they’re grouped somewhat closely together. Battery Spencer is at the north end of the bridge and offers a "from above" view and Fort Point sits at the southern end, offering a ground level view. From the bridge itself, you'll see the massive rivets and 36-inch thick steel cables, and the towers they're attached to, up close. Not to mention the expansive views of the ocean.
If this works for you, I recommend starting at Battery Spencer (early) as parking there can be scarce. From there, drive to the north end plaza parking lot and walk/bike that portion of the bridge. When finished, drive back across the bridge and head to Fort Point. The fort's hours can be finicky but even if it's closed you'll still be able to explore its exterior and take in the view.
That said, not having your own vehicle will make visiting Battery Spencer challenging (and expensive). If you'll be without a vehicle, I recommend skipping it. Take a ride share or bus to the Golden Gate Bridge Welcome Center on the southern end of the bridge. From there, you can walk/bike the bridge and access Fort Point as well. You can also walk to Crissy Field (about 15 minutes).
If you have EXTRA days, definitely use some of that time to hike down to Kirby Cove. I can’t recommend it enough as words and photos do no justice to how beautiful of a spot it is. You can make a day of it by beginning your day hiking to Kirby Cove, walking down the road to Battery Spencer, and possibly even Hawk Hill if you have enough energy left. Read more about Kirby Cove here!
Buy me a coffee?
If you’ve found this blog helpful, please consider leaving a tip through the Buy me a Coffee button below. Whether it’s $1 or $5, every bit helps to offset small travel costs such as coffee, meals, and parking/entrance fees. Your support means a lot—thank you!


How To See The Beach Boys Monument in Hawthorne
Even if you’re not a fan of the group, chances are good that you’ve at least heard of the Beach Boys. The Rock and Roll Hall of Famers are…
Disclosure: This post contains affiliate links. If you make a purchase through these links, I may earn a small commission at no additional cost to you. I only recommend products or services that I believe will add value to my readers.

Even if you’re not a fan of the group, chances are good that you’ve at least heard of the Beach Boys. The Rock and Roll Hall of Famers are musical legends throughout the world, but Southern California was their home and where they got their start.
Brothers Brian, Dennis, and Carl Wilson, along with cousin Mike Love and good friend Al Jardine (David Marks would briefly replace Jardine), formed the infamous quintet in 1961 in the then modest community of Hawthorne, a figurative stones throw from the beach.
As heard in their music, the surf-sand vibes of late 1950’s, early 1960’s Southern California had a profound effect on the teens. Surf culture, endless summers and sunny beaches became the foundation of their identity and the heart of their sound.
In 2005, the city in which the Beach Boys called home honored them with a monument placed in the spot of the former Wilson home where the boys honed their legendary sound and recorded their debut hit, Surfin’, which ultimately led to them signing with Capitol Records shortly thereafter.
Whether you’re a die-hard fan or you simply appreciate being in the presence of historical sites, checking out the historic Beach Boys Monument is a must! Let’s get into the details.
Beach Boys Monument Location

As stated above, the Beach Boys Monument is located in the city of Hawthorne, which in of itself is located in the South Bay area of Los Angeles, bordered by neighboring cities such as Manhattan Beach, Redondo Beach and El Segundo.
It’s on the corner of Kornblum Avenue and 119th Street, just off West 120th Street and nearby the Hawthorne Municipal Airport. For GPS purposes, the monument’s exact address is as follows:
3701 West 119th Street, Hawthorne, California

The Beach Boys Monument is situated right along the sidewalk in a quiet neighborhood. There is ample street parking, though the area directly in front of the monument is a red curb. Please be respectful when parking around the resident’s homes.
Behind the monument runs the Century Freeway (more on this later). Sometime prior to my visit in 2025, pretty much all of the trees and shrubby that once framed the monument had been cut down and cleared. Additionally, the freeway’s sound-wall was removed. Hopefully they plan to re-plant as it looked rather bare.
About the Beach Boys Monument

The monument was constructed at the site where the Wilson family home once stood. In the 1980’s, the home was demolished to make way for the Century Freeway (Interstate 105). It is believed that the actual plot their home sat on is now directly underneath the freeway.
Several notables, such as Dick Clark and the Rock and Roll Hall of Fame, were among those who supported bringing the monument to life and its registry as a California State Historic Landmark (which it would ultimately obtain).
It was the brainchild of construction engineer and Beach Boys mega-fan Harry Jarnagan, paid for by public donations and contributions by the extended Beach Boys family and was constructed by Scott Wilson, the adoptive son of band member Dennis Wilson (who tragically passed away in 1983).

The white marble slab centered on the landmark was inspired by the cover art of the band’s 1963 album, Surfer Girl. While the band was always a quintet (five-some), the slab pays tribute to all six members, each of which heavily contributed to the band’s success.
The original line up consisted of brothers Brian, Dennis, and Carl Wilson, along with their cousin Mike Love and friend Al Jardine. Jardine was briefly replaced by David Marks while Jardine attended dental school. Jardine would re-join the band roughly one year later.


On the lower portion of the monument, but still center, is a dedication plaque listing it as California Historical Landmark No. 1041, along with a script detailing the site’s history. The plaque reads:
“It was here in the home of parents Murry and Audree that Brian, Dennis, and Carl Wilson grew to manhood and developed their musical skills. During Labor Day weekend in 1961, they, with cousin Mike Love and friend Al Jardine, gathered here to record a tape of their breakthrough song, “Surfin”. This marked the birth of the rock group known worldwide as the Beach Boys, and the beginning of an historic musical legacy that would change the recording industry. The music of the Wilsons, Love, Jardine, and friend David Marks broadcast to the world an image of California as a place of sun, surf, and romance. Brian Wilson would become a legendary producer, arranger, and songwriter”.
In addition to the plaque and decorative marble slab, six gold 45 records embed the base of the monument, each with the name of one of the Beach Boys inscribed within. Names of donors and various friends and family of the Wilsons are engraved into the landmark’s bricks as well.
Significance of the Wilson Family Home

The site of the Wilson family home is significant due to its role in music history. It is where the band formed over Labor Day weekend in 1961 and is where their debut hit, Surfin’, was first written and recorded.
That record would ultimately lead the Beach Boys signing their first deal with Capitol Records, which in turn resulted in the recording of their freshman album, Surfin’ Safari, in 1962. The rest, as they say, is history.

The house across the street from the monument was thought by many to be the former home of David Marks, a childhood friend of the Wilsons who briefly joined the band when Al Jardine left the group.
However, during the dedication ceremony for the monument, David Marks, who was in attendance, noted how different the area looked as the construction of the freeway necessitated the street they lived on to be moved around.
According to an article by SF Gate, Marks was confused as to where his house actually was back then. If that was indeed the house, he undoubtedly would’ve recognized it. Additionally, that home simply doesn’t look like it was built in the 1950’s, but I digress.

With Dennis passing away in 1983 and Carl following in 1998, Brian was the sole Wilson band member present for the monument’s dedication in 2005. Other band members, Al Jardine and David Marks, were also present. Mike Love, cousin of Brian, did not attend.
Unfortunately, less than a month after my wife and I’s visit to the monument in 2025, Brian Wilson, the final surviving brother of the Beach Boys, tragically passed away. Of the original line up, only Jardine and Love remain.
If you happen to be in the area, I highly recommend stopping by and checking out the Beach Boys Monument in Hawthorne. It’s a piece of Southern California and musical history, not to be missed by die hard fans and casuals alike.
If you’re in need of a hotel nearby, check out my review of Lum Hotel Los Angeles. Also, the neighborhood that served as the set for the cult classic film, Friday, isn’t too far away from the monument. Learn how you can explore it for yourself here!


Azul Latin Kitchen: California-Style Mexican Dining in South Lake Tahoe (Review)
When searching for South Lake Tahoe restaurants, specifically ones in or near Heavenly Village, Azul Latin Kitchen is often at or near the top of the search…
Disclosure: This post contains affiliate links. If you make a purchase through these links, I may earn a small commission at no additional cost to you. I only recommend products or services that I believe will add value to my readers.

When searching for South Lake Tahoe restaurants, specifically ones in or near Heavenly Village, Azul Latin Kitchen is often at or near the top of the search results. It’s for good reason, as Azul has some of the best food in the area.
In touristy-heavy destinations such as Tahoe and Heavenly Village, some restaurants tend to rest on their laurels as it relates to food quality and service, heavily relying on the ever revolving door of fresh customers, oblivious to their reputations.
Azul Latin Kitchen stands out from that pack by providing not only friendly, prompt service, but tasty Mexican and South and Central American cuisine as well. Since opening in 2014, Azul has remained a favorite amongst tourists and locals alike.
In this light-hearted review of Azul Latin Kitchen, I’m going to share my wife and I’s dining experience, as well as share photos of the dishes and drinks we tried and what we thought of them. Let’s get into it!
Location and Parking

Azul Latin Kitchen is located in South Lake Tahoe, near the California/Nevada border and nestled within the Heavenly Village complex, along the sidewalk facing Lake Tahoe Boulevard. Since this is the main road going through Tahoe, you can’t miss it.
Parking can be found in the Heavenly Village garage (paid), behind Village Center at the corner of Heavenly Way and Montreal Road (paid), or within Village Center itself (free). Village Center offers free two-hour parking if you’re shopping or dining there, but there isn’t anybody checking. As long as you don’t surpass the two-hour limit, you’ll be fine.
Azul Latin Kitchen Menu Review

This was our second time dining at Azul. Our first time was during the covid pandemic, so things were chaotic. They were only offering outside dining, which created a substantial wait list. This time around, though, we were seated right away (we opted for a seat outside since the weather was pleasant).
Our waitress was at our table within minutes to take our drink order. Throughout the service she was attentive, friendly, conversational, and prompt. This is consistent with the incredible service we received on our first visit and from what other reviewers have said.
Cocktails

Tropic Smoke - $15
We each ordered tequila and mezcal-based cocktails. The Tropic Smoke was my wife’s drink. It’s made with an espadin mezcal, freshly squeezed lime, pineapple juice, organic agave nectar and a dash of angostura bitters with a tajin rim.
This cocktail leans into the mezcal without letting it steal the show. The smokiness is there, but subtle, and allowed to dance around the citrus and sweetness rather than dominate. It’s a fun sipper, with the tajin rim giving it a kick which ties the flavors together nicely.

Jalapeño Y Mas - $17
I ordered the Jalapeño Y Mas. It’s made with a lalo blanco tequila, freshly squeezed lime juice, organic agave nectar, and roasted jalapeño with a fresh lime garnish. The menu photo showed a salted rim, but I didn’t receive that.
You can expect a solid kick from the jalapeño, as it isn’t shy about bringing the heat, but it never feels like it’s trying to drive you away. It’s well-balanced and smoked, wrapped in a crisp layer of lime and agave to soften the edges. It’s a cocktail that whispers “spice”, rather than shouting it.
Starters

Queso Fundido - $13
As our starter, we ordered their queso fundido. You receive a handful of warm tortilla chips, served alongside a sizzling cast-iron skillet of oaxaca, jack, and cheddar cheeses and pickled peppers.
As stated above, your queso comes out sizzling, literally, with a molten blend of cheeses resembling pure comfort in skillet form. It’s gooey, rich, and designed for scooping. The kind of starter that makes you immediately regret your promise to share.
The flavor leans buttery and mild at first, then deepens as it cools, showing off just enough salt and smokiness to keep you diving back in. That said, the texture leans a bit looser than the traditional, ultra-stretchy queso fundido you might expect.
Overall, it’s a satisfying, table-pleasing start to your meal. I wouldn’t consider it a grand slam in terms of queso dips, but absolutely the kind of dish that disappears from the table faster than anyone would care to admit.
Main Dishes

Enchilada Classico Skillet - $24 (Plus another $1 for both red and green sauces)
For her entree, my wife ordered the enchilada classico skillet. In this sizzling skillet, you receive a combination of jack and oaxaca cheeses layered with corn tortillas, topped with sour cream and served with house rice, black beans, and chopped cilantro.
You can choose your protein and sauces. My wife went with the combination of red and green enchilada sauces ($1 extra for both) and for her protein, she chose shredded beef.
The beef is tender and well-seasoned, pulling apart rather easily. It compliments the sauces nicely without competing with them. The cheeses stretch and meld with the sauce, binding everything together in that pleasing hot-cheese-sauce-blanket way you want from an enchilada skillet.
Texture wise, the edges crisp just a bit against the hot dish, giving occasional crunchy contrast to the soft tortillas inside. Paired with sides of rice and beans, it feels like the kind of dish that’s hearty without being overdone. It’s a well-balanced, flavorful twist on the classic enchilada skillet.

Chipotle Tacos (1 chicken and 1 shredded beef) with side of rice and beans - $6.75 (per taco) + $5.50 for sides
For my entree, I ordered the chipotle taco, which is ordered and served a la cart. You get your choice of protein, which can be roasted chicken, carnitas pork, shredded beef, veggie chili or seasoned sweet potatoes.
I ordered two. One with roasted chicken and another with shredded beef, along with a side of their house-made beans and rice. The tacos came smothered in a spicy chipotle sauce and topped with cabbage, chopped onions (I left them off), queso fresco and cilantro.
Your protein comes nestled in warm tortillas and dressed with a chipotle sauce that adds a smokey bite without being overwhelming. The chicken is flavorful with gentle char marks and the shredded beef is tender and well-seasoned. Between the two, I favored the beef.
The chipotle sauces ties everything together, adding a mellow heat and silky texture without masking the individual components. Taken together, the dish feels satisfying and thoughtfully constructed. These tacos are proof that Azul knows how to deliver on flavor without turning things overly fussy or heavy.
Dessert

House-Made Churro - $10
One simply cannot come to Azul Latin Kitchen and not order their delicious house-made churros for dessert. They arrive crisp and golden, dusted generously in cinnamon sugar so that each bite crackles with sweetness.
They’re served warm, which makes the contrast between the crunchy exterior and soft, pillow-y inside all the more satisfying. The accompanying chocolate sauce is rich and smooth, but not overly sweet, offering a bittersweet counterpoint to the churro’s sugary coat.
The portion is generous enough to share (though you may not want to) and they hit that nostalgic dessert note without feeling overdone. While not groundbreaking, Azul nails the execution of the basics - warmth, cinnamon-kissed and crisp. The perfect end to your meal.
Final Thoughts

All told, I highly recommend Azul Latin Kitchen to anyone traveling to South Lake Tahoe. The lake is busting at the seems with many wonderful restaurants, but I feel Azul stands out from most casual dining options. Service is fantastic, food is flavorful and the atmosphere is top notch.
Its Heavenly Village location alone would bring in plenty of customers without having to worry too much about the top marks mentioned above. Azul, however, defies that and seemingly aims to provide its guests a five-star experience.
If you’ll be in the south lake area for more than just a day, I suggest giving their sister restaurant, Base Camp Pizza (also located within Heavenly Village) a try. They’re both owned by the same restaurant group - and it shows. If you decide to try either one, be sure to tell me about your experience in the comments below!


How to Visit Donner Memorial State Park (Things to Do)
When the Donner family and their teamsters became stranded at Alder Creek due to Jacob Donner’s broken wagon axel and injury, the other members of…
Disclosure: This post contains affiliate links. If you make a purchase through these links, I may earn a small commission at no additional cost to you. I only recommend products or services that I believe will add value to my readers.

About the Donner Party
If you haven’t read my post about the nearby Donner Camp Site at Alder Creek, I suggest doing so now. In it is a brief history lesson of the Donner Party and how they ended up in their predicament. It includes information leading up to Alder Creek, but not at Donner Lake.
When the Donner family and their teamsters became stranded at Alder Creek due to Jacob Donner’s broken wagon axel and injury, the other members of the party continued onward, believing the Donners’ would eventually catch up with them.
However, they would only make it another six to seven miles before they realized the mountain was impassable due to the arrival of early heavy snowfall. The party would then settle near Donner Lake, then known as Truckee Lake, within the confines of what is now Donner Memorial State Park.

The various families would huddle together in several make-shift cabins scattered throughout the forest. They would remain here throughout the winter and into spring. While some would eventually be rescued, others weren’t as fortunate and perished.
Due to lack of food and no way to hunt, many party members survived by consuming the corpses of their fallen comrades. This was mostly done to those who already perished, but there were reports of murder/cannibalism taking place as well (though none were substantiated).
By the time spring weather cleared the snow around Donner Lake, around forty members of the Donner Party perished (including the Donner family at Alder Creek), with forty-eight members (mostly consisting of women and children) were rescued and survived.
Getting There, Parking and Fees

Donner Memorial State Park is located just a few miles from historic Downtown Truckee and directly off of Interstate-80. Heading either direction on the freeway, take the Donner Pass Road exit and take the first exit out of the round-a-bout. You’ll then see the park on your left shortly thereafter.
There’s an abundance of parking at the park via a large paved lot near the visitor center and monument, as well as multiple smaller pull-out lots dotted along South Shore Drive near Donner Lake. The lots do fill quickly in the summer and on weekends, so arrive early.
Fees are $10 per car and include same-day access to the lake, trails, visitor center and monument. You can pay at the ranger booth near the entrance, the digital self-pay stations near the visitor center or in the visitor center itself. Just remember to place the receipt on your dash.
There are no electric vehicle charging stations in the park, proper. However, just a mile or so down the road, near the freeway exit you took, is a Taco Bell behind a Chevron station. There are a dozen or so Tesla Superchargers back there.
Things to do at Donner Memorial State Park

Visitor Center
Many are inclined to skip visitor centers at state and national parks, but I implore you to not do so here. It’s small, but packed with information and detailed exhibits summarizing the history of the area, not just the Donner Party incident.
In it, you’ll learn about the Chinese immigrant workers who built the transcontinental railroad through this area (including Donner Tunnels), local Native Americans and the effects pioneering had on them, early pioneers who literally built the California Trail and of course, the Donner Party.

Pioneer Monument
Fully completed in June of 1918, the Pioneer Monument is dedicated to not just the ill-fated Donner Party, but all early pioneers. Present at the dedication ceremony were Frances Donner-Wilder, Virginia Reed-Murphy and Martha Reed-Lewis, all former members of the Donner Party as young girls.
The monument, including its base and cobblestone pedestal, stands at twenty-two feet, representing the culminate amount of snowfall during the harsh winter of 1846/1847, which entrapped the Donner Party. Placed atop the pedestal, a bronze statue of a pioneering family increases its total height by 17.5 feet.


Just above the base, within the center bottom of the cobblestone pedestal, is a plaque with a quote encryption. It states, “Virile to risk and find, kindly withal and a ready help. Facing the brunt of fate, indomitable - unafraid”.
At the rear of the monument is another plaque, this one providing a brief summary of what led to the demise of the Donner Party, as well as general locations of their cabins. This includes the Graves, Murphy, and Breen cabins.

Schallenberger Cabin Site
Marked by a rock and plaque is the spot of the former cabin occupied by 18-year old Moses Schallenberger, along with two other men. In 1844, these men were part of the Stephens-Townsend-Murphy party, who were the first pioneers to take wagons over the Sierra Nevada, effectively building the Truckee route of the California Trail.
Moses and the two others agreed to stay behind and guard several wagons when a nasty storm-system barreled through (sound familiar?). Due to alienating health, Moses elected to stay behind while the other two fled, fearing he wouldn’t have been able to survive the trek over the summit.
Moses survived in his small cabin for three months during brutal winter conditions before he was finally rescued. Several years later, the same cabin which sheltered Moses would go on to do the same for the Breen family, members of the ill-fated Donner Party.
The spot can be found along the paved path leading towards the monument. Just before reaching the monument’s rock-encircled grounds is granite boulder with a bronze plaque placed within it on the right side of said path. It was around that spot where the cabin was located.

Nature Trail to Murphy Cabin Rock Site
Another thing to do at Donner Memorial State Park is to check out the site which housed the Murphy family cabin, who were also members of the Donner Party. The trail is an accessible, flat loop clocking in at just under a half-mile.
Along the way you’ll traverse through a beautiful, peaceful meadow. Donner Creek meanders its way through the meadow, providing the calming sounds of water flowing over rock. There are several wooden benches dotted along the trail where you can stop and take in the scenery.


The peaceful, serene environment isn’t the only thing of interest along this trail. It also takes you to the site of where the Murphy cabin once stood. The spot is just a short time into the trail and is marked by a giant, blackened boulder with - you’ve guessed it - another plaque.
The plaque lists the names of the entire Donner Party and categorizes who perished and survived. Keep in mind that while the Donner family members are listed on the plaque, none of them camped at Donner Lake. Rather, they were several miles away at Alder Creek.


The rock served as the northern wall and fireplace for the cabin. It should be noted that while it’s referred to as the Murphy cabin, it also provided shelter to the Pike, Foster, and Eddy families at various timeframes. It’s also believed to be one of the various sites of cannibalism, but it was never officially substantiated.
When General Stephen W. Kearny arrived and discovered all of the partially consumed corpses, he buried them in the center of the cabin and set it ablaze, not knowing what else to do. Meaning, the very trail you’re taking past this rock is the believed mass-burial site of several party members.

Additional Hiking Trails
Aside from the Nature Trail, there are numerous hiking trails in and near Donner Memorial State Park. Two notable options include China Cove Loop and Split Rock Loop. Split Rock cuts around and through a campground and features a literal split rock as its main attraction.
China Cove Loop begins near the visitor center and meanders its way through tall pines before taking you along the sparkling shores of Donner Lake and back to the visitor center. Both trails are just a few miles in length and lean towards the easier side.

Donner Lake
Your day-use fee also includes access to the south side of Donner Lake. You can hike to it via the China Cove Loop hiking trail or drive. There are numerous pull-out style lots dotted along South Shore Drive you can use.
Once there, you can set up somewhere along the shore or enjoy a beach day at China Cove Beach. There are paddle board (and other watercraft) rentals at the lake as well. It’s no Lake Tahoe, for sure, but Donner Lake is popular for its scenic views and recreational activities.
Other Things to do Nearby

There are numerous activities to do near Donner Memorial State Park. Just a short drive up the pass are the historic Donner Tunnels. Trains used to pass through these tunnels. Now, though, you can hike through them and get an incredible view of Donner Lake while you’re at it.
Just a few miles drive away is historic Downtown Truckee. There, you can walk the streets of this former mining town while checking out historic trains, enjoy lunch at one of the many restaurants, shop, and take a docent-led tour of the original Truckee jail.


Additionally, you can drive west on Interstate-80 for about thirty miles to Emerald Pools, an incredible swimming hole in California. I would plan to do this one early, as the parking lot is fairly small and fills quickly, particularly on the weekends in summer.
Finally, I’d be remiss if I didn’t again mention the Donner Camp Site at Alder Creek. There, you’ll find a short, easy-to-follow hiking trail through a gorgeous meadow filled with towering pines and tall grass. This was the site where the Donner family were trapped.
No visit to one would be complete without the other, as they’re both equally important to the Donner story as a whole. It’s less than seven miles away, so it’s an easy visit and great way to stretch your legs if you’re on a road trip. You can read more about Alder Creek here.

Explore the Donner Party Camp Site at Alder Creek Near Truckee
On April 15, 1846, the Reed and Donner families departed Springfield, Illinois, with the goal of starting a new life in California. Later, in Independence…
Disclosure: This post contains affiliate links. If you make a purchase through these links, I may earn a small commission at no additional cost to you. I only recommend products or services that I believe will add value to my readers.

A Brief Summery of the Donner Party
On April 15, 1846, the Reed and Donner families departed Springfield, Illinois, with the intent of starting a new life in California. Later, in Independence, Missouri, they would link up with several other families, expanding their wagon train to nearly eighty men, women and children. Collectively, they would become known as the Donner Party.
From point A, the Donner Party had roughly 123 days to travel 2,200 miles to California, with the goal of traversing the infamous Sierra Nevada Mountains in Truckee, now known as Donner Pass, by the end of October. If they didn’t, heavy snowfall would make that goal an impossible task.
Upon reaching Fort Bridger in modern-day Wyoming, the decision was made to take an untested route called “Hasting’s Cutoff”. The name refers to Lansford Hastings, the man who “discovered” the path. This deviation was a huge gamble from remaining on the heavily trafficked and proven Oregon and California Trails. Hastings described it as a “safe alternative” that would shave 400-miles off of the trip.

While it was true that Hasting’s Cutoff would shave off that many miles, what Hastings failed to mention was the route’s pure brutality. Instead of traversing through lush fields along a rut-worn path in Southern Idaho, this route cut through the unforgiving landscape of the Wasatch Range and the baron Great Salt Lake Desert, before entering Nevada near modern-day Elko.
What they saved in miles, they lost in time. Extreme heat, boulder-laden canyons, no grass for oxen, dry deserts, and other hazards cost the party not just time, but food rations, water, oxen and irreversible damage to their wagons. Long story short, Hasting’s Cutoff prove detrimental to the party in more ways than one.
On October 28, while crossing through Alder Creek near present-day Truckee, the front axel of George Donner’s wagon broke. While attempting to repair it, he badly cut and injured his hand. With a bad hand and broken wagon axel, both Donner families would set up camp at Alder Creek while the remainder of the party continued onward.
Donner Camp Historical Site at Alder Creek

Forgive the history lesson, but its inclusion was crucially germane to this post. Many are aware of the Donner Party and the circumstances surrounding their fate at what was then known as Truckee Lake, now Donner Lake, in present-day Donner Memorial State Park.
However, seemingly just as many are unaware that no member of the actual Donner family ever made it to Truckee (Donner) Lake, at least not right away. As mentioned above, the Donners suffered a broken wagon and severe injury at Alder Creek. As a result, they stayed behind.
The rest of the families in the party (Reeds, Breens, Graves, Murphys, and others) continued for another six miles, believing the Donners would eventually catch up. They would ultimately settle near the lake in what is now the state park site, after finding the pass buried in snow, blocking their path.
Getting There, Parking, and Fees

The Donner Camp Site is completely separate from Donner Memorial State Park at about an 6.5 mile distance. From the state park, travel eastbound on I-80 for a few miles. Take the CA-89 exit and turn left, then pass through three round-a-bouts. You’ll come to the camp site on your right.
Parking is free and expansive with a large, paved parking lot. At the northern end of the lot are restrooms (vault style), along with several picnic tables scattered about. I have to say, whoever designated this site a picnic ground has quite the morbid sense of humor.
Donner Camp Trail - Interpretive Loop
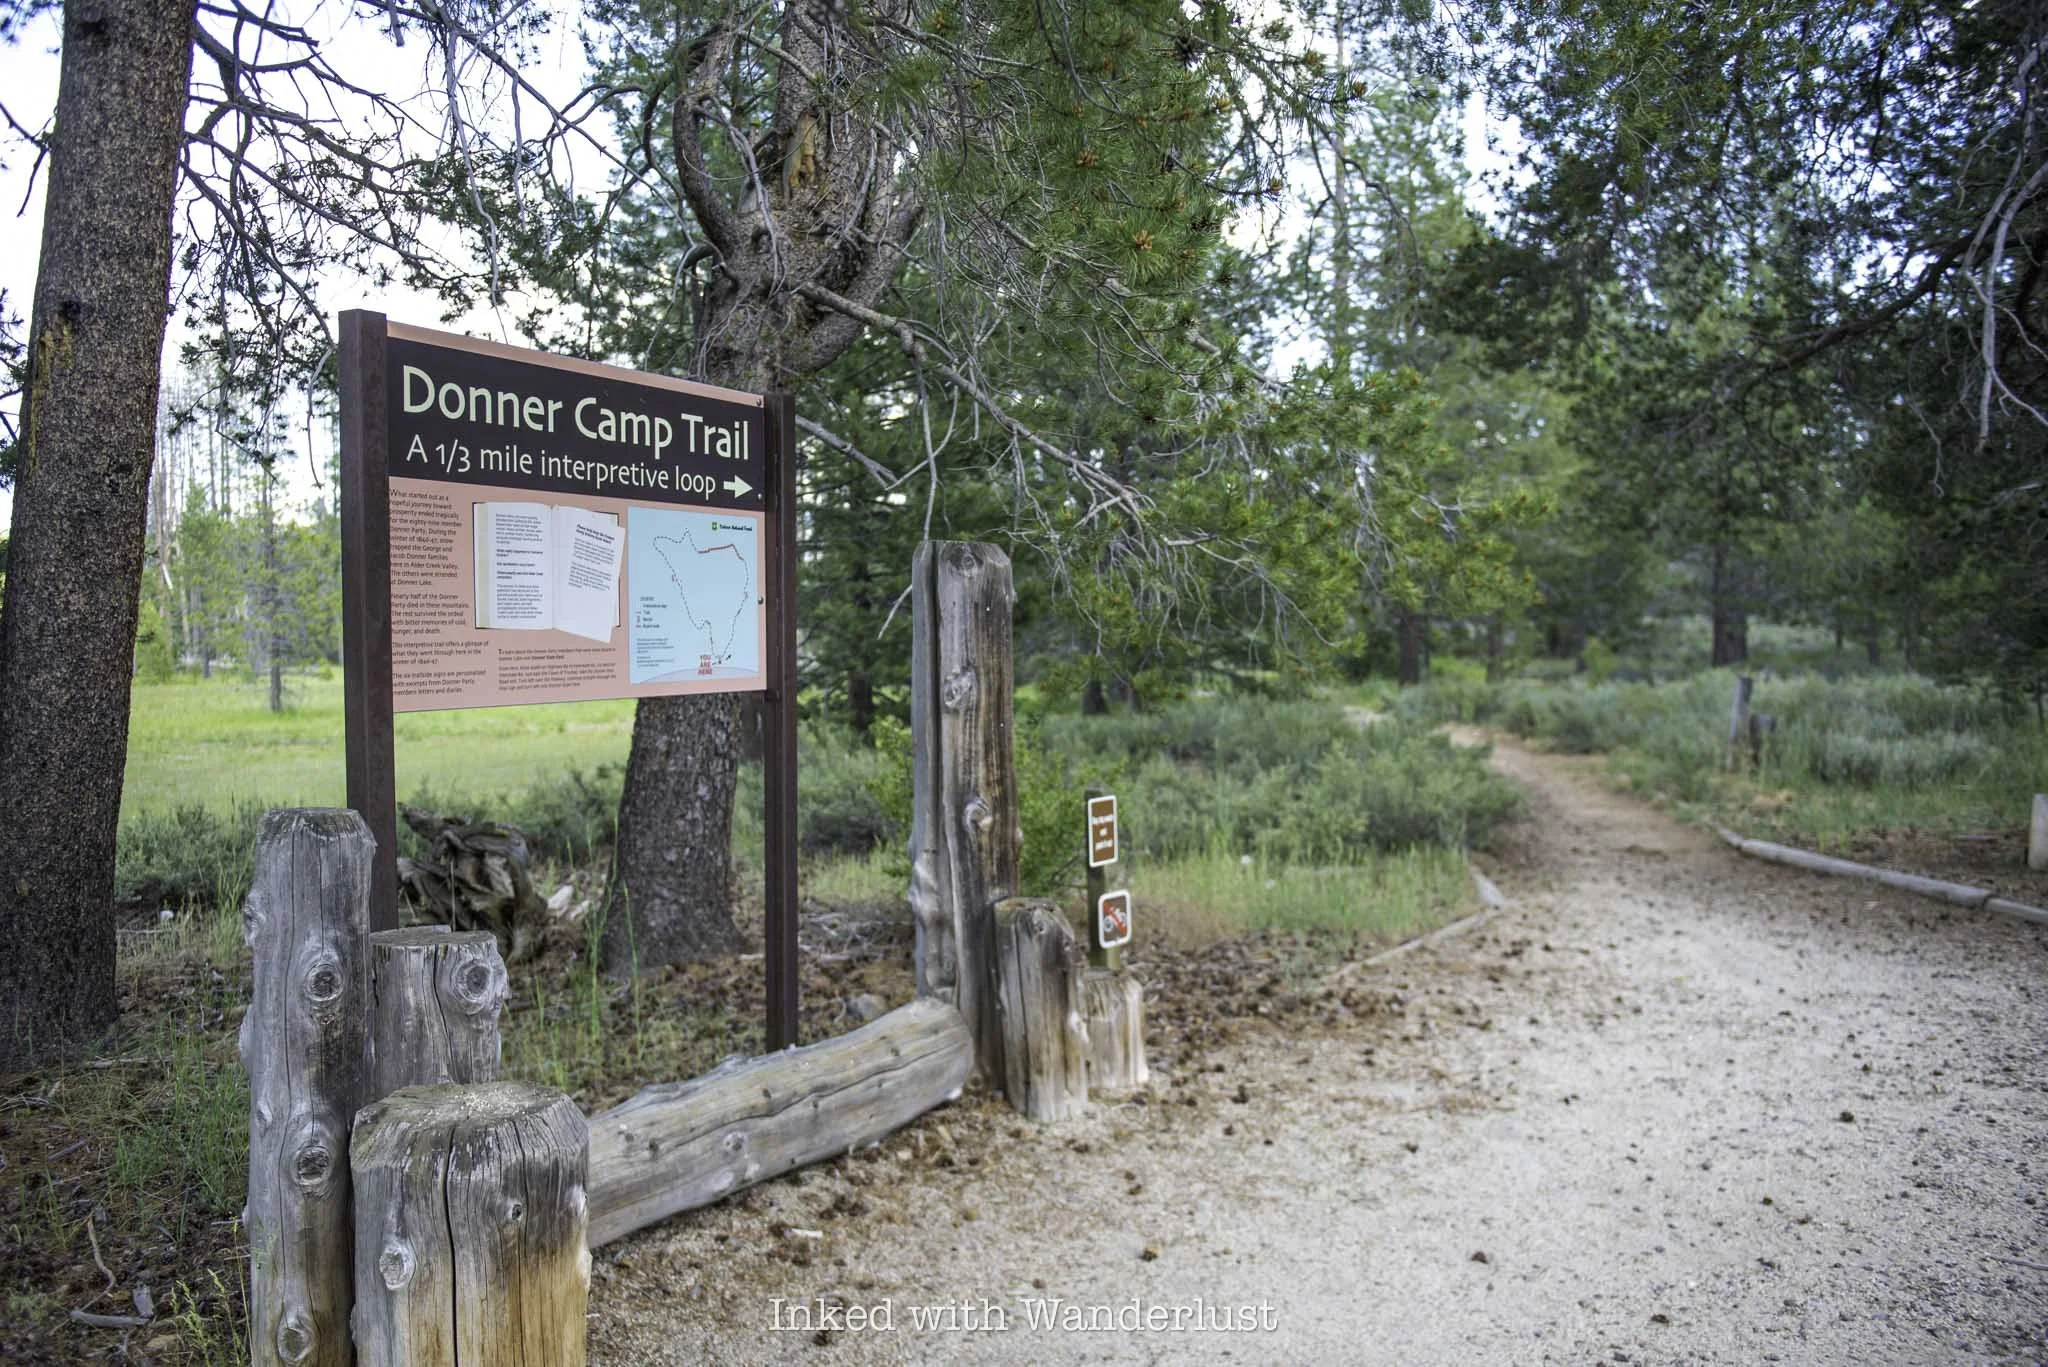
The Donner Camp trail is a well maintained, nearly completely flat loop that encircles the meadow the Donner family fought to survive in during the brutal winter of 1846/1847. It begins at the trailhead, which can be found at the southern end of the parking lot (you can’t miss it).
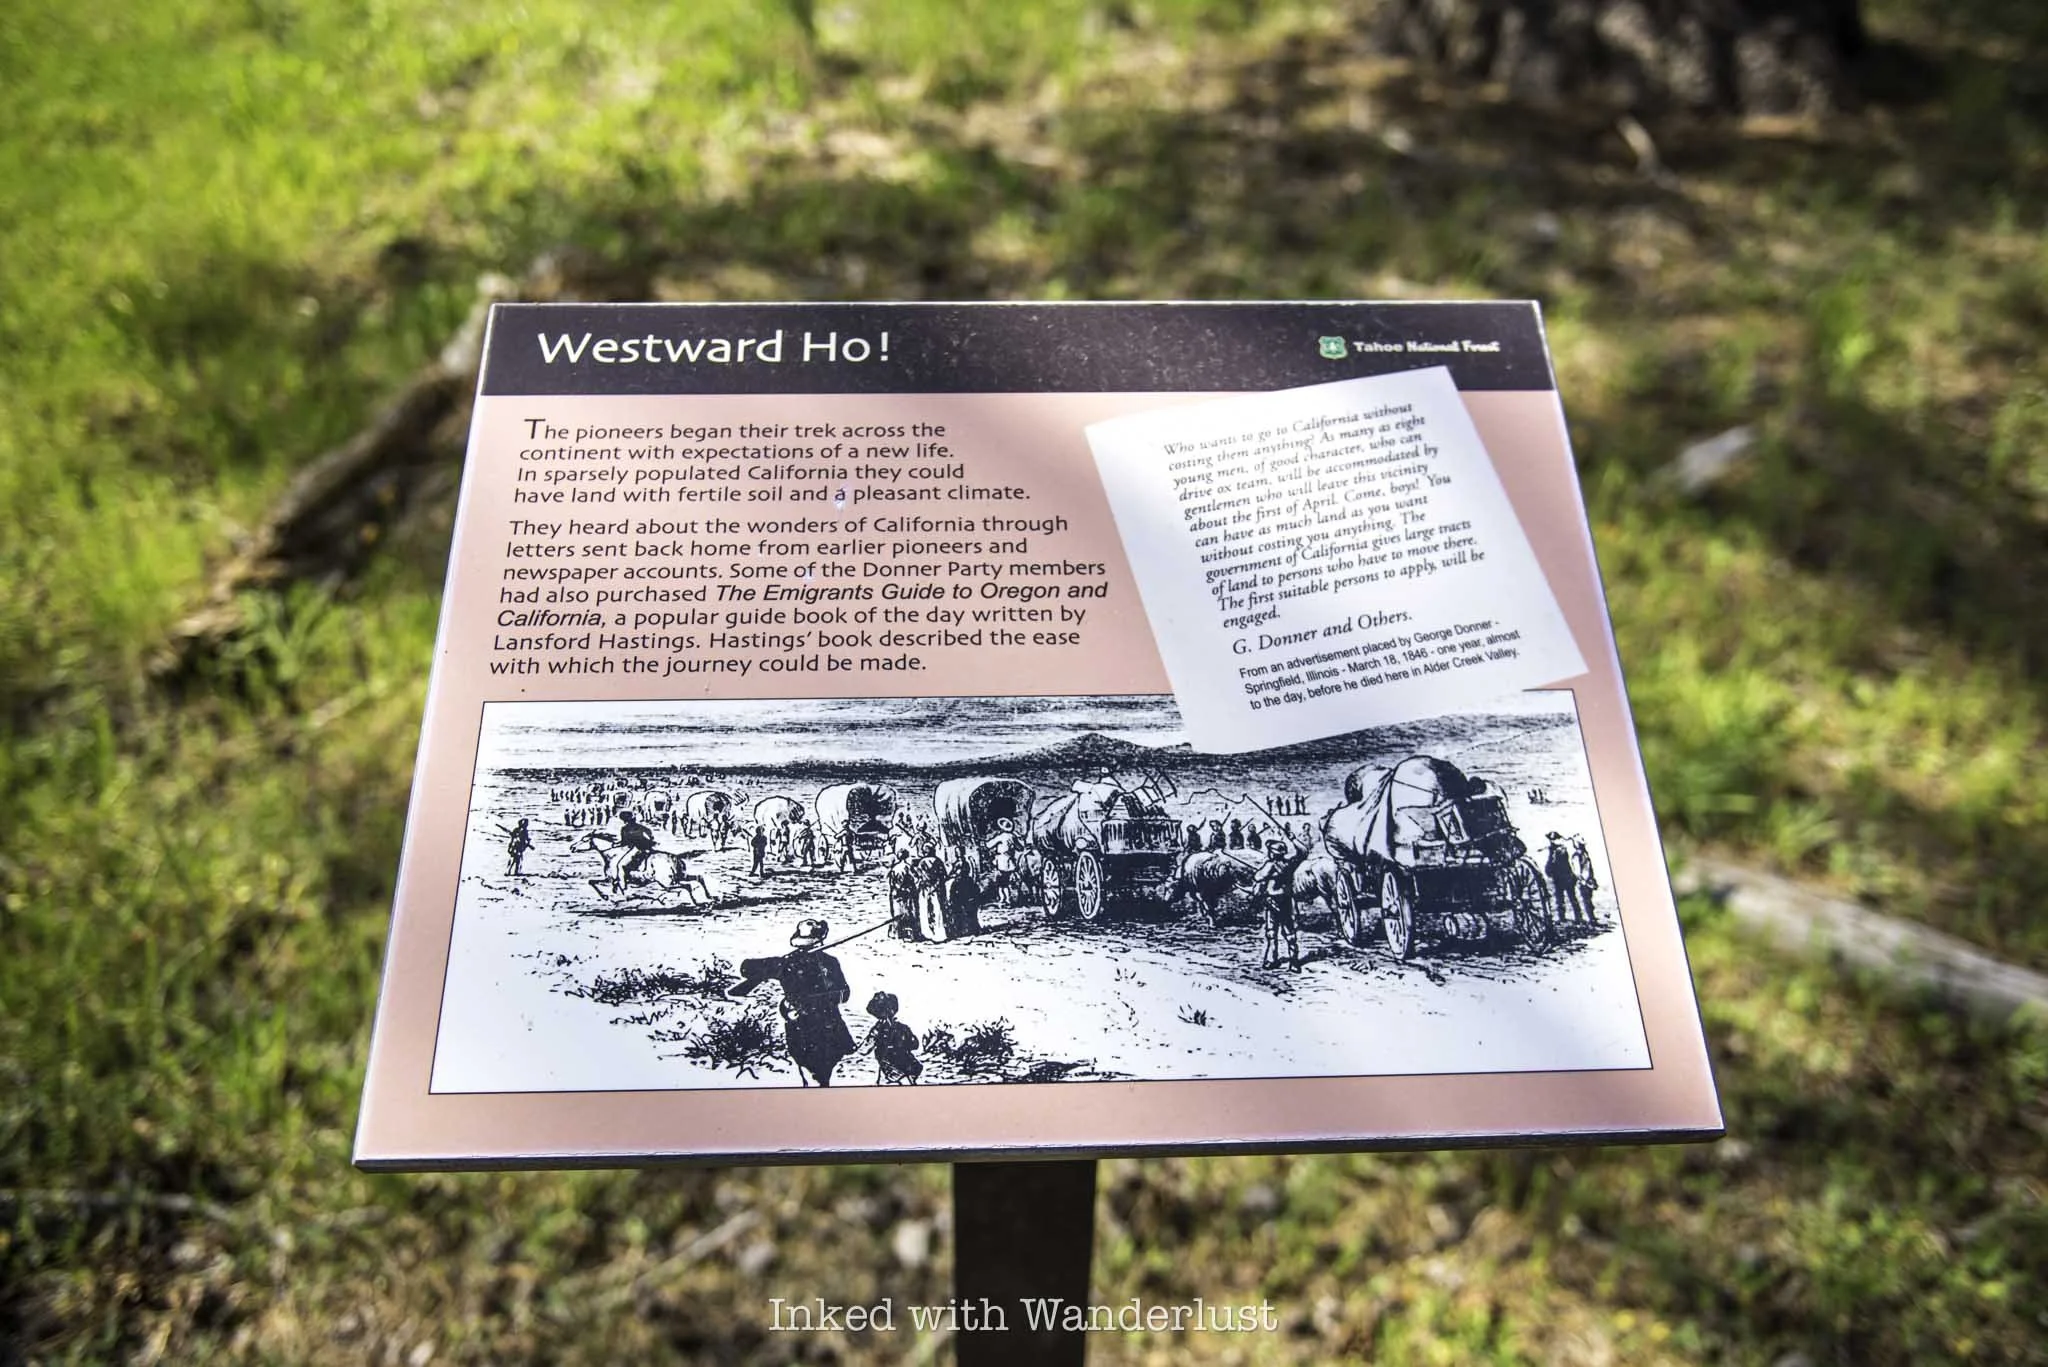
You can go in either direction but for the story to make sense, it’s best to begin by going right at the trailhead. Dotted along the compact dirt trail are interpretive signs, detailing the history of the Donner Party, as well as their journey and hardships.
The trail is as close to completely flat as it gets, making it an easy outing for families traveling along the freeway. I wouldn’t necessarily designate it stroller-friendly, but you could probably get away with it.
There are also many benches along the loop to rest and take in the scenery. It’s truly a stunning meadow, with towering pines and tall grass lining the trail. Alder Creek, the area’s namesake, gently meanders through the meadow. It’s hard to imagine the suffering that happened in such a beautiful place.

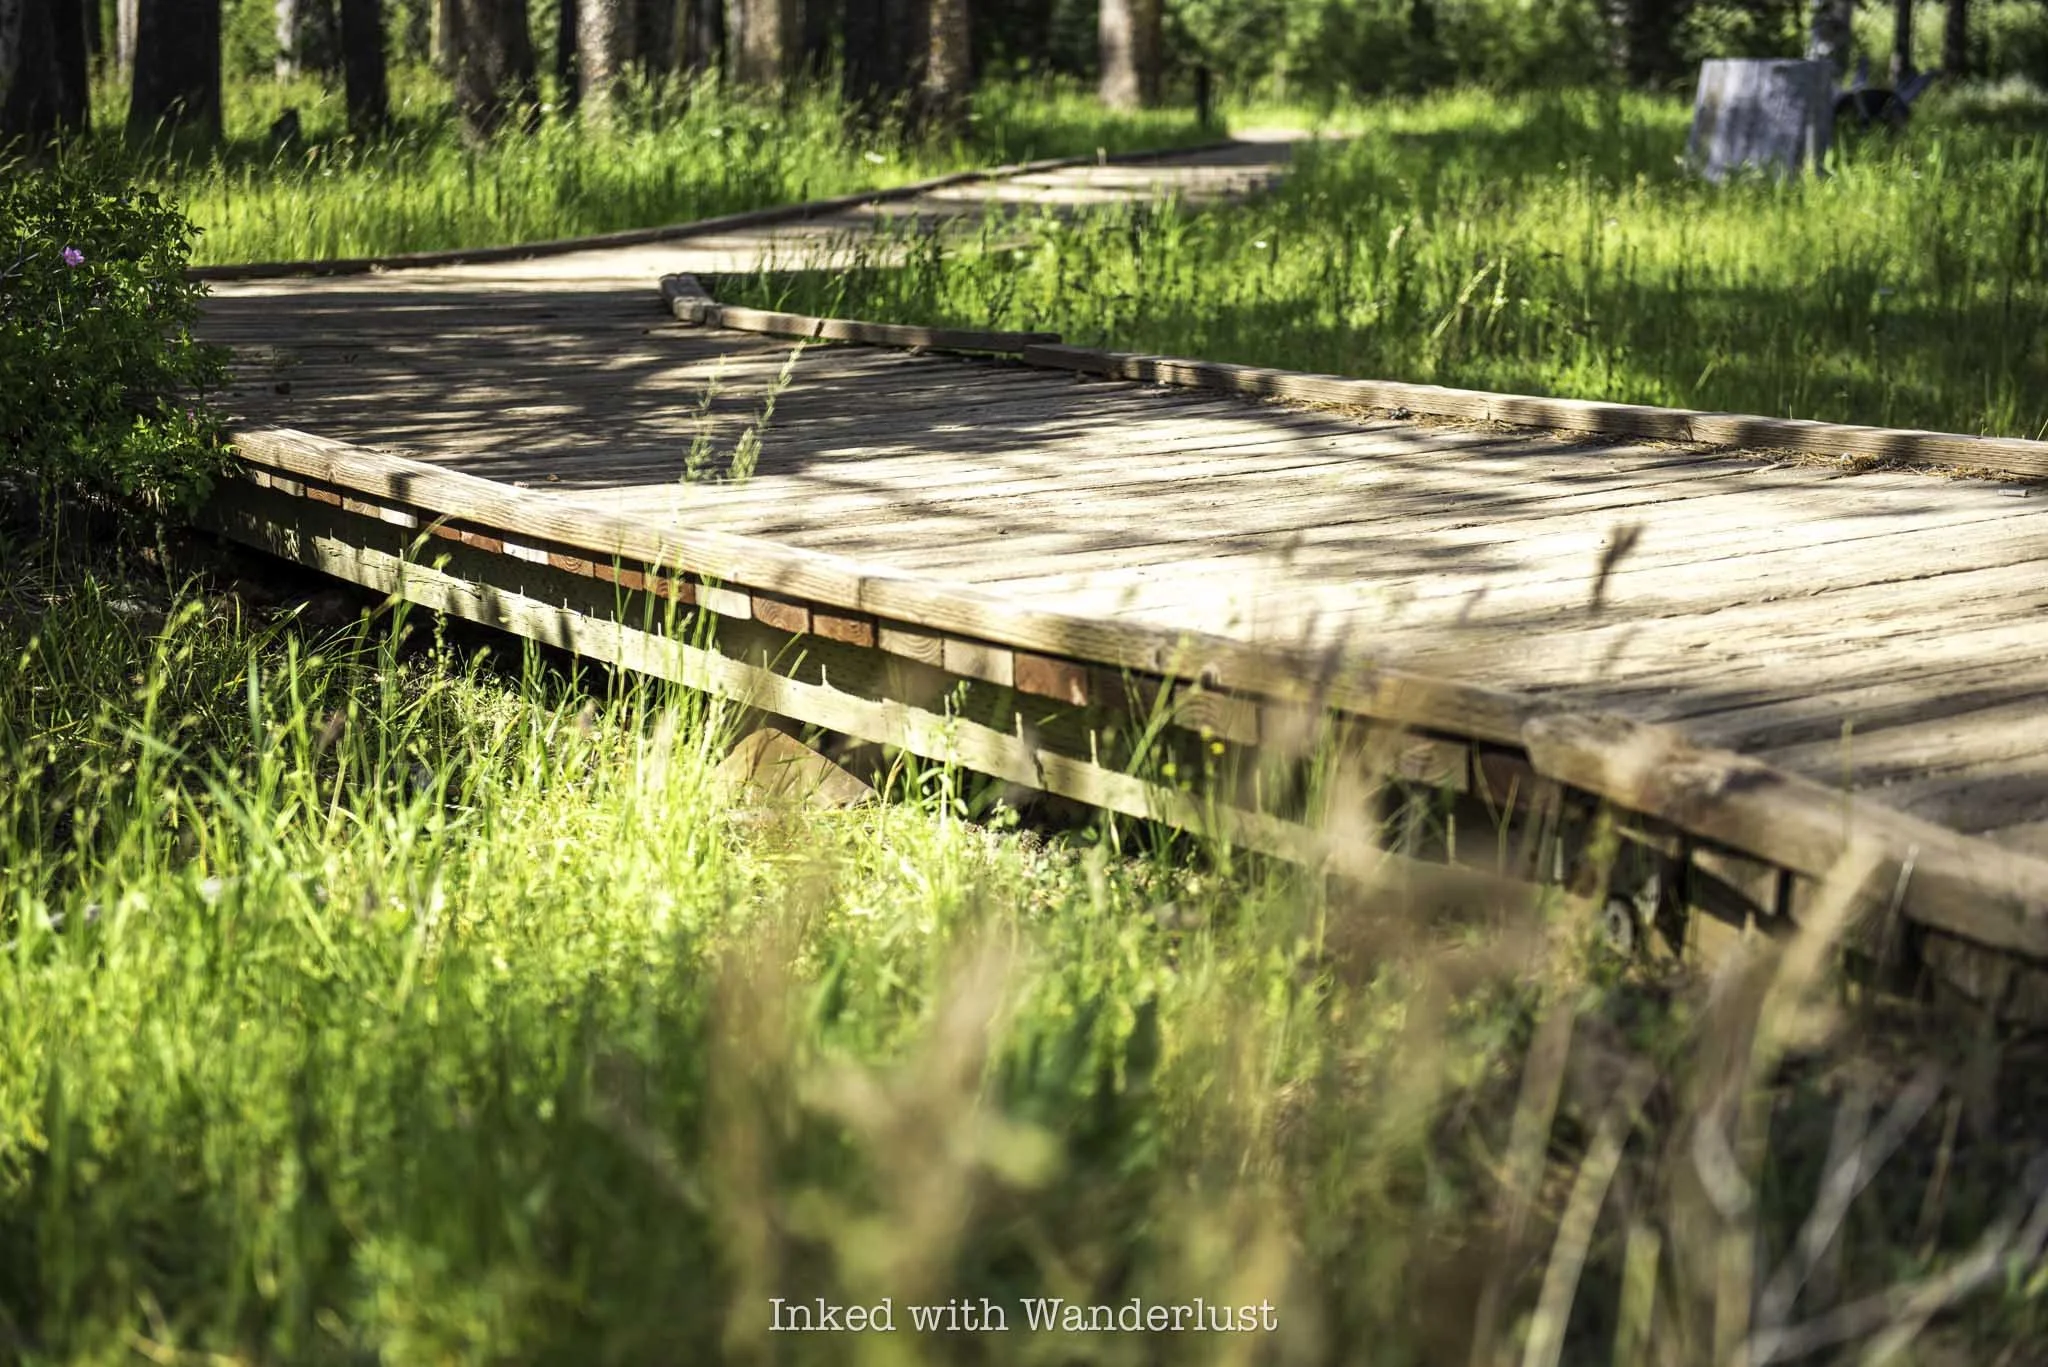
Near the halfway point of the loop, the trail goes from compact dirt to a wooden boardwalk. This section of trail traverses over a growing marsh, along with parts of Alder Creek, and the boardwalk is meant to help protect them. So be sure to stay on it.
As the loop turns back to dirt, you’ll soon come to a medium-sized rock with a plaque display, adjacent to a tall, almost featureless tree. That rock marks the spot where Jacob Donner and his family set up camp. The camp site of George Donner is marked a bit further down the trail.


As previously stated, the winter of 1846/47 was a brutal one. As the Donners watched the snow fall and it became clear that escape wouldn’t be an option, survival mode kicked in. Tall trees that once made up this area were cut down and reduced to stumps.
They’re scattered all over the meadow and are cut as high as twelve feet, indicating how oppressively tall the snowpack had gotten. Food was difficult to come by, resulting in the Donners having to boil hides and consume the gluey mass. Crushed animal bones were also boiled into a broth.

By the end of 1846, as dry wood and food became more scarce by the day, Jacob Donner, along with three teamsters, would be dead. After being unable to join the rescue party out of the mountains due to illness, George Donner would pass in his camp in March 1847. His wife, Tamsen, would pass shortly thereafter.
All told, by the time more rescuers reached the Donners at Alder Creek in 1847, seven members of the family had perished (half of them), along with several teamsters. Seven others survived, with George Donner Jr. being the sole male survivor of the family.

From the camp site, you can opt to take the spur trail leading to Prosser Reservoir. To continue on the loop, proper, continue left at the camp site, with the rock and tree to your back. The trail begins to loop back towards the parking lot, with one or two additional interpretive signs to read along the way.
Once you get back to the parking lot, you’re done. There’s another trail near the Donner Camp trailhead you can explore. I didn’t as I was short on time. If you have bikes with you, I saw several folks with bikes gearing up near the northern end of the parking lot. Perhaps there’s another trail over there.
For someone who’s been fascinated with the Donner Party and their story for so long, it was humbling and moving to stand in the spot where they camped and explore the meadow where they spent that infamously horrific winter.
Did The Donners Resort to Cannibalism at Alder Creek?

Surely, you’ve heard of the disturbing end of the Donner Party’s story in the mountains, with many reportedly resorting to cannibalism in order to survive. Reports indicate this was done to those who were already deceased, but there were several accusations of murder/cannibalism as well.
There’s much debate as to if it actually happened, but we do have journal entries and first-hand testimonials from survivors, seemingly confirming that it did occur at lake camp involving the other party members. Did the Donners take part in it as well, though?
There are conflicting reports. James Reed was said to have found George Donner’s body at the Alder Creek camp with his stomach split open and insides missing. While it could have been cannibalism, it’s also consistent with how bears consume their prey. In the mid-1800’s, grizzly bears were present in the sierras.
Additionally, it’s been said that Lewis Keseberg, another member of the ill-fated group, admitted to cannibalizing Tamsen Donner upon her death. It was said that Tamsen eventually made her way to lake camp after George’s death, where she ultimately died and was reportedly consumed. This isn’t confirmed, though, as her body was never found.
The official stance from park rangers at Donner Memorial State Park is - “perhaps it happened”. Or at least that’s how their answer to the question comes across. With multiple mutilated bodies discovered at both sites and several statements from survivors who witnessed and took part in the act, yes, I do believe it happened.
Donner Memorial State Park

West of the Donner Camp Site is Donner Memorial State Park. The Donners may not have made it to this point, but the park memorializes them and the other members of the party as well. There’s a visitor center with many fantastic exhibits and the Pioneer Monument.
The monument is a dedication to the Donner Party, specifically those who perished. It’s twenty-two feet tall, representing the twenty-two feet of snow that entrapped the Donner Party in the winter of 1846/1847.
The state park also marks the various sites where the party built their makeshift cabins. Along one trail is a giant boulder that served as the north wall and fireplace for the Murphy family cabin. On the rock face is a plaque, listing the entire Donner Party and categorizes those who survived and who perished.
No visit to either sites would be complete without the other, as both are historically significant and important to the Donner story as a whole. You can read more about the events that occurred at Donner Memorial State Park. Additionally, learn about the historic Donner Tunnels and how you can hike through them!

How to Visit The Friday House and Neighborhood in Los Angeles
Remembered for its iconic cast and lasting cultural impact, the cult-classic movie Friday has entertained fans en masse since its theatrical debut in…
Disclosure: This post contains affiliate links. If you make a purchase through these links, I may earn a small commission at no additional cost to you. I only recommend products or services that I believe will add value to my readers.

Remembered for its iconic cast and lasting cultural impact, the cult-classic movie Friday has entertained fans en masse since its theatrical debut in 1995. Filmed over a period of three weeks on a modest budget, Friday was largely filmed in a real-life Los Angeles neighborhood.
That neighborhood, located just off Normandie Avenue, contains several of the houses featured in the film, including Craig’s (the protagonist), Smokey’s, Mrs. Parker’s and Stanley’s. Since it’s a real neighborhood, fans of the film are able (and often encouraged) to visit.
In this post, I’ll discuss several topics pertaining to the Friday neighborhood and the Friday House, including how to find it, what to expect, details from the movie and more. Let’s get into it!
Friday Neighborhood Filming Location
The Los Angeles neighborhood where Friday was filmed can be found on West 126th Street, just off of Normandie Avenue. It’s a bit out of the way from most tourist areas, but it wasn’t too far from Sofi Stadium-area hotel at just under four miles away.
All four of the main houses from the movie can be seen here. The houses and their addresses include:
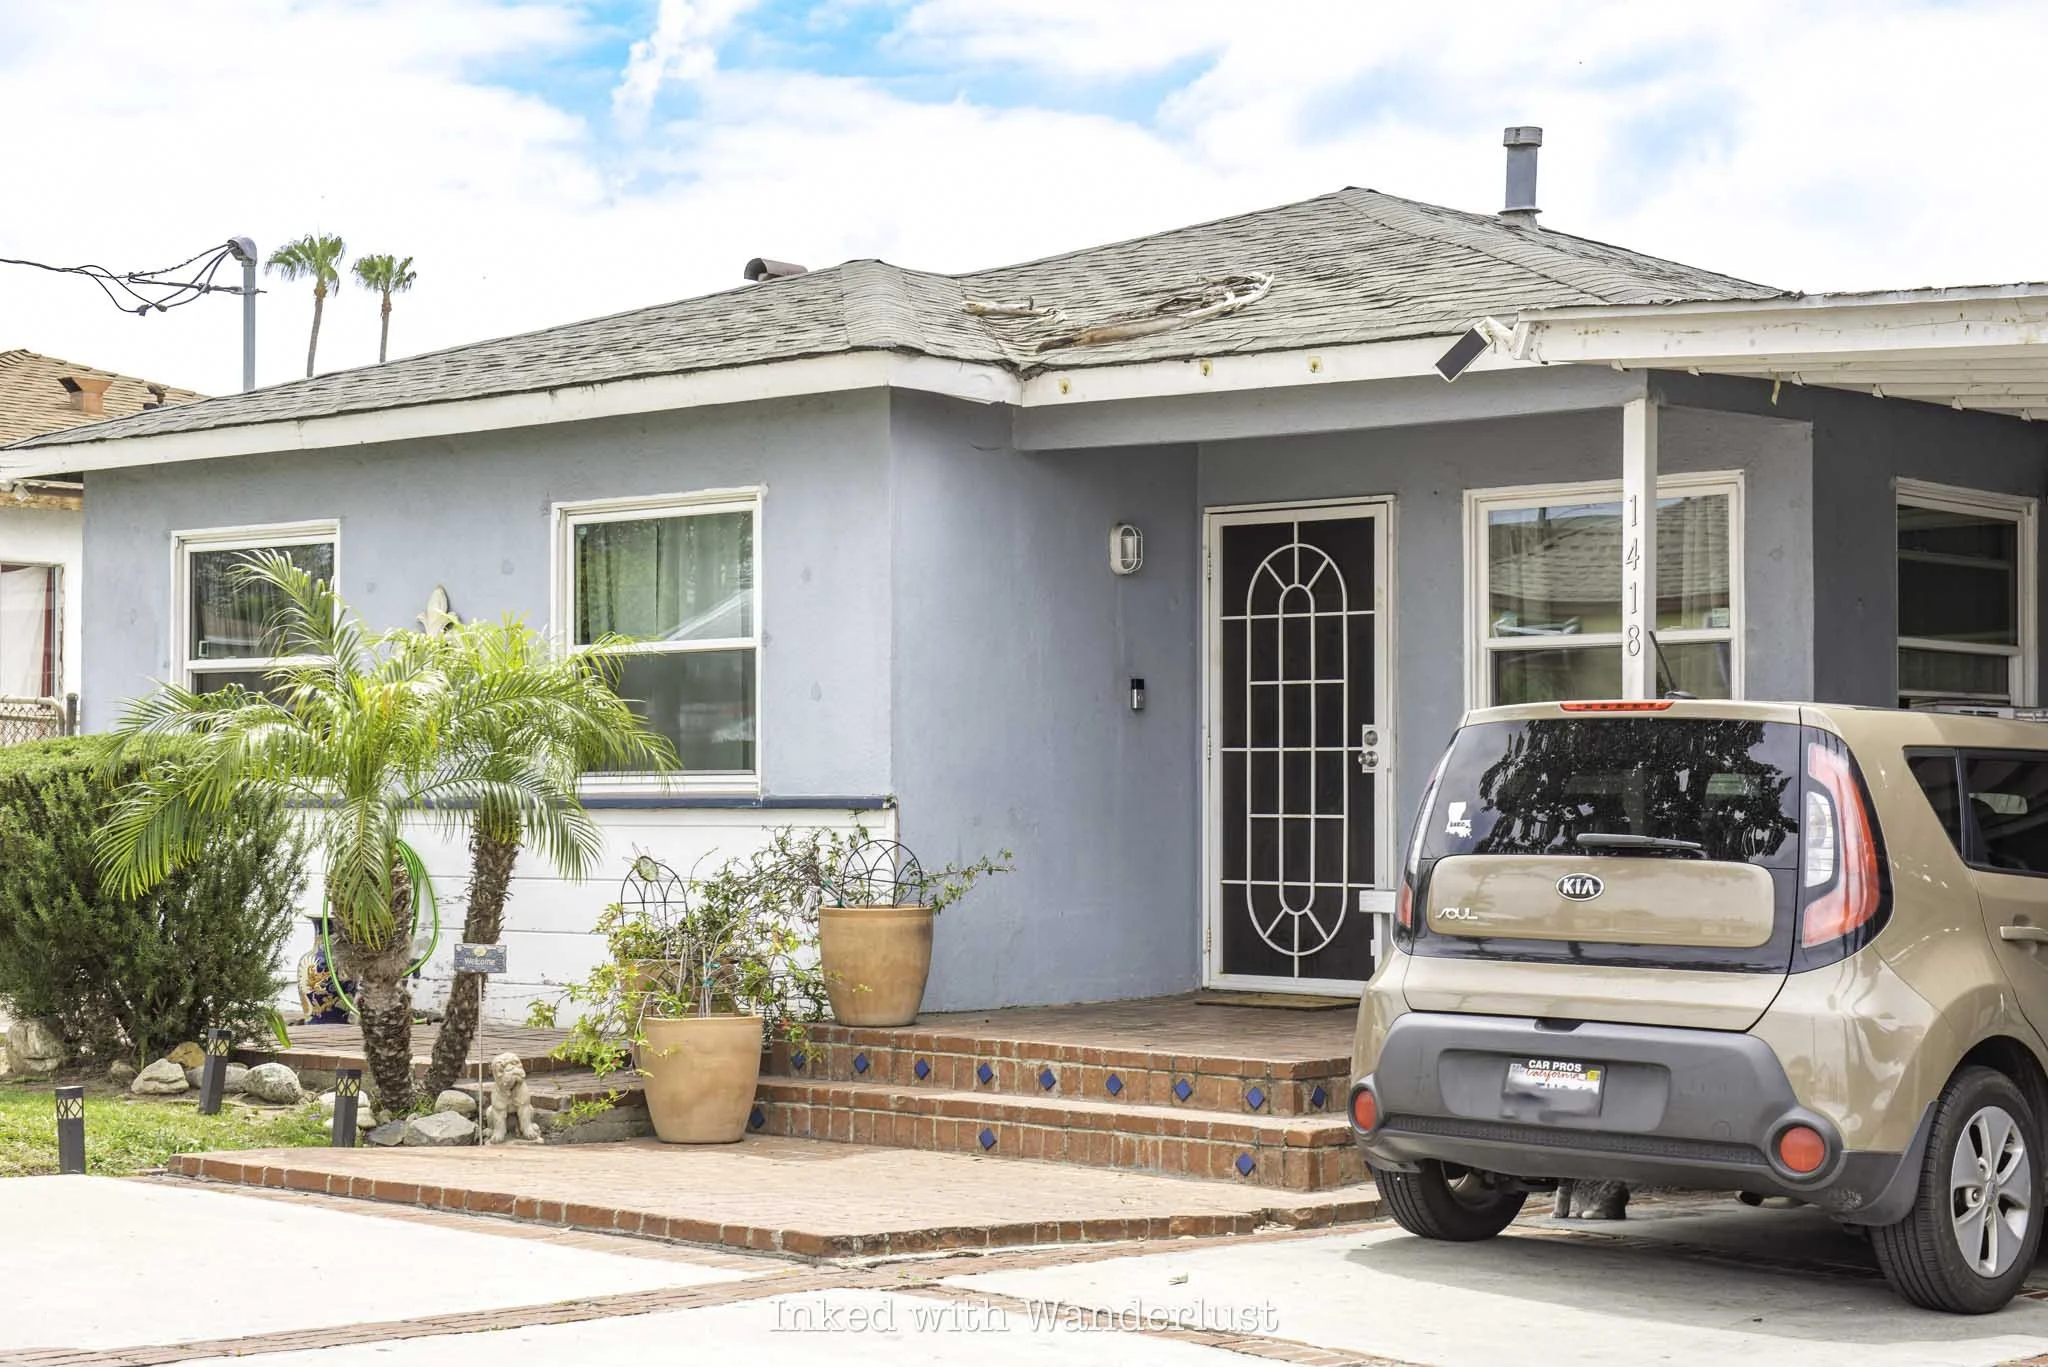
Craig’s House: 1418 West 126th Street
Smokey’s House: 1433 West 126th Street
Mrs. Parker’s House: 1423 West 126th Street
Stanley’s House: 1424 West 126th Street (adjacent to Craig’s house)
Keep in mind that this is a real neighborhood with real people living here. It isn’t an actual movie set. There are times when the homeowners allow people to take pictures on their property but if they’re not on the day you visit (like during mine), then please be respectful.

As long as you remain on the sidewalk or street, you can legally take all the photos of the houses you want. As the old saying goes - you cannot trespass the eyes. This means that whatever your eyes can see from a publicly accessible space (sidewalk), you can photograph.
As stated above, however, the homeowners do allow people to access their property and take photos of themselves (for a fee) from time to time. They offer props, a chance to see on-set photographs, sell merchandise and more.
Days and hours vary, and there’s only an Instagram page that hasn’t been updated in a while, so there’s no real way to know when the homeowners are offering these services. Based on my research, it’s mostly on weekends and they usually begin around 11am.
The Houses from Friday

Mrs. Parker’s House
If you’re a fan of the original Friday, then you certainly remember Mrs. Parker (Kathleen Bradley). She was the sultry, but married across-the-street neighbor of Craig, who often attracted attention by watering her grass-less front yard in short-shorts and plaid crop top.
Fans will likely remember the iconic scene which involved her husband (Tony Cox) returning home to find her in the house with Pastor Clever (Bernie Mac), chased him out of the house, and threw a brick through his rear vehicle window.
Today, the house looks much different than it did in the movie. In Friday, the house was blue with tall shrubbery and no grass. These days, it’s painted a cream color with earthy-brown accents, short shrubbery and a nicely manicured (possibly artificial) lawn.
The current homeowner lived here while the movie was being filmed and will often show visitors photo albums containing behind the scenes and on-set photos he and others took. For a fee, he’ll also allow you on the lawn to take a Mrs. Parker-esq picture.

Smokey’s House
While not featured in the movie as heavily as the others, Smokey’s house is still worth mentioning and checking out as Smokey (Chris Tucker) was such an integral part of the movie’s storyline and went on to become one of Hollywood’s most iconic and beloved characters.
Aside from a color scheme change, matured shrubbery, and the removal of the address numbers near the front door, the house appears to look largely similar today as it did thirty years ago.
Based on my research, the current owner doesn’t appear to take part in the Friday festivities, but that could always change. For now, you’ll have to settle for observing and photographing it from the sidewalk.
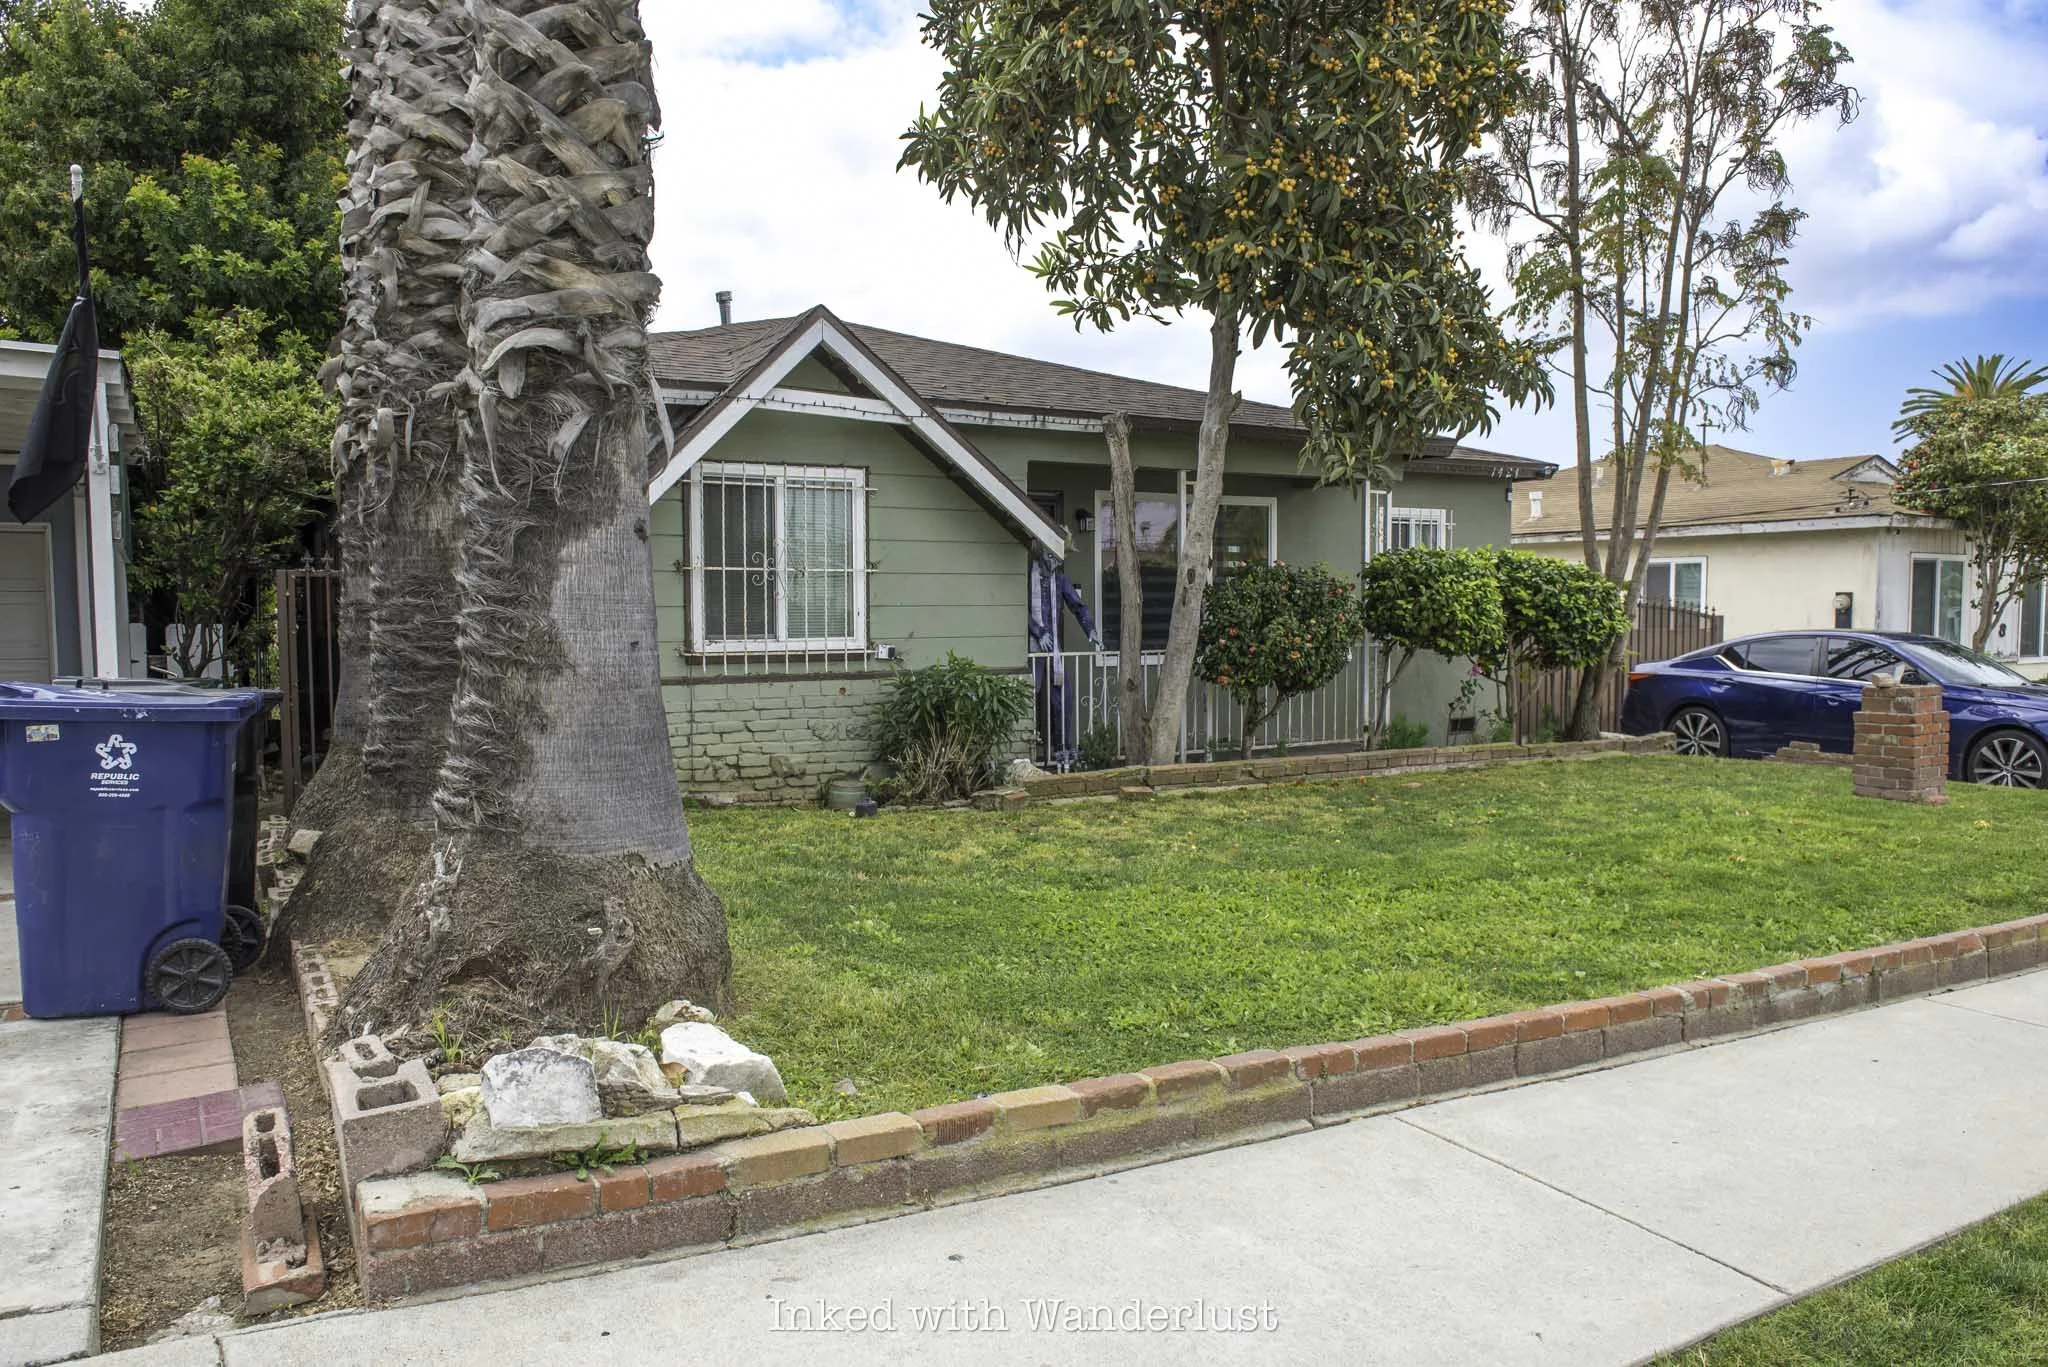
Stanley’s House
Stanley (Ronn Riser) was the egotistical, boujee neighbor of Craig (Ice Cube) and his family, who kept a neatly manicured lawn and took no issue with demanding anyone who dared to step on said lawn to promptly remove themselves.
Such as the scene where Deebo (Tommy Lister) forced Smokey to help him break into Stanley’s home via the side window (still visible today) while he was out of the house. Stanley unexpectedly returned, causing Smokey and Deebo to panic.
When Stanley began shouting at them, they thought the jig was up. As it turned out, though, Stanley demandingly, yet somewhat politely, asked them to stop stepping on his grass (even though they actually didn’t).
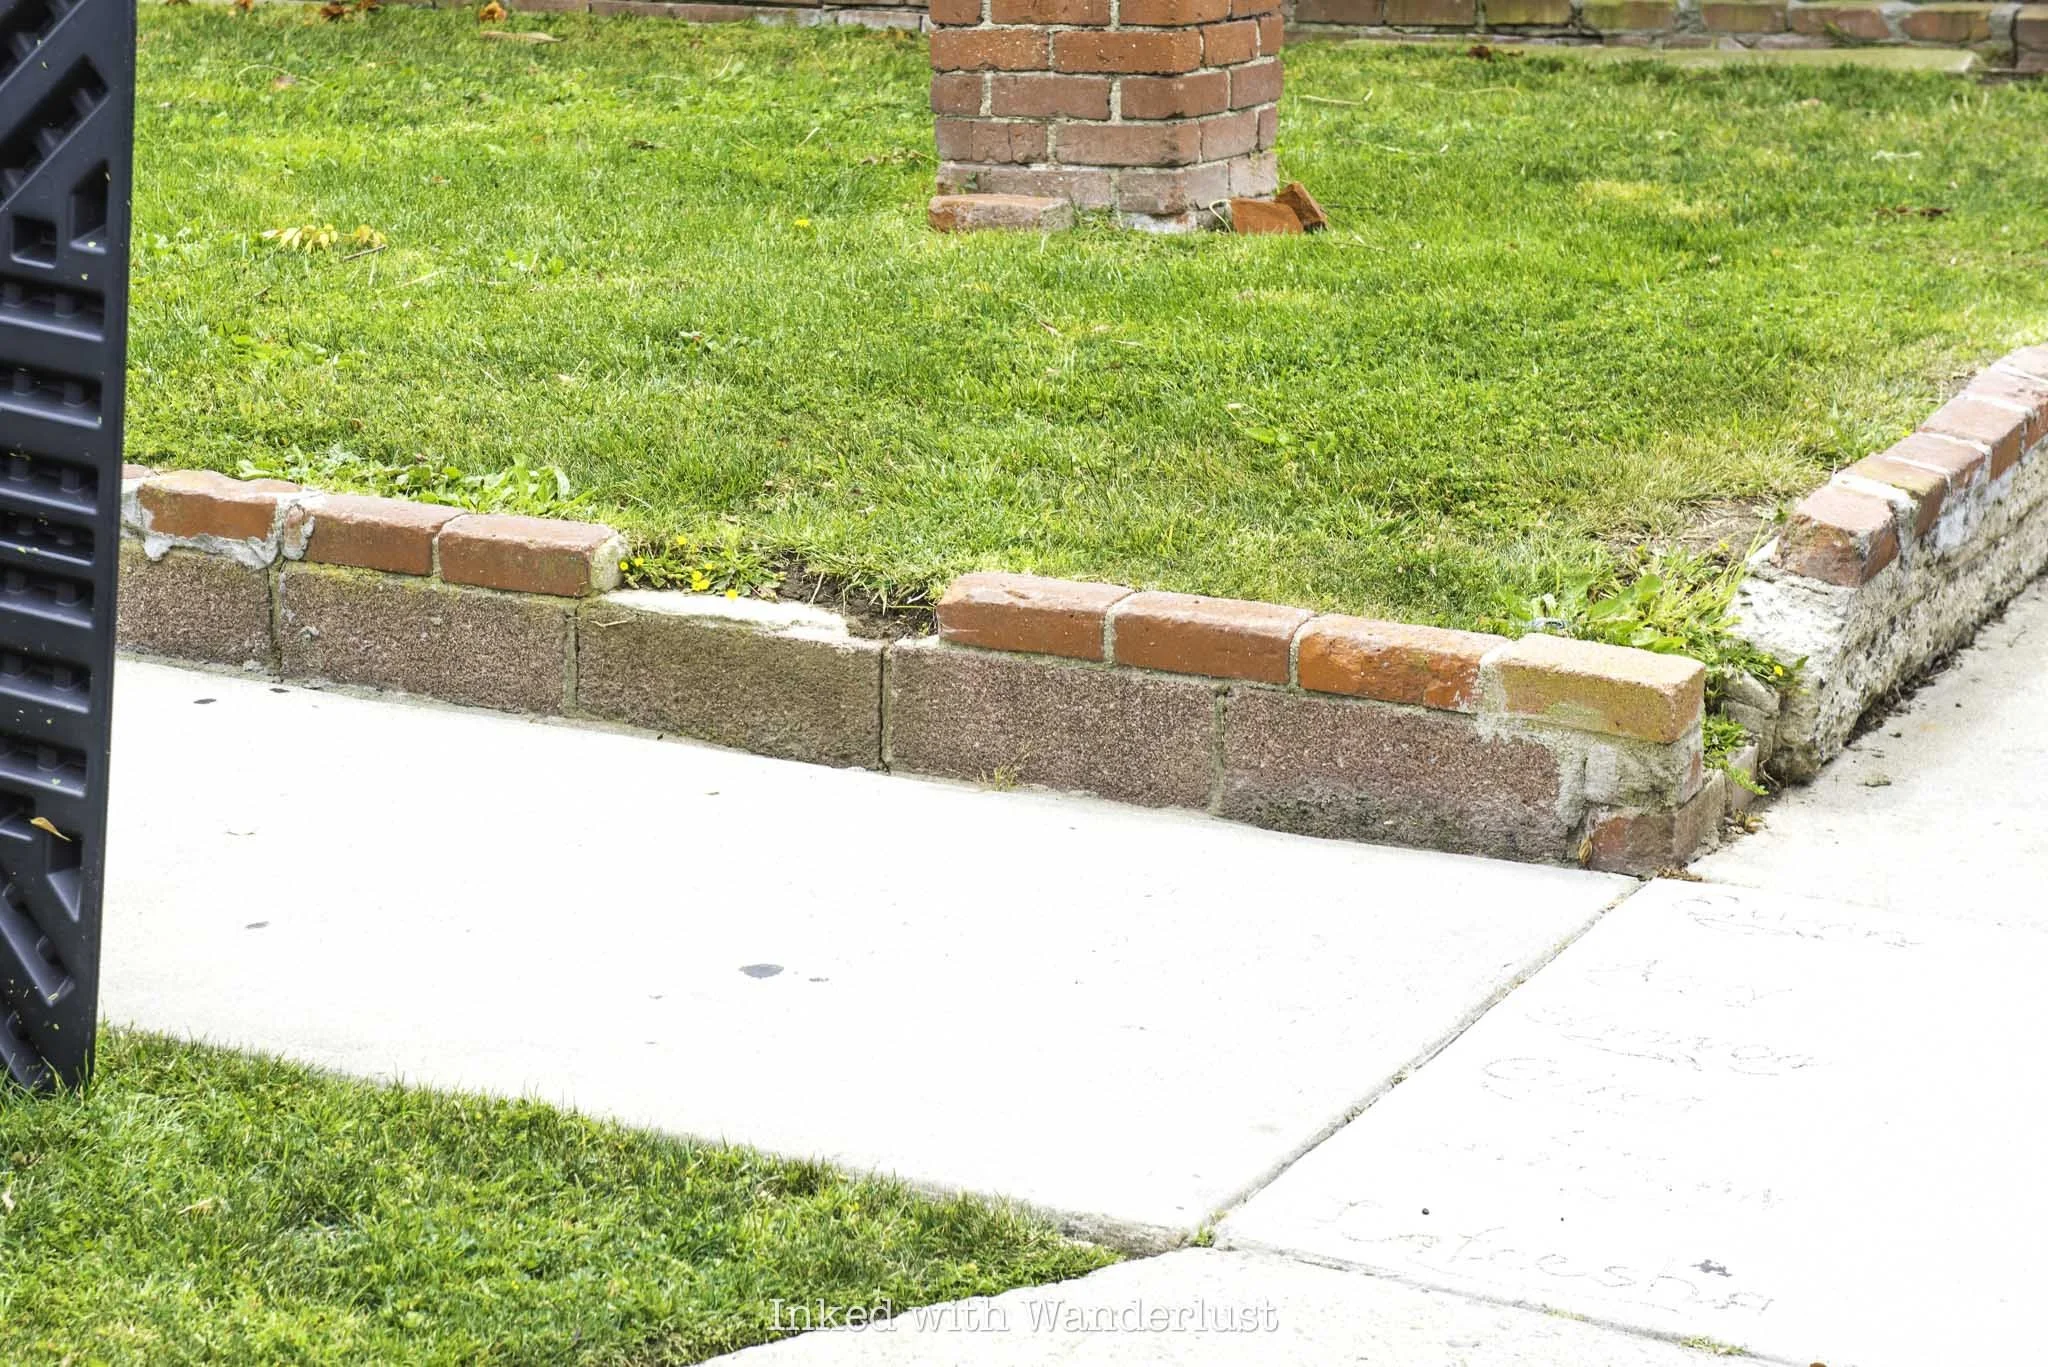
There’s even a subtle nod to the film in front of the house. If you look at the brick curb surrounding the lawn (near the driveway), you’ll notice there’s a brick missing. This is a reference to the brick Mr. Parker used to smash Pastor Clever’s window and, later in the movie, was the brick Craig used to knock out Deebo.
Much like the owners of Smokey’s house, I’m unsure if the owners of Stanley’s do anything for visitors or offer any paid photo opportunities. If nothing else, you’ll have the missing brick and the house itself to photograph.
Craig’s House (The Friday House)
Finally, the house most people come to this iconic Los Angeles neighborhood to see - Craig’s House, or more commonly known as “The Friday House”. The house is now painted a pale blue versus the burnt orange color in the movie but it’s immediately recognizable, regardless.
The front porch, which is where Craig and Smokey spent a good chunk of the movie hanging out on, will likely be the first thing you’ll notice. When the owner opens the porch to visitors, she sets it up with a couple chairs, a large portrait photo of the two main actors, and other props.

The last posted price I’ve seen online for pictures was $20. Again, there’s no official website for the Friday House, so I’m not sure if that’s per person, per picture, a group of people, etc. I would just play it safe and bring enough cash for everyone who wants to be in the photo.
The Friday House isn’t anything I would make a special trip to Los Angeles to see, but it was such an awesome experience for us, despite us feeling a bit awkward taking pictures of people’s homes.
Walking through this neighborhood was almost like stepping into the movie for my wife and I. The next time we’re in the area, we’ll definitely stop by again in hopes of getting our picture on the porch.
If you happen to be a fan of the legendary Beach Boys, not too far from here is the Beach Boys Monument placed on the former site of their childhood home. You can read more about the monument here!

The Ultimate Six Flags Discovery Kingdom Guide (From a Former Team Member)
What began in 1968 as Marine World, a small zoo in Redwood City, California, has transformed over the years to become perhaps the most unique theme park in the country…
Disclosure: This post contains affiliate links. If you make a purchase through these links, I may earn a small commission at no additional cost to you. I only recommend products or services that I believe will add value to my readers.

What began in 1968 as Marine World, a small zoo in Redwood City, California, has transformed over the years to become perhaps the most unique theme park in the country - Six Flags Discovery Kingdom.
After relocating to Vallejo and re-opening in 1986, the newly christened Marine World Africa U.S.A offered guests a chance to see not only land-based animals, but marine life as well. It operated until the late nineties when the city took ownership and transferred control to Premiere Parks (Six Flags).
Then, shortly after the conclusion of the 1998 season, Six Flags took full ownership of the park and renamed it “Six Flags Marine World”. Soon after came the addition of several roller coasters such as Boomerang, Kong, Roar and Medusa.
In 2007, to better reflect the park’s unique blend of roller coasters, animals and marine life, the name was changed to “Six Flags Discovery Kingdom” and has remained ever since. Today, it maintains its status as a destination for families and thrill-seekers alike.
This park was yours truly’s first job as a teen and into early adulthood. I worked there for several seasons and positions including parking attendant, ride operator, security guard and - wait for it - assistant to the elephant trainers. It may have been years since I’ve worked there, but I have a lot of knowledge of the park.
In this guide, I’ll cover several aspects to visiting Six Flags Marine World Discovery Kingdom; such as parking, discounts on tickets, closest hotels, what the park has to offer, dining, tips and more. Let’s get into it.
Six Flags Discovery Kingdom Information

Location
Six Flags Discovery Kingdom is located in the Bay Area city of Vallejo, situated almost perfectly between Sacramento and San Francisco. From Interstate 80, you’ll take the Highway 37 on ramp towards San Rafael.
After a short time, you’ll take the Fairgrounds Drive exit and turn left at the light. From there, the park will be on your right. Go straight through the next light and you’ll then see the road to the parking lot on your right.
Parking Fees
There are two tiers of parking at Discovery Kingdom - standard ($35) and premiere ($45). Premiere parking gets you a spot within the first few rows closest to the shuttle pick-up location. Standard is every row beyond that.
If you don’t know, back in the early 2000’s when the park began expanding with roller coasters, they were pushing closer and closer into the original lower lot to expand the park’s capacity.
As a solution, Six Flags began construction on a larger upper lot. The upper lot is now the only one used, as roller coasters have completely inundated the original lower lot. The walk from the upper lot to the gate is just over a quarter-mile.

Due to this, there’s really no benefit to justify the additional expenditure for premiere unless you happen to be at the park on an exceptionally busy day. It doesn’t get you any closer to the park, only the shuttle queue.
If you drive an electric vehicle, there are a handful of EV charging stations at the edge of a few parking rows. However, they’re not operational at the moment and there’s no word on when (or if) they will be.
Discovery Kingdom is a cashless park, so you’ll need to pay your parking fees with a credit or debit card. For season pass holders (more on those in a minute) parking is included as an added benefit. Conversely, you can pre-purchase a parking pass with your day tickets.
Chaperone Policy

In 2024, in response to a slew of fights and other issues, Six Flags instituted a company-wide chaperone policy. Starting at 4pm, kids 15 years old or younger will not be permitted into the park without a chaperone 21 years of age or older.
This policy is enforced even if individuals at that age are already in the park. If discovered without a chaperone, they’ll be escorted out of the park. Additionally, the chaperone must remain with them and cannot accompany more than ten guests.
Note that this policy is enforceable for everyone, whether you’re holding a regular day ticket, season pass, or membership. Take this into account when planning out your day at the park.
Six Flags Discovery Kingdom Tickets

Day Tickets and Discounts
Unlike other California theme parks like Disneyland and Universal Studios, Six Flags Discovery Kingdom doesn’t sell multi-day tickets. The only regular ticket you can purchase are single day (you can view current pricing and purchase here).
Ticket prices vary by year, season, and day but generally, you can expect to pay around $34 at the mid-range and $49 at the high end. I have seen ticket prices get up to $80, but it’s fairly rare as they’re almost always running deals.
These days, there aren’t a lot of outside discounts offered for Discovery Kingdom tickets. As mentioned above, the best offers now tend be on Six Flag’s own website. However, there are other options:
Costco: Not always, but it’s worth looking into
AAA: Members receive $5 off a regularly-priced ticket
Military/First Responder: These special tickets are sold through Six Flag’s website and on some military bases
Season Tickets and Memberships

SFDK also offers season passes at various tiers, as well as memberships. What’s the difference, you ask? The perks and access are the same, but with a membership you pay a monthly fee that’s ongoing, versus a season pass which you pay full price up front and it expires at the end of the year/season.
There are three season pass tiers: Silver, Gold and Prestige. They each offer their own perks and levels of access that you can view here, but all include parking (Prestige gets premiere parking), access to Discovery Kingdom (Gold and Prestige include access to 40 other Six Flags parks) and discounts on select dining, merchandise and day tickets.
To expand further, season ticket holders can purchase up to four, single day tickets at a time at $20 each. Depending how many people are in your group, it may be advantageous for one person to purchase a season pass, then purchase the necessary amount of $20 tickets. When you include the free parking, going this route could add up to significant savings.
Ticket Add-Ons

In addition to your tickets, you can purchase a variety of add-ons to enhance your park visit. We’ve already discussed pre-purchasing your parking fee above, so we won’t go into that. Other add-ons include:
Flass Passes
Dining vouchers
Dolphin programs
Souvenir bottle with free refills included
We’ll get into the dining vouchers later into the post and the bottle with free refills is fairly self-explanatory, so let’s go over Flash Passes. Essentially, they’re Six Flag’s version of Disney’s Lightning Lane service where you can bypass long queues at select attractions.
This pass could be beneficial if you’re only here for a one day visit. Queues tend to move slowly at Six Flags, as most of the rides have relatively low hourly rider capacities. If rides are the key component to your visit, I recommend purchasing a Flash Pass.
How Does Six Flags Flash Pass Work?

Flash Pass is a reservation system through the Six Flags app. Once activated, you select the ride you want to experience and you’ll then wait in a “virtual queue”. While you wait, you can enjoy other attractions, enjoy a meal, or observe animals.
When your time is up, you’ll go to the designated Flash Pass entrance and show the team member your phone. You’ll then be let in, often times with little to no wait in the actual queue. Note that you can only reserve one ride at a time.
There are four tiers of Flash Pass, they are Standard, Premiere, Ultimate and Junior. The Junior tier gets you access to select kid and family-friendly attractions only. They DO NOT include the big roller coasters. This pass starts at $20 each.

The other three tiers include access to all available rides, but vary in wait times in the “virtual queue”. For example, the standard pass is described to have a “reduced wait time” while the ultimate pass offers the “fastest access, often with immediate boarding”.
Standard starts at $35, followed by premiere starting at $65 and ending with ultimate as low as $90. Essentially, the higher you pay, the less you’ll wait. You can purchase Flash Pass when you buy your tickets or day-of. Know that sales of Flash Pass are limited and may not be available.
Hotels Close to the Park

When it comes to hotels close to Six Flags Discovery Kingdom, you simply cannot beat Courtyard by Marriott. It’s the only hotel within walking distance as it’s directly across the street from the front gates on Fairgrounds Drive.
There are a few more hotels further up Fairgrounds Drive but still just a quick five minute drive to the park. However, I cannot in good conscience recommend them as they don’t have the greatest reputations and the area they’re in can be sketchy.
Beyond the Courtyard, you can research the Hampton Inn Vallejo. Like Courtyard, it gets good reviews from guests, but is further from the park at just over three quarters of a mile away. Additionally, there is no shuttle to the park. So you’ll need access to a vehicle or utilize ride sharing services.
In-Park Dining

The “Spicy Mozz” at Korean Corn Dog in Six Flags Discovery Kingdom
At Six Flags Discovery Kingdom, in-park dining consists of quick service locations. Meaning, you walk up to a counter to order, pay for and receive your order. You’ll then find a nearby table to eat at.
There are no sit-down restaurants, where a waiter takes your order and brings your food to you. The food here is typical theme park fare, largely consisting of pizza, cheeseburgers, hot dogs, chicken strips, funnel cakes and the like.
In my opinion, the food at Discovery Kingdom is largely mid…at best. Furthermore, you pay exorbitantly high prices. The “Spicy Mozz” you see in the photo above, which is literally just mozzarella cheese fried in hot Cheeto crumbles, was $19.99 (before my season pass discount).

The Oreo Crumble Funnel Cake at Six Flags Discovery Kingdom
Additionally, $19.99 seems to be the average price-point for food items here. Even simple slices of pizza and standard cheeseburgers are priced at or near this mark. If you’re a season pass holder you’ll get a discount, but it amounts to not much more than the tax.
To add insult to injury, Six Flags does not allow guests to bring their own food into the park. Two exceptions to this rule is infant food and if you have a food allergy. These exceptions allow you to bring your own food in (to an extent).
How exactly they verify your food allergy isn’t known. It’s likely ran on an honor system, as there are strict laws pertaining to people’s health and privacy. If you want to read more about their food allergy policy, you can do so here.
Water bottles (non-glass) are allowed in the park, however, there are no water bottle refill stations anywhere. You can fill them at any of the standard water fountains or at most food counters throughout the park.

Places to Eat Nearby
Due to the intensely high prices for standard food, try dining outside of the park at local restaurants. Vallejo has no shortage of popular fast food chains like “In & Out” and “Chick-fil-A”, but I recommend trying local spots.
From someone who was born and raised in Vallejo, these are a handful of my personal favorites and their distances from the park:
Mare Island Brewery - Ferry Taproom (5.2 miles) *Great selection of beer and bites
Buds Burgers (2.8 miles) *No other burger in town comes close
Tacos Jalisco (2.7 miles)
Bambino’s Pizza (4.0 miles)
Napoli Pizzeria & Italian Food - Tennessee Street Location (3.6 miles)
Provisions (4.1 miles)
The Sardine Can (5.1 miles) *Great seafood option
Quarters Coffee House (5.7 miles) *Not many food options, but excellent coffee
Joy of Eating Cafe (3.0 miles) *Great breakfast option
Sac’s Tasty Hot Dogs (3.5 miles)
I’m not saying any of these restaurants will be any cheaper than the food in the park, but what I can say is you’ll surely receive infinitely superior food and drinks at all of them. You can read my post about Mare Island Brewery here.
Things to Do

Even though it’s a relatively small theme park, Six Flags Discovery Kingdom actually has quite a bit to do and see. It’s a park for everyone from the young and older, thrill seekers to animal lovers, and everything in between.
I’m not going to list everything, as that would make this post much longer than it already is. Instead, I’ll list the main components which make Six Flags Discovery Kingdom the unique park it is, in addition to a few others many may not know.
Roller Coasters and More
We’ll get the meat and potatoes category out of the way. Six Flags Discovery Kingdom may not have the most impressive line up of roller coasters, but they have a decent enough collection to keep your day busy.
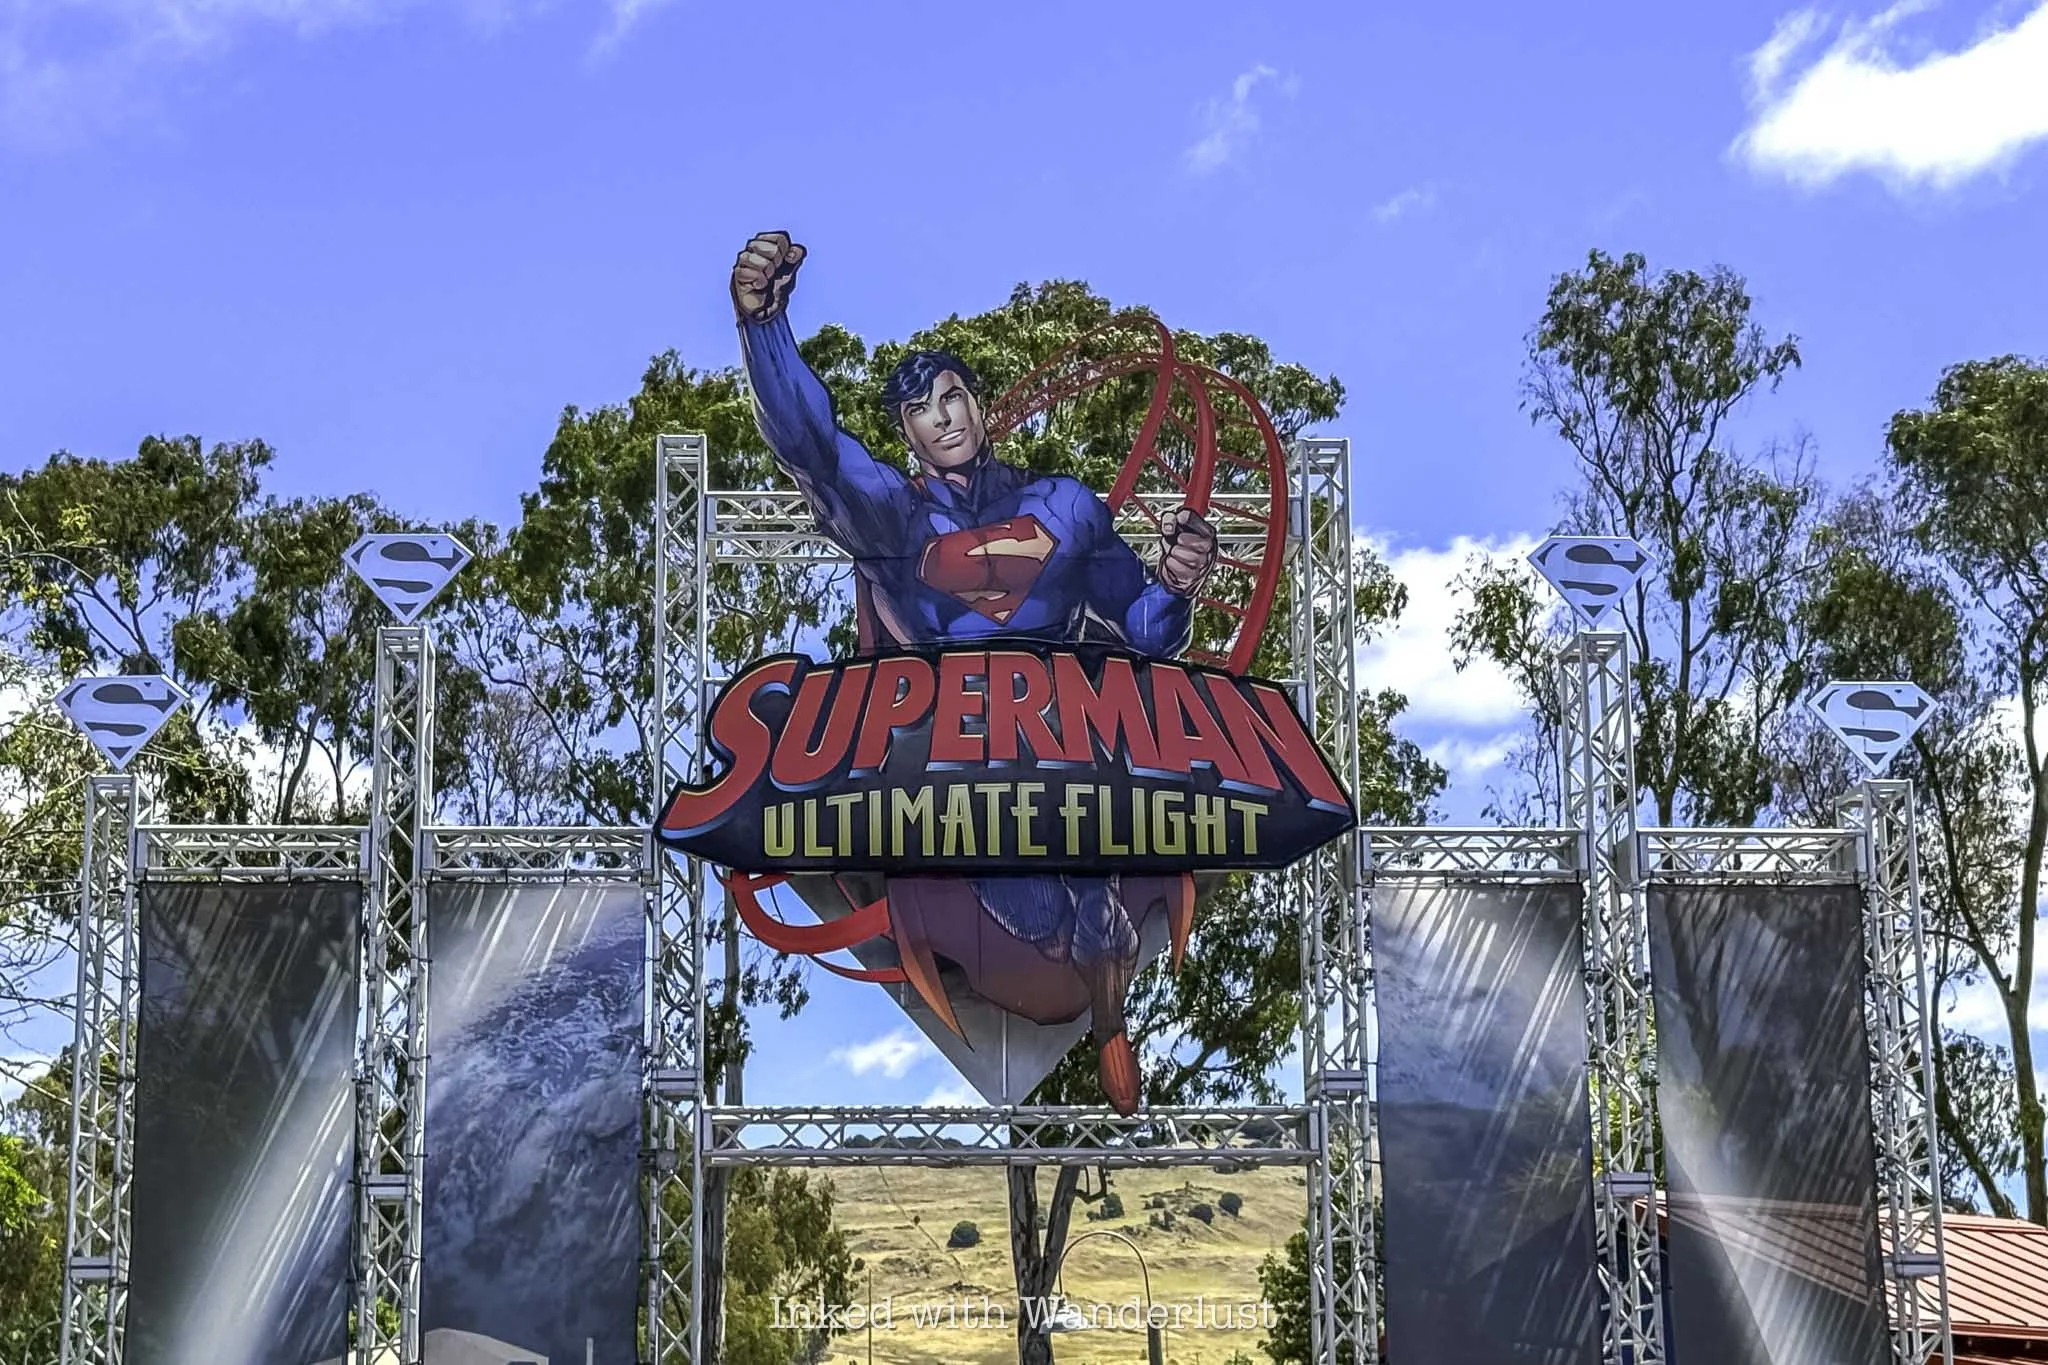
From old-school classics like Kong and Medusa, to modern additions like Superman Ultimate Flight and Batman: The Ride, the thrill seeker in your group is covered. The park’s newest ride, Sidewinder Safari, enables the whole family to enjoy the thrill together.
A while back, Six Flags converted their sole wooden coaster, formally named Roar, and turned it into a wood/steel hybrid coaster, while also theming it after Joker, the popular Batman villain. In my opinion, it’s the best coaster in the park. Definitely ride this.
Looney Tunes Seaport

Looney Tunes Seaport is one of several children/family areas of the park. It opened back in 1999, shortly after Six Flags took ownership of the park and it has been a mainstay ever since, though it’s changed over the years.
The area is heavily themed after the popular Looney Tunes brand, with several kiddie and family rides featuring several well-known characters, such as Bugs Bunny, Daffy Duck, Elmer Fudd and Foghorn Leghorn, in addition to a few animal-themed rides.
Land Animal Exhibits

Still honoring its roots as a zoo with land animals and marine life, Six Flags Discovery Kingdom offers several land animal exhibits in the back corner of the park (this is one of the original “lands” during the Marine World Africa U.S.A days).
There aren’t as many animals as there used to be, as it appears Six Flags has been slowly phasing out animals from the park in recent years. Despite this, you can still see Tigers, Lions, Wolves, Cheetahs, Giraffes, Sloths, and more, in addition to a variety of birds and reptiles.
If it’s been a while since you’ve been to the park, you may notice a rather large missing species from the park - the elephants. They were removed from in 2015 and sent to a drive-through zoo in Oregon. Sidewinder Safari, the park’s newest ride, was built in the space they formally occupied.
Shark Experience

Shark Experience is one of the few exhibits still operating that predate Six Flags’ ownership of the park, though it has gone through several renovations, additions, and subtractions over the years. Some good, some not.
Still, Shark Experience remains one of the most popular attractions in the park. Here, guests will have the chance to view the oceanic predators up close and personal, including nurse sharks and Australian zebra sharks.
Other Marine Life Exhibits

Aside from Shark Experience, there are several other marine life-related exhibits. These include dolphins, sea lions, sting rays and otters. Additionally, the park’s sea lion show continues to run, with otters acting as supporting cast.
Six Flags still advertises So Flippin’ Fun, a daily-run dolphin show. However, it has been sometime since the last showing and there’s no word on if, or when, it’ll pick back up again.
Additionally, as of August 2012, the park’s popular orca show was permanently sunsetted. This was done due to a combination of two orcas passing away and public pressure to release the sole remaining whale, Shouka. She was transferred to another park shortly after the show’s end.
Furthermore, Six Flags closed the walrus exhibit, where scenes from the hit movie, 50 First Dates, were filmed. This was due to the complications of keeping walruses in captivity and several deaths. Currently, there are only 13 in captivity across the United States.
Butterfly Habitat (Rainforest Trail)

Now known as The Rainforest Trail, the formally named Butterfly Habitat opened in 1988, making it the oldest original attraction still operating in the park. The 100-by-50-foot glass atrium houses dozens of species of butterfly, as well as a koi fish pond and sloth enclosure.
When it opened, it was the first walk-through experience of its kind. Inside, free-flying butterflies fly above you. If you’re lucky, they’ll even land on your shoulder or next to you, allowing you to observe their beautifully-colorful wings up close.
This attraction will get you out of the sun but be warned, it’s a humid environment, essential for the health and wellbeing of the butterflies. So while you can get out from under the sun, you’ll still work up a sweat (your skin will feel fantastic, though).
Is Six Flags Discovery Kingdom Closing?

With the recent news of Six Flags closing several parks as part of their merger with Cedar Fair, many wonder if Discovery Kingdom is closing. The short answer is no. The longer answer is complicated and uncertain.
In the short term, no, Discovery Kingdom is not closing. Instead, Six Flags Great America, located nearly 70 miles away in Santa Clara, is all-but-certain to close at the end of their 2027 season when the park’s land lease expires.
While rumors of Discovery Kingdom’s demise have persisted for years now, there has been no official indication from Six Flags of their intention to close it. It wouldn’t make much sense to do so, as there’s virtually no competition in the area.
Things to Do Nearby

In my opinion, Discovery Kingdom is a one or two-day (max) park. It’s great of those looking for a quick getaway but if you have more time, I recommend spending time exploring the Bay Area - San Francisco specifically.
There you’ll find many historic and significant attractions in and near the city. Alcatraz, the former federal prison located on an island, is one of the better things to do in San Francisco. Other attractions include Fisherman’s Wharf, Coit Tower, Golden Gate Bridge, Fort Point and more.
I’ve previously written a one-day itinerary of 10 San Francisco attractions you can see. It also includes suggestions if you have additional days to spend and which ones to skip if you’re running low on time.
Buy me a coffee?
If you found this blog helpful, consider leaving a tip through the Buy Me A Coffee button below! Whether it’s $1 or $5, every bit helps offset small travel costs like coffee, water, lunch, parking, or park entry fees. Your support means the world—thank you!
PROVERBS 16:9

Emerald Pools: A Wonderful Swimming Hole in Northern California
California has no shortage of wonderful swimming holes, particularly throughout the Sierra Nevadas in Northern California…
Disclosure: This post contains affiliate links. If you make a purchase through these links, I may earn a small commission at no additional cost to you. I only recommend products or services that I believe will add value to my readers.
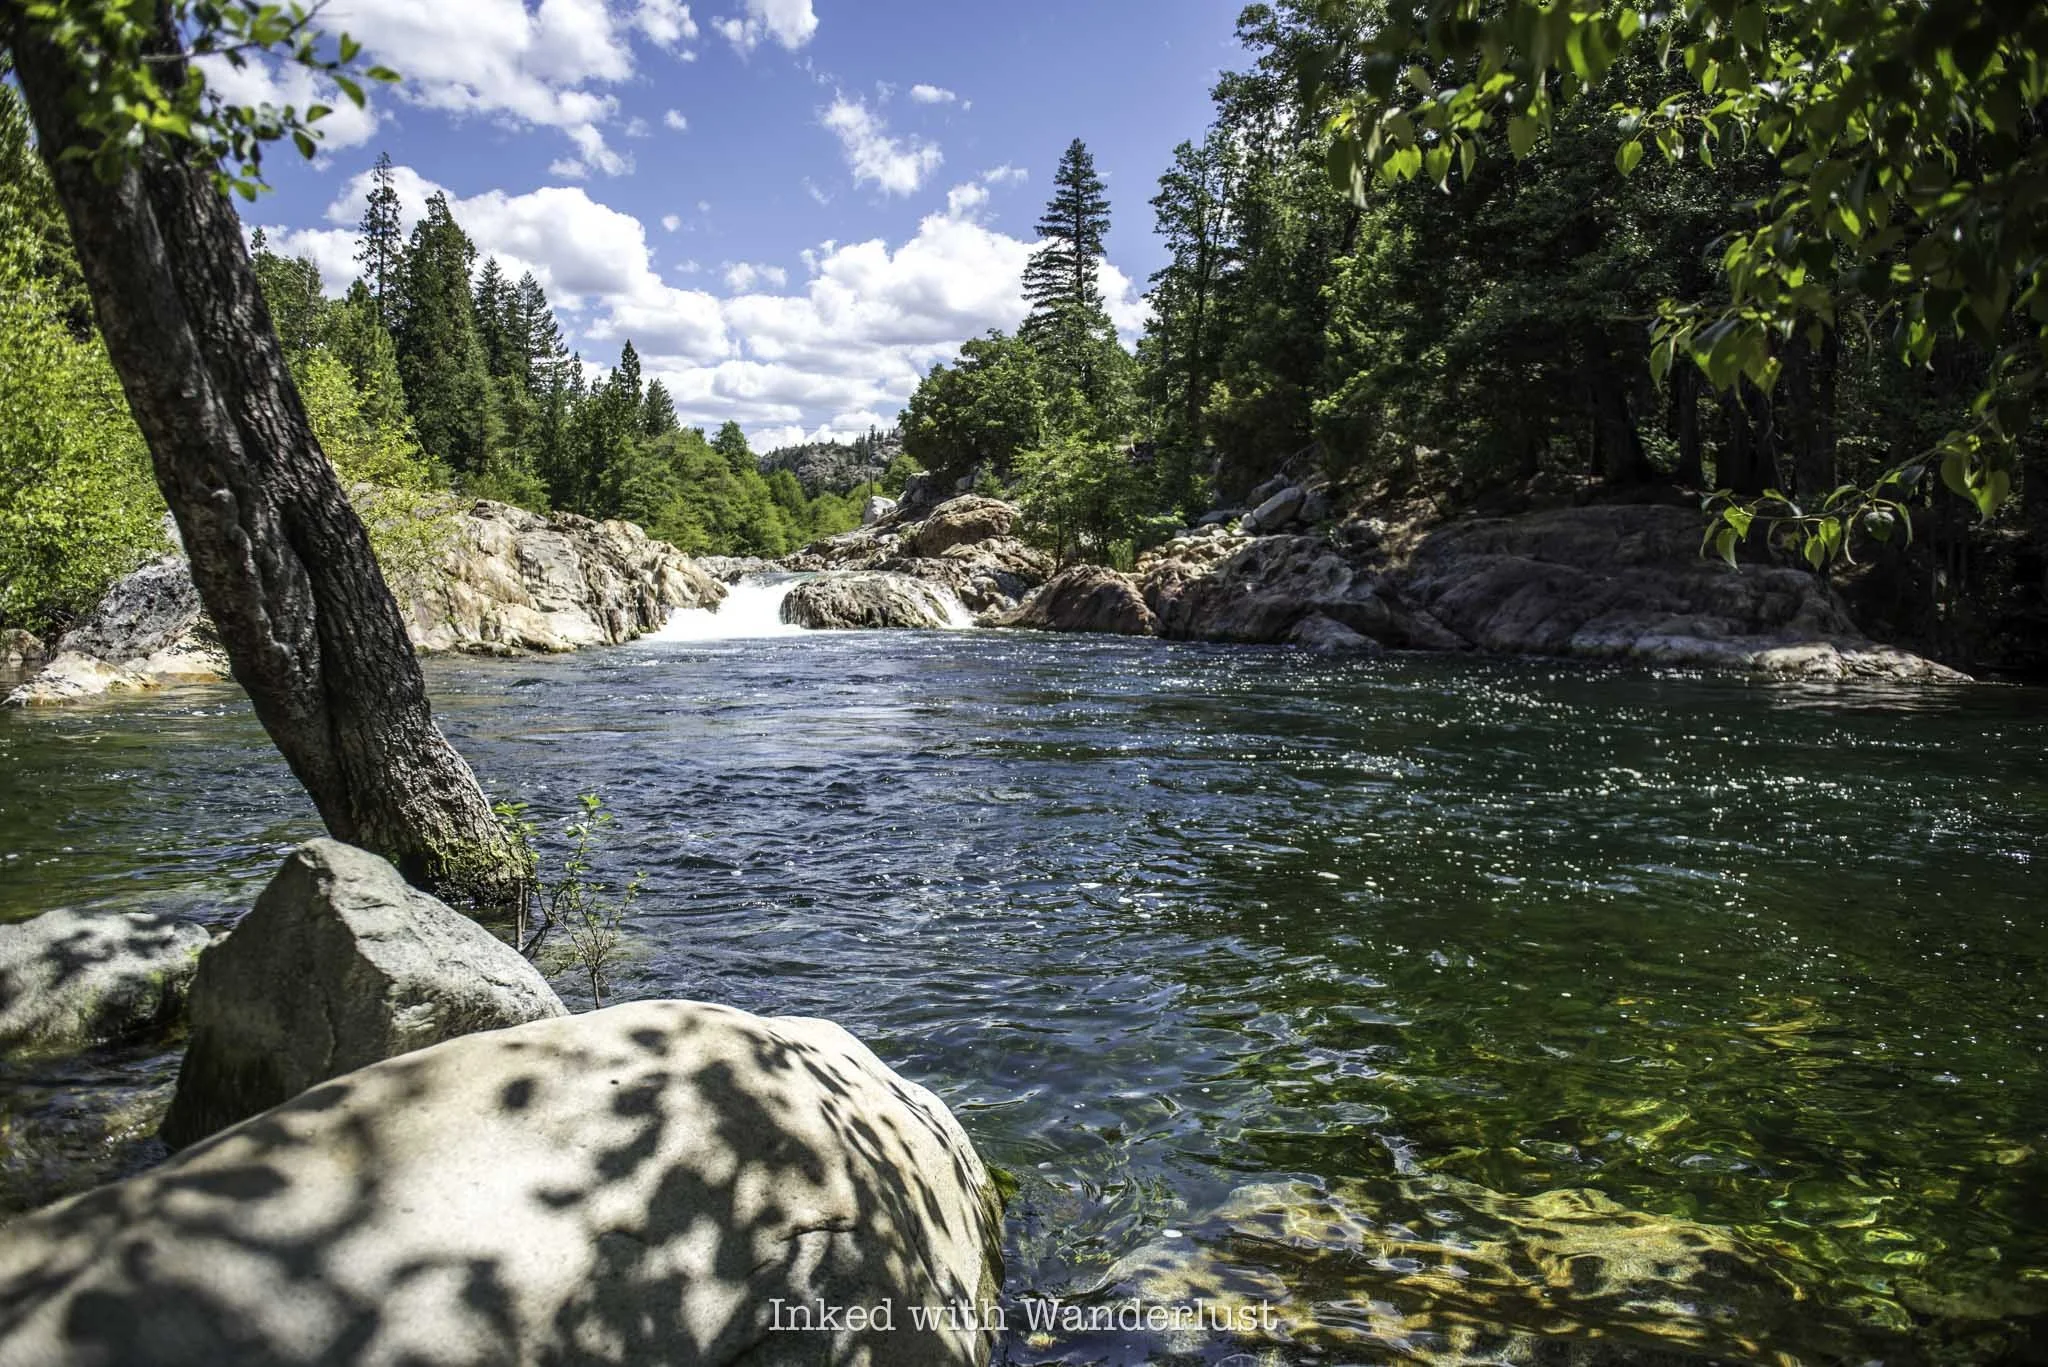
California has no shortage of wonderful swimming holes, particularly throughout the Sierra Nevadas in Northern California. One such swimming hole, Emerald Pools, is one of the most popular for a good reason - it’s absolutely amazing!
If you happen to be driving through Interstate 80 between Sacramento and Reno on a warm summer day and you’re looking to break the monotony that driving long distances can bring, Emerald Pools is a great choice.
Additionally, it isn’t incredibly far from many areas of Tahoe, such as Emerald Bay State Park. Though Tahoe has an abundance of swimming holes (and the lake itself) all its own, taking a half-day trip to Emerald Pools is easy from virtually every side of the lake.
In the post below, I’ll discuss how to get there, the parking situation, things to look out for, tips, and more. Let’s get into it!
Buy me a coffee?
If you found this blog helpful, consider leaving a tip through the Buy Me A Coffee button below! Whether it’s $1 or $5, every bit helps offset small travel costs like coffee, water, lunch, parking, or park entry fees. Your support means the world—thank you!
Quick Stats
Location: Northern California, in between Nevada City and Donner Summit
Fee: None
Open: Spring, summer, and fall
Family Friendly: Yes
Cell Service: Good (based on Verizon service)
Restroom: Vault toilets in the parking lot
Parking: Small gravel/dirt lot
EV Stations: None
Difficulty: Easy
Popularity: Moderate to high
Mileage: Quarter-mile from trailhead to first pool
Condition: Well maintained, obvious trail to the first pool
Features: Swimming holes, views of the mountains and river
Best Viewed: Warm days in spring, summer, or fall
Pets: Allowed
Drones: No signage prohibiting them
Hazards: Typical hazards of the outdoors/potential wildlife encounters
My Visit(s): June 2025
Emerald Pools Parking and Location

So how do you get to Emerald Pools? It’s actually quite easy, especially if you’re already in the general area. Emerald Pools is in Northern California, almost perfectly situated between Nevada City and Donner Summit.
If you’re traveling along Interstate 80, you’ll take exit 161 (Nevada City/Grass Valley). From there, you’ll travel a few miles before turning right onto Bowman Road. You’ll take that road for about 1.5 miles before arriving to the parking lot on your right, just past the bridge pictured below.


Emerald Pools’ parking lot is fairly small and is only partially paved. There are no officially designated spots. You’ll basically just find a spot in the dirt that makes sense. The only rule is you can’t park in front of the bathroom.
There is no fee to park or access the trail and there’s a vault-style restroom right there (though it isn’t well maintained at all, so bring these with you…you’ll thank me later). From the parking lot and the bridge, you’ll get a stunning view of the Yuba River.
Emerald Pools Trailhead

There are two trailheads that lead to Emerald Pools. The main trailhead (pictured above) can be found just off of the parking lot to the right of the restroom. The trail is wide, flat dirt, and flanked by towering pines. You’ll walk for roughly a quarter mile before ending up at the main pool.
To find the second trailhead (pictured below), which leads to a rocky outcrop on the other side of the main pool, cross the bridge that you drove over and go left. You’ll see a green gate ahead of you. This path is more of a forrest road but is still super easy to follow.

About a quarter-mile in, you’ll see a spur trail going through a clearing in the trees on your left. Go left and then notice the other spur trails on your left, center, and right. Choose the center one, cross the creek, and head up to the rocky outcrop by the pool.
This side is much less crowded and you’ll usually have more than enough room to yourself. The only downside is there isn’t any great spots to ease your way into the pool. If you’re looking to just jump in, though, it’s perfect.
Emerald Pools Swimming Hole
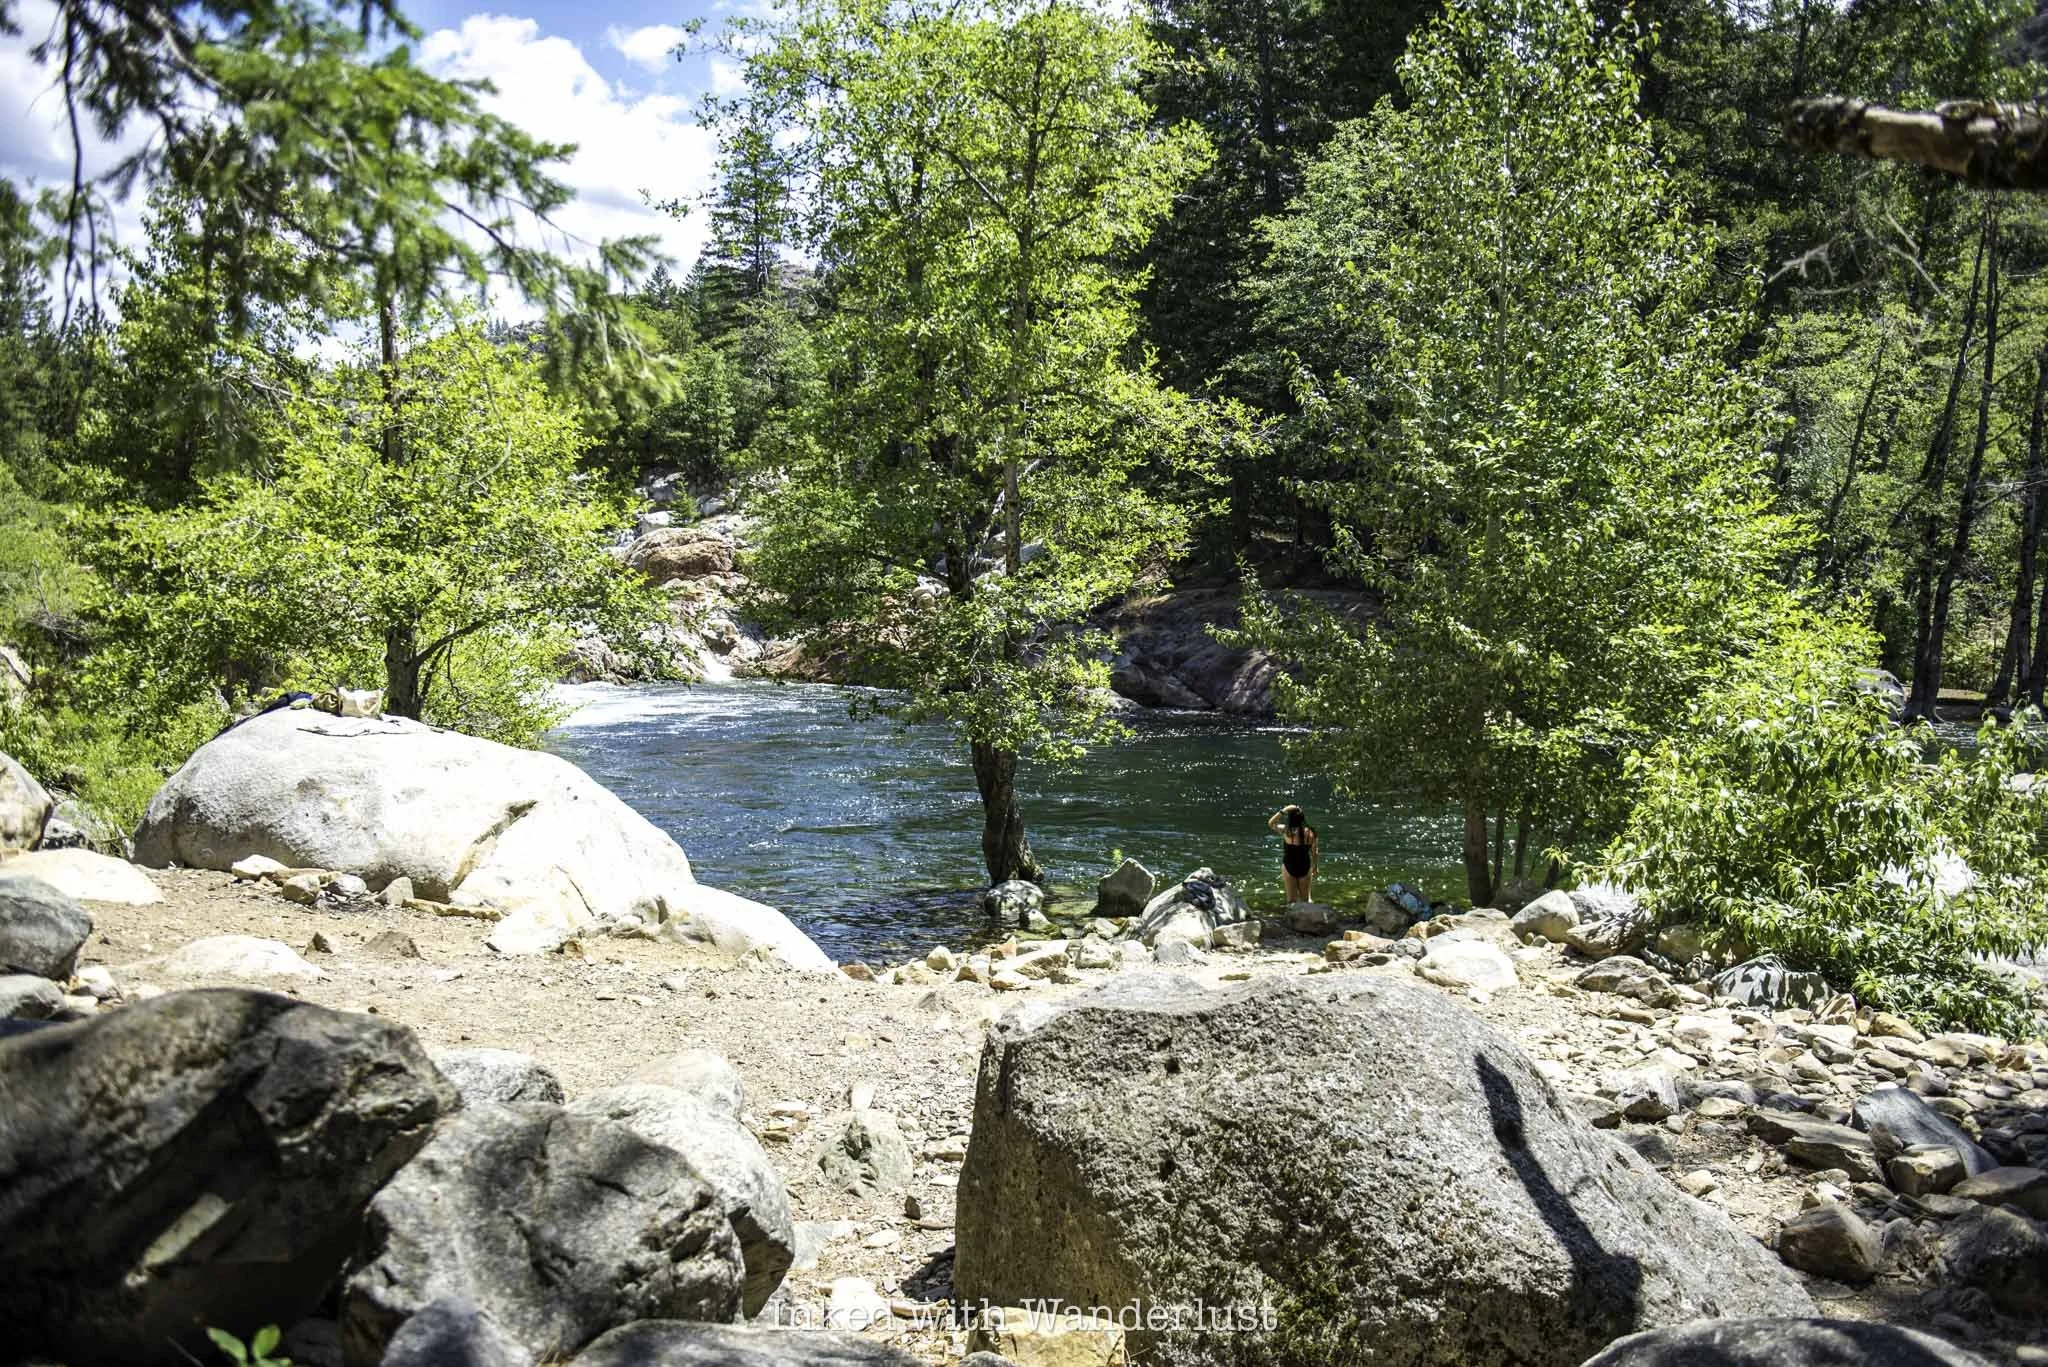
Coming from the main trailhead from the parking lot, Emerald Pools’ main pool will come into view shortly after starting your way down the trail. The shoreline on this side is rather rocky, though there are a few spots with either smooth rock or open dirt. There are also quite a few trees for shade.
If you’re here in the spring when Yuba River is roaring with fresh snowmelt, the pool will be rather full and deep in some spots. The water level actually rises into the shoreline, covering the base of a tree.

As summer progresses and the snowmelt dissipates, the water level in the pool will slowly go down. There will still be plenty of water to swim in, though, so don’t fret about that. There’s a chance you won’t be able to jump from the cliffside, though.
Facing the waterfall at the other side of the pool, look to your left and take note of the rocky cliffside. That is what you’ll traverse to access the thinner, far less crowded part of the river that you can also swim in.
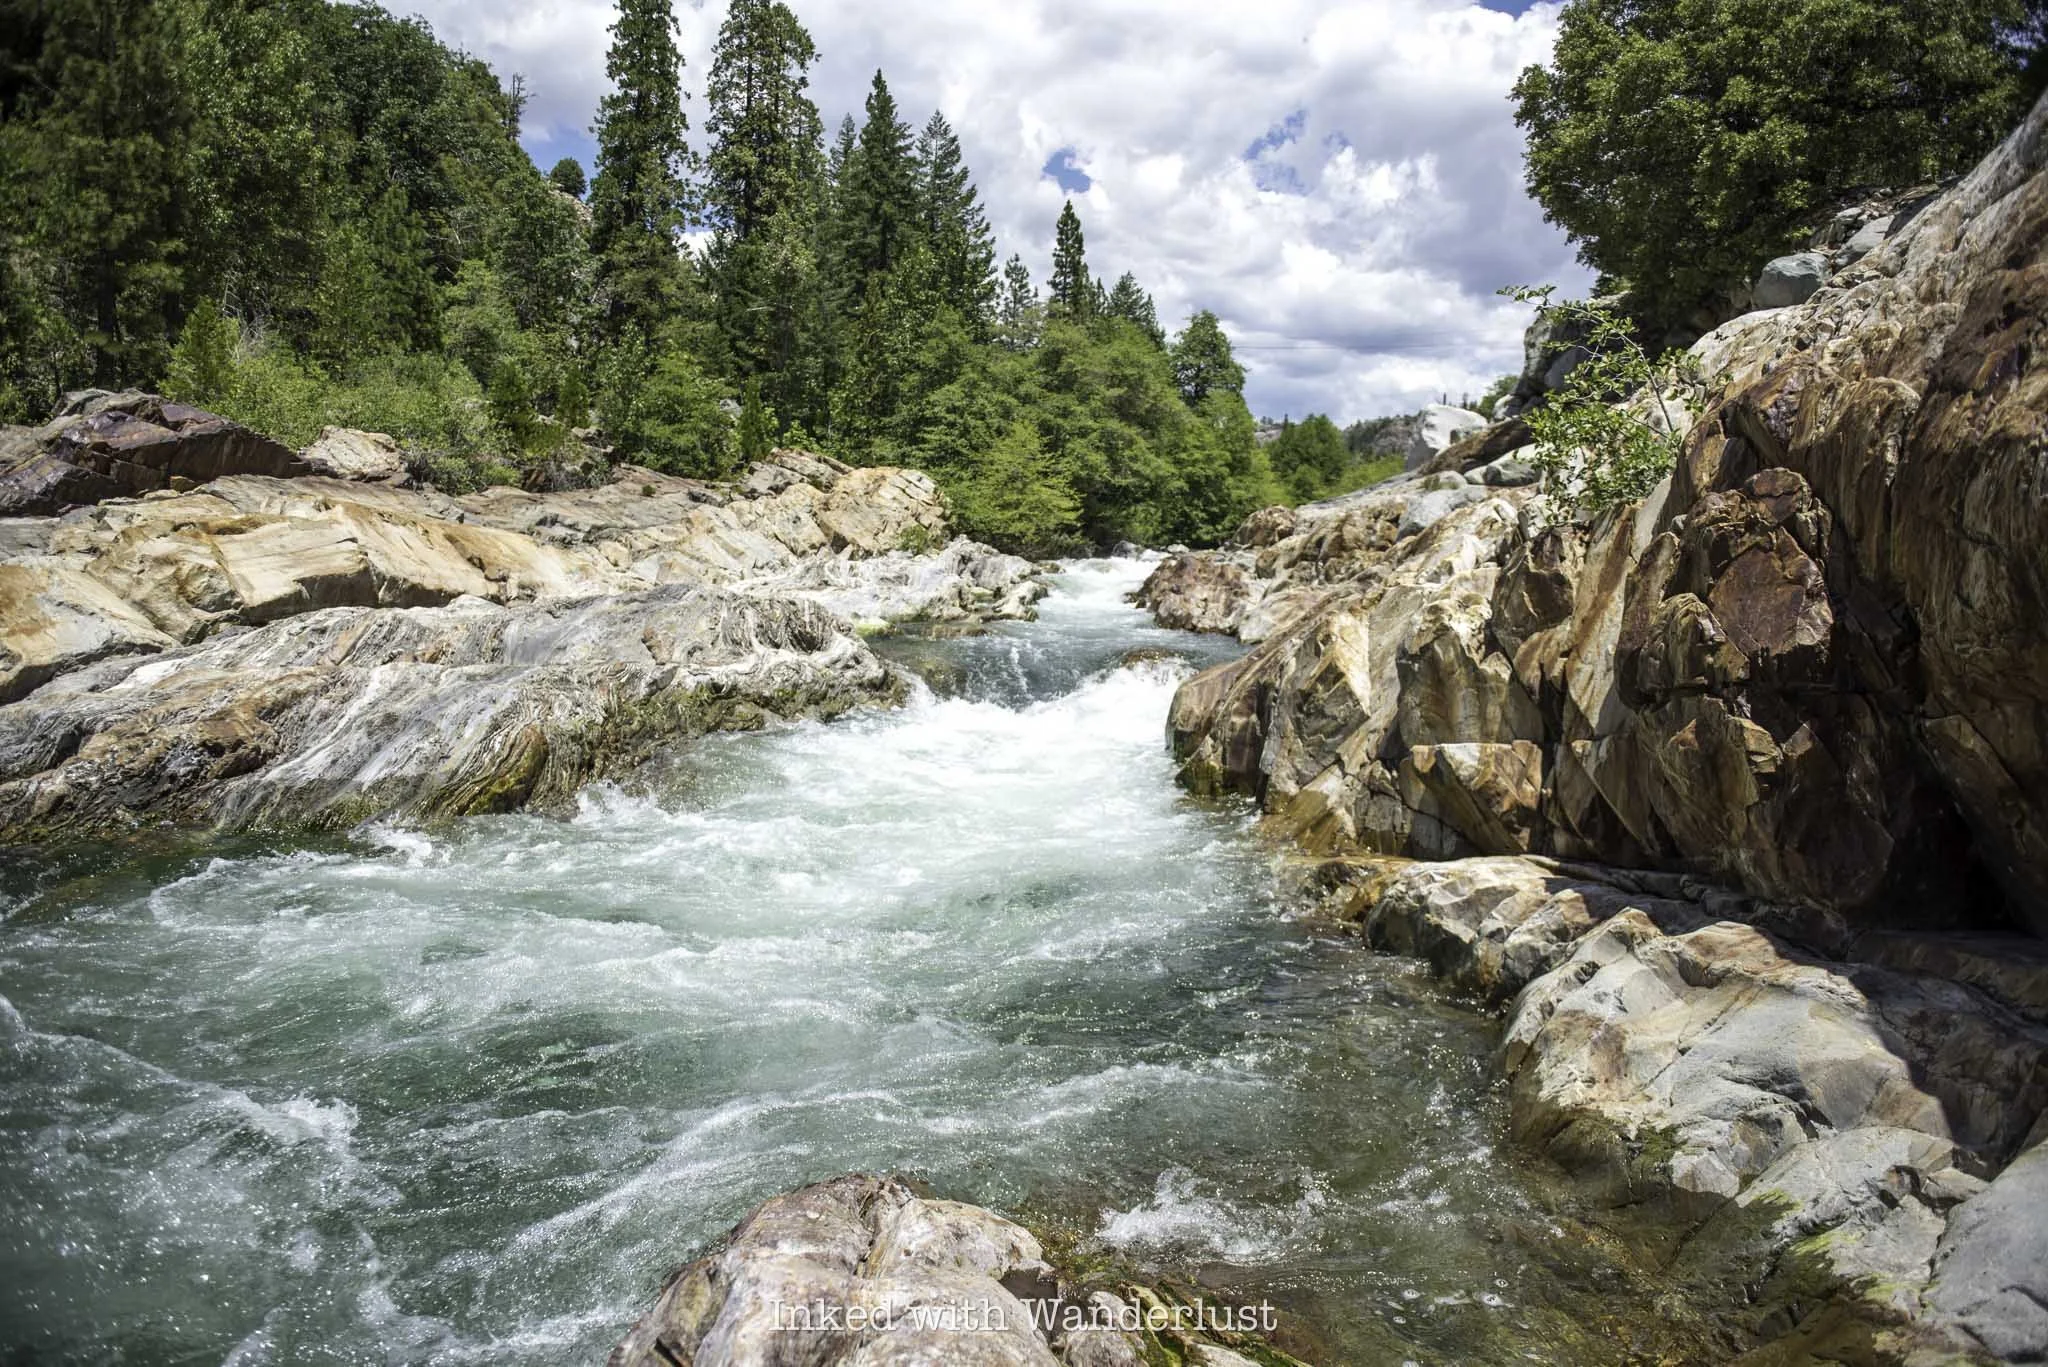
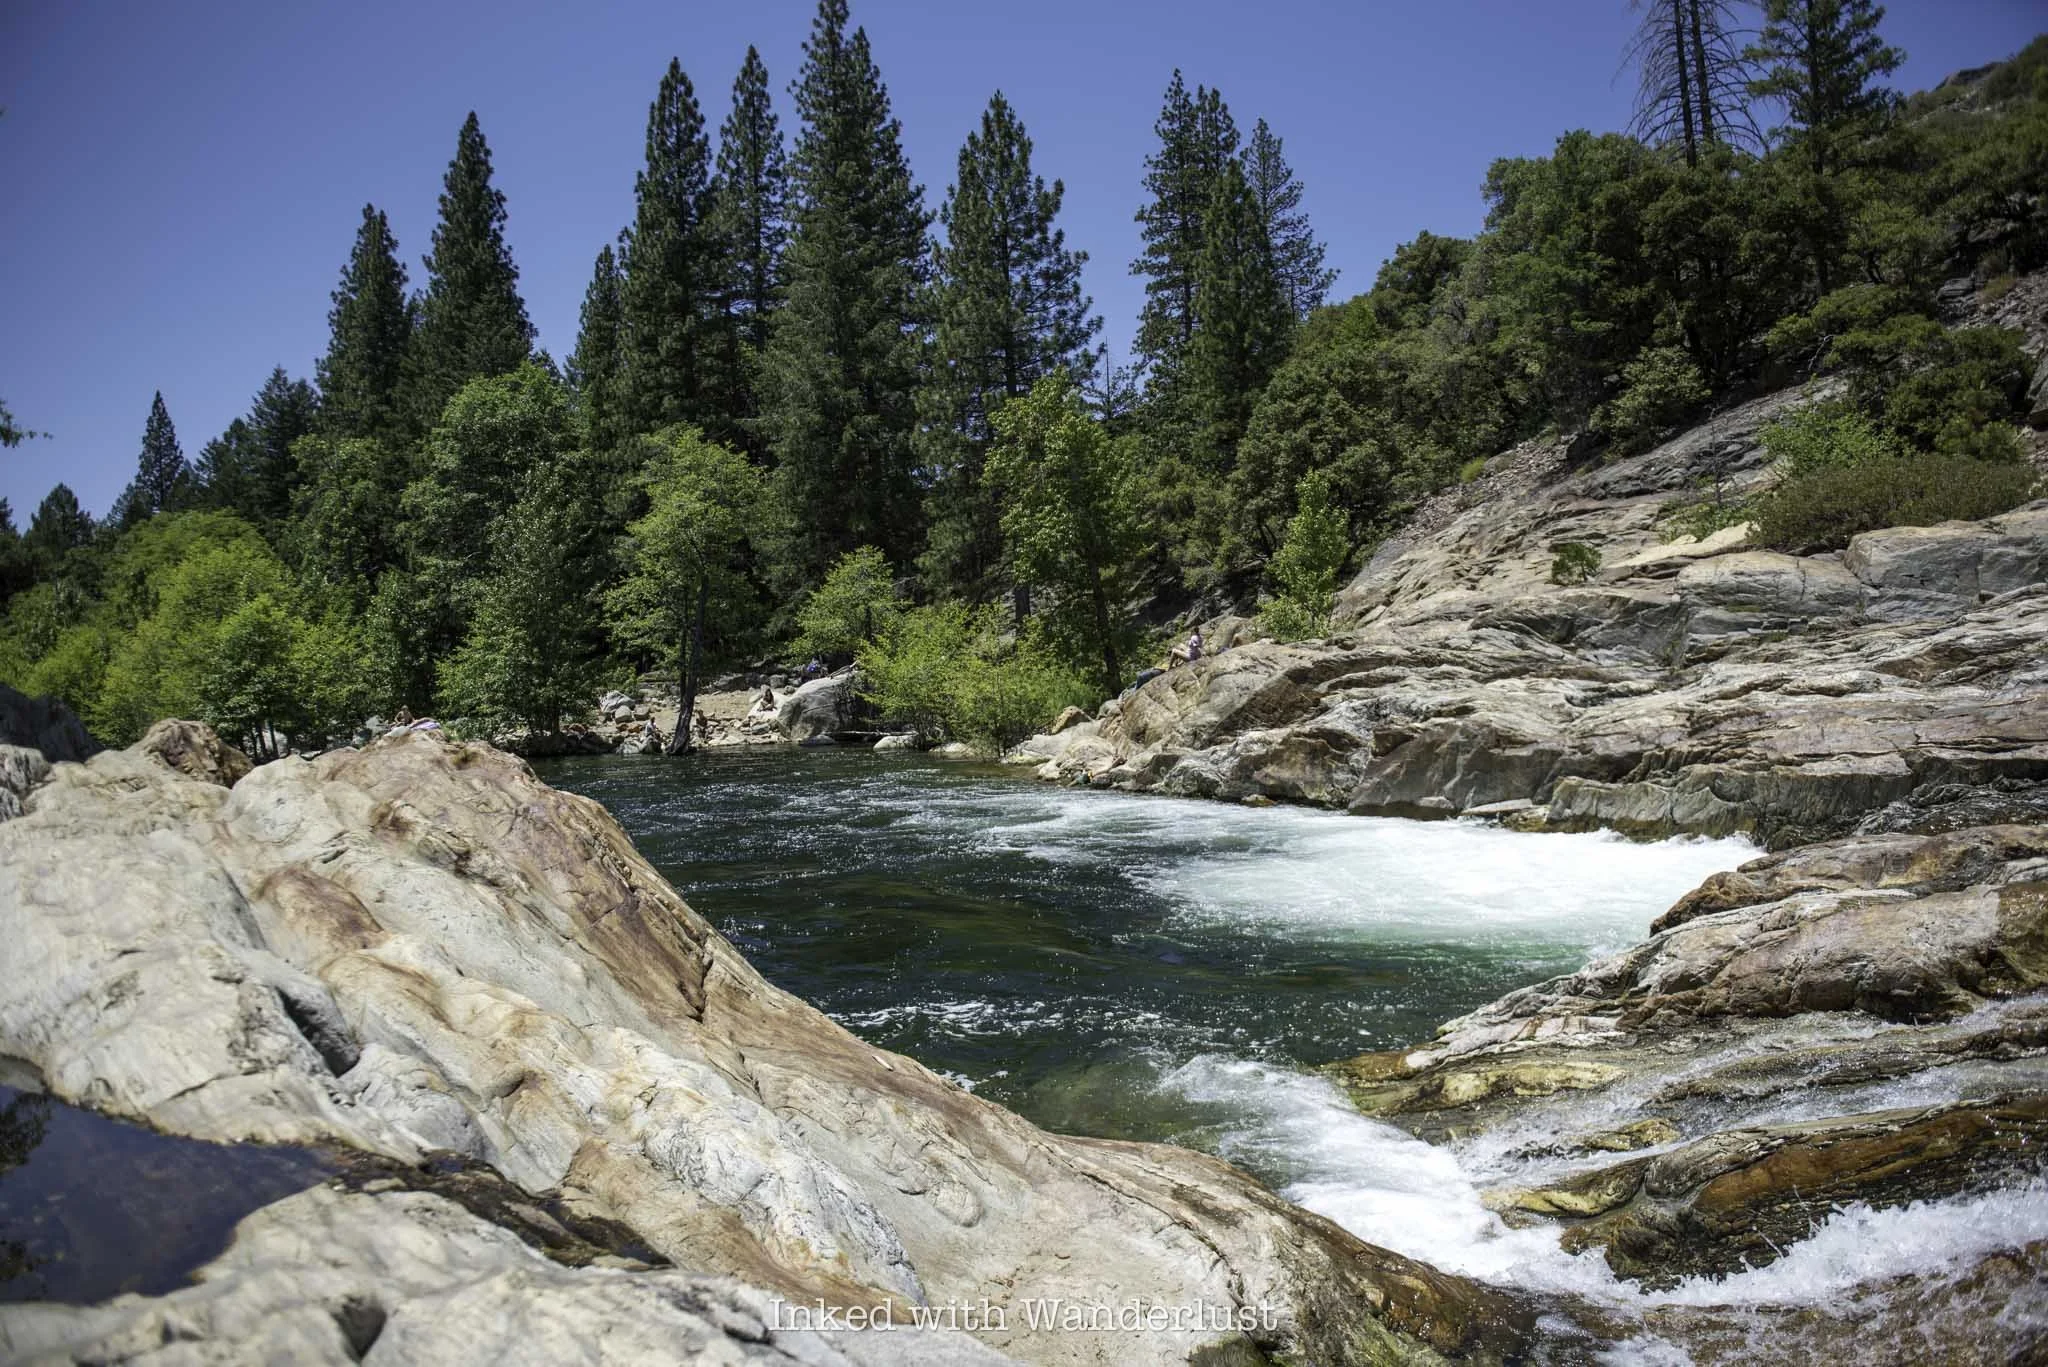
Again, depending on the time of year, this part of the river could be roaring and therefore, dangerous to access. If you see fast moving water, don’t risk it. If you have your heart set on taking a dip here, it’ll be best to visit in late summer or fall.
The day I was here it was fairly quiet in terms of crowds. I arrived at around 10am on a weekday and found the parking lot nearly full, but not that many people at the pool. If you’re coming on the weekend, get here even earlier than that.

If you’re used to the sandy lake floor of Lake Tahoe, be warned that the floor here is rather rocky. If you don’t already have them, I suggest purchasing and bringing along these quick drying barefoot water shoes by Racqua. They’re good to have while recreating in lake, river, and even ocean waters.
Again, be sure to get here early to avoid disappointment. It gets very crowded here and it isn’t a big space. Also, be sure to pack out what you brought in. Unfortunately, I saw a hefty amount of trash discarded around the pool.
Regardless, it’s a gorgeous spot that’s perfect for cooling off on a warm day. If you’re looking for more to do along this stretch of Interstate 80, consider taking a hike through the historic Donner Tunnels and visiting the Donner Camp Site, where members of the ill-fated Donner Party met their demise.
Additionally, take a drive for about thirty miles to Donner Memorial State Park, where more of the Donner Party members fought to survive during the brutal winter of 1846/1847. No visit to the area would be complete without it.
Buy me a coffee?
If you found this blog helpful, consider leaving a tip through the Buy Me A Coffee button below! Whether it’s $1 or $5, every bit helps offset small travel costs like coffee, water, lunch, parking, or park entry fees. Your support means the world—thank you!

A One Day Yosemite Travel Itinerary
For some, Yosemite is a once-in-a-lifetime experience. Often regarded as one of California’s crown jewels, Yosemite reigns…
Disclosure: This post contains affiliate links. If you make a purchase through these links, I may earn a small commission at no additional cost to you. I only recommend products or services that I believe will add value to my readers.
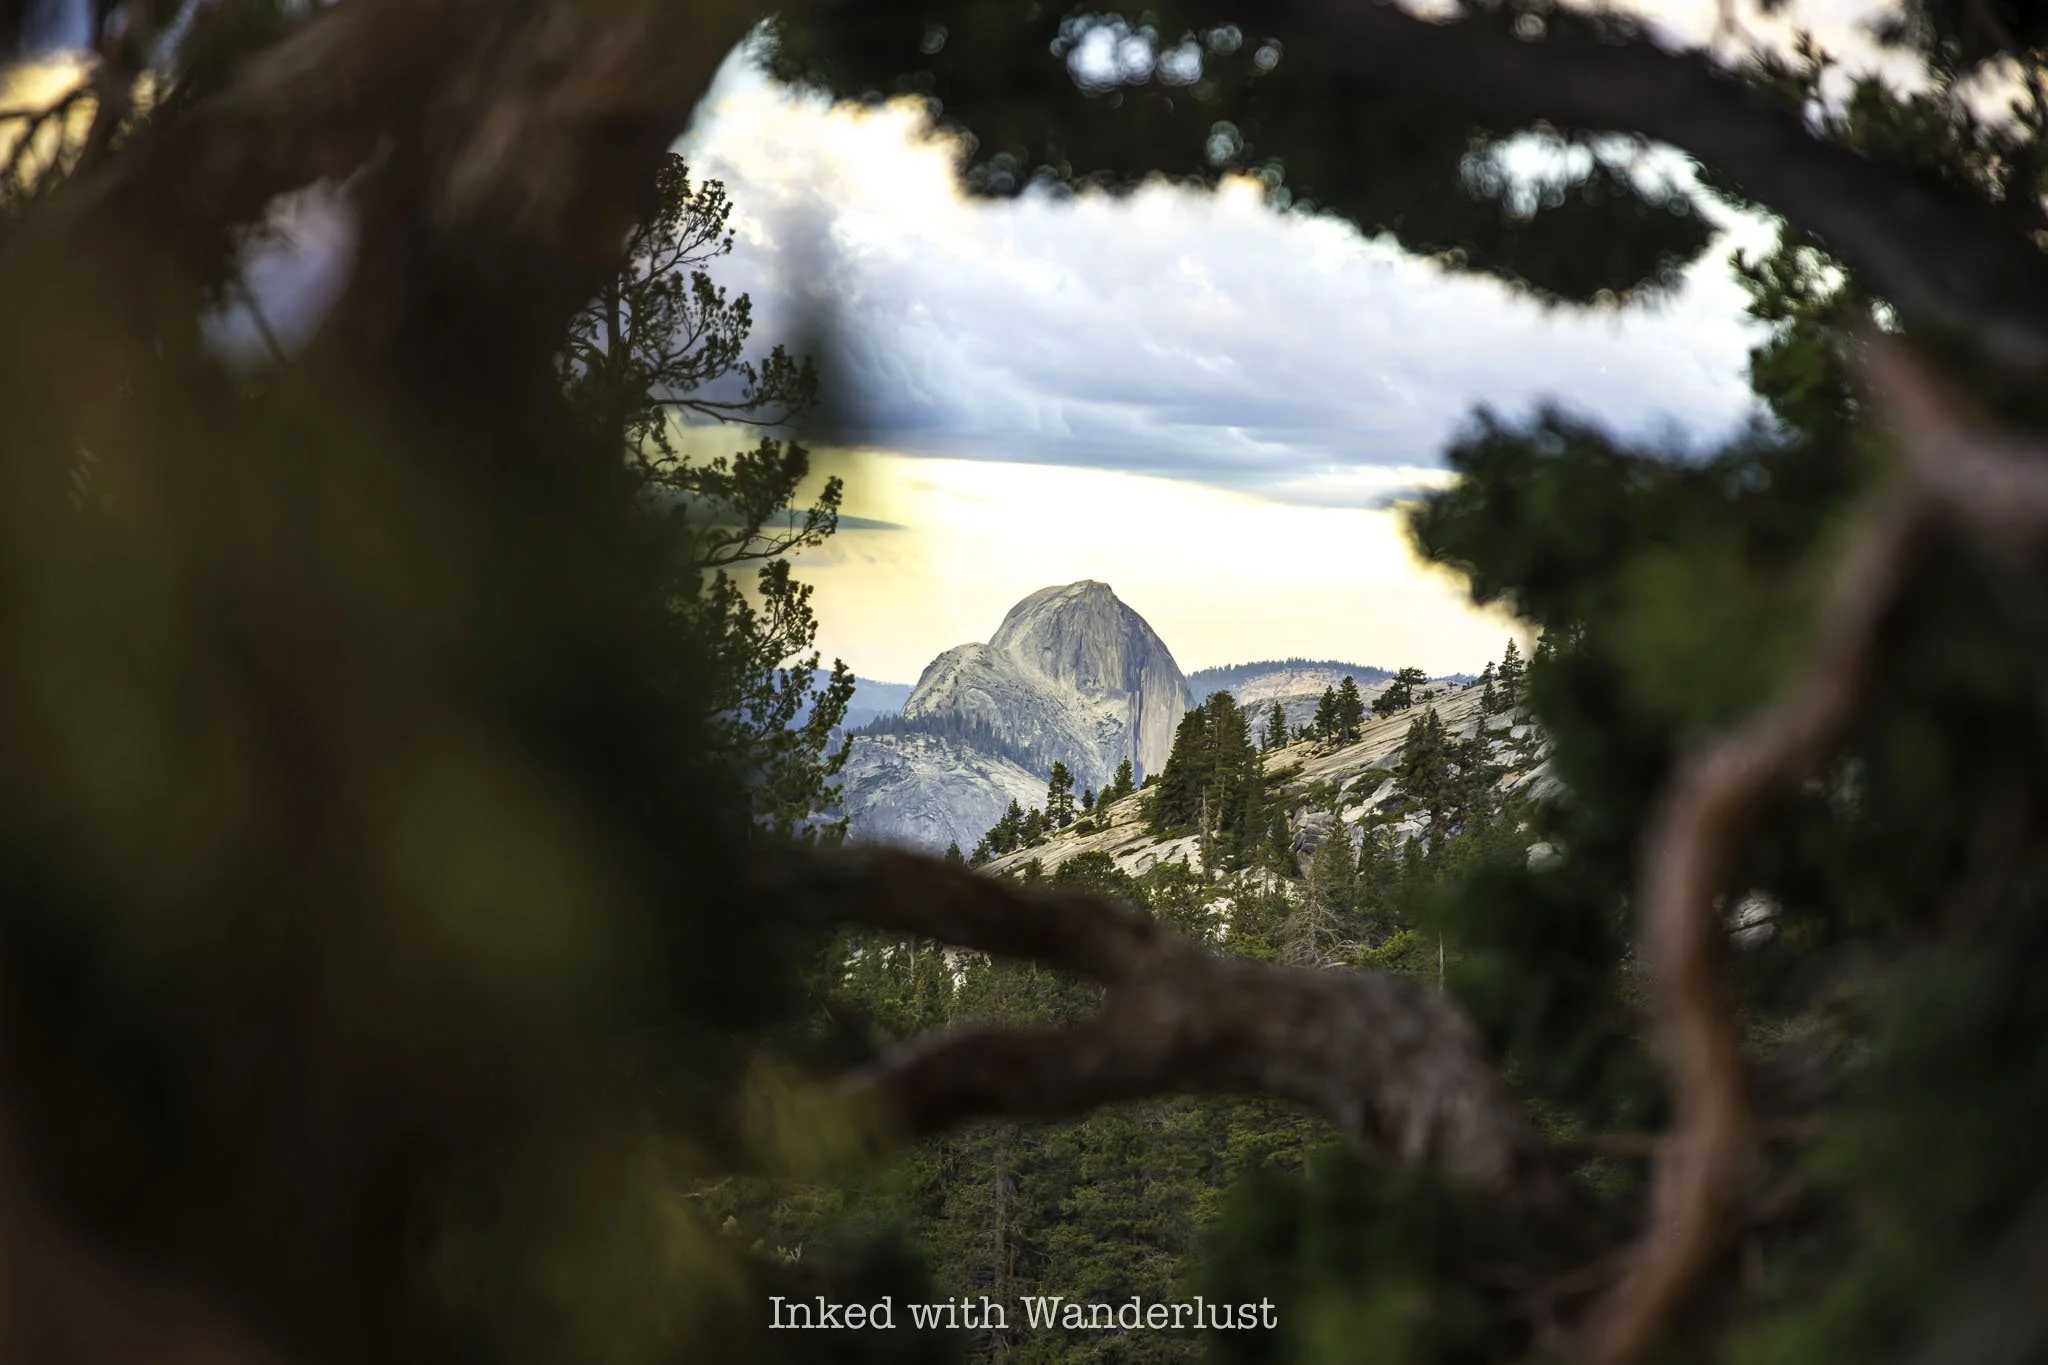
For some, Yosemite is a once-in-a-lifetime experience. Often regarded as one of California’s crown jewels, Yosemite reigns as one of the most visited destinations in the state and in the national park system as a whole.
Despite that, a good chunk of the millions who visit Yosemite annually do so for the first time. Additionally, with work and school commitments ever present, many are short on time or want to include multiple destinations in one trip.
If that’s your situation, then this one day Yosemite itinerary is for you. In it, I’m going to provide a doable schedule to follow to see most of the top sights and trails Yosemite has to offer.
Note that this itinerary isn’t exactly small-kid friendly. If your kids are older (or have experience with long, active days), then they should be able to handle it. For a solo traveler or pair of adult travelers with hiking experience, it definitely shouldn’t be an issue.
Buy me a coffee?
If you found this blog helpful, consider leaving a tip through the Buy Me A Coffee button below! Whether it’s $1 or $5, every bit helps offset small travel costs like coffee, water, lunch, parking, or park entry fees. Your support means the world—thank you!
Best Time to Visit Yosemite
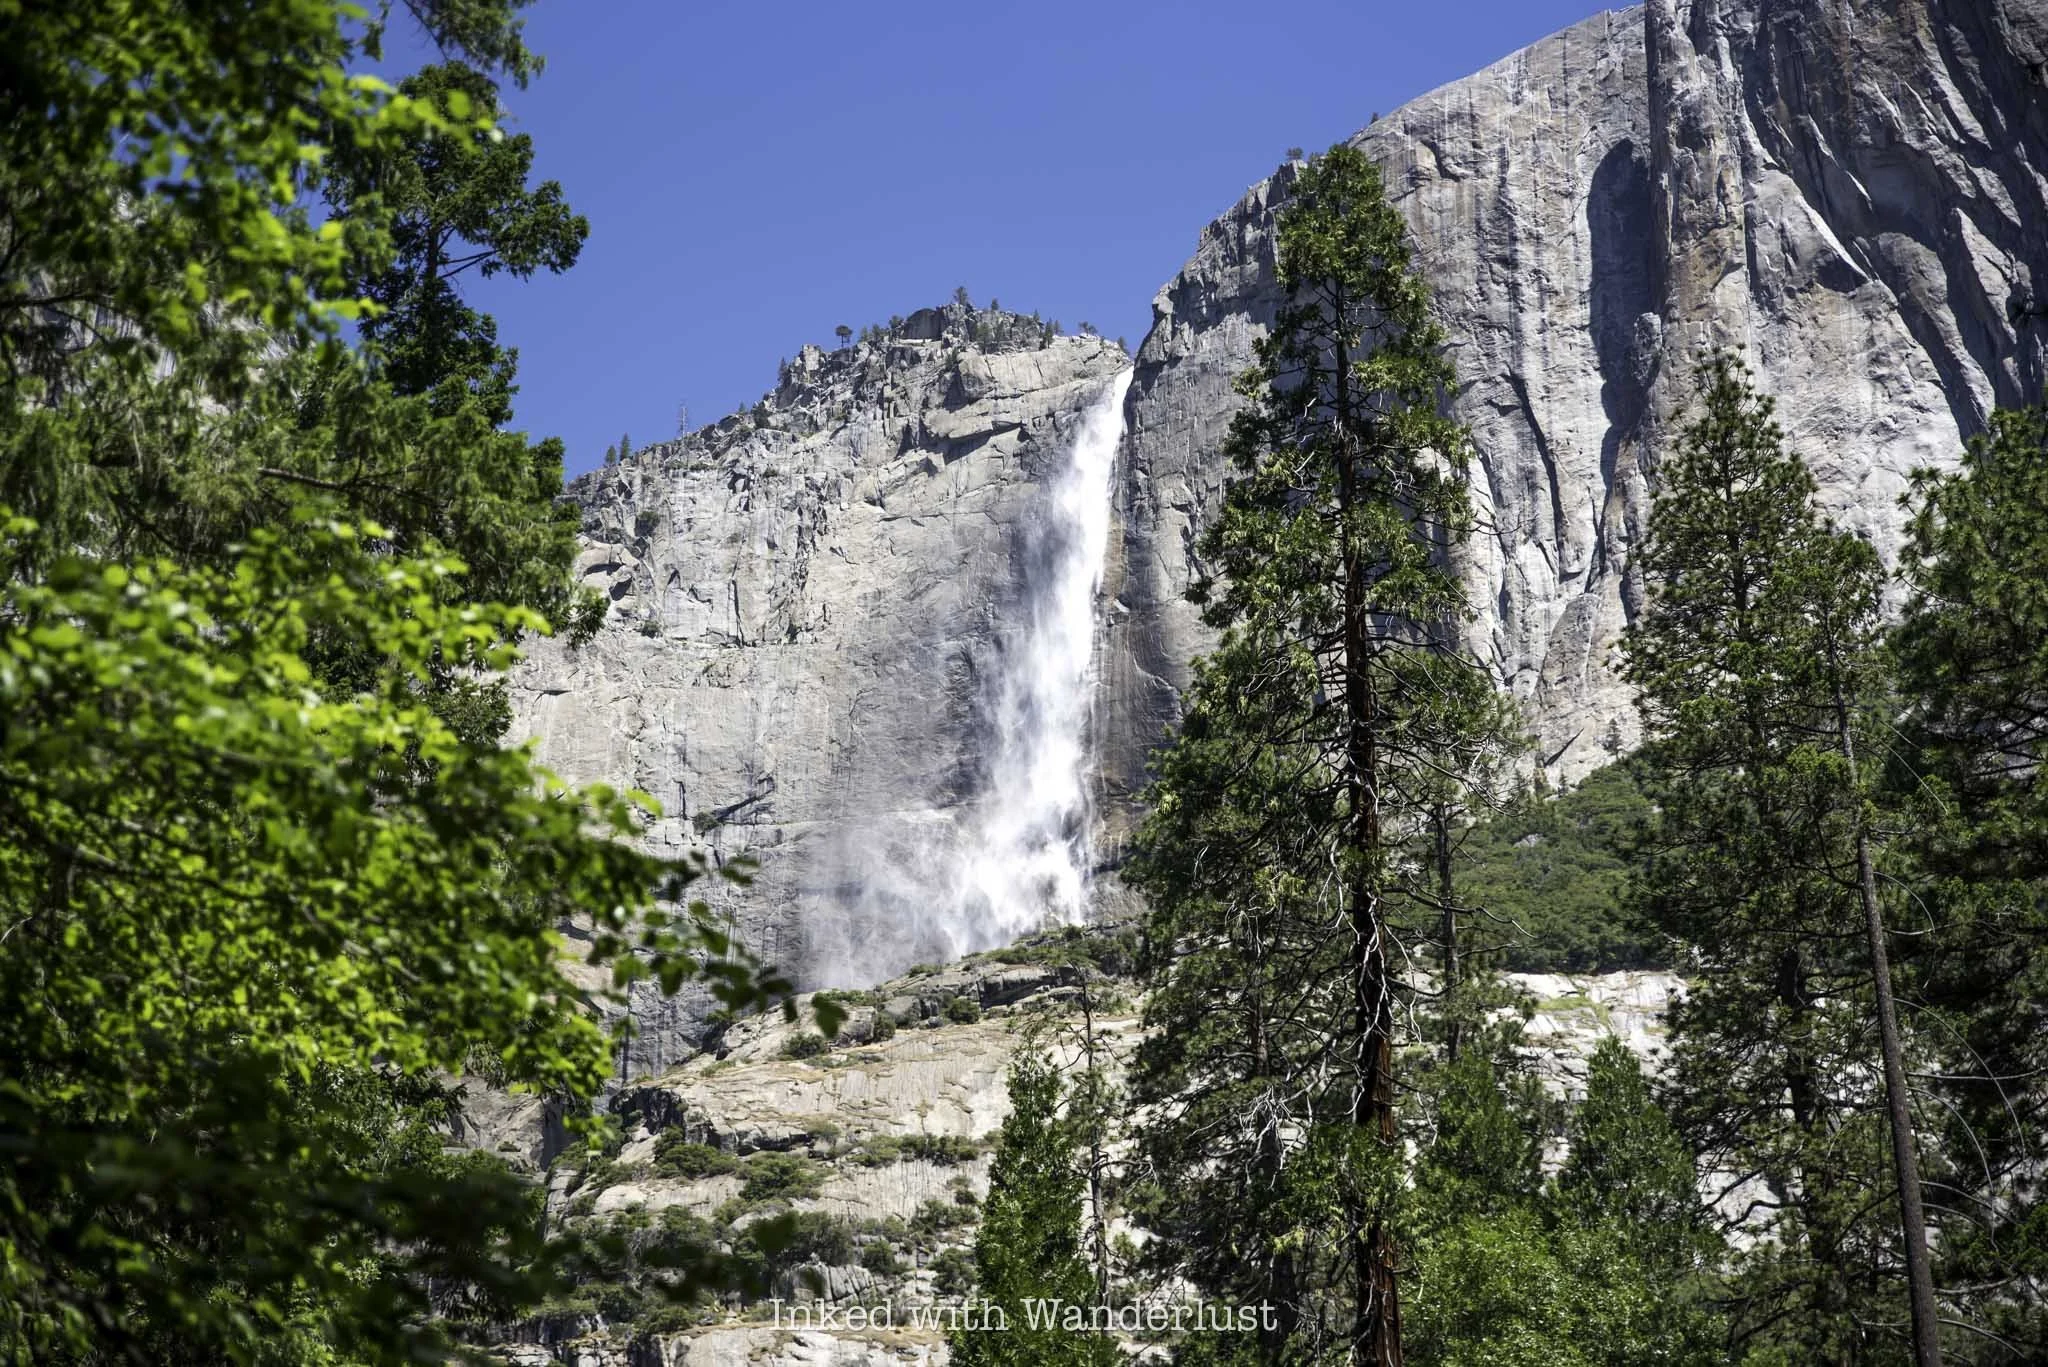
The answer to that all depends on your travel preferences and goals but if you’re asking me, spring and fall are my favorite times of year to go to Yosemite. Summer comes in third, with winter coming in dead last because many hiking trails are largely inaccessible due to snow.
I prefer spring and fall mainly due to the pleasant weather and cooler temperatures. Spring is best for waterfall viewing (specifically Yosemite Falls) as some deplete as summer progresses. Conversely, fall offers golden foliage colors that pop against the massive granite walls.
For the purpose of this itinerary, we’ll focus on visiting during spring or early summer. Note that you’re traveling to the mountains, which tend to create their own weather. Just because it’s normally pleasant, that doesn’t mean it won’t change on any given day.
Yosemite Reservations
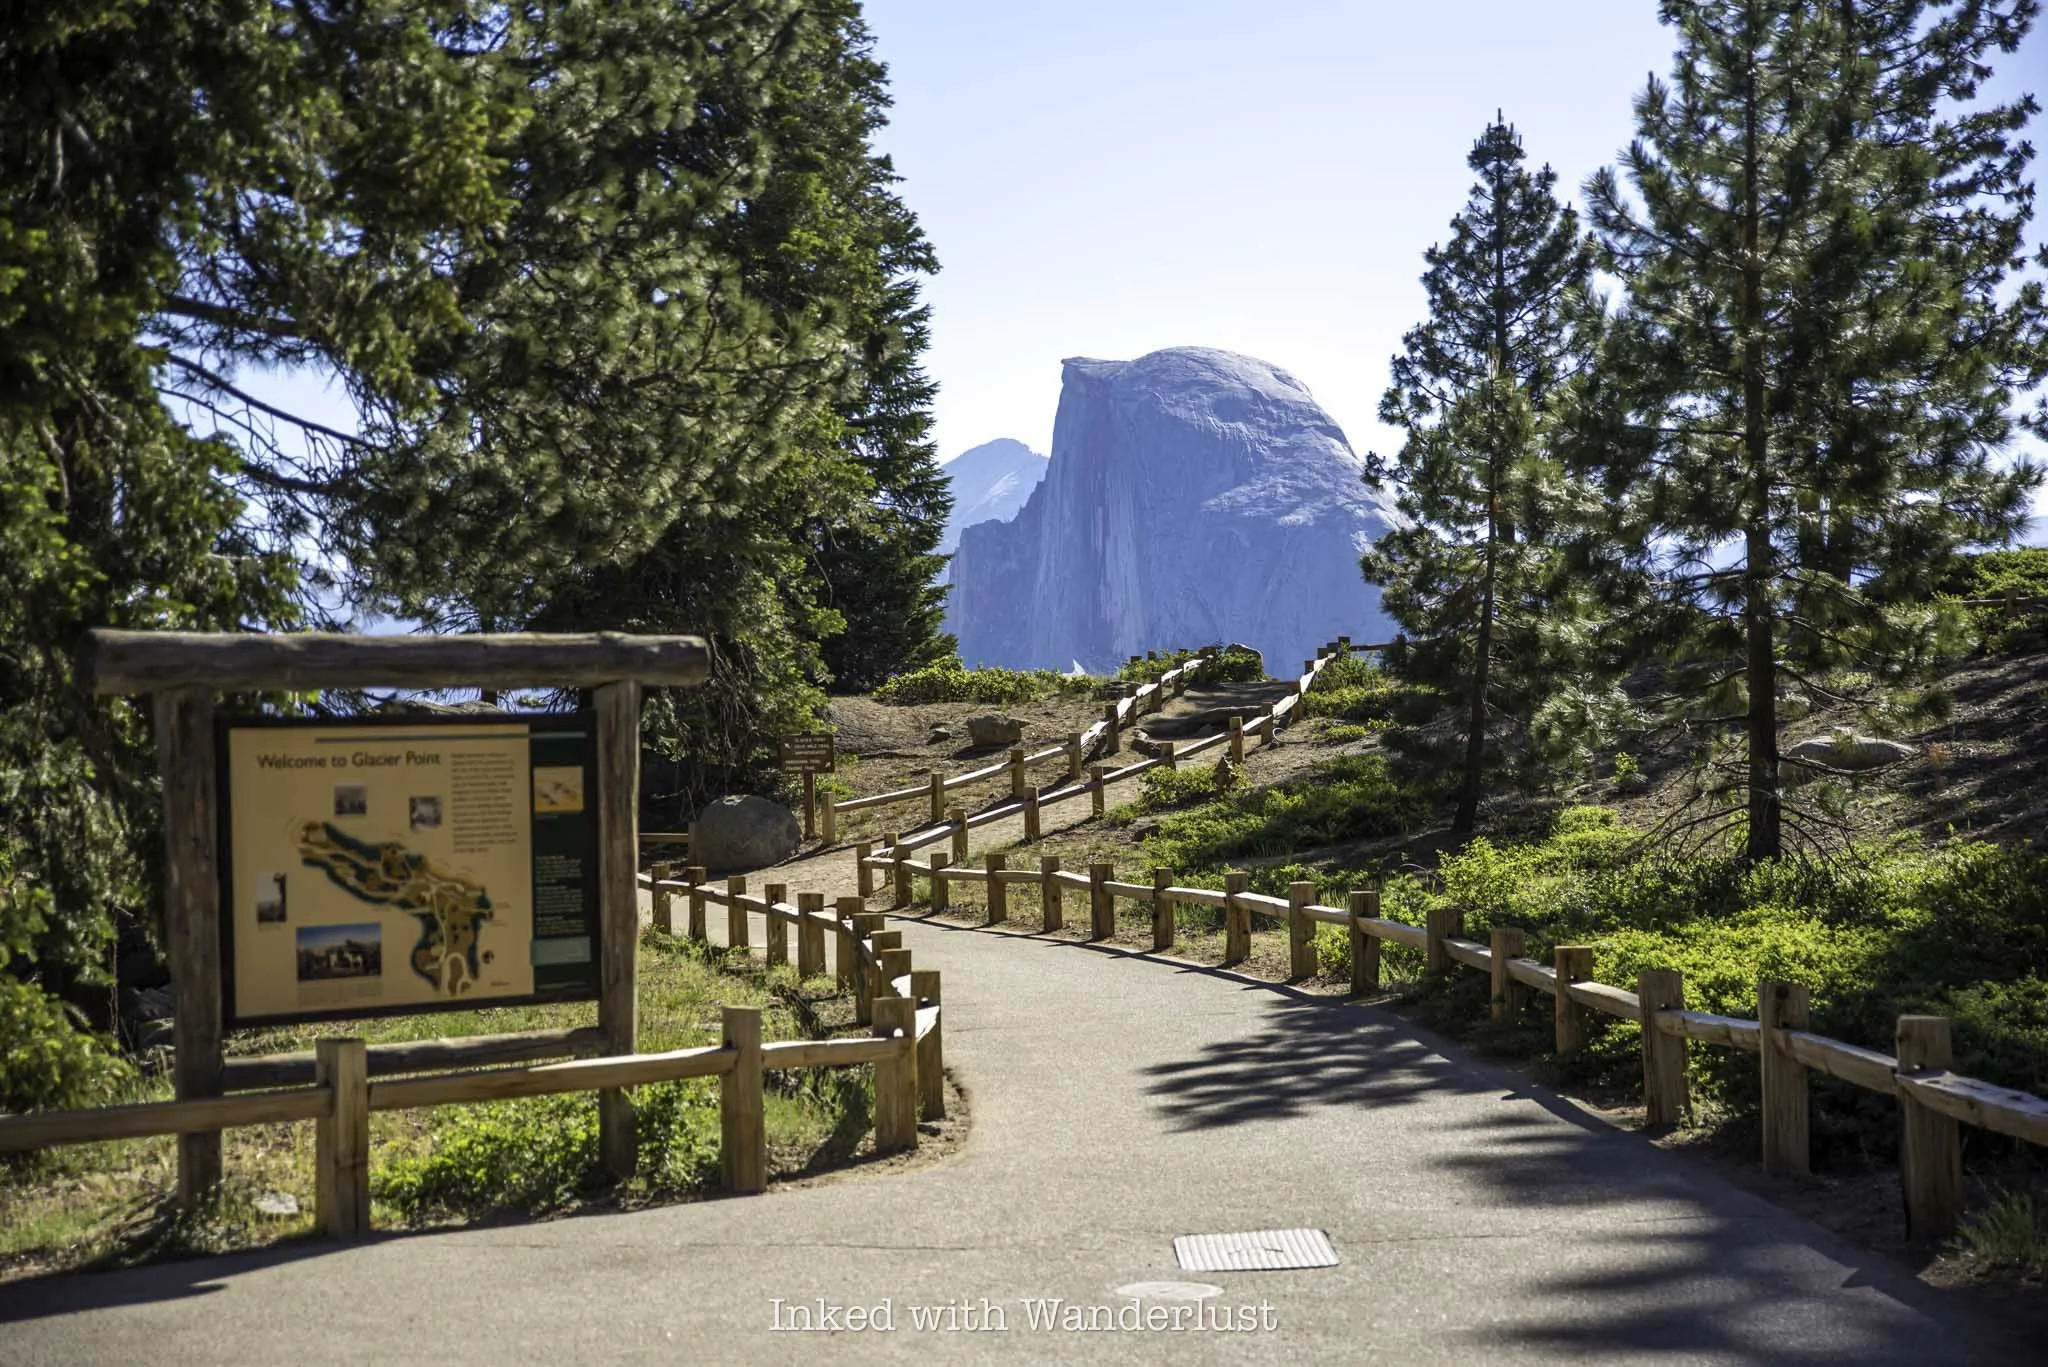
One aspect to visiting in spring or summer is having to contend with Yosemite’s reservation system. There are exceptions but most people, visiting during these times will require one. One exception to take advantage of, however, is what I’ll recommend - arriving before 6am.
On select dates in spring and all days in summer, you’ll need a reservation if you arrive between 6am and 2pm. Outside of those hours, you’re good to go. I highly suggest getting there prior to 6am to avoid crowds, but to also see as much as you can on your one day visit to Yosemite.
Where to Stay and Eat
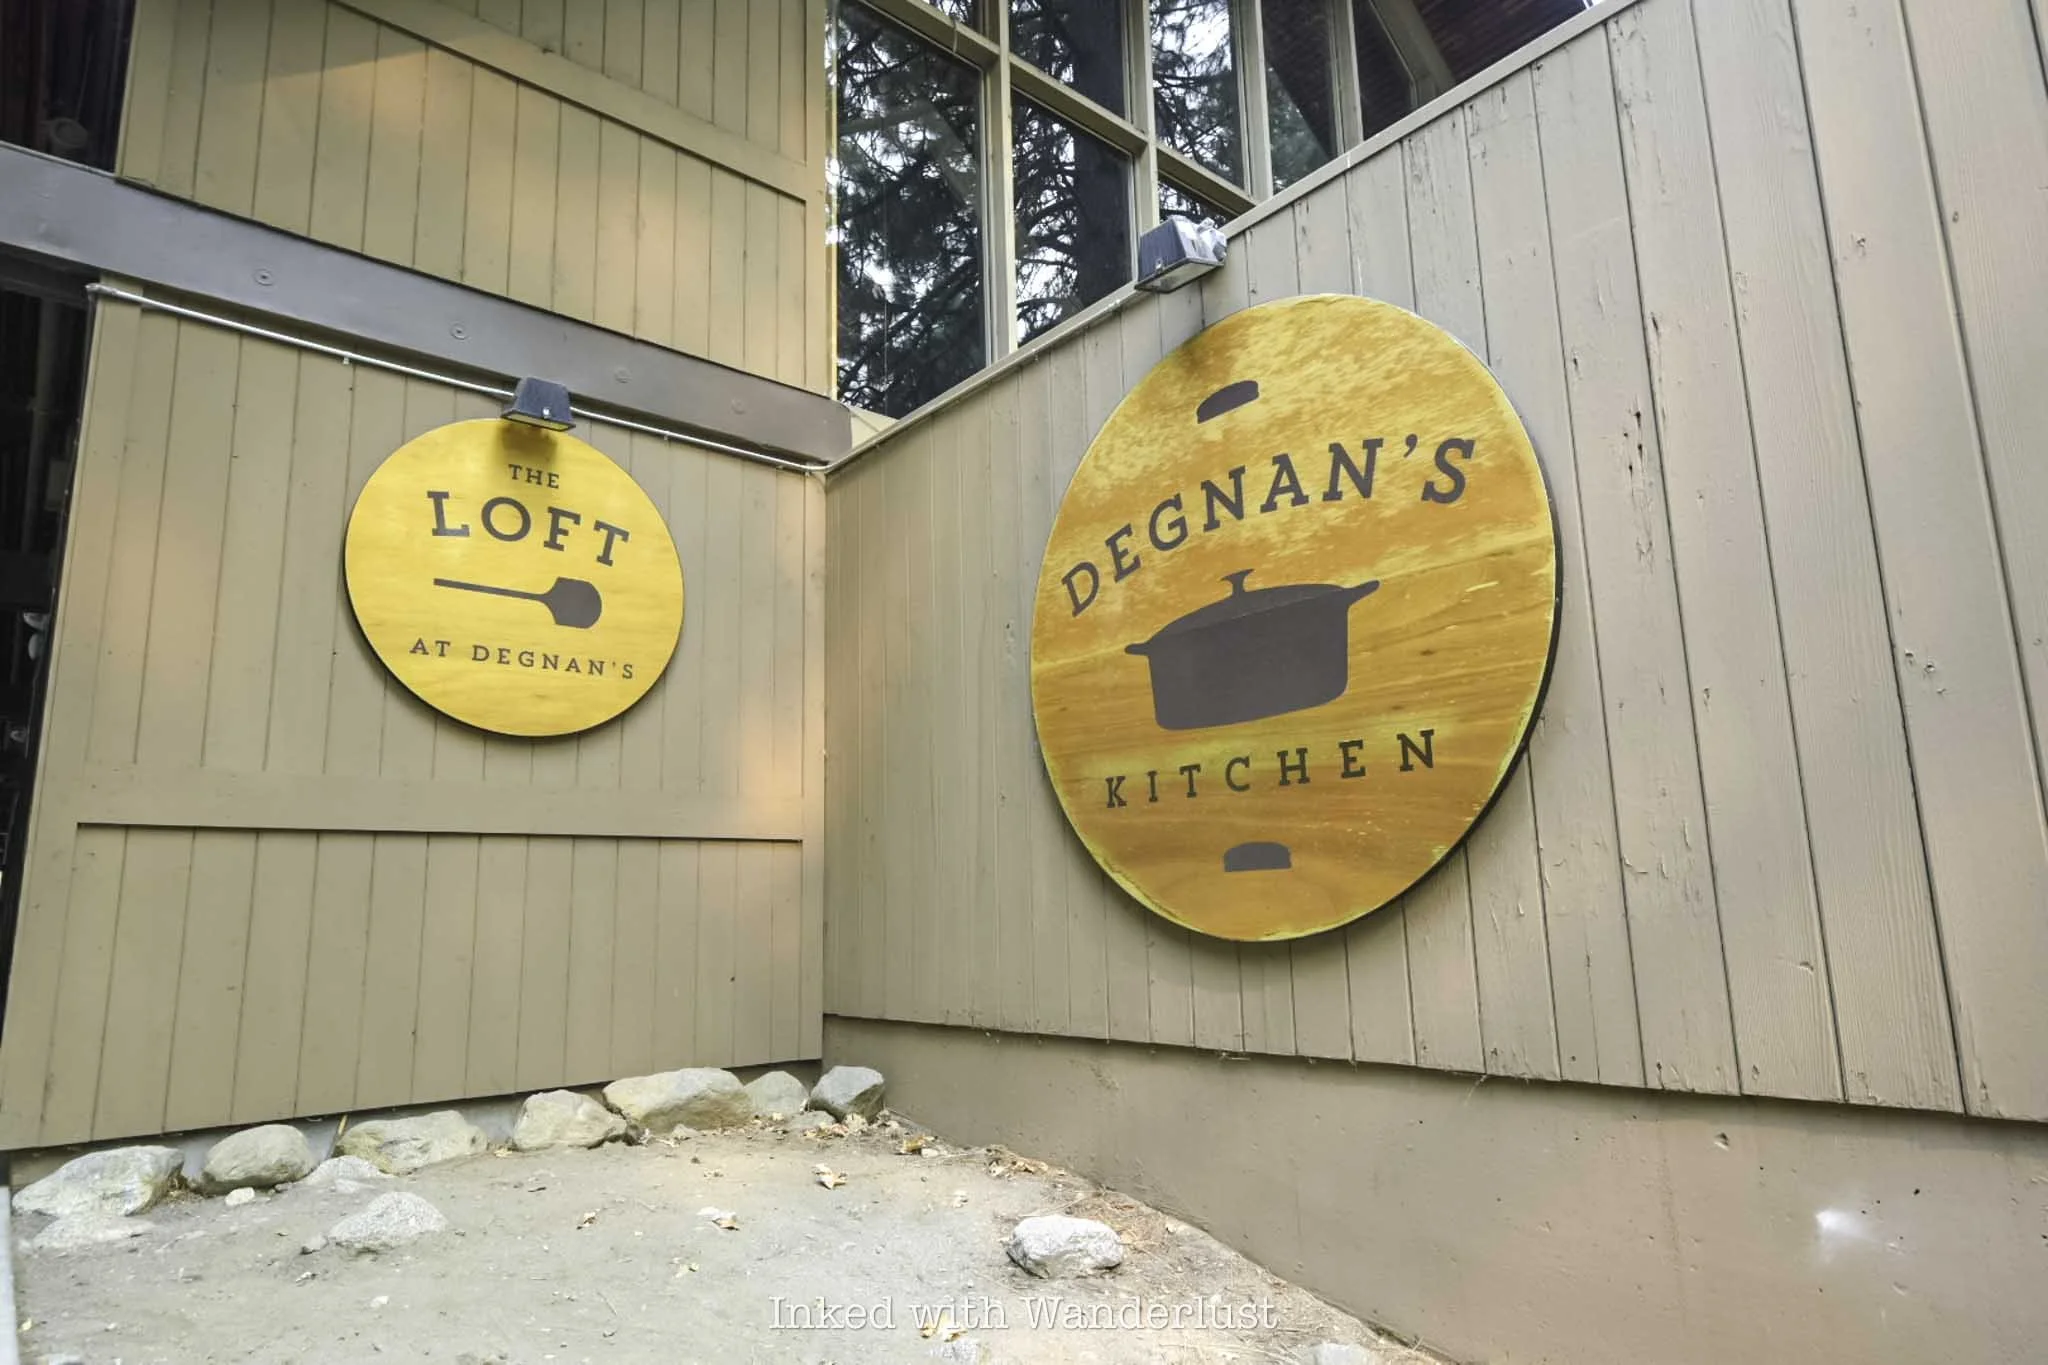
Believe it or not, there are no shortages of places to eat in Yosemite Valley. Quick service and mid-range options include Base Camp Eatery, Mountain Room Lounge and Curry Village Pizza Patio. For a more upscale experience, The Ahwahnee has you covered.
Keep in mind that while food may not be scarce, the restaurants are exceptionally overpriced for what you get and while I haven’t eaten everywhere in Yosemite Valley, the ones I have tried weren’t all that great, in my opinion.
This itinerary will include time to enjoy lunch, but I recommend packing a plethora of snacks and even picnic foods to save yourself time (and money, no less). You’ll practically be spending your entire day in the valley with no time to leave the park and return later.
I suggest bringing a Yeti Soft Cooler backpack (or something similar) to keep food cold. Remember to NOT leave any food or scented items in your vehicle (including the trunk) and to utilize bear boxes. Bears WILL ruin your day by ripping your vehicle apart looking for them.
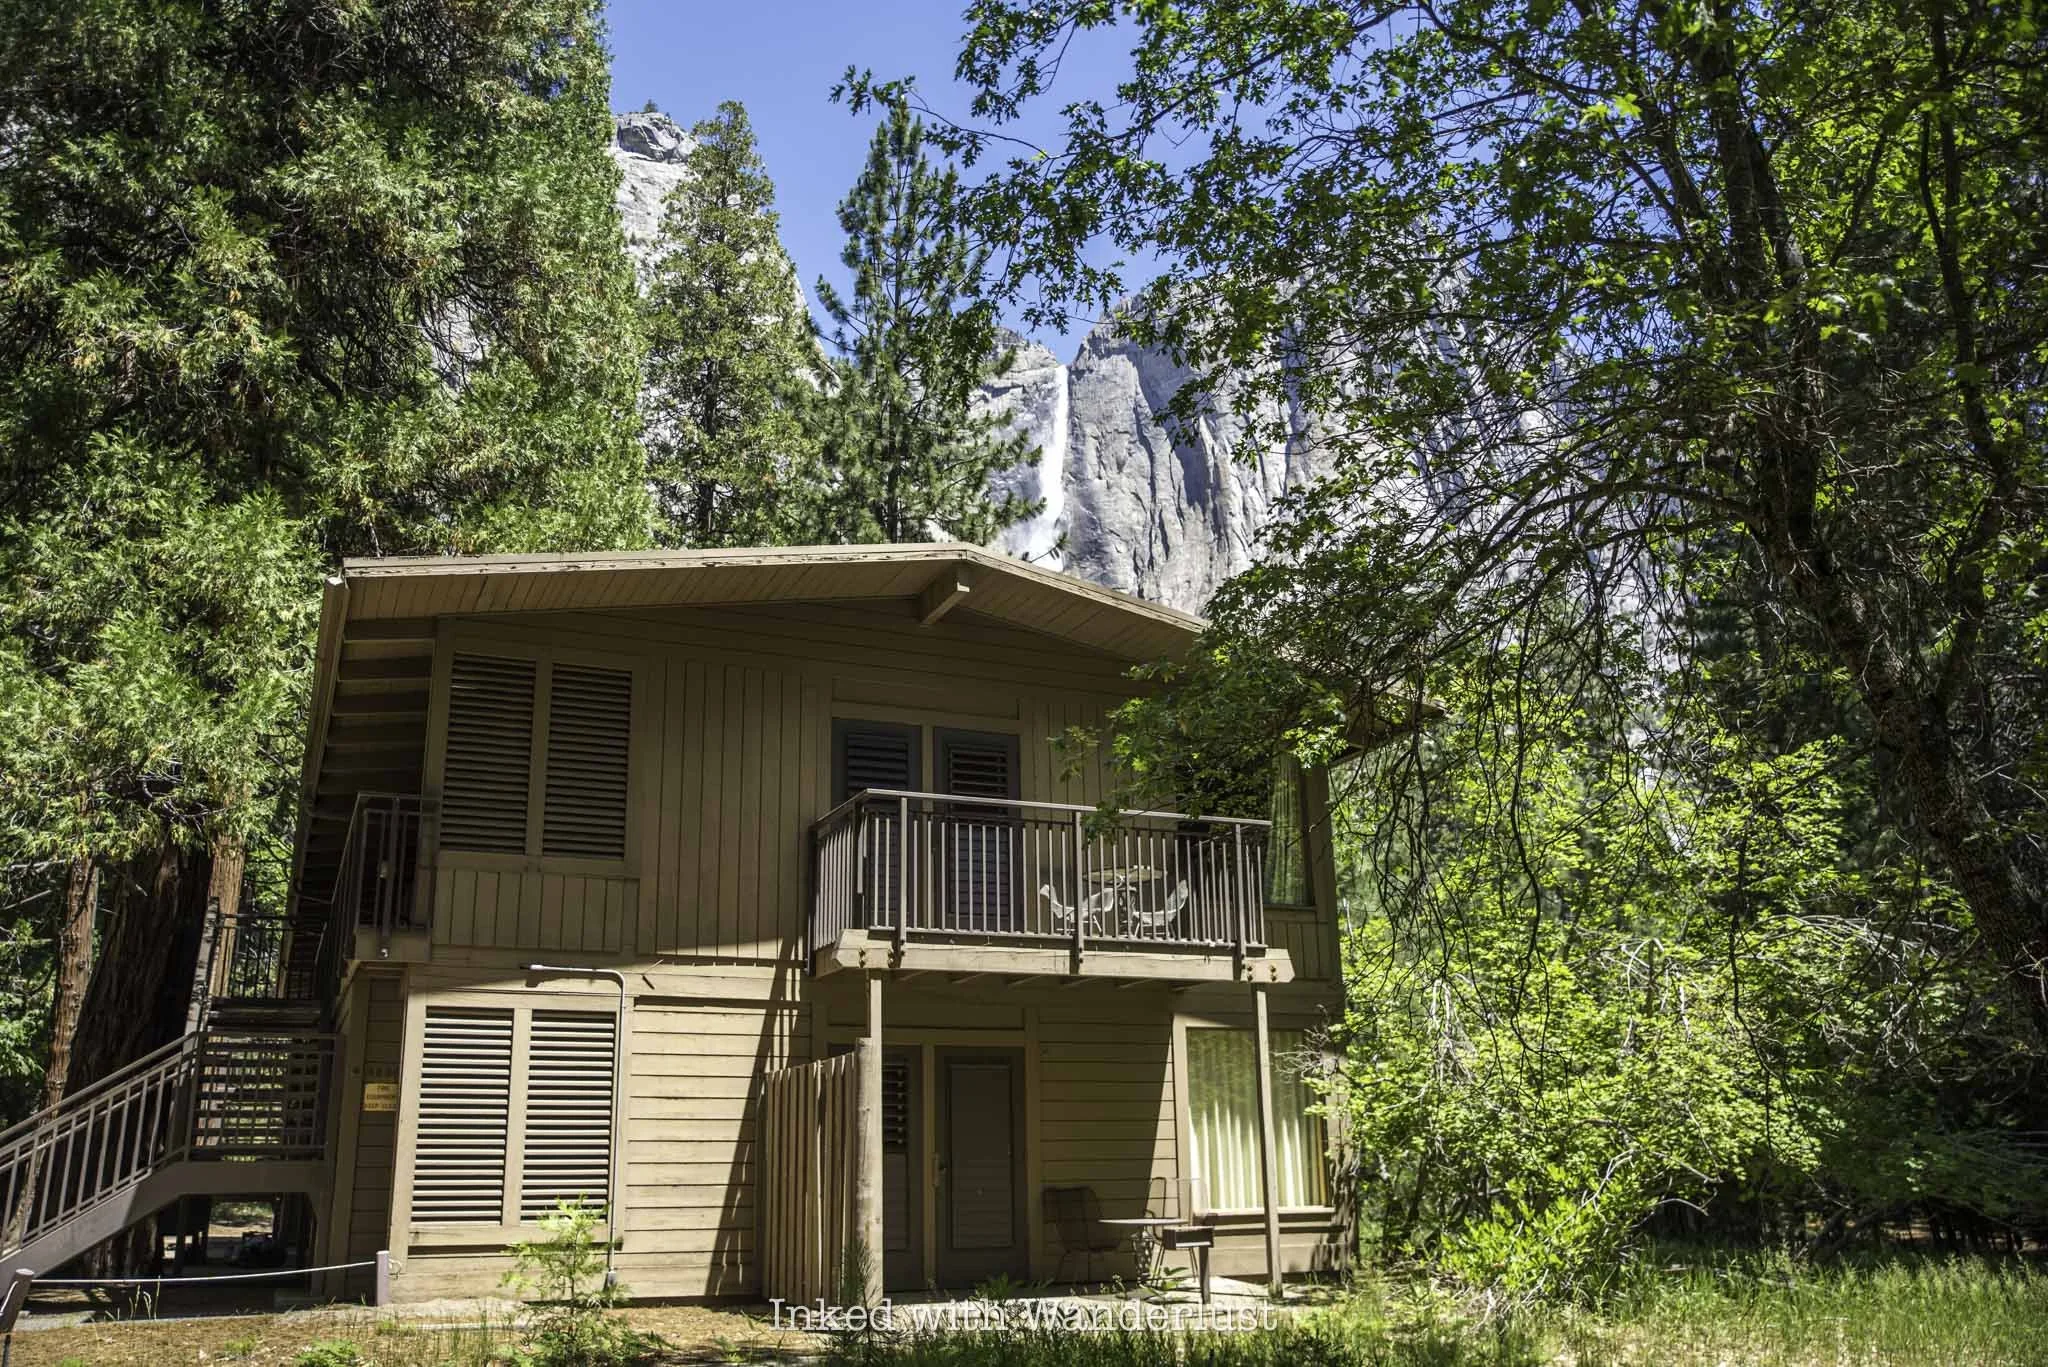
As far as lodging goes, I recommend staying at a hotel or campground in Yosemite, or somewhere close by. This is so you can begin the itinerary right away and maximize your one day at Yosemite. Hotels and campgrounds in Yosemite Valley proper include:
The Ahwahnee
Yosemite Valley Lodge
Curry Village
Camp 4
Upper Pines
Lower Pines
North Pines
Keep in mind that reservations at the in-park hotels and campgrounds are competitive. Often requiring booking months in advance to secure a room during the summer at Ahwahnee. Cancelations happen, though. So just keep trying.
Additionally, there are also hotels and campgrounds in the surrounding gateway towns that are often easier to come by. These include El Portal, Mariposa, Oakhurst, Groveland and Lee Vining (east side).
This itinerary is assuming that you’ll be staying outside of the park. If you’ll be staying inside the park, simply adjust the itinerary below (arrival time, where you’ll initially board the shuttle, etc) accordingly.
One Day Yosemite Travel Itinerary

Since you’ll only have one day at Yosemite, your time on this itinerary will heavily focus on the highlights of Yosemite Valley, as well as a visit to Glacier Point. Remember, if you weren’t able to secure a reservation, be sure to arrive before 6am.
If you’re like most, you’ll be driving in through the Arch Rock entrance. Either present or purchase your America the Beautiful pass ($80) or pay the regular fee ($35) to enter. Remember, cash is not accepted. Only credit/debit cards.
1) Tunnel View (30 minutes or less)
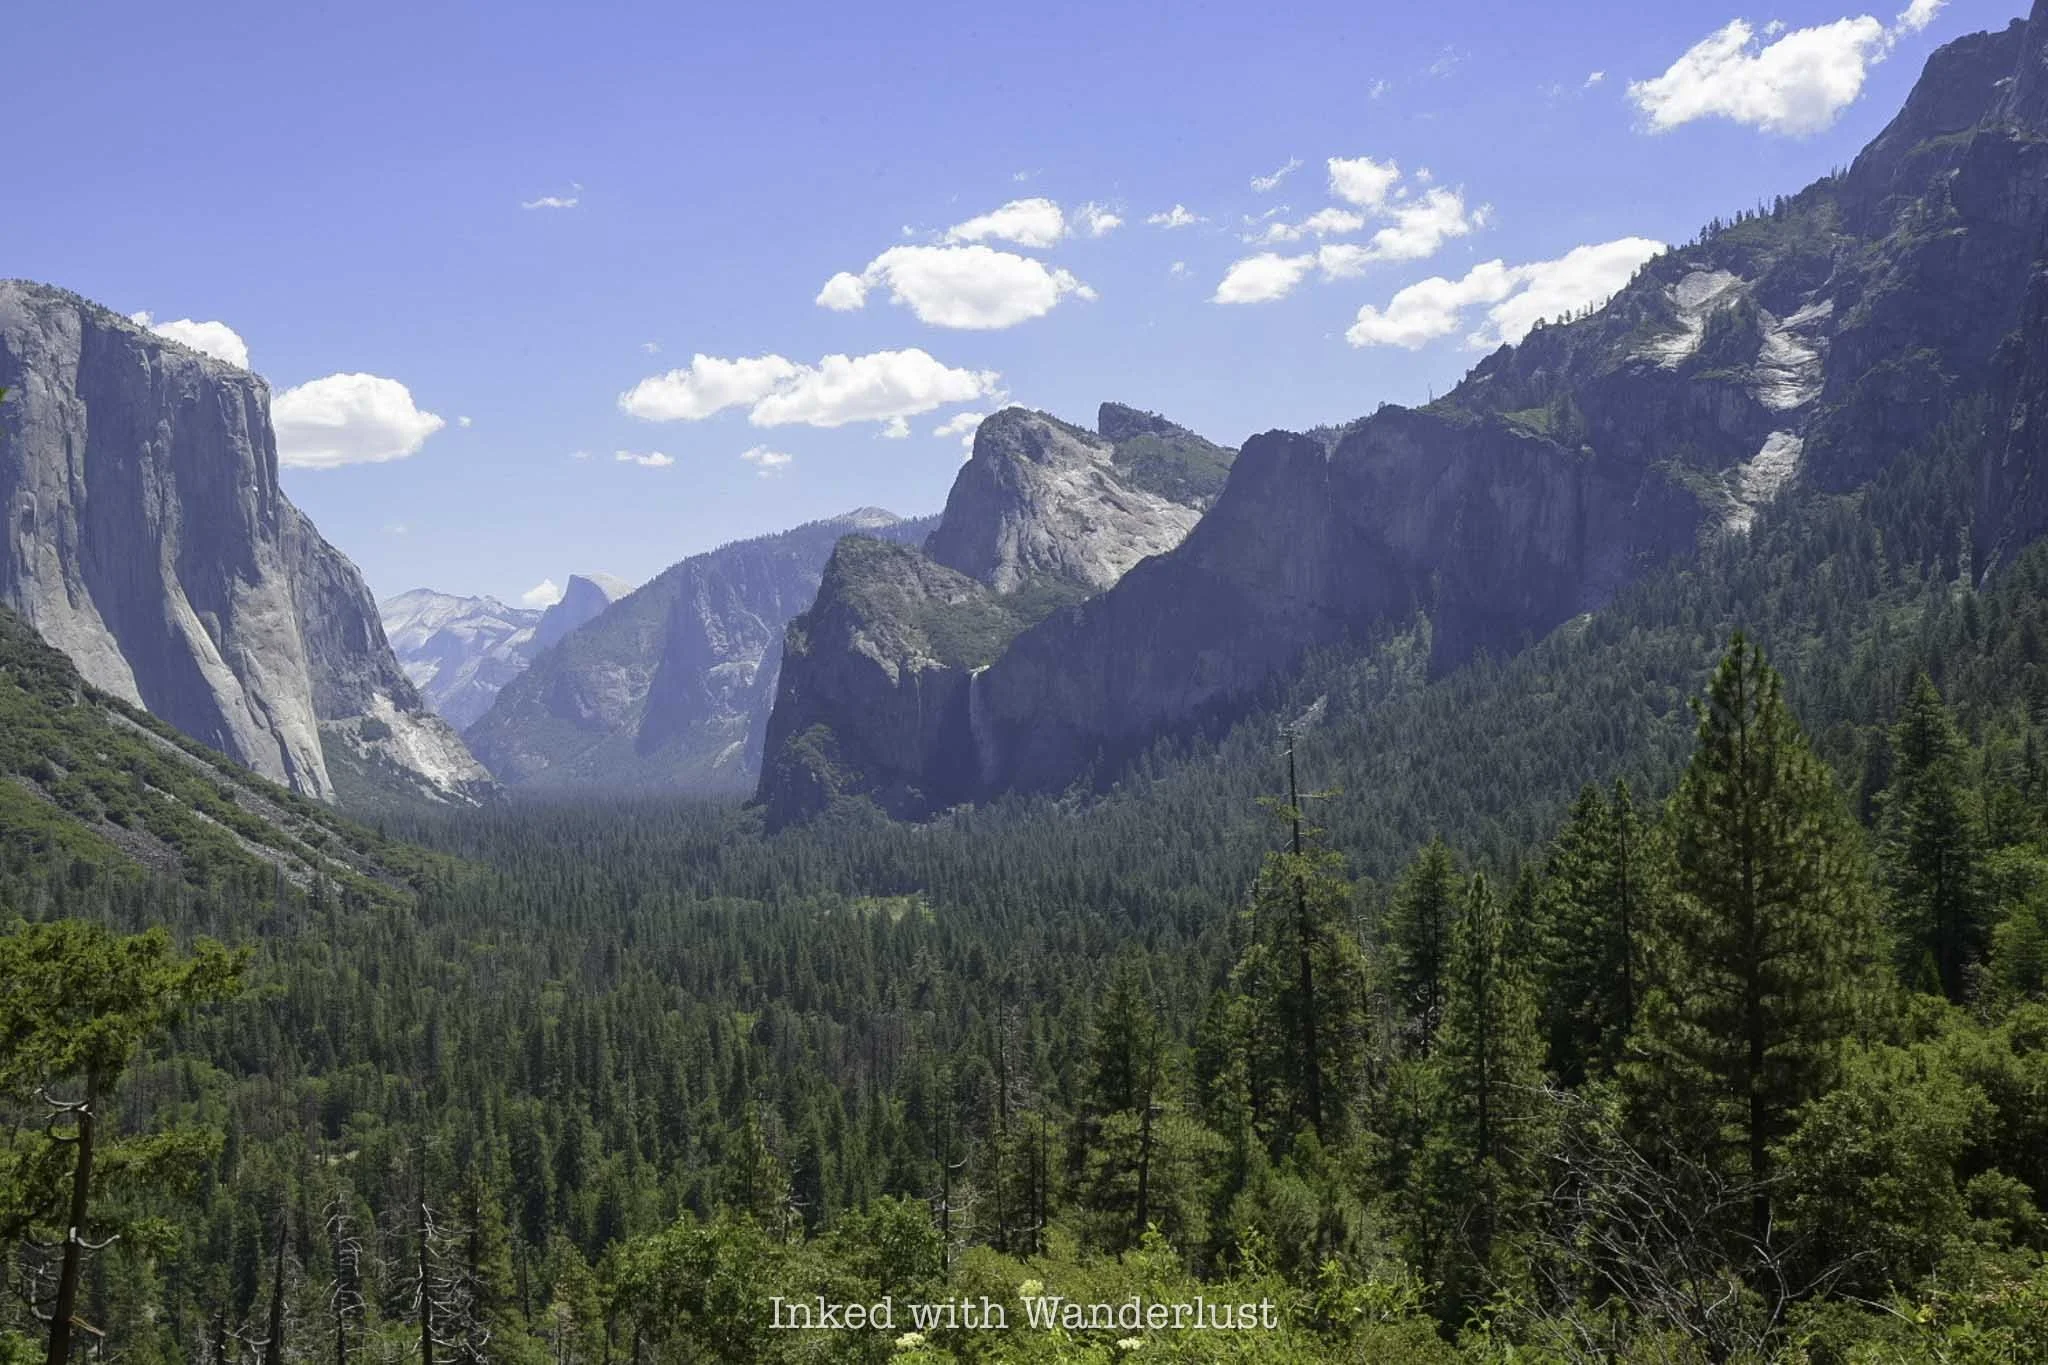
Tunnel View is one of the quintessential Yosemite experiences that anyone, especially first-timers, should check out. You’ve likely seen it on the various social media sites and probably on merchandise as it’s the infamous postcard view of the park.
Despite seeing it in photos, you simply must see it for yourself as photos and video do it no justice. From Tunnel View, you can see many of the park’s most infamous landmarks including Half Dome, El Capitan, Cathedral Rocks and Bridalveil Falls.
READ: “Tunnel View: How to See the Most Iconic View in Yosemite”
2) Bridalveil Falls (one hour or less)
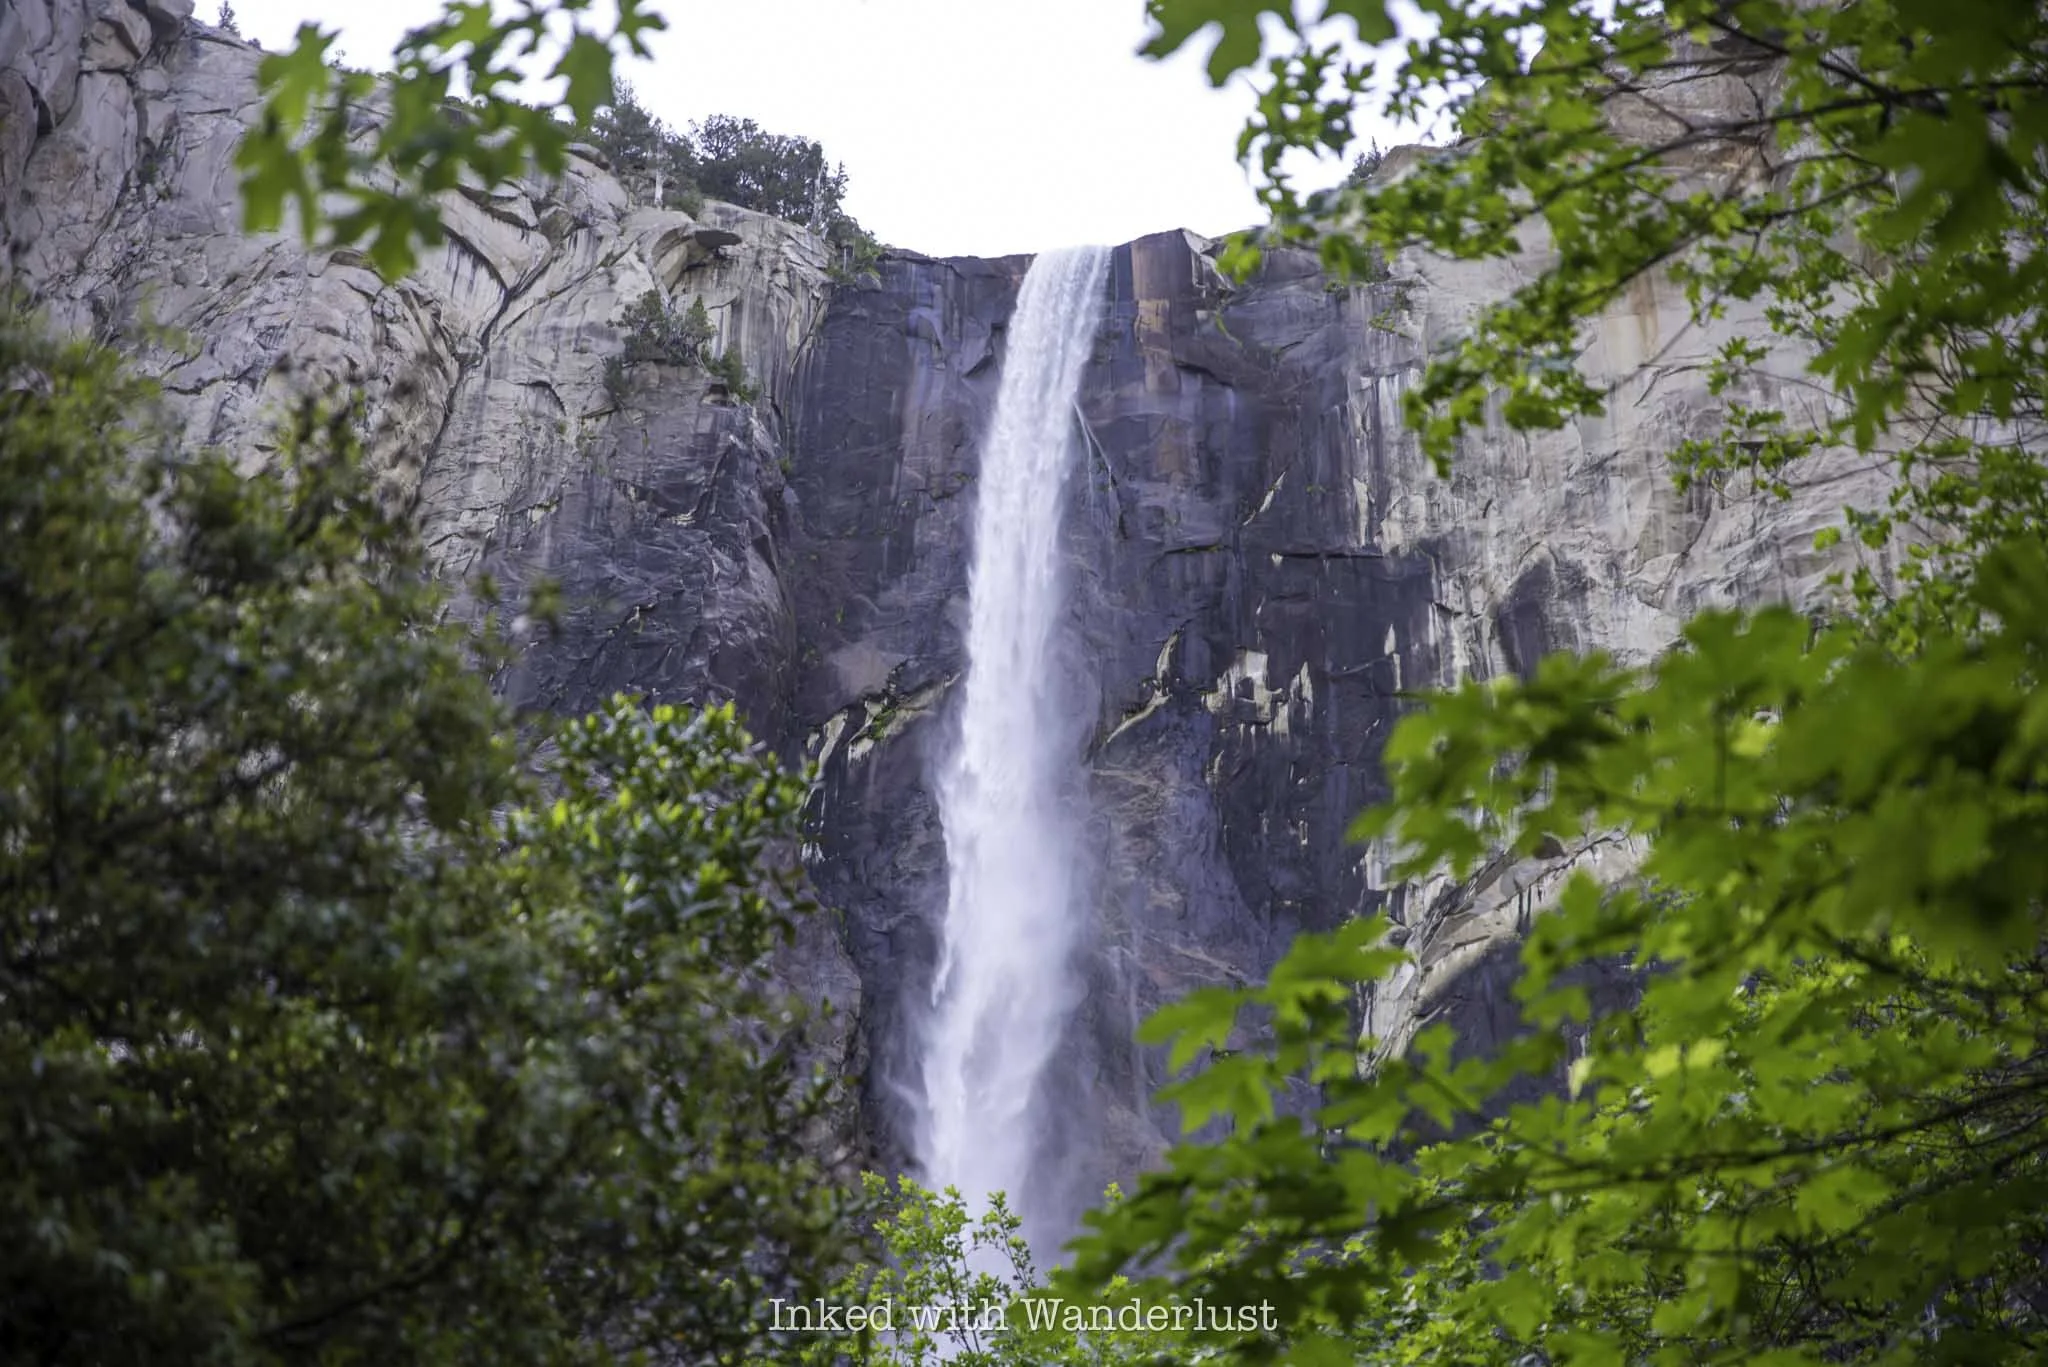
From Tunnel View, you’ll work your way down the road and over to the first waterfall of your visit - Bridalveil Fall. Unlike most waterfalls in Yosemite, Bridalveil is spring fed, so it flows year-round (though it’ll be heavier in the spring and early summer).
Parking is plentiful here, especially in the early morning. The reason I’m recommending starting your day at Tunnel View and Bridalveil is because they’re both mega-popular and the park shuttle doesn’t go to either - and that’s your next stop.
READ: “How to See Bridalveil Fall in Yosemite National Park”
3) Board the Yosemite Valley Shuttle at Stop #11 (15-20 minute wait for the shuttle)
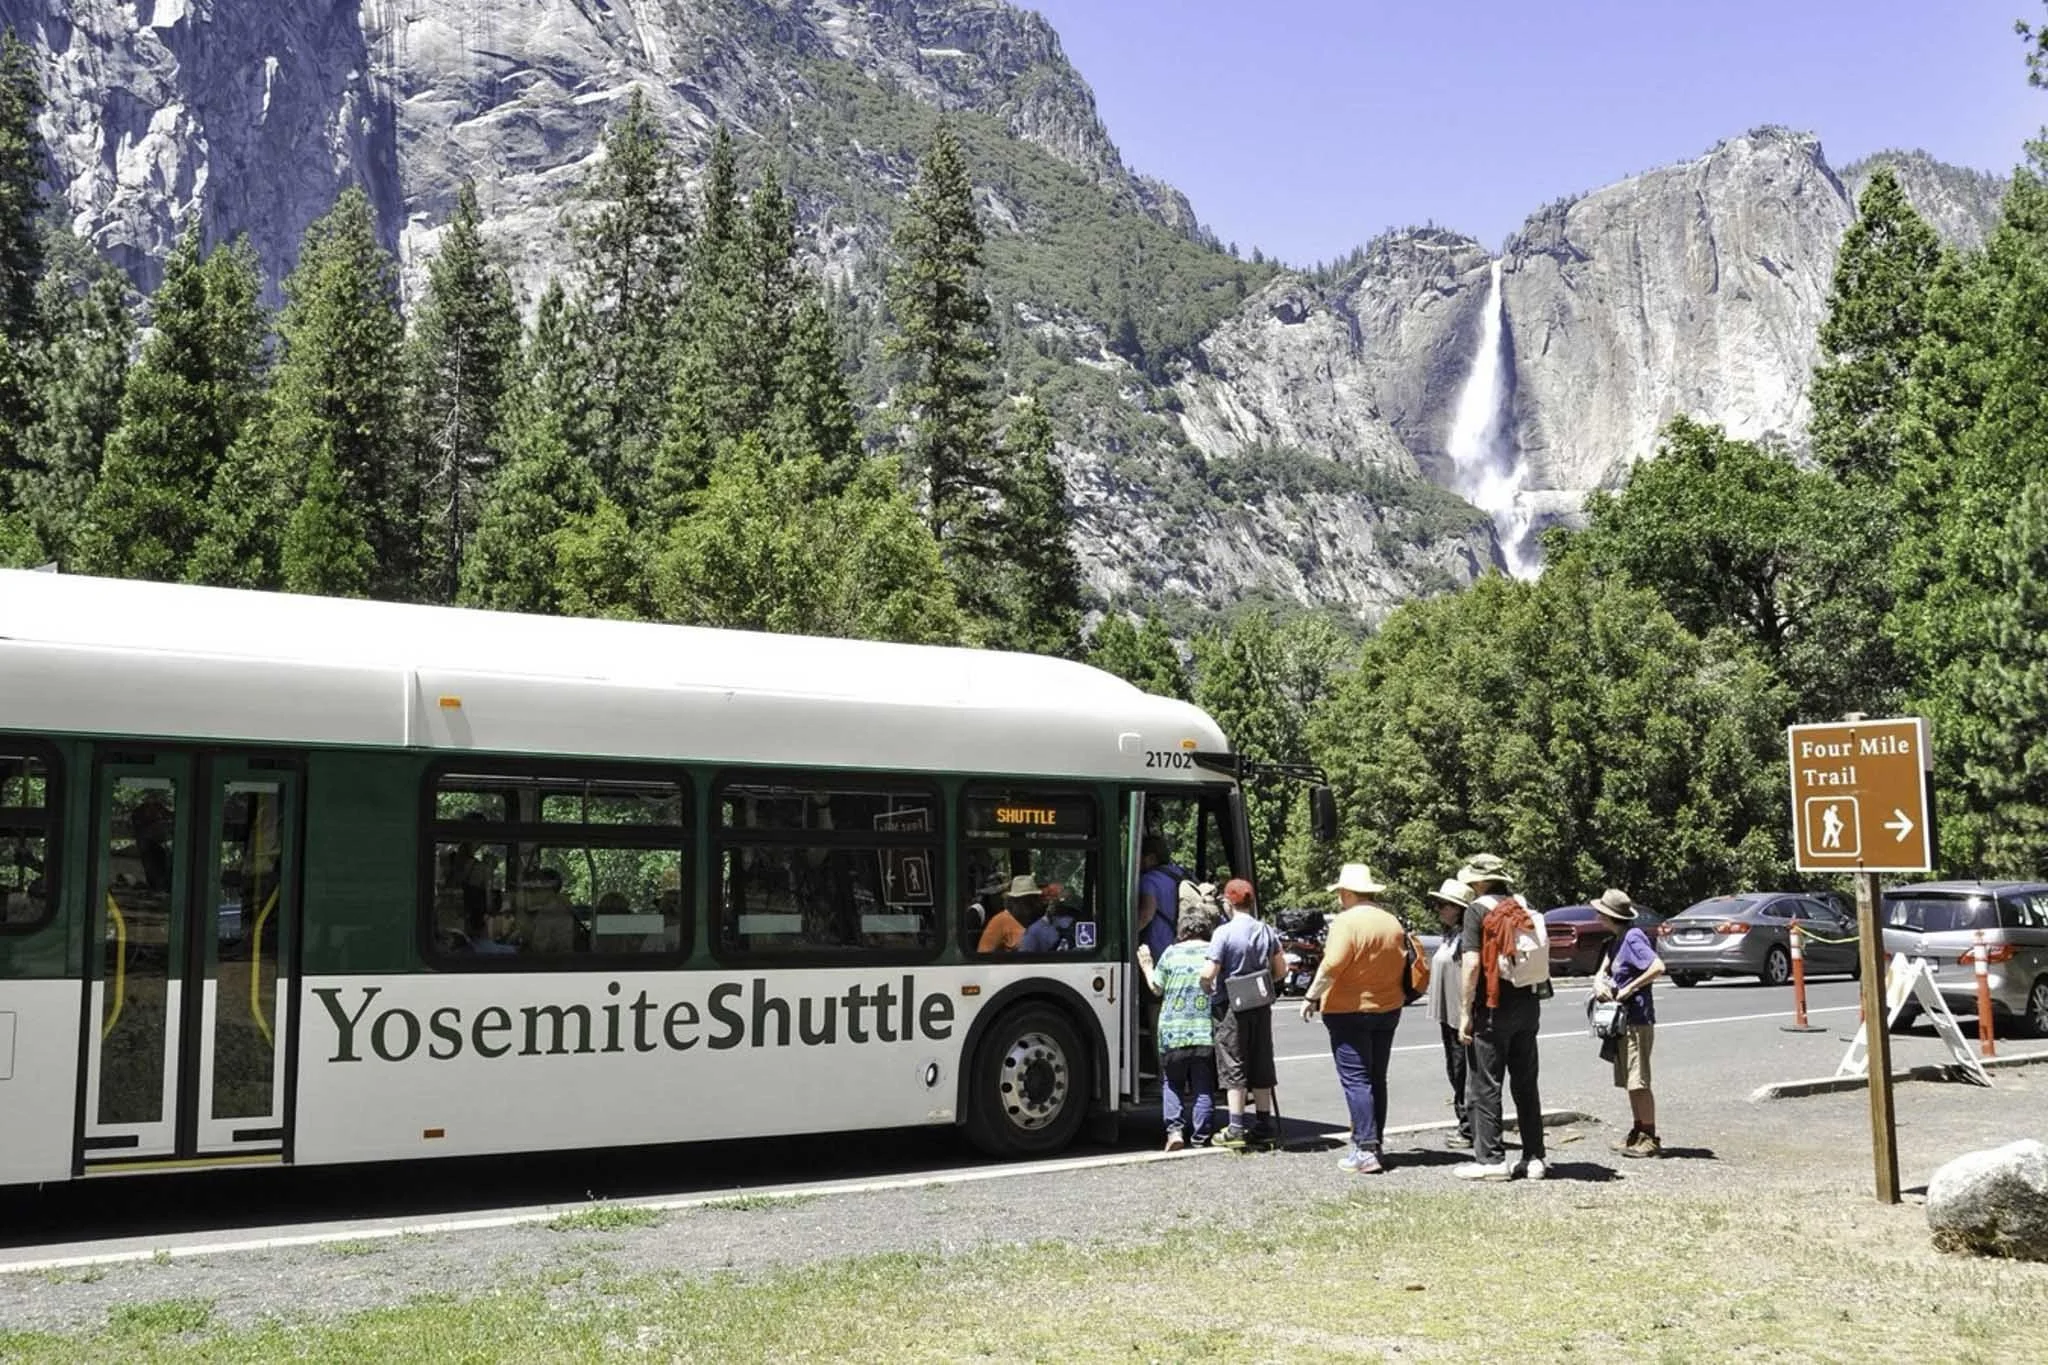
From Bridalveil, you’ll drive for three miles on Southside Drive to the trailhead to the Four Mile Trail. Find a place to park and wait for the Yosemite Valley shuttle (green line) to arrive and board it when it does.
As the day progresses, parking will become increasingly difficult. By utilizing the free valley shuttle, you’ll save yourself from the hassle of finding a place to park, a ton of time and it’ll help to cut down on the effect of emissions on the park.
4) Hike The Mist Trail (4 hours or less)

To hike the Mist Trail, you’ll get off of the valley shuttle at Happy Isles, which is stop sixteen. From the shuttle stop, you’ll walk a short distance down the road to the official trailhead (which goes upwards through a gate).
The Mist Trail is one of the premiere hiking trails in all of Yosemite. It’s mega popular, attracting hikers and tourists alike by the millions, annually. It’s no walk in the park (pun intended), but it’s totally doable if you take your time.
According to AllTrails, it takes an average of four hours, round-trip, to hike to the top of Nevada Fall (the second waterfall on this hike) and back. To save time, many hike to Vernal Fall and stop there. However, I highly recommend completing the entire trail if you can.
READ: “The Mist Trail: Hike One of Yosemite’s Most Beautiful Trail”
5) Enjoy Lunch At and Explore Yosemite Village (one hour)

After completing the Mist Trail, it should be somewhere around noon or 1pm. Get back on the valley shuttle (you can board the green or purple lines here) and take the short ride to stop one (Yosemite Village) or stop two (Welcome Center).
There, you and your group can take a break, enjoy lunch at one of the valley restaurants, enjoy a picnic, scope out historic photographs at the Ansel Adams Gallery, learn about the Ahwahnee people at Indian Village, shop for souvenirs and more.
Once you’re feeling ready to get back at it, hop back onto the valley shuttle (green line only) and take the short trip to stop six - Lower Yosemite Falls.
6) Lower Yosemite Falls (45 minutes to one hour)

Much like Tunnel View and Bridalveil Fall, taking the short hike to the base of Yosemite Falls, the tallest waterfall in North America, is quintessential Yosemite. You can hike the full loop (1.2 miles) or simply to the base and back.
How much of the falls you’ll see depends entirely on when you’re visiting, as Yosemite Falls dries up as summer progresses. If you’re visiting in spring or early summer, you’re good to go. From mid-July and on, though, there isn’t much to see.
If Yosemite Falls is dry, I recommend skipping it and going straight to the next location discussed below and spending that extra time there.
7) Stroll El Cap Meadow (one to two hours)
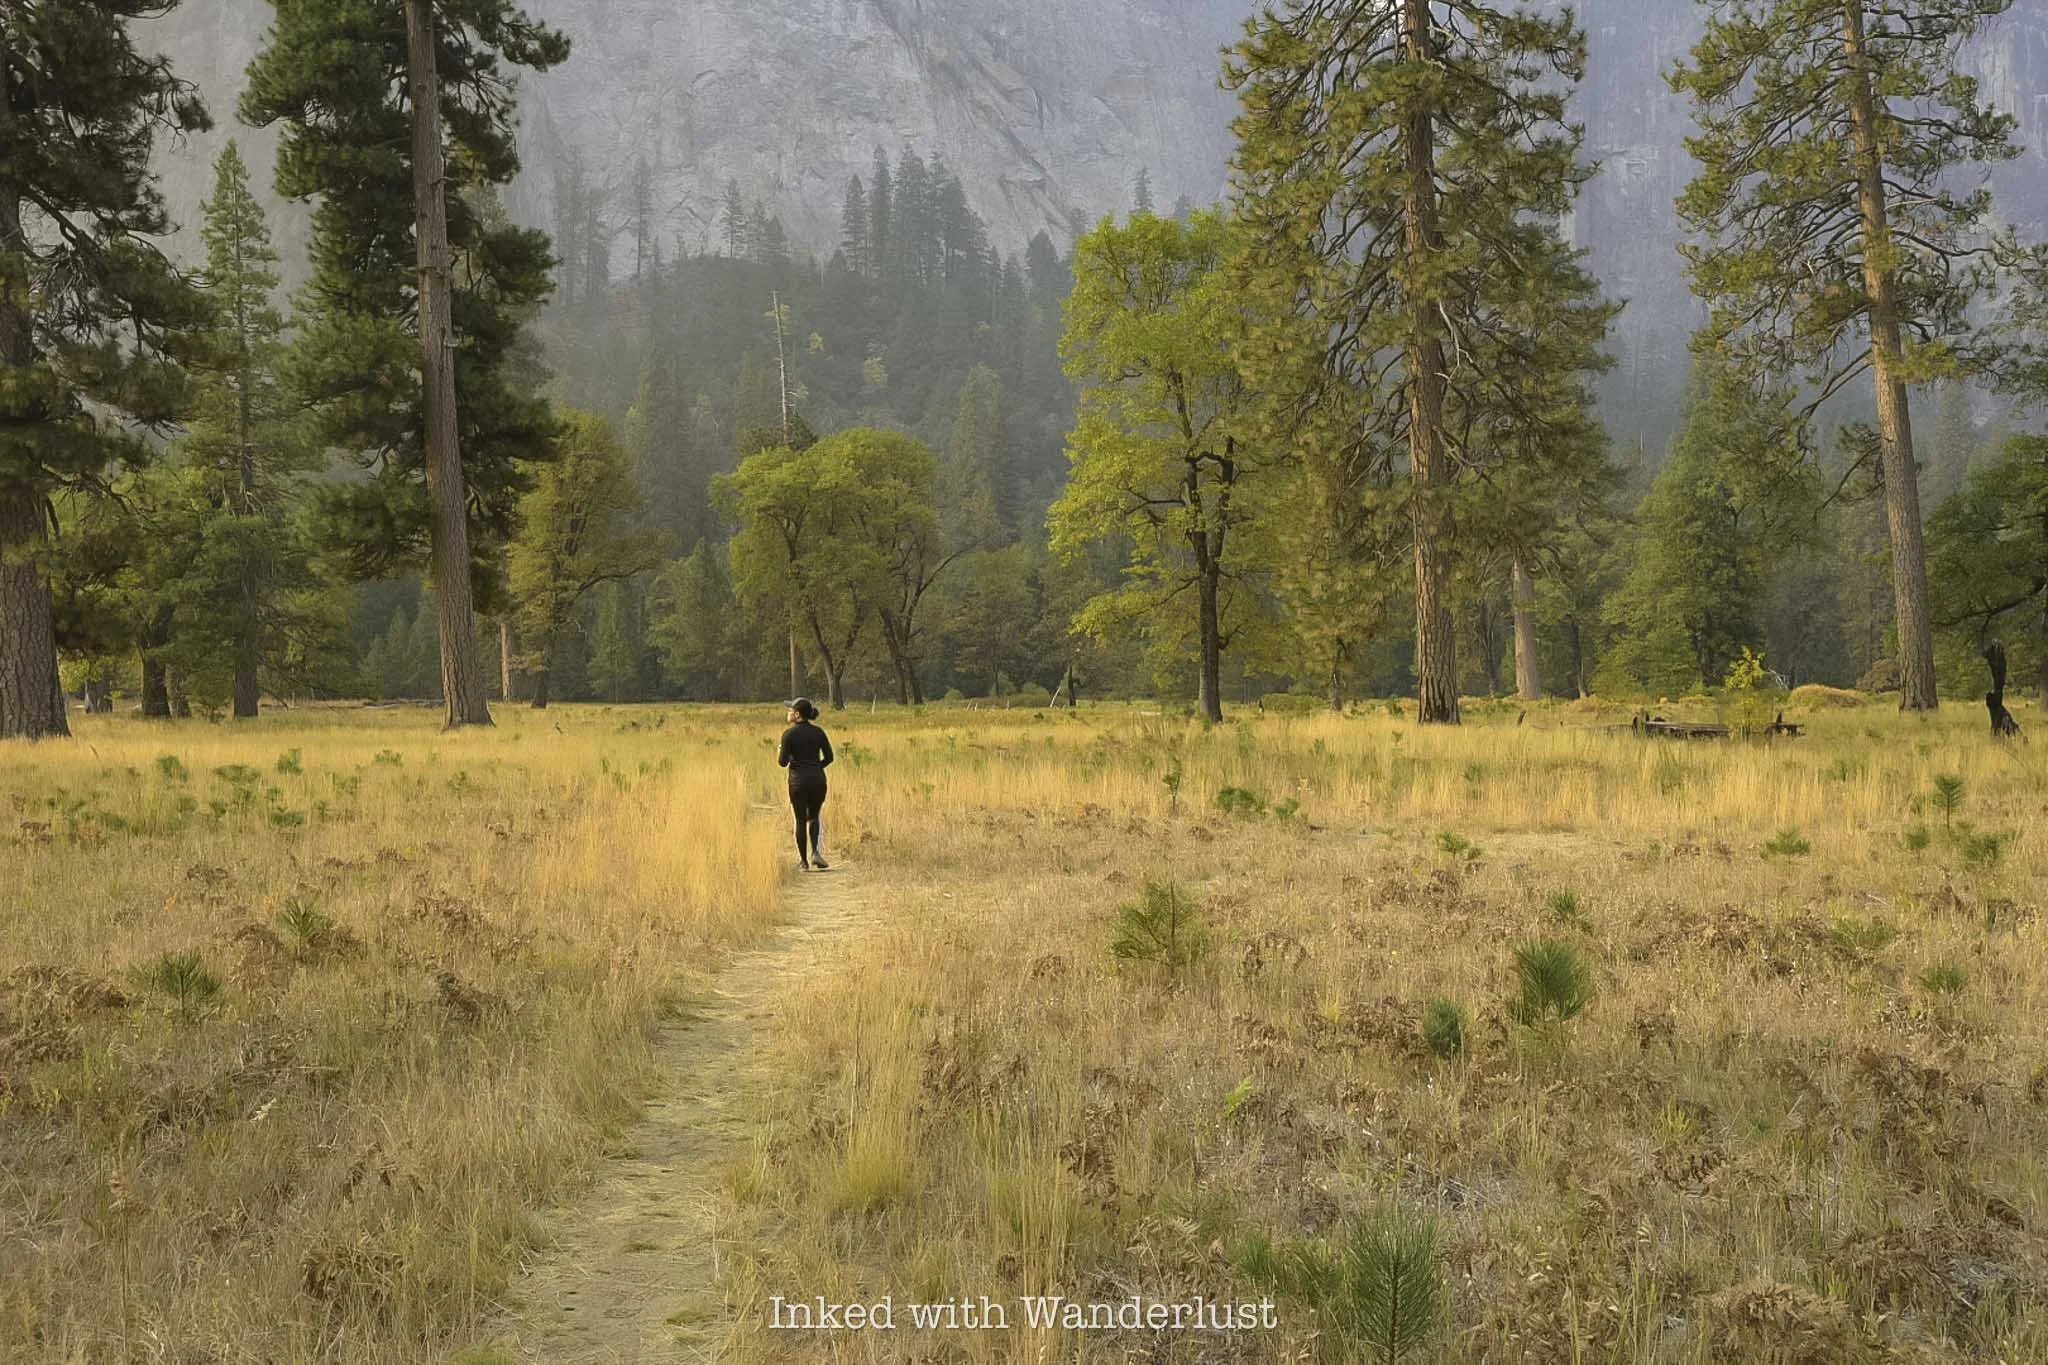
From Lower Yosemite Falls, take the shuttle to stop nine - El Capitan Meadow. Strolling through this gorgeous meadow is an experience like none other. It’s flanked by towering granite formations, including El Cap itself on one side and Cathedral Rocks on the other.
The jaw-dropping views aren’t the only feature of El Cap Meadow. Other activities include observing rock climbers on El Cap, photography, access to Merced River and enjoying a picnic. If you’re running short on time, then take a short stroll through the meadow and take in the sights.
8) Glacier Point (one hour or more)
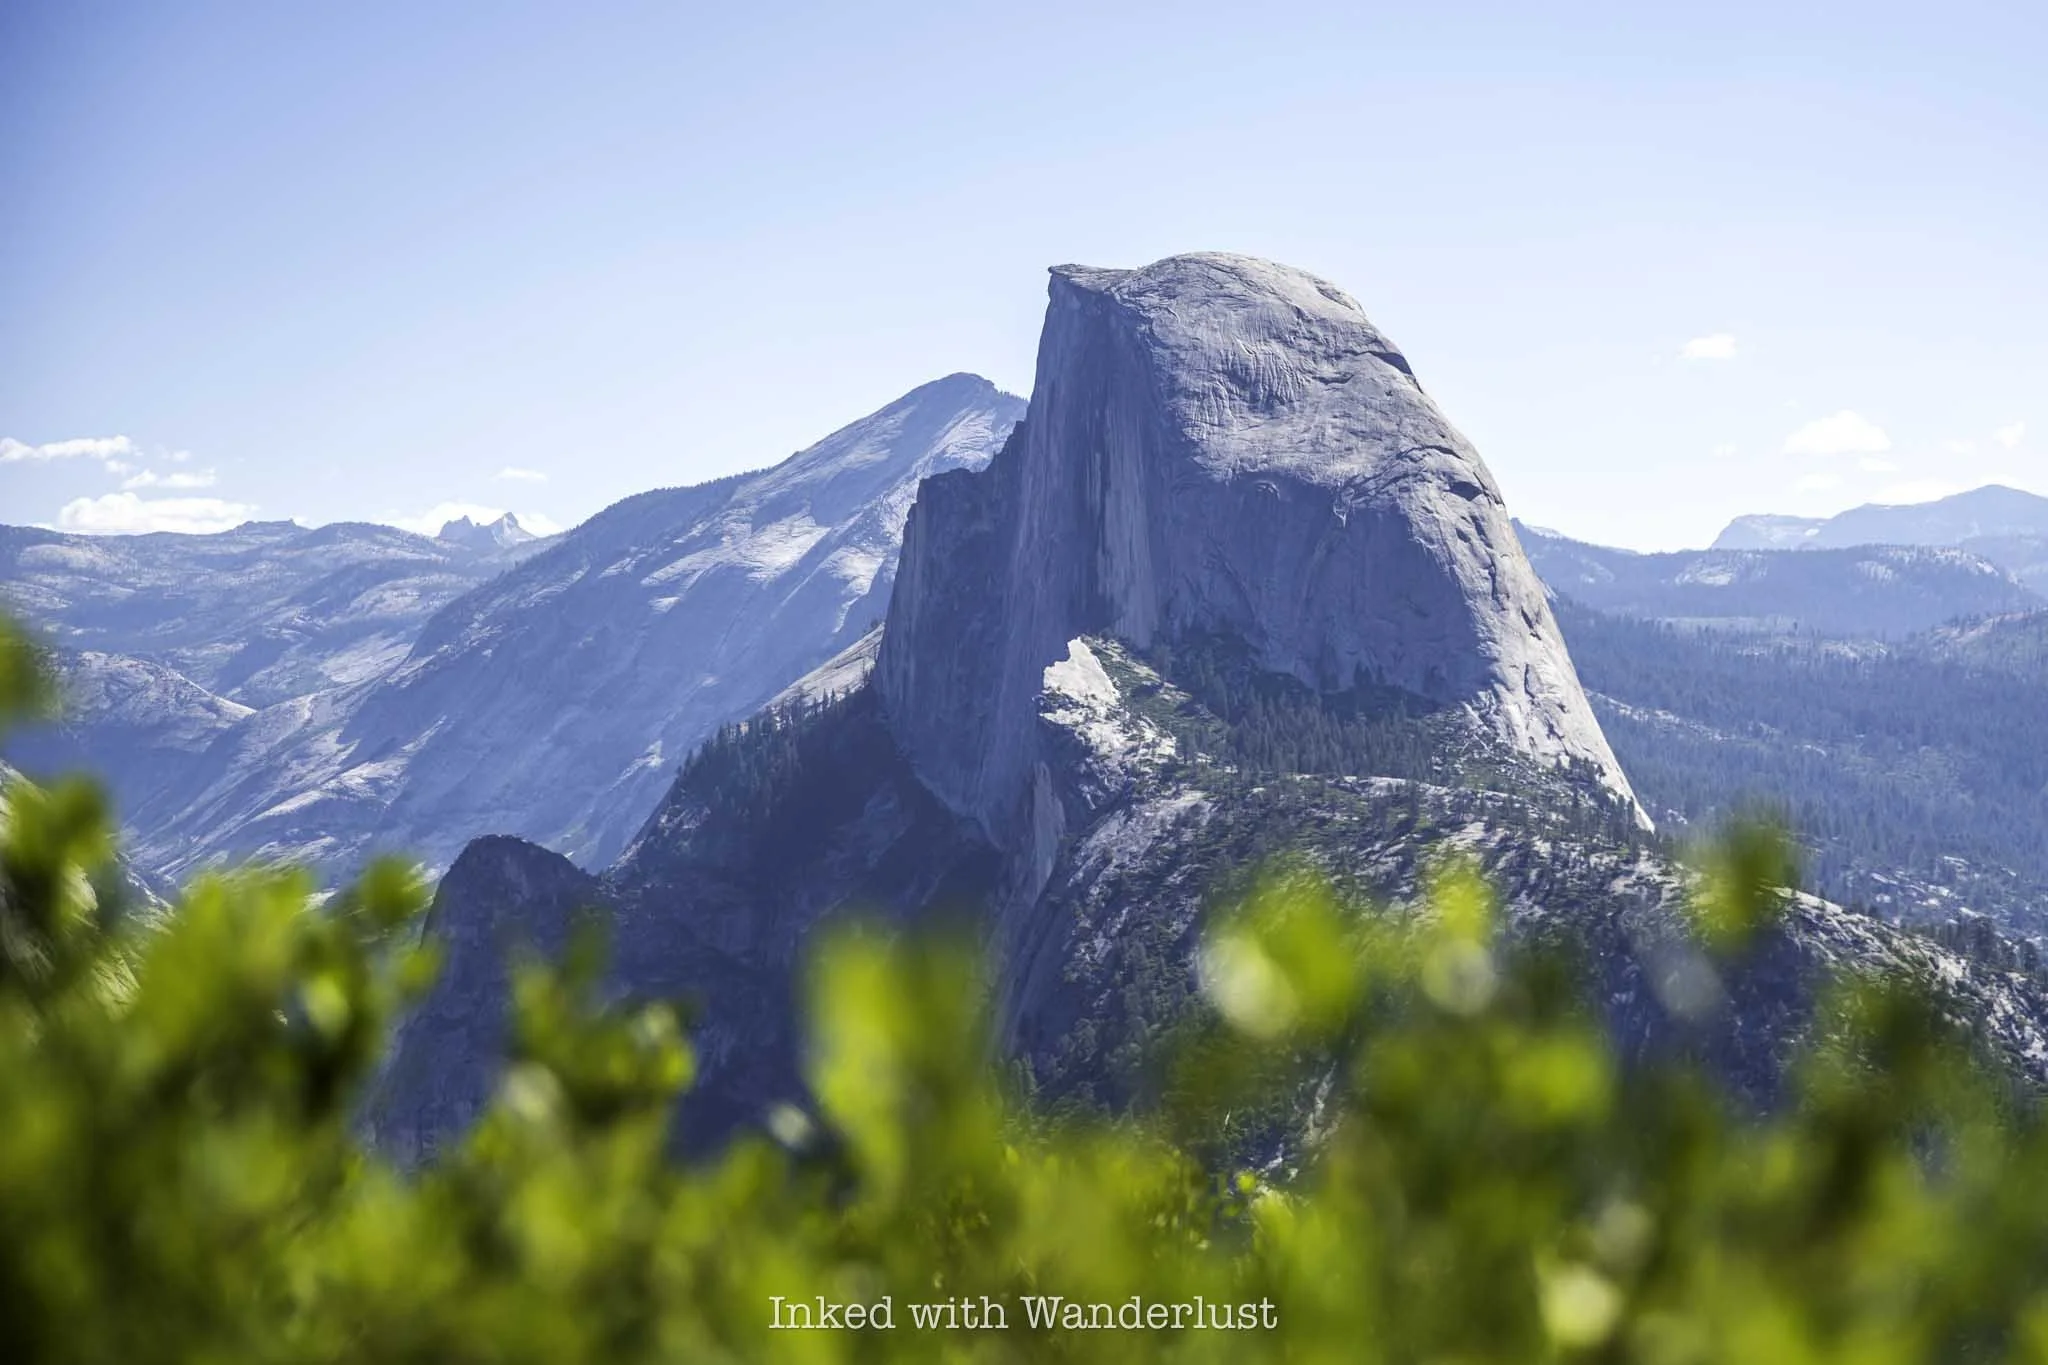
Until this point, you would have spent the majority of your one day in Yosemite in the valley. It’s now time to take a drive to Glacier Point. If you’ve never heard of Glacier Point, it’s one of the most scenic and popular viewpoints in the park.
From Glacier Point, you’ll have a wonderful view of the valley from 3,200 feet above. Yosemite Falls, North Dome, Teneya Canyon, Vernal Fall, Nevada Fall, and Clouds Rest are visible from here. Most notably, the commanding view of the infamous Half Dome is second-to-none.
There is no free shuttle to Glacier Point, though you can book the Glacier Point tour. This tour is seasonal and the final bus leaves at 1:30pm. If this is what you’ll want to do, then you’ll need to adjust this itinerary accordingly.
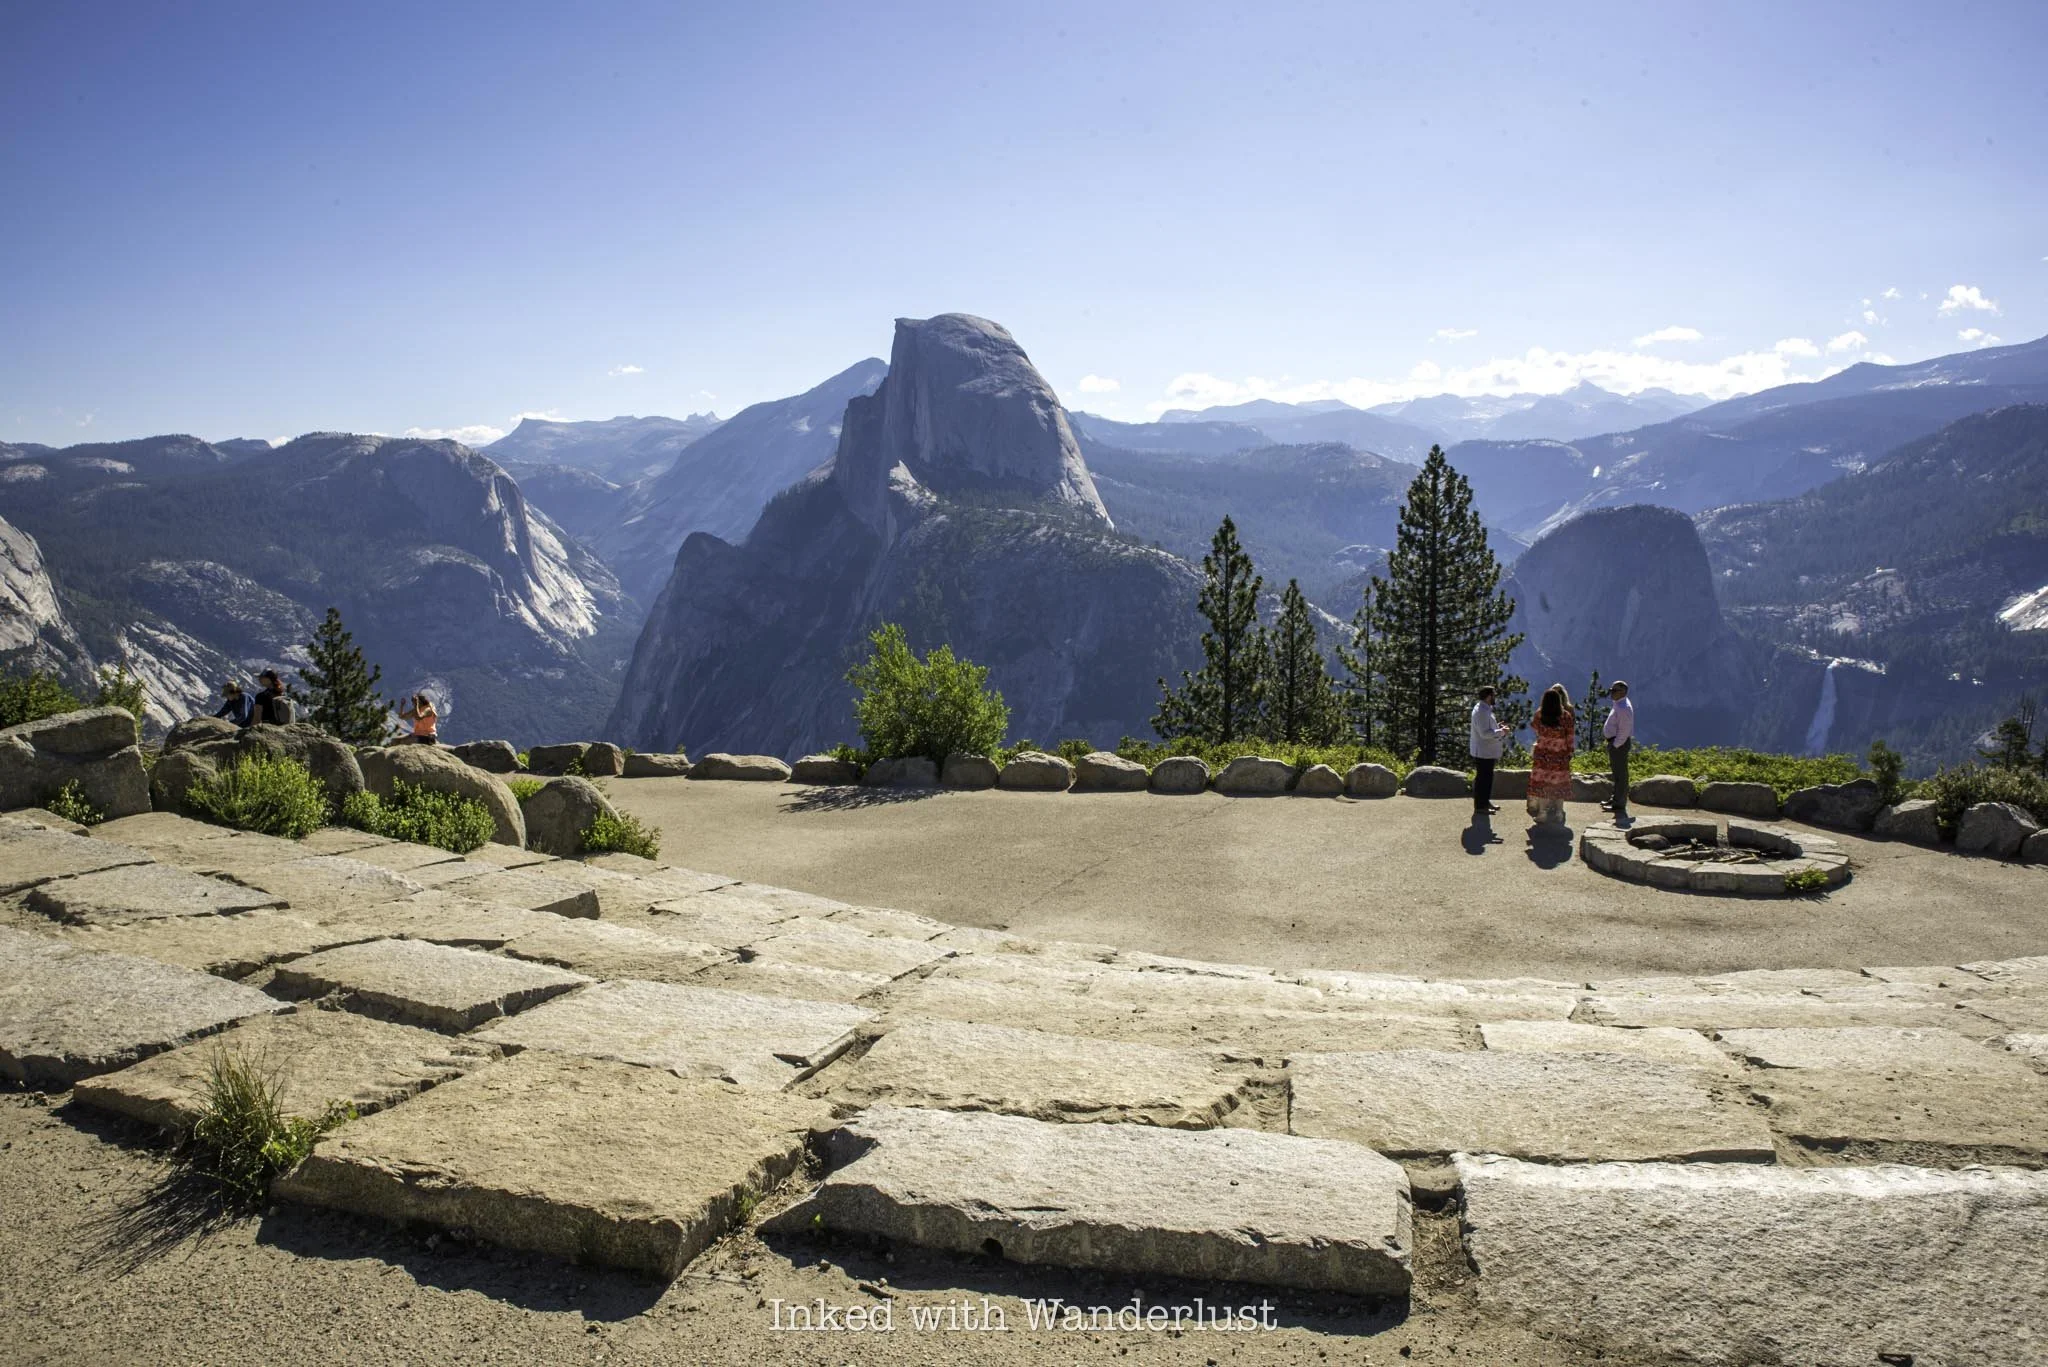
My recommendation is to take your own vehicle. From El Cap Meadow, take the shuttle back to your vehicle at Four Mile Trail. From there, drive down Southside Drive, loop back onto Northside Drive, and then follow the signs to Glacier Road.
Take in the incredible views, check out the historic geologic hut and if you time it right, stick around and witness a jaw-dropping sunset. From here, simply drive back to the valley and on to your hotel or campground.
If you can help it, I implore you to consider spending two days at Yosemite (or even three) as there is so much more to the park than just the valley. Yosemite’s east side is a hikers paradise and Hetch Hetchy, the original valley, is stunning. Thanks for reading!
Did you find this post useful?
If you did, consider leaving a tip through the Buy Me A Coffee button below! Whether it’s $1 or $5, every bit helps offset small travel costs like coffee, water, lunch, parking, or park entry fees. Your support means the world—thank you!


Northern California Waterfall Road Trip Itinerary (6 Waterfalls!!)
The northern half of California is literally teething with one gorgeous waterfall after another. Some, like Burney Falls, are easy to…
Disclosure: This post contains affiliate links. If you make a purchase through these links, I may earn a small commission at no additional cost to you. I only recommend products or services that I believe will add value to my readers.
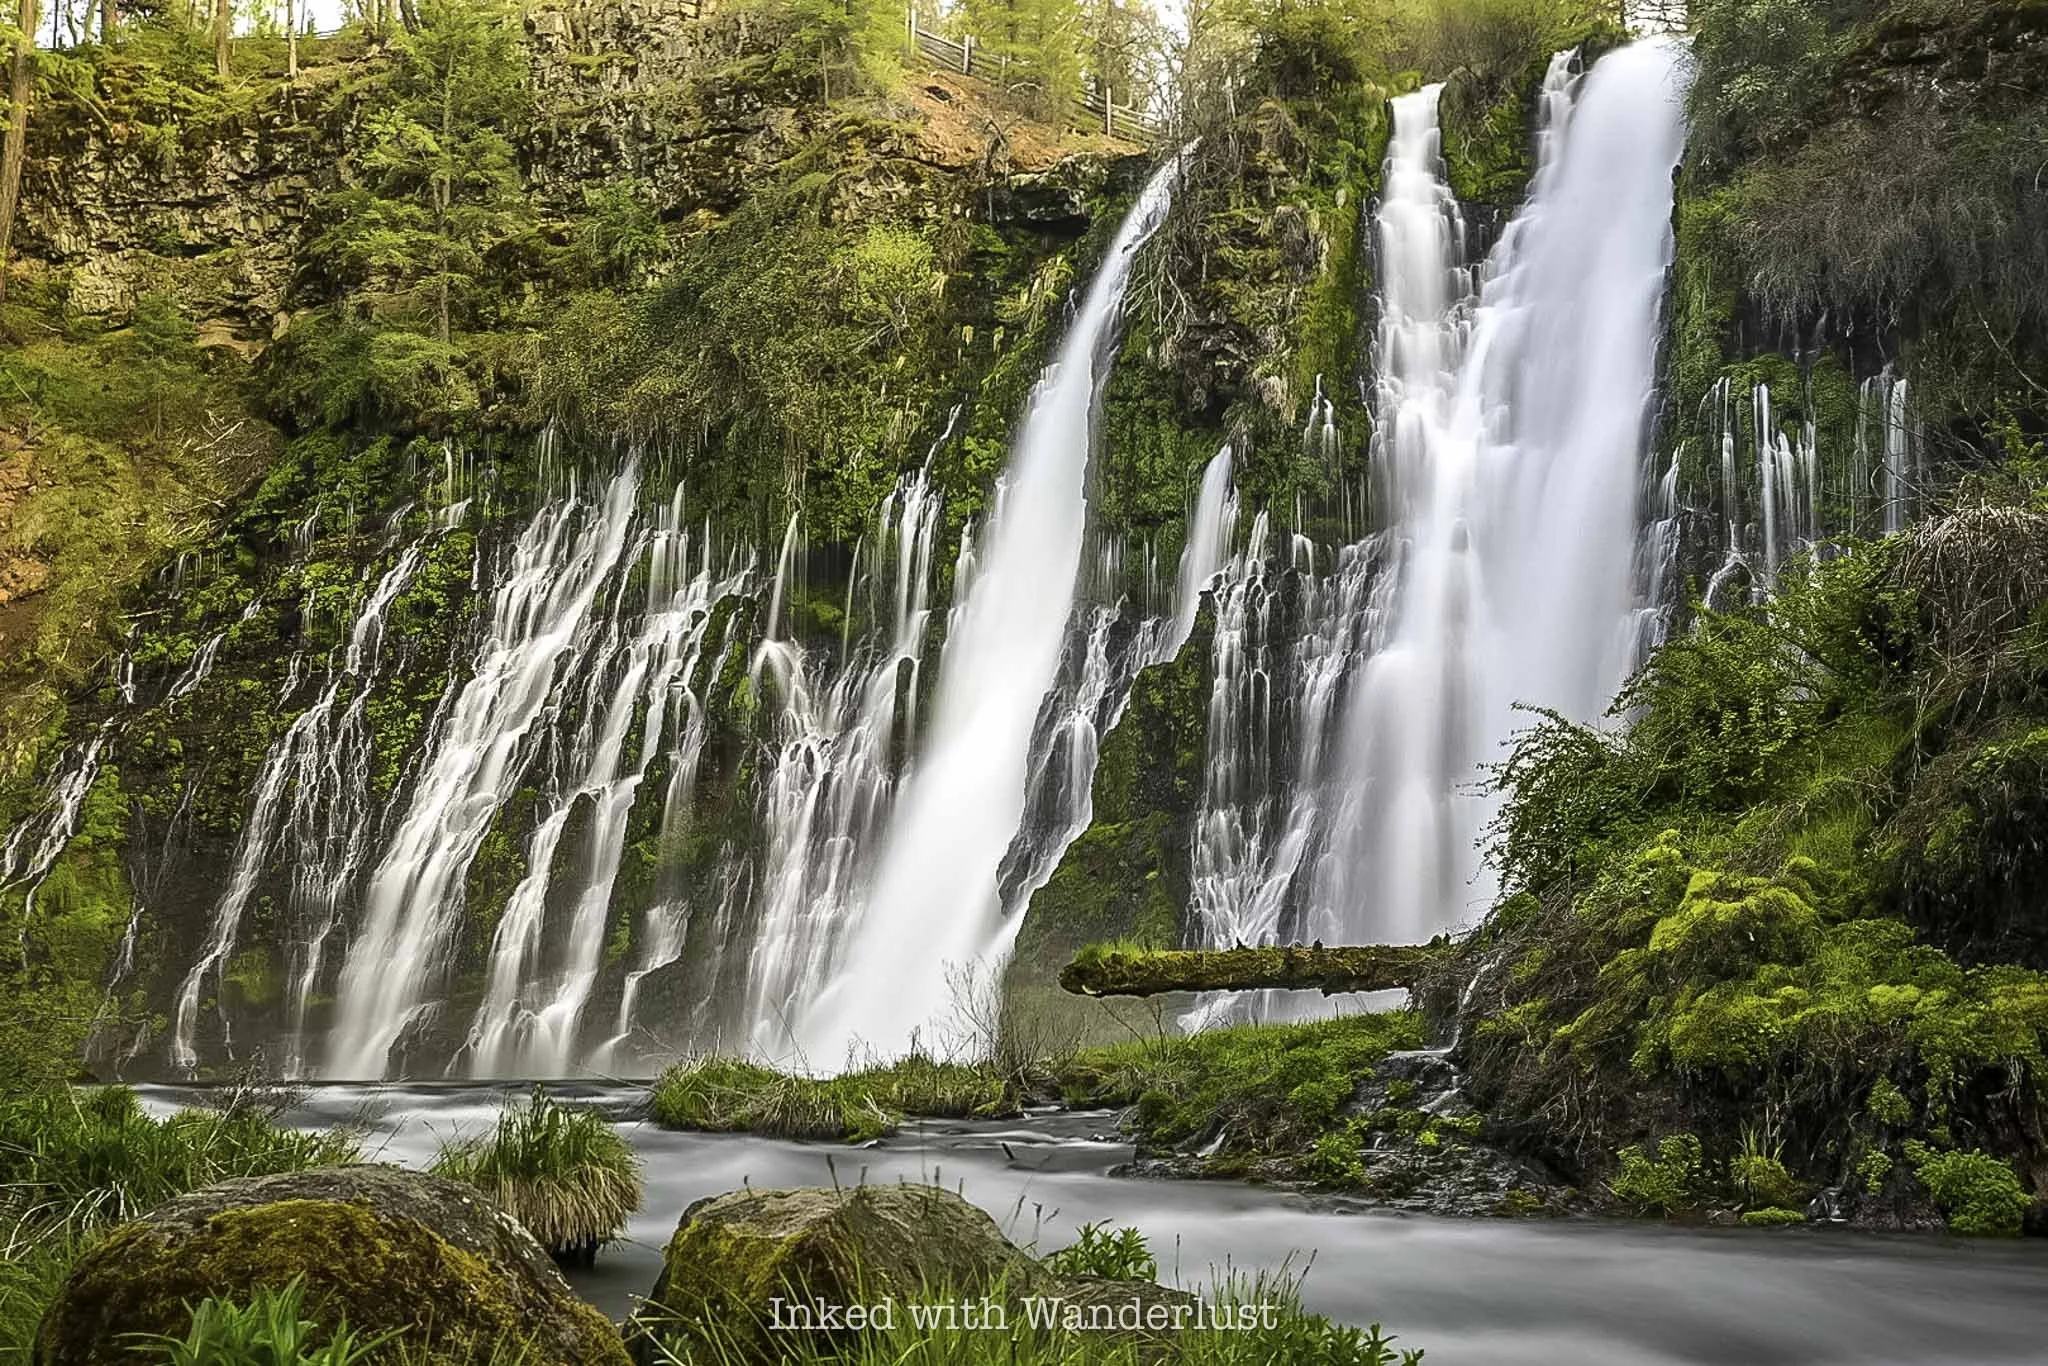
The northern half of California is literally teething with one gorgeous waterfall after another. Some, like Burney Falls, are easy to view as they require little to no effort beyond driving there. Others, such as the upper portion of Yosemite Falls, require extra effort and determination.
The Shasta region, located in the upper sector of California, has many of the former. In fact, between the small mountain towns of Burney and Dunsmuir along a 60-mile stretch of road are six such waterfalls, some of which require nothing more than getting out of your car to see.
If you plan correctly and don’t linger for too long, seeing all six of these waterfalls is entirely doable. I have been to all of these falls, numerous times, and will provide what I believe to be a solid Northern California waterfall road trip itinerary to see them.
Additionally, I’ll provide information about parking, some helpful (from experience) tips, area restaurants, hotel recommendations, and more. Let’s get into it!
Buy me a coffee?
If you found this blog helpful, consider leaving a tip through the Buy Me A Coffee button below! Whether it’s $1 or $5, every bit helps offset small travel costs like coffee, water, lunch, parking, or park entry fees. Your support means the world—thank you!
I Recommend Beginning in Dunsmuir
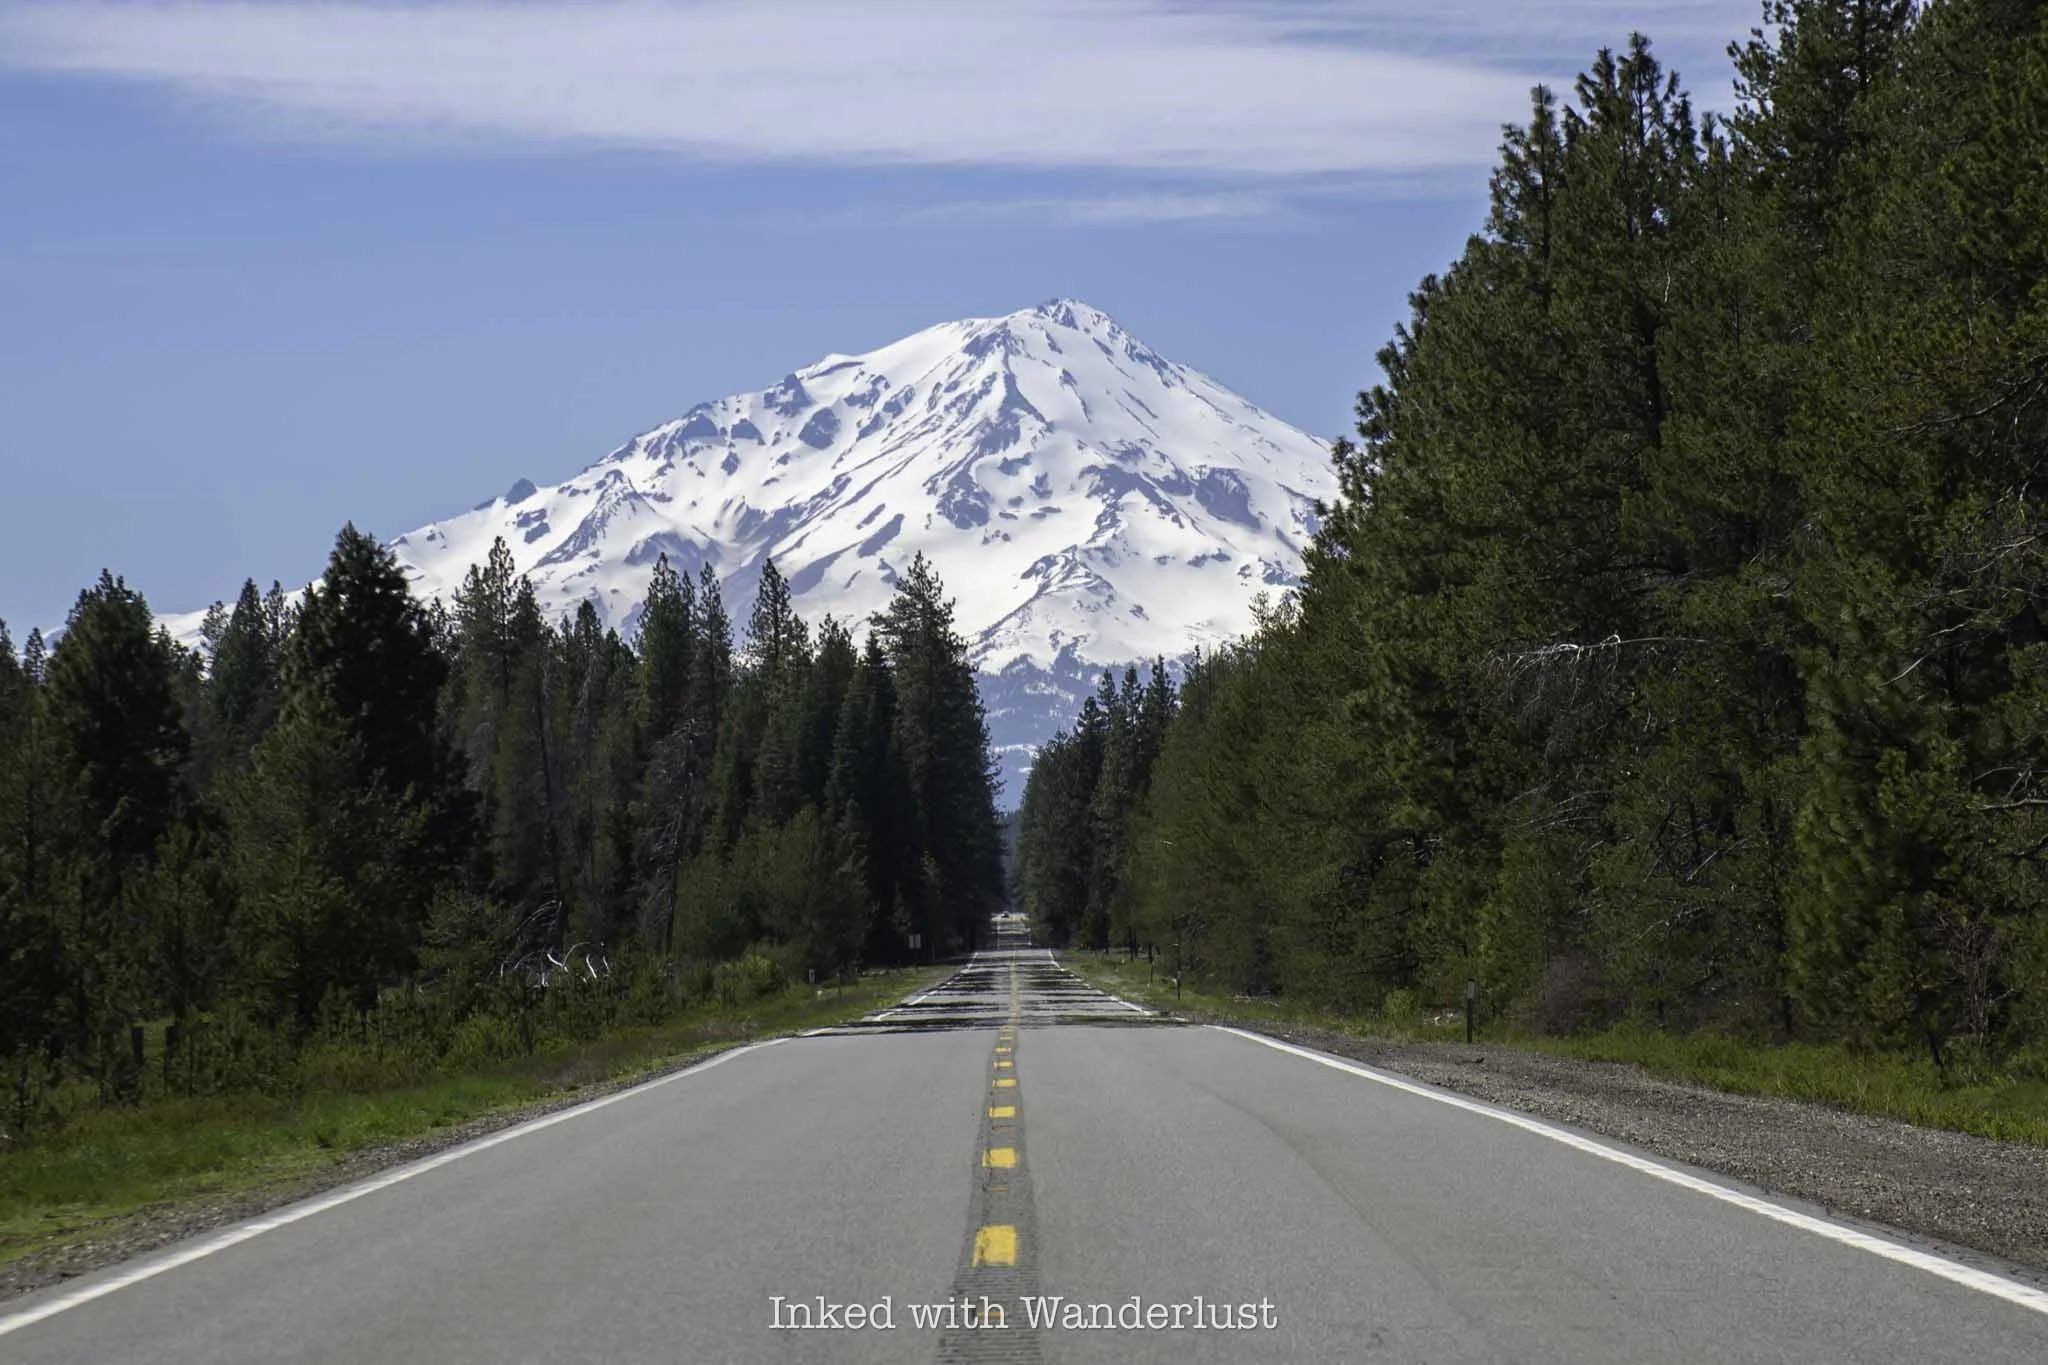
The town of Dunsmuir is located right off of Interstate-5 in the Shasta region of California. It is here where you’ll find the first two waterfalls on this list. One of which requires the most amount of effort of the six to see.
You could also begin in the town of Burney and save Dunsmuir for last if you wish. This itinerary, however, will focus on beginning in Dunsmuir. If you want to begin in Burney, simply hit these waterfalls in the reverse order.
There are numerous hotels and local eateries in Dunsmuir. To start your day, I recommend a breakfast burrito and coffee at Up and Running Espresso. Enjoy your breakfast, secure yourself a parking spot, and head off to your first waterfall of the day.
1) Mossbrea Falls

Admittedly, this one’s a bit tricky. It’s fairly easy to get to, but you’ll need to be ok with a little trespassing to see it. Mossbrea Falls itself isn’t the issue, it’s the route you’ll need to take that traverses across private property.
I wrote an extensive guide with step-by-step instructions on how to get to Mossbrea Falls. Additionally, it’s full of helpful tips, advice, and picture references to ensure a smooth experience.
You’ll need to walk through a private retreat and then along railroad tracks (Union Pacific property) for about a mile to reach the falls. Both property owners have relaxed their stance on hikers going through their property, as I had no issues at all when I went.
Mossbrea Falls is easily one of the most beautiful waterfalls I’ve ever seen. It’s almost like stepping into the pages of a fairytale novel. Trust me, it’s worth the effort. If you knock this one out first thing in the morning, you should be able to complete it in two hours or less.
When you’re done, and if it’s open, consider stopping for lunch at nearby Yaks on the 5 restaurant. It’s right down the street from Mossbrea and serves can’t-miss, delicious artisan burgers.
READ ALSO: “The Ultimate Guide to Mossbrea Falls in Dunsmuir”
2) Hedge Creek Falls

From where you parked for Mossbrea Falls, head north on Dunsmuir Avenue or on Interstate 5 to Hedge Creek Falls. As you get closer, you’ll see signs indicating which exit to take and where to park.
From the small pull out-style lot, it’s a short jaunt down to the relatively small, but nonetheless beautiful fall. This single flow fall flows 35-feet over a dramatic basalt shelf with towering pines and other greenery abound.
A unique aspect to Hedge Creek Falls is you’re able to walk behind it, offering a unique perspective. This is the only fall on this list where you can do that, which helps it to stand out.
READ ALSO: “Hedge Creek Falls: A Short Hike to an Incredible Waterfall”
3) Upper McCloud Fall

To reach your next destination, you’ll head east on CA-89 towards to the historic town of McCloud. More specifically, McCloud River Falls. From Hedge Creek Falls, it’ll take roughly 25 minutes of drive time to reach the upper fall.
There, you’ll find three incredible waterfalls along a single 3.9-mile (out and back) trail. However, you likely won’t have time to hike it and still make it to the final waterfall. Instead, drive to each one as they all have their own lots and viewing areas.
I suggest beginning at Upper McCloud Falls. You can see it fairly well from the viewing decks but for a better view, head a bit further down the trail to an unmarked spur trail. Shortly after the concrete ends, you’ll see said unmarked spur trail on your left.
Take your time as it’s a bit sketchy. From the bottom, you’ll get an incredible “head-on” view of the fall and can access the pool if you want to swim. I do recommend saving that for the middle and/or lower falls, though.
4) Middle McCloud Fall
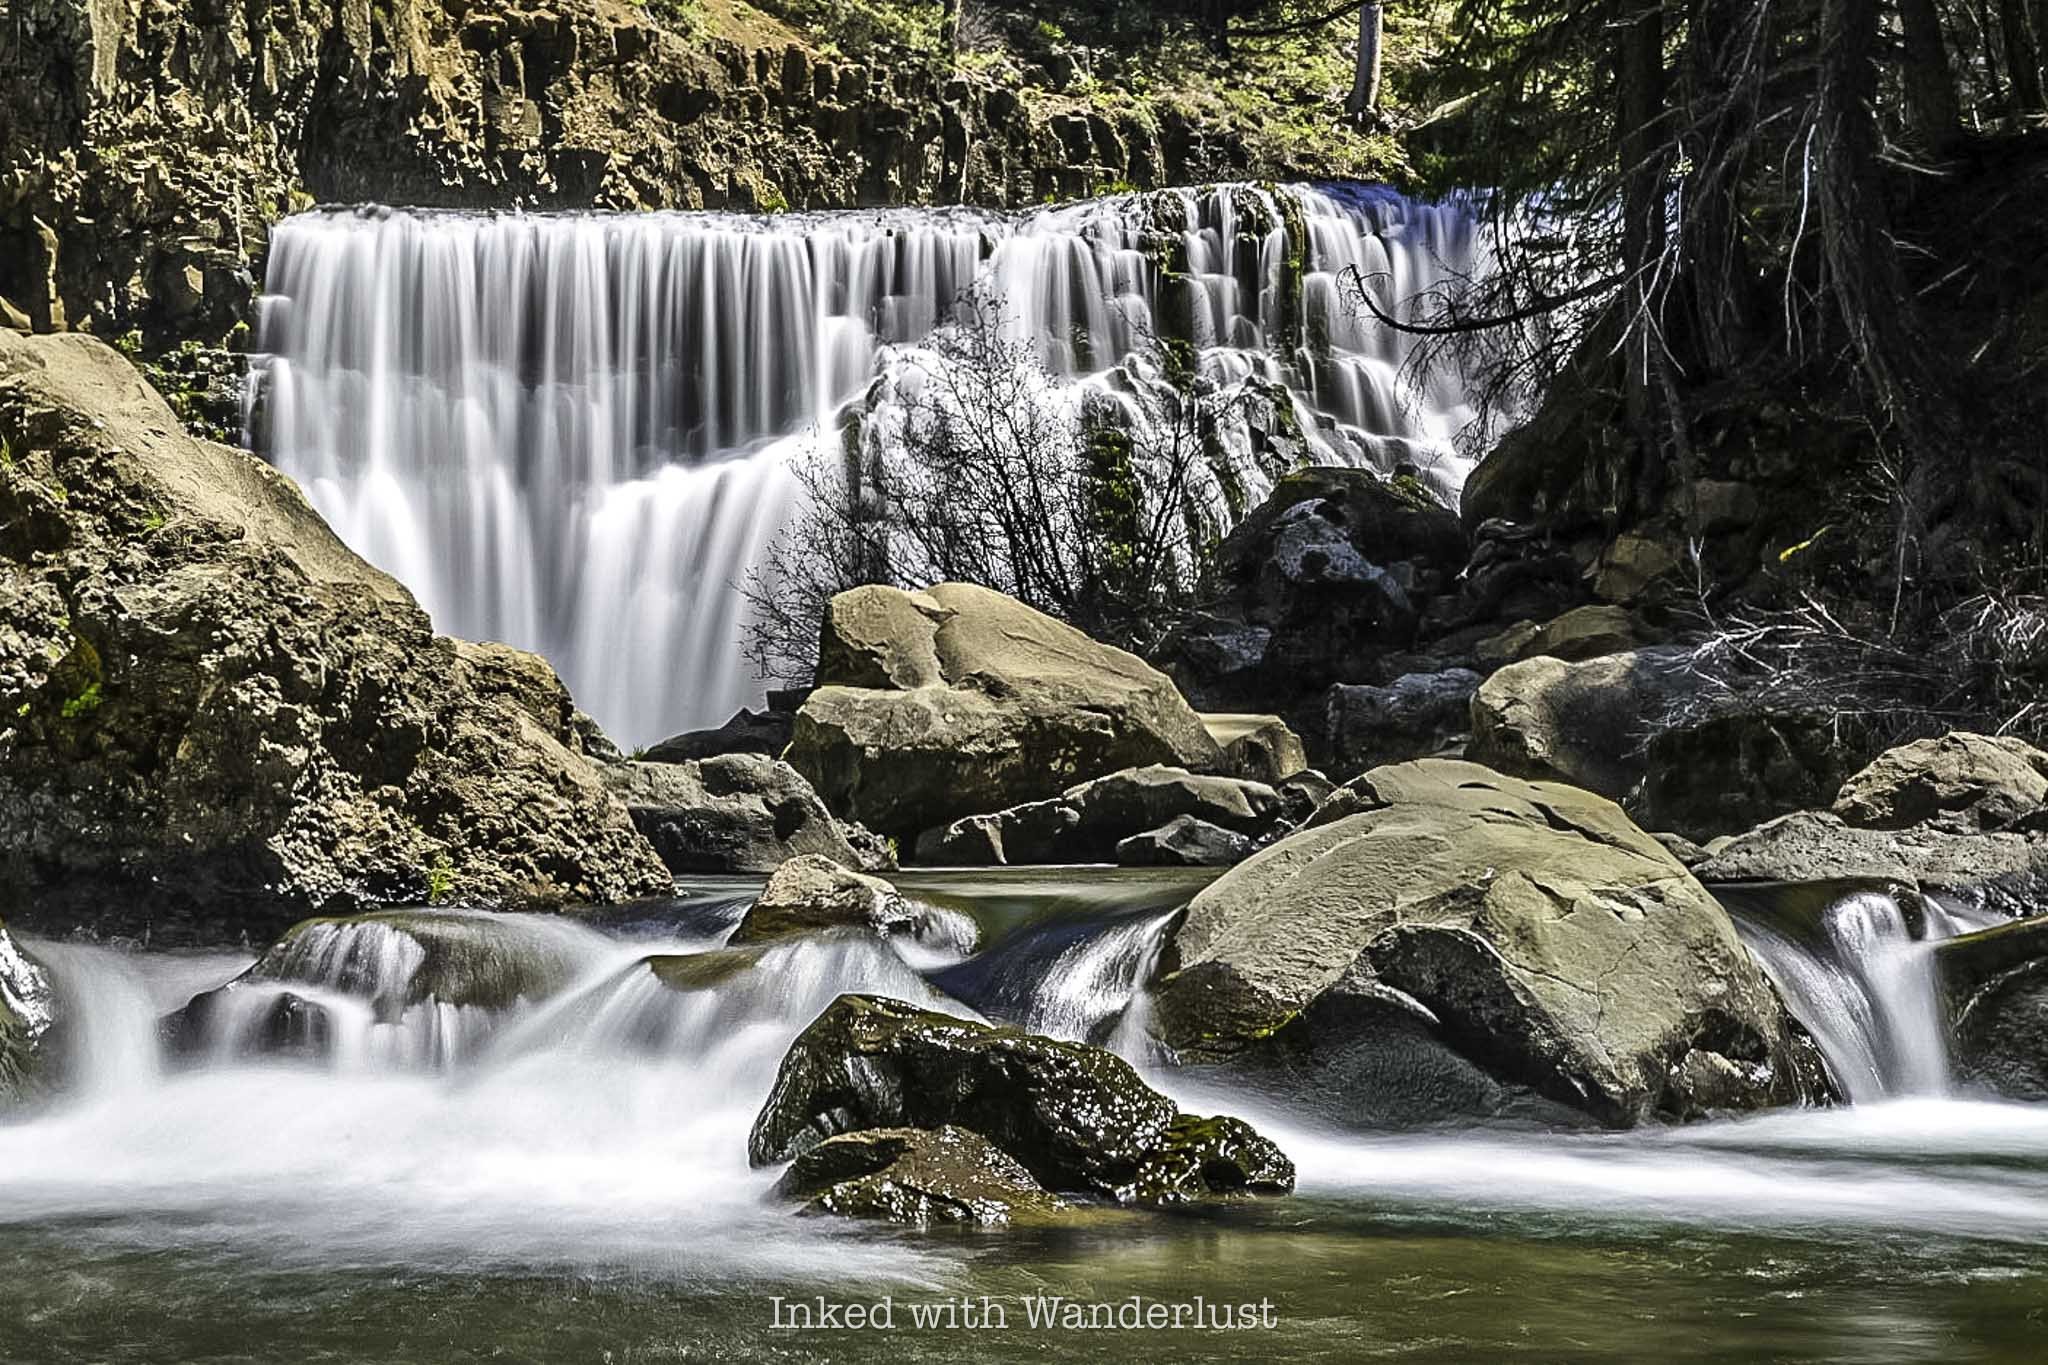
After checking out the upper fall, you’ll next head to Middle McCloud Fall. The middle fall is the largest and, in my opinion, most picturesque of the three. It also has a large and deep pool at the base.
However, it’s also the one that requires the most effort to see, provided you want to see it from its base. There are a couple of viewing platforms just steps from the parking lot if you’re ok with seeing it from afar.
To get to the base, you’ll hike the fourth of a mile (one-way) dirt trail to the bottom. Getting there is easy, but it’ll be an uphill slog on the way out. It’s not difficult at all, but be prepared for it.
I encourage you to take a dip in the pool down there. It’s a great way to cool off on a hot summer day and you won’t find a better view. Many folks cliff jump here as well, but I would check for underwater boulders before doing so.
READ ALSO: “How to Hike to the Base of Middle McCloud Falls”
5) Lower McCloud Fall

Next, head further down the road to Lower McCloud Fall. This 12 foot singular fall plunges into a bowl-shaped pool surrounded by basalt rock walls. It’s the most popular (for obvious reasons) for swimming out of the three.
There is no steep trail to take and you won’t need to go down a sketchy spur trail to reach it either, as it’s mere feet from the parking lot. If you skipped swimming at the middle fall, definitely don’t skip it here.
If you want to want to hike the entire trail, I recommend starting here as opposed to the upper fall. You’ll get the initial climb done on your way in, when you have the most energy. The way back will be a breeze as it’ll be all downhill.
READ MORE: “McCloud River Falls: Three Fantastic Waterfalls in One Hike”
6) Burney Falls

Your final waterfall on your Northern California waterfall road trip is the awe-inspiring Burney Falls. If you’ve never been to Burney Falls, you’re in for a treat. It’s largely fed by Burney Creek, but also by underground rivers that flow outward through the large basalt wall.
You can view Burney from above at the accessible (and paved) viewing deck but for the full experience, head down the short path to its base and pool. It’s a sight you can only truly appreciate in person.
Burney Falls does get crowded during the day, which is why I recommend saving it for last and getting there in the late afternoon or closer to sunset. That’s what I do whenever I visit and I almost always have it to myself or I’m sharing it with just a few others.
On the way to Burney Falls from McCloud Falls, you’ll pass the location of the infamous scene from the movie “Stand by Me” where the boys ran for their lives across a bridge from an oncoming train. It’s still there if you want to check it out this piece of Hollywood history.
As stated earlier, to do this in the reverse order, go to Burney Falls in the morning. From there, stop at the three McCloud Falls. Then, drive to Dunsmuir and knock out Hedge Creek Falls before concluding at Mossbrea Falls.
If you’re planning to stay near Burney Falls, I recommend Shasta Pines Motel in the town of Burney. It’s a no-frills motel with little in the way of amenities, but it’s clean and affordable with comfortable bedding. From Burney, you can check out Subway Cave, Lassen-Volcanic National Park, and more!
READ MORE: “McArthur-Burney Falls State Park Ultimate Guide”
Buy me a coffee?
If you found this blog helpful, consider leaving a tip through the Buy Me A Coffee button below! Whether it’s $1 or $5, every bit helps offset small travel costs like coffee, water, lunch, parking, or park entry fees. Your support means the world—thank you!
PROVERBS 16:9

The Getaway Cafe: An Excellent Breakfast Option Near South Lake Tahoe
Located about 18 minutes (drive) from the Heavenly Village area of South Lake Tahoe, in the tiny community of Meyers, sits…
Disclaimer: I am not a professional restaurant critic and I paid for my meal out of pocket. This restaurant hasn’t offered me any incentive to write this post. My opinions are my own and are based on my personal experience only.

Located about 18 minutes (drive) from the Heavenly Village area of South Lake Tahoe, in the tiny community of Meyers, sits the charming Getaway Cafe. Getaway Cafe offers an array of breakfast and lunch classics, always made fresh to order.
Restauranteur Diane Guth states on the website that she’s “always dreamed of owning a restaurant where my friends and family would feel at home and where strangers would soon become friends”. Based on my experience, she surely made that dream a reality.
I love dining at Getaway Cafe. Each time I go I’m treated to delicious food, along with fantastic and attentive service. Sure, it’s a bit out of the way from South Lake proper, but it’s worth the small effort to get there. Let’s get into it!
Getaway Cafe Location
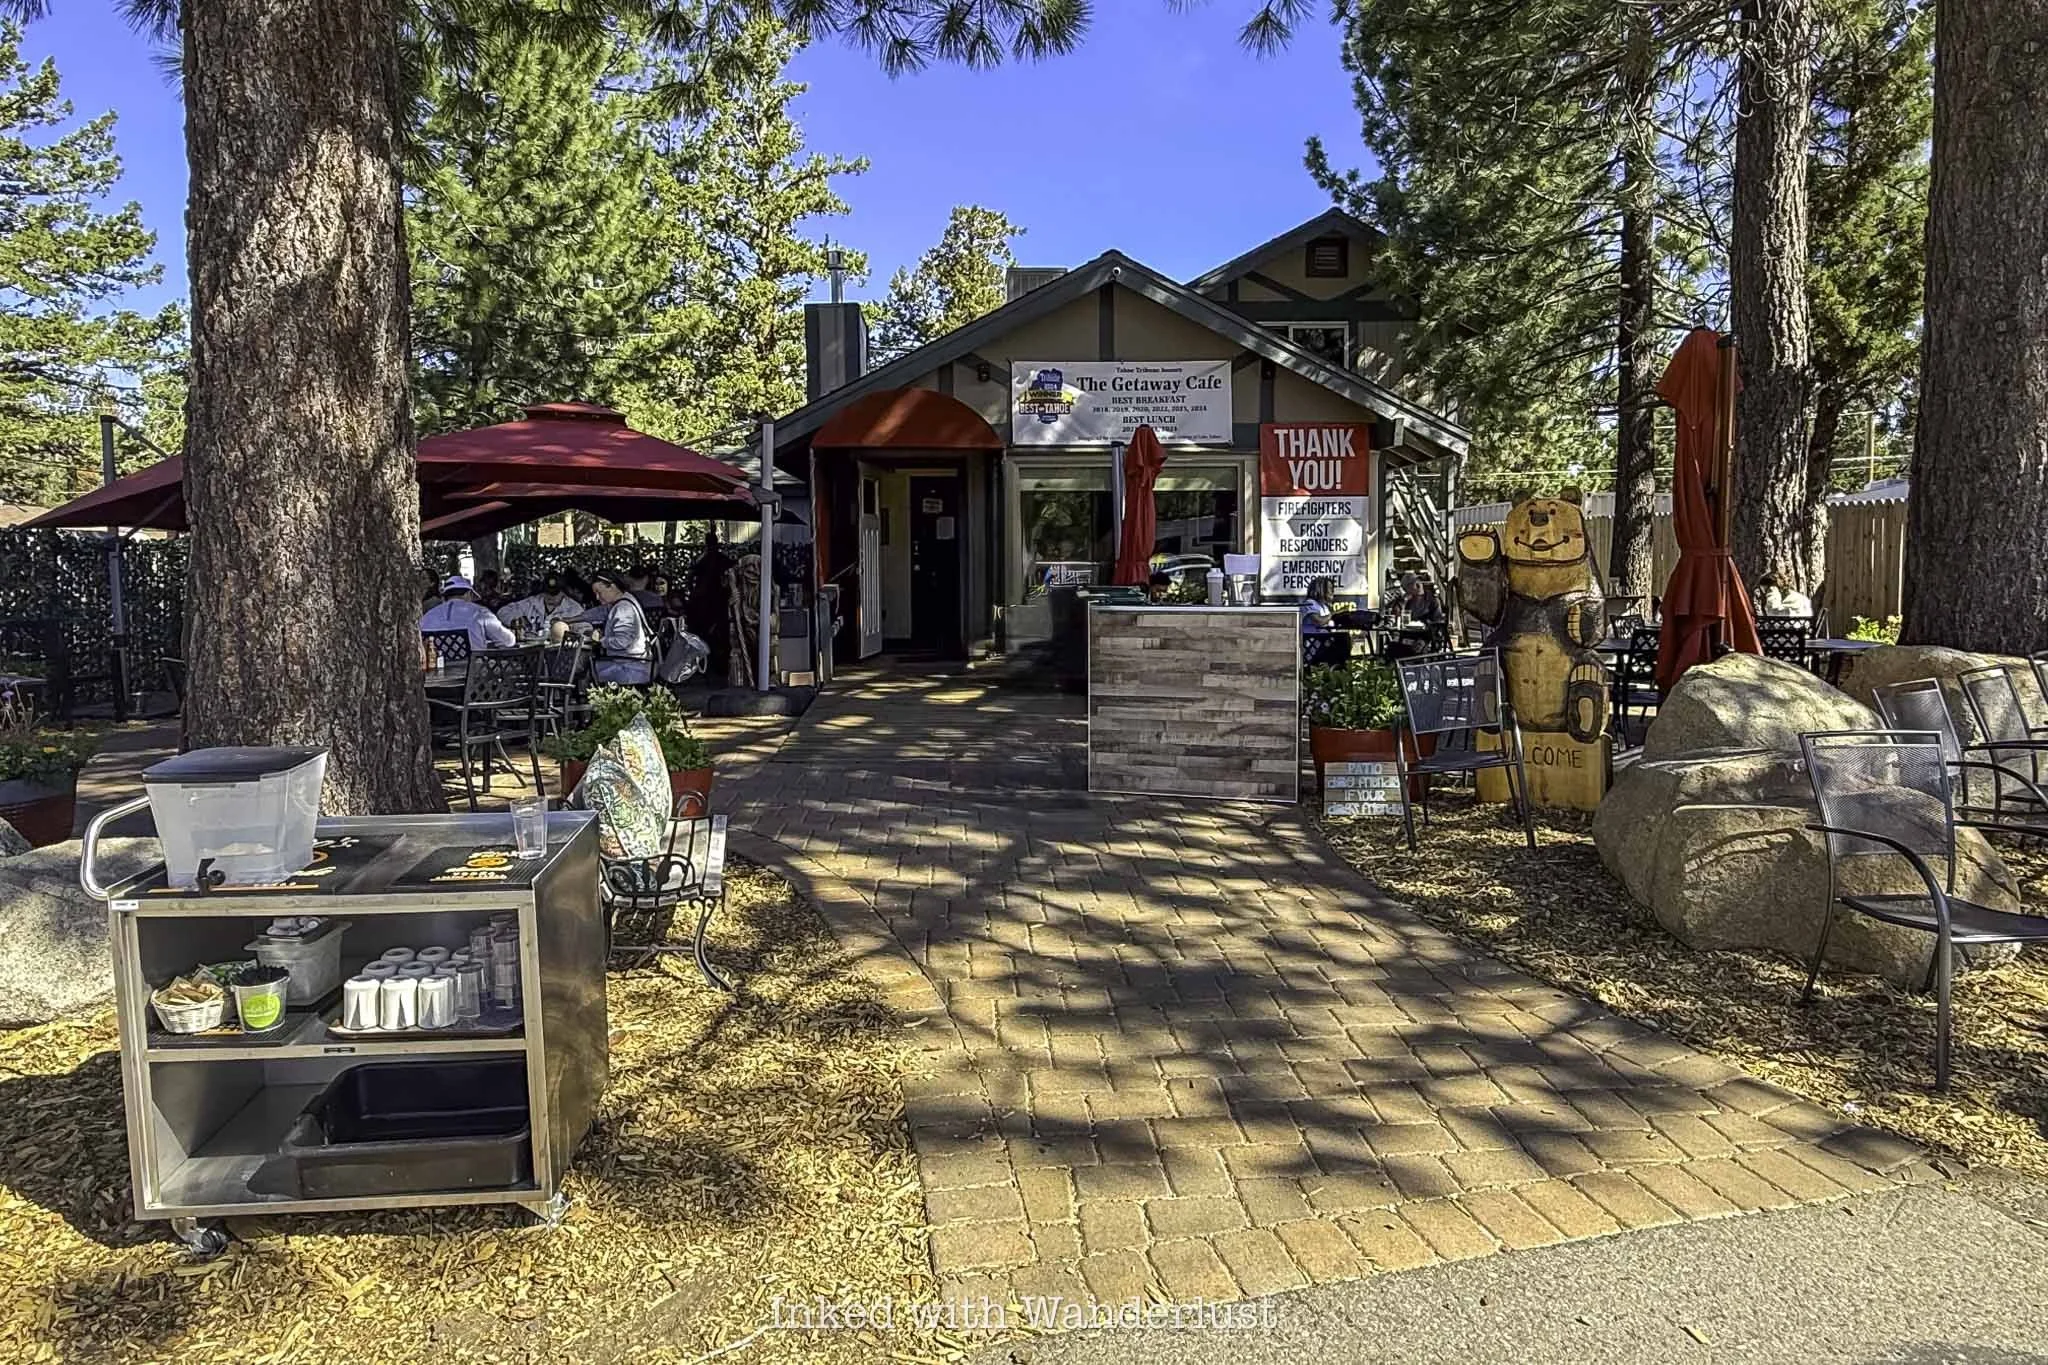
Despite popular belief, Getaway Cafe isn’t located in South Lake Tahoe proper. It’s located nearby in the tiny El Dorado County community of Meyers. Despite this, it’s an easy, relatively quick drive from South Lake. Below is its distance from more popular areas of Lake Tahoe proper:
Heavenly Village: 9 miles
Stateline: 10 miles
Emerald Bay: 11 miles
Tahoe East Shore: 32 miles
North Lake area: 32 miles*
You may be inclined to skip it due to its distance from the lake but I implore you to reconsider. There’s only one or two turns, as it’s mostly a straight shot (depending where you’re driving from).

Parking is usually easy to come by in the large dirt/gravel lot out front. It does get busier throughout the day, so be prepared to have to park elsewhere nearby and walk over (this isn’t a common occurrence, though).
Seating is both indoor and outdoor (mostly covered). The inside is small, so I recommend opting for a seat outside if given the choice. There, you’ll be dining under shade provided from a combination of umbrellas and towering pines.
The Getaway Cafe Menu Items I Tried
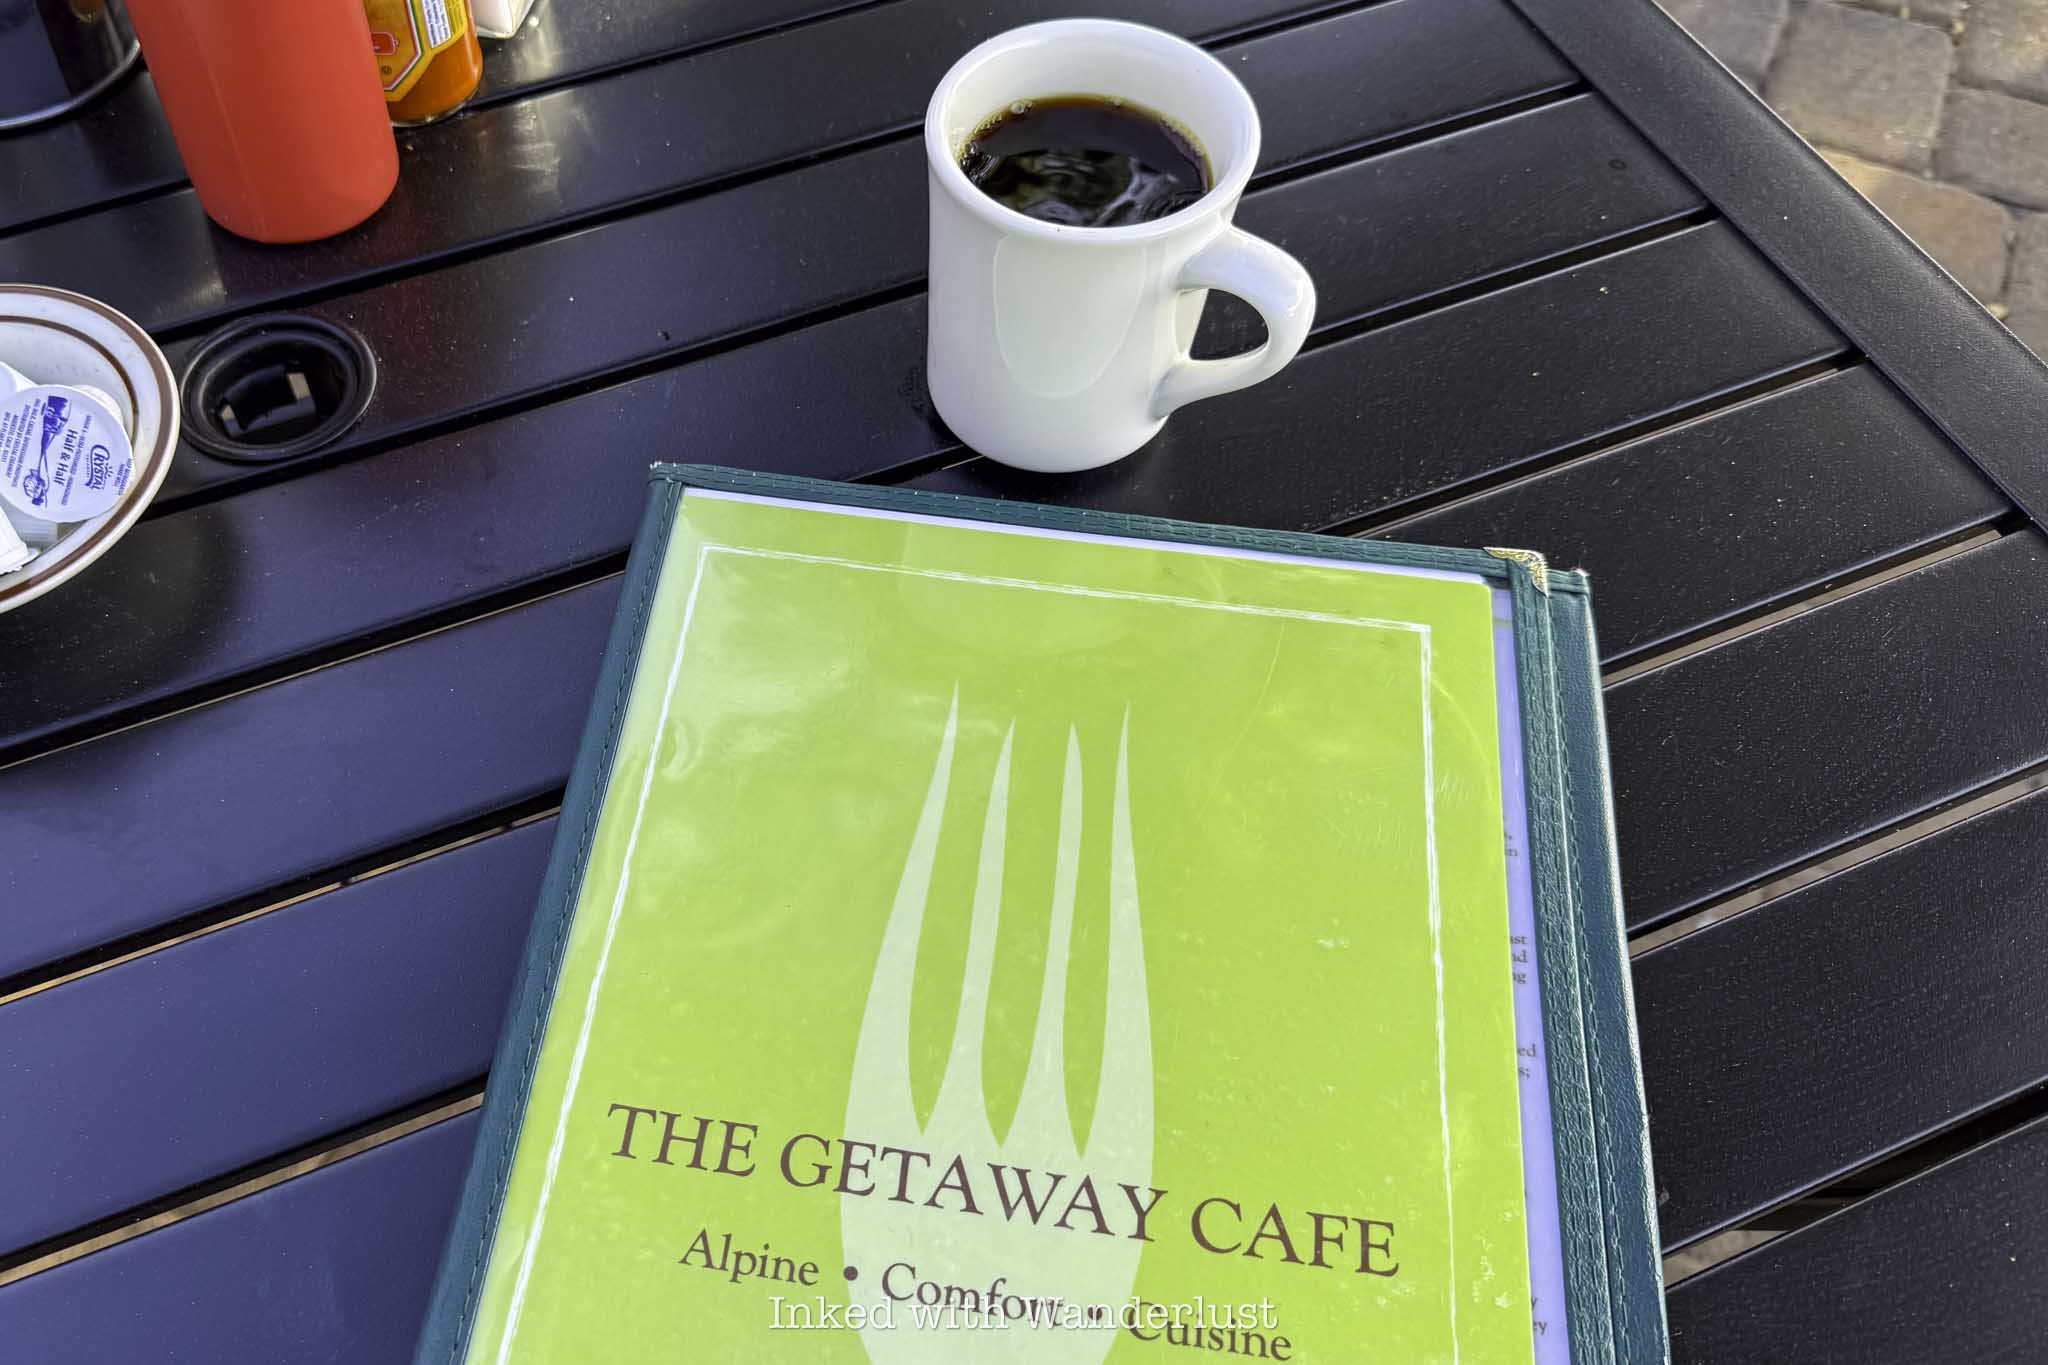
Getaway Cafe’s menu consists of common American and Mexican fare, some with a creative twist and at affordable/fair prices. The “Best of the Best” section of their menu lists many of the house favorites.
A few of these include Maple Bacon Glazed French Toast (amazing, by the way), Chorizo Quesadilla, Deluxe Eggs Benedict, and Banana Nut Pancakes dishes. For lunch, you’ll find an array of burgers, wraps, and salad offerings.
On our most recent visit, my wife and I ordered from the regular menu. Additionally, we split a plate of their current special, which was a lemon-blueberry french toast dish. Yes, it was as delicious as it sounds and looks.

It was a serving of their signature french toast bread topped with lemon slices, blueberry compote, a lemon-blueberry meringue (for transparency, I’m not 100% sure that it’s a meringue), and finished with a dusting of powdered sugar.
It was possibly the most delicious french toast I’ve ever had. The lemon and blueberry flavors were balanced perfectly, and the nutty richness from the sourdough toast was a nice contrast to the sweetness of the blueberry.

From the regular menu, my wife ordered the classic eggs benedict dish and I selected an egg omelet with pepper-jack cheese. Both dishes came with a side of hashbrowns (there are other options) and mine came with slices of sourdough.
While simple in terms of presentation, the hashbrowns here are my favorite of any restaurant. There isn’t anything inherently special about them, but the chefs at Getaway always seem to get the exterior perfectly crisp, which is where others often fail.
The eggs benedict was rich, creamy, and had a nice balance of soft texture and savory flavor. My omelet was…an omelet. I ordered it mainly for the protein as the real star of the meal was that decadent french toast.


All told, The Getaway Cafe is an excellent option for breakfast or lunch while in South Lake Tahoe. Sure, there are a few other, much closer options, such as Red Hut Cafe and Driftwood Cafe, that are also great.
However, Getaway Cafe is the clear stand-out for my wife and I. The owner and staff, with their friendliness and attentive service, is what sets it apart from the others. I highly recommend paying them a visit.
If you’re planning to visit Lake Tahoe, I have blog post guides about many of the most popular destinations. Be sure to read about Emerald Bay, the Tahoe East Shore Trail, and Glen Alpine Falls.
If you’re wanting to spend a day at the beach, read about Sand Harbor’s reservation requirements here, or consider spending the day at Round Hill Pines Beach Resort. You can’t go wrong with either one.
LUKE 4:10

My Honest Review of Lum Hotel Los Angeles: Close to SoFi Stadium
My wife and I found ourselves returning to Sofi Stadium in Los Angeles for the opening night of Beyonce’s Cowboy Carter tour. We…
Disclosure: This post contains affiliate links. If you make a purchase through these links, I may earn a small commission at no additional cost to you. I only recommend products or services that I believe will add value to my readers.

My wife and I found ourselves returning to Sofi Stadium in Los Angeles for the opening night of Beyonce’s Cowboy Carter tour. We were there six months prior for Green Day’s Saviors tour and learned our lesson of NOT staying at a hotel within walking distance of Sofi Stadium.
Much like any popular event at big stadiums, parking (pre event) and ride sharing (post event) is commonly - shall we say - a shit show. While Sofi does decently with the former, it fails spectacularly with the latter.
With that in mind, I began hunting for hotels after securing our tickets and came across Lum Hotel. It had mixed reviews online but due to its amazing location, I decided to pull the trigger and book a two night stay.
Lum had a few stand outs, but almost as many drawbacks. In this review of Lum Hotel, I’m going to discuss and rate topics such as cleanness, our room, the property’s amenities, parking situation, proximity to the various stadiums and more.
QUICK STATS…
Location: Los Angeles (Inglewood), California
Rewards: Hilton Honors
Check In: 4pm
Check Out: 11am
Early Check In/Late Check Out: Yes (additional fees)
Rates: $150 - $400 per night
Resort Fee: None
WiFi: Yes (complimentary and decent speed)
Adjoining Rooms: Yes
Multi-Room Suites: No
Bathtubs in Room: No (stand-up shower only)
Mini Fridge: Yes
Microwave: No
Parking: On-site, valet service only
Parking Fee: $55 - $60 per night
Pet Friendly: Yes (additional fees)
Pool: Yes
Hot Tub: Yes
Fitness Center: Yes
Laundry Service: No
Dining Options: On-site restaurant
Lum Hotel Los Angeles Location - 9/10

Location is Lum Hotel’s biggest perk and is where it receives top marks from me. It’s on the 3900 block of Century Blvd, directly adjacent to the main entrance of Intuit Dome and across the street from the Hollywood Park complex (where Sofi Stadium is located).
When I say adjacent to Intuit Dome, I mean it. It’s literally right on the other side of the divider wall in the parking lot. I took the below photo near Intuit’s entrance. Beyond the hands sculpture, you can visibly see the hotel’s on-site restaurant, Cork & Batter.
The hotel is also within walking distance of Sofi Stadium and Kia Forum, making it an ideal location for games and events at either of the three venues. Proximity to other destinations of note include:

Hollywood Park: Across the street
Sofi Stadium: 0.7 mile (20-min) walk
Kia Forum: 1 mile (25-min) walk
Crypto Arena/LA Live: 14 miles
Cosm: 0.5 mile (15 min) walk
Beach Boys Monument: 2.6 miles
The Friday House and Neighborhood: 4.3 miles
La Brea Tar Pits: 11 miles
Hollywood Walk of Fame: 14 miles
Griffith Observatory: 21 miles
LAX: 3 miles
Long Beach Airport: 21 miles
Burbank Airport: 29 miles
The only negative aspect of its location is a direct result of the same reasons that make it ideal - the crowds. Often, there are events taking place at Intuit and Sofi concurrently, sometimes even the Forum as well.
This creates a perfect storm of pure chaos. Congestion on the sidewalks, especially as the venues empty out, is often shoulder to shoulder. And the traffic? There are no words to properly describe it.

If you’ll be driving or ride-sharing in, be sure to research Intuit‘s event schedule on the day of your arrival and time it prior to their end times. Otherwise, you’ll be dealing with having to navigate the mess you see in the photo above.
As stated, that’s the only negative thing I can say about its location. Otherwise, it’s in a great spot for those who are attending an event at either of the three venues. Unfortunately, I’m afraid that’s where most of the positivity in this review ends.
Lum Hotel Parking - 2/10

Unfortunately, parking is where this review starts its downward turn. I’ll preface by stating that egregious parking fees in Los Angeles aren’t unique to Lum Hotel, but I criticize all hotels that I feel nickel and dime their guests.
Lum Hotel uses a third party valet service to handle parking. You have no other choice as it’s required by the property. There’s a tiny parking lot in front of the hotel, but most vehicles are kept in the adjacent ally.
The rates fluctuate based on which website you’re looking at, but I paid $55 on my visit. For comparison, Sofi charges $60 for parking (one time). Here, however, you’re having to pay that high parking rate for every night on your reservation.
That’s where my main criticism comes from. The entire point of staying within walking distance of any event venue is to avoid traffic and insane parking fees.

You certainly avoid the latter, but the former (in this case) is worse because you’re paying even more than you would if you stayed further away (for a cheaper nightly rate) and just drove to Sofi and parked there, but I digress.
On arrival, you’ll immediately be greeted by the valet staff. My experience with them was mostly positive. They treated my vehicle with respect and were helpful with getting my luggage together.
Amazingly, the property has only one luggage cart for the entire hotel, which was in use when I arrived. Our valet kept my vehicle parked by the door so I could make multiple trips to get my wife and I’s luggage to our room.
I understand that parking is limited and these fees are another revenue source for hoteliers. However, I feel registered guests should get a break on parking fees. A discounted rate, at the very least.
Check-In Experience - 8/10

My check-in experience at Lum Hotel was good, honestly. The reason it’s 8/10 instead of a 10/10 is because of the lack of luggage carts and me having to make multiple trips to retrieve my luggage as a result.
Aside from that, it went great. Despite booking my stay through Expedia, there were no hiccups with their system. It was right around standard check-in time (4pm) so it was busy, but the staff at the desk did a great job taking care of everyone.
Quick tip, don’t use the elevator directly across from the front desk. It’s, shall we say, compact. It’ll maybe fit three adults with luggage. As a result, lines form quickly, especially around check-in time.
Instead of waiting for that one, simply walk down the proceeding hallway and take the elevator at the very end of it. It’s much larger and during my stay, there was hardly anybody using it so my wife and I never waited.
The Room - 6.5/10

I booked a king room for our two-night stay. The room was on the small size with faux-hardwood throughout (except for the bathroom, which was a patterned vinyl flooring). Despite its size, I feel it’s just right for two people. Any more than that would be pushing it, though.
To compensate for that, they do offer rooms with two queens and adult sized, hostel-style bunkbed set ups if you’re coming with a larger group. Most rooms also include a mini-fridge, safe with keypad, iron, flat screen TV and balcony.
Just about all of the amenities mentioned above are stored on/in the workstation (pictured below), which also doubles as your storage rack. You can keep your luggage in the space above, as well as hang jackets or hoodies.

There’s a work desk with ample space and wall plugs nearby. Next to the work station is a space where your mini-fridge and safe are placed, followed by a smaller area for shoe storage. The k-cup style coffee maker is also located here.
The safe was large enough for my Apple Macbook Pro (13-inch) to fit snugly. However, I would advise against keeping anything powered by lithium batteries in it. The safe sits on top of the fridge, which does a great job at heating the safe.
Lithium batteries are somewhat sensitive to prolonged heat exposure and thus, this set up creates a potential fire hazard or at the very least, damage to or outright ruining the device.
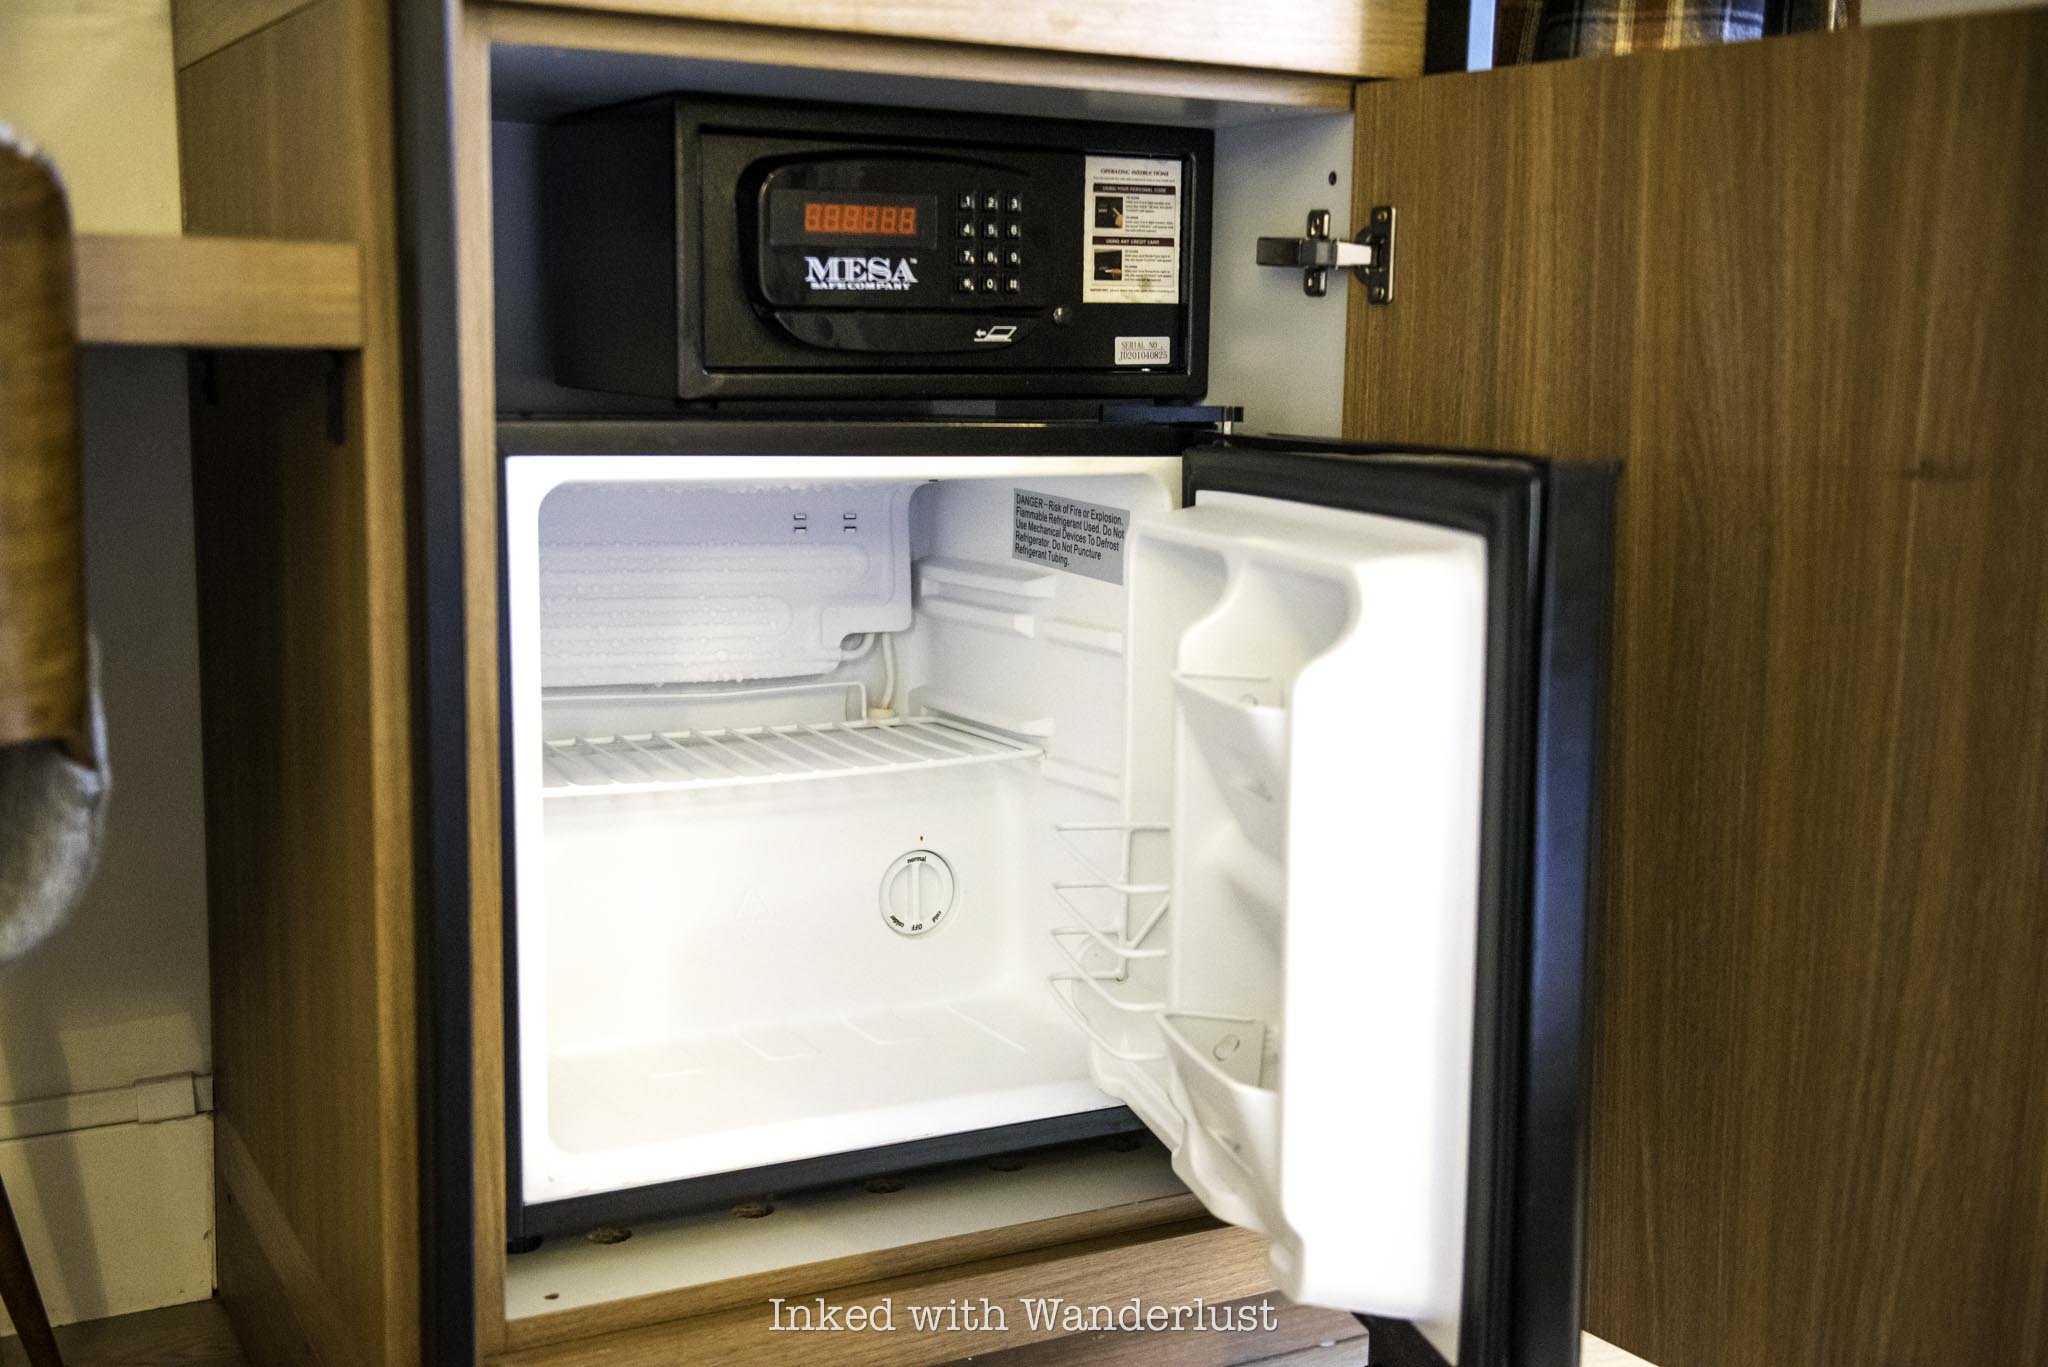

The bathroom is a decent size and features a doorless, stand-up style shower. Going by photos of the other rooms, it doesn’t appear as though bathtubs are included anywhere, which is often a deal breaker for families with small children.
There are full-size bottles of body wash, shampoo, and conditioner stationed on the wall. In my room, the body wash was missing. It wasn’t a big deal to me as I bring my own toiletries with me when I travel.
The water pressure in the shower was decent, but there was barely a trickle coming out of the sink faucet (which made it challenging to properly clean my razor). Additionally, there’s no space in the shower to place your soap, shampoo, etc (aside from the floor, that is).


My wife theorized that the bathroom was likely designed by a man, as it is fairly basic and lacks common conveniences other properties at this price-point offer and I can’t say I disagree. It isn’t necessarily bad, as it’s fine for what it is.
Finally, the king sized mattress is comfortable, but shockingly short. I’m 5’9 and my feet were flirting with the edge of the bed. If you’re any taller than that, yours are likely going to dangle off the side.

The pillows were decent, though were softer than I’m used to. I prefer mine on the firmer, so I had to stack two of them together in order to get comfortable. The great news, though, is both the bedding and room as a whole were impeccably clean.
My room was street facing and thus, I could hear traffic noise and the like. The sliding-glass door did a great job blocking out most of that noise, though. Additionally, I sleep with a travel-sized white noise machine that blocked out the rest.
The biggest negative (by a wide margin) to the room was the pencil-thin walls. I could hear full conversations, word-for-word, in the room next to us without even trying to listen. Thankfully, our neighbors kept it quiet at night. Otherwise, that would’ve been difficult to overcome.
Hotel Dining - 1/10

Lum Hotel’s on-site restaurant, Cork & Batter, is attached to the hotel and can be accessed via the first floor interior or outside from the parking lot. The menu consists of specialty cocktails and common fare such as burgers, tacos, seafood and more.
I wish I could give you a proper review, but I wasn’t given the opportunity to. My wife and I attempted to dine here for lunch but after we sat down, we were never greeted or approached by any member of wait staff.
We sat there for a solid twenty minutes and despite the tables around us getting served, we were never even offered water. We ended up just leaving and ordering lunch to our room from DoorDash.
The overall vibe of the restaurant was great and there were many menu items I wanted to try, but it just wasn’t in the cards. As an alternative, I recommend crossing the street to Hollywood Park and giving The Meeting Spot your business. Excellent service, great food, and tasty cocktails over there.
Hotel Amenities - 10/10
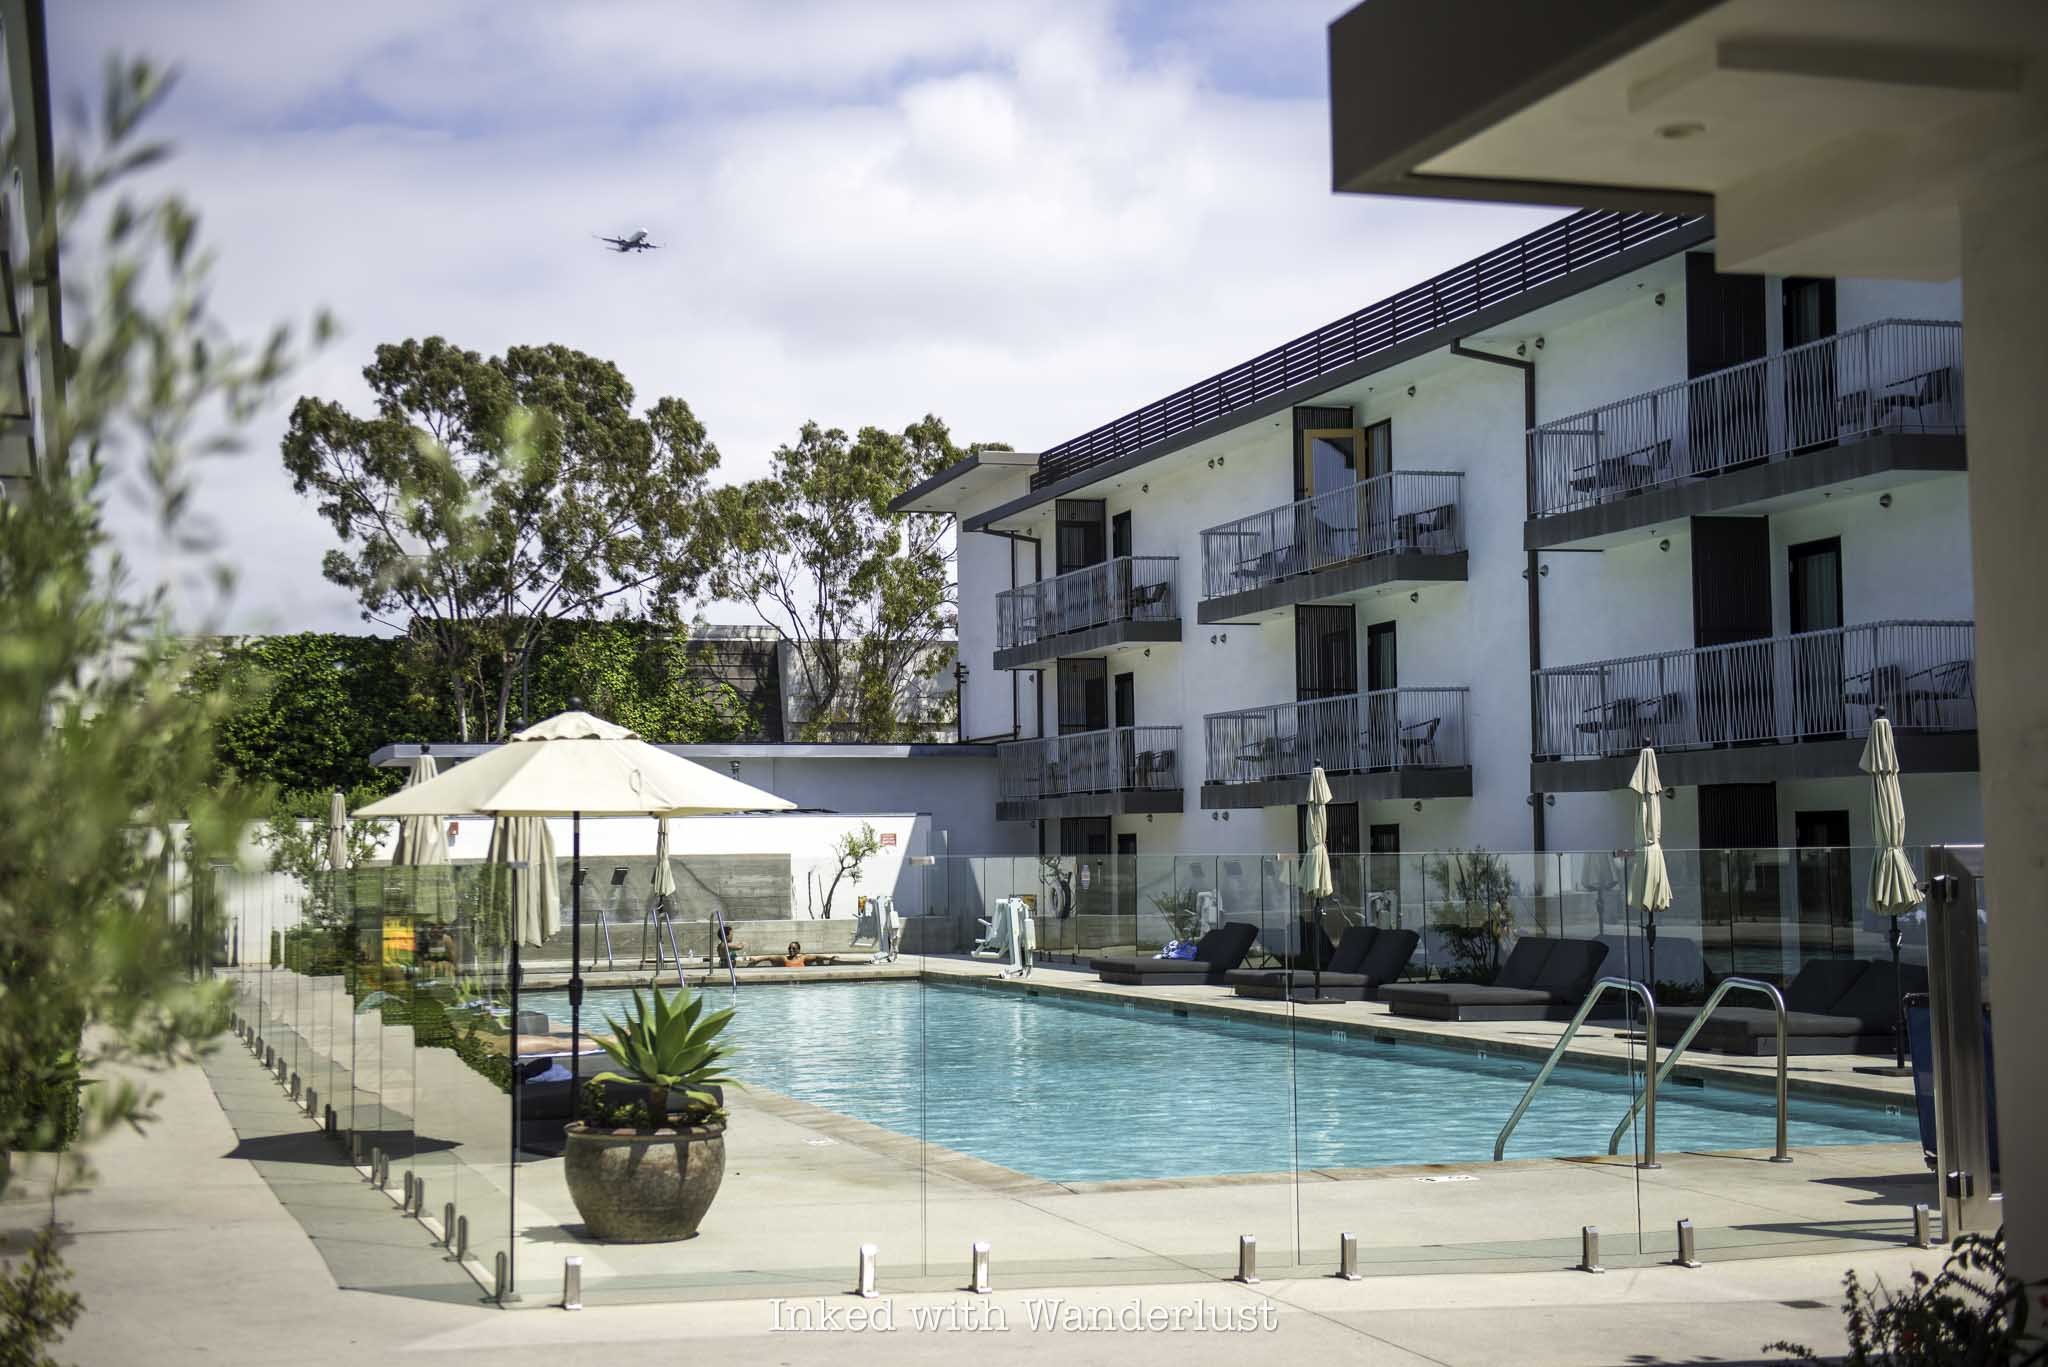
Lum Hotel has limited, but solid amenities for guests. For starters, there’s a nice lounge area near the check-in desk. Across from that is a table with complimentary fruit-infused water, coffee, and other drink options.
The lap-style pool is located outside in the center of the property, between the two hotel buildings. There’s a decently sized jacuzzi adjacent to the pool, in addition to an abundance of lounge chairs (with accompanying umbrellas) dotting the pool’s edges.

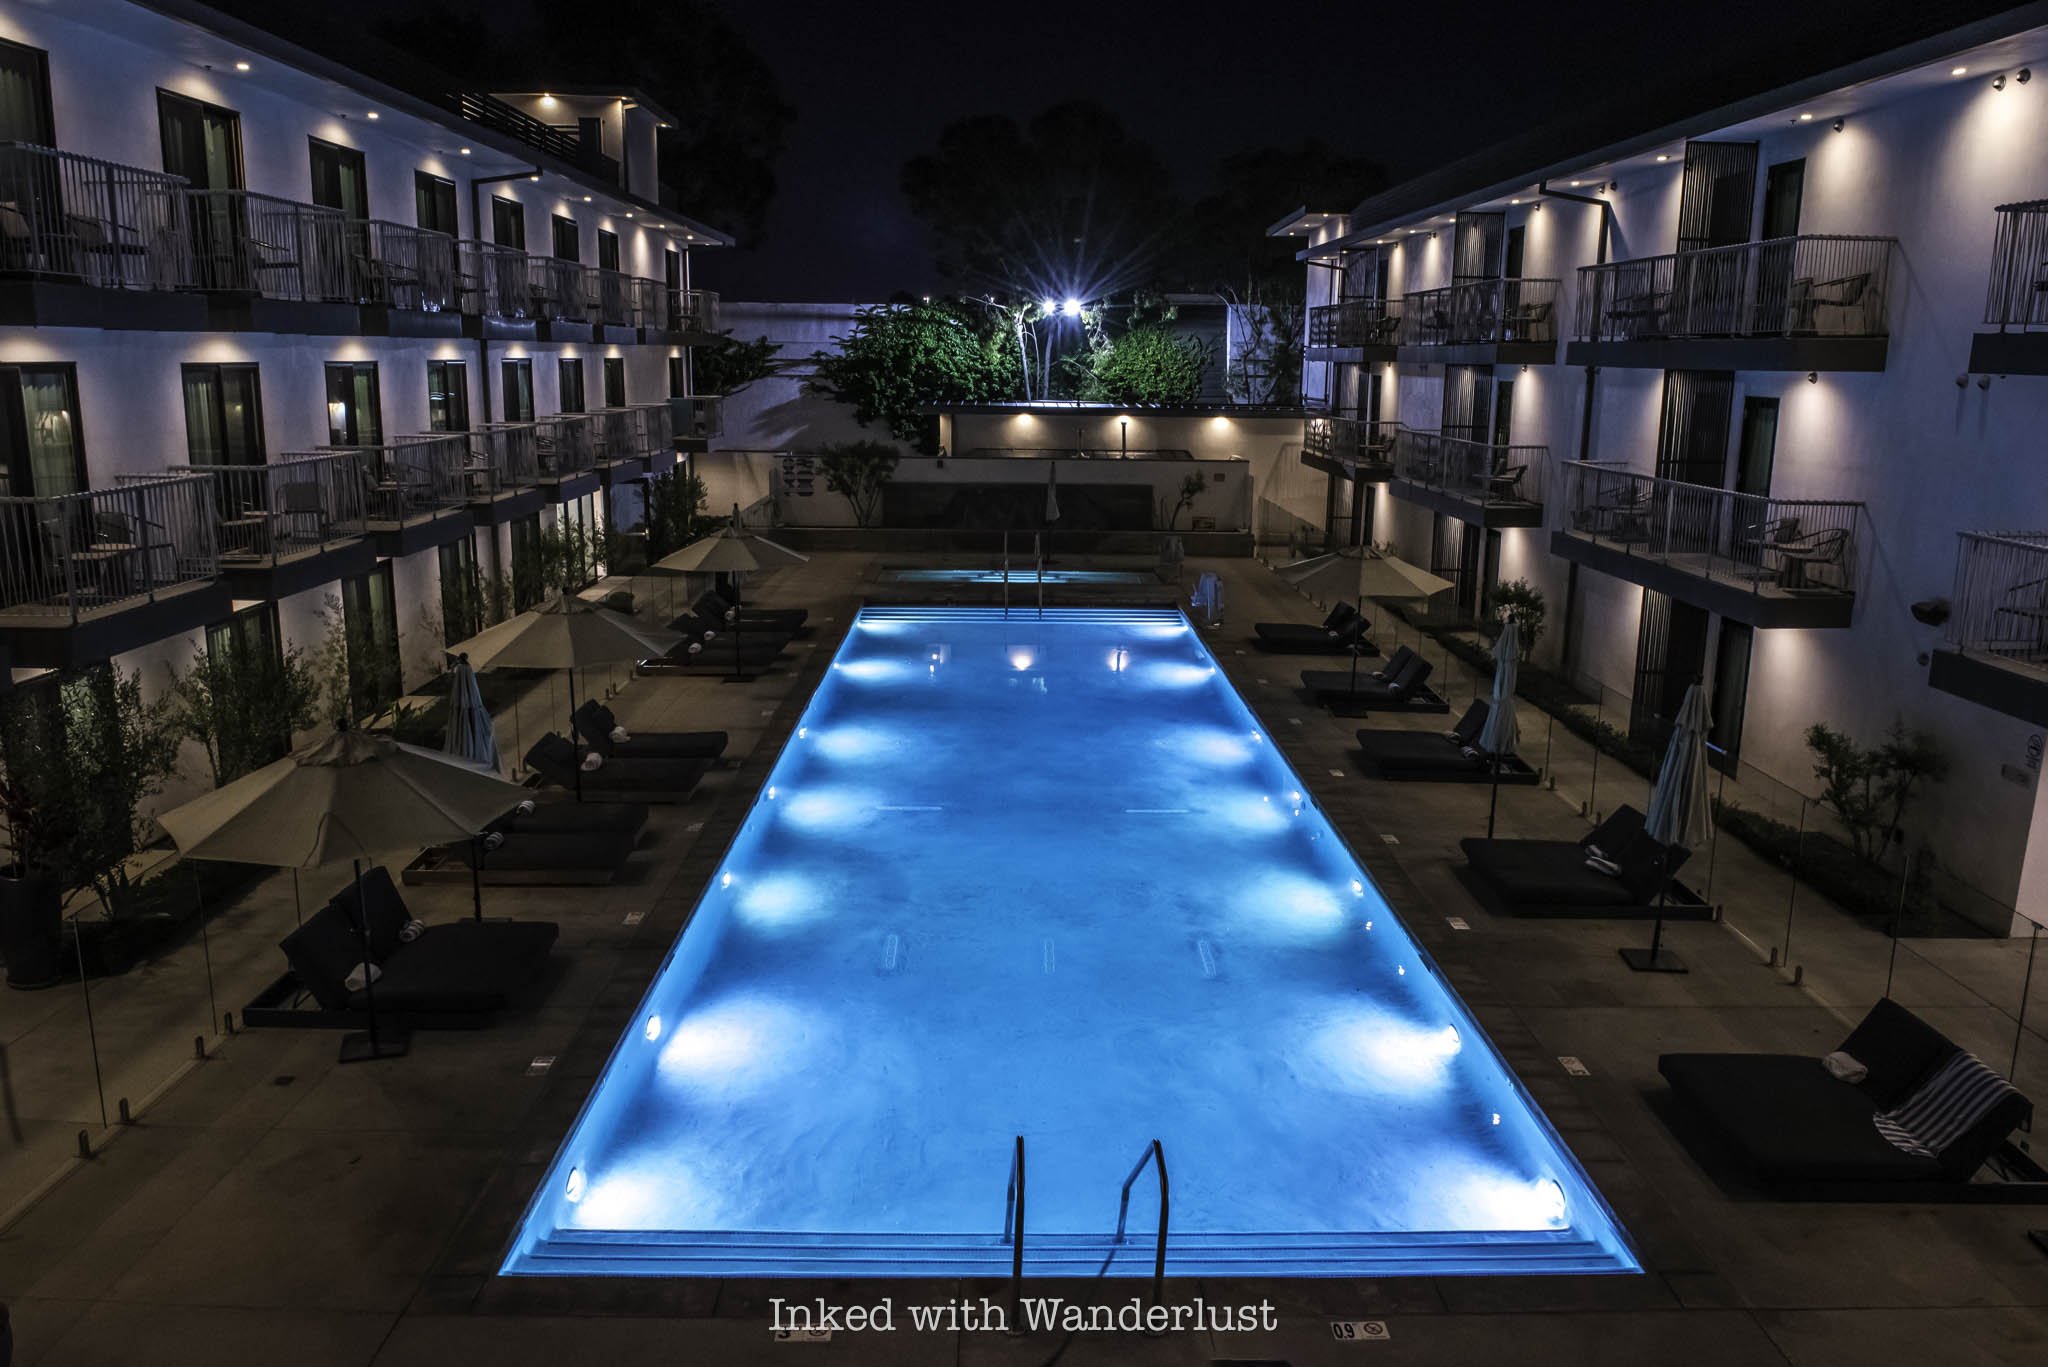
My wife and I didn’t partake in the pool, but it did look inviting (especially at night). Since the hotel is located near LAX, approaching planes constantly fly low overhead, adding an exciting element. The pool and jacuzzi hours are:
11am - 9pm (Sunday)
11am - 10pm (Mon - Thur)
11am - 11pm (Fri - Sat)
Adjacent to the pool is additional seating under a canopy. During the day, I saw guests using this area to work on their laptops and at night, it transformed into a social gathering space of sorts.
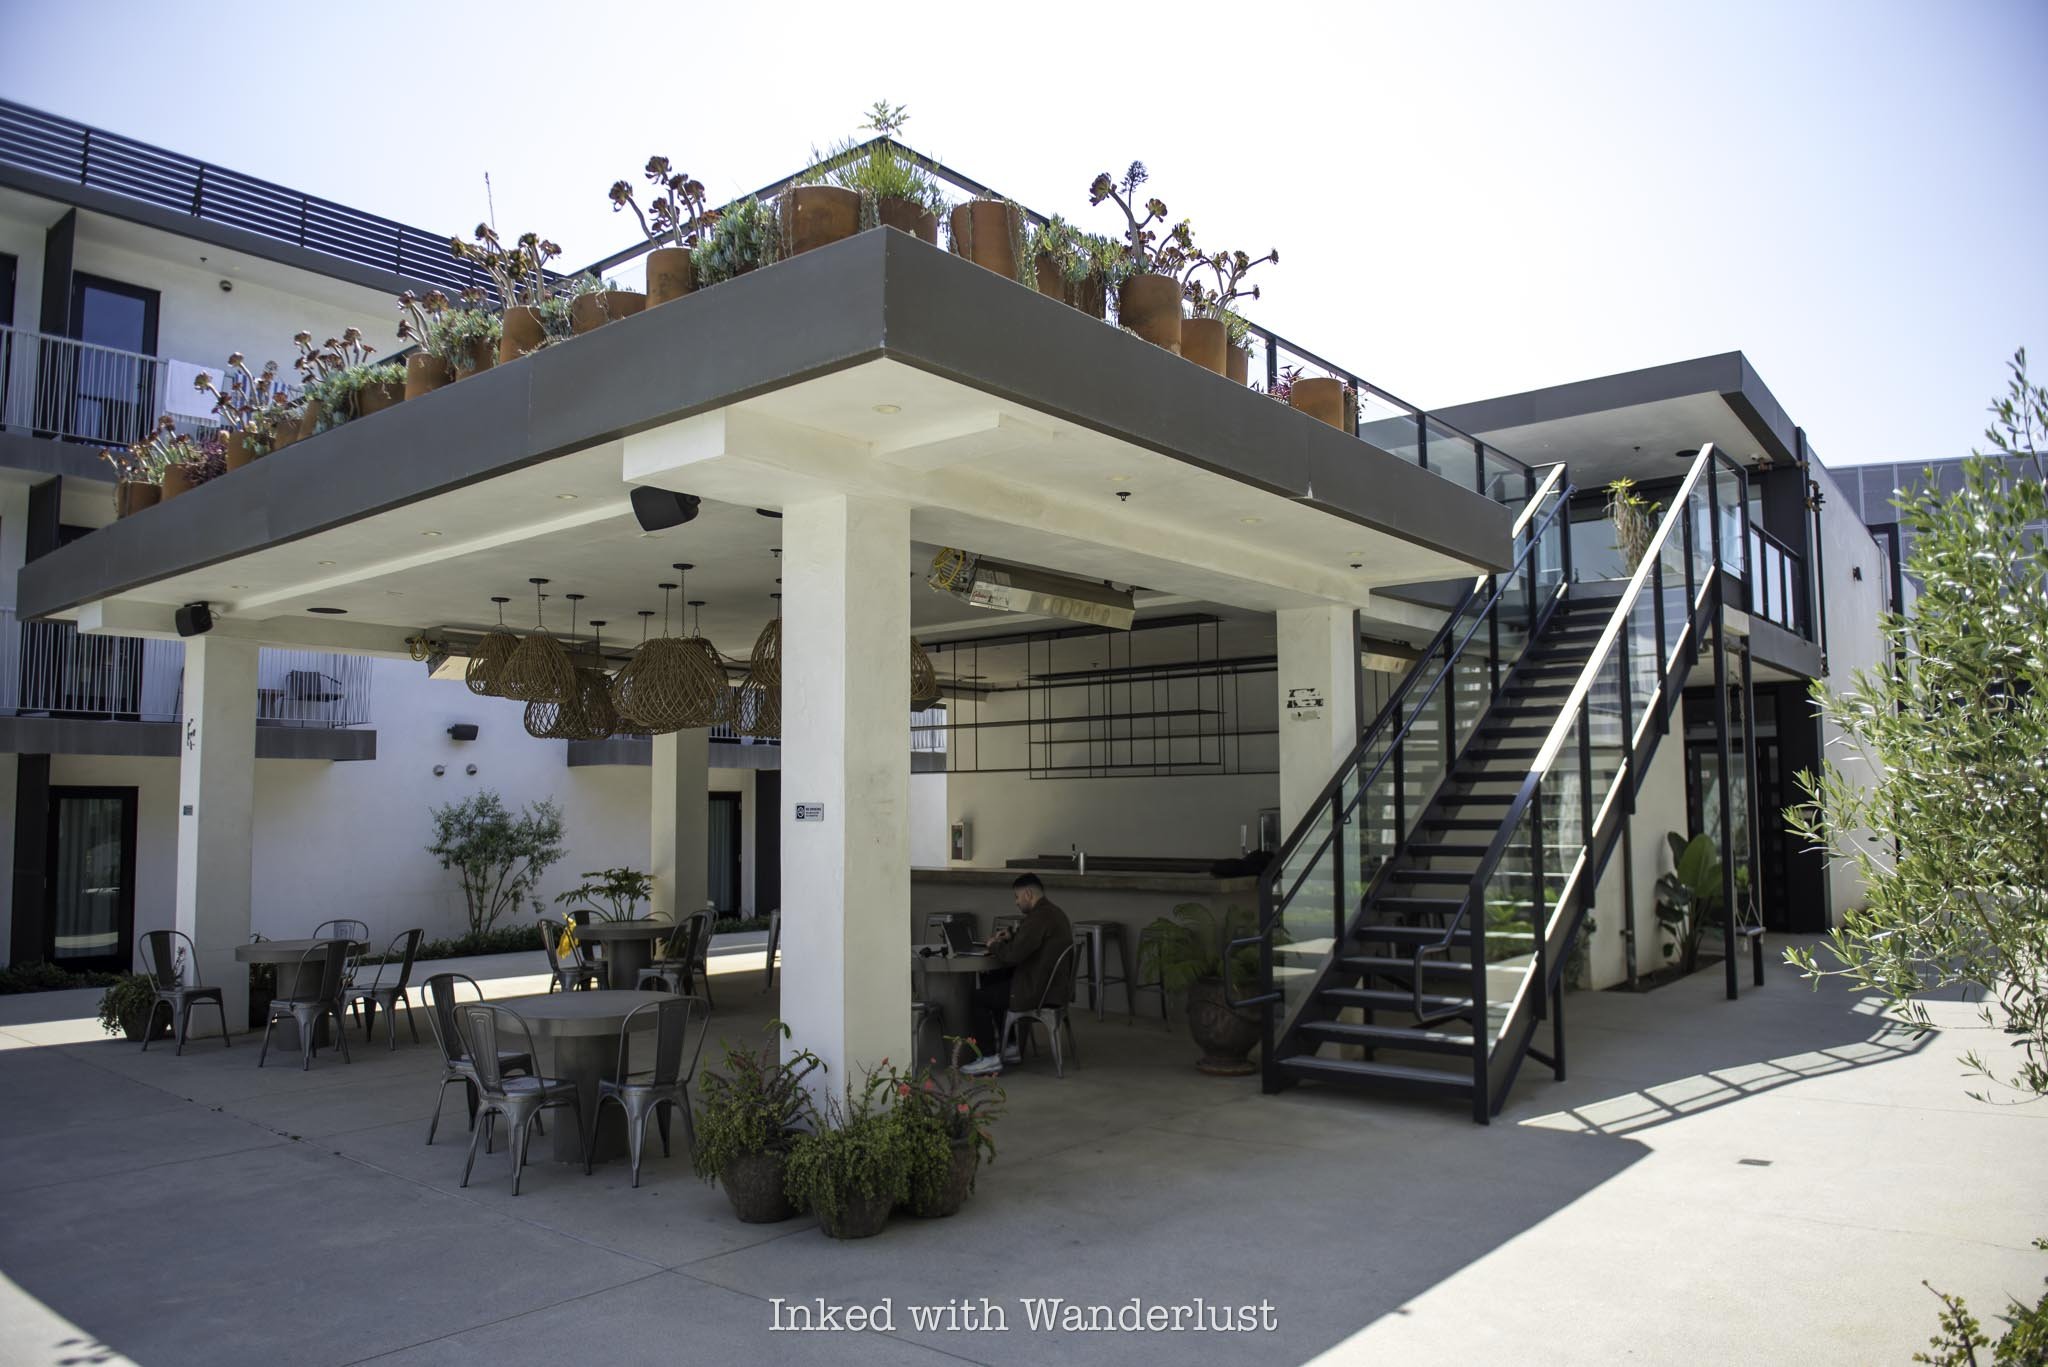
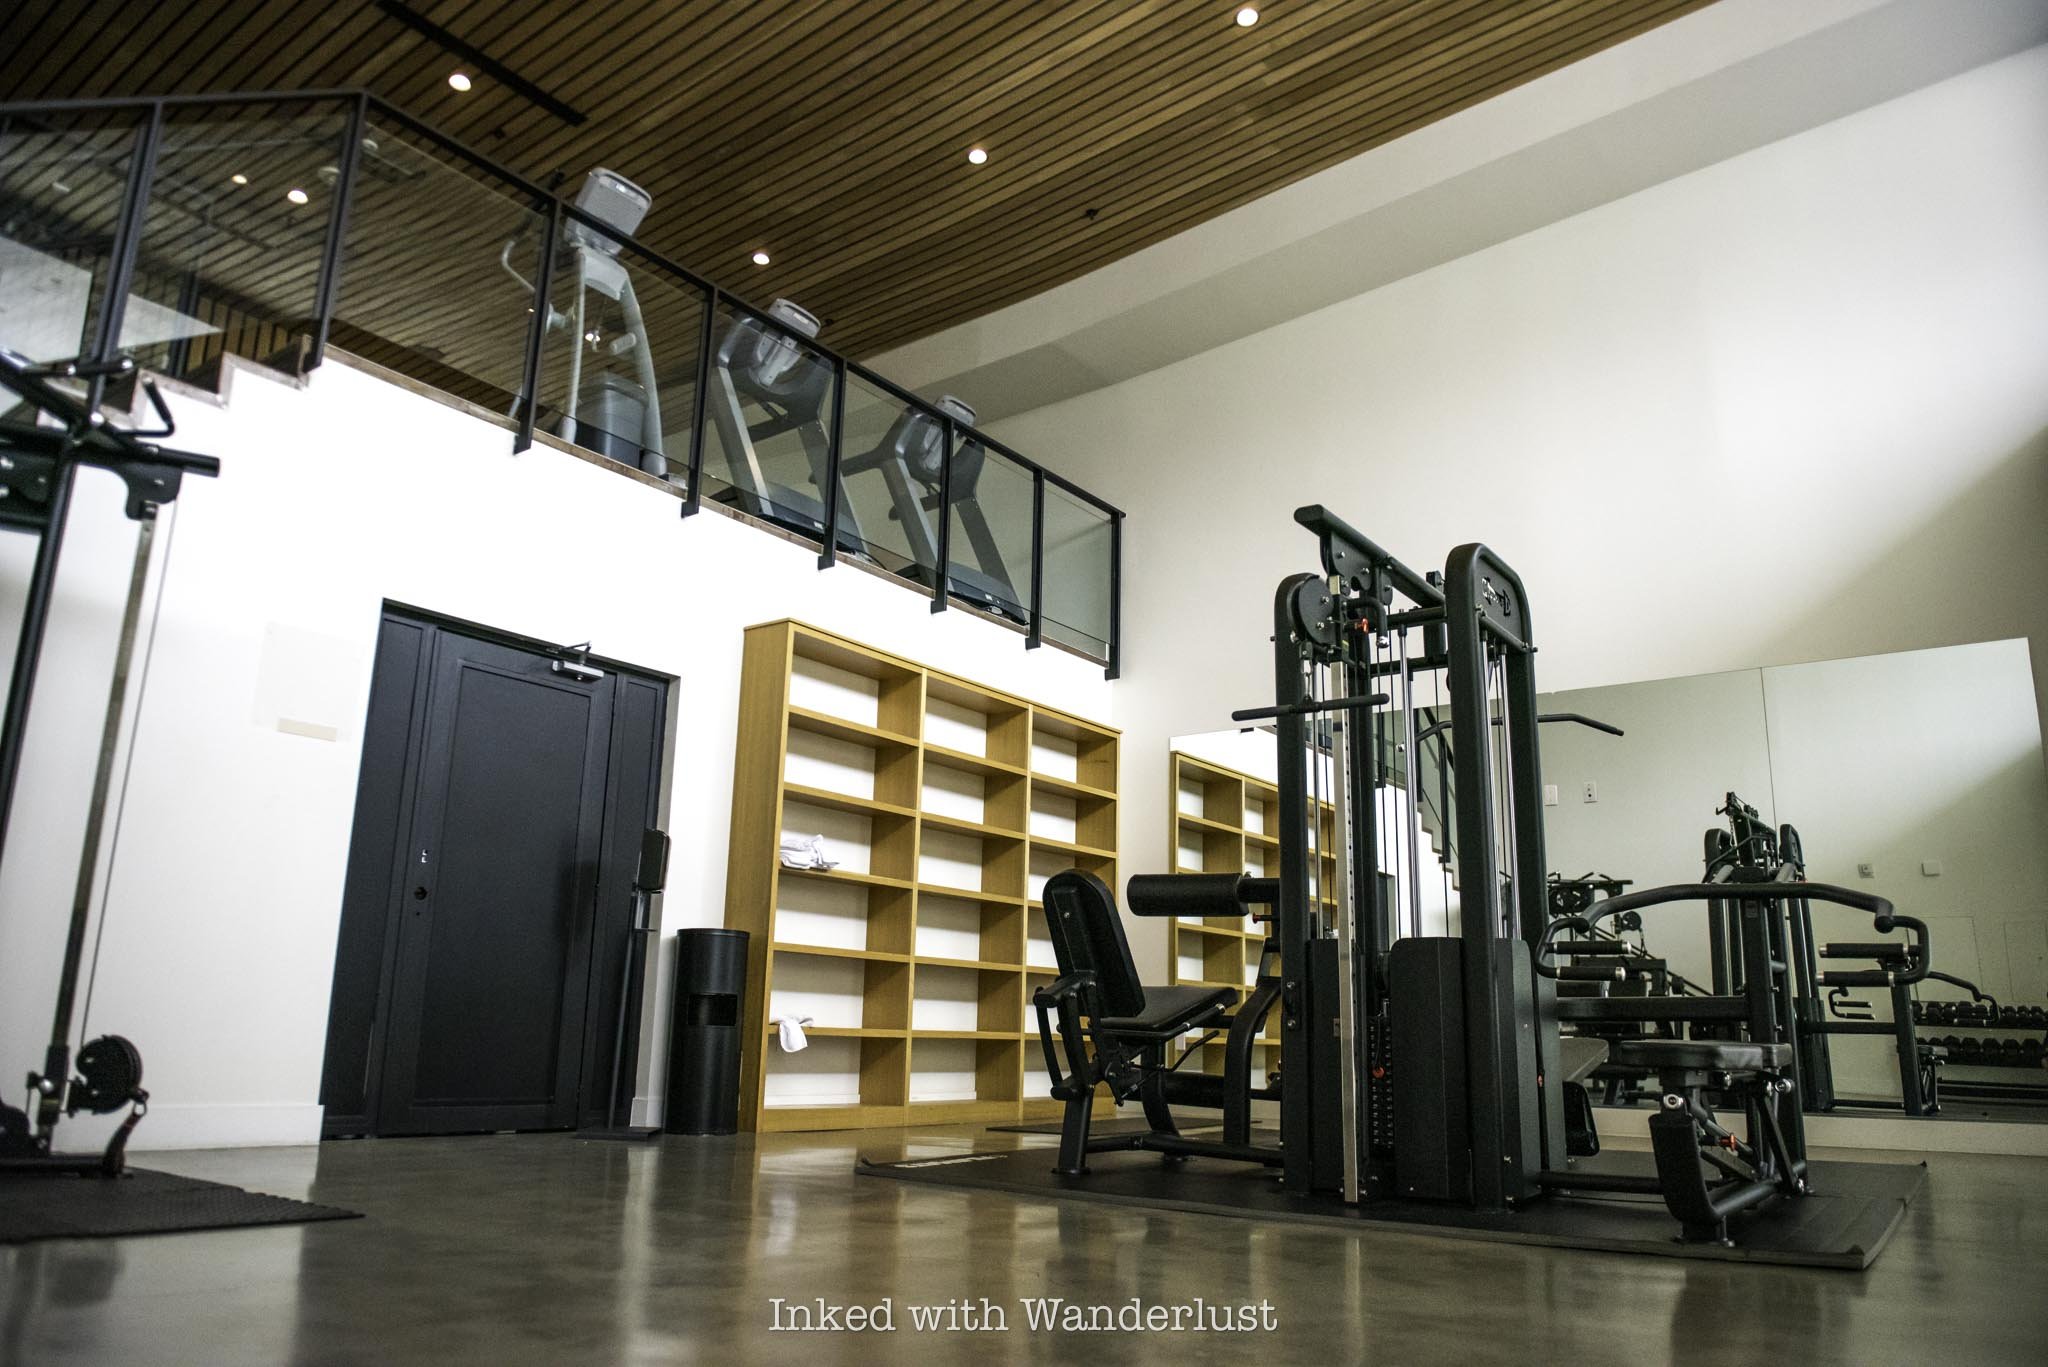

Behind this area is where you’ll find Lum Hotel’s fitness center. It’s probably the most spacious hotel fitness center I’ve seen to date. There are two levels, with the strength training equipment on the bottom and the cardio machines on the second floor.
You’ll need your room key to access it, but it’s open 24 hours. To find either the pool or fitness center, simply walk through the double doors to the right of the check-in desk. These doors are always open, but the glass wall surrounding the pool is locked at night.
For a boutique hotel, the amenities at Lum Los Angeles are solid. You’re given 24 hour access to the fitness center (when many other hotels have set hours) and a decent amount of time throughout the day at the pool.
Is Lum Hotel Family or Pet Friendly?
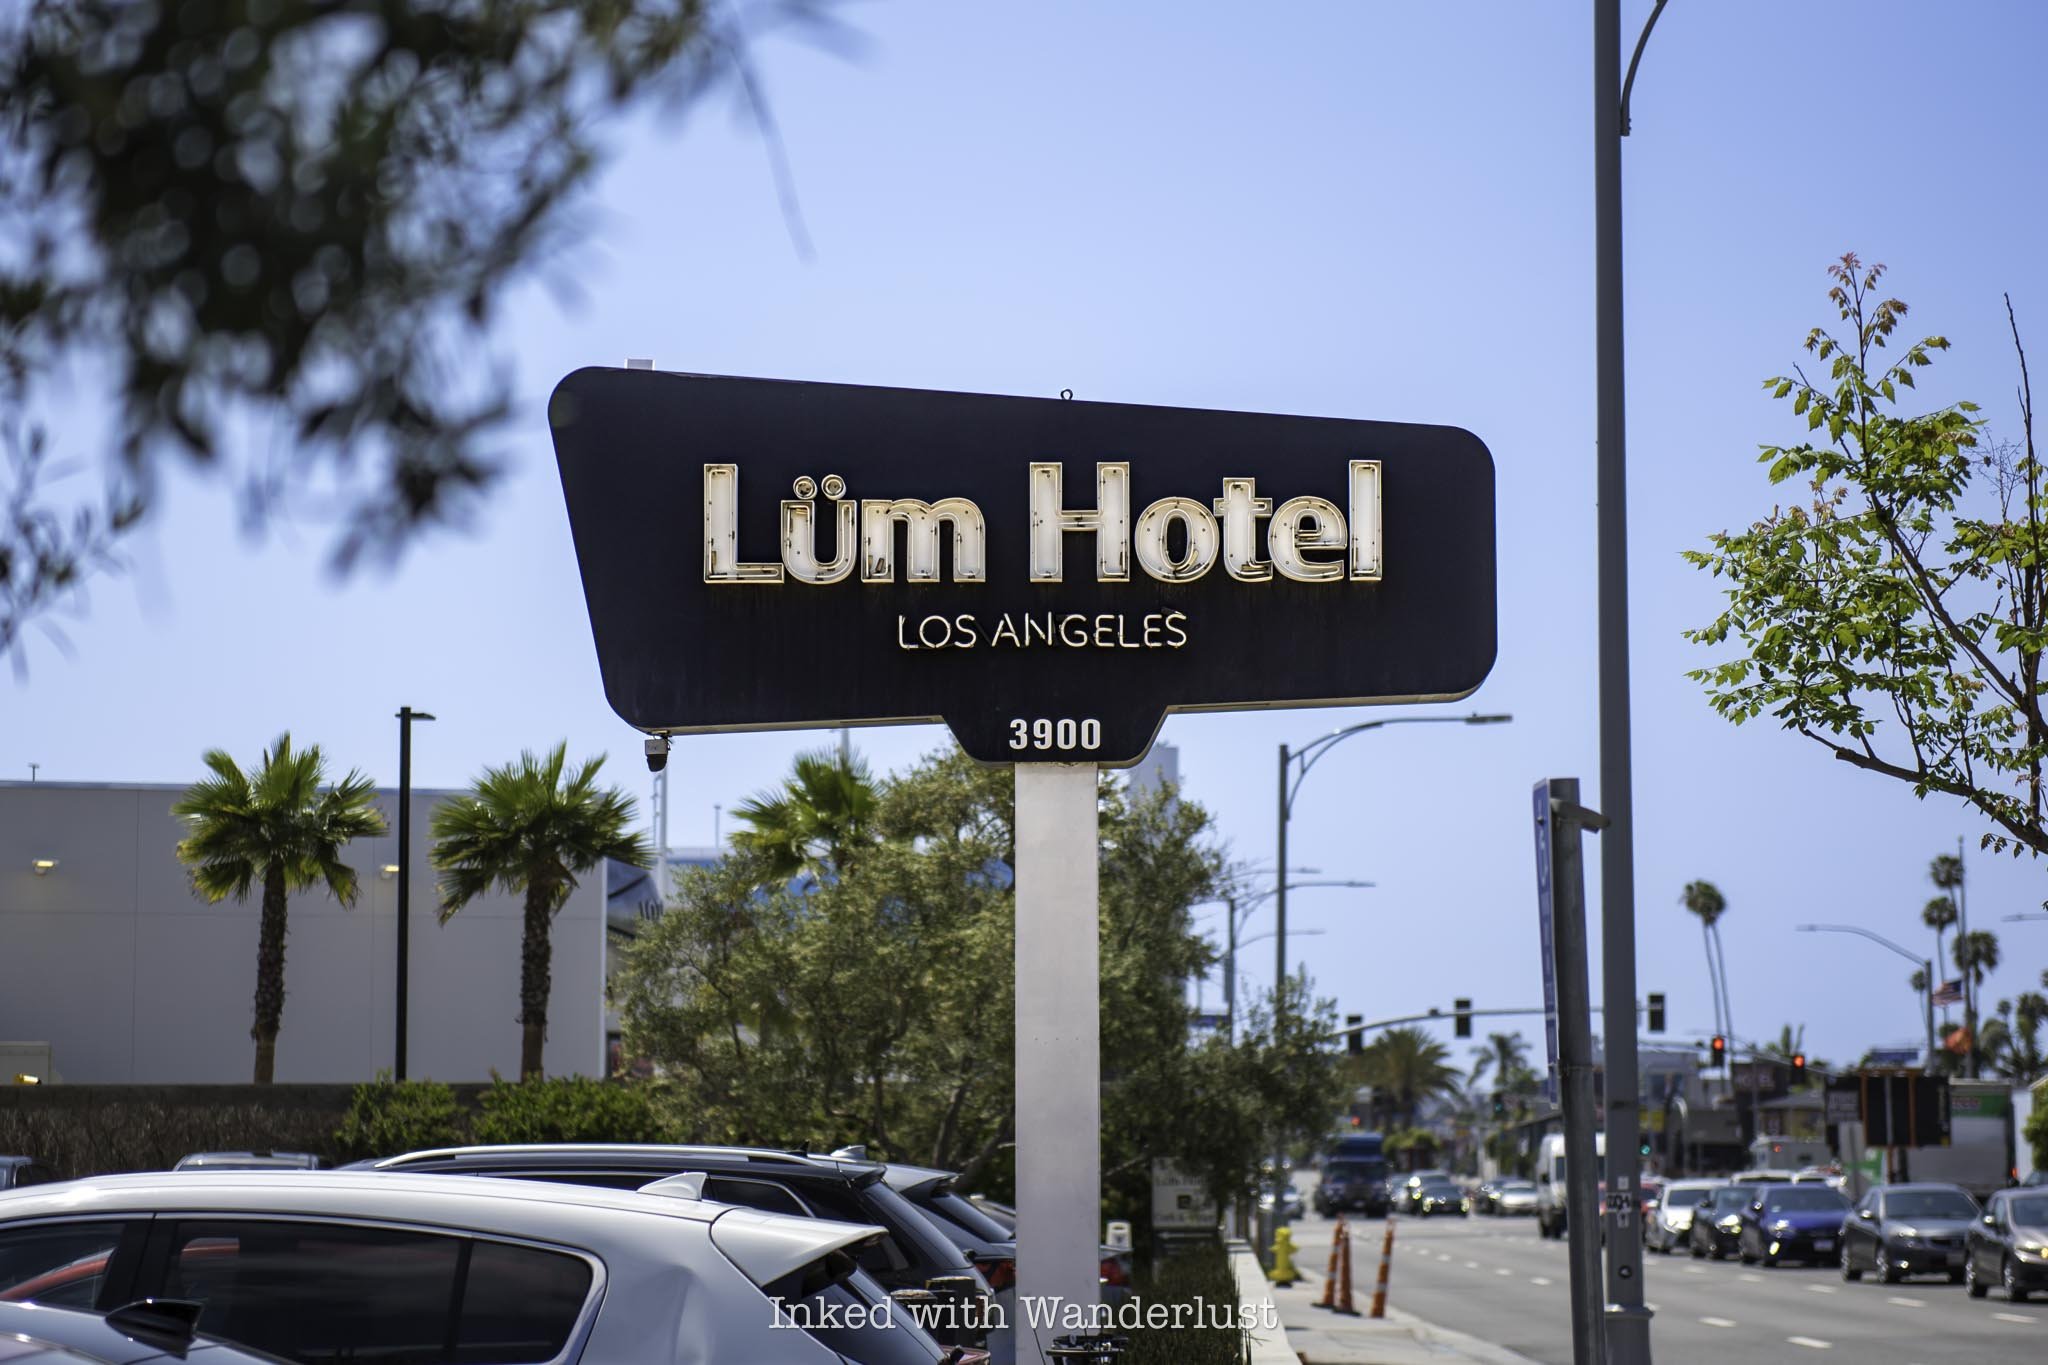
Medium size dogs under 75 pounds are permitted to stay in certain guest rooms at Lum Hotel Los Angeles. You’ll need to ensure their vaccinations are up to date and pay a non-refundable fee of $75 per pet (NOT per night).
While they do allow dogs, I would advise against bringing them to this hotel. I searched the property and could not locate any designated space for dogs to do their business. There’s only a sliver of space in the parking lot near the busy street.

It reminded me of my experience at Hotel Indigo in Anaheim. While they are (technically speaking) “pet friendly”, since there’s no space to do their business it makes it awkward for the dog, especially if yours has anxiety like mine does.
As far as being family-friendly goes, I’m also going to say no. It isn’t necessarily for anything bad, it’s just this property appears to mostly attract a younger/kid-free couples crowd who’re here for events at the various venues.
The rooms (while good) aren’t spacious and don’t offer bathtubs (just stand-up showers) and that typically isn’t conducive to what families search for. Additionally, the paper-thin walls could prevent small children from sleeping, especially if you have a particularly noisy neighbor.
Final Thoughts
Do I recommend staying at Lum Hotel Los Angeles? That entirely depends on your plans and why you’re in Los Angeles. When it comes to hotels within walking distance to Sofi Stadium or Intuit Dome, it’s hard to beat. Though their parking fees put a damper on things.
If you’re flying in and are only staying a night or two for an event at either venue, then my recommendation is a definite yes. By flying, you’ll avoid parking fees all together. Combine this with no resort fees and you’re set for an affordable stay without unnecessary fees.
If you’re planning to stick around for additional nights and explore more parts of Los Angeles, I recommend staying at Lum for the first one or two, and then move hotels for the remaining nights of your trip.
I say this because of the traffic issues this area almost always sees because of the event schedules of the three venues. Additionally, Lum Hotel isn’t exactly close to LA’s classic attractions, such as La Brea Tar Pits, Griffith Observatory, and the Hollywood Sign hike.

Conversely, if you’re driving in and staying any longer than a night or two, I would advise against it. The egregious parking fees charged here simply outweigh the advantages of staying close to the venues.
Driving in and paying to park for one night, maybe even two, may be advantageous. Parking at Lum costs a bit less than it does at Sofi ($60) and much less than at Intuit Dome ($70) so that, combined with being within walking distance, may be worth the additional expense.
Finally, if you’re traveling to Los Angeles to sightsee and not to for an event at one of the venues then definitely choose another hotel closer to major attractions, such as Hotel Indigo Downtown Los Angeles.
Lum Hotel isn’t close to most attractions people come to LA to see and you’ll be dealing with near constant vehicle and foot traffic congestion and difficulty getting parked again at the hotel. Even if you’re flying in for that purpose, the same problems apply to ride share drivers.

Right now, Lum Hotel Los Angeles is a great option for those that’re here for an event at Sofi or Intuit…but for how long? In Spring 2026, the new Kali Hotel is expected to open. When it does, it’ll be the only hotel within the Hollywood Park complex and a literal stone’s throw away from Sofi Stadium.
Kali Hotel will undoubtedly be an expensive stay, so Lum will likely remain a solid budget option even when Kali opens. However, for the sheer convenience alone, I believe Kali will take the throne as the best hotel for those attending events at Sofi Stadium.
When it comes to events at Intuit Dome, though, it’ll always be hard to top Lum Hotel, despite the fact that an Arya Hotel will begin construction nearby. If you’re staying at Lum and going to a concert at Intuit, you could leave ten minutes before start time and still make it.
If you’ve stayed at Lum Hotel before, be sure to tell me about your experience in the comments below.

The Ultimate Guide to La Brea Tar Pits and Museum
The La Brea Tar Pits and Museum has long been one of the quintessential best things to do in Los Angeles. It’s an active paleontological…
Disclosure: This post contains affiliate links. If you make a purchase through these links, I may earn a small commission at no additional cost to you. I only recommend products or services that I believe will add value to my readers.

The La Brea Tar Pits and Museum has long been one of the quintessential best things to do in Los Angeles. It’s an active paleontological research site surrounded by the urban hustle and bustle of downtown LA.
There are numerous tar pits to see, in addition to the museum which houses hundreds of ice age-era animal fossils that were all found in the tar pits. The pits themselves are believed to be upwards of 40,000 years old!
In this post, I’m going to cover multiple topics about the tar pits and museum. Things such as parking, costs, what to expect, nearby attractions, and more will be discussed in the post below. Let’s get into it!
La Brea Tar Pits Location

La Brea Tar Pits and Museum is located in the La Brea neighborhood district of Los Angeles. The main entrance into the park can be found on the corner of Wilshire Blvd. and South Curson Ave.
However, there are multiple entrances into Hancock Park, which is where the tar pits and museum are located. Additional entrances can be found north of the museum off 6th Street or by the adjacent Los Angeles County Museum of Art.
La Brea Tar Pits Parking

There’s a rather large lot for the La Brea Tar Pits located behind the museum. To get to it, you’ll drive onto South Curson Ave and pull into it from there. When you arrive, get a ticket out of the digital booth and place it on your dashboard.
Unfortunately, parking is not free at La Brea Tar Pits. Parking fees as of spring 2025 at $18 per vehicle. You’ll pay this at the conclusion of your visit and only debit/credit cards are accepted.

There is metered street parking available as well along 6th Street, Curson Ave., and Wilshire. However, tour buses generally take up most available parking on Curson. If you decide to park on Wilshire, keep in mind:
If you’re here Monday - Friday, do not park along Wilshire between 7am and 9am or 4pm to 7pm
If you do, you’ll be cited and towed (even if you’re on metered parking)
You can avoid parking fees all together by utilizing LA’s Metro Line. If you do and show your TAP card to museum staff, you’ll receive a $2 discount on your entrance fee. You can research nearby stations here.
La Brea Tar Pits Tickets

Tickets are only required if you’re planning to visit the museum, which I encourage you to do. In my opinion, it would be an incomplete visit without it. However, if all you want to do is check out the tar pits, parking is all you’ll need to pay.
Ticket prices to the museum are:
$18 - adults
$14 - seniors 62+ and students 13 - 17 (with student ID)
$7 - children 3 - 12
$0 - children 2 and under
Additionally, LA County residents receive free admission Monday through Friday between the hours of 3pm and 5pm. You can purchase tickets on-site or in advance through their website here.
Hancock Park and the Tar Pits

The tar pits and museum begin and end at Hancock Park, a sprawling and ever evolving complex. It was named after George Allen Hancock, a local philanthropist and developer who subdivided the land back in the 1920’s.
I didn’t count them, but there are many pits of varying sizes and you can discover all of them via the paved walking path. Remember that the park, tar pits, and observatory pit (Pit 91) are all free to access.

The main pit (or - “Lake Pit”), the most recognizable of the bunch, is right in front of the museum and is immediately accessible from the Wilshire entrance. You’ve undoubtably seen this pit in movies, TV shows, ads, and more.
Lake Pit is the largest and is a remnant of asphalt mining operations in the late 1800’s. Over time, the pit collected rain and ground water, leaving us with the “lake” we see today. The lake’s sheen, stink, and bubbling comes from a deep underground oil field.


From Lake Pit, you can make your way along the walking path that traverses the park. Along the way, you’ll discover many more tar pits (though none are as large as Lake Pit). Each pit has informational boards posted, detailing their history and what was discovered there.
You’ll also see random areas that are fenced or coned off. These are newly formed tar pits and this is done to protect fossils and other discoveries that could potentially be there.
Are The La Brea Tar Pits Still Active? - Pit 91 and Project 23

One of the most interesting pits is Pit 91. It’s located at the far end of the park and is an active fossil dig with visible fossils in the ground. They first dug into Pit 91 in 1915 and have since found numerous animal fossils here. These include:
73 Saber-Toothed Tigers
56 Dire Wolves
16 Coyotes
12 Ancient Bison
13 Western Horses
6 Ground Sloths
6 Giant Jaguars
4 Short-Faced Bears
2 Yesterday’s Camels
1 American Mastodon

As you can see, the number of predators discovered far outnumber the others. This was common at the tar pits, as animals like Ancient Bison and Western Horses went to the pits for water, not knowing the danger.
As they drank, they would become entrapped in the tar, unable to free themselves and would ultimately perish. Predators then saw what they thought would be an easy meal and ended up stuck in the tar themselves, meeting the same fate.

Shortly after leaving Pit 91, the next special exhibit is Project 23. The “23” is representative of the 23 crates containing the most recent fossils found nearby during construction at the Los Angeles County Museum of Art (LACMA) complex.
Construction crews worked closely with paleontologists, often digging just a foot at a time in order to preserve as many fossils as possible. So far, everything from mammoth tusks to mouse toe fossils have been discovered.
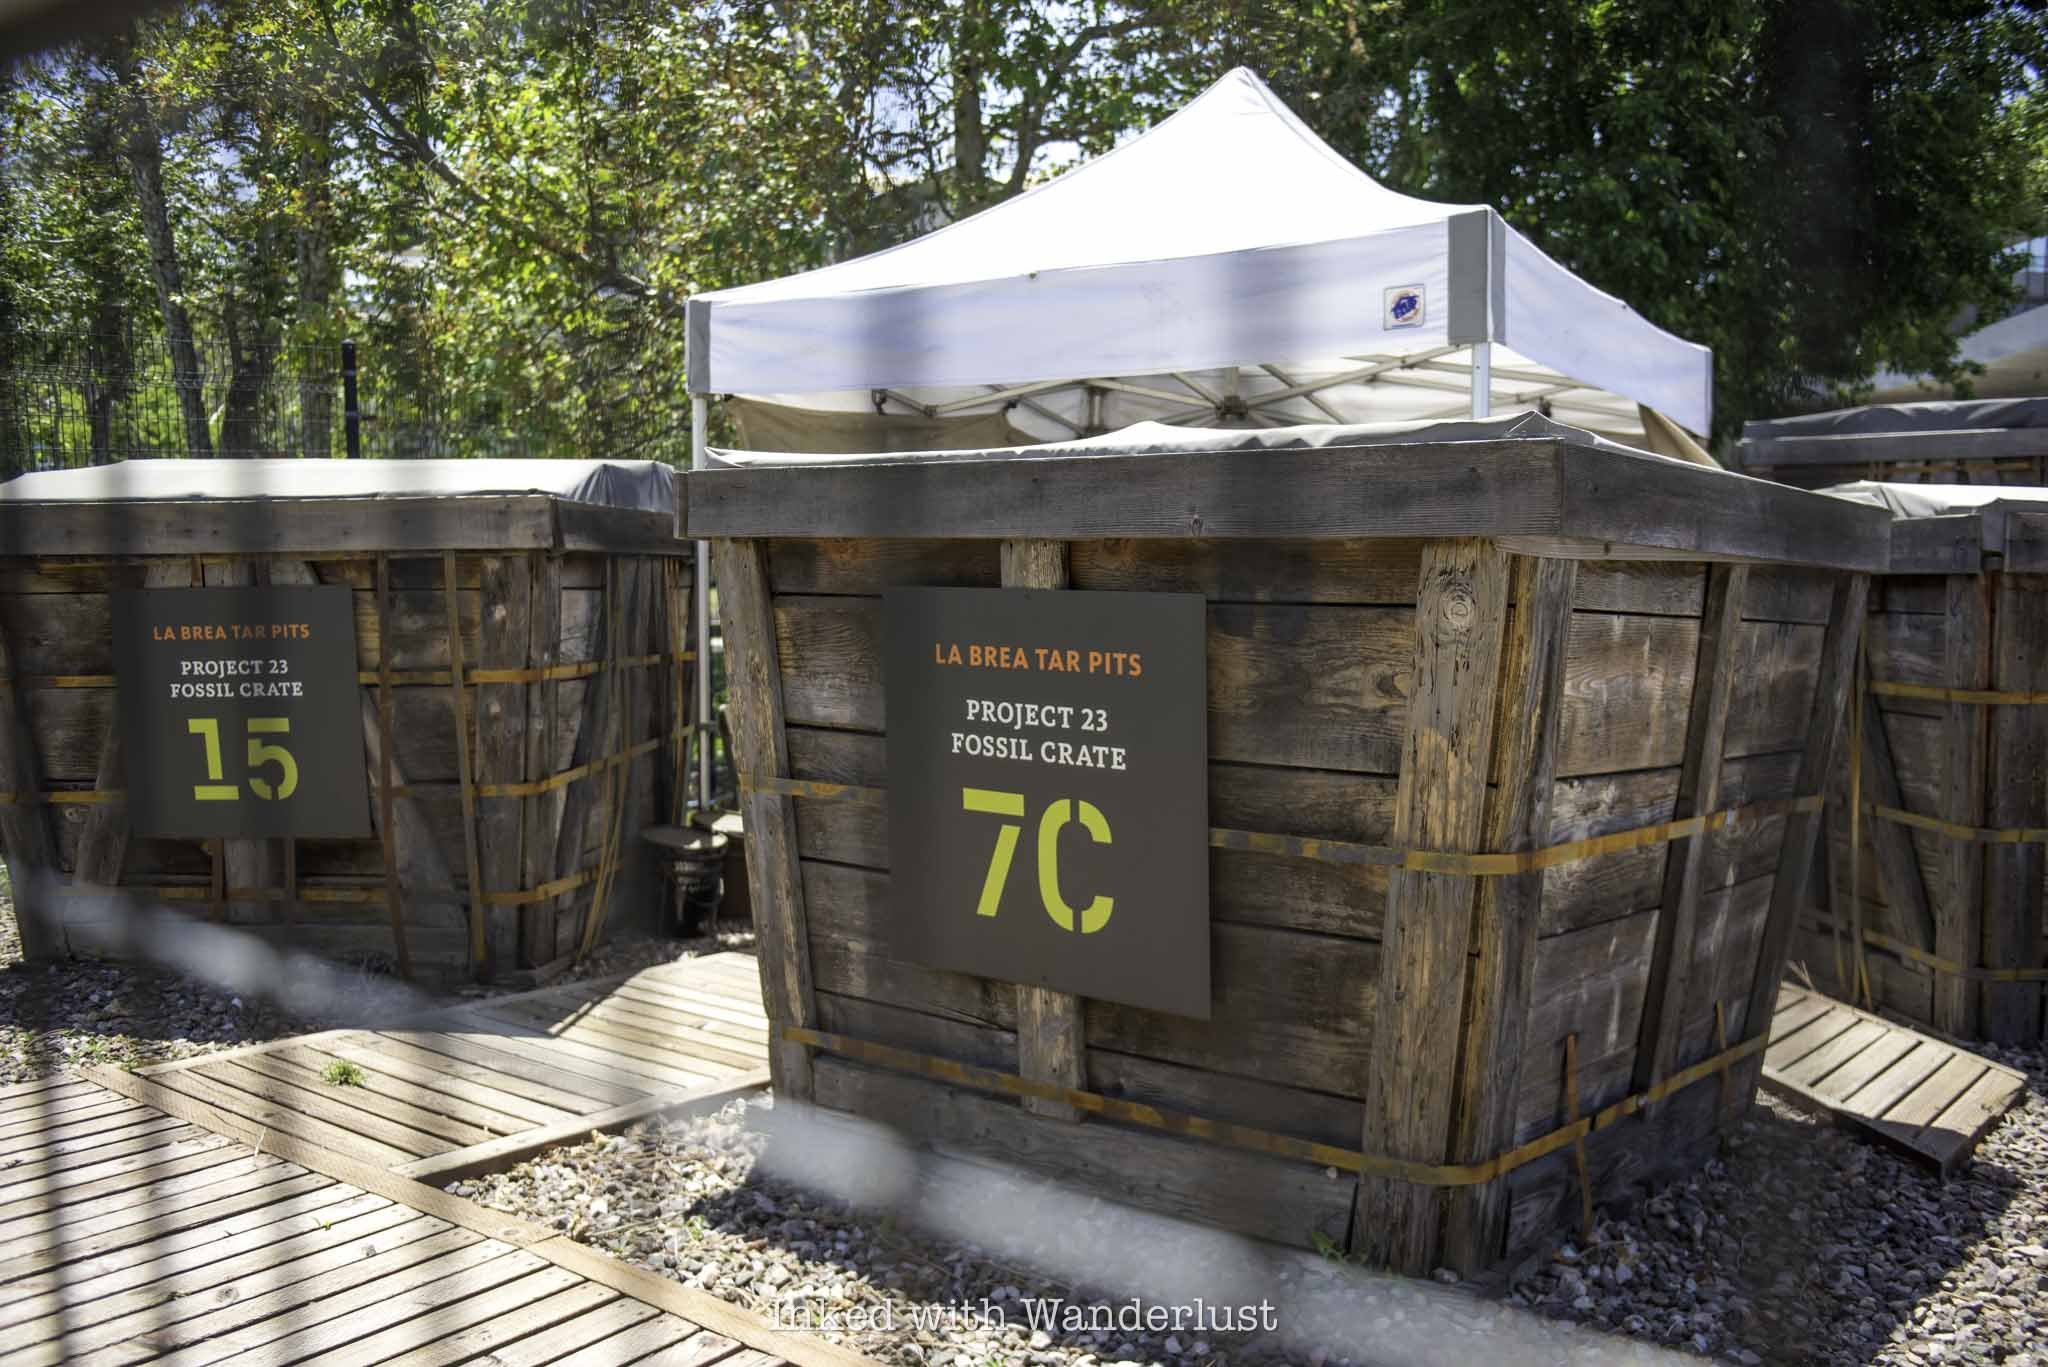
Each day, staff scientists and volunteers work on excavating each of the 23 crates. I didn’t see any new discoveries on my visit, but you might get lucky and see a new mammoth tusk unearthed. Since 2006, millions of new fossils have been discovered from these crates.

Adjacent to the Project 23 display is another tar pit, named Pit 9. It doesn’t look like much now, but this pit stands out as the site where 27 individual Columbian mammoths were discovered, in addition to 10,000 other fossils.
It’s truly amazing to be present in the same space where all of these massive, ancient animals once roamed and ruled. Without this, we would likely never know they were here, judging by the surrounding urban jungle we know today.
La Brea Tar Pits Museum

When you’re finished exploring the tar pits, it’s time to head inside the museum. If you’ve purchased your tickets ahead of time, have them ready on your phone for museum staff to scan.
The museum begins to the left of the ticket booth. As you enter the first exhibition hall, you’re immediately greeted by a large collection of complete and partial animal fossils and skeletons. The first of which you’ll see is a giant sloth and the skull/tusks of a mastodon.

Rounding the corner you’ll come into an open room with many more fossils. There’s also an interactive display giving you the opportunity to find out how difficult it is to escape when you’re stuck in tar.
Simply grab the handle and pull up. The bottom of the handle is submerged in tar. You’ll definitely feel the resistance as you pull as it gives you a good idea of how so many of these animals became stuck.

In this space, you’ll find several examples of mastodons and mammoths, both large and (comparatively) small. Remember Pit 9 where they found 27 of them? Many of them are on display right here.
This includes “Zed”, located near the end of this hall. Zed is the most complete Columbian mammoth skeleton ever discovered at La Brea Tar Pits. It’s about 80% complete, including its skull and both 10-foot long tusks!


Throughout the rest of the museum, you’ll see many more fossil exhibits, interactive displays, and even a working laboratory where you can observe staff scientists and paleontologists cleaning and conserving newly discovered fossils.

One of my favorite exhibits (aside from Zed, of course) is the wall display of the 404 dire wolf skulls. Because they hunted in large packs, dire wolves are the most discovered animal at La Brea Tar Pits, with over 1600 being discovered!
Near the dire wolves skull display, there’s an exhibit on ice age-era bird fossils, as well as complete skeletons of an American lion and saber-toothed cat. You’ll also see examples of large fossils still encased in mud and dried tar.


Beyond the fossil displays and interactive elements, there is a 3D theatre featuring the film Titans of the Ice Age. This is an additional cost of $8 per person. I passed on it, but it’s located at the end of the museum loop if you’re interested.
Additionally, there’s a nice green space in the center on the museum you can walk through. There are multiple entry and exit doors, so just choose one. We waited until the end of the museum tour to check it out.
The Future of La Brea Tar Pits

While the past is on full display at La Brea Tar Pits, they’re also looking towards the future. Depending when you visit, La Brea Tar Pits and Hancock Park could look very different than what you see in the photos above.
The Transformation is a project currently ongoing at the property to not only elevate and modernize what’s already here, but to add to it as well. New outdoor displays, upgraded pedestrian pathway, modernized museum, and more, are coming.
Construction is ongoing, as it was during my visit. Parts of the walking path around the tar pits were blocked off and there was a large structure (pictured below) being worked on. I believe that structure is going to be the new museum.

So when you visit, prepare yourself for the construction. It didn’t damper my experience at all. I’m looking forward to visiting again when this project is complete. You can read further details on it here.
From here, I encourage you to visit the adjacent Los Angeles County Museum of Art (LACMA) complex. Particularly the free, outdoor art exhibits, such as Urban Lights and Levitating Mass. Both have appeared in numerous Hollywood movies.
There’s also the LACMA museum proper, in addition to the Academy Museum of Motion Pictures. If you’re hungry, there’s almost always food trucks present in the area as well. All told, there’s enough in this one city block to keep you busy for a full day.
If you’re interested, read about this classic Los Angeles hike up to the backside of the Hollywood Sign and the summit of Mount Lee. Why view the sign from afar when you can get up close and personal to it?!
PROVERBS 16:9

YAKS on the 5: Delicious Artisan Burgers in Dunsmuir
Since its opening in 2003, locals and visitors alike have flocked to Yaks on the 5 for their hearty varsity of artisan burgers, sweet sticky…
Disclosure: This post contains affiliate links. If you make a purchase through these links, I may earn a small commission at no additional cost to you. I only recommend products or services that I believe will add value to my readers.
Since its opening in 2003, locals and visitors alike have flocked to Yaks on the 5 for their variety of hearty artisan burgers stacked high with unique toppings, sweet sticky buns and an array of other American-fare dishes.
I finally had the opportunity to try it for myself and I have to say, I wasn’t let down. It lived up to hype and some. After-all, its been named one of the best restaurants in America on Yelp’s top 100 list.
Looking at it from the outside, you might think it doesn’t look like much. Once you’ve tried it for yourself, though, I have no doubt you’ll be singing its praises along with me. It’s pricy, which is the only negative at Yaks. However, you get your money’s worth for sure.
Quick Stats
Location: Dunsmuir, California
Type of Food: Artisan burgers, BBQ and other American fare
Alcohol: Yes
Cost: $13 - $26 pp
Seating: Inside and outside
My Visit(s): May 2025
Getting to Yaks and Parking
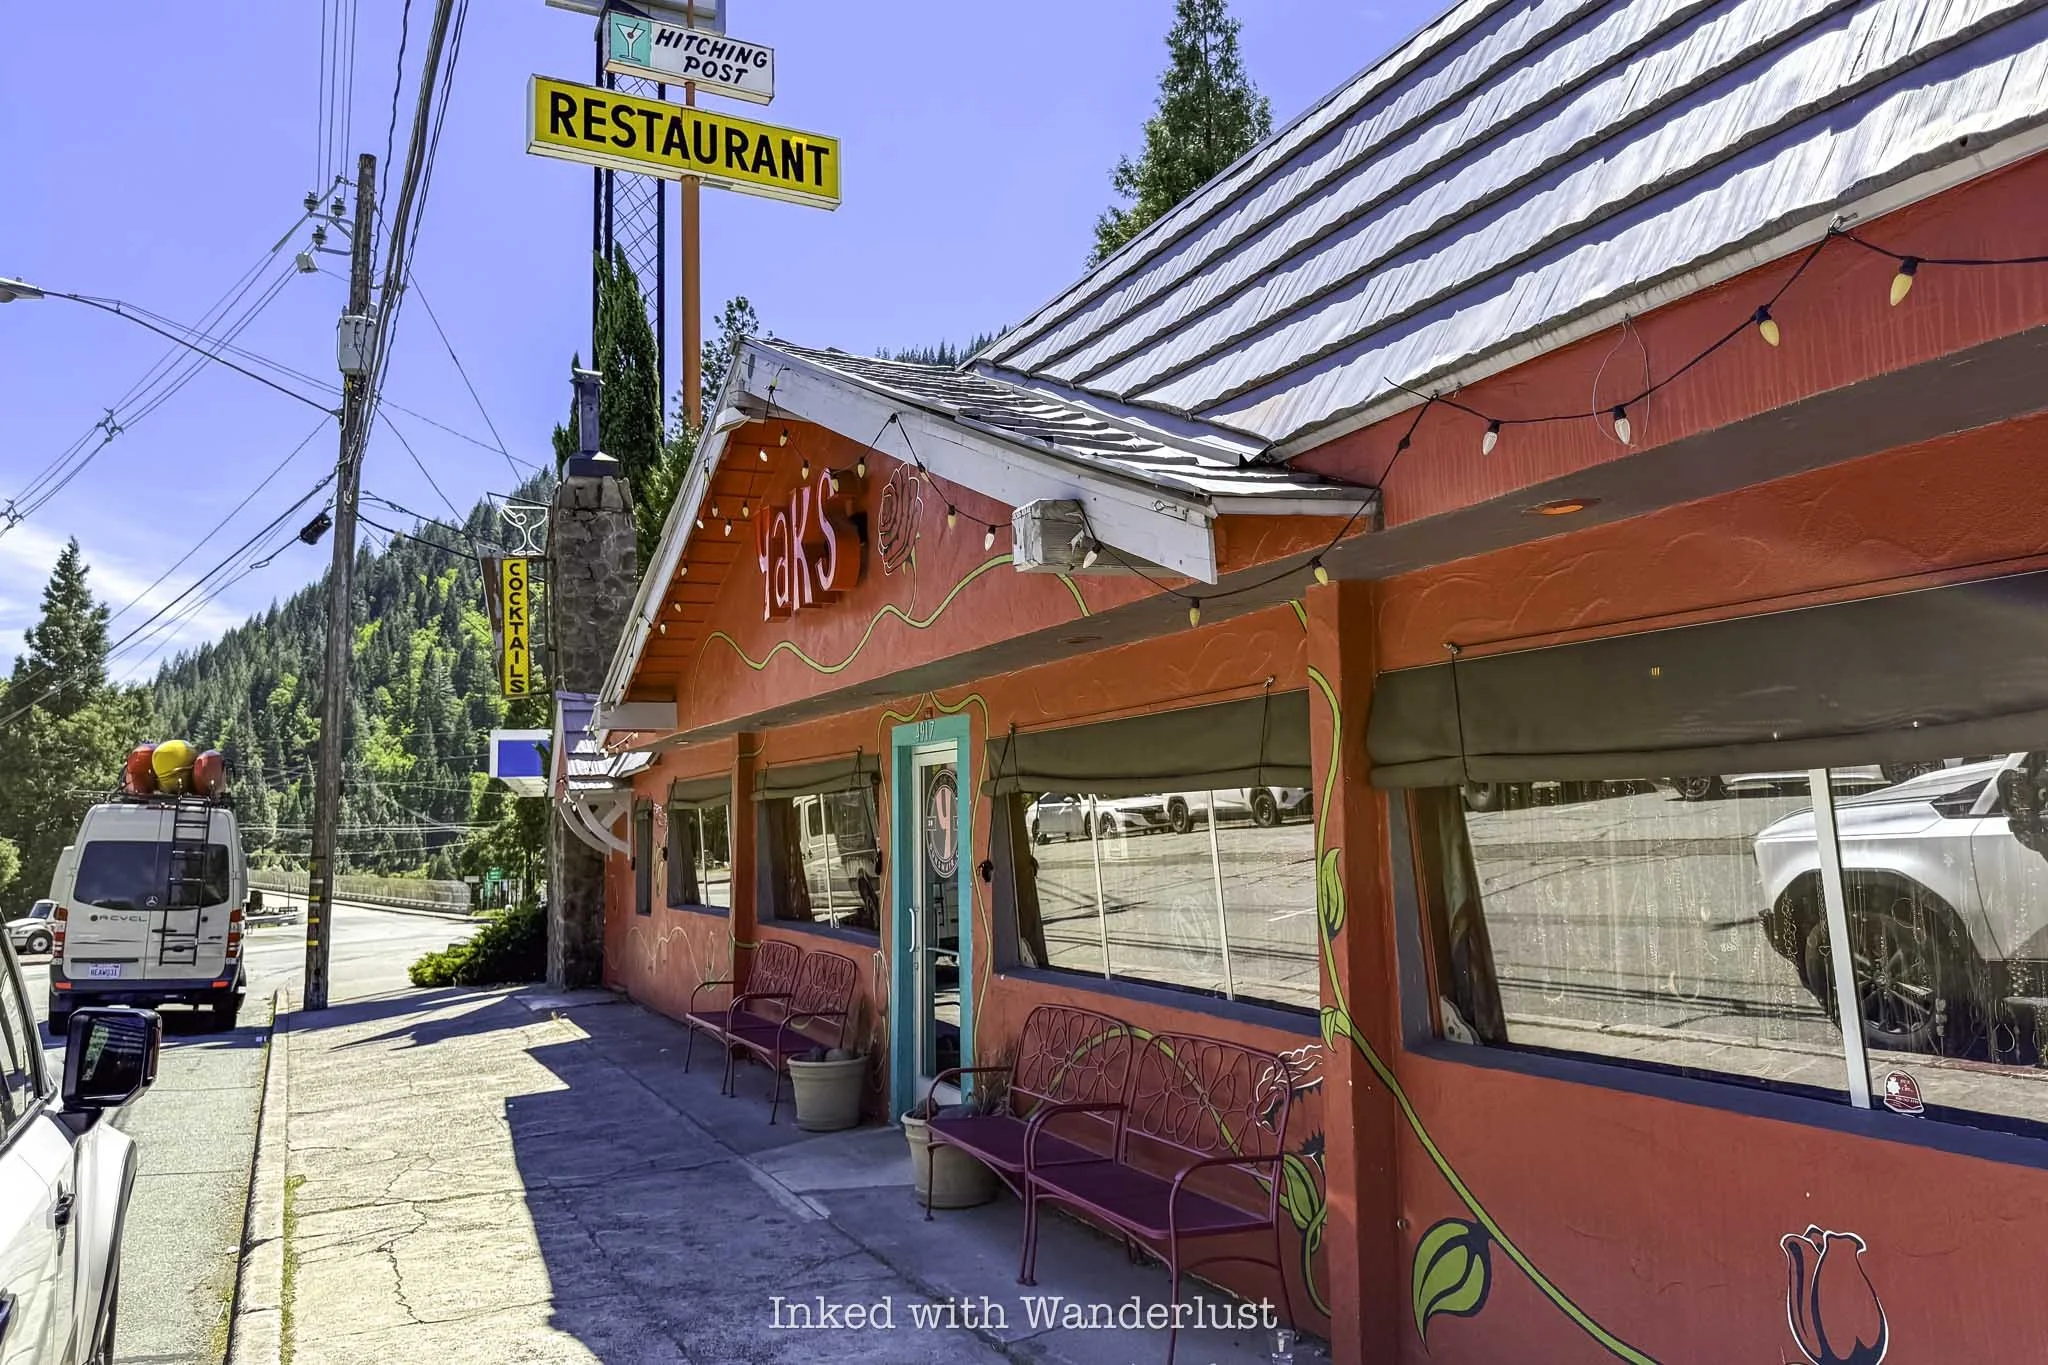
There are two Yaks locations - one in Shasta City and another in Dunsmuir. This post pertains to the Dunsmuir location, specifically. It’s located directly off of Intestate 5 (hence - Yaks on the 5).
You can see it from the freeway and the restaurant’s exterior is bright red, so there’s no getting lost. From either direction, you’ll exit onto Dunsmuir Avenue and go right. There’s limited street parking out front and additional parking in the back.
If you drive an EV, there are two ChargePoint stations behind the restaurant. There’s also additional seating back there, which is nice because the inside is fairly small and often fills up quickly.
The Restaurant and Food

Yaks’ menu mostly consists of unique, artisan burgers. A couple examples include the OMG!, which is a burger topped with jack cheese, fried onion strings, beer battered jalapeños, lemon-ginger marmalade, cream cheese, garlic aioli and red leaf. This is one of their most ordered burgers.
By the way, if you don’t say anything, your burger will be cooked pink. Which typically means “medium” doneness. If you want REALLY pink, no pink or hockey puck (if you’re anything like my mom) be sure to request this when ordering.

There’s also the Bacon Overload, which is what I ordered. This burger is topped with jack cheese, bacon crumbles, house-made fried onion strings, house-made ranch drizzle, garlic aioli and red leaf.
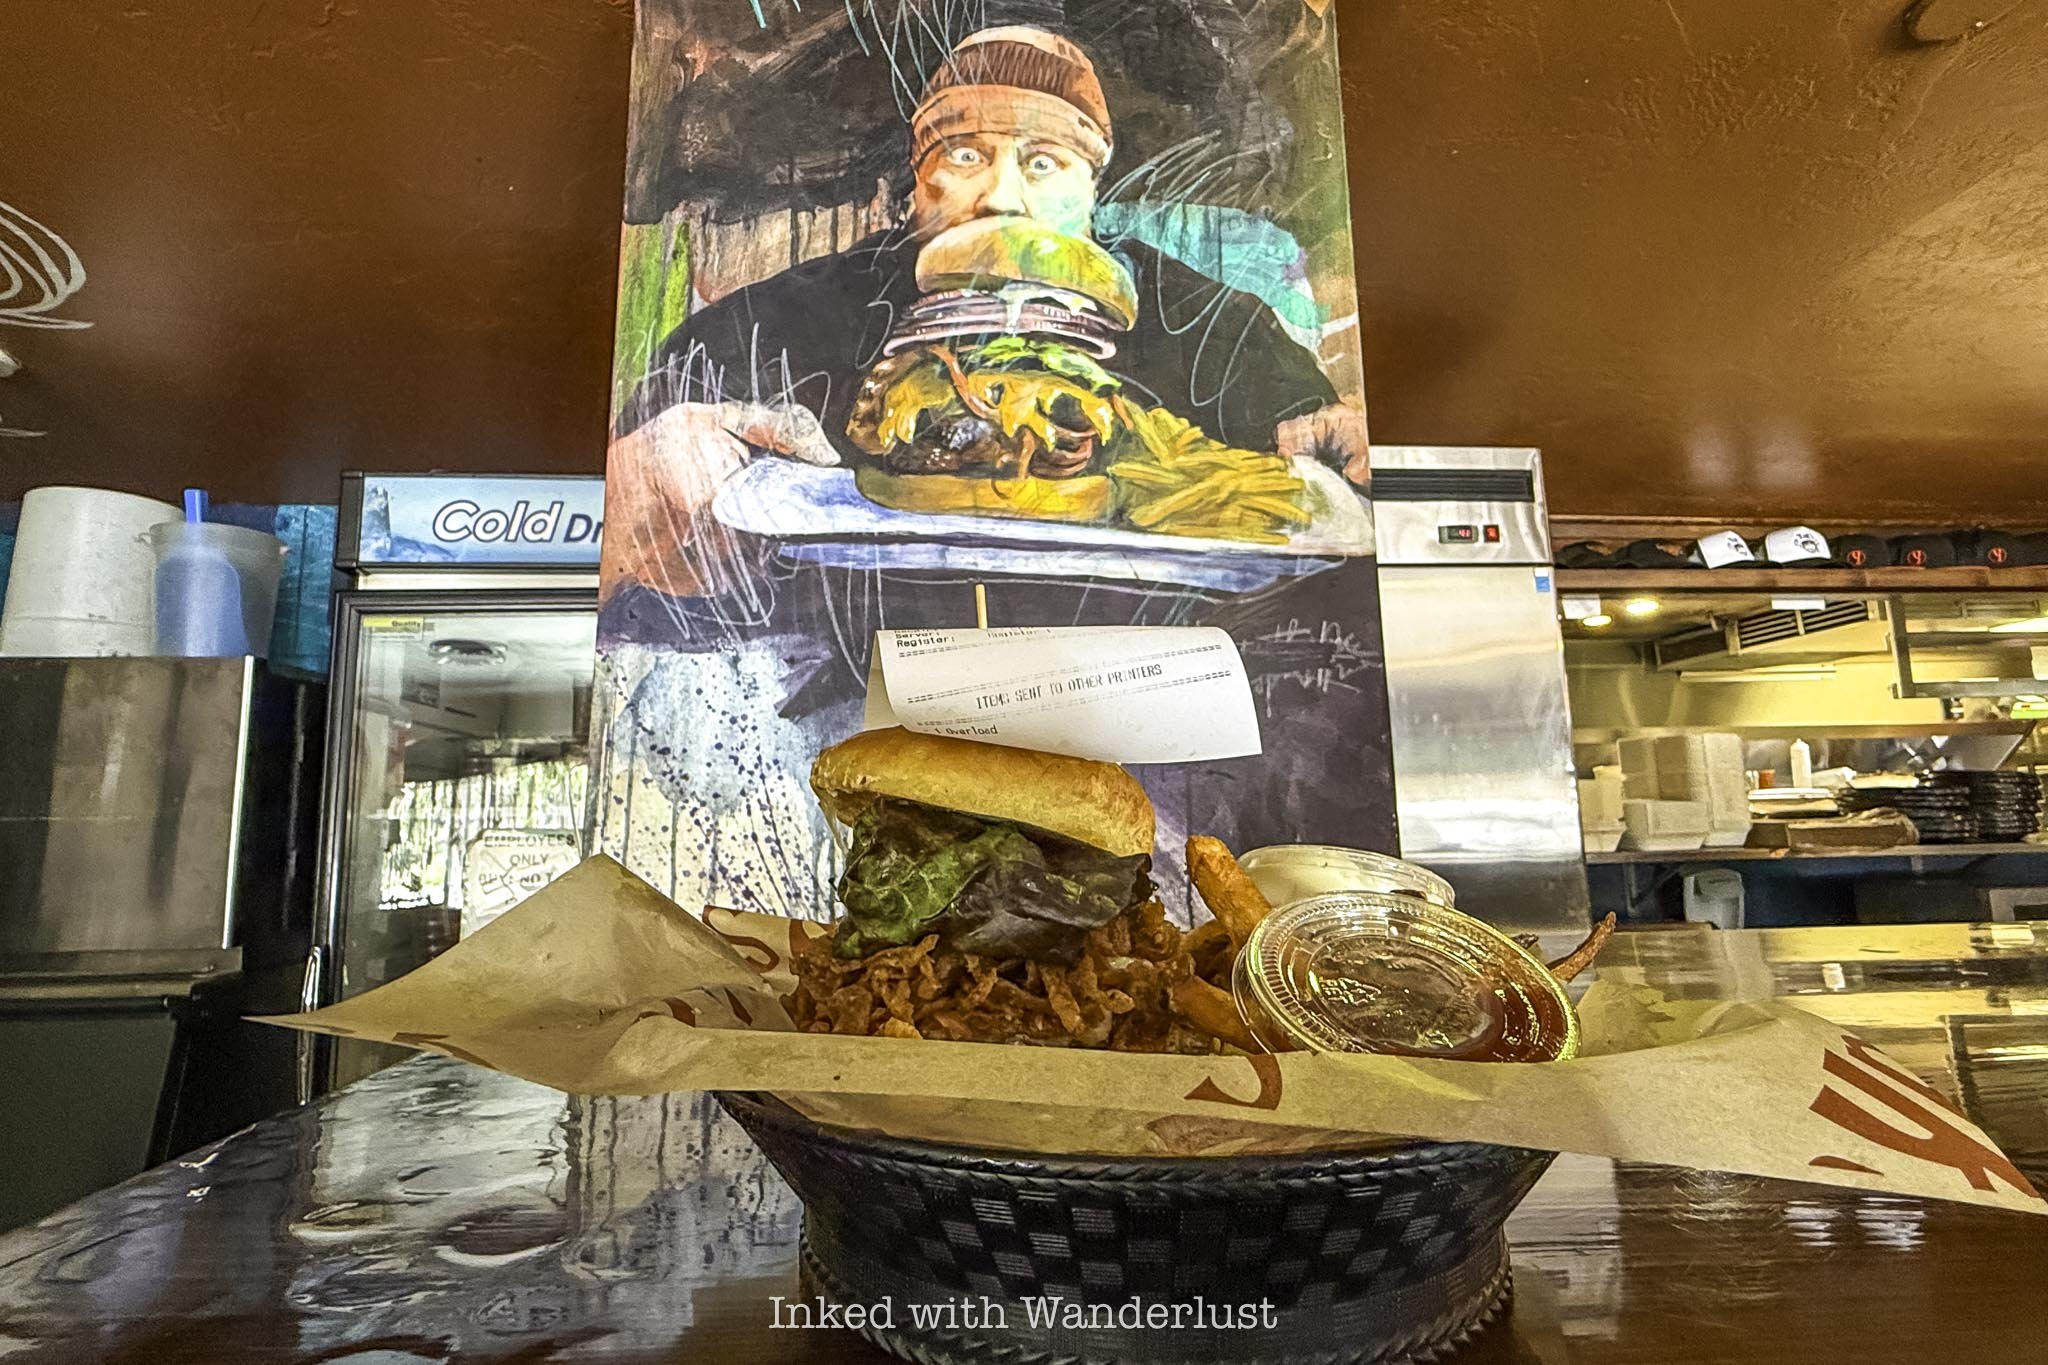
In short, it was delicious. The flavors of this burger blended well and exploded with every bite. I’m normally not a ranch guy, but their house-made ranch was amongst the best I’ve ever tried.
If you don’t upgrade, your burger will come with a side of chips. I decided to upgrade to their house-cut fries, though, and I’m glad I did. They’re salted and fried perfectly, and come with a side of their house-made lavender ketchup.


Two more popular menu items at Yaks include their famous sticky buns. The buns’ flavor of buttered bourbon and warm caramel sauce comes together as decadently as it sounds. If all you want are sticky buns, they let you skip the main ordering line.
Their most ordered appetizer is the Scott’s Tots. Their crispy-fried tater tots smothered in their sweet and spicy brown sugar-cajun rub and topped with bacon, jack cheese, gorgonzola, house-made chili-lime aioli, cilantro and a squeeze of lime.

To me, there’s nothing better than a burger and beer after hiking. I asked the cashier for her recommendation (since they have twenty beers on tap) and I ultimately went with the Blackberry Blonde by Fall River Brewing Company. It was perfectly refreshing.

All told, Yaks on the 5 is a great place to eat. Whether you’re hiking in the area or just passing through, it’s the perfect meal to keep you going. It is definitely pricy but do your best to look past that because the food really is top notch and worth it.
By the way, if you’re looking for outdoorsy things to do in Dunsmuir, I recommend checking out Hedge Creek Falls, Castle Crags State Park, and the enchanting Mossbrea Falls hike.
PSALM 121:7-8

The Ultimate Guide to Mossbrea Falls in Dunsmuir (Step-by-Step Directions)
Visiting Mossbrea Falls, located in the wonderful Northern California town of Dunsmuir, is like stepping straight into a fairytale novel. This unique waterfall is fed…
Disclosure: This post contains affiliate links. If you make a purchase through these links, I may earn a small commission at no additional cost to you. I only recommend products or services that I believe will add value to my readers.

Visiting Mossbrea Falls, located in the wonderful Northern California town of Dunsmuir, is like stepping straight into a fairytale novel. This unique waterfall is fed by multiple springs which flow through a moss-covered mountainside and into the Sacramento River.
Stretching roughly 175-feet across and 50-feet at its highest point, the falls create a lush, living tapestry of water and greenery. It’s an absolute dream for hikers, photographers, waterfall chasers and nature lovers alike.
There’s one caveat to hiking to Mossbrea Falls, though—it isn’t exactly legal. Being at the falls isn’t the problem, rather it’s the route you’ll need to take to get there. Technically, you’ll be trespassing not once, but twice on the way.
Normally, I wouldn’t include something like this on my website, as I like to promote responsible travel and hiking practices. However, all parties involved have seemingly relaxed their position on this. So I decided to promote the responsible way to enjoy this illegal hike (make sense?).
Buy me a coffee?
If you found this blog helpful, consider leaving a tip through the Buy Me A Coffee button below! Whether it’s $1 or $5, every bit helps offset small travel costs like coffee, water, lunch, parking, or park entry fees. Your support means the world—thank you!
Trail Stats
Location: Dunsmuir, California
Fee: None
Open: Year round, but difficult to access in winter
Family Friendly: No (potentially)
Cell Service: Limited
Restroom: Portable near the trailhead
Parking: Street
EV Stations: None, but there are two charging stations down the road at Yak’s
Difficulty: Easy
Popularity: Moderate to high
Mileage: 3 miles, out and back
Condition: No maintained trail, but simple to follow the worn path
Elevation: 2,529 feet
Features: Multiple waterfall streams into a flowing river down moss-covered cliffs
Best Viewed: Spring, for full flow
Pets: Allowed
Drones: No signs stating you can’t
Hazards: Potential wildlife interactions and walking along an active railway
My Visit(s): May 2025
Is Mossbrea Falls Illegal?

The short answer…yes. This is because of the route, though. NOT the waterfall itself. There are two points on the route where you’ll be trespassing—once when you walk through Shasta Retreat and again when you walk along the train tracks, which is owned by Union Pacific.
There are numerous signs stating such at both locations but as stated above, these two parties have seemingly relaxed their position. I won’t name names, but I have spoken with a county employee, two Union Pacific employees, and a local about Mossbrea Falls.
Based on what I have been told, the people at Shasta Retreat do not mind people WALKING through to access the falls. However, they VERY MUCH mind folks parking down there. If you do, your vehicle being towed is all but certain.
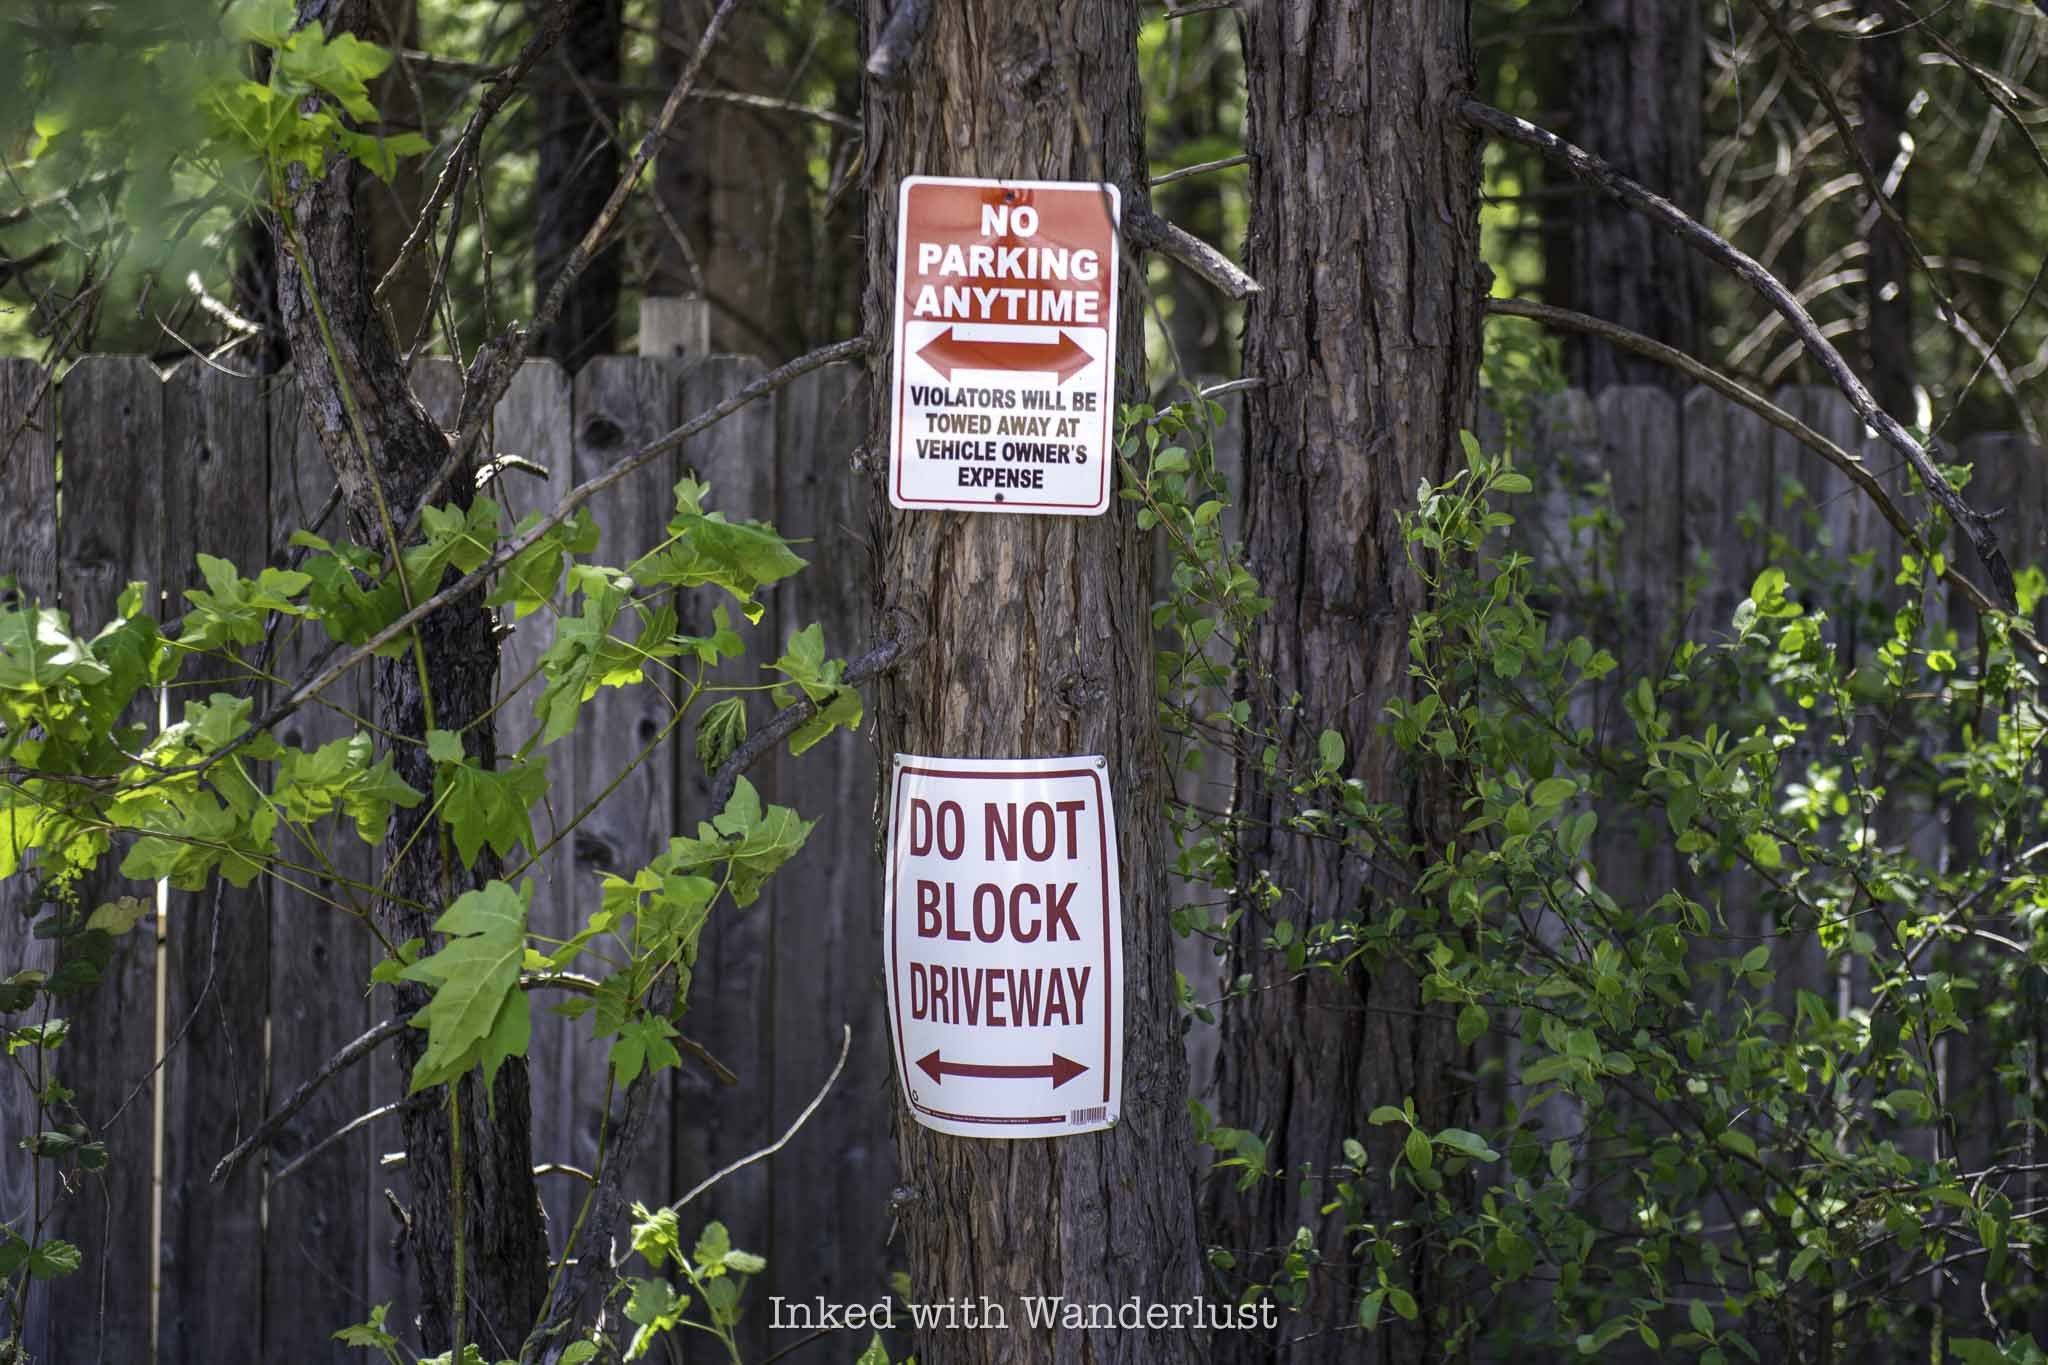
Secondly, Union Pacific also does not seem to care much about it either. The railroad section is the longest stretch of the “trail”, as you’ll walk along the tracks for just shy of a mile. On my visit, I passed multiple UP employees and passed a train as well.
The UP employees I spoke with stated that their main gripe is people walking ON the tracks as opposed to alongside them. They say people have been much better about it in recent years, so Union Pacific’s stance has cooled.
Evidence of this was when I passed a stopped train on my way to the falls. Instead of a lecture, I received a smile and a wave from the conductor. Additionally, I walked by a parked Sheriffs Deputy on Dunsmuir Avenue on my out and he just waved as well.
As long as you’re being respectful and not parking anywhere you’re not supposed to, you shouldn’t have any issues. That could always change, though, so don’t take my word as gospel. I’m simply relaying my experience and what I was told by key individuals.
Where to Park to See Mossbrea Falls

Parking, as opposed to the trespassing part, appears to be the biggest point of contention as it pertains to getting to Mossbrea Falls. There is free, limited parking available along the west side of Dunsmuir Avenue. However, most of the curbs are either red or white.
The east side of the street (the side closest to Interstate 5) is 100% no parking. Don’t do it. Additionally, there are a couple of tempting dirt pull-outs along the road, but most of them have posted “no parking” or “private property” signs.


Just up the road from Shasta Retreat there’s a large parking lot next to a community ball field. There’s an abandoned building there, as well as a coffee and food truck called Up-N-Running Espresso. This is where I parked.
When talking to a local while getting my morning coffee, I was advised that despite the posted “no parking” signs, nobody would care if I parked there. According to her, it’s rarely ever enforced, especially outside of the summer months.
Sure enough, my vehicle wasn’t towed, nor did I receive a ticket. If you’re visiting during the summer, I would arrive early and snag one of the street parking spots to play it safe. In early spring or fall, you’ll likely be ok in that lot.

Further down Dunsmuir Avenue and right after the I-5 off-ramp across from Chevron and Yak’s on the 5 restaurant is a dirt pullout long enough to accommodate multiple vehicles. Parking down here will add another half-mile or so to your hike.
I must stress again to NOT park at the entrance to or in Shasta Retreat. Please don’t give them any reason to take this access point away. Additionally, don’t put “Mossbrea Falls” into your GPS. This will take you into Shasta Retreat. Instead, use this address to drive there:
4727 Dunsmuir Avenue (this will take you to the parking lot I mentioned above)
How to Get to Mossbrea Falls

I’m going to give you the most clear and to-the-point directions to Mossbrea Falls you’ll find anywhere. There will also be many photo references. Be sure to bookmark this post to your device so you can refer back to it later on.
From where you parked, start walking north on Dunsmuir Avenue towards Shasta Retreat. When you get to the arch pictured above, the street going through it and into the retreat is Scarlet Way. Proceed (walking) down that street.
By the way, they have set up a port-o-potty, complete with handwashing station, near this arch for public use

When you get to the bottom of the road, it’ll become Cave Avenue. Turn right. Soon after, you’ll come to the bridge pictured above. Cross it and check out the gorgeous views of the Sacramento River below.
When you get to the other side of the bridge, you’ll come to the railroad tracks you’ll be strolling alongside of for the next mile. Turn right at the tracks and remain on the east side of them (the side closest to the river).

Much has been said online about this stretch of the “trail” being too dangerous. In my opinion, there was nothing inherently dangerous about it, provided you’re staying off of the tracks and keeping your ears open for oncoming trains.
There is plenty of room to safely walk on the east side (nearest the river) even if a train is passing through. Conversely, the west side is a different story. If you walk on that side, you’re simply asking to get hit.

There’s a well-worn, noticeable path throughout much of this stretch that comes and goes. The rest of the time you’ll be traversing on what I call, “rail rocks”. These rocks, while not huge, are larger than basic gravel and are exceptionally loose.
More than once while walking on a slant, the rocks gave way, causing my foot to slide a bit and threw me off balance. I never fell or anything like that but if you have balance issues or sensitive ankles/knees, I would take it slowly.
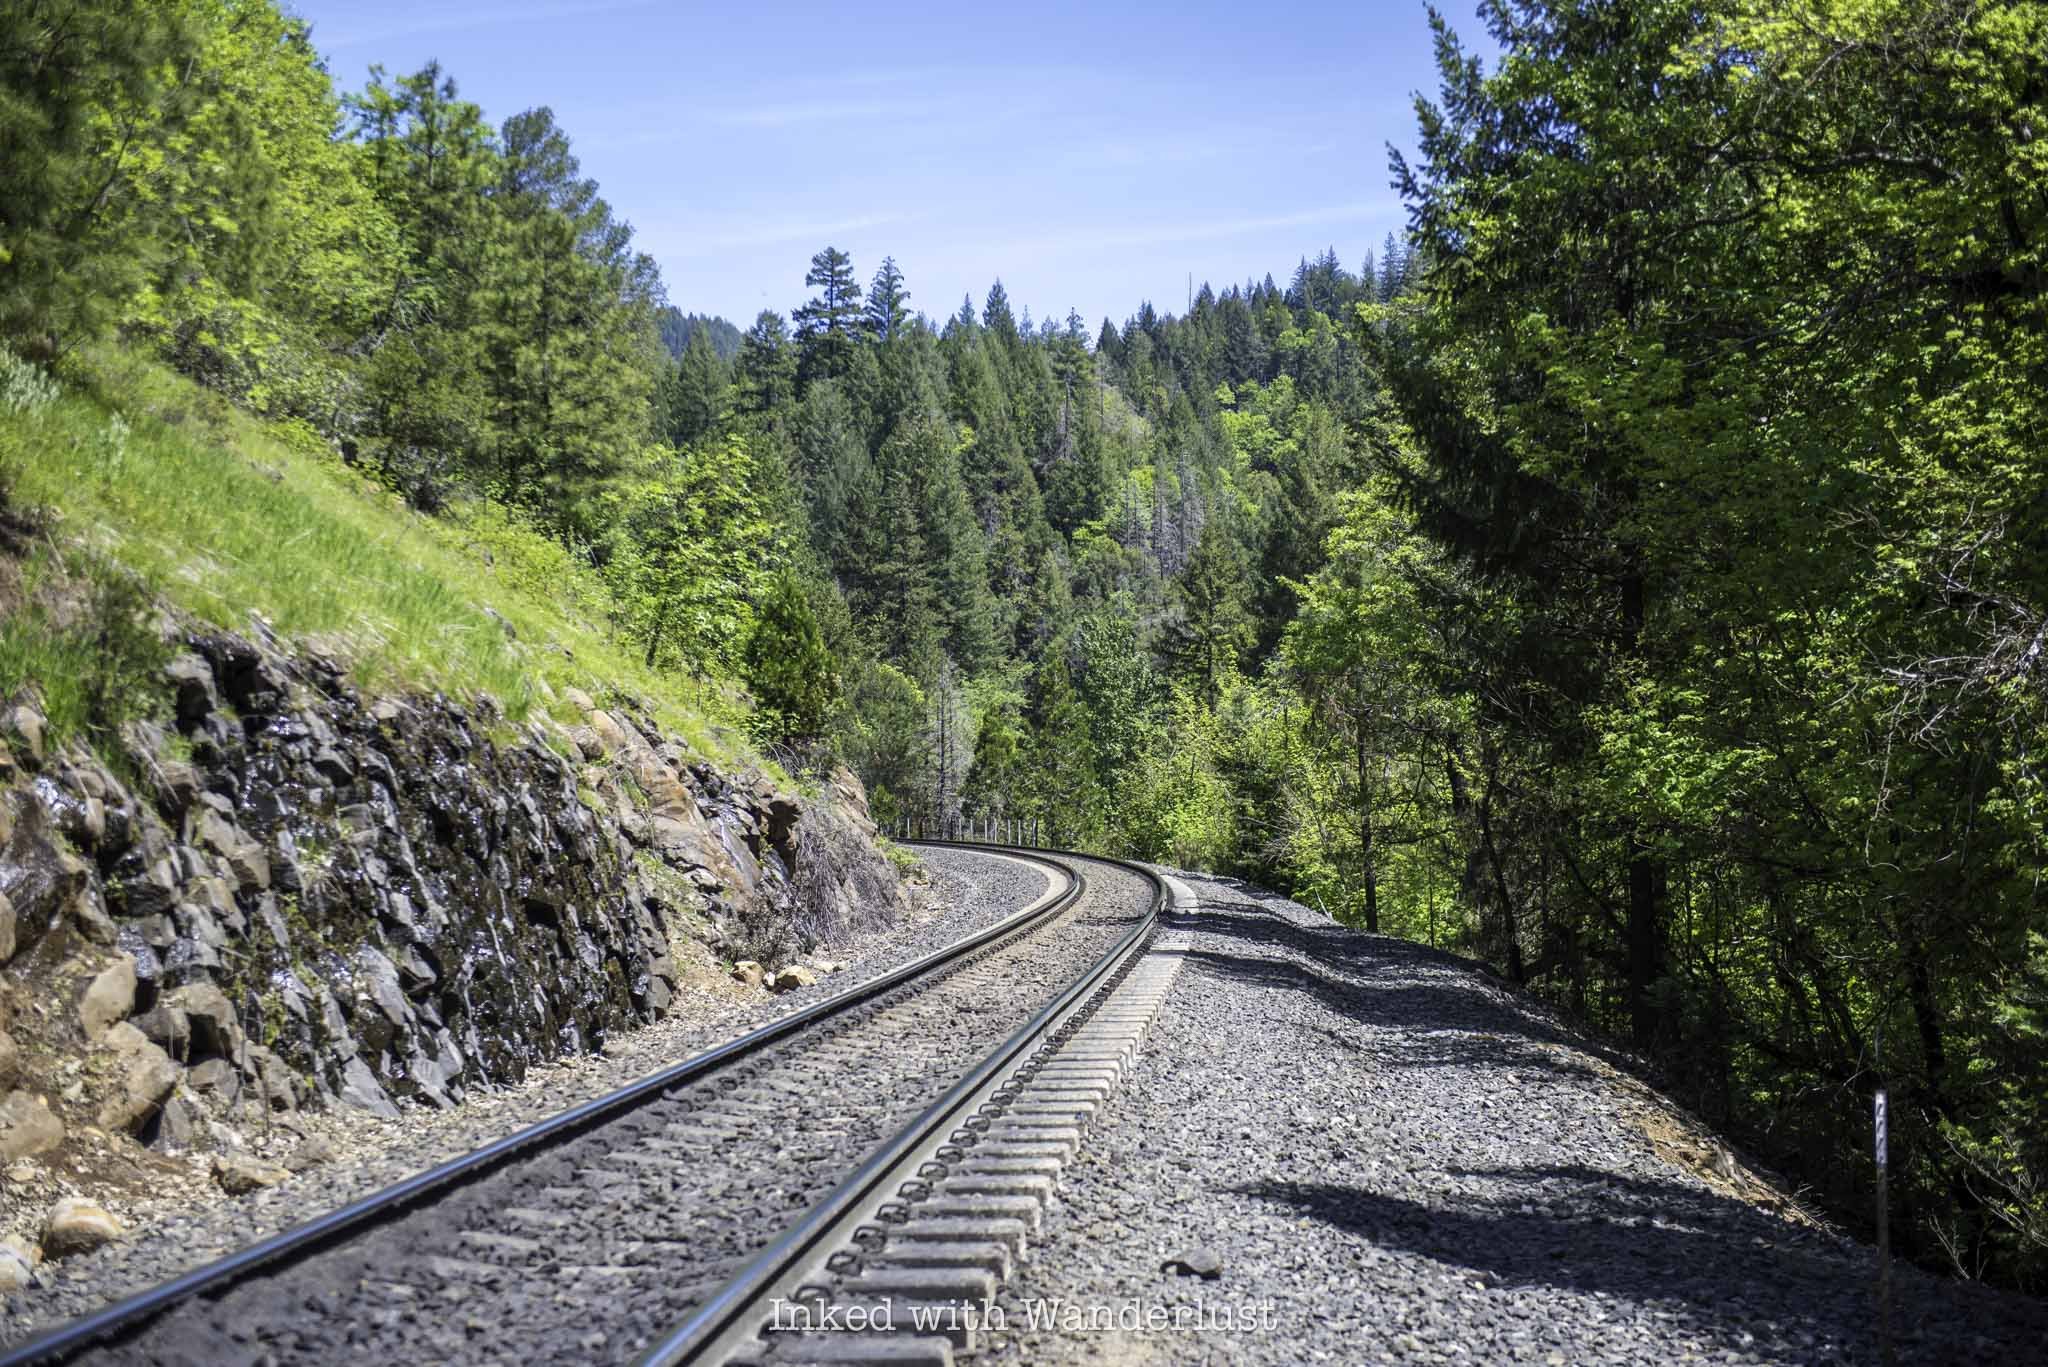
Admittedly, there are a few points along this one mile stretch of track where it gets a bit narrow. I didn’t run into any moving trains, but there was one parked and I walked alongside it for probably half the time.
If it were moving, those narrow portions would’ve been nail biters. If you happen to be at the narrow points and hear or see a train coming, simply step as far to the side as you can and wait for it to pass before proceeding.
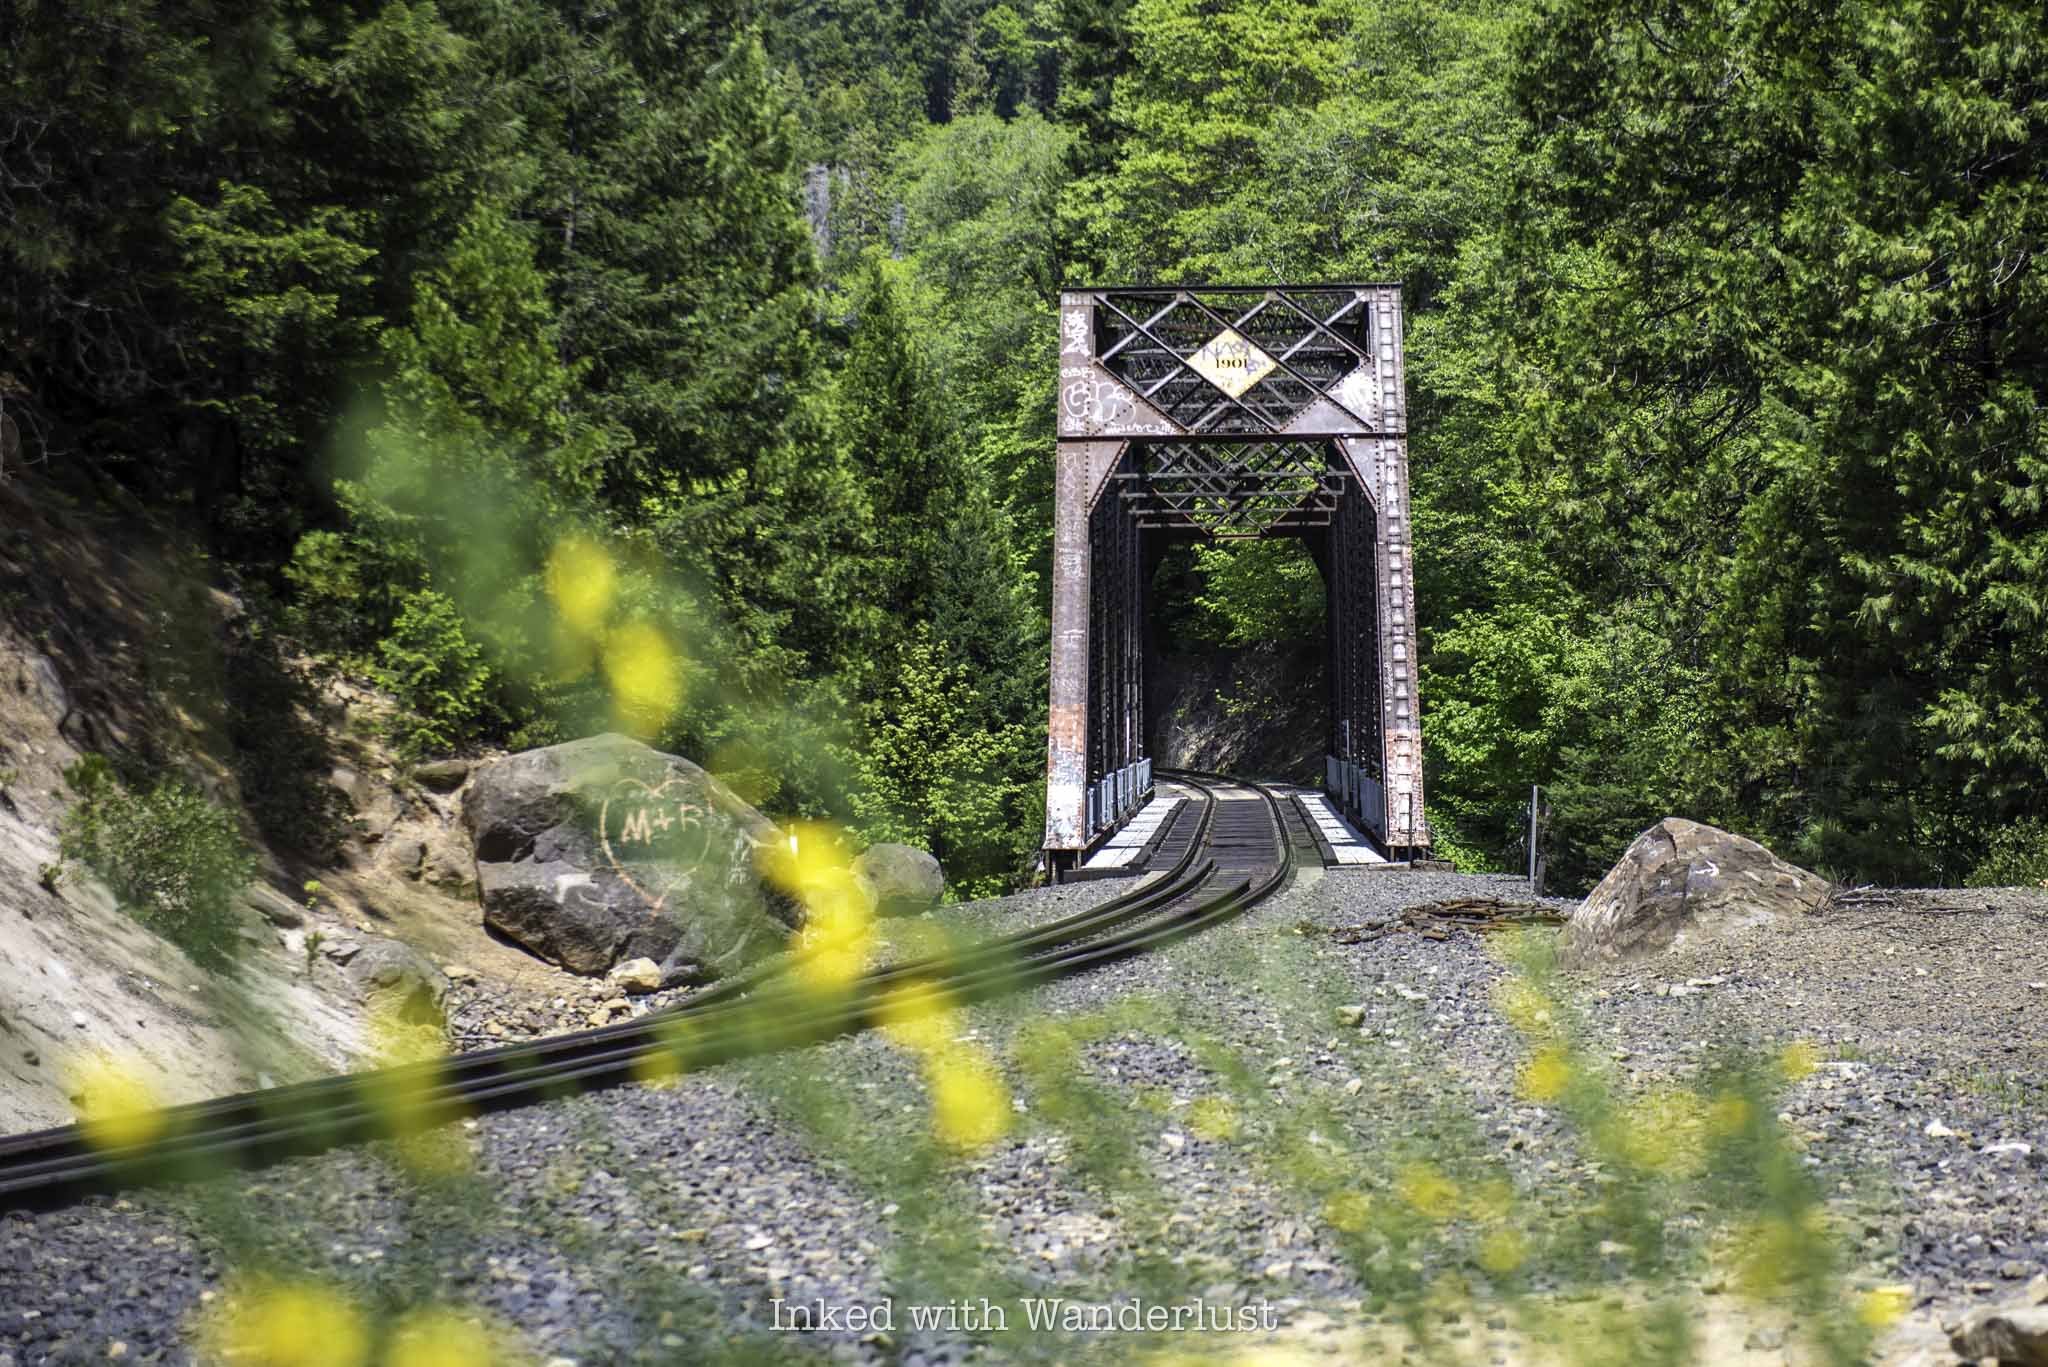
There are no signs pointing the way to the falls, but thankfully there’s a big tell letting you know when you’re there. When you come to the trestle bridge in the photo above, stop. Don’t cross it. Instead, turn right and head into the trees.
Just on the other side of those trees is where you’ll find Mossbrea Falls. If you’re here in the spring like I was, you’ll likely hear the falls before you see them. There are multiple paths and each one will lead you to the same spot.
Mossbrea Falls

When you get into the trees, the multiple flowing streams which make up Mossbrea Falls quickly come into view. If you’re here in the spring, the Sacramento River will be flowing heavily and fully, leaving only a small-ish shoreline to view the falls from.

As summer progresses and especially into the fall, the river levels lower, exposing more shoreline and allowing you to get closer. Even with a depleted shoreline, though, you’ll still have a close view.

The best time of day to visit Mossbrea Falls, in my opinion, would be morning or closer to sunset. I had minor car trouble on the day of my visit, which delayed my arrival to around mid-day and I had to deal with the harsh sun hitting the river.

As far as best time of year goes, I would recommend either spring or fall. In the spring, both the river and falls are at their fullest. In the fall, Mossbrea Falls is still flowing, but you’ll have the added benefit of lower river levels and the beautiful fall foliage. Both scenarios are great for photography.
When you’re done viewing the falls, simply head back in the same direction you came. Remember to walk in the space between the tracks and river, keeping your ears open for oncoming trains.
Is Mossbrea Falls Family Friendly?

This is a question commonly asked online and honestly, it can only be answered by individual parents. Personally, I didn’t see any kids at the falls or along the trail during my visit. However, I have seen photos online of families at the falls.
If your kids are teenagers, they shouldn’t have a problem. Especially if they have experience with the outdoors. However, I can see smaller children struggling with the rail rocks. There’s also the potential for danger from the trains.
Only you know your children and their abilities. As amazing as Mossbrea Falls is, it isn’t worth it if you have doubts about them being able to get through the trail. There are solid alternatives in the area, such as Hedge Creek Falls, McCloud Falls and Burney Falls Scenic Loop.
Mossbrea Falls: An Uncertain Future

For years, the city of Dunsmuir has been actively campaigning to construct a safer (and…legal) path to Mossbrea Falls. There have been many hurdles, such as money and getting property owners to relinquish portions of land to make the trail possible.
Recently, Union Pacific agreed to sign over a portion of their land, but the city still needs to raise funding. The current proposal involves extending the Hedge Creek Falls trail. A bridge would be constructed, allowing hikers to safely cross the Sacramento River.
On the other side, fences would be built, keeping people away from the railroad tracks. To bridge the gap, a trail (likely a wooden boardwalk or something similar) would connect you to Mossbrea Falls.

The project is estimated to cost well into the millions. I’m not sure how close or far away they are, but the city is actively asking for donations. They’ve placed a sign with a QR code near the entrance to Shasta Retreat. You can view their website, donation page, and proposal here.
Until this idea becomes a reality, we’ll need to be comfortable with committing misdemeanors in order to see what I believe is one of the most beautiful waterfalls in the state. I truly hope the city can make this happen.
For now, please be respectful when on Shasta Retreat property. No pictures of people’s homes, loitering, parking, etc. Pass through as quickly and quietly as you can. Furthermore, keep off the tracks when on UP property.
The point of all of this is to not give either any reason to reverse their decisions to be relaxed on us trespassing. It’s a privilege that either could strip from us without warning. Let’s do our part to keep Mossbrea Falls as accessible as possible for everyone.
Buy me a coffee?
If you found this blog helpful, consider leaving a tip through the Buy Me A Coffee button below! Whether it’s $1 or $5, every bit helps offset small travel costs like coffee, water, lunch, parking, or park entry fees. Your support means the world—thank you!
EXODUS 13:21

Hollywood Sign and Mount Lee Summit Hike: The Best and Easiest Way (2026)
Before starting this hike, there are a few things you need to know. This trail has been involved in controversy over the years as…
Disclaimer: This post contains affiliate links. If you make a purchase through these links, I may earn a small commission at no additional cost to you. I only recommend products or services that I believe will add value to my readers.

The hike up to the Mount Lee summit and behind the infamous Hollywood Sign is one of the best hikes in Los Angeles. On a clear day, the views from the summit are unparalleled and you get a unique perspective of the sign that most don’t.
Before starting this hike, there are a few things you need to know. This trail has been involved in controversy over the years as parts of it (and former trailheads/parking areas) intersect with neighborhoods in the Hollywood Hills.
To avoid catching trespassing charges and fines, and to keep this trail accessible to everyone, you’ll need to know where to park, where to begin the trail, areas to avoid, gate access, and more.
In the post below, I will give you a step-by-step guide on the best, easiest, and most straightforward path to Mount Lee and the Hollywood Sign (including a plethora of photo references). Be sure to bookmark this post to your device so you can refer back to it later on.
Buy me a coffee?
If you found this blog helpful, consider leaving a tip through the Buy Me A Coffee button below! Whether it’s $1 or $5, every bit helps offset small travel costs like coffee, water, lunch, parking, or park entry fees. Your support means the world—thank you!
Trail Stats
Location: Los Angeles/Hollywood, California
Fee: None
Open: Sunrise to sunset
Family Friendly: Possibly, if your kids have hiking experience
Cell Service: Good, but spotty in some areas of the trail
Restroom: None
Parking: At Lake Hollywood Park along the street
EV Stations: None
Difficulty: Moderate to hard (depending on your fitness level)
Popularity: High
Mileage: 4.6 miles (from Lake Hollywood Park, to the summit, and back)
Elevation: 1,708 feet
Time: 2-3 hours, round trip
Condition: Mostly flat and easy to follow
Features: Behind Hollywood Sign view and expansive views of Los Angeles (on a clear day)
Best Viewed: Any time of year
Pets: Allowed
Drones: Prohibited
Hazards: Sheer drop offs, heat exposure, and rattlesnakes
My Visit(s): April 2025
Where to Park - Lake Hollywood Park

For this particular hike, the only safe place to park is at Lake Hollywood Park. This park has become a hot spot for tourists wanting to capture an epic selfie with the Hollywood Sign and hills serving as the backdrop.
Due to this, you’ll want to start early. I got here at around 8am and was one of only three cars. By the time my wife and I got back to the car a few hours later, we were one of dozens and parking was getting tight (see photos below).

(8:15am)

(11:30am)
To avoid getting fined and potentially towed, be sure to park on the side of the street closest to the park as you’ll have unlimited parking between 6am and 8pm. On the other side, parking is limited to just fifteen minutes (there’s no fee to park on either side as of May 2025).
Other posts advise you to start your way uphill and walk along Mulholland Drive to start the hike. I advise against this, as this stretch of road is narrow with many blind spots and is often heavily trafficked. It’s simply too dangerous.
Instead of walking uphill, walk downhill on the sidewalk towards the residential area (pictured above). You’ll eventually come to the corner of Innsdale and Canyon Lake Drive. Once there, you’ll see a gate on your right (pictured below).


When I got here, there were vehicles parked in the area around the gate and in the neighborhood. While I didn’t see anything stating you couldn’t, I have read online that you’re subject to fines and being towed if you do.
I did see a parking enforcement vehicle in the area when we got back, but didn’t see the officer ticketing anybody. I still advise you to play it safe and park along Lake Hollywood Park, but the risk is yours to take (if you’re being dropped off, this is the spot).
The Innsdale Trail to the Hollywood Sign and Mount Lee

Now you’re officially on the trail to the Hollywood Sign and Mount Lee Summit. At that gate, you’ll see many signs stating “restricted access” and warnings of trespassing. This has to do with vehicles, NOT being on foot. It’s perfectly legal to walk through.
The trail is wide and mostly compact dirt. You’ll have a clear view of the Hollywood Sign on your left as well as views of the hills and downtown LA on your right. If the marine layer is present, your views will be obstructed.
After a relatively short period, you’ll eventually come to chain attached to two poles stretching across the trail (pictured below). You’ll also see houses on both sides of you with another trespass warning posted.

Simply ignore the signs and go around the pole on the right to continue. That trespass warning pertains to that home owners actual property behind their fence. It does NOT pertain to the trail. You’re still ok.
When you come out of the ally, you’ll walk onto a street and see the house (pictured below) in front of you. Go left here and keep as far left as you possibly can. This short section is the one and only time you’ll need to traverse along a street.


After a short time, you’ll come to another junction. There’s a side street leading to more houses on your right (Ledgewood Drive) and another street to the left (Mulholland) that’s blocked with cones. You’ll want to walk up Mulholland, keeping the Hollywood Sign in sight.


Again, you’ll see more restrictive access signs but just ignore them. Those pertain to vehicle access. Continue walking up the road, passing multiple houses on your left. Eventually, you’ll see a mural of the Hollywood Sign pointing the way up the trail (as well as more cones).
Additionally, you’ll pass a small field of California Poppies (if you’re here in spring/early summer) and a random art exhibit on your left. There’s also the one-and-only water bottle refill station here. The trail will then horseshoe, passing through yet another chained gate.


The trail remains exposed for a bit, passing several impressive homes on the right side before entering a grove of palm trees and another Hollywood Hills neighborhood. You’ll then come to the final oddball portion of the trail.
You’ll eventually arrive to what appears to be a locked gate. Go towards the left of the gate and go through the opening. Stay to the left and continue up the paved path, staying between the white walls.
Be sure to remain on that narrow path. On the other side of that white wall is private property. Please don’t give the homeowners any reason to report you. Every time that happens, this trail becomes that much closer to being closed off to the public.


Soon after the green gate, you’ll come to a fence and a door with a key-code pad (pictured above). Between sunrise and sunset, this door is unlocked, so simply open the door and go through it.
When you get to the other side of the fence, you’ll face another junction with a palm tree at the split. To continue to the summit of Mount Lee, go right at the junction. As a side quest, you can go left for a great photo opportunity and view of the sign.
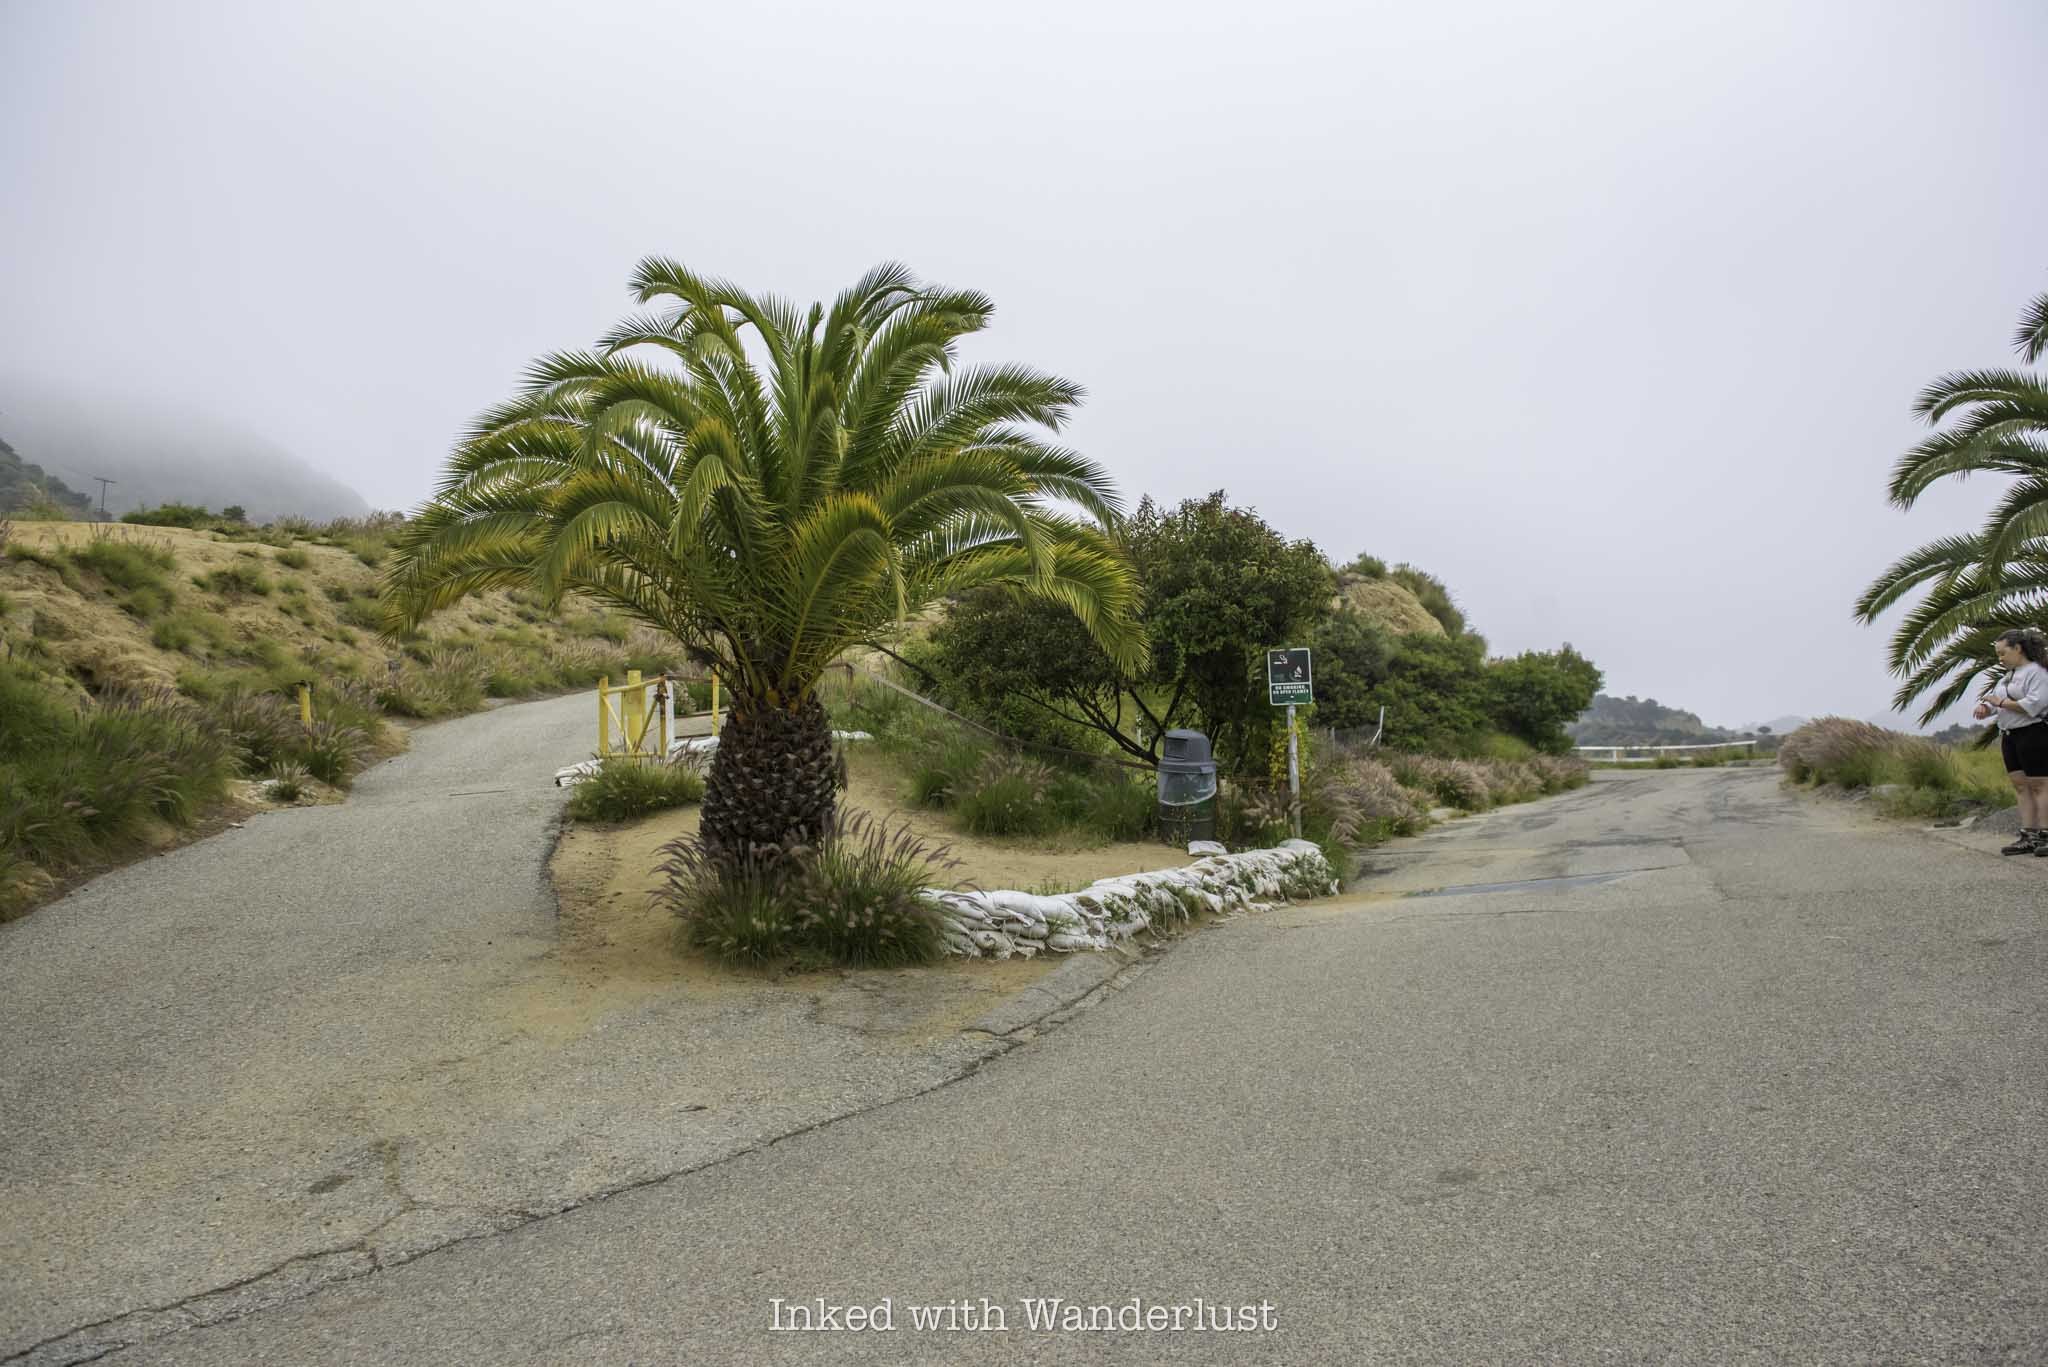
From here, you’ll be hiking on Mount Lee Road. Long ago, it was possible to drive up to the Hollywood Sign. These days, it’s simply a service road for utility workers to reach the satellite and utility towers at the top.
Before long, you’ll reach the final junction of the trail. Going right will take you on the Mulholland Trail. Keep to the left to continue on to Mount Lee. From here, there are no specific instructions needed. Simply follow the road. You’re now just 0.9-miles from the top.


This portion of the trail is a winding, unrelenting uphill slog the rest of the way. While I wouldn’t classify it as “difficult”, I will say that depending on your fitness level, your milage will vary. What’s moderate for me may be hard to others, and vice-versa.
You’ll know you’re almost to the top when you reach the monument plaque in the photo below. The plaque is a dedication to those who donated to help keep public access to Cahuenga Peak and make it part of Griffith Park.
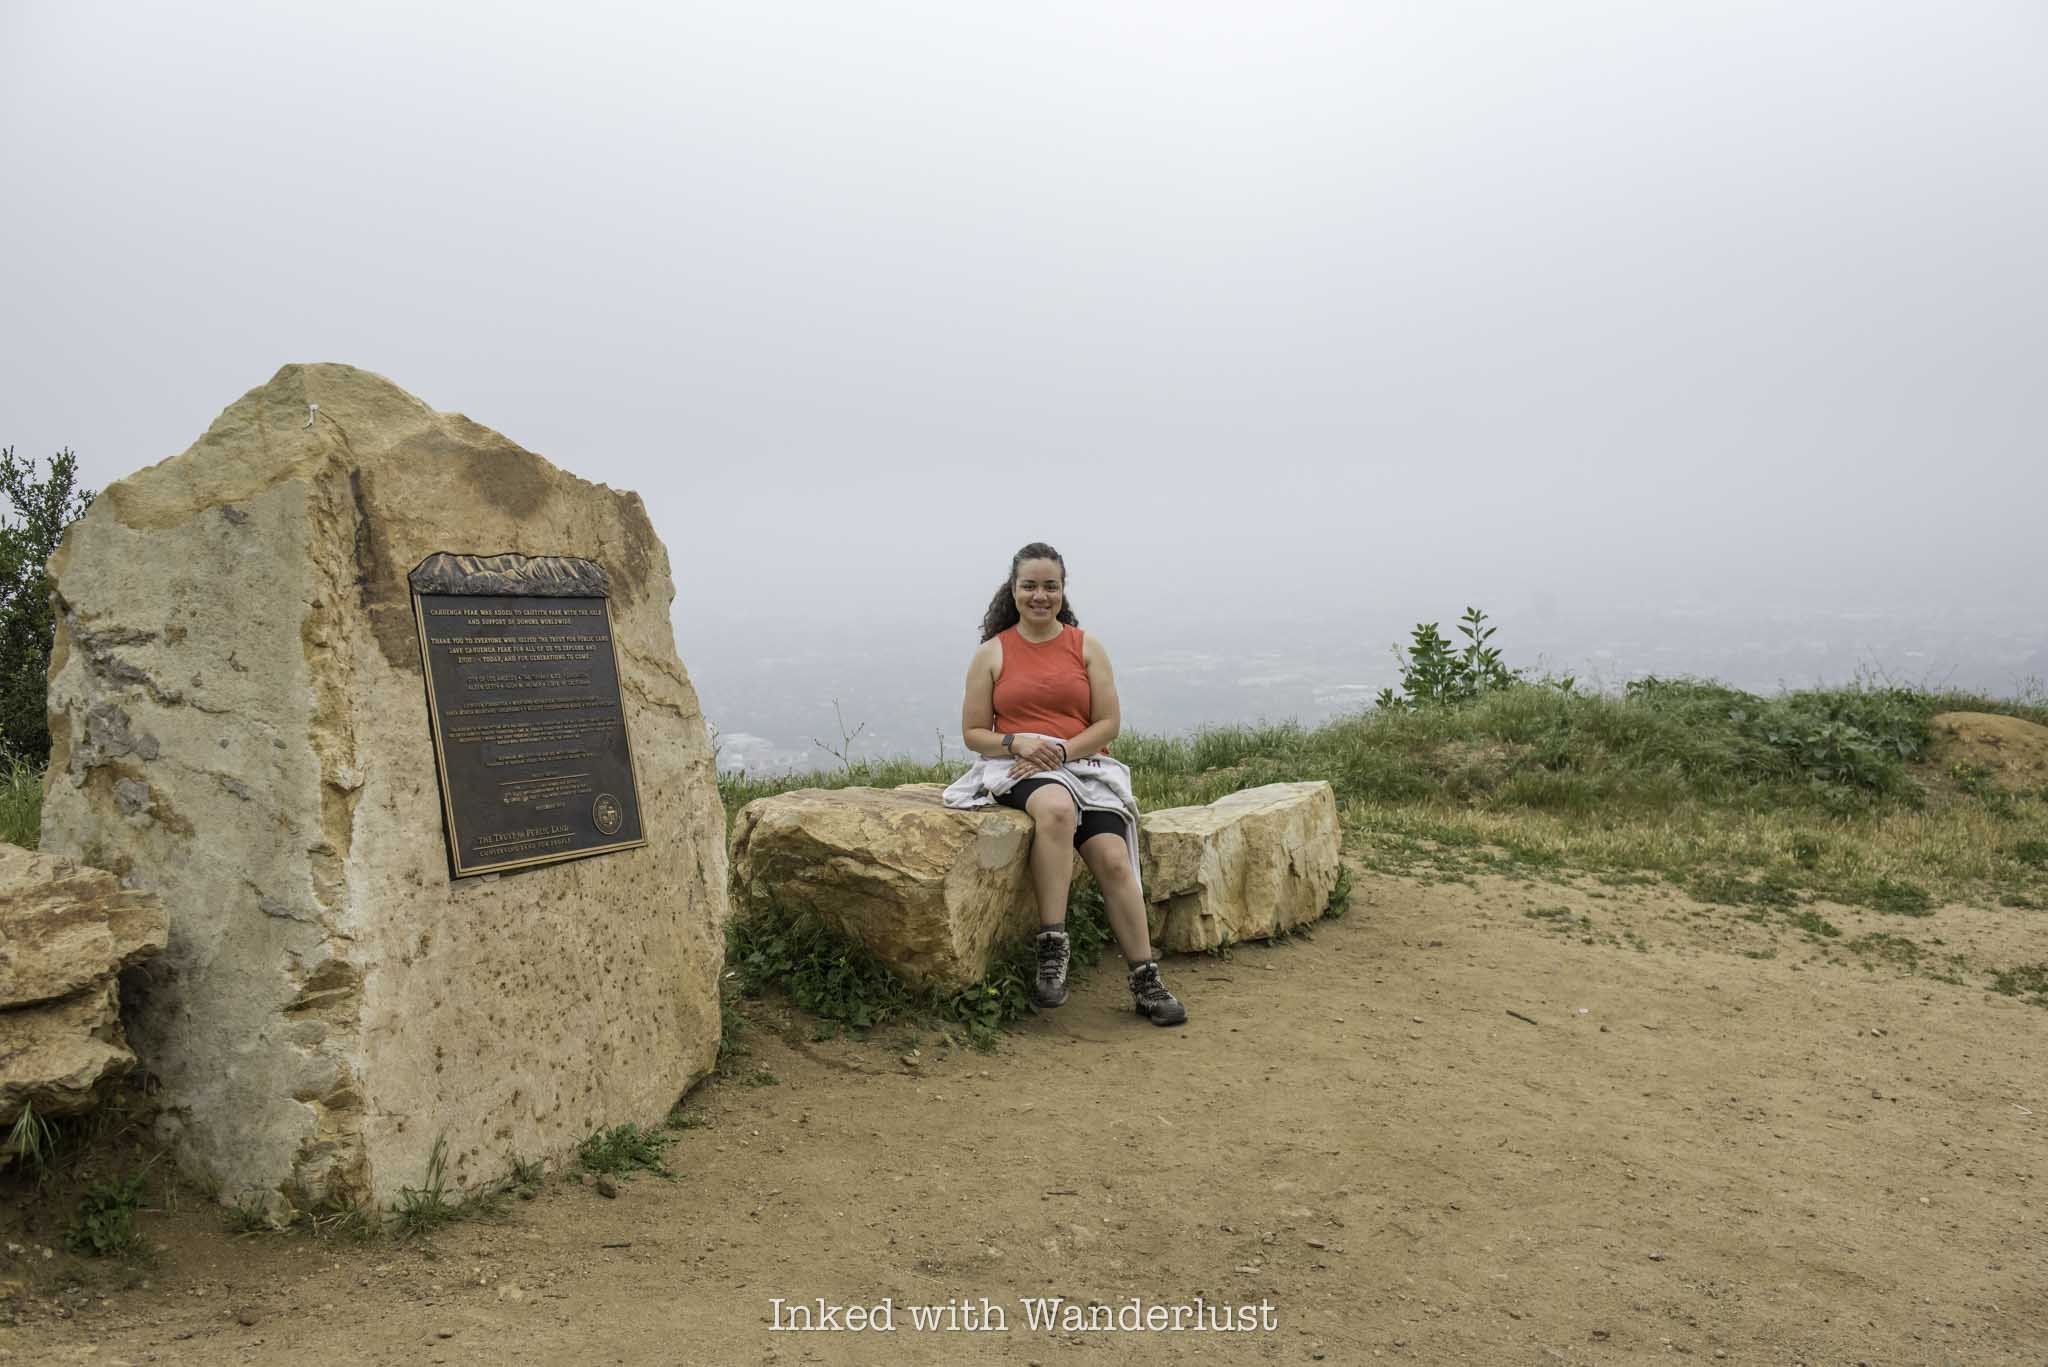
Near the plaque, you’ll see a side trail spurring off the paved road. If you want to side-quest to Cahuenga Peak, that’s the direction you’d go. There’s also a nice side view of parts of the Hollywood Sign from that trail as well.
Mount Lee Summit and Behind the Hollywood Sign

Staying on the paved road, you’ll see it make a sharp left around a rocky outcrop. You’ll also notice a chainlink fence on the right side. Head that way and shortly after making that left, you’ll get your first glimpse of the sign on your right.
You may see the sign now, but you’re not finished. To get to the actual summit of Mount Lee, you’ll need to go just a little bit further. Ahead of you, you’ll notice utility and satellite towers. To the left you’ll see a dirt path. Take that and then head up the short hill to the summit.

Once you’re up that hill, you’re officially on the summit of Mount Lee. From here, on a clear day, you’ll have expansive views of Los Angeles and the unique perspective of the backside of the Hollywood Sign.


During our visit, the marine layer was still hovering over the city, so our view was dampened a bit. Either way, the hike up to Mount Lee and the Hollywood Sign is still one of the best hikes in Los Angeles and worth doing, no matter the view.
From here, simply head back in the same direction you came. If you still have energy, there are many other cool things in the area to check out. You can explore the old Los Angeles Zoo or gaze at the sky from the Griffith Observatory. To replenish those calories, I recommend a double smash burger at nearby For the Win restaurant.
Buy me a coffee?
If you found this blog helpful, consider leaving a tip through the Buy Me A Coffee button below! Whether it’s $1 or $5, every bit helps offset small travel costs like coffee, water, lunch, parking, or park entry fees. Your support means the world—thank you!
EXODUS 13:21

Visit Marshall Gold Discovery Site near Placerville
Of all the historical sites in the great state of California, Marshall Gold Discovery State Historic Park in Coloma is right up there as one…
Disclosure: This post contains affiliate links. If you make a purchase through these links, I may earn a small commission at no additional cost to you. I only recommend products or services that I believe will add value to my readers.

Of all the historical sites in the great state of California, Marshall Gold Discovery State Historic Park in Coloma is right up there as one of the most significant. The reason? It’s the site where gold was first discovered in 1848, two years prior to California becoming a state.
The man who made this remarkable discovery, James W. Marshall, found several shining flecks of gold along the South Fork of the American River in the tail-race of the sawmill he was building in partnership with a man named John Sutter.
This find was indeed significant, yet consequential, as it spawned the largest migration of people in the Western Hemisphere. Once word got out the (gold) rush was on, as thousands of miners made their way to the golden hills of California to earn their own fortune.
It’s important to remember that at the time Marshall made this discovery, Coloma (as well as most of Northern California) was largely inhabited by the Nisenan Indian Tribe. They called this place, Cullumah, which means “beautiful valley”.
Today, the California State Park agency runs this massive site. In it, there are multiple examples of replicated buildings, a visitor center, the burial site of James Marshall, a monument marking the spot of gold discovery, a replica of Sutter’s Mill, and more.
MARSHALL GOLD DISCOVERY SITE PARKING & FEES

There are actually two spots where you can start your day at Marshall Gold Discovery Site; the main area near the visitor center and up the hill at the James Marshall Monument. To avoid confusion, type “Marshall Gold Discovery Site Visitor Center” or “John Marshall Monument” into your GPS of choice.
I didn’t know that going in and just entered “Marshall Gold Discovery Site” into Apple directions and was taken to the hill near the monument and worked my way down from there. You can’t go wrong with either, it’s simply a matter of preference.
Up the hill at the monument is a medium-sized paved lot capable of holding a few dozen vehicles. There is no digital pay station here, just the old school iron ranger when you fill out the envelopes. Be sure to bring exact change.


Below at the visitor center, you can pay your entry fees to the staff inside (you can pay with debit cards here). Either way, be sure to place your receipt on your dashboard so you don’t end up with a ticket.
Fees at Marshall Gold Discovery State Historic Park are:
$10 per vehicle
$9 per vehicle (seniors 62 and over)
The day-use areas are open to the public at 8am, no matter the time of year. However, it closes at 6pm from Labor Day to Memorial Day and 8pm during the summer months. The visitor center opens at 9am and generally closes at 4 or 5pm.
Marshall Monument/Burial Site

As stated above, my wife and I started on the hill at the Marshall Monument. The monument is impressive, as it’s California’s first historic monument and is the final resting place of James W. Marshall himself.
At the top of the monument is a bronze statue of Marshall. In it, he’s pointing downward to the spot on the South Fork of the American River where his discovery changed the course of California history forever.
Marshall passed away on August 10, 1885, totally penniless. Since he couldn’t contain news of the gold discovery and bigger, stronger miners began to show up, Marshall was muscled out his spot before he could finish constructing Sutter’s Mill.

Ironically, neither Marshall nor Sutter profited from their discovery. In 1886, a year after his death, the monument was constructed. Four years later in 1890, the bronze statue was created and placed on top of the monument. In 2010, it was re-dedicated to honor Marshall on his 200th birthday.
From the monument, begin your slow descent down the hill in your vehicle. A mile or so past Marshall Monument is where you’ll find Marshall’s cabin that he built shortly after arriving in Coloma. He occupied the cabin from 1856 to 1870.
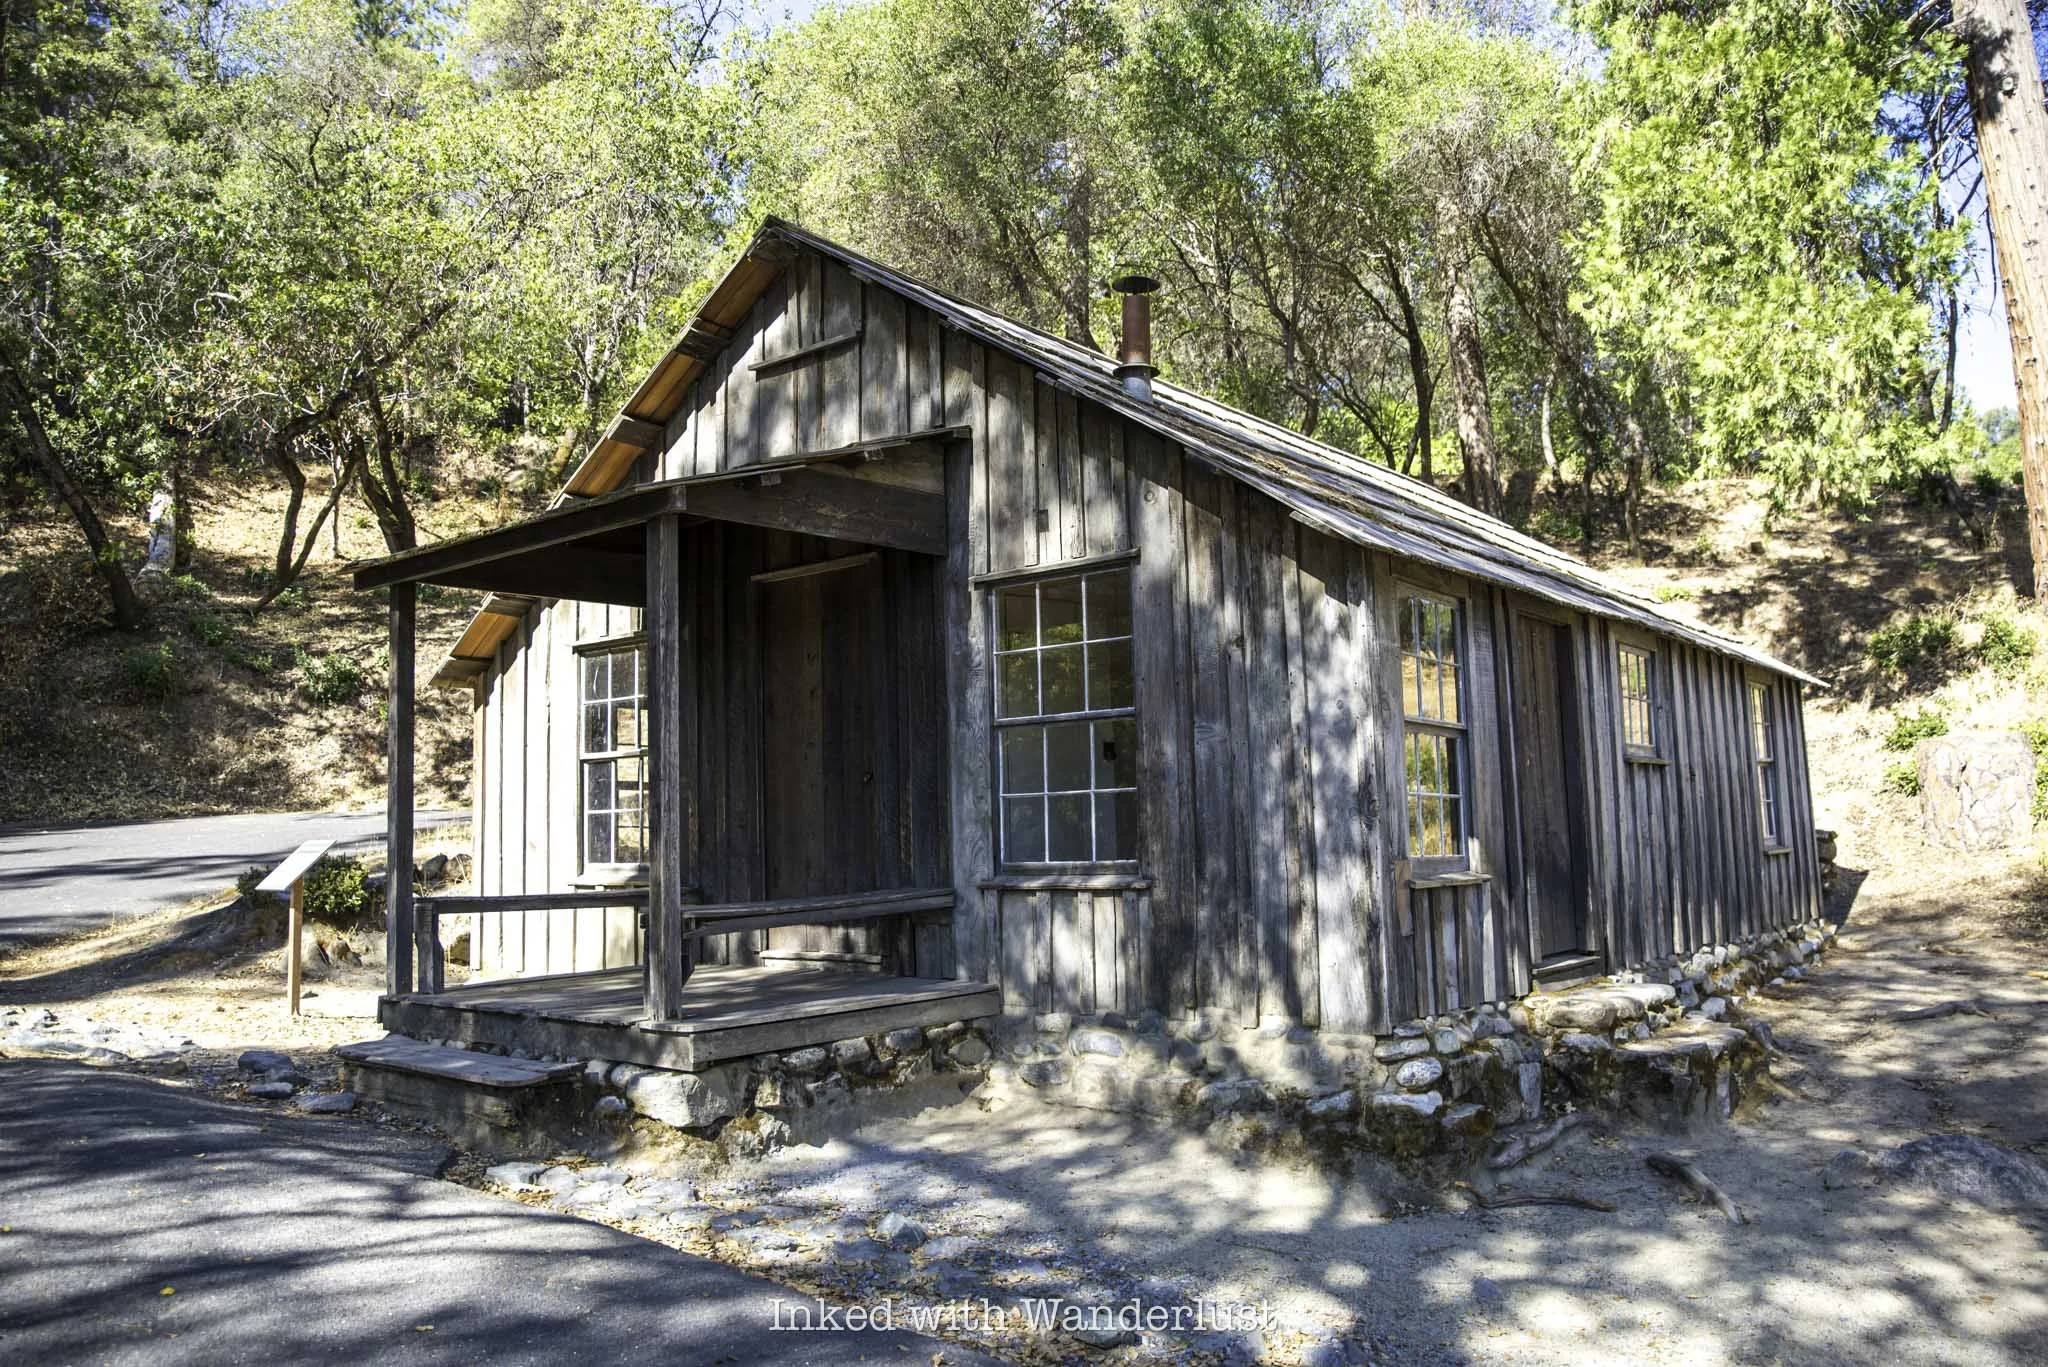

Adjacent to the cabin is an old pioneer’s cemetery and further down from there is the highly-historic (and beautiful) Emmanuel Church, which was built in 1855 and was the first Episcopal Church in California.
You can’t go inside either the church or the cabin, unfortunately. Though there are several windows you can look through. To my knowledge, the items displayed inside the cabin are not original.
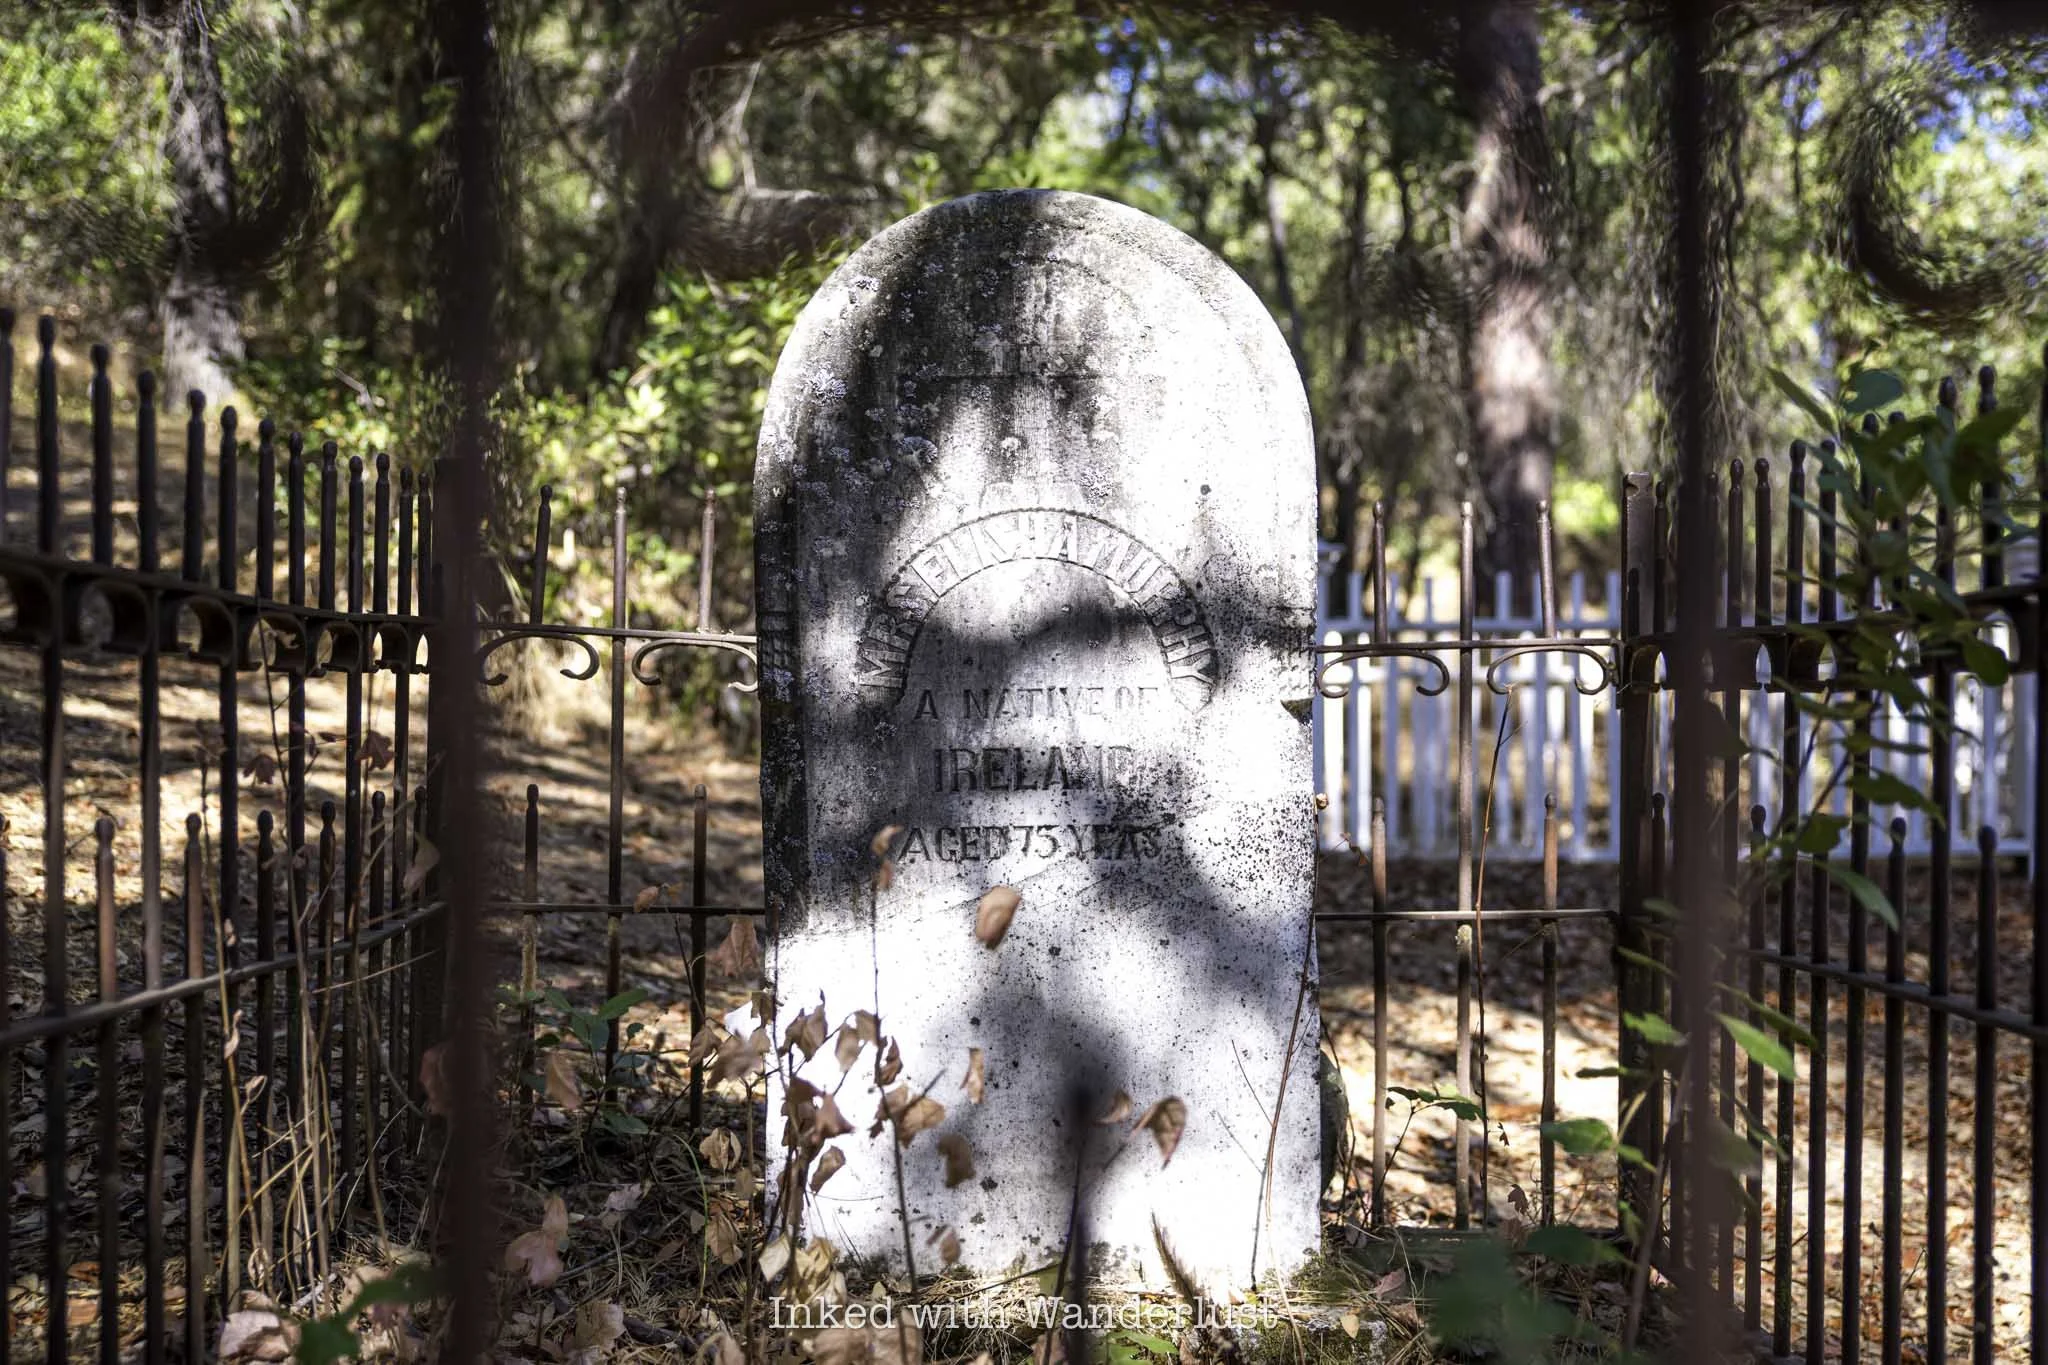


You can park in the small pull-out adjacent to the cabin and walk to all three of these attractions. When you’re done exploring, get back in your car and continue down the road. You’ll see signs pointing the way to the visitor center.
At one point, you’ll be driving through a street lined with houses. Some of them are currently occupied, but others are not and have historical markers next to them that you can read.
Visitor Center and Sutter’s Mill Replica

When you reach the bottom of the hill you should arrive to the visitor center. I know visitor centers are sometimes skipped by visitors, but give this one a look. There are dozens of exhibits and artifacts inside detailing the history and development of the area.
The museum pays tribute to Native Americans, who previously inhabited this area. It also details the discovery of gold in the river and the gold rush that proceeded it. Additionally, there’s real-life examples of pioneer wagons, gold-panning tools, clothing and more.


All around the road cutting through Coloma and surrounding the visitor center are numerous replicated and real-life historic structure exhibits. This includes a schoolhouse, Chinese store, a blacksmith’s shop, and others.
Just down the way from the visitor center is the ruins of the Coloma Jail, which was the first known jail in the state. The cells aren’t accessible to visitors, but they’ve pulled one outside of the ruins that you can see.


Nearby, you’ll find exhibits detailing the presence of the Nisenan people who called this region home. The biggest and most significant of which are the bedrock mortars, or “grinding rock”. It’s a huge rock with dozens of near-perfectly round shaped holes seemingly drilled into it.
The Native people used these grinding rocks to ground acorns for food, which was their main diet. According to a park ranger, the depth of the holes indicate that the Nisenan people were likely in the area for 1,000 years or more.
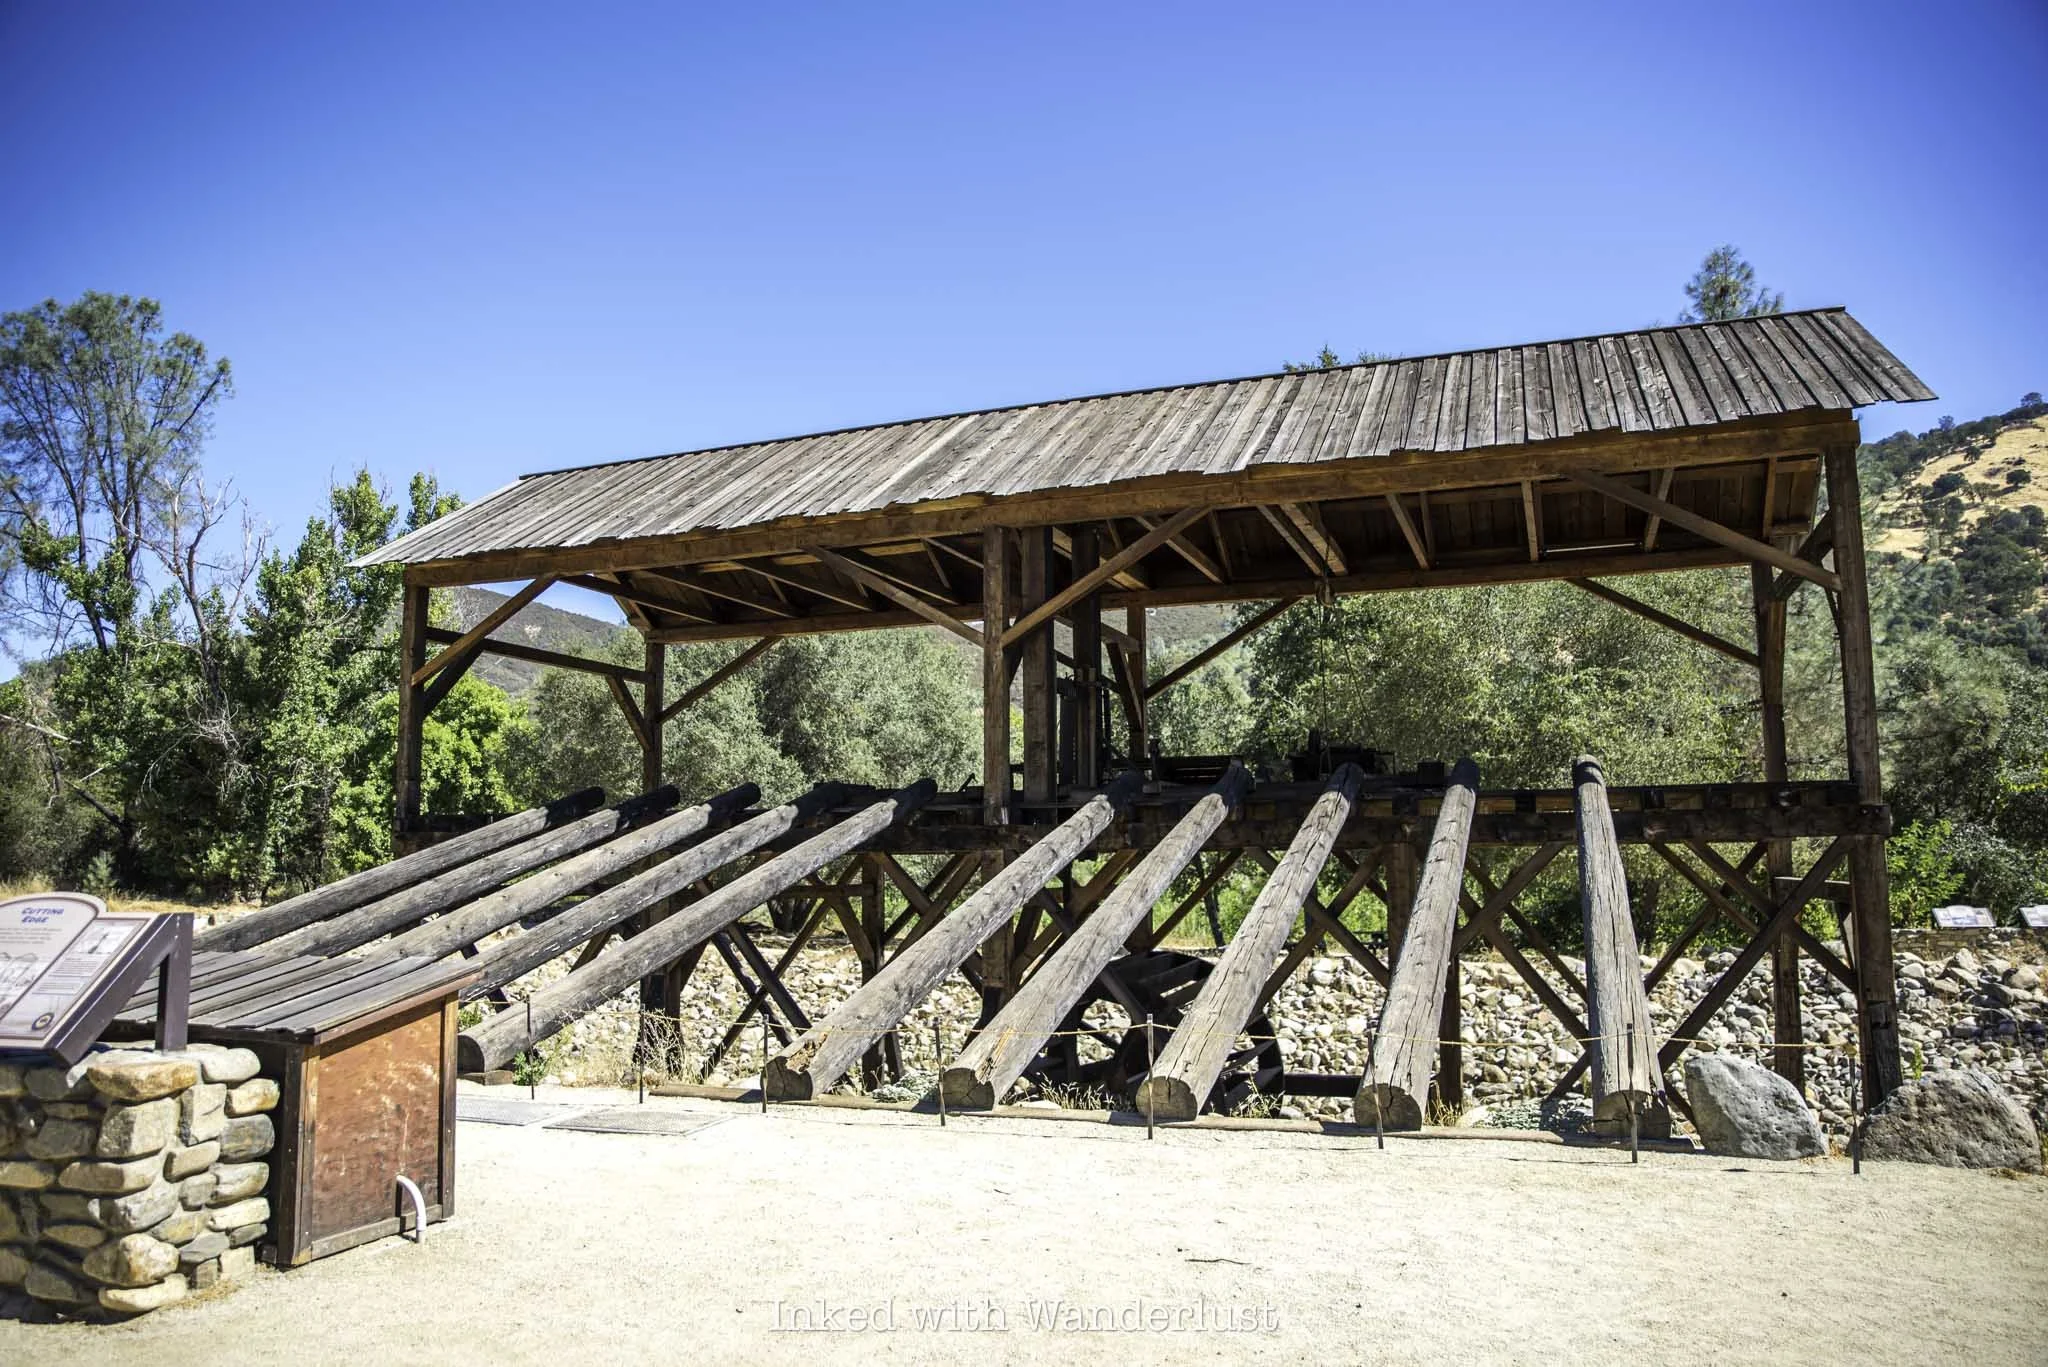

Across the street from the Native American exhibit is where the (arguably) biggest attractions of the park are located; the replica of Sutter’s Mill (what James Marshall used to mine for gold) and a monument placed on the spot of the first discovery.
The spot where the replica sits is not the original location. It was actually closer to the river’s edge, about where the monument sits now. There’s much debate as to if that monument is even in the correct spot but according to a ranger I spoke with, it is correctly placed.


The monument sits behind the Sutter Mill replica, right on the edge of the river. It’s largely made of stacked stone and has a bronze plaque in its center which reads, “This monument marks the site of John A. Sutter’s sawmill. In its tail-race, on January 24, 1848, James W. Marshall discovered gold and started the great rush of Argonauts to California”.
On the other side of Sutter’s Mill is the newest structure in the park, a replica of the “Mormon Workers Cabin”. This cabin is where six Mormon Battalion members Sutter and Marshall hired to build the sawmill built and lived in. The cabin was completed on January 23, 1848, one day before Marshall’s discovery.


In fact, we know the exact date of the first discovery because of the journals of Henry Bigler and Azariah Smith, two of the Mormon workers. An example of these journal entries is framed and displayed inside the cabin.
During my wife and I’s visit, there were park employees dressed in pioneer garb, offering a presentation detailing the history and meaning of the cabin free of charge. It was a nice touch and added a lot to the cabin’s historical value.
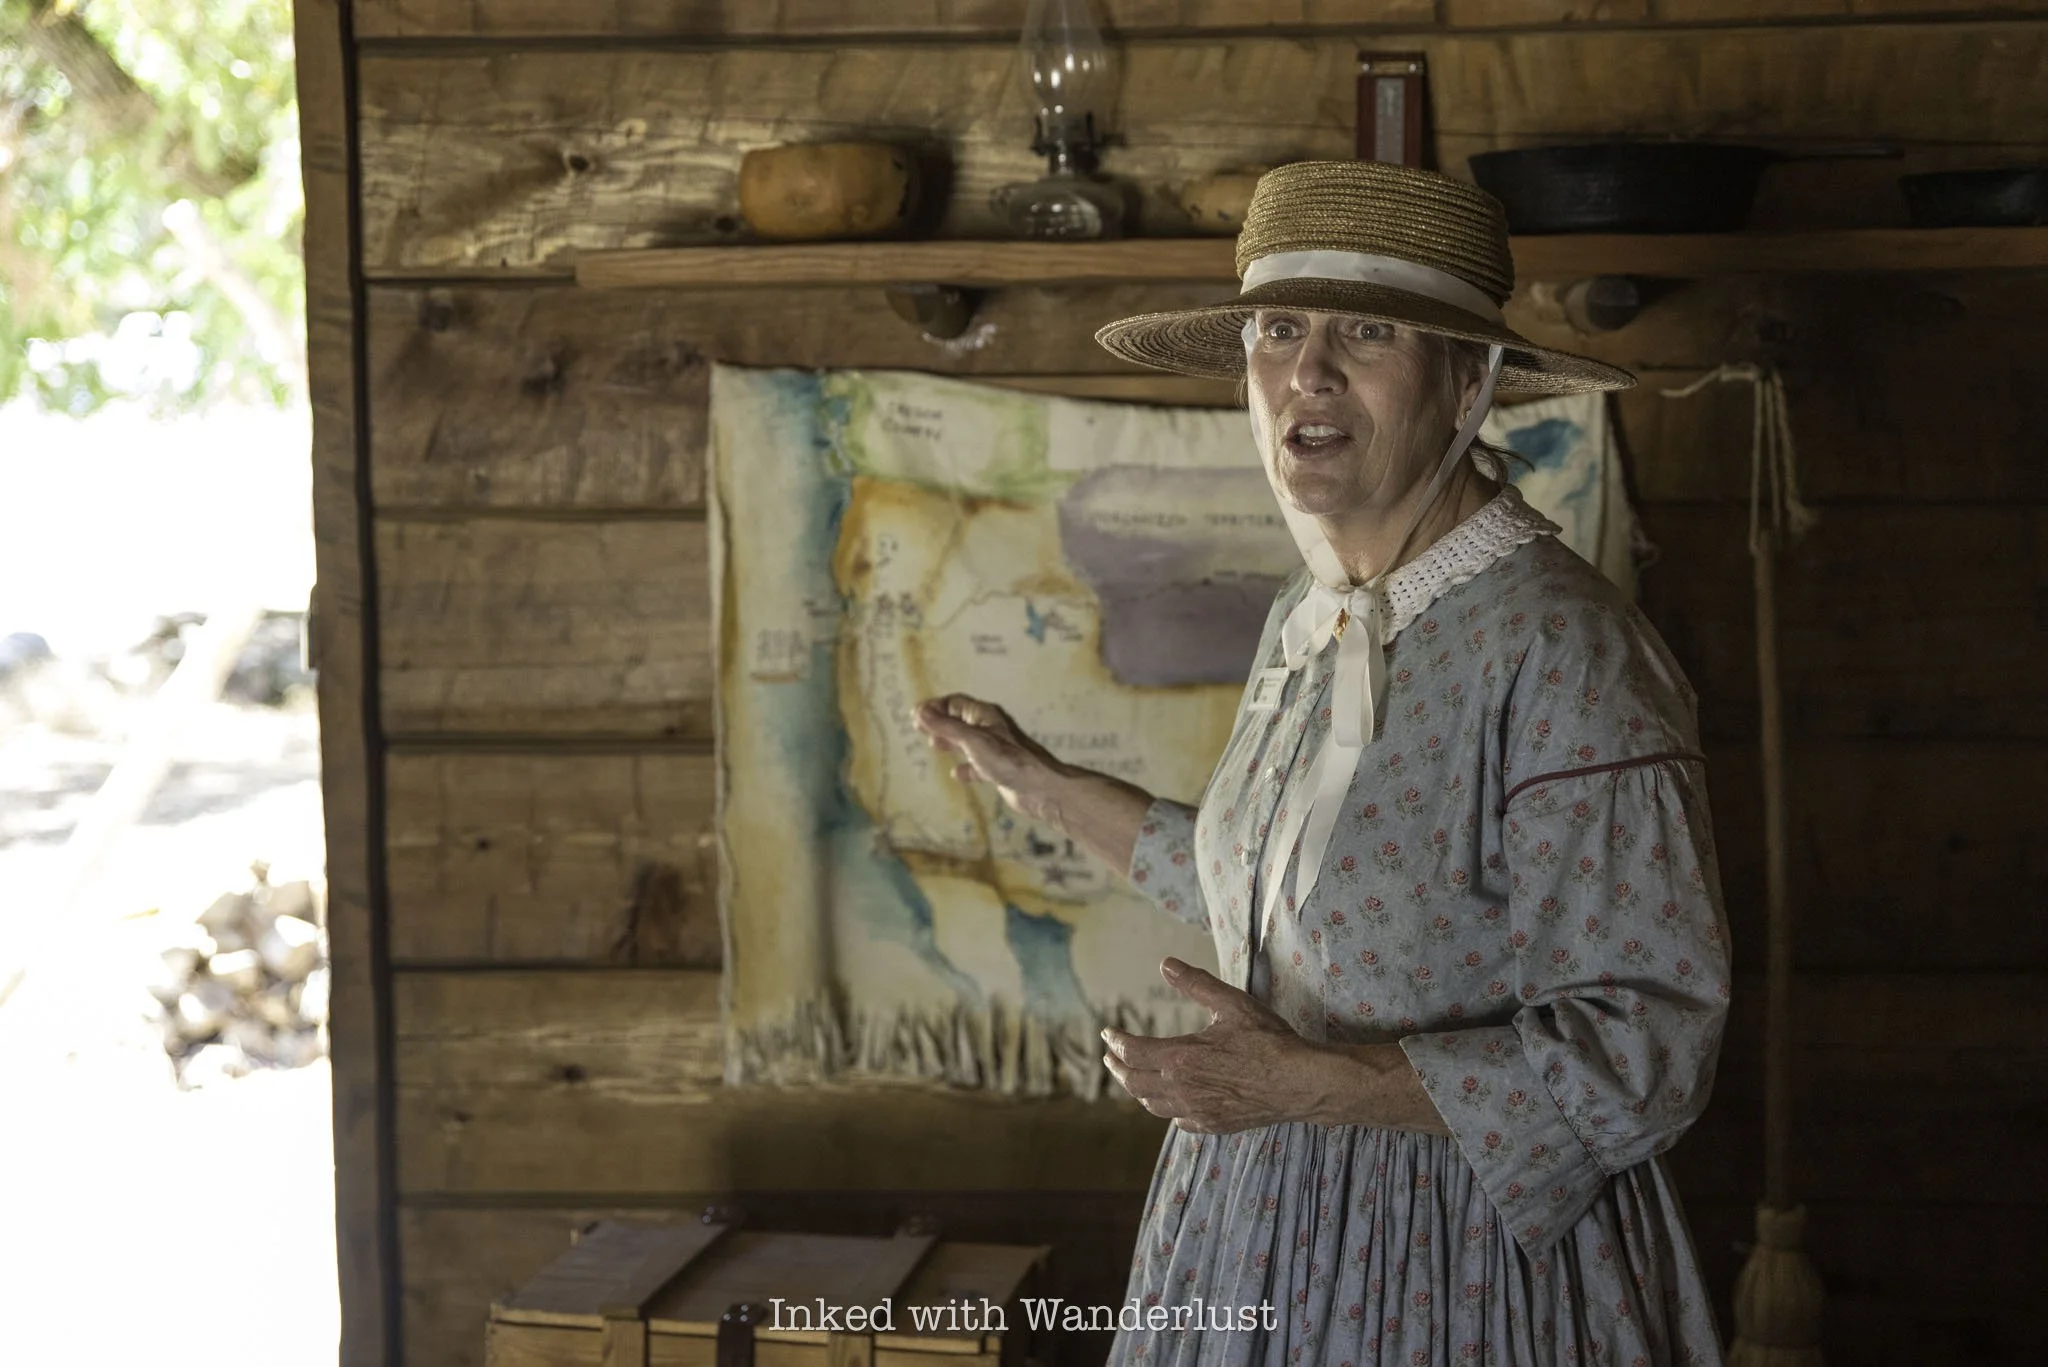
There’s so much to see and do at Marshall Gold Discovery State Historic Park that you could literally spend the entire day here and probably not see it all. The park is huge and there are many exhibits to explore.
My wife and I had no idea just how much there was here. We thought it was just the monument, the sawmill, cabin, and visitor center. Since we were merely passing through, we didn’t have the time to see it all. So we’ll definitely be making a return visit.
If you want to come here (and I encourage you to do so) be sure to reserve at least half a day to explore the park (a full day would be preferable). You could always break for lunch at nearby Hog-Wild Barbecue in Placerville. If you’ll be in the area for more than a day, I highly suggest taking a self-guided tour of nearby Gold Bug Mine.
EXODUS 13:21


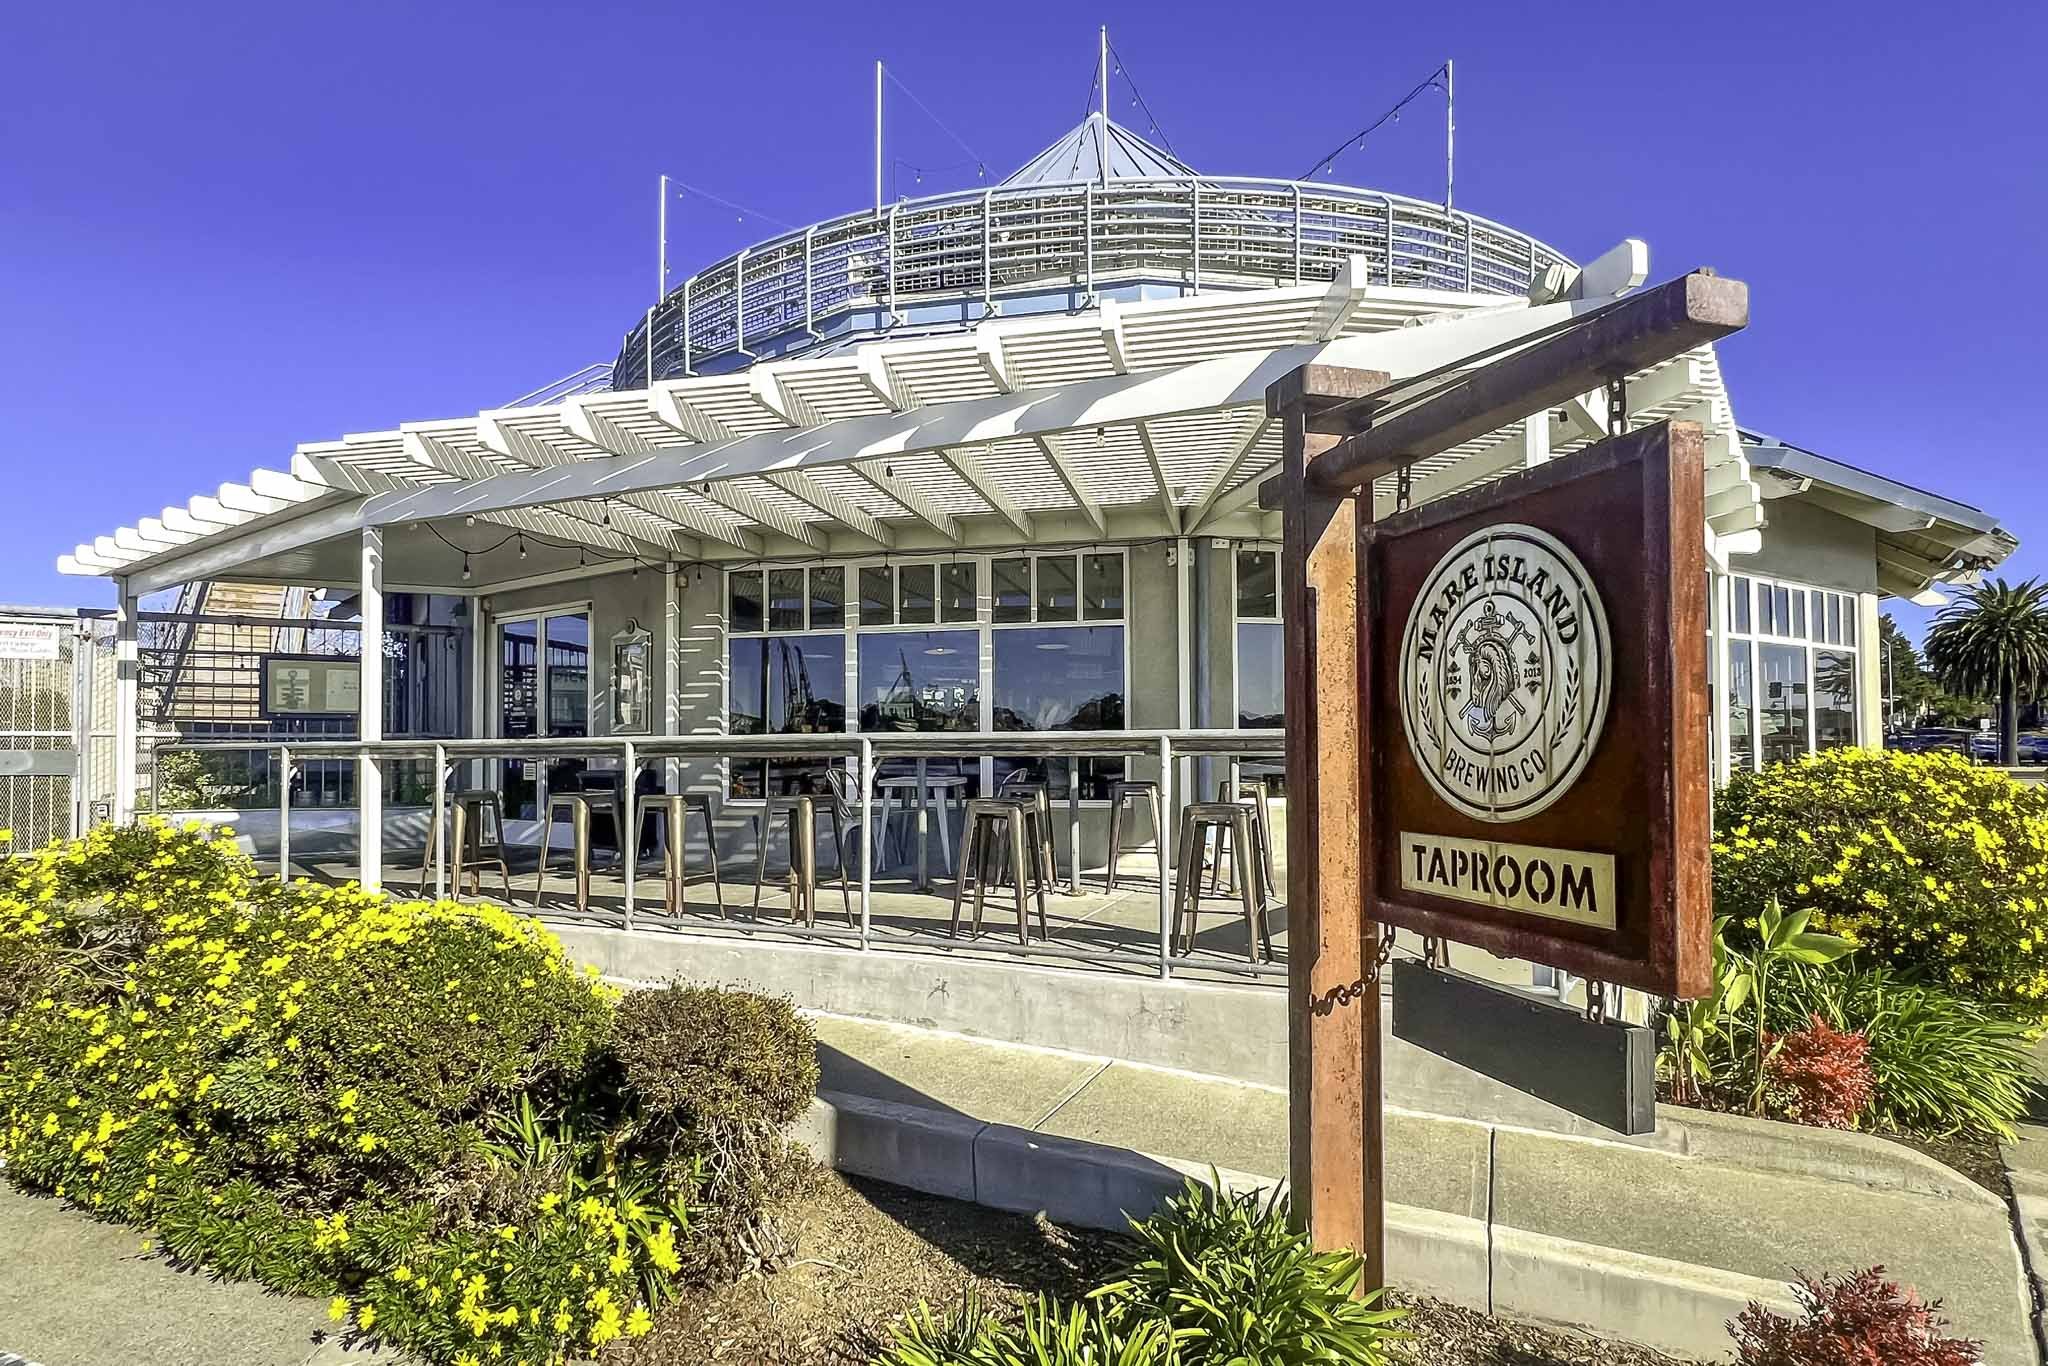
Mare Island Brewery Taproom: Delicious Waterfront Food in Vallejo
In 2014, after brewing their first beer the year prior, two former wine makers and founders of Mare Island Brewery, Kent Fortner and Ryan Gibbons opened what would become the first of three locations…
Disclosure: This post contains affiliate links. If you make a purchase through these links, I may earn a small commission at no additional cost to you. I only recommend products or services that I believe will add value to my readers.

In 2014, after brewing their first beer the year prior, two former wine makers and founders of Mare Island Brewery, Kent Fortner and Ryan Gibbons opened what would become the first of three locations (nicknamed, Taproom) inside a section of the ferry building on Vallejo’s waterfront.
Since then, Mare Island Brewery Taproom has become a staple among local residents, joining the ranks of local favorites like Bud’s Burgers, Provisions, Sac’s Tasty Hot Dogs, and Bambino’s.
Known for their vast line up of locally brewed beers, including some exclusive to their Yard Birds club, the Taproom also features an extensive menu of scratch-made pub-style favorites. A few include burgers, fish & chips, fried chicken sandwich, an array of salads, and more.
Mare Island Brewery Taproom Location and Parking

Despite its name, the Mare Island Brewery Taproom is not located on Mare Island. Rather, it’s located across the water on Vallejo’s waterfront inside a portion of the city’s ferry building. The company’s Coal Shed location is located on Mare Island proper and the Taphouse is located in nearby Benicia.
If you’re taking the ferry into Vallejo from the city, you’ll find the brewery just to the left of the dock. If driving, there’s a small amount of parking available behind the building. If that lot is full, then you’ll need to park in the large lots across the street.
Depending on when and where you park, you may have to pay a fee of up to $8.00. To see the current rates and requirements, you can refer to the city of Vallejo website here. Also, be sure to hide your valuables, as this area is prone to smash and grabs.
Mare Island Brewery Taproom

They make good use of the interior space. There’s an abundance of high-top seating options in the center of the floor with additional “normal” tables dotted along the restaurant’s windows. On top of that, there’s more seating at the bar.
If you’d rather sit outside, you can do so. There are numerous picnic-style tables near the waterfront with additional bench seating with high chairs. My wife and I went with the latter, as it was shaded and provided an epic view of Mare Island.


Also in the interior are numerous pieces of wall decor featuring old photos and other artifacts showing Mare Island’s and the waterfront’s past. If you don’t know, Mare Island is a former Naval Shipyard that operated from 1854 to 1996, when it was decommissioned.
These days, the city and its citizens have made significant efforts to keep Mare Island alive. Now, there are many historical landmarks and buildings, private residences, parks, and a handful of businesses, including a coffee shop, wine bar, and more.

Whether you just want a drink or you’re looking to enjoy a meal, you’ll order at the bar. If you’ve only ordered drinks, you’ll be given them shortly after paying or opening a tab. If you’ve ordered food, you’ll be given a buzzer so you can find a seat. The buzzer will go off when your meal is ready.

When your buzzer goes off, take it to the pick up window next to the front door to retrieve your meal. If you need help, don’t be afraid to ask for it, as the employees are more than happy to help carry your food to your table.
On this visit, I ordered the poutine, which is a heaping serving of their steak fries topped with cheddar cheese curds, brown gravy and sausage. Conversely, my wife ordered their fried chicken sandwich which is pickle juice brined and topped with sriracha remoulade and house-made pickles on a brioche bun, served with a side of fries.


I’ve had their poutine a number of times and have always enjoyed it. The fries hold their crisp for a decent amount of time despite being smothered in gravy. The flavor is simply outstanding, which means something coming from me because normally, I’m not a gravy person.
My wife thoroughly enjoyed her fried chicken sandwich. She reports that the chicken itself was tender and juicy, likely thanks to the pickle juice brine. It also had an excellent crisp to it. If you’ve ever had Chik-Fil-A, it’s similar to that, but taken up a few notches thanks to the sriracha remoulade.

As a side dish, I also ordered their artisan pretzel, served with a side of Saginaw beer-cheese. To go with it, I ordered a glass of their Saginaw Golden Ale. The pretzel was great. Super soft, warm, and perfectly salted. The beer-cheese was rich and creamy, nicely balancing the pretzel’s salty, chewy texture.
This wasn’t our first time at Mare Island Brewery. Since Vallejo is my hometown, we’ve been here a number of times. In the past, I’ve tried their pulled pork sandwich and truffle mac dishes, while my wife has tried their fish and chips, and pastrami rueben. All of which were great.

After your meal, head outside and go for a stroll along the Vallejo waterfront and check out the various displays of military artillery, informational boards, and sweeping views of the water with Mare Island in the backdrop. Or, perhaps, hop on the ferry and head over to San Francisco for the day.
We’ve literally never had a bad experience here. The food, beer, and service is top notch. If you’ll be coming to Vallejo in the near future and want to dine at a great local spot, Mare Island Brewery Taproom would be my recommendation.

10 Best Things to do in One Day in San Francisco
Being born and raised in the San Francisco Bay Area, I was never more than an hour's drive away from San Francisco or how locals refer to it, "The City". It's been…
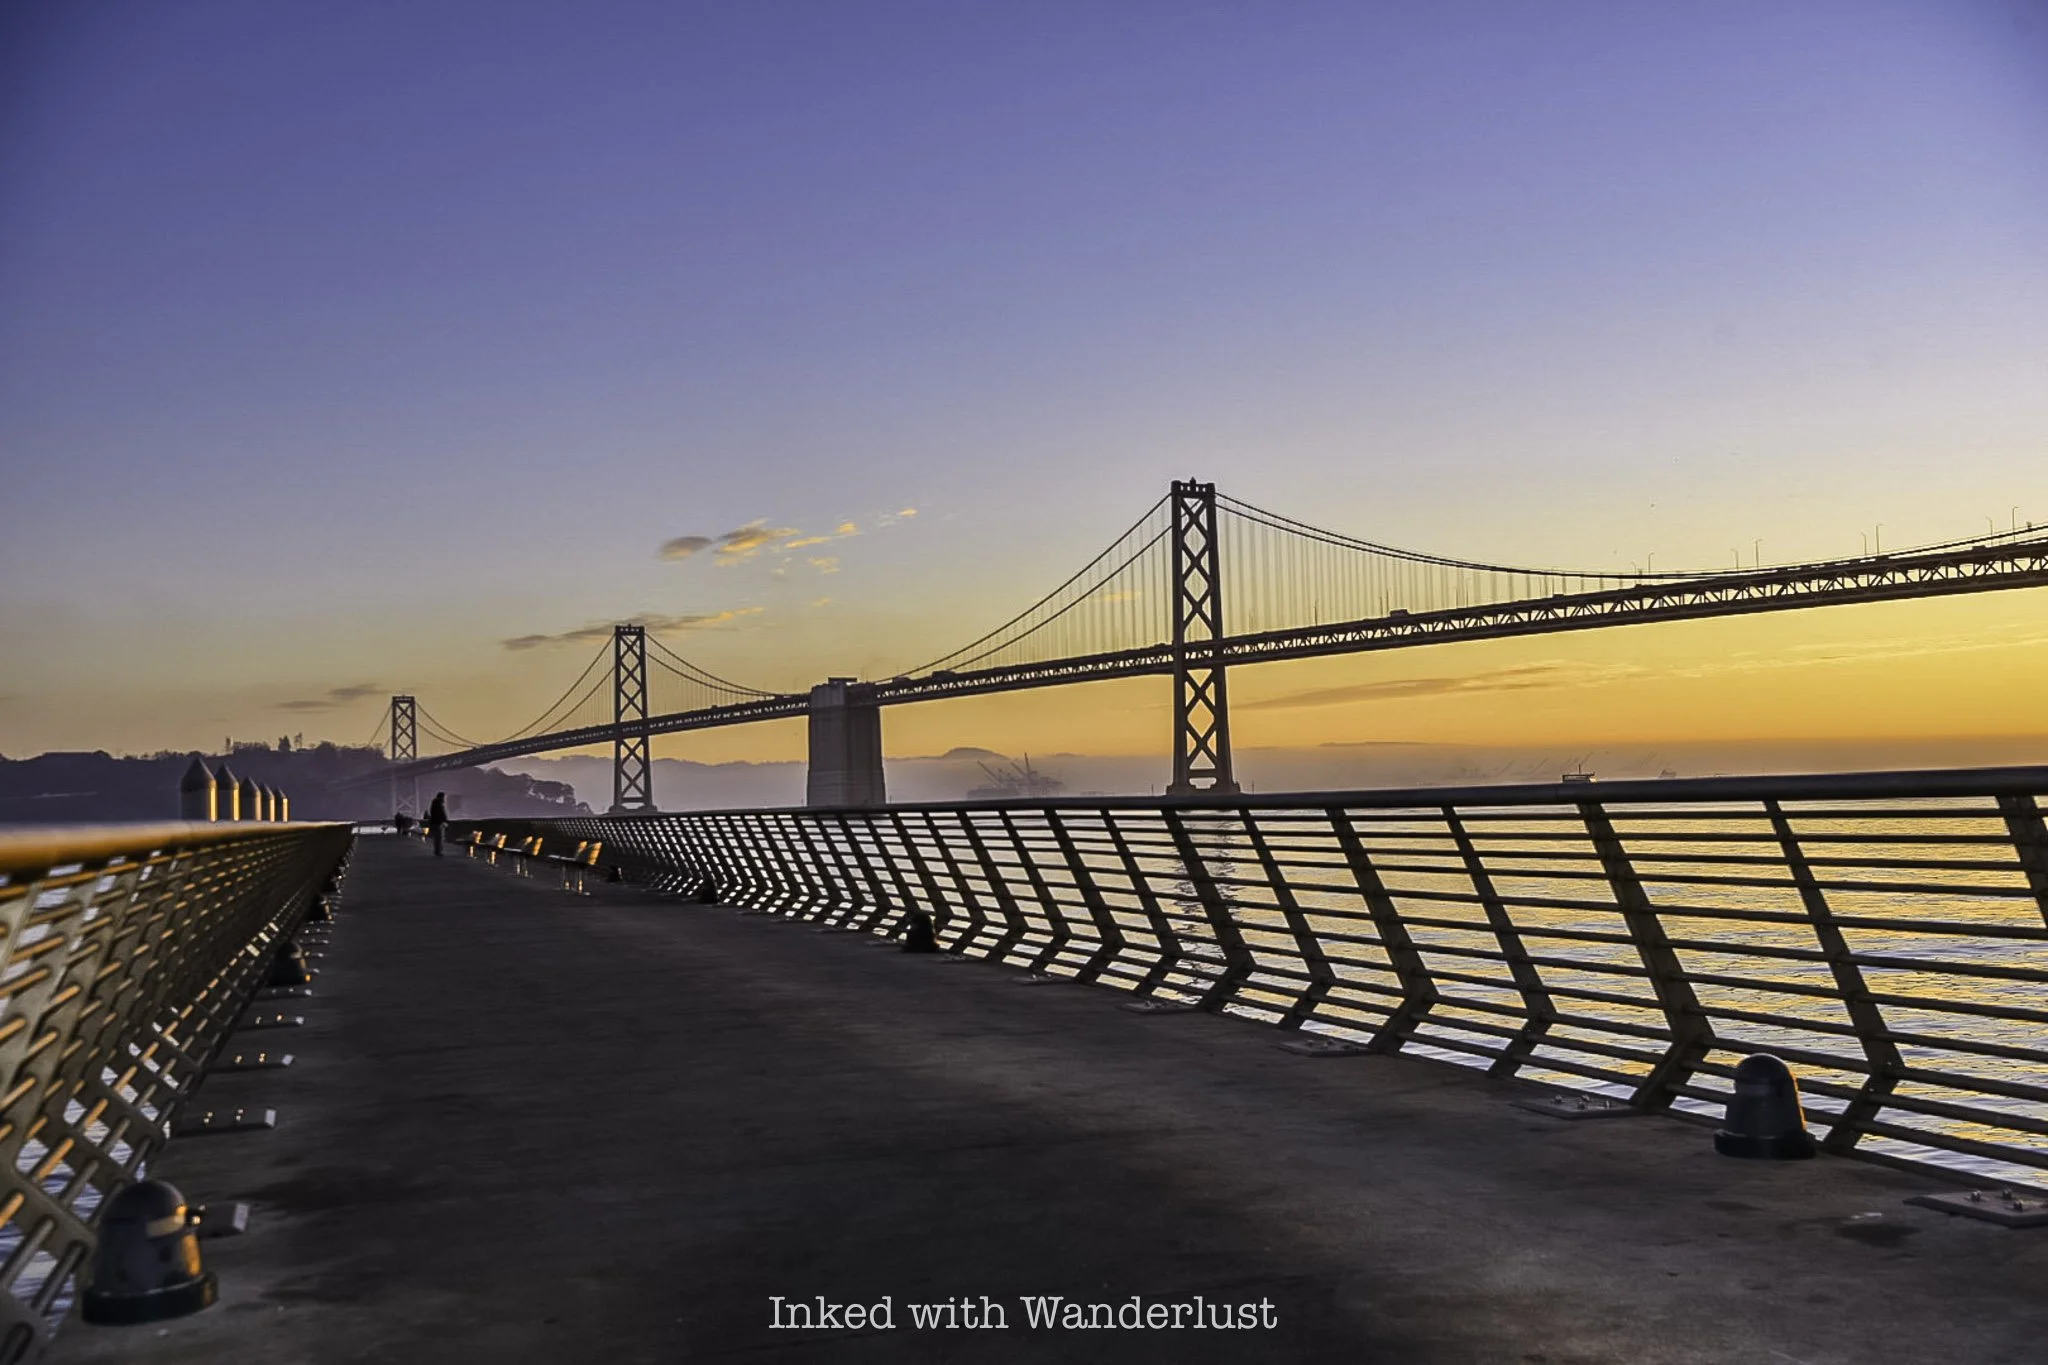
Being born and raised in the San Francisco Bay Area, I was never more than an hour's drive away from San Francisco or how locals refer to it, "The City". It's been some time since I've moved away, but my fondness for the city never faded.
Despite living a state away, I still visit the city (and bay area, in general) fairly regularly. In fact, my wife and I recently discussed planning a mini-vacation there to reconnect with it and the attractions we love.
When I started thinking about it more, I thought about how many people visit San Francisco for the first time every year. The city is huge and can seem daunting to those who've never been (to be honest, I've been there dozens of times and it still feels daunting).
Then I started thinking about those who may only have one day to spend. If they asked me which quintessential attractions I would recommend for a one day visit, what would they be and in which order should they do them?
That's who this post is for. If you only have one day to spend in San Francisco, I'm going to recommend ten attractions that I feel you could fit into a one day visit. I’ll also recommend several other “must-see’s” if you happen to have another day or two to spend. But first…
Buy me a coffee?
If you found this blog helpful, consider leaving a tip through the Buy Me A Coffee button below! Whether it’s $1 or $5, every bit helps offset small travel costs like coffee, water, lunch, parking, or park entry fees. Your support means the world—thank you!
Should I Take My Car to San Francisco?

It's no secret that San Francisco, and California in general, has had its issues with crime in recent years. In the city, vehicle breaks ins have occurred regularly, with locals resorting to leaving their windows rolled down so thieves can just look through the car without breaking the window.
While there has been recent success with combating this problem, it can still happen without warning, whether at night or in broad daylight. Having your own vehicle to take you around to these places would be the most economical option, but you'll face this potential issue and others.
Aside from the possibility of theft, parking can be a huge headache, as it’s limited in many places and you'll likely need to pay a flat or hourly rate. That said, public transportation is readily available, as are ride sharing options.
Unless you're planning to take trips outside of the city or San Francisco is just one stop on your trip, no, you won't need your own vehicle. Everything listed below can be accessed either by ride sharing, public transportation, walking, biking, etc.
Now, let’s get to the ten things to do in one day in San Francisco…
1) The Golden Gate Bridge

I recommend beginning your day on the north side of the city, with your first stop being the iconic, Golden Gate Bridge. No first visit to the city would be complete without it, as it's the quintessential top attraction. There are two official viewpoints, one on the south (city) side and another on the north (Marin) side of the bridge.
If you'll have your own vehicle, definitely check out both, as they each offer their own perspectives of the bridge. If you do go to the Marin Headlands (north) side, there are several hiking trails and additional viewpoints you can check out, such as Battery Spencer, Kirby Cove, Point Bonita Lighthouse, Fort Baker and more.
If you're short on time or will be utilizing ride sharing, stick to the city side at the Golden Gate Bridge Pavilion. There, you'll get a decent view of the bridge, as well as access to several hiking trails, a cafe/gift shop, and more.
From either side, you'll be able to access the walking/biking path of the bridge. Keep in mind that the walking path is 1.7-miles, one way, from one end to the other. Most people walk about a third of the bridge and call it a day. So don't feel like you have to walk the whole thing. See my pick of the ten best views of the Golden Gate Bridge!
PRO TIP: If you have extra time, I highly recommend taking a trip to Muir Woods National Monument. From the bridge, it's only a twenty minute drive outside of the city. You could easily spend a half day (or more) exploring this special place.
2) Explore Fort Point National Historic Site
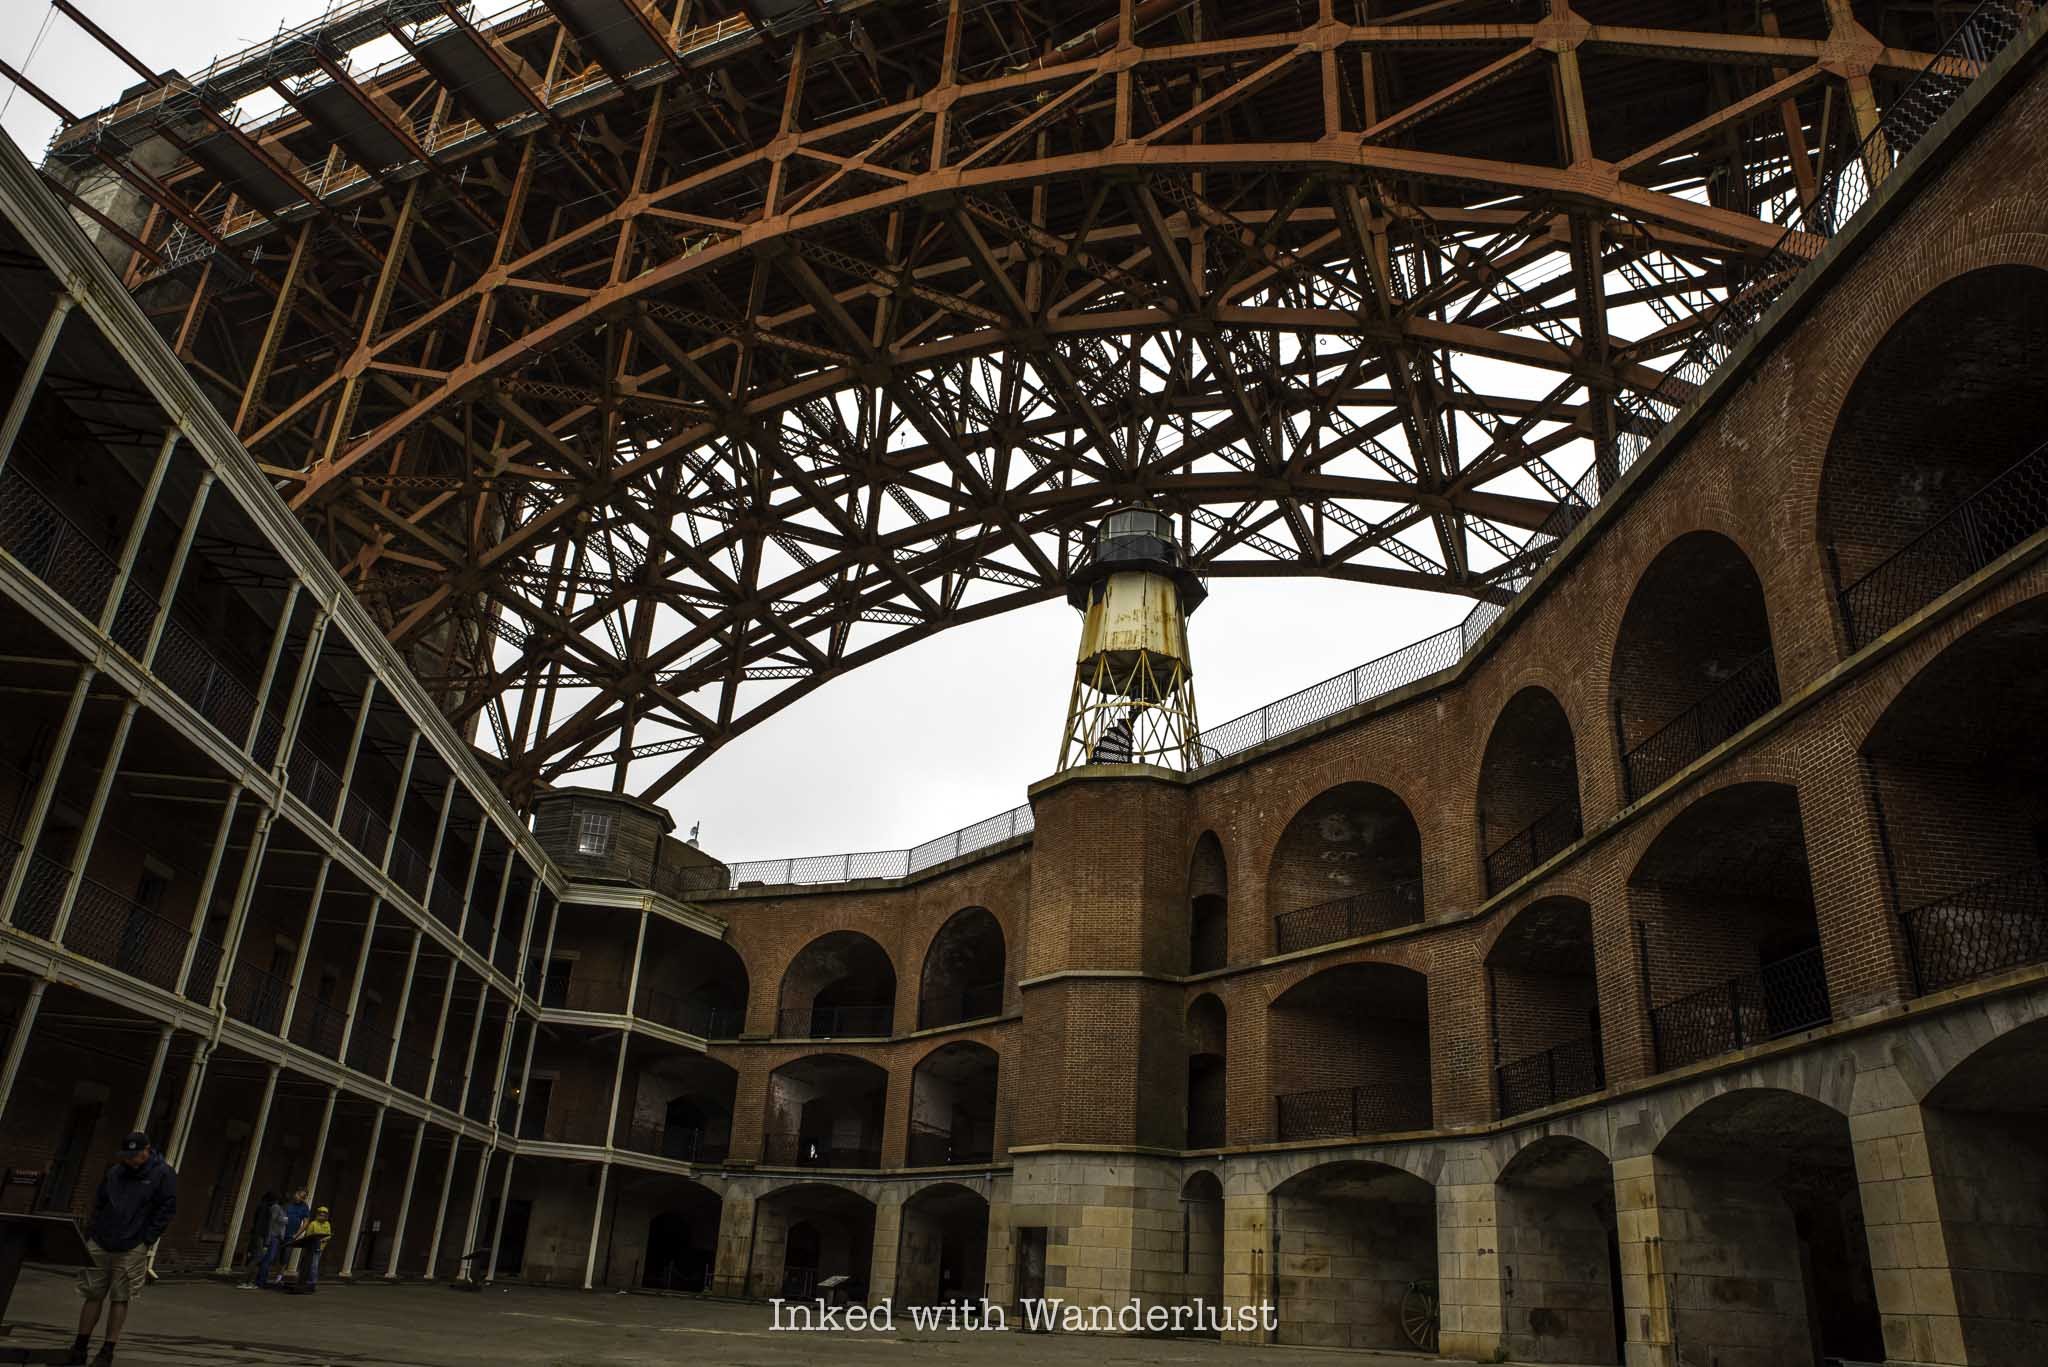
Your time on the north side of San Francisco continuous at Fort Point, a highly historical, civil war-era Army fort situated under the Golden Gate Bridge. The fort was constructed between 1853 and 1861, predating the bridge now spanning over it.
Fort Point is free to enter but depending where you park, there may or may not be a fee. If you park close to the fort, you won't have to pay a fee but if you park above the fort at Battery East Vista, you will have to pay.
At the fort are several museum-style exhibits showing what life was like at the fort, as well as several examples of weaponry of the period, a gift shop, and in my opinion, one of the best views of the Golden Gate Bridge you can get.
If you park at the Golden Gate Bridge Pavilion, it's an easy fifteen minute walk down to Fort Point. Otherwise, it's an even easier drive down to it from there. The parking closest to the fort tends to fill quickly so if you're already parked nearby, it'll likely be easier to just walk.
3) Visit the Palace of Fine Arts
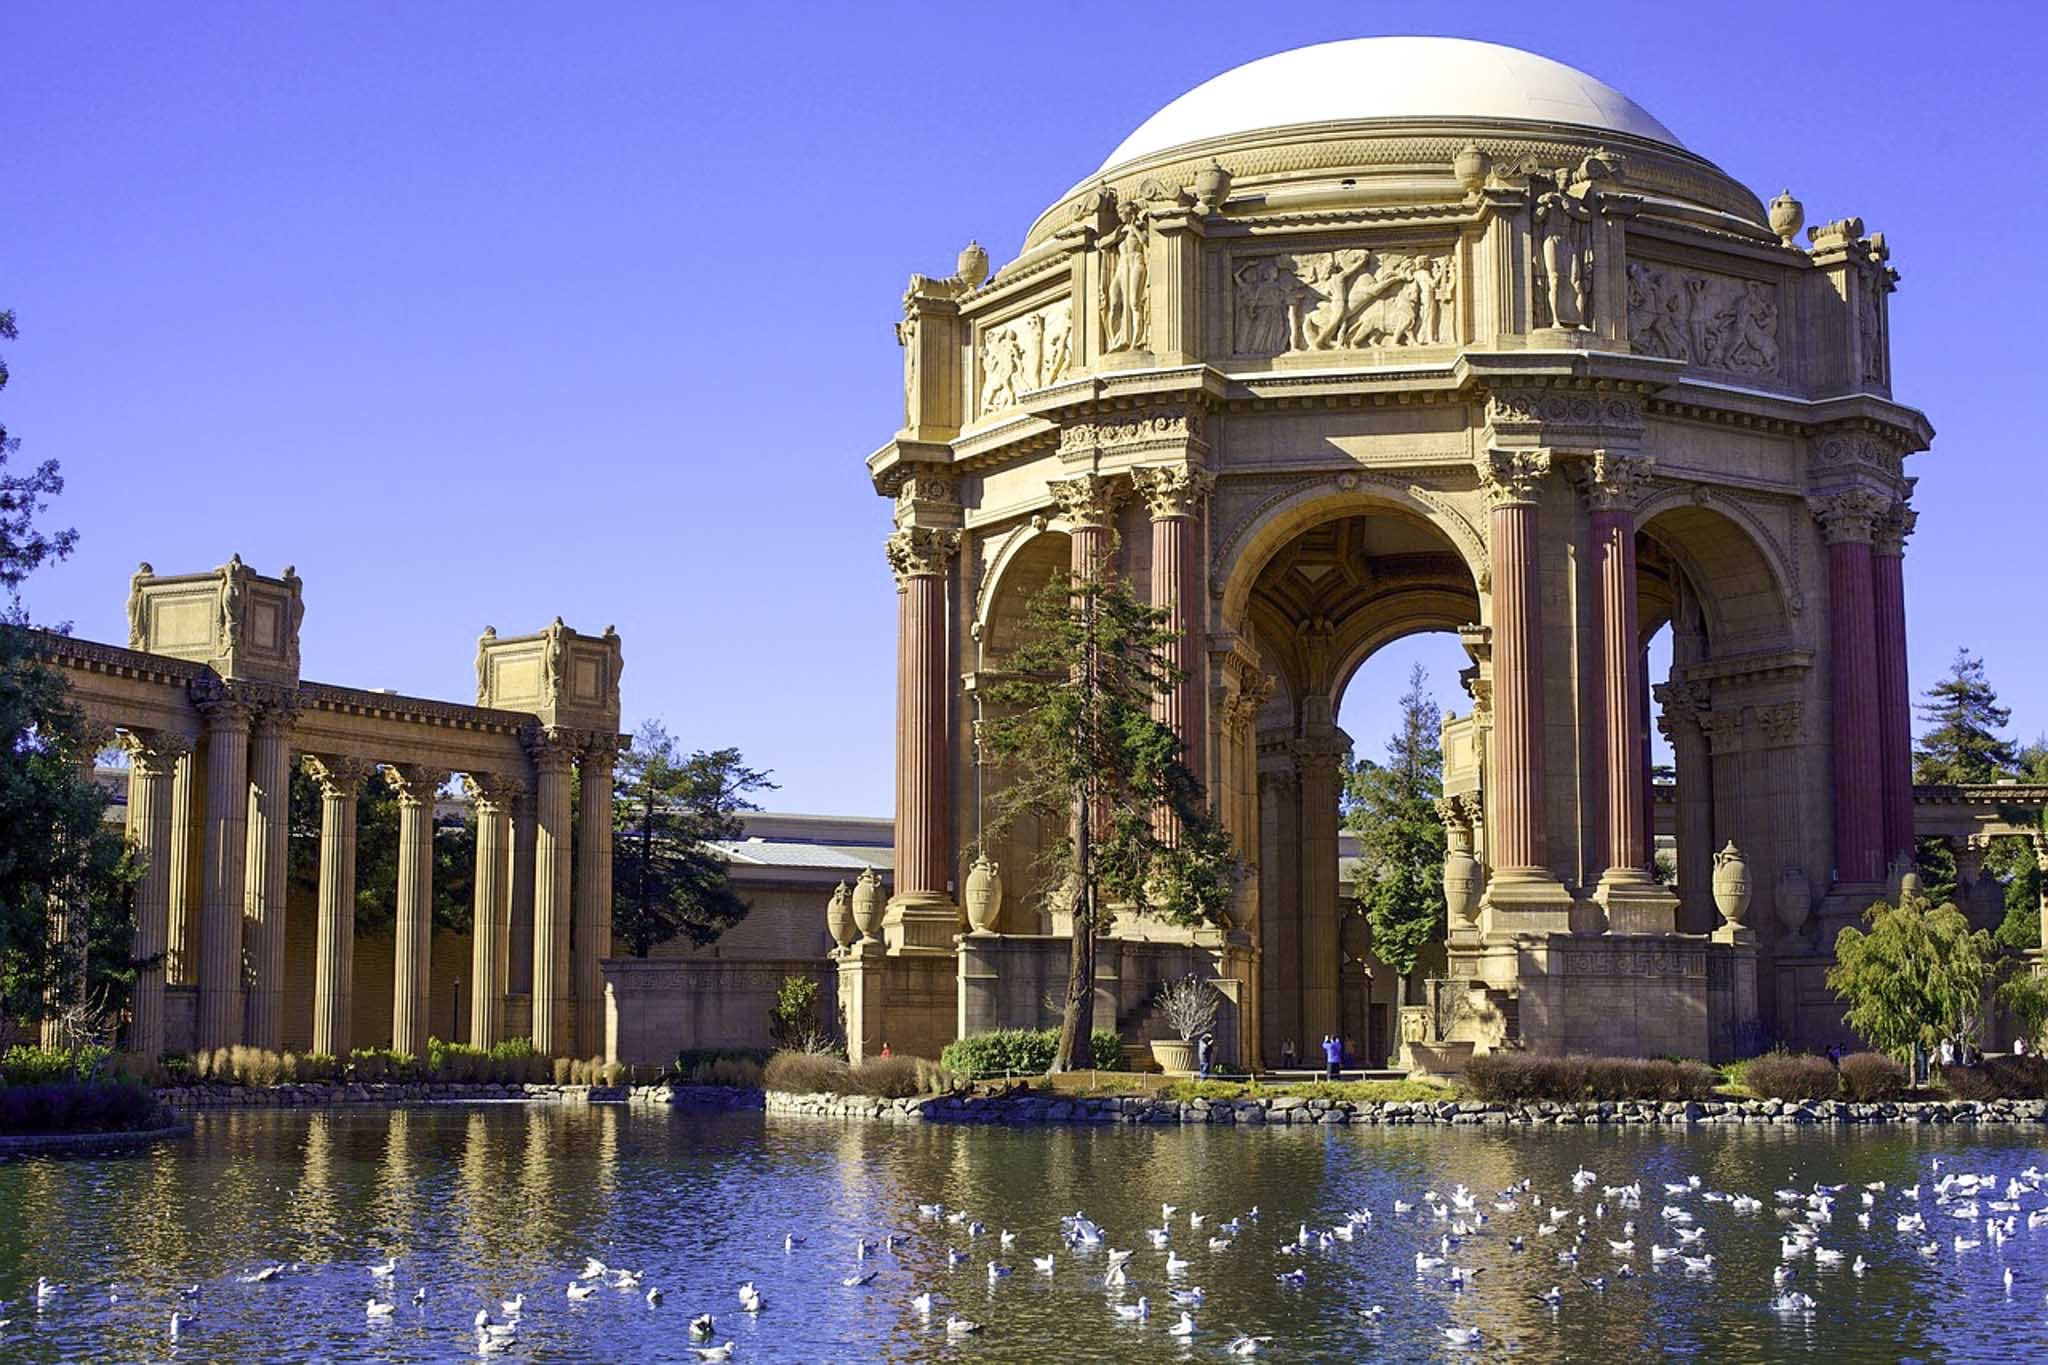
The Palace of Fine Arts in San Francisco is a magical place that feels like stepping into a storybook. Built in 1915, it looks like an ancient Roman or Greek ruin with grand columns, a huge dome and a peaceful lagoon often full of swans and ducks. It’s a nice spot to take photos, have a picnic or just walk around enjoying the beauty of the architecture.
One of the coolest things about visiting the Palace of Fine Arts is how peaceful it feels, even though it’s right in the middle of a bustling city. The sound of the water fountain and birds make it such a relaxing place to sit and take a break.
If you’re into photography or art, this spot is full of inspiration—there’s something inspirational about the way the sunlight hits the dome and reflects in the lagoon. And even if you’re not into art, just being there makes you feel like you’re part of something special.
Another reason to visit is how much fun you can have exploring the area. The Palace of Fine Arts is close to other amazing San Francisco spots like the Golden Gate Bridge and Crissy Field. You can spend the day walking, biking or just enjoying the fresh air and views.
4) See the Ruins of Sutro Baths and Hike Lands End
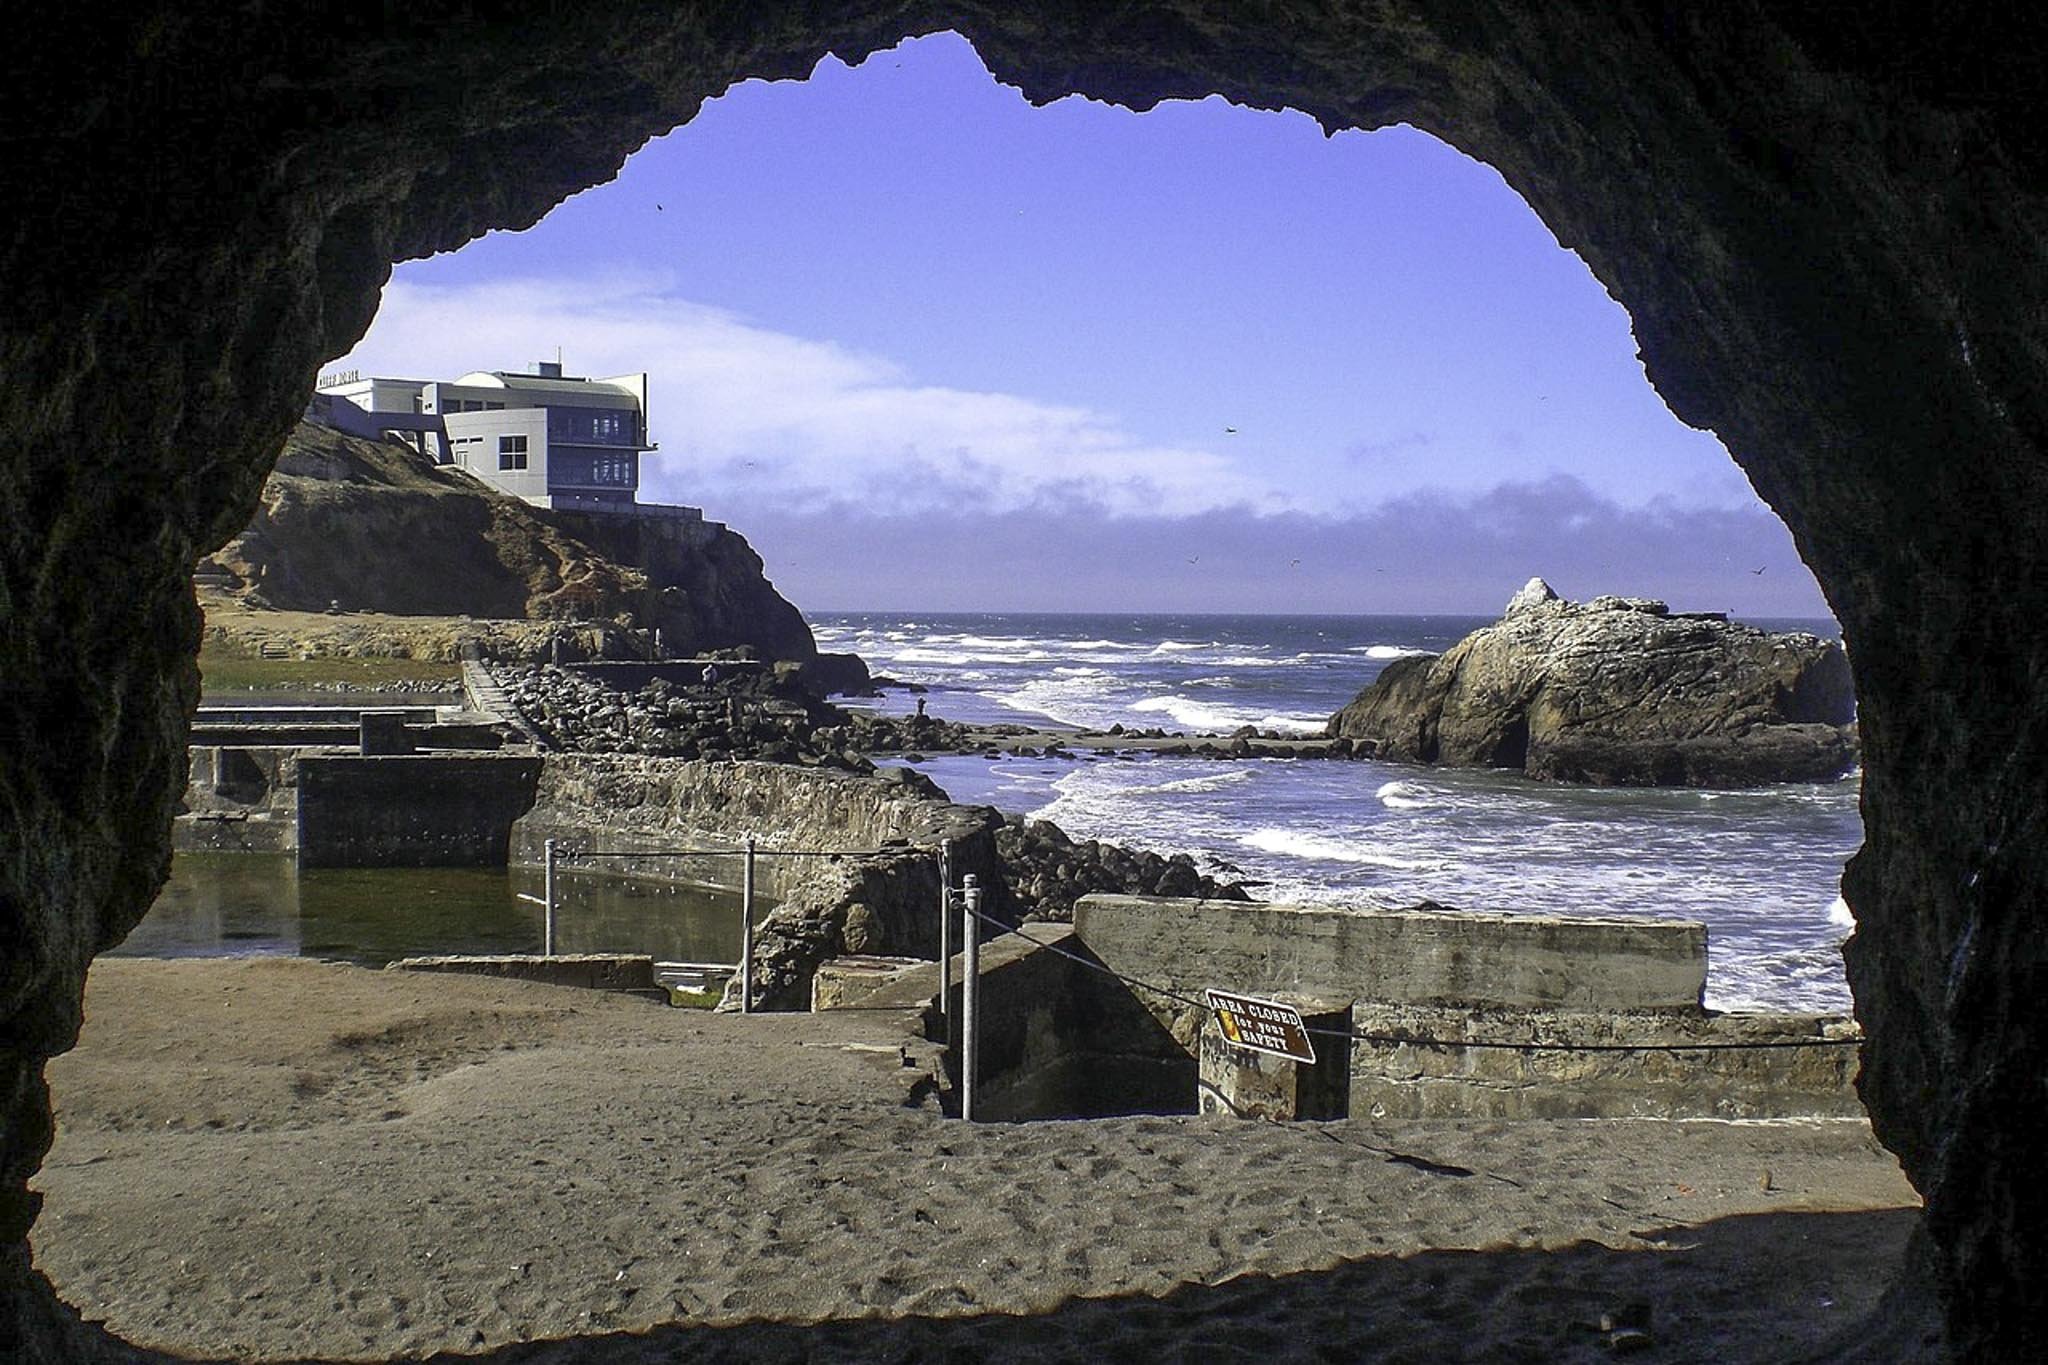
The ruins of Sutro Baths in San Francisco is one of the coolest places to explore. It's the site of a huge, former, indoor swimming pool complex built in the 1890s by a man named Adolph Sutro. People came from all over to swim in the saltwater pools and check out the amazing glass ceiling and decorations.
Today, even though the baths are in ruins, they’re still an exciting spot to visit and explore. You can walk around the old stone walls, see what’s left of the pools and imagine what it was like back in its glory days.
One of the best parts of visiting the Sutro Baths is the view. The ruins sit right on the edge of the ocean, and the waves crashing against the rocks make it feel wild and dramatic. You can also go up nearby trails for even better views of the coastline and the Golden Gate Bridge in the distance.
The adjoining Lands End trail also connects to the ruins, making it an easy add on to your visit. Whether you’re a history buff, a nature lover, or just someone who enjoys unique places, the Sutro Baths and Lands End trail is the perfect post-lunch stop while visiting San Francisco.
5) Walk the Embarcadero

When you're finished exploring Sutro Baths, you'll bid adieu to the city's north side and make your way west, where the next set of San Francisco attractions are located. First up is the historic Embarcadero.
San Francisco's historic Embarcadero is a section of road packed with all sorts of things to do and discover. While the official road goes on much further, the 1.3-mile walking portion begins near the historic ferry building/Pier 14 and ends near Fisherman's Wharf.
While you could drive it, the only way to discover all it has to offer is by walking. Not accounting for stops, it'll take roughly thirty minutes to go from the ferry building to Pier 39. The entire thing is paved, well maintained and flat.
Along the way, you'll pass several piers and attractions, such as Pier 14 (which offers fantastic views of the Bay Bridge), the historic ferry building, Exploratorium, numerous shops and restaurants, Aquarium by the Bay, and Pier 33, which is where tours to Alcatraz Island leave from.
If you've never done it, I highly recommend taking a tour of Alcatraz Island, a former federal prison that housed infamous criminals such as Al Capone and Machine Gun Kelly. You'll need a whole half day (at minimum) to devote to it, but it's well worth spending an extra day for, in my opinion.
6) Admire the Infamous Sea Lions at Pier 39

Pier 39 is an infamous tourist hot spot in the city, featuring numerous shops, restaurants and even a carousel. While all of those are fine for what they are, the real attraction at Pier 39 is the massive colony of sea lions who have carved out a home at a set of nearby boating docks for that last thirty-five years and counting.
These curious, charismatic sea lions often put on a show for spectators, with their playful nature on full display. How many you see entirely depends on the time of year and food availability, but 2024 saw a record 2,100 sea lions move in.
The best times of year to see a large colony are March through May, and August through October. To find them, head towards the end of the pier and go left through the walkway going behind the structures. When in doubt, just listen for the sea lions barking and head in that general direction.
Afterwards, if you're feeling famished, look no further than Fog Harbor Fish House, located near the entrance of Pier 39 on the second level to the left. Here, you can enjoy their award winning clam chowder and for your main course, a serving of their incredibly flavorful filet mignon.
7) Take in Epic Views at Coit Tower
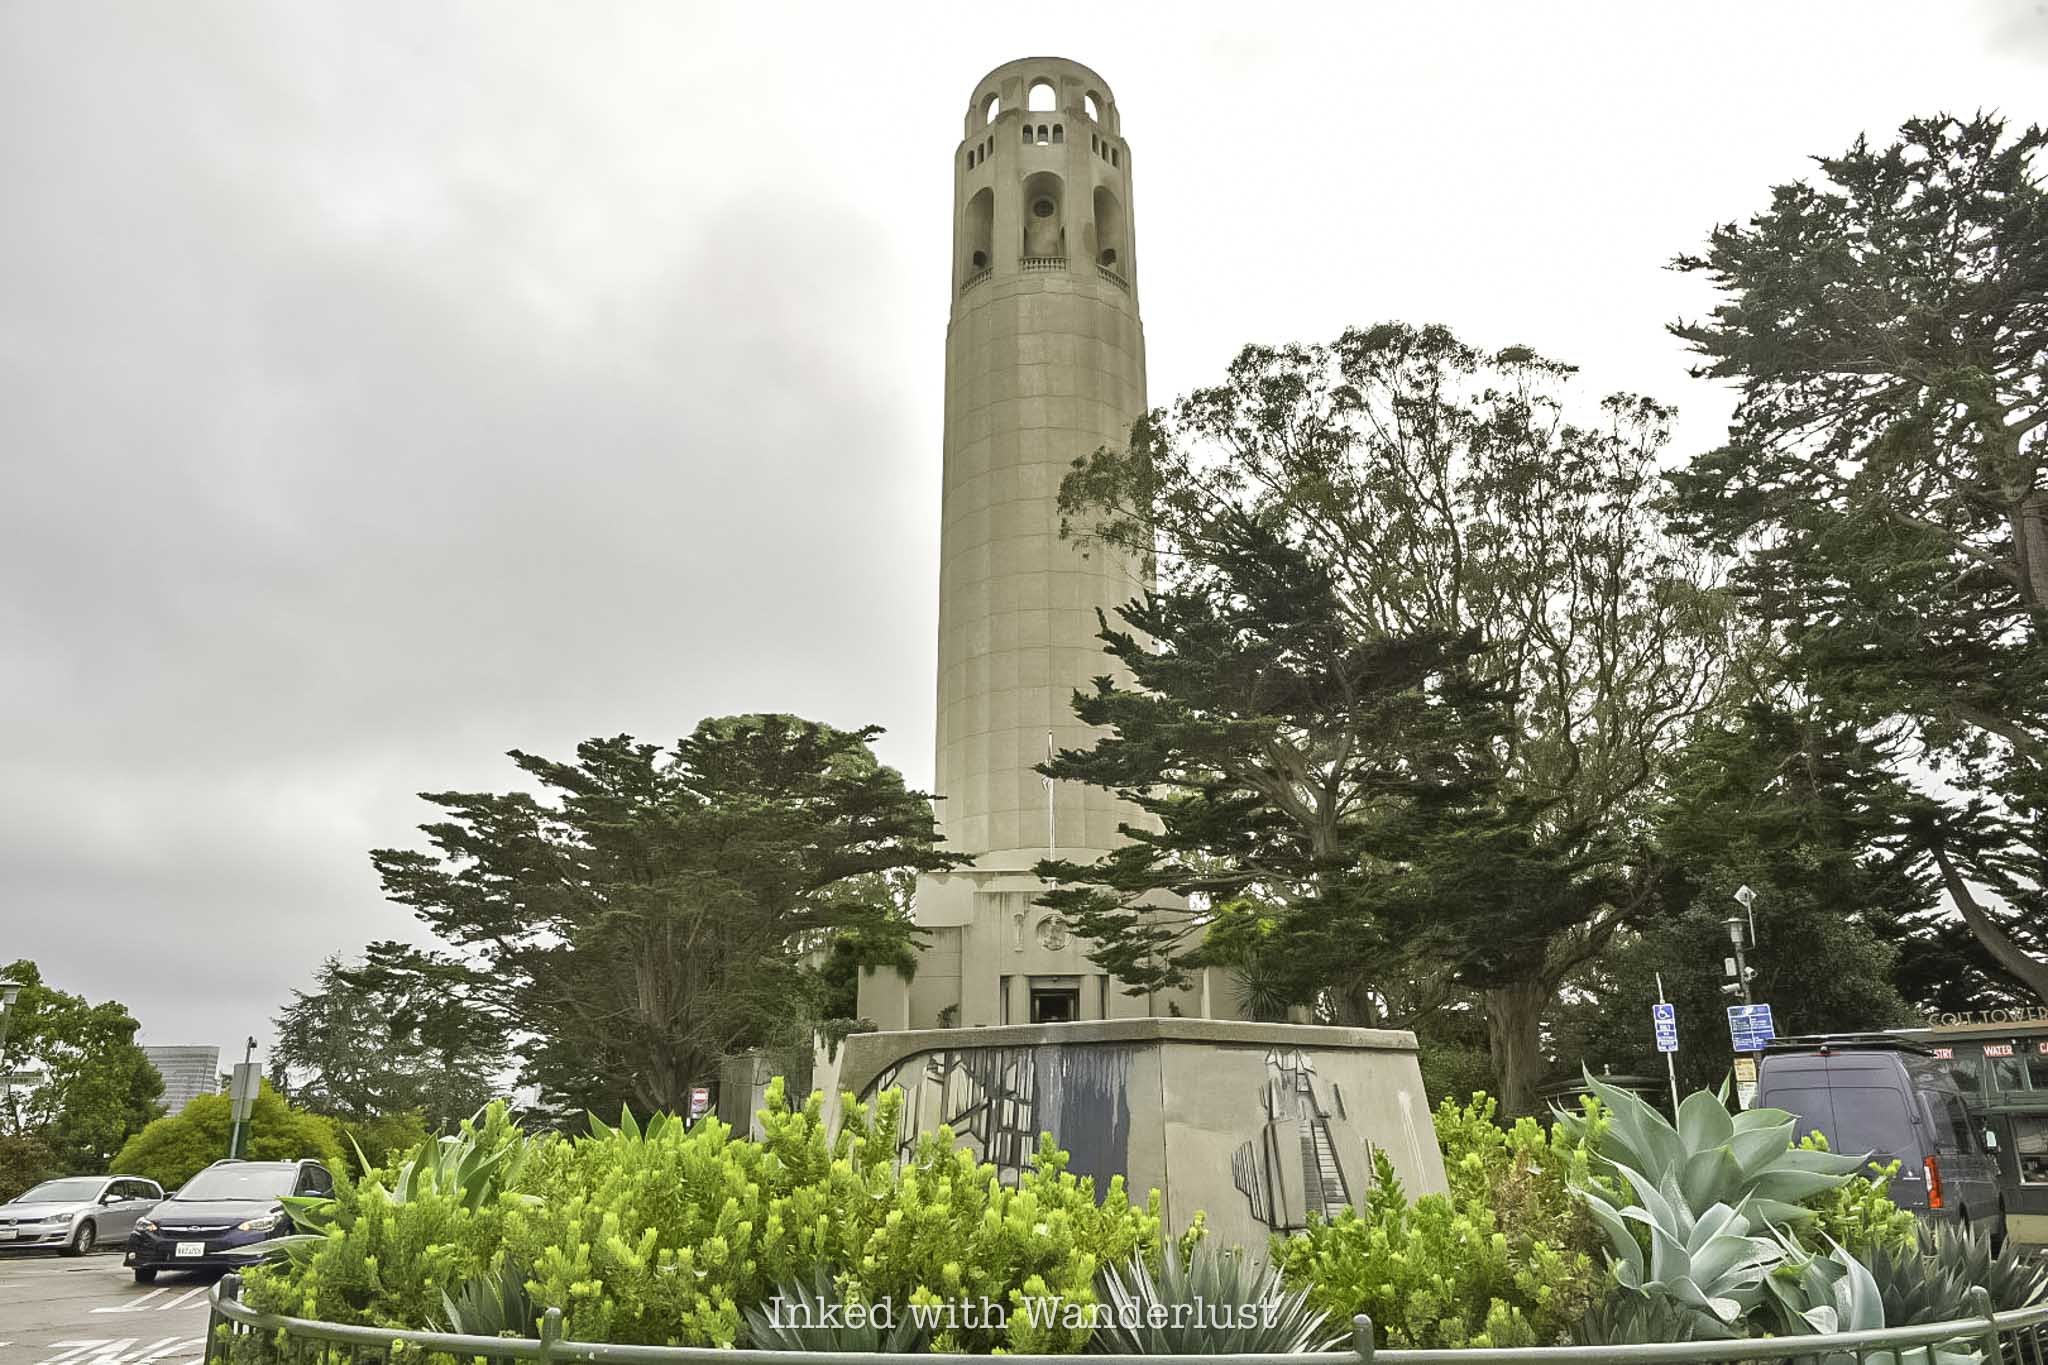
Coit Tower is an iconic sight in San Francisco and is a fantastic place to visit, especially if you love amazing views. This tall, white tower sits on top of Telegraph Hill and is one of the city’s most famous landmarks.
From the top of the tower, you'll get incredible 360-degree views of the city, including the Golden Gate Bridge, Alcatraz and the Bay. It’s a great spot to snap some photos and really take in how beautiful the city is.
What makes Coit Tower extra special are the murals inside. These colorful paintings cover the walls on the first floor and were created in the 1930s by local artists. The murals show scenes of life in California during the Great Depression, from farmers and factory workers to busy city streets.
Another fun thing about Coit Tower is the adventure of getting there. You can take the steep, winding Filbert Street Steps, which are lined with beautiful gardens and even wild parrots if you’re lucky! The climb is a bit of a workout, but the views along the way make it totally worth it.
Coit Tower closes at 4pm daily, so I recommend hailing a ride share (or driving yourself) instead of walking there from Pier 39, so you can save yourself some time. If you can help it, don't skip it. It may not have the same grandeur as the Golden Gate Bridge, but it's a culturally significant place worth visiting.
8) Drive the Iconic Lombard Street
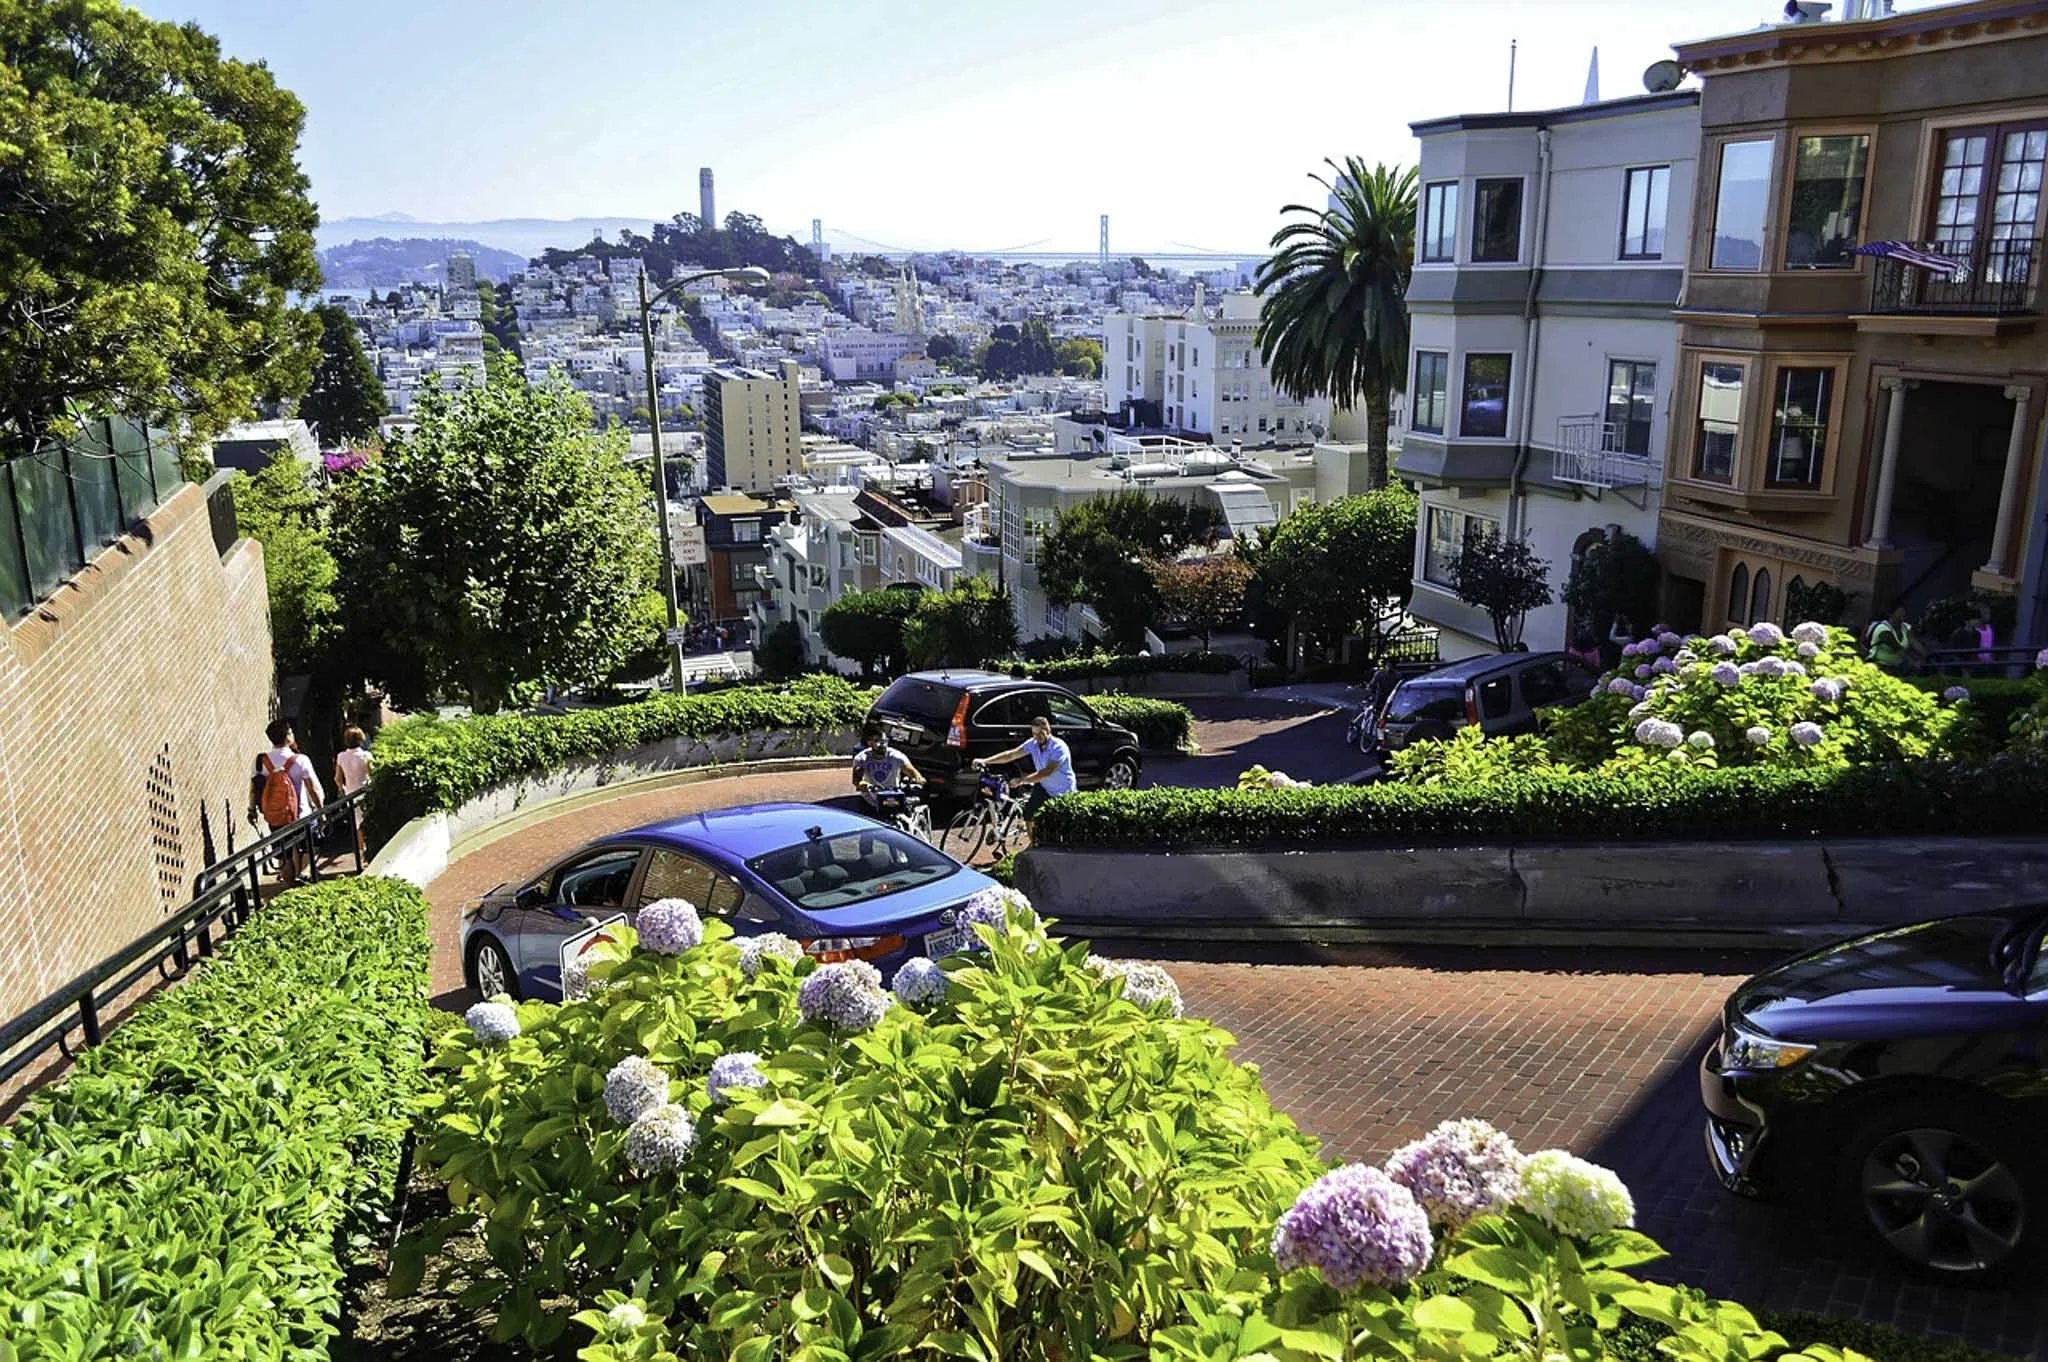
Lombard Street in San Francisco is one of the coolest and most famous streets in the world! What makes it so special is its unique zigzag shape. Known as the “crookedest street in the world,” it has eight sharp turns packed into just one block.
Driving down it feels like being on a roller coaster, but without the speed. If you’re not driving, you can walk along the sidewalks and see the street from a whole new perspective. Either way, it’s a super fun experience that you can’t find anywhere else.
What makes Lombard Street even more amazing is how beautiful it is. The street is lined with colorful flowers, green plants, and charming houses. In the spring and summer, the hydrangeas bloom, making the street look like something out of a postcard.
Visiting Lombard Street is also really easy to fit into your day. It’s located in the Russian Hill neighborhood, close to other cool spots like Fisherman’s Wharf and North Beach. After driving or walking down Lombard Street, you can explore nearby shops, grab a bite to eat, or hop on a cable car!
9) Ride a Cable Car

Riding a cable car in San Francisco is one of the best ways to experience the city! These old-fashioned trolleys are super fun and let you travel up and down the city’s famous steep hills. It’s like a ride and a way to get around all in one!
As you ride, you can hang onto the side rails (if you’re brave) or grab a seat and enjoy amazing views of the city. You’ll get to see iconic sights like the Bay, Alcatraz and the Golden Gate Bridge in the distance. Plus, the sound of the cable car’s bell is so unique, it’ll feel like you’re transporting back to another time.
Another reason to ride a cable car is that it’s a part of San Francisco’s history. These trolleys have been running since the 1800s, and they’re the only cable cars in the world that still operate! It’s a cool way to connect with the city’s past while having fun at the same time.
You can hop on at famous spots like Fisherman’s Wharf, Union Square or Lombard Street and ride all the way to Chinatown and other popular neighborhoods. Whether it’s your first time in the city or you’ve been here before, a cable car ride is a must-do activity that’ll make your visit unforgettable.
10) Indulge at Ghirardelli Square
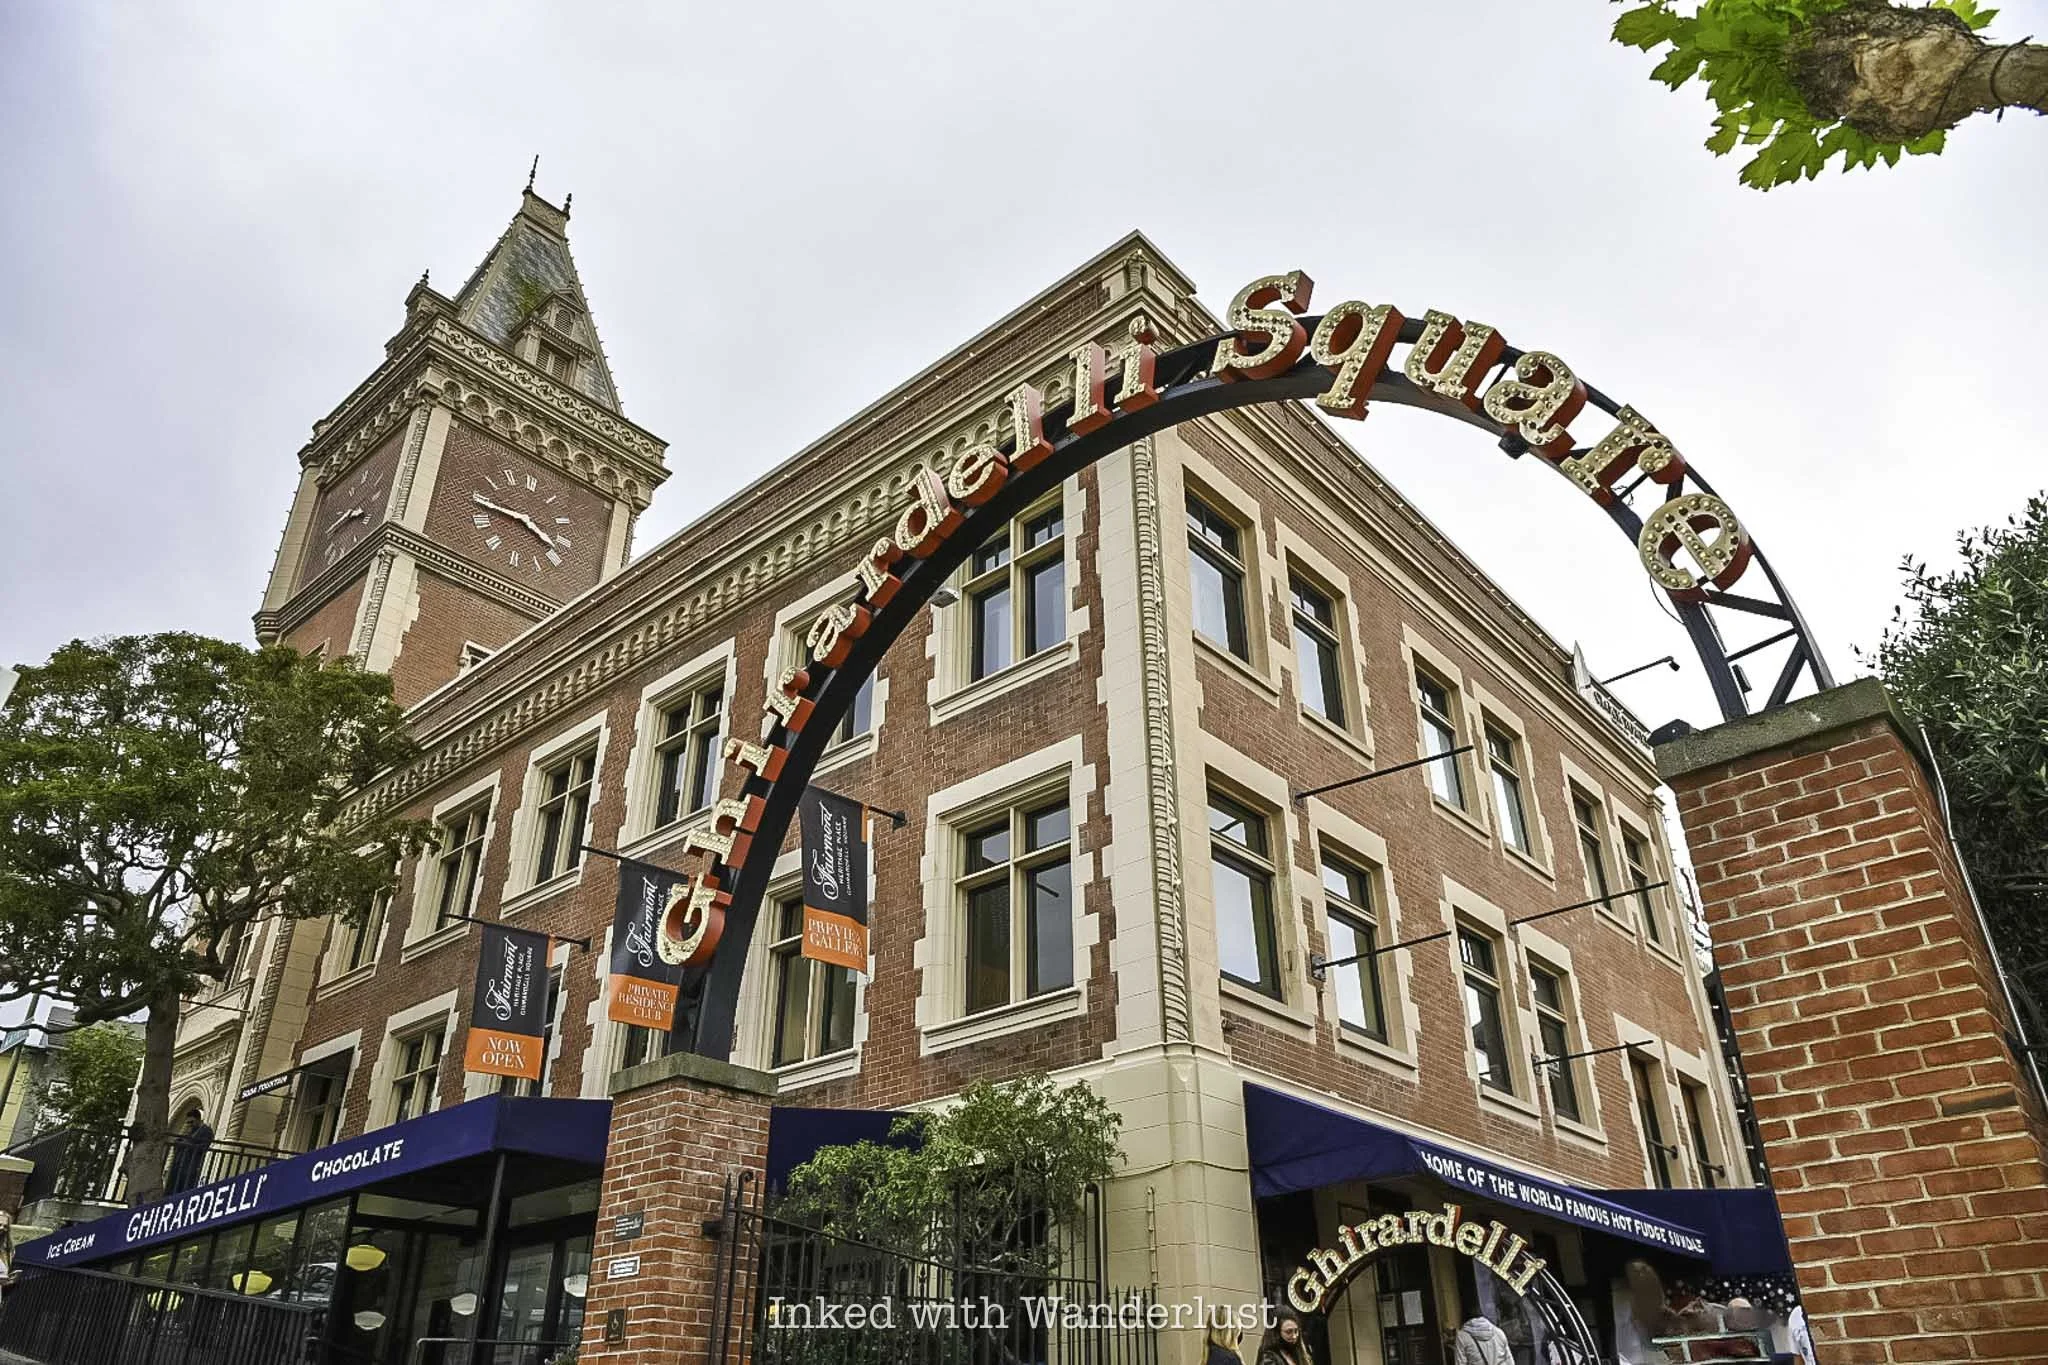
Ghirardelli Square in San Francisco is a sweet spot that every visitor should check out. This historic square is home to the famous Ghirardelli chocolate company, so you can imagine how amazing it smells with the chocolate aroma.
You can visit the Ghirardelli Ice Cream and Chocolate Shop and treat yourself to their world-famous sundaes or pick up some delicious chocolate to take home. Watching the chocolatiers make treats right in front of you is fun for children and adults alike, and you might even get a free sample when you walk in the door!
But Ghirardelli Square isn’t just about chocolate—it’s a great place to hang out and explore. The square has charming shops, restaurants and beautiful views of the San Francisco Bay. You can grab a meal, do a little shopping or simple relax and take in the lively atmosphere. Particularly in the evening, when everything is lit up with beautiful gold lights.
In my opinion, there’s no better way to cap your one day in San Francisco than with a chocolate sundae from the most iconic chocolatier in the world. From here, simply make your way back to your hotel or rental and enjoy your well deserved rest. This concludes my pick of ten things to do in one day in San Francisco.
What to Skip (if you run low on time)
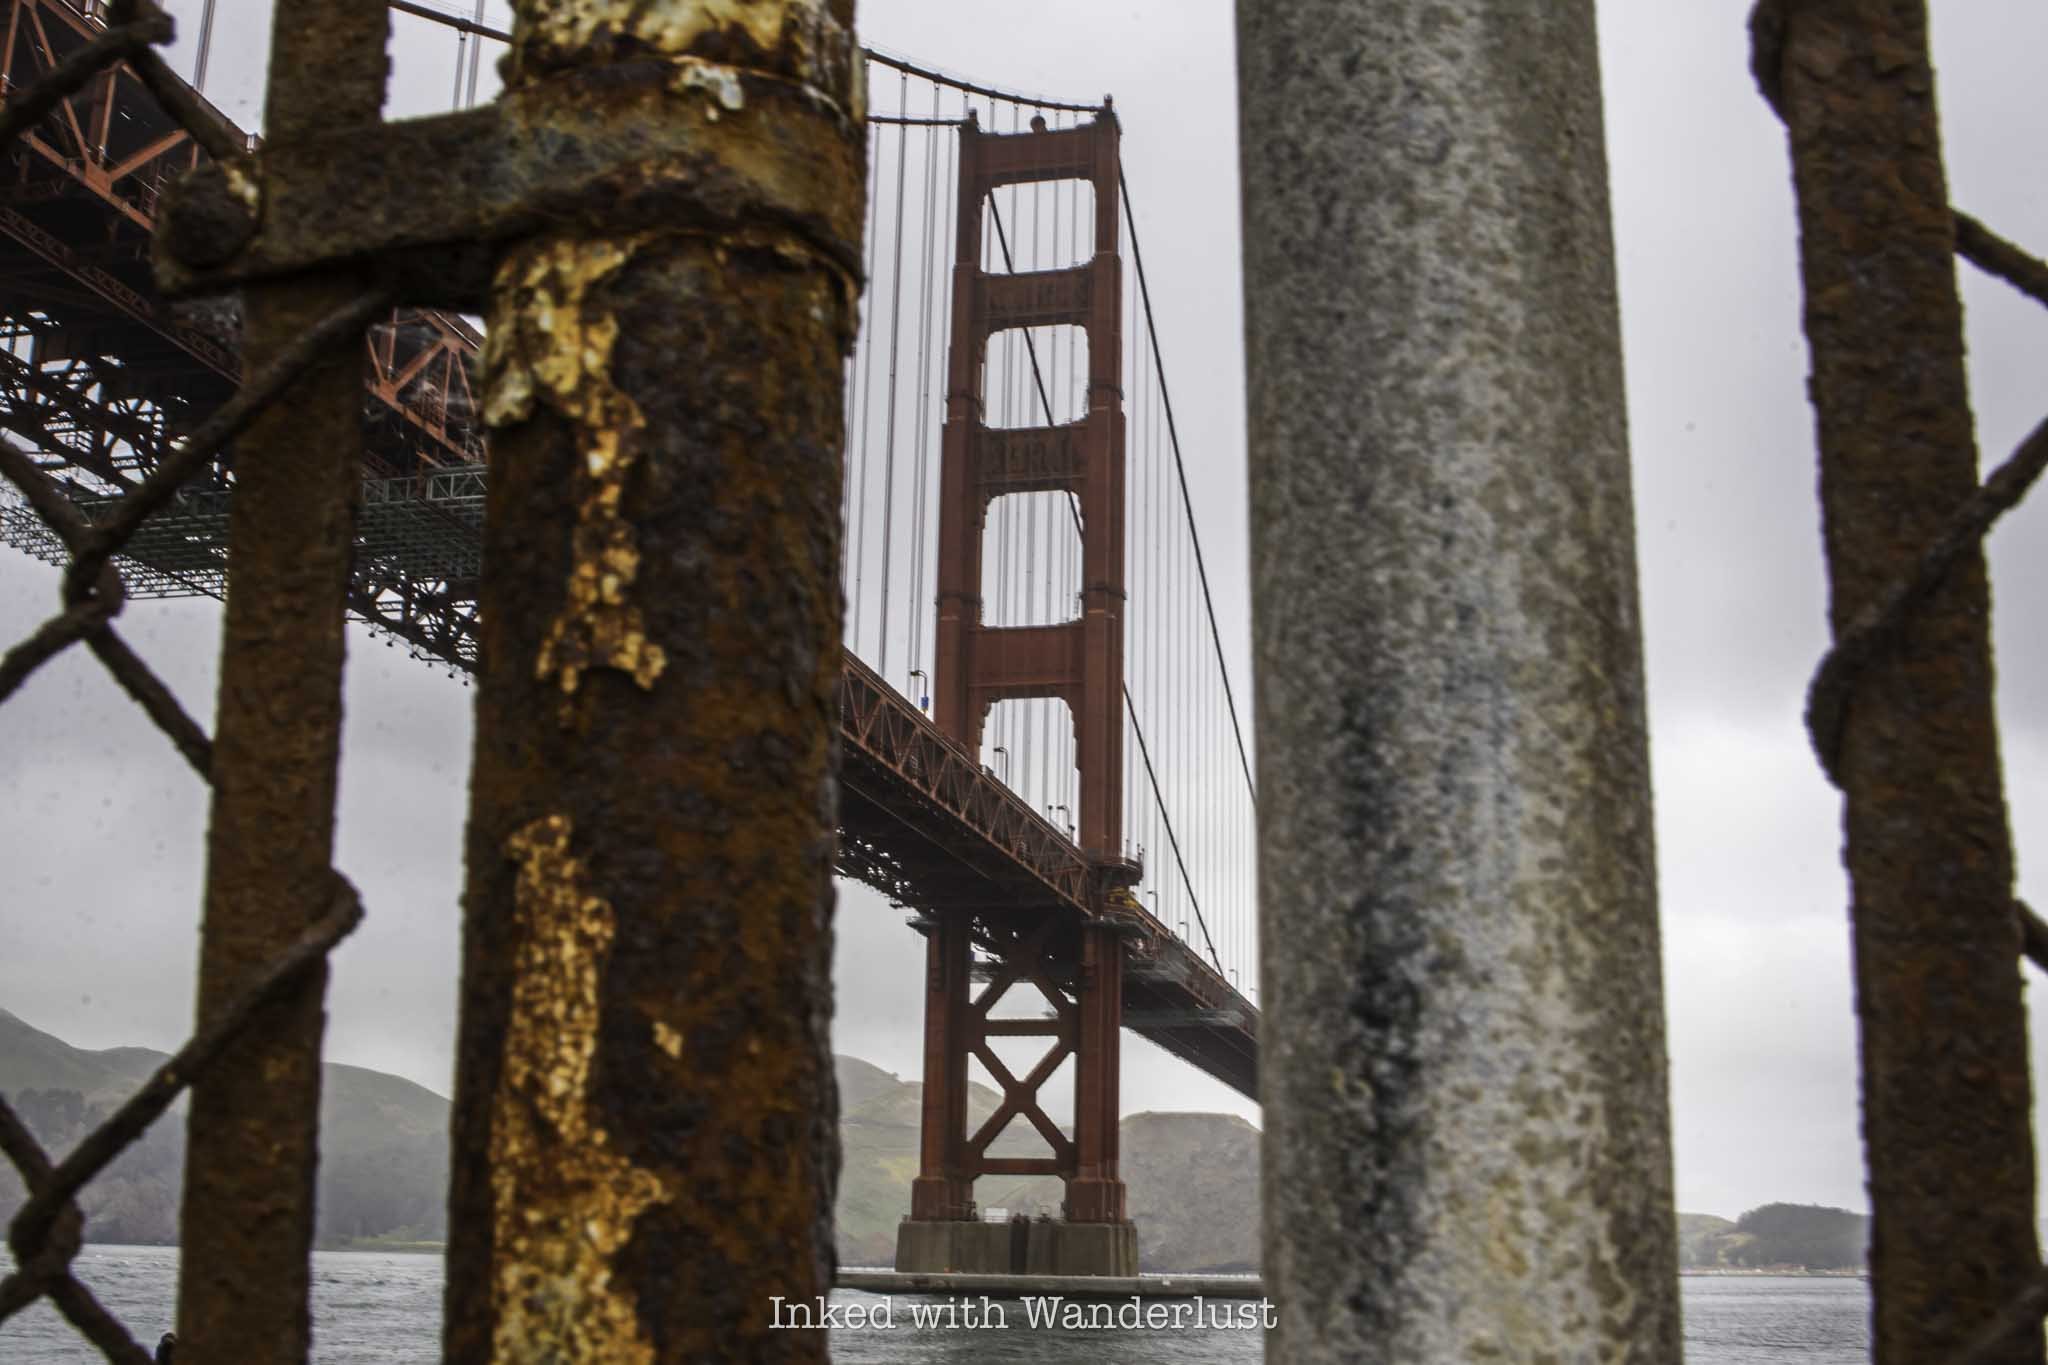
I acknowledge that this itinerary is fairly hardcore and doesn't leave much room for error. Things happen. Feet get sore, kids get tired, attractions close unexpectedly, you get stuck in traffic, you spend too much time at another attraction, etc.
If you find yourself running low on time and you need to sacrifice one or more of the above listed attractions, I suggest skipping the Palace of Fine Arts, Coit Tower and walking the Embarcadero. If you're REALLY low on time, also skip Fort Point and possibly even Sutro Baths/Lands End.
The Golden Gate Bridge is non-negotiable for a first-time visit to the city. If you have a fear of bridges or heights, you don't need to walk on it in order to enjoy it. Simply view it from one of the many available viewpoints. Either way, go see it.
Additionally, in my opinion, riding a cable car, the sea lions at Pier 39 and driving Lombard Street are also quintessential San Francisco. So I definitely recommend keeping those, along with the bridge, as part of your itinerary.
What Else to do If You Have Extra Days

I always recommend spending at least a few days in any city or destination in order to get the most out of your experience. If you’re able to carve out an extra day or two, here's a list of a few other attractions around San Francisco you should definitely check out.
Golden Gate Park
Twin Peaks
Painted Ladies (row of colorful houses from the title sequence of the Tv show, Full House)
Union Square
Haight-Ashbury
San Francisco Zoo
California Academy of Sciences
San Francisco Museum of Modern Art
Crissy Field
Exploratorium
Fisherman’s Wharf
Buy me a coffee?
If you found this blog helpful, consider leaving a tip through the Buy Me A Coffee button below! Whether it’s $1 or $5, every bit helps offset small travel costs like coffee, water, lunch, parking, or park entry fees. Your support means the world—thank you!

Visiting Glacier Point in Yosemite National Park
If you’ve ever seen a photo of Half Dome online, there’s a good chance it was taken from the subject location of this post…
Disclosure: This post contains affiliate links. If you make a purchase through these links, I may earn a small commission at no additional cost to you. I only recommend products or services that I believe will add value to my readers.
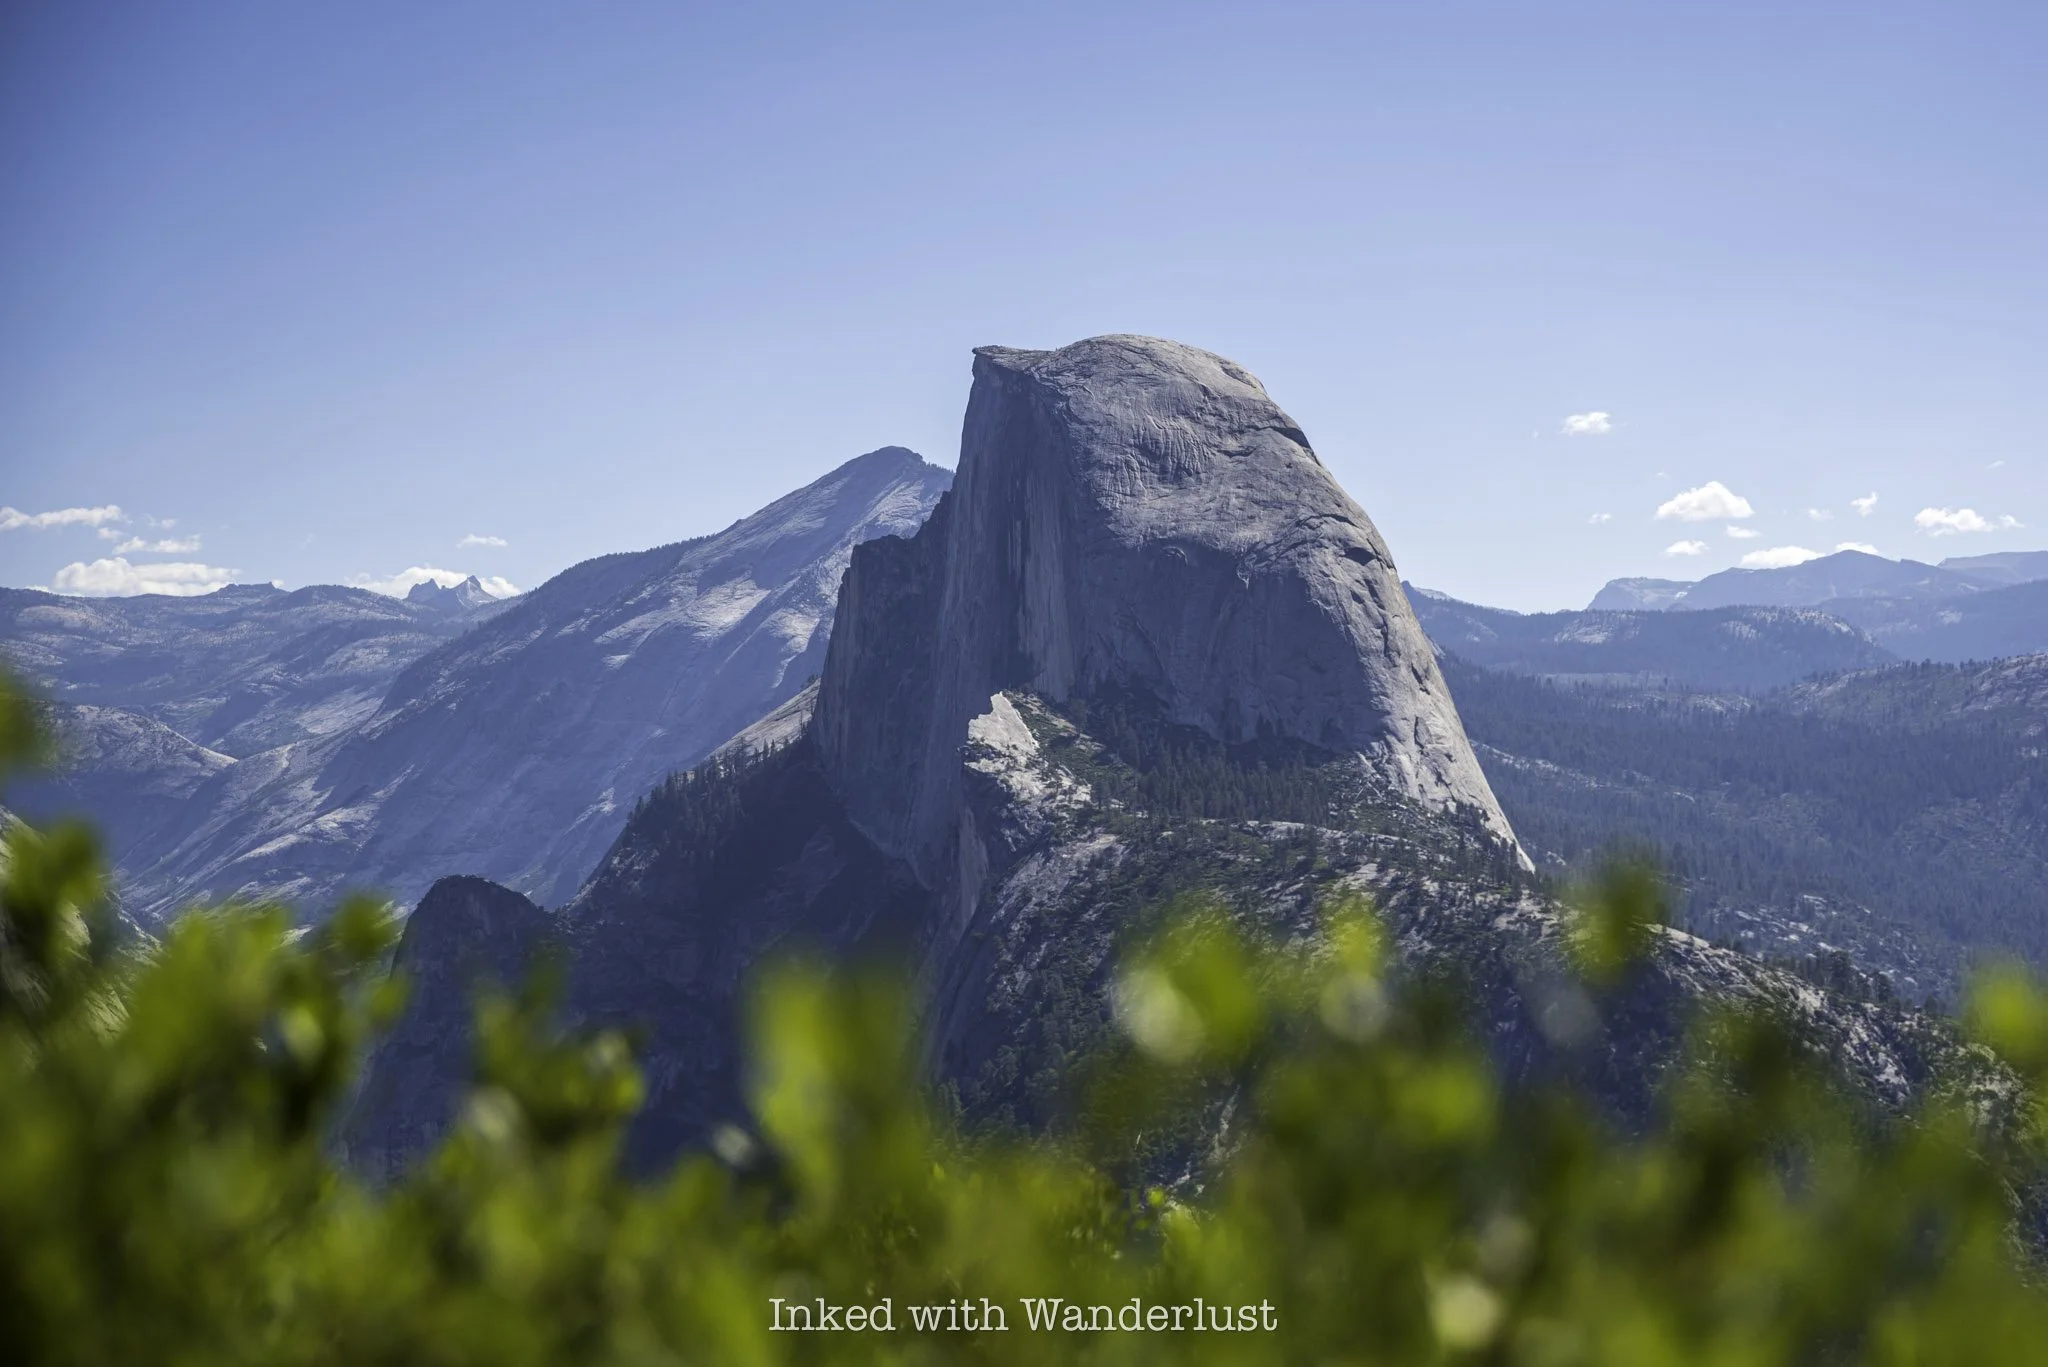
If you’ve ever seen a photo of Half Dome on social media, there’s a good chance it was taken from the subject location of this post, Glacier Point in Yosemite National Park. It’s one of the most iconic viewpoints in Yosemite and is visited by millions of people each year.
However, many don’t realize where in the park Glacier Point is located, and are often surprised to find out when they arrive to Yosemite Valley that it’s actually another hour’s drive away along a windy, mountainous road.
While it isn’t difficult to reach, there are a few things you should know ahead of time to avoid being surprised yourself. Aspects such as drive time, directions, transportation options, seasonality, and more are discussed in the post below. Let’s get into it.

Quick Stats
Location: Yosemite National Park
Fee: Yosemite requires an entry fee of $35
Open: All year, but only accessible via vehicle from April/May to November
Family Friendly: Yes
Cell Service: Yes
Restroom: Multiple
Parking: Large, paved lot
EV Stations: None
Milage: 0.5 mile, out and back
Elevation Gain/Loss: 50 feet
Difficulty: Easy
Popularity: Mega-high
Mileage: Less than a half-mile
Condition: Well maintained and easy to follow
Features: Views of Yosemite Valley and Half Dome
Best Viewed: Any time of year
Pets: Allowed on leash
Drones: Prohibited
Hazards: Usual wildlife hazards
My Visit(s): 2020 and 2024
When is Glacier Point Yosemite Open?

Glacier Point is open all year long, even during the park’s snow-dense winter season. However, most people will not be able to access it during winter because Glacier Point Road, the mountainous road which leads to and terminates at Glacier Point, is closed due to heavy snowpack.
Once it stops snowing, road crews begin plowing the road sometime in April and will typically open it to vehicle traffic in May. Much like Tioga Road on Yosemite’s east side, the road will close with the first heavy snowfall of the season, which usually occurs in November. You can see status updates on the NPS website here.
When the road is closed, you can still access Glacier Point, however, you’ll need to do so via cross-country skiing. If you’re skilled and experienced in this, there’s a good chance you’ll have Glacier Point all to yourself when you get there.
How to Get to Glacier Point Yosemite

The only entrance in Yosemite that’ll take you straight to Glacier Point is the southern entrance via Wawona Road. After driving through the entrance, you’ll continue along Wawona Road for about 17 miles before reaching Glacier Point Road, on which you’ll turn right. From there, it’s 15 miles to the road’s terminus at Glacier Point. Total drive time is about one hour.
From all other entrances, you’ll first need to drive into Yosemite Valley. If you’re driving in from the east entrance or El Portal, you’ll drive along Northside Drive before taking the turn off onto Southside Drive, before quickly turning right onto Wawona Road.
You’ll be passing one of the valley’s most famed waterfalls, Bridalveil Fall, on your left, as well as the most popular of Yosemite viewpoints, Tunnel View, on your right, before driving through the historic Wawona Tunnel.
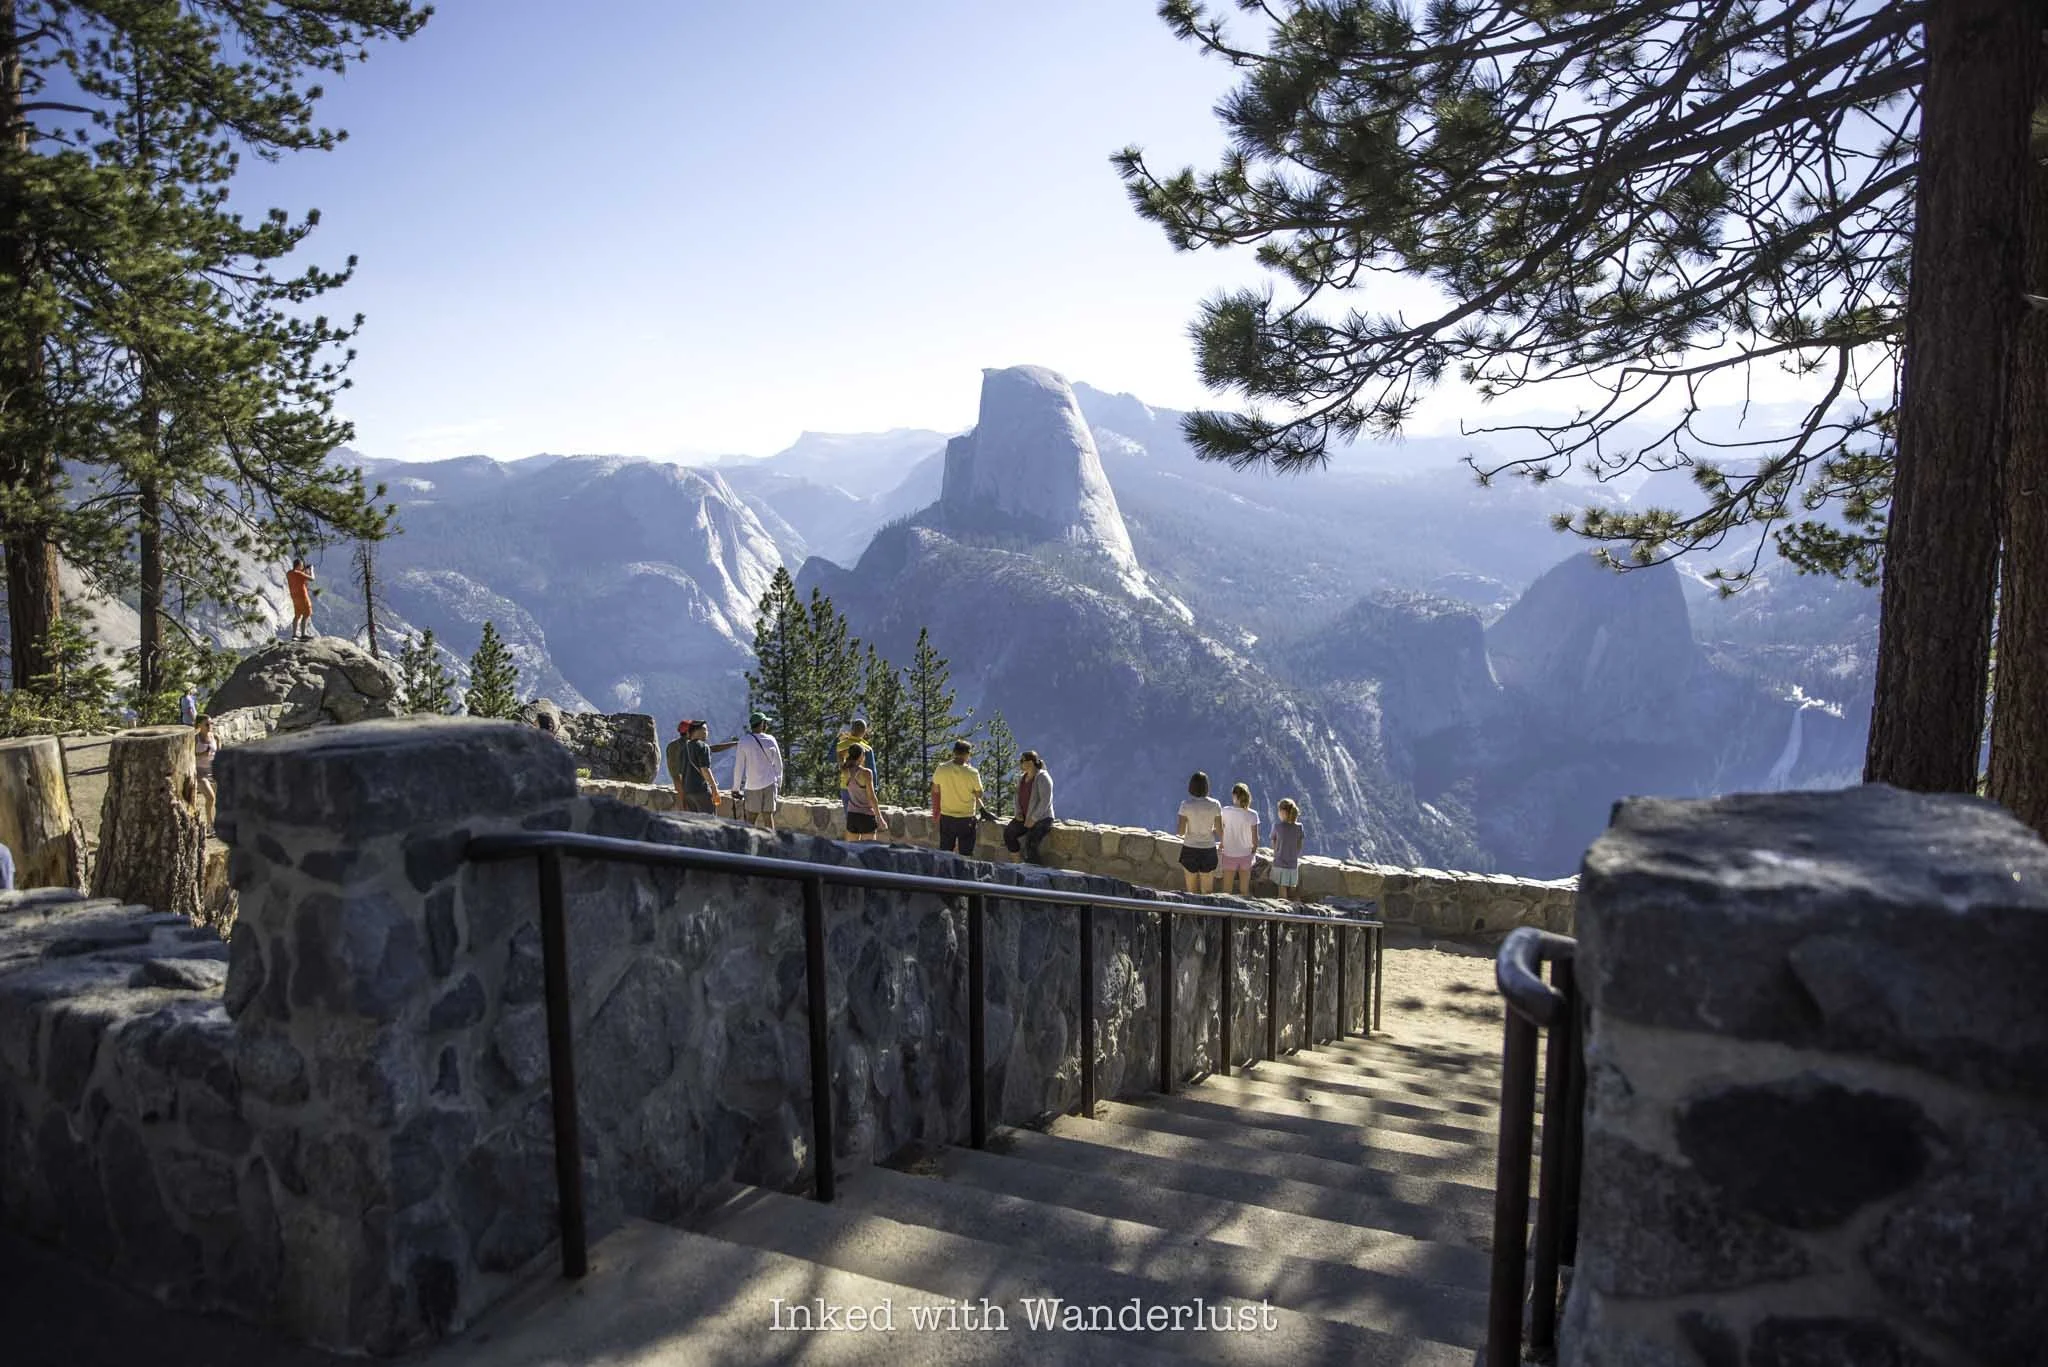
You’ll drive on Wawona Road for about 18 miles before coming to Glacier Point Road. Turn left here and continue driving for about 15 miles until you’ve reached Glacier Point’s parking lot. Drive time depends on where in the valley you’re coming from but generally speaking, you can expect about one hour.
Shortly before reaching Glacier Point, you’ll pass another Yosemite viewpoint, Washburn Point, which offers a similar view. From Washburn, you’ll have an angled view of Half Dome and a closer view of two of Yosemite Valley’s most popular waterfalls, Vernal Fall and Nevada Fall, which are part of The Mist Trail.
Despite being signed appropriately, many mistake Washburn Point for Glacier Point. While deserving of a stop in its own right, and a great alternative if Glacier Point is too busy, you’ll need to continue another mile or so down the road to reach Glacier Point. Remember, the road terminates at Glacier Point’s parking lot, so there’s no mistaking it.
Parking at Glacier Point
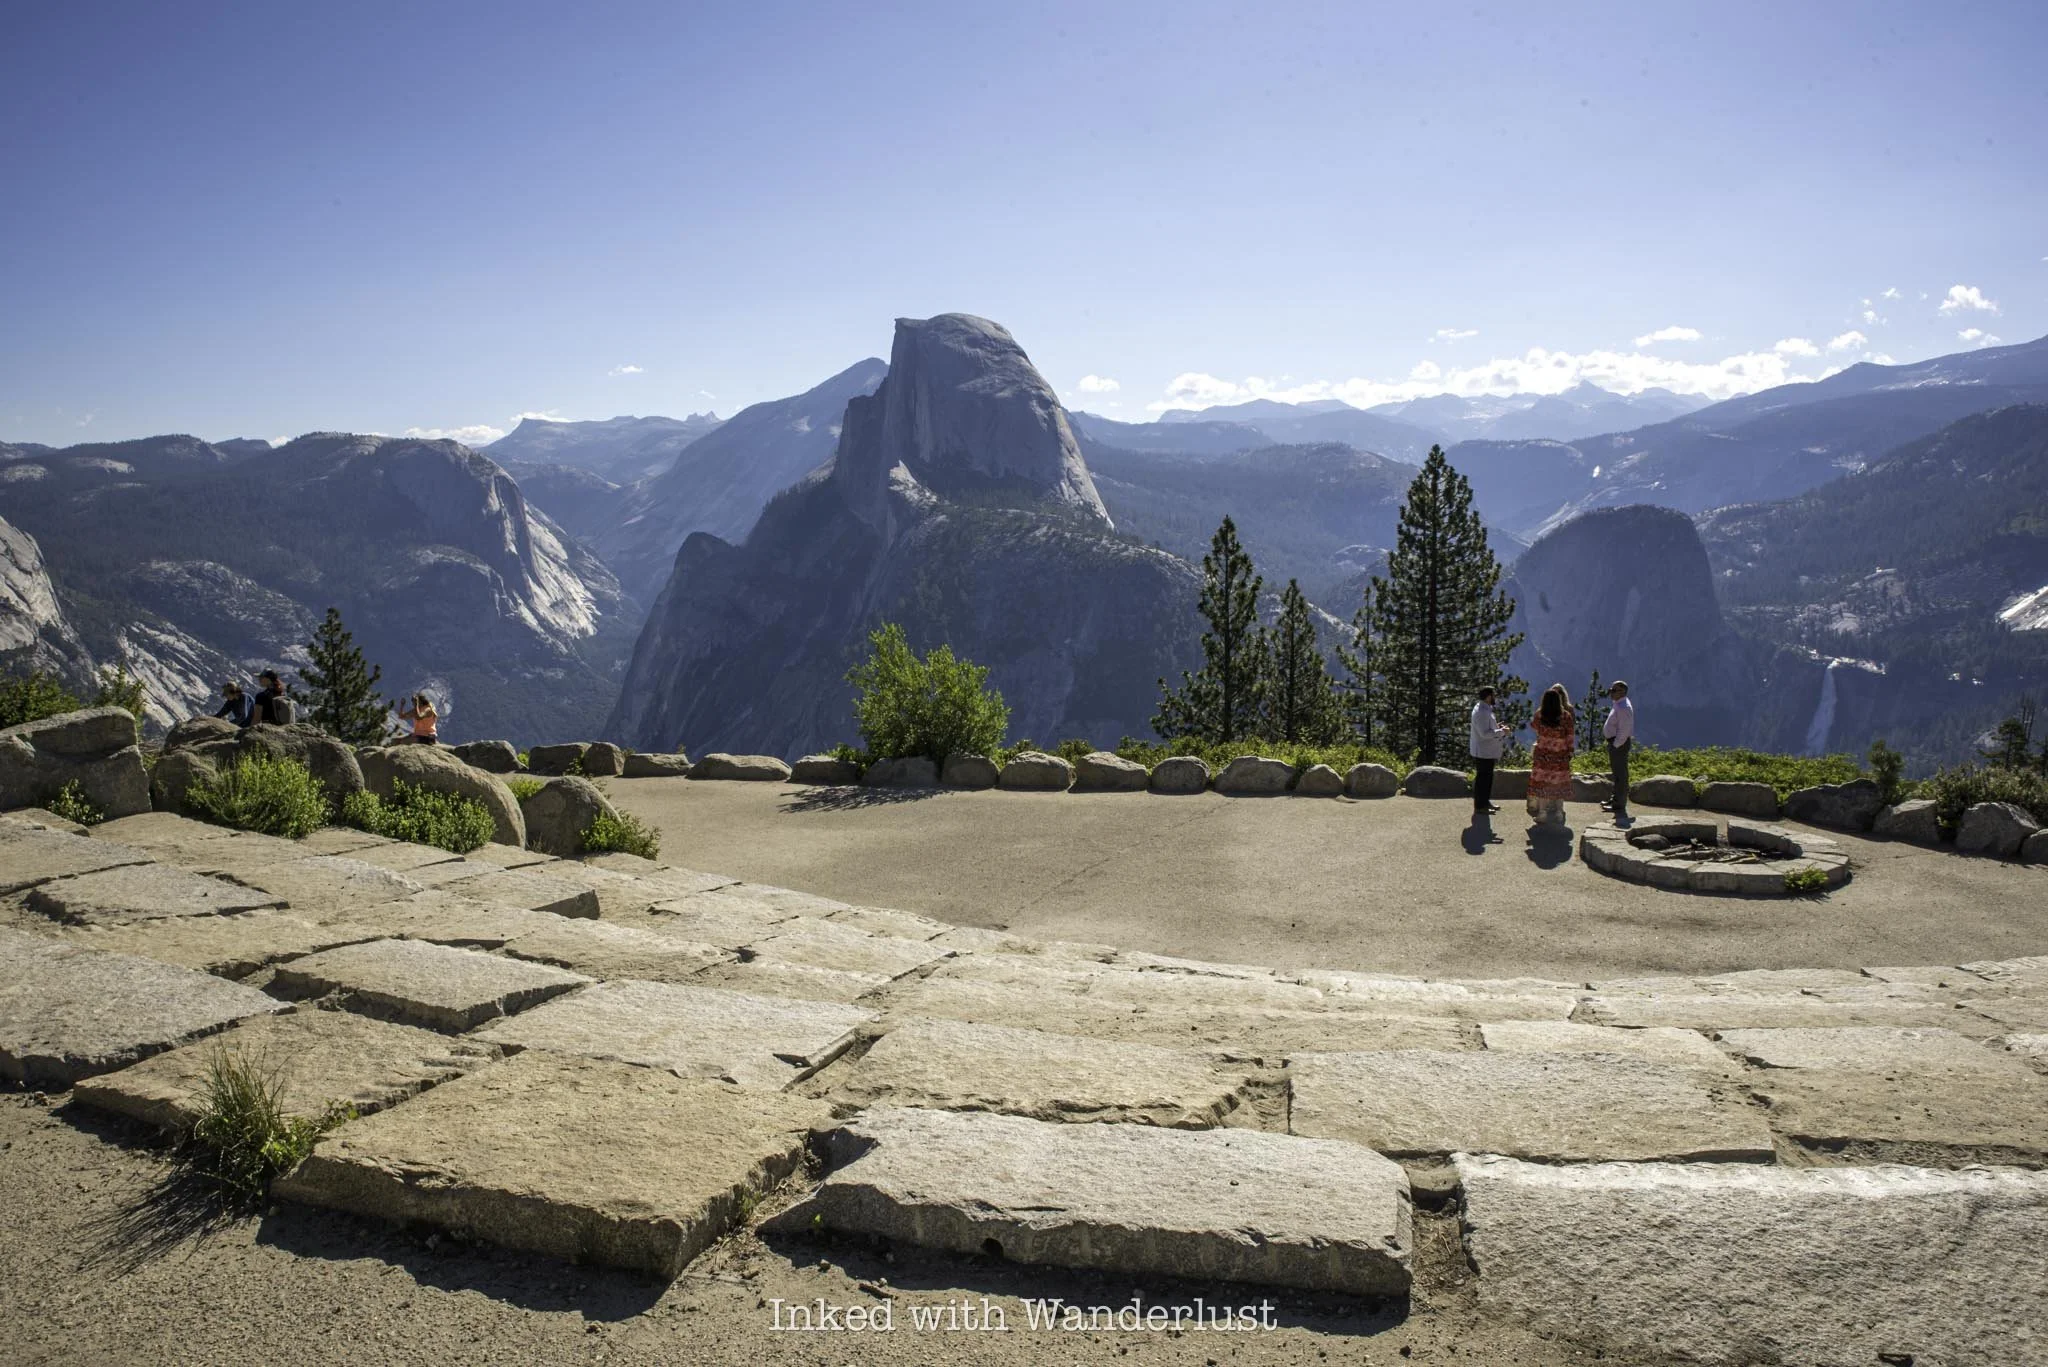
Parking is plentiful at Glacier Point. The lot is paved, large, and contains hundreds of designated parking spaces. However, it is still known to fill quickly, particularly during the busy summer months and on days when there are no day-use reservation requirements.
Comparatively, sunrise and sunset both are mega-popular times at Glacier Point, particularly amongst photographers. I’ve been there in the morning shortly after sunrise and I’ve been there in the middle of the day. In my opinion, morning time is the way to go for guaranteed parking.
Another option is to arrive in the late afternoon, an hour or two prior to sunset. Whatever you do, avoid going in the middle of the day. That’s typically when Glacier Point is at its busiest and it’s also the hottest point in the day, and there’s little to no shade up there.
Does the Yosemite Valley Shuttle Go to Glacier Point?
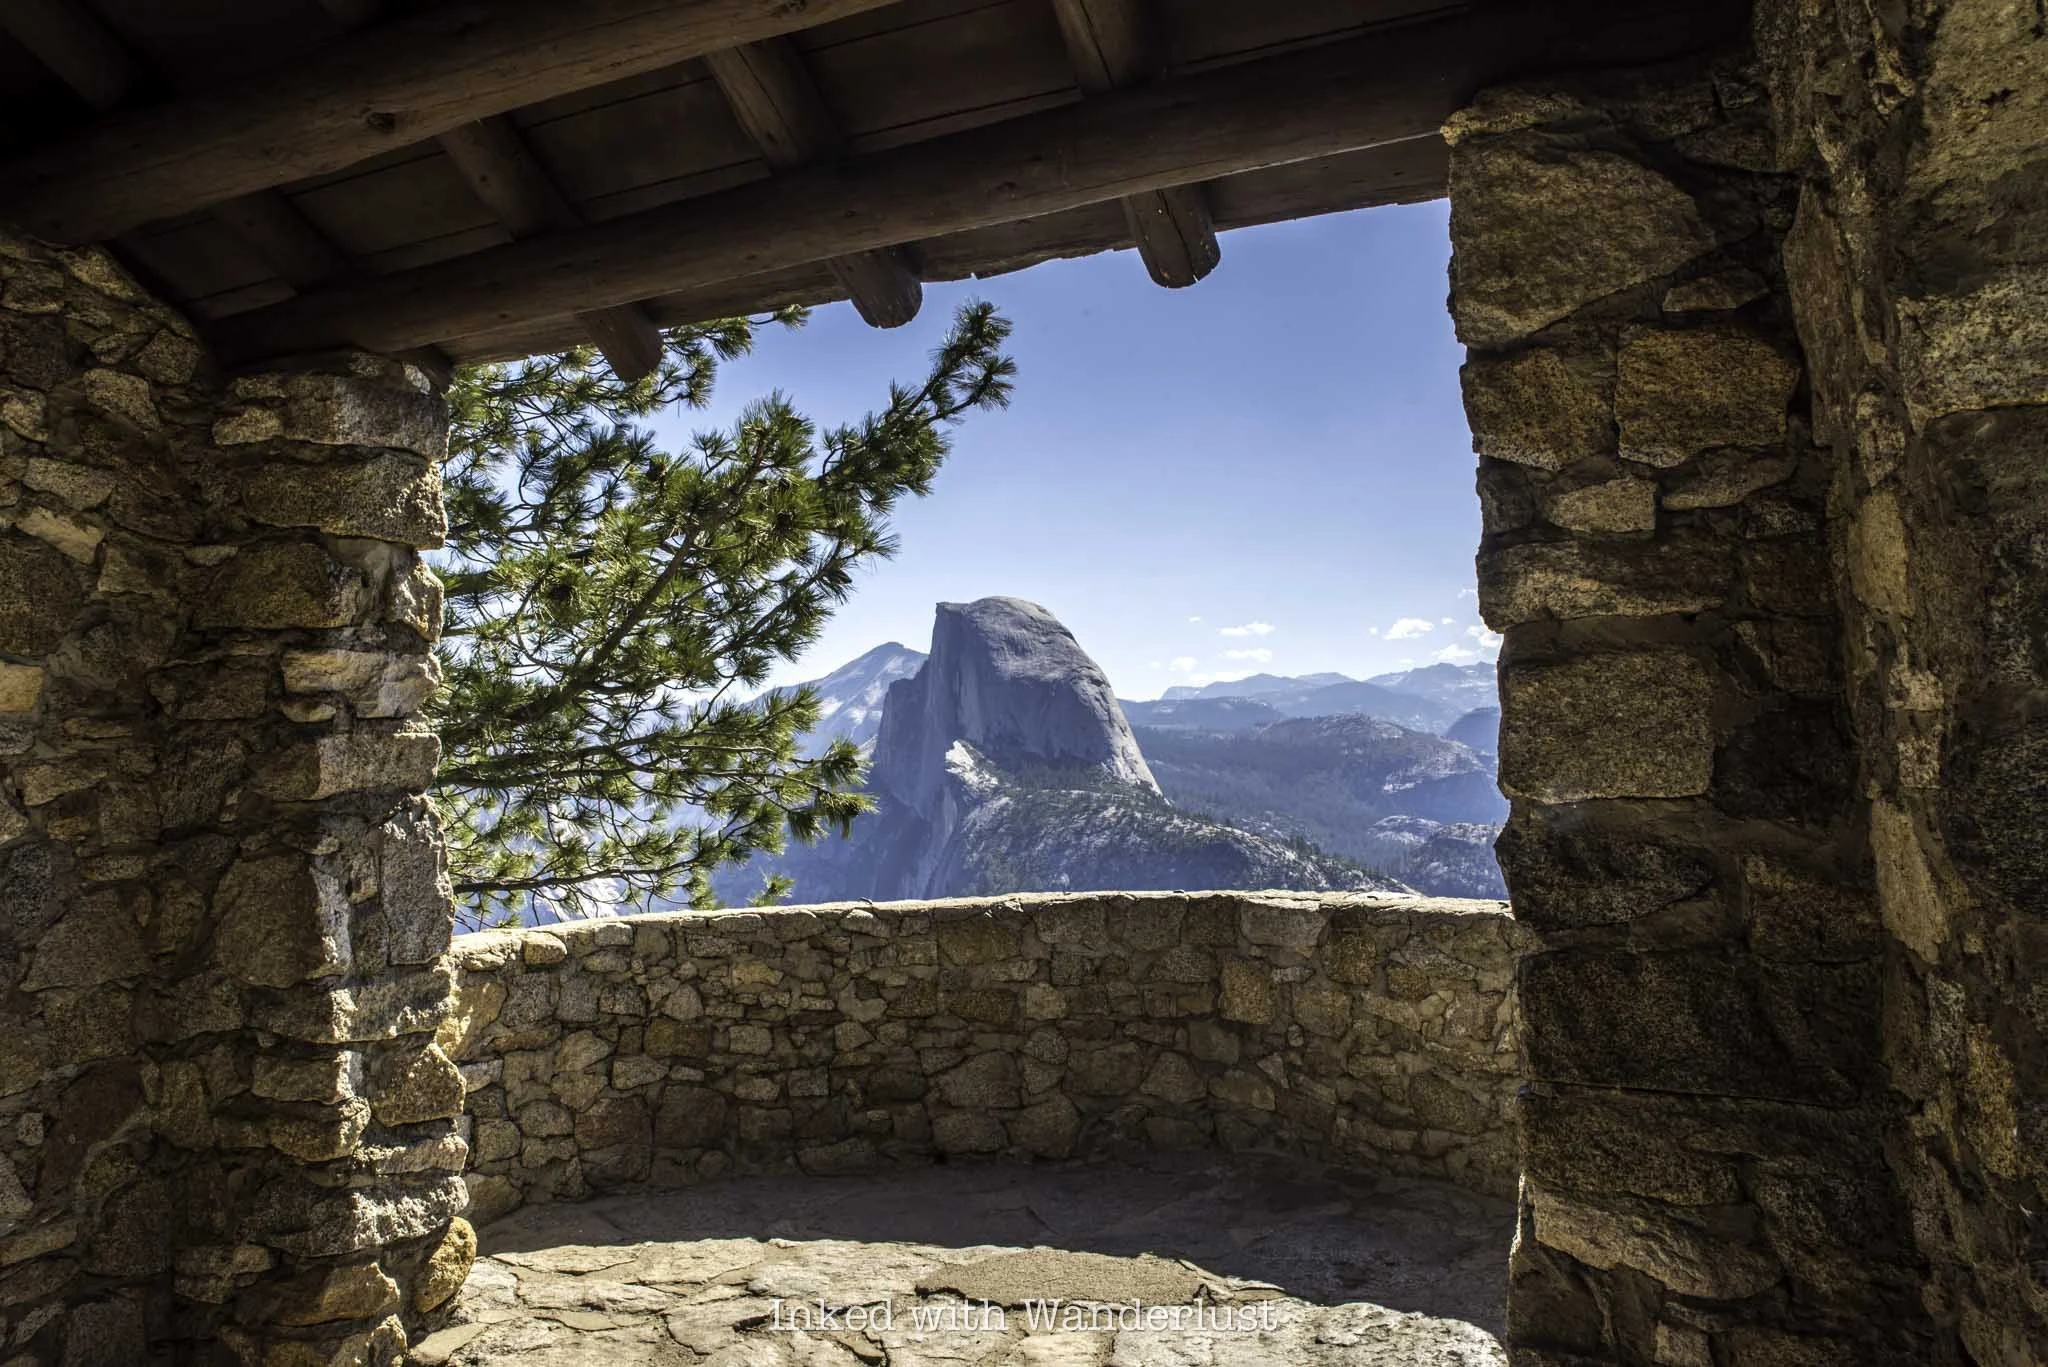
While there are a varying degree of third party tour groups that’ll take you to Glacier Point, unfortunately, the free Yosemite Valley Shuttle service does not. If you don’t have your own vehicle with you or you’re just not comfortable driving yourself, you can utilize the paid shuttle to Glacier Point.
These shuttles pick up near Yosemite Valley Lodge (shuttle stop #7) and first take visitors on a tour of the valley highlights before continuing onto Glacier Point. The service has concluded for 2024 but in 2025, this tour will run from June 15 and conclude after October 13.
There are only two departure times daily, one at 8:30am and another at 1:30pm. Both roundtrip and one-way fares are available. The one-way fare is a great option for those who want to hike the iconic Four Mile Trail one-way into the valley and just a need a lift to the starting point.
Aside from this shuttle, your only other option is to either drive yourself or with someone else. Additionally, this shuttle does not make any other stops along Glacier Point Road. And no, ride sharing services are not options within the park due to limited cellular signals.
Glacier Point Hiking Trail
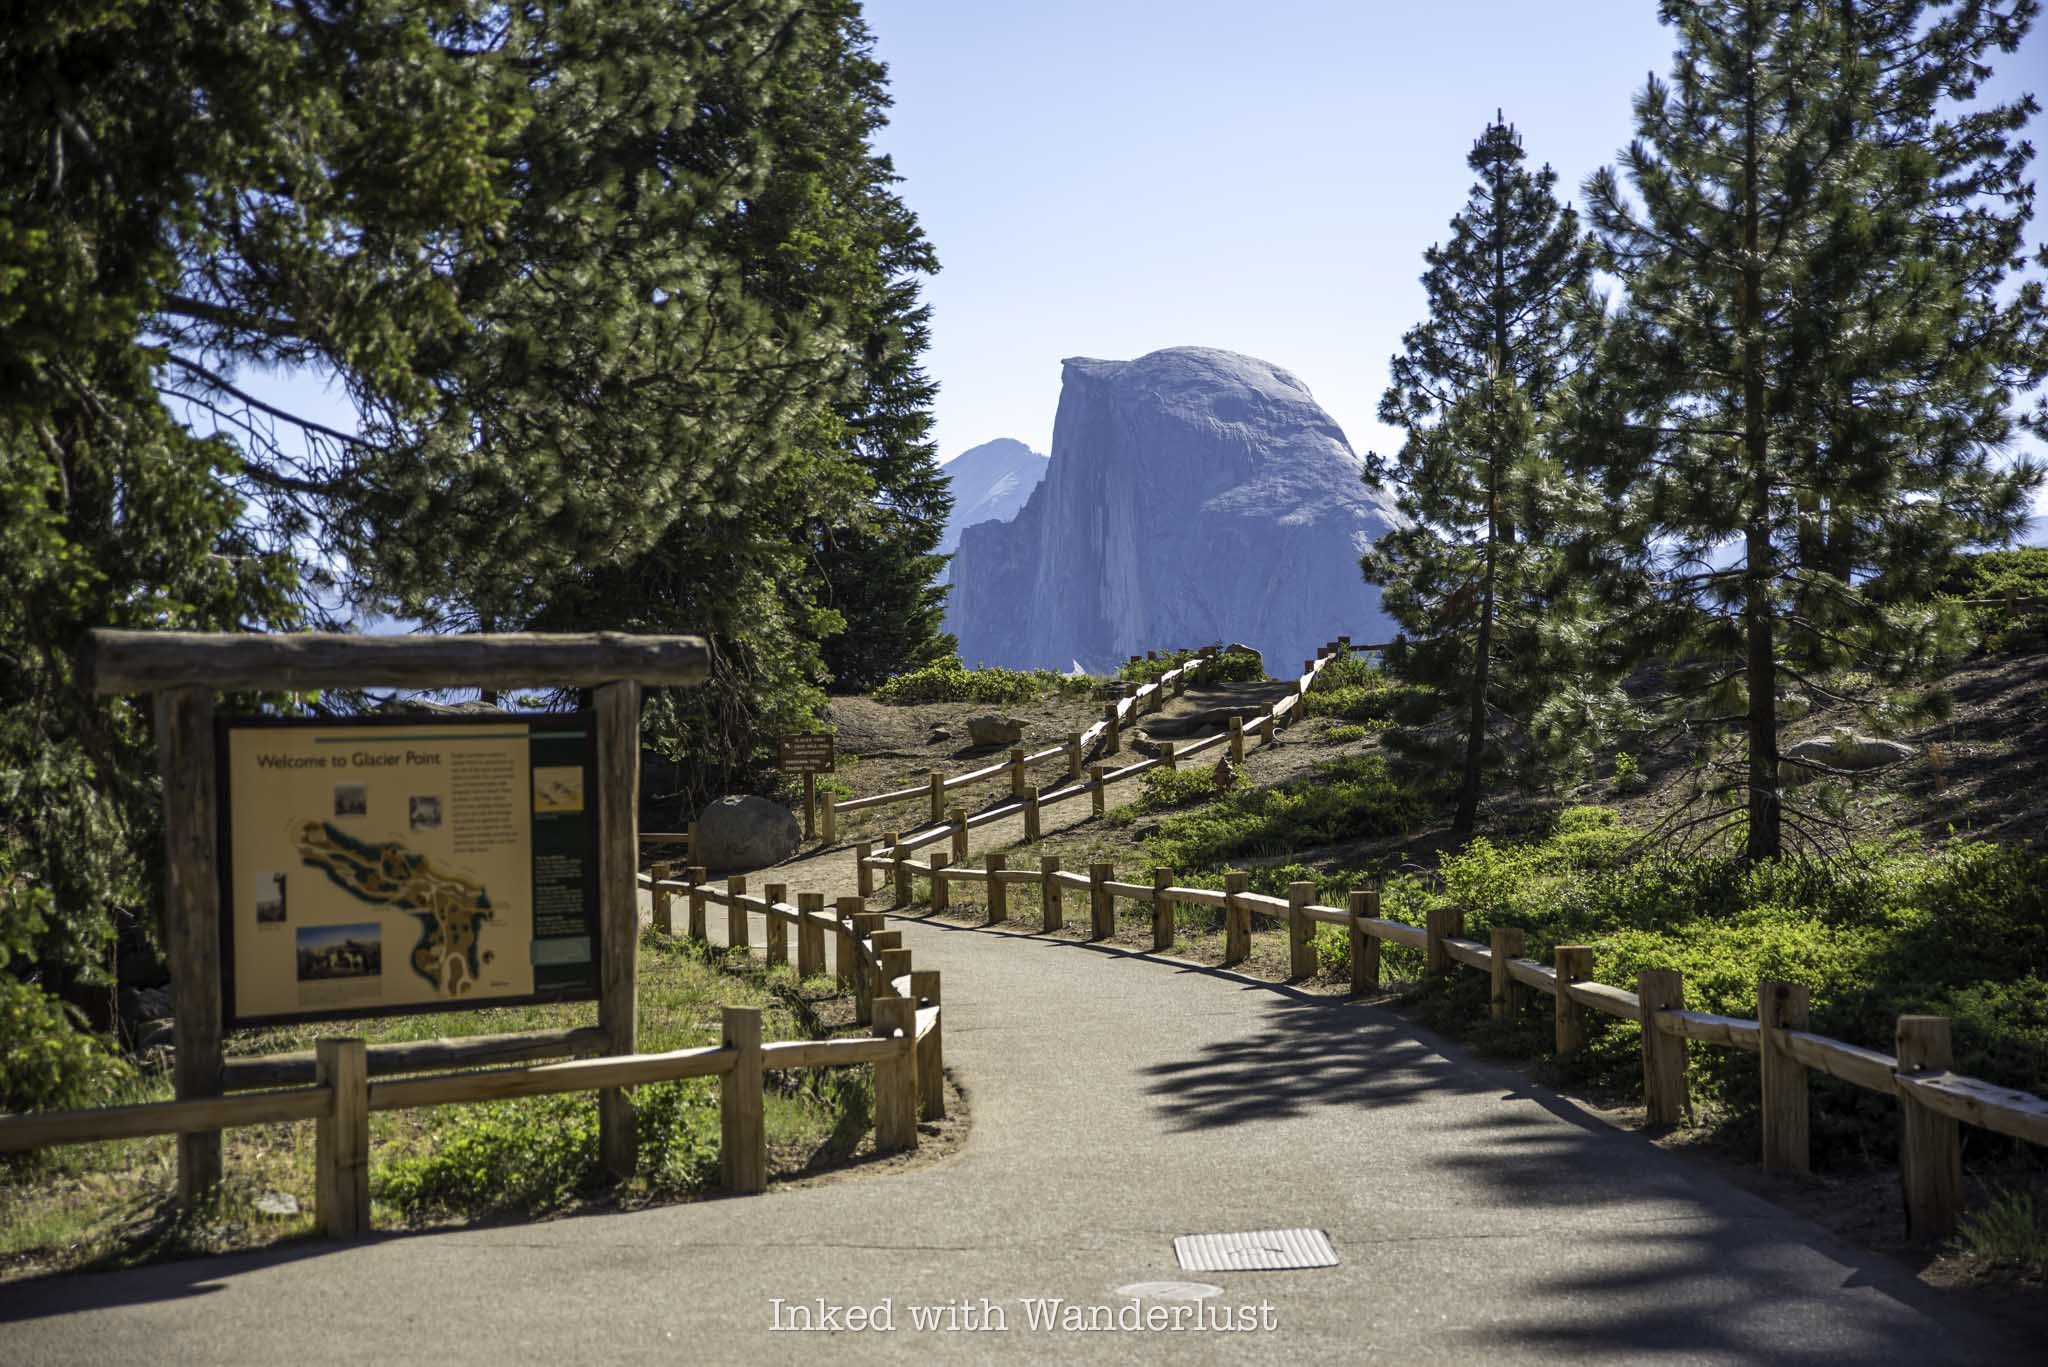
The Glacier Point trail is short and mostly paved. It begins nearly right off of the parking lot and concludes at an overlook offering magnificent views of Yosemite Valley and many of its main attractions. As you’re walking away from the parking lot and you get your first glimpse of Half Dome, keep left on the trail.
When you reach the clearing through the trees, you’ll see a structure on your left. Honestly, I’m not sure if this is supposed to be a visitor center or what, as it was closed on both of my visits. Moving on, to continue on the trail, stay to the left while keeping Half Dome on your right.
You’ll soon come across a sign indicating you’re on the right path. For Glacier Point, you’ll continue straight towards the upcoming geology hut. If you’re here to hike the Four Mile Trail, you’ll veer to the left at the junction.
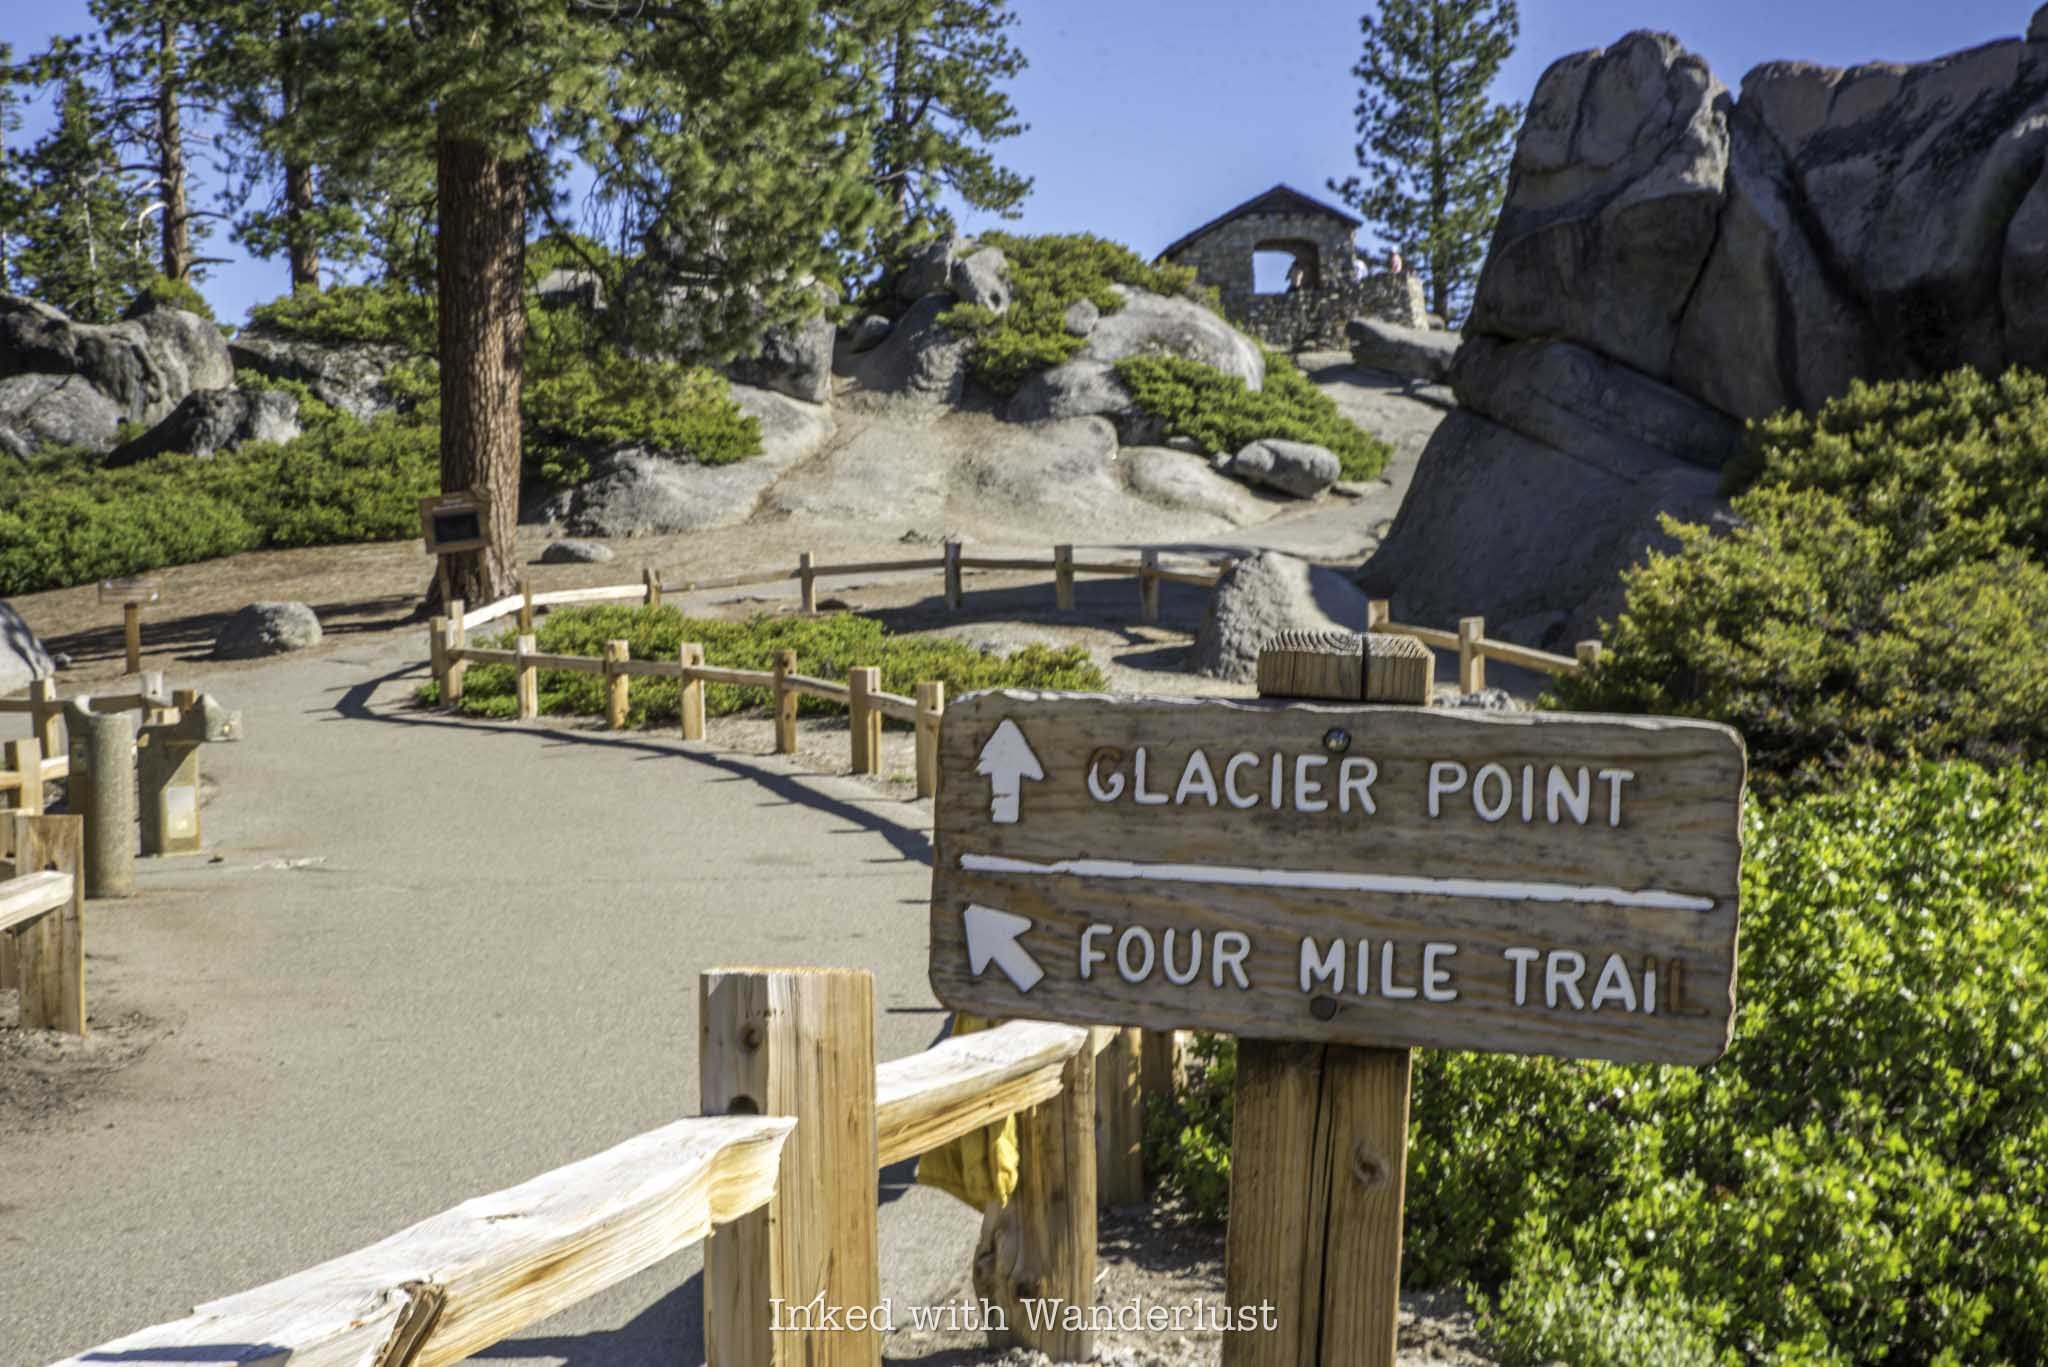

The first feature of the trail you’ll walk up on is the geology hut, a stone-built structure constructed by the Yosemite Natural History Association in 1925. It was built as an observatory to help educate visitors about Yosemite’s geological past and how the valley was formed.
You can either go through or around it, but I do recommend checking it out. There isn’t much room on the inside, but there are numerous informational boards detailing the park’s glacial formation and history.
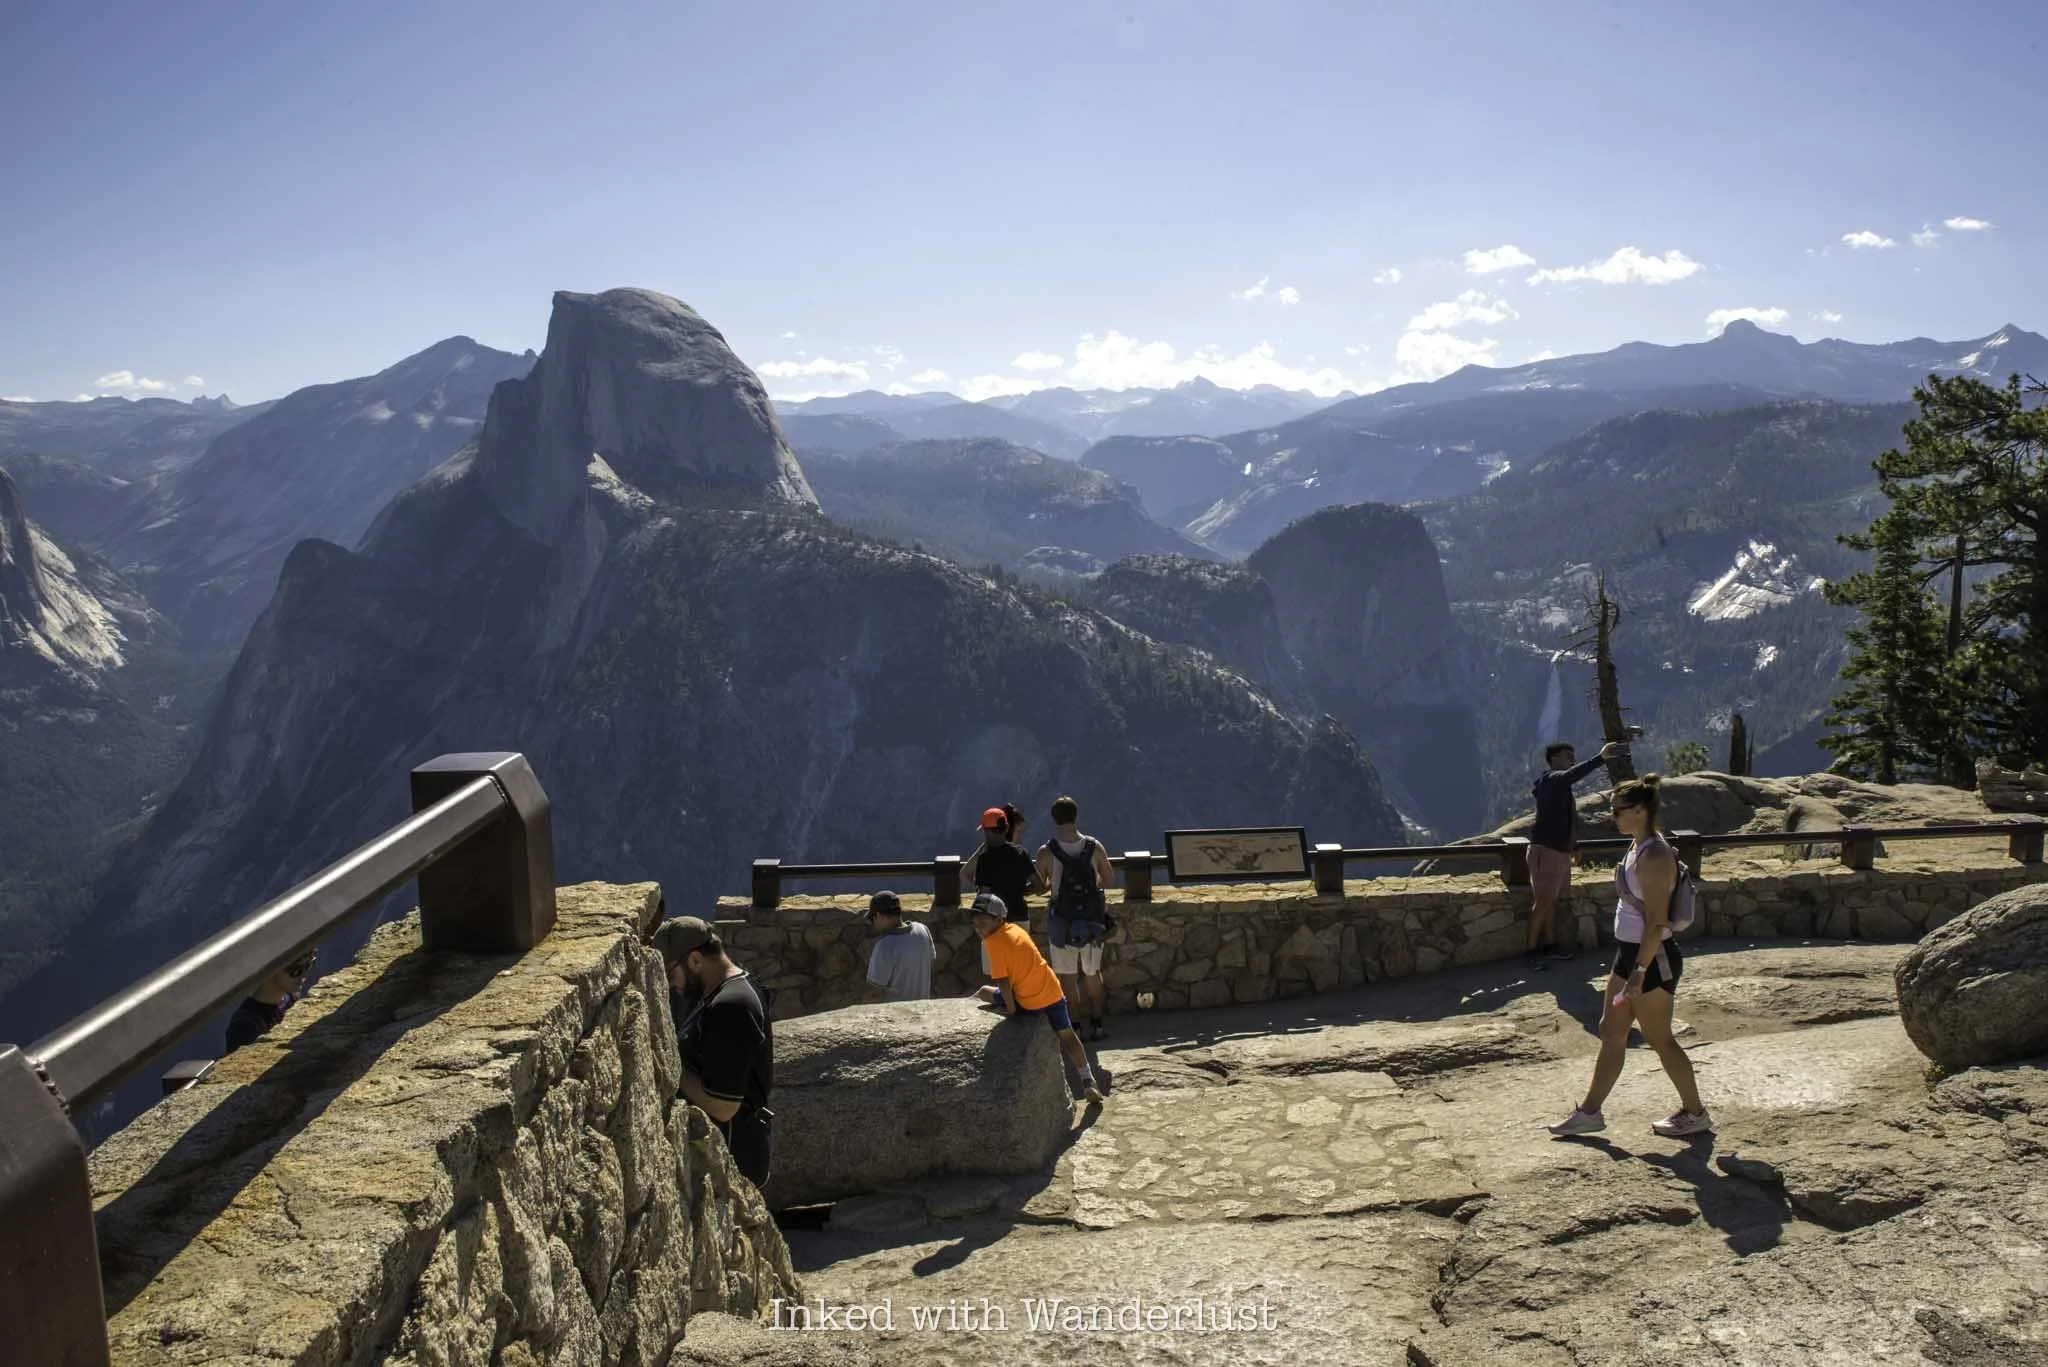
Beyond the geology hut, you’re just a short walk away from the viewing deck. When you arrive, you’ll notice there are two decks, one on the lower end that offers a superb view of Half Dome, Clouds Rest, Tenaya Canyon, Vernal Fall, Nevada Fall, North Dome, and more.
From the slightly elevated deck, you’ll be treated to straight-on views of the Royal Arches, Mount Hoffman, The Ahwahnee Hotel, Yosemite Village, Overhanging Rock, and if you’re here early enough in the season, Yosemite Falls.
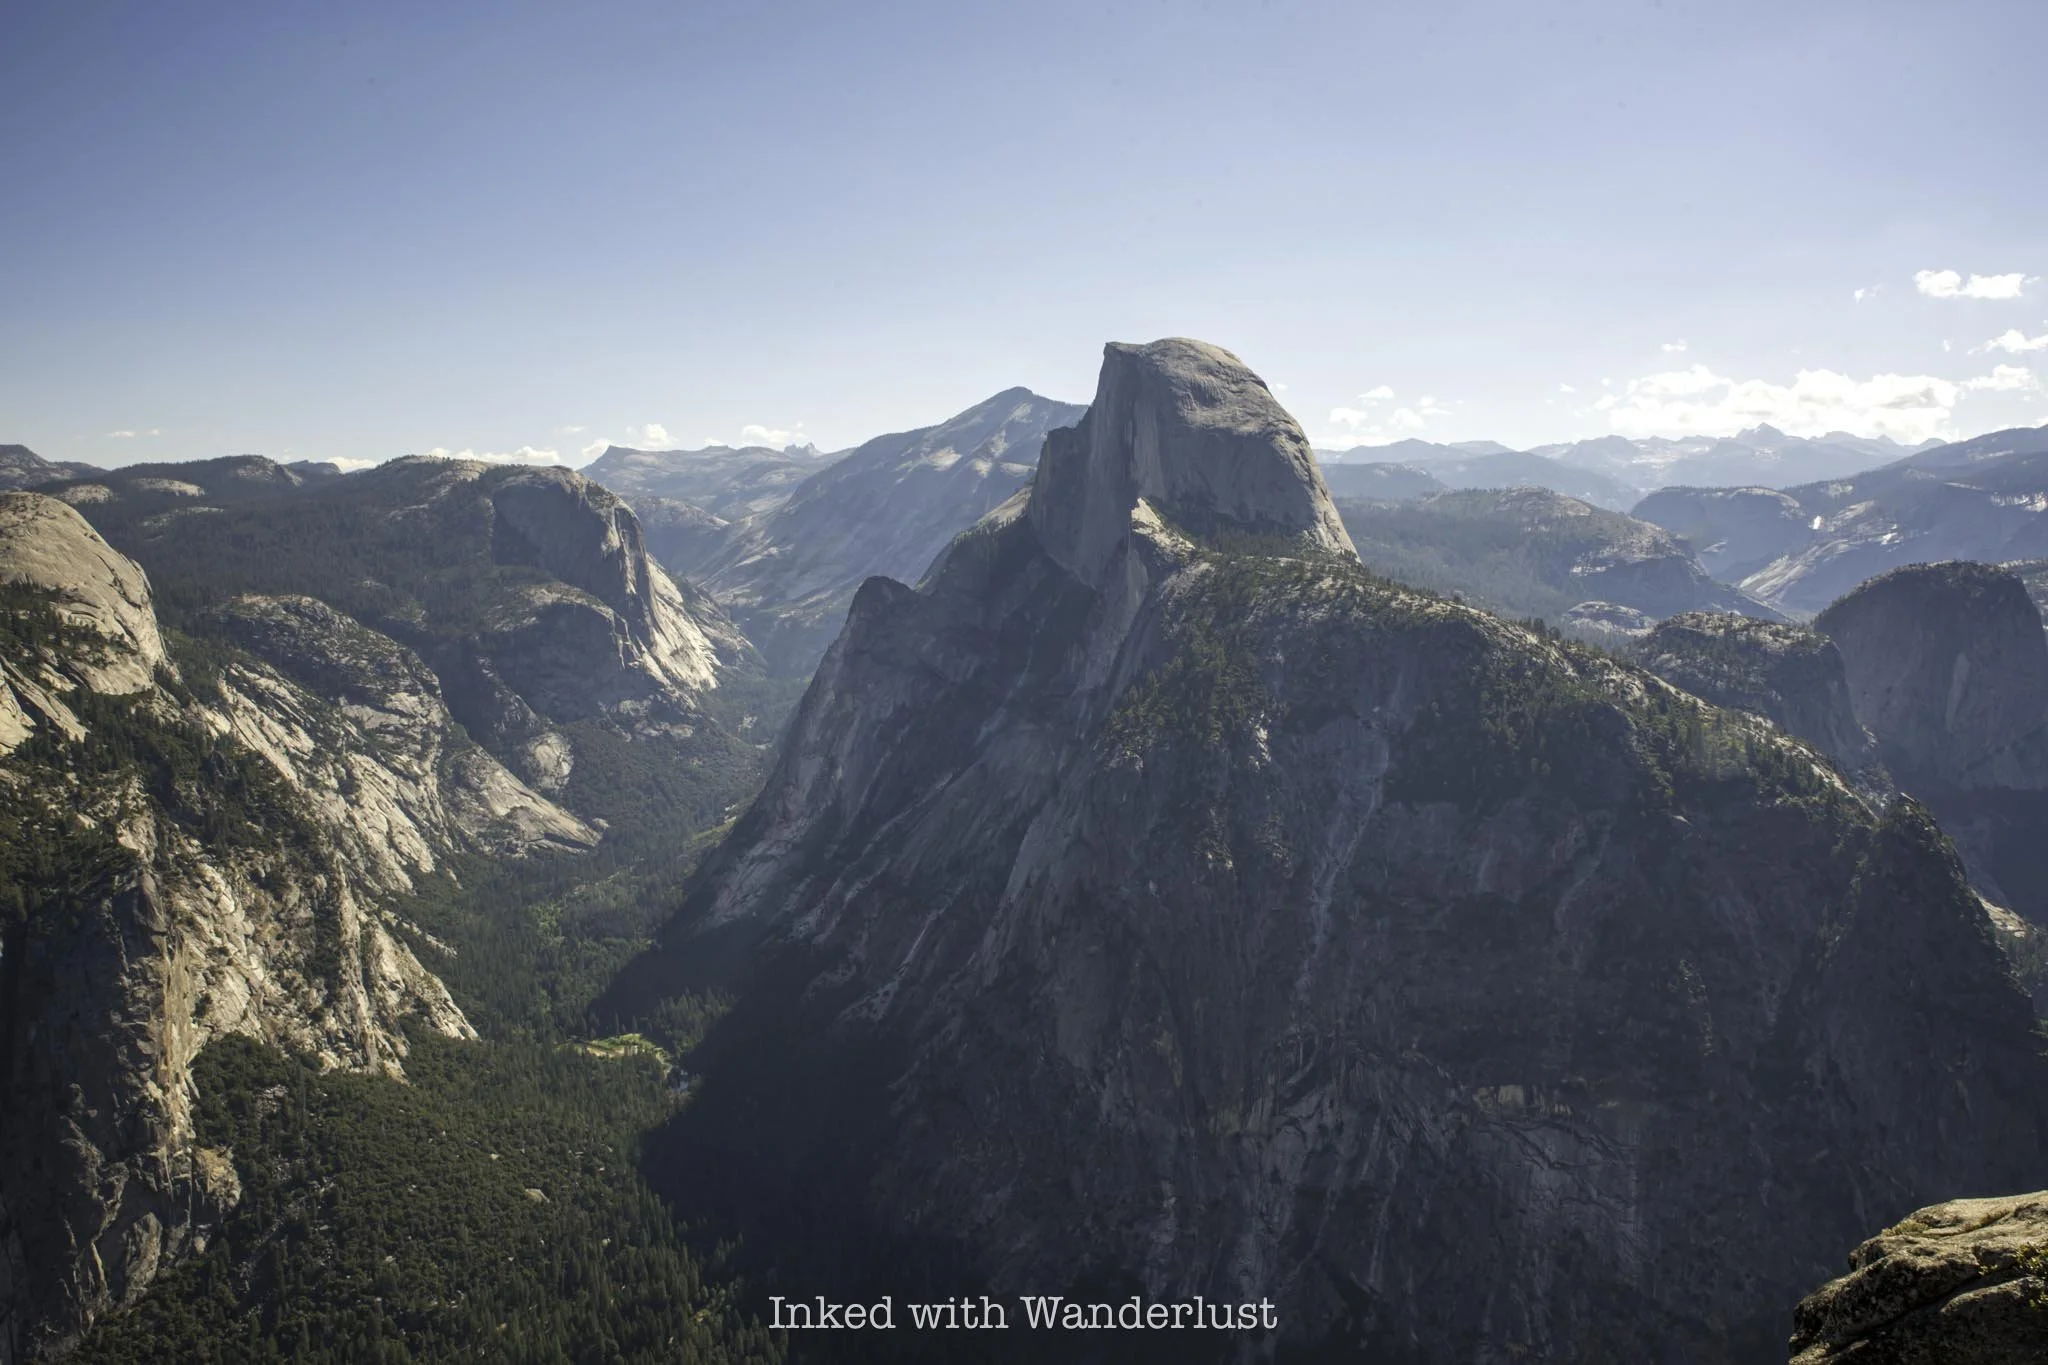

From Glacier Point, you’re able to see about a quarter of the park from one spot. Since you’re 3,200 feet above Yosemite Valley from here, that means you’ll be looking down on many of the valley features that you'd normally look up at, including Yosemite Falls, which is 2,425 feet above the valley floor.
Throughout most of the viewing area, the guardrails are fairly high up, making an accidental fall highly unlikely. That said, at some points they are close to the ground, low enough for kids to climb on. If you’re bringing littles with you, watch them closely in these areas. During my visit, I saw one kid nearly climb completely over the rail before somebody spotted him.

From here, you can continue along the Four Mile Trail, which will offer much of the same views but from a different perspective. Keep in mind that this trail isn’t for the weak and goes all the way down to the valley floor. At the end, you’ll only be half done as you’ll have a physically demanding hike back up.
Other popular hiking trails that leave from Glacier Point include Panorama Trail, Pohono Trail, Illilouette Falls, Half Dome (provided you have a permit) and more. If not, simply head back the same way you came. From Glacier Point, you can check out Washburn Point, Taft Point, and more sights along Glacier Point Road.
PSALM 23:3-4