How To Hike The Burney Falls Scenic Loop Trail
3 minute read | contains affiliate links
Burney Falls is one of the most visited state parks in all of California. Prior to covid, the park would see an average of 4,000 daily visitors. Since covid, that number has more than tripled to an average of 13,000.
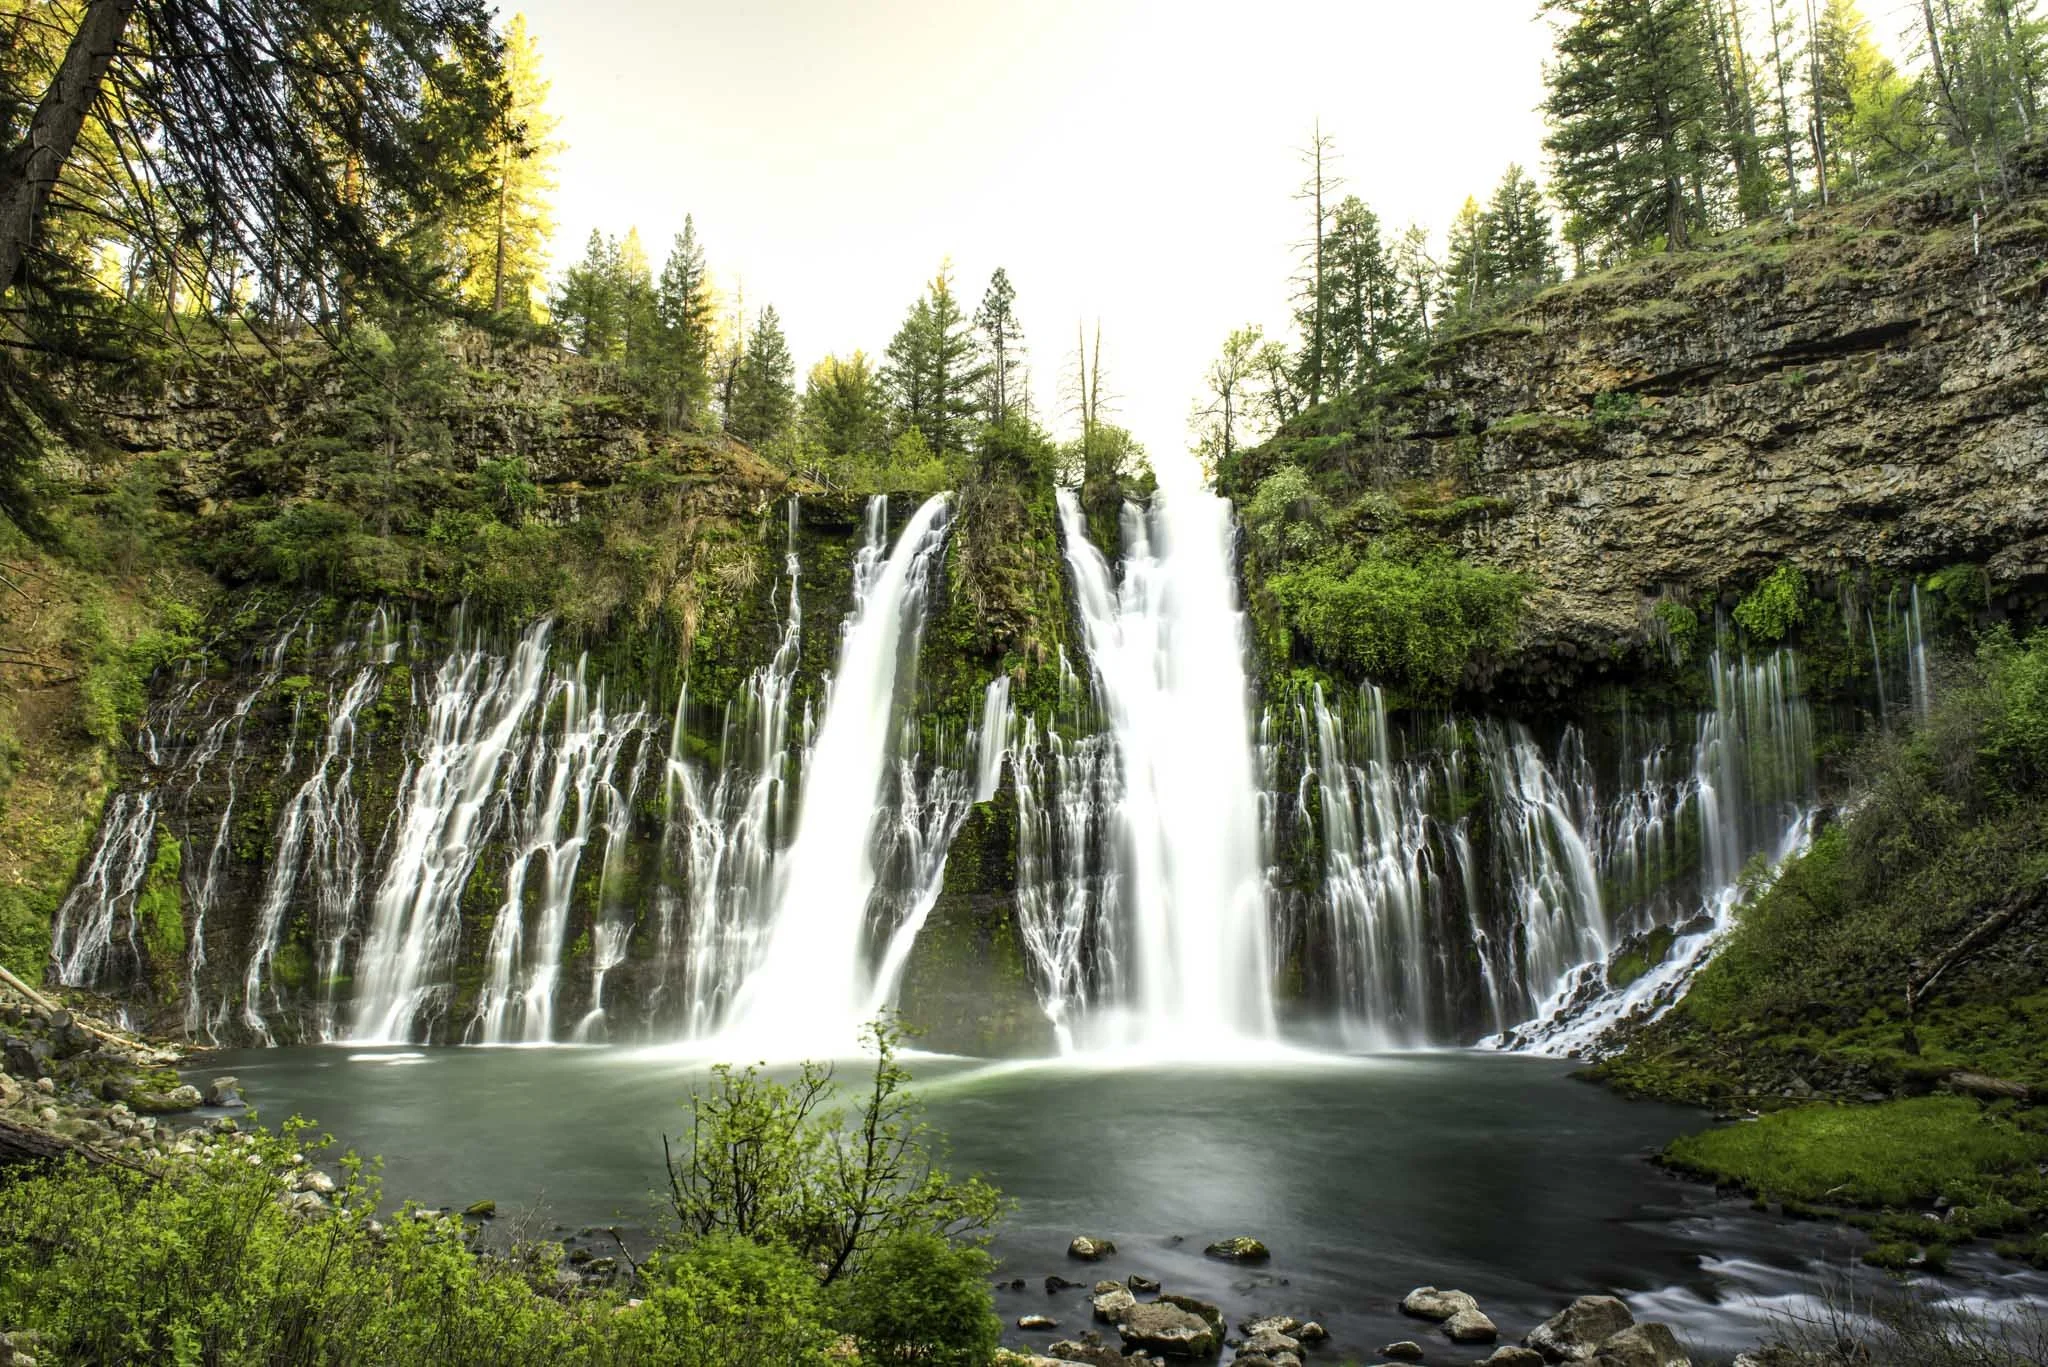
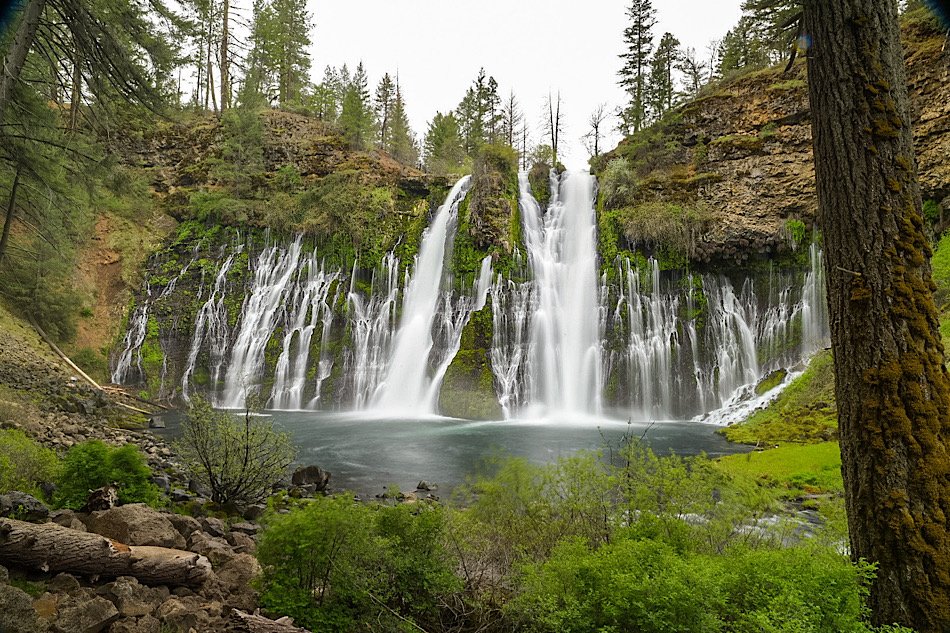
It’s no wonder, either. Burney Falls is a spectacular waterfall. On top of that, it’s one of the most easily accessible waterfalls as it can viewed from an accessible viewing deck just steps away from the parking lot or by taking a short, paved trail to the base.
Many people are completely unaware of the hiking trails contained within the park. So we’ve decided to write a post about the most popular one, the Burney Falls Scenic Loop. It’s a beautiful trail that begins at the rim of the falls and concludes at the base.
If you’ve never been there, you should check out our comprehensive guide on Burney Falls. In it, we cover a lot of information such as directions, camping, hiking trails, best time to visit and more! So if you’re looking for that information, you should definitely read that one and come back here.
Let’s get into it.

Quick Stats
Location: McArthur-Burney Falls State Park
Fee/Permit: $10 per vehicle to enter the park
Open: Year round
For: All visitors/hikers
Parking: Semi-large, paved lot
Restroom: At the visitor center
EV Stations: None
Drone Use: Not allowed
Difficulty: Easy
Popularity: Highly trafficked
Time: 1 hour or more
Milage: 1.2-miles
Elevation Gain: 167-feet
Trail Condition: Well maintained
Main Feature(s): Burney Falls
Pets: Not allowed
Special Notes/Hazards: Though it’s a beautiful trail, Burney Falls will be out-of-view for the majority of the hike
Our Visit(s): October 2016, August 2019, & May 2022

Trailhead, Parking & Direction
The trailhead for the Burney Falls loop trail is directly across the road from the park’s visitor center and parking lot. You’ll see a sign up ahead indicating as such (pictured above).
The parking lot is fairly large, probably closer to medium sized, actually. As we covered in our guide to Burney Falls, this lot tends to fill quickly in the summer months. So if you go during that time, we highly advise that you plan for an early arrival.
Once you’ve parked and paid your entry fee ($10), cross the street and head towards the rim of the falls to begin your hike. There’s a viewing deck where you can get a from above view of the falls.

Burney Falls Loop Trail
If all you want to do is go to the base of falls and leave, bear right towards the stairwell. It’ll only take a few minutes to get down there as it’s only a third-of-a-mile along a well-maintained path.
If you’re dead-set on the loop trail (as you should be) you’ll want to bear left along the dirt path. This trail also takes you to the base, just not as quickly.

Unfortunately, Burney Falls won’t be visible for much of the trail. In fact, you’ll only get the full view once you’ve circled down to the base. Shortly after the beginning of the trail, you’ll get one final look at it through some trees.
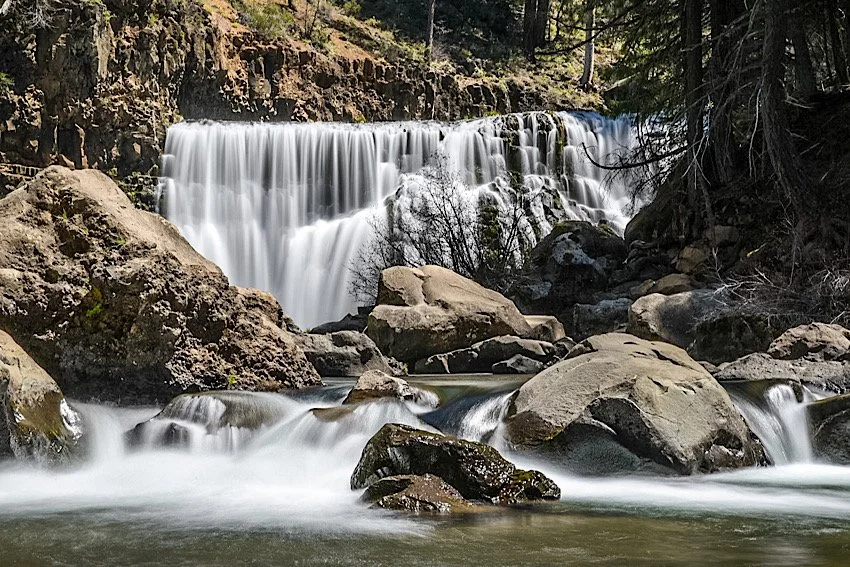
After a short time, you’ll arrive at the serene, ‘Fisherman’s Bridge’, crossing Burney Creek just upstream from the top of the falls. If you’re an angler, there are great spots here along the creek to fish for Rainbow Trout.

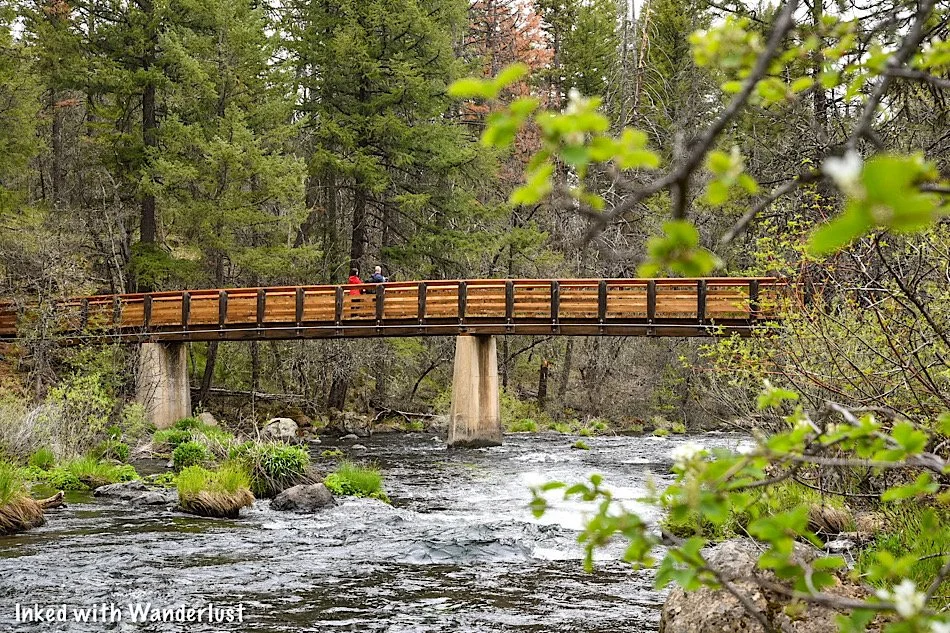
Be sure to stop near the middle of the bridge to take in the views. You won’t be able to see the crest of Burney Falls from here, but you’ll get a great view looking upstream of the creek.

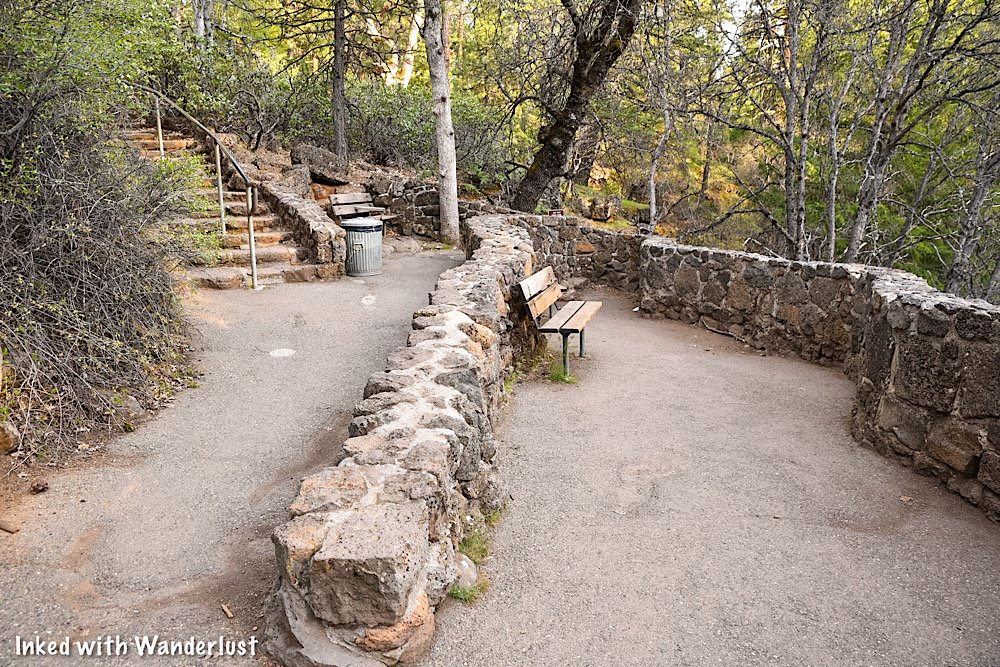
After the bridge, turn right and you’ll enter a heavily forested portion of the trail filled with Douglas Firs and Oaks. Also along this stretch are a number of benches. Feel free to rest your feet for a moment and take in the sights around you.
The trail will begin to descend slightly along a series of gentle switchbacks. Before hitting the descent, you’ll pass a junction to the Pacific Crest Trail and a series of rocky steps built into the trail. No need to worry as the steps are easily navigable.


Near the halfway mark down the switchbacks you’ll get your first glimpse of Burney Falls since the start of the trail. Again, it’s through a collection of trees but it’s a gorgeous view nonetheless.
Rainbow Bridge Junction

At the bottom of the switchbacks you’ll come to another footbridge crossing over Burney Creek. This one is named, “Rainbow Bridge”. Much like the first one, stopping here to take in the views of the creek would be worth your while.
From here, you have two directions in which you could go. Going left from Rainbow Bridge will take you on a detour to Lake Britton. This is a solid option as the picturesque lake provides many recreational activities.
*Note: The detour to Lake Britton from this junction is closed for the 2022 season due to heavy storm damage to the trail. No word on when it’ll open. To reach Lake Britton, you’ll need to utilize the trail leaving from the rim of the falls and through the campground.

To keep to the loop trail and continue on to the falls, however, you’ll want to bear right as you’re walking off of the bridge. Along this stretch, you’ll pass a huge boulder field on your left. Showcasing evidence of the area’s volcanic past.
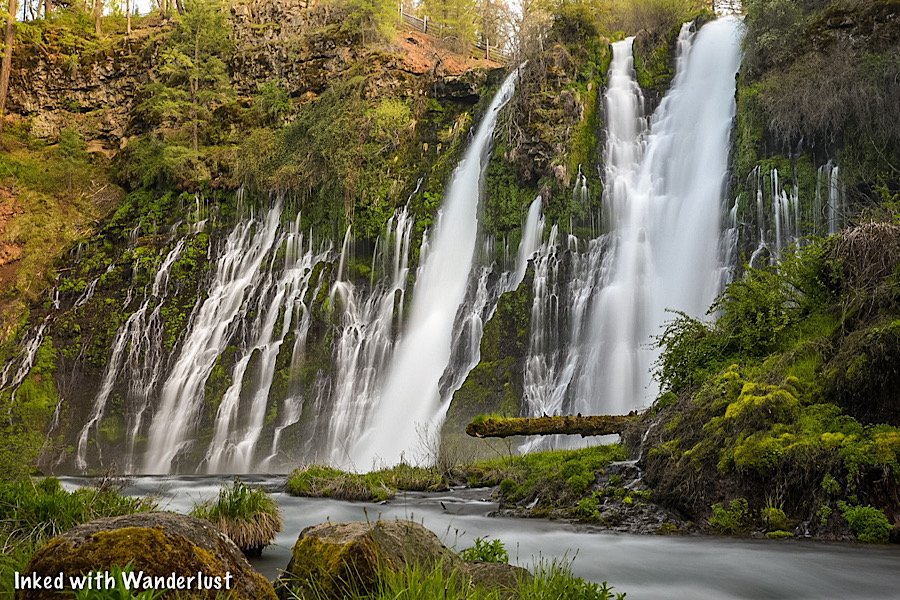
Soon, you’ll begin to hear the sounds of Burney Falls crashing into the pool below it and before long, it’ll come into view. There are many spots along this stretch of the creek to get an excellent side view of the falls. You’ll need to scramble a bit but trust us, it’s worth it.
The Base of Burney Falls

This is the main viewing area of Burney Falls and is where you would’ve ended up had you gone right at the trailhead instead of left. This area is defined by a perimeter made of rocks and is a somewhat small area (considering the crowds this park sees).
For a closer look - or to go for a swim in the pool below the falls - you’ll need to scramble down a rock field. The constant mist from the falls makes most of these rocks very slick. So be sure to watch your footing.

If you’re here on a particularly busy day (pretty much any day during the summer season) expect to find many, many people to be here. It doesn’t take long before that viewing area - and even the rock field - becomes a shoulder-to-shoulder situation.
We’ve never been here during winter, but we feel spring is the best time to go, crowds wise. Our most recent visit was the first week of May, 2022, and we practically had the falls all to ourselves. A few people came and went but that was it.

Once you’ve gotten your fill of the views, continue on the trail by heading up the paved switchbacks back to the rim (where you first began). Along the way, you’ll encounter several interpretive signs detailing the development and history of Burney Falls and the area.

It may be a persistent climb back to the rim but fret not, it isn’t that bad. The switchbacks are gentle and towards the end, there’s a couple sets of stairs to help with the final push.
Once you’re back at the rim and satisfied with your visit to the park, simply cross the road to get back to the parking lot. Or better yet, stop by the visitor center before leaving. They have many interesting/informative exhibits.

Which Direction Should You Go?
That’s entirely up to you, but we wrote this trail guide in the clockwise direction as that was the direction we went and feel it’s the way to go. The reason is because of the epic payoff at the end (Burney Falls).
However, there’s nothing that says you can’t go counter-clockwise. If you do, you’ll arrive at the falls after just a third-of-a-mile. To continue past that, head down the paved trail along the creek.
When you reach Rainbow Bridge, simply cross it and head up the dirt switchbacks and onward to Fisherman’s Bridge. There’s no right or wrong. Either direction will provide the same great views and experience.
*Tip: Be sure to read our comprehensive guide about Burney Falls State Park. It’ll help you plan your visit with information on weather, camping, amenities, directions and more!

Your Thoughts…
Does this sound a trail you and your family would enjoy hiking together? Have you been to Burney Falls or have you been dying to go? Tell us about it in the comments below. We love love hearing from our readers!


Please support our website by sharing it with your family and friends.
Thank you for reading.