
How to Visit Donner Memorial State Park (Things to Do)
When the Donner family and their teamsters became stranded at Alder Creek due to Jacob Donner’s broken wagon axel and injury, the other members of…
Disclosure: This post contains affiliate links. If you make a purchase through these links, I may earn a small commission at no additional cost to you. I only recommend products or services that I believe will add value to my readers.

About the Donner Party
If you haven’t read my post about the nearby Donner Camp Site at Alder Creek, I suggest doing so now. In it is a brief history lesson of the Donner Party and how they ended up in their predicament. It includes information leading up to Alder Creek, but not at Donner Lake.
When the Donner family and their teamsters became stranded at Alder Creek due to Jacob Donner’s broken wagon axel and injury, the other members of the party continued onward, believing the Donners’ would eventually catch up with them.
However, they would only make it another six to seven miles before they realized the mountain was impassable due to the arrival of early heavy snowfall. The party would then settle near Donner Lake, then known as Truckee Lake, within the confines of what is now Donner Memorial State Park.

The various families would huddle together in several make-shift cabins scattered throughout the forest. They would remain here throughout the winter and into spring. While some would eventually be rescued, others weren’t as fortunate and perished.
Due to lack of food and no way to hunt, many party members survived by consuming the corpses of their fallen comrades. This was mostly done to those who already perished, but there were reports of murder/cannibalism taking place as well (though none were substantiated).
By the time spring weather cleared the snow around Donner Lake, around forty members of the Donner Party perished (including the Donner family at Alder Creek), with forty-eight members (mostly consisting of women and children) were rescued and survived.
Getting There, Parking and Fees

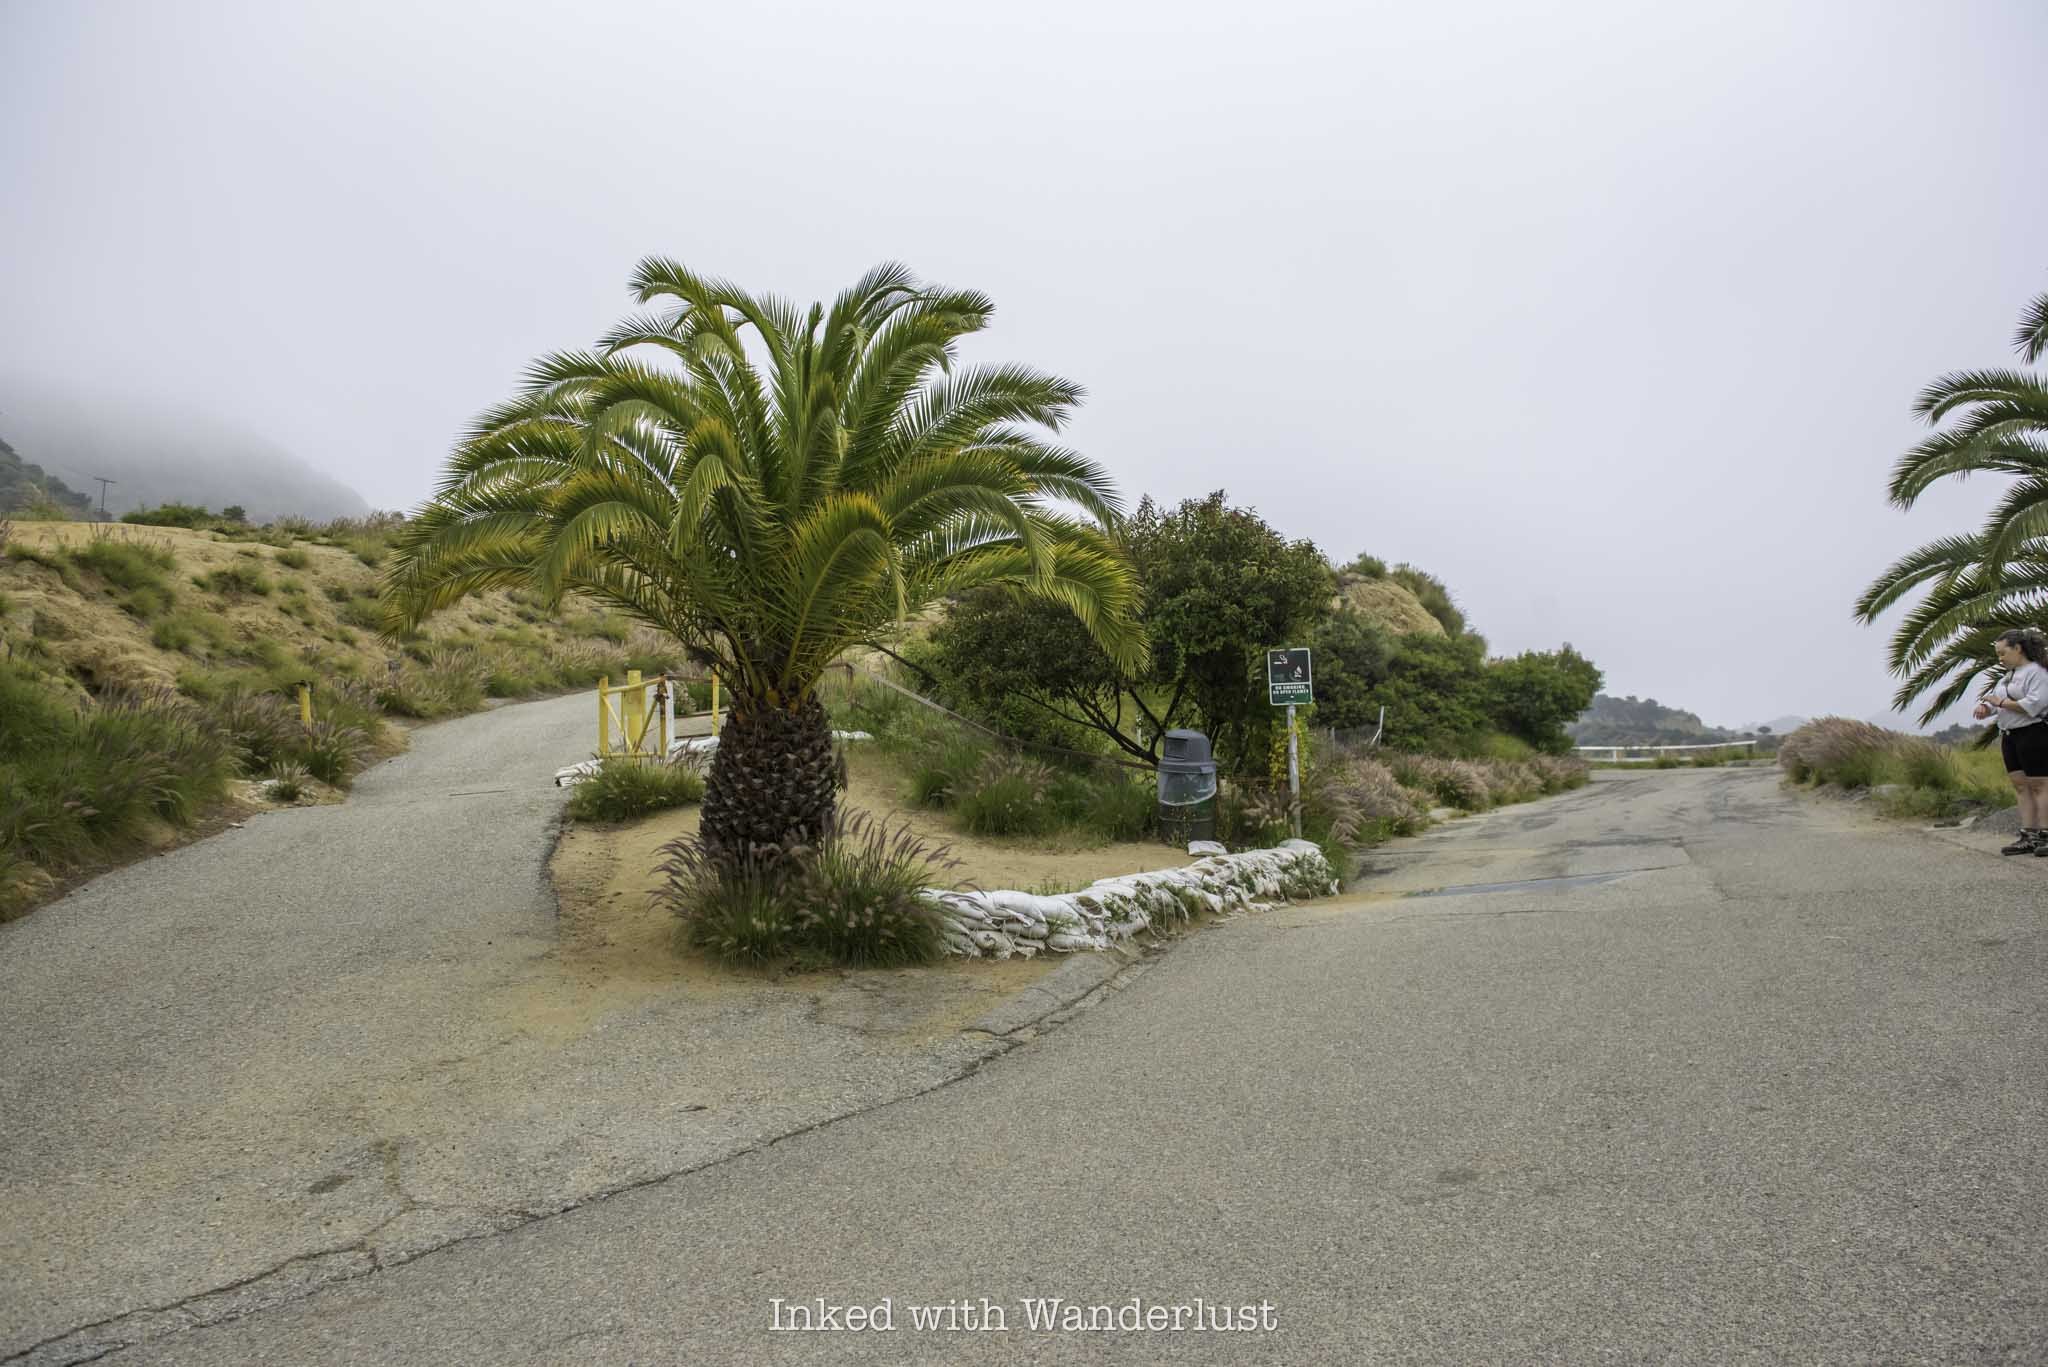
Donner Memorial State Park is located just a few miles from historic Downtown Truckee and directly off of Interstate-80. Heading either direction on the freeway, take the Donner Pass Road exit and take the first exit out of the round-a-bout. You’ll then see the park on your left shortly thereafter.
There’s an abundance of parking at the park via a large paved lot near the visitor center and monument, as well as multiple smaller pull-out lots dotted along South Shore Drive near Donner Lake. The lots do fill quickly in the summer and on weekends, so arrive early.
Fees are $10 per car and include same-day access to the lake, trails, visitor center and monument. You can pay at the ranger booth near the entrance, the digital self-pay stations near the visitor center or in the visitor center itself. Just remember to place the receipt on your dash.
There are no electric vehicle charging stations in the park, proper. However, just a mile or so down the road, near the freeway exit you took, is a Taco Bell behind a Chevron station. There are a dozen or so Tesla Superchargers back there.
Things to do at Donner Memorial State Park

Visitor Center
Many are inclined to skip visitor centers at state and national parks, but I implore you to not do so here. It’s small, but packed with information and detailed exhibits summarizing the history of the area, not just the Donner Party incident.
In it, you’ll learn about the Chinese immigrant workers who built the transcontinental railroad through this area (including Donner Tunnels), local Native Americans and the effects pioneering had on them, early pioneers who literally built the California Trail and of course, the Donner Party.

Pioneer Monument
Fully completed in June of 1918, the Pioneer Monument is dedicated to not just the ill-fated Donner Party, but all early pioneers. Present at the dedication ceremony were Frances Donner-Wilder, Virginia Reed-Murphy and Martha Reed-Lewis, all former members of the Donner Party as young girls.
The monument, including its base and cobblestone pedestal, stands at twenty-two feet, representing the culminate amount of snowfall during the harsh winter of 1846/1847, which entrapped the Donner Party. Placed atop the pedestal, a bronze statue of a pioneering family increases its total height by 17.5 feet.


Just above the base, within the center bottom of the cobblestone pedestal, is a plaque with a quote encryption. It states, “Virile to risk and find, kindly withal and a ready help. Facing the brunt of fate, indomitable - unafraid”.
At the rear of the monument is another plaque, this one providing a brief summary of what led to the demise of the Donner Party, as well as general locations of their cabins. This includes the Graves, Murphy, and Breen cabins.

Schallenberger Cabin Site
Marked by a rock and plaque is the spot of the former cabin occupied by 18-year old Moses Schallenberger, along with two other men. In 1844, these men were part of the Stephens-Townsend-Murphy party, who were the first pioneers to take wagons over the Sierra Nevada, effectively building the Truckee route of the California Trail.
Moses and the two others agreed to stay behind and guard several wagons when a nasty storm-system barreled through (sound familiar?). Due to alienating health, Moses elected to stay behind while the other two fled, fearing he wouldn’t have been able to survive the trek over the summit.
Moses survived in his small cabin for three months during brutal winter conditions before he was finally rescued. Several years later, the same cabin which sheltered Moses would go on to do the same for the Breen family, members of the ill-fated Donner Party.
The spot can be found along the paved path leading towards the monument. Just before reaching the monument’s rock-encircled grounds is granite boulder with a bronze plaque placed within it on the right side of said path. It was around that spot where the cabin was located.

Nature Trail to Murphy Cabin Rock Site
Another thing to do at Donner Memorial State Park is to check out the site which housed the Murphy family cabin, who were also members of the Donner Party. The trail is an accessible, flat loop clocking in at just under a half-mile.
Along the way you’ll traverse through a beautiful, peaceful meadow. Donner Creek meanders its way through the meadow, providing the calming sounds of water flowing over rock. There are several wooden benches dotted along the trail where you can stop and take in the scenery.


The peaceful, serene environment isn’t the only thing of interest along this trail. It also takes you to the site of where the Murphy cabin once stood. The spot is just a short time into the trail and is marked by a giant, blackened boulder with - you’ve guessed it - another plaque.
The plaque lists the names of the entire Donner Party and categorizes who perished and survived. Keep in mind that while the Donner family members are listed on the plaque, none of them camped at Donner Lake. Rather, they were several miles away at Alder Creek.


The rock served as the northern wall and fireplace for the cabin. It should be noted that while it’s referred to as the Murphy cabin, it also provided shelter to the Pike, Foster, and Eddy families at various timeframes. It’s also believed to be one of the various sites of cannibalism, but it was never officially substantiated.
When General Stephen W. Kearny arrived and discovered all of the partially consumed corpses, he buried them in the center of the cabin and set it ablaze, not knowing what else to do. Meaning, the very trail you’re taking past this rock is the believed mass-burial site of several party members.

Additional Hiking Trails
Aside from the Nature Trail, there are numerous hiking trails in and near Donner Memorial State Park. Two notable options include China Cove Loop and Split Rock Loop. Split Rock cuts around and through a campground and features a literal split rock as its main attraction.
China Cove Loop begins near the visitor center and meanders its way through tall pines before taking you along the sparkling shores of Donner Lake and back to the visitor center. Both trails are just a few miles in length and lean towards the easier side.

Donner Lake
Your day-use fee also includes access to the south side of Donner Lake. You can hike to it via the China Cove Loop hiking trail or drive. There are numerous pull-out style lots dotted along South Shore Drive you can use.
Once there, you can set up somewhere along the shore or enjoy a beach day at China Cove Beach. There are paddle board (and other watercraft) rentals at the lake as well. It’s no Lake Tahoe, for sure, but Donner Lake is popular for its scenic views and recreational activities.
Other Things to do Nearby

There are numerous activities to do near Donner Memorial State Park. Just a short drive up the pass are the historic Donner Tunnels. Trains used to pass through these tunnels. Now, though, you can hike through them and get an incredible view of Donner Lake while you’re at it.
Just a few miles drive away is historic Downtown Truckee. There, you can walk the streets of this former mining town while checking out historic trains, enjoy lunch at one of the many restaurants, shop, and take a docent-led tour of the original Truckee jail.


Additionally, you can drive west on Interstate-80 for about thirty miles to Emerald Pools, an incredible swimming hole in California. I would plan to do this one early, as the parking lot is fairly small and fills quickly, particularly on the weekends in summer.
Finally, I’d be remiss if I didn’t again mention the Donner Camp Site at Alder Creek. There, you’ll find a short, easy-to-follow hiking trail through a gorgeous meadow filled with towering pines and tall grass. This was the site where the Donner family were trapped.
No visit to one would be complete without the other, as they’re both equally important to the Donner story as a whole. It’s less than seven miles away, so it’s an easy visit and great way to stretch your legs if you’re on a road trip. You can read more about Alder Creek here.


Explore the Donner Party Camp Site at Alder Creek Near Truckee
On April 15, 1846, the Reed and Donner families departed Springfield, Illinois, with the goal of starting a new life in California. Later, in Independence…
Disclosure: This post contains affiliate links. If you make a purchase through these links, I may earn a small commission at no additional cost to you. I only recommend products or services that I believe will add value to my readers.

A Brief Summery of the Donner Party
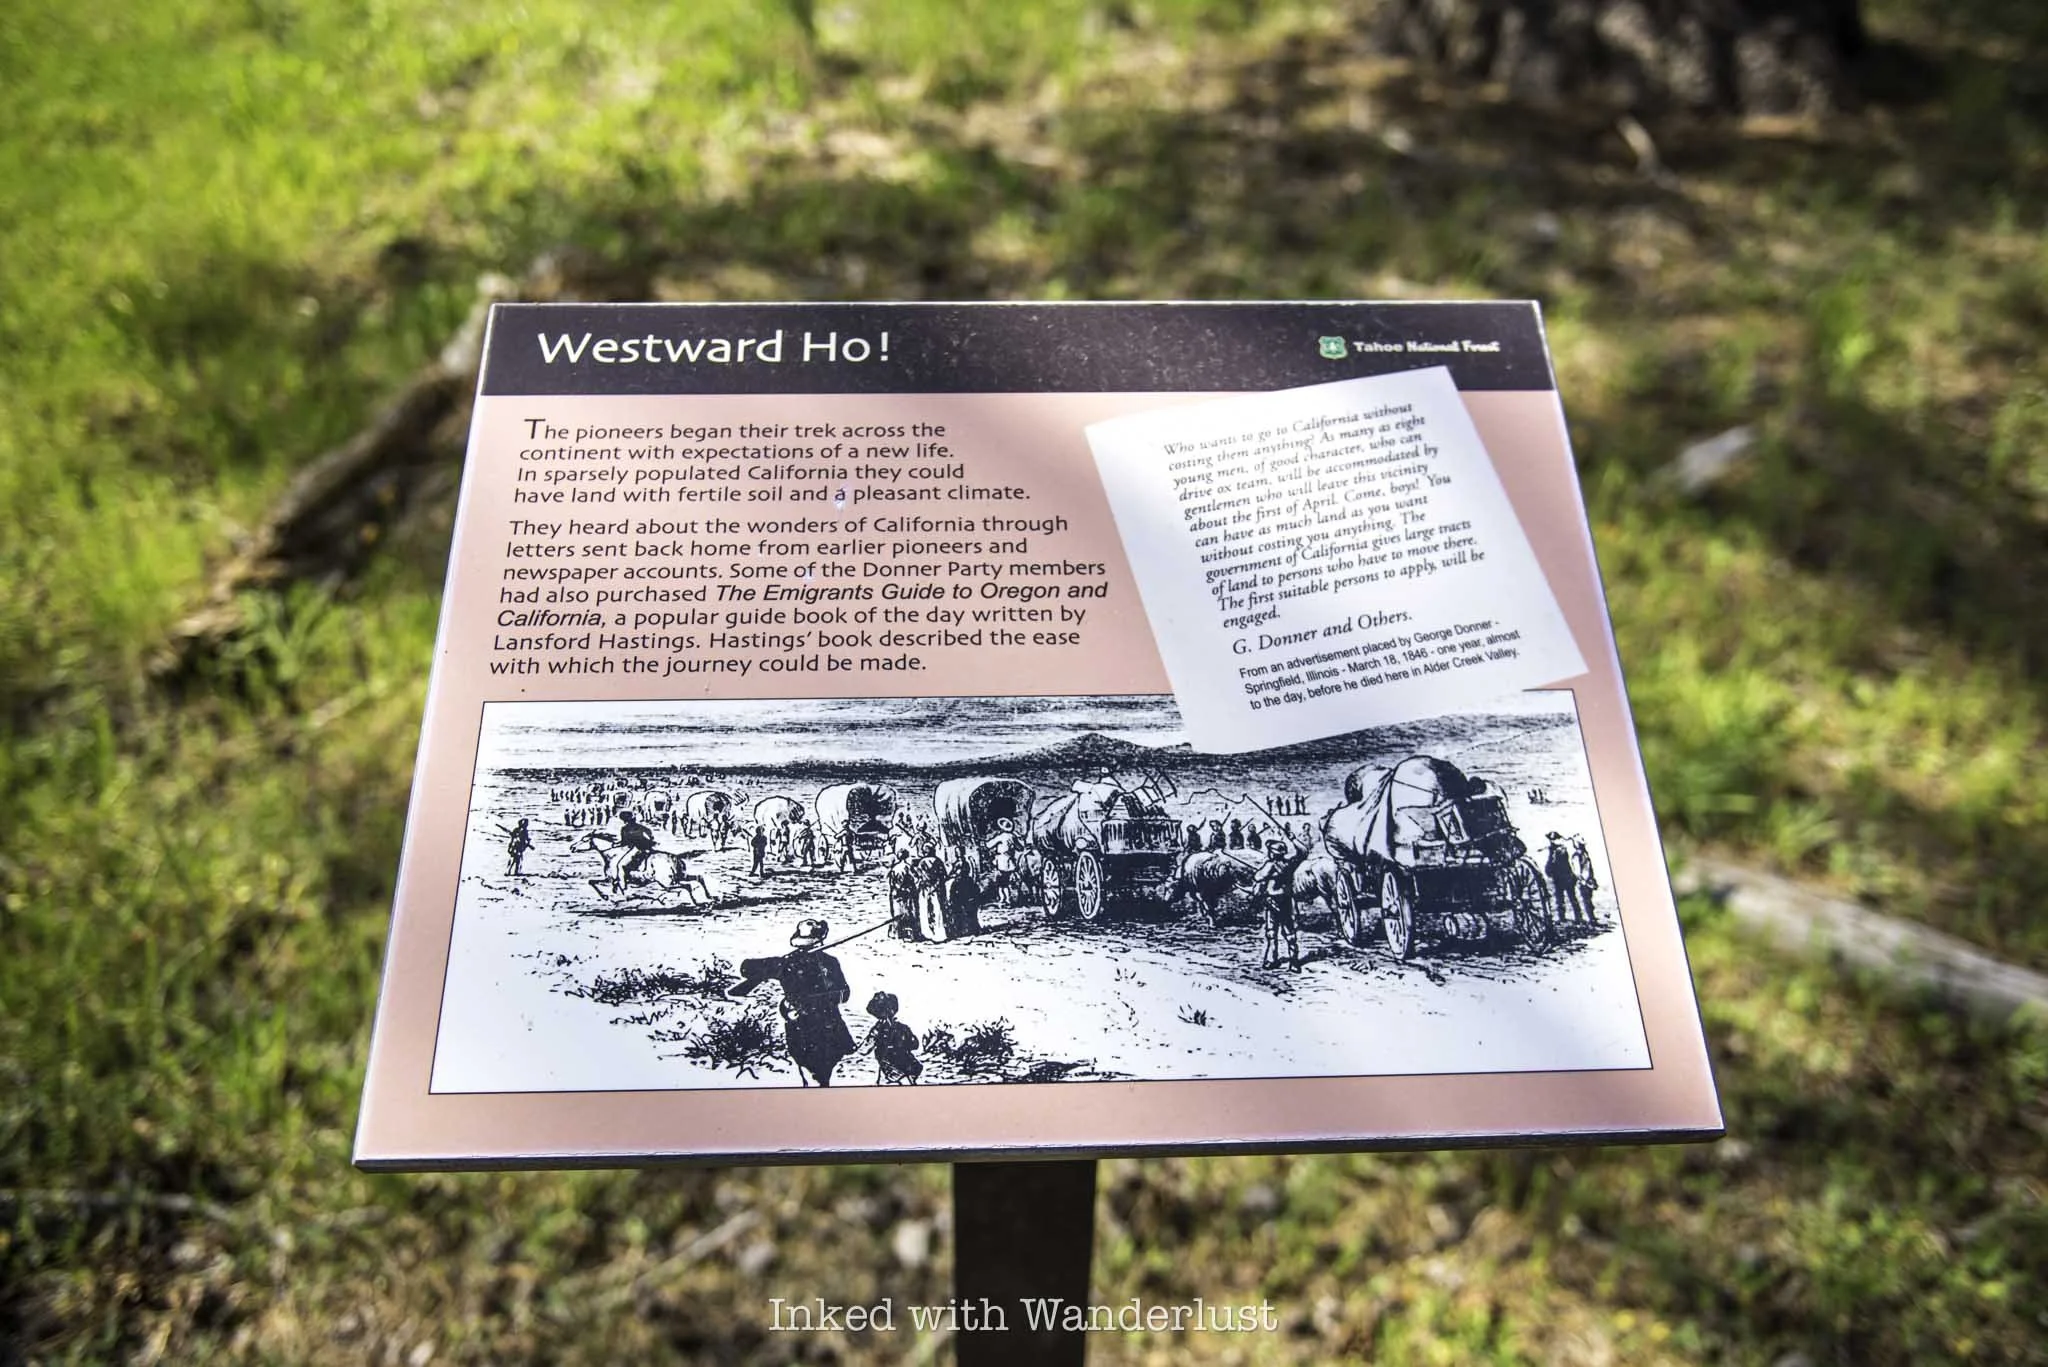
On April 15, 1846, the Reed and Donner families departed Springfield, Illinois, with the intent of starting a new life in California. Later, in Independence, Missouri, they would link up with several other families, expanding their wagon train to nearly eighty men, women and children. Collectively, they would become known as the Donner Party.
From point A, the Donner Party had roughly 123 days to travel 2,200 miles to California, with the goal of traversing the infamous Sierra Nevada Mountains in Truckee, now known as Donner Pass, by the end of October. If they didn’t, heavy snowfall would make that goal an impossible task.
Upon reaching Fort Bridger in modern-day Wyoming, the decision was made to take an untested route called “Hasting’s Cutoff”. The name refers to Lansford Hastings, the man who “discovered” the path. This deviation was a huge gamble from remaining on the heavily trafficked and proven Oregon and California Trails. Hastings described it as a “safe alternative” that would shave 400-miles off of the trip.

While it was true that Hasting’s Cutoff would shave off that many miles, what Hastings failed to mention was the route’s pure brutality. Instead of traversing through lush fields along a rut-worn path in Southern Idaho, this route cut through the unforgiving landscape of the Wasatch Range and the baron Great Salt Lake Desert, before entering Nevada near modern-day Elko.
What they saved in miles, they lost in time. Extreme heat, boulder-laden canyons, no grass for oxen, dry deserts, and other hazards cost the party not just time, but food rations, water, oxen and irreversible damage to their wagons. Long story short, Hasting’s Cutoff prove detrimental to the party in more ways than one.
On October 28, while crossing through Alder Creek near present-day Truckee, the front axel of George Donner’s wagon broke. While attempting to repair it, he badly cut and injured his hand. With a bad hand and broken wagon axel, both Donner families would set up camp at Alder Creek while the remainder of the party continued onward.
Donner Camp Historical Site at Alder Creek

Forgive the history lesson, but its inclusion was crucially germane to this post. Many are aware of the Donner Party and the circumstances surrounding their fate at what was then known as Truckee Lake, now Donner Lake, in present-day Donner Memorial State Park.
However, seemingly just as many are unaware that no member of the actual Donner family ever made it to Truckee (Donner) Lake, at least not right away. As mentioned above, the Donners suffered a broken wagon and severe injury at Alder Creek. As a result, they stayed behind.
The rest of the families in the party (Reeds, Breens, Graves, Murphys, and others) continued for another six miles, believing the Donners would eventually catch up. They would ultimately settle near the lake in what is now the state park site, after finding the pass buried in snow, blocking their path.
Getting There, Parking, and Fees

The Donner Camp Site is completely separate from Donner Memorial State Park at about an 6.5 mile distance. From the state park, travel eastbound on I-80 for a few miles. Take the CA-89 exit and turn left, then pass through three round-a-bouts. You’ll come to the camp site on your right.
Parking is free and expansive with a large, paved parking lot. At the northern end of the lot are restrooms (vault style), along with several picnic tables scattered about. I have to say, whoever designated this site a picnic ground has quite the morbid sense of humor.
Donner Camp Trail - Interpretive Loop
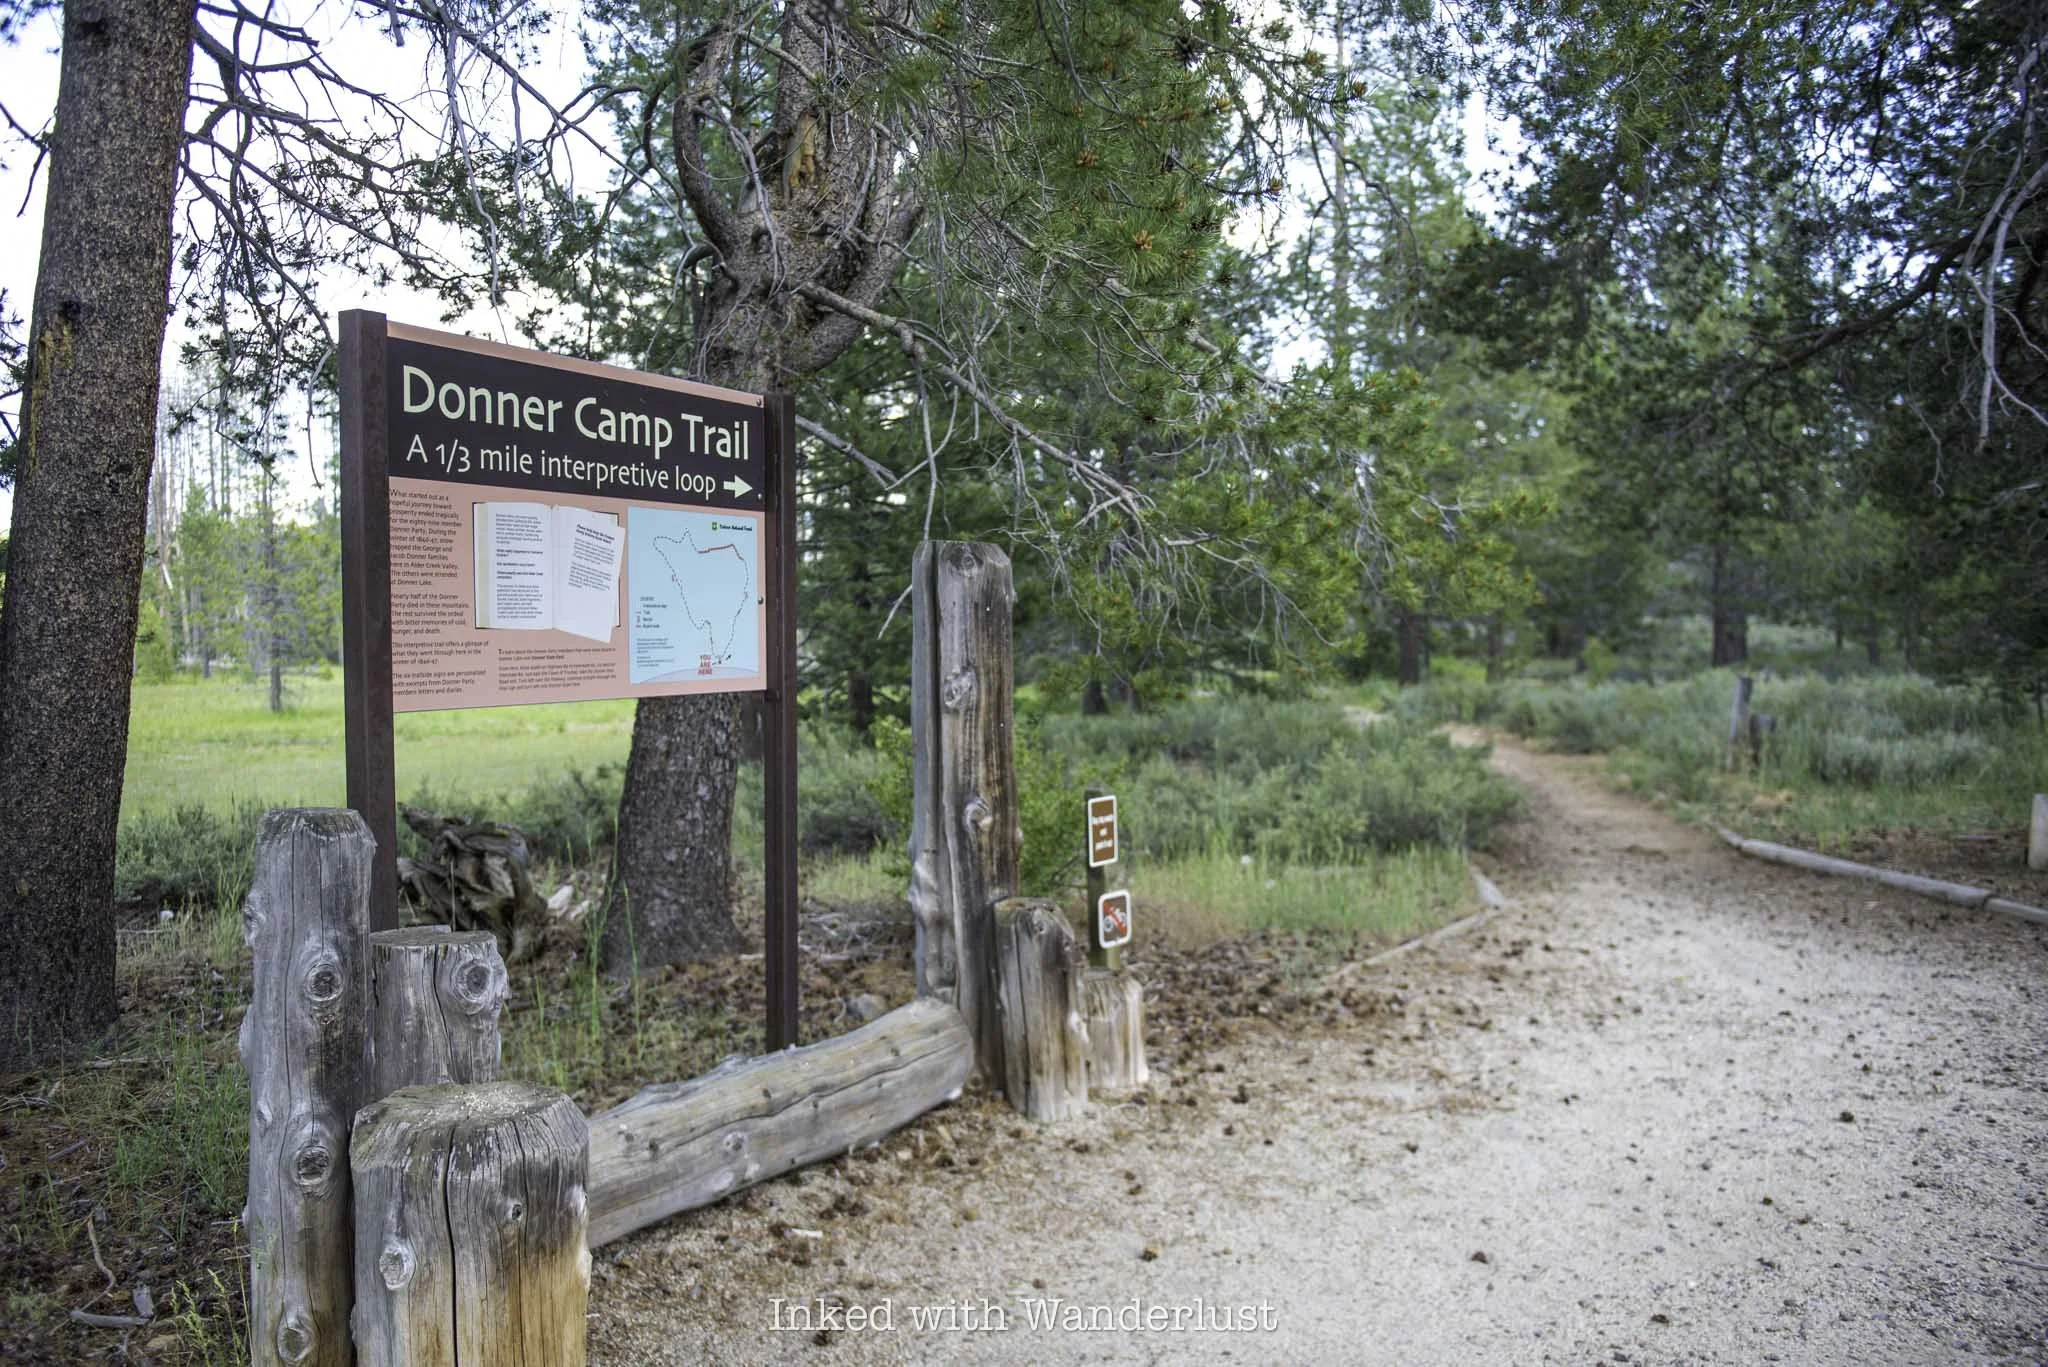
The Donner Camp trail is a well maintained, nearly completely flat loop that encircles the meadow the Donner family fought to survive in during the brutal winter of 1846/1847. It begins at the trailhead, which can be found at the southern end of the parking lot (you can’t miss it).
You can go in either direction but for the story to make sense, it’s best to begin by going right at the trailhead. Dotted along the compact dirt trail are interpretive signs, detailing the history of the Donner Party, as well as their journey and hardships.
The trail is as close to completely flat as it gets, making it an easy outing for families traveling along the freeway. I wouldn’t necessarily designate it stroller-friendly, but you could probably get away with it.
There are also many benches along the loop to rest and take in the scenery. It’s truly a stunning meadow, with towering pines and tall grass lining the trail. Alder Creek, the area’s namesake, gently meanders through the meadow. It’s hard to imagine the suffering that happened in such a beautiful place.

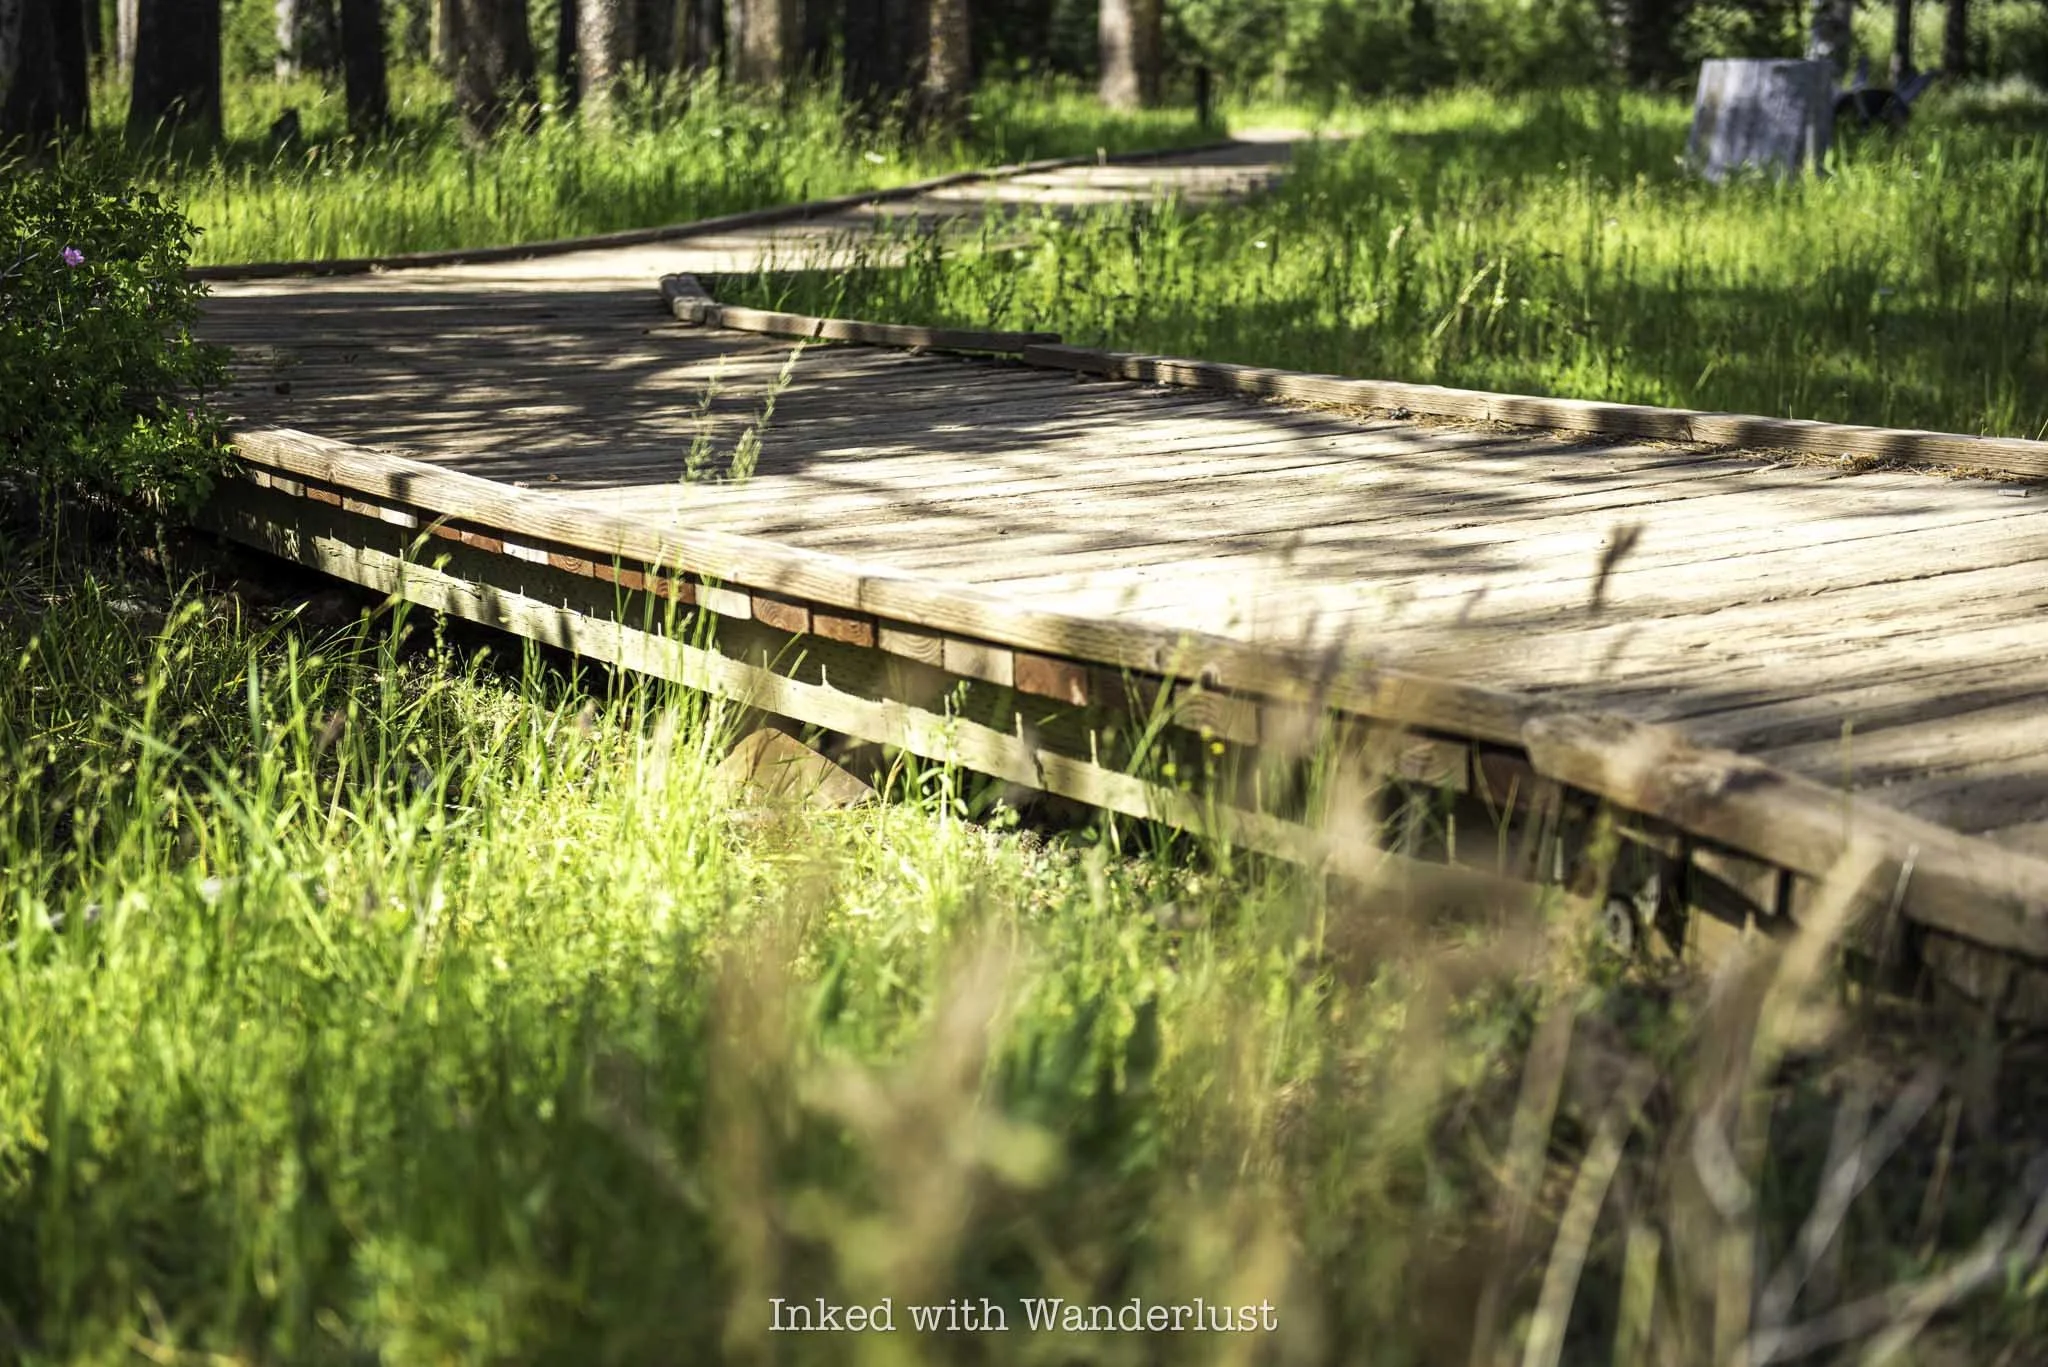
Near the halfway point of the loop, the trail goes from compact dirt to a wooden boardwalk. This section of trail traverses over a growing marsh, along with parts of Alder Creek, and the boardwalk is meant to help protect them. So be sure to stay on it.
As the loop turns back to dirt, you’ll soon come to a medium-sized rock with a plaque display, adjacent to a tall, almost featureless tree. That rock marks the spot where Jacob Donner and his family set up camp. The camp site of George Donner is marked a bit further down the trail.


As previously stated, the winter of 1846/47 was a brutal one. As the Donners watched the snow fall and it became clear that escape wouldn’t be an option, survival mode kicked in. Tall trees that once made up this area were cut down and reduced to stumps.
They’re scattered all over the meadow and are cut as high as twelve feet, indicating how oppressively tall the snowpack had gotten. Food was difficult to come by, resulting in the Donners having to boil hides and consume the gluey mass. Crushed animal bones were also boiled into a broth.

By the end of 1846, as dry wood and food became more scarce by the day, Jacob Donner, along with three teamsters, would be dead. After being unable to join the rescue party out of the mountains due to illness, George Donner would pass in his camp in March 1847. His wife, Tamsen, would pass shortly thereafter.
All told, by the time more rescuers reached the Donners at Alder Creek in 1847, seven members of the family had perished (half of them), along with several teamsters. Seven others survived, with George Donner Jr. being the sole male survivor of the family.

From the camp site, you can opt to take the spur trail leading to Prosser Reservoir. To continue on the loop, proper, continue left at the camp site, with the rock and tree to your back. The trail begins to loop back towards the parking lot, with one or two additional interpretive signs to read along the way.
Once you get back to the parking lot, you’re done. There’s another trail near the Donner Camp trailhead you can explore. I didn’t as I was short on time. If you have bikes with you, I saw several folks with bikes gearing up near the northern end of the parking lot. Perhaps there’s another trail over there.
For someone who’s been fascinated with the Donner Party and their story for so long, it was humbling and moving to stand in the spot where they camped and explore the meadow where they spent that infamously horrific winter.
Did The Donners Resort to Cannibalism at Alder Creek?

Surely, you’ve heard of the disturbing end of the Donner Party’s story in the mountains, with many reportedly resorting to cannibalism in order to survive. Reports indicate this was done to those who were already deceased, but there were several accusations of murder/cannibalism as well.
There’s much debate as to if it actually happened, but we do have journal entries and first-hand testimonials from survivors, seemingly confirming that it did occur at lake camp involving the other party members. Did the Donners take part in it as well, though?
There are conflicting reports. James Reed was said to have found George Donner’s body at the Alder Creek camp with his stomach split open and insides missing. While it could have been cannibalism, it’s also consistent with how bears consume their prey. In the mid-1800’s, grizzly bears were present in the sierras.
Additionally, it’s been said that Lewis Keseberg, another member of the ill-fated group, admitted to cannibalizing Tamsen Donner upon her death. It was said that Tamsen eventually made her way to lake camp after George’s death, where she ultimately died and was reportedly consumed. This isn’t confirmed, though, as her body was never found.
The official stance from park rangers at Donner Memorial State Park is - “perhaps it happened”. Or at least that’s how their answer to the question comes across. With multiple mutilated bodies discovered at both sites and several statements from survivors who witnessed and took part in the act, yes, I do believe it happened.
Donner Memorial State Park

West of the Donner Camp Site is Donner Memorial State Park. The Donners may not have made it to this point, but the park memorializes them and the other members of the party as well. There’s a visitor center with many fantastic exhibits and the Pioneer Monument.
The monument is a dedication to the Donner Party, specifically those who perished. It’s twenty-two feet tall, representing the twenty-two feet of snow that entrapped the Donner Party in the winter of 1846/1847.
The state park also marks the various sites where the party built their makeshift cabins. Along one trail is a giant boulder that served as the north wall and fireplace for the Murphy family cabin. On the rock face is a plaque, listing the entire Donner Party and categorizes those who survived and who perished.
No visit to either sites would be complete without the other, as both are historically significant and important to the Donner story as a whole. You can read more about the events that occurred at Donner Memorial State Park. Additionally, learn about the historic Donner Tunnels and how you can hike through them!


The Ultimate Guide to Mossbrea Falls in Dunsmuir (Step-by-Step Directions)
Visiting Mossbrea Falls, located in the wonderful Northern California town of Dunsmuir, is like stepping straight into a fairytale novel. This unique waterfall is fed…
Disclosure: This post contains affiliate links. If you make a purchase through these links, I may earn a small commission at no additional cost to you. I only recommend products or services that I believe will add value to my readers.

Visiting Mossbrea Falls, located in the wonderful Northern California town of Dunsmuir, is like stepping straight into a fairytale novel. This unique waterfall is fed by multiple springs which flow through a moss-covered mountainside and into the Sacramento River.
Stretching roughly 175-feet across and 50-feet at its highest point, the falls create a lush, living tapestry of water and greenery. It’s an absolute dream for hikers, photographers, waterfall chasers and nature lovers alike.
There’s one caveat to hiking to Mossbrea Falls, though—it isn’t exactly legal. Being at the falls isn’t the problem, rather it’s the route you’ll need to take to get there. Technically, you’ll be trespassing not once, but twice on the way.
Normally, I wouldn’t include something like this on my website, as I like to promote responsible travel and hiking practices. However, all parties involved have seemingly relaxed their position on this. So I decided to promote the responsible way to enjoy this illegal hike (make sense?).
Buy me a coffee?
If you found this blog helpful, consider leaving a tip through the Buy Me A Coffee button below! Whether it’s $1 or $5, every bit helps offset small travel costs like coffee, water, lunch, parking, or park entry fees. Your support means the world—thank you!
Trail Stats
Location: Dunsmuir, California
Fee: None
Open: Year round, but difficult to access in winter
Family Friendly: No (potentially)
Cell Service: Limited
Restroom: Portable near the trailhead
Parking: Street
EV Stations: None, but there are two charging stations down the road at Yak’s
Difficulty: Easy
Popularity: Moderate to high
Mileage: 3 miles, out and back
Condition: No maintained trail, but simple to follow the worn path
Elevation: 2,529 feet
Features: Multiple waterfall streams into a flowing river down moss-covered cliffs
Best Viewed: Spring, for full flow
Pets: Allowed
Drones: No signs stating you can’t
Hazards: Potential wildlife interactions and walking along an active railway
My Visit(s): May 2025
Is Mossbrea Falls Illegal?

The short answer…yes. This is because of the route, though. NOT the waterfall itself. There are two points on the route where you’ll be trespassing—once when you walk through Shasta Retreat and again when you walk along the train tracks, which is owned by Union Pacific.
There are numerous signs stating such at both locations but as stated above, these two parties have seemingly relaxed their position. I won’t name names, but I have spoken with a county employee, two Union Pacific employees, and a local about Mossbrea Falls.
Based on what I have been told, the people at Shasta Retreat do not mind people WALKING through to access the falls. However, they VERY MUCH mind folks parking down there. If you do, your vehicle being towed is all but certain.
Secondly, Union Pacific also does not seem to care much about it either. The railroad section is the longest stretch of the “trail”, as you’ll walk along the tracks for just shy of a mile. On my visit, I passed multiple UP employees and passed a train as well.
The UP employees I spoke with stated that their main gripe is people walking ON the tracks as opposed to alongside them. They say people have been much better about it in recent years, so Union Pacific’s stance has cooled.
Evidence of this was when I passed a stopped train on my way to the falls. Instead of a lecture, I received a smile and a wave from the conductor. Additionally, I walked by a parked Sheriffs Deputy on Dunsmuir Avenue on my out and he just waved as well.
As long as you’re being respectful and not parking anywhere you’re not supposed to, you shouldn’t have any issues. That could always change, though, so don’t take my word as gospel. I’m simply relaying my experience and what I was told by key individuals.
Where to Park to See Mossbrea Falls

Parking, as opposed to the trespassing part, appears to be the biggest point of contention as it pertains to getting to Mossbrea Falls. There is free, limited parking available along the west side of Dunsmuir Avenue. However, most of the curbs are either red or white.
The east side of the street (the side closest to Interstate 5) is 100% no parking. Don’t do it. Additionally, there are a couple of tempting dirt pull-outs along the road, but most of them have posted “no parking” or “private property” signs.


Just up the road from Shasta Retreat there’s a large parking lot next to a community ball field. There’s an abandoned building there, as well as a coffee and food truck called Up-N-Running Espresso. This is where I parked.
When talking to a local while getting my morning coffee, I was advised that despite the posted “no parking” signs, nobody would care if I parked there. According to her, it’s rarely ever enforced, especially outside of the summer months.
Sure enough, my vehicle wasn’t towed, nor did I receive a ticket. If you’re visiting during the summer, I would arrive early and snag one of the street parking spots to play it safe. In early spring or fall, you’ll likely be ok in that lot.

Further down Dunsmuir Avenue and right after the I-5 off-ramp across from Chevron and Yak’s on the 5 restaurant is a dirt pullout long enough to accommodate multiple vehicles. Parking down here will add another half-mile or so to your hike.
I must stress again to NOT park at the entrance to or in Shasta Retreat. Please don’t give them any reason to take this access point away. Additionally, don’t put “Mossbrea Falls” into your GPS. This will take you into Shasta Retreat. Instead, use this address to drive there:
4727 Dunsmuir Avenue (this will take you to the parking lot I mentioned above)
How to Get to Mossbrea Falls

I’m going to give you the most clear and to-the-point directions to Mossbrea Falls you’ll find anywhere. There will also be many photo references. Be sure to bookmark this post to your device so you can refer back to it later on.
From where you parked, start walking north on Dunsmuir Avenue towards Shasta Retreat. When you get to the arch pictured above, the street going through it and into the retreat is Scarlet Way. Proceed (walking) down that street.
By the way, they have set up a port-o-potty, complete with handwashing station, near this arch for public use

When you get to the bottom of the road, it’ll become Cave Avenue. Turn right. Soon after, you’ll come to the bridge pictured above. Cross it and check out the gorgeous views of the Sacramento River below.
When you get to the other side of the bridge, you’ll come to the railroad tracks you’ll be strolling alongside of for the next mile. Turn right at the tracks and remain on the east side of them (the side closest to the river).

Much has been said online about this stretch of the “trail” being too dangerous. In my opinion, there was nothing inherently dangerous about it, provided you’re staying off of the tracks and keeping your ears open for oncoming trains.
There is plenty of room to safely walk on the east side (nearest the river) even if a train is passing through. Conversely, the west side is a different story. If you walk on that side, you’re simply asking to get hit.

There’s a well-worn, noticeable path throughout much of this stretch that comes and goes. The rest of the time you’ll be traversing on what I call, “rail rocks”. These rocks, while not huge, are larger than basic gravel and are exceptionally loose.
More than once while walking on a slant, the rocks gave way, causing my foot to slide a bit and threw me off balance. I never fell or anything like that but if you have balance issues or sensitive ankles/knees, I would take it slowly.
Admittedly, there are a few points along this one mile stretch of track where it gets a bit narrow. I didn’t run into any moving trains, but there was one parked and I walked alongside it for probably half the time.
If it were moving, those narrow portions would’ve been nail biters. If you happen to be at the narrow points and hear or see a train coming, simply step as far to the side as you can and wait for it to pass before proceeding.
There are no signs pointing the way to the falls, but thankfully there’s a big tell letting you know when you’re there. When you come to the trestle bridge in the photo above, stop. Don’t cross it. Instead, turn right and head into the trees.
Just on the other side of those trees is where you’ll find Mossbrea Falls. If you’re here in the spring like I was, you’ll likely hear the falls before you see them. There are multiple paths and each one will lead you to the same spot.
Mossbrea Falls

When you get into the trees, the multiple flowing streams which make up Mossbrea Falls quickly come into view. If you’re here in the spring, the Sacramento River will be flowing heavily and fully, leaving only a small-ish shoreline to view the falls from.

As summer progresses and especially into the fall, the river levels lower, exposing more shoreline and allowing you to get closer. Even with a depleted shoreline, though, you’ll still have a close view.

The best time of day to visit Mossbrea Falls, in my opinion, would be morning or closer to sunset. I had minor car trouble on the day of my visit, which delayed my arrival to around mid-day and I had to deal with the harsh sun hitting the river.

As far as best time of year goes, I would recommend either spring or fall. In the spring, both the river and falls are at their fullest. In the fall, Mossbrea Falls is still flowing, but you’ll have the added benefit of lower river levels and the beautiful fall foliage. Both scenarios are great for photography.
When you’re done viewing the falls, simply head back in the same direction you came. Remember to walk in the space between the tracks and river, keeping your ears open for oncoming trains.
Is Mossbrea Falls Family Friendly?

This is a question commonly asked online and honestly, it can only be answered by individual parents. Personally, I didn’t see any kids at the falls or along the trail during my visit. However, I have seen photos online of families at the falls.
If your kids are teenagers, they shouldn’t have a problem. Especially if they have experience with the outdoors. However, I can see smaller children struggling with the rail rocks. There’s also the potential for danger from the trains.
Only you know your children and their abilities. As amazing as Mossbrea Falls is, it isn’t worth it if you have doubts about them being able to get through the trail. There are solid alternatives in the area, such as Hedge Creek Falls, McCloud Falls and Burney Falls Scenic Loop.
Mossbrea Falls: An Uncertain Future

For years, the city of Dunsmuir has been actively campaigning to construct a safer (and…legal) path to Mossbrea Falls. There have been many hurdles, such as money and getting property owners to relinquish portions of land to make the trail possible.
Recently, Union Pacific agreed to sign over a portion of their land, but the city still needs to raise funding. The current proposal involves extending the Hedge Creek Falls trail. A bridge would be constructed, allowing hikers to safely cross the Sacramento River.
On the other side, fences would be built, keeping people away from the railroad tracks. To bridge the gap, a trail (likely a wooden boardwalk or something similar) would connect you to Mossbrea Falls.

The project is estimated to cost well into the millions. I’m not sure how close or far away they are, but the city is actively asking for donations. They’ve placed a sign with a QR code near the entrance to Shasta Retreat. You can view their website, donation page, and proposal here.
Until this idea becomes a reality, we’ll need to be comfortable with committing misdemeanors in order to see what I believe is one of the most beautiful waterfalls in the state. I truly hope the city can make this happen.
For now, please be respectful when on Shasta Retreat property. No pictures of people’s homes, loitering, parking, etc. Pass through as quickly and quietly as you can. Furthermore, keep off the tracks when on UP property.
The point of all of this is to not give either any reason to reverse their decisions to be relaxed on us trespassing. It’s a privilege that either could strip from us without warning. Let’s do our part to keep Mossbrea Falls as accessible as possible for everyone.
Buy me a coffee?
If you found this blog helpful, consider leaving a tip through the Buy Me A Coffee button below! Whether it’s $1 or $5, every bit helps offset small travel costs like coffee, water, lunch, parking, or park entry fees. Your support means the world—thank you!


EXODUS 13:21

Hollywood Sign and Mount Lee Summit Hike: The Best and Easiest Way (2026)
Before starting this hike, there are a few things you need to know. This trail has been involved in controversy over the years as…
Disclaimer: This post contains affiliate links. If you make a purchase through these links, I may earn a small commission at no additional cost to you. I only recommend products or services that I believe will add value to my readers.

The hike up to the Mount Lee summit and behind the infamous Hollywood Sign is one of the best hikes in Los Angeles. On a clear day, the views from the summit are unparalleled and you get a unique perspective of the sign that most don’t.
Before starting this hike, there are a few things you need to know. This trail has been involved in controversy over the years as parts of it (and former trailheads/parking areas) intersect with neighborhoods in the Hollywood Hills.
To avoid catching trespassing charges and fines, and to keep this trail accessible to everyone, you’ll need to know where to park, where to begin the trail, areas to avoid, gate access, and more.
In the post below, I will give you a step-by-step guide on the best, easiest, and most straightforward path to Mount Lee and the Hollywood Sign (including a plethora of photo references). Be sure to bookmark this post to your device so you can refer back to it later on.
Buy me a coffee?
If you found this blog helpful, consider leaving a tip through the Buy Me A Coffee button below! Whether it’s $1 or $5, every bit helps offset small travel costs like coffee, water, lunch, parking, or park entry fees. Your support means the world—thank you!
Trail Stats
Location: Los Angeles/Hollywood, California
Fee: None
Open: Sunrise to sunset
Family Friendly: Possibly, if your kids have hiking experience
Cell Service: Good, but spotty in some areas of the trail
Restroom: None
Parking: At Lake Hollywood Park along the street
EV Stations: None
Difficulty: Moderate to hard (depending on your fitness level)
Popularity: High
Mileage: 4.6 miles (from Lake Hollywood Park, to the summit, and back)
Elevation: 1,708 feet
Time: 2-3 hours, round trip
Condition: Mostly flat and easy to follow
Features: Behind Hollywood Sign view and expansive views of Los Angeles (on a clear day)
Best Viewed: Any time of year
Pets: Allowed
Drones: Prohibited
Hazards: Sheer drop offs, heat exposure, and rattlesnakes
My Visit(s): April 2025
Where to Park - Lake Hollywood Park

For this particular hike, the only safe place to park is at Lake Hollywood Park. This park has become a hot spot for tourists wanting to capture an epic selfie with the Hollywood Sign and hills serving as the backdrop.
Due to this, you’ll want to start early. I got here at around 8am and was one of only three cars. By the time my wife and I got back to the car a few hours later, we were one of dozens and parking was getting tight (see photos below).

(8:15am)

(11:30am)
To avoid getting fined and potentially towed, be sure to park on the side of the street closest to the park as you’ll have unlimited parking between 6am and 8pm. On the other side, parking is limited to just fifteen minutes (there’s no fee to park on either side as of May 2025).
Other posts advise you to start your way uphill and walk along Mulholland Drive to start the hike. I advise against this, as this stretch of road is narrow with many blind spots and is often heavily trafficked. It’s simply too dangerous.
Instead of walking uphill, walk downhill on the sidewalk towards the residential area (pictured above). You’ll eventually come to the corner of Innsdale and Canyon Lake Drive. Once there, you’ll see a gate on your right (pictured below).


When I got here, there were vehicles parked in the area around the gate and in the neighborhood. While I didn’t see anything stating you couldn’t, I have read online that you’re subject to fines and being towed if you do.
I did see a parking enforcement vehicle in the area when we got back, but didn’t see the officer ticketing anybody. I still advise you to play it safe and park along Lake Hollywood Park, but the risk is yours to take (if you’re being dropped off, this is the spot).
The Innsdale Trail to the Hollywood Sign and Mount Lee

Now you’re officially on the trail to the Hollywood Sign and Mount Lee Summit. At that gate, you’ll see many signs stating “restricted access” and warnings of trespassing. This has to do with vehicles, NOT being on foot. It’s perfectly legal to walk through.
The trail is wide and mostly compact dirt. You’ll have a clear view of the Hollywood Sign on your left as well as views of the hills and downtown LA on your right. If the marine layer is present, your views will be obstructed.
After a relatively short period, you’ll eventually come to chain attached to two poles stretching across the trail (pictured below). You’ll also see houses on both sides of you with another trespass warning posted.

Simply ignore the signs and go around the pole on the right to continue. That trespass warning pertains to that home owners actual property behind their fence. It does NOT pertain to the trail. You’re still ok.
When you come out of the ally, you’ll walk onto a street and see the house (pictured below) in front of you. Go left here and keep as far left as you possibly can. This short section is the one and only time you’ll need to traverse along a street.


After a short time, you’ll come to another junction. There’s a side street leading to more houses on your right (Ledgewood Drive) and another street to the left (Mulholland) that’s blocked with cones. You’ll want to walk up Mulholland, keeping the Hollywood Sign in sight.


Again, you’ll see more restrictive access signs but just ignore them. Those pertain to vehicle access. Continue walking up the road, passing multiple houses on your left. Eventually, you’ll see a mural of the Hollywood Sign pointing the way up the trail (as well as more cones).
Additionally, you’ll pass a small field of California Poppies (if you’re here in spring/early summer) and a random art exhibit on your left. There’s also the one-and-only water bottle refill station here. The trail will then horseshoe, passing through yet another chained gate.


The trail remains exposed for a bit, passing several impressive homes on the right side before entering a grove of palm trees and another Hollywood Hills neighborhood. You’ll then come to the final oddball portion of the trail.
You’ll eventually arrive to what appears to be a locked gate. Go towards the left of the gate and go through the opening. Stay to the left and continue up the paved path, staying between the white walls.
Be sure to remain on that narrow path. On the other side of that white wall is private property. Please don’t give the homeowners any reason to report you. Every time that happens, this trail becomes that much closer to being closed off to the public.


Soon after the green gate, you’ll come to a fence and a door with a key-code pad (pictured above). Between sunrise and sunset, this door is unlocked, so simply open the door and go through it.
When you get to the other side of the fence, you’ll face another junction with a palm tree at the split. To continue to the summit of Mount Lee, go right at the junction. As a side quest, you can go left for a great photo opportunity and view of the sign.
From here, you’ll be hiking on Mount Lee Road. Long ago, it was possible to drive up to the Hollywood Sign. These days, it’s simply a service road for utility workers to reach the satellite and utility towers at the top.
Before long, you’ll reach the final junction of the trail. Going right will take you on the Mulholland Trail. Keep to the left to continue on to Mount Lee. From here, there are no specific instructions needed. Simply follow the road. You’re now just 0.9-miles from the top.


This portion of the trail is a winding, unrelenting uphill slog the rest of the way. While I wouldn’t classify it as “difficult”, I will say that depending on your fitness level, your milage will vary. What’s moderate for me may be hard to others, and vice-versa.
You’ll know you’re almost to the top when you reach the monument plaque in the photo below. The plaque is a dedication to those who donated to help keep public access to Cahuenga Peak and make it part of Griffith Park.
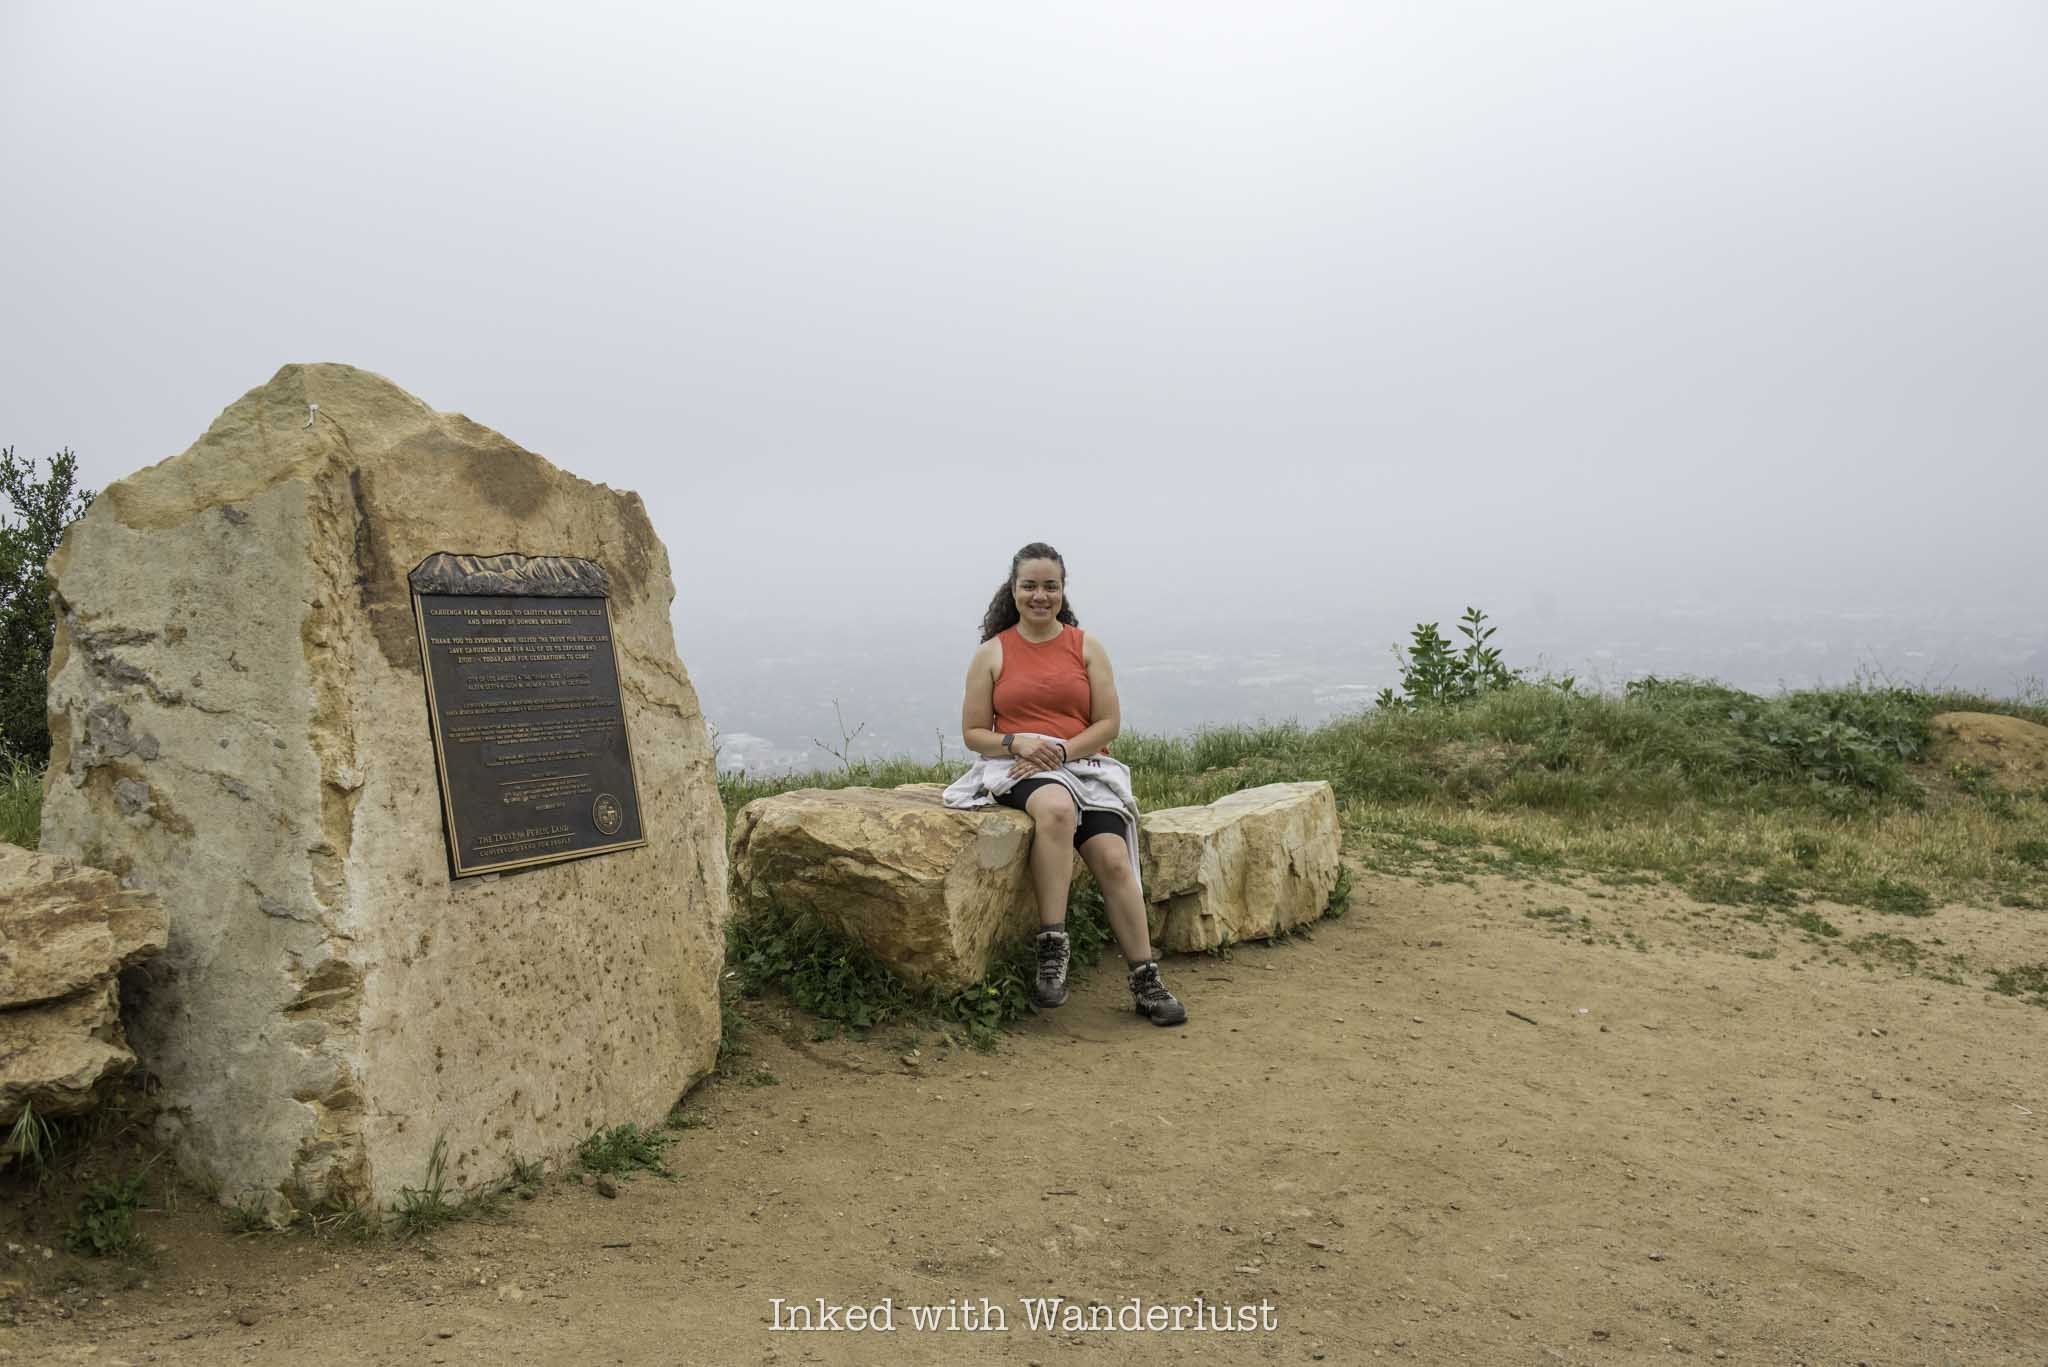
Near the plaque, you’ll see a side trail spurring off the paved road. If you want to side-quest to Cahuenga Peak, that’s the direction you’d go. There’s also a nice side view of parts of the Hollywood Sign from that trail as well.
Mount Lee Summit and Behind the Hollywood Sign

Staying on the paved road, you’ll see it make a sharp left around a rocky outcrop. You’ll also notice a chainlink fence on the right side. Head that way and shortly after making that left, you’ll get your first glimpse of the sign on your right.
You may see the sign now, but you’re not finished. To get to the actual summit of Mount Lee, you’ll need to go just a little bit further. Ahead of you, you’ll notice utility and satellite towers. To the left you’ll see a dirt path. Take that and then head up the short hill to the summit.

Once you’re up that hill, you’re officially on the summit of Mount Lee. From here, on a clear day, you’ll have expansive views of Los Angeles and the unique perspective of the backside of the Hollywood Sign.


During our visit, the marine layer was still hovering over the city, so our view was dampened a bit. Either way, the hike up to Mount Lee and the Hollywood Sign is still one of the best hikes in Los Angeles and worth doing, no matter the view.
From here, simply head back in the same direction you came. If you still have energy, there are many other cool things in the area to check out. You can explore the old Los Angeles Zoo or gaze at the sky from the Griffith Observatory. To replenish those calories, I recommend a double smash burger at nearby For the Win restaurant.
Buy me a coffee?
If you found this blog helpful, consider leaving a tip through the Buy Me A Coffee button below! Whether it’s $1 or $5, every bit helps offset small travel costs like coffee, water, lunch, parking, or park entry fees. Your support means the world—thank you!
EXODUS 13:21

Mobius Arch Loop Trail in Alabama Hills
Alabama Hills is located just outside of the small town of Lone Pine, along California’s highly scenic Highway 395. It’s known for its extensive history of being the filming locations...
Disclosure: This post contains affiliate links. If you make a purchase through these links, I may earn a small commission at no additional cost to you. I only recommend products or services that I believe will add value to my readers.

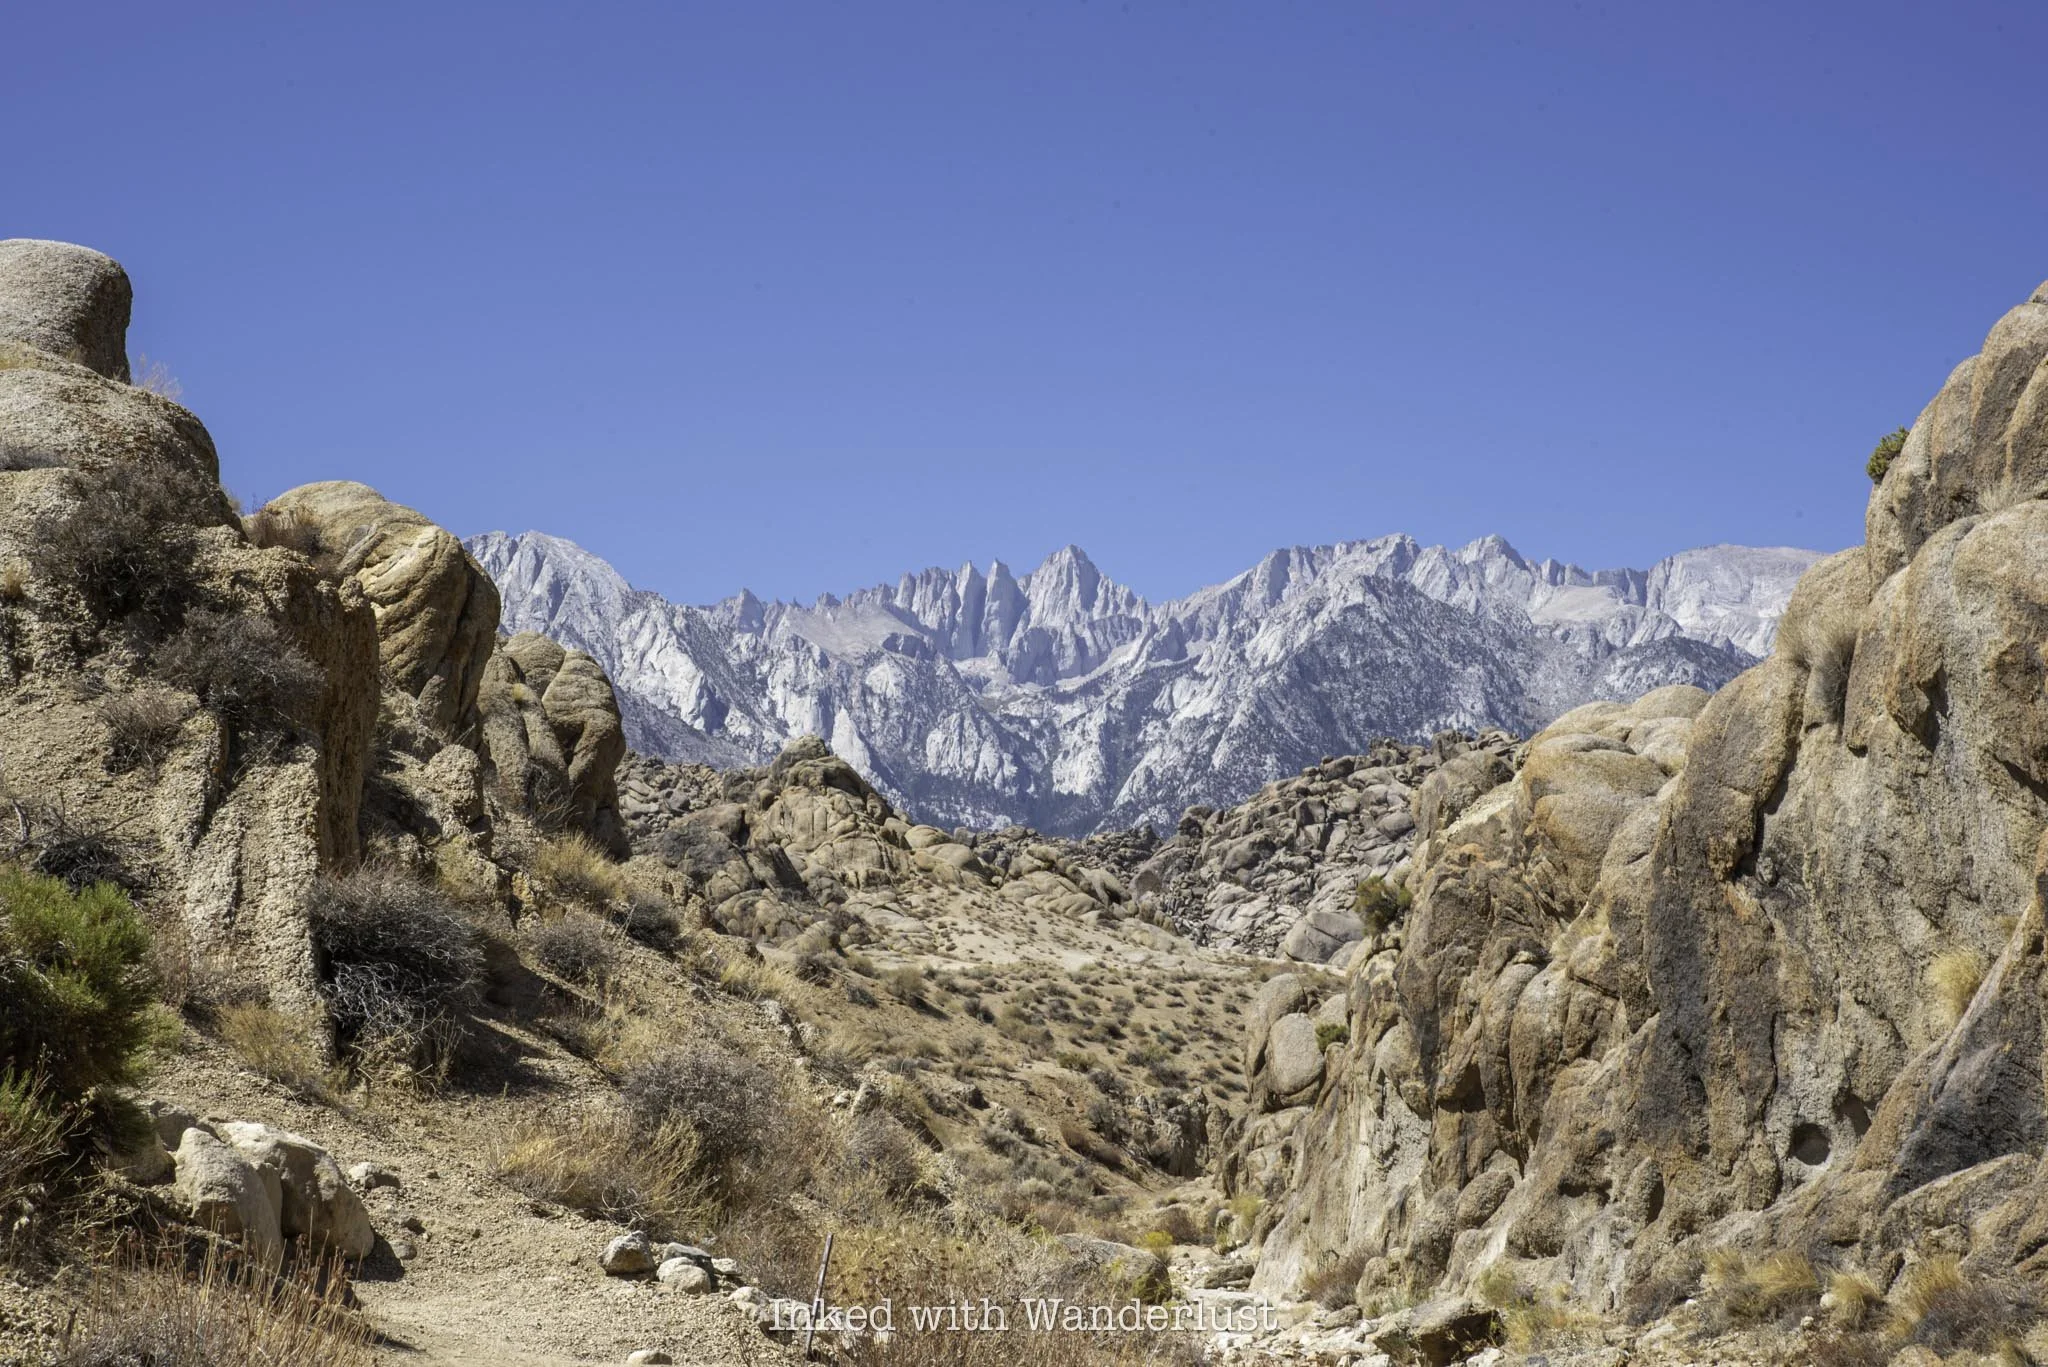
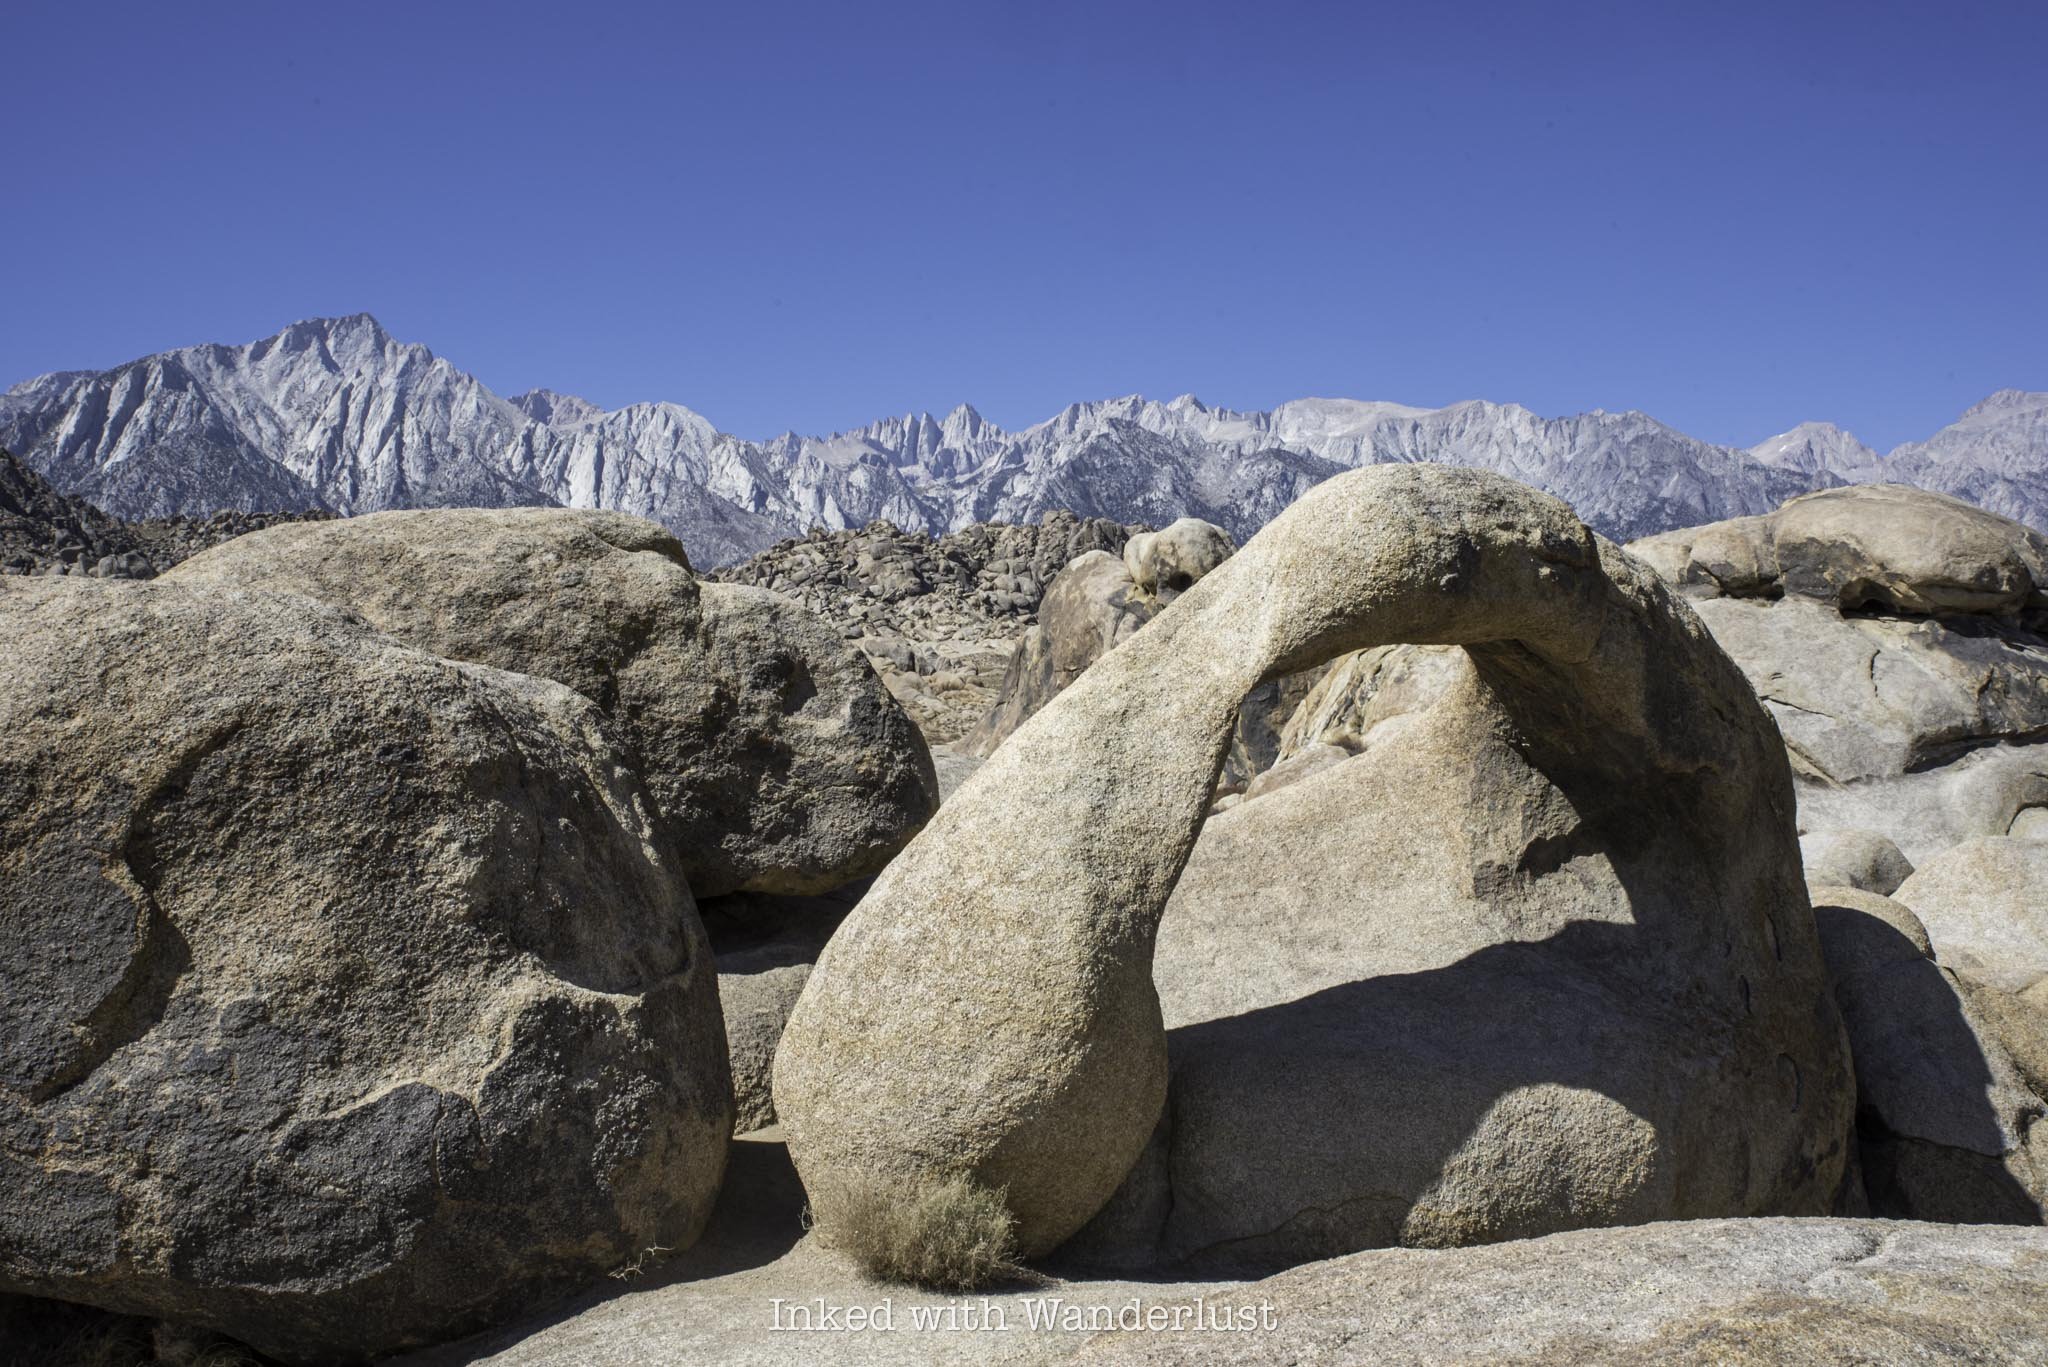
Alabama Hills is located just outside of the small town of Lone Pine, along California’s scenic Highway 395. It’s known for its extensive history of being the filming locations for dozens of movies and most of all, being the “front yard” of Mount Whitney, the highest mountain peak in the lower 48.
While there are many things to do in Alabama Hills, this post is going to focus on one of, if not the, most popular trail in the area - the Mobius Arch loop trail. It’s well known by hikers and photographers alike, for its scenery, as they’re as close to second-to-none as it gets.
The orange/brown, drab-weathered volcanic and granite rock creates a stunning contrast to the often snow-capped granite peaks that make up the Whitney Range. Best of all, Alabama Hills is on Bureau of Land Management (BLM) land and thus, is free to recreate in.
The Mobius Arch loop trail is on the short end of the spectrum but if you’re traveling along Highway 395 and need to stretch your legs for an hour, there are few places better to do that than Alabama Hills and the Mobius Arch trail, respectively.
So how long is the trail? How do you get there? What’s the bathroom and parking situation like? I answer all of these questions and more in the post below. Let’s get into it.
Trail Stats
Location: Alabama Hills in Lone Pine, California
Fees: None
Open: All year
Nearest Camping: Free, dispersed camping all over Alabama Hills. Paid, reservation-based camping at Mount Whitney Portal
Family Friendly: Yes
Cell Service: Decent
Restroom: Three port-o-potties at the trailhead
Parking: Large, well maintained dirt lot
EV Stations: None
Difficulty: Easy
Popularity: Medium
Mileage: 0.6 mile loop
Time: One hour or less
Elevation Gain: 42 feet
Condition: Well maintained and easy to follow
Features: Famous granite arch and views of Mount Whitney
Best Time: Best in Spring or Fall.
Pets: Allowed, must be leashed
Drones: Allowed with a valid permit. You can obtain one here
Hazards: Rattlesnakes have been known to frequent the area. Additionally, the trail is very exposed
Our Visit(s): 2017, 2019 and September 2024
Mobius Arch Loop Trail Parking and Directions
Getting to the trailhead for Mobius Arch is an easy endeavor. No matter which direction you’re coming from, you’ll need to find your way to Highway 395. Once you get into the small town of Lone Pine, you’ll turn onto Whitney Portal Road (at the town’s sole stoplight).
If there’s construction going on (like there was during our recent visit), you’ll have to detour for about ten miles through Turtle Creek and Horseshoe Meadow Roads, before rejoining Whitney Portal Road and then turning left onto Movie Flat Road.
If there isn’t construction going on, you’ll simply continue up Whitney Portal Road for a few miles, passing Nightmare Rock on your right (pictured below). The designs and colors on Nightmare Rock change quite often, so there’s almost always something new to see with each visit.
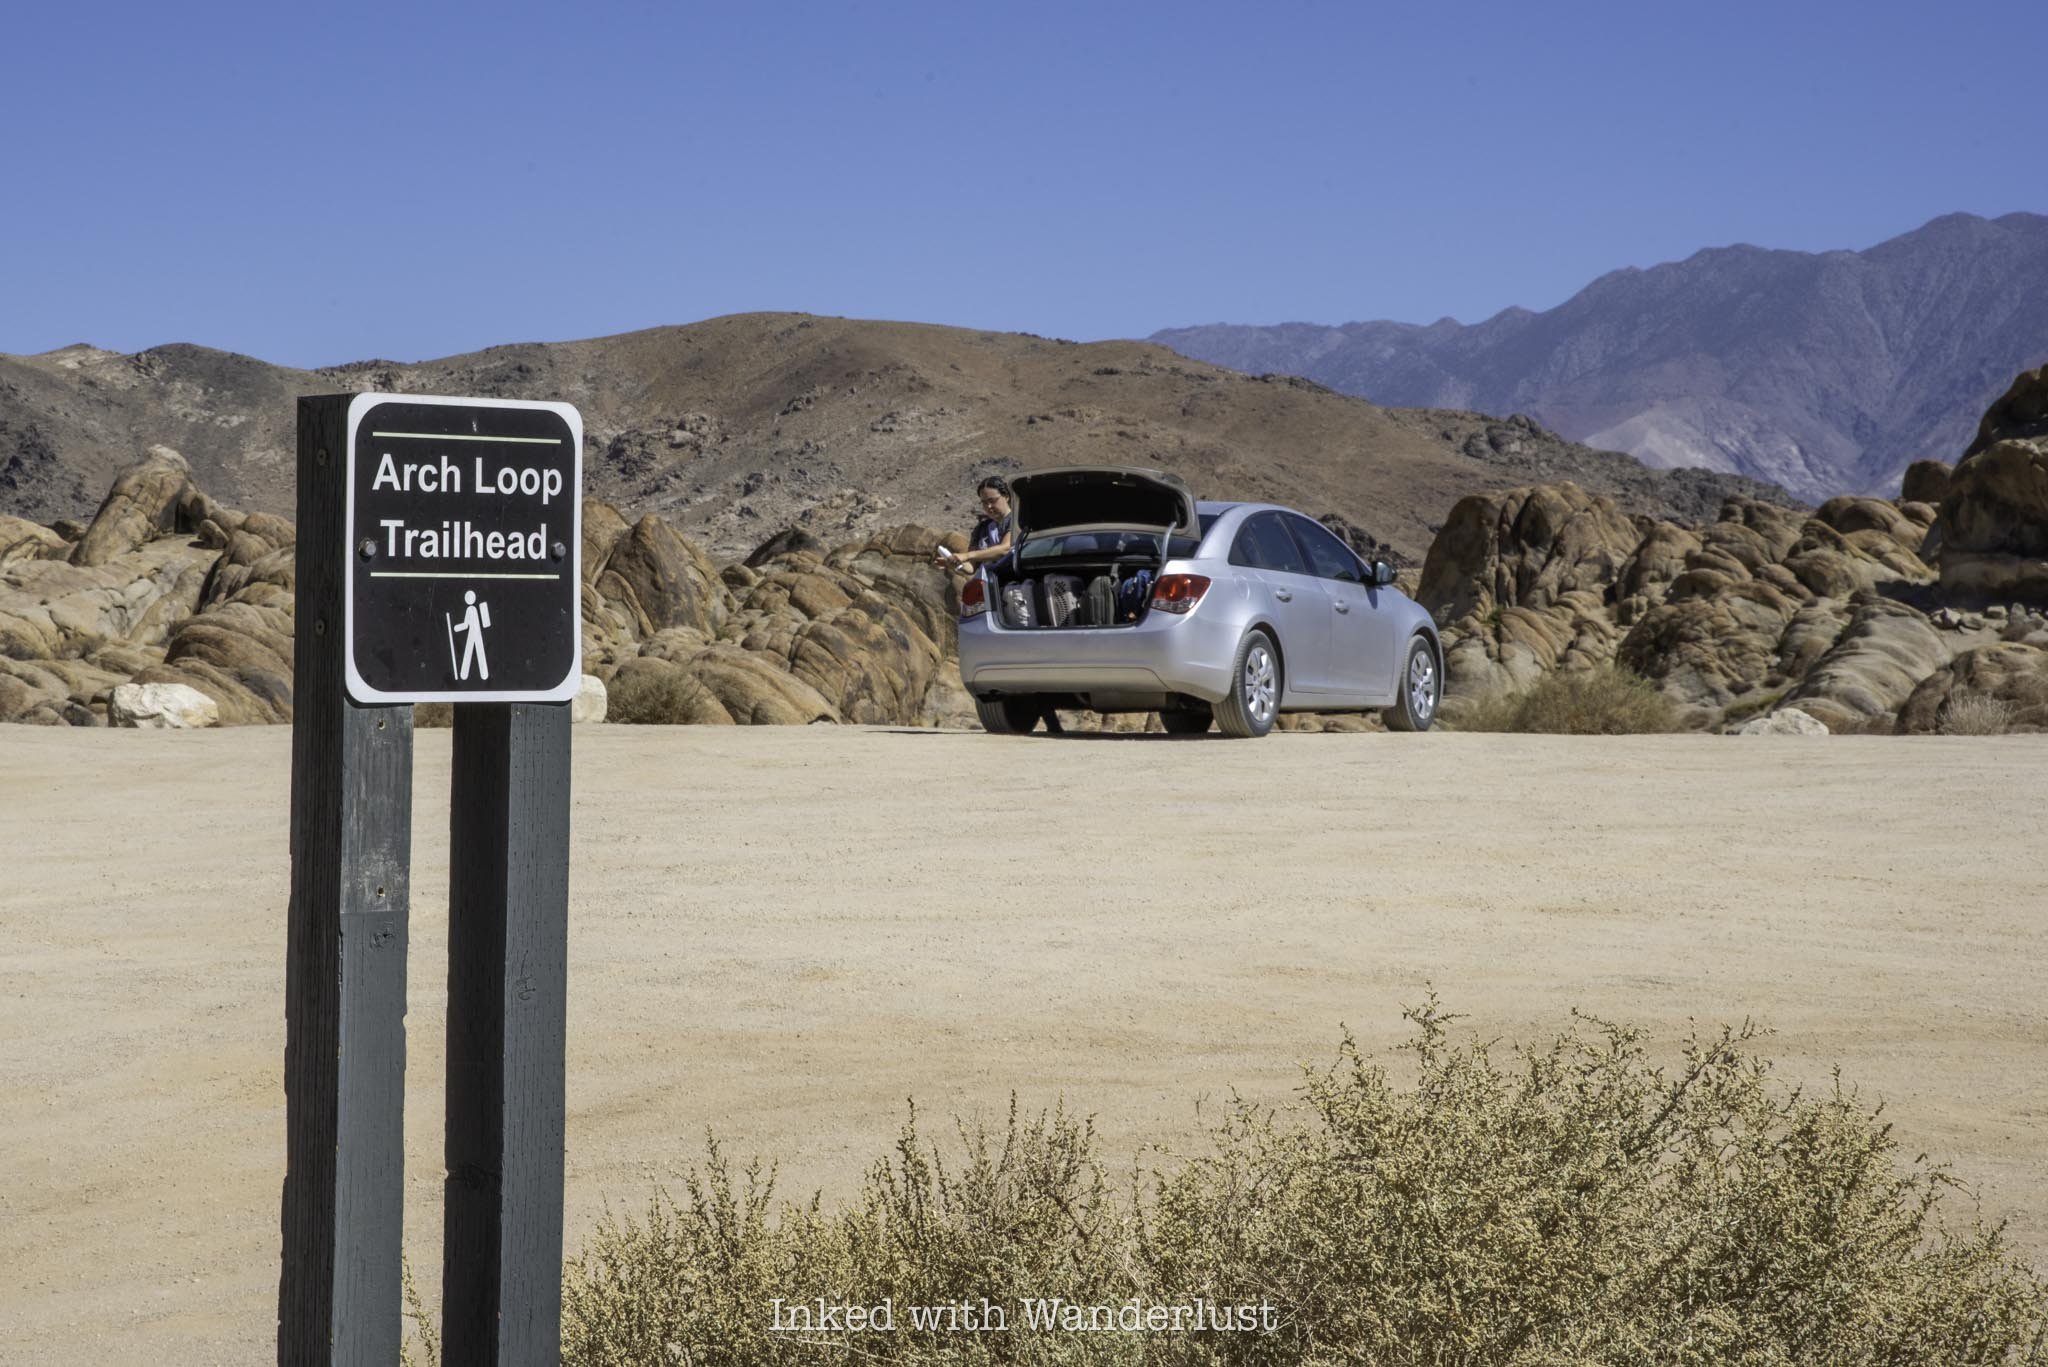
Shortly after passing Nightmare Rock, you’ll see the turnoff for Movie Flat Road on your right. From either direction, travel along the road for about one mile. You’ll eventually see the large, dirt-floor parking lot on your left. There’s no fee. Just find a spot and park your car.
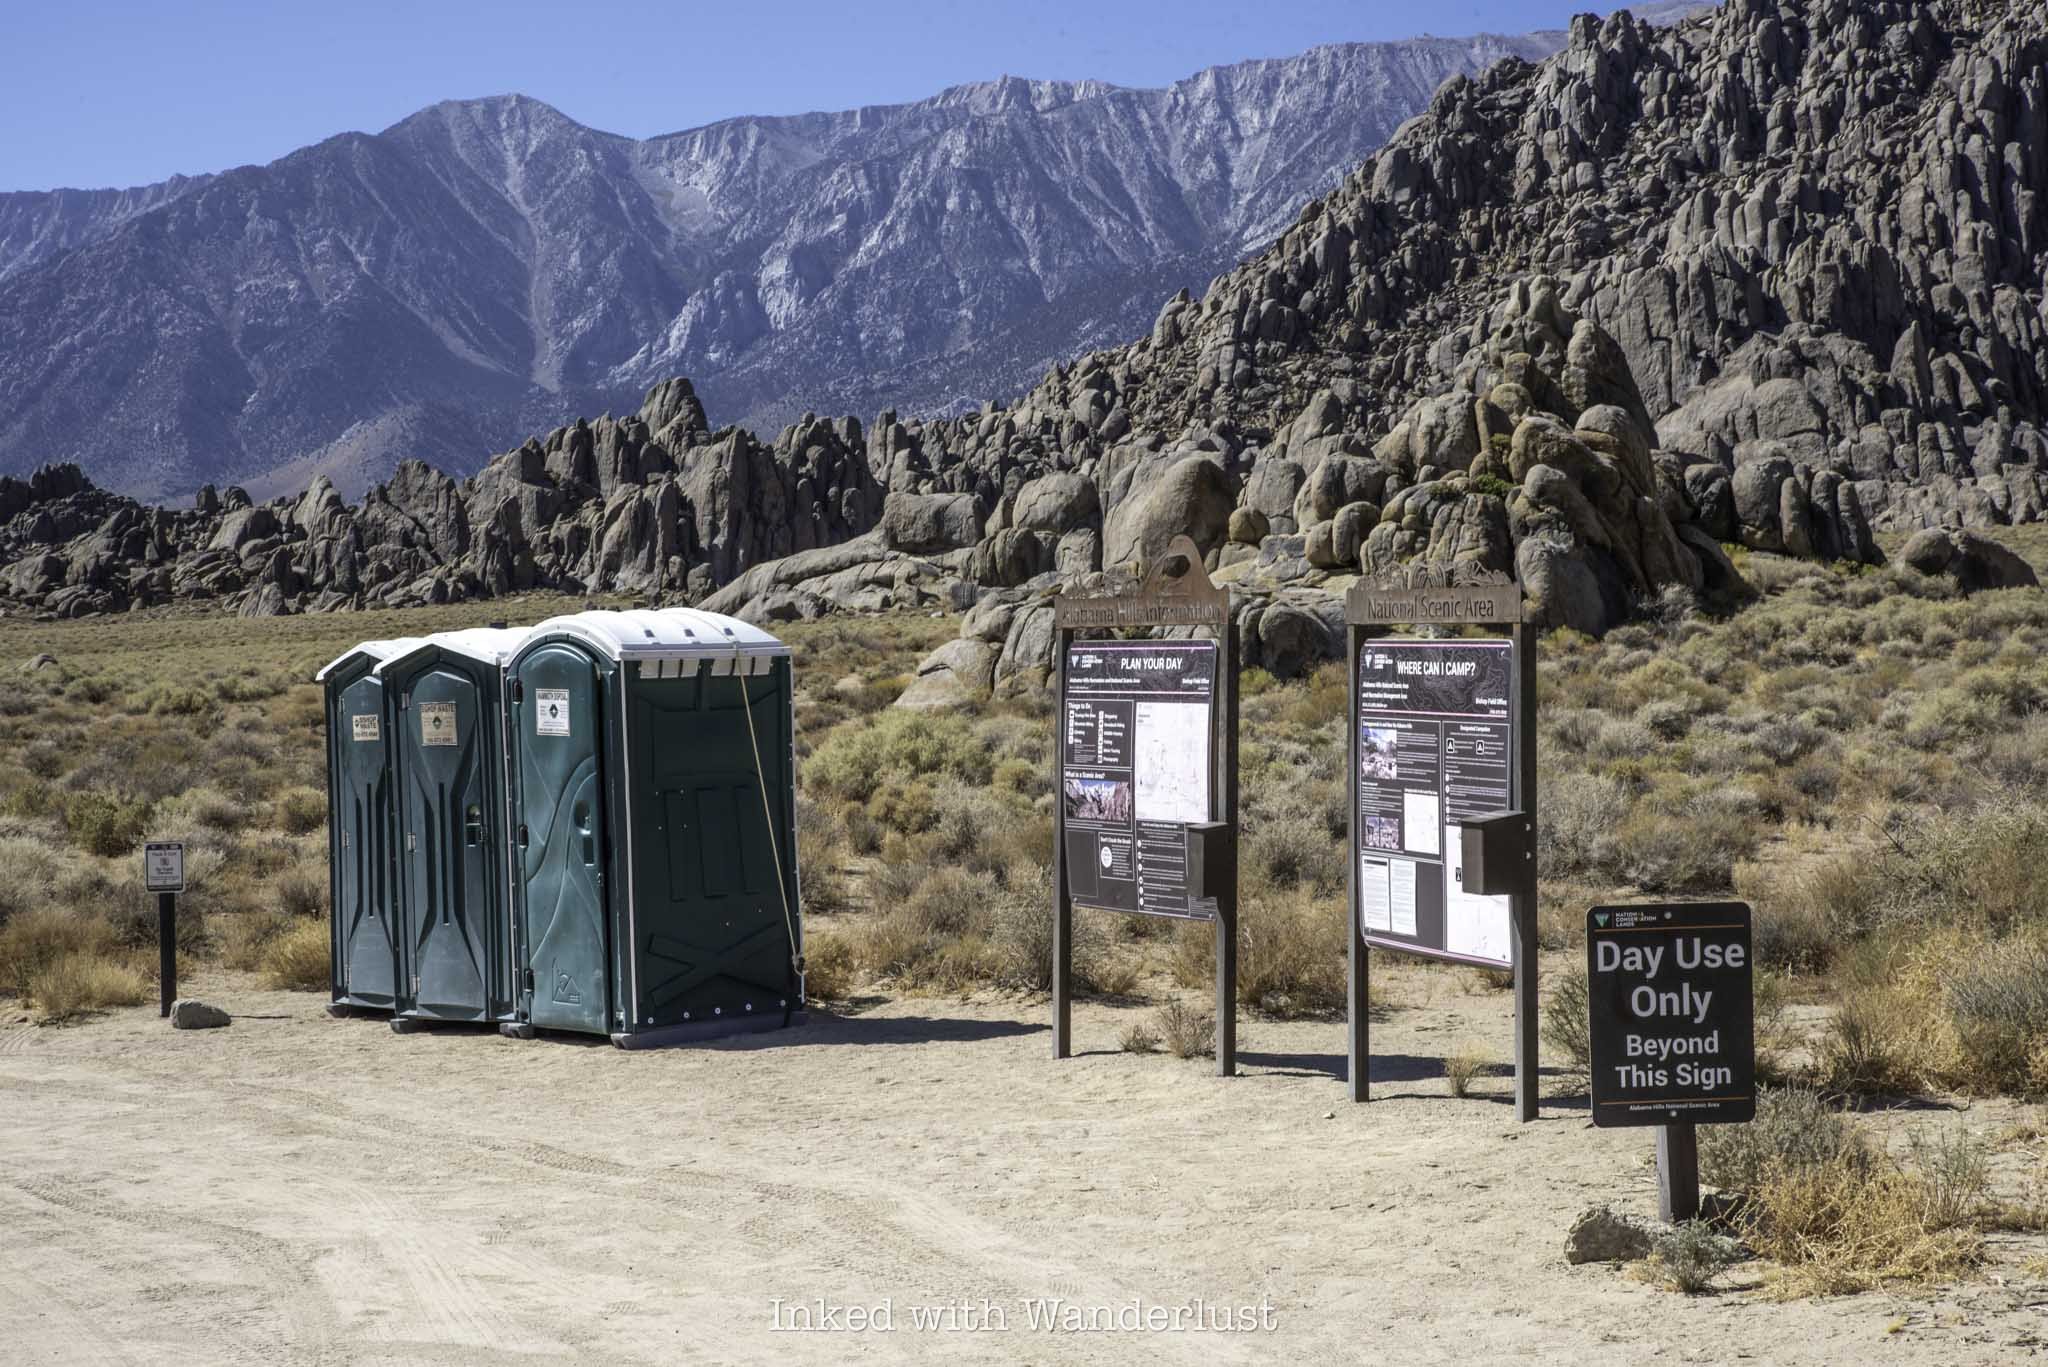
Near where you first drove into the lot are three port-o-potties available to use. I peaked inside of them to see how maintained they are and I was pleasantly surprised by their cleanliness (as far as port-o-potty standards go, anyway). Additionally, there are two informational boards over there as well.
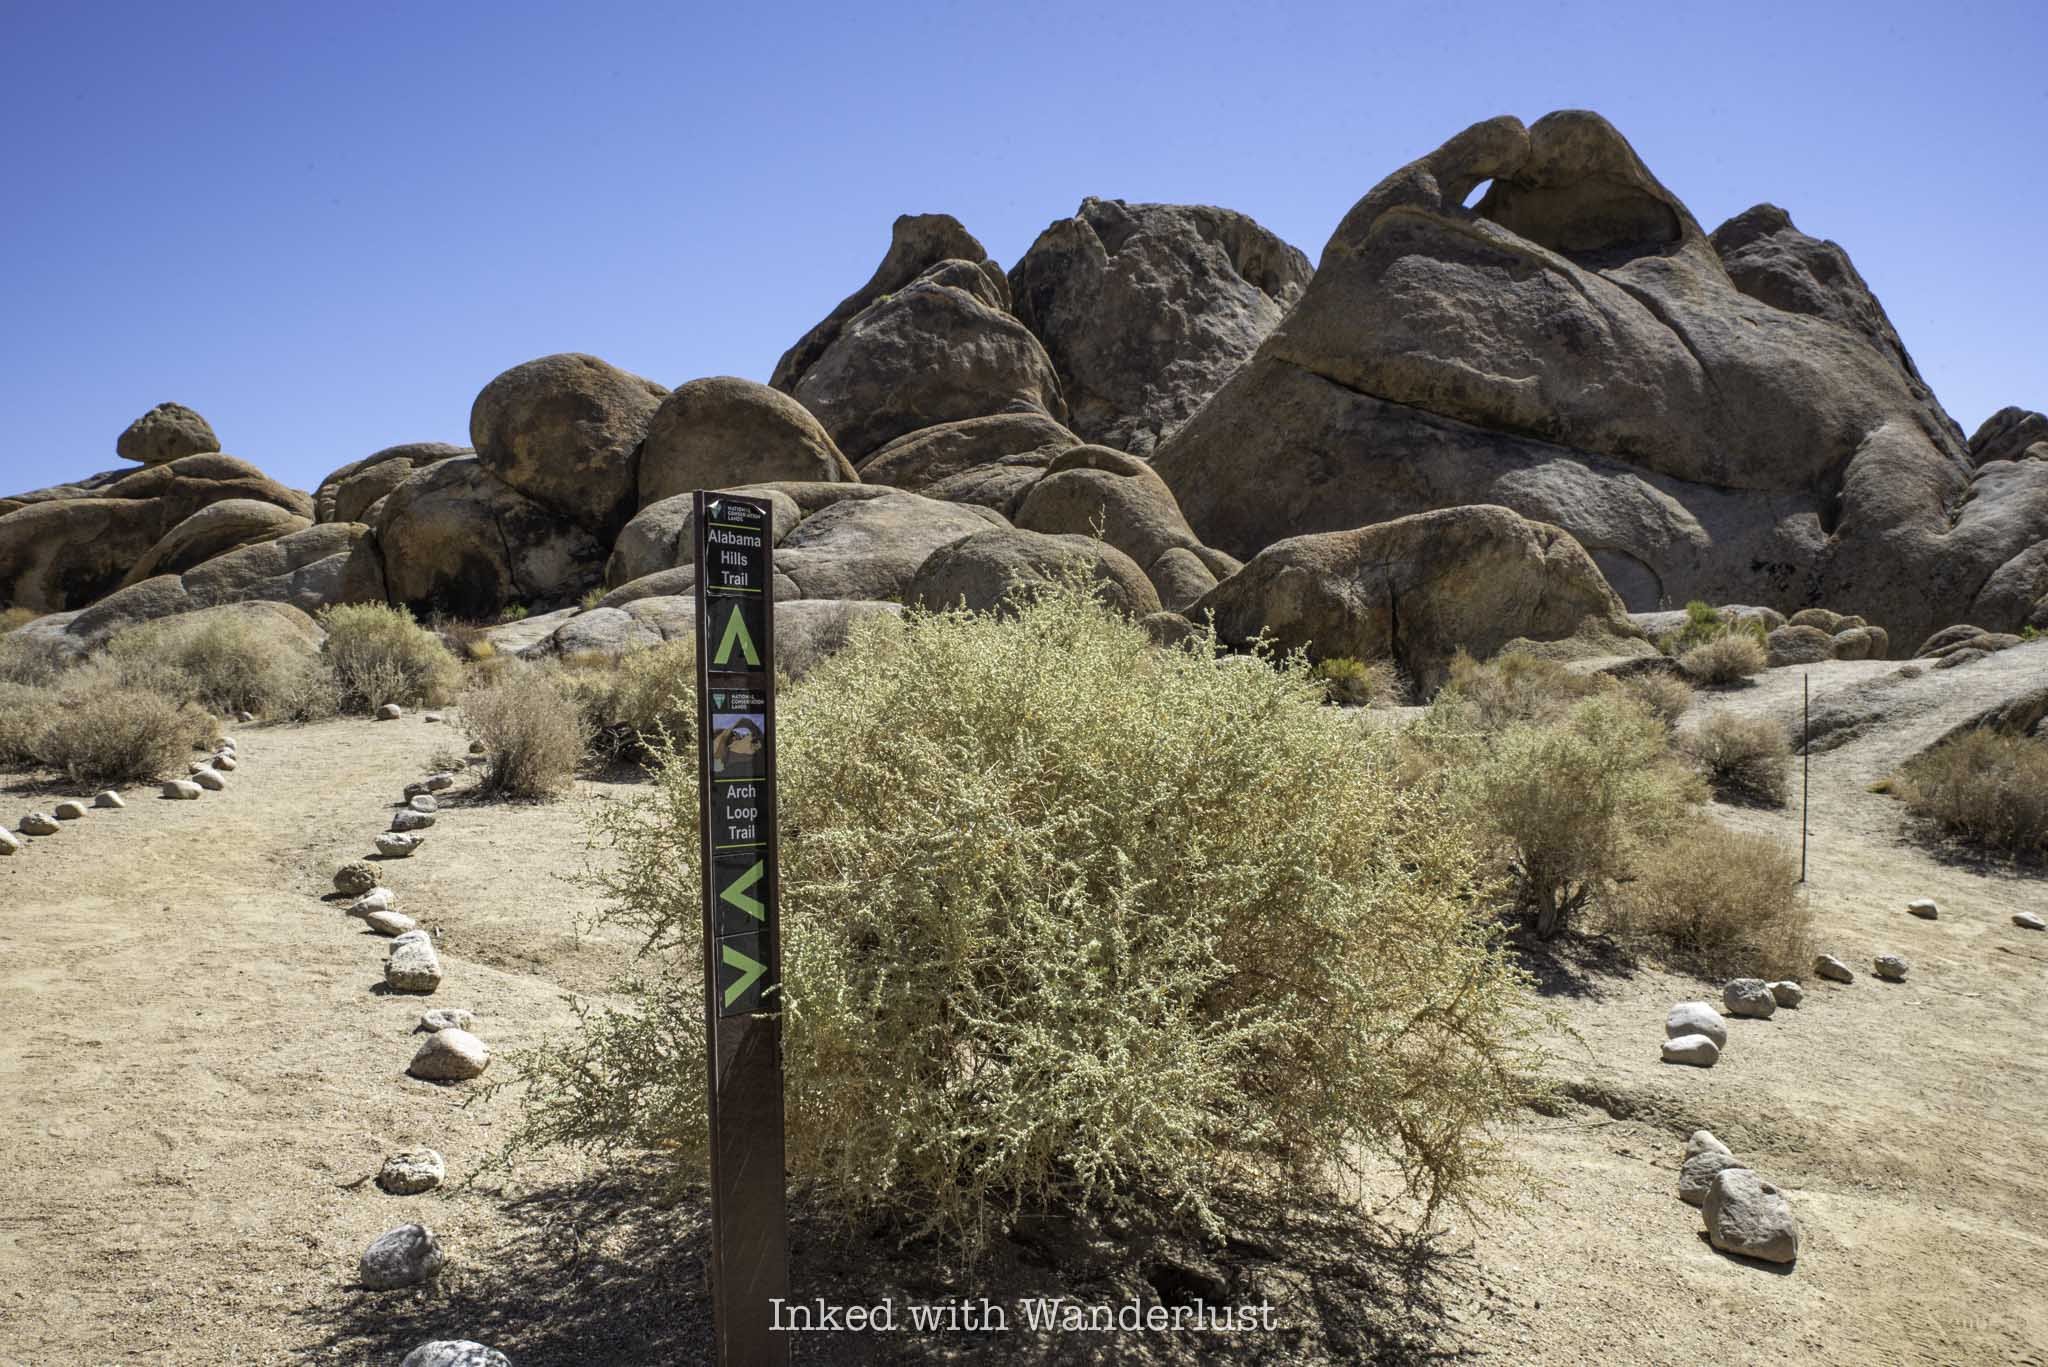
This trail is of the loop variety, so it doesn’t particularly matter which direction you go. For the purpose of simplicity, though, this post will focus on the trailhead pictured below. It is located on the left side of the parking lot, facing Mount Whitney and Lone Pine Peak.
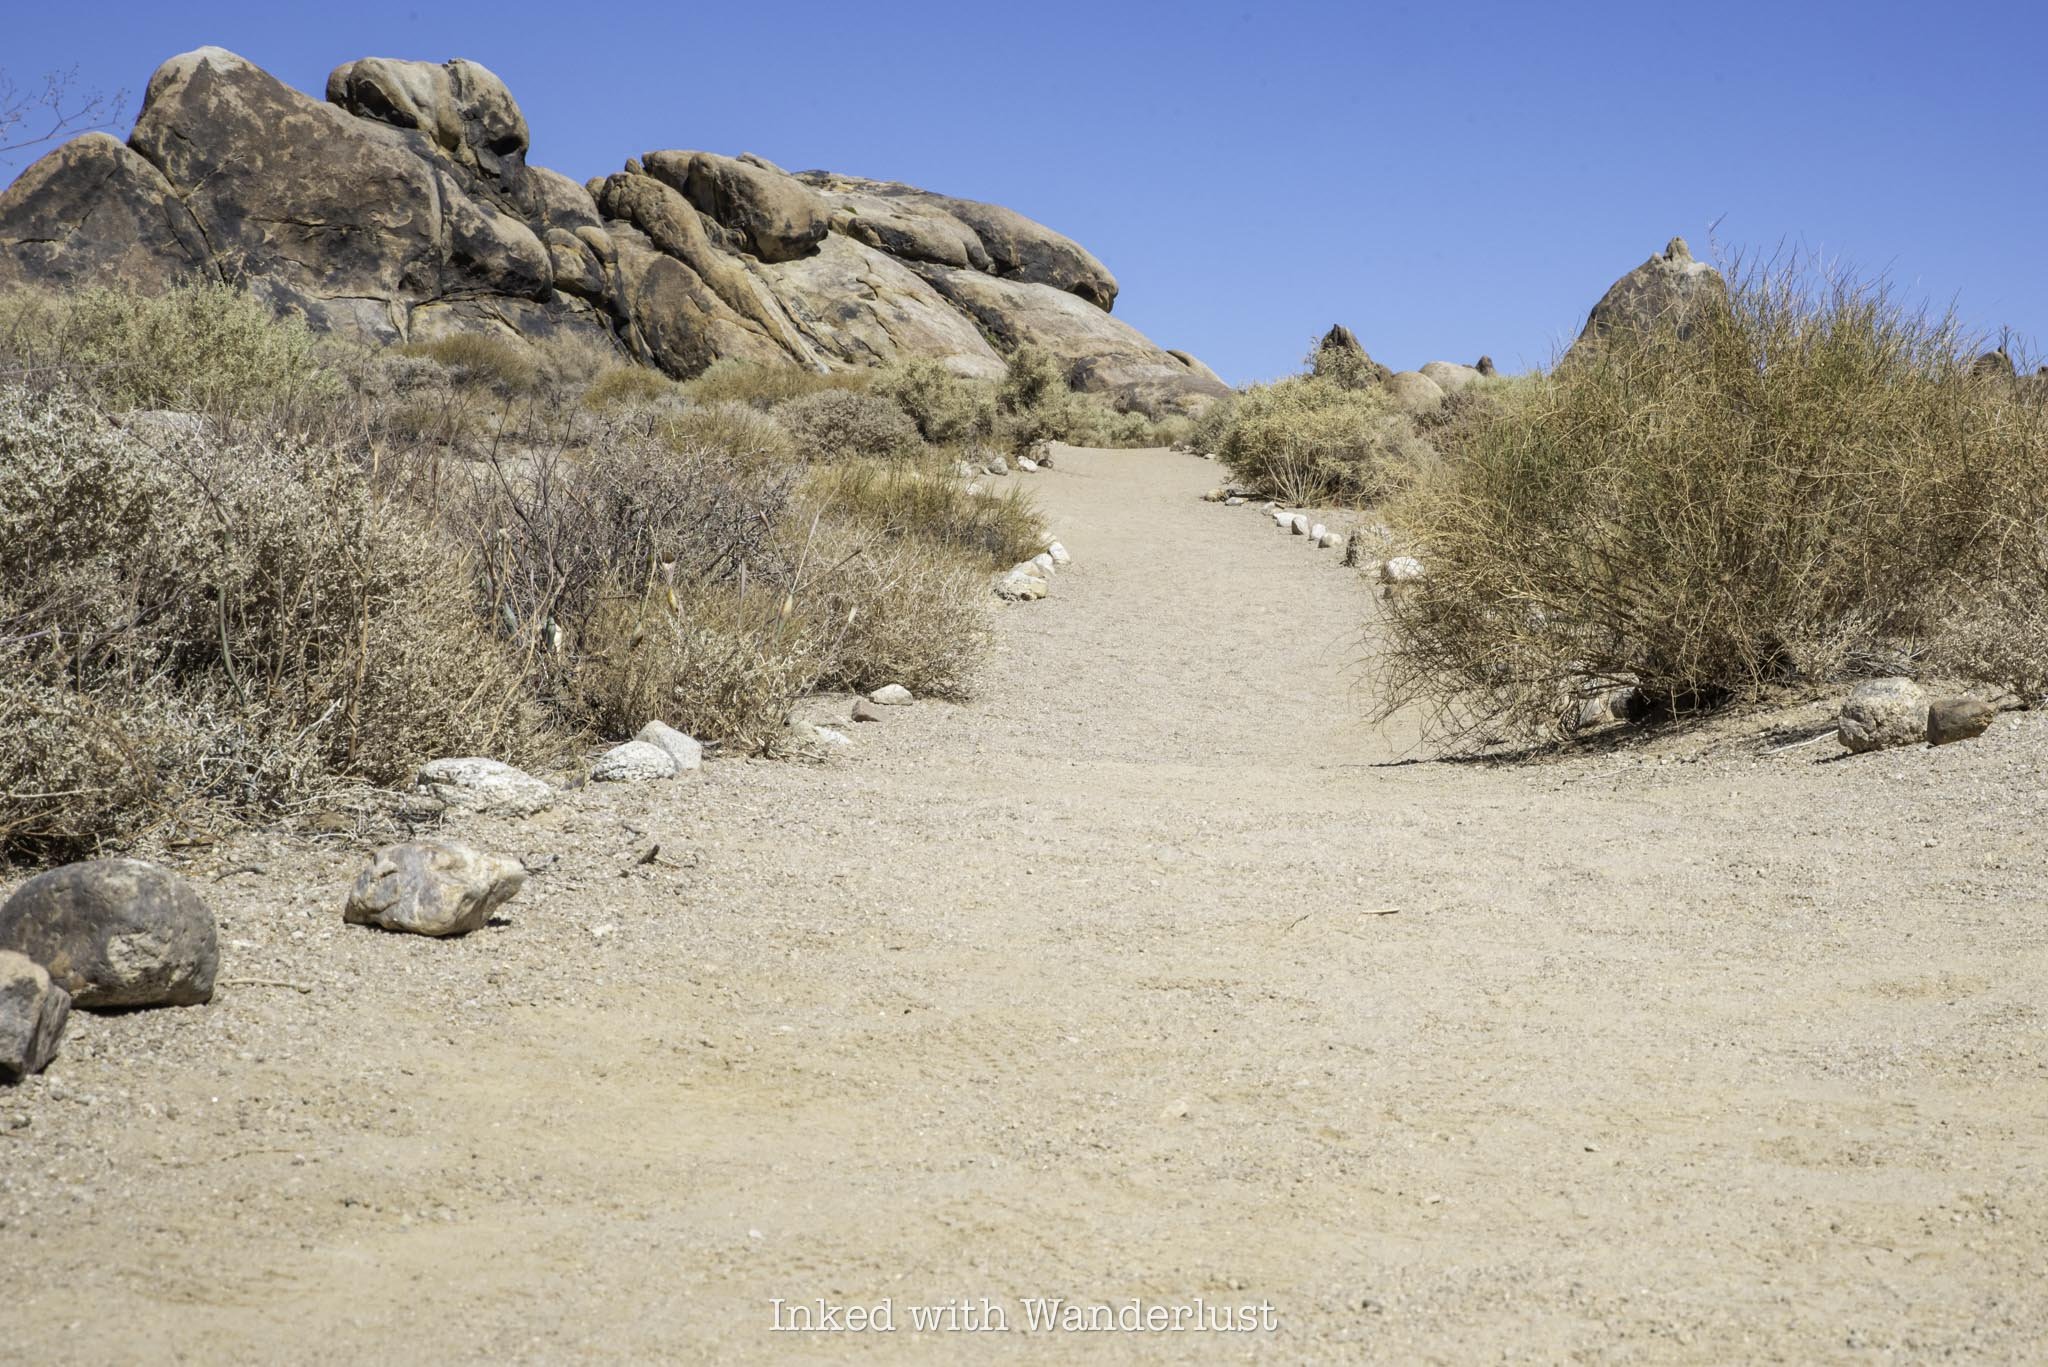
Mobius Arch Loop Trail
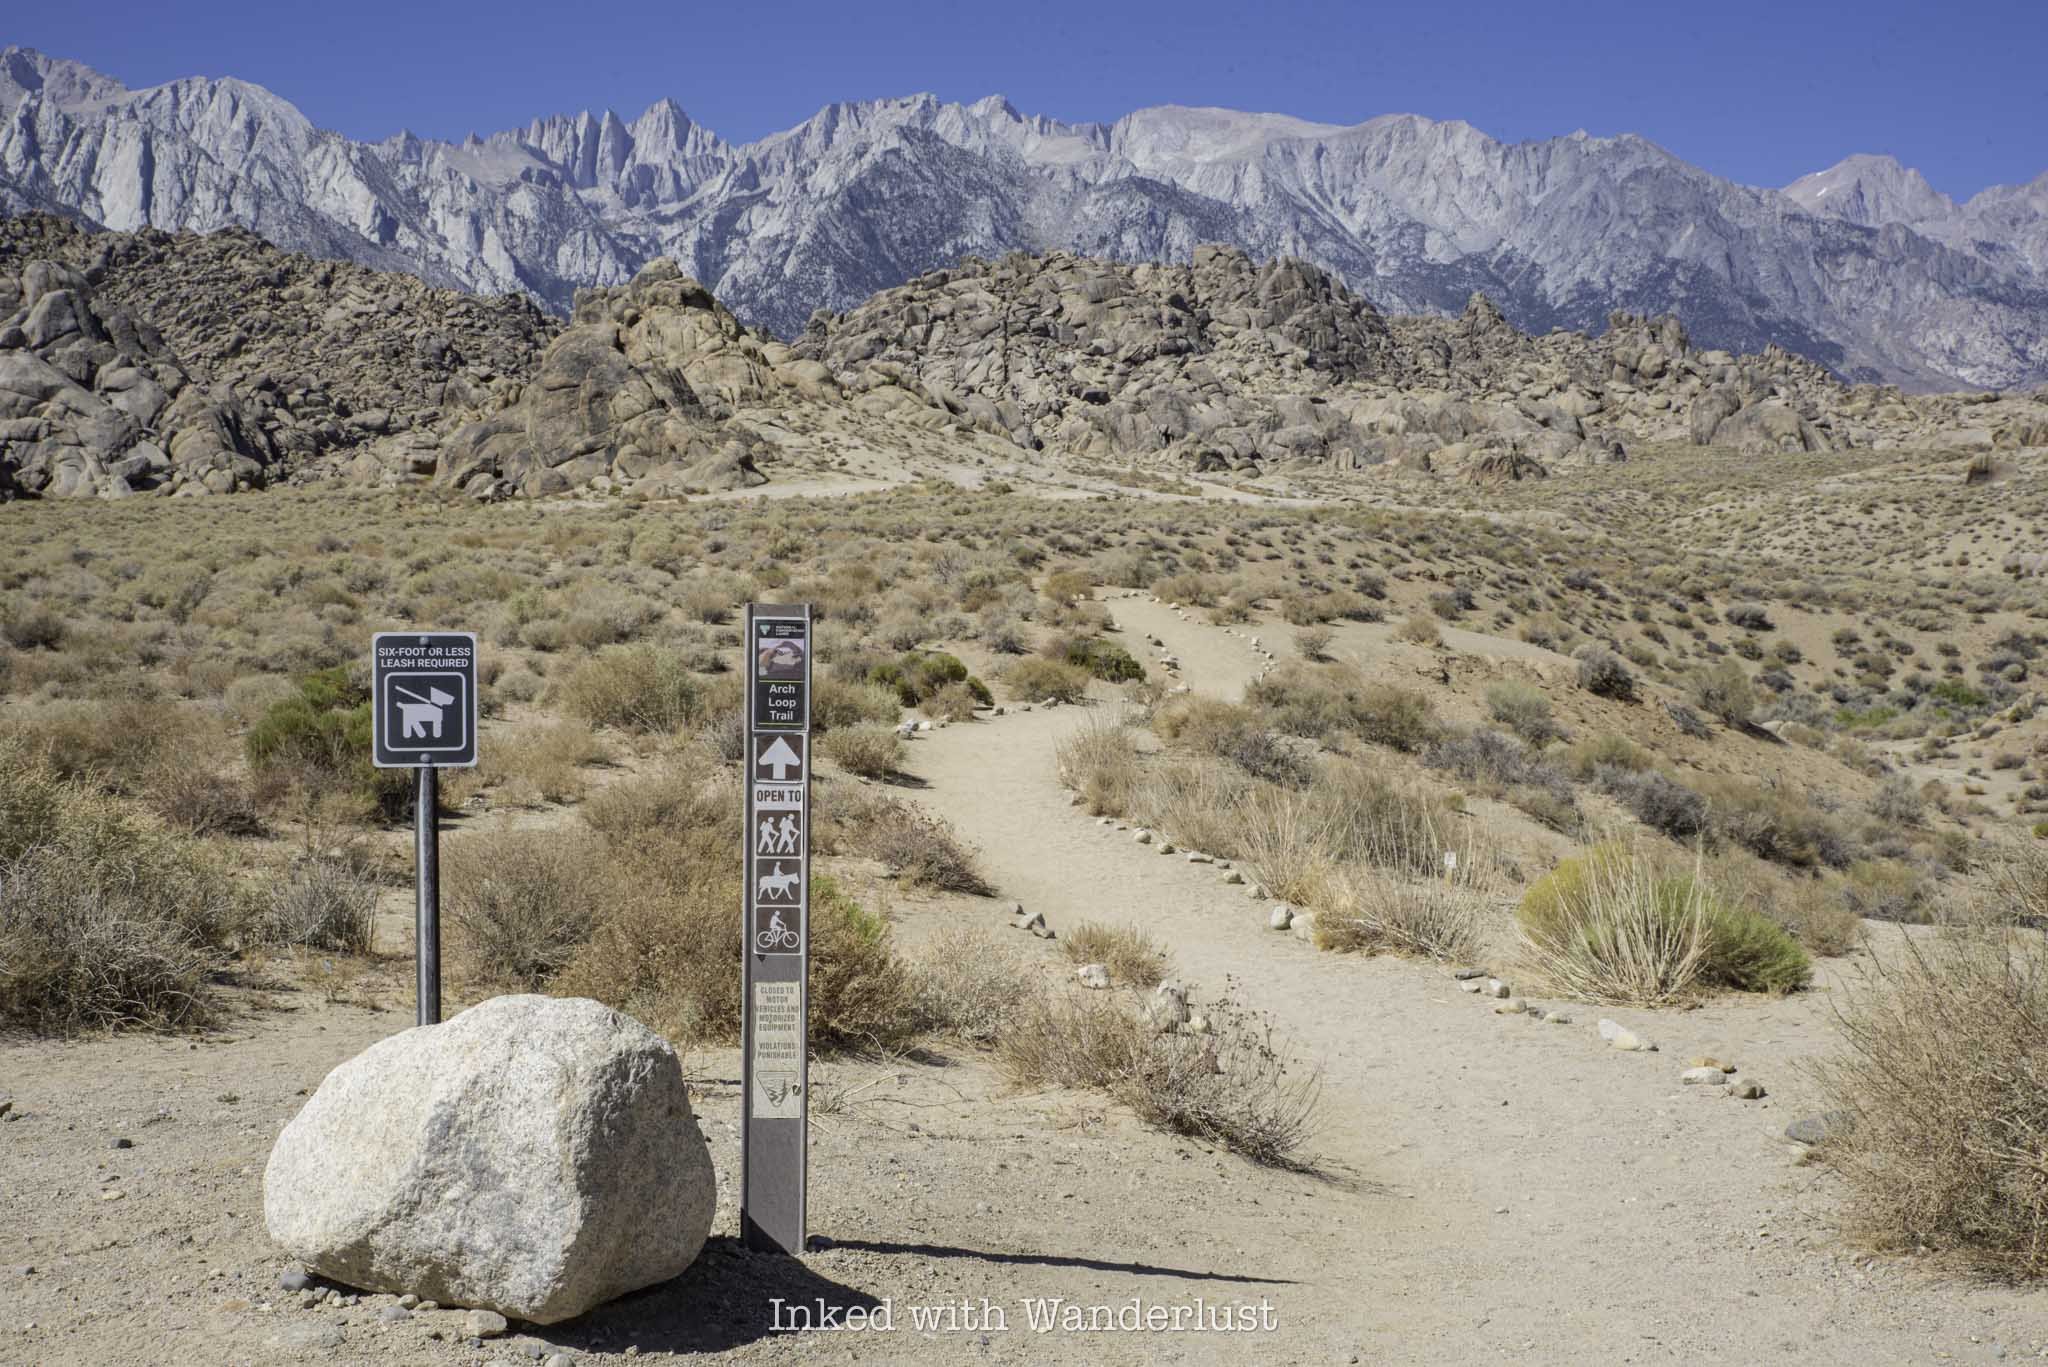
The trail is easy to follow as it’s mostly free of debris and lined with rocks, making the pathway obvious. It begins with one of only two elevation changes along the entire trail by descending a small hill to a dried creek bed. Once you pass that, you’ll start ascending to the arch.
You’ll only gain a meager 42-feet of elevation throughout this hike so while it isn’t completely flat, it’s easy for nearly anyone. I’ve seen kids, their grandparents, and grown adults in sandals (not recommended, though) on this trail. If your dog is with you, you can bring them as long as they’re leashed or otherwise controlled.

It was a bit too warm for our dog to walk, so my wife put her into this pouch/sling we got from Amazon. She’s a small dog and fit into it perfectly. It allowed her to come with us on the hike and avoided her paws getting burned. If you have a small dog and are interested, you can find it here.
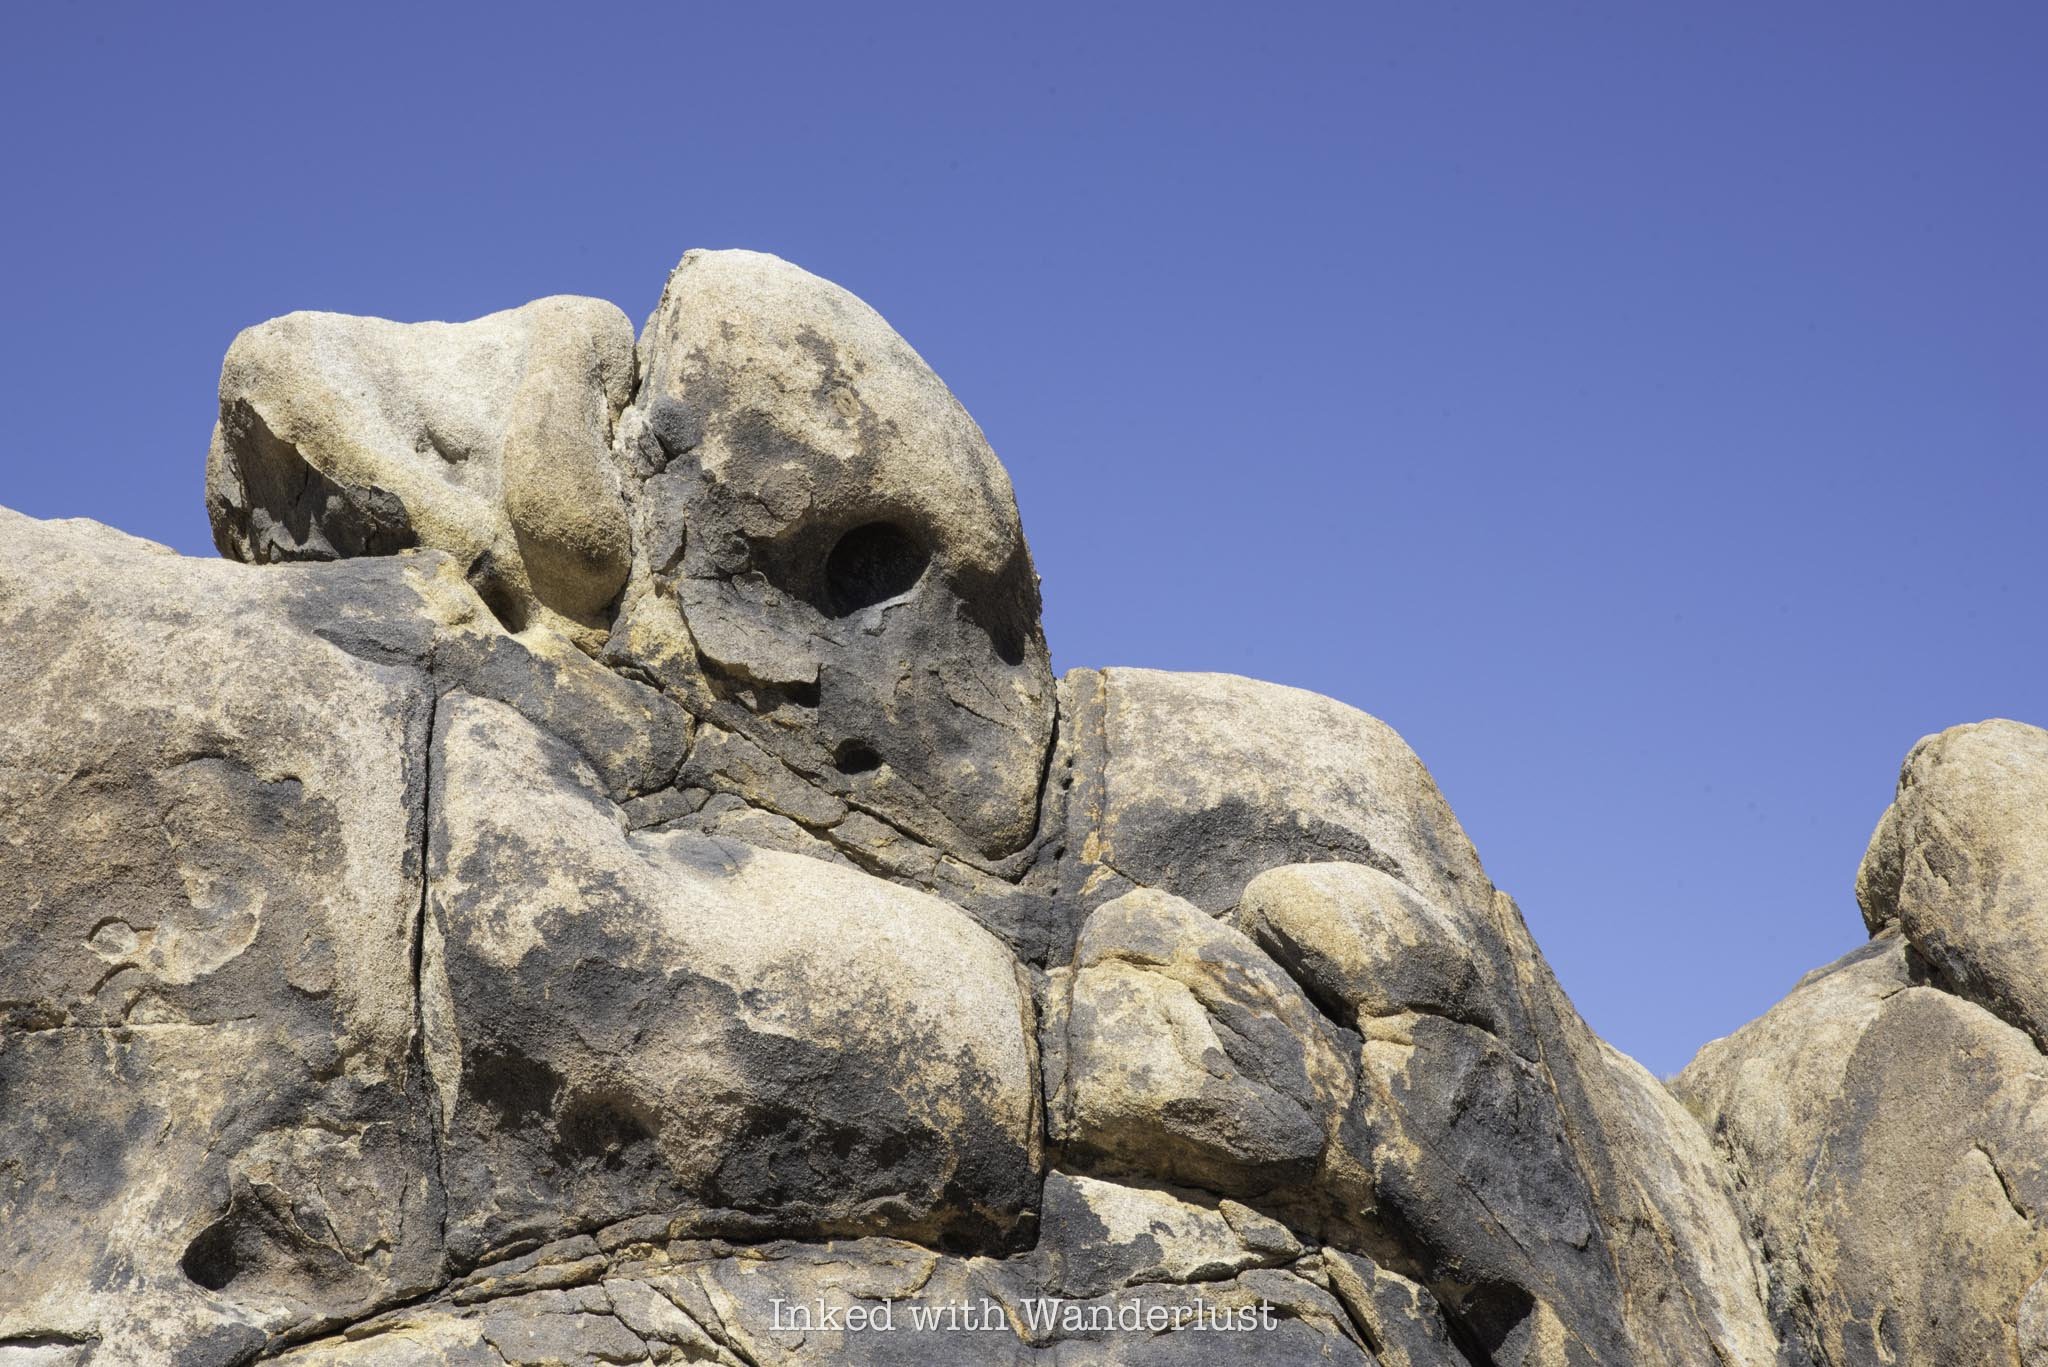
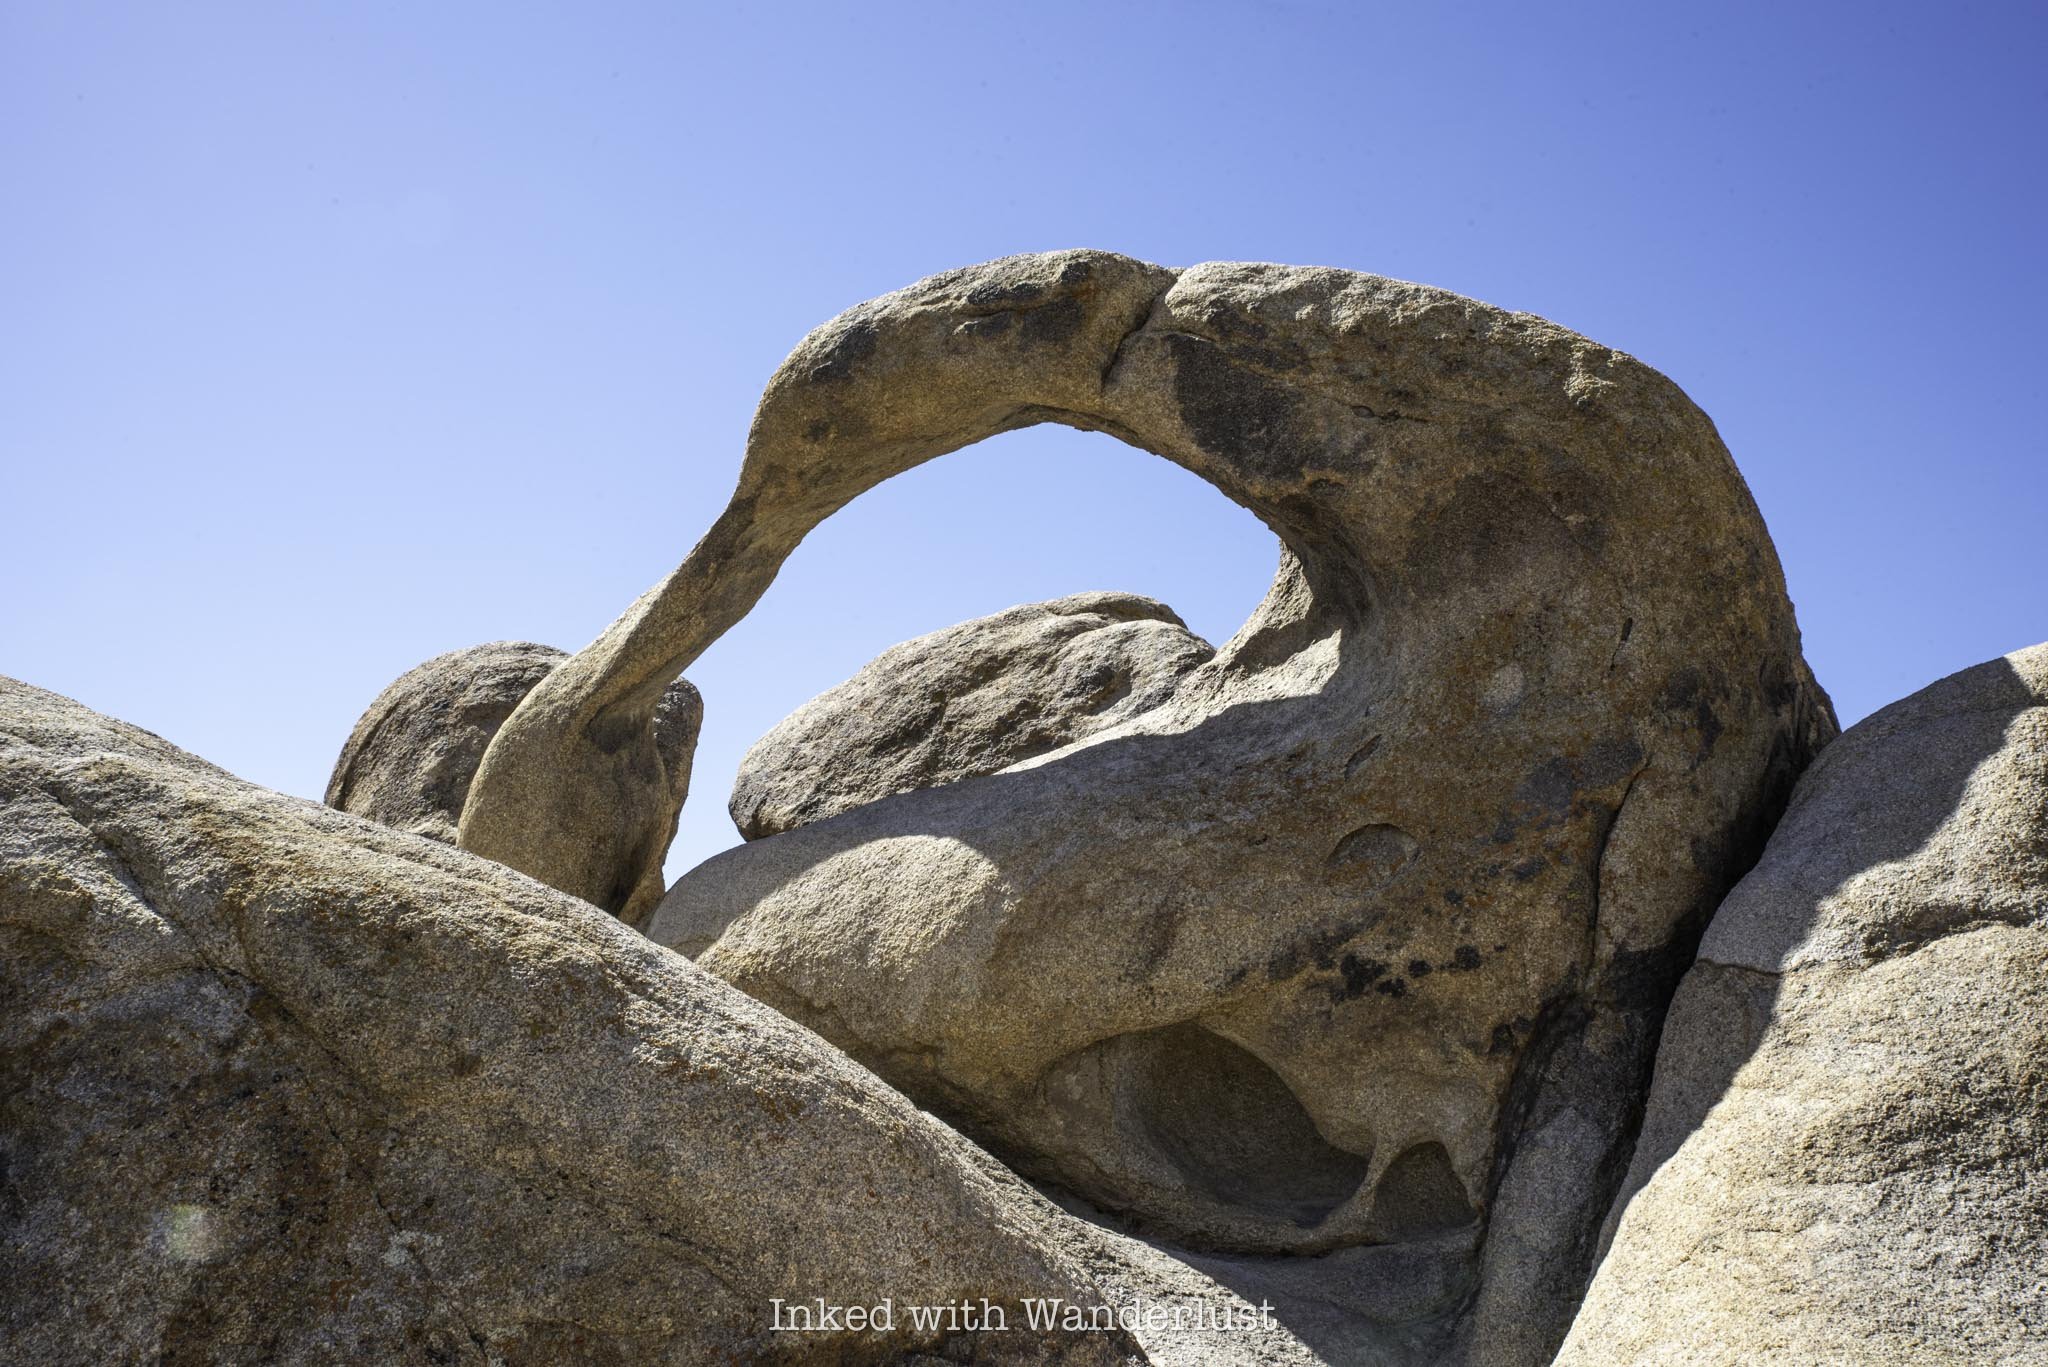
Mobius Arch is situated at around the halfway point of the trail. If you don’t make stops, you should reach it within ten minutes of starting the trail. In fact, look for the rock that looks like a skull on your left (pictured below). You’ll come upon Mobius Arch (on your right) shortly after passing that rock.
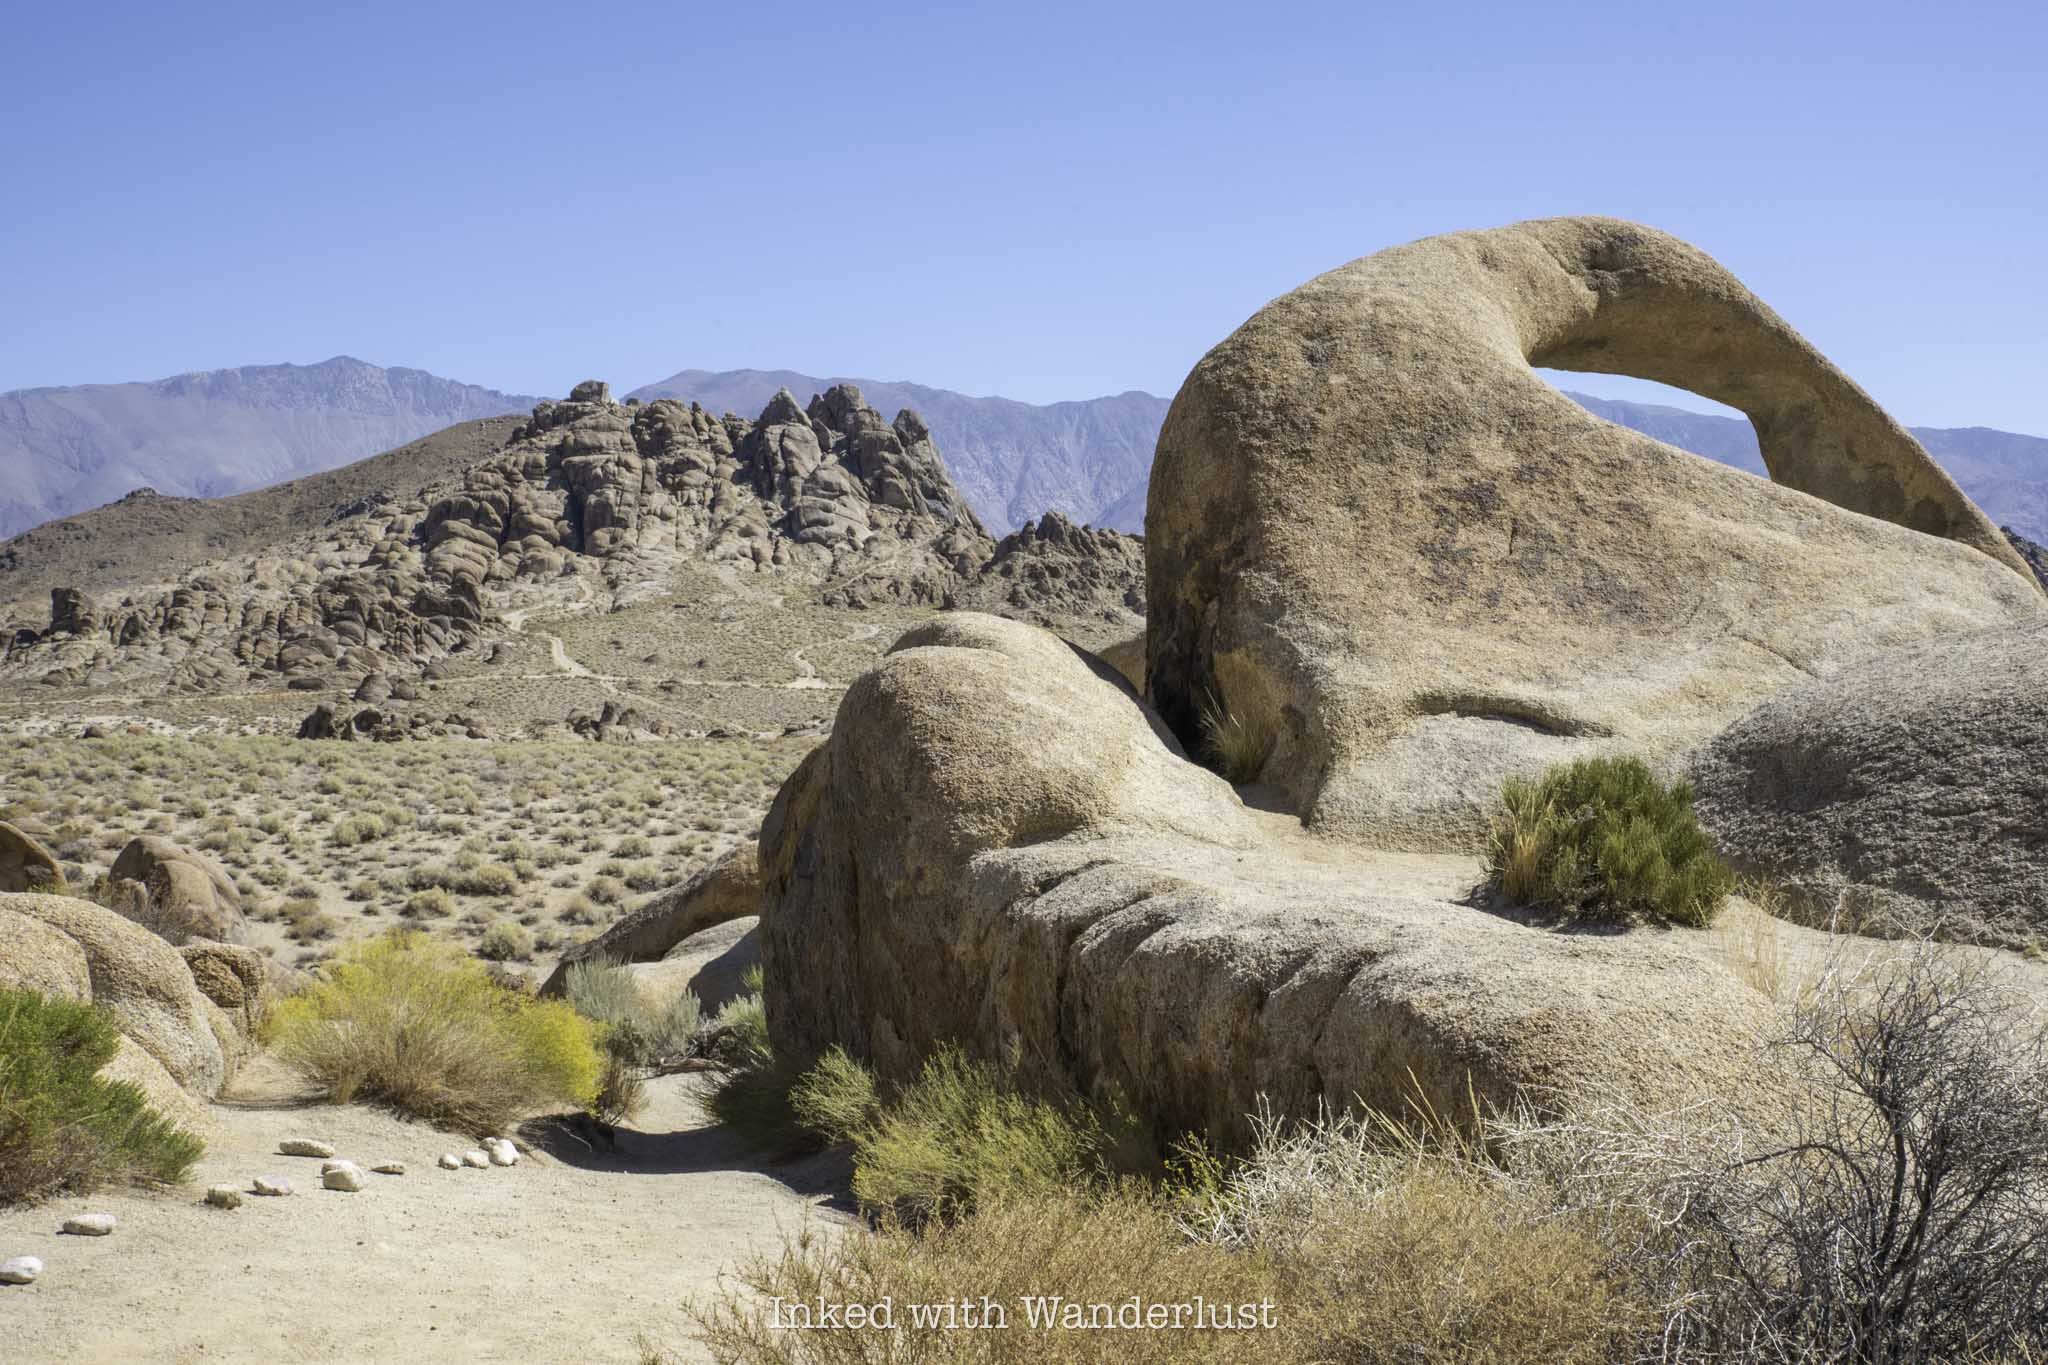
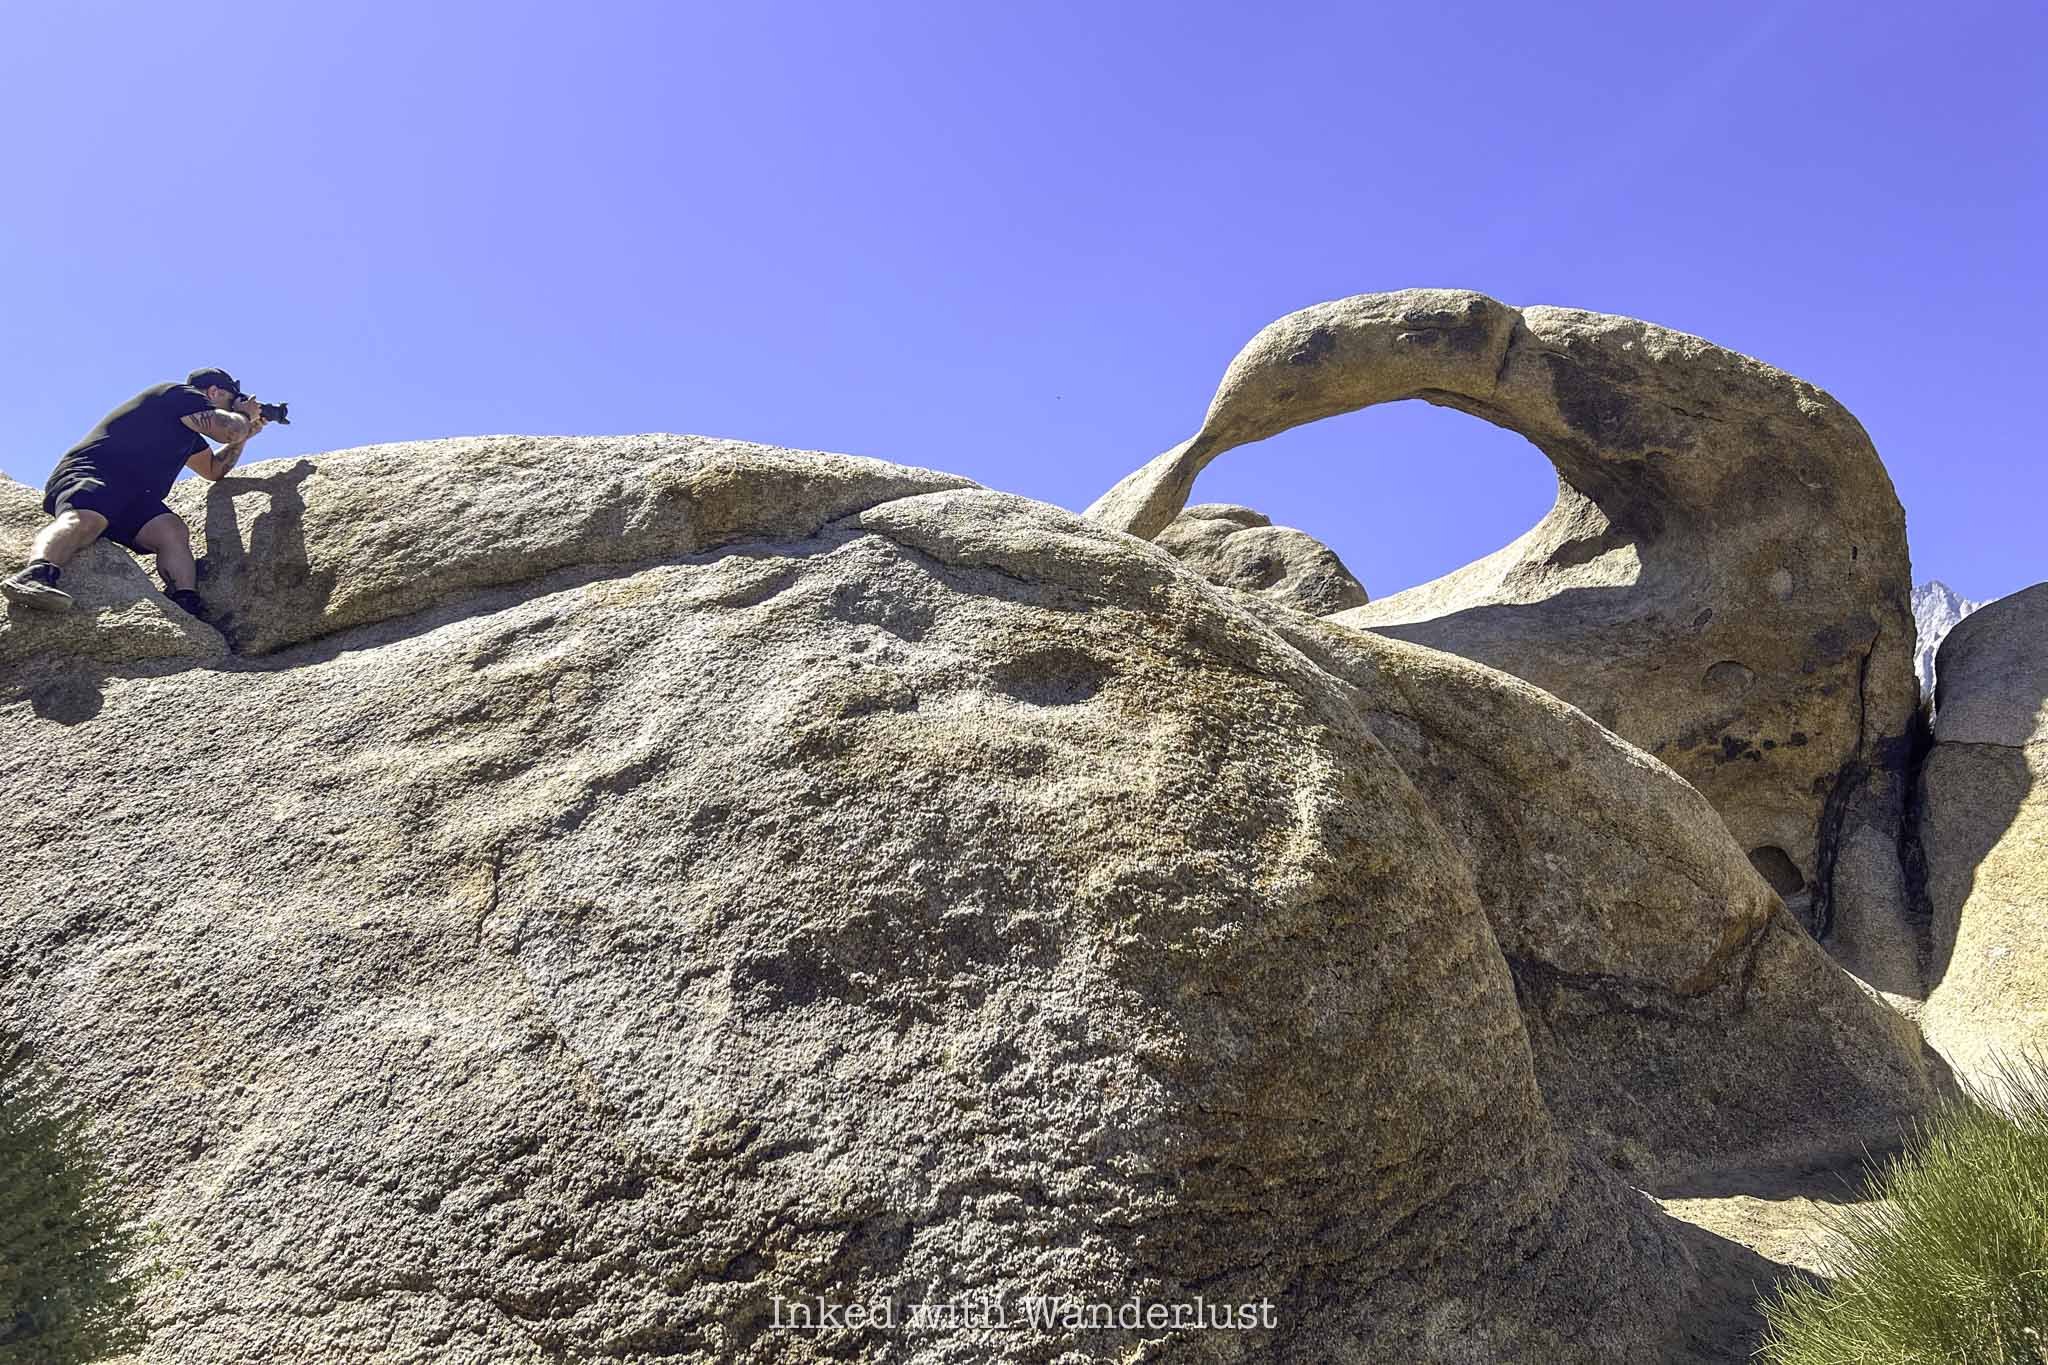
There are many arches in Alabama Hills, but Mobius Arch is the famous one of the bunch, particularly among photographers, for the ability to frame both Mount Whitney or Lone Pine Peak within it to capture creatively stunning photographs.
Even if you’re not into photography, it’s still cool to look at and say you were there. In order to frame Whitney or Lone Pine within the arch, you’ll need to go up the boulder next to it and shoot from there (as you can see in the photo that my wife captured below). You won’t be able to do it from ground level.
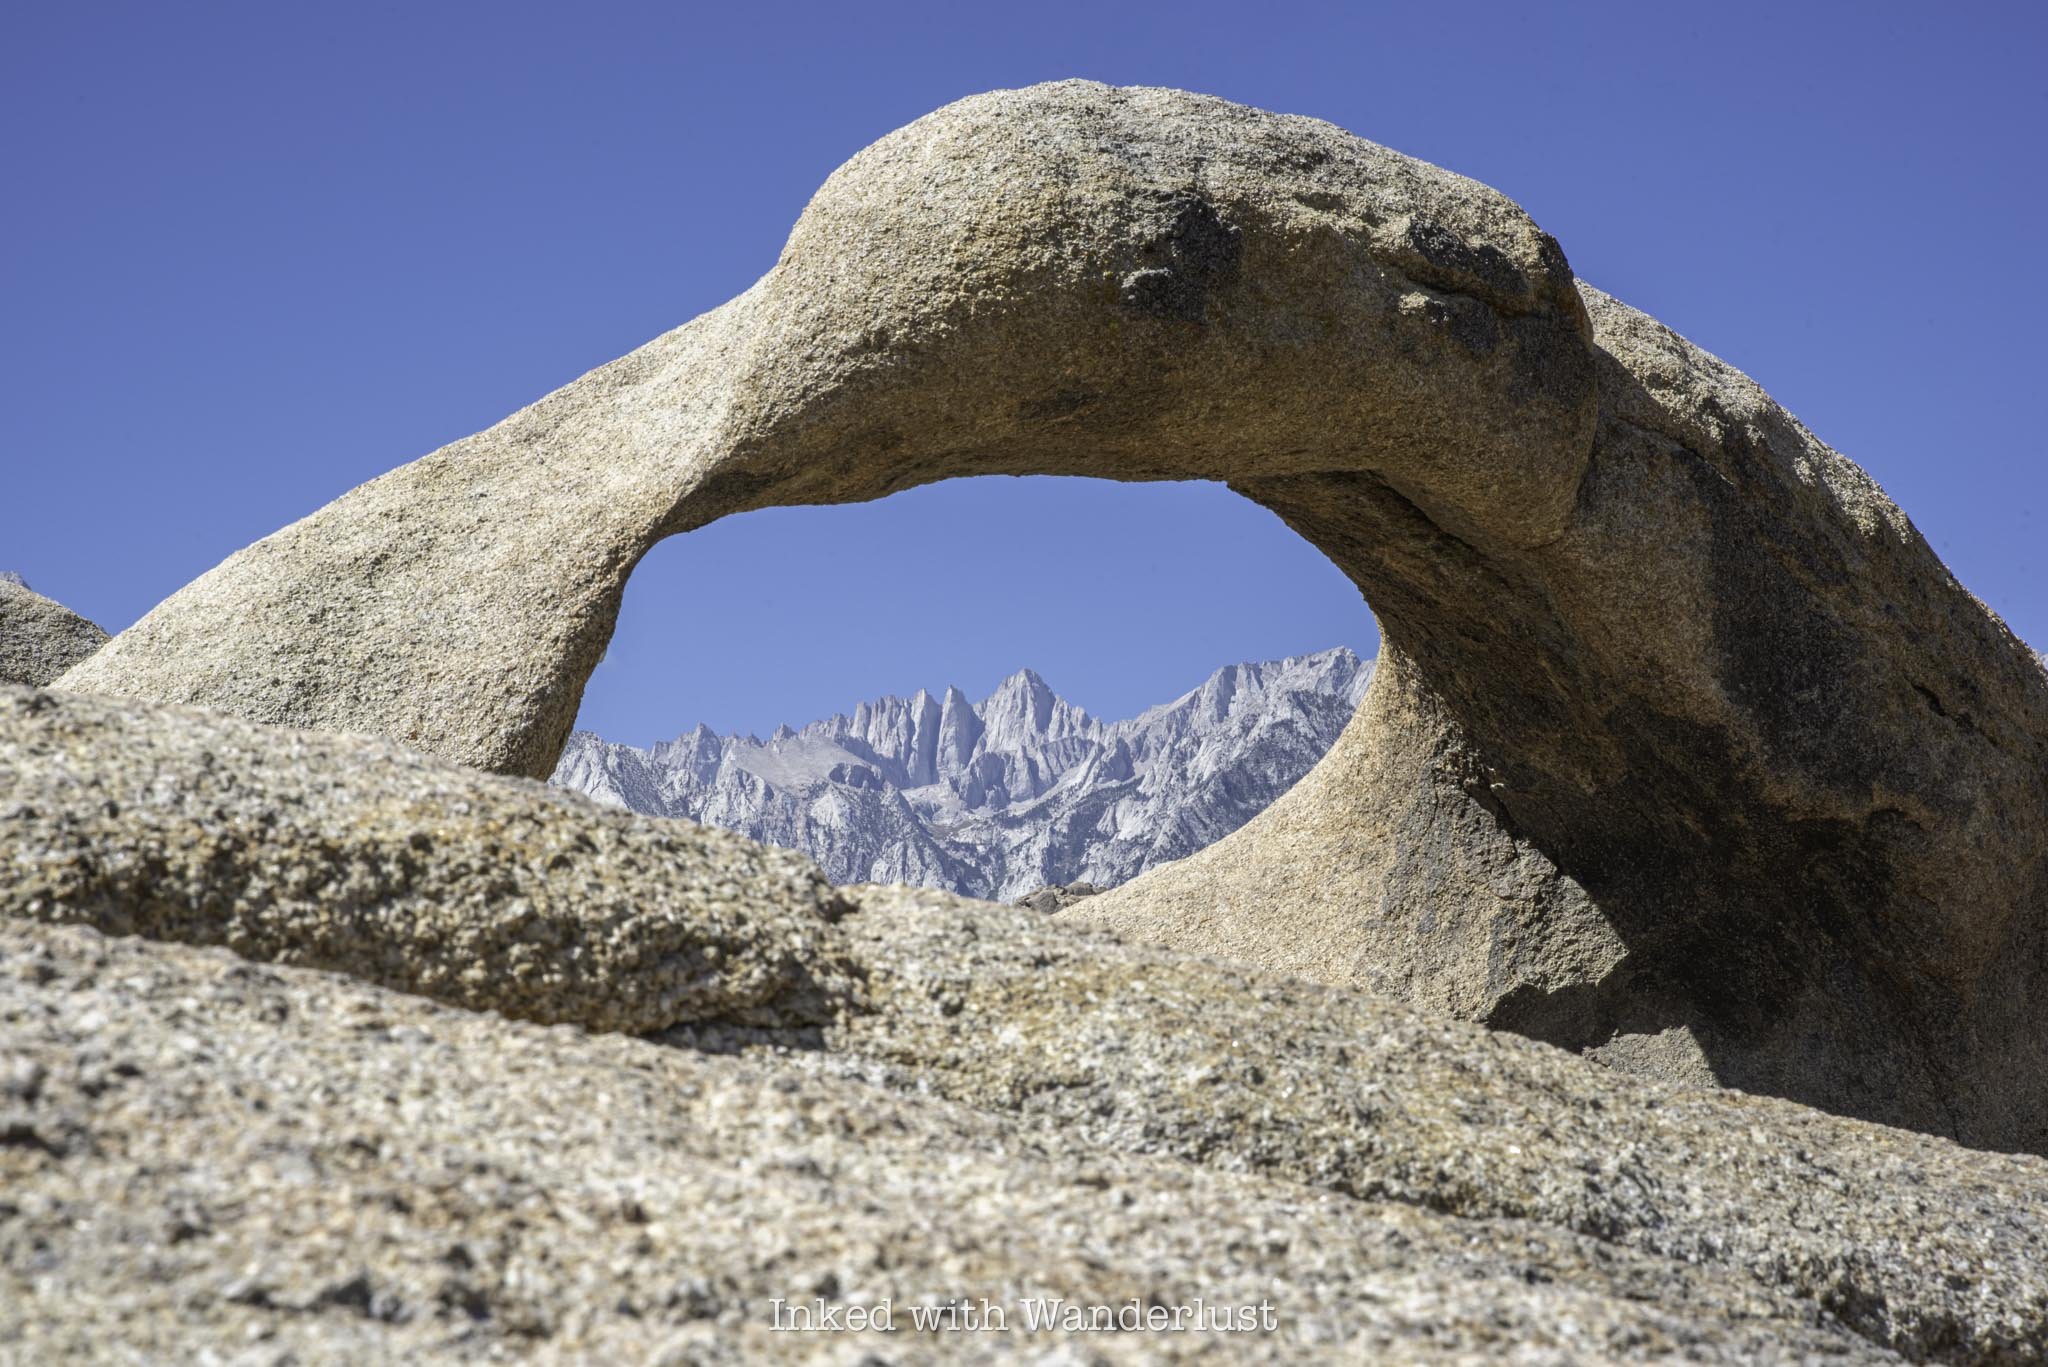
If you’ve never been here before or haven’t seen what Mount Whitney looks like, don’t make the same mistake I did during my first visit in 2017. I framed Lone Pine Peak inside Mobius Arch, thinking it was Whitney, then got humbled later when our waitress at Alabama Hills Cafe advised me I had photographed the wrong mountain.
The peak you see in the photo above is indeed Mount Whitney. The one that appears more prominent from this perspective is Lone Pine Peak. It looks taller and more imposing, but that’s only because Whitney is much further back. Perspective is a crazy thing.
Once you’ve gotten enough photos of the arch, simply continue along the path to complete the loop. You could also opt to return in the same direction you came, but if you did you’d be missing out on some killer landscape and a bonus arch.
Shortly after Mobius is Heart Arch. You can see it in the distance from the parking lot (and honestly, the heart shape is more defined from there), but you can also see it up close along the trail. You’ll soon come to a trail junction after leaving Mobius. To the right will be the continuance of Mobius Arch Loop, up ahead will be Heart Arch.
As stated above, you can see the shape of the heart much better from the parking lot. From up close, it only slightly resembles a heart. It’s still cool to see, though. I’ve heard that there was another arch along this trail, but unfortunately I wasn’t able to locate it.
The remainder of the Mobius Arch Loop is made up of stunning landscapes and fascinating rock/boulder formations. It’s almost like walking through a scene in Star Wars, which is fitting because a scene for a Star Wars movie (among many others) was filmed in Alabama Hills.


Despite there being multiple trail junctions, the trail is easy to follow. For most of the later half of the loop, you’ll have the parking lot within view. Worst case scenario, as long as you keep Mount Whitney and Lone Pine Peak in front of you, you’re fine.
Near the end, you’ll have one final ascent that’ll take you to the parking lot and you’ll be done. This hike is super family friendly, pet friendly and is a great way to stretch your legs during your road trip. I highly recommend checking it out.
Frequent Questions About Alabama Hills

Why do they call it ‘Alabama Hills’?
It was named for a confederate warship, the CSS Alabama (not sure why, but it is what it is)
How many movies were filmed at Alabama Hills?
Alabama Hills has been featured in more than 400 movies, 100 TV show episodes, and countless commercials/ads.
Do you need a 4X4 for Alabama Hills?
For the trail featured in this post, no. However, there are many areas of Alabama Hills where a 4x4 would be needed.
Where is the best place to camp in Alabama Hills?
You can camp at the BLM managed Turtle Creek campground, or take advantage of dispersed camping and set up almost anywhere.
Can you see Mount Whitney from Alabama Hills?
Yes. Mount Whitney is visible from most areas of Alabama Hills.
PSALM 91

Lower Yosemite Falls Hiking Trail
When visiting Yosemite Valley, you’ll immediately take notice of its collective grandeur. Everywhere you look, it’s one amazing sight after...
Disclosure: This post contains affiliate links. If you make a purchase through these links, I may earn a small commission at no additional cost to you. I only recommend products or services that I believe will add value to my readers.
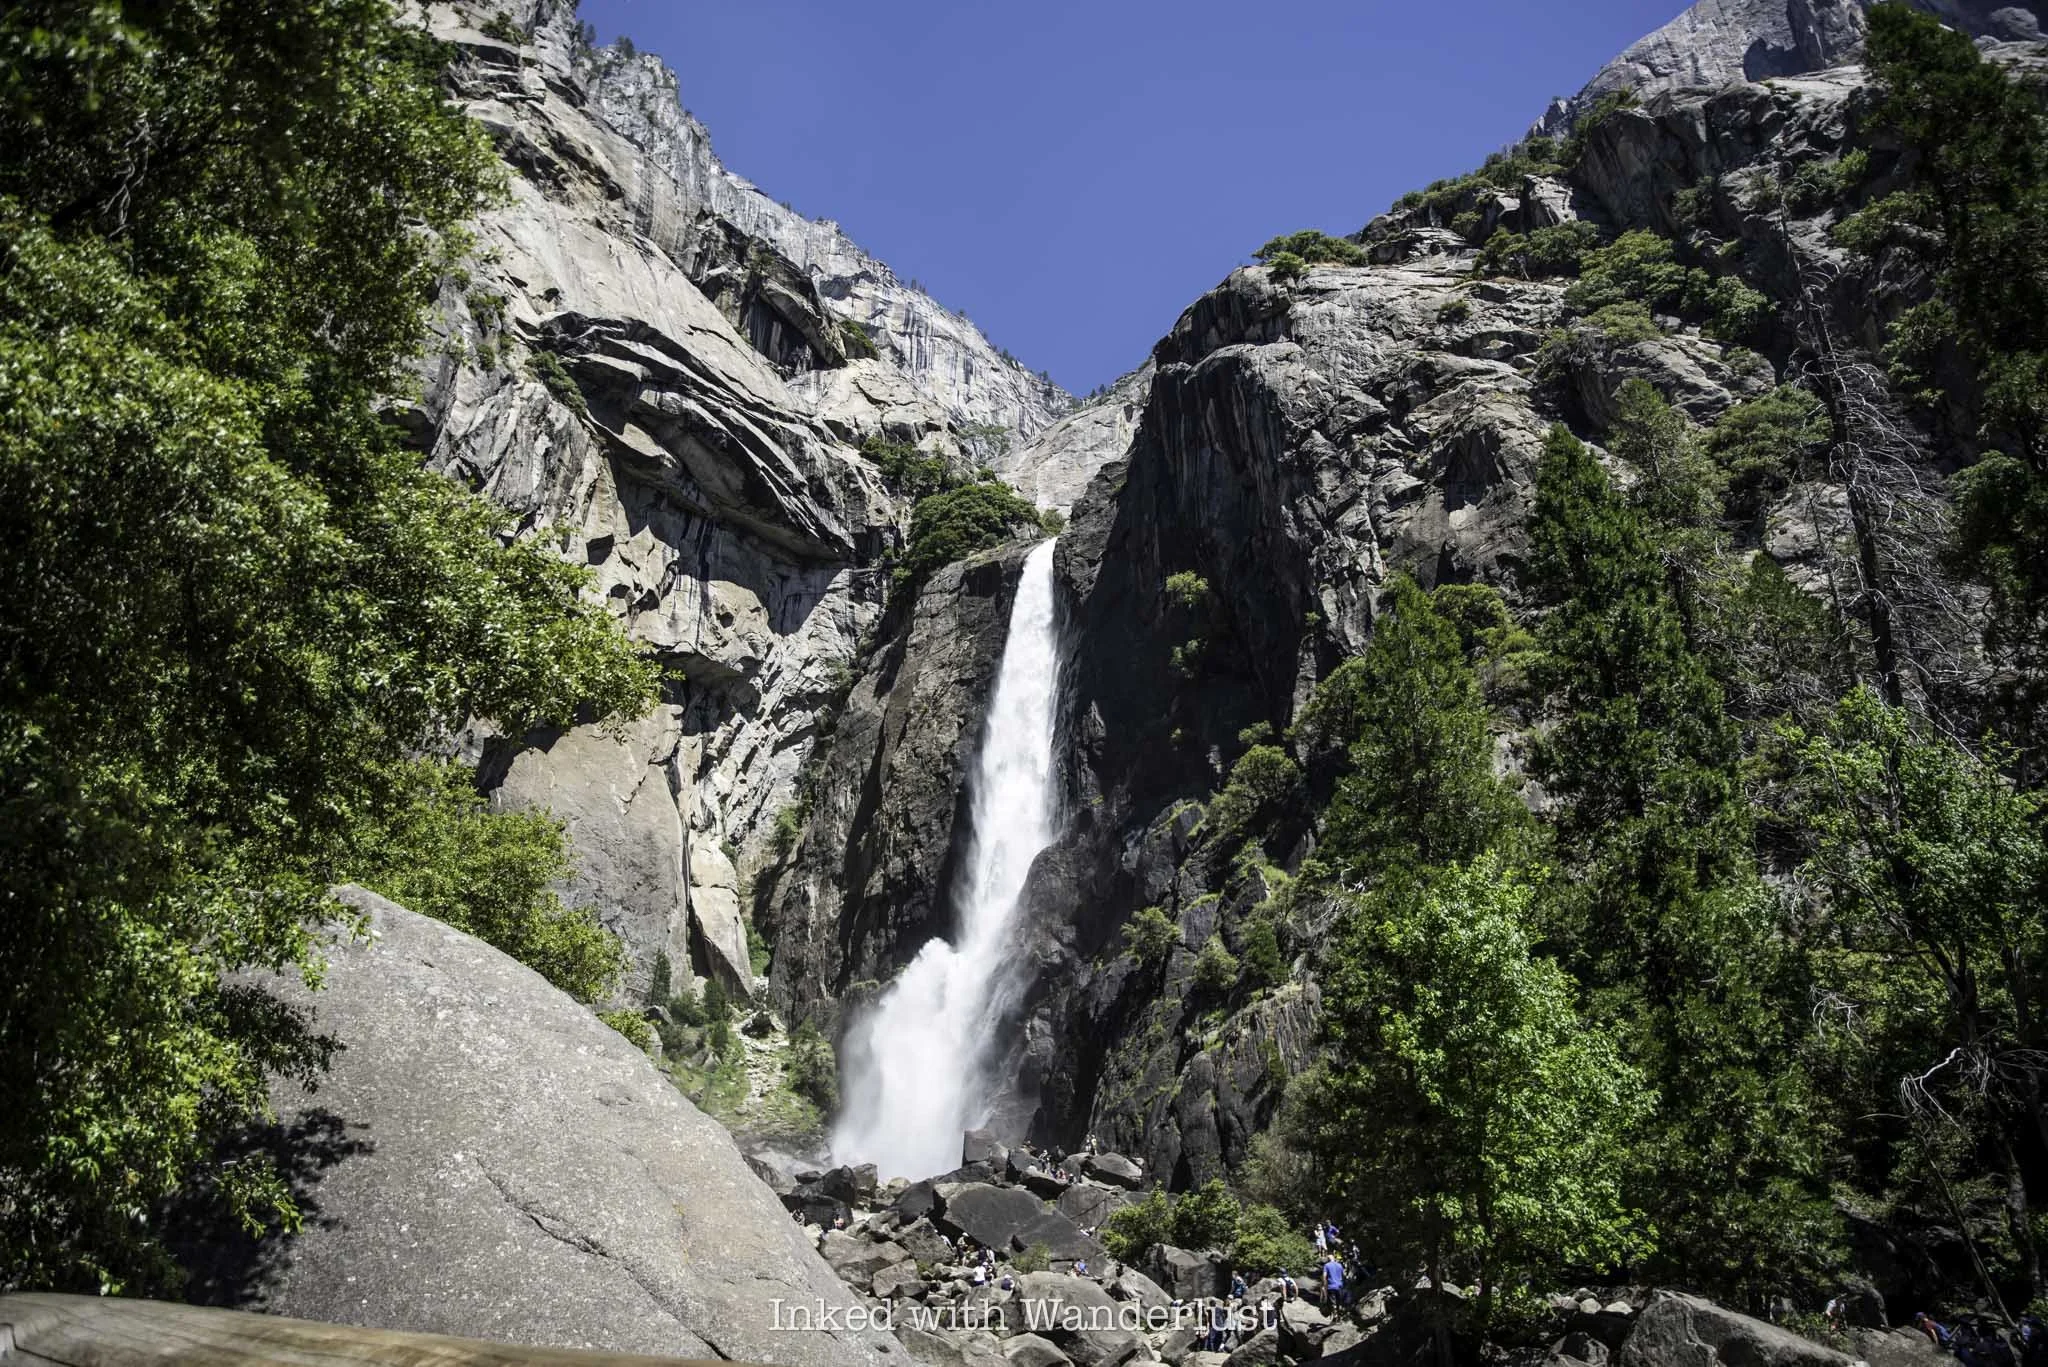
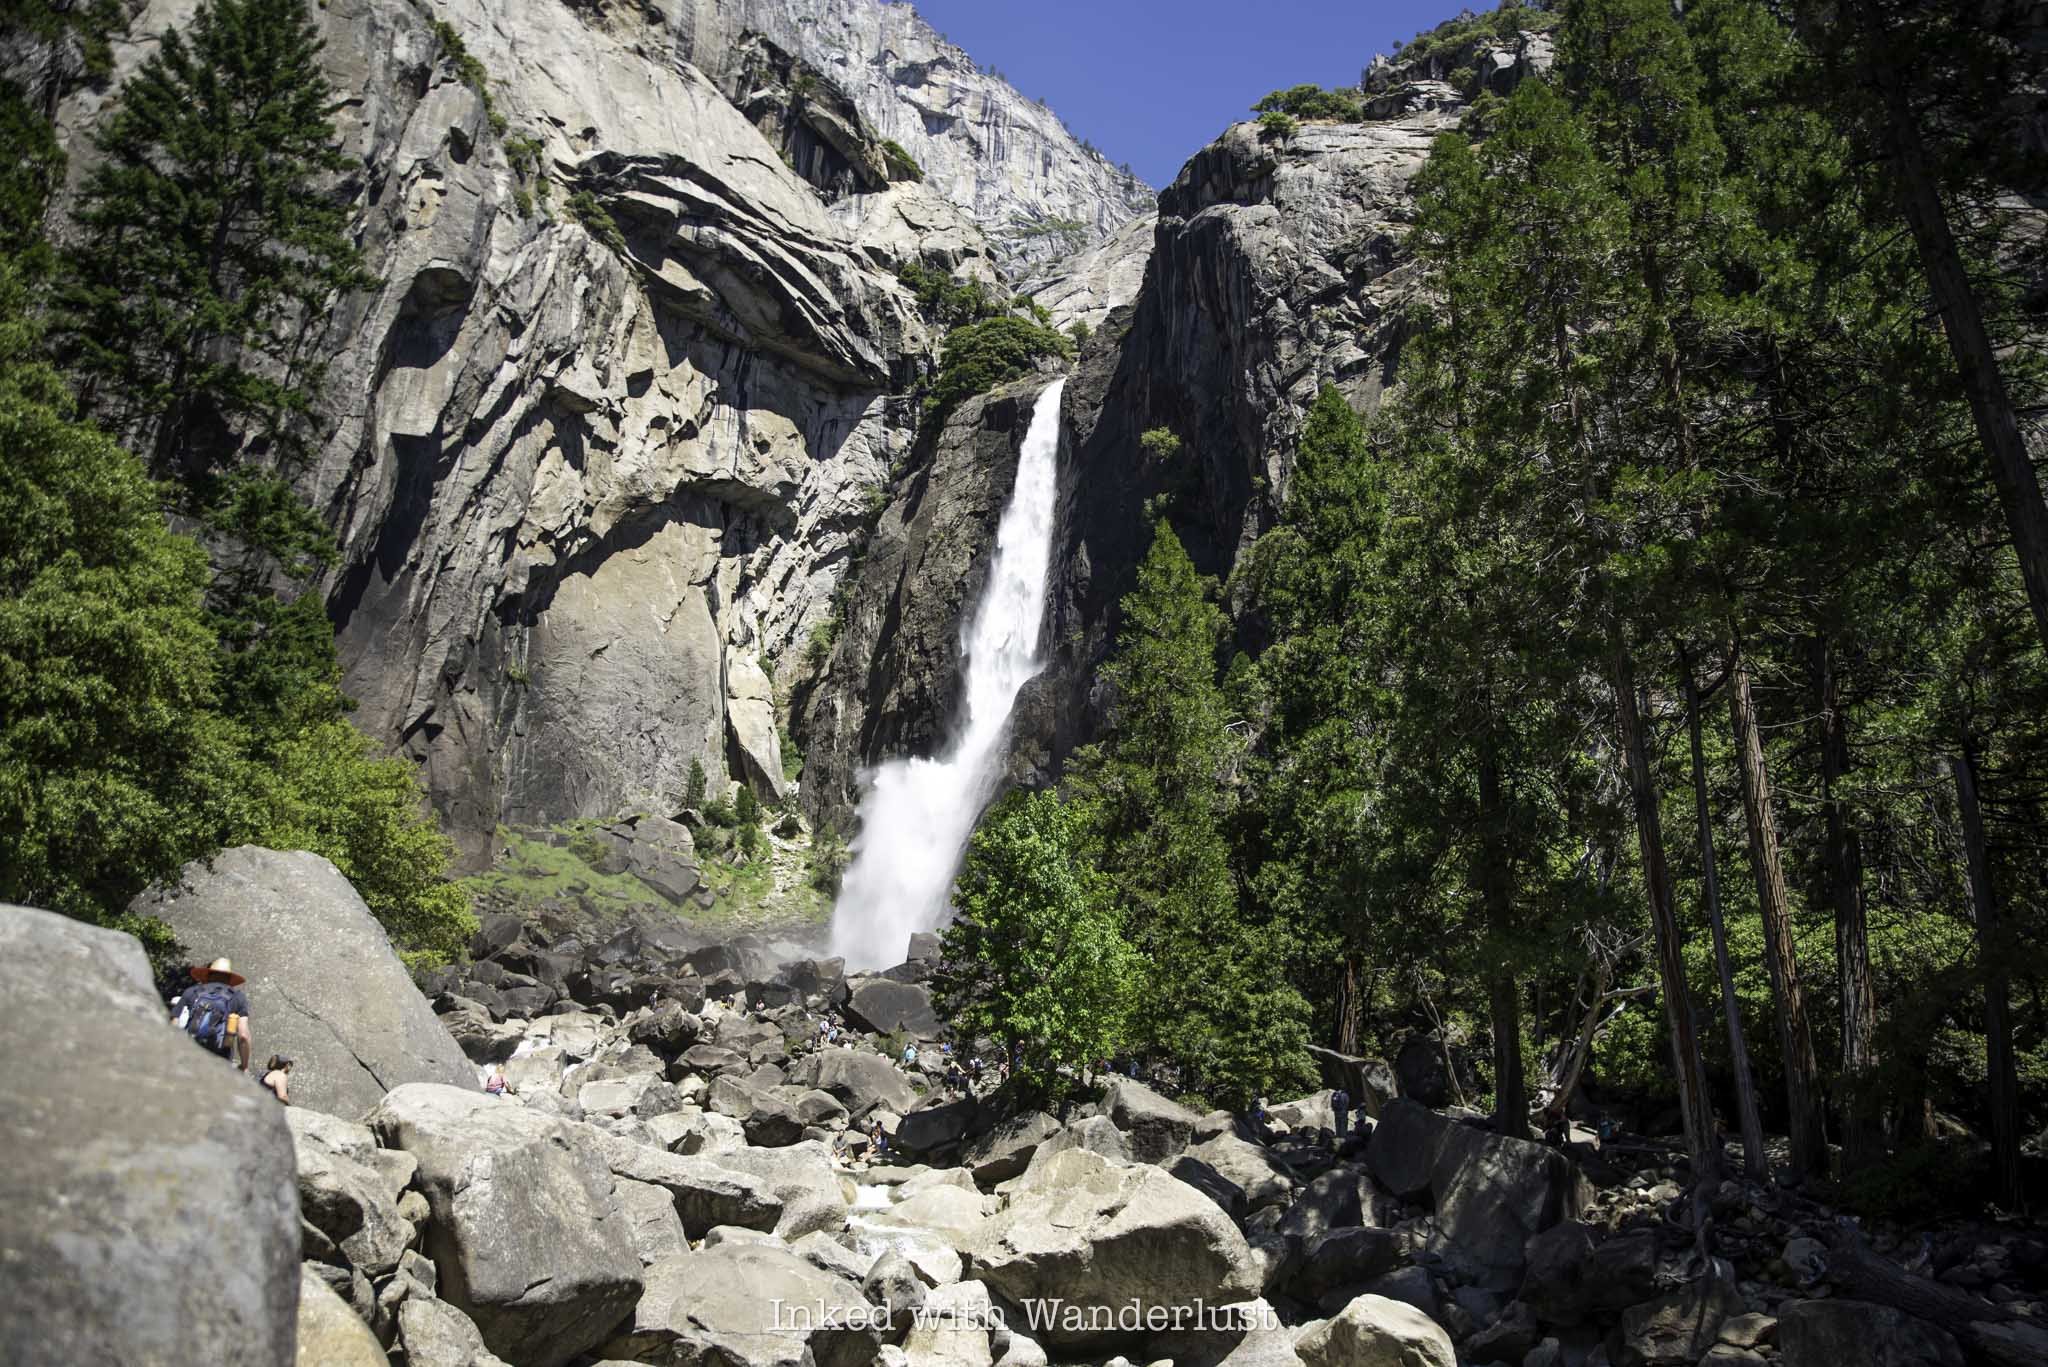
When visiting Yosemite Valley, you’ll immediately take notice of its collective grandeur. Everywhere you look, it’s one amazing sight after another. One of those sights which stand out amongst most is the park’s namesake - Yosemite Falls, the tallest waterfall in North America at 2,425 feet.
When searching for the best things to do in Yosemite Valley, many will point to the Upper Yosemite Falls hike and for good reason. The views from up there are simply incredible. However, it’s a physically demanding, time consuming hike.
For those who don’t have the time (or energy) to tackle the upper falls, and simply want an up-close view of this magnificent waterfall, there’s the Lower Yosemite Falls hiking trail. It’s an excellent option for those just looking to hit up the highlights.
So where do you park to see Yosemite Falls? How long is the trail to the lower portion? Is this trail stroller friendly? I answer all of these questions and more in the post below.
Trail Stats
Location: Yosemite Valley, California
Fee: Standard park entry fee (currently $35)
Open: All year
Cell Service: Decent, but can be spotty
Restroom: Semi-large structure with flush toilets at the trailhead
Parking: Large day-use lot east of Yosemite Valley Lodge
EV Stations: Rivian Waypoint stations in the Yosemite Valley Lodge lot
Difficulty: Easy
Popularity: Mega high
Mileage: One mile for the whole loop
Time: Less than one hour
Elevation Gain: 55 feet
Condition: Well maintained
Features: Lower portion of Yosemite Falls
Best Viewed: November - June (peak flow in May)
Pets: Allowed, but must be leashed
Drones: Prohibited
Hazards: Wildlife encounters are possible, as well as slippery rocks around the waterfall (off trail)
My Visit(s): 2015, 2020, 2021 and 2024
Lower Yosemite Falls Parking

Much like the rest of Yosemite Valley, finding parking for Yosemite Falls can be quite the hassle. It’s for this reason I always encourage people to utilize the free Yosemite Valley Shuttle. It makes multiple stops at most of the valley highlights and is easy to use.
However, if you insist on using your own vehicle to get around, you’ll find parking for Yosemite Falls (either the upper or lower trails) in the lot east of Yosemite Valley Lodge, just a bit further down Northside Drive.
To get to the trailhead from here, you can, in theory, walk along Northside Drive but I don’t recommend it. The best (and safest) ways to reach it are to either cross the street and take the trail that cuts through Camp 4 or take the trail through Yosemite Valley Lodge and then cross the street to the trailhead.
Either way, you’re looking at a (roughly) half a mile walk to the trailhead, one way. I’d be remiss if I didn’t mention the parking lot directly across the street. I’m not encouraging you to park there as that area is typically reserved for hotel guests, but it is there. So do with that what you will.
Again, I’m going to strongly encourage you to utilize the shuttle. Park your vehicle at either Curry Village or Yosemite Village and hop on. Be sure you’re taking the valley-wide shuttle and not the east valley one. Shuttle service begins at 7am and ends at 10pm and again, it is free. The stop you’ll use for Yosemite Falls is #6.
Lower Yosemite Falls Trail

Both the trail to the base of the falls, and the conjoining loop, are paved paths with virtually no elevation gain to speak of. They’re also wheelchair and stroller accessible, making it an ideal outing for the entire family.
To the right of the trailhead is a semi-large structure with flushable toilets, water bootle refill stations and an array of unshaded picnic tables. It’s busy here quite often so if you’re looking to enjoy a quiet picnic, this isn’t it.
The lower section of Yosemite Falls is on full display in front of you at the trailhead so to continue, simply head straight for it and follow the path. If you’re here during the busy summer season, get here early in the morning and you’ll likely have it (mostly) to yourself.
About a quarter mile after starting, the trail will veer to the right and you’ll arrive to the base of the falls. As stated above, if you’re here in the early morning, you’ll likely only encounter a few others. After that, though, the crowds will be sizable. So pack your patience.
With few exceptions, don’t expect to see water flowing past June. Every so often there’s still flow into July, but it’s rare. If you want to see Yosemite Falls at its fullest, I recommend visiting no later than May. Once you get into July and August, the falls are all but dried up for the season.
If you feel inclined, you can boulder-hop your way to a closer view of the falls. I’m assuming Yosemite doesn’t prohibit this, as many were doing it and the ranger that was there didn’t seem to mind. Be careful, though. Those granite rocks are notoriously slick.


Most people stop here and head back the same way they came. For a more tranquil experience, traverse over Yosemite Creek via the wooden bridge and continue on the loop trail. Here, you’ll walk through a cluster of tall redwoods, which provide much needed shade. You’ll also get continued views of Yosemite Falls.
This segment of the trail was a virtual ghost town compared to what I experienced on the other side and at the base. Definitely don’t skip the other half of the loop. If nothing else, it’s a relatively peaceful escape from the crowds.
Shortly after crossing the bridge, you’ll come to a massive granite rock. There’s nothing inherently special about it that I was able to determine, but it’s crazy to think how loud of a noise that thing caused when it slammed into the valley floor all those years ago.

Shortly after the big rock, you’ll reach a segment of the trail that transitions from pavement to a wooden boardwalk. I asked about this and was told it’s because early in the season, there’s often runoff from Yosemite Creek and the boardwalk allows the runoff to flow while enabling visitors to still enjoy the trail.
In between the boardwalks there’s a small detour you can take for a view of the falls. Look for a small sign stating “falls view”. You’ll come to the view shortly after taking the detour. The view from here isn’t all that unique, but it’s still worth checking out since the detour only takes a few minutes.
If you’ve taken the shuttle to Lower Yosemite Falls, you’ll find shuttle stop #6 prior to the end of the loop, along Northside Drive to the left of the trail. Otherwise, continue on the loop to reach the trailhead, and continue to your vehicle.
Lower Yosemite Falls Common Questions

What is the difference between Upper and Lower Yosemite Falls?
Yosemite Falls is comprised of three parts - the lower falls, middle cascade and the upper falls. Together, they create Yosemite Falls. The upper portion is 1,430 feet tall while the lower portion stands at 320 feet. When adding in the middle cascade, the waterfall’s total height is 2,425 feet.
How long does it take to hike Lower Yosemite Falls?
That all depends on your fitness level and walking stride but generally, I would say less than one hour (including time spent at the base).
Is the Yosemite Falls hike hard?
The lower loop trail? No. It’s easy. If you’ve heard someone referring to this hike as hard, they were referring to the Upper Yosemite Falls hike which is a hard, physically demanding hike.
Do you need a reservation for Yosemite Falls?
Not for the falls itself but dependent on when you visit, you may need a day-use reservation to enter Yosemite.
Can you see Yosemite Falls without hiking?
You won’t be able to see the base but yes, there are many points throughout the park where you can see Yosemite Falls without hiking. A few include from the trailhead of this hike, Cook’s Meadow and Glacier Point.
Can you see Yosemite Falls from Tunnel View?
No, you cannot see it from Tunnel View.
When is Yosemite Falls dry?
Yosemite Falls typically begins to dry up around late June or early July. By late July, all you’ll be looking at is a smooth granite surface. If you want to see Yosemite Falls, plan you visit for between November to June. May is the falls’ peak flow time. If Yosemite Falls is dry during your visit, you can still see Bridalveil Falls, which flows all year.
PSALM 121:8


10 Amazing Things To Do On Yosemite’s East Side
It still surprises me how many people are completely unaware that there’s much more to Yosemite beyond the valley. Yes, the valley is littered with amazing sights. Tunnel View, Yosemite Falls, Half Dome, and...
Disclosure: This post contains affiliate links. If you make a purchase through these links, I may earn a small commission at no additional cost to you. I only recommend products or services that I believe will add value to my readers.

It still surprises me how many people are completely unaware that there’s much more to Yosemite than the valley. Don’t get me wrong, the valley is literally dotted with amazing sights like Tunnel View, Yosemite Falls, Half Dome, and the Mist Trail, so there’s no shame in spending your vacation there.
However, I put this list together to persuade you to include a visit to the east side of Yosemite during your visit. Many of the main sights can be seen in a single day, but if you want to include a few of the hiking trails (and you should), you’ll want to set aside at least two days.
This list was made with families and casual hikers in mind, which is why the more strenuous trails, such as Cloud’s Rest, were omitted. With that in mind, let’s get into my pick of 10 amazing things to do on the east entrance of Yosemite.
Buy me a coffee?
If you found this blog helpful, consider leaving a tip through the Buy Me A Coffee button below! Whether it’s $1 or $5, every bit helps offset small travel costs like coffee, water, lunch, parking, or park entry fees. Your support means the world—thank you!
Is the East Entrance to Yosemite open?
Yosemite’s east entrance is seasonal. It is closed during the winter due to heavy snowpack and remains closed through spring while road crews work to clear it. Typically, Yosemite’s east gate opens between late May and mid June, depending how heavy the snowfall was that year. For example, due to the record snowfall of the 2022/2023 winter, the east entrance didn’t open until late July.
In general, park officials will keep the gate open until the first major snowfall of the year, which typically occurs in late October or sometime in November. During this time, the only way to access this side of the park is via backcountry skiing.
1) Drive Tioga Pass

If you’re coming from Lee Vining, this part is built into the trip. Tioga Pass is California’s highest automobile pass in the state and is the access road to Yosemite’s east entrance. Most of it is also closed during winter.
From the valley, follow the signs to Highway 120 and keep driving until you’re outside of the east gate and head down to Lee Vining. While you’re there, be sure to grab some lunch at Whoa Nelly Deli or Bodie Mike’s BBQ.
This drive is simply breathtaking and is a must see. Drive cautiously, though. The is narrow, the drop-offs are steep, and there are no guard rails. Additionally, keep an eye out for falling rocks. Some notable features along the pass include Nunatak Loop, Saddlebag Lake, Lake Ellery, and the Twenty Lakes Loop trail.
2) Gaylor Lakes Trail

Gaylor Lakes is one of the first hiking trails you’ll come across after arriving. In fact, the parking lot is immediately to your right upon driving through the gate. People who are hiking up to the summit of Mount Dana also park here, so it fills rather quickly.
Gaylor Lakes is a moderate-level hike and rather short in length, but the first mile or so is an exhausting uphill slog above 10,000 feet. After the pass, it drops you back down and it is there where you’ll come across the first of a series of lakes. Keep going and you’ll discover historic miners cabins.
Trail Length: About 3 miles, out and back
3) Elizabeth Lake Trail
This is another hike on the easier side. There is some elevation gain along the way, but nothing difficult and for the most part, it’s barely noticeable. It’s mostly flat, short in length and has an epic payoff at the end. Unicorn Peak is the mountain shadowing the lake and is climbable if you have any energy left to burn.
The official trailhead is located at the back end of Tuolumne Meadows campground. To get there, simply drive through the campground and park by the restrooms. If it is closed, you’ll need to park in the lot out front and walk to the trailhead. This will add another couple miles overall.
Trail Length: 5 miles, out and back. 7 miles if hiking through the campground
4) Olmsted Point

Olmsted Point is one of the east side’s most popular attractions due to its easy access and epic view of Half Dome. The lot can comfortably hold around a few dozen vehicles, but tour buses do utilize it and thus, it fills up quickly. Especially on weekends and in the summer months.
Try to get here as early as possible to guarantee a parking spot (being here for sunrise is an experience all its own). It will fill up later in the day but people tend to come and go often. So worst case, you may just have to circle around a couple times.
Pro tip: If you have extra energy to burn, head up the granite slope across the road because from there, the views of Half Dome and Tenaya Lake are epic
5) Lembert Dome & Dog Lake Trail

Looming 800 feet above Tuolumne Meadows is Lembert Dome, one of the most recognizable landmarks on the east side. Hiking to the top of Lembert Dome is possible via a rather short, but steep in some places, trail. Once you’re up there, the views of Tuolumne Meadows are outstanding.
Additionally, you can add some milage to this hike but taking the detour to Dog Lake, which is just behind Lembert Dome. Why did they name it, “Dog”, you ask? I have no idea, but it’s a beautiful lake regardless and worth the short detour.
While this hike starts out on flat terrain, it soon turns into an uphill climb that will make you question your desire to complete the hike. Once you get past that, though, the trail smooths out again (until you reach the dome, that is). Despite the climb, it’s completely doable as a family hike.
Trail Length: 2.8 miles, out and back for both Lembert Dome and Dog Lake
6) Tenaya Lake

Tenaya Lake is the largest and easily accessed of all Yosemite lakes. No hiking required. Simply find a parking spot in the lots at either end of the lake or find a spot along the shoulder.
In the dead of summer, the crowds here can get particularly large but still nowhere near the levels Yosemite Valley receives. To guarantee yourself a good spot on the lake itself, arrive early.
There’s an easy going trail that circles the lake. You won’t have to worry about ups and downs as it’s mostly flat but early on in the season you will encounter high water levels at the lake’s outlet on the west end. Late in the season, however, it’s a non-issue.
Pro Tip: Tenaya Lake is one of the most scenic lakes you could possibly paddle board on. Bring this highly-rated inflatable SUP board along with you
7) Pothole Dome

The easiest of all the domes, Pothole stands on the western end of Tuolumne Meadows and is mild in difficulty. It’s also hard to miss as it’s easily visible from the road.
From the parking lot (10-12 cars max) you’ll find the trail that takes you straight to it. As tempting as it may be to cut straight across, please keep to the trail. This area is part of a years long effort to grow more trees in the meadow.
Once you reach Pothole, simply find a section that looks to be in your comfort zone and go up. There’s no official path from this point. Alternatively, keep on the trail and it’ll eventually take you to beautiful cascades on the Tuolumne River.
Pro tip: Go as high as you can. The views of Tuolumne Meadows and Cathedral Peak are amazing from the top
8) Mono Pass Trail

This hike falls under the category of sorta long but still moderate. It’s mostly flat until you reach the fork to Spillway Lake and starts to head up to Mono Pass at 10,599 feet.
Along the trail you’ll pass beautiful river streams, meadows, and shaded pines (until you reach the pass, that is). Once you pass the boundary of Yosemite and reach a rocky shelf, you’ll have an epic view of Sardine Lake and a slither of Mono Lake in the same frame.
Trail Length: 7.8 miles, RT if you go to the Sardine Lake overlook. 7.4 miles if you don’t
Pro Tip: Shortly after arriving at the pass but before the lake you’ll see an unmarked trail spurring off to the right. Take it and in a quarter mile you’ll see a few old 1800’s miner cabins
9) Tuolumne Meadows

Few things beat taking a stroll through the always beautiful, Tuolumne Meadows. It is probably the most tourist heavy attraction on this list but don’t fret, you’ll have plenty of elbow room.
Some notable features of Tuolumne Meadows are frequent deer & bear sightings (mostly in the morning), the Merced River, Pothole Dome, Parsons Memorial Lodge, Soda Springs, and more!
Pro Tip: If you’re here in spring or early summer, bring mosquito repellant and lots of it. If you’re not a fan of DEET, you can try this DEET-free citronella spray. I use when I hike and it does a great job at keeping mosquitos, bees, and other insects off of me (it smells fantastic as well)
10) Cathedral Lakes Trail

Rounding out the list is one of the premier hikes on Yosemite’s east side and easily one of the top hikes in the entire park, Cathedral Lakes. This one is mega popular among the Instagram crowd and is a regular stop along the John Muir Trail (JMT).
The trail is moderate in difficulty but the first couple miles or so will be a steady uphill slog. You’ll see two lakes, both of which are worthy of your efforts. Lower Cathedral is the largest of the pair but the upper lake, in my opinion, wins in the scenery department.
Trail Length: 7 miles, out and back if doing one lake. 8 miles if doing both
After exploring the park’s highly scenic east side, consider spending one day in Yosemite Valley. If you’ve never been there, it’s not to be missed. I’ve curated a highly detailed one day Yosemite travel itinerary if you’re interested.
This post was originally published in 2021 and was recently updated for accuracy.
Buy me a coffee?
If you found this blog helpful, consider leaving a tip through the Buy Me A Coffee button below! Whether it’s $1 or $5, every bit helps offset small travel costs like coffee, water, lunch, parking, or park entry fees. Your support means the world—thank you!

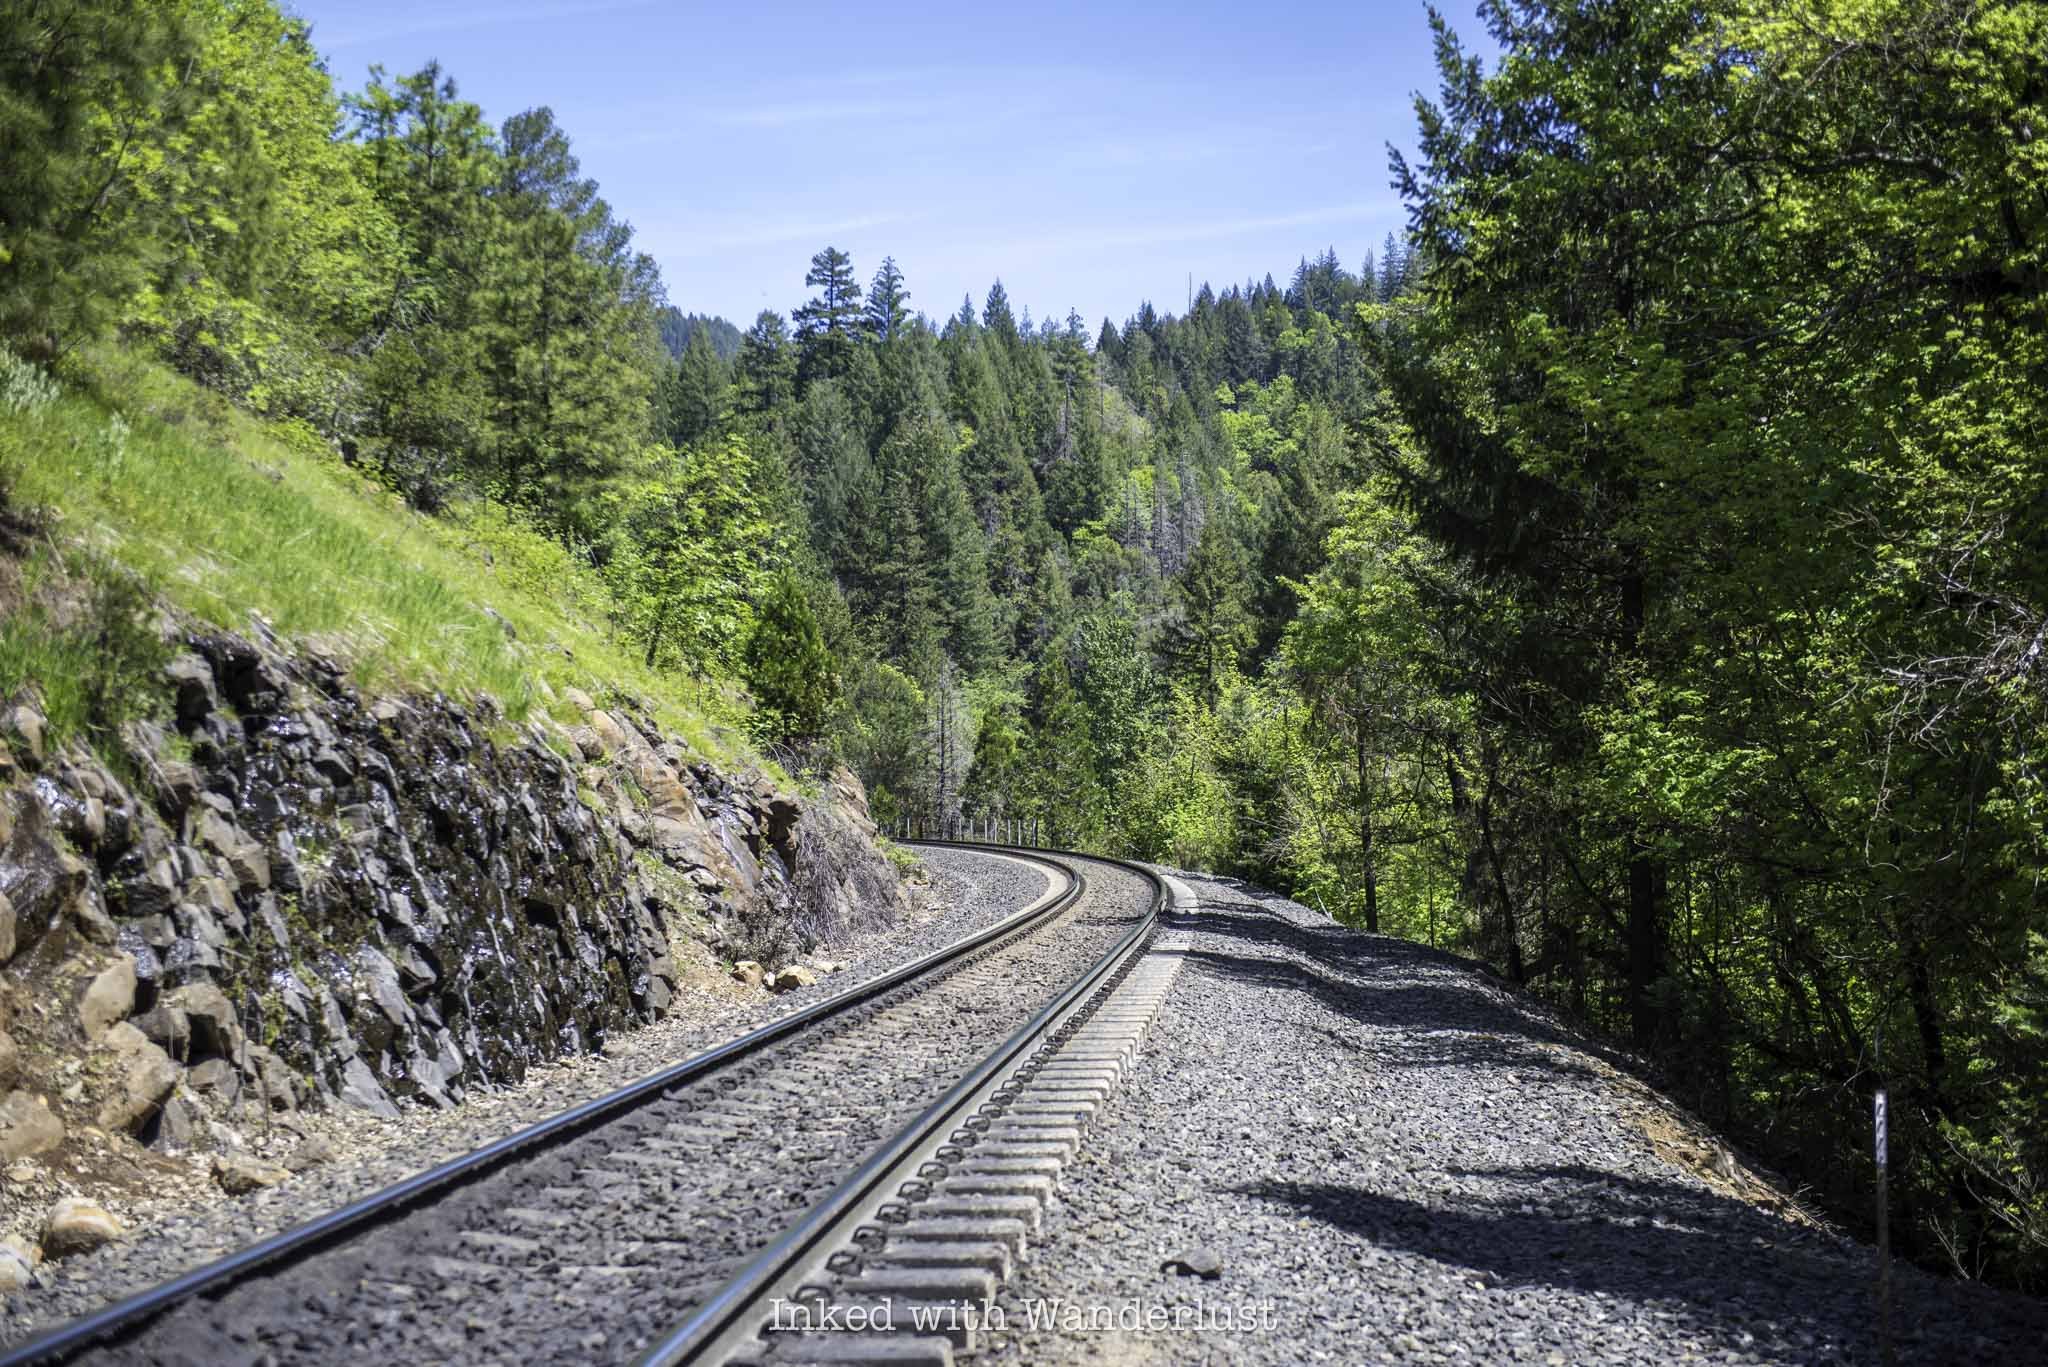
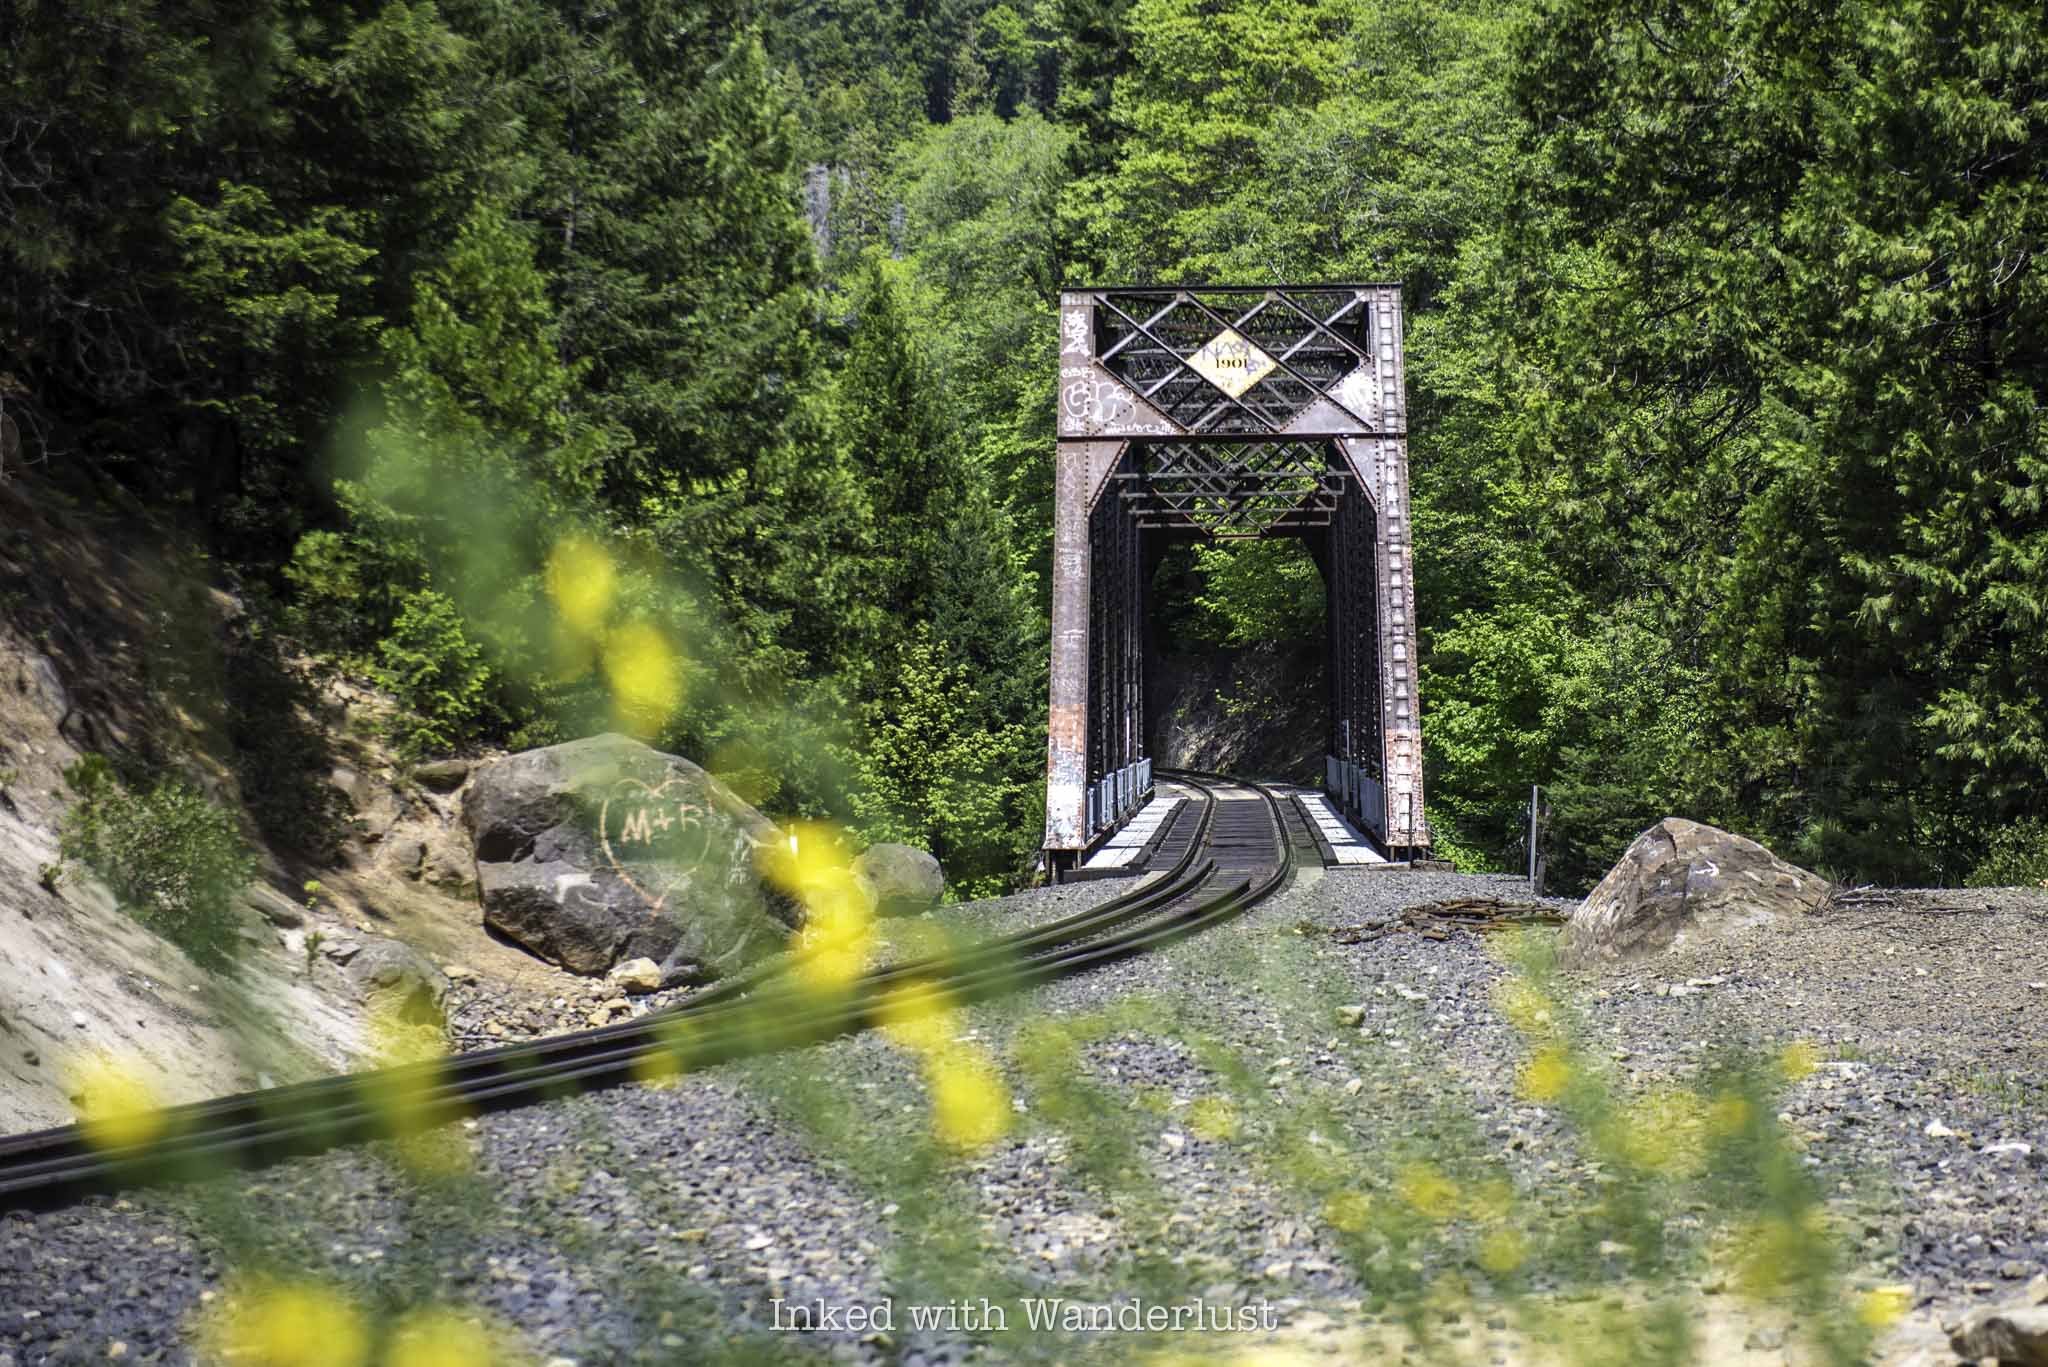
Hike Through the Historic Donner Summit Tunnels
When searching for the most unique and best hikes in Northern California, many will point to areas like South Lake Tahoe, Yosemite National...
Disclosure: This post contains affiliate links. If you make a purchase through these links, I may earn a small commission at no additional cost to you. I only recommend products or services that I believe will add value to my readers.

When searching for the most unique and best hikes in Northern California, many will point to areas like South Lake Tahoe, Yosemite National Park, and famed Mono County, and for good reason. Those areas have some of the most beautiful hiking trails in the state.
Just a bit outside of Lake Tahoe proper, near the historic gold mining town of Truckee, is one of the most unique hikes you’ll come across anywhere - the Donner Summit Tunnels.
The tunnels were built in 1867 to accommodate the first train passage through the Sierra Nevada Range. Built primarily by Chinese laborers, nothing but hand drilling methods and explosives were used to carve through the granite-based Mount Judah.
The tunnels saw the first train traffic shortly after completion in 1868, and were used as recently as 1993, when they were then decommissioned. Today, the property is still owned by Union Pacific, who have been kind enough to allow people to freely explore the tunnels.
So how do you get to the Donner Summit Tunnels? What’s the parking situation like? What can you expect on this hike? I answer all of these questions and more below. Let’s get into it.
Trail Stats
Location: Donner Summit in Norden, CA
Fee: None
Open: Mostly in Spring, Summer, and Fall. Difficult to impossible to access in Winter.
For: Everyone
Cell Service: Spotty
Restroom: None
Parking: Large dirt lot at the trailhead. There are also pull-outs on the side of the road, but you’ll be backtracking on the hike
EV Stations: None
Difficulty: Easy
Popularity: Moderate
Mileage: About 5-miles, out and back
Elevation Gain: Just shy of 400 feet. The trail is mostly flat
Condition: Not maintained, but completely doable
Features: Historic trail tunnels, China Wall, petroglyphs and vast views.
Pets: Allowed on leash
Drones: No signs prohibiting it, but I saw a few people flying theirs
Hazards: Uneven ground, loose gravel, low visibility, steep drop offs, and potential wildlife encounters.
My Visit(s): July 2024

Recommended Products for this Hike
Camera Tripod (you’ll need it for the low-light situations)
Citronella Spray (a Deet-free way to keep the bugs off of you)
DJI Drone (for even better photos/video of the area)
How to Get to Donner Tunnels
Most people access the Donner Tunnels from Interstate-80, as it’s easy and straight forward. If you’re coming from the direction of Reno or Truckee (westbound), take the Donner Lake Road exit. When you get to the bottom, turn right on Donner Pass Road to head up the pass.
Less than a mile after crossing the Donner Summit Bridge, look for the sign in the photo above (Sugar Bowl Road). You’ll turn left here. Shortly thereafter, look for an unmarked dirt road on your right. This will take you to the parking lot.
Coming from Sacramento (eastbound), you’ll take the Donner Pass Road exit for about four miles before turning right onto Sugar Bowl Road to the parking lot. If you’re coming from Lake Tahoe, you have a couple options:
From North Lake/Sand Harbor area: Make your way to North Shore Boulevard (CA-217) and go north. Then, merge onto I-80 west for a short time before taking the Donner Pass road exit and head up the summit to the parking lot.
From South Lake/Emerald Bay area: Travel north on CA-89 and continue onto Highway 28, before turning left onto North Shore Boulevard (north). From there, follow the same directions as described above.
Donner Tunnels Parking Lot and Trailhead

The parking lot for Donner Tunnels is a circular dirt lot with no actual parking spaces laid out. It’s essentially park wherever you can find space. If you arrive early (like I did), you’ll have no trouble finding a spot. Later in the day is when it starts to fill, as shown in the photo above.

While any vehicle can access this lot, I do need to warn you about all of the tire-busting rocks. Union Pacific doesn’t maintain this lot at all and as such, there are rocks all over the place that have the potential for ruining your day. Take it slow and you should be fine. The good news is there’s no parking fee.
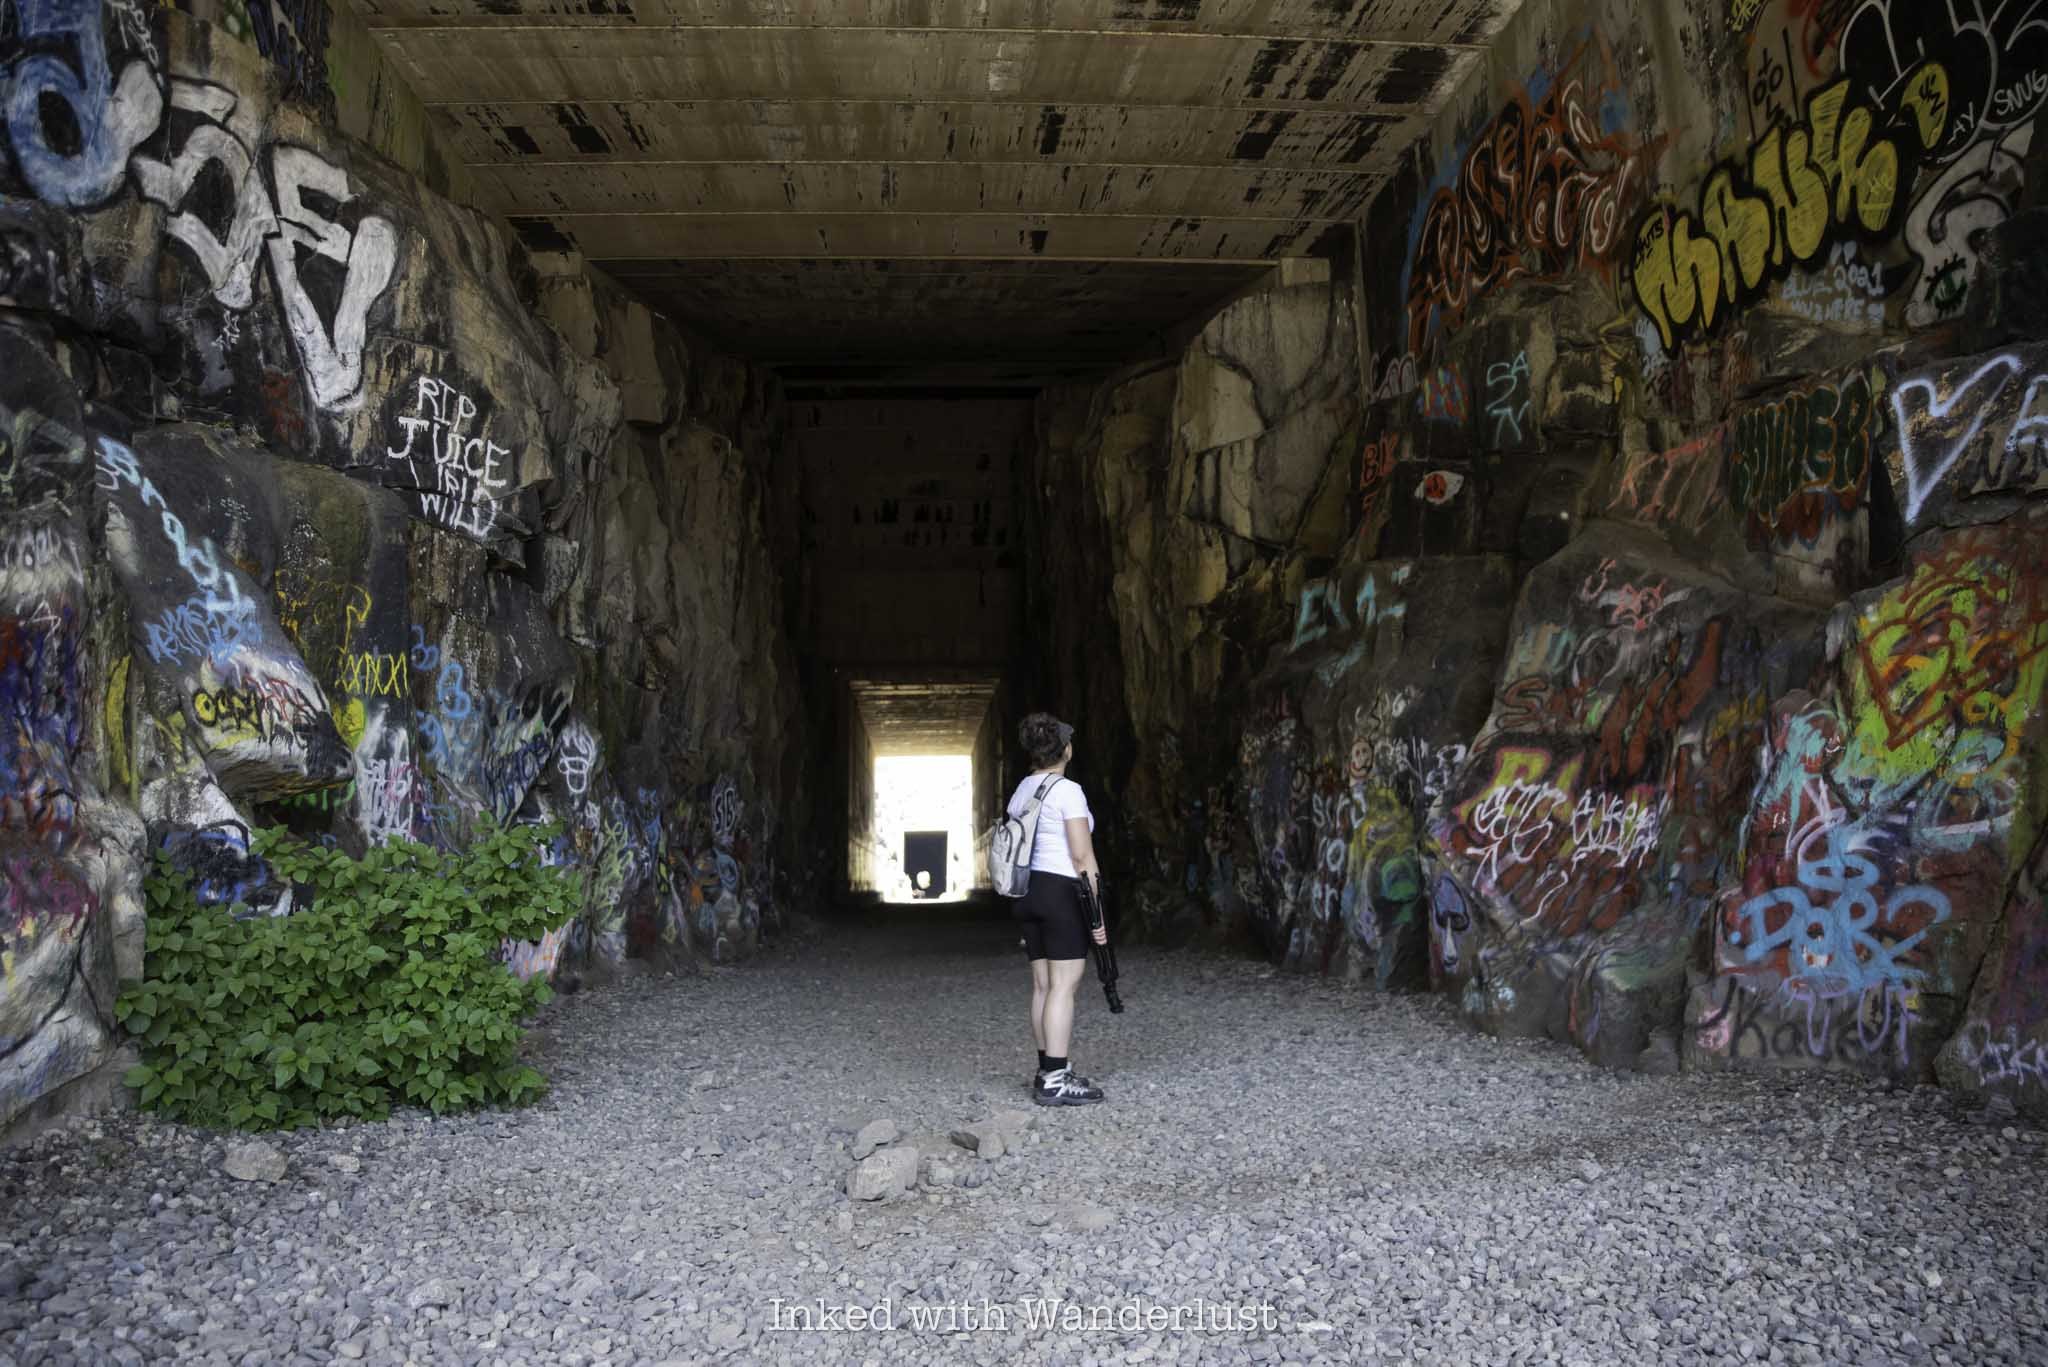
The unsigned trailhead is located just off the parking lot through a heavily graffitied red gate. You’ll find the first of several tunnels after you walk underneath the road you took to get here.
Donner Tunnels Hike

From here, you’ll work your way through a series of tunnels, each with a varying level of length (and graffiti). The first one from the parking lot is fairly long and dark, but you’ll always have the light at the end in sight.
Don’t be fooled by the amount of light in the photo above. That was me using my camera’s settings so I could show you the detail. It’s actually very dark in here and in my opinion, a cell phone flashlight doesn’t cut it. Which is why I recommend bringing a flashlight with high lumens.
In these tunnels and the upcoming ones, you’ll likely hear, smell, and possibly even see bats in the tunnels. We never saw them, but we did hear and smell them. As is the case with most wildlife encounters, don’t go looking for trouble and you likely won’t find it. In other words, don’t bother them.
After the first tunnel, you’ll briefly enter a snow shed before walking back out into a clearing with sweeping views of Donner Lake and the surrounding mountains. On this stretch, you’ll pass by some petroglyphs on your left and walk over the historic China Wall (pictured below) before entering the next tunnel.

The China Wall is a 75-foot high hand-built retaining wall that helped keep the trains propped up as it passed between the two tunnels. Take a moment to check it out. It’s amazing what the laborers were able to accomplish without the help of modern equipment.
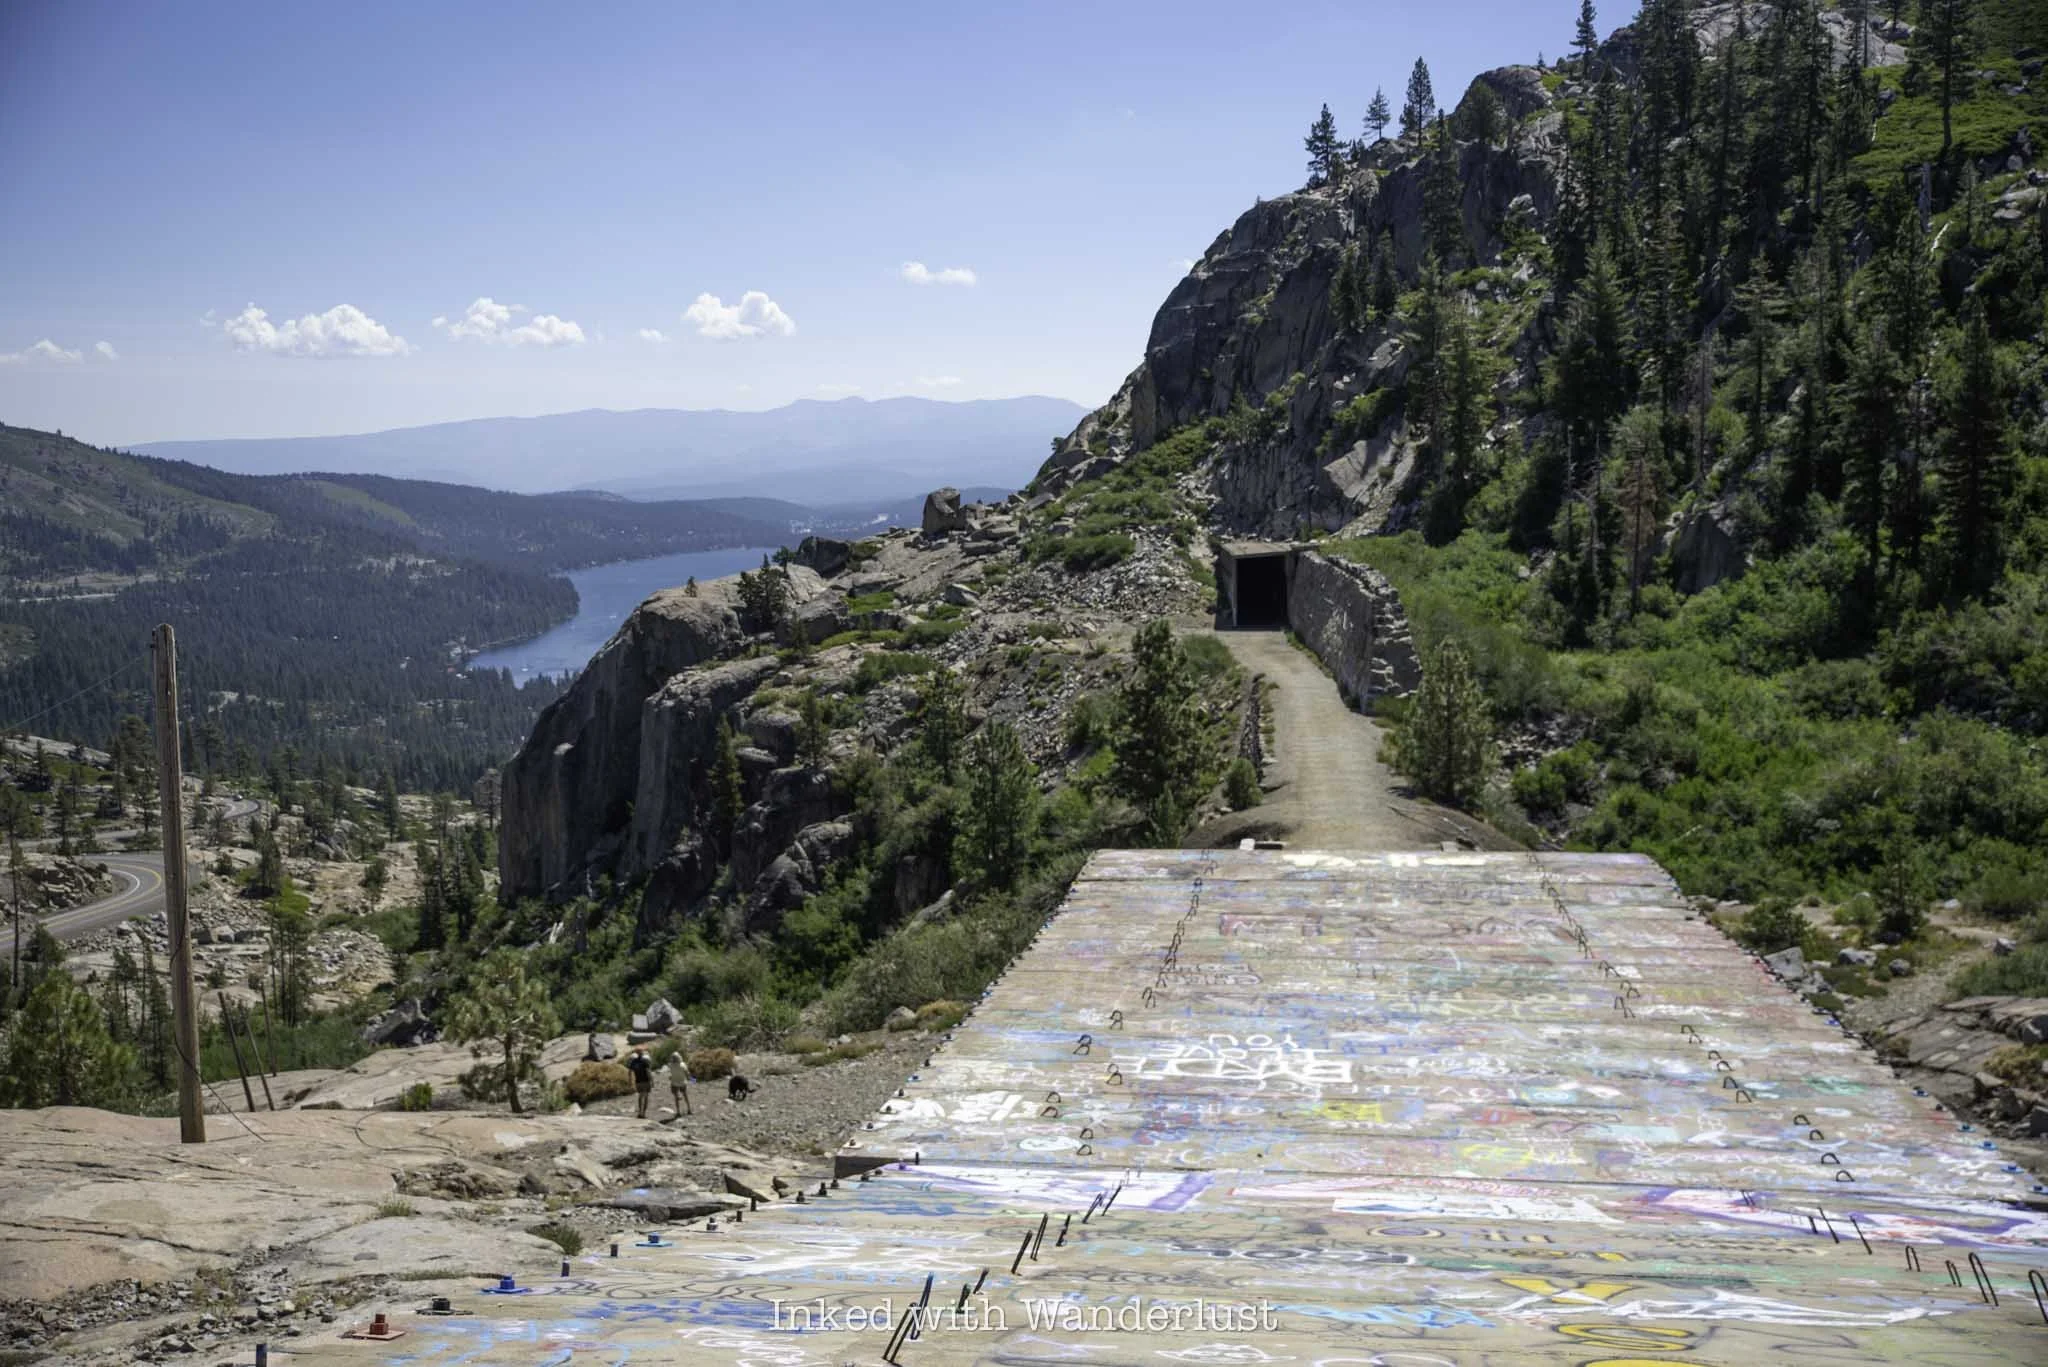
Also along this stretch is the ability to climb up onto the top of the tunnel you just left. You’ll get an awesome perspective for photos. Just be careful as there’s no established way up and the granite rocks are slippery. Going back down is a bit sketchy.
From here, you’ll enter the next tunnel and go through a series of several more. You’ll go through sections where enough light passes through the slits in the walls, enabling you to see without a flashlight. Then you’ll hike through sections of near-complete darkness as well.

On top of the darkness, the ground you’ll be walking on is on uneven, loose gravel with occasion larger rocks. Additionally, and particularly if you’re here while the snowpack is still melting, you’ll also have standing water and potential icy spots to traverse.

The walls of the tunnels are literally covered in graffiti. Some are actually artistically well done while other pieces are simply words/political statements or nondescript images. While I do think it’s a shame that a historical site like this has graffiti all over it, I have to admit that it does add a certain vibe to the overall experience.
If you’re bringing small children, be warned that some of the graffiti art is highly inappropriate for young eyes. Thankfully, most of it is difficult to make out, or even see in the darkness, so I wouldn’t let it stop you from bringing them. Just something to be conscience of.
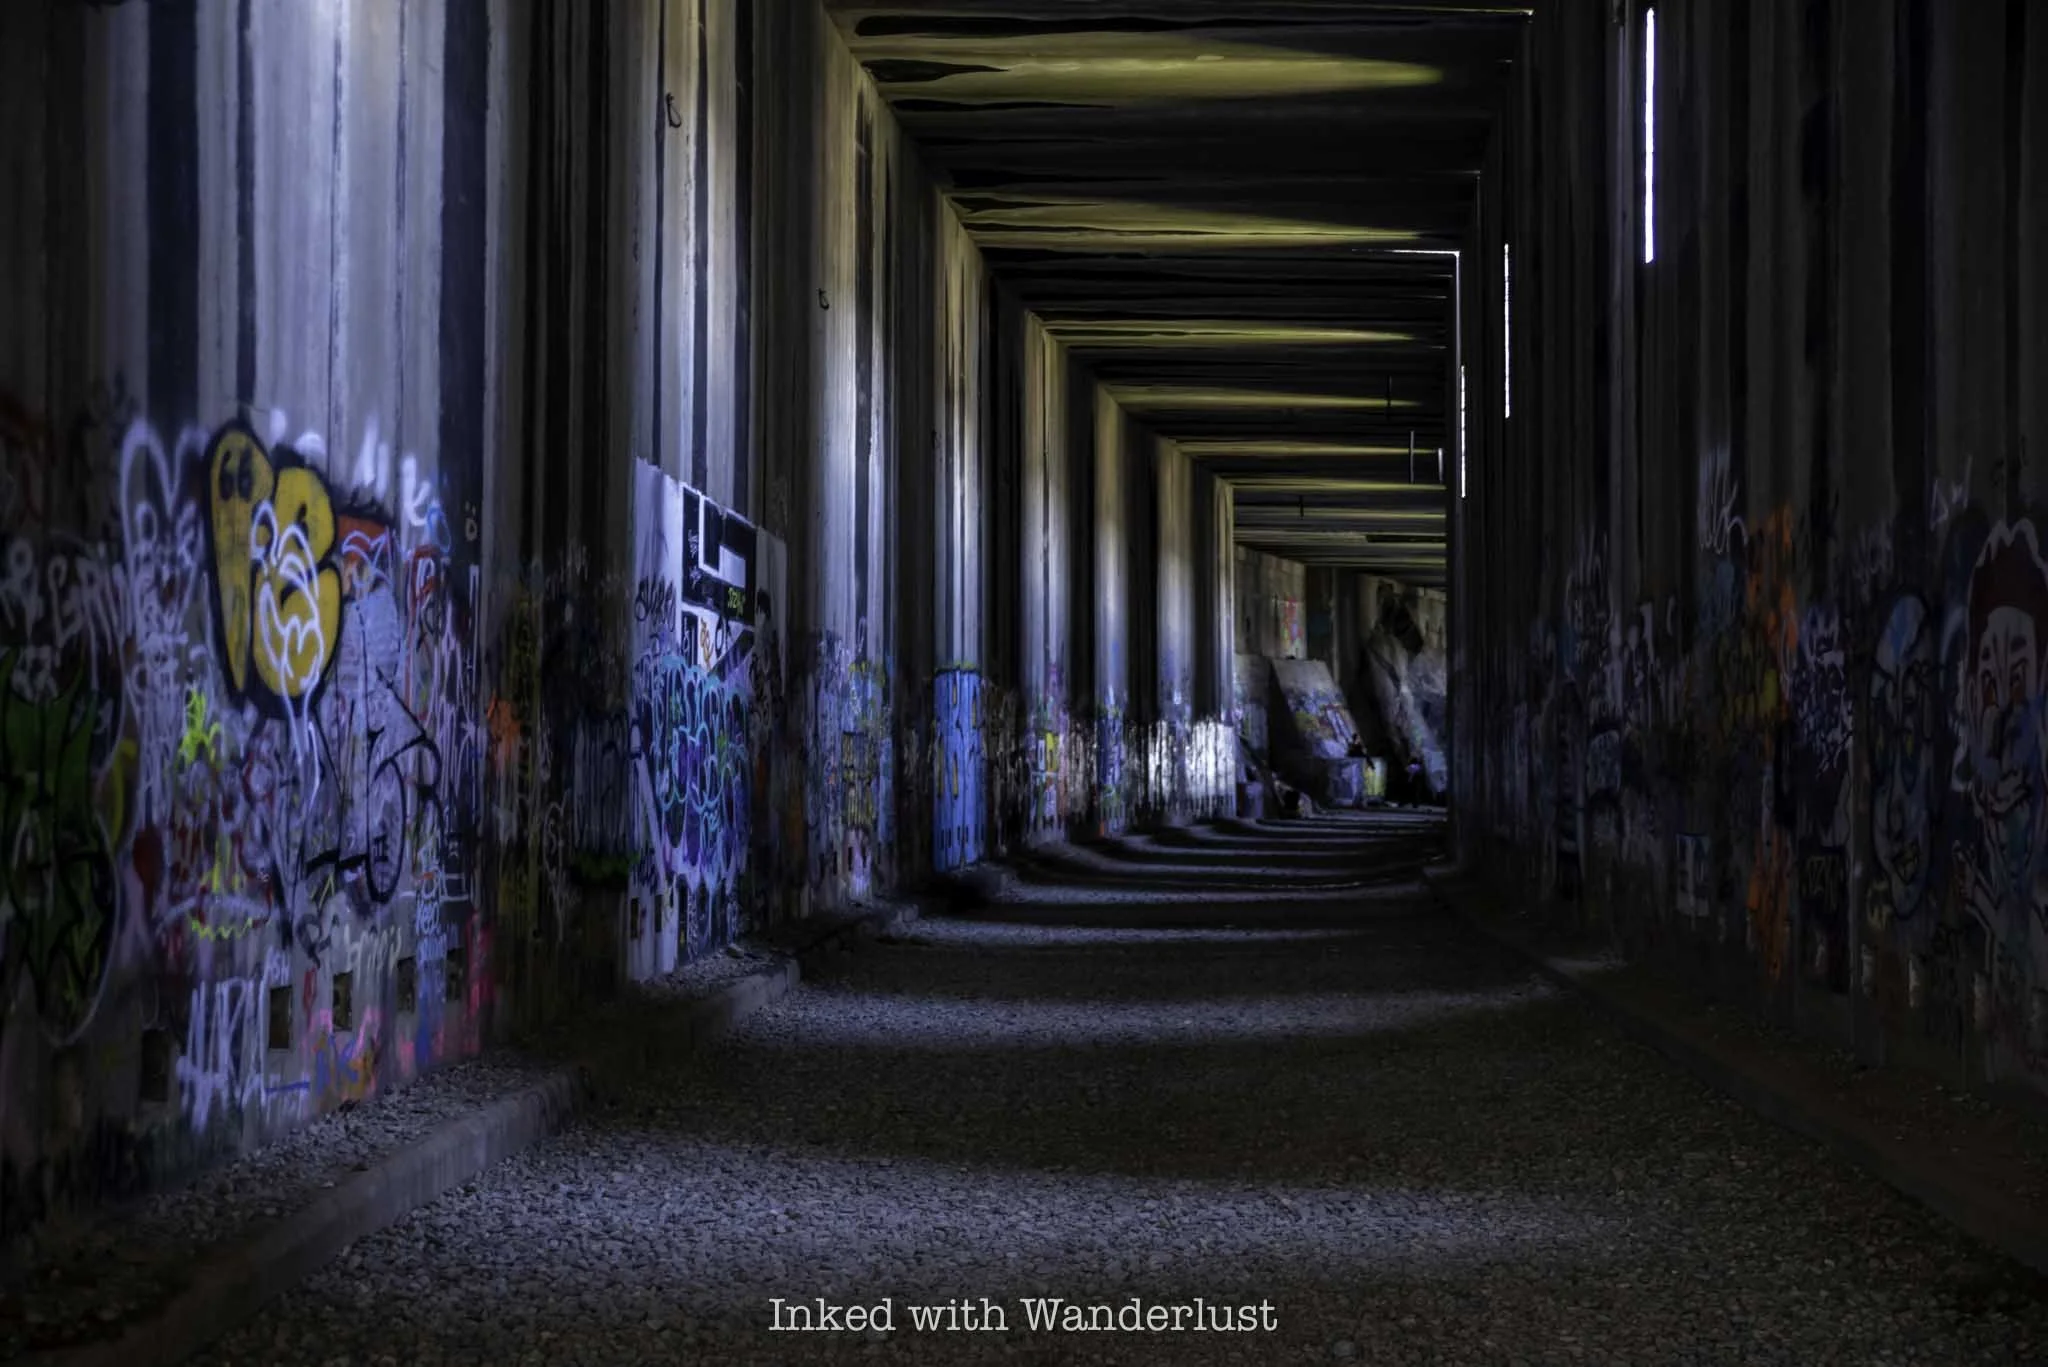
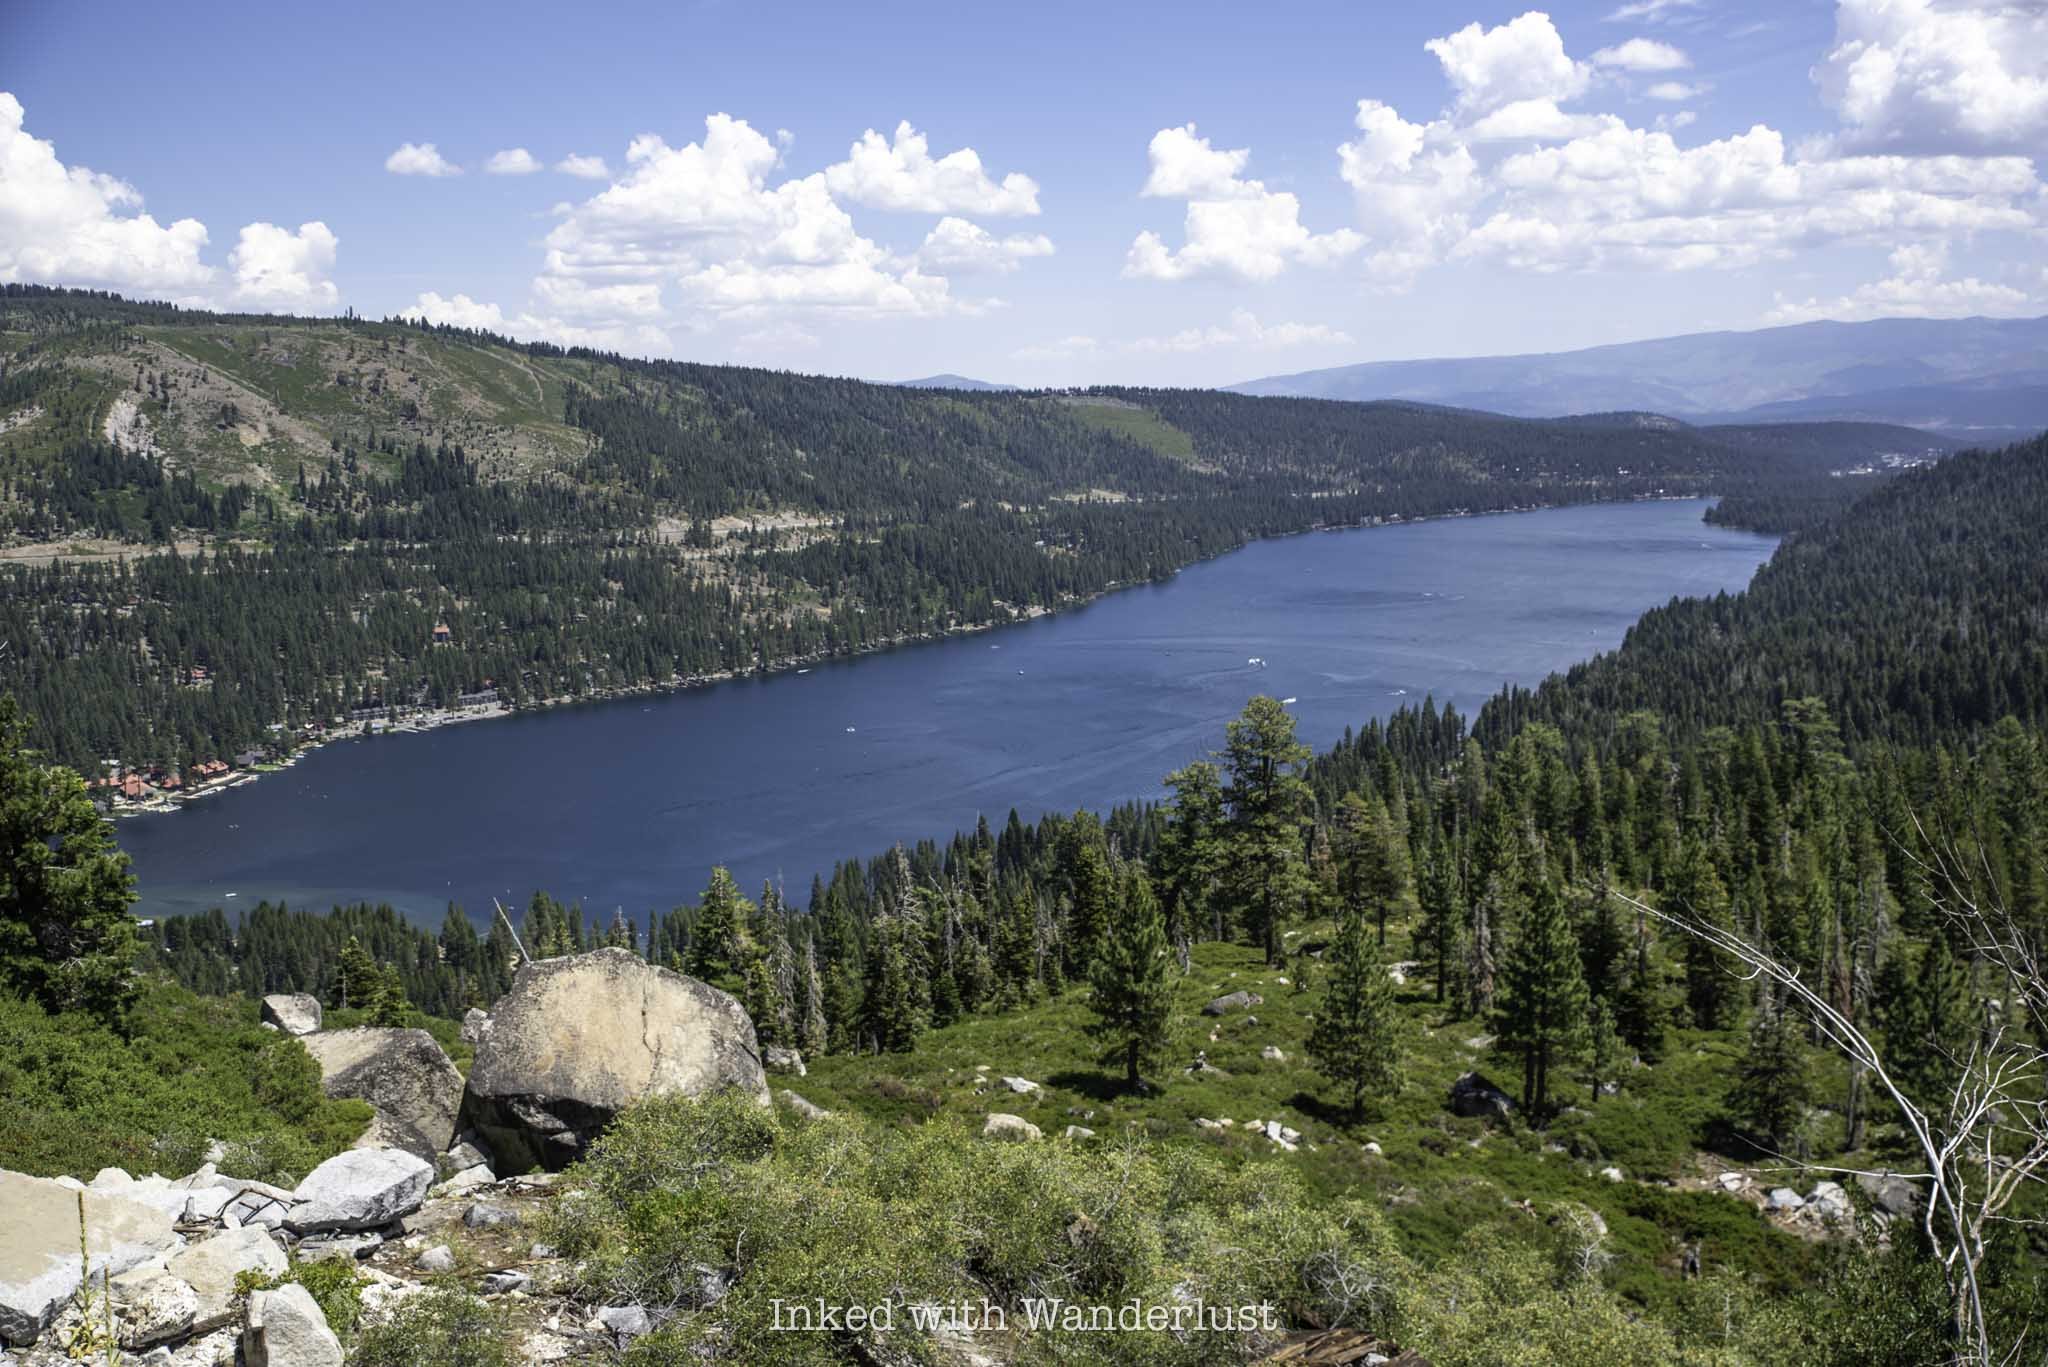
The hike can be as short or as long as you want it to be. During our hike, I noticed most people turn around after the second tunnel, but I recommend sticking it out and keep going to the end of the final tunnel. If you do, you’ll be rewarded with an epic, unobstructed view of Donner Lake (especially if you climb on top of the tunnel).
In conclusion, this hike is fantastic. Even if you don’t care about the historical aspect of it, it’s worth it for the views and photography opportunities alone. Additionally, because there’s so much to explore, you could hike the Donner Tunnels multiple times over and always see something new.
When you’re finished, consider heading over to nearby Donner Camp Site and see where part of the ill-fated Donner Party attempted to wait out winter and fight off starvation. Further up the freeway is where you’ll find Emerald Pools, a stunning swimming hole. Additionally, Emerald Bay State Park is about an hour away and more than worth the drive.
EXODUS 13:21
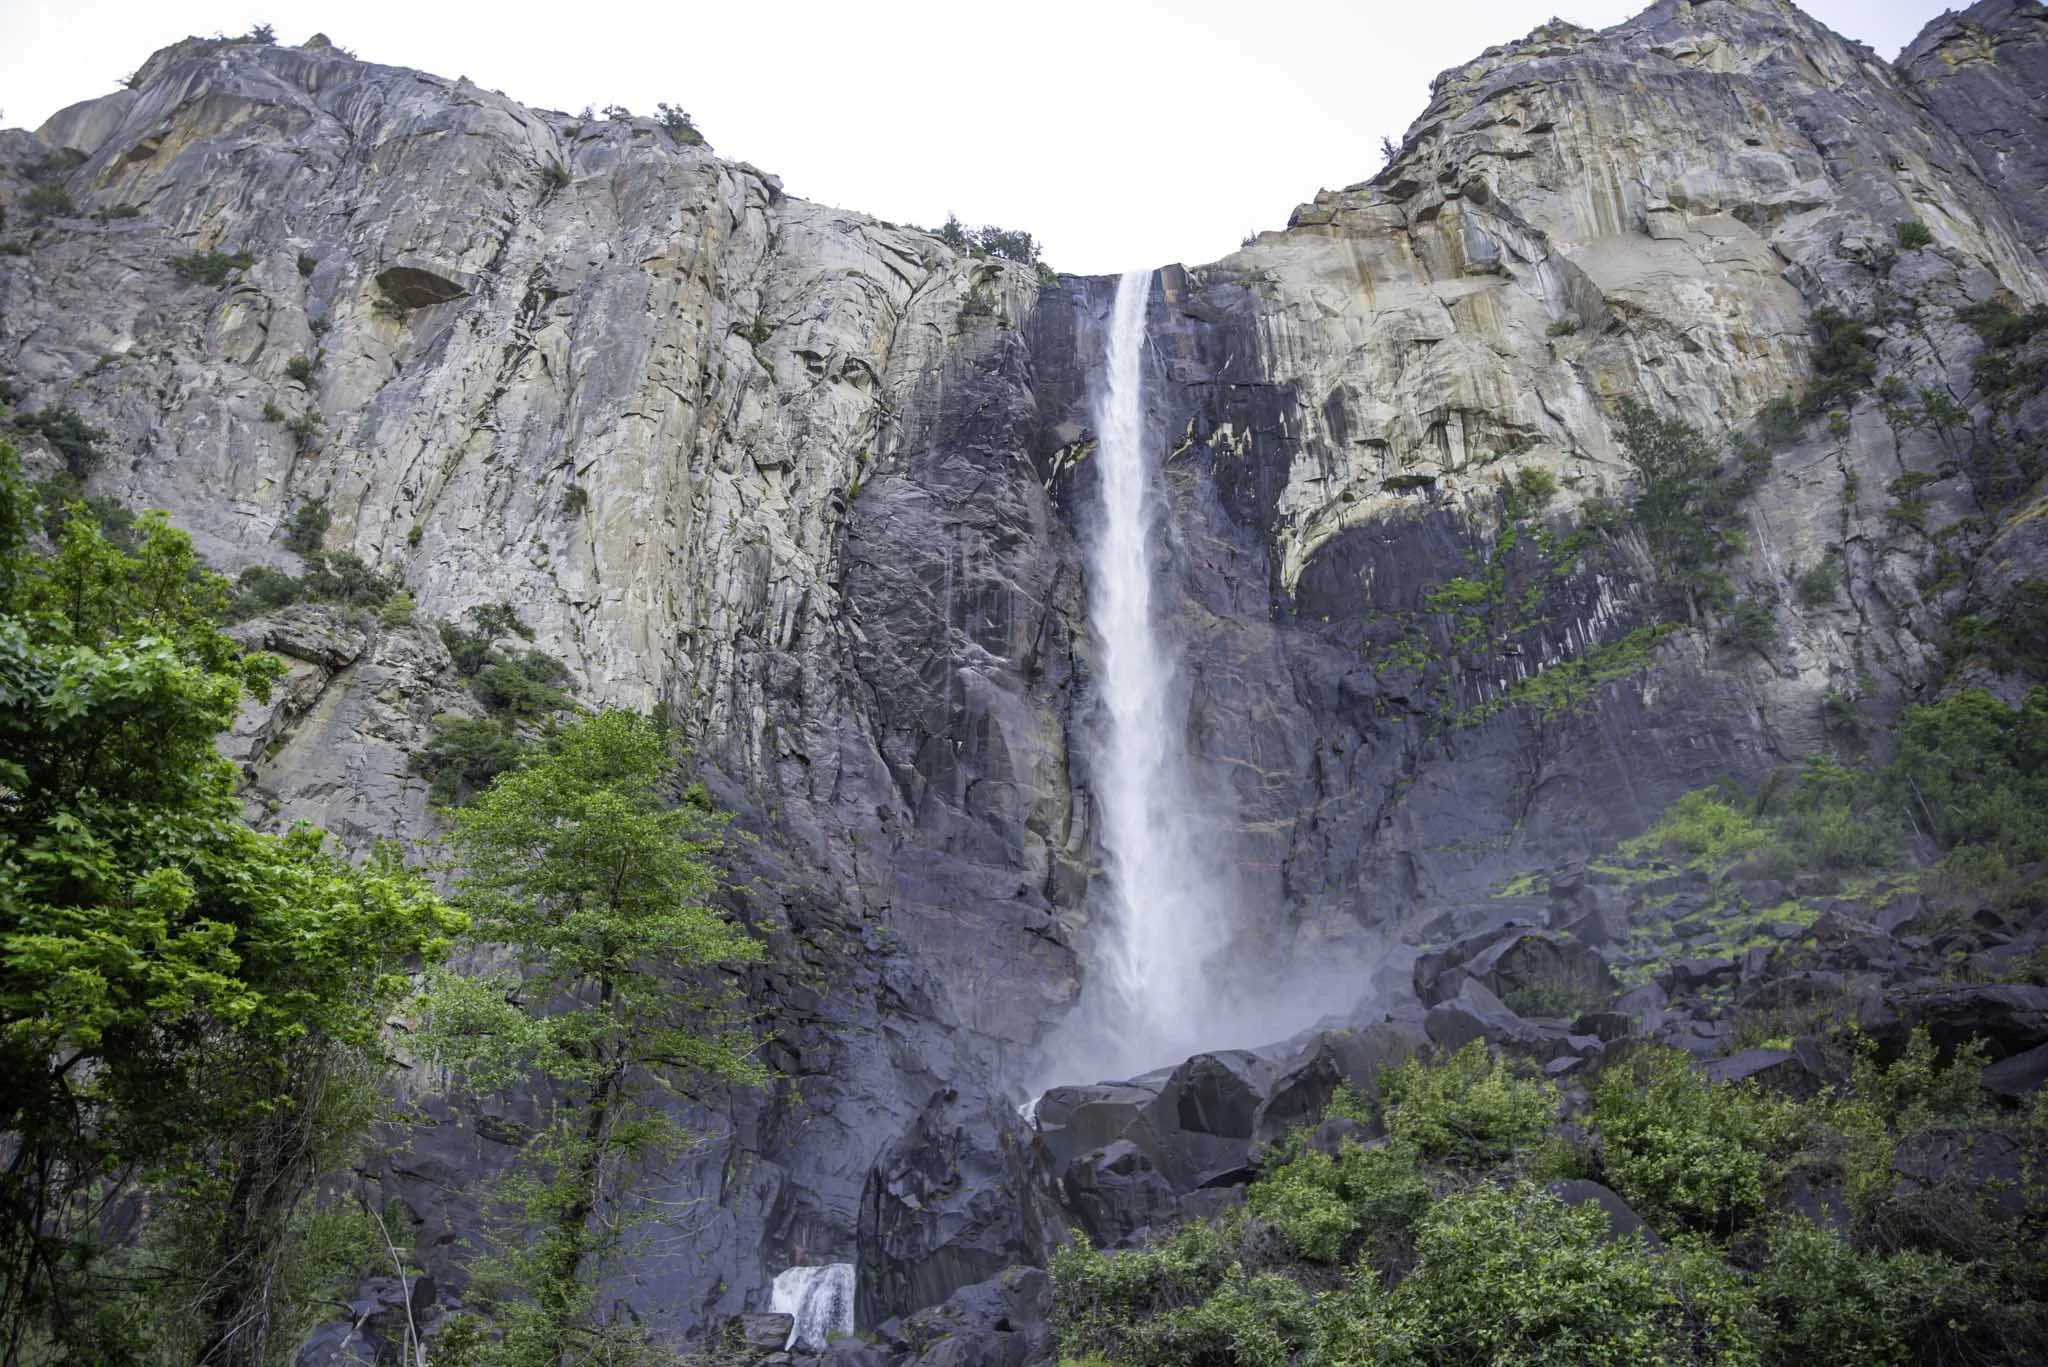
How to See Bridalveil Fall in Yosemite National Park
Standing at a commanding 617 feet, Bridalveil Falls is often the first waterfall visitors see when driving into Yosemite…

Standing at a commanding 617 feet, Bridalveil Falls is often the first waterfall visitors see when driving into Yosemite Valley. It is visible from portions of both Northside and Southside Drive, several pull outs along Big Oak Flat Road, and is part of the famed postcard view from the Tunnel View vista.
However, why stop at viewing it from afar when you can hike a short, easy-to-follow trail to the base and get up close and personal with it? Recently, Bridalveil Falls reopened to the public after a years-long closure for improvements to the trail, parking lot, and facilities.
The Bridalveil Falls hike is one of the most popular in the valley, often seeing similar crowds to other waterfall trails such as Lower Yosemite Falls and the Mist Trail. So how long is the Bridalveil Falls trail? When is the best time to visit? I discuss all of this and more in the post below.
How to Get to Bridalveil Fall and Parking

As one of the premier attractions in Yosemite Valley, Bridalveil Falls is easy to reach within the park. Its parking lot and facilities have recently gone through a years-long improvement project, adding additional parking spaces, improved trail conditions, and several restoration efforts.
The parking lot for Bridalveil is on the way to famed viewpoint, Tunnel View. From the El Portal entrance, make your way through El Portal road and take the Southside Drive option at the fork. From there, turn right onto Wawona Road. Shortly after that turn, the entrance to the parking lot will be on your left.
From the west entrance, continue down Wawona Road. After driving through Wawona Tunnel and passing Tunnel View on your left, continue a bit further down the road where you’ll find the parking lot on your right.

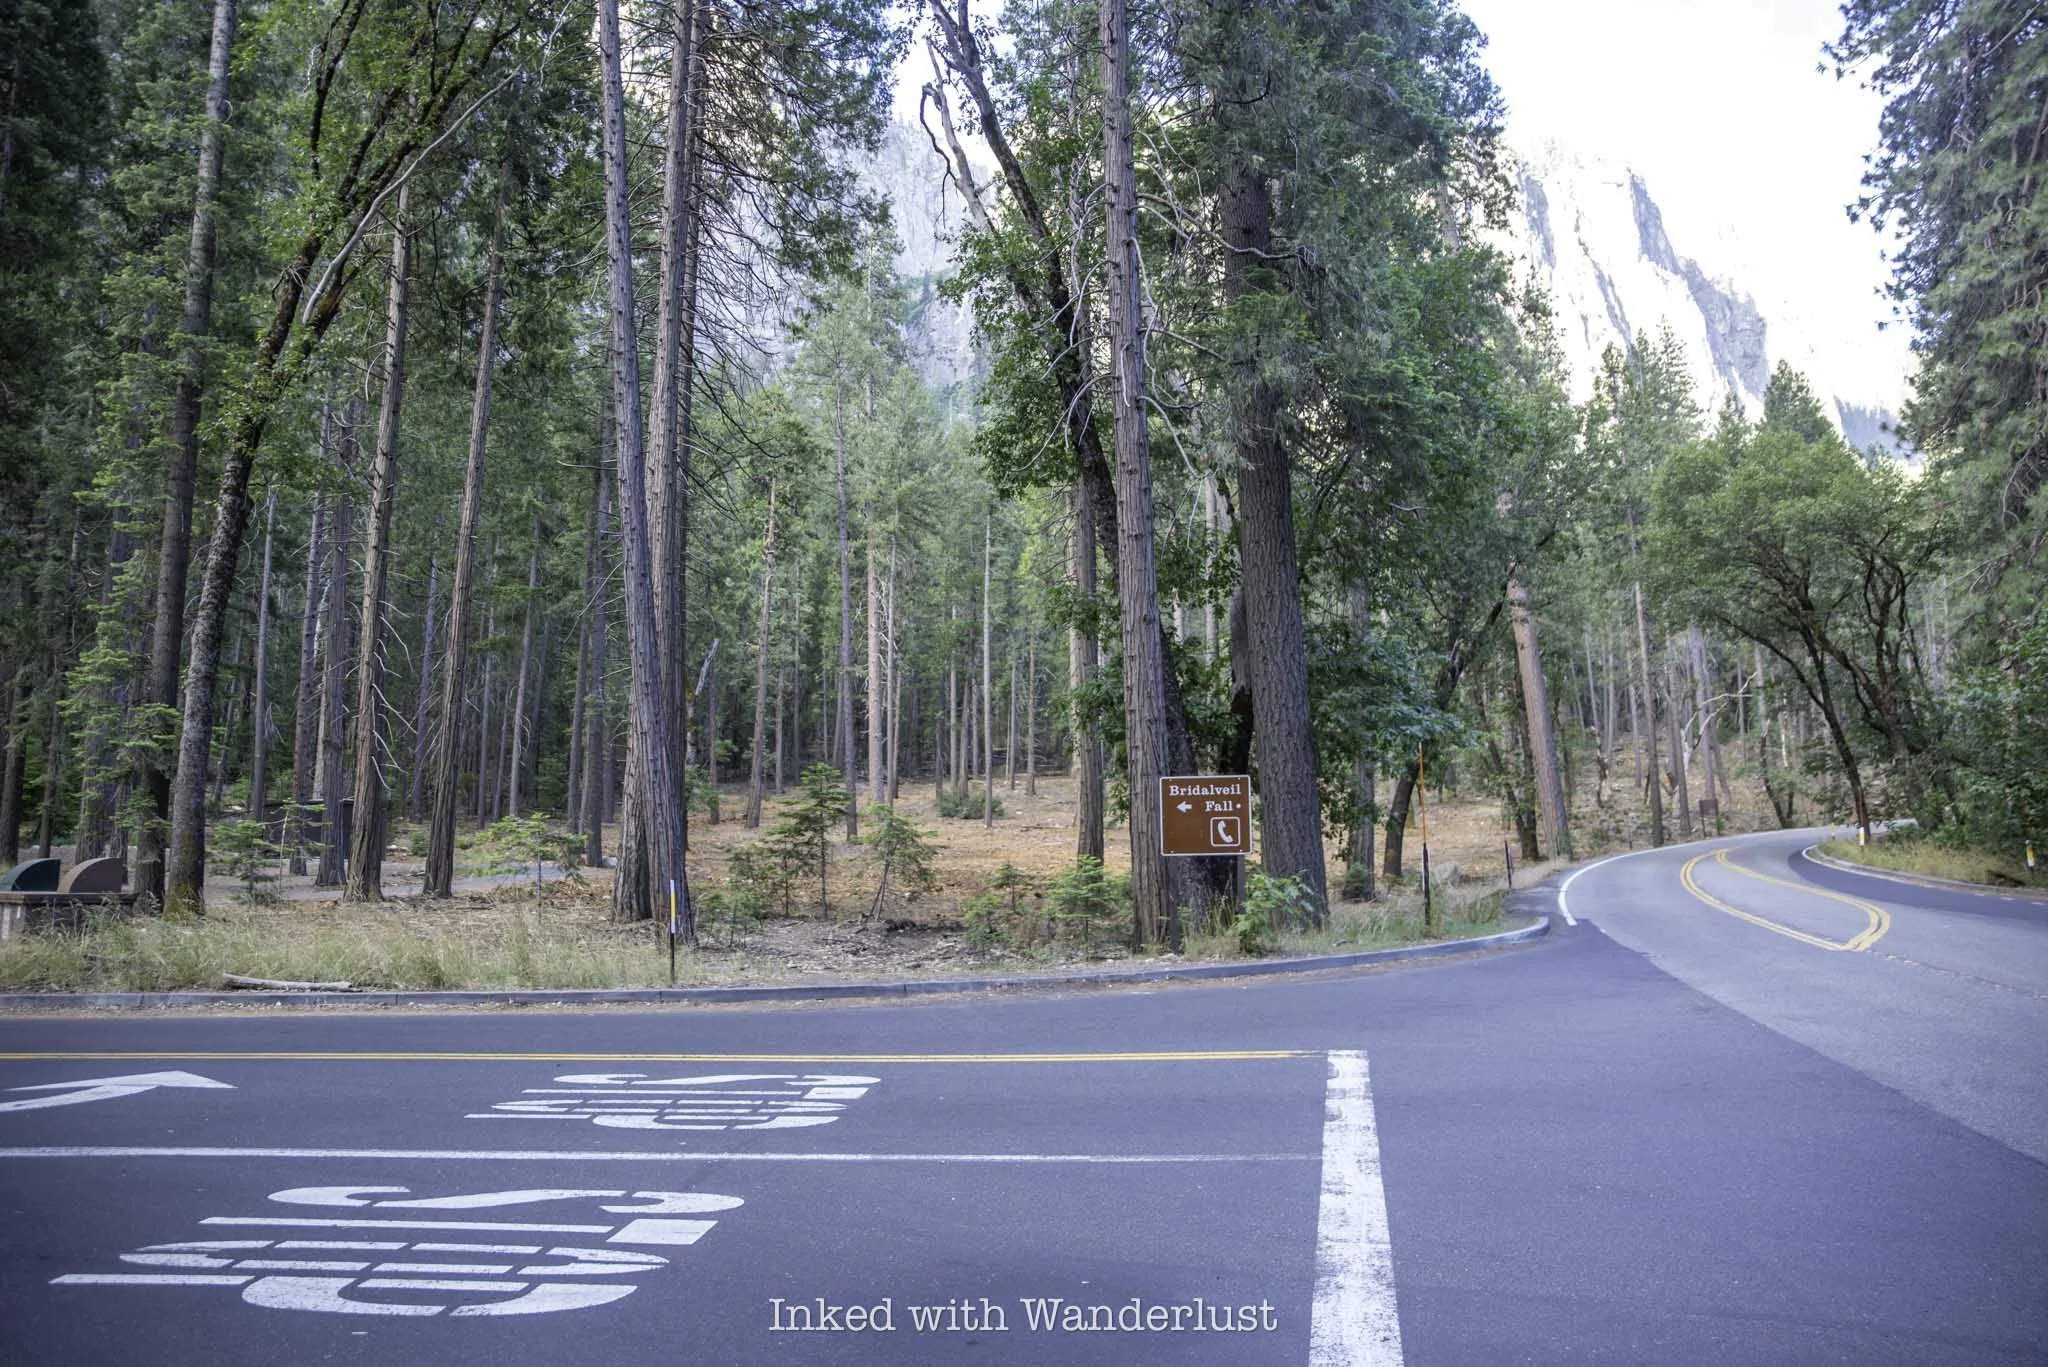
From the park’s east entrance or Hetch Hetchy, you’ll make your way to or on Big Oak Flat Road before transitioning onto El Portal Road, then onto Southside Drive, and taking the right turn onto Wawano Road. As you can see, no matter which direction you are coming from, Bridalveil Fall is easy to reach.
One important thing to note is the Yosemite Valley or the El Capitan shuttles do not stop here. The closest is stop E5 (Cathedral Beach Picnic Area) via the El Capitan shuttle (summer months only). From there, you can reach Bridalveil Fall via the Valley Loop Trail, which is a roughly 1.5-mile hike.
Bridalveil Fall Yosemite Hiking Trail

How long is the hike to Bridalveil Fall? Not long at all. If you’re not fond of long hikes or you’re just short on time, you’ll be happy to discover that the trail to Bridalveil Fall is less than a mile, round trip, along a smooth dirt path with very little elevation gain.
The trail begins at the far end of the parking lot, just past the restrooms. To the left of the trailhead is informational literature of how Bridalveil formed, current wildlife activity, and more.
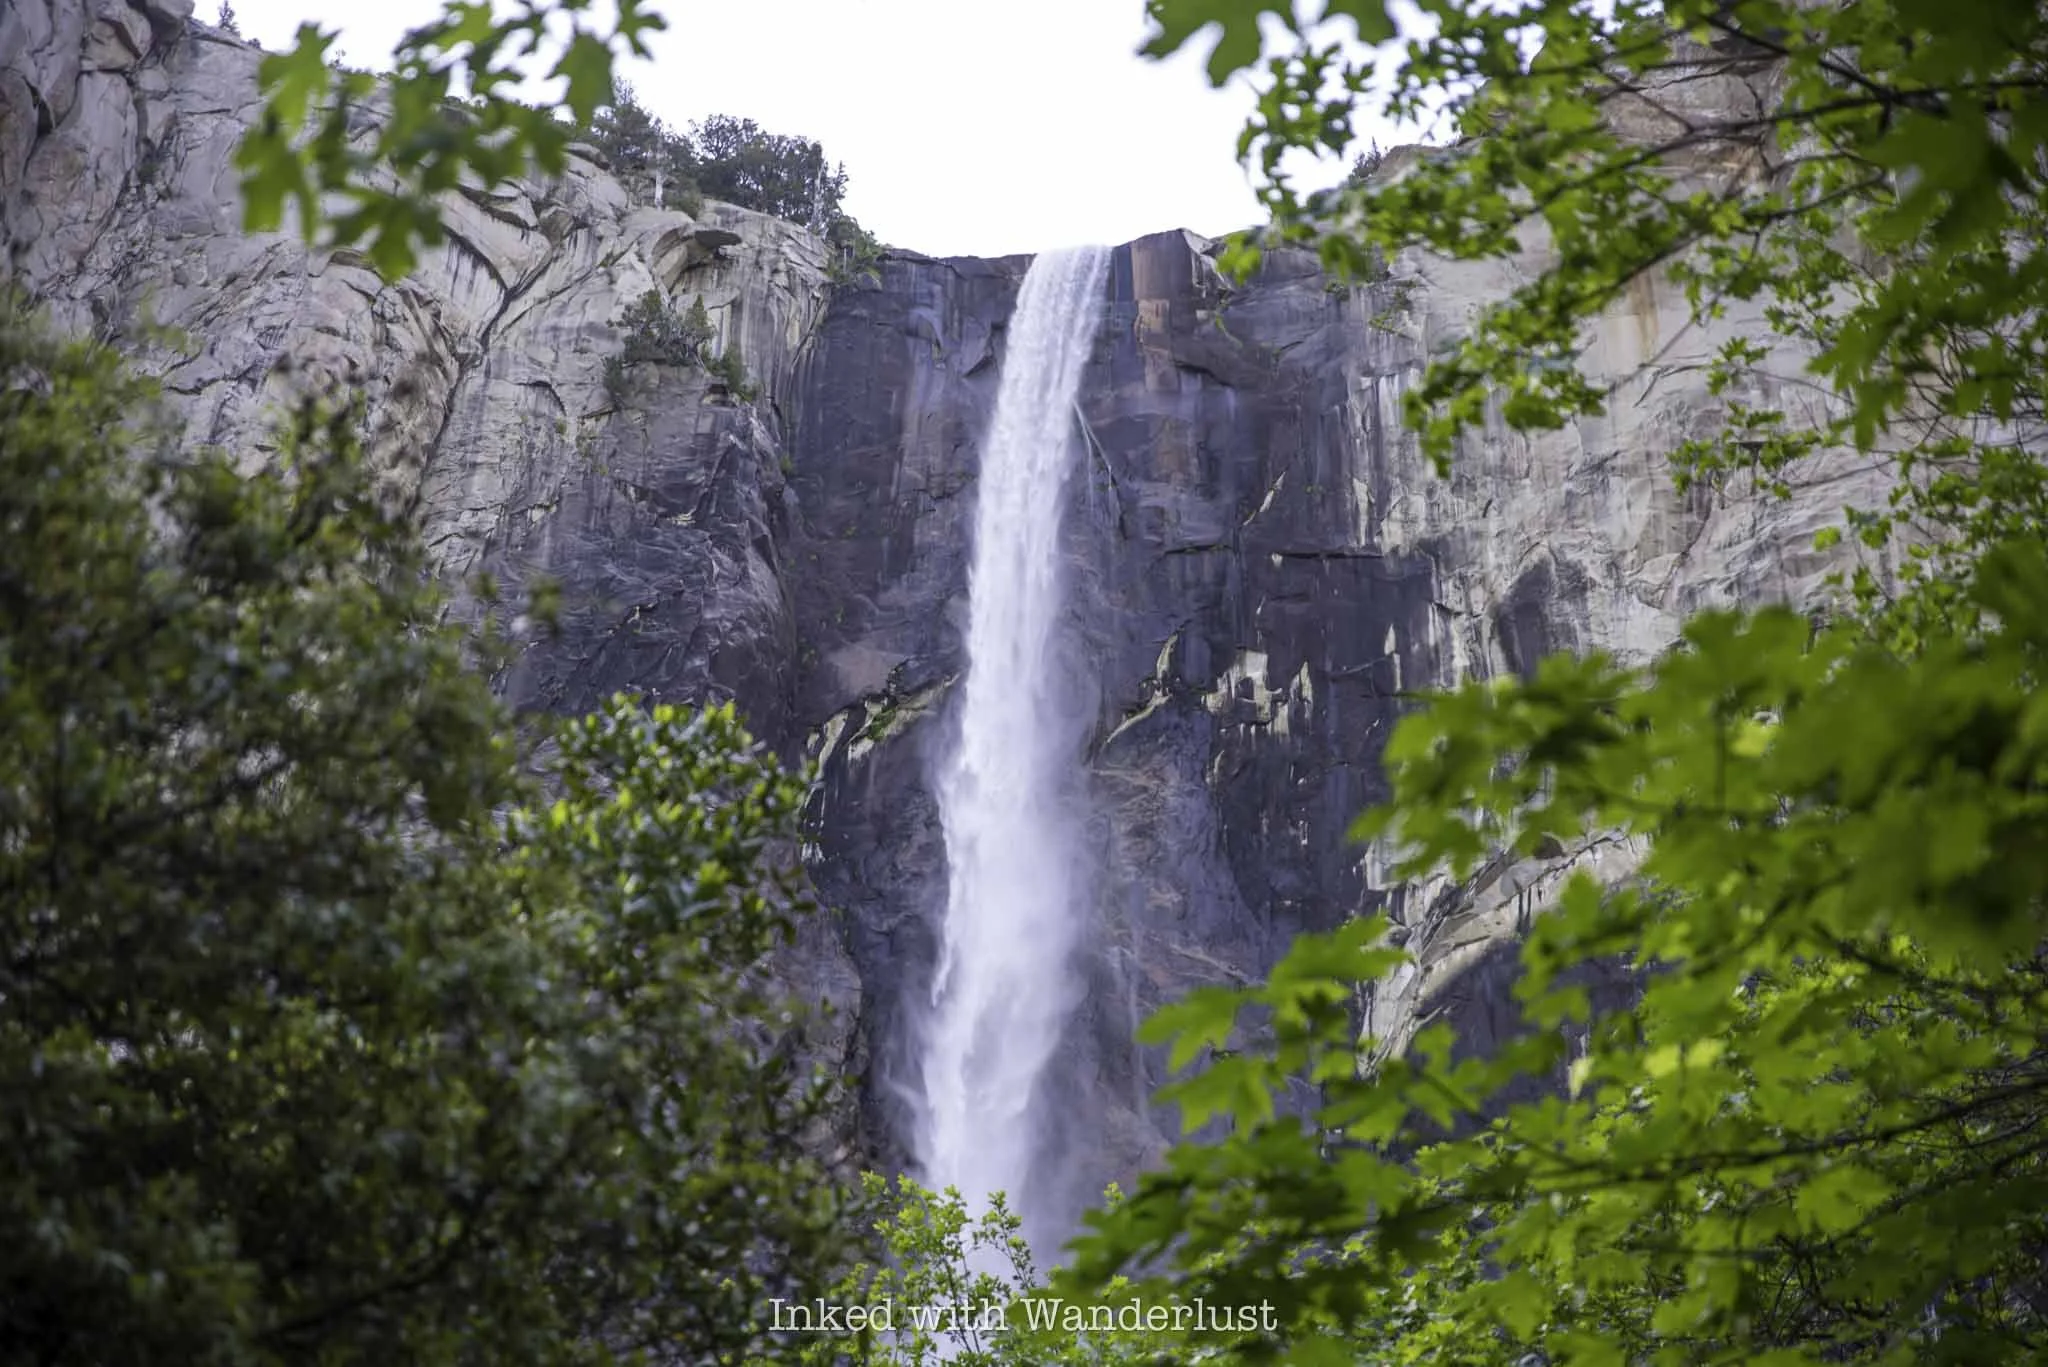
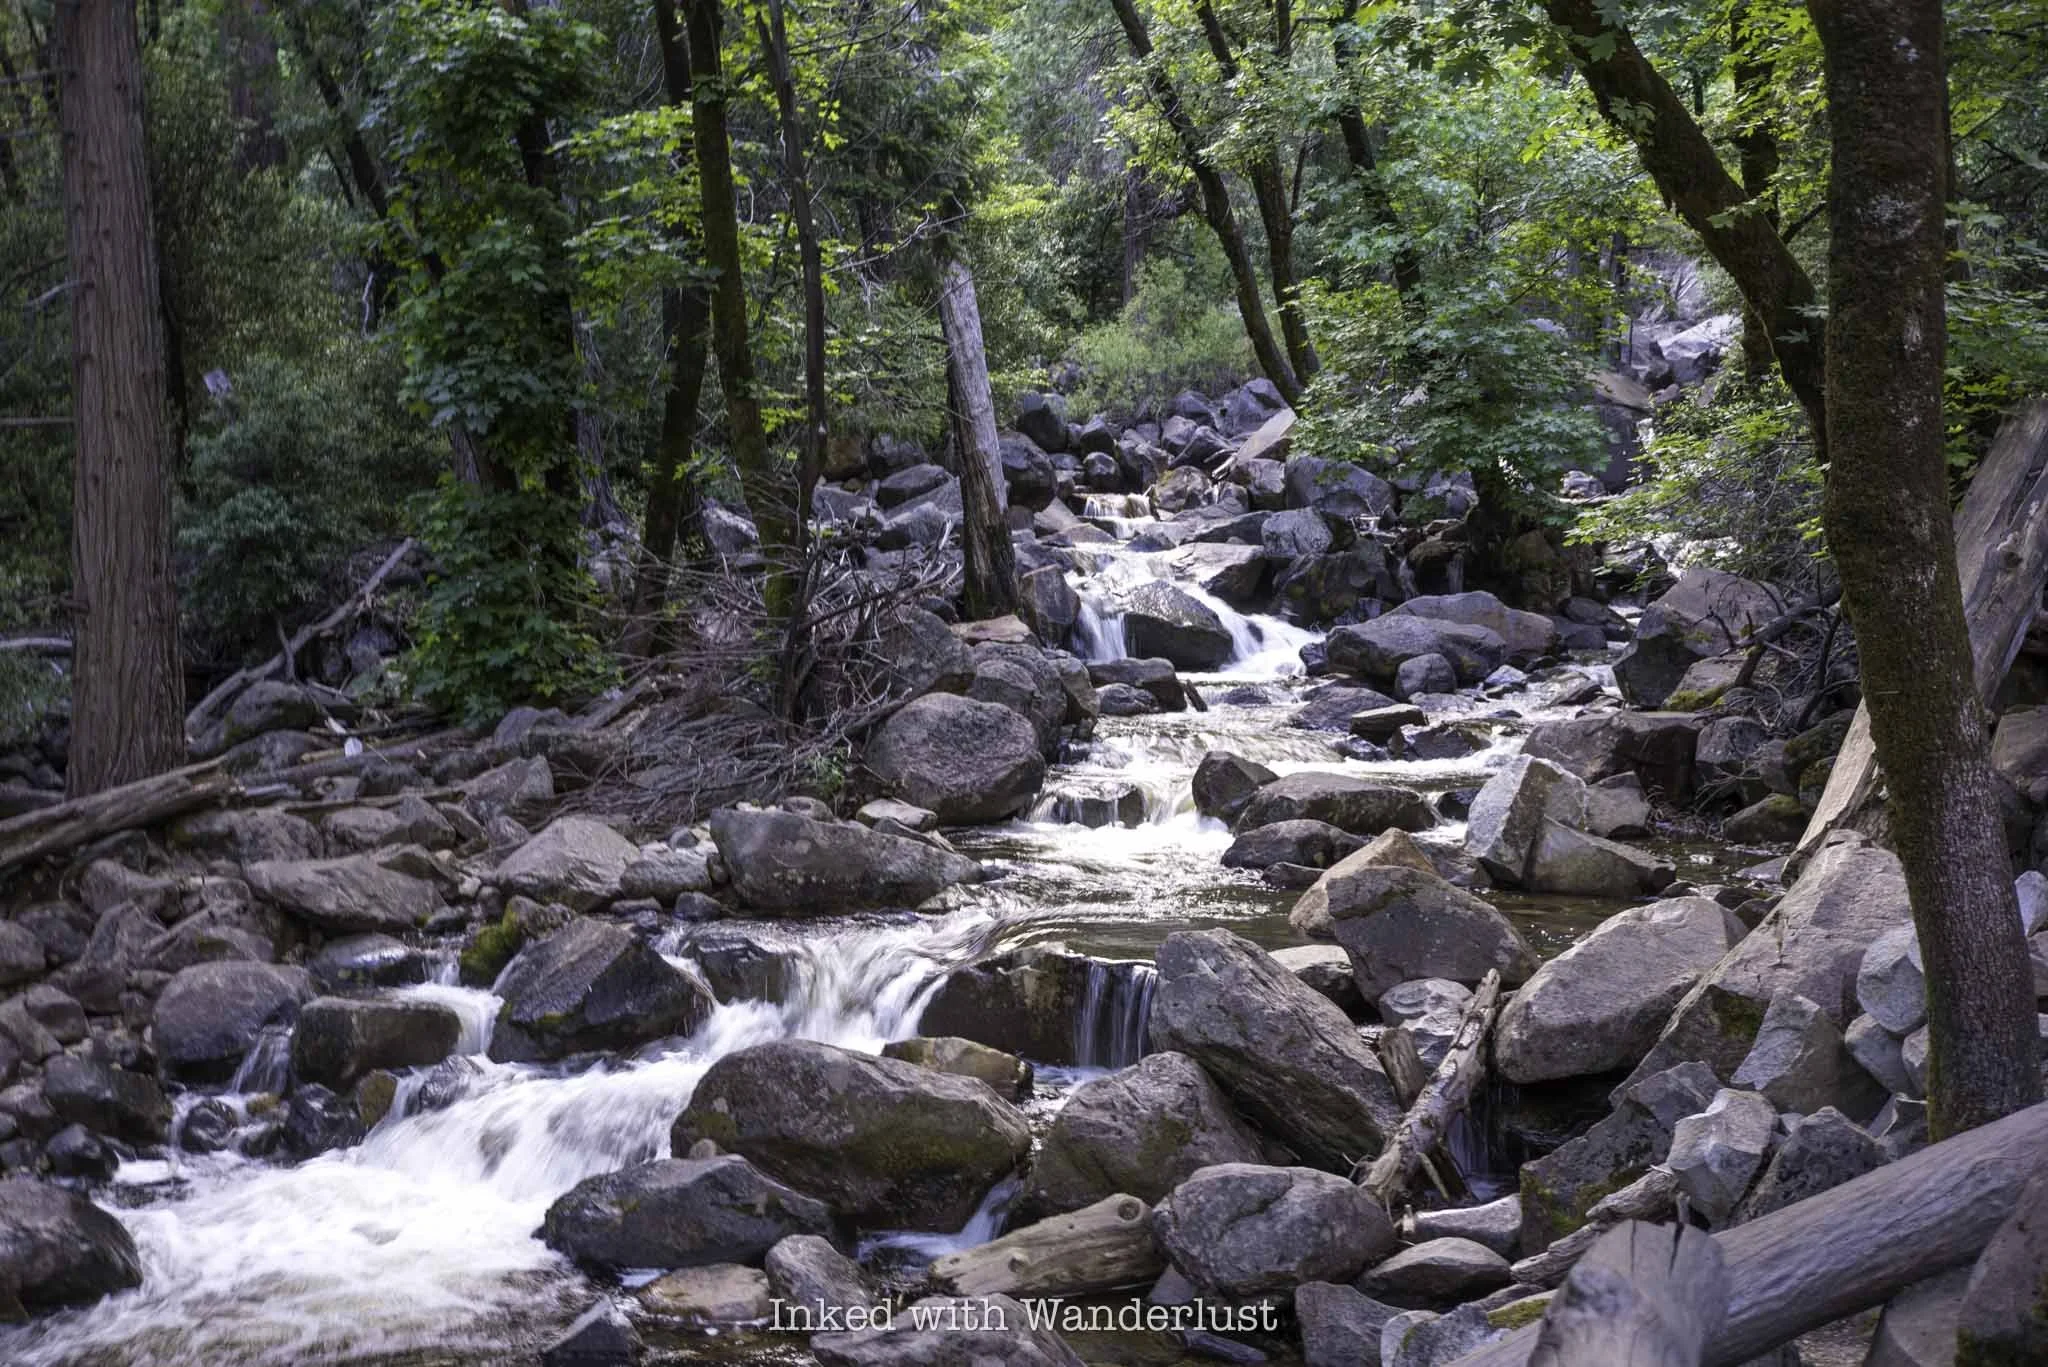
The views of the waterfall are non-stop throughout this short trail. Just past the boardwalk section of the trail you’ll get more glimpses of Bridalveil beautifully framed by trees and other greenery. If you happen to be here during the fall, the fall foliage takes the view up a few notches.
Just prior to reaching the waterfall, you’ll encounter several views of the beautiful Bridalveil Creek. While spring is the best time to see the creek at its fullest, it’s a lovely sight even when it slows down as the water cascades over the boulders, creating dozens of mini waterfalls.
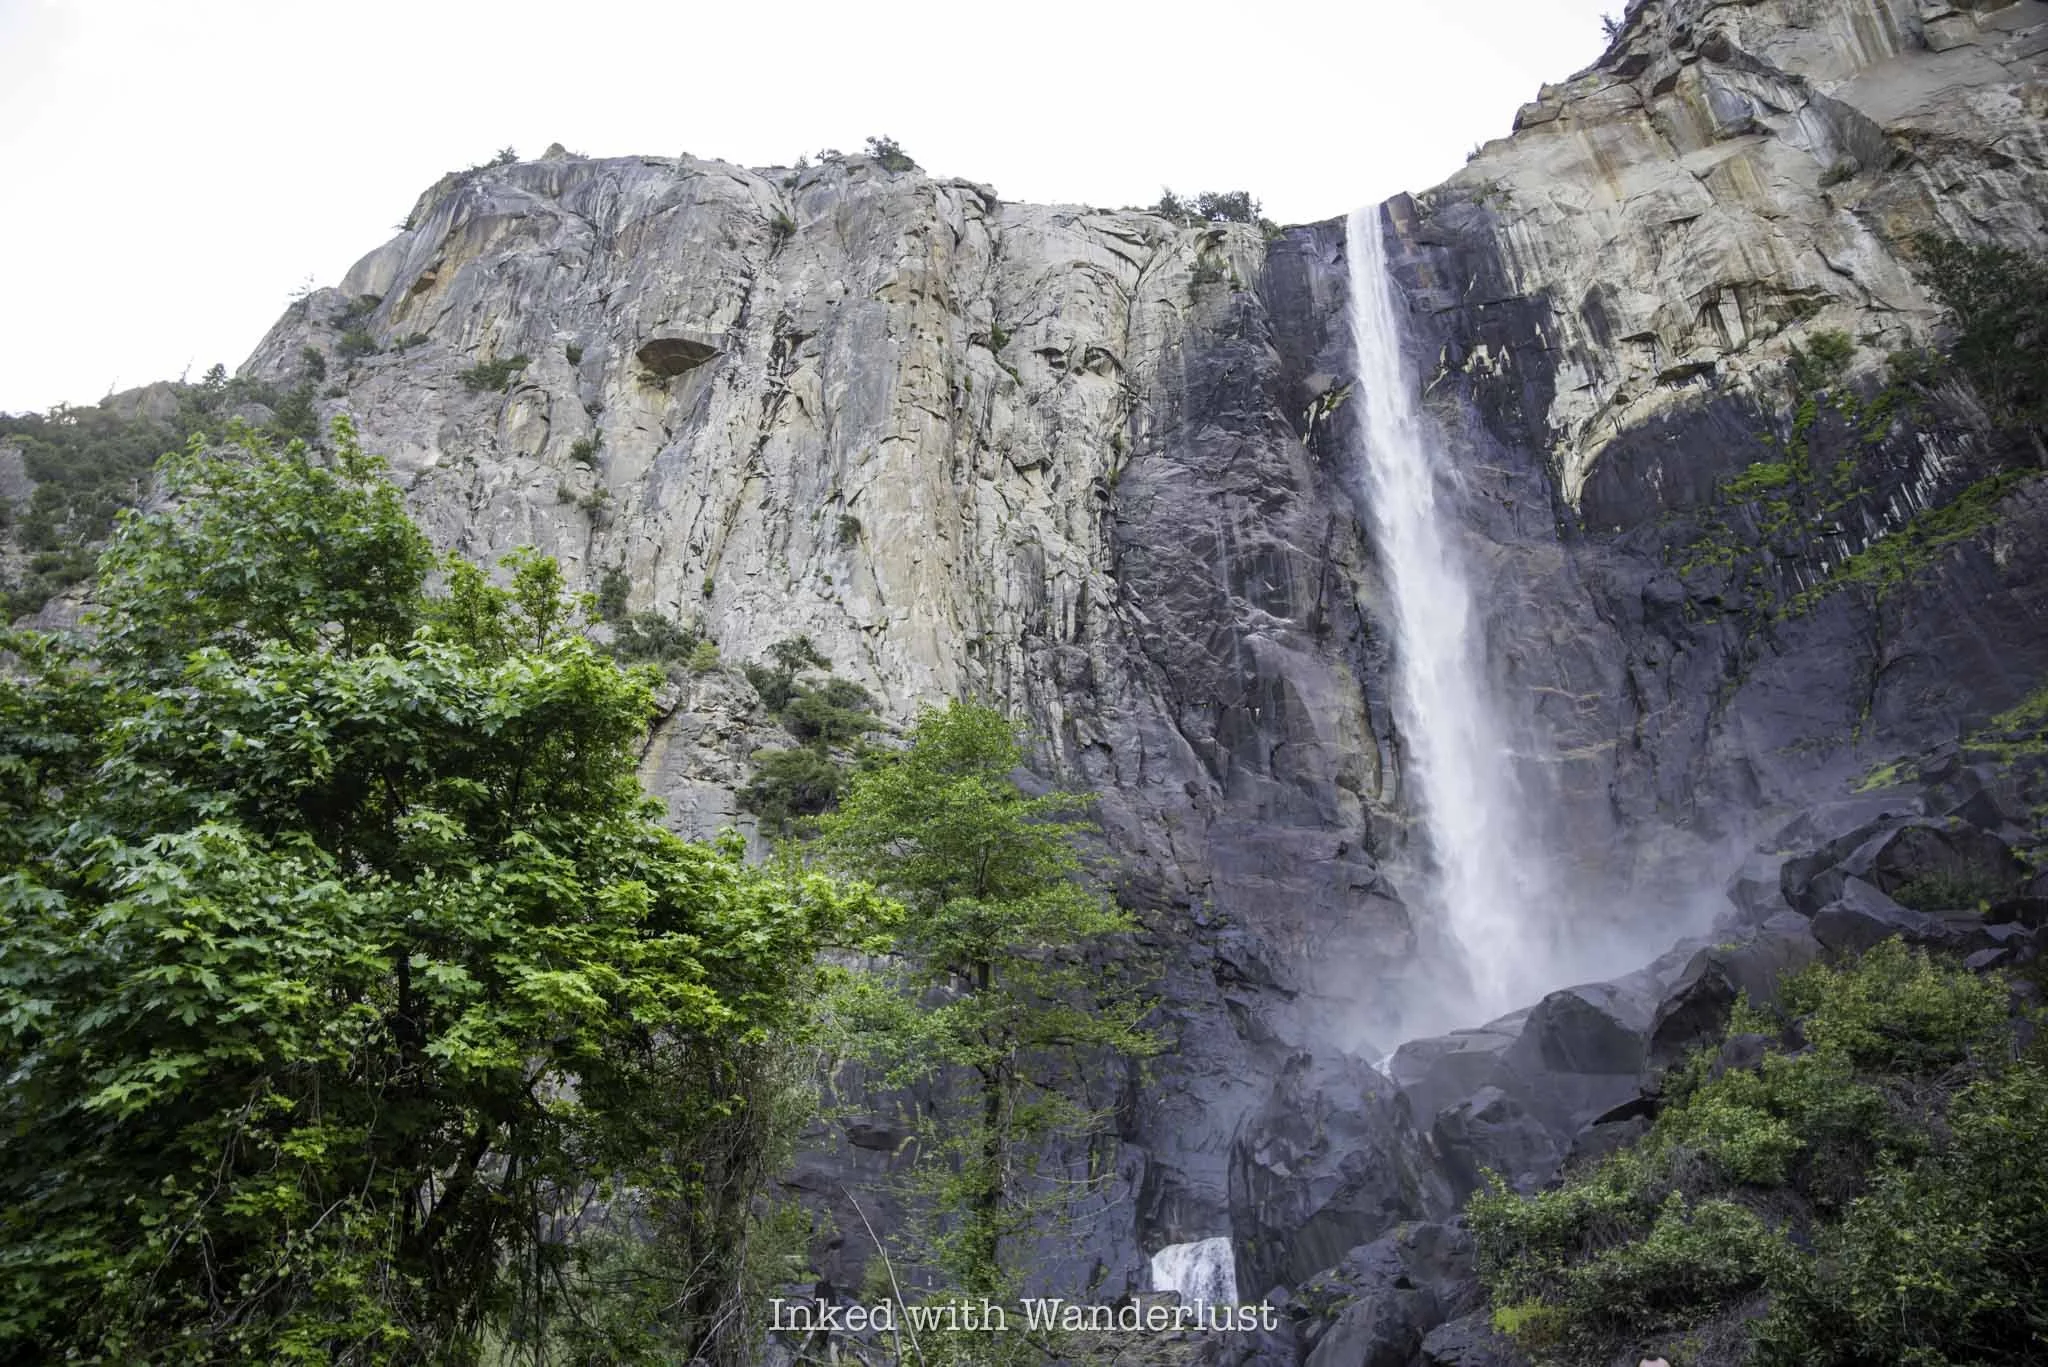
Once you reach the creek, simply follow it upstream. You’ll eventually come to a few steps and after that, Bridalveil Fall comes into view as you step into the viewing area. From here, you get close enough to the waterfall to feel the mist coming off of it (though not nearly as bad as the Mist Trail).
The viewing area is fairly small for such a popular destination. On a busy day, it isn’t unheard of for people to be shoulder-to-shoulder here. That is why I highly recommend getting here early to beat the rush. During my visit, I only had to share it with a few other people.
Common Questions About Bridalveil Fall
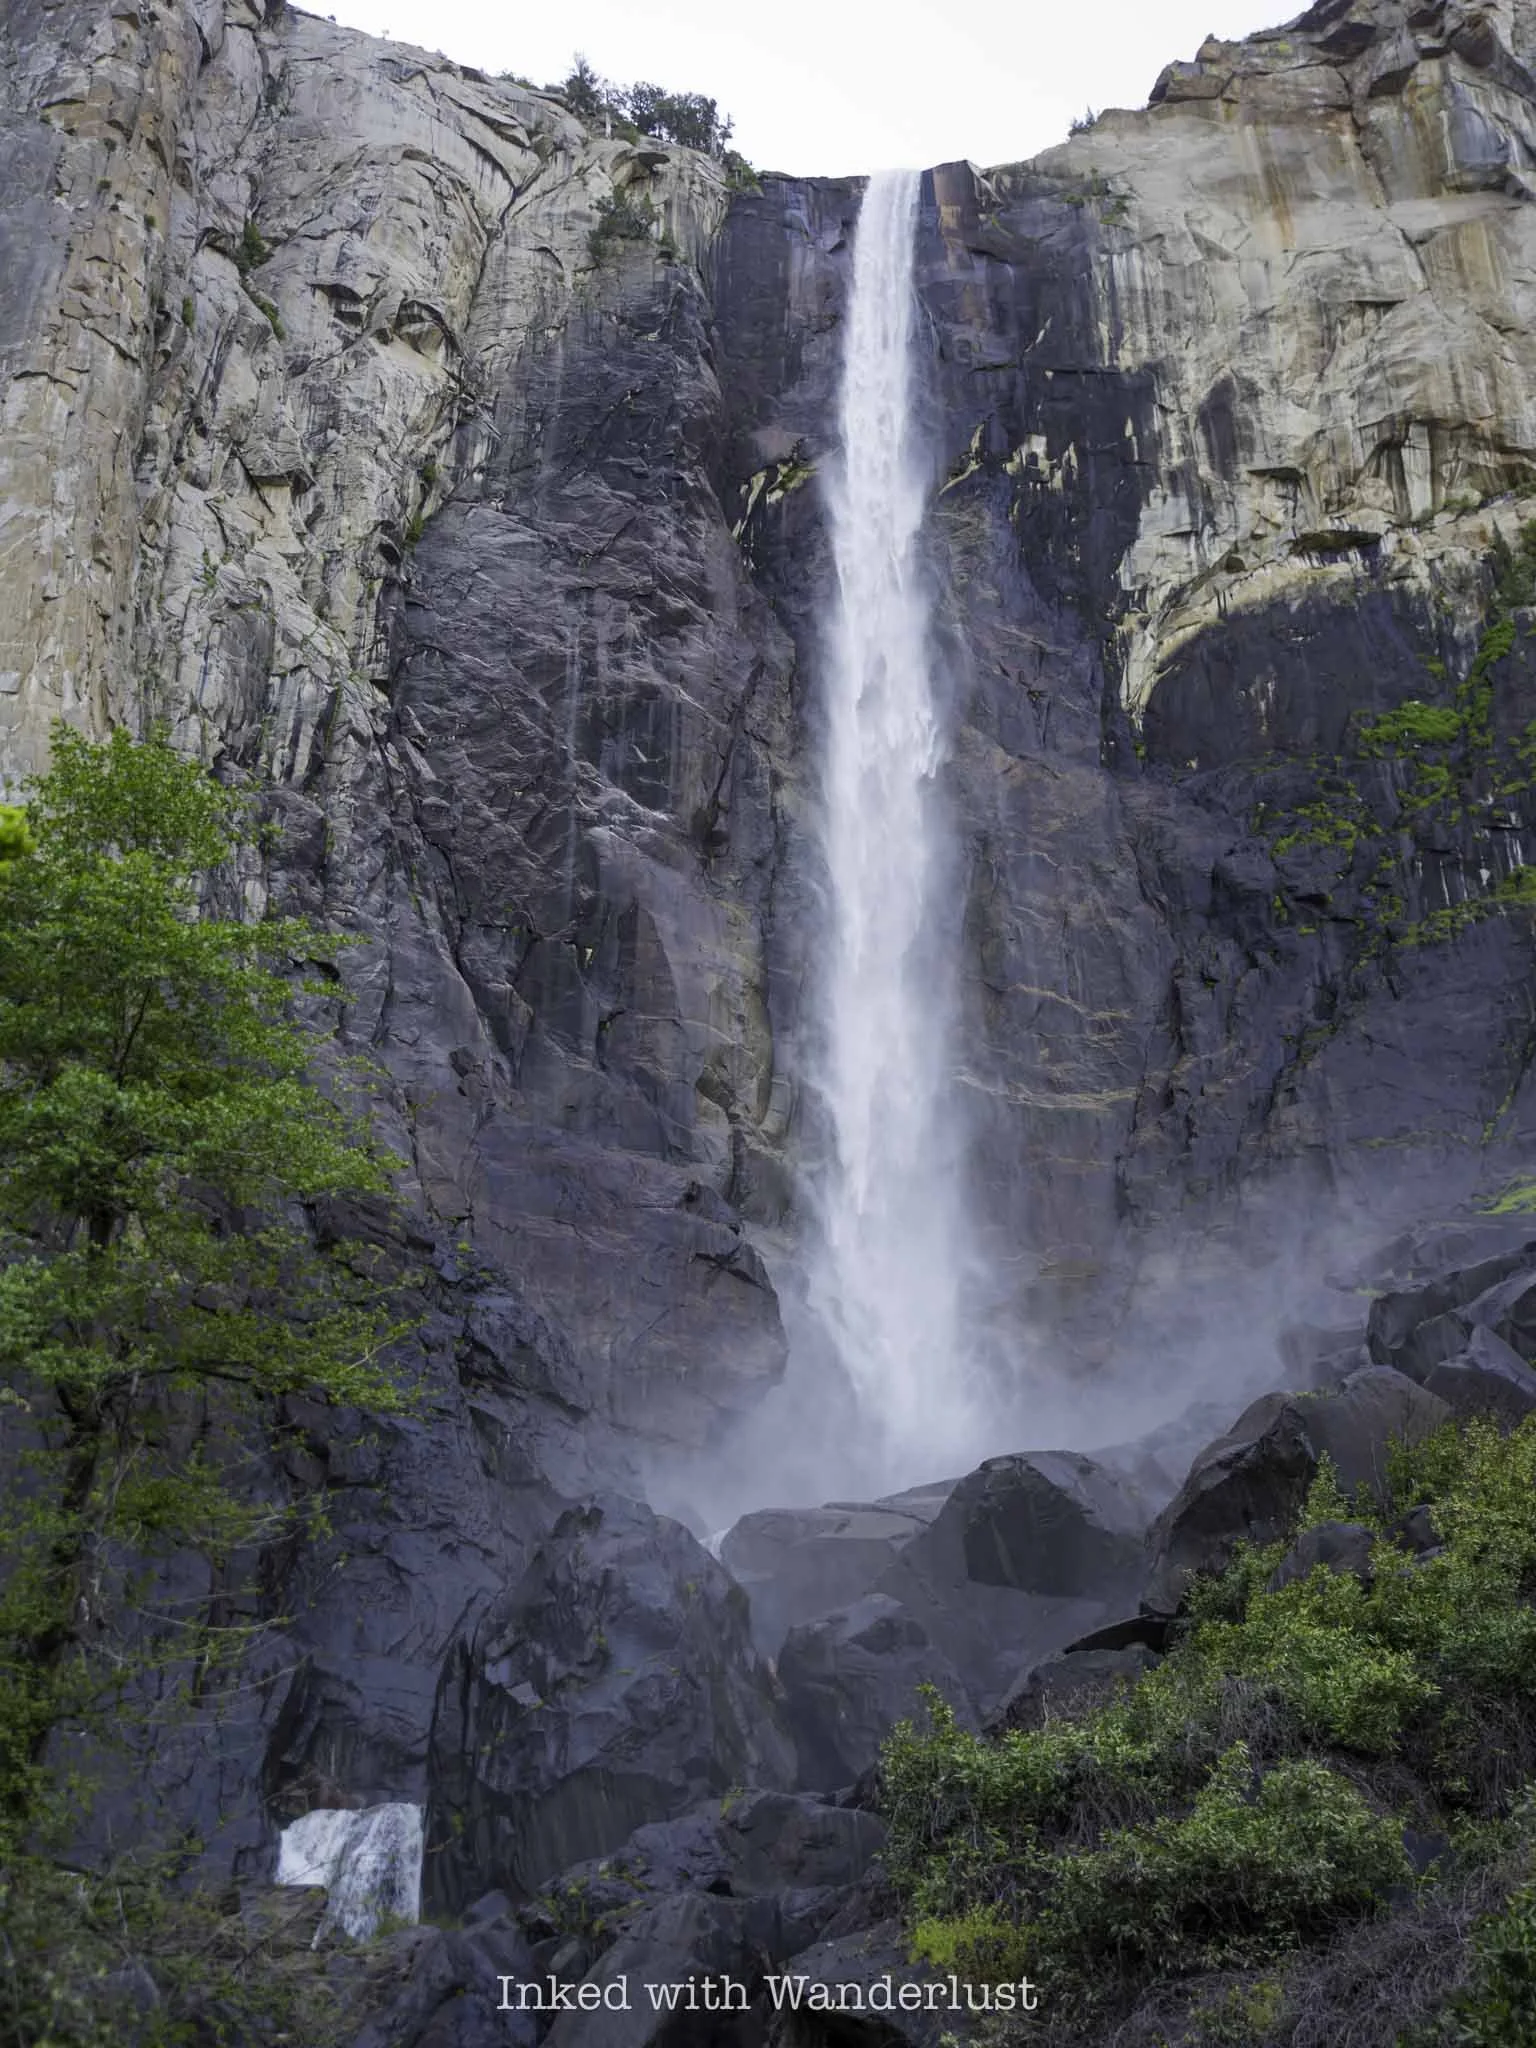
Is Bridalveil Fall open?
Yes. Bridalveil Fall reopened in 2023 from its years-long closure for the restoration project.
How long is the hike to Bridalveil Fall in Yosemite?
The trail is 0.8-miles, out and back.
What is the difference between Bridalveil Fall and Yosemite Falls?
While both are amazing in their own right, the differences are stark. Yosemite Falls is comprised of three waterfalls (upper, middle cascade, and lower sections), totaling 2,425 feet. Making it the tallest waterfall in North America. Bridalveil Fall is much smaller at 617 feet and is a singular waterfall. Both, however, are worthy of your time.
When is the best time to visit Bridalveil Fall?
Any time. Bridalveil flows all year, so there’s never a bad time. You’ll see it at its best in the spring. The summer months bring dense crowds and a diminished(ish) flow. Fall is fantastic for the colors and reduced crowds. Winter could be a great time as crowds are minimal, but you could be dealing with icy conditions and possible trail closures.

Is Bridalveil Fall trail ADA friendly?
Yes. The entire trail is paved, with the exception of the wooden boardwalk portion. There are three steps at the end, but to the right of those steps is a ramp you can utilize. Additionally, there is very little, if any, elevation gain on this trail.
Where is Bridalveil Fall located?
There are many waterfalls with this name in the United States. Both “Bridalveil” and “Bridal Vail” are often used. The Bridalveil Fall in this article is located in the valley of Yosemite National Park, California.
When does Bridalveil Fall stop flowing?
Unlike Yosemite Falls, Bridalveil Fall in Yosemite flows all year long.
Planning a trip to Yosemite? If so, be sure to read about the current day-use reservation requirements here. Also, read about Washburn Point, one of Yosemite’s most beautiful viewpoints. Additionally, if it’s your first visit, see my recommendations for the best things to do in Yosemite Valley. Finally, no visit to Yosemite would be complete without seeing its equally amazing east side.

15 Tips For Your First Time Hiking Half Dome
Every year, thousands of hikers summit Half Dome, many of them for the first time. In 2017, I was one of those first timers…
3 minute read | contains affiliate links
Each year, thousands of hikers summit Half Dome, many of them for the first time. In 2017, I was one of those first timers and though I felt like I was fully prepared, truth is, I wasn't.
In fact, I’m confident that if you polled others who’ve hiked Half Dome, I’m willing to bet that many of them would agree.
If you’re hiking Half Dome for the first time this season (or just mildly curious), this post is for you. I’m giving you 15 tips I feel all Half Dome hikers should be aware of going in. Let’s get into it.

Disclosure: This post contains affiliate links. If you click through and make a purchase, I may earn a commission at no additional cost to you. Thank you for supporting us!
1) Get An Early Start
This is especially true if, like most people, you’re doing this as a day hike. You’ll want to arrive to the trailhead as early as possible.
When my brother and I hiked it, we arrived at the Happy Isles trailhead at 3am. We didn’t see any daylight until we got past Nevada Fall.
The reasons you’ll want to start early are:
You’ll beat the crowds to the cables and avoid bottlenecks
You’ll likely avoid the afternoon storms that are notorious in Yosemite
You’ll beat the mid-day heat
If you’re doing this hike as a multi-day and you’re just hiking to your camping spot the first day, you won’t have to worry about it as much.
If you’re doing this as a day hike, however, definitely get started as soon as you can. It doesn’t have to be 3am, but pre-dawn is ideal.

2) Bring Gloves With You
Surprisingly, many people don’t think of this. The Half Dome cables are made of steel and they get hot. They’re also blister inducing.
Using gloves on the cables will help prevent blisters, protect you from burns and most importantly, provide you with good grip.
Sometimes, a pile of discarded gloves forms near the base. You’re welcome to use a pair but you shouldn’t count on the pile being there.
While it’s thoughtful, Rangers will collect and throw the gloves away as it’s technically littering. So bring your own. Full fingered preferably.
SEE MY TOP RECOMMENDATION FOR GLOVES TO USE ON HALF DOME HERE!

3) Bring More Water Than You Think You’ll Need
I cannot stress this enough. It’s always important to bring water with you on a hike but it’s especially true on this one.
I recommend 3-4 liters, per person. I only brought two liters with me and ran out on the way back (with over six miles left to go).
The only filtered water source is the fountain at the Vernal Fall footbridge (just about a mile into the hike). After that, you’re on your own.
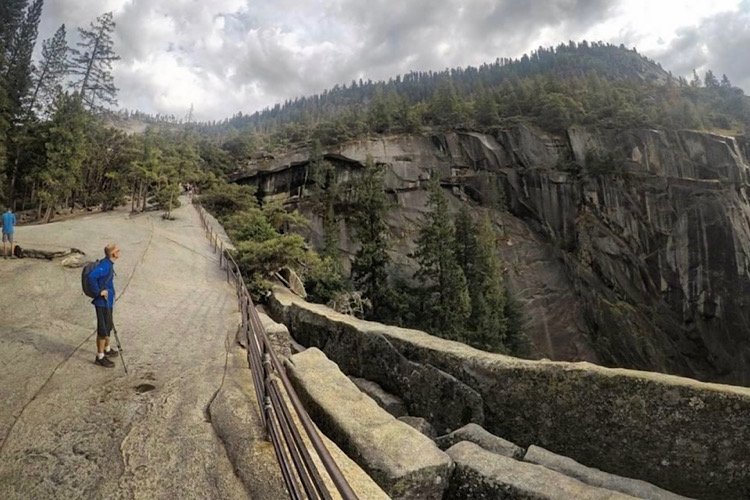
4) Trekking Poles Are A Must!
My knees were killing me on the way back. If it weren’t for my trekking poles helping to off-set the weight, my brother would’ve had to carry me out.
If you’re someone who’s prone to knee pain or you know you usually require trekking poles on normal hikes, you’ll definitely want to bring them along on this one.

5) Wear Shoes/Boots With Excellent Grip
While granite usually has excellent natural grip, years of hikers traversing it has caused that section to become smooth and slick.
Seriously, normal shoes or ones that are worn down will not suffice. You’ll definitely want to break them in prior to your hike, but the tread should be as new as possible.

6) Leave Your Backpack At The Base
It may be tempting to bring your backpack with you as you climb up the cables but take it from me, make it easier on yourself (and others) and ditch it at the base.
The reason I say this is twofold:
There isn’t a lot of space between the cables, so if everyone’s wearing a bulky backpack, that space only becomes more restrictive
For some, it’s already challenging enough to climb the cables. Adding the weight/balance of a backpack only complicates matters
If you must bring a backpack to the top, bring a smaller day bag and leave the bulky one behind. No one’s going to mess with your stuff.
Do be sure to seal your bag before leaving, though. You don’t want Marmots and other critters getting in there.
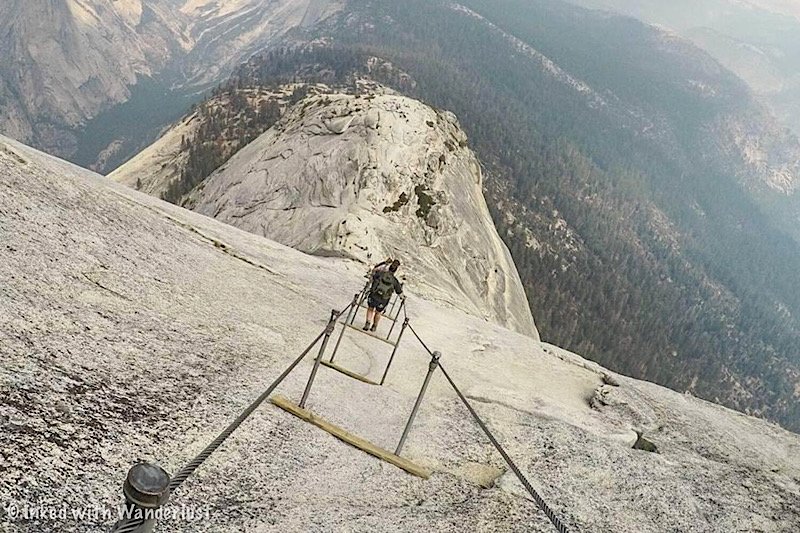
7) Take As Long As You Need On The Cables
There’s no shame in taking it slow. This isn’t a race and there’s no prize at the top for the fastest climber. Go at your own pace.
Every six feet or so (at each set of steel poles) are wooden planks. Use those as a guide and focus on them if the heights start getting to you.
Rest at each one if necessary. No one will make fun of you. Just be mindful of those who may want to go faster and let them pass.
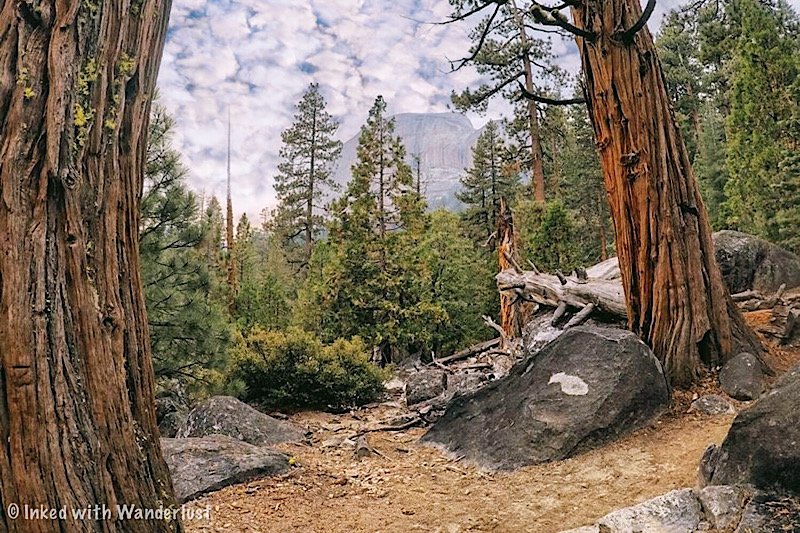
8) If You See Dark Clouds, Don’t Attempt It
Yosemite is infamous for its afternoon storms. It isn’t uncommon to go from clear blue sky to rain and lightning in the blink of an eye.
Bad weather and climbing Half Dome isn’t a good mix. If lightning decides to strike, there’s a good chance Half Dome will be where it hits.
If you get to the base and it starts to rain, don’t risk it. If you’re at the summit and see black clouds rolling in, get back down pronto.
In the 1980’s, numerous people were killed and injured on the summit when a sudden storm came in. It’s always best to er on the side of caution when it comes to storms.
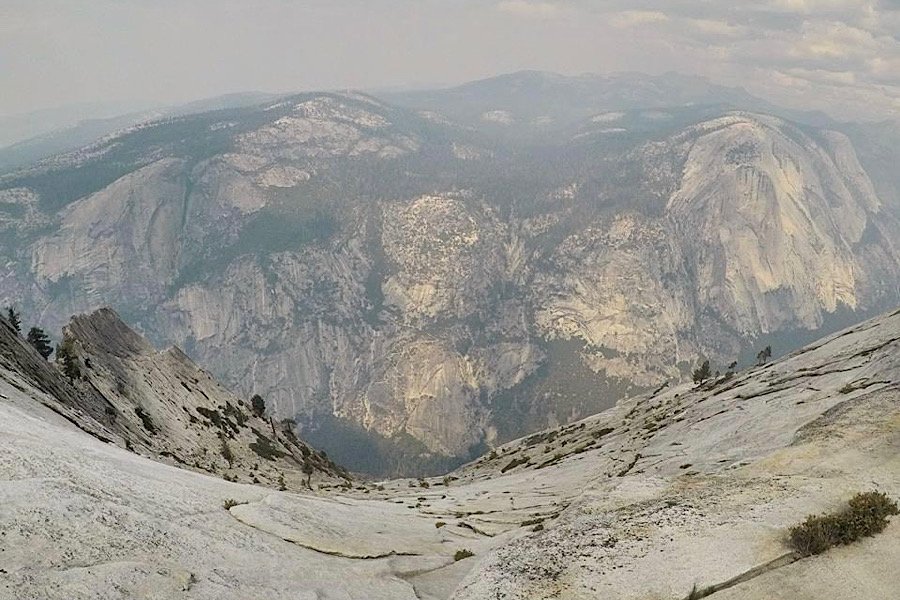
9) You Can Use A Climbing Harness If You Want
Some opt to utilize a harness to secure themselves to the cables, reducing their chance of falling.
It’s a device that you wear around your waist and legs, with the other end connecting to the cables via a carabiner.
Personally, I don’t think it’s necessary. However, if it’ll make you feel better and help you fulfill your dream, go for it.
You will need to unclip and clip back in every six feet or so, so it will slow you down a bit. The peace of mind it provides may be worth it, though.
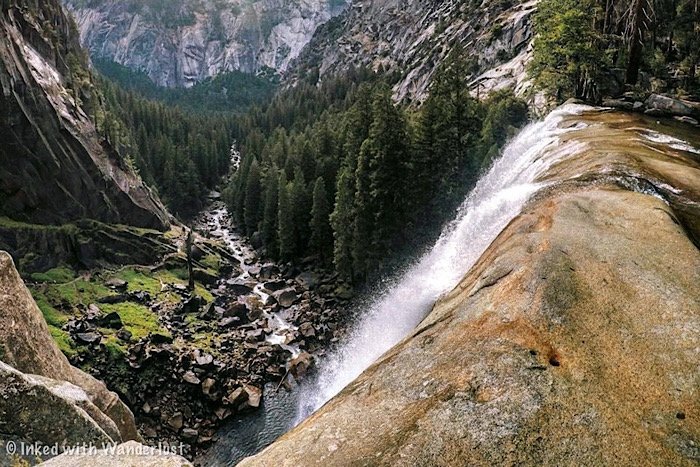
10) Get Into The Best Shape You Can
There’s no need to be a top-level athlete or master climber, but the better shape you’re in, the easier time you’ll have.
The cables themselves are more upper strength than leg strength and the hike itself will test your cardiovascular endurance.
Hitting a stair master will prepare you for the Mist Trail portion of the hike. Likewise, a strength training routine would be beneficial.
Most importantly, hike as much and as often as you can prior to your trip. The higher the elevation, the better.
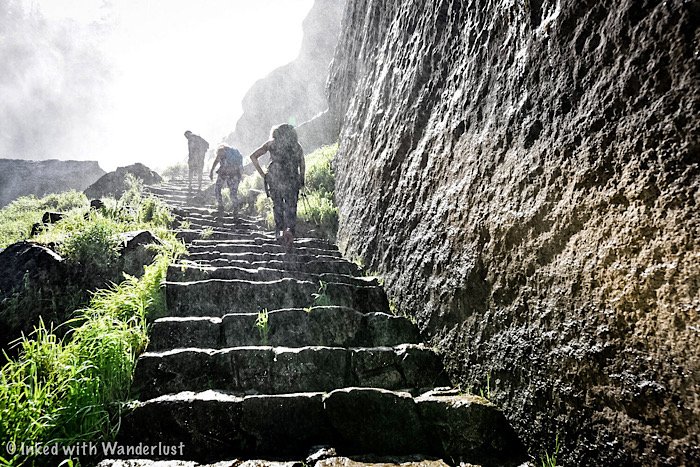
11) Bring Extra Socks
This is one I wish I’d thought about. You should always take care of your feet…always. That means bringing a fresh pair of socks (or two).
If you don’t and get soaked on the Mist Trail, you’ll be forced to hike the rest of the way with soggy socks.
If the Mist Trail doesn’t get you, then your socks will most definitely be soaked in sweat by the time you make it to the summit.
Packing extra socks will allow you to swap out the nasty ones for a fresh pair for the hike back down.

12) Have A Hard Copy Of Your Permit Available
Some hikers spend 8-10 hours or more doing this hike. Consequently, if you’re taking a lot of pictures, your phone battery will almost certainly die.
If that happens and all you have is a digital copy of your permit, you’ll have nothing to show the ranger when asked. Guess what that means? Off you go.
It wouldn’t hurt to have a printed copy in a plastic bag inside your backpack. That way, you won’t risk getting turned around.
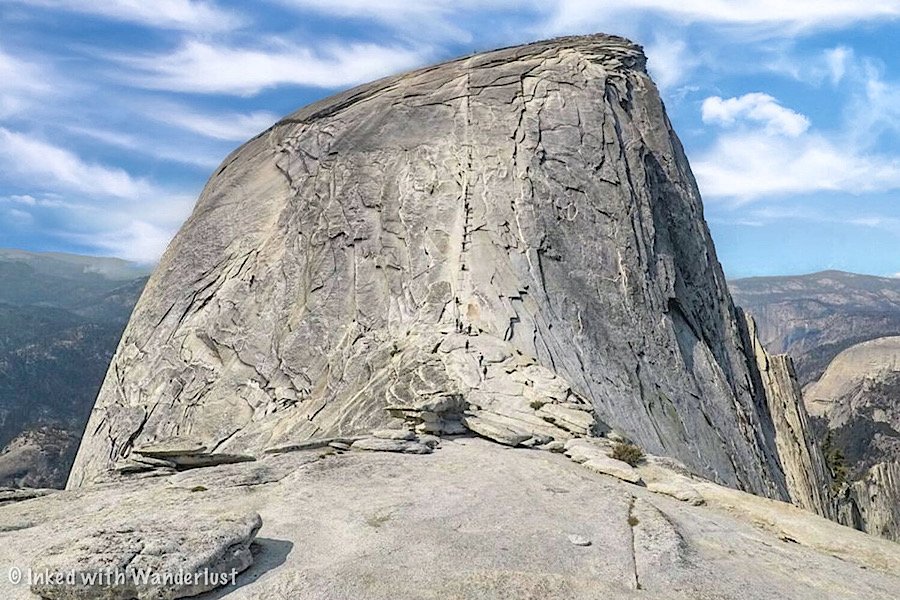
13) Bring Ibuprofen & Moleskin
You can add this one to the, “wish I thought of it”, category. As stated above, my legs and feet were wrecked by the time we got back to the car.
It was only then that I realized my mistake. I had absolutely nothing to help mask the pain and had a long drive home ahead of me.
Bring some Ibuprofen (or an alternate pain killer) with you. Take a couple at the summit, if needed, to reduce the discomfort on the way back down.
Also, moleskin does wonders for covering and preventing blisters. If you don’t know what it is, it’s a dense, woven cotton fabric that acts as a shield between your skin and shoes in areas where blisters are most common. Highly recommended for ANY hike.

14) Eat, Eat And Eat Some More
This is a long, demanding hike and for most people, will take a full day. You will burn a serious amount of calories and energy.
Due to this, you’ll need to replenish your body with as many nutrient dense foods as you can.
Foods with complex carbs, low amounts of sugar, decent level of healthy fats and high amount of protein will do the trick.
Also, salty snacks, such as beef jerky and sunflower seeds, will help you retain water and keep you hydrated for longer.
Stop as often as you need if you’re feeling hungry or low on energy. Trust me, you don’t want to tackle the cables with nothing in the tank.
SEE MY TOP RECOMMENDATION FOR PREPARING FOOD IN THE WILDERNESS!
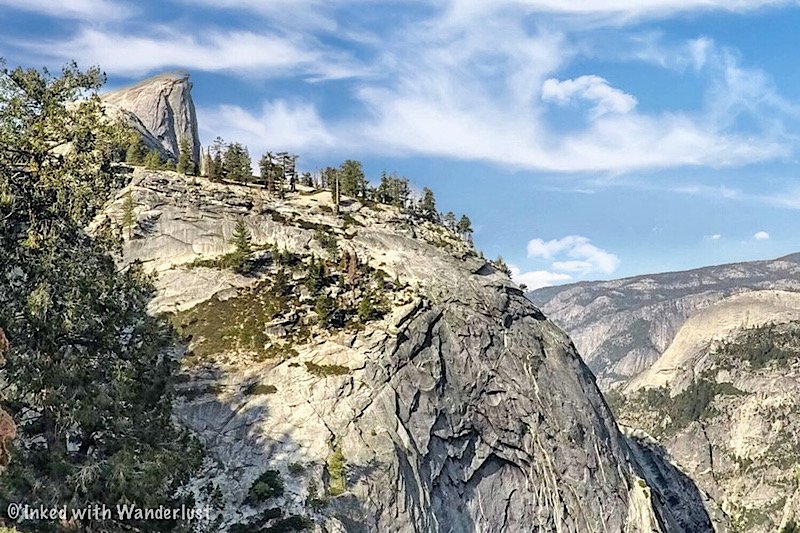
15) There’s No Shame In Turning Around
More hikers do it than you might think. I’d wager a guess that for every ten hikers that make it to the cables, at least one decides against it.
Whether it’s due to bad weather or simply a gut-feeling on your part, there’s no shame in turning around. The cables are intimidating.
So don’t succumb to peer pressure or allow pride to take over. If you get there and it doesn’t feel right, then don’t do it. You still had an amazing adventure!
BONUS: Peak Design Camera Clip

This camera clip by Peak Design is a MUST for anyone using their DSLR or point-and-shoot camera while out on a hike or are just out and about on a shoot.
As shown in the image above, it securely attaches to your backpack strap and firmly holds your camera in place. Allowing you to be hands free while not in use.
When inspiration strikes, a quick button press is all it takes to remove it. When done, simply snap back into place and you’re done.
CHECK OUT THIS SOLID CAMERA CLIP BY PEAK DESIGN ON AMAZON HERE!
If you’re serious about hiking Half Dome, be sure to read my other Half Dome related posts…
Disclosure: This post contains affiliate links. If you click through and make a purchase, I may earn a commission at no additional cost to you. Thank you for supporting us!
Please support this website by subscribing to the newsletter below.
Thanks for reading.

How To Hike To Lower Eagle Falls In Lake Tahoe
Nestled within the captivating natural beauty of the iconic Emerald Bay State Park, the trail to Lower Eagle Falls offers…
2 minute read | contains affiliate links
Nestled within the captivating natural beauty of the iconic Emerald Bay State Park, the trail to Lower Eagle Falls offers an awe-inspiring experience for outdoor enthusiasts and nature lovers alike.
Most are aware of the upper section of Eagle Falls just outside the park and how you can traverse the crest of lower falls across the highway.
If you want to see Lower Eagle Falls straight on, though, you’ll need to hike down into Emerald Bay via the short, but steep, one mile trail.
In this guide, we’ll discuss the parking situation, fees, what to expect on the trail and more. Let’s get into it!

Trail Stats
Location: Emerald Bay State Park, Lake Tahoe
Fee: $3 - $10 parking fee
Permit: None
Open: Seasonally
For: Hikers
Restroom: At the trailhead and in Emerald Bay
Parking: Medium sized paved lot
EV Stations: None
Difficulty: Easy going in, moderate going out
Popularity: Mega High
Mileage: About 2.5 miles total, RT
Time: 2-3 hours
Condition: Maintained, easy to follow
Features: Waterfall, Island, Visitor Center, Beach
Best Time: Spring/early summer
Pets: Not allowed
Drones: Not allowed
Hazards: Trail is steep going back out. Can be difficult for some
Our Visit(s): August 2022 & July 2023
Disclosure: This post contains affiliate links. If you click through and make a purchase, I may earn a commission at no additional cost to you. Thank you for supporting us!
Emerald Bay Parking Lot

Your trip to Lower Eagle Falls begins and ends in the Emerald Bay parking lot. To avoid the hassle of having to wait for a spot to open, you should arrive as early as possible as it’s known to fill up quickly.
There are pay stations near the trailhead that accept credit or debit cards. The parking fees are:
$3.00 for one hour (select this option if all you want to do is go to the viewing deck)
$10.00 for day use
To begin your hike, head towards the wooden booth past the pay station. To your right, there’s a viewing deck that provides a great view of Emerald Bay and your destination, Lower Eagle Falls.
The Trail To Emerald Bay

Going into Emerald Bay, the trail is all downhill and easy going. Just prepare yourself for the way out because it’s fairly steep and can be difficult for some. So come prepared.
It’s slightly less than a mile along a wider than usual dirt path. Near the bottom you’ll arrive at a junction. Head right to continue to the waterfall.
After this junction, you’ll officially be in Emerald Bay State Park. Continue straight as you pass the restroom, beach access and the Vikingsholm Castle.
Keep straight on the trail until you reach the visitor center. The incredibly short trail to Lower Eagle Falls begins just behind it.
Lower Eagle Falls

Facing the visitor center, the tail to the waterfall begins on the right. It starts out as gravel but as you get closer the falls, it’ll turn to dirt and stone.
When the trail aligns with the water, your first glimpse will be off two mini-waterfalls split between rocks and brush.
Further up, you’ll work your way up several granite rock steps before arriving at the Rubicon trail footbridge.

Go ahead and take in the views of the creek from the bridge, but don’t cross it to the other side as that’ll take you along the Rubicon Trail.
To continue towards Lower Eagle Falls, head up the trail for another 2/10’s of a mile while keeping the creek to your left.
You’ll encounter several more flights of granite steps just before reaching the falls. When you reach the top of those steps, the viewing deck and waterfall come into view.

The viewing deck is split in two by a tree and provides a straight-on view of Lower Eagle. There’s a fair amount of room but it doesn’t take many people to feel cramped.

There’s no access to Highway 89 from here. The viewing deck is the literal dead end of the trail. So when you’re finished taking it in, simply head back the same way you came.
I hope you’ll consider checking out Lower Eagle Falls. It’s a beautiful waterfall and worth the effort to see. If you’re interested in other sites nearby, check out our articles below.
Disclosure: This post contains affiliate links. If you click through and make a purchase, I may earn a commission at no additional cost to you. Thank you for supporting us!
Please support this website by subscribing to the newsletter below.
Thank you for reading.

How To Hike To The Base Of Middle McCloud Fall
Middle McCloud Fall is just one of three beautiful waterfalls, collectively known as McCloud Falls, along the McCloud…
3 minute read | contains affiliate links
Middle McCloud Fall is just one of three beautiful waterfalls, collectively known as McCloud Falls, along the McCloud River about 45 minutes from the town of Burney.
Being that there’s two more waterfalls, you may be wondering why i’m only writing about the middle fall in this post. There reason is simple…it’s my favorite.
I have a post dedicated to the three falls as a whole. If you’re interested in reading that one, you can do so here.
In that post, I state near the end of article that if you only have time to visit just one of these, make it the middle fall.
On top of that, of the three, the middle fall is the only one that requires any real effort to reach the base (you can drive to all three but the middle one requires a small hike to reach it).
So in this post, i’m going to cover where to find parking, what to expect along the trail and what it’s like at the base of the fall. Let’s get into it!

Quick Stats
Location: McCloud, CA (45 minutes from Burney Falls)
Fee: None
Permit: None
Open: Spring, summer & fall
For: Hikers, swimmers, sightseers
Restroom: At the trailhead
Parking: Large, paved lot
EV Stations: None
Difficulty: Easy
Popularity: Medium to high
Mileage: 0.8-mile, out-and-back
Time: 1-3 hours (depending how much you spend at the fall)
Elevation Gain: 157-feet
Condition: Maintained & easy to follow
Features: Waterfall and great swimming hole
Pets: Allowed on leash
Drones: No signage stating you can’t use them
Hazards: Boulder field near the base and submerged boulders in the swimming hole
Our Visit(s): September 2019 and May 2022
Getting There and Parking

Middle McCloud Fall is fairy easy to get to. If you’re coming from the town of Burney:
Drive north on highway 89 for about 40-miles
Turn left onto Fowler Public Camp road
Continue for about a half-mile
Then turn left onto an unnamed, paved service road (you’ll see signage indicating the way)
If you’re coming from the Dunsmuir:
Drive south on highway 89 for about 22-miles
Turn right onto Fowler Public Camp road for a half-mile
Turn left onto the same unnamed service road.
Each of the three falls have their own paved parking lots but the middle one is the largest. It could easily fit dozens of vehicles plus some RV’s and buses.
You’ll find the trailhead directly adjacent to the bathrooms.
Trail To The Vista

For those who don’t want to make the trek down to the bottom, the middle fall can be viewed from above at the vista.
The trail to the vista is paved and is able to accommodate wheelchairs and strollers. There are two of them to choose from.
For most people, this is as far as they’ll go. The view of the falls from up there is nice but to get the true experience, you’ll want to hike down to the base.
Trail To The Base

Finding the beginning of the trail to the base can be a bit tricky. Especially if you aren’t paying attention (like me during our first visit).
The dirt path to the base spurs off from the paved trail that leads to the second vista. Right as the paved path elbows, look to your right (pictured above).
The dead giveaway are the rocks lining the right side of the trial, forming a path. How I missed that the first time I’ll never know.
*Side Note: There is no sign pointing the way. So keep an eye out for those rocks you see in the photo above.

From there, it’s only 0.4-mile down to the bottom. Accounting for a few stops to take pictures, it shouldn’t take more than 10 minutes or so.
Shortly after finding the trail, you’ll encounter a set of wooden stairs. After this, the trail continues its descent via a series of switchbacks.

The trail, while a bit rocky in some spots, is well maintained and easy to follow. There are no steep points as the switchbacks are gradual.
When you reach the bottom, you'll come to a junction. Going right will take you down to Lower McCloud Falls (about a mile out).

To continue to the middle fall, head left (you should have the waterfall in your line of sight as this point).
At the end of the trail, you’ll see a large boulder field in front of you. If you want to swim near the waterfall, you’ll need to negotiate it.

Most of the boulders are positioned fairly close to one another, so getting through it isn’t too difficult. Young children may have a tough time, though.
Once on the other side, you’ll have unobstructed views of Middle McCloud Fall and its pool. I was fortunate enough to have it all too myself.

The scenery is amazing. Huge, towering alpines surround you while the water pours over the crest and down the large basalt rock wall into the pool below.
If you plan to swim, I do caution you to watch for the submerged boulders and to wear water shoes as there’s tons of debris in the water.

When you’re done, simply head back up the same way you came. While you’ll definitely notice the incline going out, it’s still an easy trek.
I stand firm that the middle fall is the best of the three and if you only have time for one, to make it this one. You won’t regret it.
If you want to make it a point to see all three waterfalls and hike the trail connecting them, check out our post, “McCloud River Falls: Three Fantastic Waterfalls In One Hike”
Your Thoughts…
What do you think of Middle McCloud Falls? Does this seem like a waterfall/hiking trail you and your family would enjoy?
Let us know in the comments below! We love to hear from our readers.
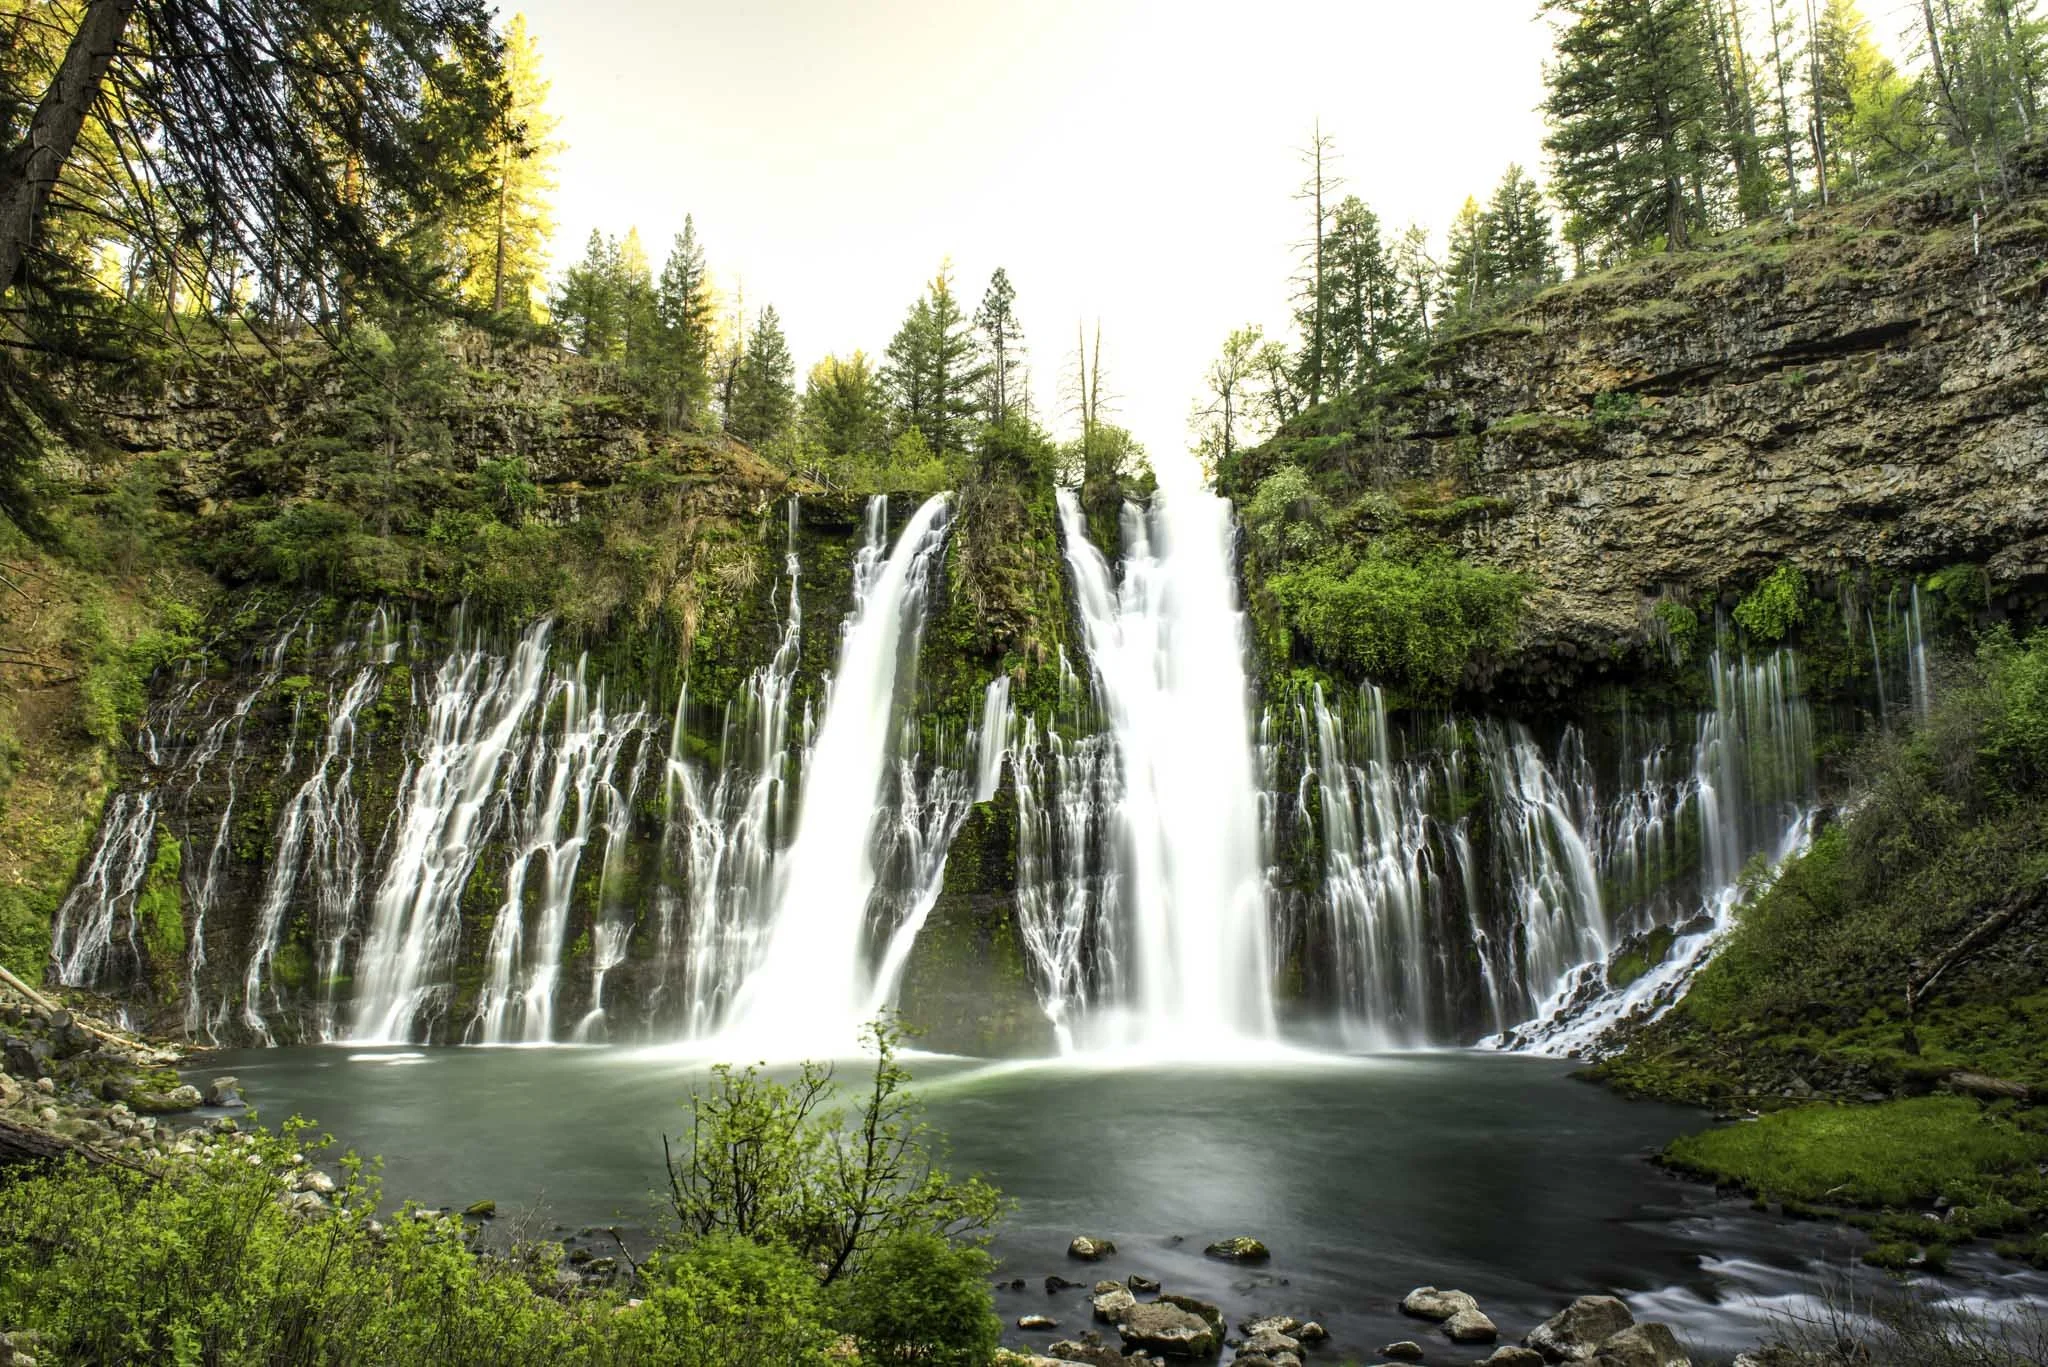


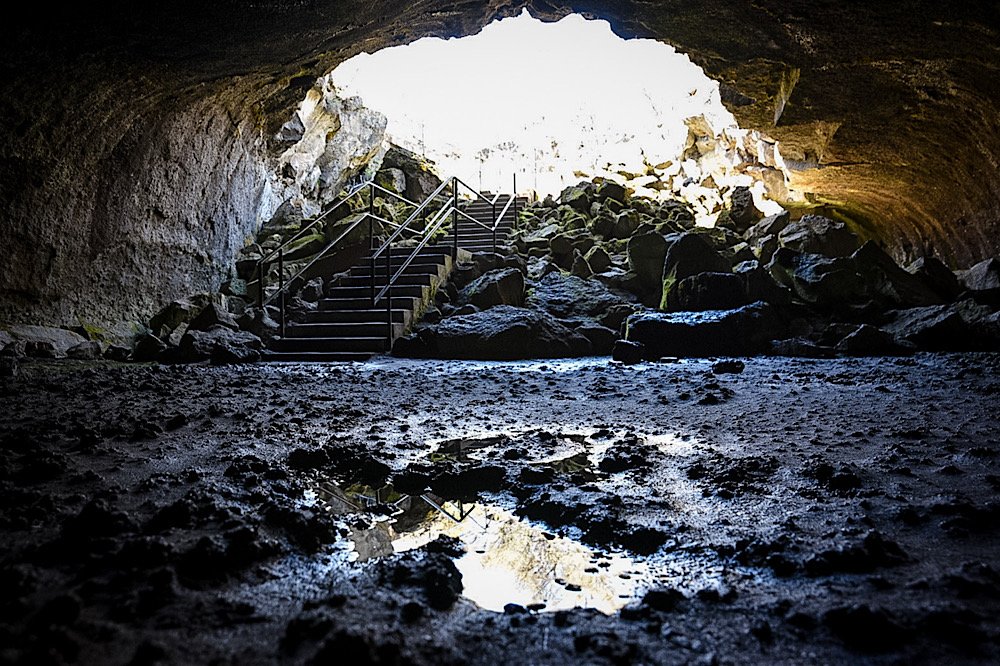
Please support our website by subscribing to our newsletter below.
Thank you for reading.
Check Out These Other Amazing Destinations!


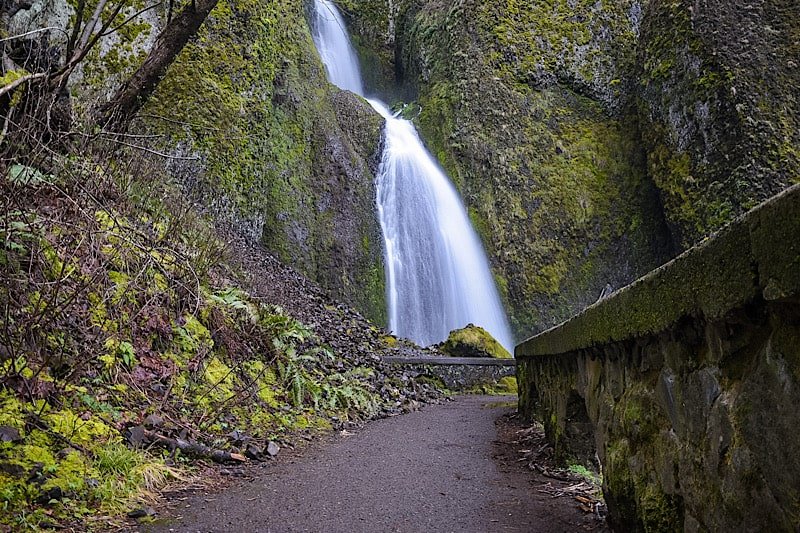


Hike The Convict Lake Loop In Mammoth Lakes
If you’ve never been to Convict Lake before, you really should plan a visit. It’s one of the most beautiful, photogenic and easy-to-access…
Contains affiliate links | 3 minute read
If you’ve never been to Convict Lake, you really should plan a visit. It’s one of the most beautiful, photogenic, easy-to-access lakes in the area.
While fishing is the top activity here, many people are unaware of the loop trail that encircles the lake. It’s a fairly easy-going trail with little elevation change.
In this article, we’re going to cover our experience hiking this trail for the first time. Topics such as where to find the trailhead, how Convict Lake got its name and more will be covered.

Quick Stats
Location: Convict Lake (Mammoth Lakes, CA)
Fee: None for the loop trail
Permit: None
Open: Spring, Summer & Fall
For: Hikers
Restroom: Near the trailhead
Parking: Small lot at the trailhead, larger lot further down the road
EV Stations: None
Difficulty: Easy
Popularity: Medium
Mileage: 2.5-miles
Time: 1 - 2 hours
Elevation Gain: 180-feet
Condition: Well-maintained
Features: Large lake surrounded by mountains
Pets: Allowed on leash
Drones: Not allowed
Hazards: None aside from usual wilderness hazards
Our Visit(s): October 2022
How To Get There

Getting to Convict Lake is pretty straight-forward as the street leading to the lake is directly off from Highway 395, just outside of Mammoth Lakes.
Regardless of which direction you’re traveling on the highway, you’ll want to turn onto Convict Lake road and follow that until it terminates at the lake.
For simplicity, plug in, “Convict Lake Resort”, into any GPS capable device and that’ll get you there. The resort is located right on the lake.
Trailhead & Parking

As you’re driving up on the lake, right before you’re forced to turn left, you’ll see a small parking lot for the marina on your right.
If there’s space, pull into this lot and park as this is the closest to the trailhead you can get. If not, continue left. There are numerous parking lots further down the road.
To find the trailhead, simply walk to the far end of the first parking lot (just a little bit past the marina). You’ll see trail signage indicating you’re in the right spot.
Convict Lake Loop

The trail is well-maintained and mostly flat throughout its entirety. You’ll encounter several small, gentle hills but most are barely noticeable.
Aside from a few moments of thick tree cover, the lake will be in view the entire time, giving you the opportunity to see it from multiple angles.
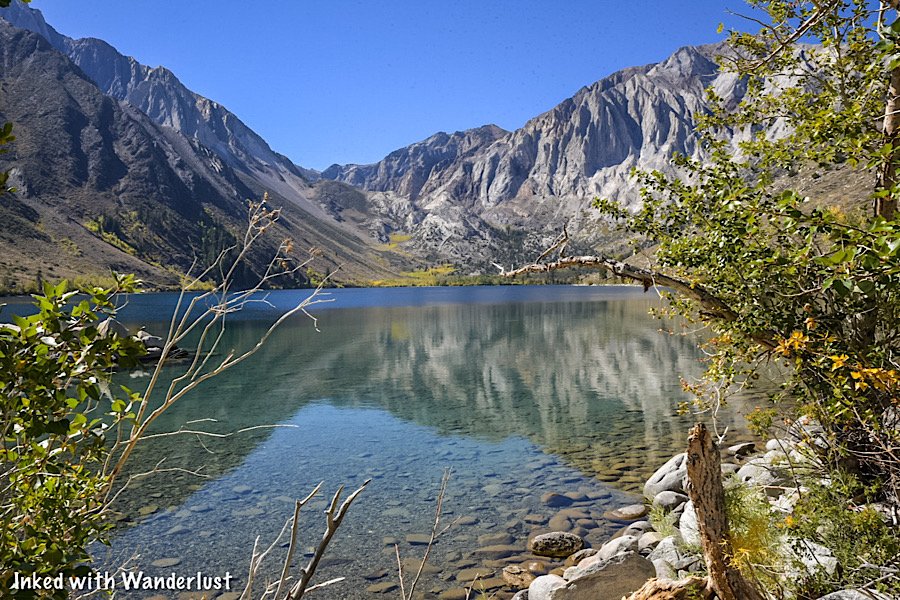
Also in view throughout much of the hike is Mount Morrison. This impressive, granite peak towers over Convict Lake at its head.
Mount Morrison is named after Robert Morrison, who was killed near the lake in a shootout with escaped convicts from Carson City (more on this later).

Along the trail, you’ll see many flora scattered throughout with rabbitbrush making multiple appearances (at least during our visit).
While not nearly as impressive of a view, be sure to look behind you as you progress. Many view the lake head-on but rarely do they see it from the opposite direction.

Prior to reaching the head of the lake, you’ll come across two forks on the trail. To remain on Convict Lake Loop proper, keep to the left at both junctions.
As you approach the head of the lake, you’ll come across a beach to relax on. There are many rocks and downed logs to sit on, as well as shade.
Depending on the time of year that you’re here, this beach may or may not be accessible. This is due to the decrease in snow pack as summer progresses.

Here, you’ll have easy access to the lake if you decide to go for a mid-hike swim (like I did) or to just simply dip your toes into the water.
When you’ve finished relaxing, simply continue in the same direction you were heading to complete the loop. More views await you.
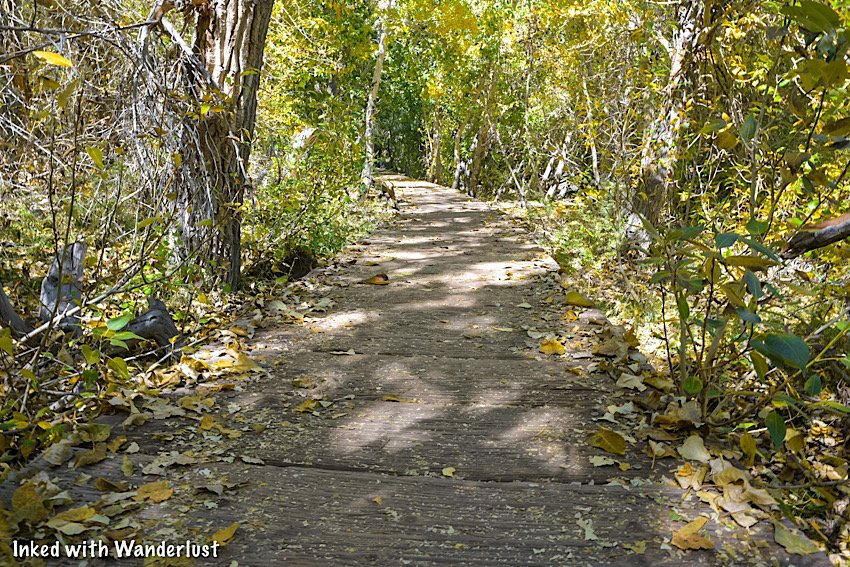
Soon after passing the beach is when you’ll come across the boardwalk that elevates you above the creek. It’s fairly slim with no guardrails. So take care when passing others.
The reason for the boardwalk is the heavy run-off from melting snow pack early in the season. If it weren’t for this boardwalk, this section of trail would be inaccessible during that time.
We were here in mid-October, so there wasn’t any run-off to speak of. Even without the run-off, though, the boardwalk made for an idyllic element to the trail.

After a short while you’ll be back on hard compacted dirt and hiking through beautiful aspens before heading up a short incline to the other side of the lake.
Up until this point, the trail was relatively flat. On this side of the trail, you’ll encounter quite a few ups and downs. Fret not, they’re barely noticeable.

Soon, you’ll come to a point that’ll appear to be the end of the trail. That point is another beach with a large, paved parking lot just above it.
To re-join the trail, work your way through this area (or the parking lot). From this point forward, you’ll be on the paved, accessible portion of the trail.

Throughout this section of the trail, the views of Convict Lake and Mount Morrison will be heavily obstructed by trees.
Here and there, the views open up through the trees and as you near the end, you’ll come across an accessible fishing dock with a commending view.

From here, simply continue on until you’ve reached your vehicle. Better yet, stop by the marina and inquire about kayak or paddle board rentals.
You could also head a ways up the road and stop at the resort for lunch. They’re open daily during the summer months and most days in the fall.
How Did Convict Lake Get Its Name?

In 1871, a group of inmates escaped from a prison in Carson City and somehow, without shoes, made it all the way to what was then known as Monte Diablo Creek.
These days, with established highways, that trek would be about 140-miles. Keep in mind that Highway 395 wasn't constructed until 1926. So they trekked much, much longer than that.
At Monte Diablo Creek (what is now Convict Creek) Sheriff George Hightower and members of his posse (consisting of Robert Morrison, Mono Jim and others) encountered the inmates.

The inmates ambushed the posse and a shootout ensued. In the shootout, both Robert Morrison and Mono Jim were killed. The inmates got away, but were later captured in Round Valley.
For their sacrifice, the mountain towering over the lake was named, Mount Morrison, while the smaller peak adjacent to it was named Mono Jim.
Then, the lake was named, Convict. This gives the representation that the two posse members who perished will always have the watch over the convicts.

Your Thoughts…
Have you hiked the Convict Lake Loop before? If not, does this sound like a trail you and your family would enjoy?
Let us know in the comment section below! We love hearing from our readers.


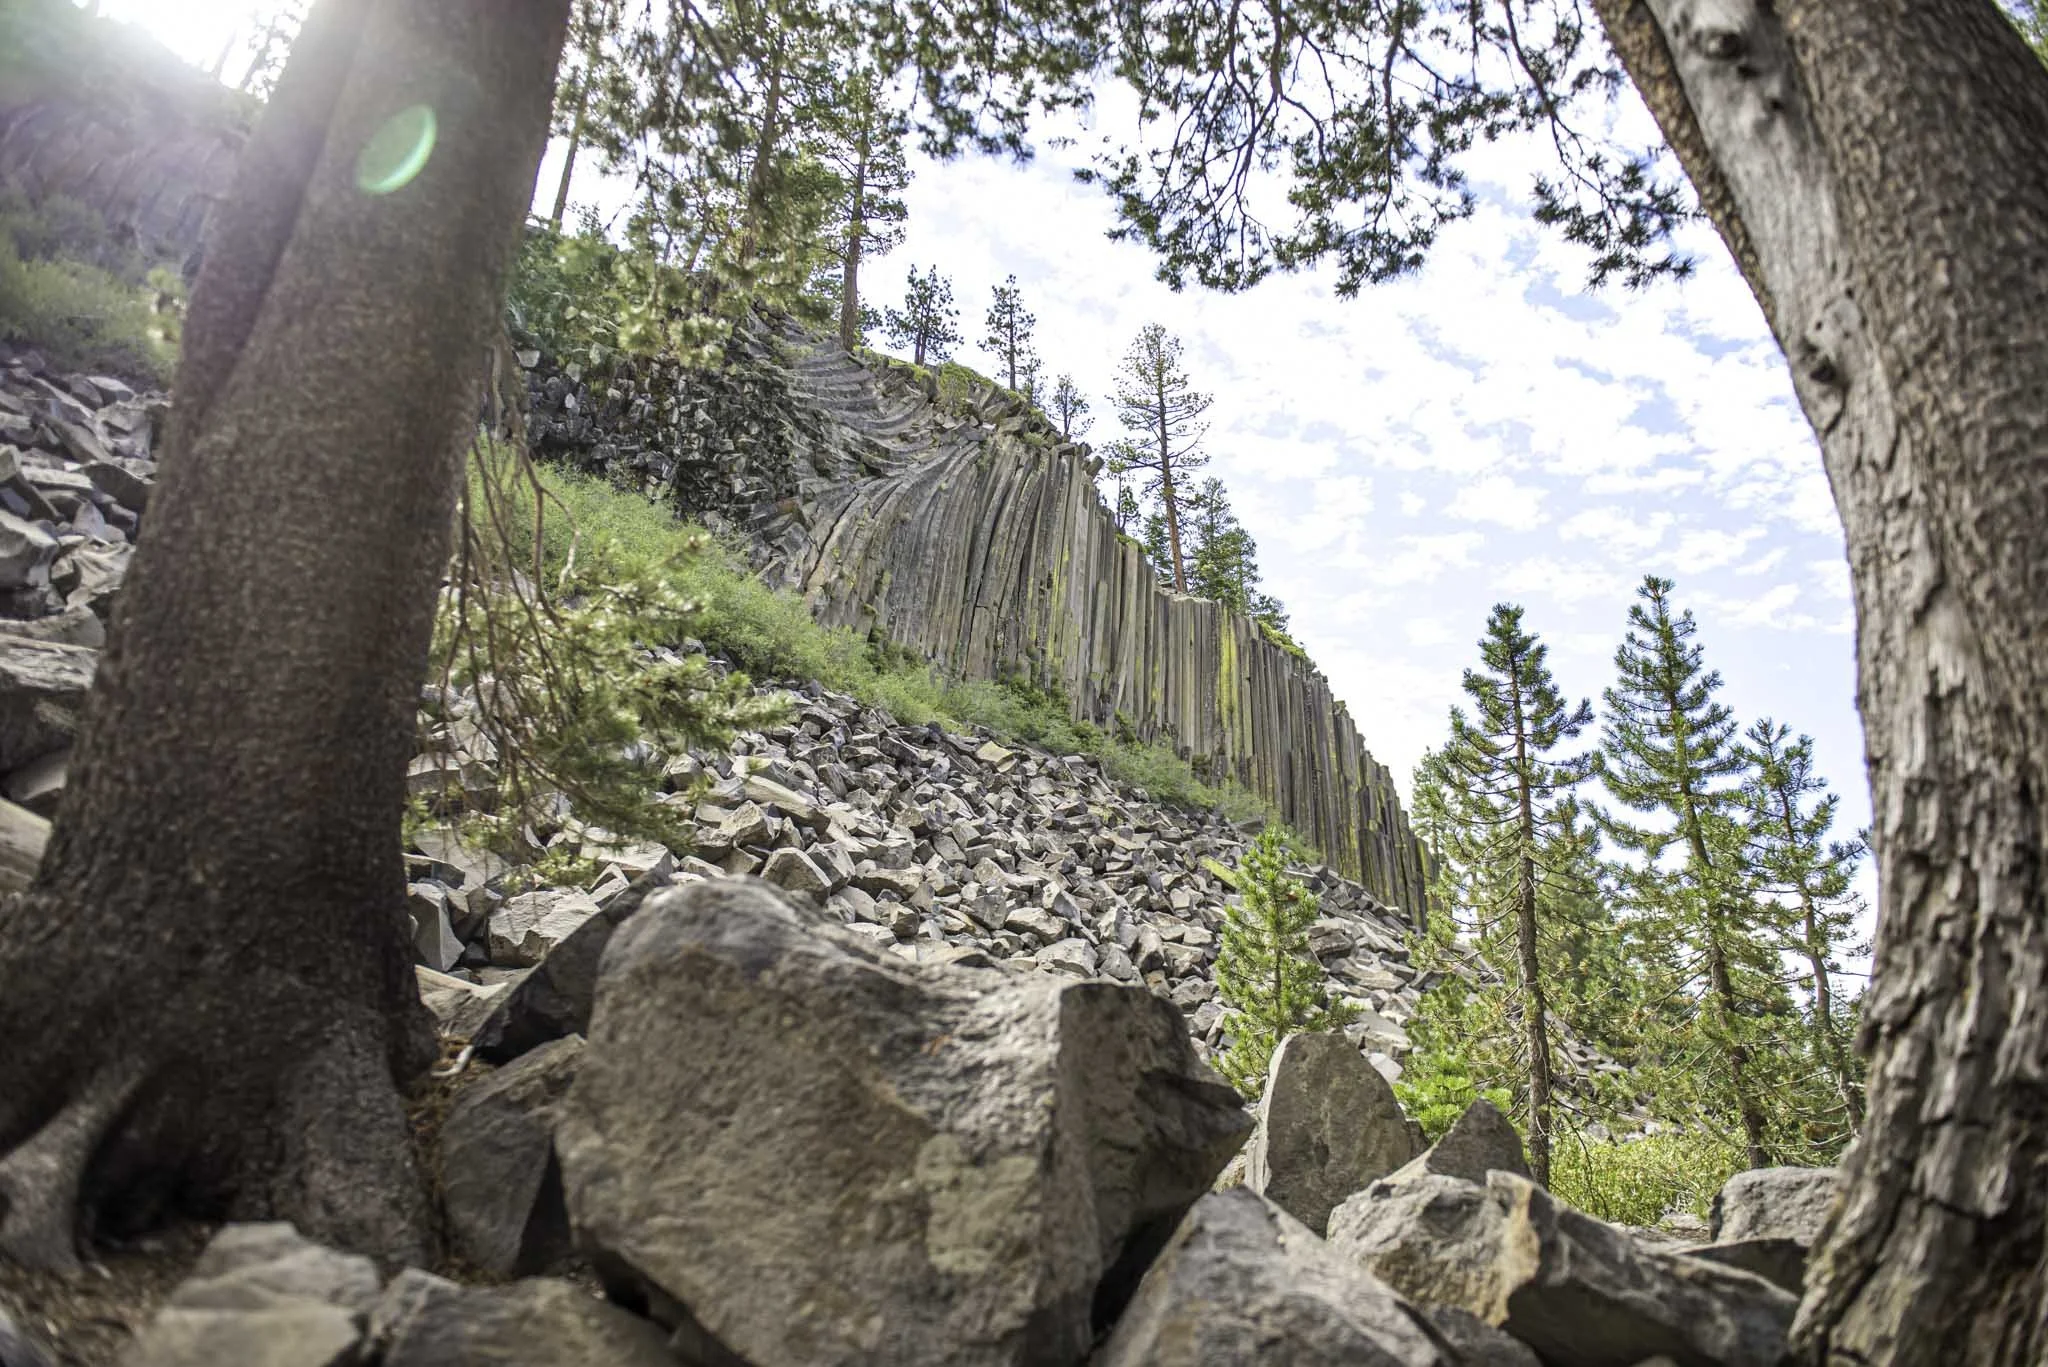

Please support our website by subscribing to our newsletter below.
Thank you for reading.
Check Out These Amazing Oregon Destinations!

How To Visit Vikingsholm Castle In Emerald Bay State Park
Located along the beach and at the head of Emerald Bay State Park, Vikingsholm Castle is a fine example of Scandinavian…
3 minute read | contains affiliate links
Located along the beach and at the head of Emerald Bay State Park, Vikingsholm Castle is a fine example of Scandinavian architecture right here in Lake Tahoe.
This Nordic estate sits on 232-acres of pristine beach line, beautiful turquoise water, Fannette Island (the only island in Tahoe) and the only waterfall in Tahoe that flows directly into the lake.
Unlike most state parks and attractions like Vikingsholm, you cannot drive up to it. A visit to Emerald Bay and Vikingsholm requires you to either hike or boat in.
In this guide, we’ll cover all the necessary information you’ll need to plan a visit for yourself. Topics such as the hiking trail, parking, when to go and more will be covered.
Let’s get into it!

Exciting news for our readers!
We’re excited to Introduce the all-new "Inked with Wanderlust" online store!
We're thrilled to bring you a fantastic collection of wanderlust-inspired merchandise. Celebrate your love for travel and exploration with our stylish apparel and accessories, designed to ignite your sense of adventure.
Discover a range of unique designs that capture the spirit of wanderlust, from cozy hiking-themed t-shirts to charming accessories that make your wanderlust spirit soar!
Visit our online store today and start your journey of style and adventure. Happy exploring!

Quick Stats
Location: Emerald Bay State Park, Lake Tahoe
Fee: $10 parking fee
Permit: None
Open: Year round, but road is sometimes closed in winter
For: Hikers, beach-goers, swimmers, kayakers, etc
Restroom: At the trailhead and at the beach
Parking: Medium-sized lot
EV Stations: None
Difficulty: Moderate
Popularity: High
Mileage: Two-miles, round trip
Time: A couple hours to a full day
Elevation Gain: 377-feet
Condition: Well-maintained and signed
Features: Vikingsholm Castle, waterfall and beach
Pets: Not allowed
Drones: Not allowed
Hazards: None other than usual wilderness dangers
Our Visit(s): August 2022
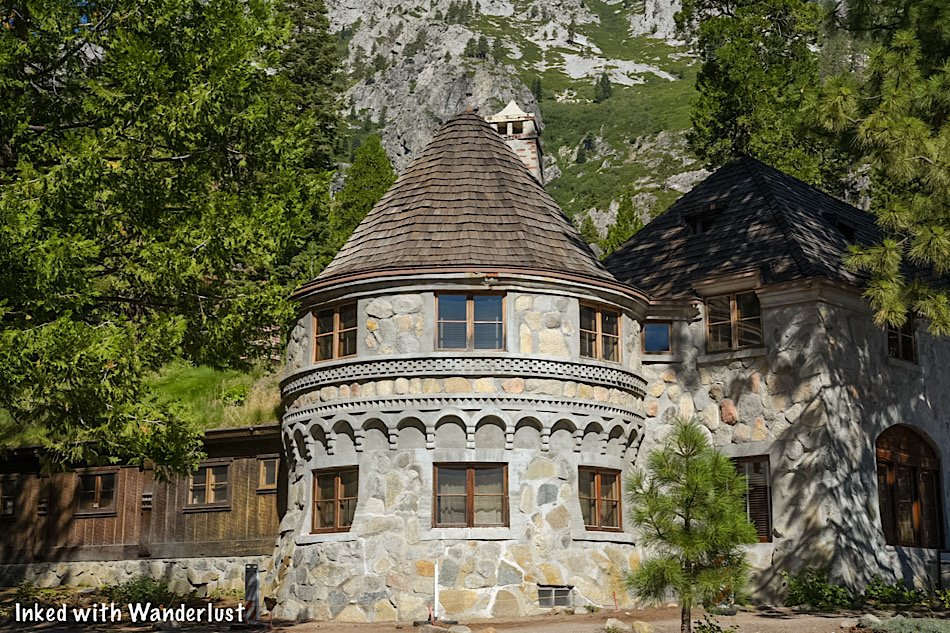
Parking and Location

Vikingsholm Castle is located in Emerald Bay, the crown jewel of Lake Tahoe. It’s one of the most popular destinations along the lake and thus, gets crowded quickly.
The key to a successful visit is to arrive early. Emerald Bay does have it’s own parking lot but for the crowds it sees, it’s inadequate at best.
We arrived just after 8am to a near empty lot. By 8:30am, while we were still gathering our things, the lot was nearly full. So arrive early. Earlier if you’re here on a holiday.

If you see this sign, you’ve arrived too late. It won’t re-open until enough space has been made and you’re not allowed to park on the side of the road.
You’ll either need to circle around a few times until spaces become available or try back again later in the day.
If you find space near the Eagle Falls trailhead, you can park there and walk to it but keep in mind, the road is very narrow and borderline hazardous for pedestrians.


The fee to use this lot is $10 for the day. This fee covers other California state parks in Tahoe during the same day (D.L. Bliss State Park is just down the road).
The pay stations accept cash or credit/debit cards. After paying, you’ll be given a receipt. You’ll need to display this receipt on your dashboard.
*Note: If you’re paying with cash, have the exact amount. The pay stations do not give change.

Just to the right of the pay stations is a booth. Head past this to access both the trail and the viewing deck for Emerald Bay.

Soon after passing the booth you’ll see a viewing deck on your right. This platform provides a commanding view of Emerald Bay and Fannette Island.

A lot of people simply get to this point, take their pictures and leave. If your intention is to visit the castle, then rejoin the trail and continue forward.
The Trail to Vikingsholm Castle

We’ll first address the difficulty of this trail. At more than a few spots, trail signage indicates how steep and borderline difficult the way back up can be.
From my perspective, the hike back up wasn’t bad. It was a constant incline and a little steep in some spots, but overall I didn’t have a problem with it.
That being said, if you have certain physical limitations, be honest with yourself. The way in is a breeze, but the way out can be difficult if you’re not acclimated to trails like this.


As stated above, the way in is a breeze. If you’re here early, the majority of the trail will have a plethora of shade and you’ll have sporadic views of Fannette Island.

As you near the end of the trail, you’ll reach a junction. If you go left, you’ll be on the Rubicon Trail. To continue to Vikingsholm Castle, go right.
Soon after this juncture, you’ll see the public restrooms for Emerald Bay on your right. Soon after that, you’ll see the back side of Vikingsholm Castle on your left.
Vikingsholm Castle

Vikingsholm Castle is sight to behold and one you’ll have to see for yourself to truly appreciate. How well it blends in with its natural surroundings is a wonderful example of how construction can compliment nature.


Vikingsholm Castle was designed by Swedish architect, Lennart Palme, in 1928. Palme was the nephew of the property owner, Lora Josephine Knight.
Construction of the castle was completed in 1929 and was used my Mrs. Knight and her family as a summer home (one of the first of which in Lake Tahoe).


The castle was owned by Mrs. Knight until her death in 1945. The castle traded hands a couple more times until the State of California acquired it in 1953.
Considering the jaw-dropping beauty of Emerald Bay, it’s crazy to imagine that someone once lived here. I know we would love to have Emerald Bay all to ourselves for the summer.
Tours of Vikingsholm Castle

Unfortunately, we didn’t partake in the tour of the castle as by the time the first one embarked, it was time for us to get going.
Tours of the castle are offered daily and take you through the interior. You’ll follow a knowledgable guide who’ll detail the history of the castle, its development and impact on the area.

Tour information is as follows:
Tours are guided
They are 30-minutes in length
They’re offered daily, early June - late September
Tour times are between 11am - 4pm
$15 per adult, $12 per child 7-17, free for under 7
Tickets can be purchased at the Emerald Bay Visitor Center
For more information on the guided tours, you can check out the Sierra State Parks Foundation.
Also, if you want further details of the history of Emerald Bay, Vikingsholm Castle and the people involved, we highly recommend checking out their official website.
Additional Activities in Emerald Bay

There’s more to do in Emerald Bay than just touring the castle. Many people make the trek down here to hang out on the beach and recreate on the lake.
There’s a dedicated (but small) swimming area near the center of the beach. There’s no swimming allowed outside this border due to the amount of vessels going through the bay.

Paddle boarding and kayaking are also popular activities. There’s a dedicated rental stand (Kayak Tahoe) where you can rent either one for an hour or for the day.
While I was here, I took the opportunity to try kayaking for the first time. It didn’t take me long to get it down so if you’ve never done it, don’t let that stop you.
If you’re interested in reading about my kayaking experience to Fannette Island and the Tea House, check out our article about it here.
Your Thoughts…
Have you visited Emerald Bay, Vikingsholm Castle or Fannette Island before? Do you have any additional tips about visiting this park? Let us know in the comments below. We love hearing from our readers!
Please support our website by sharing it with your family and friends.
Thank you for reading.

Hiking To Cascade Falls In South Lake Tahoe
Cascade Falls is a beautiful series of waterfalls just outside of the boundaries of Emerald Bay State Park in Lake Tahoe…
5 minute read | contains affiliate links
Cascade Falls is a beautiful series of waterfalls just outside the boundaries of Emerald Bay State Park in Lake Tahoe.
To get the full experience, you’ll need to see it in spring or early summer. Unfortunately, when we came, it was early August. So the run-off was lite.
However, the lack of run-off created dozens of tiny waterfalls scattered throughout (instead of one big cascading waterfall). So it was still a great experience.
In this guide, we’re going to cover all the information you’ll need to visit it for yourself. Topics such as directions, parking information, what to expect and more will be covered.
Let’s get into it.
Quick Stats
Location: West side of Lake Tahoe
Fee/Permit: $10 per vehicle parking fee
Open: Year round, but difficult to access in winter
For: Hikers
Parking: Semi-large parking area
Restroom: In the parking lot
EV Stations: None
Drone Use: Not allowed
Difficulty: Easy to moderate
Popularity: High
Time: 2-3 hours
Milage: 2-miles, round trip
Elevation Gain: 255-feet
Trail Condition: Maintained, but very rocky
Main Feature(s): Cascading waterfall / views of the lake
Pets: Allowed on leash
Special Notes/Hazards: Trail is very rocky. Broken ankles aren’t uncommon on this trail
Our Visit(s): August 2022
Directions, Parking & Trailhead

Getting to the trailhead for Cascade Falls is easy and straight forward. Simply plug Bayview Campground into your GPS and follow the directions.
Shortly after entering Emerald Bay State Park, you’ll see a sign for Bayview Campground on the side of the road. Turn into this lot.
If there’s space available, a parking attendant will approach you to collect the parking fee. It is $10 per vehicle, payable by cash or check.
*Note: Credit/debit cards are not accepted as of 2022
Bayview is a former campground that was re-purposed into a parking for this popular trail. The former camp sites have been repurposed into parking spaces.
If there isn’t space available, you’ll be directed to find a spot along the side of the road. While you won’t have to pay for a spot here, you may have to circle around a couple times and it will add another half-mile to your overall hike.
Cascade Falls Trail
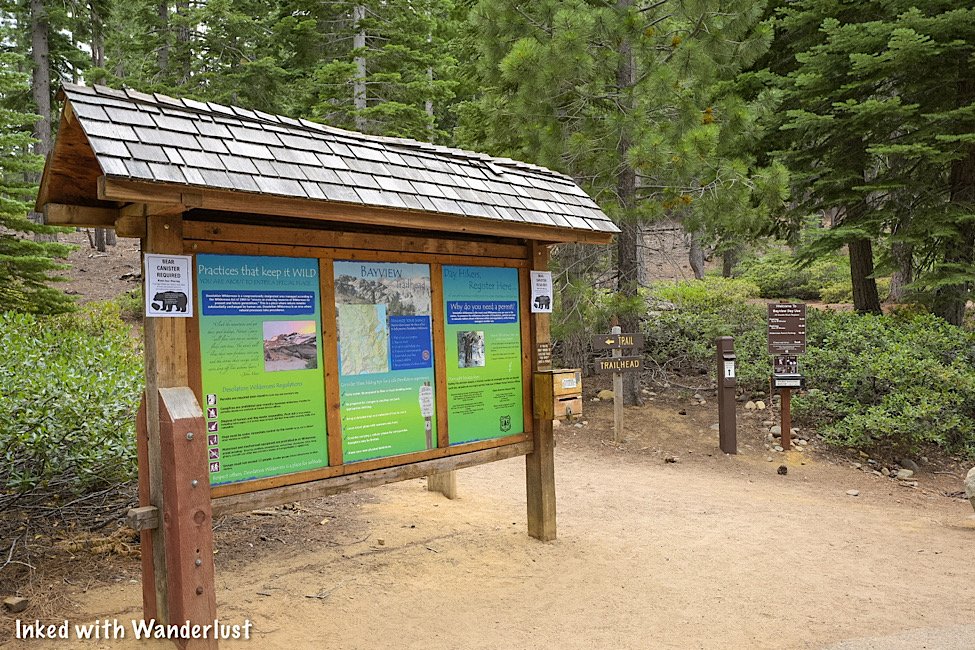
The trailhead is located at the back-end of the parking lot, across from the restrooms. This trailhead is also for the trail to Granite Lake and Maggie’s Peaks.
If you’re only going to Cascade Falls, a Desolation Wilderness permit isn’t required. If you’re going to Granite Lake or Maggie’s Peaks, then you will need to fill one out.

To go to Cascade Falls, head left at the trailhead. This section of the trail takes you under a plethora of shade from the pine trees and is relatively flat.
As you approach Cascade Lake, you’ll hit your first set of steps along this trail. At the top, you’ll get a partial view of Cascade Lake on your left. Keep going to get the full view.
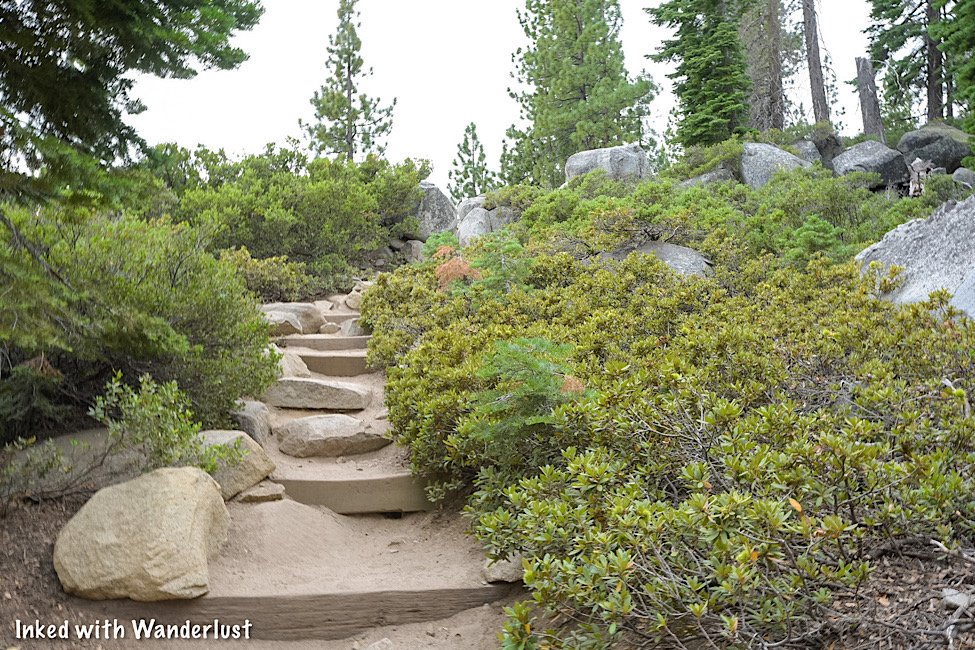

As you reach the top, you’ll continue to follow the dirt/rock trail for another third-of-a-mile. Cascade Lake will remain on your left throughout its entirety.
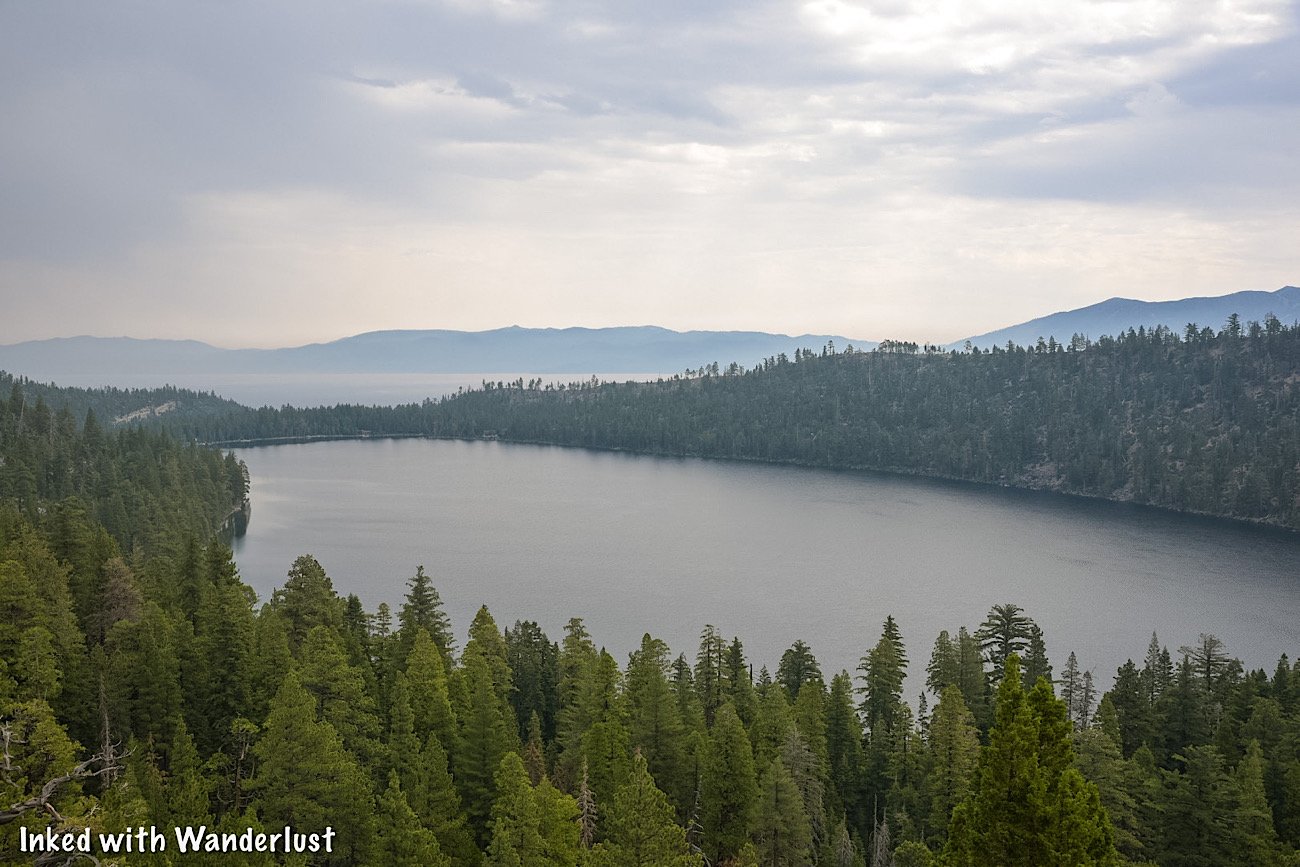

As you get closer to Cascade Falls, you’ll see a small sign of an arrow pointing left posted on a tree. Heed these directions.
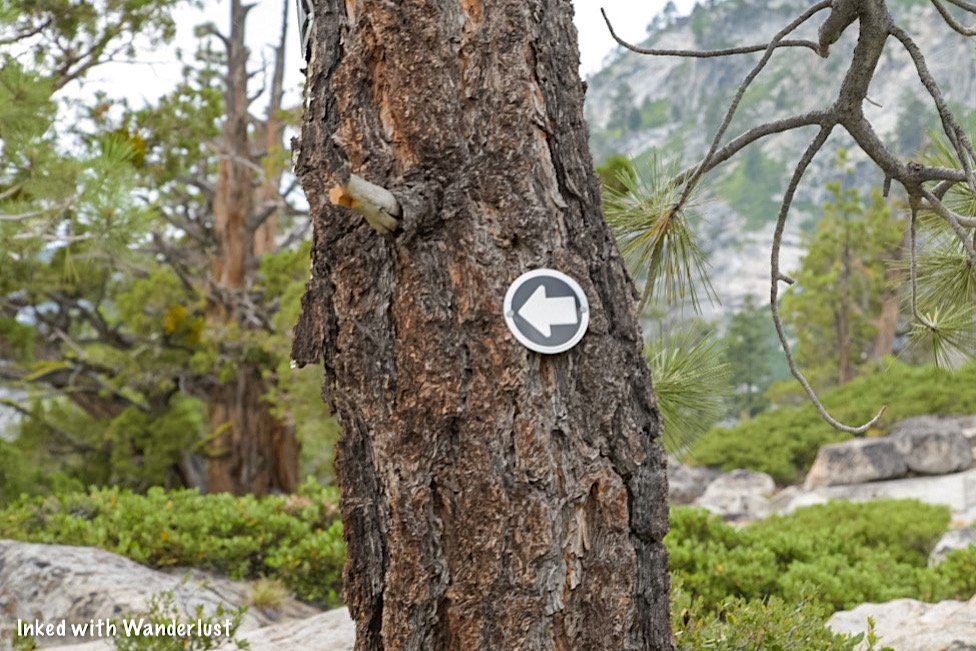
From here, the trail moves over solid granite rock and can be hard to follow. Simply use common sense and head in the direction of the waterfall.
Cascade Falls

As stated earlier in this post, if you’re here in spring or very early summer, you’ll be fortunate enough to experience the falls at peak flow.
We were here in early August, so the run-off was down to a trickle. If you happen to be here during this timeframe, fret not, you’ll be treated to dozens of mini waterfalls.


The best ones we found were closer to the bottom where the edge of the falls is, but there are others literally all over the place. You just have to find them.

If you’re a photographer (or aspiring one) be sure to bring a tripod and ND filter with you to help you get creative with your photos.


To get to the edge of Cascade Falls, you’ll need to scramble down some boulders but don’t worry, it’s nothing difficult.
From there, you’ll have a commanding view of Cascade Lake with Tahoe out in the distance. We’re not certain how accessible this spot is during peak flow, though.

From here, you can continue further up the trail to other desolation lakes. Keep in mind, though, that if you intend to do so you’ll need to have had filled out the permit at the trailhead.
If you’ve gotten your fill, simply head back in the same direction you came. You’ll be on an incline on your way out so make sure you’re prepared with plenty of water.

Your Thoughts…
Have you hiked to Cascade Falls before? Were you fortunate enough to see it at peak flow? Let us know in the comments below. We love hearing from our readers!
Please support our website by sharing it with your family and friends.
Thank you for reading.

Hike To Eagle Falls and Eagle Lake In Lake Tahoe
Lake Tahoe is filled to the brim with hiking trails of varying lengths. Some can be done in a matter of hours while some will…
6 minute read | contains affiliate links
Lake Tahoe is filled to the brim with hiking trails of varying lengths. Some can be done in a matter of hours while some will take a day or two to complete.
If you’re new to hiking - or you’re a family with children in tow - you may be wondering which Tahoe trails would be best for you. Enter, Eagle Lake.
It’s a short, albeit rocky trail that begins at a beautiful waterfall (Eagle Falls) and concludes at the equally beautiful sub-alpine lake surrounded by rocky granite mountains.
In this guide, we’ll cover everything you’ll need to know about this trail, including; how to get there, what to expect, pictures and more! Let’s get into it!
Here’s some great hiking equipment we recommend…
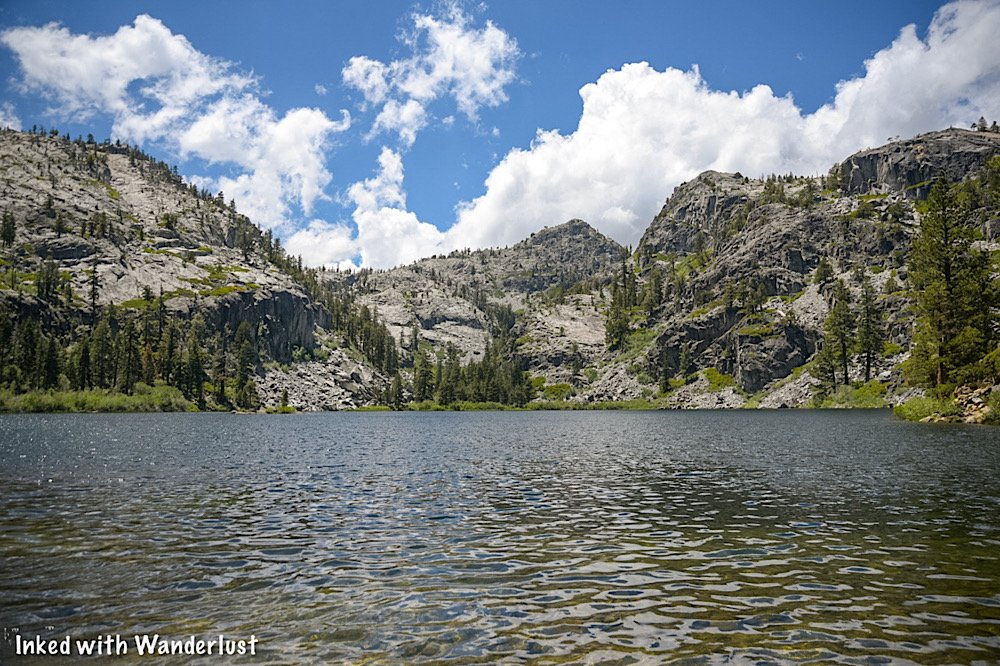
Quick Stats
Location: Emerald Bay State Park, Lake Tahoe
Fee/Permit: $10 per vehicle parking fee
Open: Year round (though the road to Emerald Bay does close in the winter if conditions are bad
For: Hikers
Parking: Small, paved lot at the trailhead and another (even smaller) lot along the road
Restroom: Yes. At the trailhead
EV Stations: None
Drone Use: Not allowed
Difficulty: Easy to moderate
Popularity: High
Time: 2-3 hours
Milage: 1.9-miles, round-trip
Elevation Gain: 459-feet
Trail Condition: Maintained and clearly signed
Main Feature(s): Waterfall and lake
Pets: Allowed on leash
Special Notes/Hazards: This trail is VERY rocky.
Our Visit(s): 2016, 2018, & 2022
Location & Parking

While not contained within Emerald Bay State Park proper, the parking lot and trailhead can be found just outside its bounderies across the road.
From South Lake Tahoe:
Head south on Lake Tahoe blvd for 2.5 to 3-miles (depending on where you are in South Lake).
Turn right onto CA-89 north/Emerald Bay road.
You’ll soon hit a series of switchbacks and before long, you’ll arrive in Emerald Bay.
Don’t turn right in the lot when you see the sign for Emerald Bay. That’s for the campground.
Instead, continue straight until you see the sign for Eagle Falls (pictured above) and turn left into the parking lot.
From North Lake Tahoe:
Make your way to CA-89 south and stay on it for about 18-miles.
You’ll pass D.L. Bliss State Park before arriving.
After entering Emerald Bay, turn right into the parking lot at the Eagle Falls sign.
Parking is going to be the hardest part of this whole experience. For starters, the lot fills QUICKLY during the spring and summer months.
If you arrive before 9am, you’ll probably be ok. Any time after that, though, and you’ll have a rough time. It may be necessary to circle around a couple of times.
If the lot at the trailhead is full, there’s a small pull-out style lot along the road you can use. Every time we’ve gone, this was where we ended up parking.
The biggest advantage to parking here is you don’t have to pay the parking fee. If you park in the main lot, then you’ll need to pay the $10 per vehicle fee.
Lower Eagle Falls

One aspect of this hike people tend to miss is the lower section of Eagle Falls. To get to it, you’ll need to (safely) cross the road from the parking lot.
You won’t get the traditional, straight-on view of the falls, but you will have the opportunity to get close to it. Especially when the run-off starts to slow down.

From the lower falls, you’ll also get an awesome view of Emerald Bay and Fannette Island. You’ll be contending with trees slightly obstructing your view, though.

When you’re done taking in the views, simply head back up to the road and cross it to get back over to the Eagle Falls trailhead.
If you’re facing the lot, use the boardwalk style walkway on your left. This is a much safer route to the trailhead versus walking through the lot and dodging vehicles.
Upper Eagle Falls

The tail to Eagle Lake officially begins near the upper portion of Eagle Falls. From the trailhead to the bridge at the upper falls, it’s about a quarter-mile.
The trail immediately begins to climb from the trailhead up wide steps made from rock and wooden pillars. You’ll get a temporary reprieve at the top.

As the trail levels out, you’ll come to a junction. Going right will take you to an elevated viewing area for Eagle Falls. Going straight will take you to the bridge.
Shortly after the junction, the bridge will come into view. To the right of it, there’s a bench you can use to rest if needed.


To the left of the bench you’ll find a small viewing area that provides a full view of the upper falls with the bridge in the backdrop.
You will need to scramble down to it and it’s a bit sketchy. Taking small children down there probably wouldn’t be the best idea.

After crossing the bridge, you’ll see a small opening on your right between a few boulders and bushes. If you go through it, it’ll take you to the pond above Eagle Falls.


There wasn’t any signage stating to keep out but I would advise against against it considering it’s literally RIGHT above the crest of the falls.
To continue onto Eagle Lake, simply get back onto the trail and head up. From here, the trail gets even rockier. So watch your footing.
Trail To Eagle Lake

From this point forward, you’ll be in Tahoe’s Desolation Wilderness. In order to pass this point, you will have needed to fill out a permit at the trailhead.
The permit doesn’t cost anything. This is just their way of keeping track of how many people are in Desolation and in case anyone goes missing, they’ll have an idea where you are.
Simply fill out the permit at the trailhead and drop it into the iron ranger. This rule was suspended during the 2022 season but it’ll probably kick back up again in 2023.
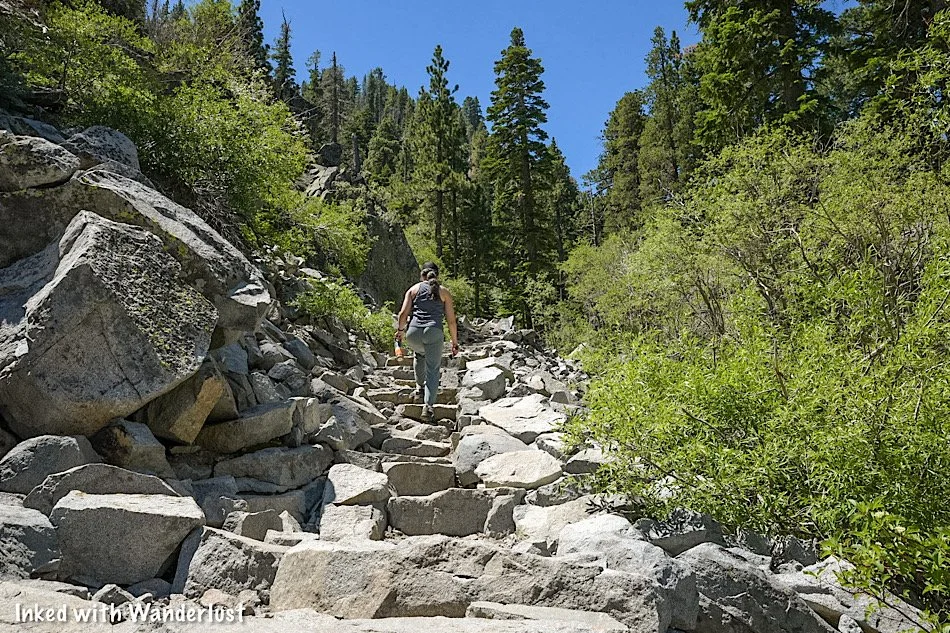
From here, the trail gets even rockier than how it was before. It’s literally carved out of rock in most places. Being mindful of your footing is paramount. Many of the rocks are slick.
You’ll continue this incline for another quarter-mile or so before it flattens out up top for a temporary reprieve. From here, you’ll be treated to an epic view of Emerald Bay and the lake.

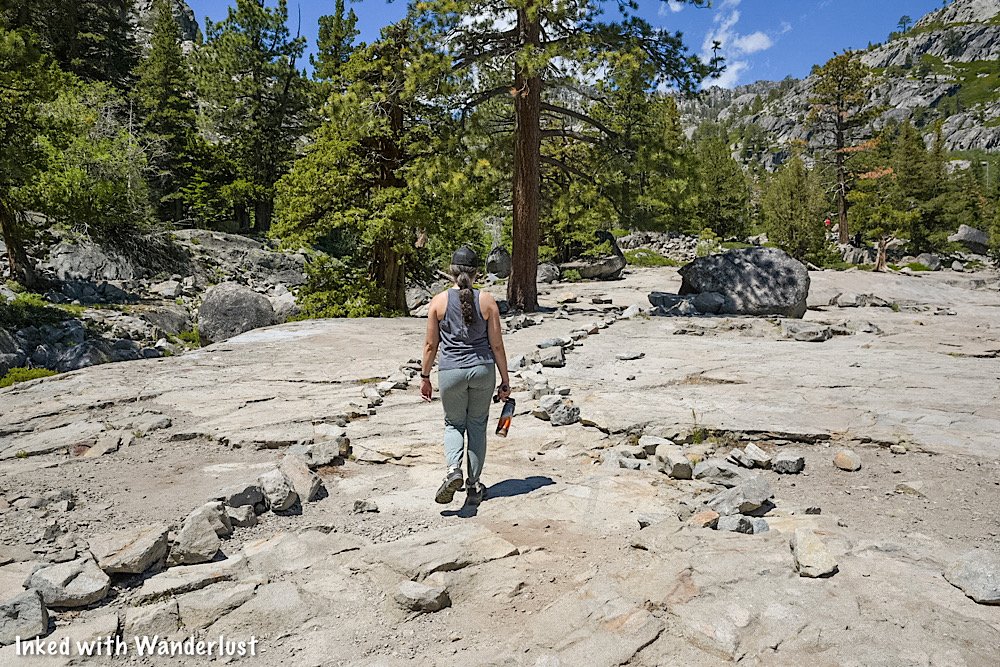
This middle section of the trail crosses over straight granite, making the trail a bit easy to lose at times. Follow the rocks lining the path and keep to the left.
If you want to see the view of Lake Tahoe as pictured above, you will need to leave the official trail a bit to see it.

Also coming into view throughout this section are the craggy peaks surrounding Eagle Falls and Eagle Lake. The scenery is simply stunning.
Before long, the trail will begin to ascend again as you make the final push to Eagle Lake. The sounds of the creek in the ravine below signals how close you’re getting.

The incline levels out a bit as the peak above Eagle Lake comes into view. You’ll pass another junction at this point. Keep straight.
Soon after this junction, you’ll come to Eagle Lake. Most people stop at the rocky beach near the outlet of the lake. For more privacy, continue straight to other spots.
Eagle Lake

As stated above, this small rocky beach is where most people stop. The outlet is right there and is lined with stepping stones to afford you access to the other side.
You can continue straight for other beaches with less crowds, but these aren’t very well maintained. So you’ll be fighting fallen branches and other hazards.


Eagle Lake sits at around 6,000-feet and is surrounded by rocky, granite peaks. It gets its water from snow melt run-off in the mountains.
The lake itself, while cold, is perfect for swimming or wading. We would recommend keeping kids away from the outlet of the lake, though.


From here, you have a couple choices. The first is you just head back the same way you came to the trailhead.
If you have enough energy, though, you can continue up the trail to more alpine lakes including Granite Lake, Dick’s Lake and Velma Lake.
This short-but-sweet hike to Eagle Falls and Eagle Lake is nothing short of spectacular. It packs a lot of punch with little effort required.
Your Thoughts…
Does this seems like a trail you and your family would enjoy? Tell us about it in the comment section below. We love hearing from our readers!
Please support our website by sharing it with your family and friends.
Thank you for reading.
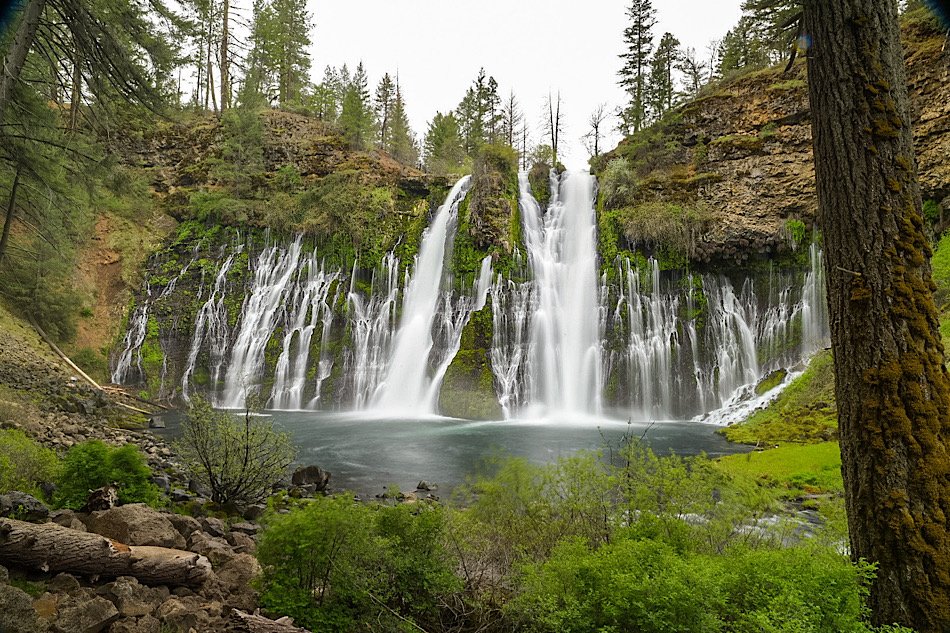
How To Hike The Burney Falls Scenic Loop Trail
Burney Falls is one of the most visit state parks in all of California. Prior to covid, the park would see an average of 4,000…
3 minute read | contains affiliate links
Burney Falls is one of the most visited state parks in all of California. Prior to covid, the park would see an average of 4,000 daily visitors. Since covid, that number has more than tripled to an average of 13,000.
It’s no wonder, either. Burney Falls is a spectacular waterfall. On top of that, it’s one of the most easily accessible waterfalls as it can viewed from an accessible viewing deck just steps away from the parking lot or by taking a short, paved trail to the base.
Many people are completely unaware of the hiking trails contained within the park. So we’ve decided to write a post about the most popular one, the Burney Falls Scenic Loop. It’s a beautiful trail that begins at the rim of the falls and concludes at the base.
If you’ve never been there, you should check out our comprehensive guide on Burney Falls. In it, we cover a lot of information such as directions, camping, hiking trails, best time to visit and more! So if you’re looking for that information, you should definitely read that one and come back here.
Let’s get into it.

Quick Stats
Location: McArthur-Burney Falls State Park
Fee/Permit: $10 per vehicle to enter the park
Open: Year round
For: All visitors/hikers
Parking: Semi-large, paved lot
Restroom: At the visitor center
EV Stations: None
Drone Use: Not allowed
Difficulty: Easy
Popularity: Highly trafficked
Time: 1 hour or more
Milage: 1.2-miles
Elevation Gain: 167-feet
Trail Condition: Well maintained
Main Feature(s): Burney Falls
Pets: Not allowed
Special Notes/Hazards: Though it’s a beautiful trail, Burney Falls will be out-of-view for the majority of the hike
Our Visit(s): October 2016, August 2019, & May 2022

Trailhead, Parking & Direction
The trailhead for the Burney Falls loop trail is directly across the road from the park’s visitor center and parking lot. You’ll see a sign up ahead indicating as such (pictured above).
The parking lot is fairly large, probably closer to medium sized, actually. As we covered in our guide to Burney Falls, this lot tends to fill quickly in the summer months. So if you go during that time, we highly advise that you plan for an early arrival.
Once you’ve parked and paid your entry fee ($10), cross the street and head towards the rim of the falls to begin your hike. There’s a viewing deck where you can get a from above view of the falls.

Burney Falls Loop Trail
If all you want to do is go to the base of falls and leave, bear right towards the stairwell. It’ll only take a few minutes to get down there as it’s only a third-of-a-mile along a well-maintained path.
If you’re dead-set on the loop trail (as you should be) you’ll want to bear left along the dirt path. This trail also takes you to the base, just not as quickly.

Unfortunately, Burney Falls won’t be visible for much of the trail. In fact, you’ll only get the full view once you’ve circled down to the base. Shortly after the beginning of the trail, you’ll get one final look at it through some trees.
After a short time, you’ll arrive at the serene, ‘Fisherman’s Bridge’, crossing Burney Creek just upstream from the top of the falls. If you’re an angler, there are great spots here along the creek to fish for Rainbow Trout.

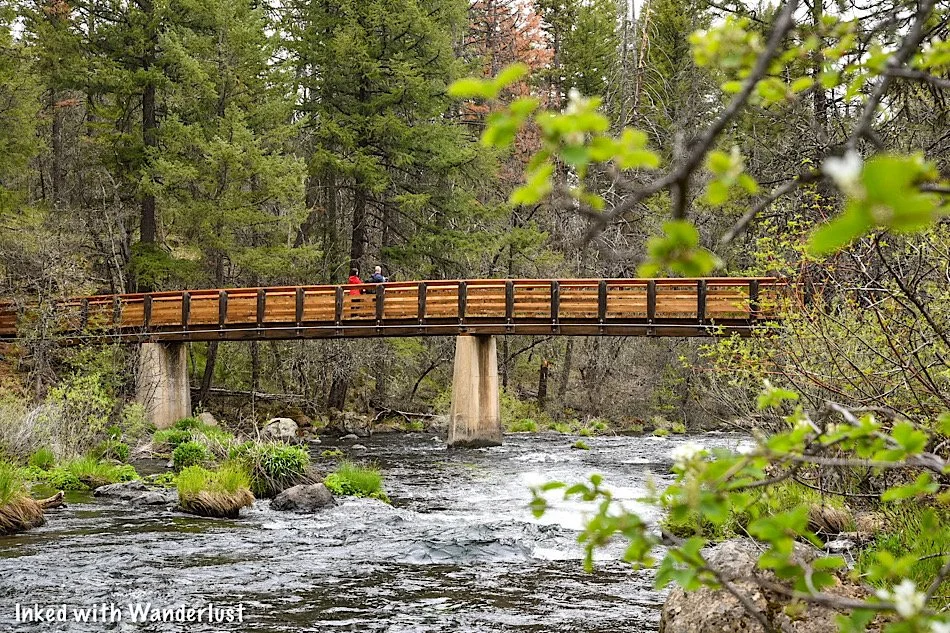
Be sure to stop near the middle of the bridge to take in the views. You won’t be able to see the crest of Burney Falls from here, but you’ll get a great view looking upstream of the creek.

After the bridge, turn right and you’ll enter a heavily forested portion of the trail filled with Douglas Firs and Oaks. Also along this stretch are a number of benches. Feel free to rest your feet for a moment and take in the sights around you.
The trail will begin to descend slightly along a series of gentle switchbacks. Before hitting the descent, you’ll pass a junction to the Pacific Crest Trail and a series of rocky steps built into the trail. No need to worry as the steps are easily navigable.


Near the halfway mark down the switchbacks you’ll get your first glimpse of Burney Falls since the start of the trail. Again, it’s through a collection of trees but it’s a gorgeous view nonetheless.
Rainbow Bridge Junction

At the bottom of the switchbacks you’ll come to another footbridge crossing over Burney Creek. This one is named, “Rainbow Bridge”. Much like the first one, stopping here to take in the views of the creek would be worth your while.
From here, you have two directions in which you could go. Going left from Rainbow Bridge will take you on a detour to Lake Britton. This is a solid option as the picturesque lake provides many recreational activities.
*Note: The detour to Lake Britton from this junction is closed for the 2022 season due to heavy storm damage to the trail. No word on when it’ll open. To reach Lake Britton, you’ll need to utilize the trail leaving from the rim of the falls and through the campground.

To keep to the loop trail and continue on to the falls, however, you’ll want to bear right as you’re walking off of the bridge. Along this stretch, you’ll pass a huge boulder field on your left. Showcasing evidence of the area’s volcanic past.
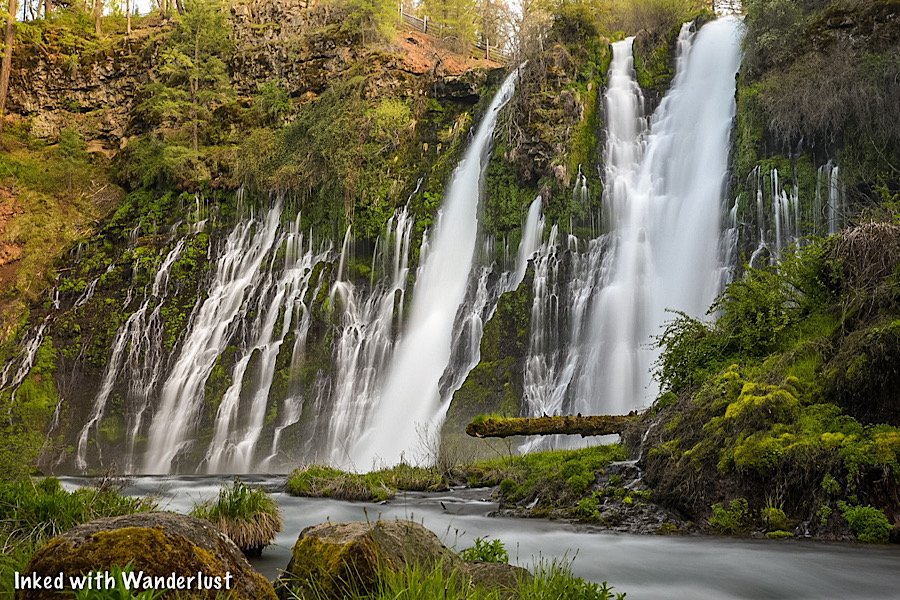
Soon, you’ll begin to hear the sounds of Burney Falls crashing into the pool below it and before long, it’ll come into view. There are many spots along this stretch of the creek to get an excellent side view of the falls. You’ll need to scramble a bit but trust us, it’s worth it.
The Base of Burney Falls

This is the main viewing area of Burney Falls and is where you would’ve ended up had you gone right at the trailhead instead of left. This area is defined by a perimeter made of rocks and is a somewhat small area (considering the crowds this park sees).
For a closer look - or to go for a swim in the pool below the falls - you’ll need to scramble down a rock field. The constant mist from the falls makes most of these rocks very slick. So be sure to watch your footing.

If you’re here on a particularly busy day (pretty much any day during the summer season) expect to find many, many people to be here. It doesn’t take long before that viewing area - and even the rock field - becomes a shoulder-to-shoulder situation.
We’ve never been here during winter, but we feel spring is the best time to go, crowds wise. Our most recent visit was the first week of May, 2022, and we practically had the falls all to ourselves. A few people came and went but that was it.

Once you’ve gotten your fill of the views, continue on the trail by heading up the paved switchbacks back to the rim (where you first began). Along the way, you’ll encounter several interpretive signs detailing the development and history of Burney Falls and the area.

It may be a persistent climb back to the rim but fret not, it isn’t that bad. The switchbacks are gentle and towards the end, there’s a couple sets of stairs to help with the final push.
Once you’re back at the rim and satisfied with your visit to the park, simply cross the road to get back to the parking lot. Or better yet, stop by the visitor center before leaving. They have many interesting/informative exhibits.

Which Direction Should You Go?
That’s entirely up to you, but we wrote this trail guide in the clockwise direction as that was the direction we went and feel it’s the way to go. The reason is because of the epic payoff at the end (Burney Falls).
However, there’s nothing that says you can’t go counter-clockwise. If you do, you’ll arrive at the falls after just a third-of-a-mile. To continue past that, head down the paved trail along the creek.
When you reach Rainbow Bridge, simply cross it and head up the dirt switchbacks and onward to Fisherman’s Bridge. There’s no right or wrong. Either direction will provide the same great views and experience.
*Tip: Be sure to read our comprehensive guide about Burney Falls State Park. It’ll help you plan your visit with information on weather, camping, amenities, directions and more!

Your Thoughts…
Does this sound a trail you and your family would enjoy hiking together? Have you been to Burney Falls or have you been dying to go? Tell us about it in the comments below. We love love hearing from our readers!
Please support our website by sharing it with your family and friends.
Thank you for reading.

Hedge Creek Falls: A Short Hike To An Incredible Waterfall
While not a grand sight or a long hike deep into the wilderness, Hedge Creek Falls still packs a punch as a highly scenic…
3 minute read | Contains affiliate links
While not a grand sight or a long, deep hike into the wilderness, Hedge Creek Falls still packs a punch as a highly scenic, simple trail terminating at the 35-foot waterfall spilling over a hanging wall of basalt.
The trail’s unique feature, aside from the waterfall itself, gives hikers the rare chance of going behind the waterfall via a large cleft in the rock.
Hedge Creek Falls is perfect for families with small children, pets, or anyone who happens to be driving by and wants to stretch their legs. Both the parking lot and trailhead are conveniently located right off Interstate-5.
In this guide, we’ll cover everything you’ll need or want to know about hiking to Hedge Creek Falls. Let’s get into it.

Quick Stats
Location: Dunsmuir, CA
Fee/Permit: None
Open: All year
For: Hikers
Parking: Small dirt lot across the street from the trailhead
Restroom: Port-O-Potty in the parking lot
EV Stations: None
Drone Use: No signs stating you can’t
Difficulty: Easy
Popularity: Moderate
Time: Less than an hour
Milage: 0.7-miles, out and back
Elevation Gain: 200 feet
Trail Condition: Well maintained
Main Feature(s): 35 foot waterfall, views of Mount Shasta, and views of the Sacramento River
Pets: Allowed on leash
Special Notes/Hazards: Vehicle break-ins are common in the trail’s parking lot
Our Visit(s): May 2022
*Please practice leave no trace principles and keep to the trail

Trailhead and Parking
The Hedge Creek Falls trail is probably one of the easiest trailheads on earth to find. Both it and the parking lot are located directly off Interstate-5 on Dunsmuir Ave.
Whether you’re traveling south or north on I-5S, you will see signs for Hedge Creek as you get close. From either direction, take exit #732 and go right on Dunsmuir Ave and it’ll be right there.

If you’re coming from Burney Falls, simply travel north on CA-89 for about 56-miles before jumping on Interstate-5 south for a short time. From there, follow the same directions above.
The parking lot is of the dirt variety and small. It fills rather quickly in the summer so the sooner you can arrive, the better. To find the trailhead, simply cross the street.

The Trail
The trail begins just past the water fountain on the left. It’s a well maintained, packed dirt trail with very little tripping hazards (rocks, branches, etc).
You’ll descend down to the falls under the cover of trees, providing plenty of shade even on the sunniest of days. After just a few minutes, you’ll take note of the sounds of Hedge Creek.

After just ten minutes or so, you’ll arrive at the waterfall. The time of year you’re visiting will determine how heavy the flow is. We were here in May and it wasn’t flowing very heavily.
As you approach the falls, the trail temporarily gets rockier (and slick during the winter) due to how close you’re able to get to both the falls and the creek.


Here, you’ll have the rare opportunity to walk directly behind a waterfall. There’s a large cleft cut into the columnar basalt wall for you to walk through.
You’ll also take notice of the dozens of handprints all over the walls of the hanging rock. These were left by visitors who used the mud in the cleft to leave those prints.


From here, the trail continues for another tenth of a mile to a spectacular view of the Sacramento River and an ‘ok’ view of the summit of Mount Shasta (the rest is obstructed by trees).

Onward to Mossbrea Falls
Now, there’s (almost) nowhere left to go. Most will simply turn around and go back their car. Others could cross the river (if it’s safe) and continue on to an even more beautiful waterfall, “Mossbrea Falls”.
Currently, there’s only an unofficial trail to Mossbrea that requires hikers to commit the crime of trespassing on more than one occasion. So the only other way is to cross the river.
The Mount Shasta Trail Association has been making efforts to finally construct an official trail. Essentially, the plan is to connect Mossbrea Falls to the Hedge Creek Falls trail via a bridge over the river.

Unfortunately, there hasn’t been much progress as the last update given by the MSTA was back in July of 2020. If you want to keep tabs on this project, go here.
Hopefully this project will pick up steam soon because Mossbrea Falls is amazing and it’s criminal that it can’t be accessed without risking a misdemeanor charge.
Have you been to Hedge Creek Falls? Or are you a local and have heard any rumors about the trail to Mossbrea or what the hold up’s about? Lets us know about it in the comments below!
Please support our website by sharing this article with your family and friends.
Thanks for reading.
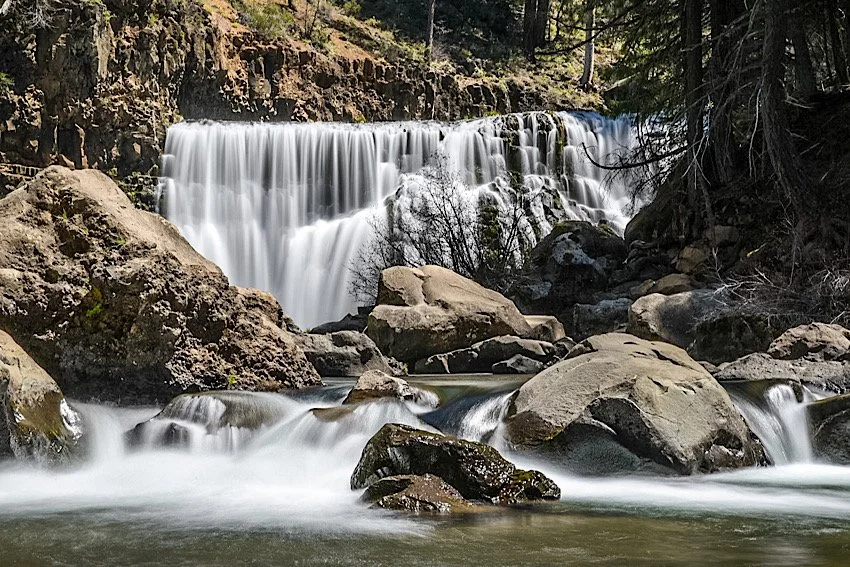
McCloud River Falls: Three Fantastic Waterfalls in One Hike
Just a short distance between two popular Northern California towns; Burney and Dunsmuir, McCloud Falls is a series of three…
Disclosure: This post contains affiliate links. If you make a purchase through these links, I may earn a small commission at no additional cost to you. I only recommend products or services that I believe will add value to my readers.

Just a short distance between two popular Northern California towns; Burney and Dunsmuir, McCloud Falls is a series of three beautiful waterfalls along the McCloud River.
Lower, Middle, and Upper McCloud Falls are easily accessible by foot via a 3.9-mile (out-and-back) hiking trail or by driving to each one via the paved road connecting the three. Additionally, each fall has its own parking lot with picnic tables, signage, restrooms and a campground nearby.
In this guide, we’ll cover a few things you’ll need to know about each of the falls like where to find them, how to access them once you’re there, etc. Let’s get into it.
Quick Stats
Location: McCloud, CA (in between Burney and Dunsmuir)
Fee/Permit: None
Open: Year round, but can be difficult to access in winter
Parking: Large, paved lots at each waterfall
Restroom: Three (one at each waterfall)
EV Stations: None
Drone Use: Allowed (UAV must be registered and follow applicable laws)
Difficulty: Easy by vehicle / Easy to moderate by foot
Popularity: Popular
When: Weekdays and early is best for lower crowds
Time: 2-3 hours
Milage: 3.9 miles, out and back via the trail
Elevation Gain: 337-feet
Trail Condition: Well maintained and easy to follow
Main Feature(s): Three waterfalls of varying heights
Campground: Fowler’s Campground (located near the lower falls)
Pets: Allowed on leash
Special Notes/Hazards: Each waterfall can either be hiked or driven to. No specific dangers aside from usual wilderness hazards.
Our Visit(s): August 2019 & May 2022
Directions To McCloud Falls

If you already happen to be at Burney Falls (or will be), making McCloud Falls part of your itinerary is easy as it’s just under fifty miles away. Even better, if you’re coming from Interstate-5, it’s only thirty(ish) miles away.
McCloud Falls is a well known destination, so simply plugging that into your GPS of choice will get you there without issue. If you’re not a tech person, here’s the simple directions:
From Burney: Go north on Highway 89 for 35-40 miles, then take a left onto Fowler Public Camp road and follow the directions.
From Dunsmuir: Go north on Interstate-5 and take the exit for Highway 89 south. Follow this for about 20-25 miles and take a right onto Fowler Public Camp road.
The road leading to the falls is paved and well maintained. You just need to decide whether you’re going to hike to all three or simply drive.
The falls are handicap accessible and feature viewing decks straight off of the parking lots. For those who wish to, you have the option to walk down to the base of each one for a closer look.
Because we stopped here between our visits to Dunsmuir and Burney, we decided to drive to each waterfall and walk down to their bases to save time. While I recommend hiking the trail connecting the three, you can save a significant amount of time by doing what we did.
Lower McCloud Falls

The lower falls is a great place to begin your visit. The parking lot is paved and decently large. The viewing deck is just off the parking lot, past the restrooms.
If you’re able, I highly recommend going down the stone steps to get a closer view of this 15-foot waterfall. These stone steps is also where the official beginning (or end) of the hiking trail is. I have seen pictures of people swimming in the emerald green plunge pool, so I assume it’s allowed.
In fact, while you’re there, look for metal hooks embedded into the rock. According to a local I spoke with, those are the remains of what used to be a ladder swimmers used to climb out.
From here, you can either start hiking up the trail to the middle falls or head back to your car and drive up. If you drive, simply take a right up the road and look out of the waterfall sign.
Middle McCloud Falls

The middle falls was our favorite and arguably the most impressive of the three. If you only have time for one, I recommend this one. If you’re hiking here from the lower falls, the trail will take you straight to the base. If you drive, you’ll need to hike down or simply view it from above.
To get to the base, you’ll need to hike the short, quarter-mile(ish) trail to the bottom. It’s easy to miss and there isn’t any signage indicating where to go (at least none that we saw). What you’ll look out for is a dirt path, lined with rocks, spurring off to the right from the paved one going to the viewing deck.
The trail consists of packed dirt and while a bit rocky in some spots, overall it’s a well-maintained, easy to-follow trail. You’ll take a short series of graded switchbacks before reaching the bottom.

When the trail flattens out at the bottom, keep left to the falls and you’ll eventually reach a rest area. Between you and the falls is a boulder field that you’ll need to scramble over if you want a closer view. The pool in front of the falls is perfect for swimming and while we don’t how deep it is, we have seen videos of people cliff jumping into it, indicating it’s decently deep.
Out of the three, the middle fall is where we spent the majority of our time. I wrote an extensive post highlighting the middle falls and its trail if you’d like to read more about it.
Upper McCloud Falls

The upper falls is the one with second tallest plunge at 30-feet. Similar to the lower fall, it’s narrow and dumps into a small pool but unlike the lower fall, it’s carved out an opening between the basalt rock walls, rather than just spilling over it.
There’s a plethora of viewing space up top but unfortunately, none of them provided an impressive view of the waterfall (in my opinion, anyway). To get a better view, you’ll need to rough it a bit.
Just past the last viewing deck, where the dirt trail begins, you’ll see a spur trail on your left going straight down to the waterline. Watch your footing and take your time. It’s short, but steep with nothing but loose dirt and rocks. Taking a spill here wouldn’t feel good.
There isn’t a lot of space at the water’s edge. Most of it consists of awkwardly spaced boulders that you’ll need to sit or stand on to view the waterfall.
When you’re done, head back up and go a little further upstream to see the cascades feeding the waterfall or read about the development of these falls on the informational signs near the trailhead.
Hike or Drive?

That all depends on personal preference, physical limitations, how much time you have, etc. Both have their advantages and disadvantages.
Hiking the trail: You’ll need to ensure you have the proper equipment with you such as trekking poles (see my recommendation here), hiking boots/shoes, water, sun protection, etc. Each waterfall is less than one mile from the next and the only real “challenging” part is the uphill slog out of the middle fall. Aside from that, it’s a fairly simple trail.
Driving to each fall: For those short on time or with physical limitations, this would be the best option. Each fall has its own parking lot and all of the upper viewing decks are wheelchair accessible. If you’re able, you can still get a close view of each waterfall (which is really the main point, anyway).
As far as where to start, that’s also your personal preference. If you’re hiking with a group with multiple vehicles, our recommendation would be to leave a vehicle at the lower fall, take another up to the upper fall, and start the hike there.
This strategy is two-fold as:
You’re hiking down to the lower falls, bypassing having to work your way up and out of the middle falls.
Saves you time by cutting the hike in half.
If you’re driving, it doesn’t really matter where you start. If you only have time for one waterfall, we recommend the middle falls as it’s the largest, most scenic/photogenic, and has the best swimming hole.

Barney Lake: A Beautiful Day Hike Near Bridgeport
Hiking to Barney Lake via the Robinson Creek trail is one of the many premier hiking experiences in Mono County…
3 minute read | contains affiliate links
Hiking to Barney Lake via the Robinson Creek trail is one of the many premier hiking experiences in Mono County.
The trailhead is located behind the campground at Mono Village, which is just 10-miles or so outside of the small town of Bridgeport.
We have hiked this trail many times. It’s one of our favorites. In fact, it was on this trail where the idea and name for this website was born.
In this guide, we’ll cover topics such as directions, what to expect along the trail, places to eat and more! Let’s get into it.
Here’s some great hiking products we recommend…

Quick Stats
Location: Bridgeport, CA
Fee: None
Permit: None
Open: Year round, though difficult to access in winter
For: Hikers & Equestrians
Restroom: At the trailhead in the campground
Parking: Large day-use dirt lot
EV Stations: None
Difficulty: Easy to moderate
Popularity: Medium
Mileage: 8-9 miles, roundtrip
Time: 3-4 hours
Elevation Gain: 1,223-feet
Condition: Fairly maintained, mostly unsigned
Features: Robinson Creek & Barney Lake
Pets: Allowed on leash
Drones: Not allowed
Hazards: None aside from usual wilderness dangers
Our Visit(s): 2015, 2016, 2017, 2018, 2019, & 2021
Mono Village Campground
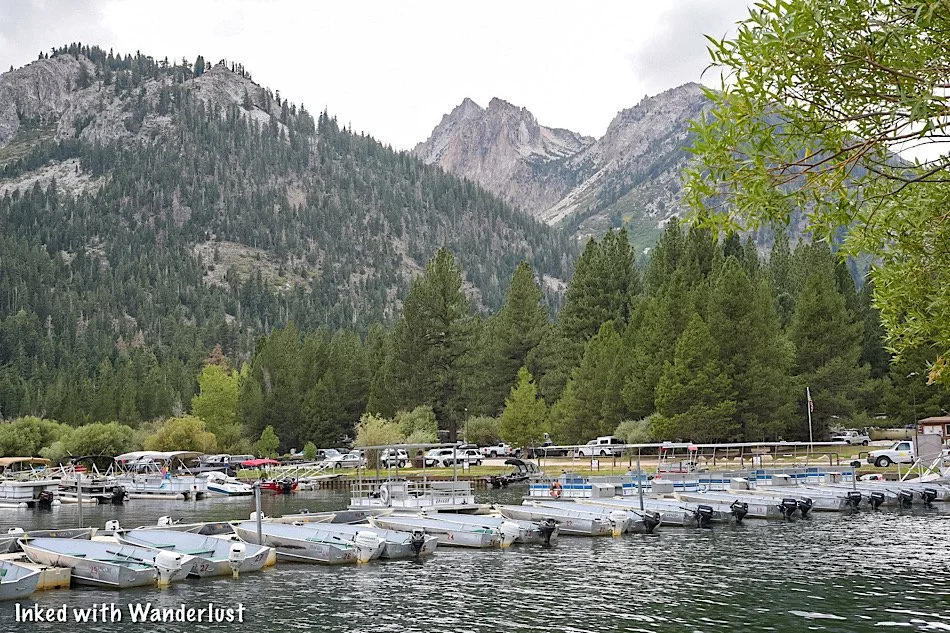
As stated at the beginning of this post, the trailhead for Barney Lake is behind the campground at Mono Village.
Mono Village is easy to get to from the town of Bridgeport. From town, go down Twin Lakes road and continue straight for about ten miles.
Mono Village is located at the terminus of Twin Lakes road. You’ll literally run right into it. Shortly after arriving, you can park in the day-use lot on the left.

If you have time before or after your hike, there’s plenty to do at Mono Village if you’re here during their normal operational months. These include:
A large campground with many sites for tents, RV’s, etc.
Boat, Kayak and Paddleboard rentals
Bait & tackle shop
A general store
Restaurant
If you need to use the restroom before heading out, you can find one just behind the restaurant. If you’re eating there, there’s also one inside.
Finding The Barney Lake Trailhead

To find the trailhead, stand near the check-in booth to the left of the restaurant and face the campground.
Ahead of you, you’ll see two trees with a pathway going between them and yellow markers on each tree. Head between those trees.
Continue on this pathway until you see a meadow at the rear of the campground. Keep going straight while keeping this meadow on your left.
After a half-a-mile or so, you’ll see the one and only trail sign on this trail. It’s an arrow pointing right and says, Barney Lake, on it. Bear right with the sign.
Robinson Creek Trail to Barney Lake

As of now, you’re officially on the Robinson Creek trail. Initially, this part of the trail is mostly flat, with a few gentle inclines here and there.
There’s a plethora of tree cover and if you’re here during spring and early summer, there will be a few creeks to cross (easy to do).

After a mile or so, you’ll enter a large meadow with mountain peaks surrounding you. There isn’t a lot of shade on this section of the trail.
*Tip: Be sure to bring plenty of water with you. Tap to check out the Hydration Backpack we recommend (affiliate link). It can carry 2-liters of water in addition to your day-hike essentials.

You’ll eventually dip back down under tree cover but don’t get too excited. After a short time, you’ll come out of tree cover and start going at a slight incline.
This is also where you’ll meet back up with Robinson Creek. Aside from the lake itself, this is our favorite part of the trail.
There’s a few spots here where you can take a break and admire a couple mini waterfalls. All the while enjoying your return to tree cover.
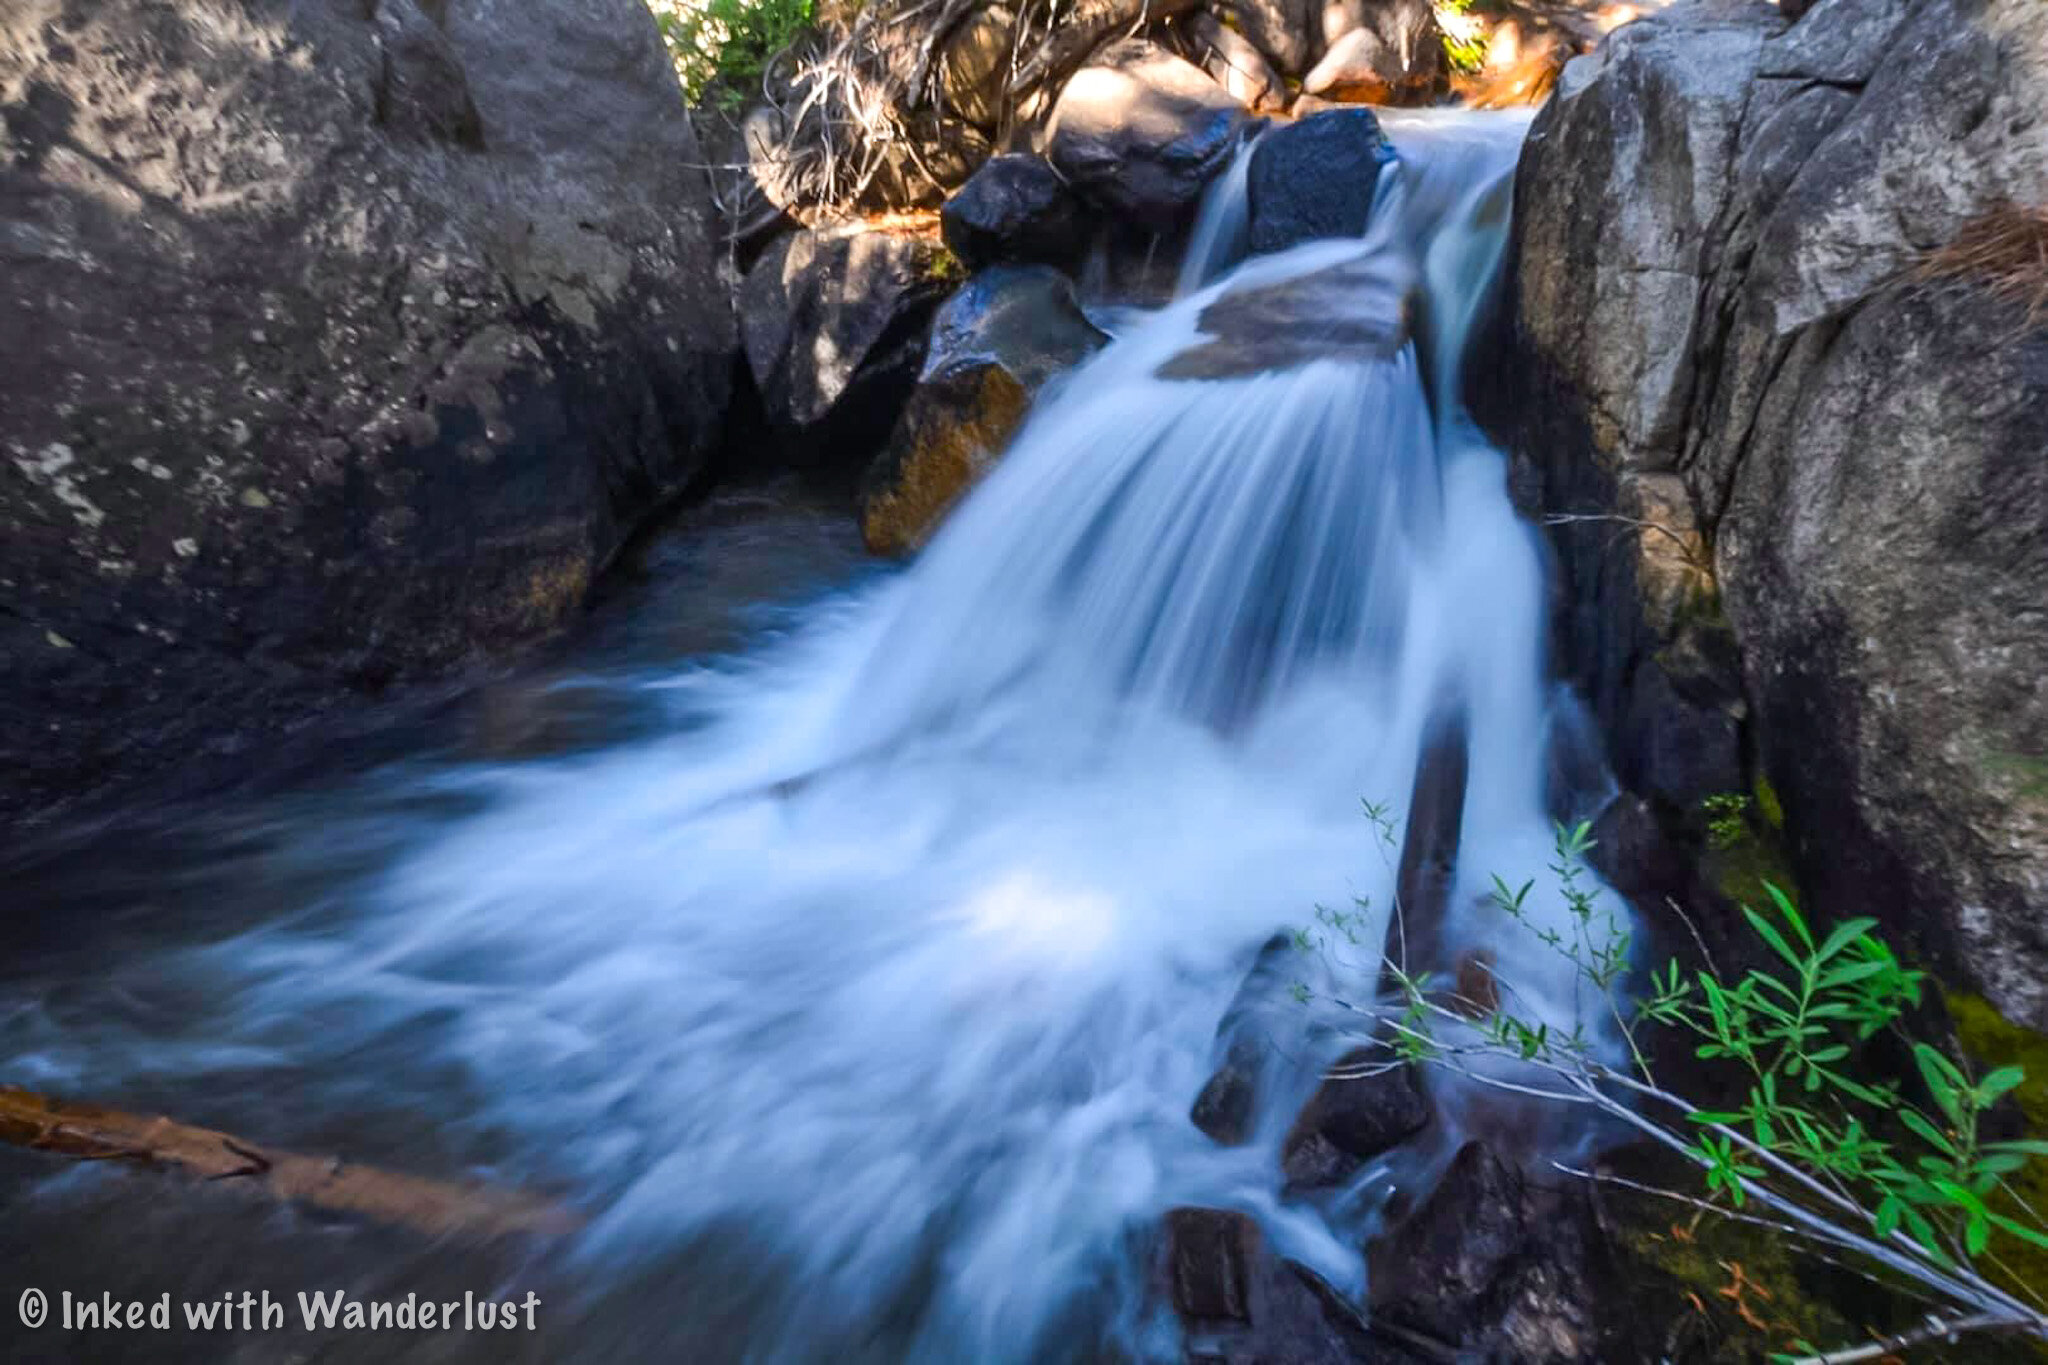

Once you feel rested, continue up the trail. After coming into another opening, you’ll arrive to the start of the switchbacks (at this point, you’re close to the lake).
These switchbacks aren’t bad at all, but this is the least maintained part of the trail. There’s a lot of overgrowth.
To make matters worse, if you’re here in the spring or early summer, they’re muddy and slick from the water run-off.
About halfway up the switchbacks, you’ll come to a point where it seems as though the trail disappears. Continue up and over the granite rock to rejoin the trail.
Shortly after this point, the trail will flatten out and the sight of Barney Lake will soon come into view.
Barney Lake

The scenery at Barney Lake is impossibly gorgeous. Especially if you’re here on a day without wind. The surface of the lake is glass-like.
The west end of the lake (near the outlet) provides an alternate view, los of shade and many seating opportunities.
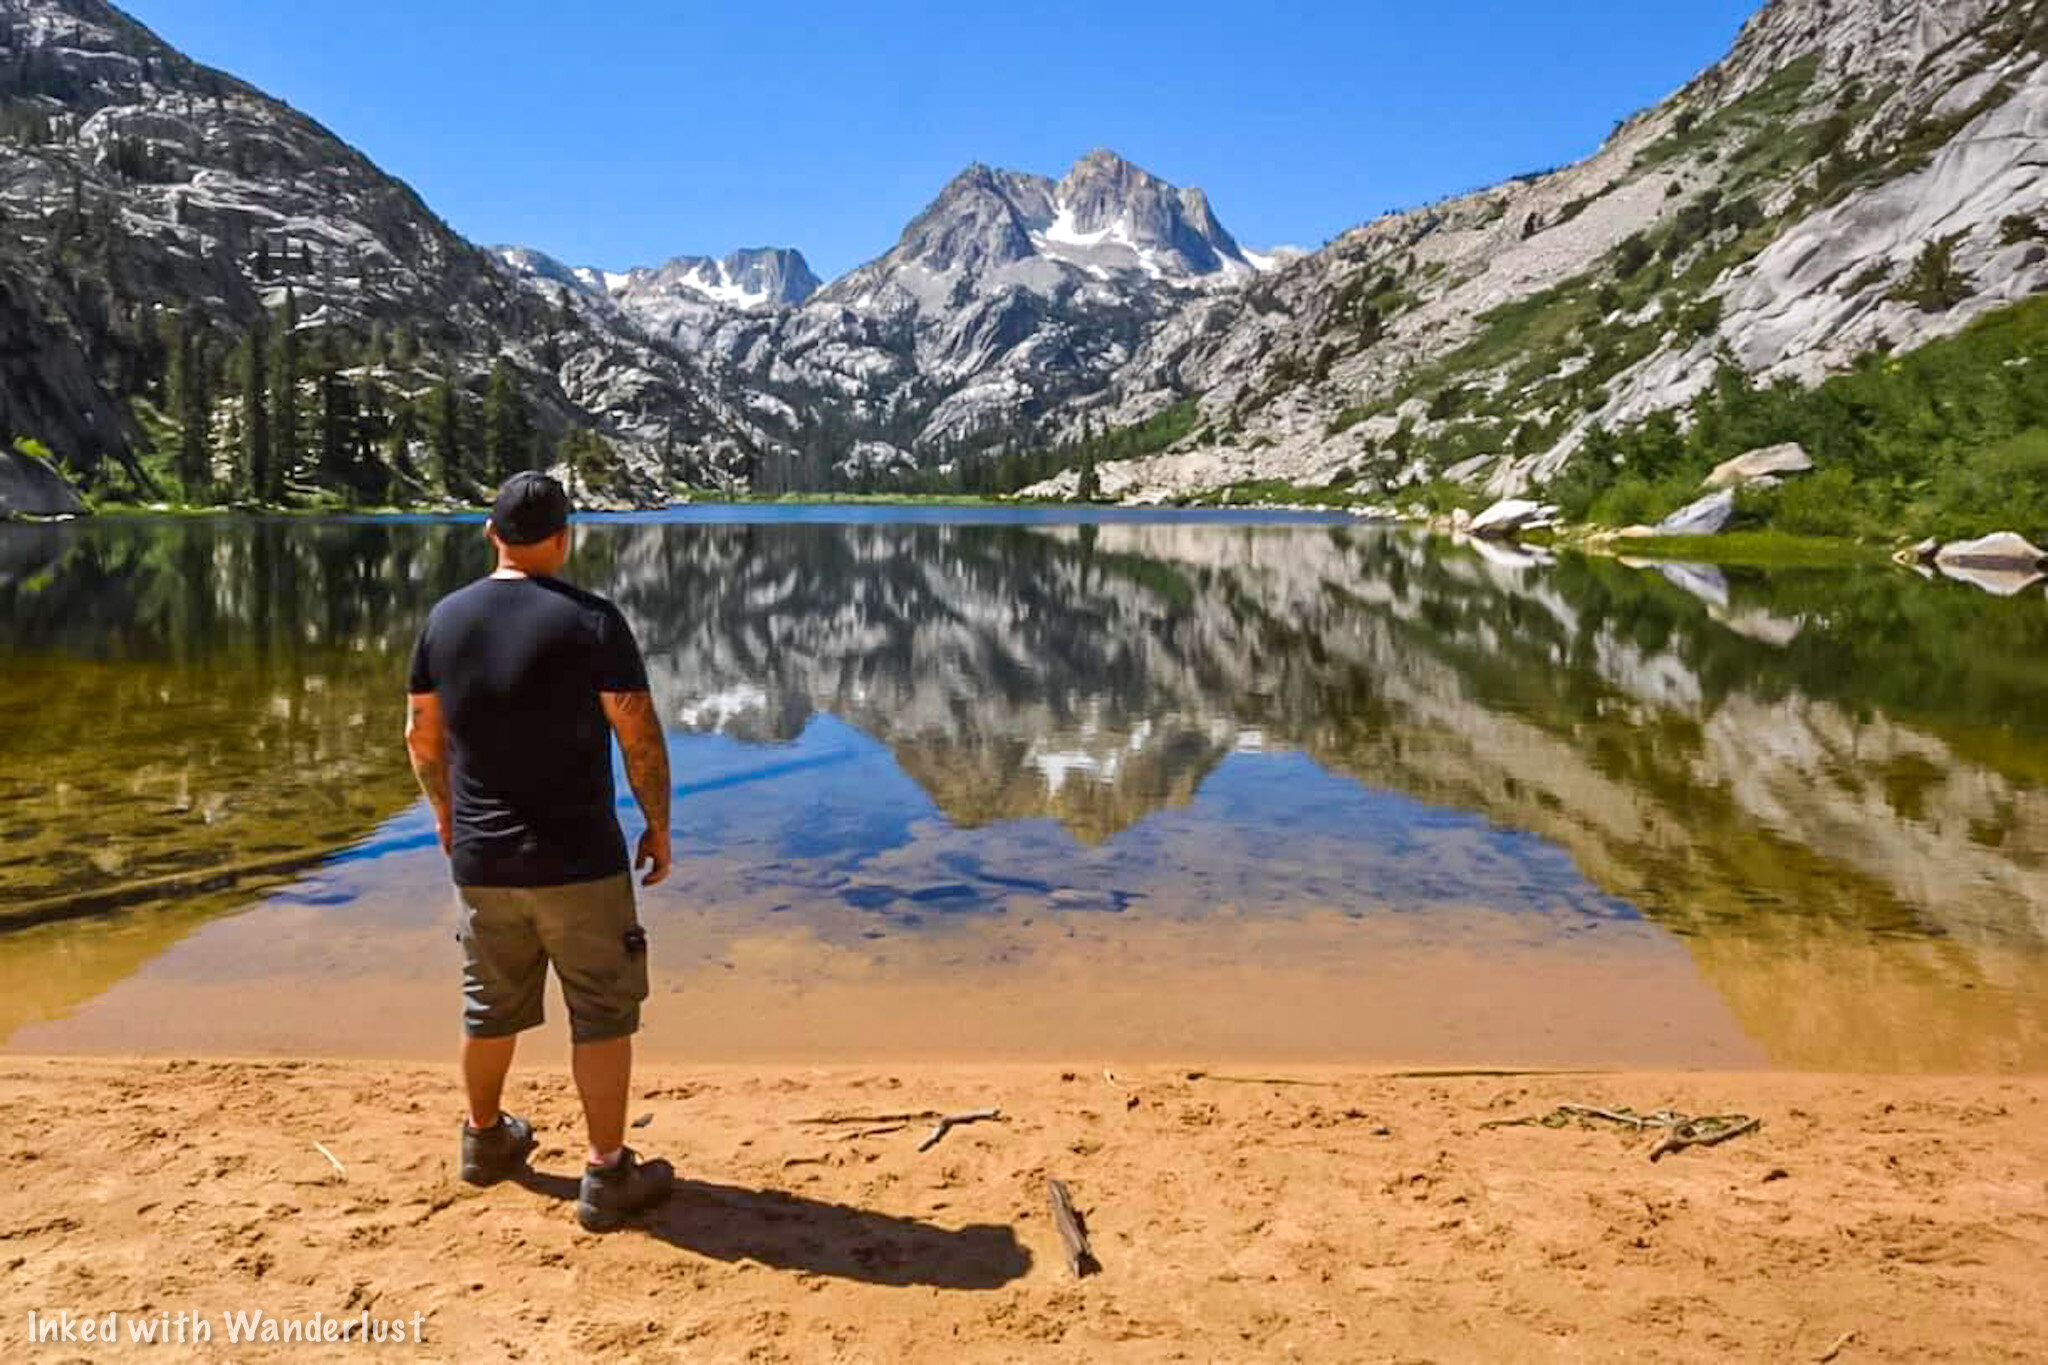
If you’re here in spring, the beach may be non-existent due to the amount of snow melt still coming off the mountains.
Throughout summer, as snowmelt lessens and water levels subside, the beach becomes more prominent.
Optional Lakes

From here, you have two choices. The first one is you can simply finish up with your hike and make your way back to the trailhead.
If you still have some energy to burn, you can continue up the trail and onto additional, even more amazing lakes.
Some of these lakes include Crown Lake, Robinson Lake, Peeler Lakes, Snow Lake and more!
Additionally, you can go even further by making your way over the pass and dropping into the Grand Canyon of the Tuolumne in Yosemite.
Unless you’re a super fit hiker, you’ll need to secure a permit to do most of these as you’ll be spending a night or three in the backcountry.
*Tip: If you’re feeling hungry after your hike, stop by the Burger Barn before heading home. Tap the link to check out our post about them!
Your Thoughts…
Have you hiked to Barney Lake before? If so, tell us about your experience in the comment section below. We love hearing from our readers!
Please support our website by sharing it with your family and friends.
Thank you for reading.