A One Day Yosemite Travel Itinerary
Disclosure: This post contains affiliate links. If you make a purchase through these links, I may earn a small commission at no additional cost to you. I only recommend products or services that I believe will add value to my readers.
For some, Yosemite is a once-in-a-lifetime experience. Often regarded as one of California’s crown jewels, Yosemite reigns as one of the most visited destinations in the state and in the national park system as a whole.
Despite that, a good chunk of the millions who visit Yosemite annually do so for the first time. Additionally, with work and school commitments ever present, many are short on time or want to include multiple destinations in one trip.
If that’s your situation, then this one day Yosemite itinerary is for you. In it, I’m going to provide a doable schedule to follow to see most of the top sights and trails Yosemite has to offer.
Note that this itinerary isn’t exactly small-kid friendly. If your kids are older (or have experience with long, active days), then they should be able to handle it. For a solo traveler or pair of adult travelers with hiking experience, it definitely shouldn’t be an issue.
Buy me a coffee?
If you found this blog helpful, consider leaving a tip through the Buy Me A Coffee button below! Whether it’s $1 or $5, every bit helps offset small travel costs like coffee, water, lunch, parking, or park entry fees. Your support means the world—thank you!
Best Time to Visit Yosemite
The answer to that all depends on your travel preferences and goals but if you’re asking me, spring and fall are my favorite times of year to go to Yosemite. Summer comes in third, with winter coming in dead last because many hiking trails are largely inaccessible due to snow.
I prefer spring and fall mainly due to the pleasant weather and cooler temperatures. Spring is best for waterfall viewing (specifically Yosemite Falls) as some deplete as summer progresses. Conversely, fall offers golden foliage colors that pop against the massive granite walls.
For the purpose of this itinerary, we’ll focus on visiting during spring or early summer. Note that you’re traveling to the mountains, which tend to create their own weather. Just because it’s normally pleasant, that doesn’t mean it won’t change on any given day.
Yosemite Reservations
One aspect to visiting in spring or summer is having to contend with Yosemite’s reservation system. There are exceptions but most people, visiting during these times will require one. One exception to take advantage of, however, is what I’ll recommend - arriving before 6am.
On select dates in spring and all days in summer, you’ll need a reservation if you arrive between 6am and 2pm. Outside of those hours, you’re good to go. I highly suggest getting there prior to 6am to avoid crowds, but to also see as much as you can on your one day visit to Yosemite.
Where to Stay and Eat
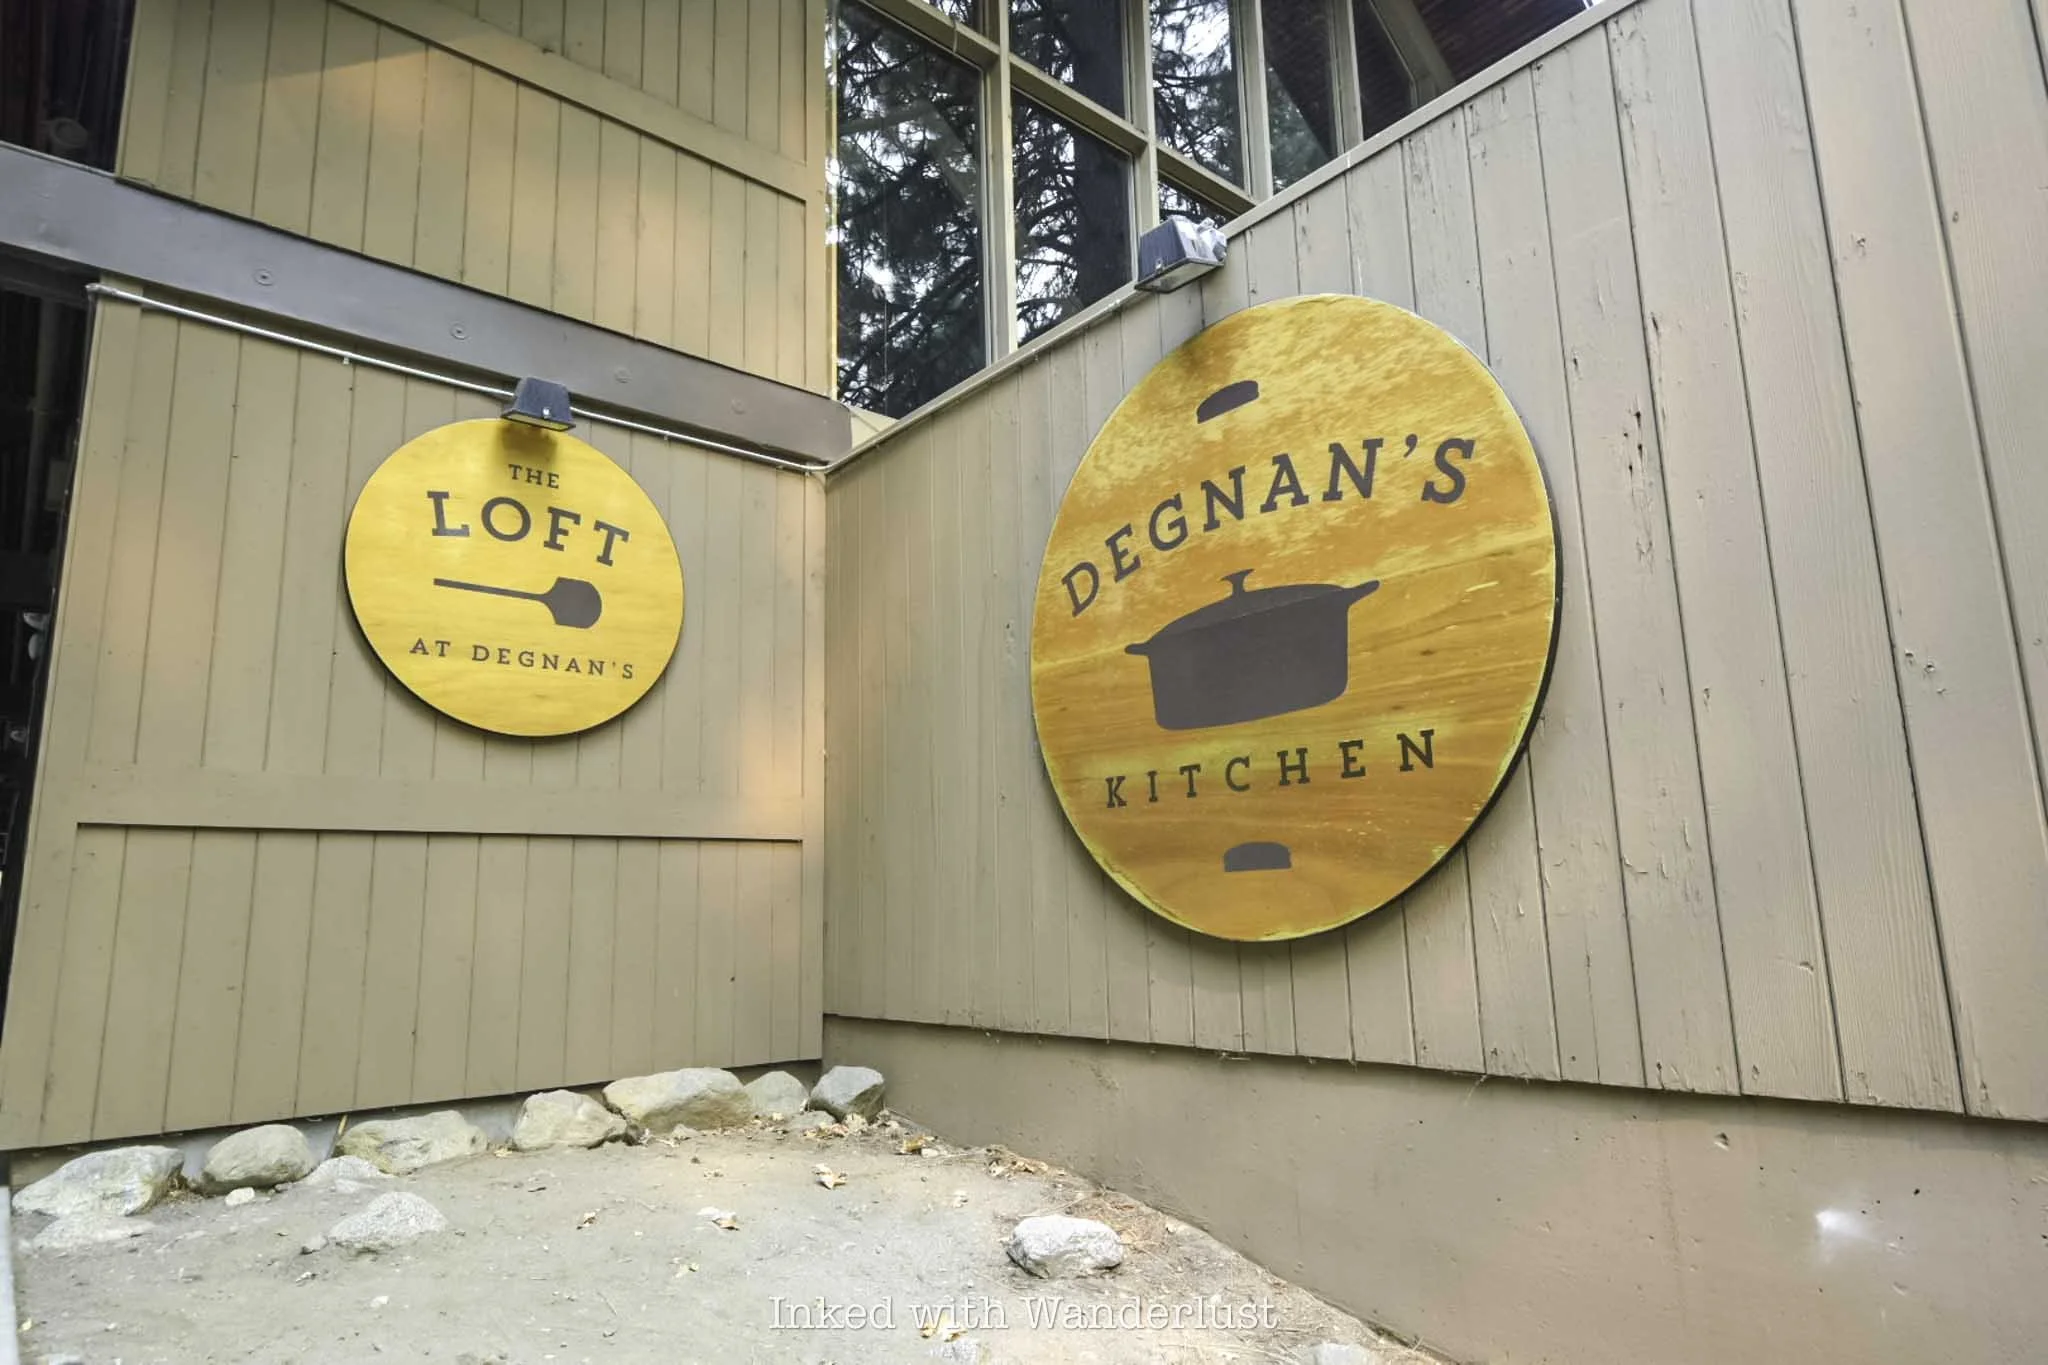
Believe it or not, there are no shortages of places to eat in Yosemite Valley. Quick service and mid-range options include Base Camp Eatery, Mountain Room Lounge and Curry Village Pizza Patio. For a more upscale experience, The Ahwahnee has you covered.
Keep in mind that while food may not be scarce, the restaurants are exceptionally overpriced for what you get and while I haven’t eaten everywhere in Yosemite Valley, the ones I have tried weren’t all that great, in my opinion.
This itinerary will include time to enjoy lunch, but I recommend packing a plethora of snacks and even picnic foods to save yourself time (and money, no less). You’ll practically be spending your entire day in the valley with no time to leave the park and return later.
I suggest bringing a Yeti Soft Cooler backpack (or something similar) to keep food cold. Remember to NOT leave any food or scented items in your vehicle (including the trunk) and to utilize bear boxes. Bears WILL ruin your day by ripping your vehicle apart looking for them.
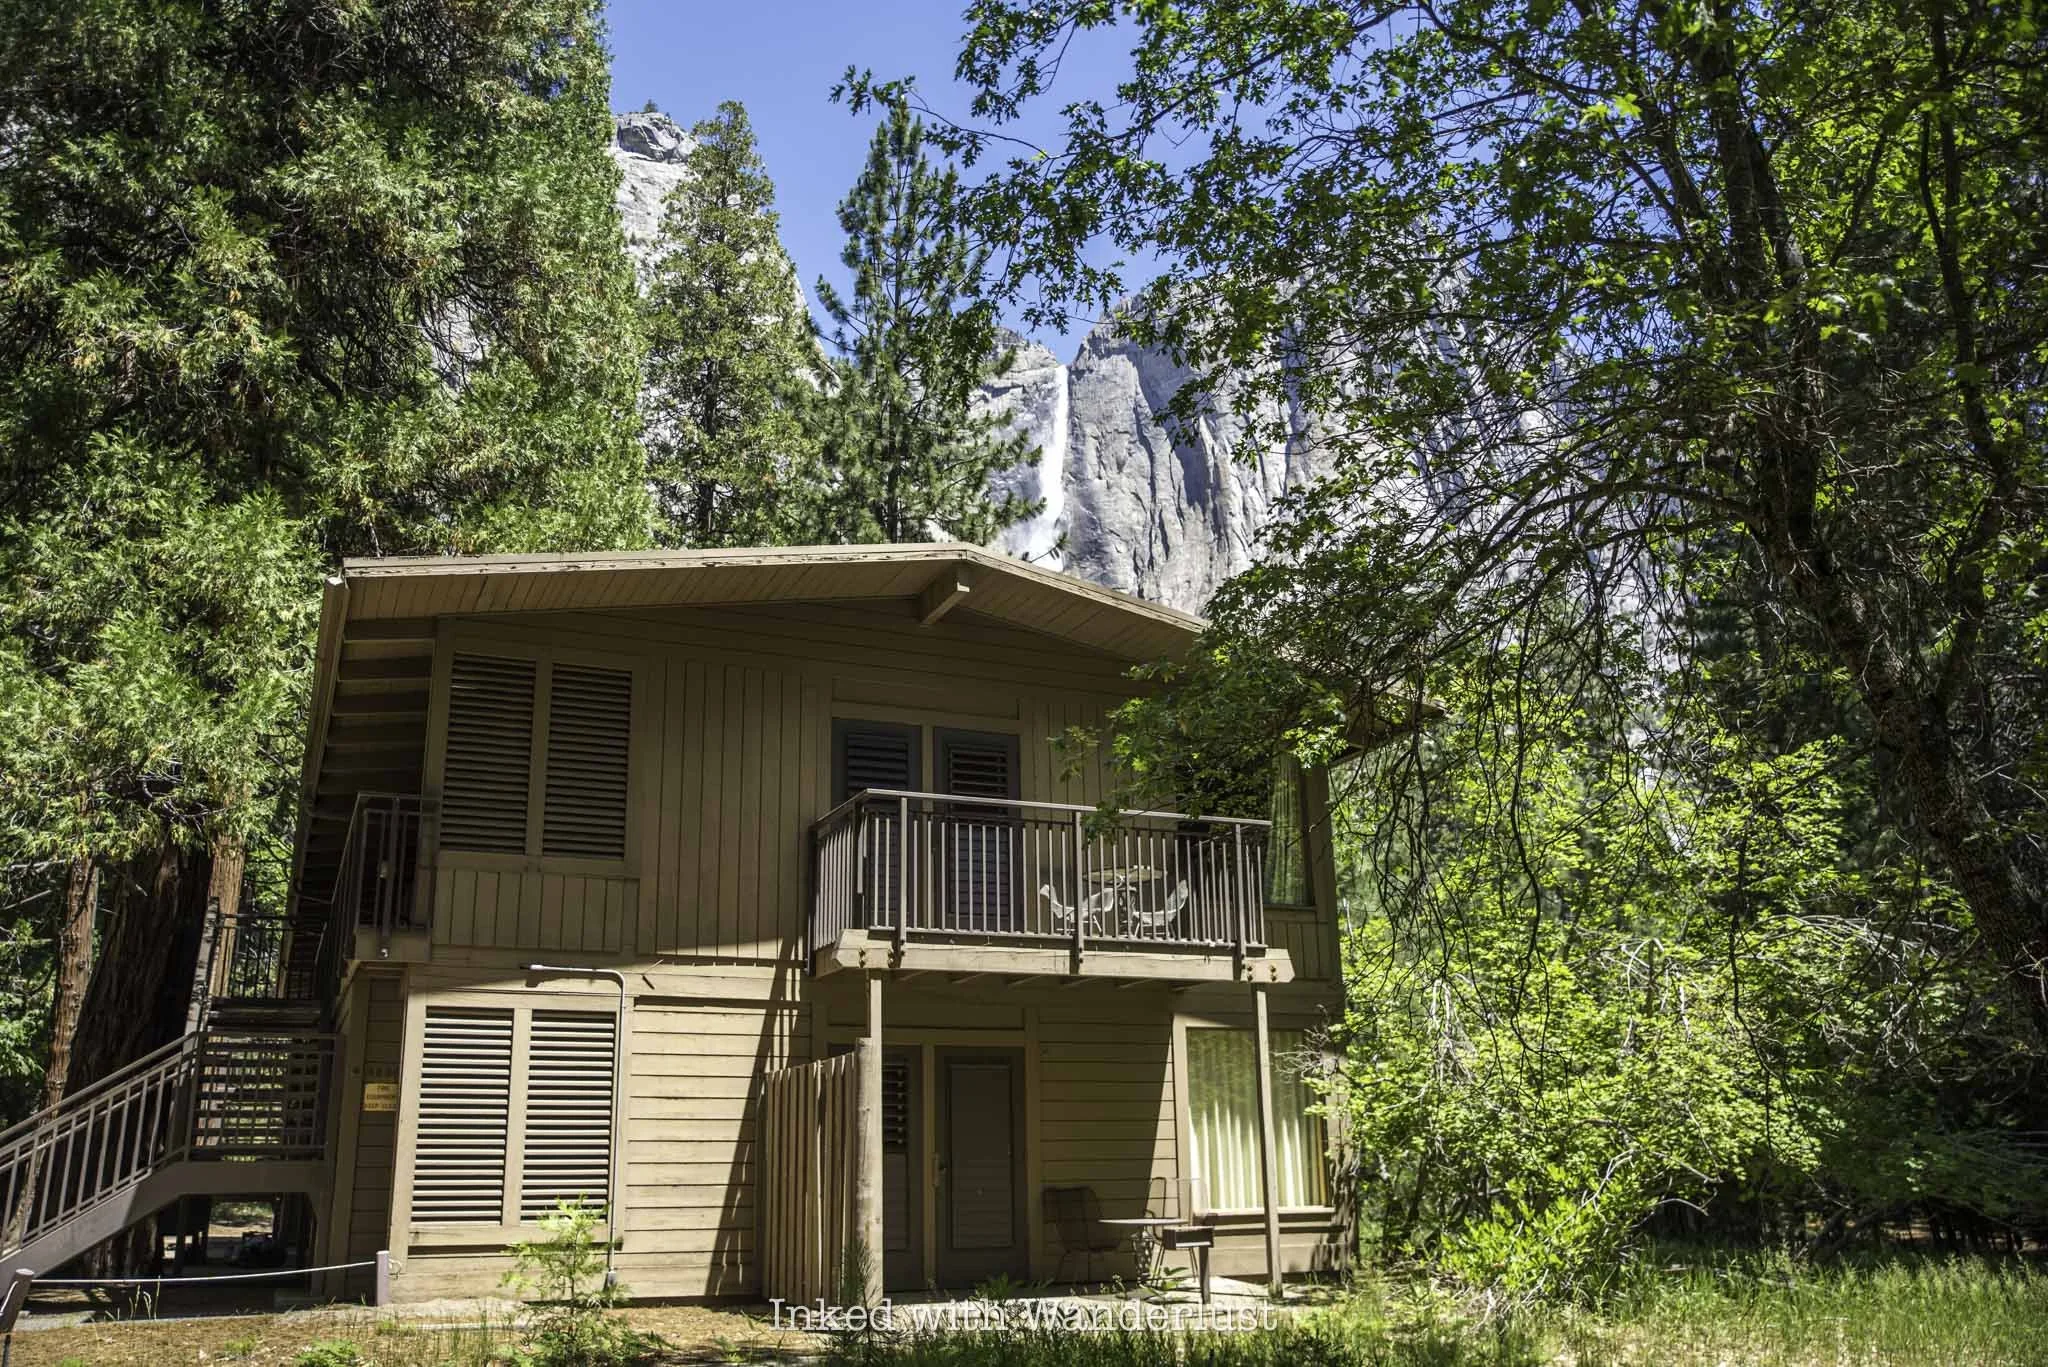
As far as lodging goes, I recommend staying at a hotel or campground in Yosemite, or somewhere close by. This is so you can begin the itinerary right away and maximize your one day at Yosemite. Hotels and campgrounds in Yosemite Valley proper include:
The Ahwahnee
Yosemite Valley Lodge
Curry Village
Camp 4
Upper Pines
Lower Pines
North Pines
Keep in mind that reservations at the in-park hotels and campgrounds are competitive. Often requiring booking months in advance to secure a room during the summer at Ahwahnee. Cancelations happen, though. So just keep trying.
Additionally, there are also hotels and campgrounds in the surrounding gateway towns that are often easier to come by. These include El Portal, Mariposa, Oakhurst, Groveland and Lee Vining (east side).
This itinerary is assuming that you’ll be staying outside of the park. If you’ll be staying inside the park, simply adjust the itinerary below (arrival time, where you’ll initially board the shuttle, etc) accordingly.
One Day Yosemite Travel Itinerary

Since you’ll only have one day at Yosemite, your time on this itinerary will heavily focus on the highlights of Yosemite Valley, as well as a visit to Glacier Point. Remember, if you weren’t able to secure a reservation, be sure to arrive before 6am.
If you’re like most, you’ll be driving in through the Arch Rock entrance. Either present or purchase your America the Beautiful pass ($80) or pay the regular fee ($35) to enter. Remember, cash is not accepted. Only credit/debit cards.
1) Tunnel View (30 minutes or less)
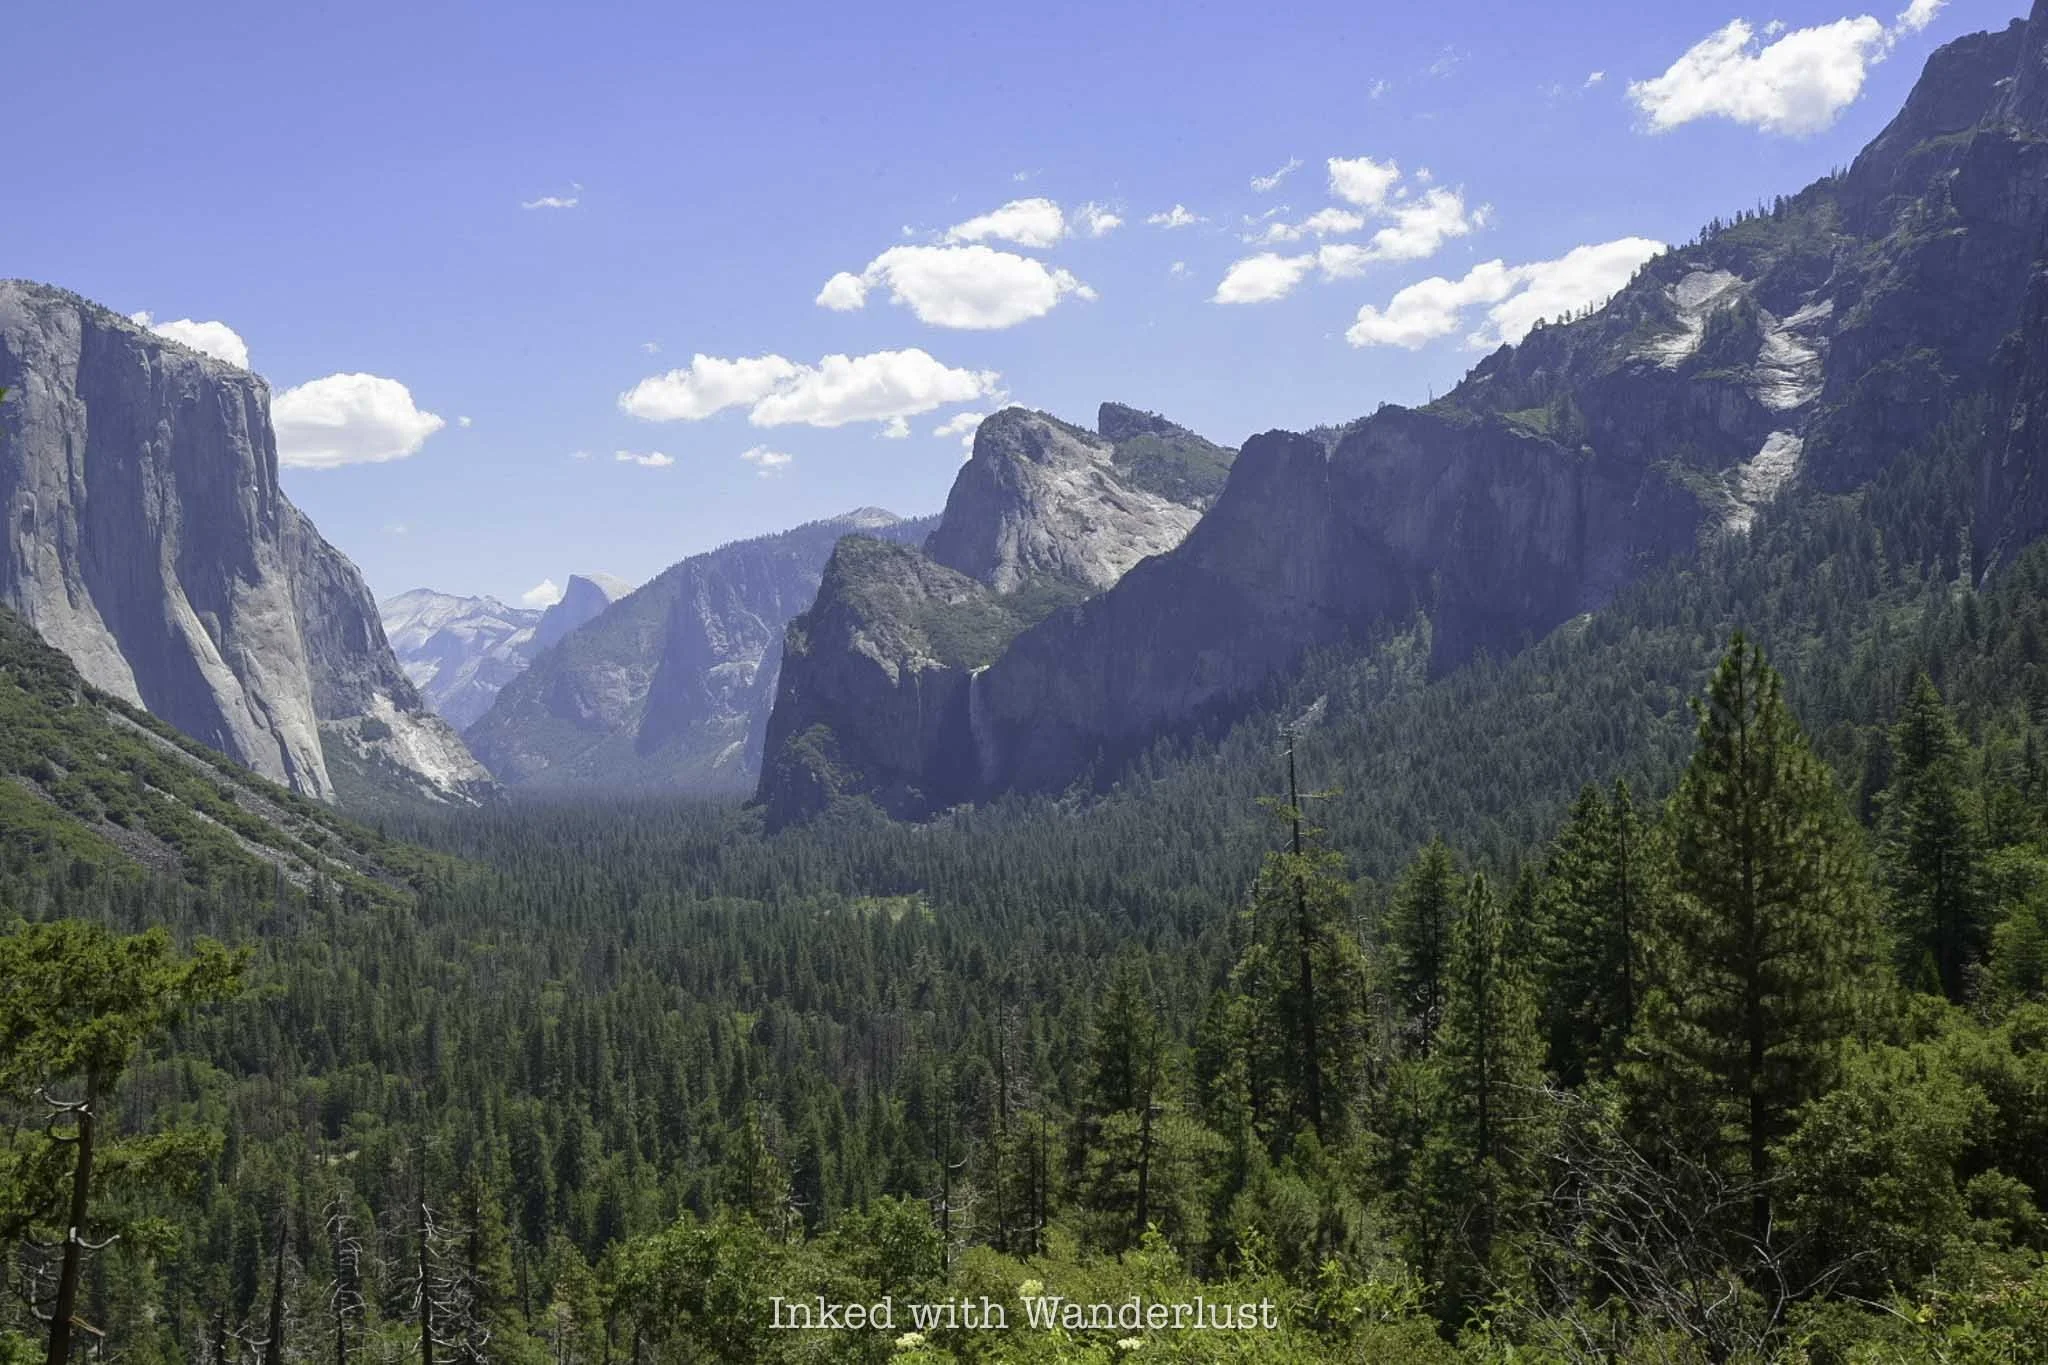
Tunnel View is one of the quintessential Yosemite experiences that anyone, especially first-timers, should check out. You’ve likely seen it on the various social media sites and probably on merchandise as it’s the infamous postcard view of the park.
Despite seeing it in photos, you simply must see it for yourself as photos and video do it no justice. From Tunnel View, you can see many of the park’s most infamous landmarks including Half Dome, El Capitan, Cathedral Rocks and Bridalveil Falls.
READ: “Tunnel View: How to See the Most Iconic View in Yosemite”
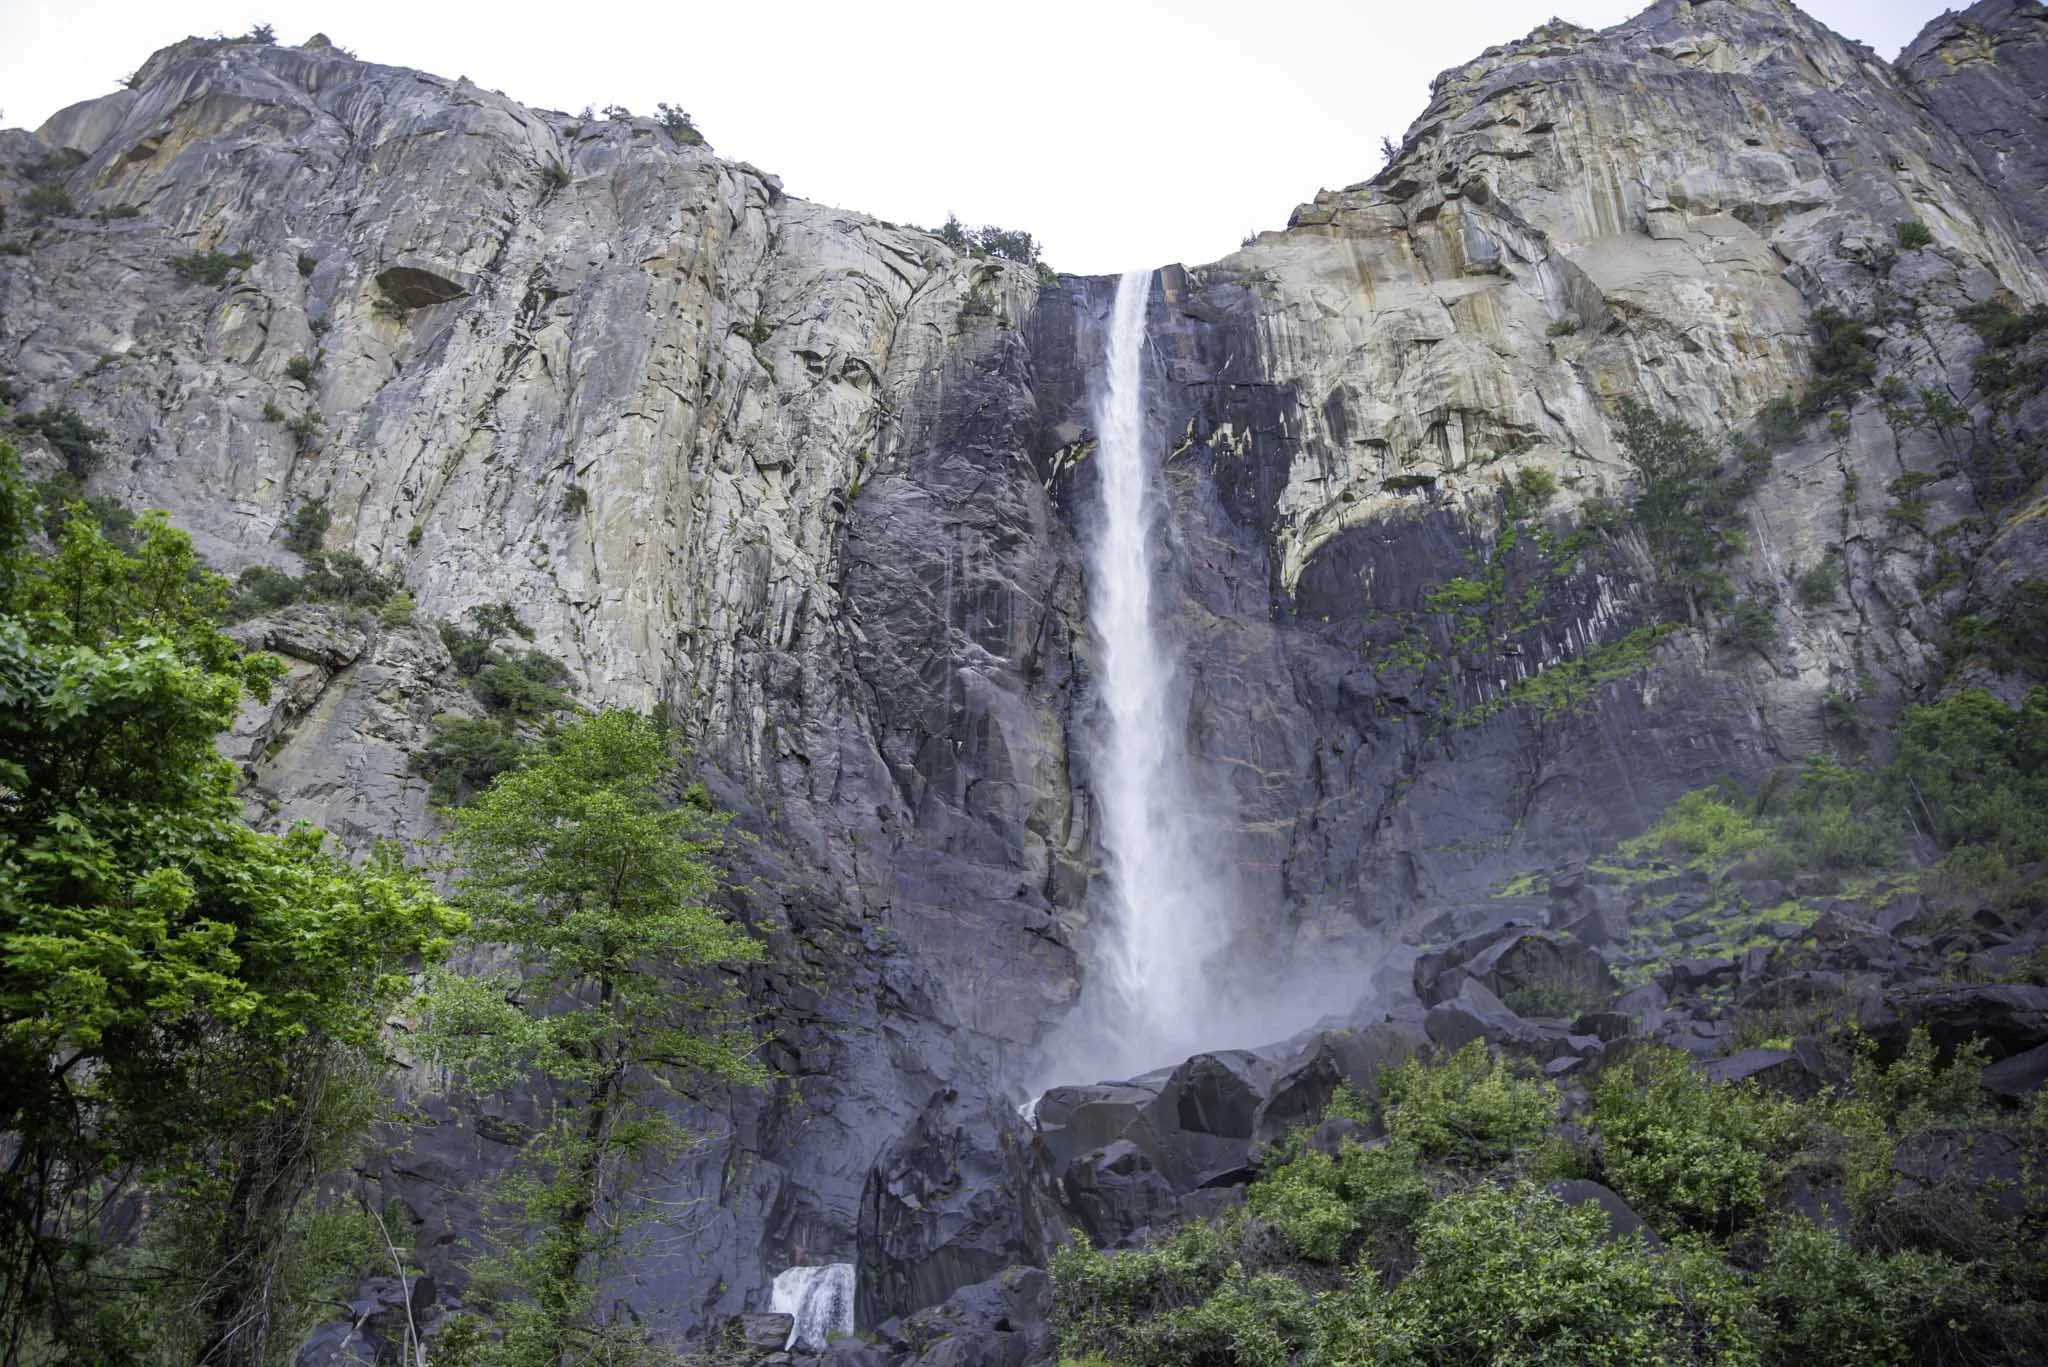
2) Bridalveil Falls (one hour or less)
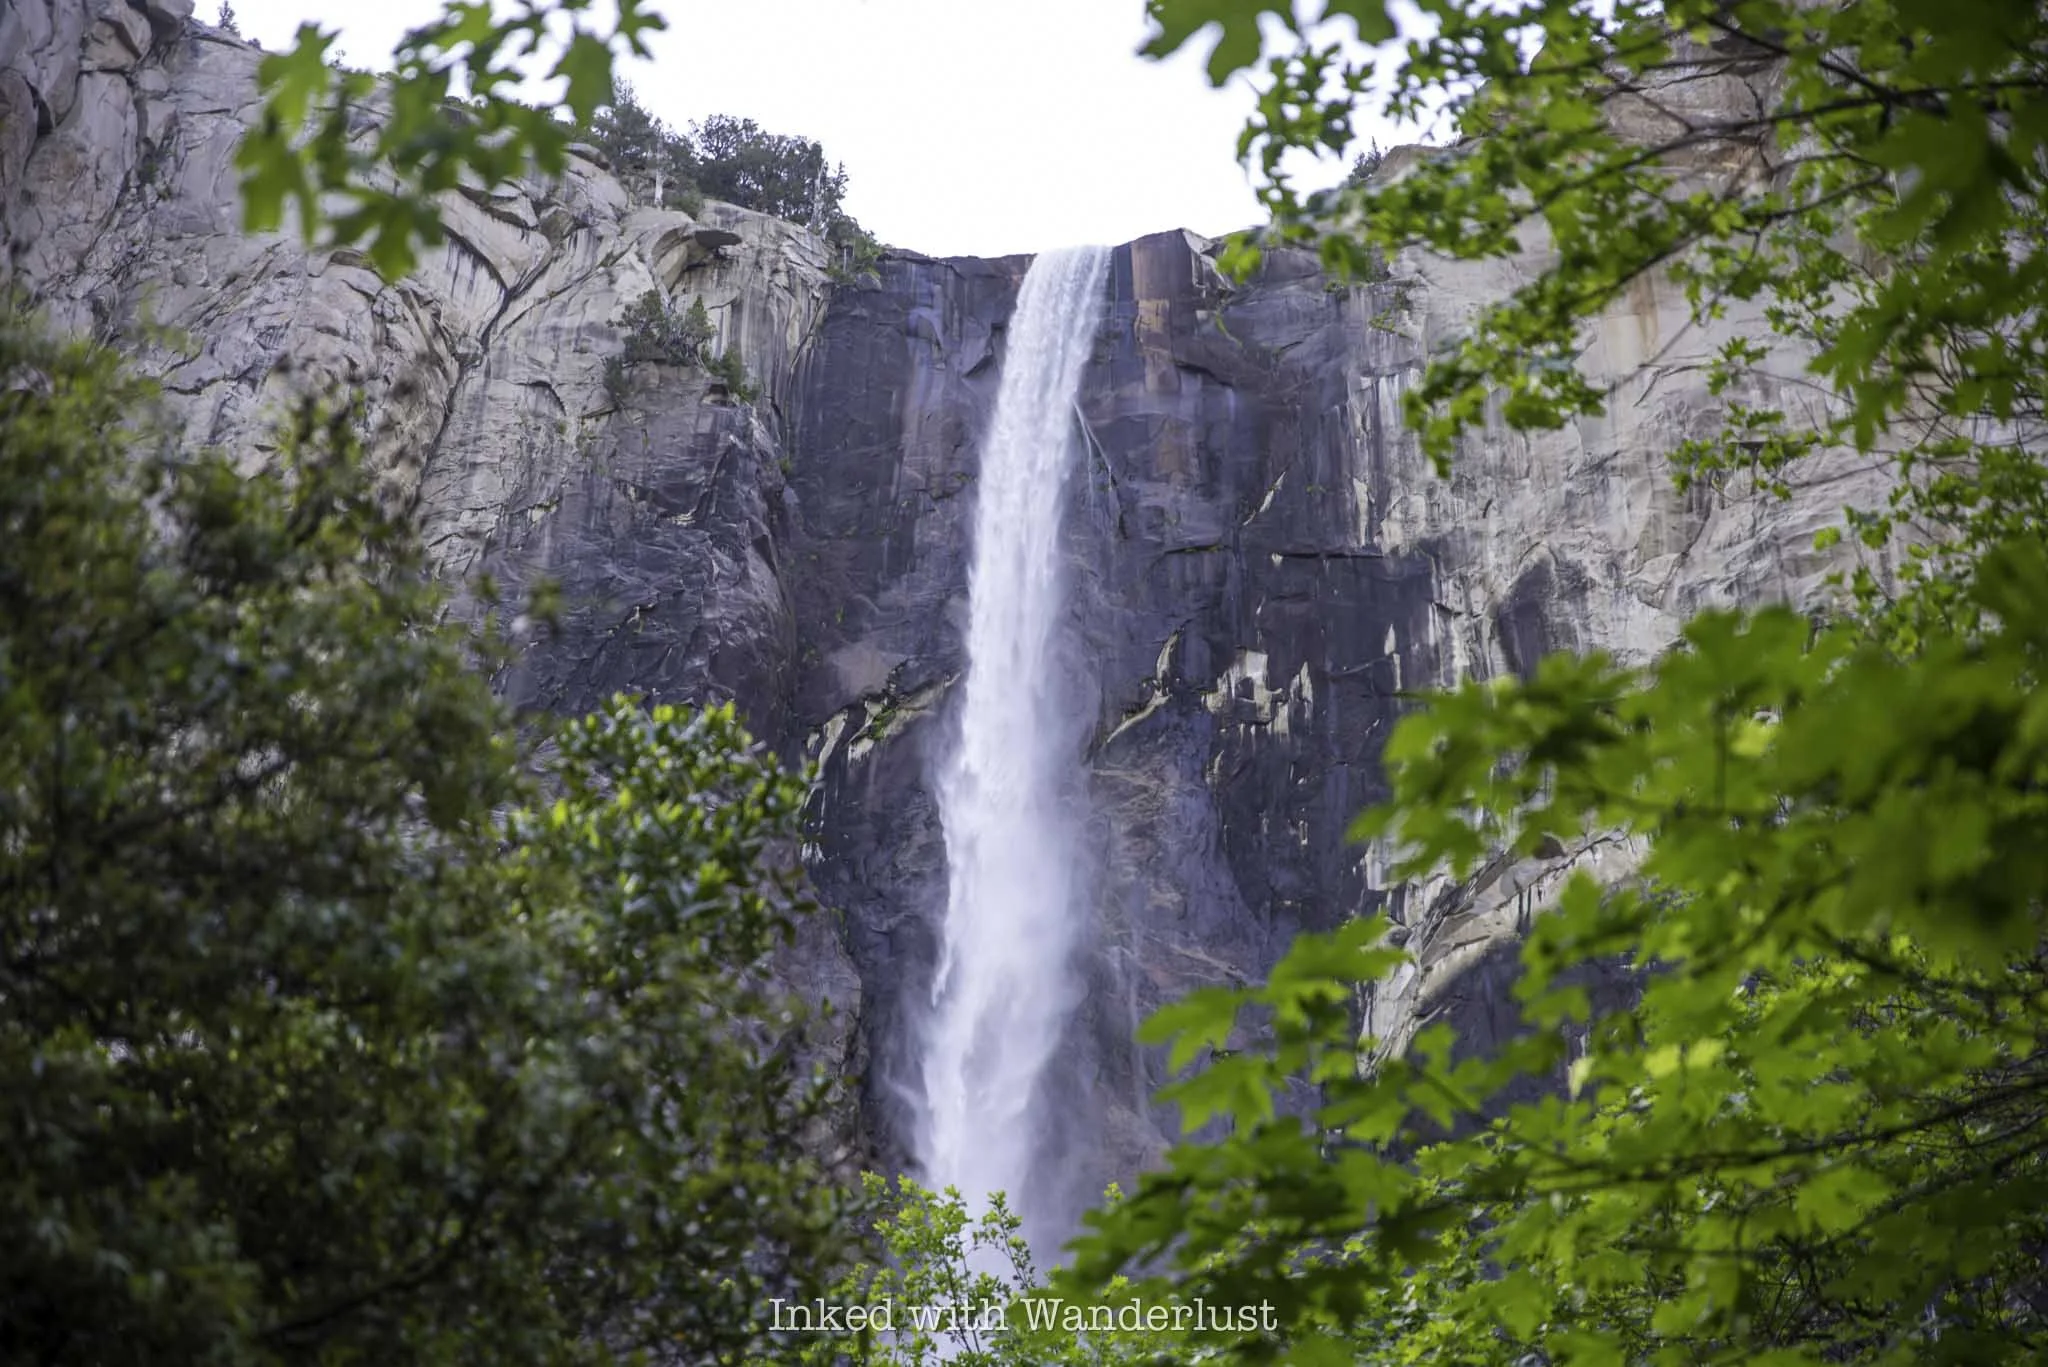
From Tunnel View, you’ll work your way down the road and over to the first waterfall of your visit - Bridalveil Fall. Unlike most waterfalls in Yosemite, Bridalveil is spring fed, so it flows year-round (though it’ll be heavier in the spring and early summer).
Parking is plentiful here, especially in the early morning. The reason I’m recommending starting your day at Tunnel View and Bridalveil is because they’re both mega-popular and the park shuttle doesn’t go to either - and that’s your next stop.
READ: “How to See Bridalveil Fall in Yosemite National Park”
3) Board the Yosemite Valley Shuttle at Stop #11 (15-20 minute wait for the shuttle)
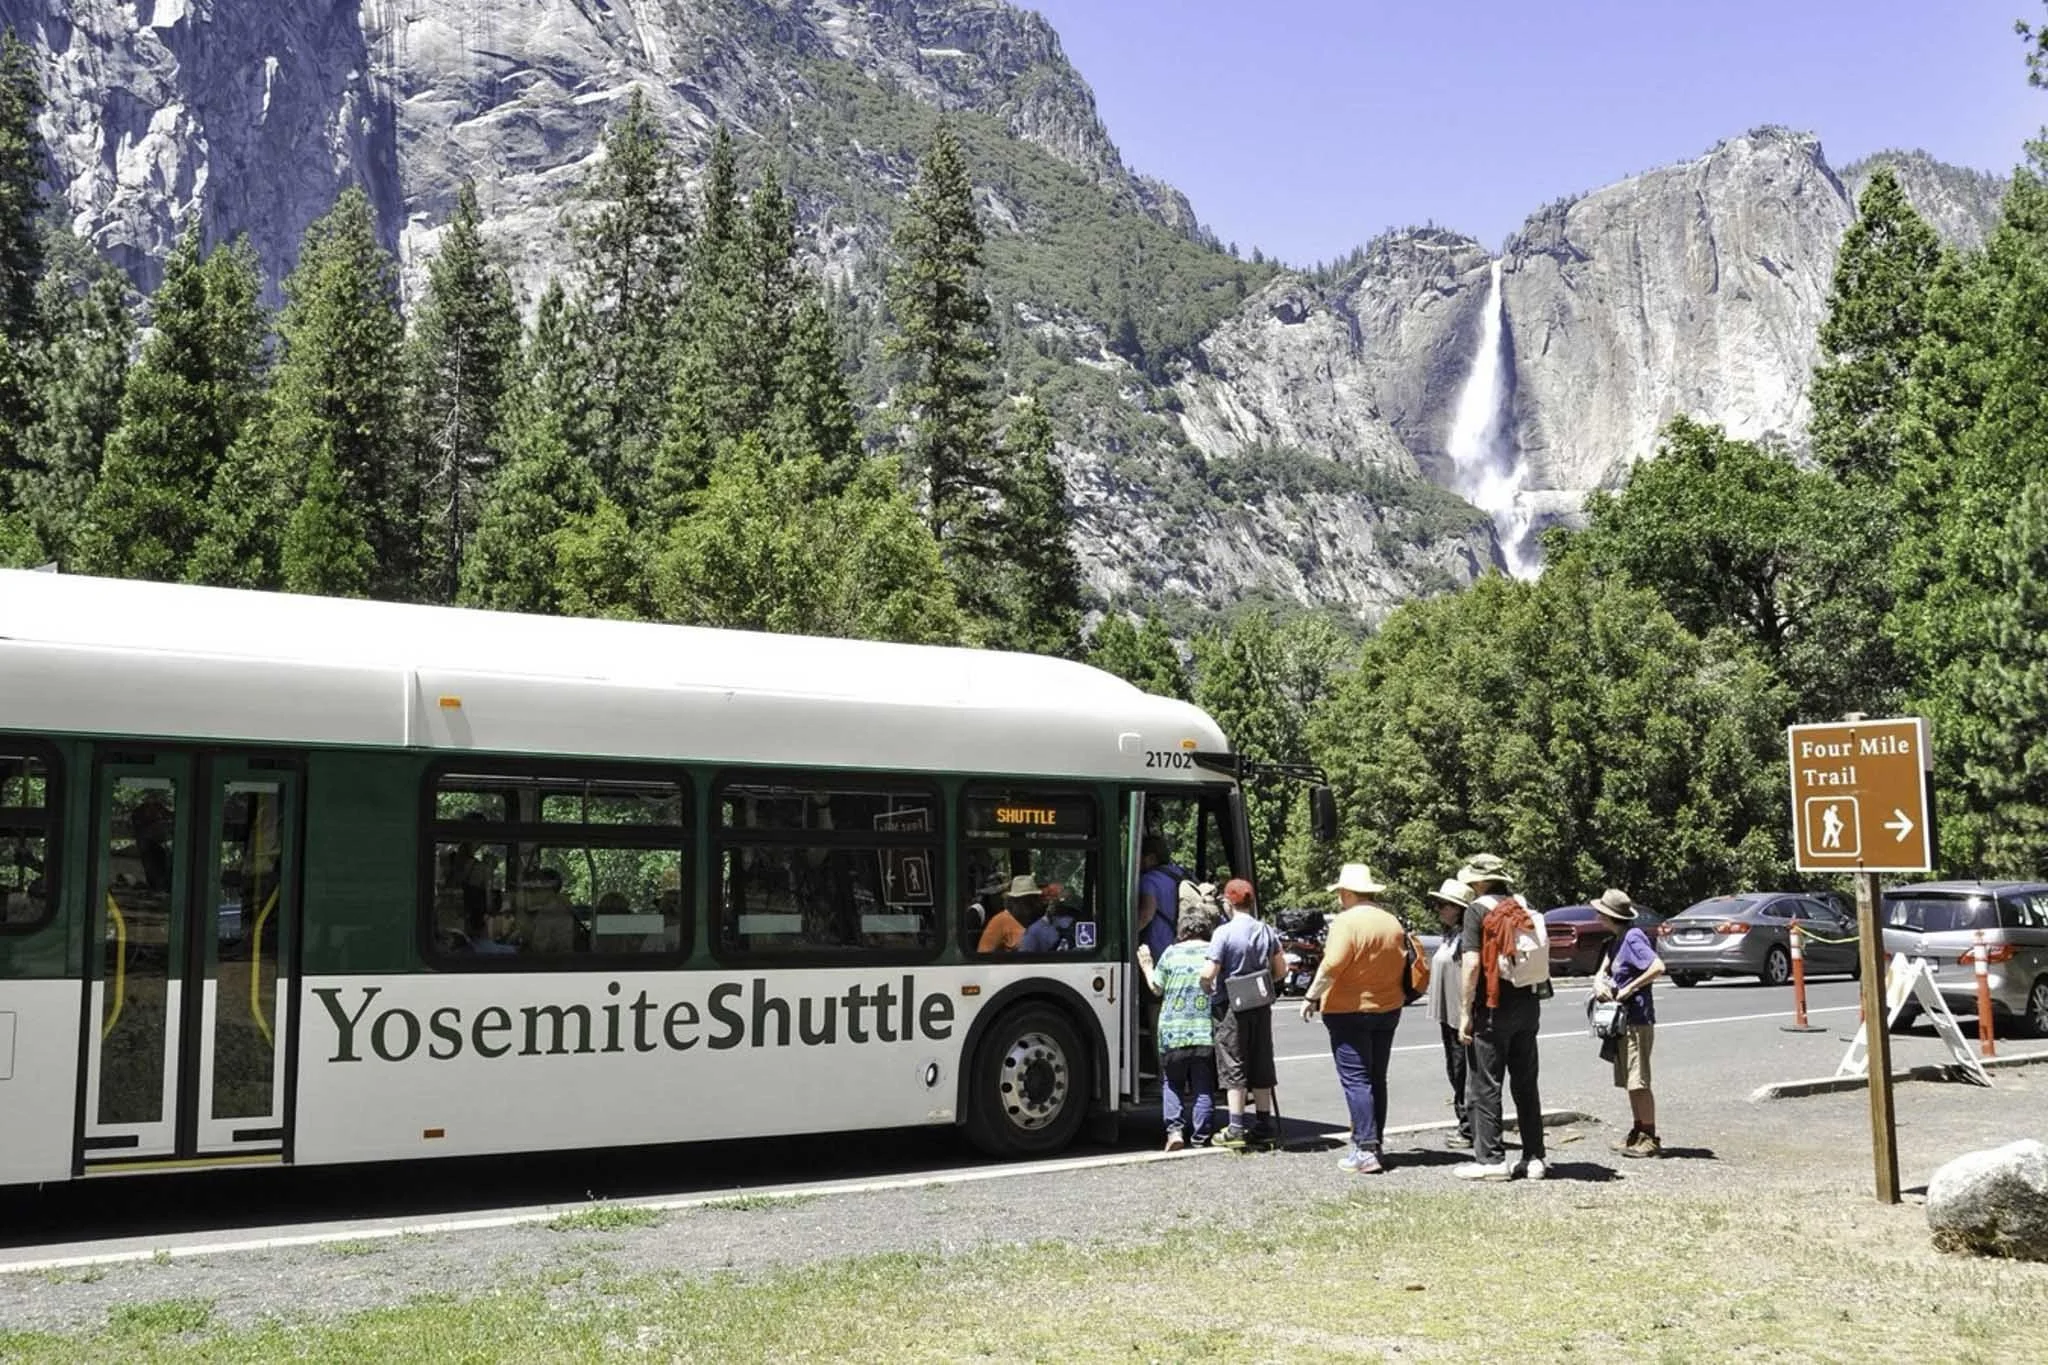
From Bridalveil, you’ll drive for three miles on Southside Drive to the trailhead to the Four Mile Trail. Find a place to park and wait for the Yosemite Valley shuttle (green line) to arrive and board it when it does.
As the day progresses, parking will become increasingly difficult. By utilizing the free valley shuttle, you’ll save yourself from the hassle of finding a place to park, a ton of time and it’ll help to cut down on the effect of emissions on the park.
4) Hike The Mist Trail (4 hours or less)

To hike the Mist Trail, you’ll get off of the valley shuttle at Happy Isles, which is stop sixteen. From the shuttle stop, you’ll walk a short distance down the road to the official trailhead (which goes upwards through a gate).
The Mist Trail is one of the premiere hiking trails in all of Yosemite. It’s mega popular, attracting hikers and tourists alike by the millions, annually. It’s no walk in the park (pun intended), but it’s totally doable if you take your time.
According to AllTrails, it takes an average of four hours, round-trip, to hike to the top of Nevada Fall (the second waterfall on this hike) and back. To save time, many hike to Vernal Fall and stop there. However, I highly recommend completing the entire trail if you can.
READ: “The Mist Trail: Hike One of Yosemite’s Most Beautiful Trail”
5) Enjoy Lunch At and Explore Yosemite Village (one hour)

After completing the Mist Trail, it should be somewhere around noon or 1pm. Get back on the valley shuttle (you can board the green or purple lines here) and take the short ride to stop one (Yosemite Village) or stop two (Welcome Center).
There, you and your group can take a break, enjoy lunch at one of the valley restaurants, enjoy a picnic, scope out historic photographs at the Ansel Adams Gallery, learn about the Ahwahnee people at Indian Village, shop for souvenirs and more.
Once you’re feeling ready to get back at it, hop back onto the valley shuttle (green line only) and take the short trip to stop six - Lower Yosemite Falls.
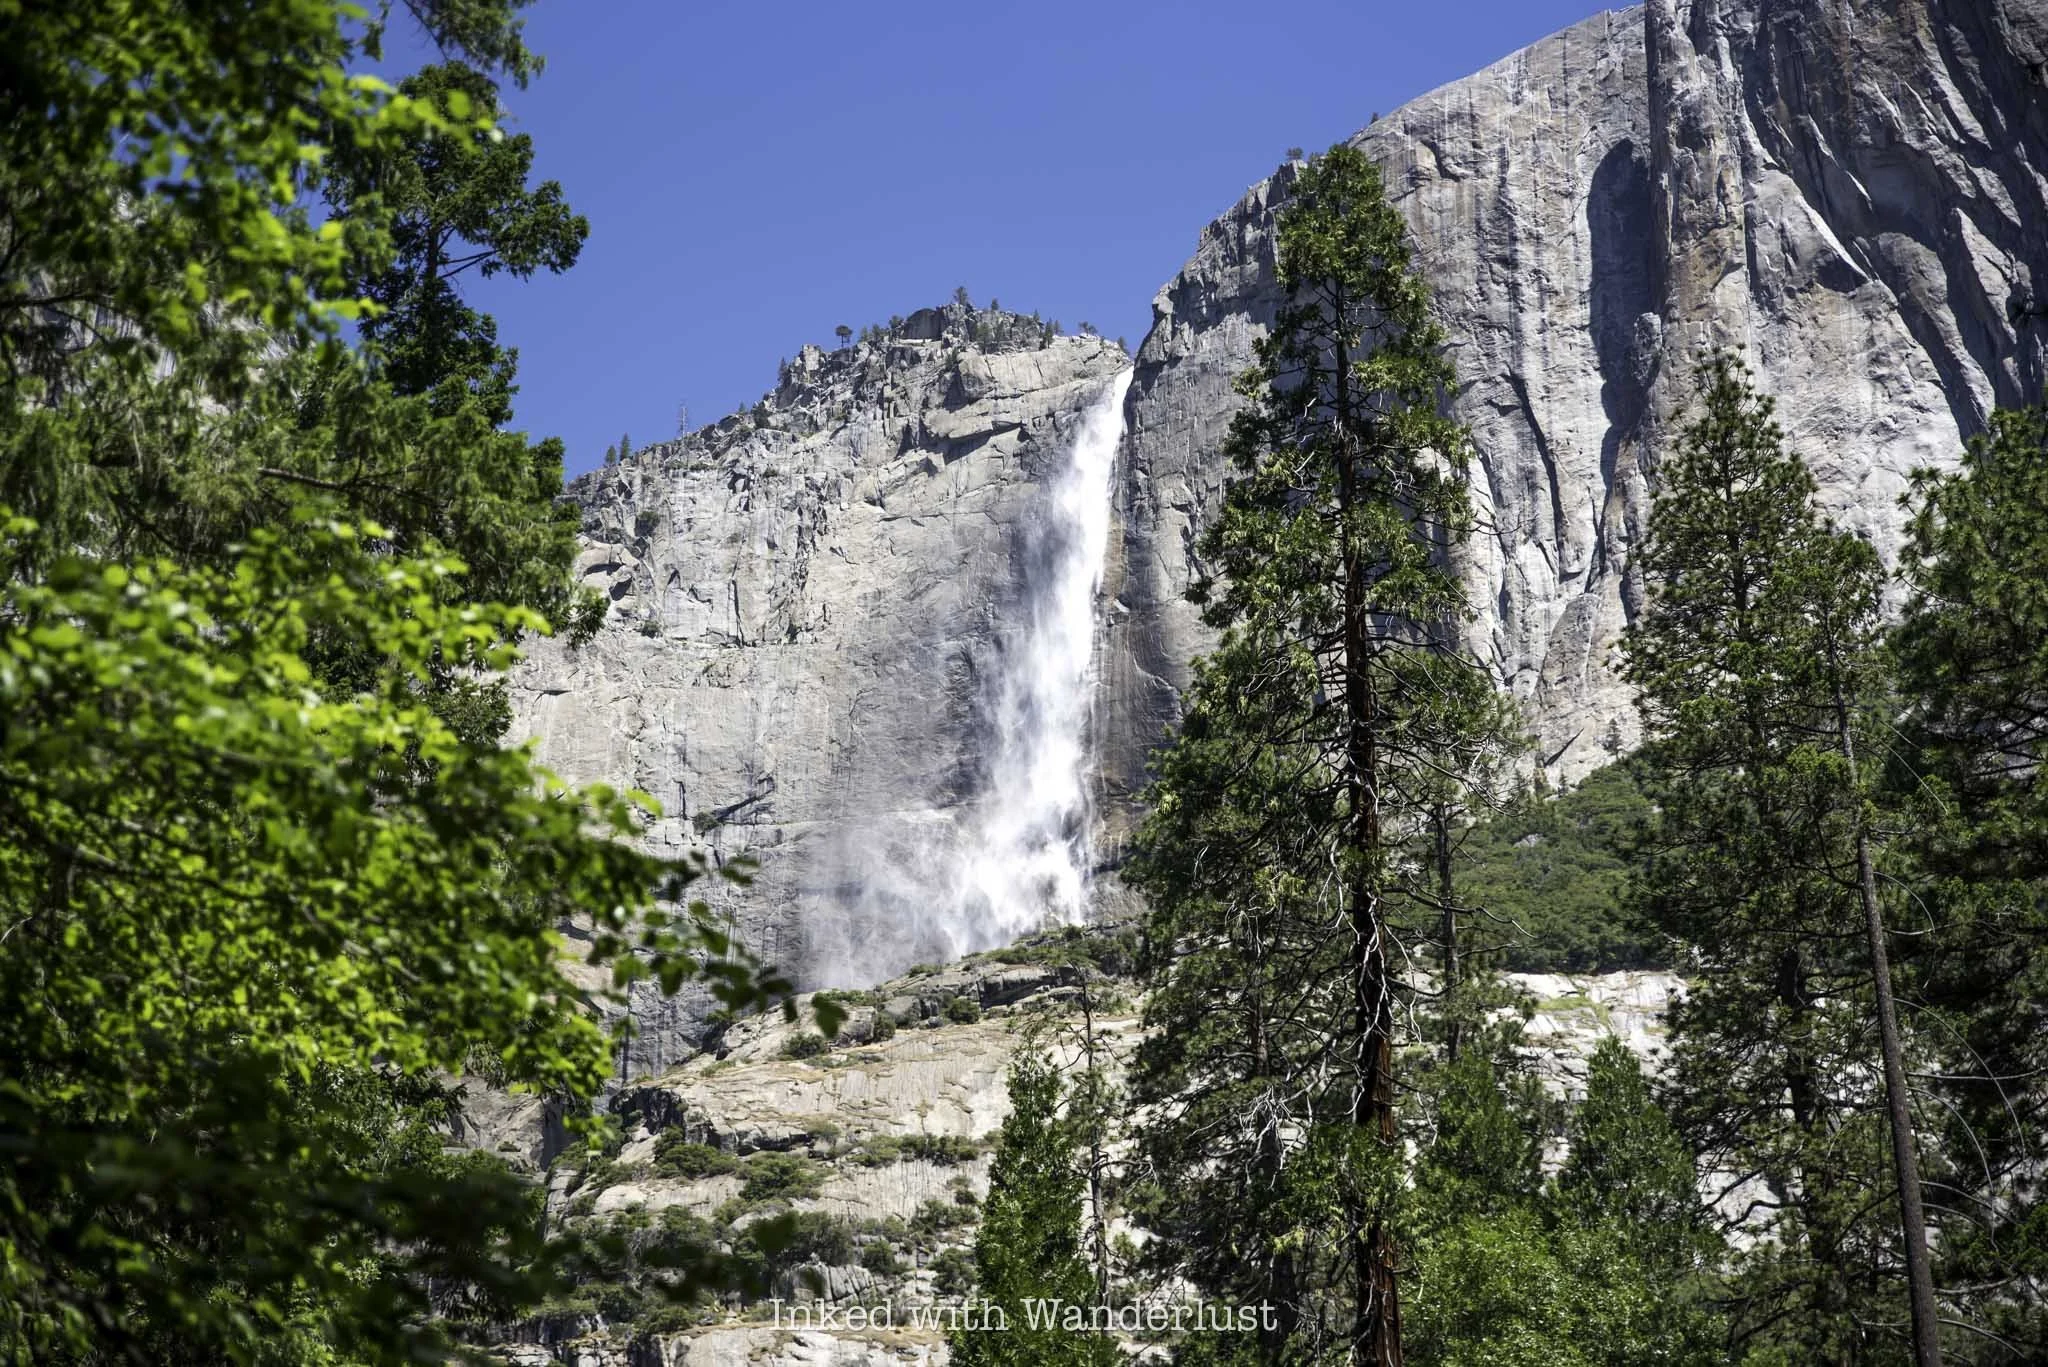
6) Lower Yosemite Falls (45 minutes to one hour)

Much like Tunnel View and Bridalveil Fall, taking the short hike to the base of Yosemite Falls, the tallest waterfall in North America, is quintessential Yosemite. You can hike the full loop (1.2 miles) or simply to the base and back.
How much of the falls you’ll see depends entirely on when you’re visiting, as Yosemite Falls dries up as summer progresses. If you’re visiting in spring or early summer, you’re good to go. From mid-July and on, though, there isn’t much to see.
If Yosemite Falls is dry, I recommend skipping it and going straight to the next location discussed below and spending that extra time there.
7) Stroll El Cap Meadow (one to two hours)
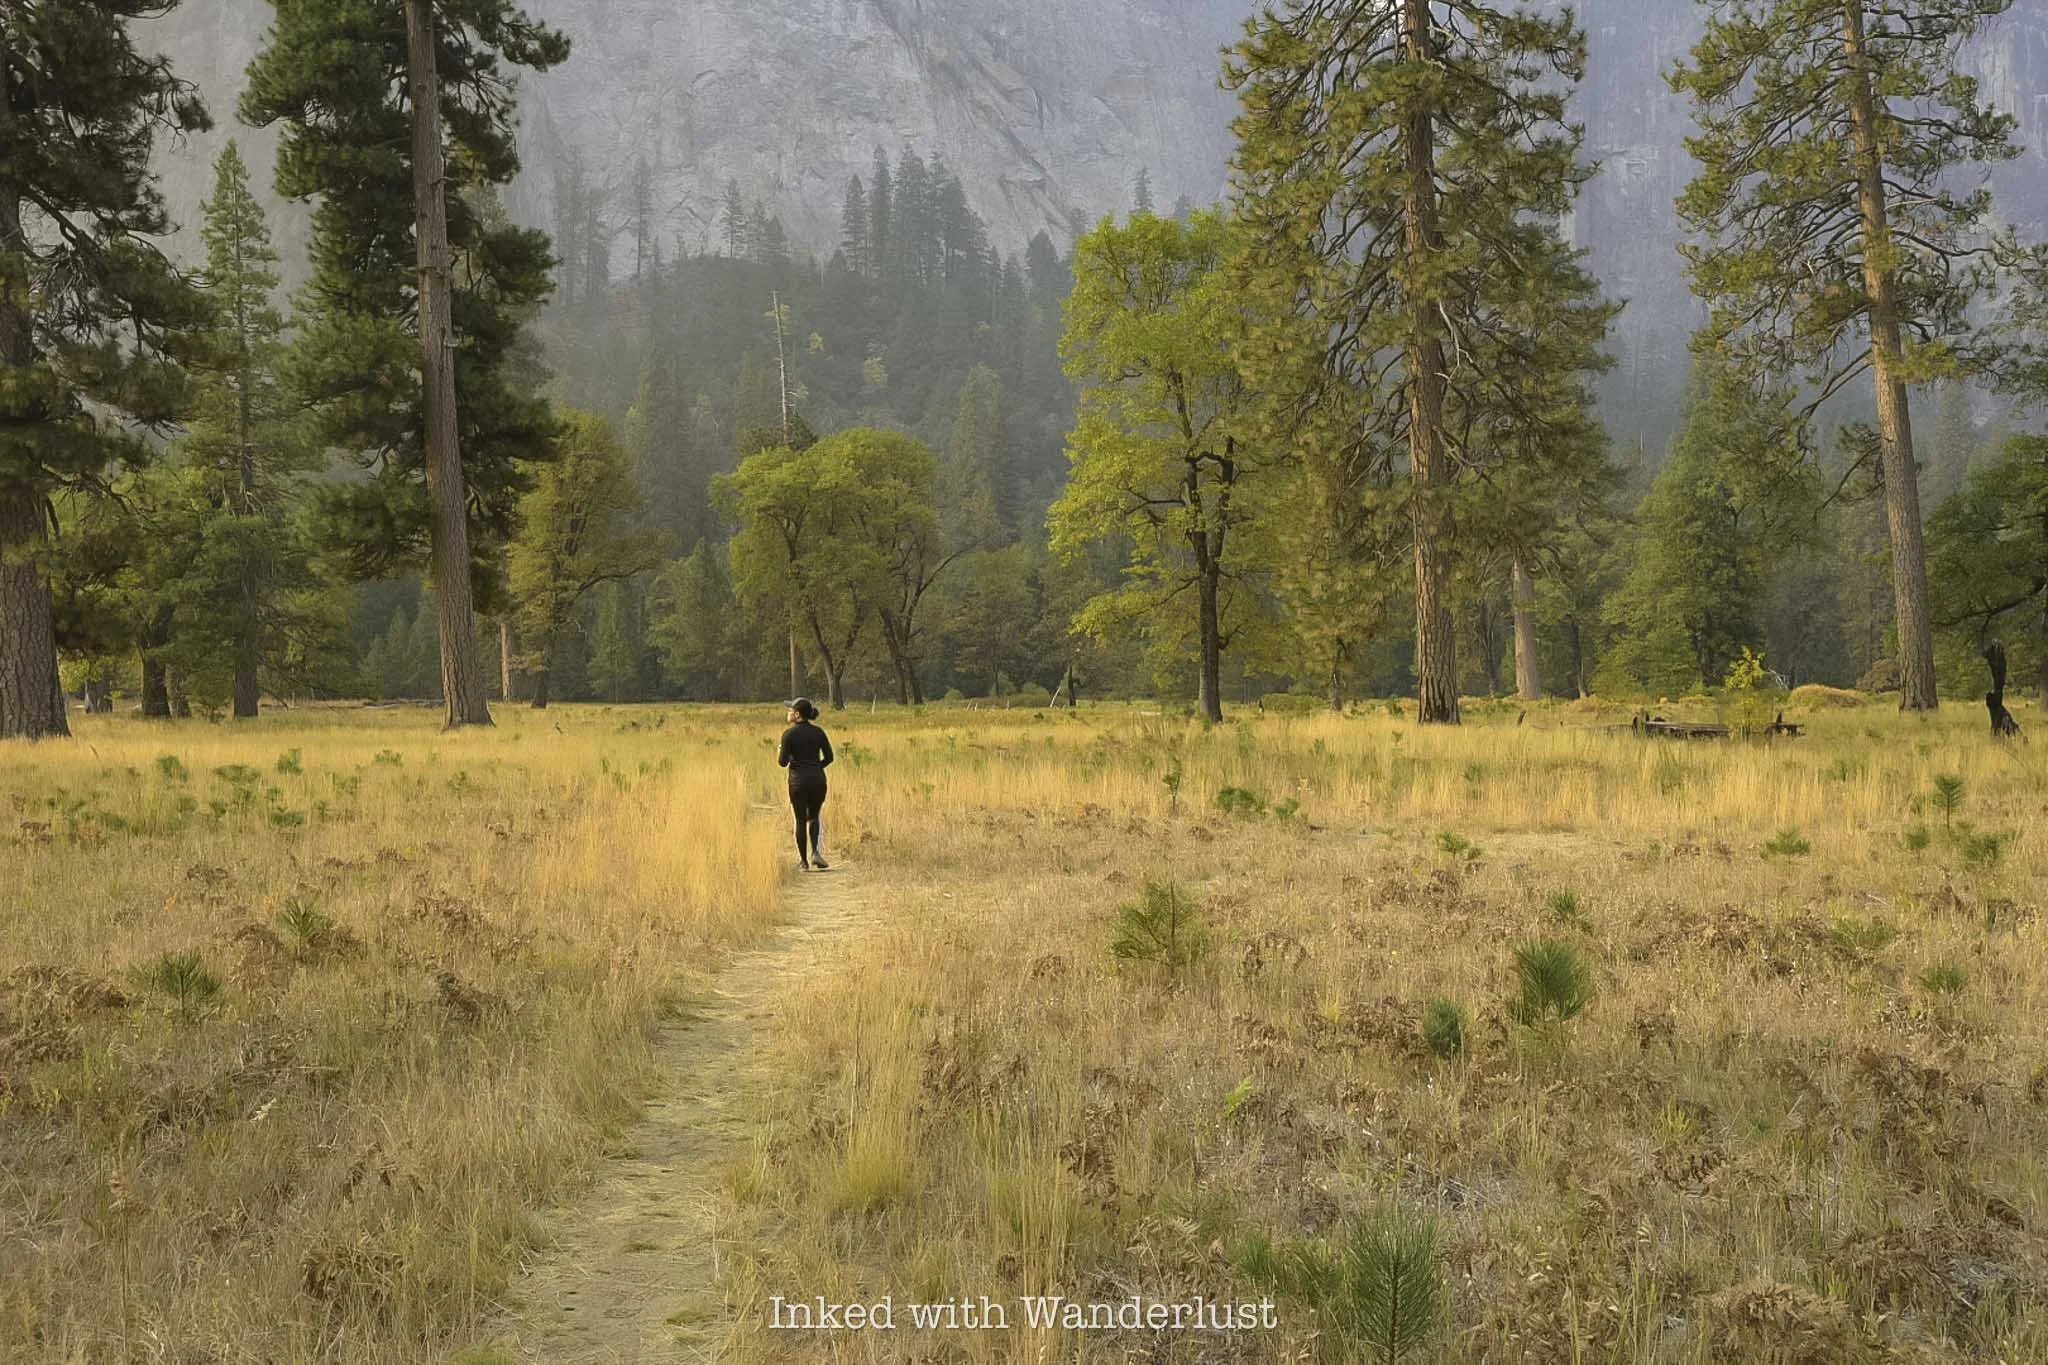
From Lower Yosemite Falls, take the shuttle to stop nine - El Capitan Meadow. Strolling through this gorgeous meadow is an experience like none other. It’s flanked by towering granite formations, including El Cap itself on one side and Cathedral Rocks on the other.
The jaw-dropping views aren’t the only feature of El Cap Meadow. Other activities include observing rock climbers on El Cap, photography, access to Merced River and enjoying a picnic. If you’re running short on time, then take a short stroll through the meadow and take in the sights.
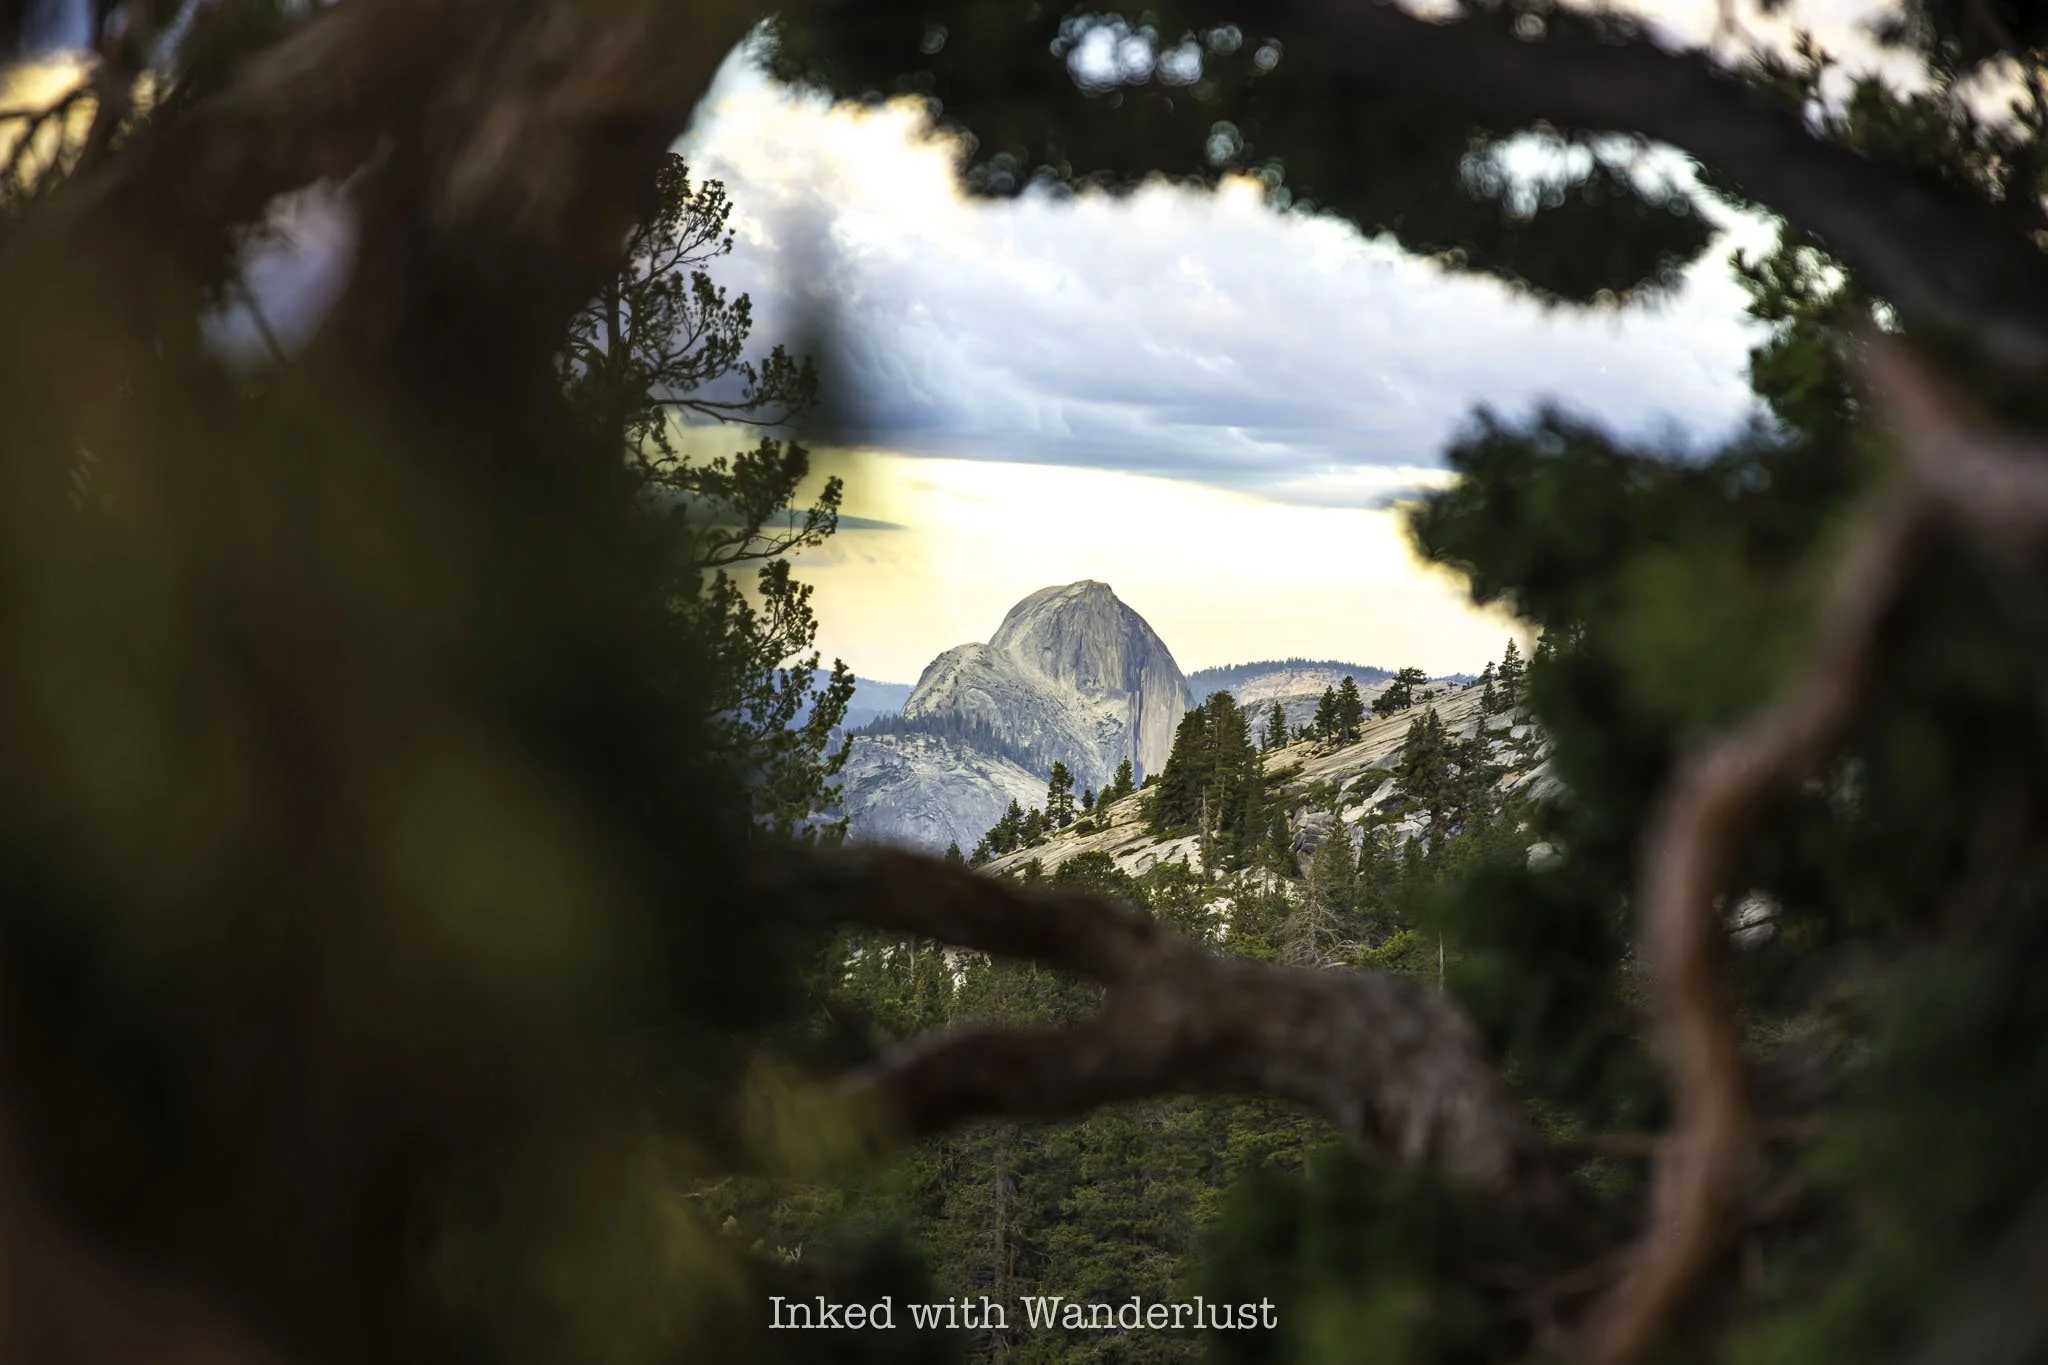
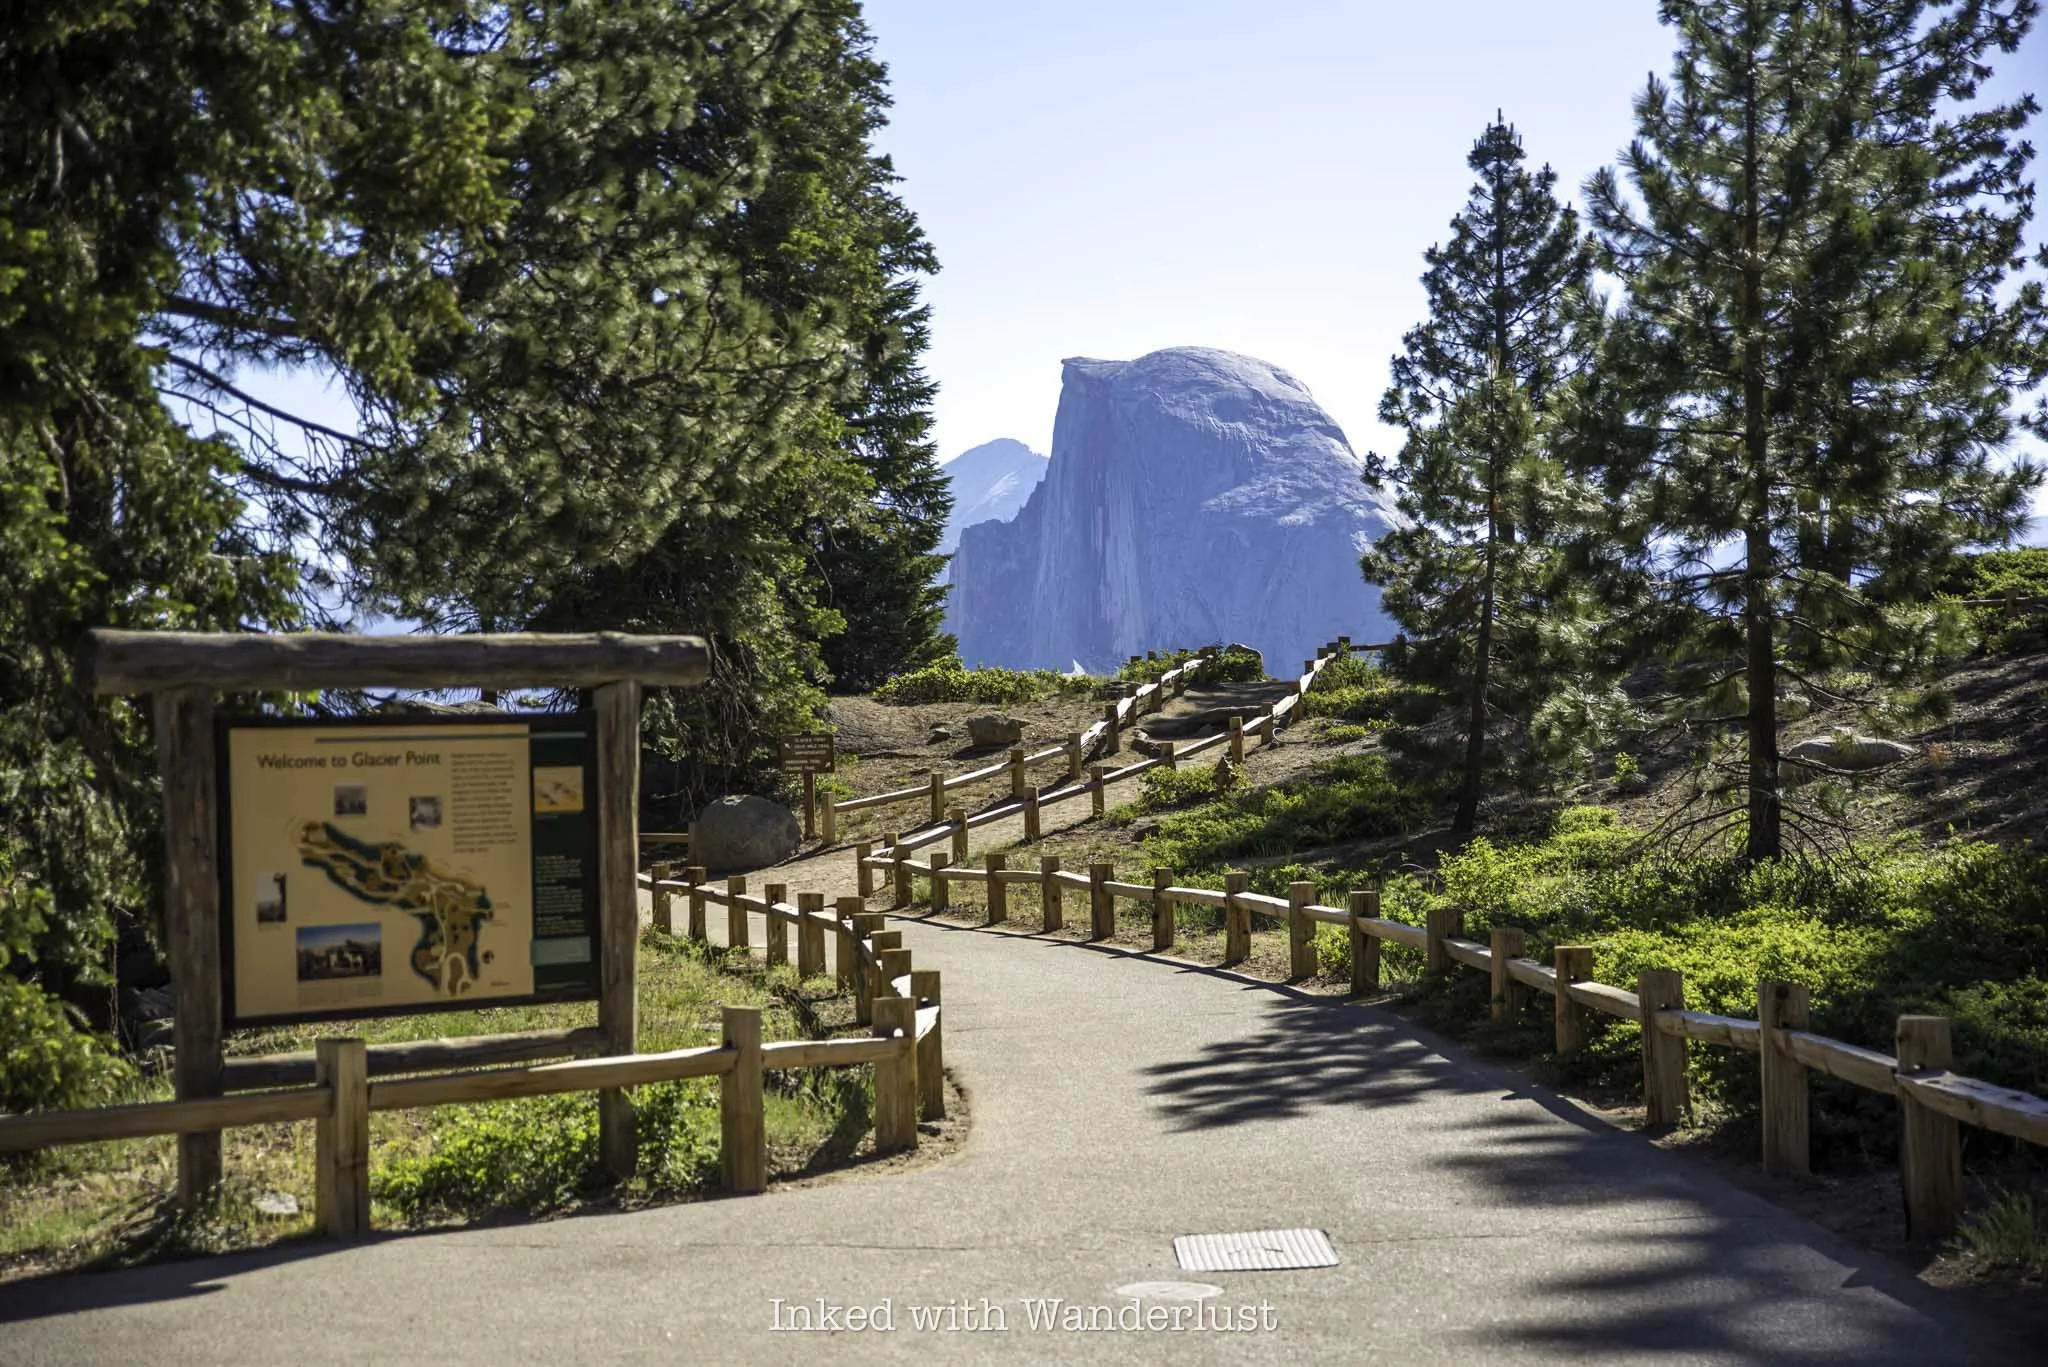
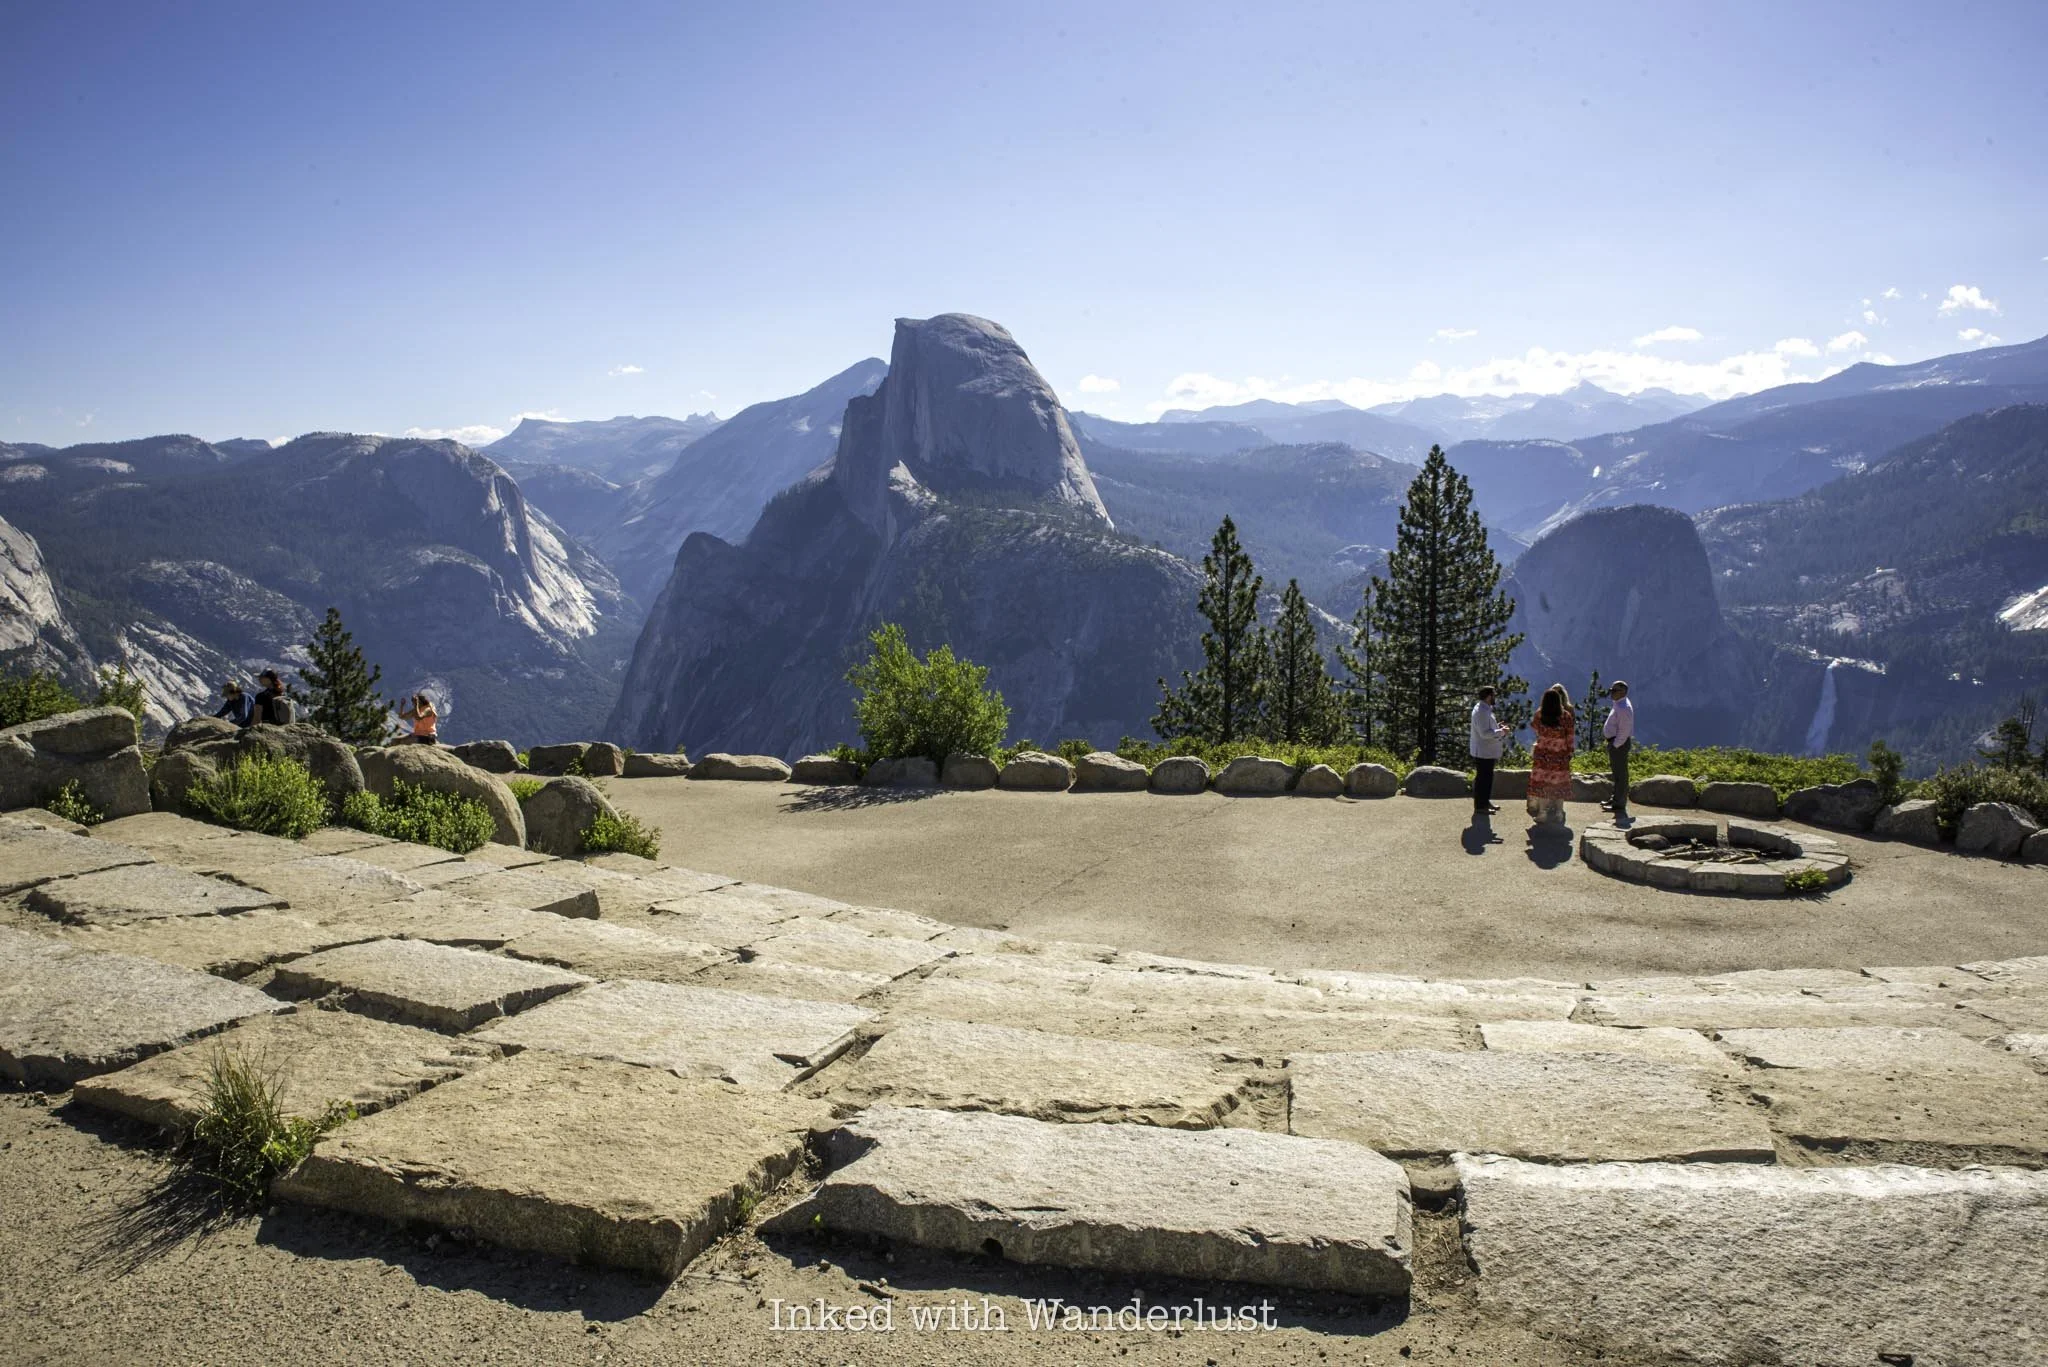
8) Glacier Point (one hour or more)
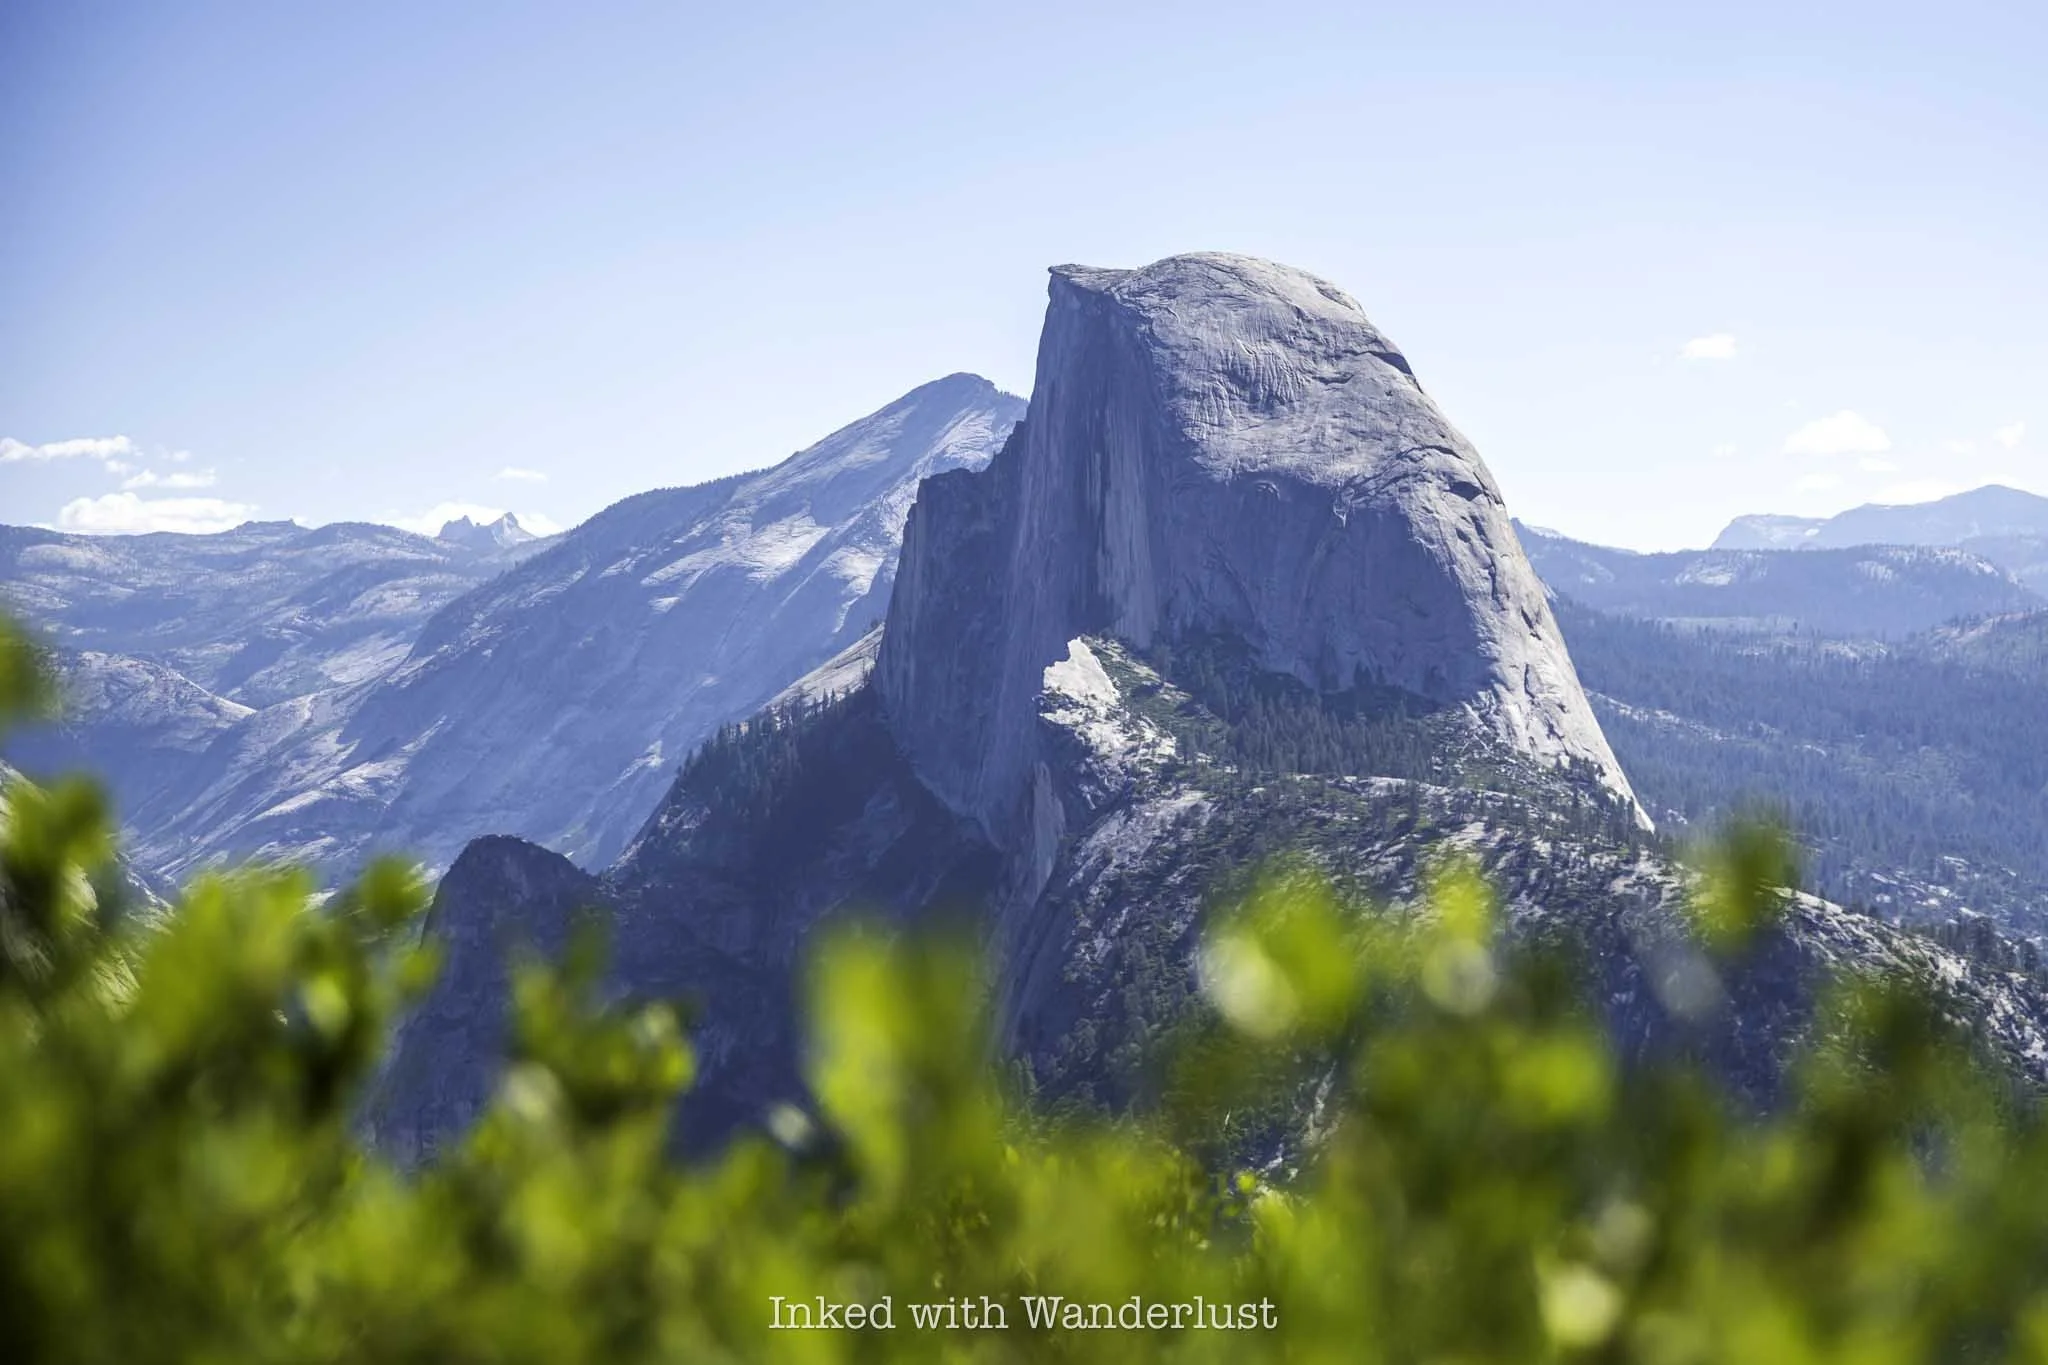
Until this point, you would have spent the majority of your one day in Yosemite in the valley. It’s now time to take a drive to Glacier Point. If you’ve never heard of Glacier Point, it’s one of the most scenic and popular viewpoints in the park.
From Glacier Point, you’ll have a wonderful view of the valley from 3,200 feet above. Yosemite Falls, North Dome, Teneya Canyon, Vernal Fall, Nevada Fall, and Clouds Rest are visible from here. Most notably, the commanding view of the infamous Half Dome is second-to-none.
There is no free shuttle to Glacier Point, though you can book the Glacier Point tour. This tour is seasonal and the final bus leaves at 1:30pm. If this is what you’ll want to do, then you’ll need to adjust this itinerary accordingly.
My recommendation is to take your own vehicle. From El Cap Meadow, take the shuttle back to your vehicle at Four Mile Trail. From there, drive down Southside Drive, loop back onto Northside Drive, and then follow the signs to Glacier Road.
Take in the incredible views, check out the historic geologic hut and if you time it right, stick around and witness a jaw-dropping sunset. From here, simply drive back to the valley and on to your hotel or campground.
If you can help it, I implore you to consider spending two days at Yosemite (or even three) as there is so much more to the park than just the valley. Yosemite’s east side is a hikers paradise and Hetch Hetchy, the original valley, is stunning. Thanks for reading!
Did you find this post useful?
If you did, consider leaving a tip through the Buy Me A Coffee button below! Whether it’s $1 or $5, every bit helps offset small travel costs like coffee, water, lunch, parking, or park entry fees. Your support means the world—thank you!