
Half Dome Permit: The Ultimate Permit Lottery Guide
I won’t sugar coat it, no one likes having to get a permit to go hiking. However, due to the increasing popularity of…
2026 Information!
While this post was written in 2020, the information below has been updated for 2026
The Half Dome lottery will run from March 1st - March 31st
The National Park Service announced that they anticipate the cables to be up from May 24 - October 15, however, these dates can change at any time
If your desired date falls within that timeframe, you’ll need a permit

Click or tap ad to view offer
Why You Need a Permit for Half Dome

No one likes having to get a permit to go hiking. However, due to the increasing popularity of our National Parks over the years, it has become a necessity.
Prior to the implementation of the permit system in 2010, there were as many as 1200 hikers on Half Dome on any given day. There would be a literal queue to go up the cables. This not only presented safety issues, but it also caused damage to the trail.
So as of 2010, a permit would be needed to hike Half Dome while the cables are up, limiting the amount of hikers on Half Dome to just 300 per day. While bottlenecking still occurs, it’s far more manageable and the impact to the environment has been reduced.
If you’ve never hiked Half Dome (and since you’re reading this article chances are good that you haven't), be sure to read my detailed article that shows you what to expect on this epic hike.
So, how do you get your hands on one of these elusive permits? Read on below to find out!
Half Dome Pre Season Lottery 2026

As stated above, the Half Dome cables will be up between May 25 and October 16 in 2026. If your desired date falls within that timeline, you’ll need to enter the permit lottery via Recreation.gov or by calling 877/444-6777 between the hours of 7am and 9pm (PST).
The Half Dome pre season lottery runs throughout March (the 1st through 31st), every year. There is no advantage to submitting your application early. Those who enter the lottery on the 31st have just as much of a chance as those who have entered on the 1st.
The applicant can list up to six people on a single application. Keep in mind that your name (as either Trip Leader or Alternate) can only appear on ONE application. If your name appears on multiple applications, ALL of them will be canceled.

You can apply for a specific day or a range of dates, but your permit will only be rewarded if there is space available on at least one of the dates listed on your application.
You must select a trip leader (yourself) and can also select an alternate (if applicable). Either the trip leader or alternate MUST be present at Subdome with permit and ID in hand, and your group must be together. Permits are not transferable.
The fee to submit the application is $10. This is per application, NOT per person. This fee is non-refundable regardless of whether you win permit or not.
Judgment Day
If you’re one of the lucky winners, you’ll be notified via email on April 10th. Alternatively, you can call the number listed above for results. Be sure to verify that the email you used to sign up on Recreation.gov is current.
Once notified, you’ll be given two weeks (April 24th) to accept the permit and pay the $10 per person, refundable fee. If you don’t, your application will be canceled. This $10 per person fee is in addition to the fee you paid when you entered the lottery.
If you didn’t win a permit, you’ll still receive an email on the same day. If this happens, don’t get discouraged. There’s still a couple more ways to get one.
Half Dome Daily Lottery

Yosemite sets aside 50 permits for a daily lottery with an application period of two days. The actual amount they give out depends on estimated under-use and cancellations.
*For example: If you wanted to hike Half Dome on Sunday, you would submit the application on Friday and receive your results that same evening.
To get one of the daily permits, simply head to recreation.gov and submit an application two days prior to your desired date. You can only submit one application per desired date, but there is no limit to how many daily lottery permits you can apply for (and win) throughout the season.
Improving your Odds

There’s no magic formula. It works like any other lottery. You just submit your application and hope for the best. However, there are a few things you can do to move the odds to your favor (a little bit, at least).
Apply for a weekday instead of a weekend. Your chances are significantly better if you choose a weekday over a weekend day. It may be difficult for you because of work schedules, but take it from someone who’s been there, using a vacation day (or two) is more than worth it.
September & October. If you can, plan for September or the first couple weeks of October. These months offer a better chance than July or August. The downfall to this is Vernal and Nevada Falls flow will be low. However, your focus here is Half Dome.
The less hikers in your group, the better. I know it would be epic for you and your entire squad to conquer Half Dome together but remember, Yosemite only allows 300 people a day on Half Dome, NOT 300 permits. So the larger your group, the greater the odds.
I hiked it in 2017 and there were 26,943 applications with a total success rate of 19%. The year prior had a success rate of 25% and 2015 saw a 35% success rate.
The 2023 Half Dome permit success rate was at a mere 22%
As you can see, the odds increase annually. The more popular Half Dome gets, the less likely you are to secure a permit. So anything you can do to give yourself even the slightest edge can make all the difference.
Hiking Half Dome During A Backpacking Trip

While the majority of hikers do this as a day hike, many choose to turn their adventure into a 2-3 day trek. This method would allow you more time to take in the views.
To do this, you’ll not only need a permit for Half Dome, but a wilderness permit as well. Having only one or the other will not suffice. The fees for a wilderness permit are $5 plus $5 per person and can be applied for below.
While applying for a wilderness permit, you need to check the box stating that you also want a Half Dome permit. If any are available during the days listed on your application AND Half Dome is reasonably part of your itinerary, you’ll receive one.
Securing a Half Dome permit in this manner will make you eligible to go up the cables on any of the dates listed on your wilderness permit.
However, ff you’re on a backpacking trip that started OUTSIDE of Yosemite and you want to climb Half Dome during your trip, you will need to apply for a permit through either the regular preseason or daily lotteries.
Hiking Half Dome Without A Permit
Let’s say you’ve done everything you could to get a permit. You weren’t successful in the pre-season lottery and the daily lotteries haven’t been kind to you either. What do you do?
Currently, the only way to hike Half Dome without a permit is to do it during the off season in winter or early spring. Yosemite officials don’t outright ban it, but they strongly discourage it for one big reason:
*The cables are down and the potential for injury or death rises exponentially.
During the off season, the poles and wooden planks are removed to avoid getting too weathered. The steel cables are left flat on the dome throughout the entirety of the climb. In theory, you could hike to the cables, grab hold of them and hoist yourself up.
The advantages to this are not needing a permit and the near certainty that you’ll be the only one up there. However, in my opinion, the advantages are far outweighed by the hazards.
We’re siding with park officials and advise against this (unless you have climbing experience and have the gear). It’s 100% your decision, though. If you do decide to go for it, please be safe and don’t take unnecessary risks.
READ NEXT: “15 Tips For Your First Time Hiking Half Dome”


This post was originally published in 2020 and was recently updated for accuracy.

15 Tips For Your First Time Hiking Half Dome
Every year, thousands of hikers summit Half Dome, many of them for the first time. In 2017, I was one of those first timers…
3 minute read | contains affiliate links
Each year, thousands of hikers summit Half Dome, many of them for the first time. In 2017, I was one of those first timers and though I felt like I was fully prepared, truth is, I wasn't.
In fact, I’m confident that if you polled others who’ve hiked Half Dome, I’m willing to bet that many of them would agree.
If you’re hiking Half Dome for the first time this season (or just mildly curious), this post is for you. I’m giving you 15 tips I feel all Half Dome hikers should be aware of going in. Let’s get into it.

Disclosure: This post contains affiliate links. If you click through and make a purchase, I may earn a commission at no additional cost to you. Thank you for supporting us!
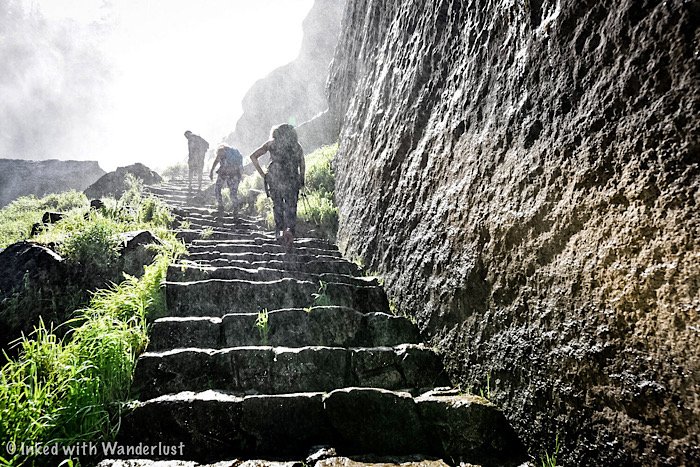
1) Get An Early Start
This is especially true if, like most people, you’re doing this as a day hike. You’ll want to arrive to the trailhead as early as possible.
When my brother and I hiked it, we arrived at the Happy Isles trailhead at 3am. We didn’t see any daylight until we got past Nevada Fall.
The reasons you’ll want to start early are:
You’ll beat the crowds to the cables and avoid bottlenecks
You’ll likely avoid the afternoon storms that are notorious in Yosemite
You’ll beat the mid-day heat
If you’re doing this hike as a multi-day and you’re just hiking to your camping spot the first day, you won’t have to worry about it as much.
If you’re doing this as a day hike, however, definitely get started as soon as you can. It doesn’t have to be 3am, but pre-dawn is ideal.

2) Bring Gloves With You
Surprisingly, many people don’t think of this. The Half Dome cables are made of steel and they get hot. They’re also blister inducing.
Using gloves on the cables will help prevent blisters, protect you from burns and most importantly, provide you with good grip.
Sometimes, a pile of discarded gloves forms near the base. You’re welcome to use a pair but you shouldn’t count on the pile being there.
While it’s thoughtful, Rangers will collect and throw the gloves away as it’s technically littering. So bring your own. Full fingered preferably.
SEE MY TOP RECOMMENDATION FOR GLOVES TO USE ON HALF DOME HERE!

3) Bring More Water Than You Think You’ll Need
I cannot stress this enough. It’s always important to bring water with you on a hike but it’s especially true on this one.
I recommend 3-4 liters, per person. I only brought two liters with me and ran out on the way back (with over six miles left to go).
The only filtered water source is the fountain at the Vernal Fall footbridge (just about a mile into the hike). After that, you’re on your own.
4) Trekking Poles Are A Must!
My knees were killing me on the way back. If it weren’t for my trekking poles helping to off-set the weight, my brother would’ve had to carry me out.
If you’re someone who’s prone to knee pain or you know you usually require trekking poles on normal hikes, you’ll definitely want to bring them along on this one.

5) Wear Shoes/Boots With Excellent Grip
While granite usually has excellent natural grip, years of hikers traversing it has caused that section to become smooth and slick.
Seriously, normal shoes or ones that are worn down will not suffice. You’ll definitely want to break them in prior to your hike, but the tread should be as new as possible.

6) Leave Your Backpack At The Base
It may be tempting to bring your backpack with you as you climb up the cables but take it from me, make it easier on yourself (and others) and ditch it at the base.
The reason I say this is twofold:
There isn’t a lot of space between the cables, so if everyone’s wearing a bulky backpack, that space only becomes more restrictive
For some, it’s already challenging enough to climb the cables. Adding the weight/balance of a backpack only complicates matters
If you must bring a backpack to the top, bring a smaller day bag and leave the bulky one behind. No one’s going to mess with your stuff.
Do be sure to seal your bag before leaving, though. You don’t want Marmots and other critters getting in there.
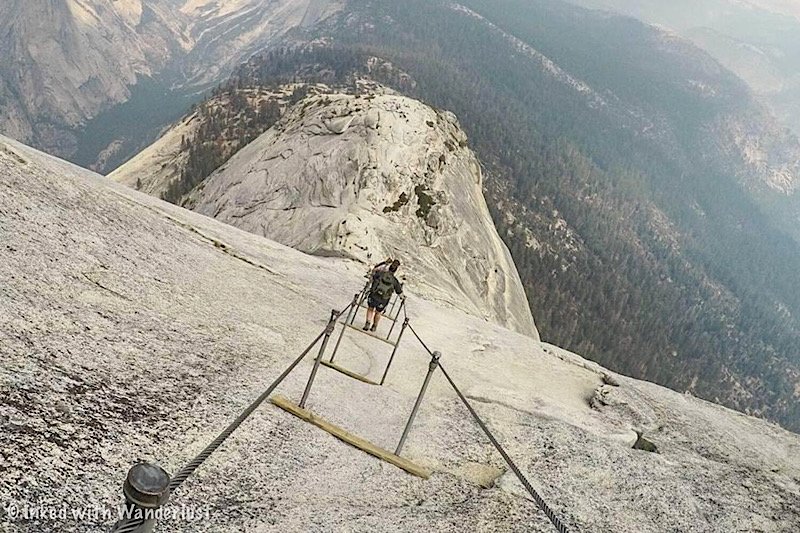
7) Take As Long As You Need On The Cables
There’s no shame in taking it slow. This isn’t a race and there’s no prize at the top for the fastest climber. Go at your own pace.
Every six feet or so (at each set of steel poles) are wooden planks. Use those as a guide and focus on them if the heights start getting to you.
Rest at each one if necessary. No one will make fun of you. Just be mindful of those who may want to go faster and let them pass.
8) If You See Dark Clouds, Don’t Attempt It
Yosemite is infamous for its afternoon storms. It isn’t uncommon to go from clear blue sky to rain and lightning in the blink of an eye.
Bad weather and climbing Half Dome isn’t a good mix. If lightning decides to strike, there’s a good chance Half Dome will be where it hits.
If you get to the base and it starts to rain, don’t risk it. If you’re at the summit and see black clouds rolling in, get back down pronto.
In the 1980’s, numerous people were killed and injured on the summit when a sudden storm came in. It’s always best to er on the side of caution when it comes to storms.
9) You Can Use A Climbing Harness If You Want
Some opt to utilize a harness to secure themselves to the cables, reducing their chance of falling.
It’s a device that you wear around your waist and legs, with the other end connecting to the cables via a carabiner.
Personally, I don’t think it’s necessary. However, if it’ll make you feel better and help you fulfill your dream, go for it.
You will need to unclip and clip back in every six feet or so, so it will slow you down a bit. The peace of mind it provides may be worth it, though.
10) Get Into The Best Shape You Can
There’s no need to be a top-level athlete or master climber, but the better shape you’re in, the easier time you’ll have.
The cables themselves are more upper strength than leg strength and the hike itself will test your cardiovascular endurance.
Hitting a stair master will prepare you for the Mist Trail portion of the hike. Likewise, a strength training routine would be beneficial.
Most importantly, hike as much and as often as you can prior to your trip. The higher the elevation, the better.
11) Bring Extra Socks
This is one I wish I’d thought about. You should always take care of your feet…always. That means bringing a fresh pair of socks (or two).
If you don’t and get soaked on the Mist Trail, you’ll be forced to hike the rest of the way with soggy socks.
If the Mist Trail doesn’t get you, then your socks will most definitely be soaked in sweat by the time you make it to the summit.
Packing extra socks will allow you to swap out the nasty ones for a fresh pair for the hike back down.

12) Have A Hard Copy Of Your Permit Available
Some hikers spend 8-10 hours or more doing this hike. Consequently, if you’re taking a lot of pictures, your phone battery will almost certainly die.
If that happens and all you have is a digital copy of your permit, you’ll have nothing to show the ranger when asked. Guess what that means? Off you go.
It wouldn’t hurt to have a printed copy in a plastic bag inside your backpack. That way, you won’t risk getting turned around.
13) Bring Ibuprofen & Moleskin
You can add this one to the, “wish I thought of it”, category. As stated above, my legs and feet were wrecked by the time we got back to the car.
It was only then that I realized my mistake. I had absolutely nothing to help mask the pain and had a long drive home ahead of me.
Bring some Ibuprofen (or an alternate pain killer) with you. Take a couple at the summit, if needed, to reduce the discomfort on the way back down.
Also, moleskin does wonders for covering and preventing blisters. If you don’t know what it is, it’s a dense, woven cotton fabric that acts as a shield between your skin and shoes in areas where blisters are most common. Highly recommended for ANY hike.

14) Eat, Eat And Eat Some More
This is a long, demanding hike and for most people, will take a full day. You will burn a serious amount of calories and energy.
Due to this, you’ll need to replenish your body with as many nutrient dense foods as you can.
Foods with complex carbs, low amounts of sugar, decent level of healthy fats and high amount of protein will do the trick.
Also, salty snacks, such as beef jerky and sunflower seeds, will help you retain water and keep you hydrated for longer.
Stop as often as you need if you’re feeling hungry or low on energy. Trust me, you don’t want to tackle the cables with nothing in the tank.
SEE MY TOP RECOMMENDATION FOR PREPARING FOOD IN THE WILDERNESS!
15) There’s No Shame In Turning Around
More hikers do it than you might think. I’d wager a guess that for every ten hikers that make it to the cables, at least one decides against it.
Whether it’s due to bad weather or simply a gut-feeling on your part, there’s no shame in turning around. The cables are intimidating.
So don’t succumb to peer pressure or allow pride to take over. If you get there and it doesn’t feel right, then don’t do it. You still had an amazing adventure!
BONUS: Peak Design Camera Clip

This camera clip by Peak Design is a MUST for anyone using their DSLR or point-and-shoot camera while out on a hike or are just out and about on a shoot.
As shown in the image above, it securely attaches to your backpack strap and firmly holds your camera in place. Allowing you to be hands free while not in use.
When inspiration strikes, a quick button press is all it takes to remove it. When done, simply snap back into place and you’re done.
CHECK OUT THIS SOLID CAMERA CLIP BY PEAK DESIGN ON AMAZON HERE!
If you’re serious about hiking Half Dome, be sure to read my other Half Dome related posts…
Disclosure: This post contains affiliate links. If you click through and make a purchase, I may earn a commission at no additional cost to you. Thank you for supporting us!
Please support this website by subscribing to the newsletter below.
Thanks for reading.

Hike to North Dome and Indian Rock Arch in Yosemite National Park
While hiking Half Dome requires a permit and a great deal of planning, hiking neighboring North Dome requires nothing more than a drive up to the trailhead…
Disclosure: This post contains affiliate links. If you make a purchase through these links, I may earn a small commission at no additional cost to you. I only recommend products or services that I believe will add value to my readers.

While hiking Half Dome requires obtaining a permit and a great deal of planning and preparation, hiking neighboring North Dome requires nothing more than a drive up to the trailhead and strong legs.
Due to this, many see North Dome as an excellent alternative to Half Dome if you were unsuccessful in the permit lottery or if Half Dome is too daunting. There are no cables or climbing involved and best of all, you’ll be in a position to get one of the best views of Half Dome in the entire park.
So where is the trailhead for North Dome? What’s the parking situation like? Like to know what to expect on this trail? What’s Indian Rock Arch? I answer all of these questions and more in the post below. Let’s get into it.
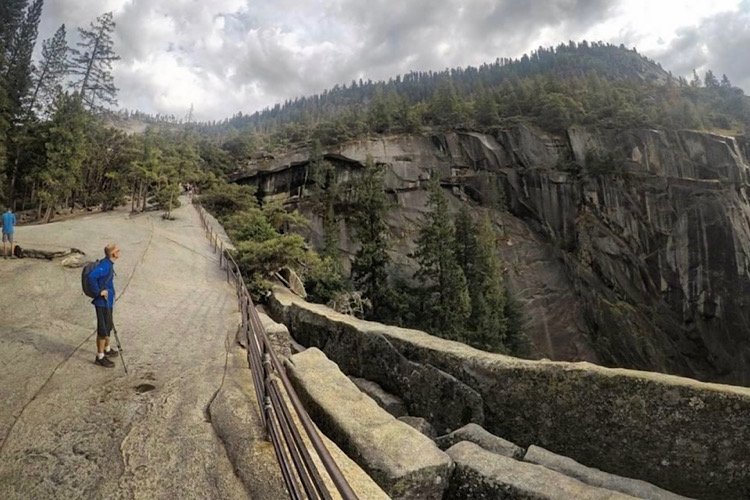
North Dome Trailhead and Parking
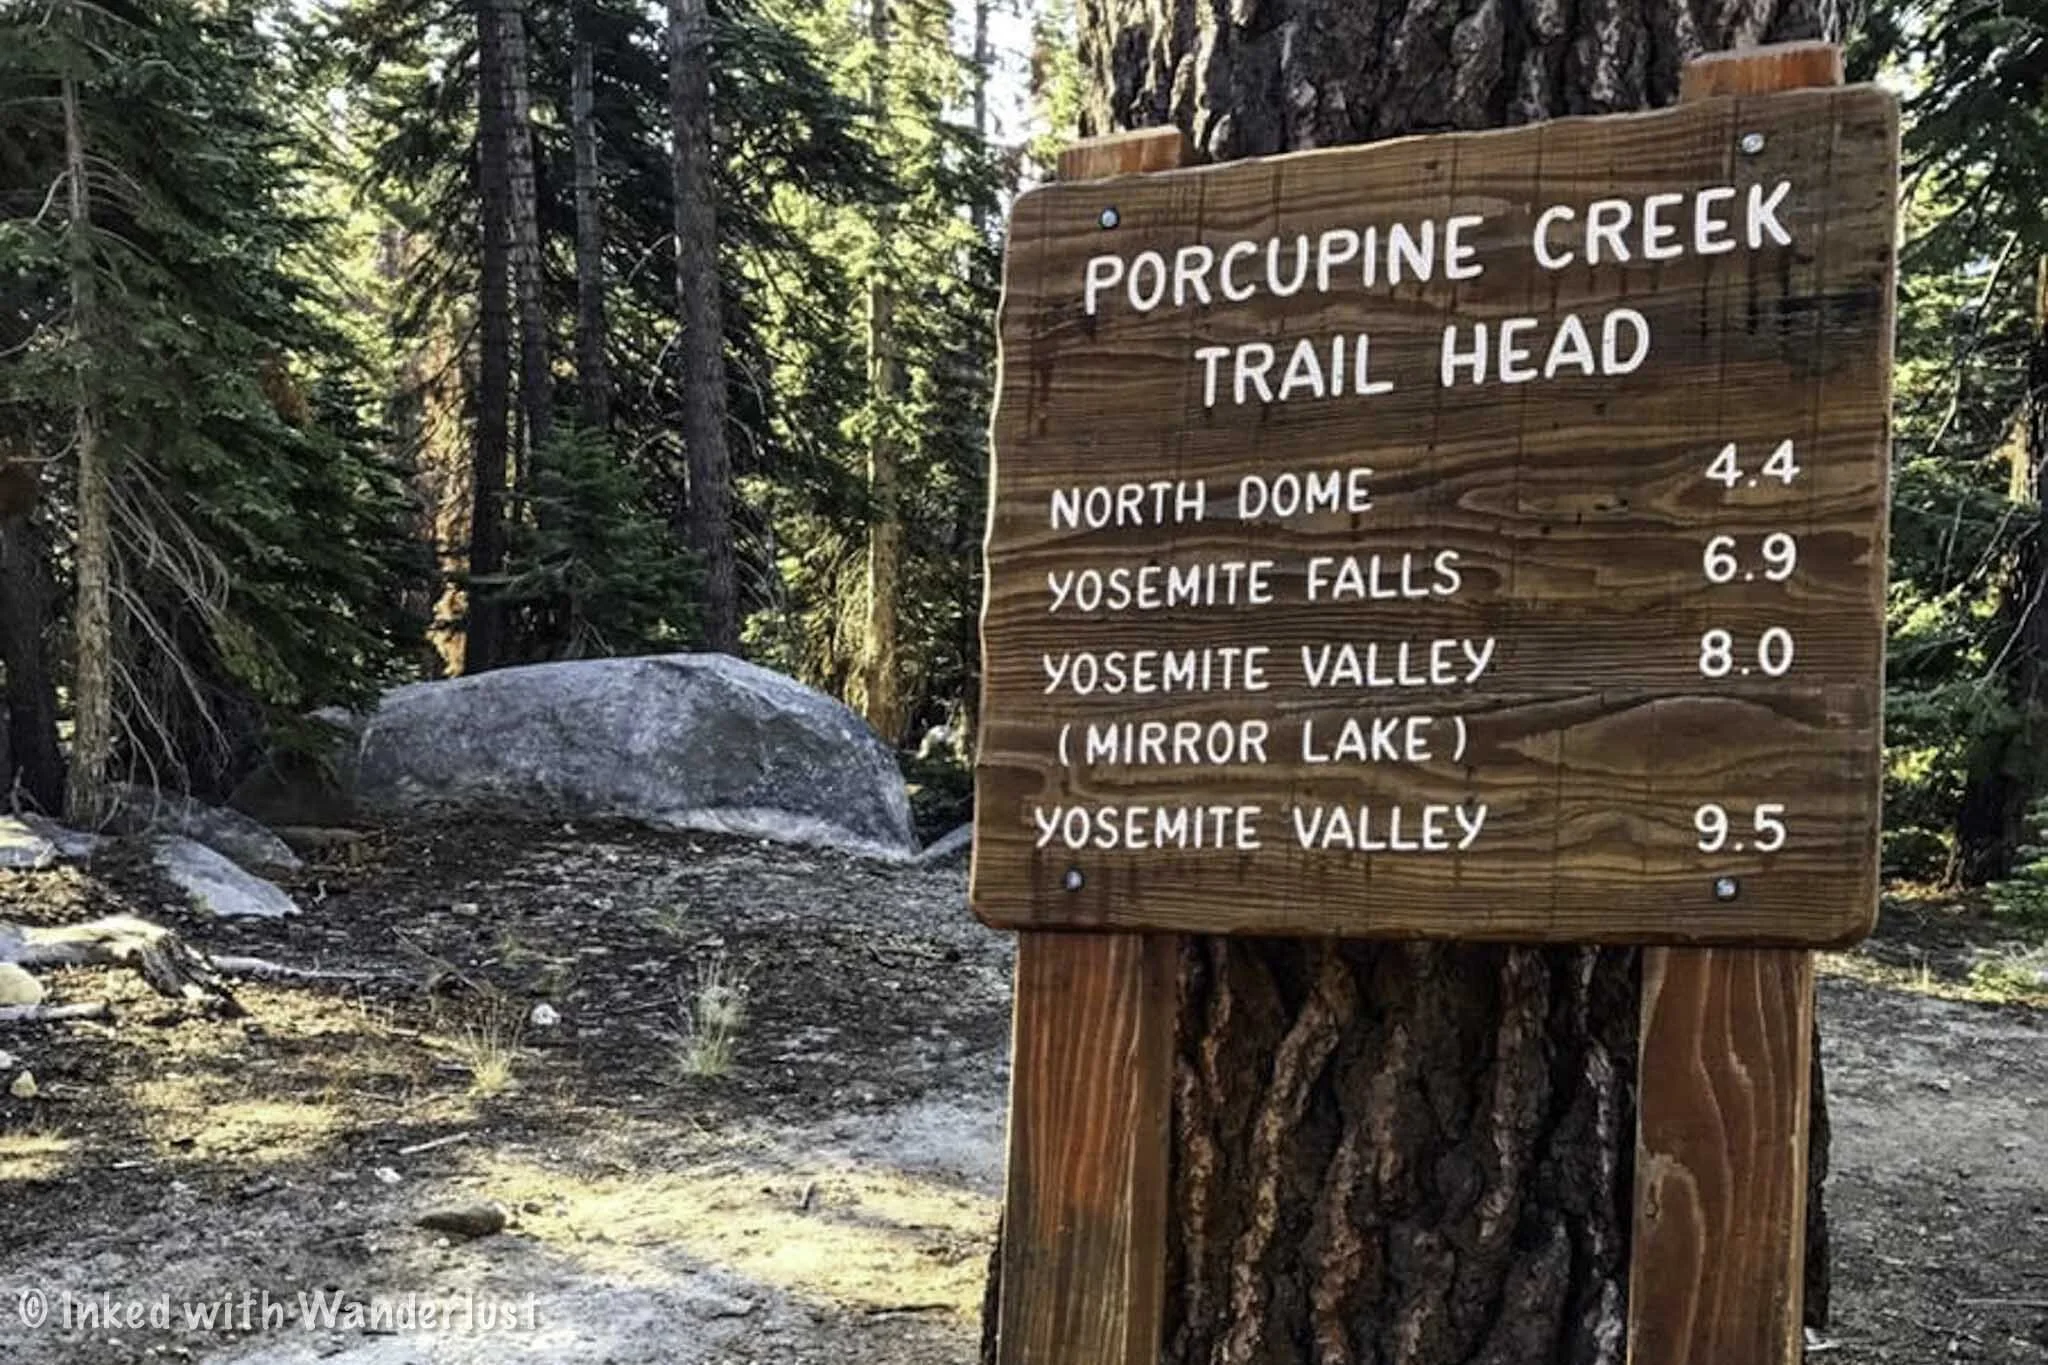
Although you’re technically able to reach North Dome from the valley, the official trailhead is just off Tioga Road on Yosemite’s east side and can be found in the Porcupine Creek parking lot (do not confuse this with Porcupine Flat).
From Yosemite Valley, follow the signs to Highway 120. Ten miles after leaving the valley you’ll come upon Crane Flat. Turn right there and after twenty-five miles or so, you’ll arrive to the parking lot on your right.
From Yosemite’s east entrance, simply drive for about twenty miles after driving through the gate and you’ll reach Porcupine Creek on your left. If needed, there are pit toilets located in the parking lot.
As is the case with most Yosemite trailheads, the earlier you arrive, the better off you’ll be. I arrived to the trailhead at around 7am and there was only one other car. When I got back to my car after the hike, around 2pm, every spot was occupied.
The North Dome Trail

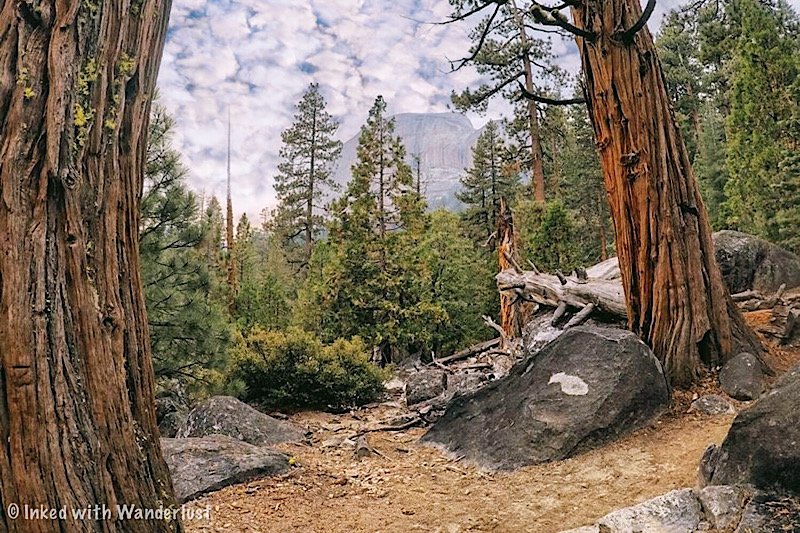
Much of the route to North Dome is your standard, albeit beautiful, walk in the woods. The scenery is stunning as you’re surrounded by hundreds of moss-covered trees and granite boulders.
You’re starting at 8,100 feet at the parking lot and you’ll work your way down to 7,540 feet at North Dome. While there will be some slight incline on the trail, you are ultimately going downward the whole time.
This is great on the way in and will feel like a breeze, but you’ll definitely feel it on your way back to the car (especially in the final mile or so). Total mileage, without taking the detour to Indian Rock Arch is 8.8 miles, round-trip. With the detour (highly recommended), you’ll add another mile or so.
Indian Rock Arch Detour

About 2/3rds of the way to North Dome, you’ll come across the half mile (one way) detour to Indian Rock Arch on your left. It is the ONLY natural granite arch located within Yosemite. The arch is about 15 feet tall and sits atop a hill with commanding views at the top.
My recommendation would be to take the detour on the way in, rather than on the way back. This way, you can save your energy and endurance for the elevation gain you’ll still need to navigate.
North Dome

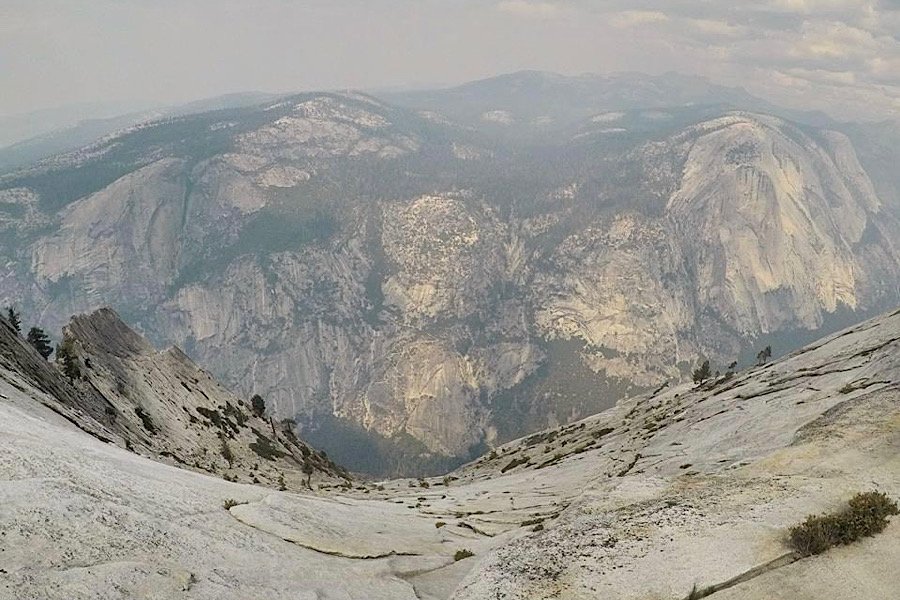
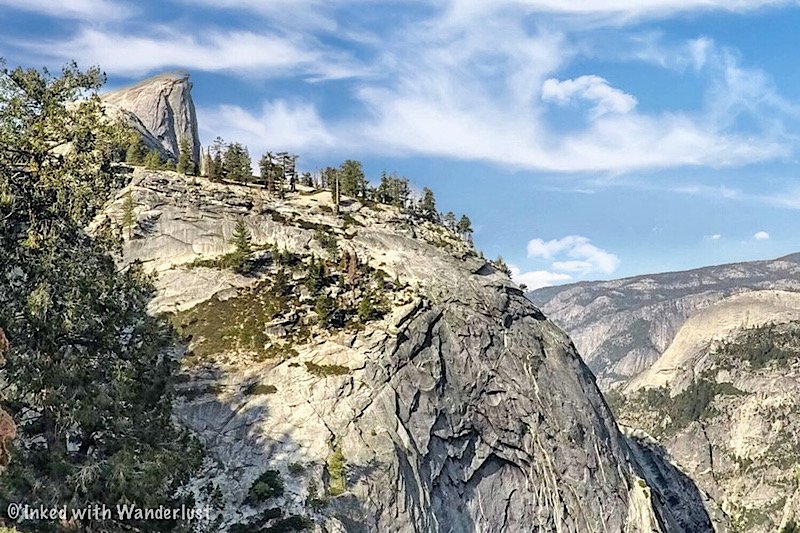
After checking out Indian Rock Arch, continue your way to North Dome. After another mile or so, you’ll come into a clearing and get your first glimpse of both North Dome and Half Dome in the distance. Don’t stop here, the views are just getting started.
Eventually, you’ll reach a point where it feels like you’ve lost the trail. You haven’t. Just keep Half Dome in your sights and stay to the left (down) and you’ll pick it back up again. If needed, there are typically cairns all over the place to help guide you.

After dropping down from the granite you were just on, you’ll once again find yourself surrounded by trees and will have lost sight of Half Dome. Keep with the trail and after a short while you’ll come to another clearing. Here, you’ve officially made it to North Dome.
Half Dome will have a commanding presence as you continue to work yourself down to North Dome’s precipice and on arrival, you’ll have an amazing view of not only Half Dome, but Tenaya Canyon and the many highlights of Yosemite Valley as well.
Things to Know About the North Dome Hike in Yosemite
The trail is inaccessible in winter. The North Dome trail is on Yosemite’s east side on Tioga Road and due to heavy snowpack, this area of the park is closed in winter. Typically, it’ll open for the season at the end of May or beginning of June and closes with the first major snowfall of the year (typically late October/November).
North Dome isn’t easy, but it isn’t difficult either. You’ll be starting out at a higher elevation and work your way down, which is the easy part. Where it could get moderately challenging for some is on the way back out. As long as you’re prepared for this, you’ll do just fine.
North Dome itself is generally safe, but use common sense. North Dome doesn’t see the amount of hikers Half Dome does, so it isn’t overly slick. However, getting too close to the edge could result in a deadly slide into Tenaya Canyon or Yosemite Valley. Using footwear with good grip is advisable and of course, watch your footing.
It doesn’t get too crowded. It’s nowhere near as bad as the trails in the valley, such as the Mist Trail, or some of the neighboring trails on Tioga road (Cathedral Lakes, Tuolumne Meadows, etc). If you get an early start, you’ll likely have it mostly (or all) to yourself. Starting later will likely mean more people on the trail, though.
North Dome is NOT the same as Half Dome. There are no cables or climbing involved and it’s roughly half of the total milage as Half Dome. North Dome is a great alternative to those seeking similar views as Half Dome provides (albeit from a lower vantage point), but don’t want to bother with the red tape or the challenge of Half Dome.


4 Reasons Why You Should NOT Hike Half Dome
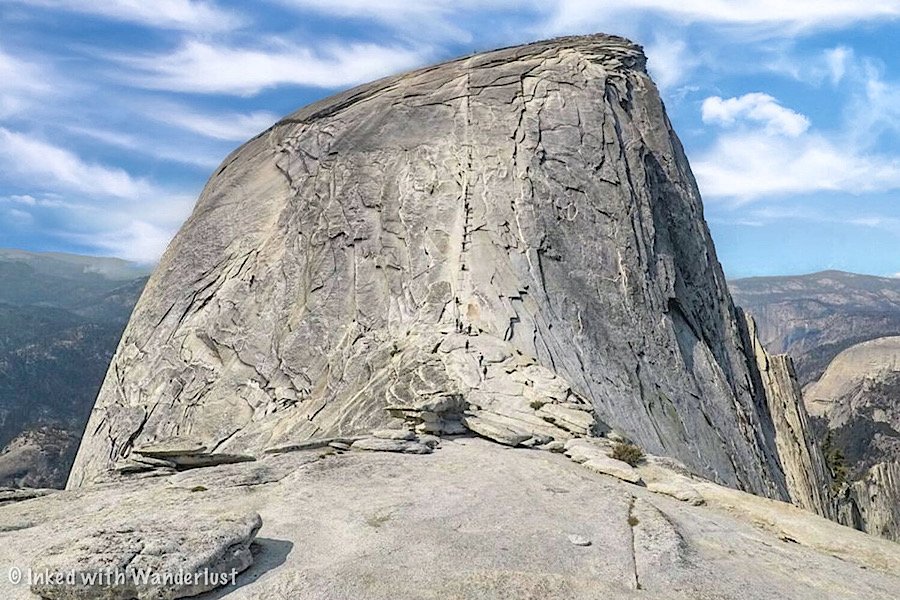
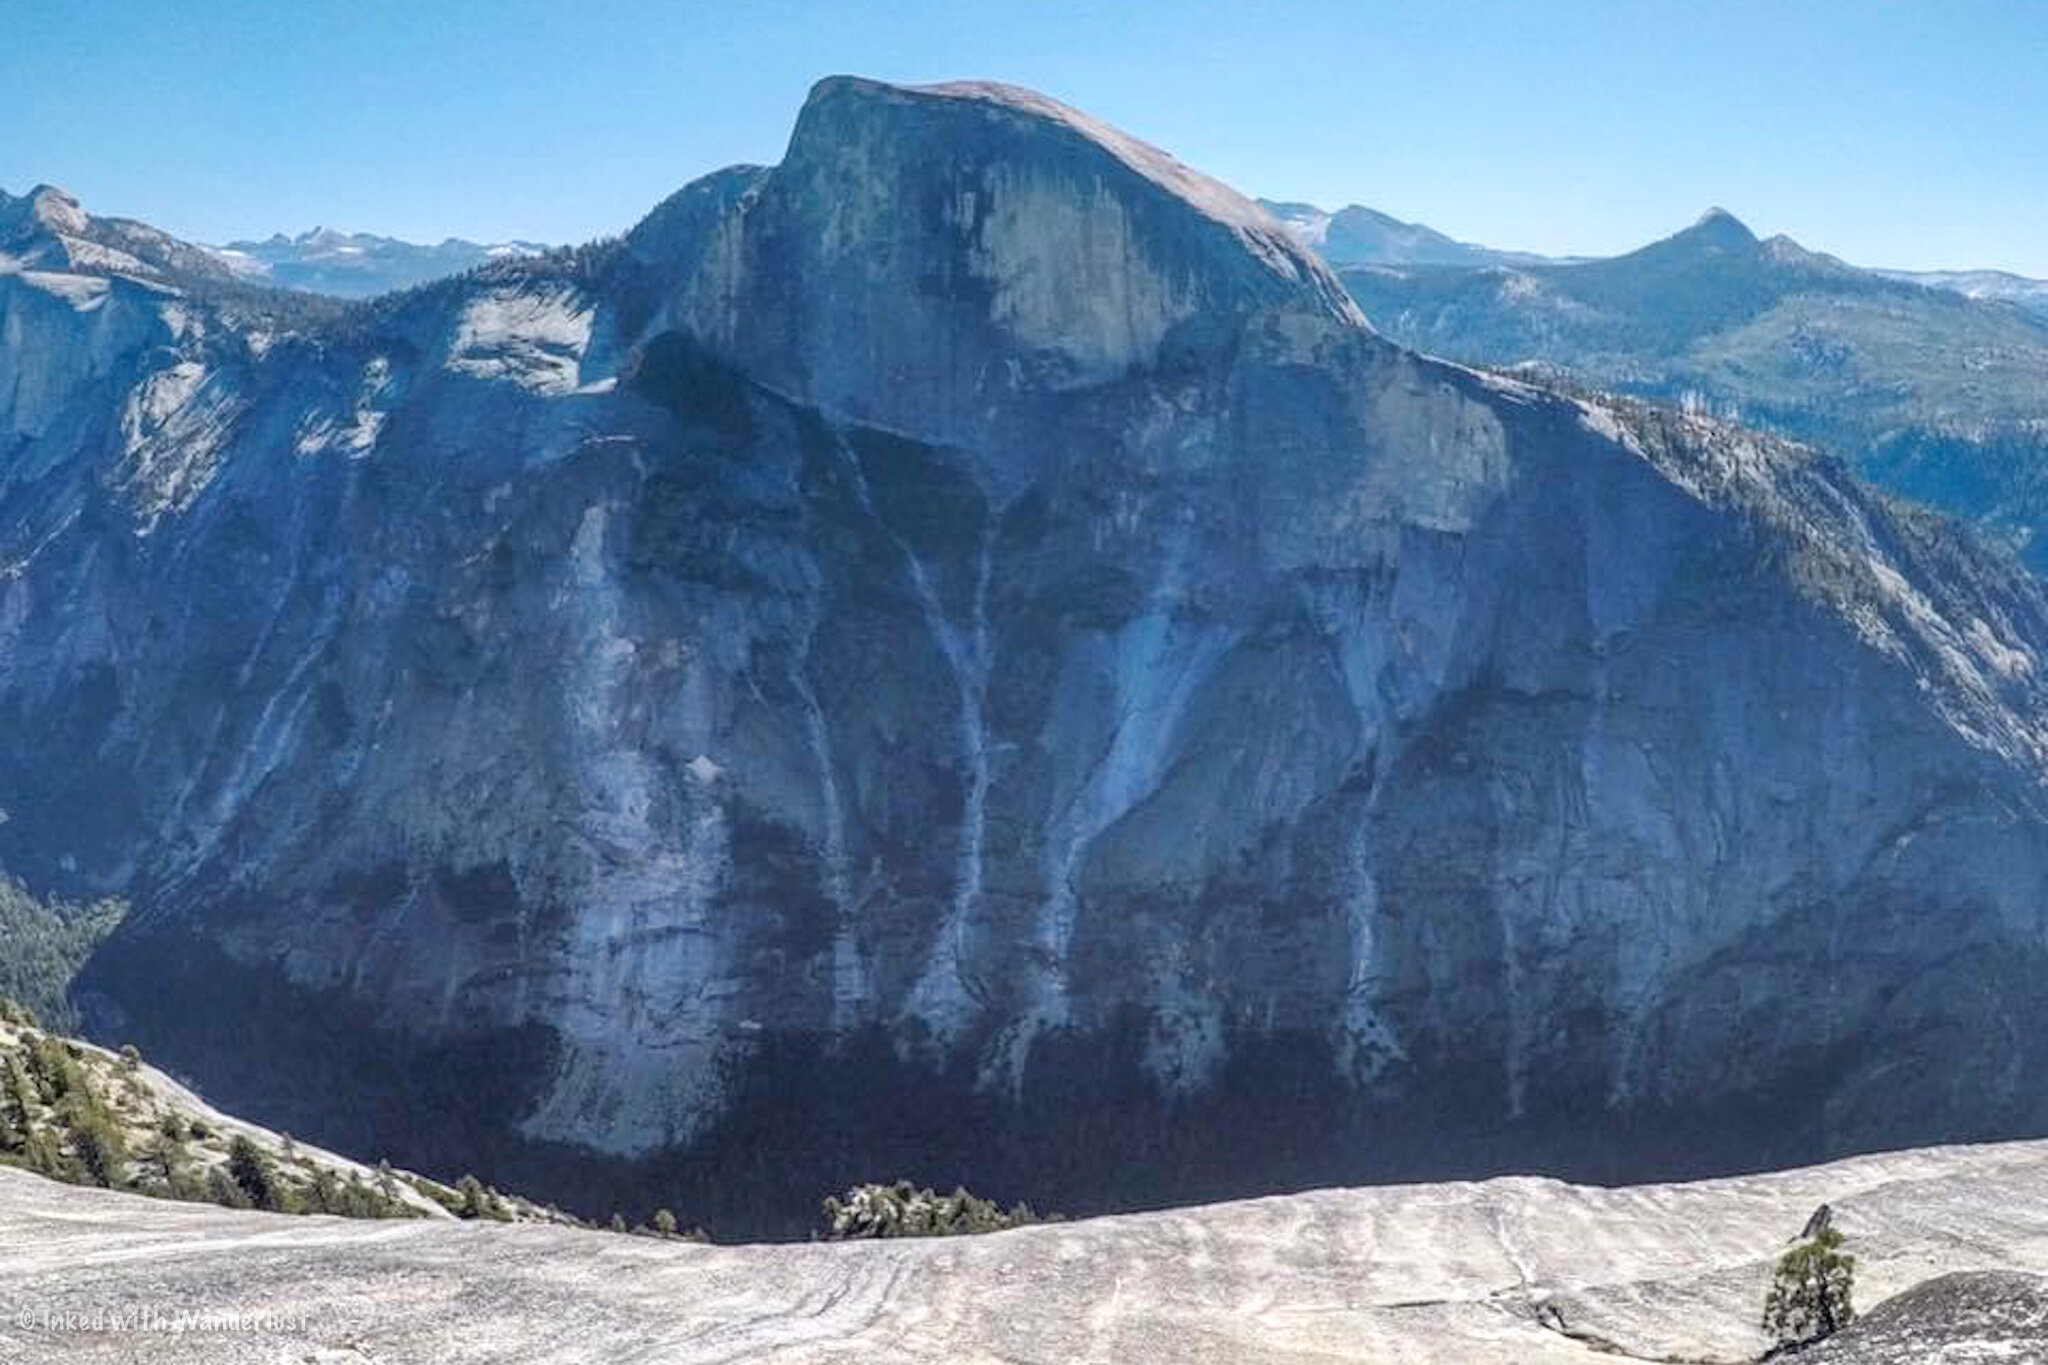
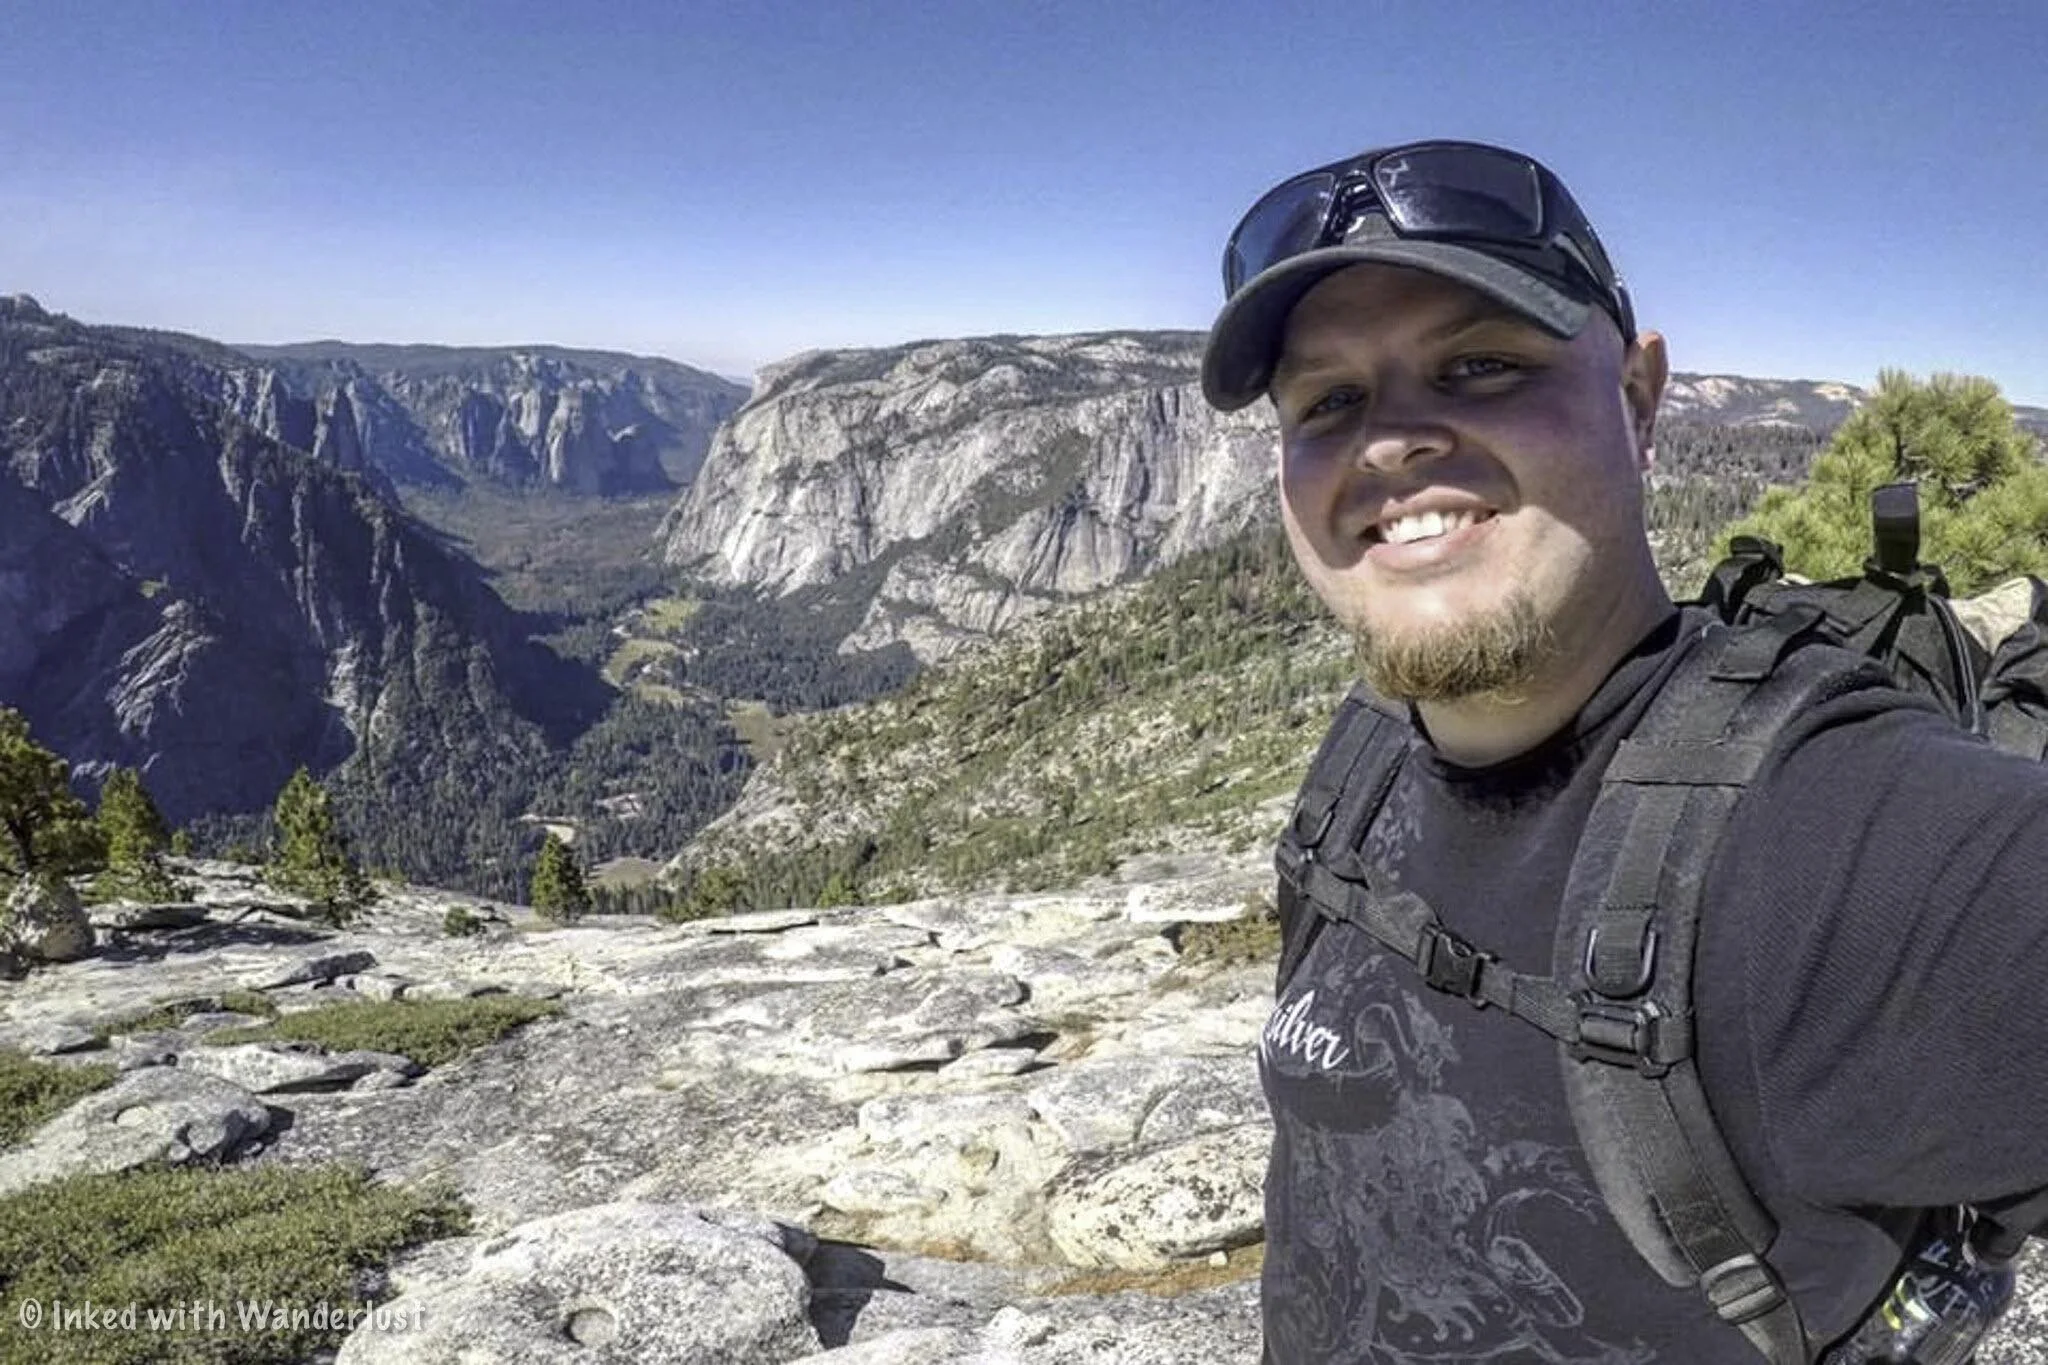
I hiked Half Dome with my brother back in 2017 and it was the most thrilling experience of my life at the time. Hiking 8 miles (mostly uphill), a 400-foot climb up the cables
I hiked Half Dome with my brother in 2017 and it was the most thrilling experience of my life at the time. Hiking 8 miles (mostly uphill), a 400-foot climb up the cables, standing at the top, and being able to look down on Yosemite Valley is an experience that’s hard to describe.
As incredible as it was, it came at a price. As my brother and I were making our way up Sub Dome, I realized how truly unprepared we were. Don’t get me wrong, I THOUGHT we were prepared but truth be told, we probably had no business being up there. That’s a tough pill to swallow, but it’s the truth.
All went well, though. We made it to the top without any major problems and managed to make it back to the car despite being low on energy and close to dehydration. I knew the experience of hiking Half Dome would make for an awesome addition to this blog (you can read that article here) but I started thinking, “what about the other part of it that no one talks about”?
The “part” I’m referring to is instead of encouraging everyone and anyone to hike Half Dome, what if I gave people reasons why they SHOULDN’T hike it? That’s the purpose of this article. We all know the reasons why you should, but there are plenty of reasons why you shouldn’t. So read on to find out the four reasons why you should NOT hike Half Dome.
1) It can be dangerous

Half Dome. Yosemite National Park.
I’m not going to sugarcoat it, there is potential, life-threatening danger on this hike. Truth be told, you’ll find danger in anything you do. Just driving to the trailhead is more dangerous (statistically speaking). That’s why I’m saying it CAN be dangerous. I believe most of the danger can be mitigated as long as you’re prepared for it.
That said, people have died on this hike. They’ve died both on the trail and on the cables. As of 2019 (2020 numbers have not be listed yet) there have been:
At least 13 deaths
291 accidents
& 140 search & rescue missions
This is just since 2005. Thankfully, there were no confirmed deaths on Half Dome in 2020. The most recent was in 2019 when a young women from Arizona slipped on the steepest part of the climb and slid 500 feet to her death.
Weather also plays a role in the level of danger. The granite is smooth and slick from all the hiking boots that’s traversed over it over the years and when it rains, it becomes incredibly dangerous to attempt an ascent or descent. You do NOT want to be up top (or even on the base) when lightning strikes.
2) You have a medical condition

Half Dome. Yosemite.
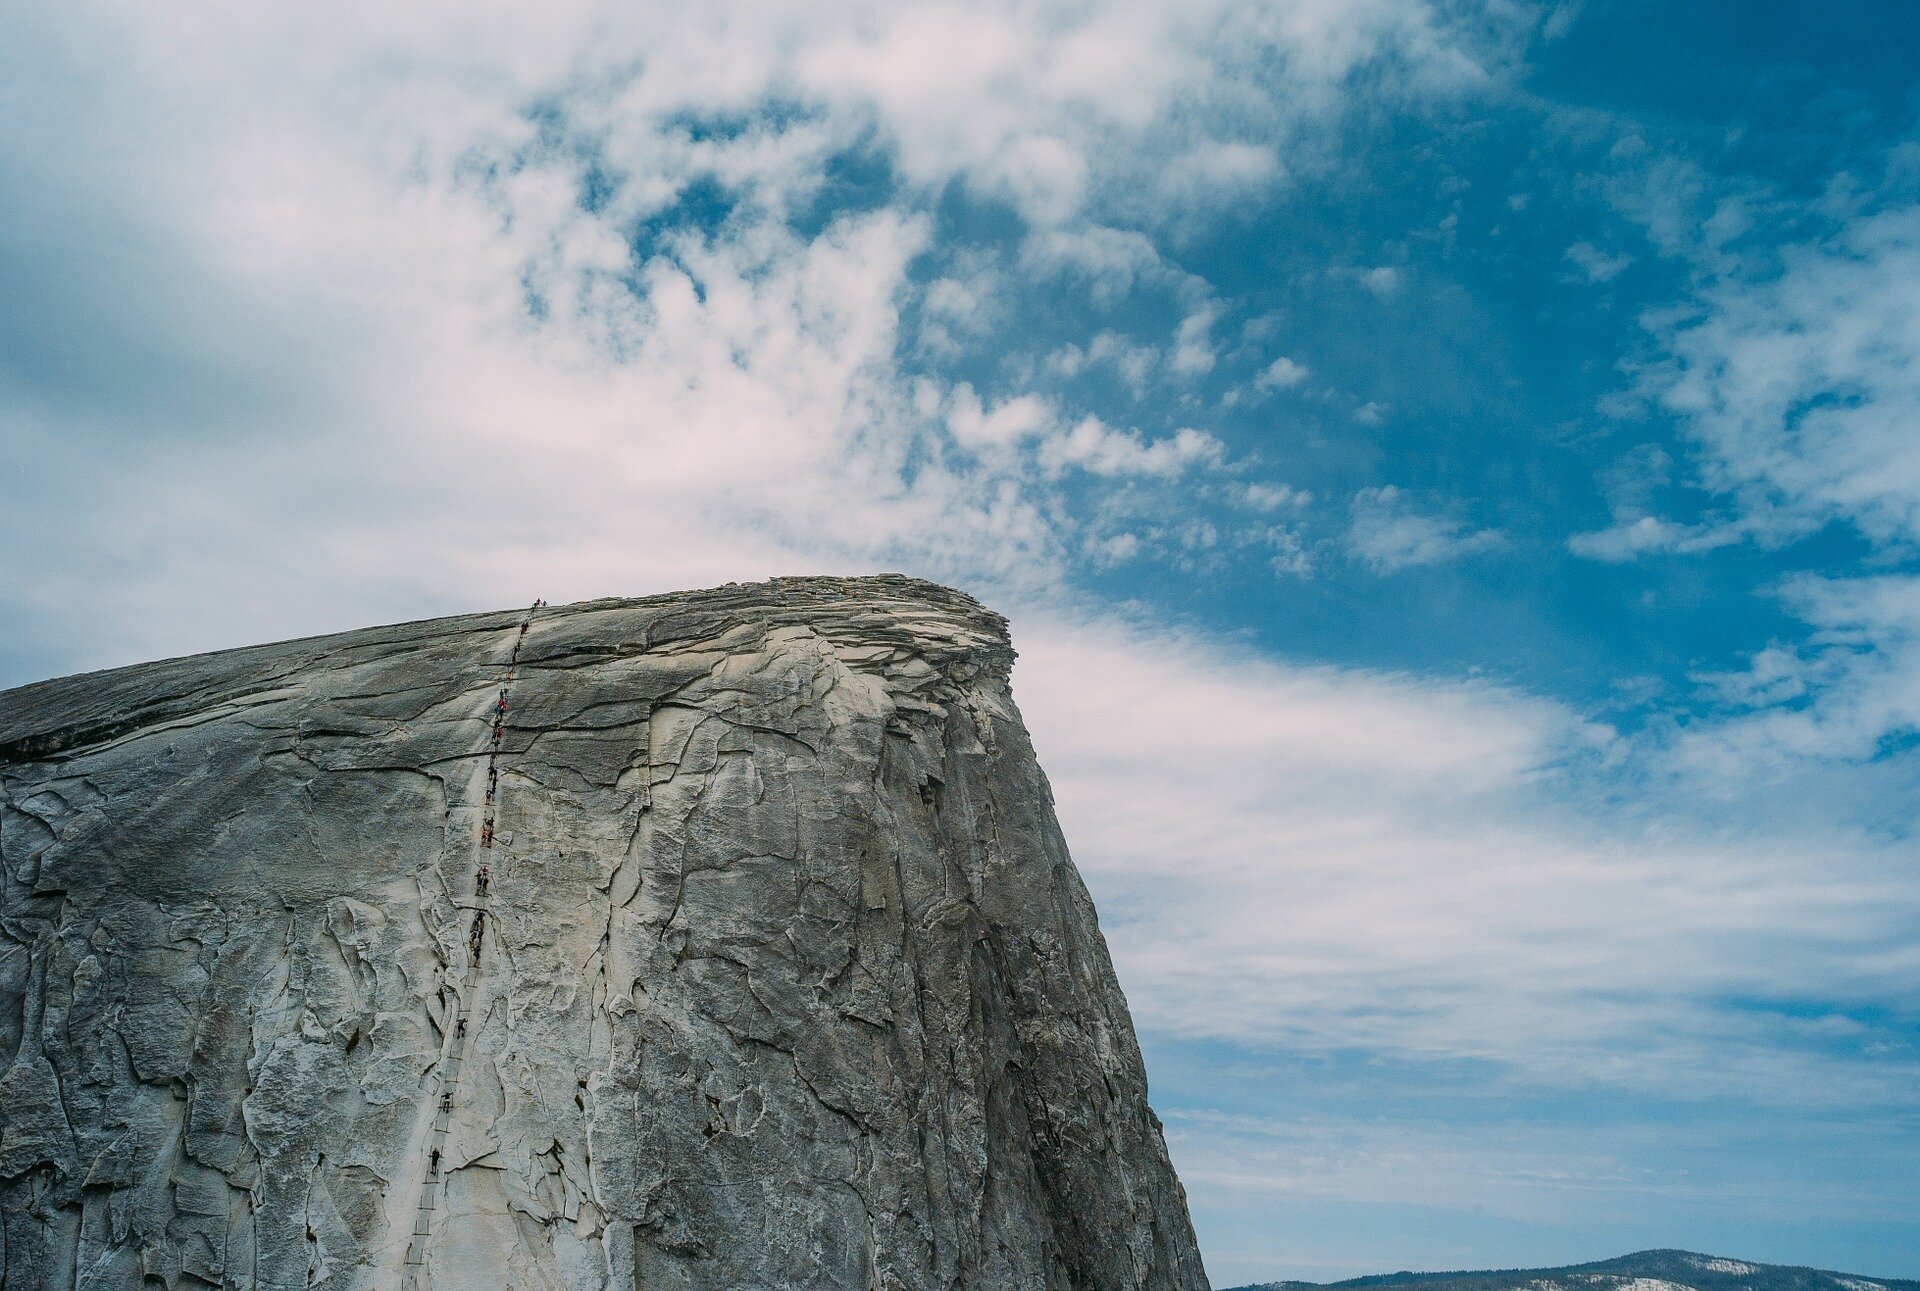
If you have vertigo, are prone to seizures, have heart or lung problems, bad knees, etc, you shouldn’t hike Half Dome. Vertigo, especially, can cause a fatal accident to occur. Most of the hike takes place on your standard hiking trail but towards the end, you’ll need to navigate your way up Sub Dome and a 400-foot climb up the cables.
Hiking Half Dome with heart issues also wouldn’t be wise. In 1995, a man from Huntington Beach collapsed from heart failure as he was making his way up the cables and fell. There have been others who have had heart attacks while hiking but thankfully survived their ordeal.
Half Dome isn’t worth your life or making your condition worse. There are many trails in Yosemite that are just as spectacular that wouldn’t put you in unnecessary risk. North Dome, for example, is an excellent alternative that ends with any epic view of Half Dome. You can read that article here.
3) You have a low level of fitness
Half Dome cables. Yosemite.
While being a top level athlete isn’t required, being in at least decent shape is. One way you can find out how in “hiking” shape you are would be to go for a hike on an easier trail and pay attention to your breathing. If you’re huffing and puffing, then Half Dome is too dangerous.
Thankfully, this is something that can be overcome. If you’re serious about hiking Half Dome start training MONTHS before, even a year! The sooner the better. Join a gym and utilize a stair master and squat press. Go hiking regularly and keep upping the difficulty. The higher elevation you train at, the better prepared you’ll be.
4) You’re inexperienced

Half Dome. Yosemite National Park.
This one is pretty self explanatory and like the reason above, can also be overcome. If you’re new to hiking, starting with Half Dome wouldn’t be ideal. Your best bet would be to start out small. Like your local park, for example. If you’re coming to Yosemite, some good beginner trails would be:
The Mist Trail (Challenging, but still beginner friendly)
Cook’s Meadow
Elizabeth Lake
Lembert Dome
Cathedral Lakes
Once you’ve put a few of these (or others) under your belt, you can start hiking the more difficult ones that’ll challenge you to up your game and test your resolve. Some of those Yosemite trails include:
Upper Yosemite Falls
Four Mile Trail
Cloud’s Rest
If you can tackle one of these without feeling like you’re going to fall over at any moment, chances are good that you’re ready for Half Dome. If not, then I would definitely stick with the easier ones mentioned above (there’s no shame in it).
Remember, it isn’t just your safety at risk, but you could be putting the safety of other hikers and Park Rangers (if they have to come help you) at risk as well.
= Conclusion =
I hope you’ve found this article helpful in deciding whether Half Dome is a good fit for you. If none of these apply to you then great, get at it. If one does, then remember that NO hike is worth your life and there’s absolutely no shame in admitting when something’s out of your comfort zone. In fact, it’s a respectable trait.
Safe travels.
Please support this website by sharing this article with your friends & family on Pinterest, Facebook, or your favorite social media app.
You can also show your support by reading one or more of the related posts below. Thank you.