McCloud River Falls: Three Fantastic Waterfalls in One Hike
Disclosure: This post contains affiliate links. If you make a purchase through these links, I may earn a small commission at no additional cost to you. I only recommend products or services that I believe will add value to my readers.

Just a short distance between two popular Northern California towns; Burney and Dunsmuir, McCloud Falls is a series of three beautiful waterfalls along the McCloud River.
Lower, Middle, and Upper McCloud Falls are easily accessible by foot via a 3.9-mile (out-and-back) hiking trail or by driving to each one via the paved road connecting the three. Additionally, each fall has its own parking lot with picnic tables, signage, restrooms and a campground nearby.
In this guide, we’ll cover a few things you’ll need to know about each of the falls like where to find them, how to access them once you’re there, etc. Let’s get into it.
Quick Stats
Location: McCloud, CA (in between Burney and Dunsmuir)
Fee/Permit: None
Open: Year round, but can be difficult to access in winter
Parking: Large, paved lots at each waterfall
Restroom: Three (one at each waterfall)
EV Stations: None
Drone Use: Allowed (UAV must be registered and follow applicable laws)
Difficulty: Easy by vehicle / Easy to moderate by foot
Popularity: Popular
When: Weekdays and early is best for lower crowds
Time: 2-3 hours
Milage: 3.9 miles, out and back via the trail
Elevation Gain: 337-feet
Trail Condition: Well maintained and easy to follow
Main Feature(s): Three waterfalls of varying heights
Campground: Fowler’s Campground (located near the lower falls)
Pets: Allowed on leash
Special Notes/Hazards: Each waterfall can either be hiked or driven to. No specific dangers aside from usual wilderness hazards.
Our Visit(s): August 2019 & May 2022
Directions To McCloud Falls

If you already happen to be at Burney Falls (or will be), making McCloud Falls part of your itinerary is easy as it’s just under fifty miles away. Even better, if you’re coming from Interstate-5, it’s only thirty(ish) miles away.
McCloud Falls is a well known destination, so simply plugging that into your GPS of choice will get you there without issue. If you’re not a tech person, here’s the simple directions:
From Burney: Go north on Highway 89 for 35-40 miles, then take a left onto Fowler Public Camp road and follow the directions.
From Dunsmuir: Go north on Interstate-5 and take the exit for Highway 89 south. Follow this for about 20-25 miles and take a right onto Fowler Public Camp road.
The road leading to the falls is paved and well maintained. You just need to decide whether you’re going to hike to all three or simply drive.
The falls are handicap accessible and feature viewing decks straight off of the parking lots. For those who wish to, you have the option to walk down to the base of each one for a closer look.
Because we stopped here between our visits to Dunsmuir and Burney, we decided to drive to each waterfall and walk down to their bases to save time. While I recommend hiking the trail connecting the three, you can save a significant amount of time by doing what we did.
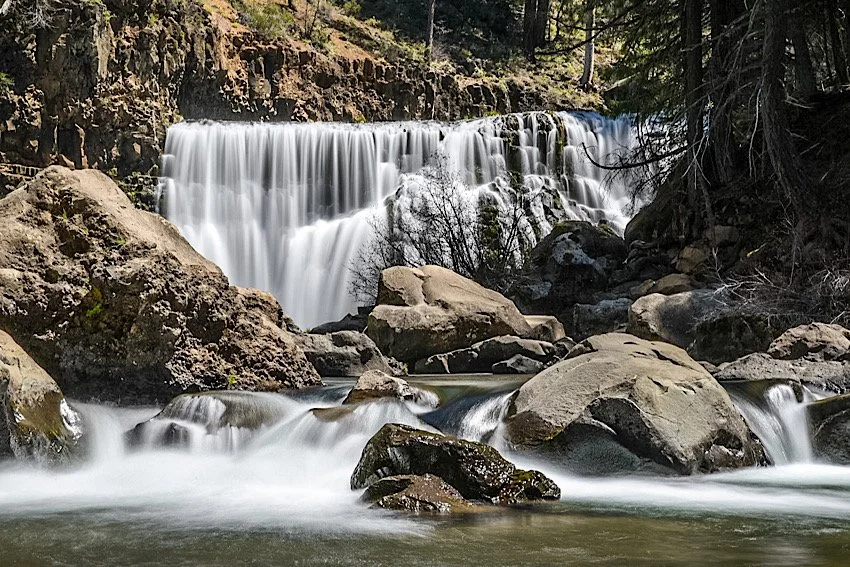
Lower McCloud Falls

The lower falls is a great place to begin your visit. The parking lot is paved and decently large. The viewing deck is just off the parking lot, past the restrooms.
If you’re able, I highly recommend going down the stone steps to get a closer view of this 15-foot waterfall. These stone steps is also where the official beginning (or end) of the hiking trail is. I have seen pictures of people swimming in the emerald green plunge pool, so I assume it’s allowed.
In fact, while you’re there, look for metal hooks embedded into the rock. According to a local I spoke with, those are the remains of what used to be a ladder swimmers used to climb out.
From here, you can either start hiking up the trail to the middle falls or head back to your car and drive up. If you drive, simply take a right up the road and look out of the waterfall sign.
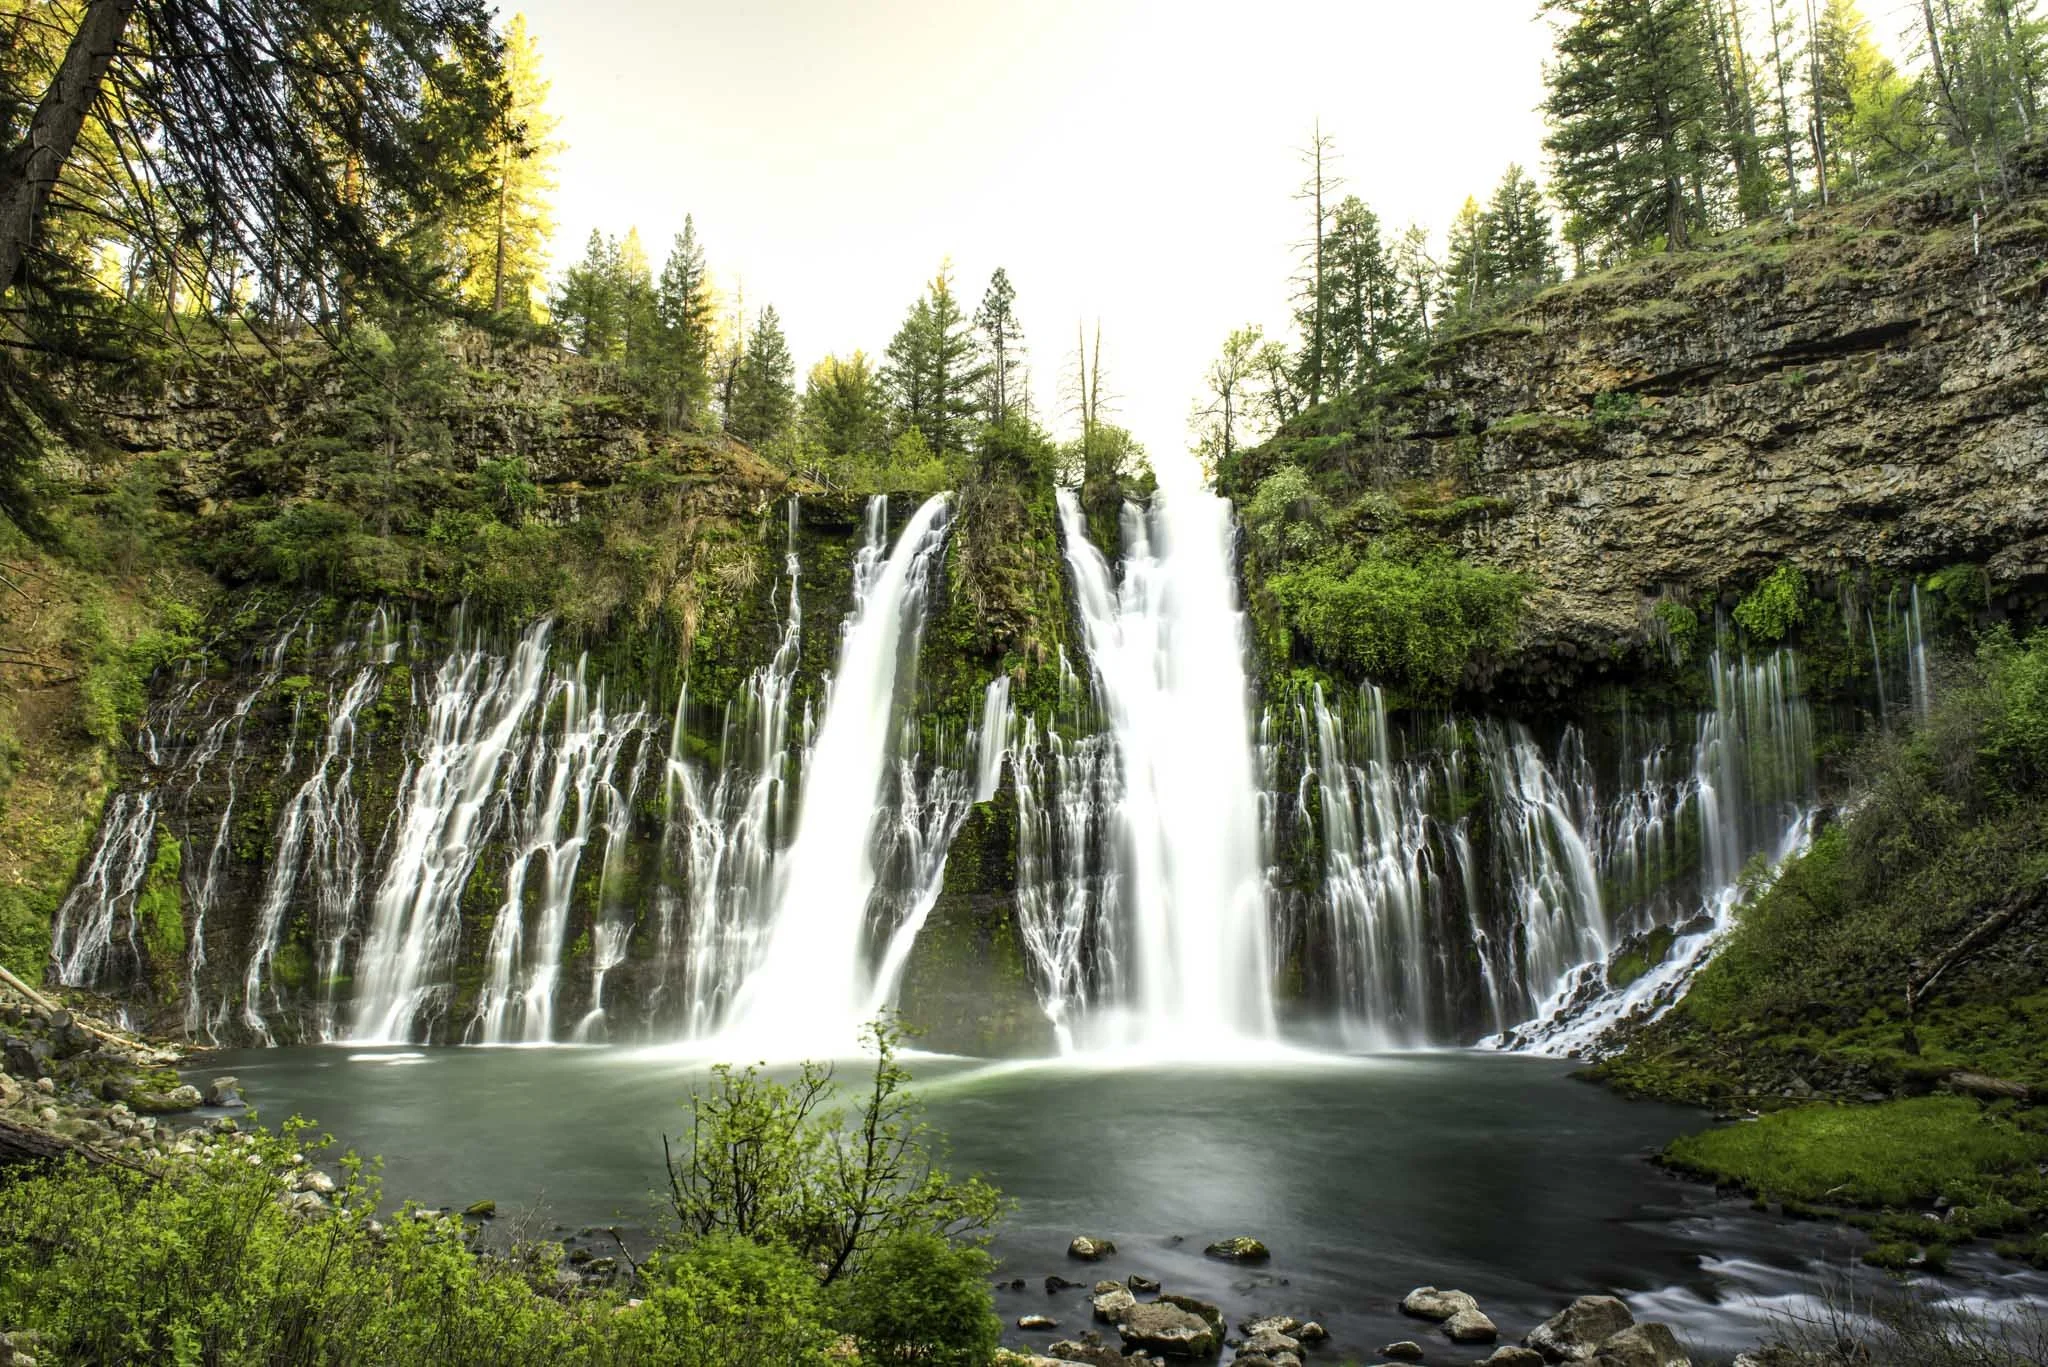
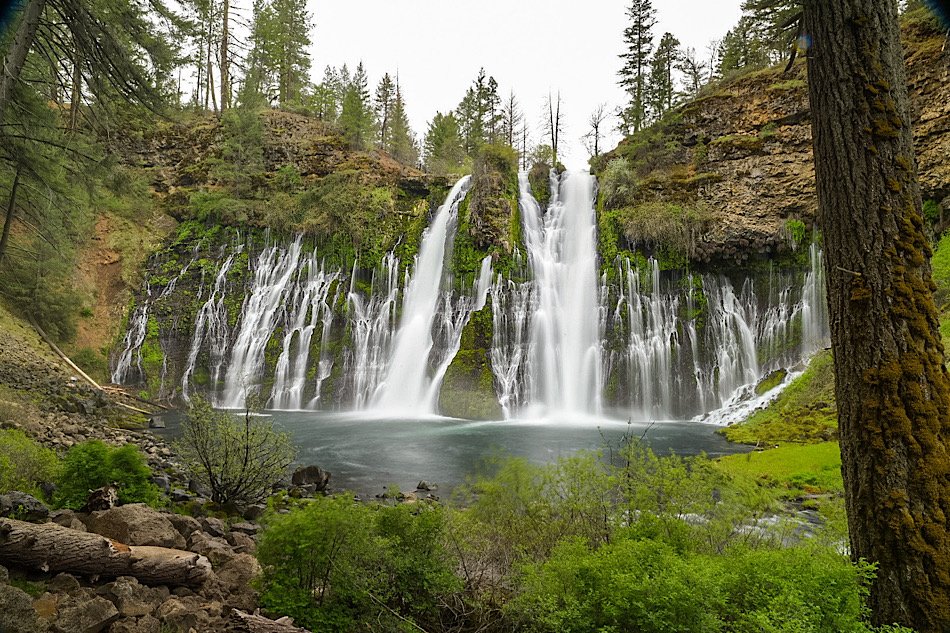
Middle McCloud Falls

The middle falls was our favorite and arguably the most impressive of the three. If you only have time for one, I recommend this one. If you’re hiking here from the lower falls, the trail will take you straight to the base. If you drive, you’ll need to hike down or simply view it from above.
To get to the base, you’ll need to hike the short, quarter-mile(ish) trail to the bottom. It’s easy to miss and there isn’t any signage indicating where to go (at least none that we saw). What you’ll look out for is a dirt path, lined with rocks, spurring off to the right from the paved one going to the viewing deck.
The trail consists of packed dirt and while a bit rocky in some spots, overall it’s a well-maintained, easy to-follow trail. You’ll take a short series of graded switchbacks before reaching the bottom.

When the trail flattens out at the bottom, keep left to the falls and you’ll eventually reach a rest area. Between you and the falls is a boulder field that you’ll need to scramble over if you want a closer view. The pool in front of the falls is perfect for swimming and while we don’t how deep it is, we have seen videos of people cliff jumping into it, indicating it’s decently deep.
Out of the three, the middle fall is where we spent the majority of our time. I wrote an extensive post highlighting the middle falls and its trail if you’d like to read more about it.
Upper McCloud Falls

The upper falls is the one with second tallest plunge at 30-feet. Similar to the lower fall, it’s narrow and dumps into a small pool but unlike the lower fall, it’s carved out an opening between the basalt rock walls, rather than just spilling over it.
There’s a plethora of viewing space up top but unfortunately, none of them provided an impressive view of the waterfall (in my opinion, anyway). To get a better view, you’ll need to rough it a bit.
Just past the last viewing deck, where the dirt trail begins, you’ll see a spur trail on your left going straight down to the waterline. Watch your footing and take your time. It’s short, but steep with nothing but loose dirt and rocks. Taking a spill here wouldn’t feel good.
There isn’t a lot of space at the water’s edge. Most of it consists of awkwardly spaced boulders that you’ll need to sit or stand on to view the waterfall.
When you’re done, head back up and go a little further upstream to see the cascades feeding the waterfall or read about the development of these falls on the informational signs near the trailhead.
Hike or Drive?

That all depends on personal preference, physical limitations, how much time you have, etc. Both have their advantages and disadvantages.
Hiking the trail: You’ll need to ensure you have the proper equipment with you such as trekking poles (see my recommendation here), hiking boots/shoes, water, sun protection, etc. Each waterfall is less than one mile from the next and the only real “challenging” part is the uphill slog out of the middle fall. Aside from that, it’s a fairly simple trail.
Driving to each fall: For those short on time or with physical limitations, this would be the best option. Each fall has its own parking lot and all of the upper viewing decks are wheelchair accessible. If you’re able, you can still get a close view of each waterfall (which is really the main point, anyway).
As far as where to start, that’s also your personal preference. If you’re hiking with a group with multiple vehicles, our recommendation would be to leave a vehicle at the lower fall, take another up to the upper fall, and start the hike there.
This strategy is two-fold as:
You’re hiking down to the lower falls, bypassing having to work your way up and out of the middle falls.
Saves you time by cutting the hike in half.
If you’re driving, it doesn’t really matter where you start. If you only have time for one waterfall, we recommend the middle falls as it’s the largest, most scenic/photogenic, and has the best swimming hole.