
Azul Latin Kitchen: California-Style Mexican Dining in South Lake Tahoe (Review)
When searching for South Lake Tahoe restaurants, specifically ones in or near Heavenly Village, Azul Latin Kitchen is often at or near the top of the search…
Disclosure: This post contains affiliate links. If you make a purchase through these links, I may earn a small commission at no additional cost to you. I only recommend products or services that I believe will add value to my readers.

When searching for South Lake Tahoe restaurants, specifically ones in or near Heavenly Village, Azul Latin Kitchen is often at or near the top of the search results. It’s for good reason, as Azul has some of the best food in the area.
In touristy-heavy destinations such as Tahoe and Heavenly Village, some restaurants tend to rest on their laurels as it relates to food quality and service, heavily relying on the ever revolving door of fresh customers, oblivious to their reputations.
Azul Latin Kitchen stands out from that pack by providing not only friendly, prompt service, but tasty Mexican and South and Central American cuisine as well. Since opening in 2014, Azul has remained a favorite amongst tourists and locals alike.
In this light-hearted review of Azul Latin Kitchen, I’m going to share my wife and I’s dining experience, as well as share photos of the dishes and drinks we tried and what we thought of them. Let’s get into it!
Location and Parking

Azul Latin Kitchen is located in South Lake Tahoe, near the California/Nevada border and nestled within the Heavenly Village complex, along the sidewalk facing Lake Tahoe Boulevard. Since this is the main road going through Tahoe, you can’t miss it.
Parking can be found in the Heavenly Village garage (paid), behind Village Center at the corner of Heavenly Way and Montreal Road (paid), or within Village Center itself (free). Village Center offers free two-hour parking if you’re shopping or dining there, but there isn’t anybody checking. As long as you don’t surpass the two-hour limit, you’ll be fine.
Azul Latin Kitchen Menu Review

This was our second time dining at Azul. Our first time was during the covid pandemic, so things were chaotic. They were only offering outside dining, which created a substantial wait list. This time around, though, we were seated right away (we opted for a seat outside since the weather was pleasant).
Our waitress was at our table within minutes to take our drink order. Throughout the service she was attentive, friendly, conversational, and prompt. This is consistent with the incredible service we received on our first visit and from what other reviewers have said.
Cocktails

Tropic Smoke - $15
We each ordered tequila and mezcal-based cocktails. The Tropic Smoke was my wife’s drink. It’s made with an espadin mezcal, freshly squeezed lime, pineapple juice, organic agave nectar and a dash of angostura bitters with a tajin rim.
This cocktail leans into the mezcal without letting it steal the show. The smokiness is there, but subtle, and allowed to dance around the citrus and sweetness rather than dominate. It’s a fun sipper, with the tajin rim giving it a kick which ties the flavors together nicely.

Jalapeño Y Mas - $17
I ordered the Jalapeño Y Mas. It’s made with a lalo blanco tequila, freshly squeezed lime juice, organic agave nectar, and roasted jalapeño with a fresh lime garnish. The menu photo showed a salted rim, but I didn’t receive that.
You can expect a solid kick from the jalapeño, as it isn’t shy about bringing the heat, but it never feels like it’s trying to drive you away. It’s well-balanced and smoked, wrapped in a crisp layer of lime and agave to soften the edges. It’s a cocktail that whispers “spice”, rather than shouting it.
Starters

Queso Fundido - $13
As our starter, we ordered their queso fundido. You receive a handful of warm tortilla chips, served alongside a sizzling cast-iron skillet of oaxaca, jack, and cheddar cheeses and pickled peppers.
As stated above, your queso comes out sizzling, literally, with a molten blend of cheeses resembling pure comfort in skillet form. It’s gooey, rich, and designed for scooping. The kind of starter that makes you immediately regret your promise to share.
The flavor leans buttery and mild at first, then deepens as it cools, showing off just enough salt and smokiness to keep you diving back in. That said, the texture leans a bit looser than the traditional, ultra-stretchy queso fundido you might expect.
Overall, it’s a satisfying, table-pleasing start to your meal. I wouldn’t consider it a grand slam in terms of queso dips, but absolutely the kind of dish that disappears from the table faster than anyone would care to admit.
Main Dishes

Enchilada Classico Skillet - $24 (Plus another $1 for both red and green sauces)
For her entree, my wife ordered the enchilada classico skillet. In this sizzling skillet, you receive a combination of jack and oaxaca cheeses layered with corn tortillas, topped with sour cream and served with house rice, black beans, and chopped cilantro.
You can choose your protein and sauces. My wife went with the combination of red and green enchilada sauces ($1 extra for both) and for her protein, she chose shredded beef.
The beef is tender and well-seasoned, pulling apart rather easily. It compliments the sauces nicely without competing with them. The cheeses stretch and meld with the sauce, binding everything together in that pleasing hot-cheese-sauce-blanket way you want from an enchilada skillet.
Texture wise, the edges crisp just a bit against the hot dish, giving occasional crunchy contrast to the soft tortillas inside. Paired with sides of rice and beans, it feels like the kind of dish that’s hearty without being overdone. It’s a well-balanced, flavorful twist on the classic enchilada skillet.

Chipotle Tacos (1 chicken and 1 shredded beef) with side of rice and beans - $6.75 (per taco) + $5.50 for sides
For my entree, I ordered the chipotle taco, which is ordered and served a la cart. You get your choice of protein, which can be roasted chicken, carnitas pork, shredded beef, veggie chili or seasoned sweet potatoes.
I ordered two. One with roasted chicken and another with shredded beef, along with a side of their house-made beans and rice. The tacos came smothered in a spicy chipotle sauce and topped with cabbage, chopped onions (I left them off), queso fresco and cilantro.
Your protein comes nestled in warm tortillas and dressed with a chipotle sauce that adds a smokey bite without being overwhelming. The chicken is flavorful with gentle char marks and the shredded beef is tender and well-seasoned. Between the two, I favored the beef.
The chipotle sauces ties everything together, adding a mellow heat and silky texture without masking the individual components. Taken together, the dish feels satisfying and thoughtfully constructed. These tacos are proof that Azul knows how to deliver on flavor without turning things overly fussy or heavy.
Dessert

House-Made Churro - $10
One simply cannot come to Azul Latin Kitchen and not order their delicious house-made churros for dessert. They arrive crisp and golden, dusted generously in cinnamon sugar so that each bite crackles with sweetness.
They’re served warm, which makes the contrast between the crunchy exterior and soft, pillow-y inside all the more satisfying. The accompanying chocolate sauce is rich and smooth, but not overly sweet, offering a bittersweet counterpoint to the churro’s sugary coat.
The portion is generous enough to share (though you may not want to) and they hit that nostalgic dessert note without feeling overdone. While not groundbreaking, Azul nails the execution of the basics - warmth, cinnamon-kissed and crisp. The perfect end to your meal.
Final Thoughts

All told, I highly recommend Azul Latin Kitchen to anyone traveling to South Lake Tahoe. The lake is busting at the seems with many wonderful restaurants, but I feel Azul stands out from most casual dining options. Service is fantastic, food is flavorful and the atmosphere is top notch.
Its Heavenly Village location alone would bring in plenty of customers without having to worry too much about the top marks mentioned above. Azul, however, defies that and seemingly aims to provide its guests a five-star experience.
If you’ll be in the south lake area for more than just a day, I suggest giving their sister restaurant, Base Camp Pizza (also located within Heavenly Village) a try. They’re both owned by the same restaurant group - and it shows. If you decide to try either one, be sure to tell me about your experience in the comments below!

How to Visit Donner Memorial State Park (Things to Do)
When the Donner family and their teamsters became stranded at Alder Creek due to Jacob Donner’s broken wagon axel and injury, the other members of…
Disclosure: This post contains affiliate links. If you make a purchase through these links, I may earn a small commission at no additional cost to you. I only recommend products or services that I believe will add value to my readers.

About the Donner Party
If you haven’t read my post about the nearby Donner Camp Site at Alder Creek, I suggest doing so now. In it is a brief history lesson of the Donner Party and how they ended up in their predicament. It includes information leading up to Alder Creek, but not at Donner Lake.
When the Donner family and their teamsters became stranded at Alder Creek due to Jacob Donner’s broken wagon axel and injury, the other members of the party continued onward, believing the Donners’ would eventually catch up with them.
However, they would only make it another six to seven miles before they realized the mountain was impassable due to the arrival of early heavy snowfall. The party would then settle near Donner Lake, then known as Truckee Lake, within the confines of what is now Donner Memorial State Park.

The various families would huddle together in several make-shift cabins scattered throughout the forest. They would remain here throughout the winter and into spring. While some would eventually be rescued, others weren’t as fortunate and perished.
Due to lack of food and no way to hunt, many party members survived by consuming the corpses of their fallen comrades. This was mostly done to those who already perished, but there were reports of murder/cannibalism taking place as well (though none were substantiated).
By the time spring weather cleared the snow around Donner Lake, around forty members of the Donner Party perished (including the Donner family at Alder Creek), with forty-eight members (mostly consisting of women and children) were rescued and survived.
Getting There, Parking and Fees

Donner Memorial State Park is located just a few miles from historic Downtown Truckee and directly off of Interstate-80. Heading either direction on the freeway, take the Donner Pass Road exit and take the first exit out of the round-a-bout. You’ll then see the park on your left shortly thereafter.
There’s an abundance of parking at the park via a large paved lot near the visitor center and monument, as well as multiple smaller pull-out lots dotted along South Shore Drive near Donner Lake. The lots do fill quickly in the summer and on weekends, so arrive early.
Fees are $10 per car and include same-day access to the lake, trails, visitor center and monument. You can pay at the ranger booth near the entrance, the digital self-pay stations near the visitor center or in the visitor center itself. Just remember to place the receipt on your dash.
There are no electric vehicle charging stations in the park, proper. However, just a mile or so down the road, near the freeway exit you took, is a Taco Bell behind a Chevron station. There are a dozen or so Tesla Superchargers back there.
Things to do at Donner Memorial State Park

Visitor Center
Many are inclined to skip visitor centers at state and national parks, but I implore you to not do so here. It’s small, but packed with information and detailed exhibits summarizing the history of the area, not just the Donner Party incident.
In it, you’ll learn about the Chinese immigrant workers who built the transcontinental railroad through this area (including Donner Tunnels), local Native Americans and the effects pioneering had on them, early pioneers who literally built the California Trail and of course, the Donner Party.

Pioneer Monument
Fully completed in June of 1918, the Pioneer Monument is dedicated to not just the ill-fated Donner Party, but all early pioneers. Present at the dedication ceremony were Frances Donner-Wilder, Virginia Reed-Murphy and Martha Reed-Lewis, all former members of the Donner Party as young girls.
The monument, including its base and cobblestone pedestal, stands at twenty-two feet, representing the culminate amount of snowfall during the harsh winter of 1846/1847, which entrapped the Donner Party. Placed atop the pedestal, a bronze statue of a pioneering family increases its total height by 17.5 feet.


Just above the base, within the center bottom of the cobblestone pedestal, is a plaque with a quote encryption. It states, “Virile to risk and find, kindly withal and a ready help. Facing the brunt of fate, indomitable - unafraid”.
At the rear of the monument is another plaque, this one providing a brief summary of what led to the demise of the Donner Party, as well as general locations of their cabins. This includes the Graves, Murphy, and Breen cabins.

Schallenberger Cabin Site
Marked by a rock and plaque is the spot of the former cabin occupied by 18-year old Moses Schallenberger, along with two other men. In 1844, these men were part of the Stephens-Townsend-Murphy party, who were the first pioneers to take wagons over the Sierra Nevada, effectively building the Truckee route of the California Trail.
Moses and the two others agreed to stay behind and guard several wagons when a nasty storm-system barreled through (sound familiar?). Due to alienating health, Moses elected to stay behind while the other two fled, fearing he wouldn’t have been able to survive the trek over the summit.
Moses survived in his small cabin for three months during brutal winter conditions before he was finally rescued. Several years later, the same cabin which sheltered Moses would go on to do the same for the Breen family, members of the ill-fated Donner Party.
The spot can be found along the paved path leading towards the monument. Just before reaching the monument’s rock-encircled grounds is granite boulder with a bronze plaque placed within it on the right side of said path. It was around that spot where the cabin was located.

Nature Trail to Murphy Cabin Rock Site
Another thing to do at Donner Memorial State Park is to check out the site which housed the Murphy family cabin, who were also members of the Donner Party. The trail is an accessible, flat loop clocking in at just under a half-mile.
Along the way you’ll traverse through a beautiful, peaceful meadow. Donner Creek meanders its way through the meadow, providing the calming sounds of water flowing over rock. There are several wooden benches dotted along the trail where you can stop and take in the scenery.


The peaceful, serene environment isn’t the only thing of interest along this trail. It also takes you to the site of where the Murphy cabin once stood. The spot is just a short time into the trail and is marked by a giant, blackened boulder with - you’ve guessed it - another plaque.
The plaque lists the names of the entire Donner Party and categorizes who perished and survived. Keep in mind that while the Donner family members are listed on the plaque, none of them camped at Donner Lake. Rather, they were several miles away at Alder Creek.


The rock served as the northern wall and fireplace for the cabin. It should be noted that while it’s referred to as the Murphy cabin, it also provided shelter to the Pike, Foster, and Eddy families at various timeframes. It’s also believed to be one of the various sites of cannibalism, but it was never officially substantiated.
When General Stephen W. Kearny arrived and discovered all of the partially consumed corpses, he buried them in the center of the cabin and set it ablaze, not knowing what else to do. Meaning, the very trail you’re taking past this rock is the believed mass-burial site of several party members.

Additional Hiking Trails
Aside from the Nature Trail, there are numerous hiking trails in and near Donner Memorial State Park. Two notable options include China Cove Loop and Split Rock Loop. Split Rock cuts around and through a campground and features a literal split rock as its main attraction.
China Cove Loop begins near the visitor center and meanders its way through tall pines before taking you along the sparkling shores of Donner Lake and back to the visitor center. Both trails are just a few miles in length and lean towards the easier side.

Donner Lake
Your day-use fee also includes access to the south side of Donner Lake. You can hike to it via the China Cove Loop hiking trail or drive. There are numerous pull-out style lots dotted along South Shore Drive you can use.
Once there, you can set up somewhere along the shore or enjoy a beach day at China Cove Beach. There are paddle board (and other watercraft) rentals at the lake as well. It’s no Lake Tahoe, for sure, but Donner Lake is popular for its scenic views and recreational activities.
Other Things to do Nearby

There are numerous activities to do near Donner Memorial State Park. Just a short drive up the pass are the historic Donner Tunnels. Trains used to pass through these tunnels. Now, though, you can hike through them and get an incredible view of Donner Lake while you’re at it.
Just a few miles drive away is historic Downtown Truckee. There, you can walk the streets of this former mining town while checking out historic trains, enjoy lunch at one of the many restaurants, shop, and take a docent-led tour of the original Truckee jail.


Additionally, you can drive west on Interstate-80 for about thirty miles to Emerald Pools, an incredible swimming hole in California. I would plan to do this one early, as the parking lot is fairly small and fills quickly, particularly on the weekends in summer.
Finally, I’d be remiss if I didn’t again mention the Donner Camp Site at Alder Creek. There, you’ll find a short, easy-to-follow hiking trail through a gorgeous meadow filled with towering pines and tall grass. This was the site where the Donner family were trapped.
No visit to one would be complete without the other, as they’re both equally important to the Donner story as a whole. It’s less than seven miles away, so it’s an easy visit and great way to stretch your legs if you’re on a road trip. You can read more about Alder Creek here.

Explore the Donner Party Camp Site at Alder Creek Near Truckee
On April 15, 1846, the Reed and Donner families departed Springfield, Illinois, with the goal of starting a new life in California. Later, in Independence…
Disclosure: This post contains affiliate links. If you make a purchase through these links, I may earn a small commission at no additional cost to you. I only recommend products or services that I believe will add value to my readers.

A Brief Summery of the Donner Party
On April 15, 1846, the Reed and Donner families departed Springfield, Illinois, with the intent of starting a new life in California. Later, in Independence, Missouri, they would link up with several other families, expanding their wagon train to nearly eighty men, women and children. Collectively, they would become known as the Donner Party.
From point A, the Donner Party had roughly 123 days to travel 2,200 miles to California, with the goal of traversing the infamous Sierra Nevada Mountains in Truckee, now known as Donner Pass, by the end of October. If they didn’t, heavy snowfall would make that goal an impossible task.
Upon reaching Fort Bridger in modern-day Wyoming, the decision was made to take an untested route called “Hasting’s Cutoff”. The name refers to Lansford Hastings, the man who “discovered” the path. This deviation was a huge gamble from remaining on the heavily trafficked and proven Oregon and California Trails. Hastings described it as a “safe alternative” that would shave 400-miles off of the trip.

While it was true that Hasting’s Cutoff would shave off that many miles, what Hastings failed to mention was the route’s pure brutality. Instead of traversing through lush fields along a rut-worn path in Southern Idaho, this route cut through the unforgiving landscape of the Wasatch Range and the baron Great Salt Lake Desert, before entering Nevada near modern-day Elko.
What they saved in miles, they lost in time. Extreme heat, boulder-laden canyons, no grass for oxen, dry deserts, and other hazards cost the party not just time, but food rations, water, oxen and irreversible damage to their wagons. Long story short, Hasting’s Cutoff prove detrimental to the party in more ways than one.
On October 28, while crossing through Alder Creek near present-day Truckee, the front axel of George Donner’s wagon broke. While attempting to repair it, he badly cut and injured his hand. With a bad hand and broken wagon axel, both Donner families would set up camp at Alder Creek while the remainder of the party continued onward.
Donner Camp Historical Site at Alder Creek

Forgive the history lesson, but its inclusion was crucially germane to this post. Many are aware of the Donner Party and the circumstances surrounding their fate at what was then known as Truckee Lake, now Donner Lake, in present-day Donner Memorial State Park.
However, seemingly just as many are unaware that no member of the actual Donner family ever made it to Truckee (Donner) Lake, at least not right away. As mentioned above, the Donners suffered a broken wagon and severe injury at Alder Creek. As a result, they stayed behind.
The rest of the families in the party (Reeds, Breens, Graves, Murphys, and others) continued for another six miles, believing the Donners would eventually catch up. They would ultimately settle near the lake in what is now the state park site, after finding the pass buried in snow, blocking their path.
Getting There, Parking, and Fees

The Donner Camp Site is completely separate from Donner Memorial State Park at about an 6.5 mile distance. From the state park, travel eastbound on I-80 for a few miles. Take the CA-89 exit and turn left, then pass through three round-a-bouts. You’ll come to the camp site on your right.
Parking is free and expansive with a large, paved parking lot. At the northern end of the lot are restrooms (vault style), along with several picnic tables scattered about. I have to say, whoever designated this site a picnic ground has quite the morbid sense of humor.
Donner Camp Trail - Interpretive Loop
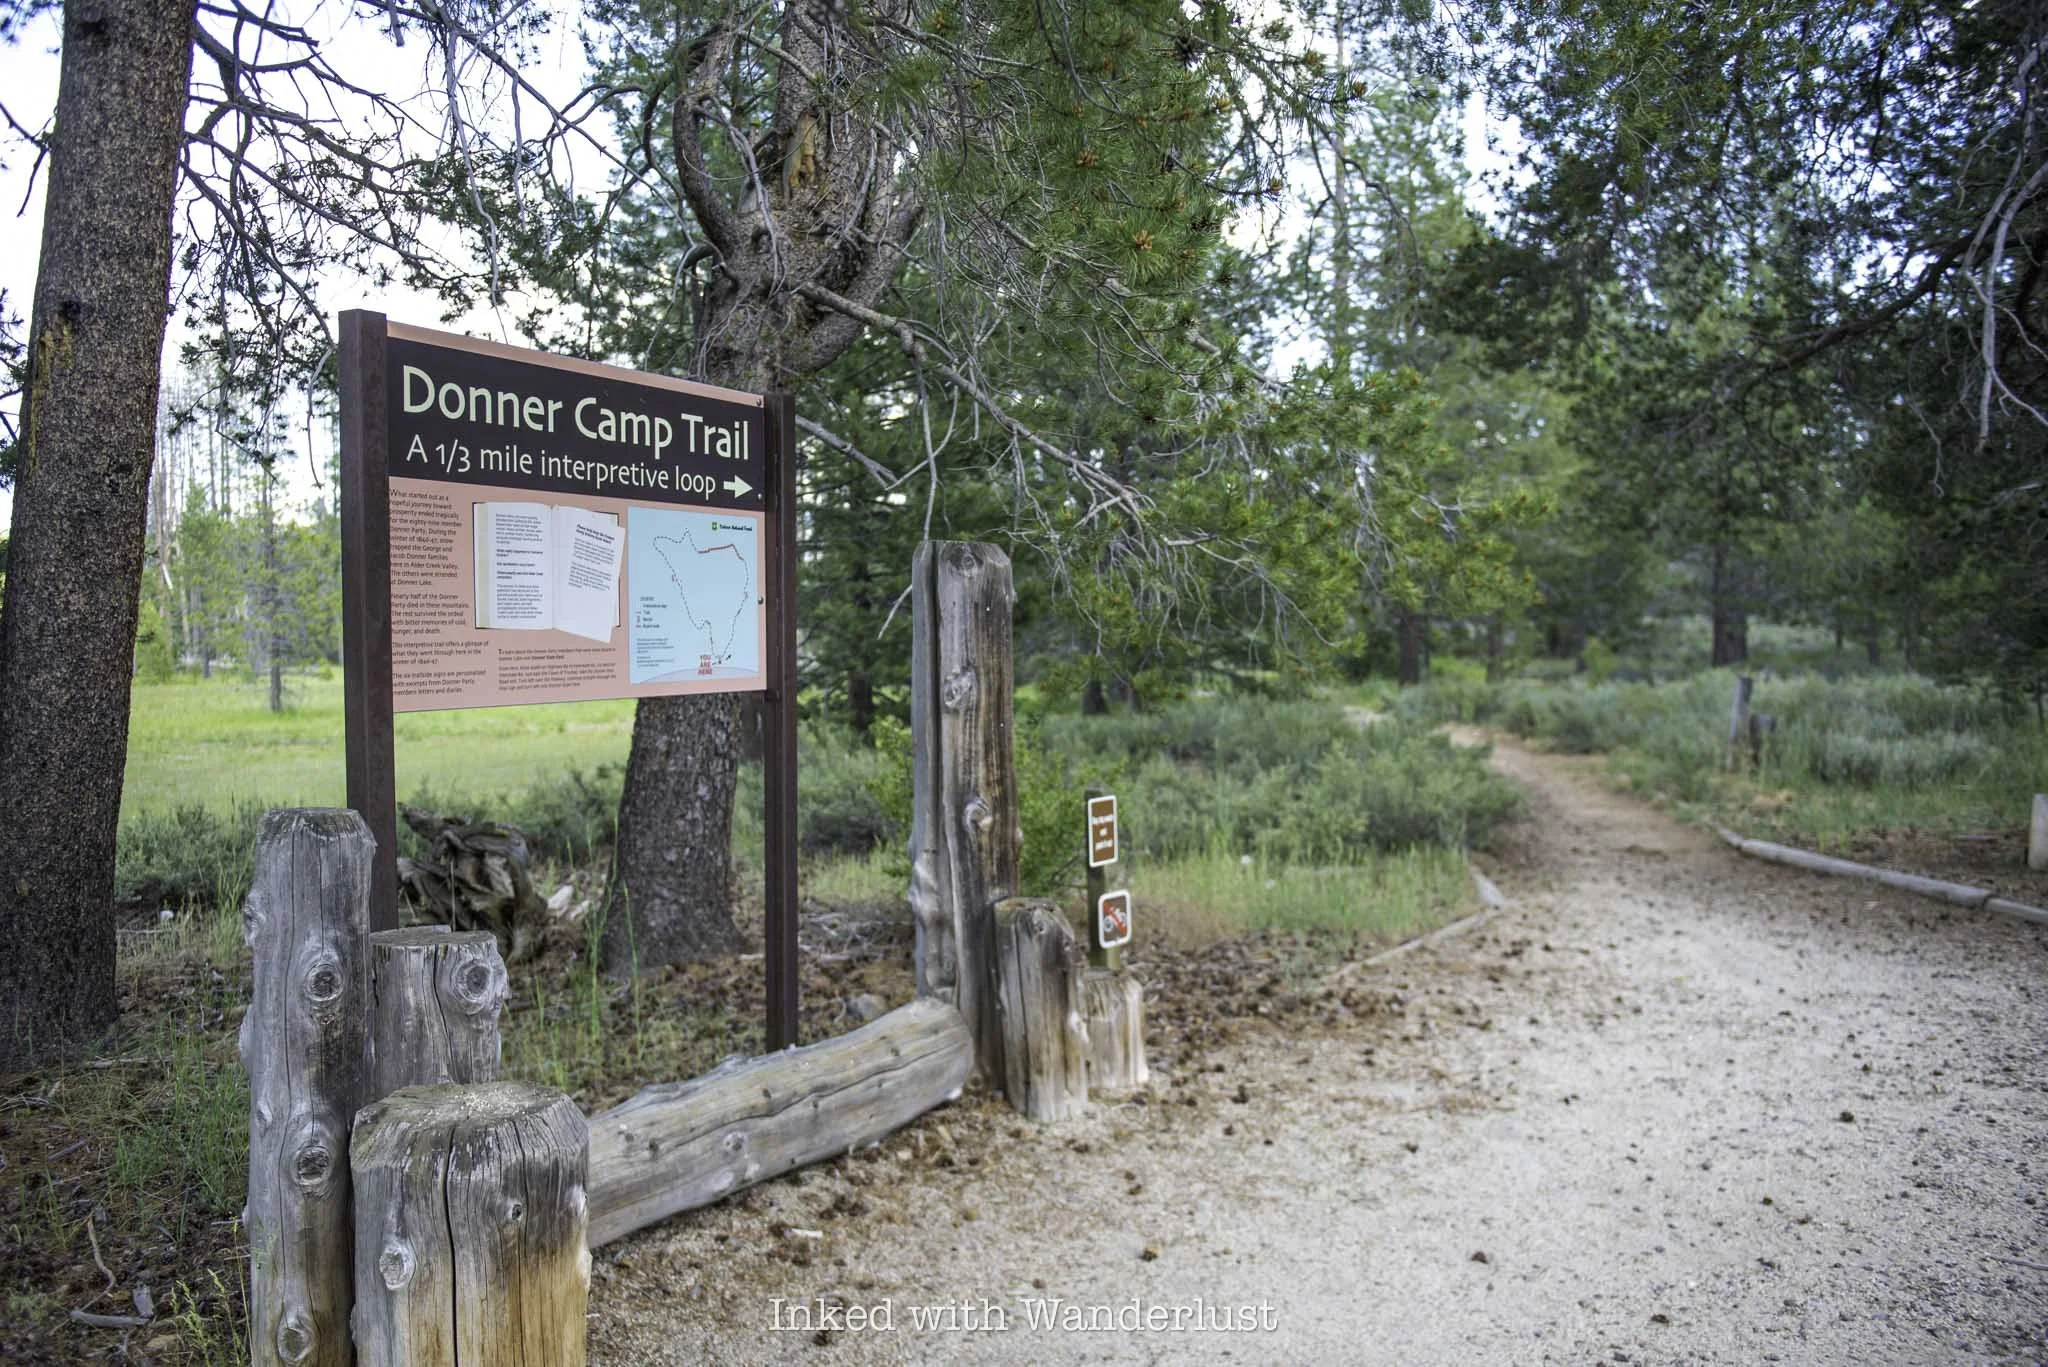
The Donner Camp trail is a well maintained, nearly completely flat loop that encircles the meadow the Donner family fought to survive in during the brutal winter of 1846/1847. It begins at the trailhead, which can be found at the southern end of the parking lot (you can’t miss it).
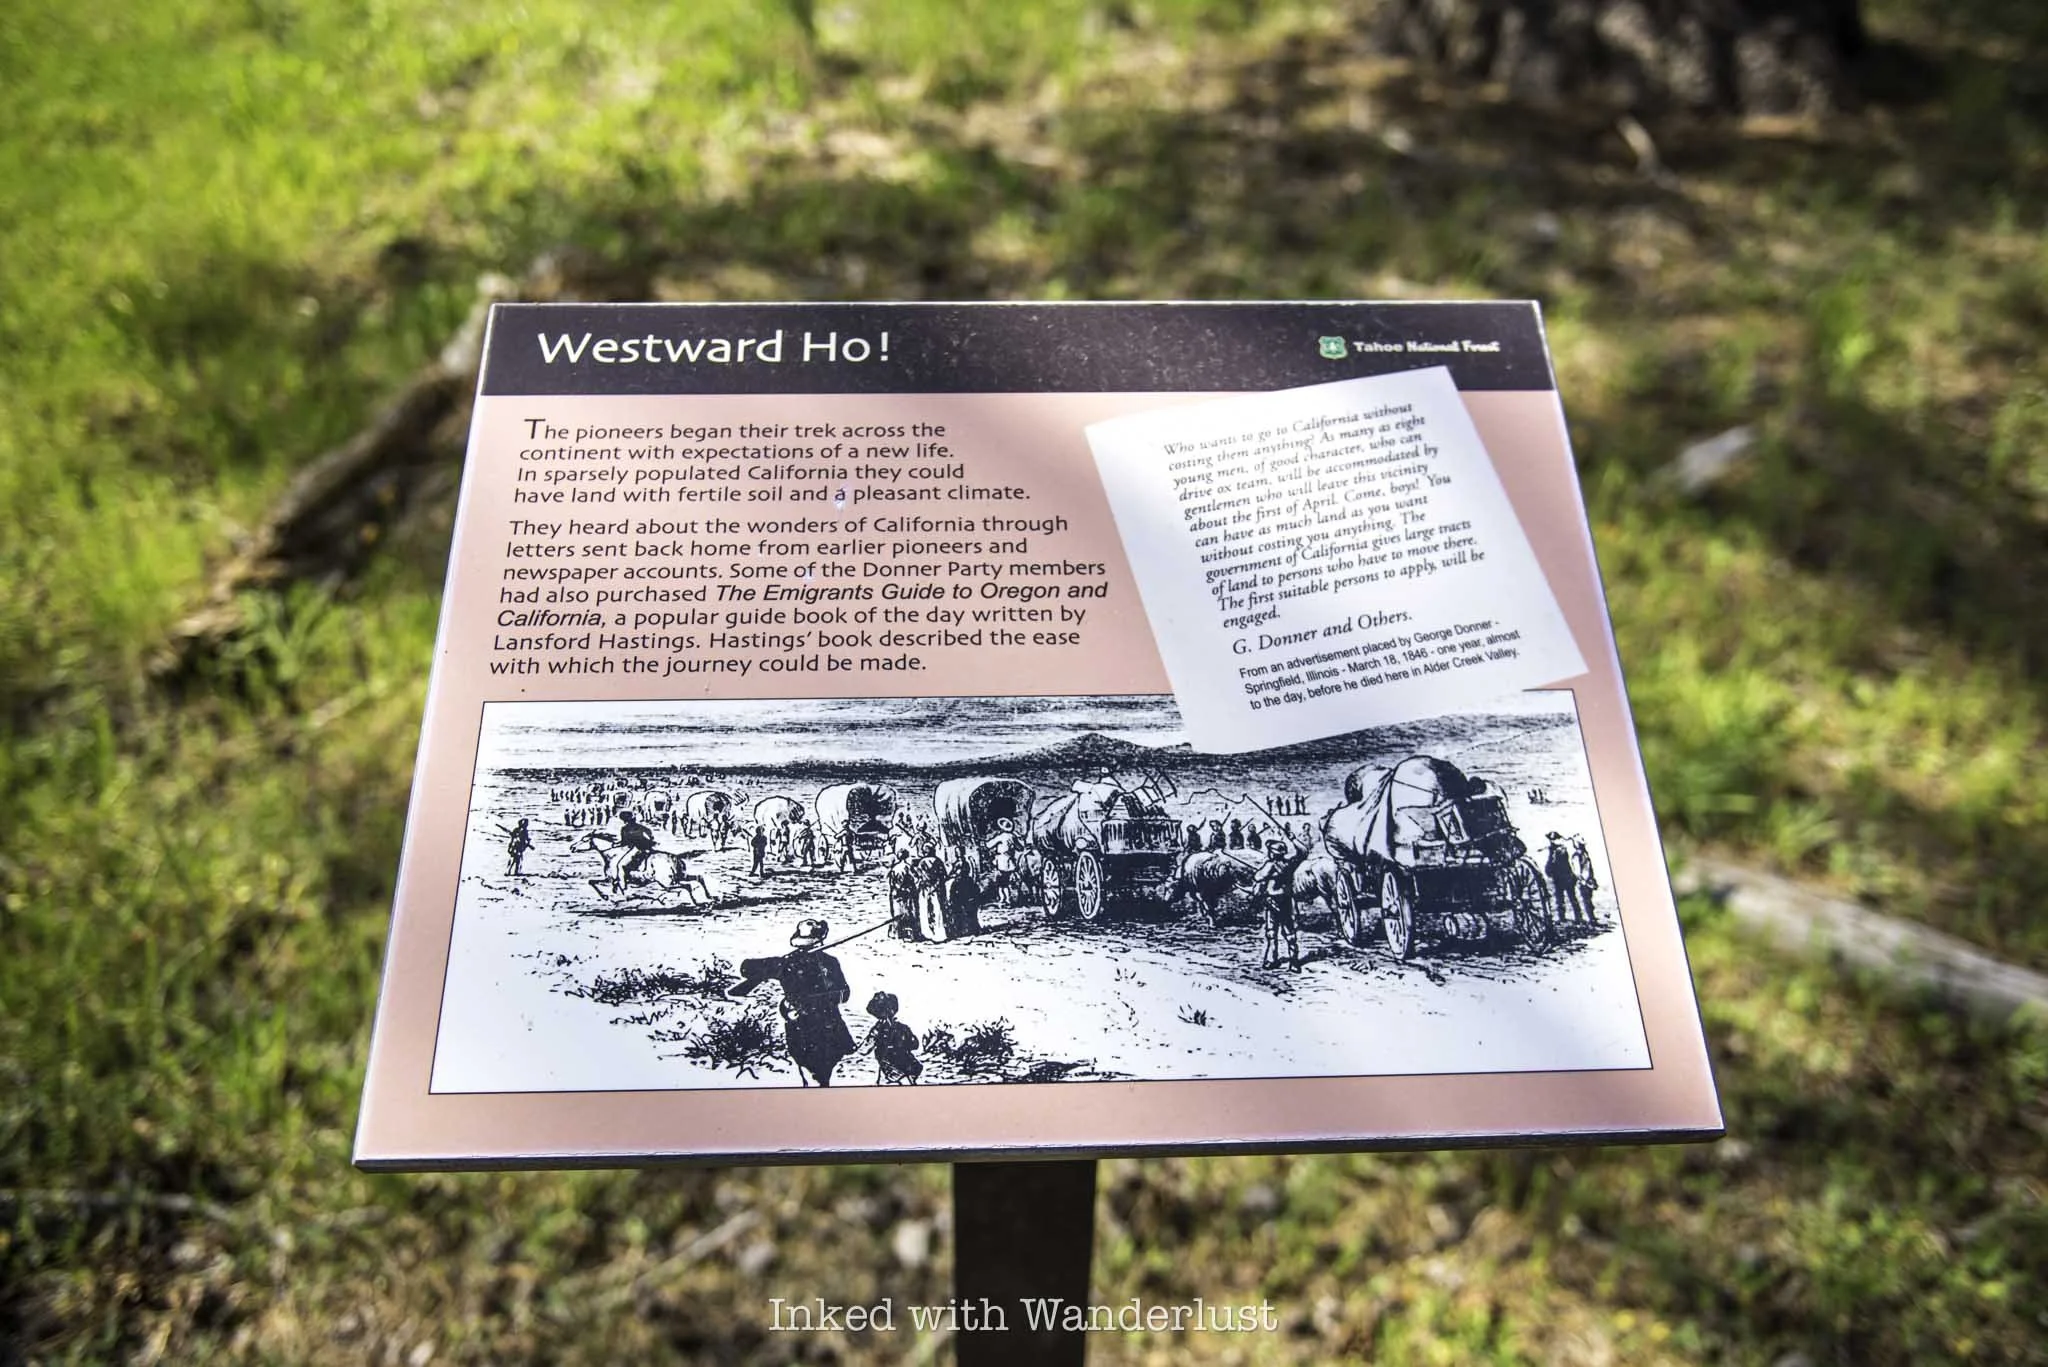
You can go in either direction but for the story to make sense, it’s best to begin by going right at the trailhead. Dotted along the compact dirt trail are interpretive signs, detailing the history of the Donner Party, as well as their journey and hardships.
The trail is as close to completely flat as it gets, making it an easy outing for families traveling along the freeway. I wouldn’t necessarily designate it stroller-friendly, but you could probably get away with it.
There are also many benches along the loop to rest and take in the scenery. It’s truly a stunning meadow, with towering pines and tall grass lining the trail. Alder Creek, the area’s namesake, gently meanders through the meadow. It’s hard to imagine the suffering that happened in such a beautiful place.

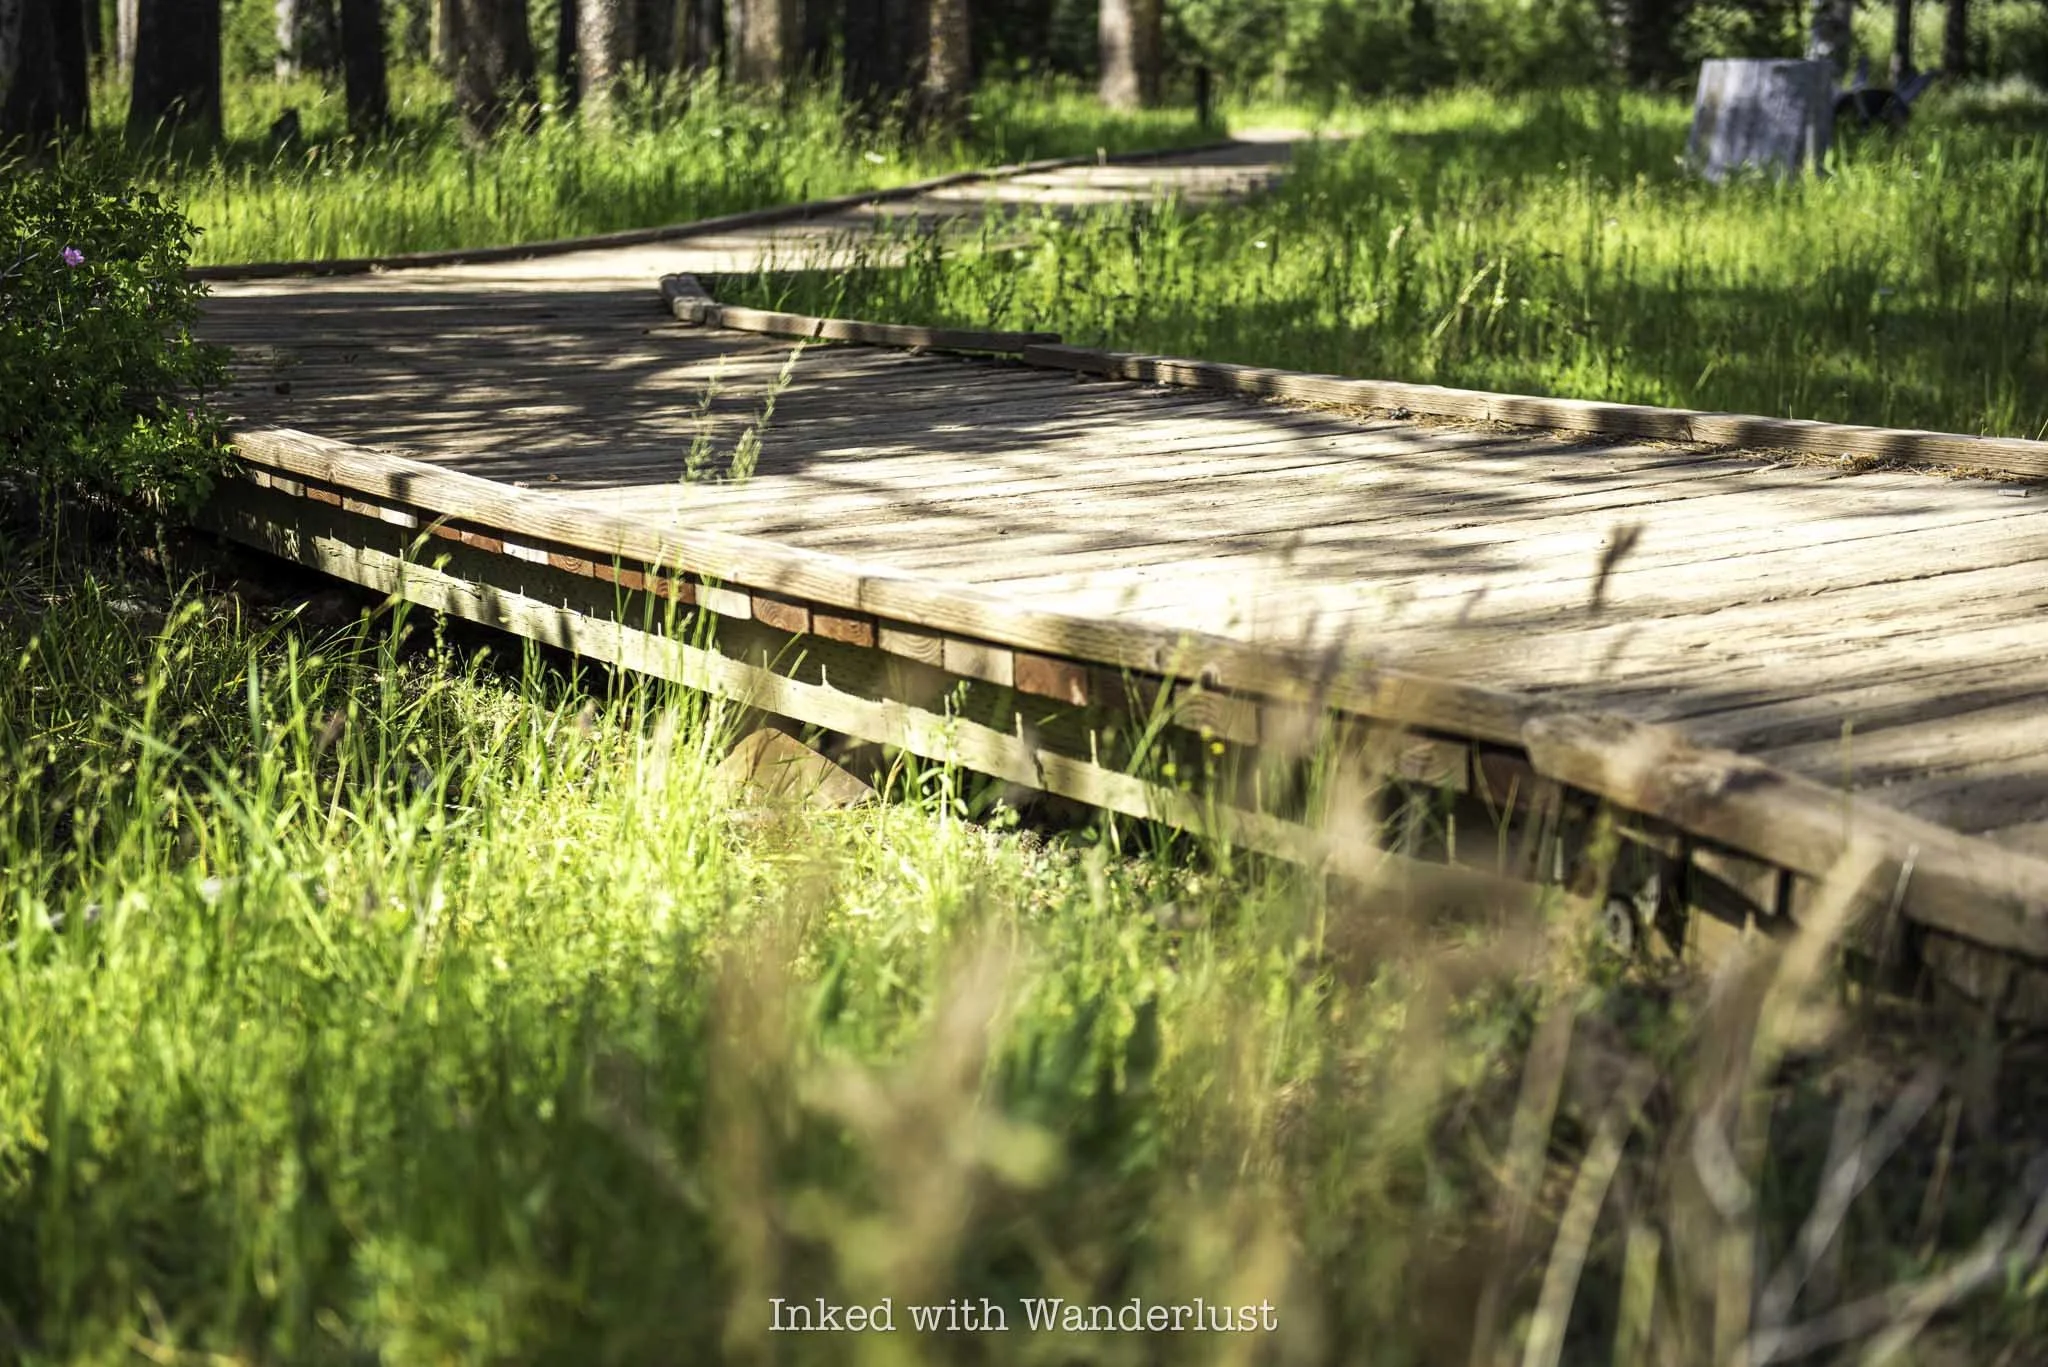
Near the halfway point of the loop, the trail goes from compact dirt to a wooden boardwalk. This section of trail traverses over a growing marsh, along with parts of Alder Creek, and the boardwalk is meant to help protect them. So be sure to stay on it.
As the loop turns back to dirt, you’ll soon come to a medium-sized rock with a plaque display, adjacent to a tall, almost featureless tree. That rock marks the spot where Jacob Donner and his family set up camp. The camp site of George Donner is marked a bit further down the trail.


As previously stated, the winter of 1846/47 was a brutal one. As the Donners watched the snow fall and it became clear that escape wouldn’t be an option, survival mode kicked in. Tall trees that once made up this area were cut down and reduced to stumps.
They’re scattered all over the meadow and are cut as high as twelve feet, indicating how oppressively tall the snowpack had gotten. Food was difficult to come by, resulting in the Donners having to boil hides and consume the gluey mass. Crushed animal bones were also boiled into a broth.

By the end of 1846, as dry wood and food became more scarce by the day, Jacob Donner, along with three teamsters, would be dead. After being unable to join the rescue party out of the mountains due to illness, George Donner would pass in his camp in March 1847. His wife, Tamsen, would pass shortly thereafter.
All told, by the time more rescuers reached the Donners at Alder Creek in 1847, seven members of the family had perished (half of them), along with several teamsters. Seven others survived, with George Donner Jr. being the sole male survivor of the family.

From the camp site, you can opt to take the spur trail leading to Prosser Reservoir. To continue on the loop, proper, continue left at the camp site, with the rock and tree to your back. The trail begins to loop back towards the parking lot, with one or two additional interpretive signs to read along the way.
Once you get back to the parking lot, you’re done. There’s another trail near the Donner Camp trailhead you can explore. I didn’t as I was short on time. If you have bikes with you, I saw several folks with bikes gearing up near the northern end of the parking lot. Perhaps there’s another trail over there.
For someone who’s been fascinated with the Donner Party and their story for so long, it was humbling and moving to stand in the spot where they camped and explore the meadow where they spent that infamously horrific winter.
Did The Donners Resort to Cannibalism at Alder Creek?

Surely, you’ve heard of the disturbing end of the Donner Party’s story in the mountains, with many reportedly resorting to cannibalism in order to survive. Reports indicate this was done to those who were already deceased, but there were several accusations of murder/cannibalism as well.
There’s much debate as to if it actually happened, but we do have journal entries and first-hand testimonials from survivors, seemingly confirming that it did occur at lake camp involving the other party members. Did the Donners take part in it as well, though?
There are conflicting reports. James Reed was said to have found George Donner’s body at the Alder Creek camp with his stomach split open and insides missing. While it could have been cannibalism, it’s also consistent with how bears consume their prey. In the mid-1800’s, grizzly bears were present in the sierras.
Additionally, it’s been said that Lewis Keseberg, another member of the ill-fated group, admitted to cannibalizing Tamsen Donner upon her death. It was said that Tamsen eventually made her way to lake camp after George’s death, where she ultimately died and was reportedly consumed. This isn’t confirmed, though, as her body was never found.
The official stance from park rangers at Donner Memorial State Park is - “perhaps it happened”. Or at least that’s how their answer to the question comes across. With multiple mutilated bodies discovered at both sites and several statements from survivors who witnessed and took part in the act, yes, I do believe it happened.
Donner Memorial State Park

West of the Donner Camp Site is Donner Memorial State Park. The Donners may not have made it to this point, but the park memorializes them and the other members of the party as well. There’s a visitor center with many fantastic exhibits and the Pioneer Monument.
The monument is a dedication to the Donner Party, specifically those who perished. It’s twenty-two feet tall, representing the twenty-two feet of snow that entrapped the Donner Party in the winter of 1846/1847.
The state park also marks the various sites where the party built their makeshift cabins. Along one trail is a giant boulder that served as the north wall and fireplace for the Murphy family cabin. On the rock face is a plaque, listing the entire Donner Party and categorizes those who survived and who perished.
No visit to either sites would be complete without the other, as both are historically significant and important to the Donner story as a whole. You can read more about the events that occurred at Donner Memorial State Park. Additionally, learn about the historic Donner Tunnels and how you can hike through them!


The Getaway Cafe: An Excellent Breakfast Option Near South Lake Tahoe
Located about 18 minutes (drive) from the Heavenly Village area of South Lake Tahoe, in the tiny community of Meyers, sits…
Disclaimer: I am not a professional restaurant critic and I paid for my meal out of pocket. This restaurant hasn’t offered me any incentive to write this post. My opinions are my own and are based on my personal experience only.

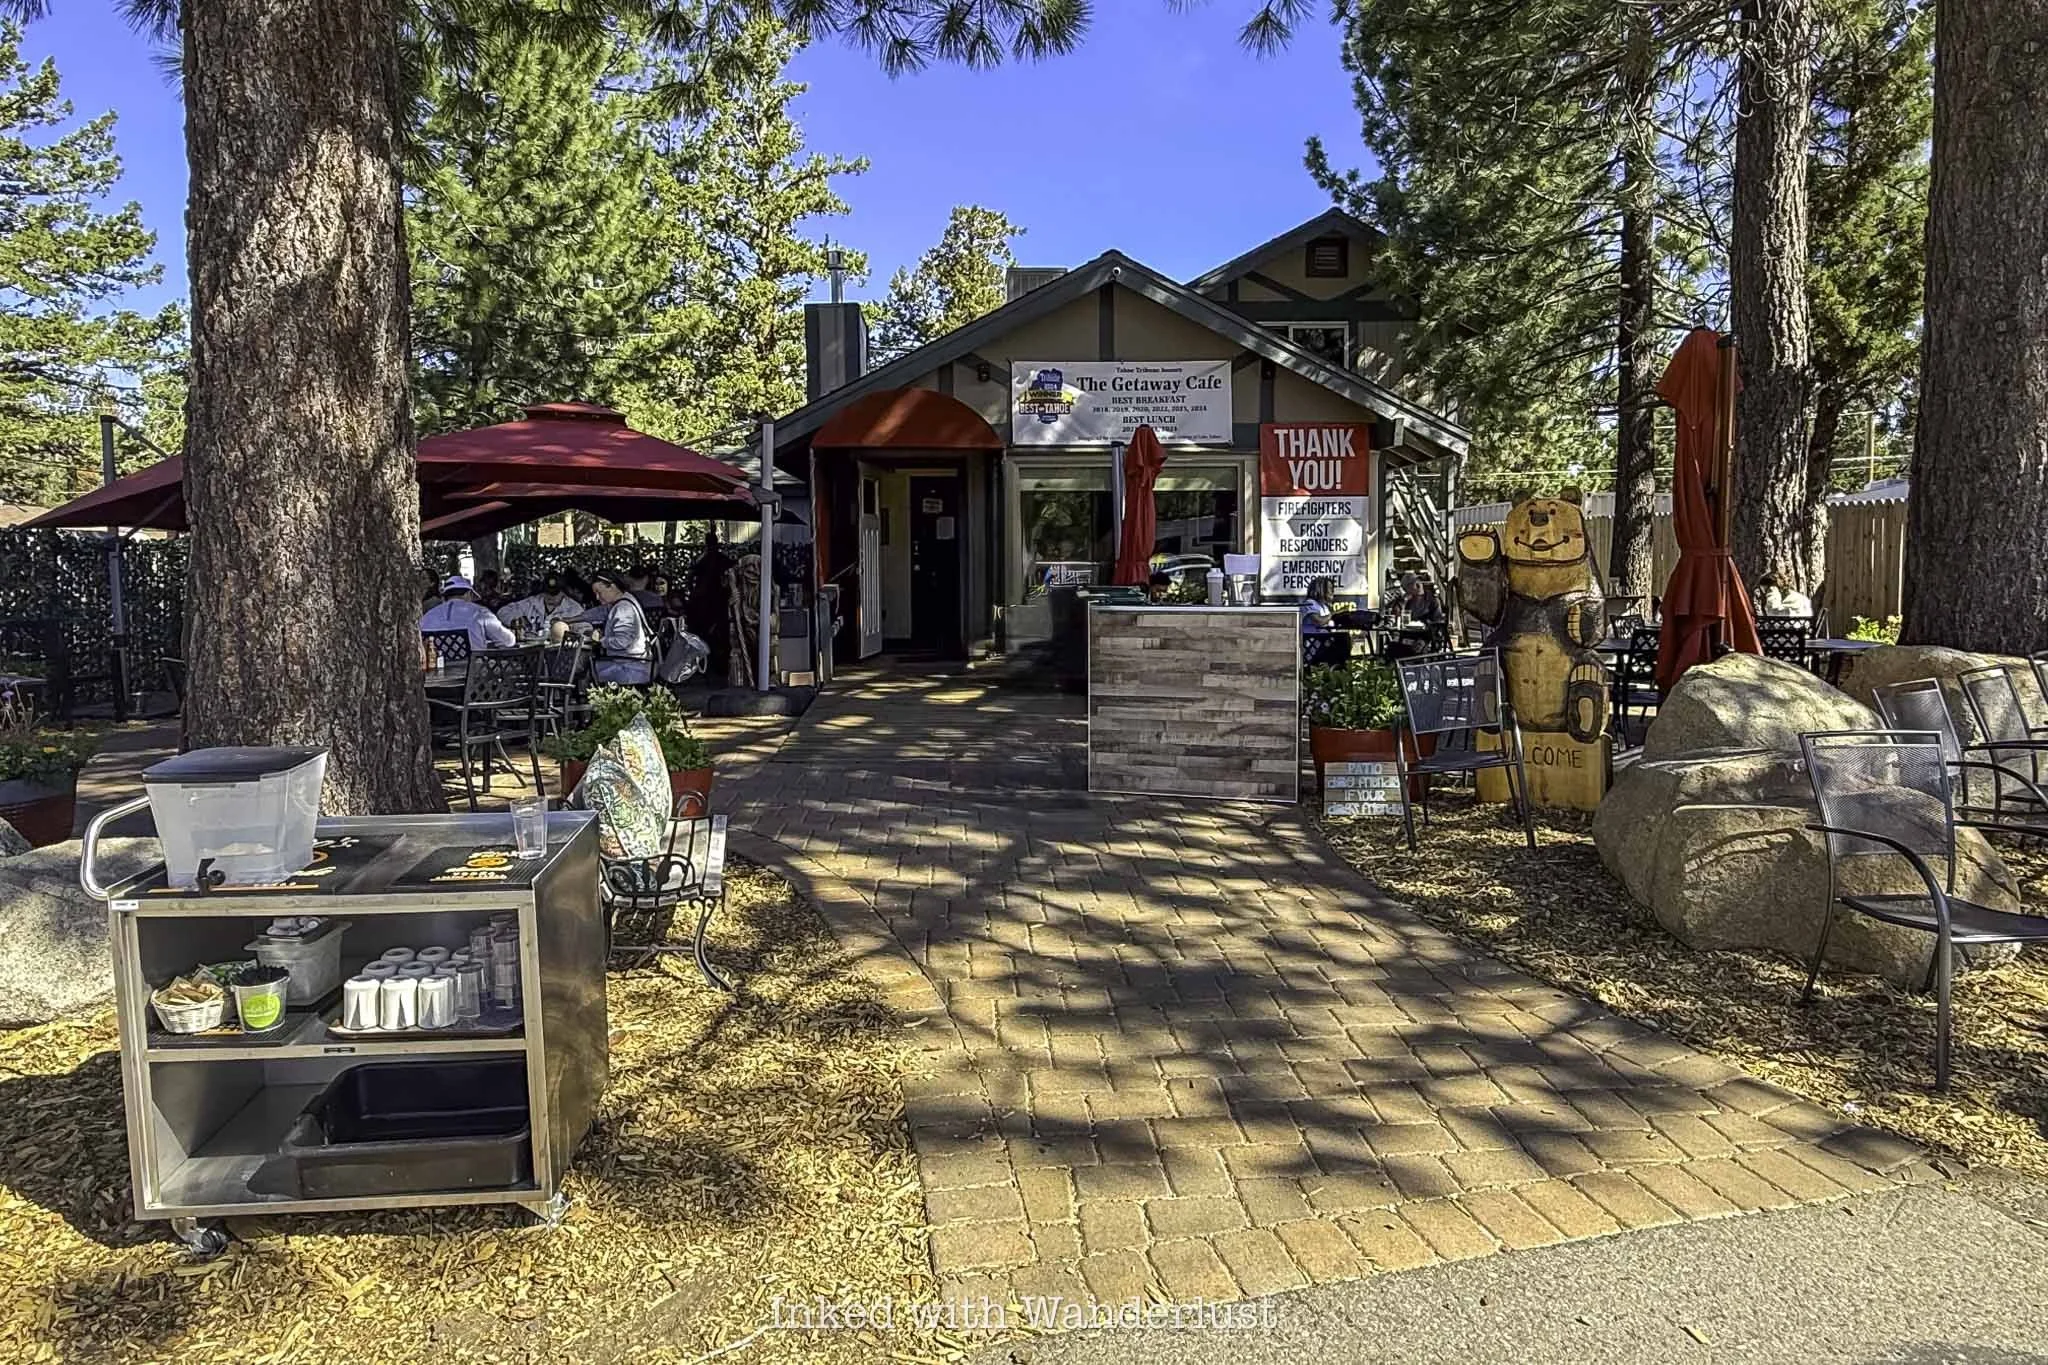
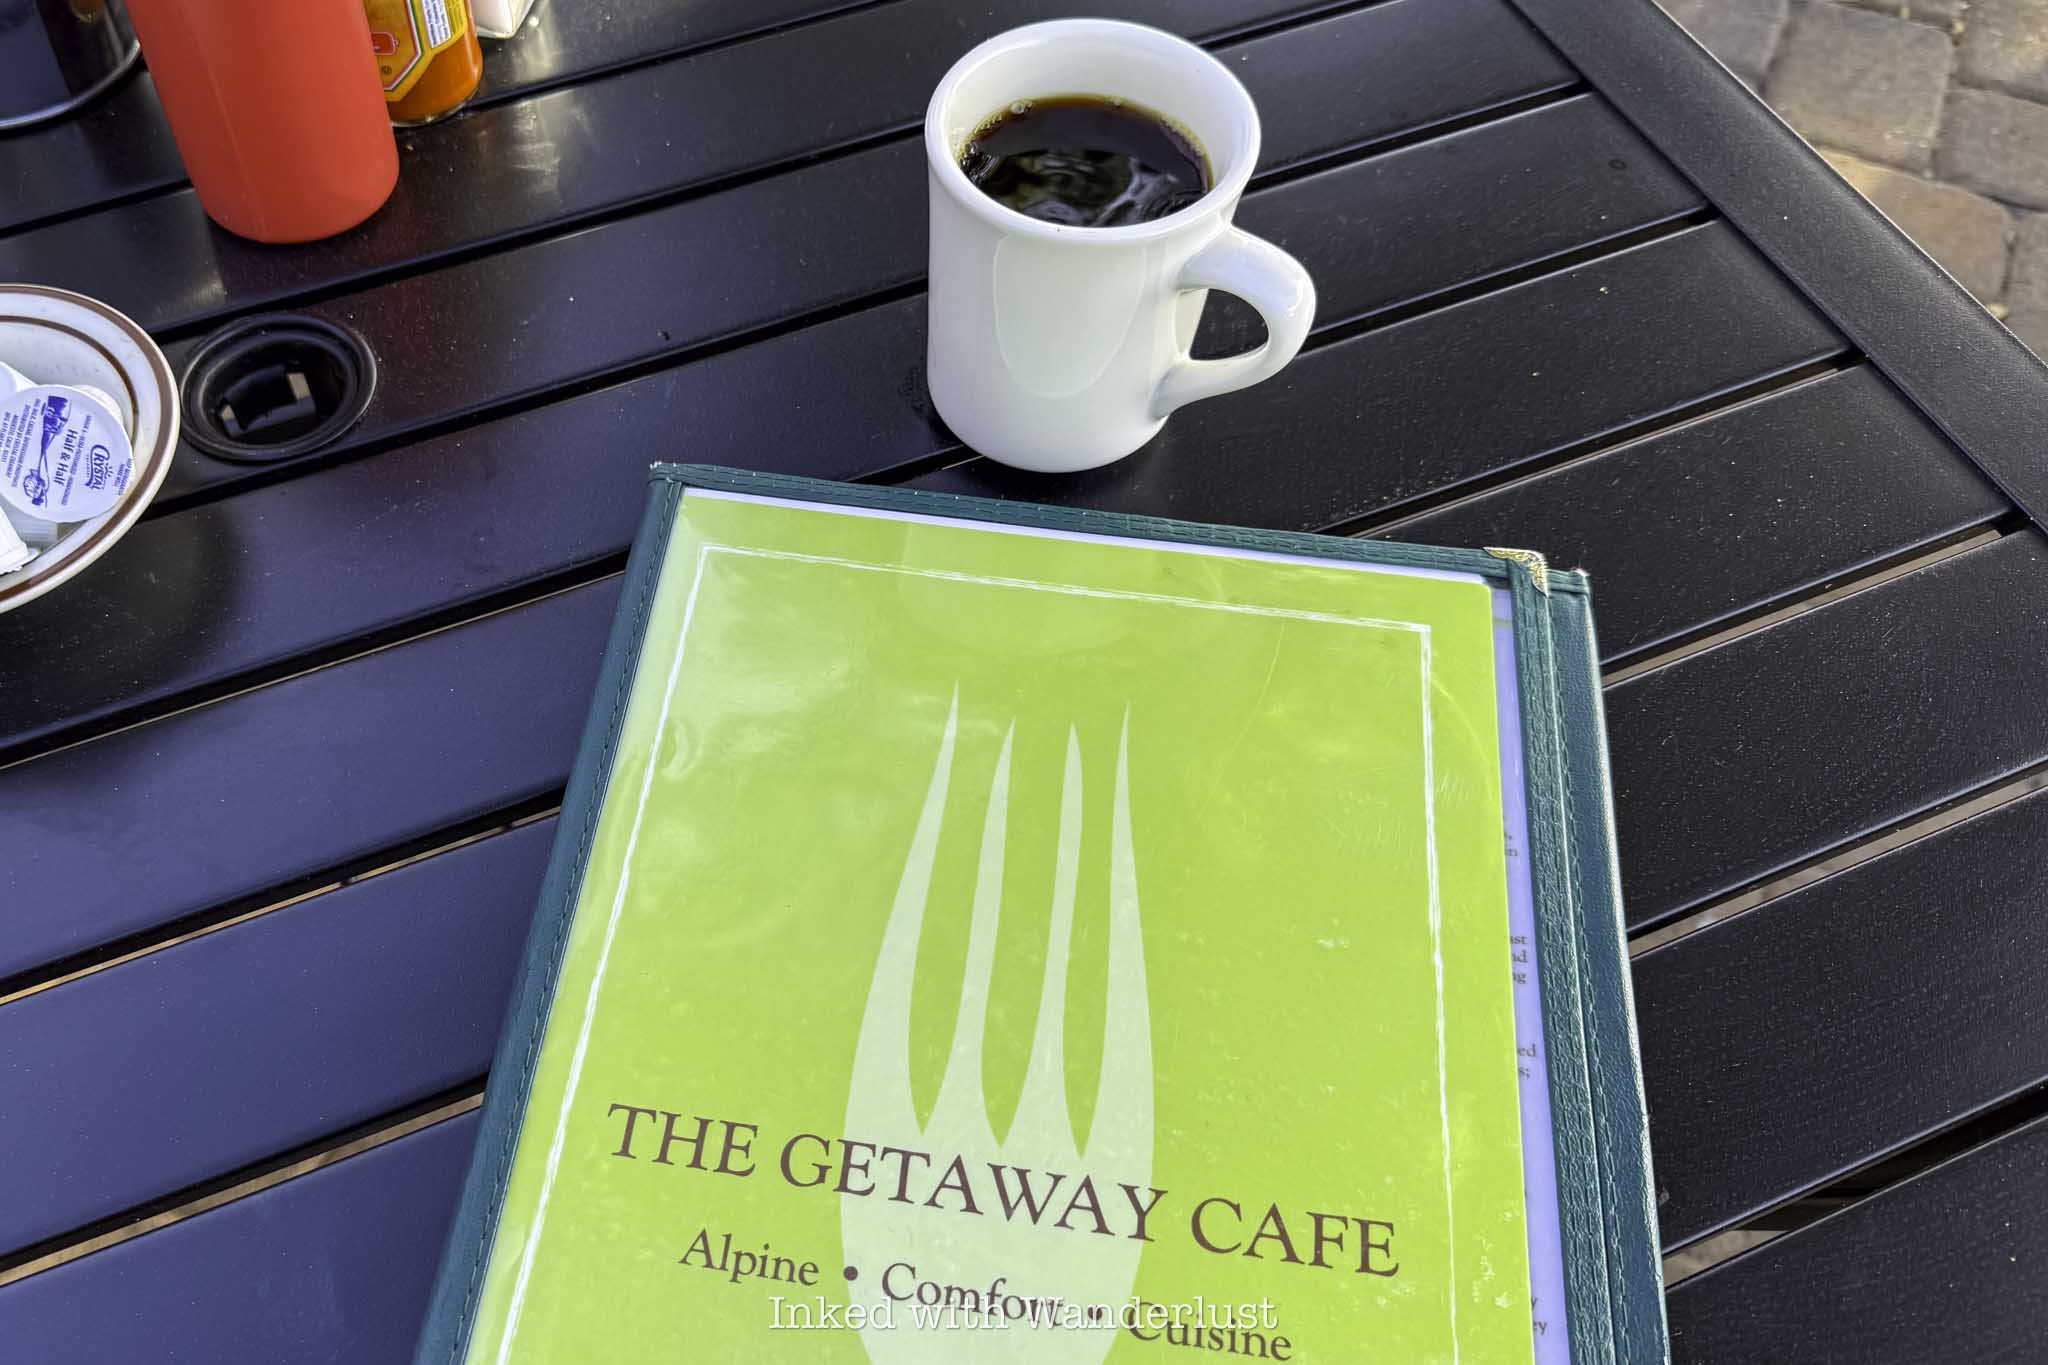
Located about 18 minutes (drive) from the Heavenly Village area of South Lake Tahoe, in the tiny community of Meyers, sits the charming Getaway Cafe. Getaway Cafe offers an array of breakfast and lunch classics, always made fresh to order.
Restauranteur Diane Guth states on the website that she’s “always dreamed of owning a restaurant where my friends and family would feel at home and where strangers would soon become friends”. Based on my experience, she surely made that dream a reality.
I love dining at Getaway Cafe. Each time I go I’m treated to delicious food, along with fantastic and attentive service. Sure, it’s a bit out of the way from South Lake proper, but it’s worth the small effort to get there. Let’s get into it!
Getaway Cafe Location
Despite popular belief, Getaway Cafe isn’t located in South Lake Tahoe proper. It’s located nearby in the tiny El Dorado County community of Meyers. Despite this, it’s an easy, relatively quick drive from South Lake. Below is its distance from more popular areas of Lake Tahoe proper:
Heavenly Village: 9 miles
Stateline: 10 miles
Emerald Bay: 11 miles
Tahoe East Shore: 32 miles
North Lake area: 32 miles*
You may be inclined to skip it due to its distance from the lake but I implore you to reconsider. There’s only one or two turns, as it’s mostly a straight shot (depending where you’re driving from).

Parking is usually easy to come by in the large dirt/gravel lot out front. It does get busier throughout the day, so be prepared to have to park elsewhere nearby and walk over (this isn’t a common occurrence, though).
Seating is both indoor and outdoor (mostly covered). The inside is small, so I recommend opting for a seat outside if given the choice. There, you’ll be dining under shade provided from a combination of umbrellas and towering pines.
The Getaway Cafe Menu Items I Tried
Getaway Cafe’s menu consists of common American and Mexican fare, some with a creative twist and at affordable/fair prices. The “Best of the Best” section of their menu lists many of the house favorites.
A few of these include Maple Bacon Glazed French Toast (amazing, by the way), Chorizo Quesadilla, Deluxe Eggs Benedict, and Banana Nut Pancakes dishes. For lunch, you’ll find an array of burgers, wraps, and salad offerings.
On our most recent visit, my wife and I ordered from the regular menu. Additionally, we split a plate of their current special, which was a lemon-blueberry french toast dish. Yes, it was as delicious as it sounds and looks.

It was a serving of their signature french toast bread topped with lemon slices, blueberry compote, a lemon-blueberry meringue (for transparency, I’m not 100% sure that it’s a meringue), and finished with a dusting of powdered sugar.
It was possibly the most delicious french toast I’ve ever had. The lemon and blueberry flavors were balanced perfectly, and the nutty richness from the sourdough toast was a nice contrast to the sweetness of the blueberry.

From the regular menu, my wife ordered the classic eggs benedict dish and I selected an egg omelet with pepper-jack cheese. Both dishes came with a side of hashbrowns (there are other options) and mine came with slices of sourdough.
While simple in terms of presentation, the hashbrowns here are my favorite of any restaurant. There isn’t anything inherently special about them, but the chefs at Getaway always seem to get the exterior perfectly crisp, which is where others often fail.
The eggs benedict was rich, creamy, and had a nice balance of soft texture and savory flavor. My omelet was…an omelet. I ordered it mainly for the protein as the real star of the meal was that decadent french toast.


All told, The Getaway Cafe is an excellent option for breakfast or lunch while in South Lake Tahoe. Sure, there are a few other, much closer options, such as Red Hut Cafe and Driftwood Cafe, that are also great.
However, Getaway Cafe is the clear stand-out for my wife and I. The owner and staff, with their friendliness and attentive service, is what sets it apart from the others. I highly recommend paying them a visit.
If you’re planning to visit Lake Tahoe, I have blog post guides about many of the most popular destinations. Be sure to read about Emerald Bay, the Tahoe East Shore Trail, and Glen Alpine Falls.
If you’re wanting to spend a day at the beach, read about Sand Harbor’s reservation requirements here, or consider spending the day at Round Hill Pines Beach Resort. You can’t go wrong with either one.
LUKE 4:10

Hike Through the Historic Donner Summit Tunnels
When searching for the most unique and best hikes in Northern California, many will point to areas like South Lake Tahoe, Yosemite National...
Disclosure: This post contains affiliate links. If you make a purchase through these links, I may earn a small commission at no additional cost to you. I only recommend products or services that I believe will add value to my readers.

When searching for the most unique and best hikes in Northern California, many will point to areas like South Lake Tahoe, Yosemite National Park, and famed Mono County, and for good reason. Those areas have some of the most beautiful hiking trails in the state.
Just a bit outside of Lake Tahoe proper, near the historic gold mining town of Truckee, is one of the most unique hikes you’ll come across anywhere - the Donner Summit Tunnels.
The tunnels were built in 1867 to accommodate the first train passage through the Sierra Nevada Range. Built primarily by Chinese laborers, nothing but hand drilling methods and explosives were used to carve through the granite-based Mount Judah.
The tunnels saw the first train traffic shortly after completion in 1868, and were used as recently as 1993, when they were then decommissioned. Today, the property is still owned by Union Pacific, who have been kind enough to allow people to freely explore the tunnels.
So how do you get to the Donner Summit Tunnels? What’s the parking situation like? What can you expect on this hike? I answer all of these questions and more below. Let’s get into it.
Trail Stats
Location: Donner Summit in Norden, CA
Fee: None
Open: Mostly in Spring, Summer, and Fall. Difficult to impossible to access in Winter.
For: Everyone
Cell Service: Spotty
Restroom: None
Parking: Large dirt lot at the trailhead. There are also pull-outs on the side of the road, but you’ll be backtracking on the hike
EV Stations: None
Difficulty: Easy
Popularity: Moderate
Mileage: About 5-miles, out and back
Elevation Gain: Just shy of 400 feet. The trail is mostly flat
Condition: Not maintained, but completely doable
Features: Historic trail tunnels, China Wall, petroglyphs and vast views.
Pets: Allowed on leash
Drones: No signs prohibiting it, but I saw a few people flying theirs
Hazards: Uneven ground, loose gravel, low visibility, steep drop offs, and potential wildlife encounters.
My Visit(s): July 2024

Recommended Products for this Hike
Camera Tripod (you’ll need it for the low-light situations)
Citronella Spray (a Deet-free way to keep the bugs off of you)
DJI Drone (for even better photos/video of the area)
How to Get to Donner Tunnels
Most people access the Donner Tunnels from Interstate-80, as it’s easy and straight forward. If you’re coming from the direction of Reno or Truckee (westbound), take the Donner Lake Road exit. When you get to the bottom, turn right on Donner Pass Road to head up the pass.
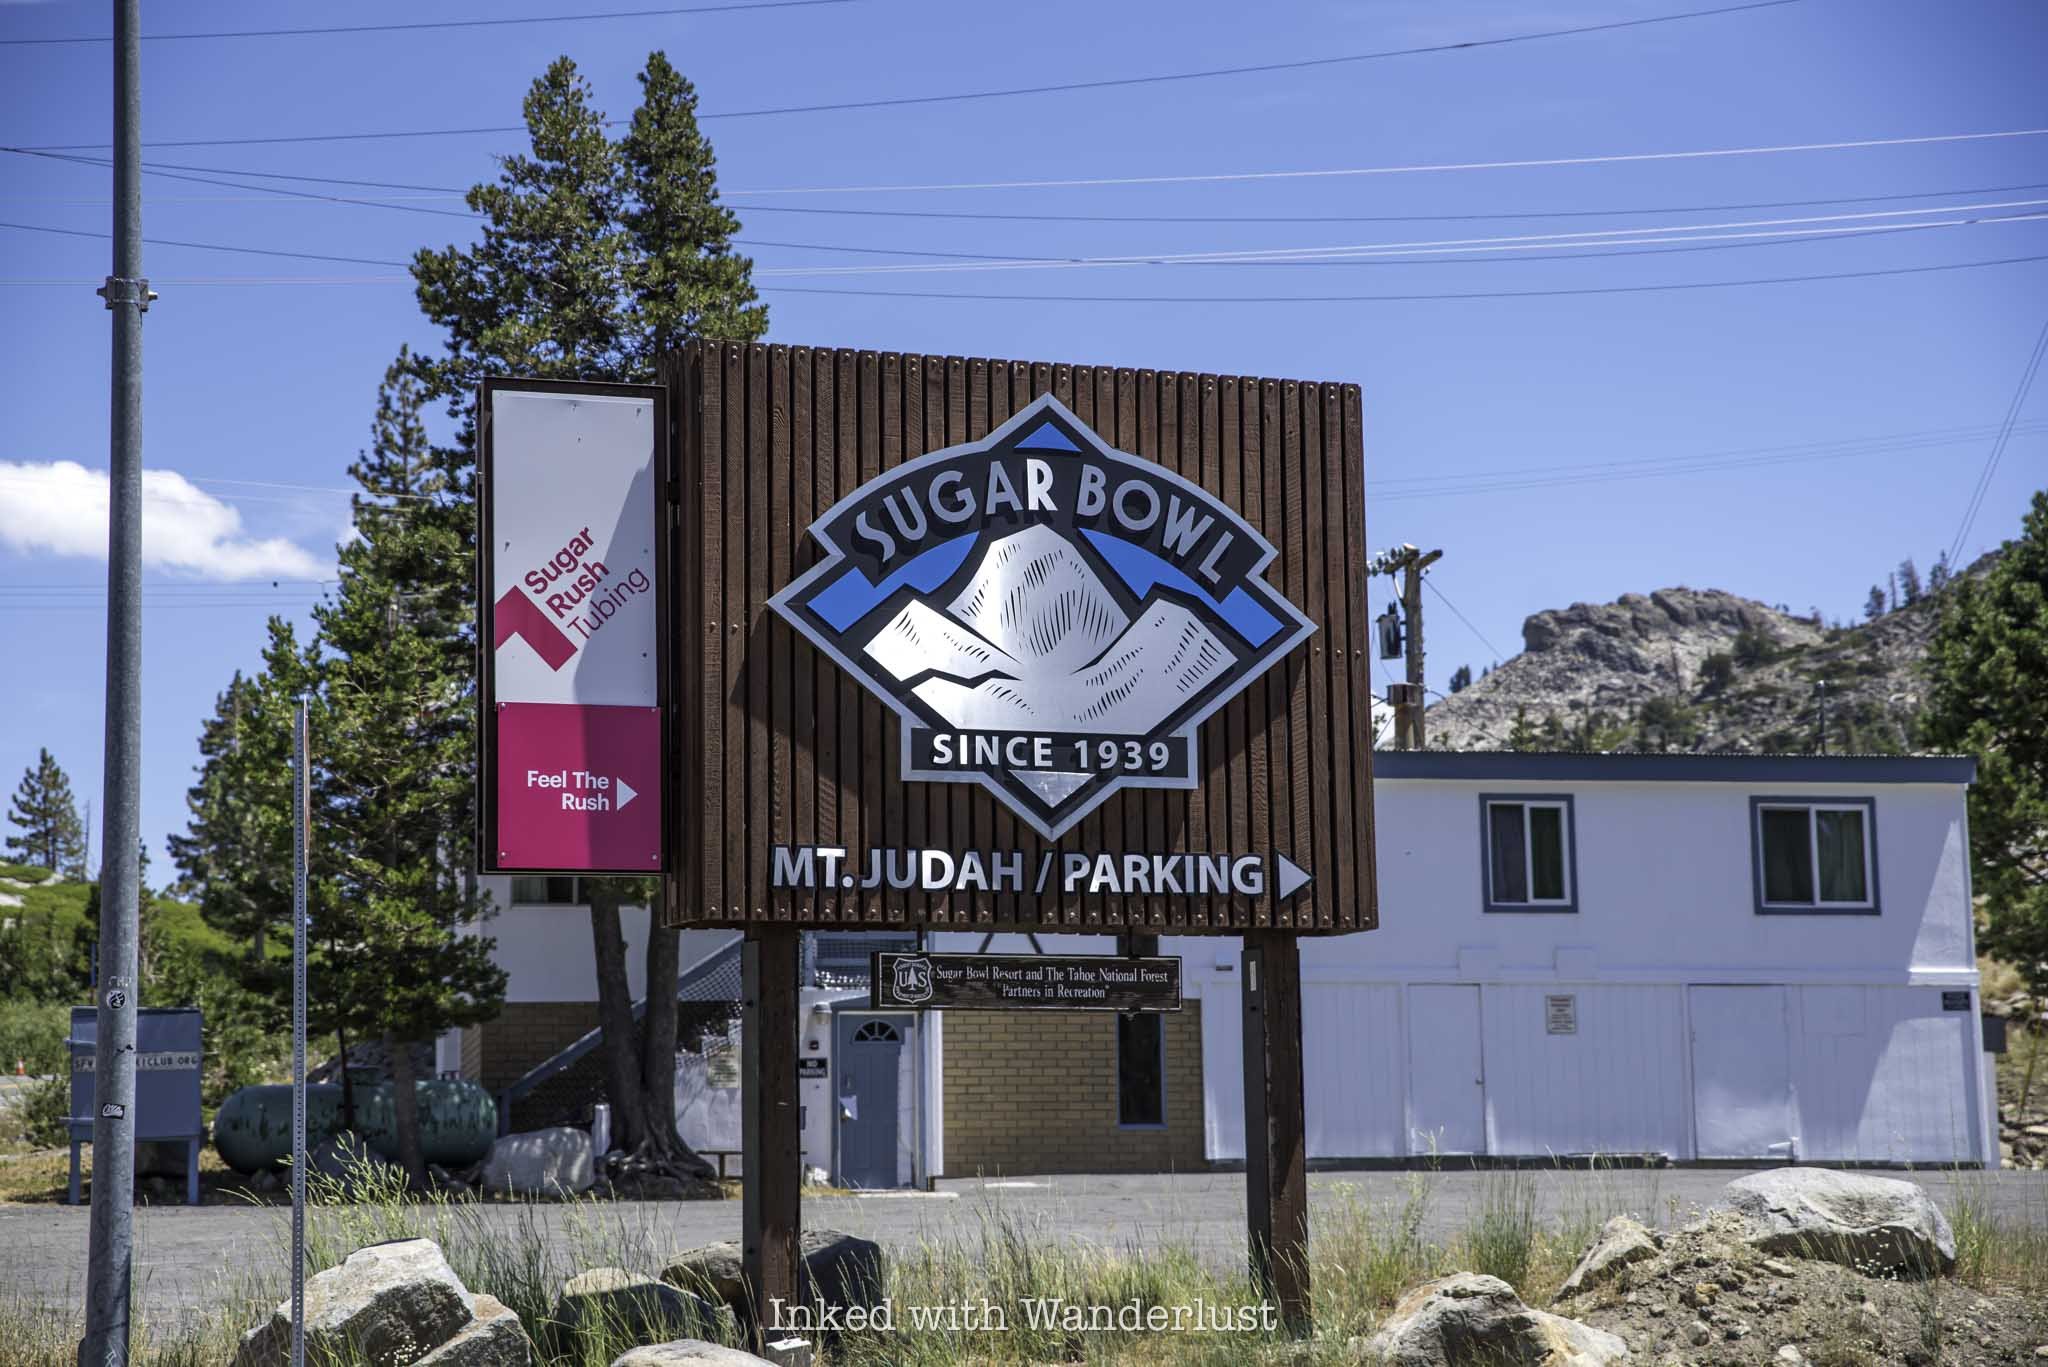
Less than a mile after crossing the Donner Summit Bridge, look for the sign in the photo above (Sugar Bowl Road). You’ll turn left here. Shortly thereafter, look for an unmarked dirt road on your right. This will take you to the parking lot.
Coming from Sacramento (eastbound), you’ll take the Donner Pass Road exit for about four miles before turning right onto Sugar Bowl Road to the parking lot. If you’re coming from Lake Tahoe, you have a couple options:
From North Lake/Sand Harbor area: Make your way to North Shore Boulevard (CA-217) and go north. Then, merge onto I-80 west for a short time before taking the Donner Pass road exit and head up the summit to the parking lot.
From South Lake/Emerald Bay area: Travel north on CA-89 and continue onto Highway 28, before turning left onto North Shore Boulevard (north). From there, follow the same directions as described above.
Donner Tunnels Parking Lot and Trailhead

The parking lot for Donner Tunnels is a circular dirt lot with no actual parking spaces laid out. It’s essentially park wherever you can find space. If you arrive early (like I did), you’ll have no trouble finding a spot. Later in the day is when it starts to fill, as shown in the photo above.

While any vehicle can access this lot, I do need to warn you about all of the tire-busting rocks. Union Pacific doesn’t maintain this lot at all and as such, there are rocks all over the place that have the potential for ruining your day. Take it slow and you should be fine. The good news is there’s no parking fee.
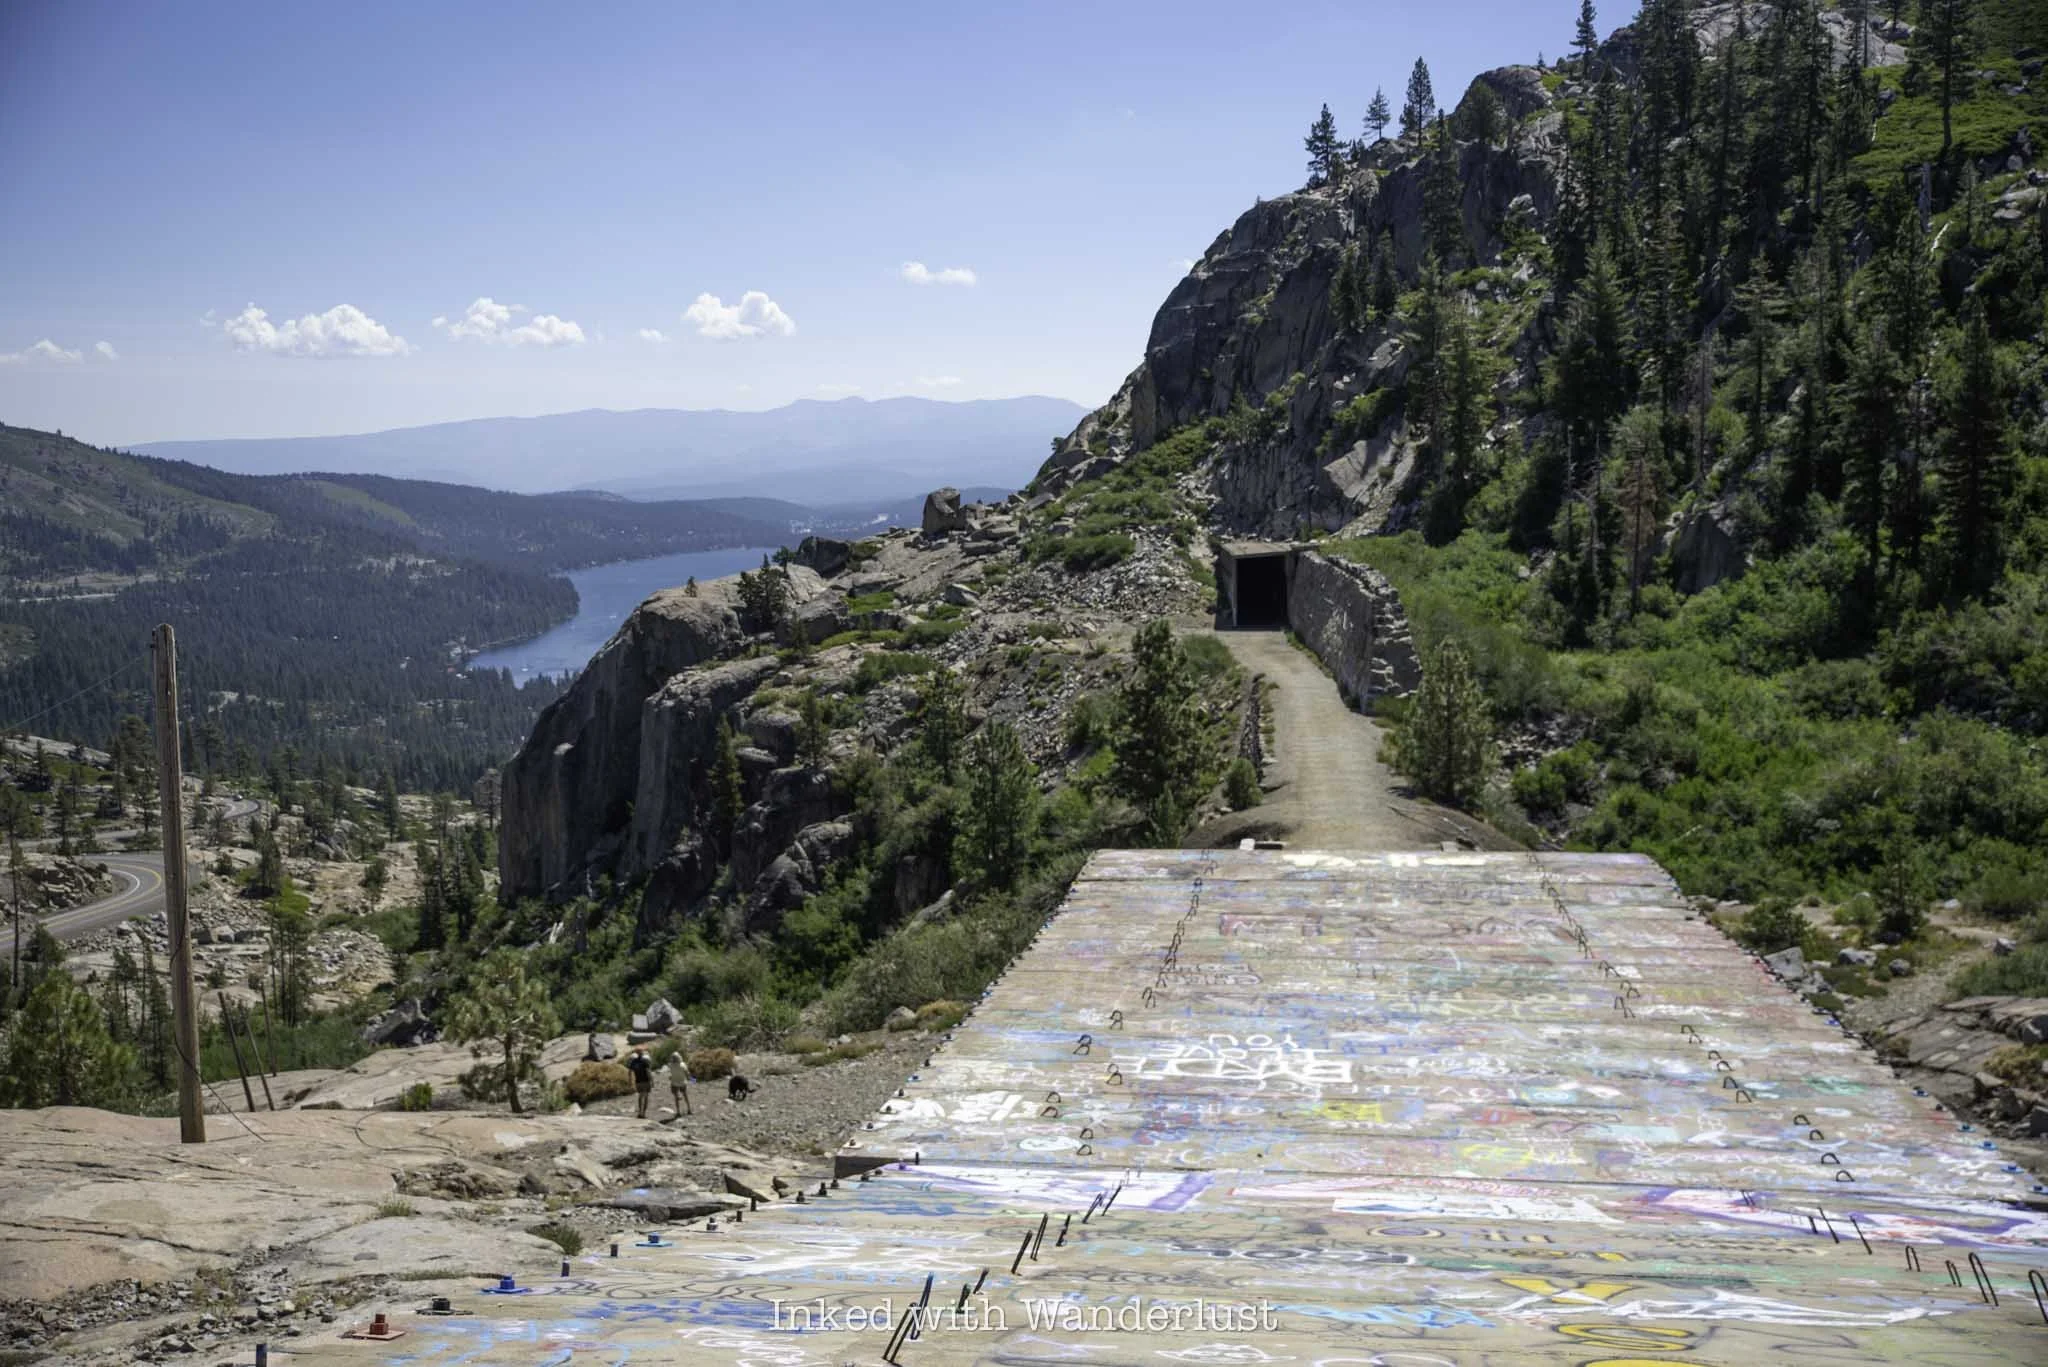
The unsigned trailhead is located just off the parking lot through a heavily graffitied red gate. You’ll find the first of several tunnels after you walk underneath the road you took to get here.
Donner Tunnels Hike

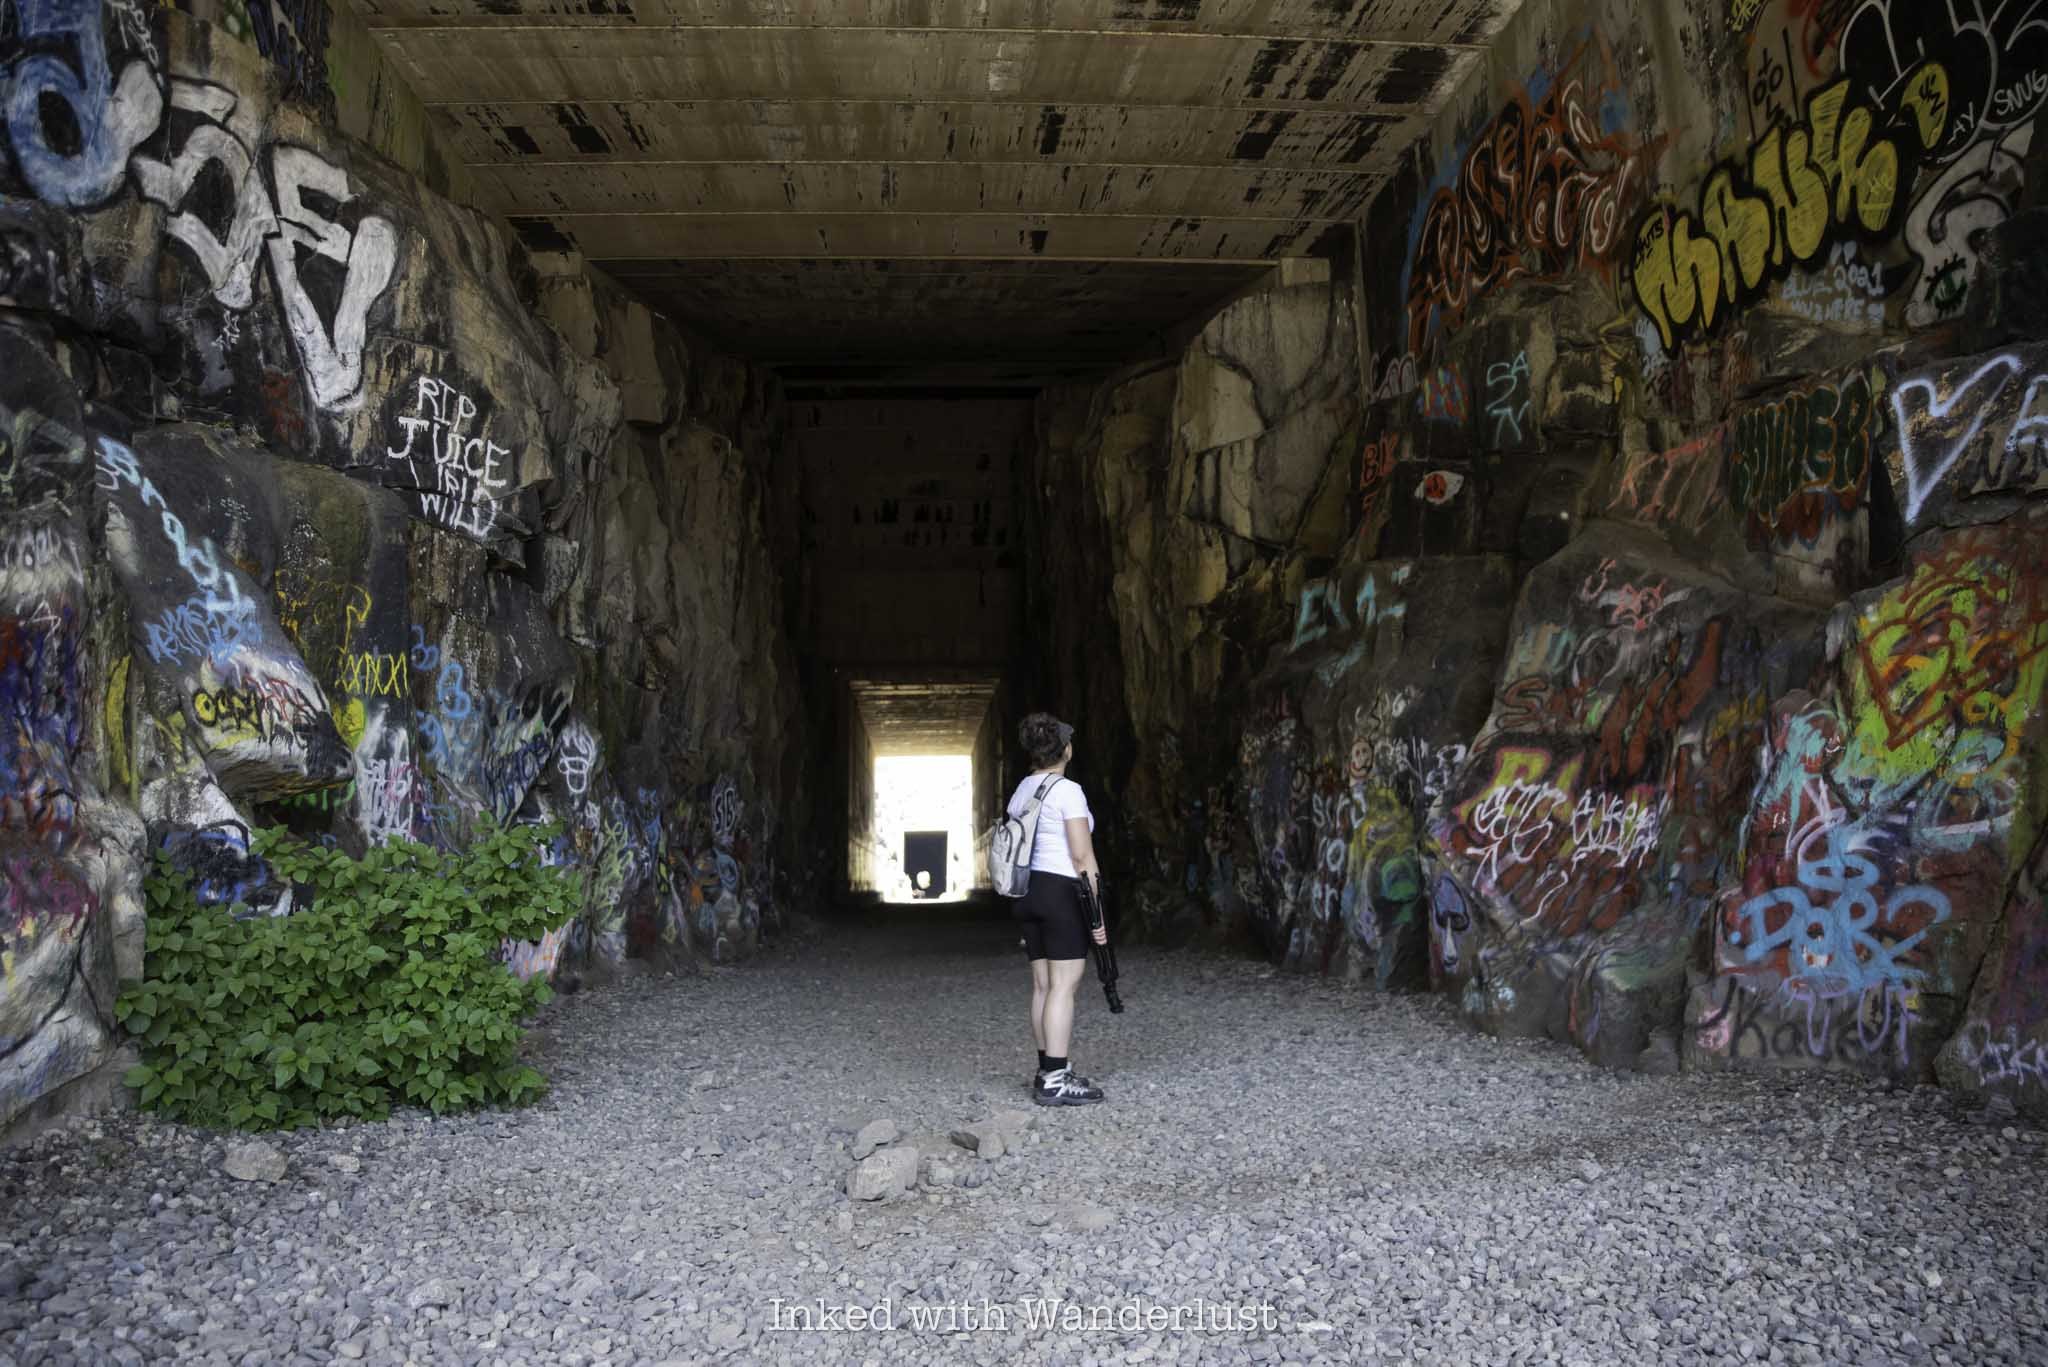
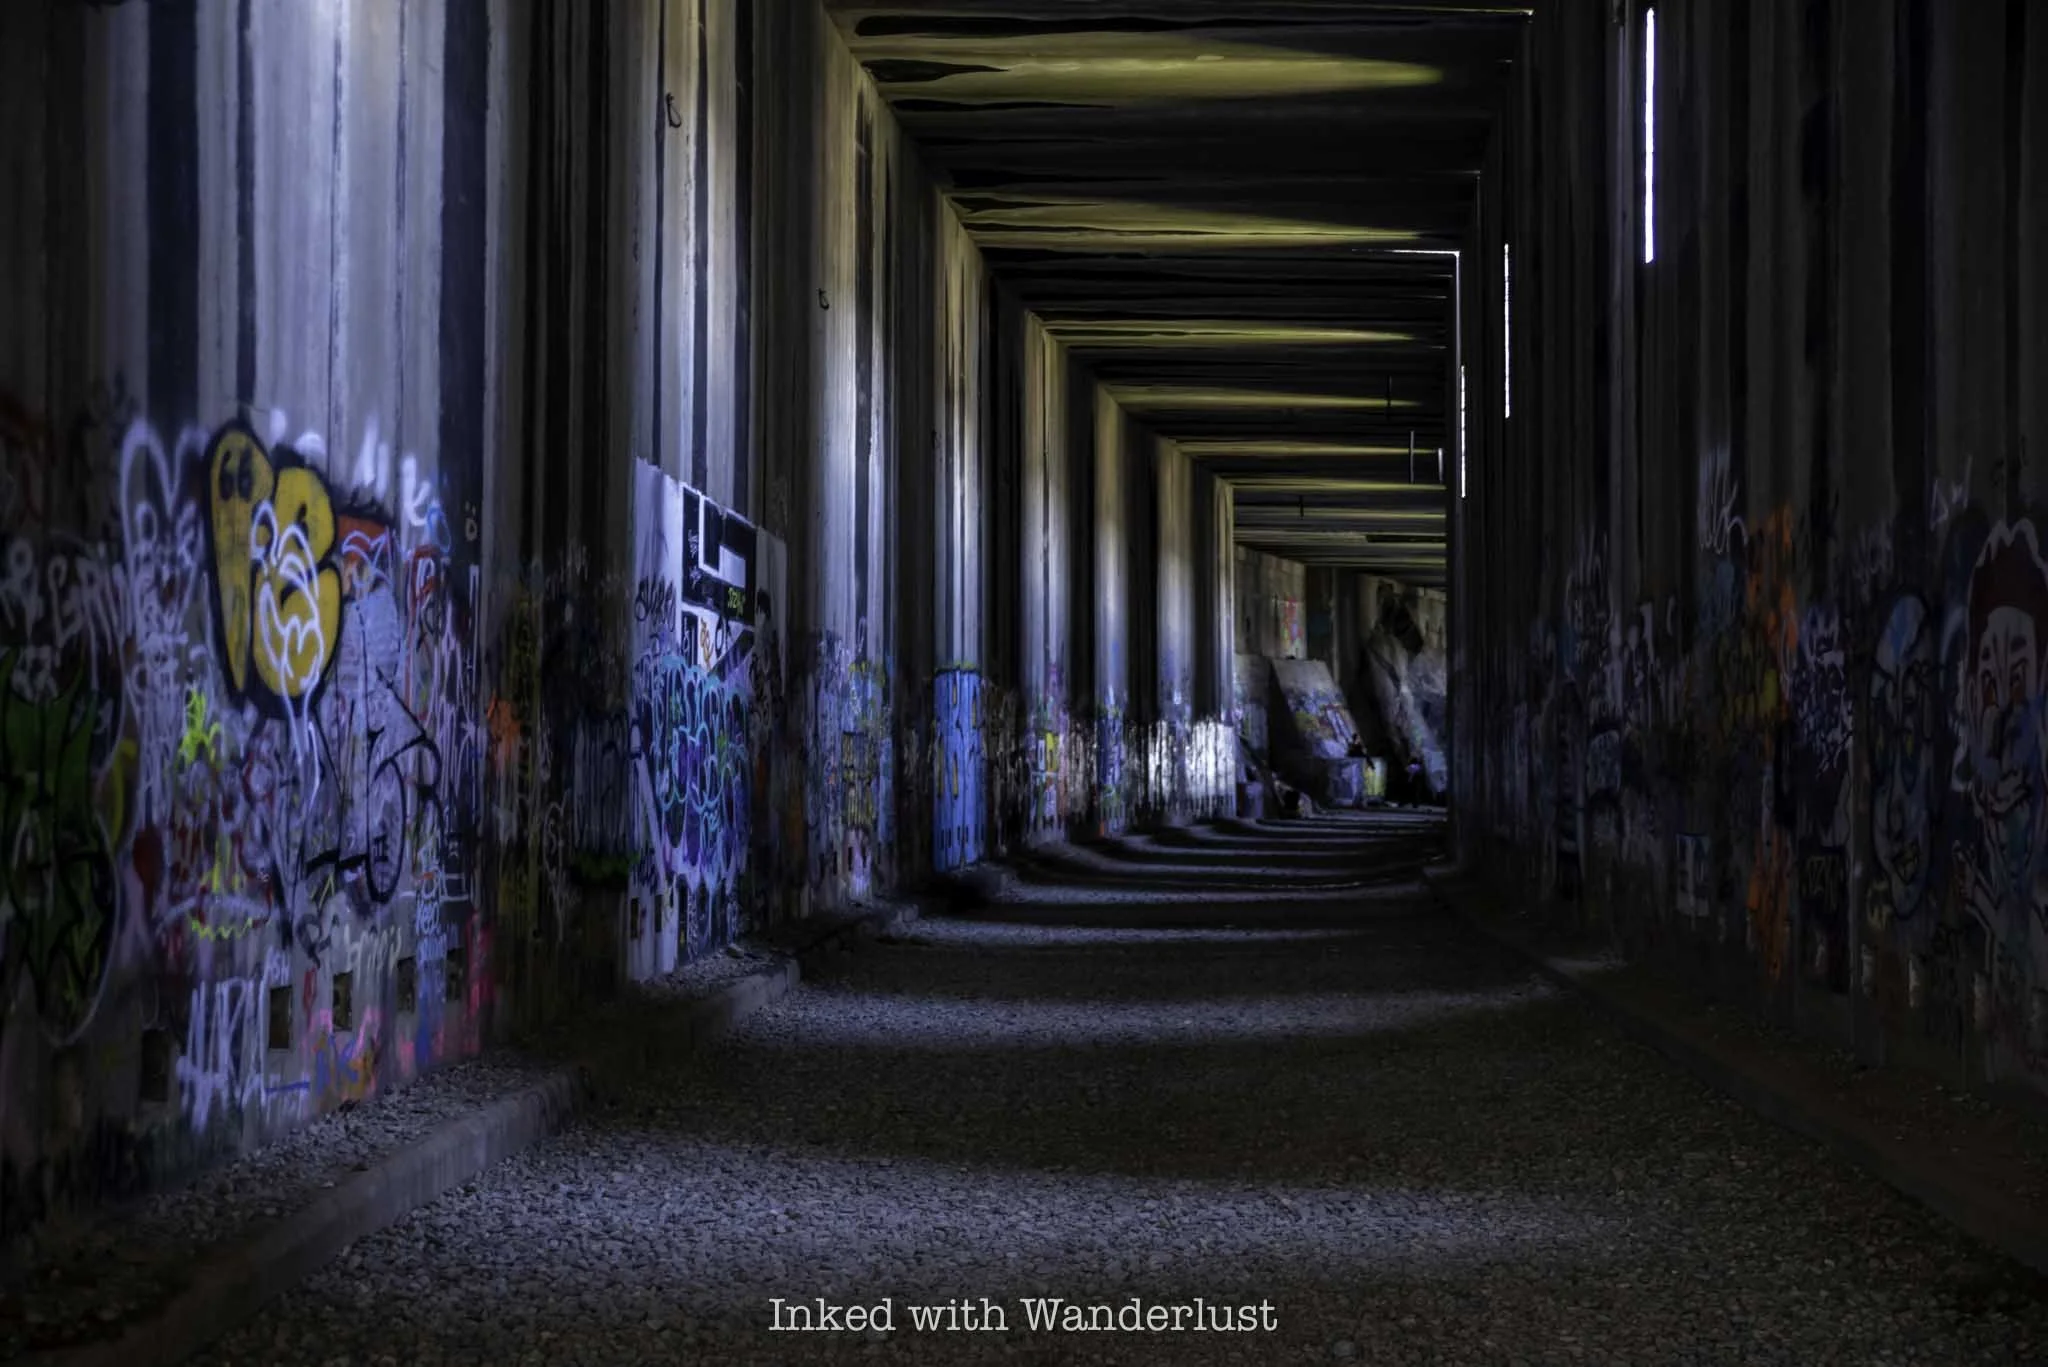
From here, you’ll work your way through a series of tunnels, each with a varying level of length (and graffiti). The first one from the parking lot is fairly long and dark, but you’ll always have the light at the end in sight.
Don’t be fooled by the amount of light in the photo above. That was me using my camera’s settings so I could show you the detail. It’s actually very dark in here and in my opinion, a cell phone flashlight doesn’t cut it. Which is why I recommend bringing a flashlight with high lumens.
In these tunnels and the upcoming ones, you’ll likely hear, smell, and possibly even see bats in the tunnels. We never saw them, but we did hear and smell them. As is the case with most wildlife encounters, don’t go looking for trouble and you likely won’t find it. In other words, don’t bother them.
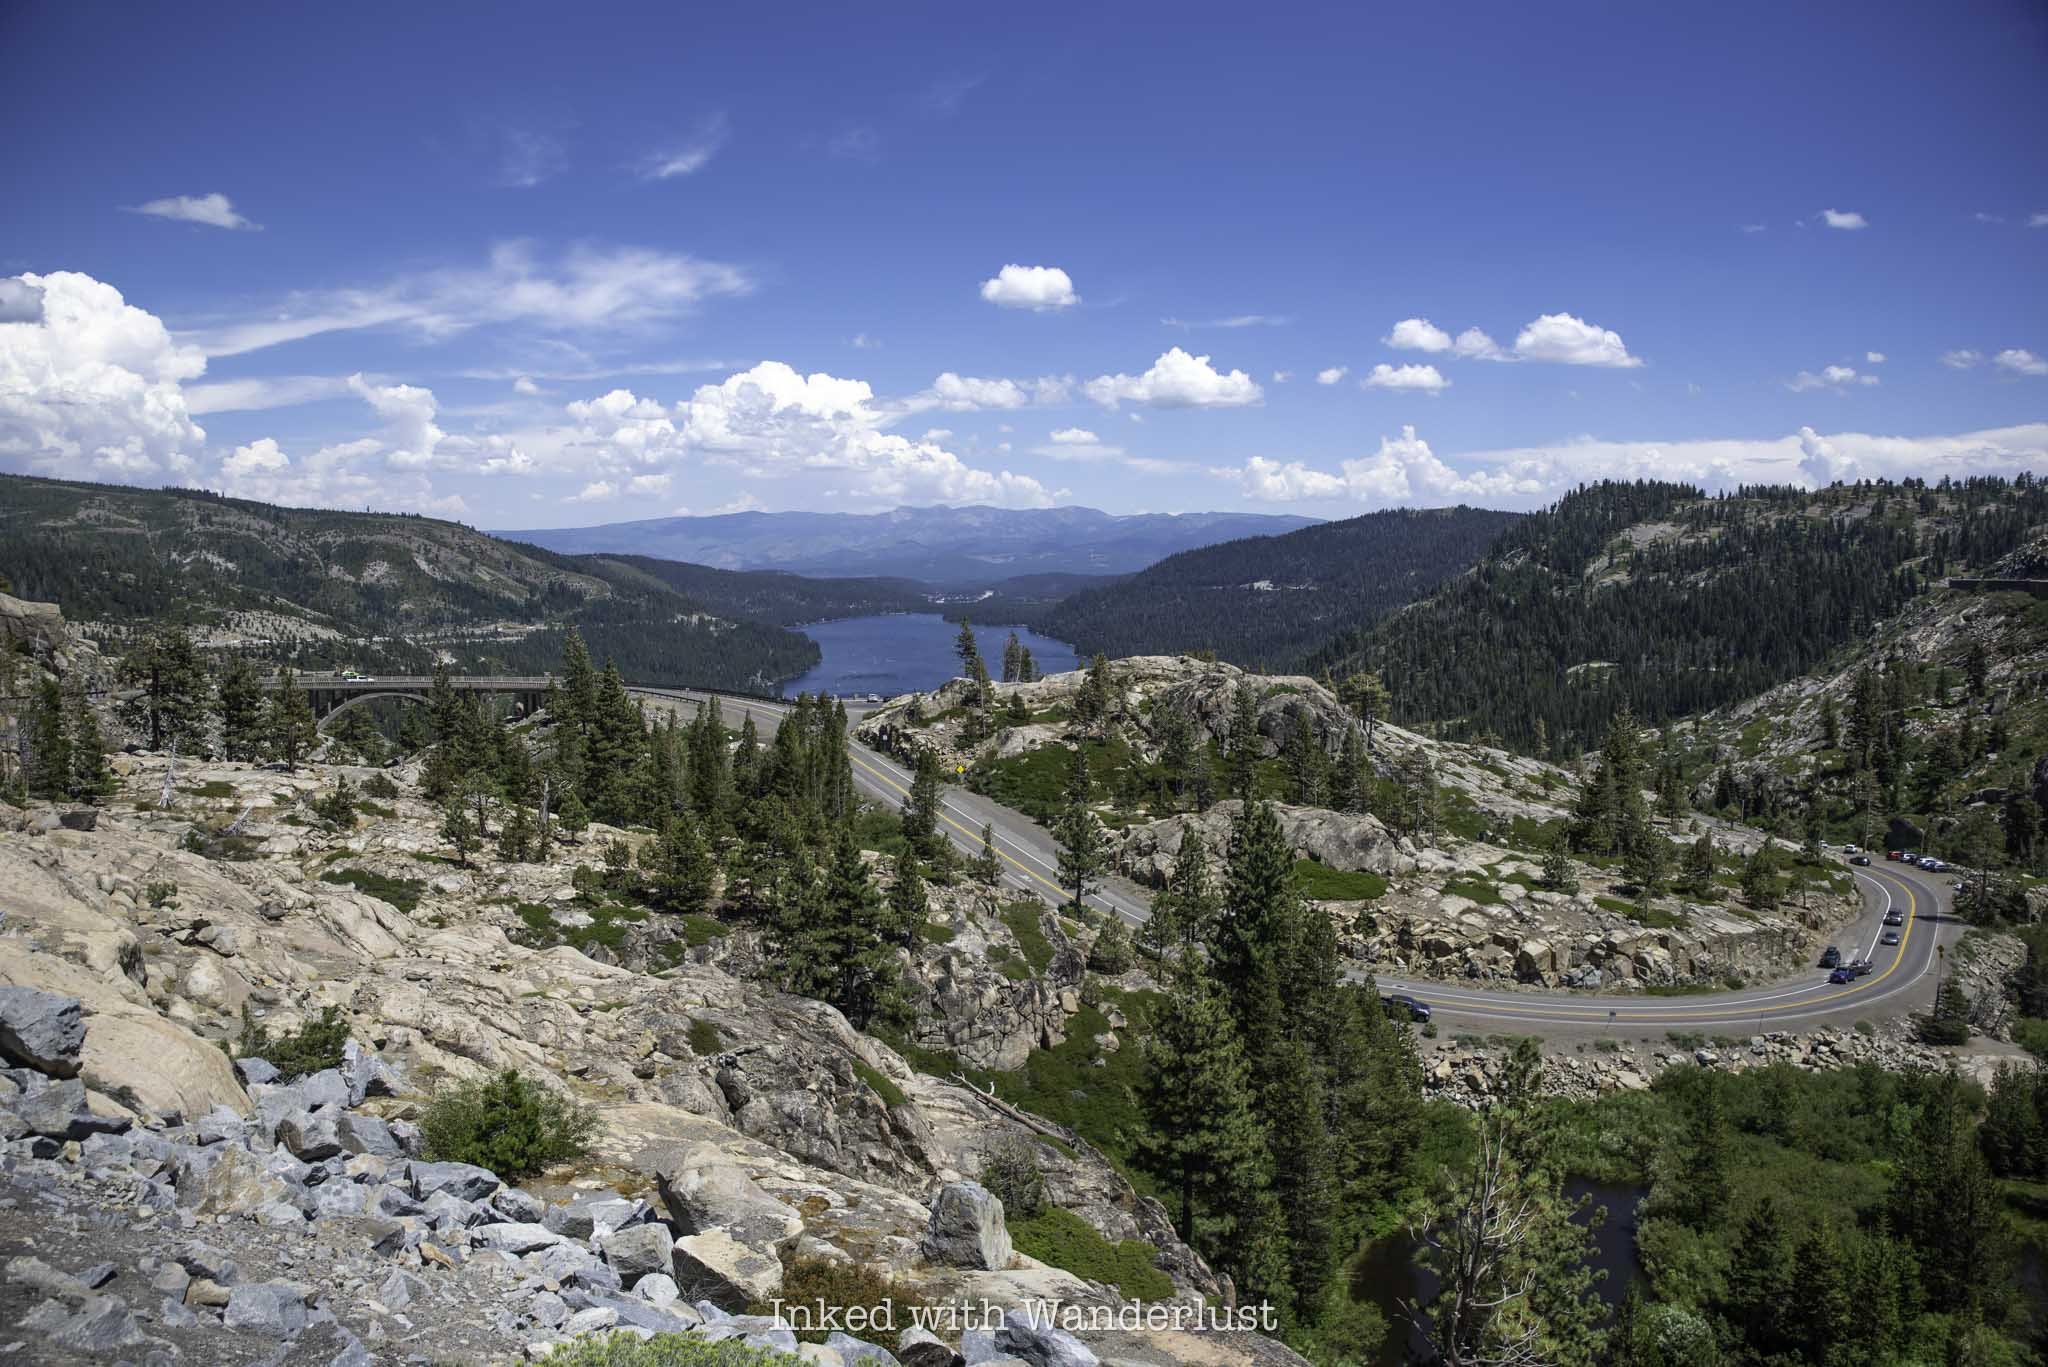
After the first tunnel, you’ll briefly enter a snow shed before walking back out into a clearing with sweeping views of Donner Lake and the surrounding mountains. On this stretch, you’ll pass by some petroglyphs on your left and walk over the historic China Wall (pictured below) before entering the next tunnel.

The China Wall is a 75-foot high hand-built retaining wall that helped keep the trains propped up as it passed between the two tunnels. Take a moment to check it out. It’s amazing what the laborers were able to accomplish without the help of modern equipment.
Also along this stretch is the ability to climb up onto the top of the tunnel you just left. You’ll get an awesome perspective for photos. Just be careful as there’s no established way up and the granite rocks are slippery. Going back down is a bit sketchy.
From here, you’ll enter the next tunnel and go through a series of several more. You’ll go through sections where enough light passes through the slits in the walls, enabling you to see without a flashlight. Then you’ll hike through sections of near-complete darkness as well.

On top of the darkness, the ground you’ll be walking on is on uneven, loose gravel with occasion larger rocks. Additionally, and particularly if you’re here while the snowpack is still melting, you’ll also have standing water and potential icy spots to traverse.

The walls of the tunnels are literally covered in graffiti. Some are actually artistically well done while other pieces are simply words/political statements or nondescript images. While I do think it’s a shame that a historical site like this has graffiti all over it, I have to admit that it does add a certain vibe to the overall experience.
If you’re bringing small children, be warned that some of the graffiti art is highly inappropriate for young eyes. Thankfully, most of it is difficult to make out, or even see in the darkness, so I wouldn’t let it stop you from bringing them. Just something to be conscience of.
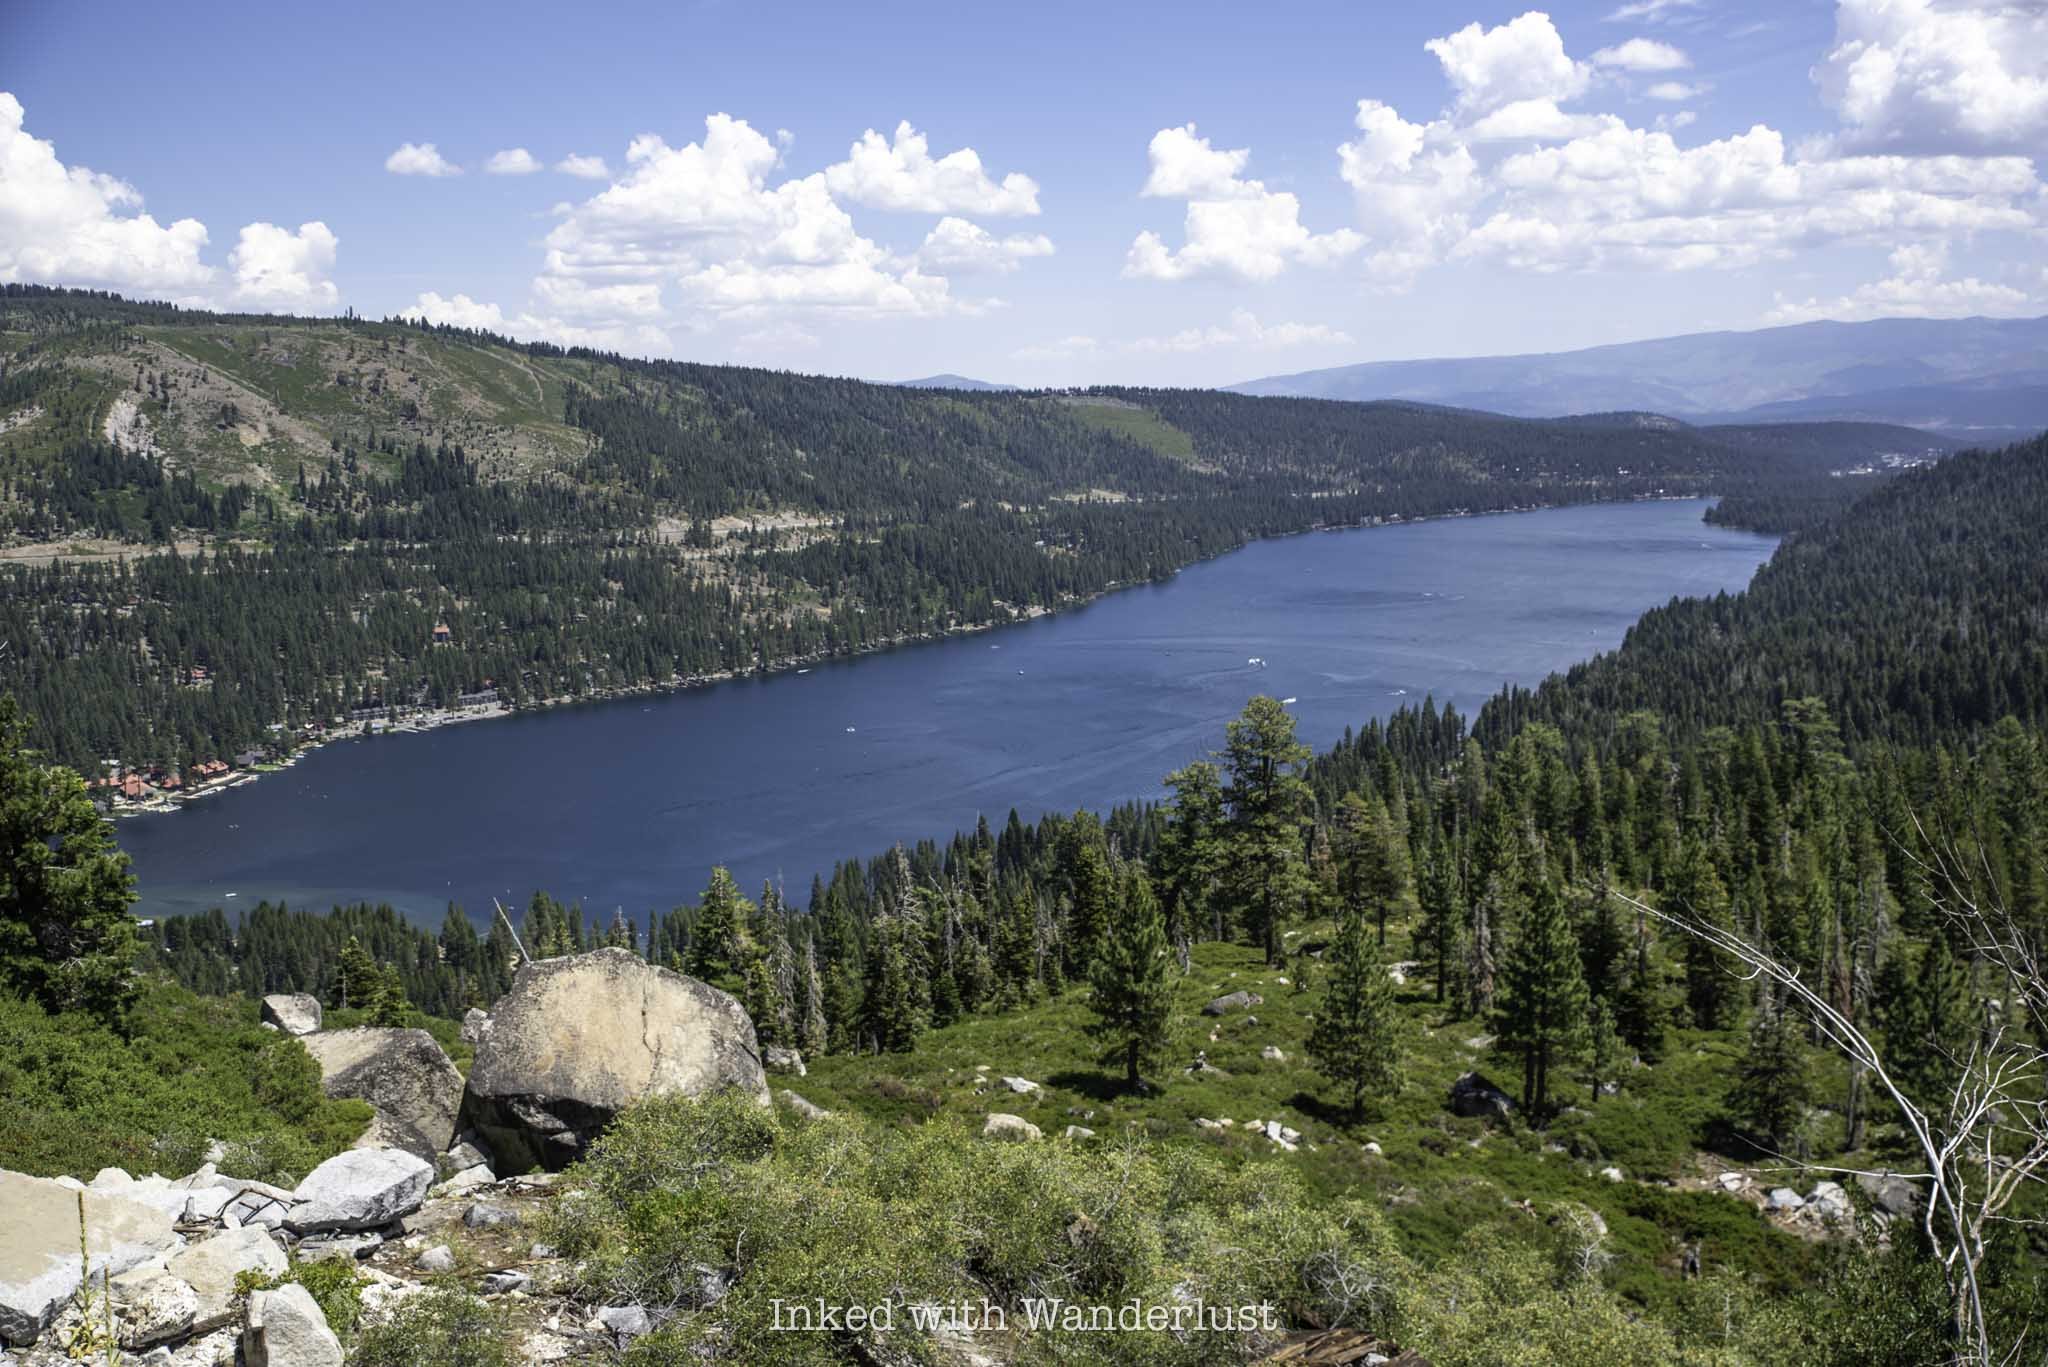
The hike can be as short or as long as you want it to be. During our hike, I noticed most people turn around after the second tunnel, but I recommend sticking it out and keep going to the end of the final tunnel. If you do, you’ll be rewarded with an epic, unobstructed view of Donner Lake (especially if you climb on top of the tunnel).
In conclusion, this hike is fantastic. Even if you don’t care about the historical aspect of it, it’s worth it for the views and photography opportunities alone. Additionally, because there’s so much to explore, you could hike the Donner Tunnels multiple times over and always see something new.
When you’re finished, consider heading over to nearby Donner Camp Site and see where part of the ill-fated Donner Party attempted to wait out winter and fight off starvation. Further up the freeway is where you’ll find Emerald Pools, a stunning swimming hole. Additionally, Emerald Bay State Park is about an hour away and more than worth the drive.
EXODUS 13:21


5 Incredible Lake Tahoe Waterfalls You Need To See
Waterfalls are a huge attraction to nature enthusiasts. No matter the size or accompanying surroundings, people flock…
Disclosure: This post contains affiliate links. If you make a purchase through these links, I may earn a small commission at no additional cost to you. I only recommend products or services that I believe will add value to my readers.

Waterfalls are a huge attraction to nature enthusiasts. No matter the size or accompanying surroundings, people flock to these nature-made wonders.
Lake Tahoe has many waterfalls. Some you drive up to while others require a bit of effort. The effort to see the waterfalls on this list is minimal, making it possible to see each one in a single day.
The best time of year to see waterfalls in Lake Tahoe is spring or early summer, due to them being fed by snowmelt in the mountains. So plan accordingly.
So which Lake Tahoe waterfalls made the list? Read on to find out.
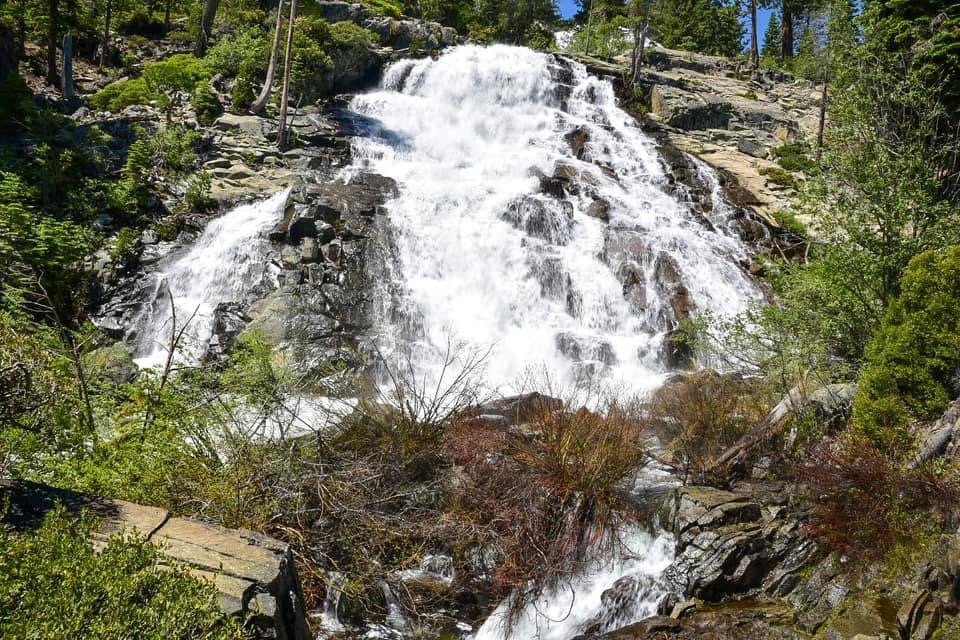
1) Glen Alpine Falls

Glen Alpine Falls is a beautiful 65-foot waterfall with multiple layered drops. It’s located at the southern end of famed Fallen Leaf Lake at the end of a narrow, bumpy road.
Thankfully, driving to the falls in the hardest part as it’s just a stones throw away from the parking area. Check out my article on Glen Alpine Falls for more details.
2) Lower Eagle Falls
Most people see the upper section of Eagle Falls (which we’ll get to in a moment) but many don’t realize that you can see the lower section as well.
To see it, you’ll need to hike the steep(ish) one mile trail into Emerald Bay State Park, as the trailhead for the falls is behind the visitor center.
3) Upper Eagle Falls

Just because it’s popular and requires some logistical planning to find a place to park, doesn’t mean you shouldn’t make the effort.
When you are able to find a spot, seeing the upper section requires minimal effort as it’s only a quarter-mile hike from the parking lot.
While you’re at it, continue another mile or so up a moderately easy trail to the picturesque, Eagle Lake. To read about that, check out my post below.
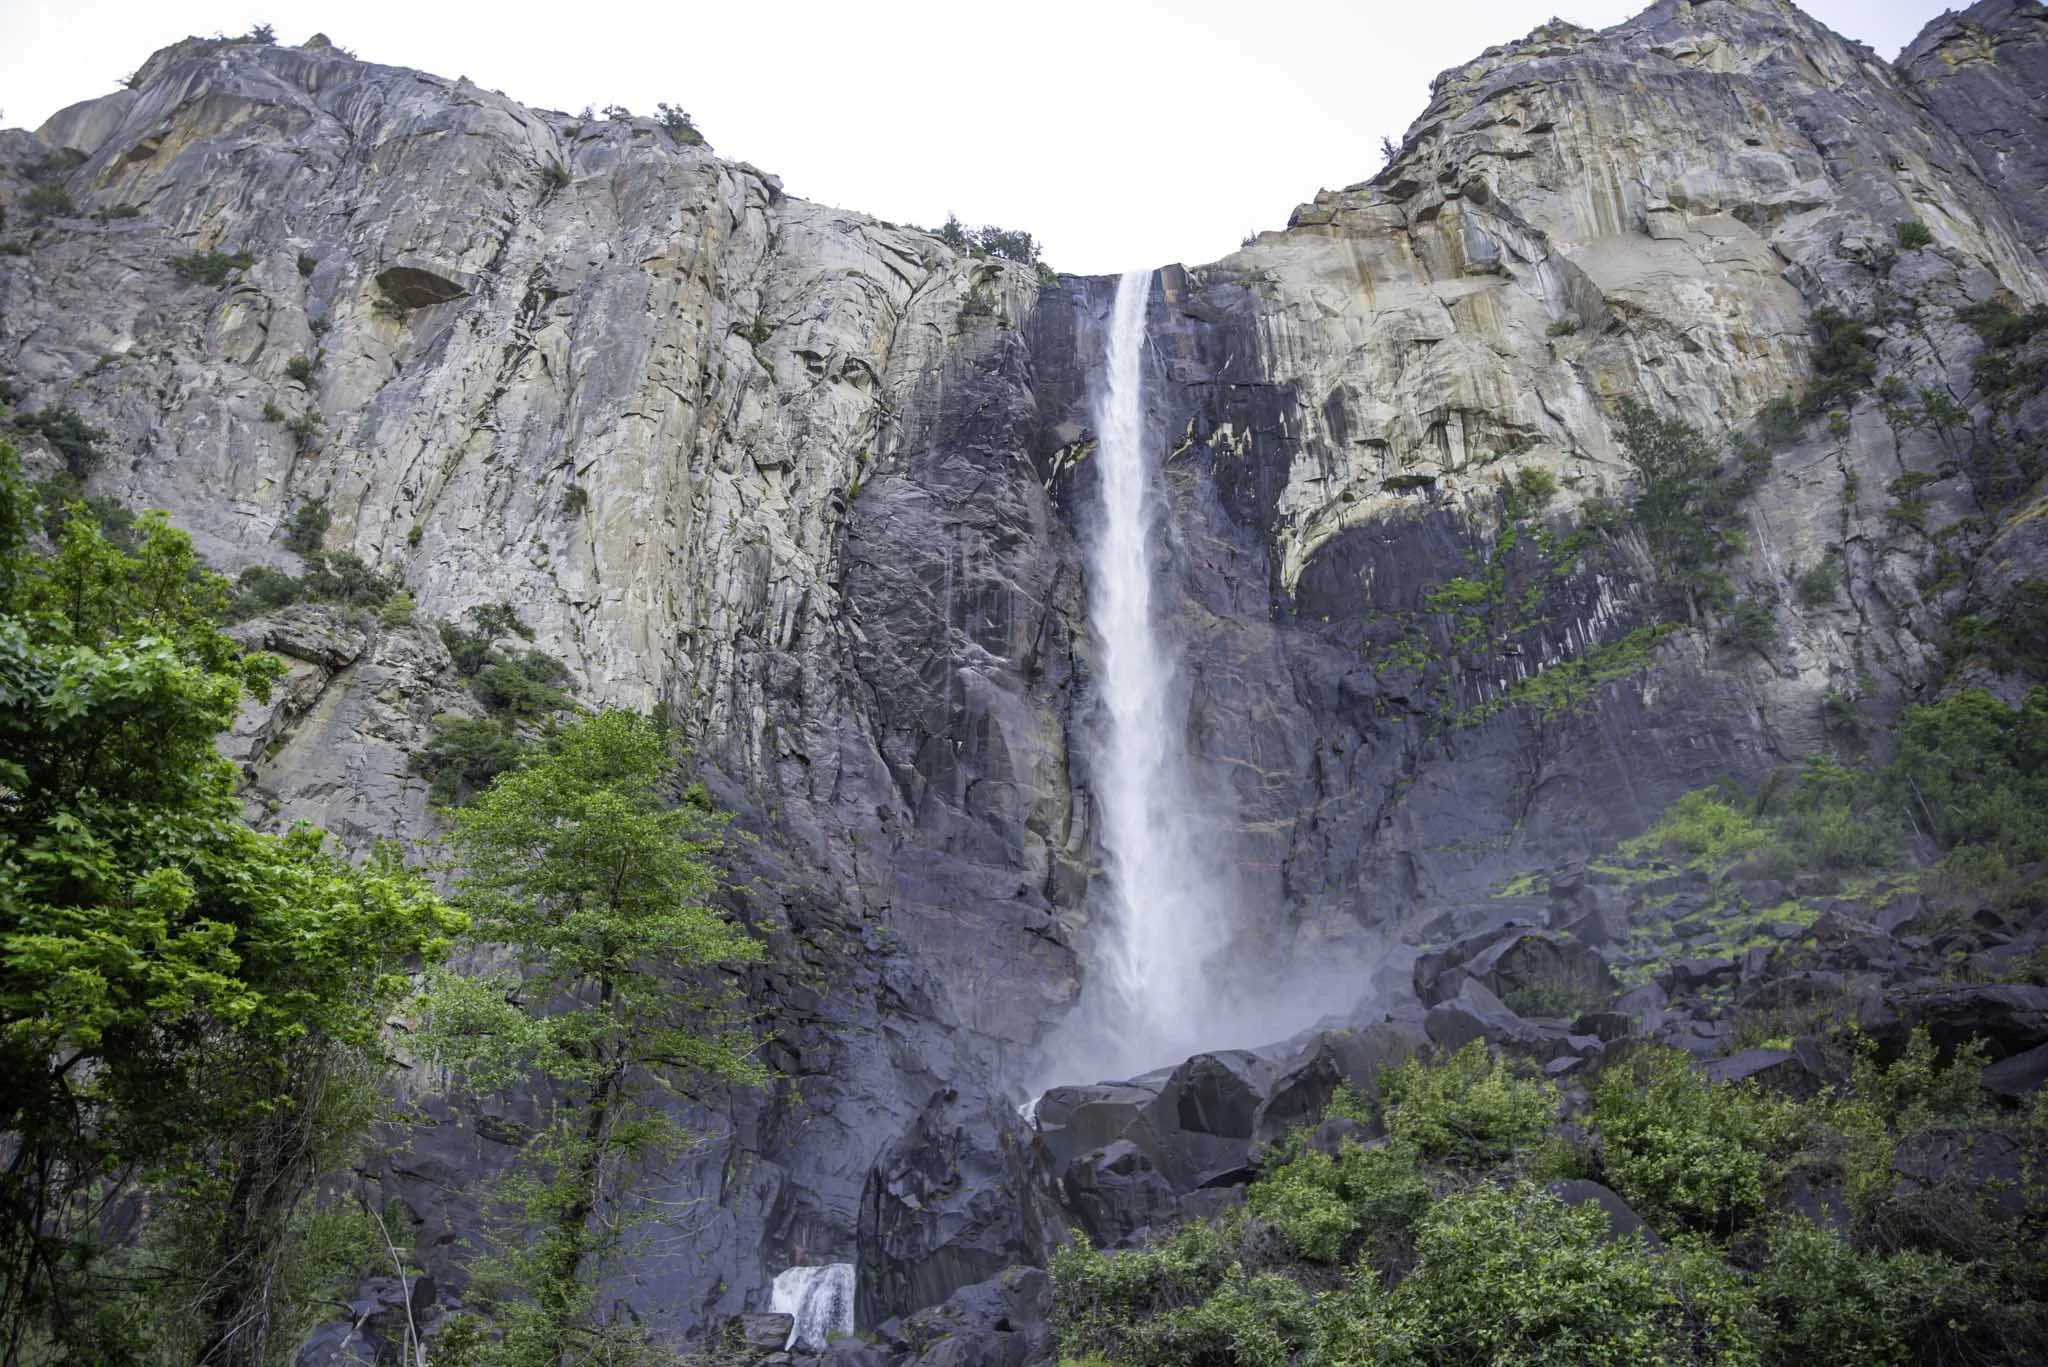
4) Horsetail Falls

If you’ve driven into (or out of) Lake Tahoe on highway 50, you’ve undoubtedly took notice of the 800-foot tall, Horsetail Falls. Technically, it’s located in the tiny town of Twin Bridges, but it’s only a few miles from Lake Tahoe, proper.
It’s height makes it the tallest waterfall in the Tahoe region and while you can see it from the highway, you’ll need to hike it to truly appreciate it.
The trail is steep, sun exposed, and difficult to follow. If you decide to do this, take your time. You’ll gain roughly 1,300 feet in two miles.
5) Cascade Falls

Cascade Falls can be found at the end of a one-mile trail. I would rate the trail as easy, as there’s little elevation gain/loss, but the last half is incredibly rocky.
To see it in its full glory, definitely make it a point to go in the spring. If you get there later in the season, though, you’ll be treated to dozens of mini-waterfalls.
At the crest of the falls, you’ll be treated to a fantastic view of Cascade Lake in the foreground and the indelible Lake Tahoe in the background.
I hope you’ll consider visiting these waterfalls during your Lake Tahoe trip. It’s definitely possible to see them all in one day but to truly enjoy yourself, try to spread them out over at least two days.
To save you from scrolling up again, here are the links to the waterfalls mentioned in this list:
Also, if you’re planning a trip to Lake Tahoe, check out our list of 25 lake and beach day essentials!

How To Hike To Lower Eagle Falls In Lake Tahoe
Nestled within the captivating natural beauty of the iconic Emerald Bay State Park, the trail to Lower Eagle Falls offers…
2 minute read | contains affiliate links
Nestled within the captivating natural beauty of the iconic Emerald Bay State Park, the trail to Lower Eagle Falls offers an awe-inspiring experience for outdoor enthusiasts and nature lovers alike.
Most are aware of the upper section of Eagle Falls just outside the park and how you can traverse the crest of lower falls across the highway.
If you want to see Lower Eagle Falls straight on, though, you’ll need to hike down into Emerald Bay via the short, but steep, one mile trail.
In this guide, we’ll discuss the parking situation, fees, what to expect on the trail and more. Let’s get into it!

Trail Stats
Location: Emerald Bay State Park, Lake Tahoe
Fee: $3 - $10 parking fee
Permit: None
Open: Seasonally
For: Hikers
Restroom: At the trailhead and in Emerald Bay
Parking: Medium sized paved lot
EV Stations: None
Difficulty: Easy going in, moderate going out
Popularity: Mega High
Mileage: About 2.5 miles total, RT
Time: 2-3 hours
Condition: Maintained, easy to follow
Features: Waterfall, Island, Visitor Center, Beach
Best Time: Spring/early summer
Pets: Not allowed
Drones: Not allowed
Hazards: Trail is steep going back out. Can be difficult for some
Our Visit(s): August 2022 & July 2023
Disclosure: This post contains affiliate links. If you click through and make a purchase, I may earn a commission at no additional cost to you. Thank you for supporting us!
Emerald Bay Parking Lot

Your trip to Lower Eagle Falls begins and ends in the Emerald Bay parking lot. To avoid the hassle of having to wait for a spot to open, you should arrive as early as possible as it’s known to fill up quickly.
There are pay stations near the trailhead that accept credit or debit cards. The parking fees are:
$3.00 for one hour (select this option if all you want to do is go to the viewing deck)
$10.00 for day use
To begin your hike, head towards the wooden booth past the pay station. To your right, there’s a viewing deck that provides a great view of Emerald Bay and your destination, Lower Eagle Falls.
The Trail To Emerald Bay

Going into Emerald Bay, the trail is all downhill and easy going. Just prepare yourself for the way out because it’s fairly steep and can be difficult for some. So come prepared.
It’s slightly less than a mile along a wider than usual dirt path. Near the bottom you’ll arrive at a junction. Head right to continue to the waterfall.
After this junction, you’ll officially be in Emerald Bay State Park. Continue straight as you pass the restroom, beach access and the Vikingsholm Castle.
Keep straight on the trail until you reach the visitor center. The incredibly short trail to Lower Eagle Falls begins just behind it.
Lower Eagle Falls

Facing the visitor center, the tail to the waterfall begins on the right. It starts out as gravel but as you get closer the falls, it’ll turn to dirt and stone.
When the trail aligns with the water, your first glimpse will be off two mini-waterfalls split between rocks and brush.
Further up, you’ll work your way up several granite rock steps before arriving at the Rubicon trail footbridge.

Go ahead and take in the views of the creek from the bridge, but don’t cross it to the other side as that’ll take you along the Rubicon Trail.
To continue towards Lower Eagle Falls, head up the trail for another 2/10’s of a mile while keeping the creek to your left.
You’ll encounter several more flights of granite steps just before reaching the falls. When you reach the top of those steps, the viewing deck and waterfall come into view.

The viewing deck is split in two by a tree and provides a straight-on view of Lower Eagle. There’s a fair amount of room but it doesn’t take many people to feel cramped.

There’s no access to Highway 89 from here. The viewing deck is the literal dead end of the trail. So when you’re finished taking it in, simply head back the same way you came.
I hope you’ll consider checking out Lower Eagle Falls. It’s a beautiful waterfall and worth the effort to see. If you’re interested in other sites nearby, check out our articles below.
Disclosure: This post contains affiliate links. If you click through and make a purchase, I may earn a commission at no additional cost to you. Thank you for supporting us!
Please support this website by subscribing to the newsletter below.
Thank you for reading.

Glen Alpine Falls: A Beautiful Lake Tahoe Waterfall
In Lake Tahoe, not too far from Emerald Bay and located on the southern end of Fallen Leaf Lake is a somewhat-hidden…
Disclosure: This post contains affiliate links. If you make a purchase through these links, I may earn a small commission at no additional cost to you. I only recommend products or services that I believe will add value to my readers.
In Lake Tahoe, not too far from Emerald Bay and located on the southern end of Fallen Leaf Lake is a somewhat-hidden waterfall named Glen Alpine Falls.
Glen Alpine Falls is about 80-feet and cascades over multiple rocks and outcroppings. Additionally, there’s no hiking involved to see it. Simply exit your car and walk a few feet.
So how do you get there? What should you expect? I answer all these question (and more) in the guide below. Let’s get into it.

Click or tap to view offer
Quick Stats
Location: South Lake Tahoe at the sound end of Fallen Leaf Lake
Fee: None
Permit: None
Open: Seasonally (Fallen Leaf Lake road is closed in winter)
Best Time of Year: Spring through early summer
Restroom: None at the falls
Parking: Multiple pull-out style lots around the falls
EV Stations: None
Difficulty: Easy
Popularity: High
Time: One hour or less
Pets: Allowed
Drones: No signage stating you can’t
Hazards: Watch your footing around the falls
Our Visit(s): 2023
Getting There & Parking

The parking lot for Glen Alpine Falls can be found at the terminus of Fallen Leaf Lake road, itself being located off Highway 89, south of Emerald Bay State Park.
From the turn-off to the falls, it’s about four miles along a narrow, bumpy road with several tire-busting potholes. The recent record snowfall did a number on this road.
Most of the road cannot accommodate two vehicles passing each other without one pulling over to the side. If you’re driving an RV - forget it.
Fallen Leaf Lake road runs parallel to the namesake lake between many gorgeous cabins. It would be amazing to rent one of these for a weekend.

After passing the lake, you’ll come to fork in the road with the Fallen Leaf Lake Fire Station in front of you. Turn left and you’ll arrive at the falls after a quarter of a mile or so.
There’s no proper parking lot. Just multiple pull-out style lots of varying sizes. Some can accommodate half a dozen vehicles while others can only fit one or two.
You should have Glen Alpine Falls in sight after exiting your vehicle (or hear it, at minimum). Simply walk towards to the main viewing point located just off the parking area.
Glen Alpine Falls

Glen Alpine Falls is large and wide so no matter where you’re viewing it from, you’ll get a great view. The main viewing area is on a large, rocky outcropping perfect for viewing the falls straight on.
You can also do a little scrambling down some boulders to get an even closer view of the falls or the river it feeds. It was easy doing so as I was able to do it while holding a camera and tripod.
Additionally, you can easily reach and see the falls along its crest. Just walk a little further up the road and turn right towards the waterfall.

The best time to see Glen Alpine Falls is in the spring as it ebbs and flows with the snowpack melt. The waterfall reduces to a trickle as summer progresses.
Plan to visit by the end of May to see it at peak flow. All in all, it’s awesome to be able to get so close to a waterfall like this with no effort required. It’s definitely worth a stop.
If you’re interested, check out my guides below to see three other beautiful waterfalls nearby…

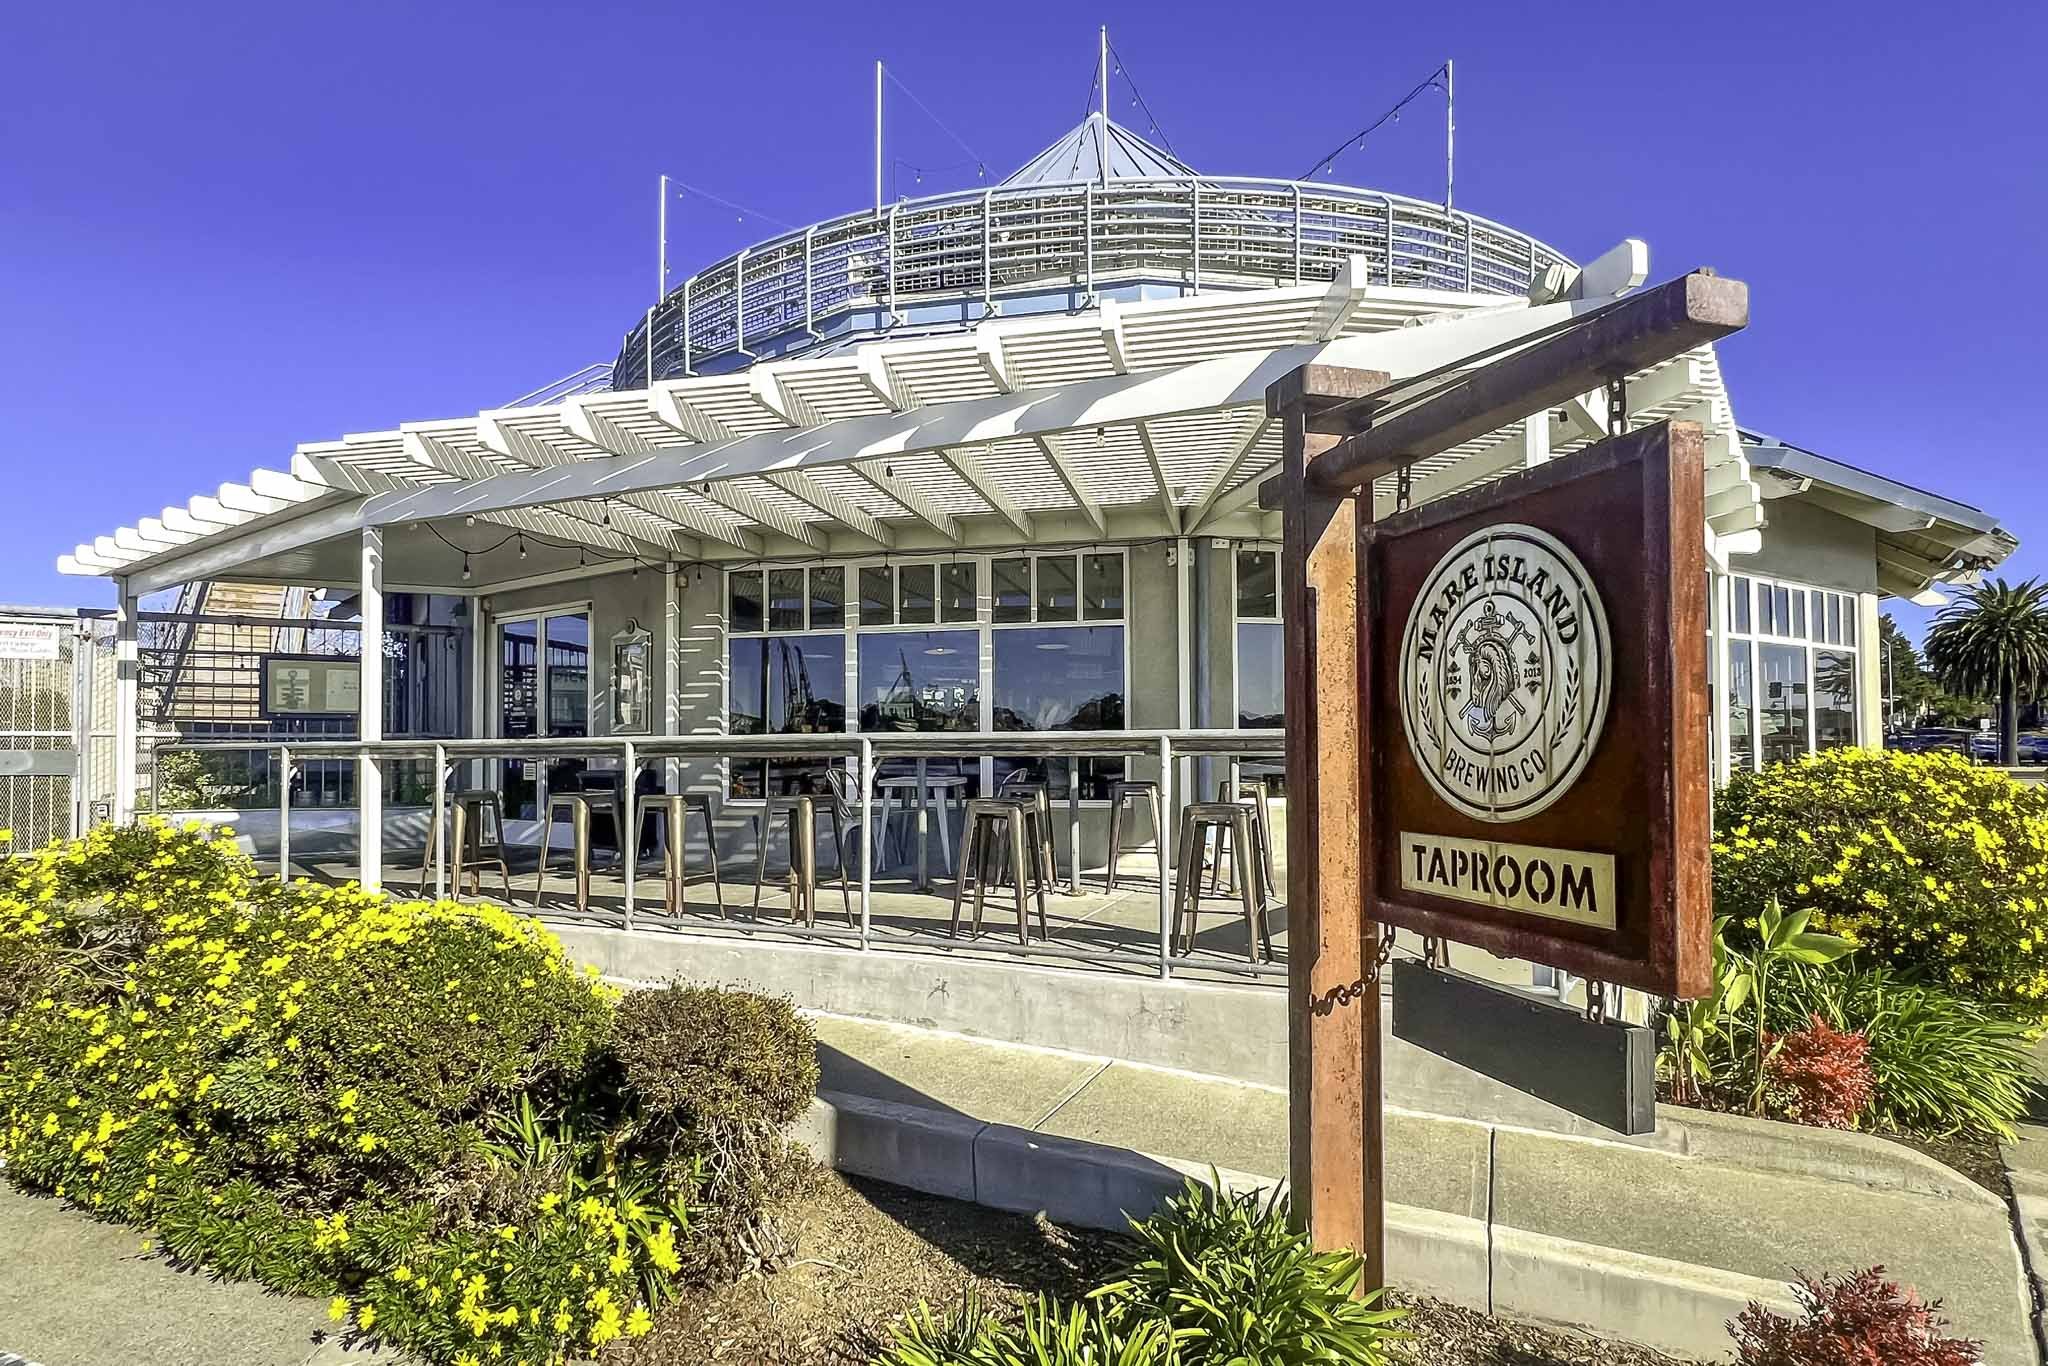
Base Camp Pizza: An Excellent Option For Pizza in Tahoe
We’ve all been there. You’ve been outside, hiking or skiing all day long, and you’re completely famished. To make matters…
3 minute read | contains affiliate links
We’ve all been there. You’ve been outside, hiking or skiing all day long, and you’re completely famished. To make matters worse, you have no idea where to eat.
Thankfully, in Lake Tahoe, there is no shortage of amazing eateries to choose from. You’ll find everything from fine dining establishments to burger shacks and everything in between.
If you and your family are looking for delicious pizza, though, we believe we have a great recommendation for you; Base Camp Pizza.
Located in Heavenly Village in South Lake, Base Camp Pizza offers up amazing, mouth-watering pizzas with all sorts of creatively unique toppings.
In this post, we’ll discuss our experience dining here and hopefully help you determine whether or not you and your family would enjoy it as well. Let’s get into it!
Pertinent Info
Location: South Lake Tahoe in Heavenly Village
Address: 1001 Heavenly Village way
Cost: $10 - $15 per person
Food: Pizza and other Italian food
Open: All year
Seating: Indoor and outdoor
Alcohol: Full bar w/ extensive cocktail menu
Website/Menu: www.basecamppizzaco.com
Our Visit(s): 2017 & 2022
The Restaurant
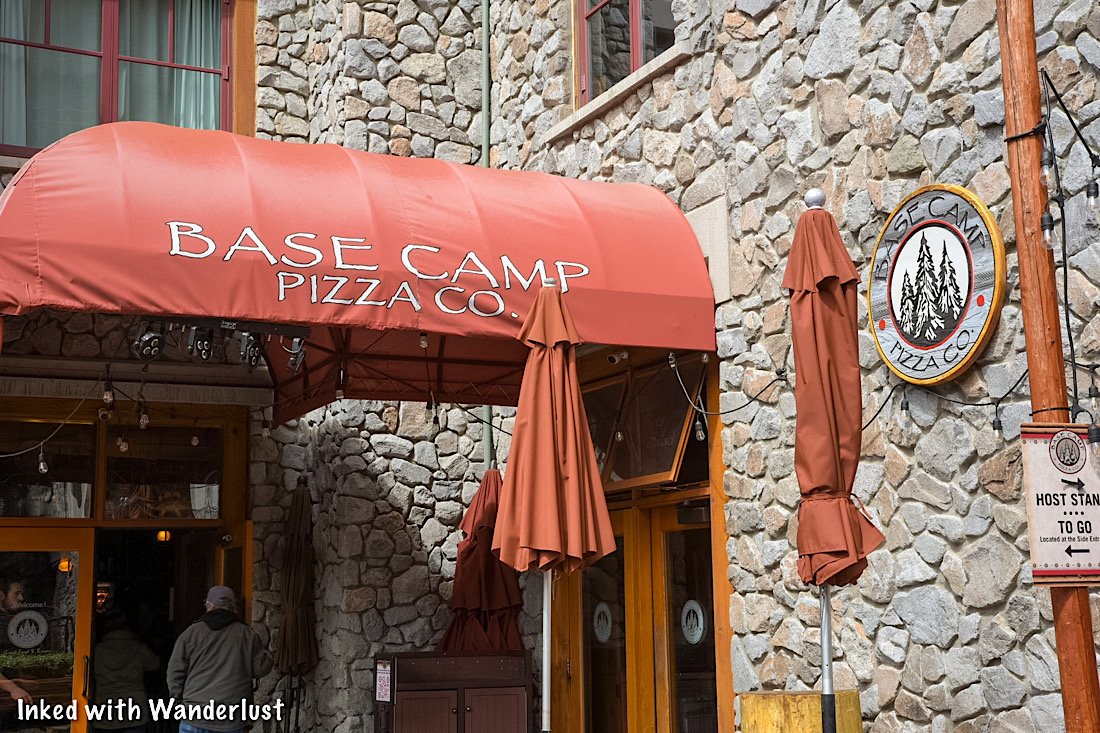
As stated above, Base Camp Pizza is located in the Heavenly Village complex in South Lake Tahoe (the busiest and most developed area of the lake).
If you park in heavenly’s parking garage, you’ll find Base Camp across from the garage’s exit just past the bathrooms and ATM machines.
If you don’t want to pay for parking, park in the Safeway parking lot across the street from Heavenly Village Cinemas.
Simply cross the street and walk past the movie theatre. You’ll soon see a mini-put course in the center of the walk-way. Base camp will be just past that on your left.

The restaurant features both indoor and outdoor seating. If your visit coincides with the busy summer months, both will likely be full.
One downside to here is they don’t accept reservations. So if it’s busy (or if your group is larger) we would recommend eating during non-traditional times to avoid a lengthy wait.
The Food

Much like most pizza eateries, Base Camp offers a variety of creatively topped pies. Of course, they also offer your garden variety types such as combo, pepperoni and plain cheese.
So as long as everyone in your group likes pizza, chances are, no one will go without. In the event that someone in your party doesn't , however, they do have other options. Such as:
Spaghetti Bolognese
Italian Herb Shrimp Pene
Four Cheese Ravioli
Gouda Mac & Cheese
Tomato Basil w/ Meatballs
A variety of soups and salads

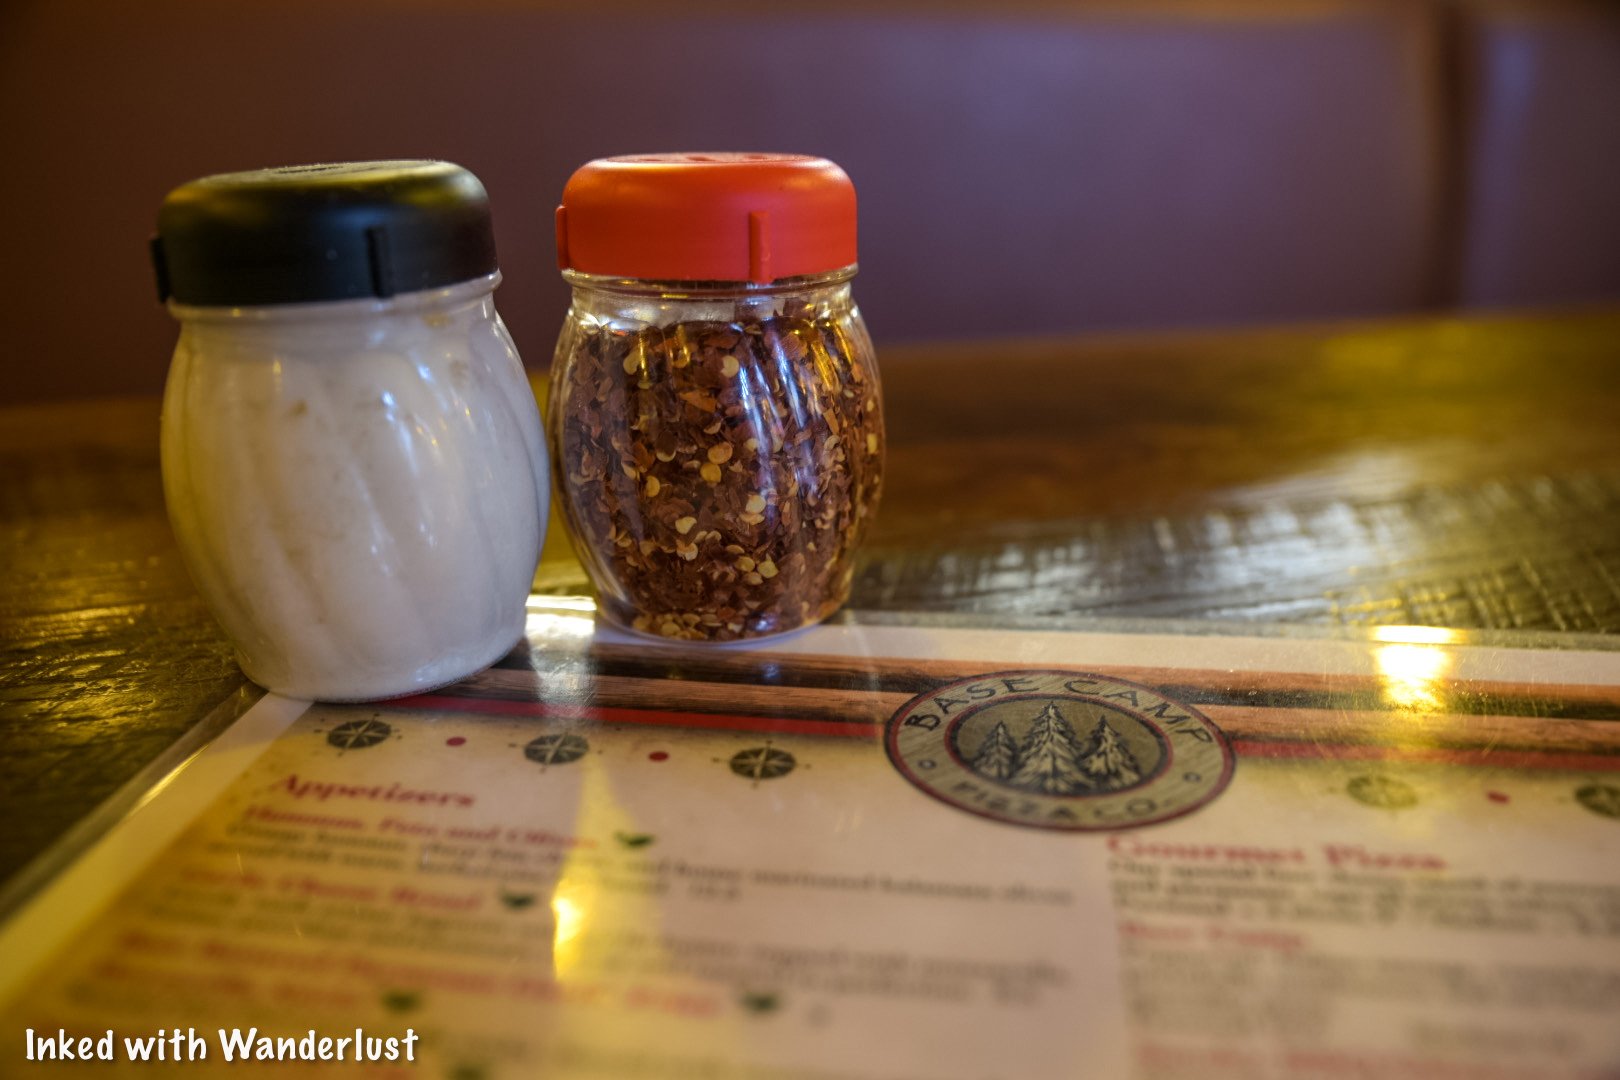
As far as appetizers are concerned, we were impressed with Base Camp’s offerings. Typically, pizza eateries don’t put too much thought into those.
We went with the beer battered parmesan garlic fries and loved them. They were perfectly crisp and came with a generous amount of garlic and parmesan.
Our one and only critique was we wish they got a little more creative with the dipping sauce rather than serving basic ketchup. Aside from that, they were great.

Now we get to the pizza. The hero. I assume that’s why most of you are reading this post, correct? As stated above, they have a variety of toppings to choose from but if you’re into the classics, they have those.
I ordered the smokey bbq chicken with bacon. It was topped with roasted chicken, crispy bacon, red onions, bbq sauce, cilantro, creamy smoked gouda cheese and their signature four cheese blend.
In short, it was delicious! I’m usually a pepperoni guy, so this was a break from my normal. If you’re picky (like me), go with this one. It doesn’t have any “scary” ingredients on it.

We also ordered the restaurant’s namesake pizza, The Base Camp. Its toppings include pepperoni, Italian sausage, roasted onions, portobello mushrooms and their signature four cheese blend.
This one was full of flavor, but all the heavy toppings caused the crust to get a bit soft towards the middle. Just fair warning if you plan on ordering this one.

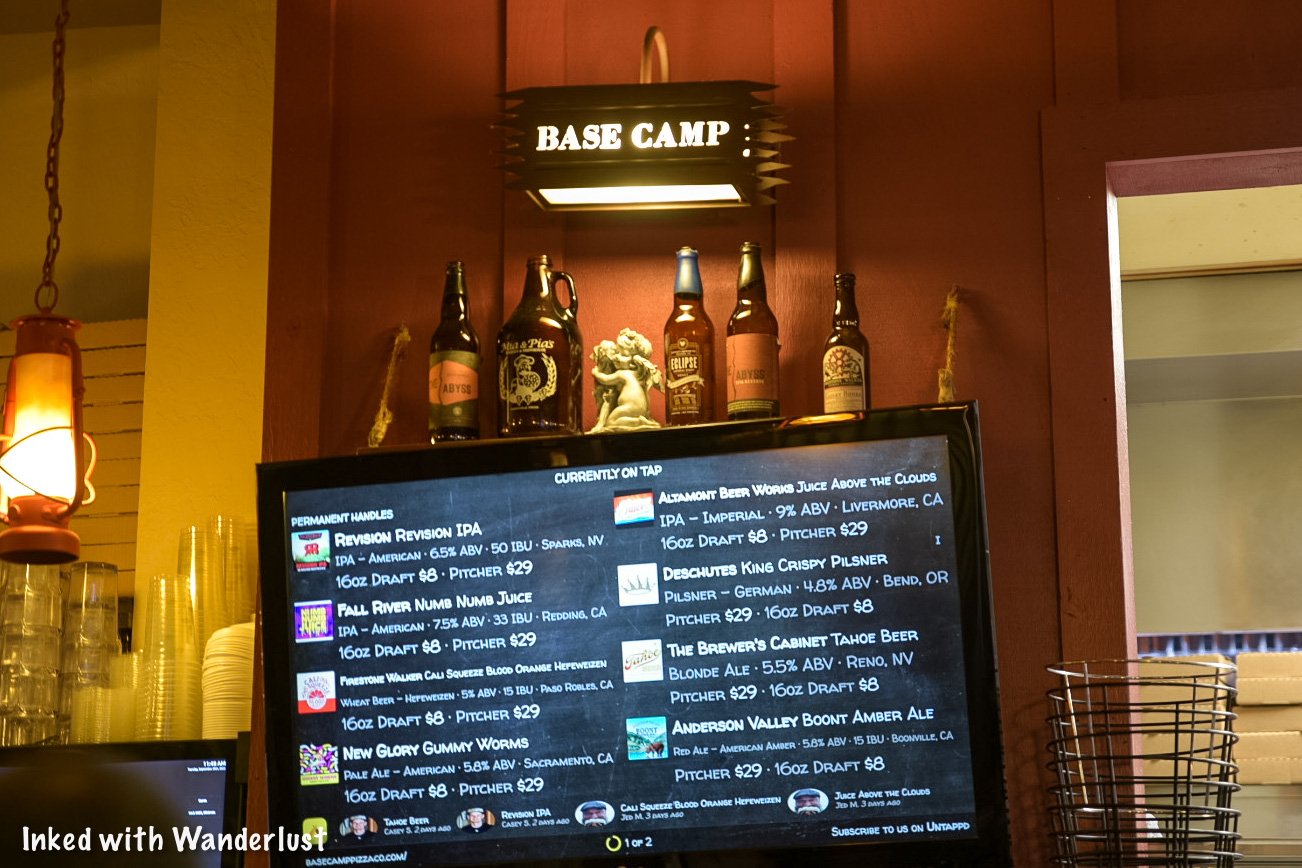
They also have an extensive drink menu with a full bar. If you don’t see a drink you like on the menu, they can make most cocktails if you request it.
Since it was a stormy day I ordered an Irish coffee with a shot of Baileys. Kisha ordered the, Tahoe Toddy. Both drinks were delicious and hit the spot.
Our Thoughts…
We’ve eaten at Base Camp Pizza twice and both times were stellar experiences. The service was good and the food was great. We really don’t have much to complain about.
The only negative we can come up with is the price but honestly, you’re eating at a restaurant in the Heavenly Village complex. You’re going to pay more for everything here.
All things considered, you could bring a large group here, order a couple large pizzas and still get away with feeding that large group for a decent price. Especially if the group splits it.
So in reality, a family eating here would make the most economical sense versus a place where you would each order your own own entree at $15 to $20 (or more) per plate.
So, yes, we recommend giving Base Camp Pizza a try if you’re planning a trip to the South Lake Tahoe area. We don’t thin you’d regret it.
Your Thoughts…
Does Base Camp Pizza sound like a place you and your family would enjoy? Do you have a recommendation for another great eatery in the area? Let us know in the comments below. We love hearing from our readers!
Please support our website by sharing it with your family and friends.
Thank you for reading.

Emerald Bay State Park Guide: Hiking, Camping, Vikingsholm, Kayaking and More
Established as a state park in 1953 Emerald Bay is one of, if not the, most gorgeous enclaves in all of Lake Tahoe. It’s over…
3 minute read | contains affiliate links
Established as a state park in 1953, Emerald Bay is regarded as one of the most gorgeous enclaves in all of Tahoe. It’s over 1,500 acres of hiking trails, turquoise water and pine trees.
It features one of Tahoe’s original summer homes, Vikingsholm Castle, and the only island on the lake, Fannette Island.
One caveat to Emerald Bay is due to its beauty, it is very popular and has a minimal amount of available parking. These two things can seriously complicate your visit.
In this guide, we’re going to cover topics such as directions, camping, activities, parking and much more. Let’s get into it!
How To Get To Emerald Bay

Emerald Bay State Park is located on the west side of the lake, along CA-89 (Emerald Bay road). Despite what you may think, getting there is pretty much a straight shot.
From South Lake Tahoe:
The south side of Lake Tahoe is where most visitors stay and play. It shares a border with Nevada and thus, is littered with casinos, hotels, shops, restaurants, ski lifts and more.

Drive south on Lake Tahoe blvd. (away from Stateline) for 2.5 - 3 miles (you’ll feel like you’re driving away from the lake. Don’t worry, you’ll rejoin it soon)
When you come to the intersection for Lake Tahoe blvd. and CA-89 (Emerald Bay road), turn right and continue straight for about 8.5 miles.
As you enter the perimeter of the park, you’ll arrive at the campground entrance first. If you’re NOT staying here, continue straight
After another couple miles, you’ll see a small lot on your right with the entrance sign (pictured above). This is the lot for Emerald Bay State Park proper.

From North Lake Tahoe/Incline Village:
Unfortunately, visiting from the north side or Incline Village means a longer drive, though it’s still pretty straight forward.
If you’re coming from Incline Village, you could go either direction. Our recommendation, however, would be to follow the north route.
Drive south on Hwy 28 for about 10 miles
Keep left to turn onto West Lake blvd.
At the traffic circle, merge onto CA-89 and follow this for about 18 miles
You’ll pass D.L. Bliss State Park on your left
About 2-miles after passing D.L. Bliss, you’ll see the parking lot for Emerald Bay on your left
Parking & Fees

The parking situation at Emerald Bay is abysmal, at best. Considering the amount of daily visitors the park sees, the amount of parking spaces is insufficient.
If you arrive early enough, and we mean EARLY, you’ll be ok. We arrived just after 8am on a weekday to near empty lot, as you can see in the photo above.
By the time we gathered our things, paid the fee and began our hike (maybe 8:30) the lot was near capacity. That’s how quickly it can happen.

If you see this sign, it’s too late. You’ll either need to circle around a few times until something opens up or try again later in the day.
Keep in mind that parking isn’t allowed on the side of the road and while you could park nearby in the Eagle Falls parking lot, walking along this road is pretty sketchy.

As is the case with most attractions in Lake Tahoe, there’s a fee to use this lot. The pay stations are to the left of the entrance of the trail to Emerald Bay.
These pay stations accept credit/debit cards, as well as cash. They do not, however, give change. So be sure you have the exact amount.
Fees are as follows:
$10.00 for day-use (your day-use receipt is also good for visits to D.L. Bliss and other state parks in the same day)
$3.00 for a single hour (if you’re just looking to check out the view and leave, this is the option for you. If you’re wanting to go down to the beach, you’ll want to opt for day-use)
Emerald Bay Viewpoints

These are a few easy-access viewpoints where you can get a commanding view of Emerald Bay and Fannette Island.
Emerald Bay State Park Viewing Deck

We’ll start with the main viewpoint located just steps from the parking lot were just discussing. It’s large and provides the closest view of the island.
If this is all you want to do (and not hike into the bay itself) then you’ll select the $3.00, one-hour option at the pay stations.
Lower Eagle Falls View
While a bit obstructed by pine trees, the view from Lower Eagle Falls (across the street from the Eagle Falls trailhead) is gorgeous, nonetheless.
If you position yourself correctly, the trees even provide frame for Fannette Island. This is also a great spot to see a sunrise/sunset over Emerald Bay.
Inspiration Point Vista

Further down the road is the small parking lot for Inspiration Point. In our opinions, this is the weakest view of the three. If it’s all you can get, though, it’s better than nothing.
Much like the Vikingsholm lot, there is a fee to park here. The fees are:
$5.00 for 30-minutes or less
$10.00 for over 30-minutes
Honestly, beyond the view, there isn’t much else to do over here. So if all you’re doing is checking out the view, opt for the 30-minute timeframe.
If the Bayview trailhead lot is full (Cascade Falls), you can check for a space in this one. Keep in mind, though, that it’ll add a half-mile to your hike and you’ll need to pay the $10 for the over 30-minute timeframe.
Emerald Bay Things To Do

Despite being a relatively small enclave of the much larger Lake Tahoe, there are many recreational opportunities in Emerald Bay.
Hiking Trails

There are a number of hiking trails contained within Emerald Bay State Park. They range from easy jaunts to full-day treks.
The main hiking trail is the one leading from the parking lot down into Emerald Bay. It’s one-mile, round trip, and is easy going down but steep going back out.
The most famous would be the Rubicon Trail. It’s a beautiful shoreline hike connecting Emerald Bay and D.L. Bliss and is roughly 16-miles, round trip.
Other trails that are outside of Emerald Bay proper but can be accessed along Emerald Bay road include Eagle Falls & Eagle Lake, Granite Lake, Maggie’s Peaks, Cascade Falls, Velma Lakes and much more.
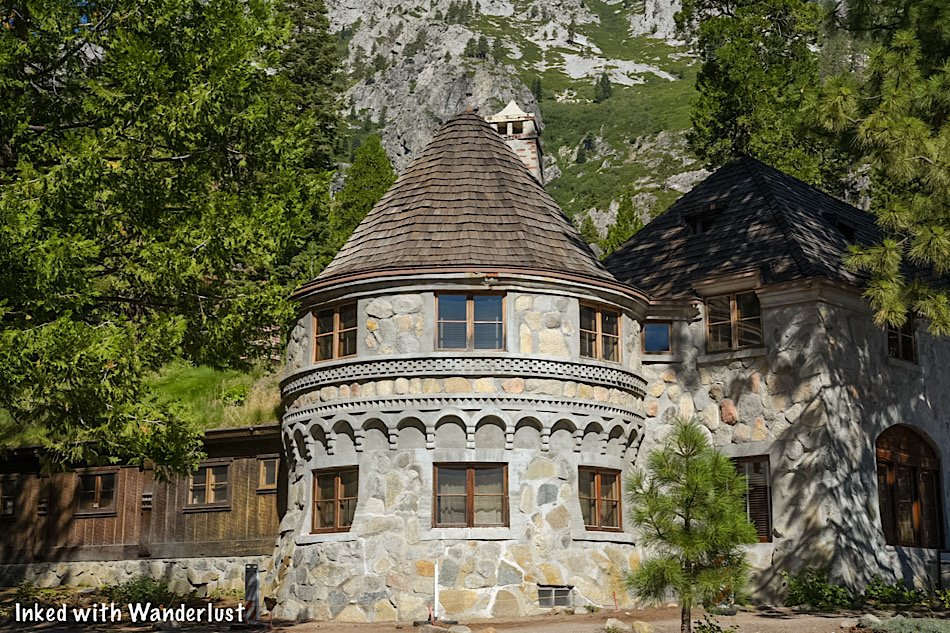
Vikingsholm Castle Tour

This gorgeous example of Scandinavian architecture is a former summer home of multiple people from the early 1900’s.
Daily tours are held during the summer season. A knowledgable guide takes you through the interior and details its history.
If you want more details on Vikingsholm Castle, we suggest reading our previous post about it here.
Kayaking, Paddleboarding, & Swimming

Other popular activities at Emerald Bay include kayaking, swimming and paddleboarding. Emerald Bay’s exclusive vendor, Kayak Tahoe, rents out both daily during the summer months.
I recently tried kayaking for first time in Emerald Bay and wrote a post about my experience kayaking to Fannette Island. If you’ve never kayaked before and are interested, give it a read.

Also, you could always swim or simply hang out at the beach. Note that if you want to swim, you must do so in the designated area.
It’s marked, located near the middle of the beach line and is rather small. If it’s a particularly busy day, this can fill with people quickly.
Emerald Bay Visitor Center

The Visitor Center, while small, is a must-do while in Emerald Bay. Especially if it’s your first time. In it, you’ll find multiple exhibits detailing the history and development of the park.
There’s also a small gift shop inside selling typical items like t-shirts, patches, pins and coffee mugs in addition to food and drink items.
Behind the Visitor Center is a short trail to the lower section of Eagle Falls. This is best viewed in spring or early summer. Run-off is near non-existent after that.
*Note: Eagle Falls is the only waterfall in Lake Tahoe that feeds directly into the lake.
Emerald Bay Boat Tours

There are multiple boat tour operators in Lake Tahoe but our favorite is, Tahoe Cruises. They’ve been operating since 1979, are fully licensed and insured.
They provide both day-time and sunset cruises around Tahoe and Emerald Bay. Their vessels have fully stocked bars and food is available for purchase.
Camping & Lodging

If you’re looking to camp in Emerald Bay, you’ll want to book a site at the Eagle Point Campground. You can reserve a site up to six months in advance.
You must reserve your site through Reserve California and due to its popularity, sites sell-out fast. So the earlier you decide on a date, the better.
Another popular campground near the lake is Fallen Leaf Lake Campground. These sites need to be reserved through Recreation.gov, also up to six-months in advance.
If you’d rather stay in a hotel, we highly recommend, The POSTMARC, in south lake. Particularly if it’s just you and your spouse. It’s our favorite and only 13-miles from Emerald Bay.
Otherwise, if you’re here with family, we recommend Bluelake Inn (budget friendly), Lakeland Village at Heavenly (luxury condos) and Hotel Azure.
Things To Do Near Emerald Bay

While there’s a lot to do in Emerald Bay, there are a plethora of activities and sights to see that are either just outside the boundaries of the park and some just a few miles away.
Below, we’re going to cover a handful of our favorites and some we think you and your family would enjoy.
Eagle Falls & Eagle Lake

Just down the road from the Emerald Bay parking lot is the trailhead for one of the most popular trails in Tahoe - Eagle Falls and Eagle Lake.
Upper Eagle Falls is a short, but somewhat steep jaunt from the parking lot. Beyond that, you hike another mile to the beautiful Eagle Lake.
It’s fairly short and family-friendly. Though you’ll want to bring hiking poles with you (tap the link to see our top recommendation) as this trail is VERY rocky.
*Tip: Check out our post about the hike to Eagle Lake here
Hike to Cascade Falls

Cascade Falls is another fantastic hike just outside of Emerald Bay proper. You’ll find the trailhead at the Bayview trailhead just across the street from the Inspiration Point parking lot.
Much like the trail to Eagle Lake, this one is also rocky. However, it’s only the last 2/3rd’s-of-a-mile. The first third is relatively flat and smooth.
To get the full experience, you should do this hike in spring or early summer. As snow melt depletes, so does the run-off.
*Tip: To get all the details of this hike, check out our post about it here
Get An Epic View From Cave Rock

This one’s a bit of drive away as it’s located on the Nevada side of the lake. Despite that, we feel it’s worth mentioning as the view of the lake from Cave Rock is too good to miss.

The trail is short (about a quarter-mile) and goes at a barely noticeable incline. You will need to scramble up to the top of Cave Rock but it isn’t anything technical.
*Tip: Get all the details about Cave Rock by checking out our post here
Other Things To Do Nearby
Those were just a few of our recommendations. Below, we’ll list a bunch more and how close/far away they are from Emerald Bay:
D.L. Bliss State Park - 2 miles
Fallen Leaf Lake - 9 miles
Baldwin Beach - 15.5 miles
Pope Beach - 17 miles
Sand Harbor Beach State Park - 35 miles
Heavenly Mountain Resort - 24 miles
Skunk Harbor - 38 miles
Stateline - 24 miles
Zephyr Cove - 28 miles
King’s Beach - 28 miles
Tahoe City - 18.5 miles
Mount Tallac Trailhead - 18 miles
Mount Rose Trailhead - 43 miles
This isn’t an exhaustive list by any means, but the places/sights listed above are some of the most popular in the area.
Restaurants Near Emerald Bay

Aside from quick treats at the Visitor Center, there are no eateries inside of or in the immediate vicinity of Emerald Bay State Park.
Below are a handful of restaurants located nearby. All of these can be found along Emerald Bay road.
The Burger Lounge
Beacon Bar & Grill
Sonney’s BBQ Shack
Emerald Bay Bar & Grill
Evan’s American Gourmet Cafe
Hunan Garden Restaurant
Jalapeño’s Tapueria
Camp Richardson’s Ice Cream Parlor
Margarita’s Mexican Restaurant
Cakes by the Lake
Your Thoughts…
Have you been to Emerald Bay? Do you feel there’s something we left out? Let us know in the comments below. We love hearing from our readers!
Please support our website by sharing it with your family and friends.
Thank you for reading.

How To Visit Vikingsholm Castle In Emerald Bay State Park
Located along the beach and at the head of Emerald Bay State Park, Vikingsholm Castle is a fine example of Scandinavian…
3 minute read | contains affiliate links
Located along the beach and at the head of Emerald Bay State Park, Vikingsholm Castle is a fine example of Scandinavian architecture right here in Lake Tahoe.
This Nordic estate sits on 232-acres of pristine beach line, beautiful turquoise water, Fannette Island (the only island in Tahoe) and the only waterfall in Tahoe that flows directly into the lake.
Unlike most state parks and attractions like Vikingsholm, you cannot drive up to it. A visit to Emerald Bay and Vikingsholm requires you to either hike or boat in.
In this guide, we’ll cover all the necessary information you’ll need to plan a visit for yourself. Topics such as the hiking trail, parking, when to go and more will be covered.
Let’s get into it!

Exciting news for our readers!
We’re excited to Introduce the all-new "Inked with Wanderlust" online store!
We're thrilled to bring you a fantastic collection of wanderlust-inspired merchandise. Celebrate your love for travel and exploration with our stylish apparel and accessories, designed to ignite your sense of adventure.
Discover a range of unique designs that capture the spirit of wanderlust, from cozy hiking-themed t-shirts to charming accessories that make your wanderlust spirit soar!
Visit our online store today and start your journey of style and adventure. Happy exploring!

Quick Stats
Location: Emerald Bay State Park, Lake Tahoe
Fee: $10 parking fee
Permit: None
Open: Year round, but road is sometimes closed in winter
For: Hikers, beach-goers, swimmers, kayakers, etc
Restroom: At the trailhead and at the beach
Parking: Medium-sized lot
EV Stations: None
Difficulty: Moderate
Popularity: High
Mileage: Two-miles, round trip
Time: A couple hours to a full day
Elevation Gain: 377-feet
Condition: Well-maintained and signed
Features: Vikingsholm Castle, waterfall and beach
Pets: Not allowed
Drones: Not allowed
Hazards: None other than usual wilderness dangers
Our Visit(s): August 2022
Parking and Location

Vikingsholm Castle is located in Emerald Bay, the crown jewel of Lake Tahoe. It’s one of the most popular destinations along the lake and thus, gets crowded quickly.
The key to a successful visit is to arrive early. Emerald Bay does have it’s own parking lot but for the crowds it sees, it’s inadequate at best.
We arrived just after 8am to a near empty lot. By 8:30am, while we were still gathering our things, the lot was nearly full. So arrive early. Earlier if you’re here on a holiday.

If you see this sign, you’ve arrived too late. It won’t re-open until enough space has been made and you’re not allowed to park on the side of the road.
You’ll either need to circle around a few times until spaces become available or try back again later in the day.
If you find space near the Eagle Falls trailhead, you can park there and walk to it but keep in mind, the road is very narrow and borderline hazardous for pedestrians.


The fee to use this lot is $10 for the day. This fee covers other California state parks in Tahoe during the same day (D.L. Bliss State Park is just down the road).
The pay stations accept cash or credit/debit cards. After paying, you’ll be given a receipt. You’ll need to display this receipt on your dashboard.
*Note: If you’re paying with cash, have the exact amount. The pay stations do not give change.

Just to the right of the pay stations is a booth. Head past this to access both the trail and the viewing deck for Emerald Bay.

Soon after passing the booth you’ll see a viewing deck on your right. This platform provides a commanding view of Emerald Bay and Fannette Island.

A lot of people simply get to this point, take their pictures and leave. If your intention is to visit the castle, then rejoin the trail and continue forward.
The Trail to Vikingsholm Castle

We’ll first address the difficulty of this trail. At more than a few spots, trail signage indicates how steep and borderline difficult the way back up can be.
From my perspective, the hike back up wasn’t bad. It was a constant incline and a little steep in some spots, but overall I didn’t have a problem with it.
That being said, if you have certain physical limitations, be honest with yourself. The way in is a breeze, but the way out can be difficult if you’re not acclimated to trails like this.


As stated above, the way in is a breeze. If you’re here early, the majority of the trail will have a plethora of shade and you’ll have sporadic views of Fannette Island.

As you near the end of the trail, you’ll reach a junction. If you go left, you’ll be on the Rubicon Trail. To continue to Vikingsholm Castle, go right.
Soon after this juncture, you’ll see the public restrooms for Emerald Bay on your right. Soon after that, you’ll see the back side of Vikingsholm Castle on your left.
Vikingsholm Castle

Vikingsholm Castle is sight to behold and one you’ll have to see for yourself to truly appreciate. How well it blends in with its natural surroundings is a wonderful example of how construction can compliment nature.


Vikingsholm Castle was designed by Swedish architect, Lennart Palme, in 1928. Palme was the nephew of the property owner, Lora Josephine Knight.
Construction of the castle was completed in 1929 and was used my Mrs. Knight and her family as a summer home (one of the first of which in Lake Tahoe).


The castle was owned by Mrs. Knight until her death in 1945. The castle traded hands a couple more times until the State of California acquired it in 1953.
Considering the jaw-dropping beauty of Emerald Bay, it’s crazy to imagine that someone once lived here. I know we would love to have Emerald Bay all to ourselves for the summer.
Tours of Vikingsholm Castle

Unfortunately, we didn’t partake in the tour of the castle as by the time the first one embarked, it was time for us to get going.
Tours of the castle are offered daily and take you through the interior. You’ll follow a knowledgable guide who’ll detail the history of the castle, its development and impact on the area.

Tour information is as follows:
Tours are guided
They are 30-minutes in length
They’re offered daily, early June - late September
Tour times are between 11am - 4pm
$15 per adult, $12 per child 7-17, free for under 7
Tickets can be purchased at the Emerald Bay Visitor Center
For more information on the guided tours, you can check out the Sierra State Parks Foundation.
Also, if you want further details of the history of Emerald Bay, Vikingsholm Castle and the people involved, we highly recommend checking out their official website.
Additional Activities in Emerald Bay

There’s more to do in Emerald Bay than just touring the castle. Many people make the trek down here to hang out on the beach and recreate on the lake.
There’s a dedicated (but small) swimming area near the center of the beach. There’s no swimming allowed outside this border due to the amount of vessels going through the bay.

Paddle boarding and kayaking are also popular activities. There’s a dedicated rental stand (Kayak Tahoe) where you can rent either one for an hour or for the day.
While I was here, I took the opportunity to try kayaking for the first time. It didn’t take me long to get it down so if you’ve never done it, don’t let that stop you.
If you’re interested in reading about my kayaking experience to Fannette Island and the Tea House, check out our article about it here.
Your Thoughts…
Have you visited Emerald Bay, Vikingsholm Castle or Fannette Island before? Do you have any additional tips about visiting this park? Let us know in the comments below. We love hearing from our readers!
Please support our website by sharing it with your family and friends.
Thank you for reading.

How To Kayak To The Fannette Island Tea House in Emerald Bay
Recently, during a visit to Emerald Bay State Park, I made the last minute decision to rent a kayak and explore Fannette…
4 minute read | contains affiliate links
Recently, during a visit to Emerald Bay State Park, I made the last minute decision to rent a kayak and explore Fannette Island and its famed tea house.
I’ve never kayaked before, but I really wanted to check out the island and have always thought about giving kayaking a try, so I pulled the trigger.
After experiencing it, I wanted to put this post together to hopefully encourage others who haven’t kayaked, but have always wanted to.
In this post, l’ll cover topics such as how get to Emerald Bay, where to find the rental place, a little information about Fannette Island and more!
Let’s get into it!
Emerald Bay State Park

In order to kayak to Fannette Island, you’ll first need to access Emerald Bay. There’s only two ways to do this - you either hike or boat in.
I’m going to assume you’re like most people and don’t own or know how to operate a boat. So in this guide, we’ll cover the later.


To start, you’ll begin at the parking lot and trailhead for Vikingsholm Castle. From here, it’s a one-mile trek down to the beach.
You’ll need to pay a $10 fee to park in this lot and you’ll also need to arrive early. The lot fills very quickly.
The trail is a breeze going in, but it will be all uphill on the way out. In my opinion, it wasn’t difficult, but it could be for some. So be honest with yourself.

When you get to the end of the trail and facing Vikingsholm Castle, look to your right and you’ll see a pier leading from the beach into the water.
Just beyond that you’ll see the rental stand for, Kayak Tahoe. They’re the exclusive vendor for kayak and SUP rentals in Emerald Bay.
Kayak Tahoe Rentals

Kayak Tahoe is open during the typical tourist season in Emerald Bay. That usually means June through September.
They open at 10am and close at 5pm, with the final rental leaving the beach at 4pm. No additional rentals can be booked beyond that.


Prices are typical for what you’d find at most beaches in Tahoe. They are:
Single Kayak: $35 one hour, $45 two hours, or $100 full day
Double Kayak: $45 one hour, $65 two hours, or $120 full day
SUP (Paddleboard): $35 one hour, $45 two hours, or $100 full day
These prices are current as of the 2022 season. We always do our best to keep information like this up-to-date, but just in case, here’s their official website.
*Tip: You’ll want to bring a dry bag with you. (tap the link to see our recommendation). These bags will keep your cell phone, camera, wallet and other valuables dry if they were to fall into the water or get splashed.

Once you’ve made your selection, paid the fee and filled out the waiver, you’ll be given a life vest and instructions on how to operate your kayak.
If you’re like me and have never kayaked before, don’t fret, you’ll be ok. Listen to and follow their instructions and you’ll catch on quickly.
*Here’s a few tips they gave me that’ll help you
Stabilize half of the kayak on shore and when getting in, sit down onto that side of the kayak.
Never step in. That’ll cause your kayak to tip.
Always wear a life jacket.
Keep your hips loose and in movement with the kayak.
Always give motorized vessels the right of way.
I went with the one-hour rental and that was more than enough time for me to get to the island, explore the Tea House and kayak back to the beach.
If you feel like it’ll take you longer, be on the safe side and go with the two-hour rental so you won’t feel rushed.
Fannette Island

The island’s now permanent name is Fannette. In the last 100 years, however, it has also gone by Baranoff, Emerald Isle, Dead Man’s, Coquette and Hermit’s.
The shoreline of the island is rocky with little to no beach to speak of. As you approach it, you’ll need to find a spot to park and secure your kayak.
*Tip: The front-facing shoreline has a lot of space to park your kayak and provides the easiest access to the tea house. The rear of the island (the side facing the mouth of Emerald Bay) has very limited access.

As you can see in the photo above, I found the perfect spot in a set of rocks to cradle the kayak while I was gone. This spot was along the shoreline facing the beach.


Once you’re actually on the island, you’ll find the path up to the Tea House through thick brush. You’ll then get to a point where you’re scrambling up some boulders (nothing complicated).
At around the halfway mark, you’ll start getting great views of the bay and a sneak peak of the Tea House over some boulders.


After a short while, you’ll arrive at the Tea House on top of the island. You’ll enter it through the doorless entryway on the side.
The Tea House

The biggest draw to visiting Fannette Island is the old Tea House. All that remains is an empty shell, but it’s still worth to checking out.

The 16 by 16-foot structure was built between 1928-1929, the same timeframe as Vikingsholm Castle and owned by Mrs. Knight (who also owned the castle).

It was used for the purpose in which it’s named; a literal tea house. Mrs. Knight and her guests would be transported to the island by motorboat and be served tea there.
There was a fireplace in the corner and a large oak table with four oak chairs in the center, giving the Tea House a rustic appearance.
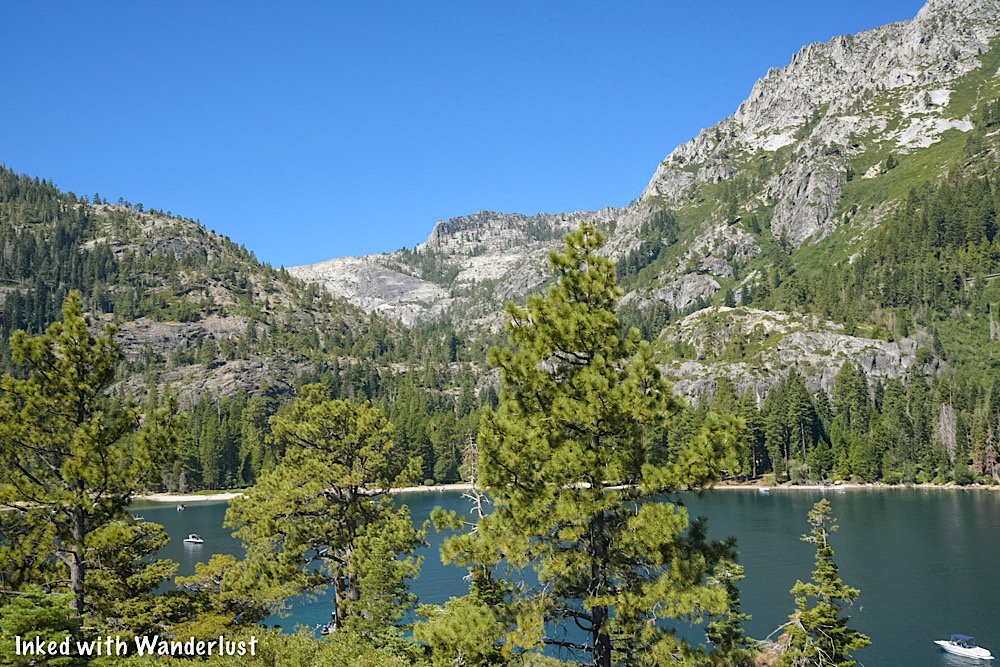

From both inside and outside the Tea House, you’ll get fantastic views of Emerald Bay and the Lake Tahoe mountains on each side.

When you’re done checking out the Tea House, simply head back down the same way you came. Hopefully, your kayak will still be there.
I still had around 20-minutes left on my rental time, so I decided to circle the island before heading back. I recommend doing the same if you have the time.


From here, simply head back to the beach to drop off your kayak and life vest. If you’re up for more activities, check out the posts of other things you do in the area below!
“How To Visit Vikingsholm Castle In Emerald Bay”
Your Thoughts…
Have you tried kayaking before or have you been wanting to try it? Tell us about it in the comments below. We love hearing from our readers!
Please support our website by sharing it with your family and friends.
Thank you for reading.

Hiking To Cascade Falls In South Lake Tahoe
Cascade Falls is a beautiful series of waterfalls just outside of the boundaries of Emerald Bay State Park in Lake Tahoe…
5 minute read | contains affiliate links
Cascade Falls is a beautiful series of waterfalls just outside the boundaries of Emerald Bay State Park in Lake Tahoe.
To get the full experience, you’ll need to see it in spring or early summer. Unfortunately, when we came, it was early August. So the run-off was lite.
However, the lack of run-off created dozens of tiny waterfalls scattered throughout (instead of one big cascading waterfall). So it was still a great experience.
In this guide, we’re going to cover all the information you’ll need to visit it for yourself. Topics such as directions, parking information, what to expect and more will be covered.
Let’s get into it.
Quick Stats
Location: West side of Lake Tahoe
Fee/Permit: $10 per vehicle parking fee
Open: Year round, but difficult to access in winter
For: Hikers
Parking: Semi-large parking area
Restroom: In the parking lot
EV Stations: None
Drone Use: Not allowed
Difficulty: Easy to moderate
Popularity: High
Time: 2-3 hours
Milage: 2-miles, round trip
Elevation Gain: 255-feet
Trail Condition: Maintained, but very rocky
Main Feature(s): Cascading waterfall / views of the lake
Pets: Allowed on leash
Special Notes/Hazards: Trail is very rocky. Broken ankles aren’t uncommon on this trail
Our Visit(s): August 2022
Directions, Parking & Trailhead

Getting to the trailhead for Cascade Falls is easy and straight forward. Simply plug Bayview Campground into your GPS and follow the directions.
Shortly after entering Emerald Bay State Park, you’ll see a sign for Bayview Campground on the side of the road. Turn into this lot.
If there’s space available, a parking attendant will approach you to collect the parking fee. It is $10 per vehicle, payable by cash or check.
*Note: Credit/debit cards are not accepted as of 2022
Bayview is a former campground that was re-purposed into a parking for this popular trail. The former camp sites have been repurposed into parking spaces.
If there isn’t space available, you’ll be directed to find a spot along the side of the road. While you won’t have to pay for a spot here, you may have to circle around a couple times and it will add another half-mile to your overall hike.
Cascade Falls Trail
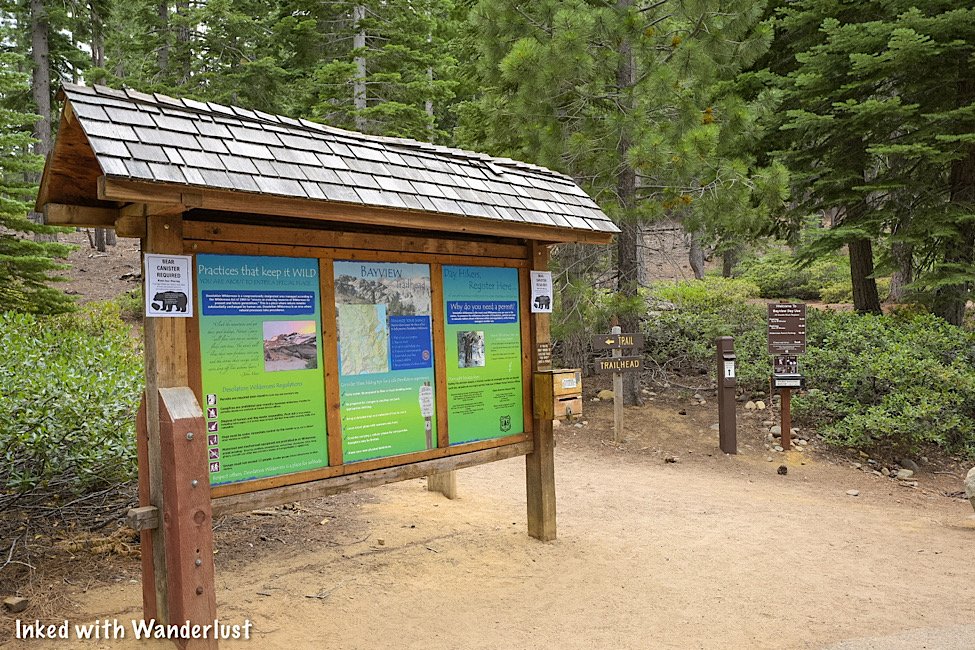
The trailhead is located at the back-end of the parking lot, across from the restrooms. This trailhead is also for the trail to Granite Lake and Maggie’s Peaks.
If you’re only going to Cascade Falls, a Desolation Wilderness permit isn’t required. If you’re going to Granite Lake or Maggie’s Peaks, then you will need to fill one out.

To go to Cascade Falls, head left at the trailhead. This section of the trail takes you under a plethora of shade from the pine trees and is relatively flat.
As you approach Cascade Lake, you’ll hit your first set of steps along this trail. At the top, you’ll get a partial view of Cascade Lake on your left. Keep going to get the full view.
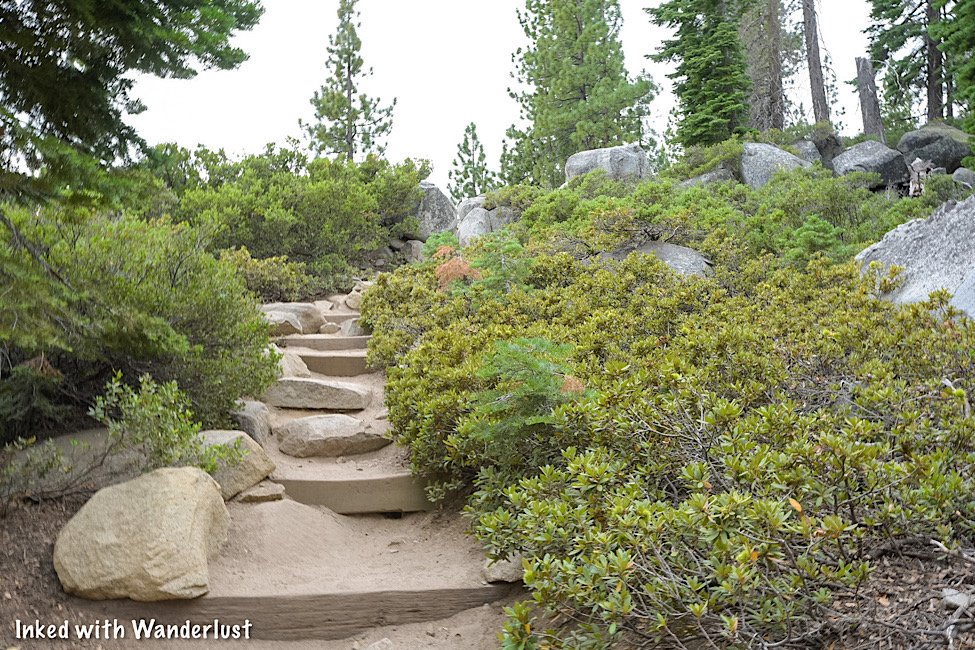

As you reach the top, you’ll continue to follow the dirt/rock trail for another third-of-a-mile. Cascade Lake will remain on your left throughout its entirety.
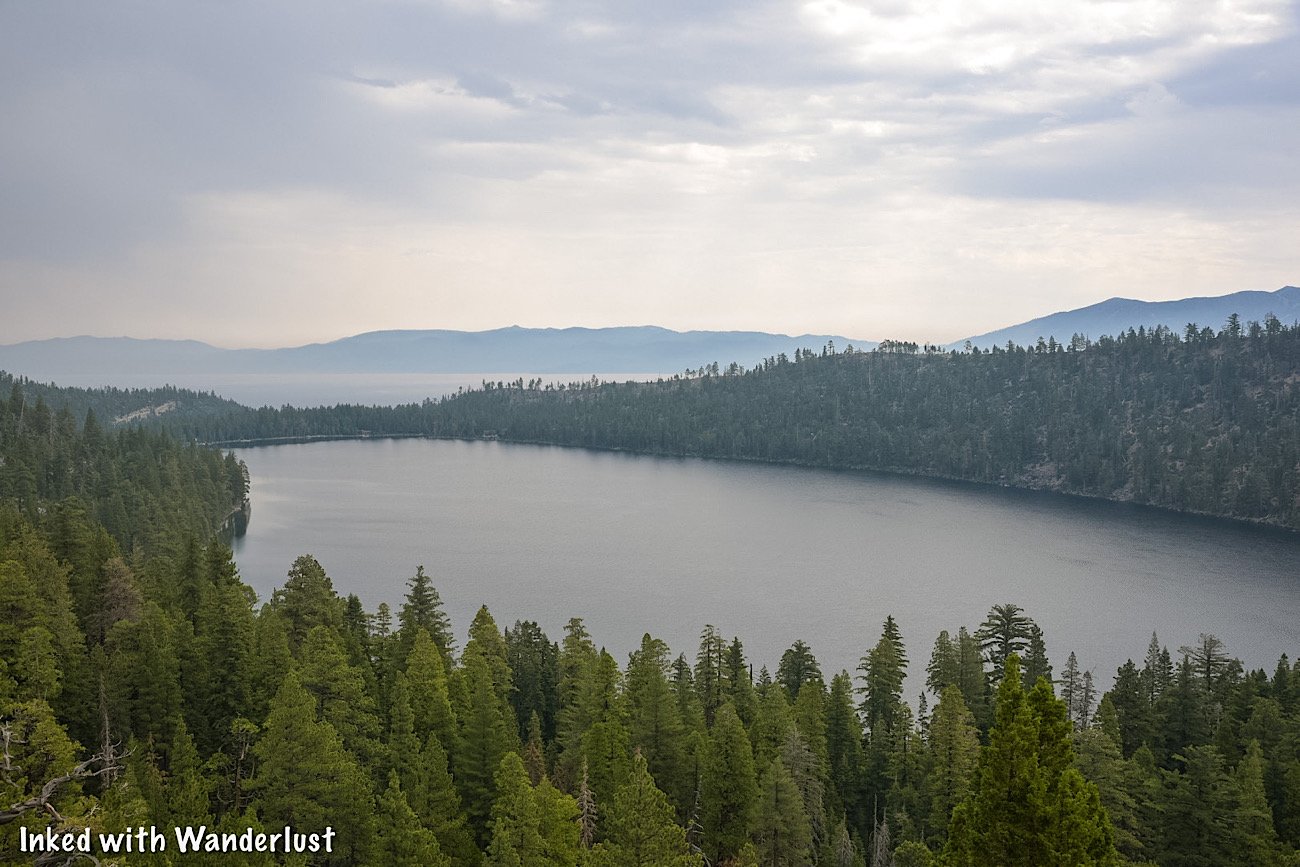

As you get closer to Cascade Falls, you’ll see a small sign of an arrow pointing left posted on a tree. Heed these directions.
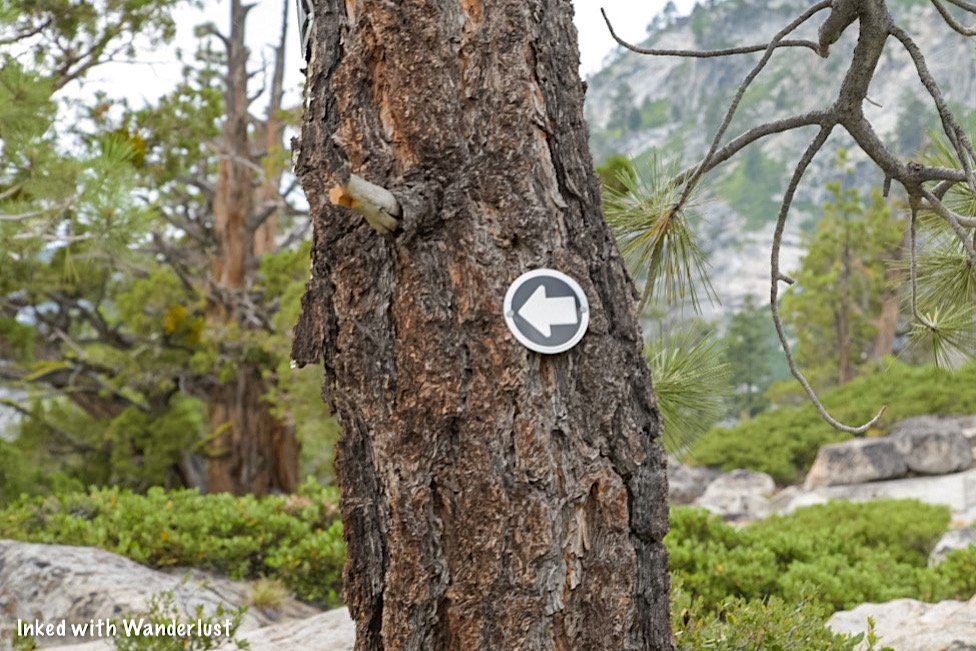
From here, the trail moves over solid granite rock and can be hard to follow. Simply use common sense and head in the direction of the waterfall.
Cascade Falls

As stated earlier in this post, if you’re here in spring or very early summer, you’ll be fortunate enough to experience the falls at peak flow.
We were here in early August, so the run-off was down to a trickle. If you happen to be here during this timeframe, fret not, you’ll be treated to dozens of mini waterfalls.


The best ones we found were closer to the bottom where the edge of the falls is, but there are others literally all over the place. You just have to find them.

If you’re a photographer (or aspiring one) be sure to bring a tripod and ND filter with you to help you get creative with your photos.


To get to the edge of Cascade Falls, you’ll need to scramble down some boulders but don’t worry, it’s nothing difficult.
From there, you’ll have a commanding view of Cascade Lake with Tahoe out in the distance. We’re not certain how accessible this spot is during peak flow, though.

From here, you can continue further up the trail to other desolation lakes. Keep in mind, though, that if you intend to do so you’ll need to have had filled out the permit at the trailhead.
If you’ve gotten your fill, simply head back in the same direction you came. You’ll be on an incline on your way out so make sure you’re prepared with plenty of water.

Your Thoughts…
Have you hiked to Cascade Falls before? Were you fortunate enough to see it at peak flow? Let us know in the comments below. We love hearing from our readers!
Please support our website by sharing it with your family and friends.
Thank you for reading.

Hike To Eagle Falls and Eagle Lake In Lake Tahoe
Lake Tahoe is filled to the brim with hiking trails of varying lengths. Some can be done in a matter of hours while some will…
6 minute read | contains affiliate links
Lake Tahoe is filled to the brim with hiking trails of varying lengths. Some can be done in a matter of hours while some will take a day or two to complete.
If you’re new to hiking - or you’re a family with children in tow - you may be wondering which Tahoe trails would be best for you. Enter, Eagle Lake.
It’s a short, albeit rocky trail that begins at a beautiful waterfall (Eagle Falls) and concludes at the equally beautiful sub-alpine lake surrounded by rocky granite mountains.
In this guide, we’ll cover everything you’ll need to know about this trail, including; how to get there, what to expect, pictures and more! Let’s get into it!
Here’s some great hiking equipment we recommend…
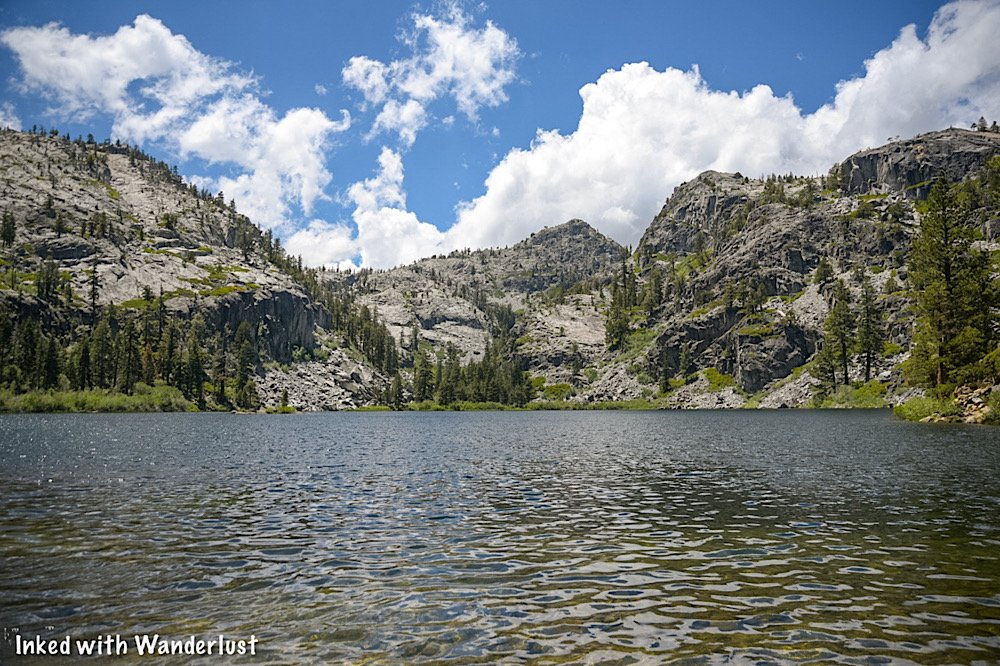
Quick Stats
Location: Emerald Bay State Park, Lake Tahoe
Fee/Permit: $10 per vehicle parking fee
Open: Year round (though the road to Emerald Bay does close in the winter if conditions are bad
For: Hikers
Parking: Small, paved lot at the trailhead and another (even smaller) lot along the road
Restroom: Yes. At the trailhead
EV Stations: None
Drone Use: Not allowed
Difficulty: Easy to moderate
Popularity: High
Time: 2-3 hours
Milage: 1.9-miles, round-trip
Elevation Gain: 459-feet
Trail Condition: Maintained and clearly signed
Main Feature(s): Waterfall and lake
Pets: Allowed on leash
Special Notes/Hazards: This trail is VERY rocky.
Our Visit(s): 2016, 2018, & 2022
Location & Parking

While not contained within Emerald Bay State Park proper, the parking lot and trailhead can be found just outside its bounderies across the road.
From South Lake Tahoe:
Head south on Lake Tahoe blvd for 2.5 to 3-miles (depending on where you are in South Lake).
Turn right onto CA-89 north/Emerald Bay road.
You’ll soon hit a series of switchbacks and before long, you’ll arrive in Emerald Bay.
Don’t turn right in the lot when you see the sign for Emerald Bay. That’s for the campground.
Instead, continue straight until you see the sign for Eagle Falls (pictured above) and turn left into the parking lot.
From North Lake Tahoe:
Make your way to CA-89 south and stay on it for about 18-miles.
You’ll pass D.L. Bliss State Park before arriving.
After entering Emerald Bay, turn right into the parking lot at the Eagle Falls sign.
Parking is going to be the hardest part of this whole experience. For starters, the lot fills QUICKLY during the spring and summer months.
If you arrive before 9am, you’ll probably be ok. Any time after that, though, and you’ll have a rough time. It may be necessary to circle around a couple of times.
If the lot at the trailhead is full, there’s a small pull-out style lot along the road you can use. Every time we’ve gone, this was where we ended up parking.
The biggest advantage to parking here is you don’t have to pay the parking fee. If you park in the main lot, then you’ll need to pay the $10 per vehicle fee.
Lower Eagle Falls

One aspect of this hike people tend to miss is the lower section of Eagle Falls. To get to it, you’ll need to (safely) cross the road from the parking lot.
You won’t get the traditional, straight-on view of the falls, but you will have the opportunity to get close to it. Especially when the run-off starts to slow down.

From the lower falls, you’ll also get an awesome view of Emerald Bay and Fannette Island. You’ll be contending with trees slightly obstructing your view, though.

When you’re done taking in the views, simply head back up to the road and cross it to get back over to the Eagle Falls trailhead.
If you’re facing the lot, use the boardwalk style walkway on your left. This is a much safer route to the trailhead versus walking through the lot and dodging vehicles.
Upper Eagle Falls

The tail to Eagle Lake officially begins near the upper portion of Eagle Falls. From the trailhead to the bridge at the upper falls, it’s about a quarter-mile.
The trail immediately begins to climb from the trailhead up wide steps made from rock and wooden pillars. You’ll get a temporary reprieve at the top.

As the trail levels out, you’ll come to a junction. Going right will take you to an elevated viewing area for Eagle Falls. Going straight will take you to the bridge.
Shortly after the junction, the bridge will come into view. To the right of it, there’s a bench you can use to rest if needed.


To the left of the bench you’ll find a small viewing area that provides a full view of the upper falls with the bridge in the backdrop.
You will need to scramble down to it and it’s a bit sketchy. Taking small children down there probably wouldn’t be the best idea.

After crossing the bridge, you’ll see a small opening on your right between a few boulders and bushes. If you go through it, it’ll take you to the pond above Eagle Falls.


There wasn’t any signage stating to keep out but I would advise against against it considering it’s literally RIGHT above the crest of the falls.
To continue onto Eagle Lake, simply get back onto the trail and head up. From here, the trail gets even rockier. So watch your footing.
Trail To Eagle Lake

From this point forward, you’ll be in Tahoe’s Desolation Wilderness. In order to pass this point, you will have needed to fill out a permit at the trailhead.
The permit doesn’t cost anything. This is just their way of keeping track of how many people are in Desolation and in case anyone goes missing, they’ll have an idea where you are.
Simply fill out the permit at the trailhead and drop it into the iron ranger. This rule was suspended during the 2022 season but it’ll probably kick back up again in 2023.
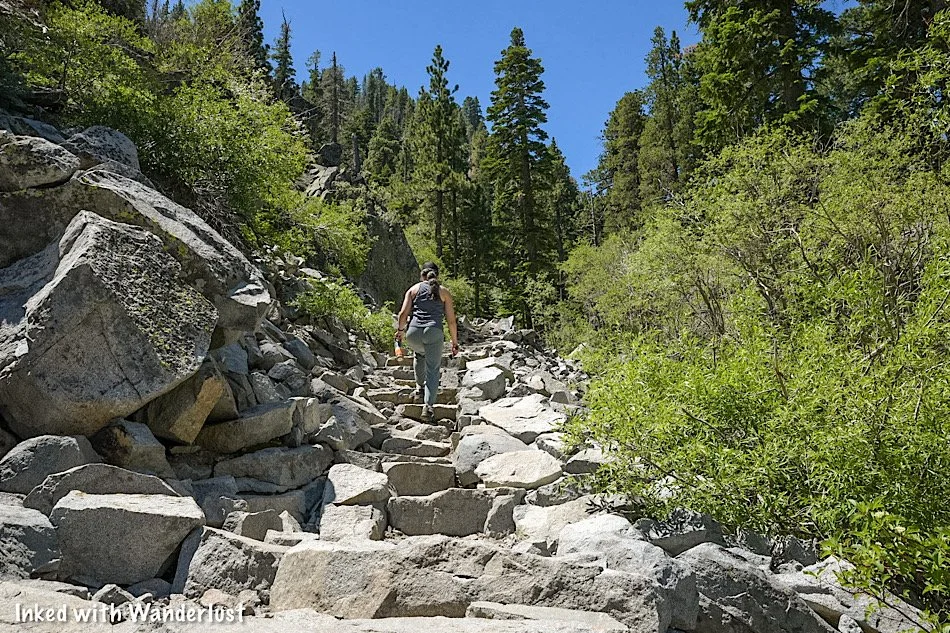
From here, the trail gets even rockier than how it was before. It’s literally carved out of rock in most places. Being mindful of your footing is paramount. Many of the rocks are slick.
You’ll continue this incline for another quarter-mile or so before it flattens out up top for a temporary reprieve. From here, you’ll be treated to an epic view of Emerald Bay and the lake.

This middle section of the trail crosses over straight granite, making the trail a bit easy to lose at times. Follow the rocks lining the path and keep to the left.
If you want to see the view of Lake Tahoe as pictured above, you will need to leave the official trail a bit to see it.

Also coming into view throughout this section are the craggy peaks surrounding Eagle Falls and Eagle Lake. The scenery is simply stunning.
Before long, the trail will begin to ascend again as you make the final push to Eagle Lake. The sounds of the creek in the ravine below signals how close you’re getting.

The incline levels out a bit as the peak above Eagle Lake comes into view. You’ll pass another junction at this point. Keep straight.
Soon after this junction, you’ll come to Eagle Lake. Most people stop at the rocky beach near the outlet of the lake. For more privacy, continue straight to other spots.
Eagle Lake

As stated above, this small rocky beach is where most people stop. The outlet is right there and is lined with stepping stones to afford you access to the other side.
You can continue straight for other beaches with less crowds, but these aren’t very well maintained. So you’ll be fighting fallen branches and other hazards.


Eagle Lake sits at around 6,000-feet and is surrounded by rocky, granite peaks. It gets its water from snow melt run-off in the mountains.
The lake itself, while cold, is perfect for swimming or wading. We would recommend keeping kids away from the outlet of the lake, though.


From here, you have a couple choices. The first is you just head back the same way you came to the trailhead.
If you have enough energy, though, you can continue up the trail to more alpine lakes including Granite Lake, Dick’s Lake and Velma Lake.
This short-but-sweet hike to Eagle Falls and Eagle Lake is nothing short of spectacular. It packs a lot of punch with little effort required.
Your Thoughts…
Does this seems like a trail you and your family would enjoy? Tell us about it in the comment section below. We love hearing from our readers!
Please support our website by sharing it with your family and friends.
Thank you for reading.