
Hike the Fire Wave Trail at Valley of Fire State Park
Located in the northern section of Valley of Fire State Park along White Domes Road lies one of the park’s most fascinating and photographed formations - Fire Wave…
Disclosure: This post contains affiliate links. If you make a purchase through these links, I may earn a small commission at no additional cost to you. I only recommend products or services that I believe will add value to my readers.
Located in the northern section of Valley of Fire State Park along White Domes Road lies one of the park’s most fascinating and photographed formations - Fire Wave. Best of all, it doesn’t require a whole lot of effort to see!
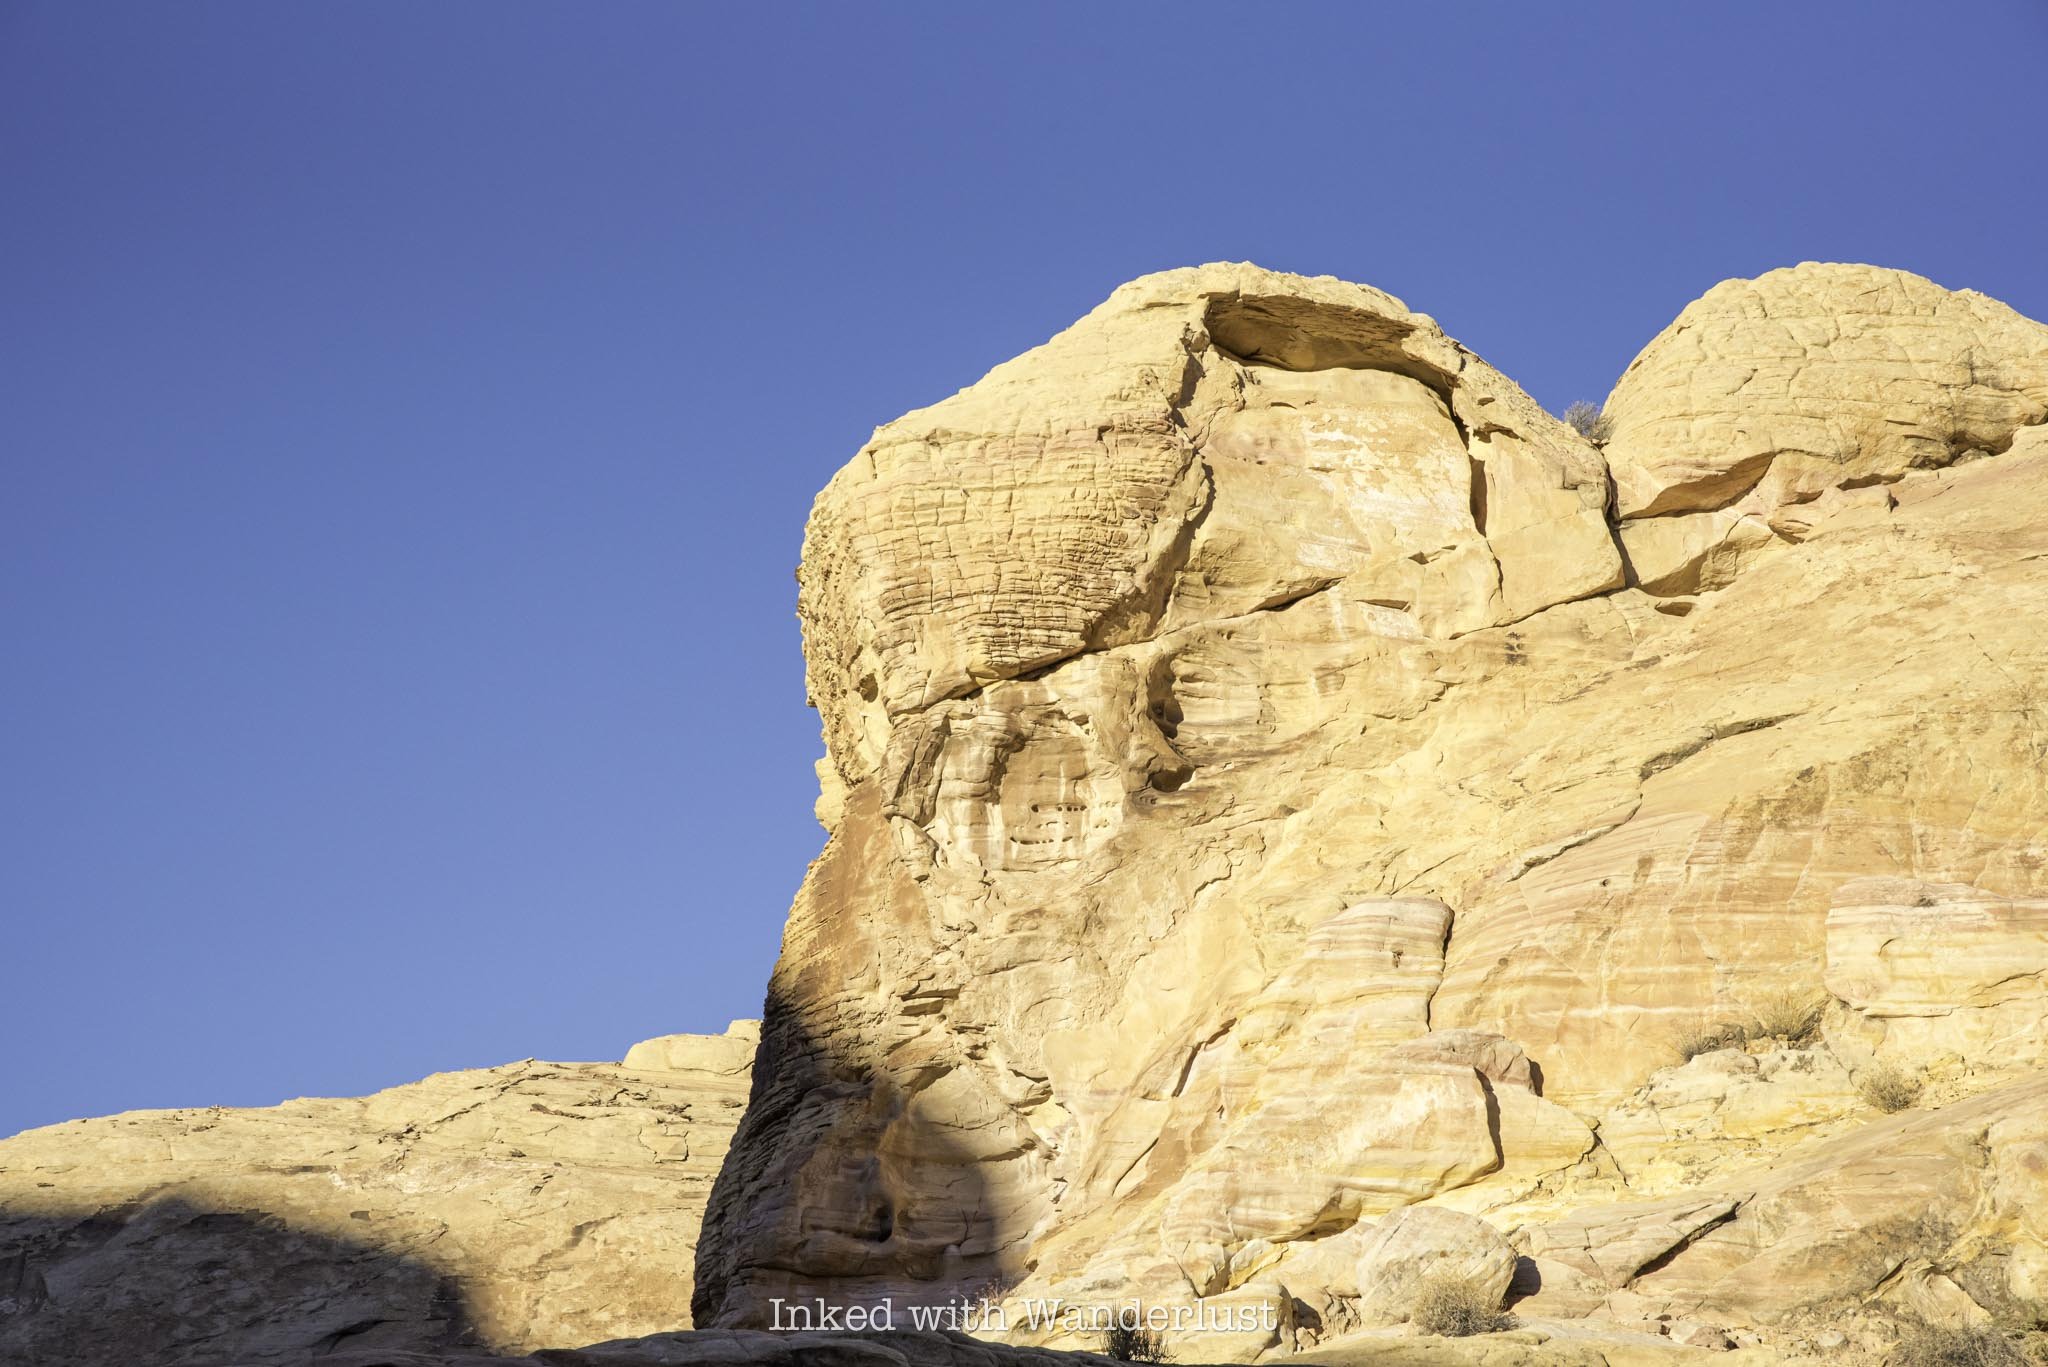
Known for its ultra-colorful swirls of red, white, and orange Aztec sandstone out-crops, Fire Wave offers park goers a picturesque, wavy formation resembling a fiery sunset. Due to this, it’s become one of the most popular attractions in the park.
If you’re heading out to Valley of Fire, Fire Wave should most definitely be on your list. There are a few things you’ll need to know before going, however. In this post, I’ll cover topics such as trail closures, parking, what to expect and more. Let’s get into it!
Trail Stats
Location: Valley of Fire State Park (north section)
Fee: None for the trail, but standard park entry fees apply
Open: Between October and mid-May
Family Friendly: Yes
Cell Service: Spotty (based on Verizon service)
Restroom: None (nearest is at White Domes Day Use Area to the north or Rainbow Vista to the south)
Parking: Two lots at the trailhead
EV Stations: None
Difficulty: Easy to moderate (depending on temperature)
Popularity: High
Mileage: 1.3 miles, out and back
Time: 30 minutes to one hour
Condition: Maintained and easy to follow
Features: Colorful sandstone formations
Best Viewed: Either sunrise or sunset
Pets: Not allowed
Drones: Not allowed
Hazards: Heat exposure, potential wildlife encounters, and rolled ankles
My Visit(s): November 2024
Is Fire Wave Trail Open?

The temperature at Valley of Fire State Park often exceeds tripe digits, necessitating the need to close select trails during parts of the year. This is done to protect visitors from heat-related illness and/or death, as the affected trails are exposed and pose significant danger to hikers. Fire Wave is one of them.
Even though it’s one of the shorter hiking trails in Valley of Fire, it’s mostly all rock and radiates heat like you wouldn’t believe. Thus, Fire Wave is on the annual list of closures, which take place between mid-May and the beginning of October.
If your visit coincides within that timeframe, you won’t be able to see Fire Wave, unfortunately. There is still plenty more to see and do, though. You can read my posts about how to spend a few hours at the park during summer and my pick of ten Valley of Fire short hikes, many of which are open year-round.
Fire Wave Parking and Getting There

Getting to Fire Wave trailhead (and around the park in general) is easy. There are only two entrances (west and east) and two main roads in the park. Valley of Fire Scenic Byway, the park’s main artery, runs between the two entrances.
To the north is Mouse Tank Road, which itself becomes White Domes Road just beyond Rainbow Vista Trailhead. This road dead ends at White Domes Day Use Area, which is also the trailhead for White Domes Loop, another hugely popular trail.
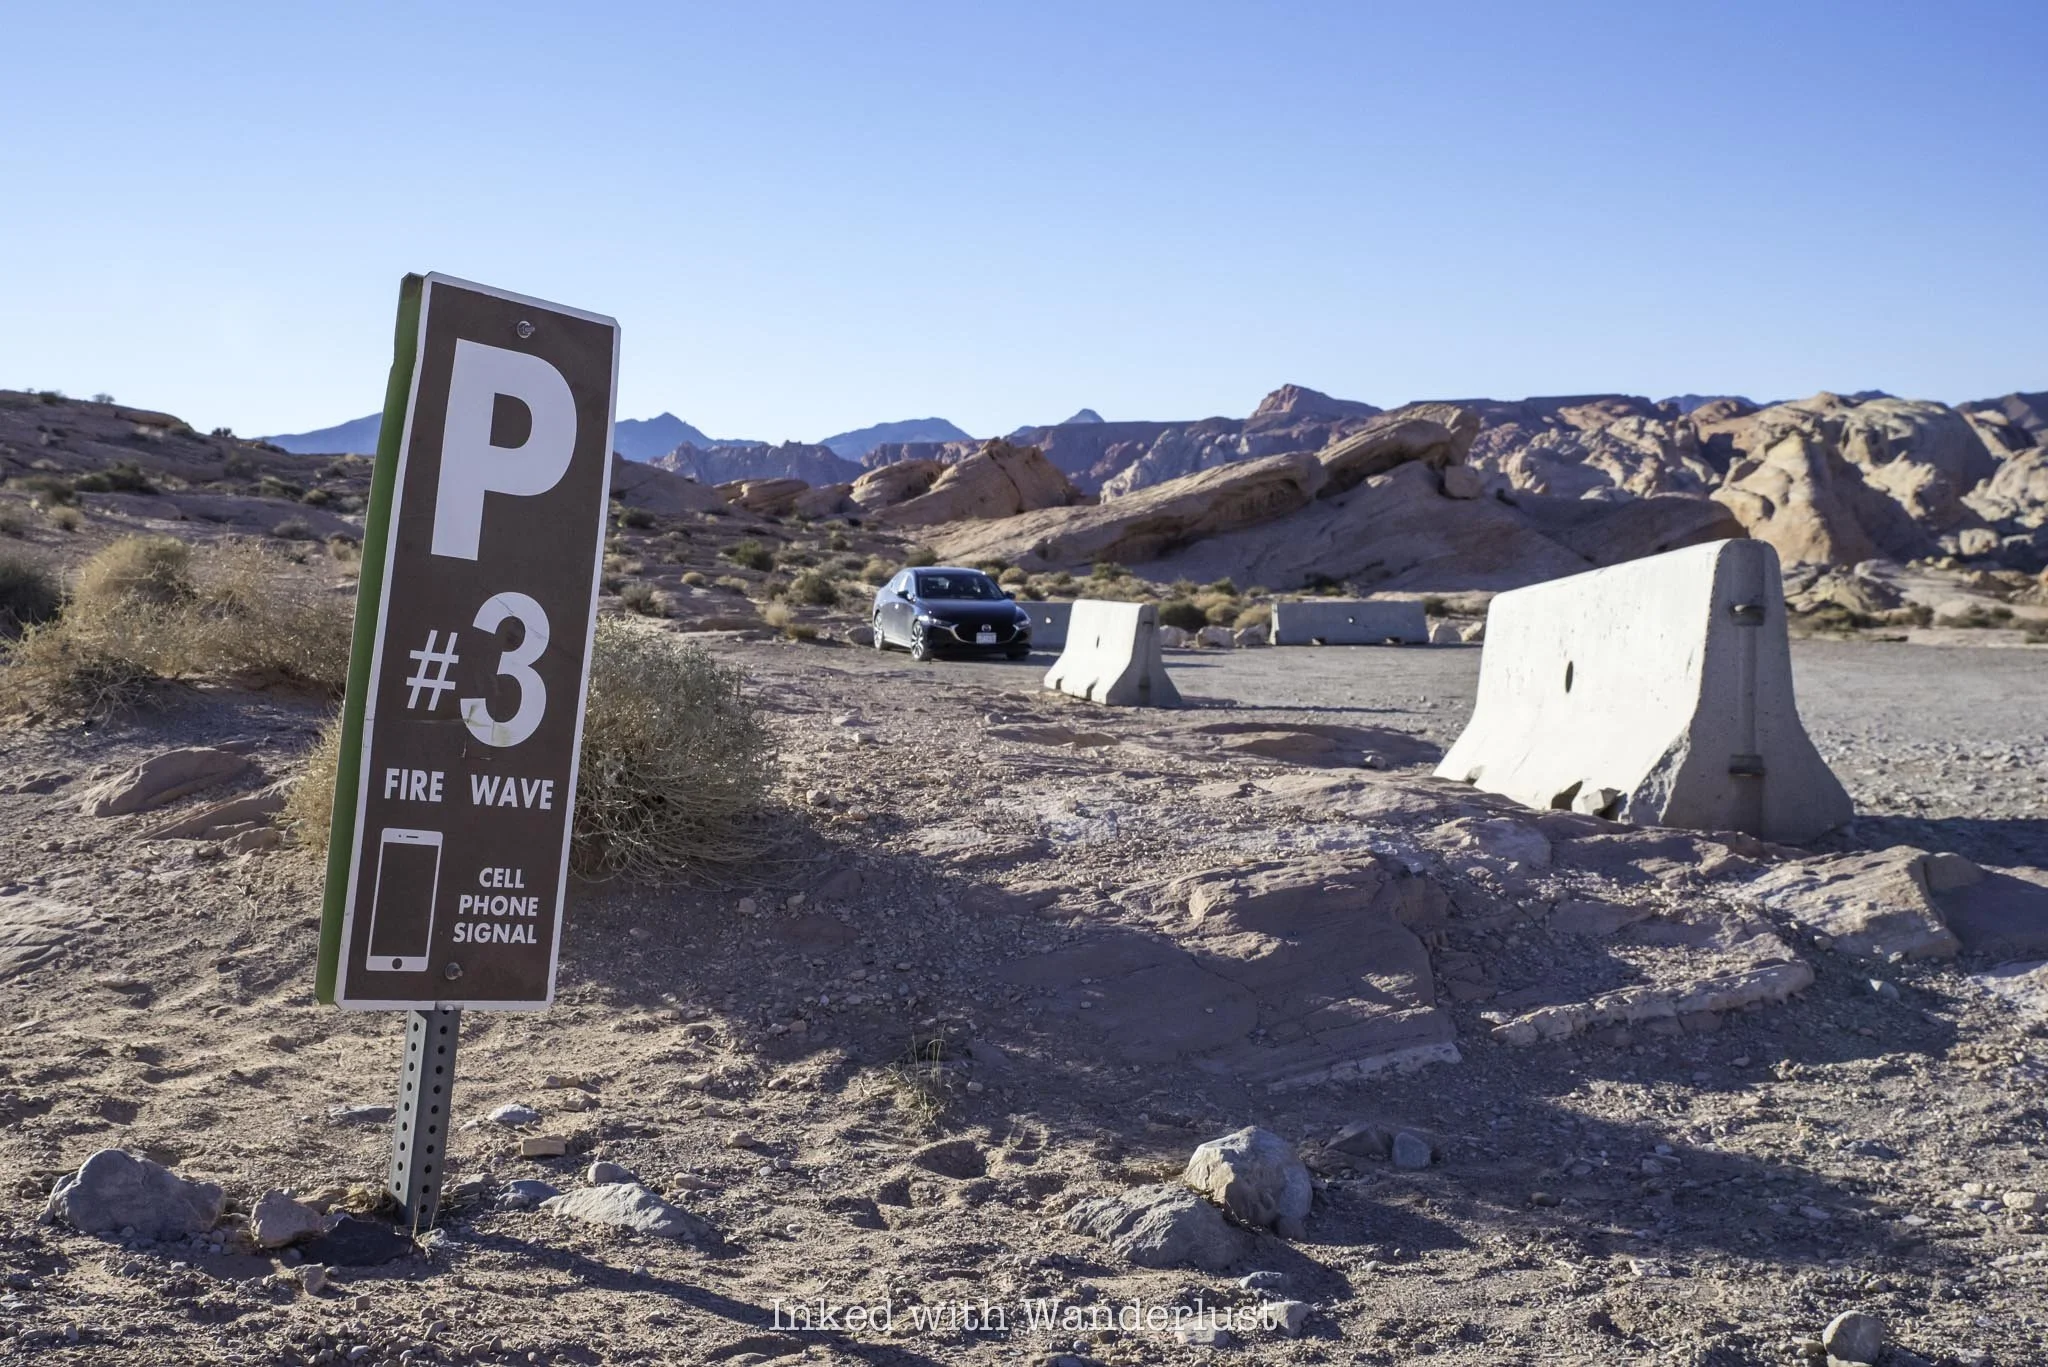
No matter which entrance you use, simply keep driving until you reach the turnoff for Mouse Tank Road and continue straight. A couple miles after it becomes White Domes Road, you’ll arrive to the parking lot on the left side of the road.
There are two gravel lots where you can park for Fire Wave, one on either side of the road. They’re both gravel and dirt, and are large enough to accommodate many vehicles. Sunrise and (especially) sunset are times when parking can be most competitive, as those are Fire Wave’s most popular times.
Even though the lots are large, it’s best to arrive early, especially during the trail’s peak visitation timeframe of October through mid-May. As the day progresses and the park gets busier, Fire Wave and nearby White Domes are usually the first lots to fill.
Fire Wave Trail
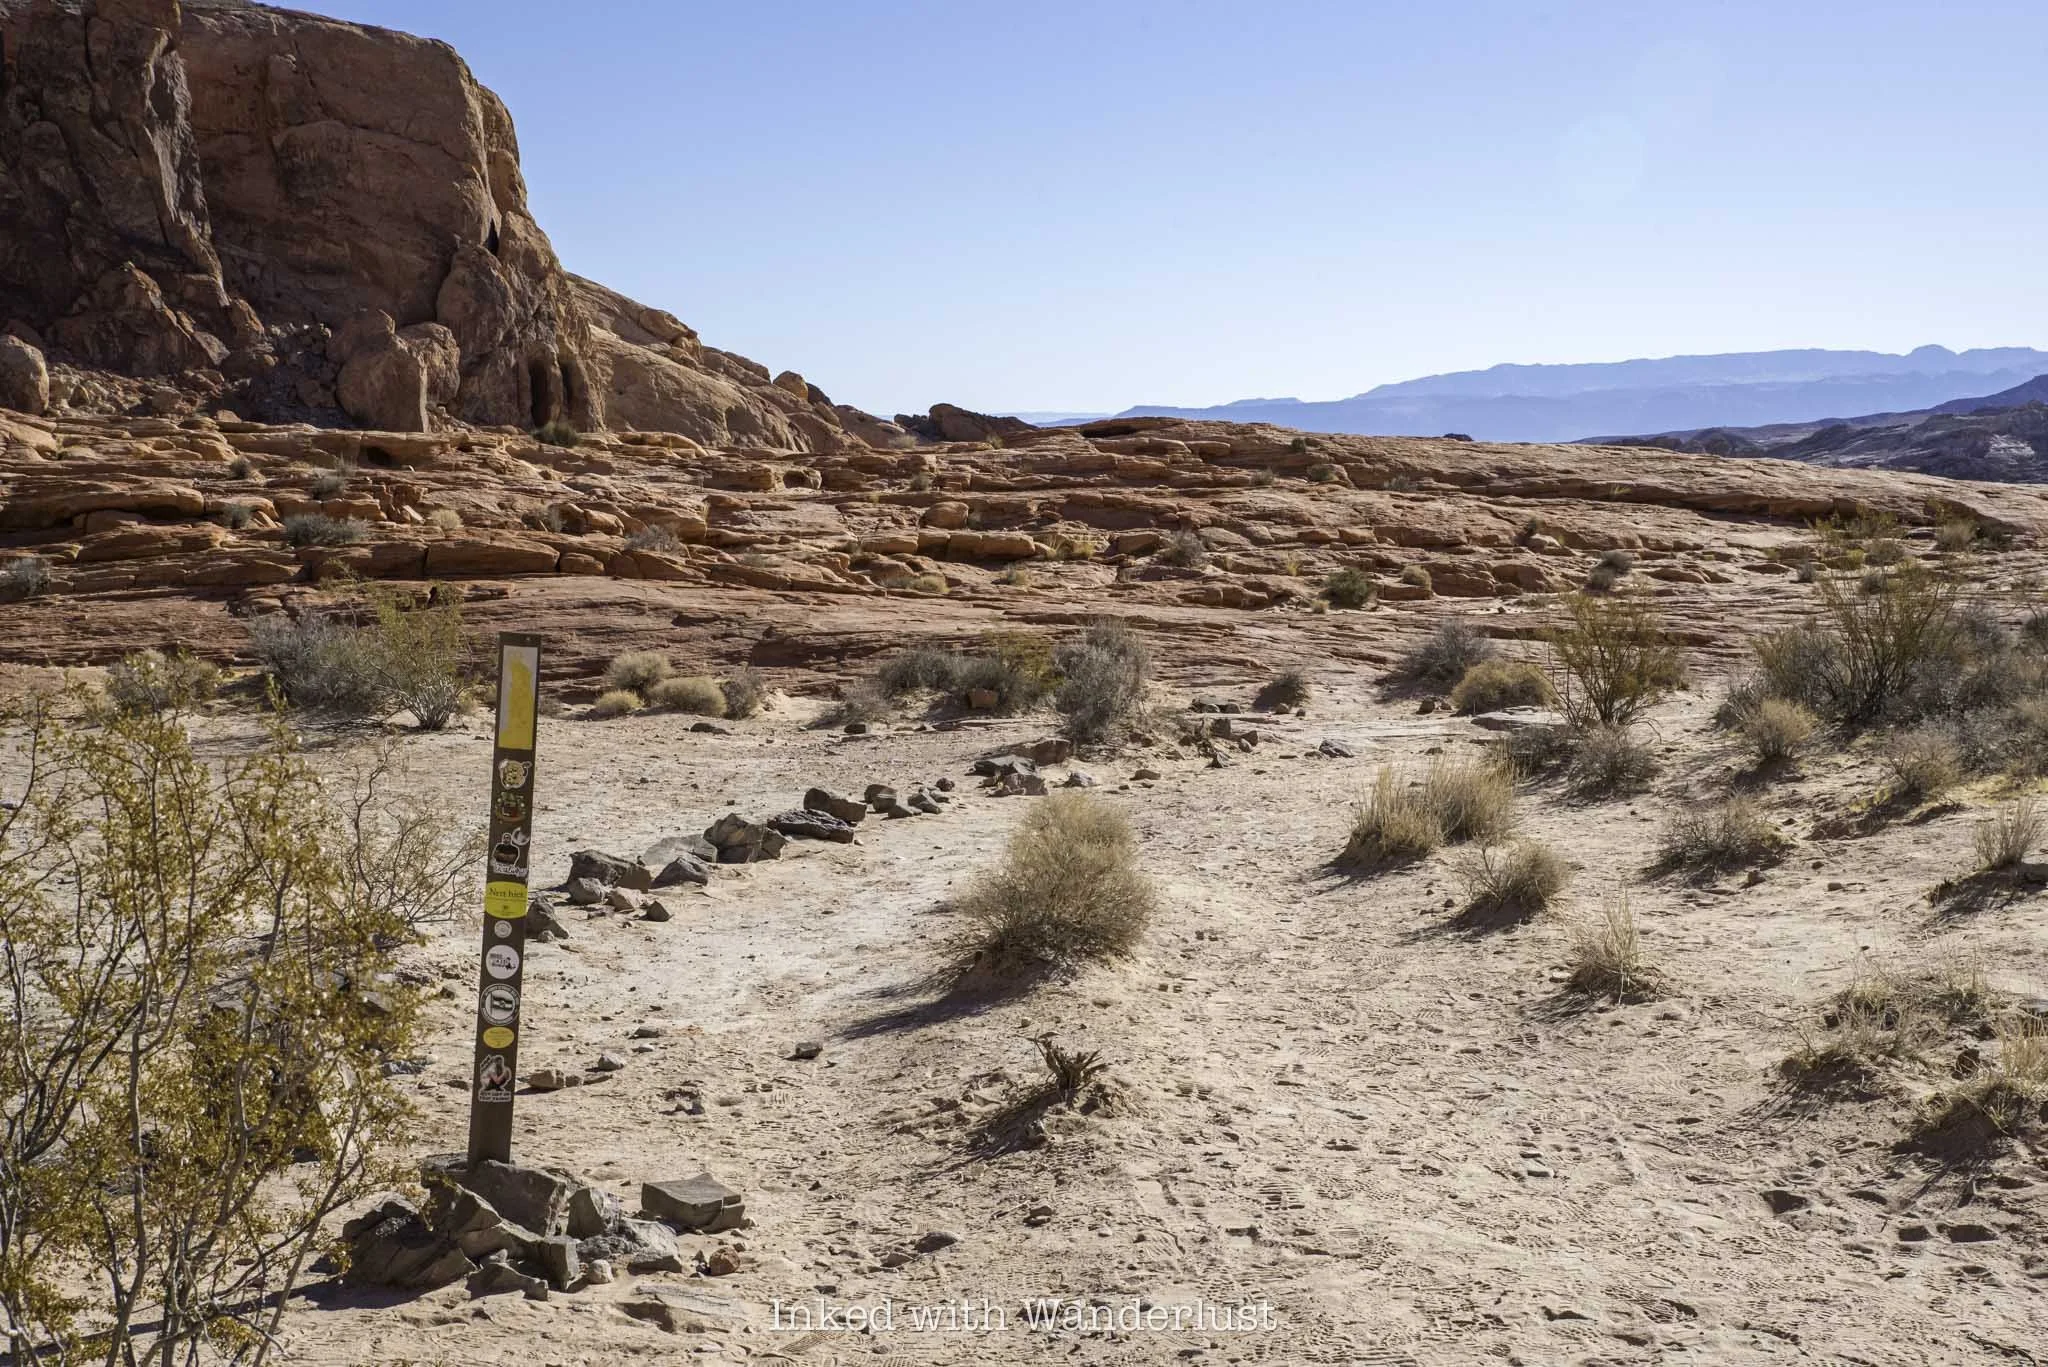
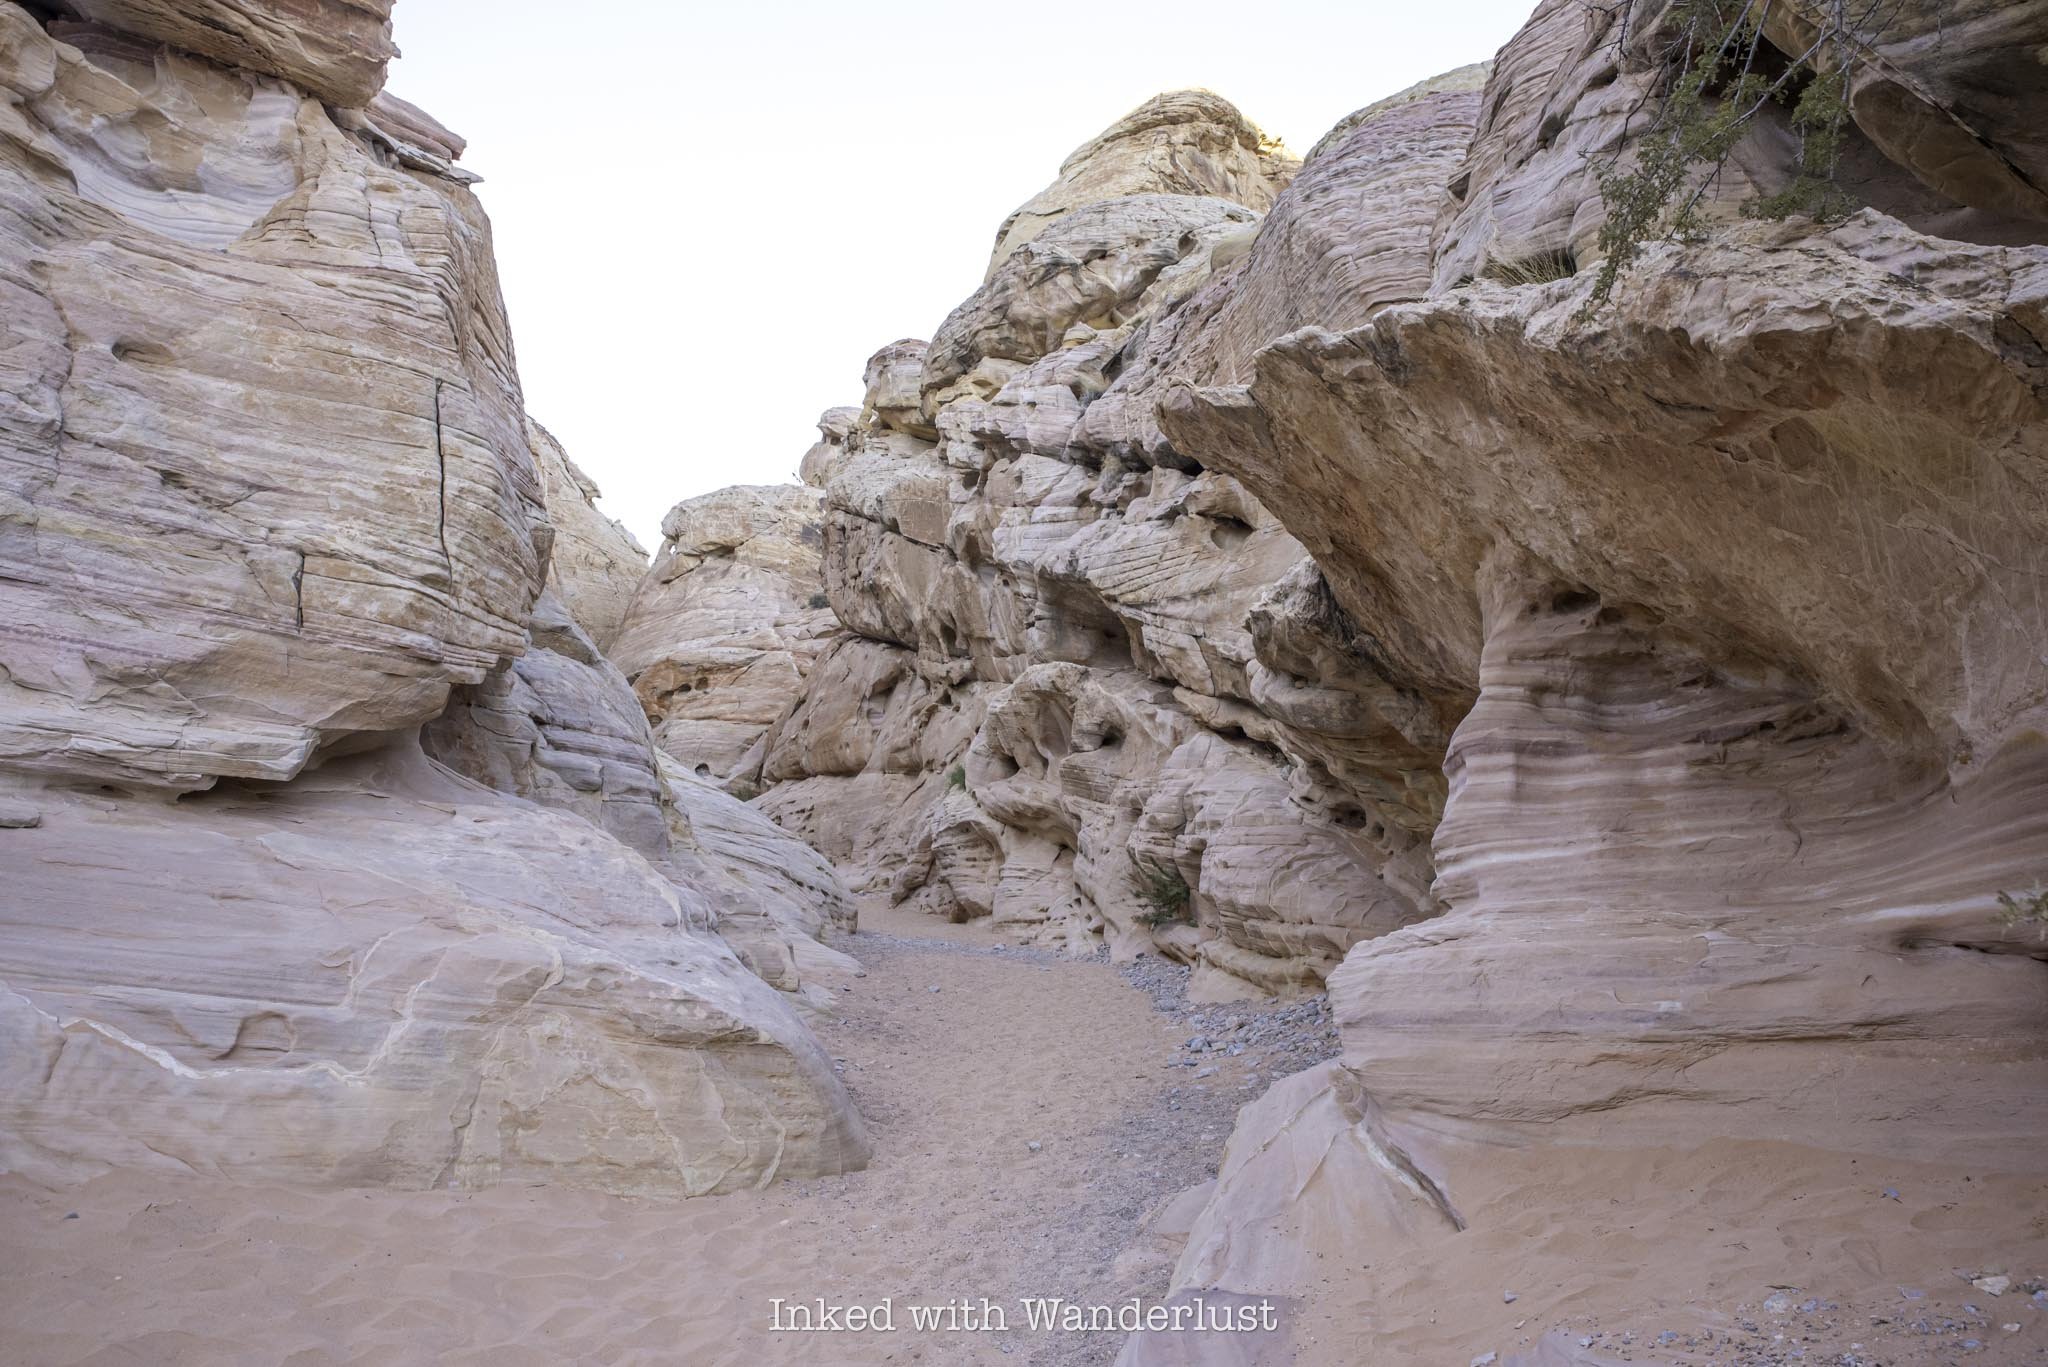
To find the start of the Fire Wave Trail, look for the huge sandstone rock in the picture above and head towards it. You’ll start out in a field condensed in sagebrush, with a sandy trail cutting through it.
The trail is mostly maintained, but does have spots where it seemingly vanishes. Don’t fret, though, as there are also trail markers indicating the correct path. So even in the spots where there doesn’t appear to be a trail, it’s still easy to follow.
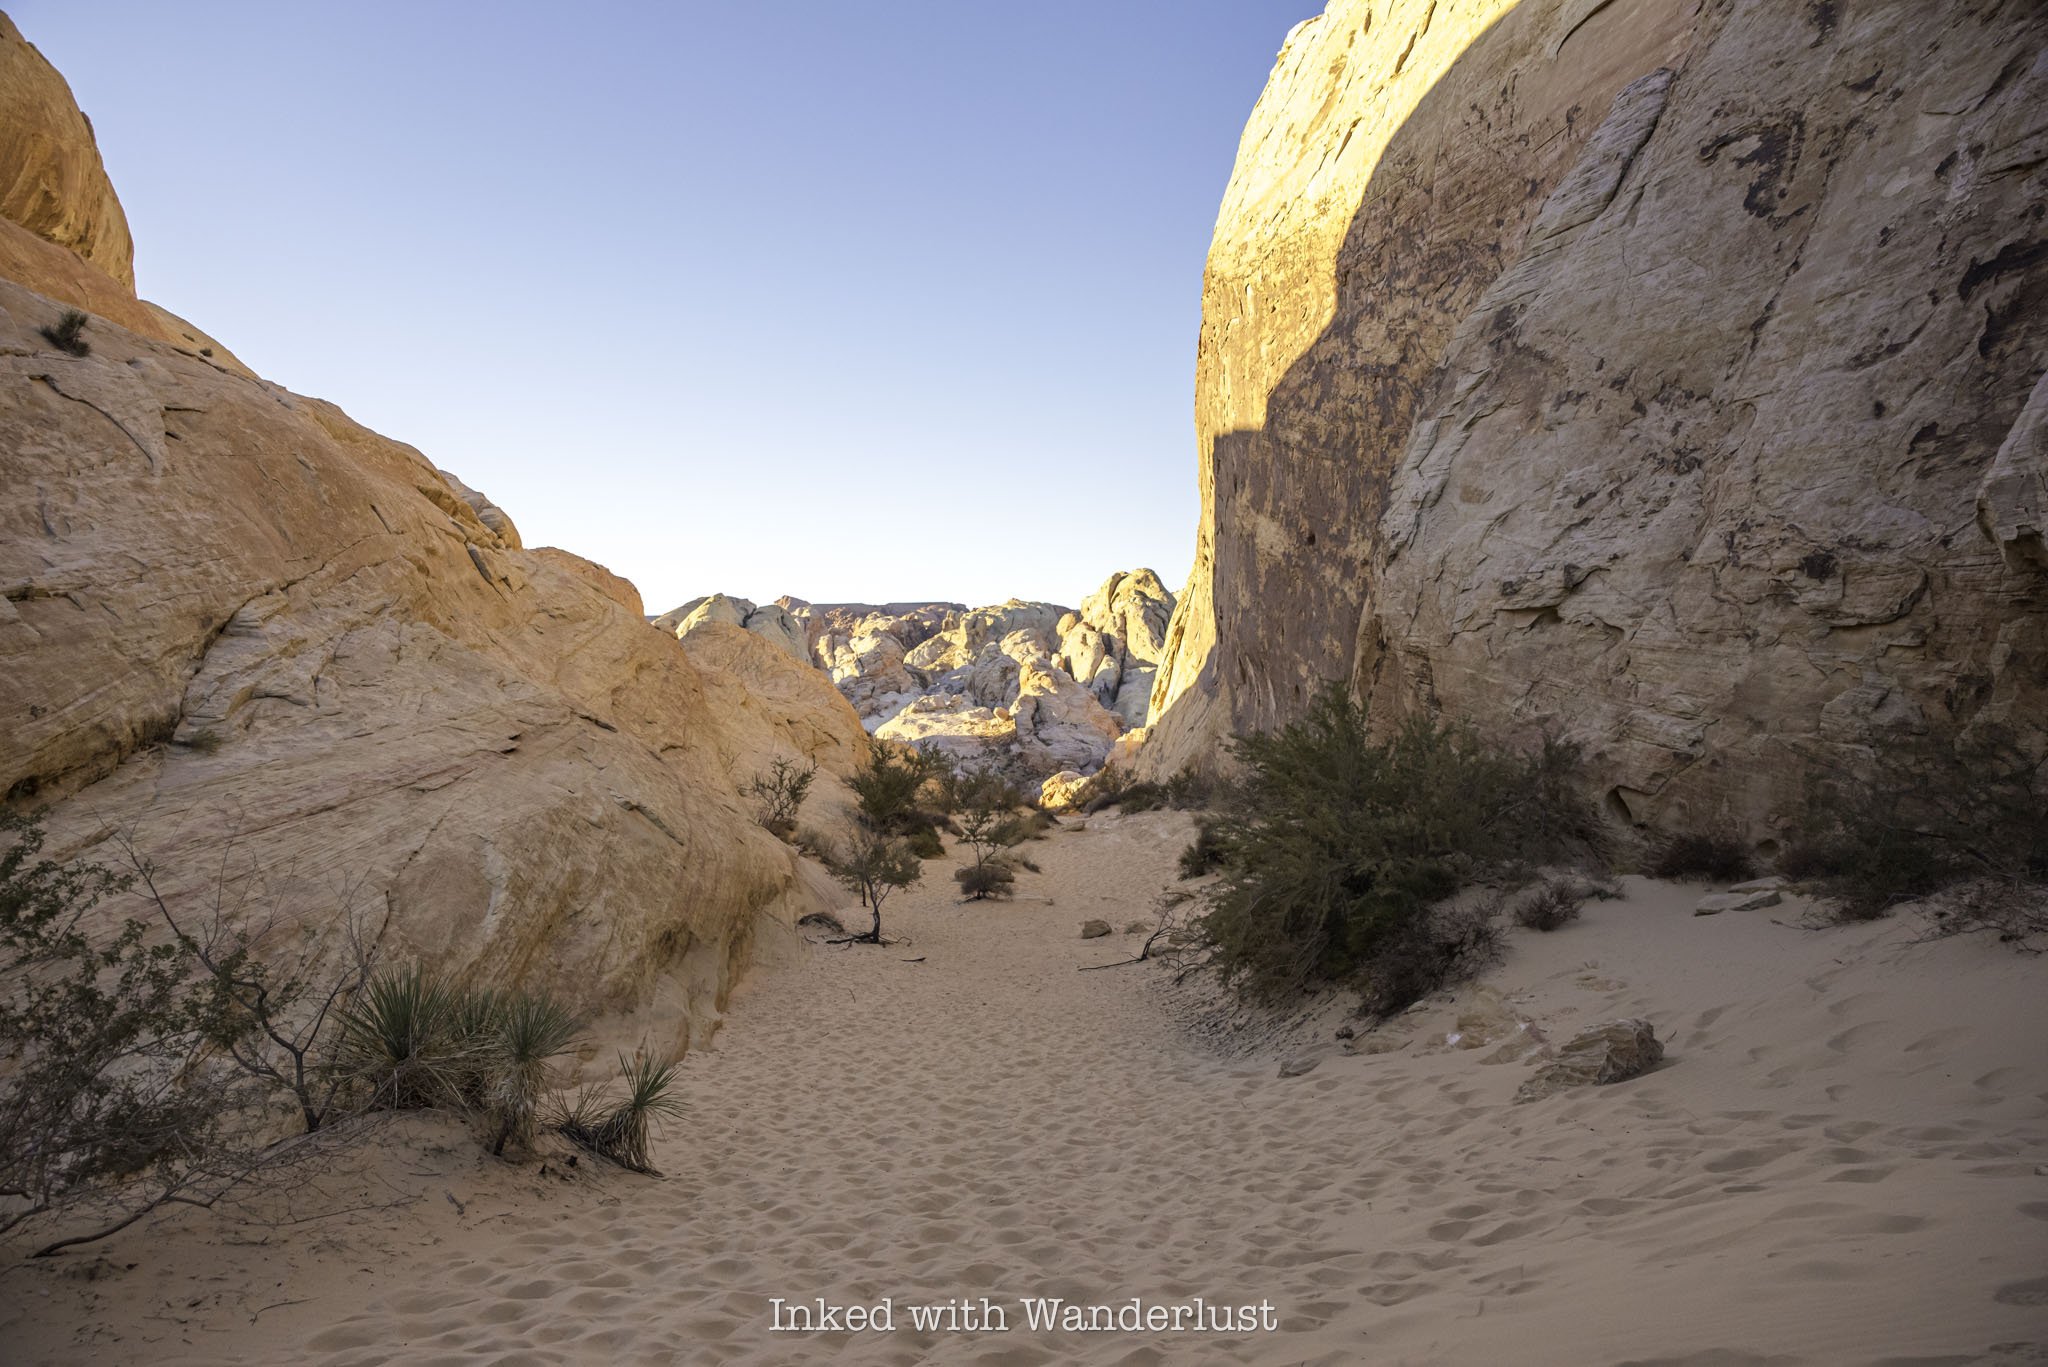
As you get up against the huge sandstone rock, the trail turns to dirt and begins a slight descent to the right. You’re still cutting through heavy sagebrush fields, but you’ll also start to see more of the unique sandstone rock formations Valley of Fire is famous for.
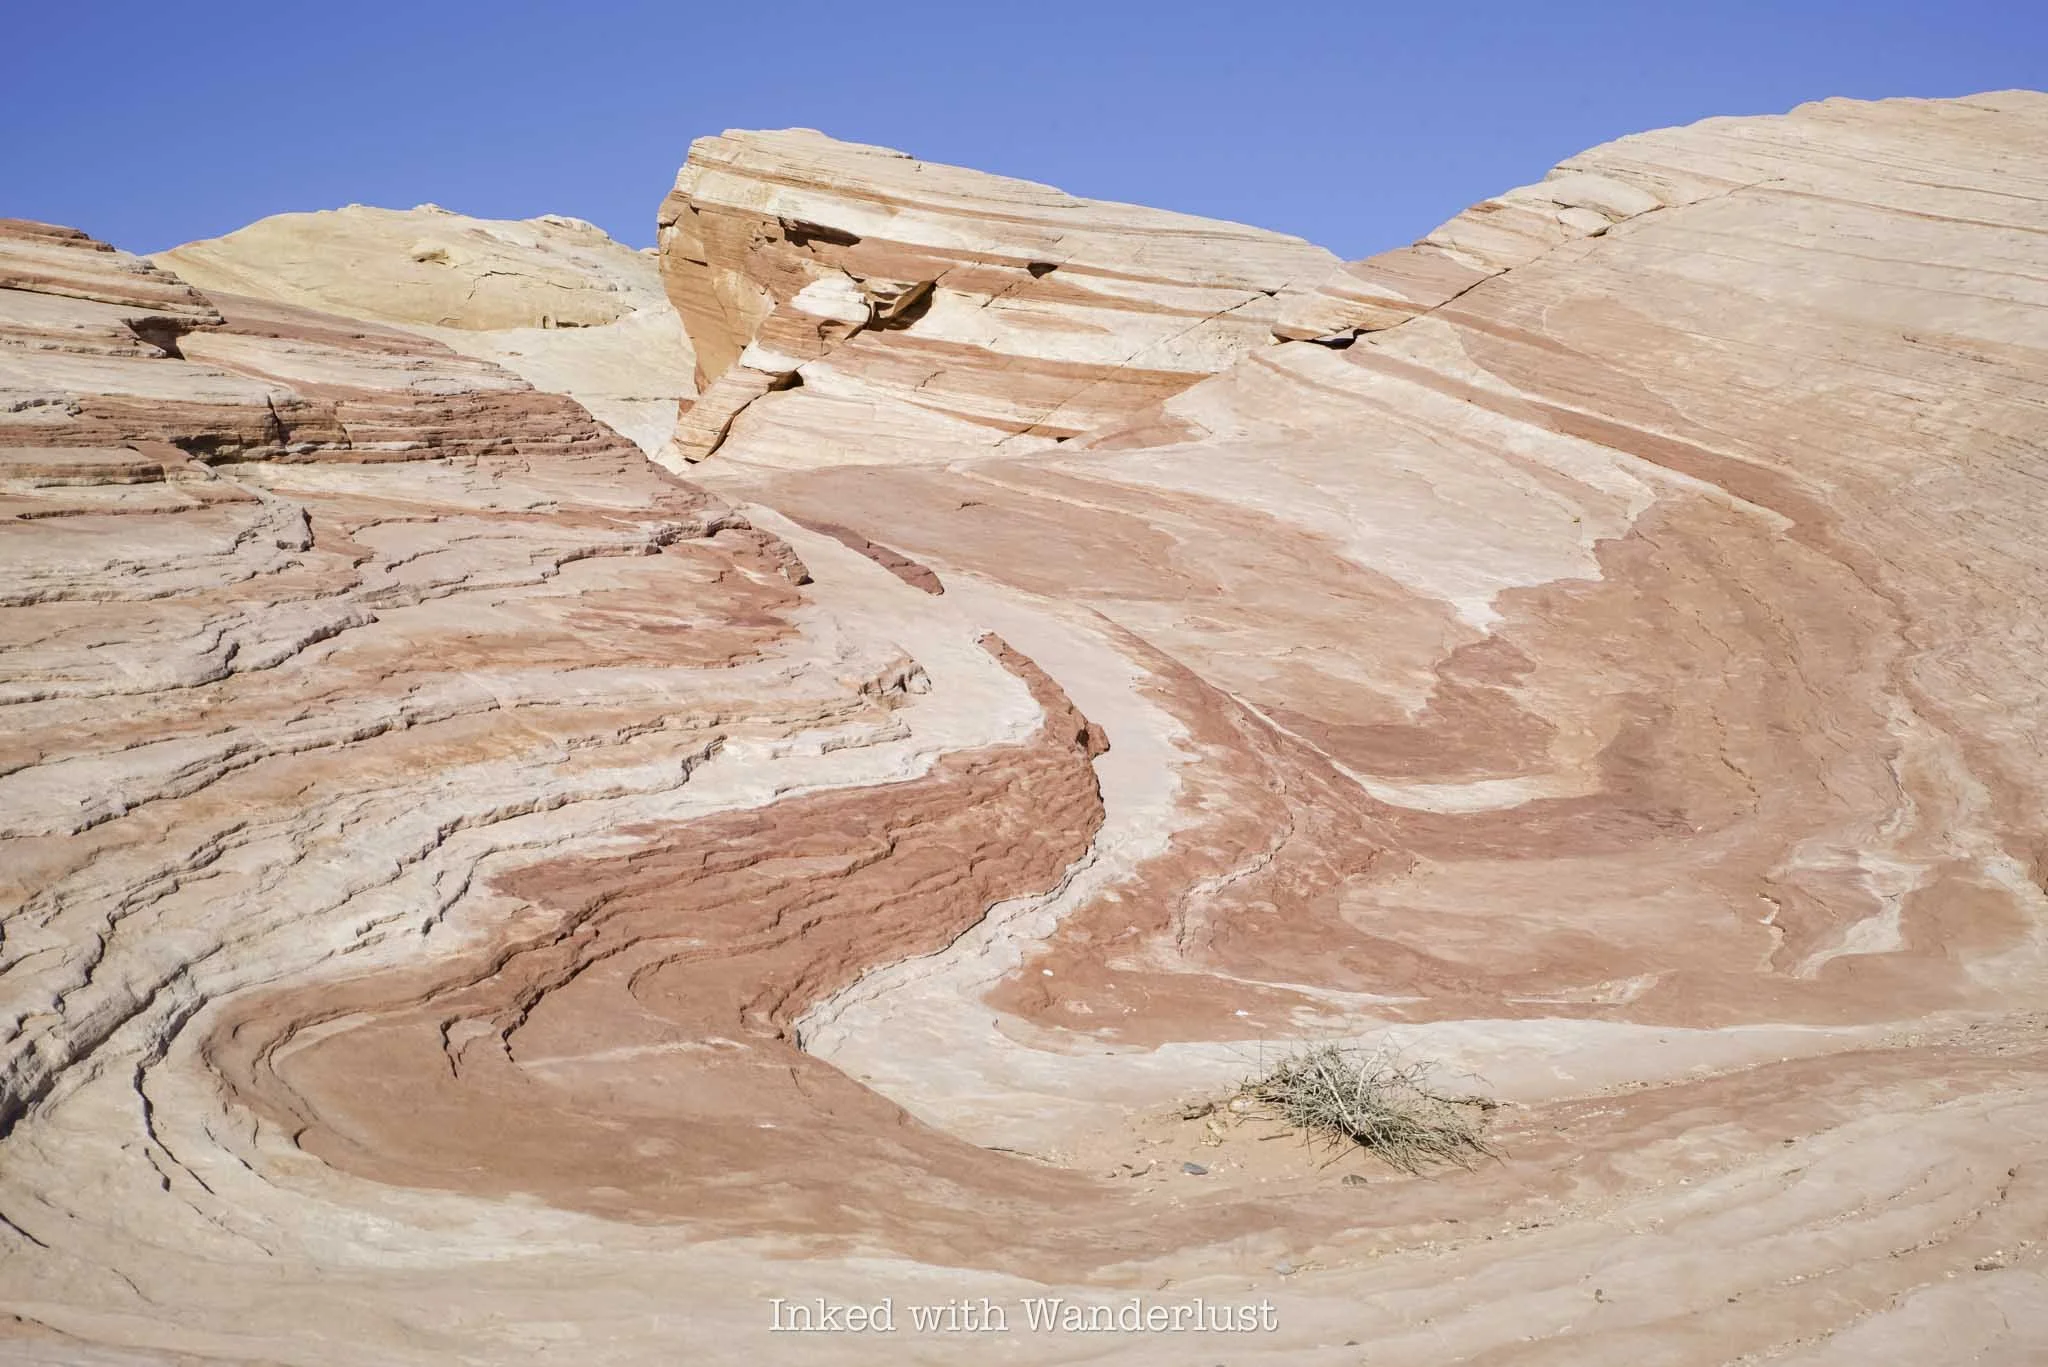
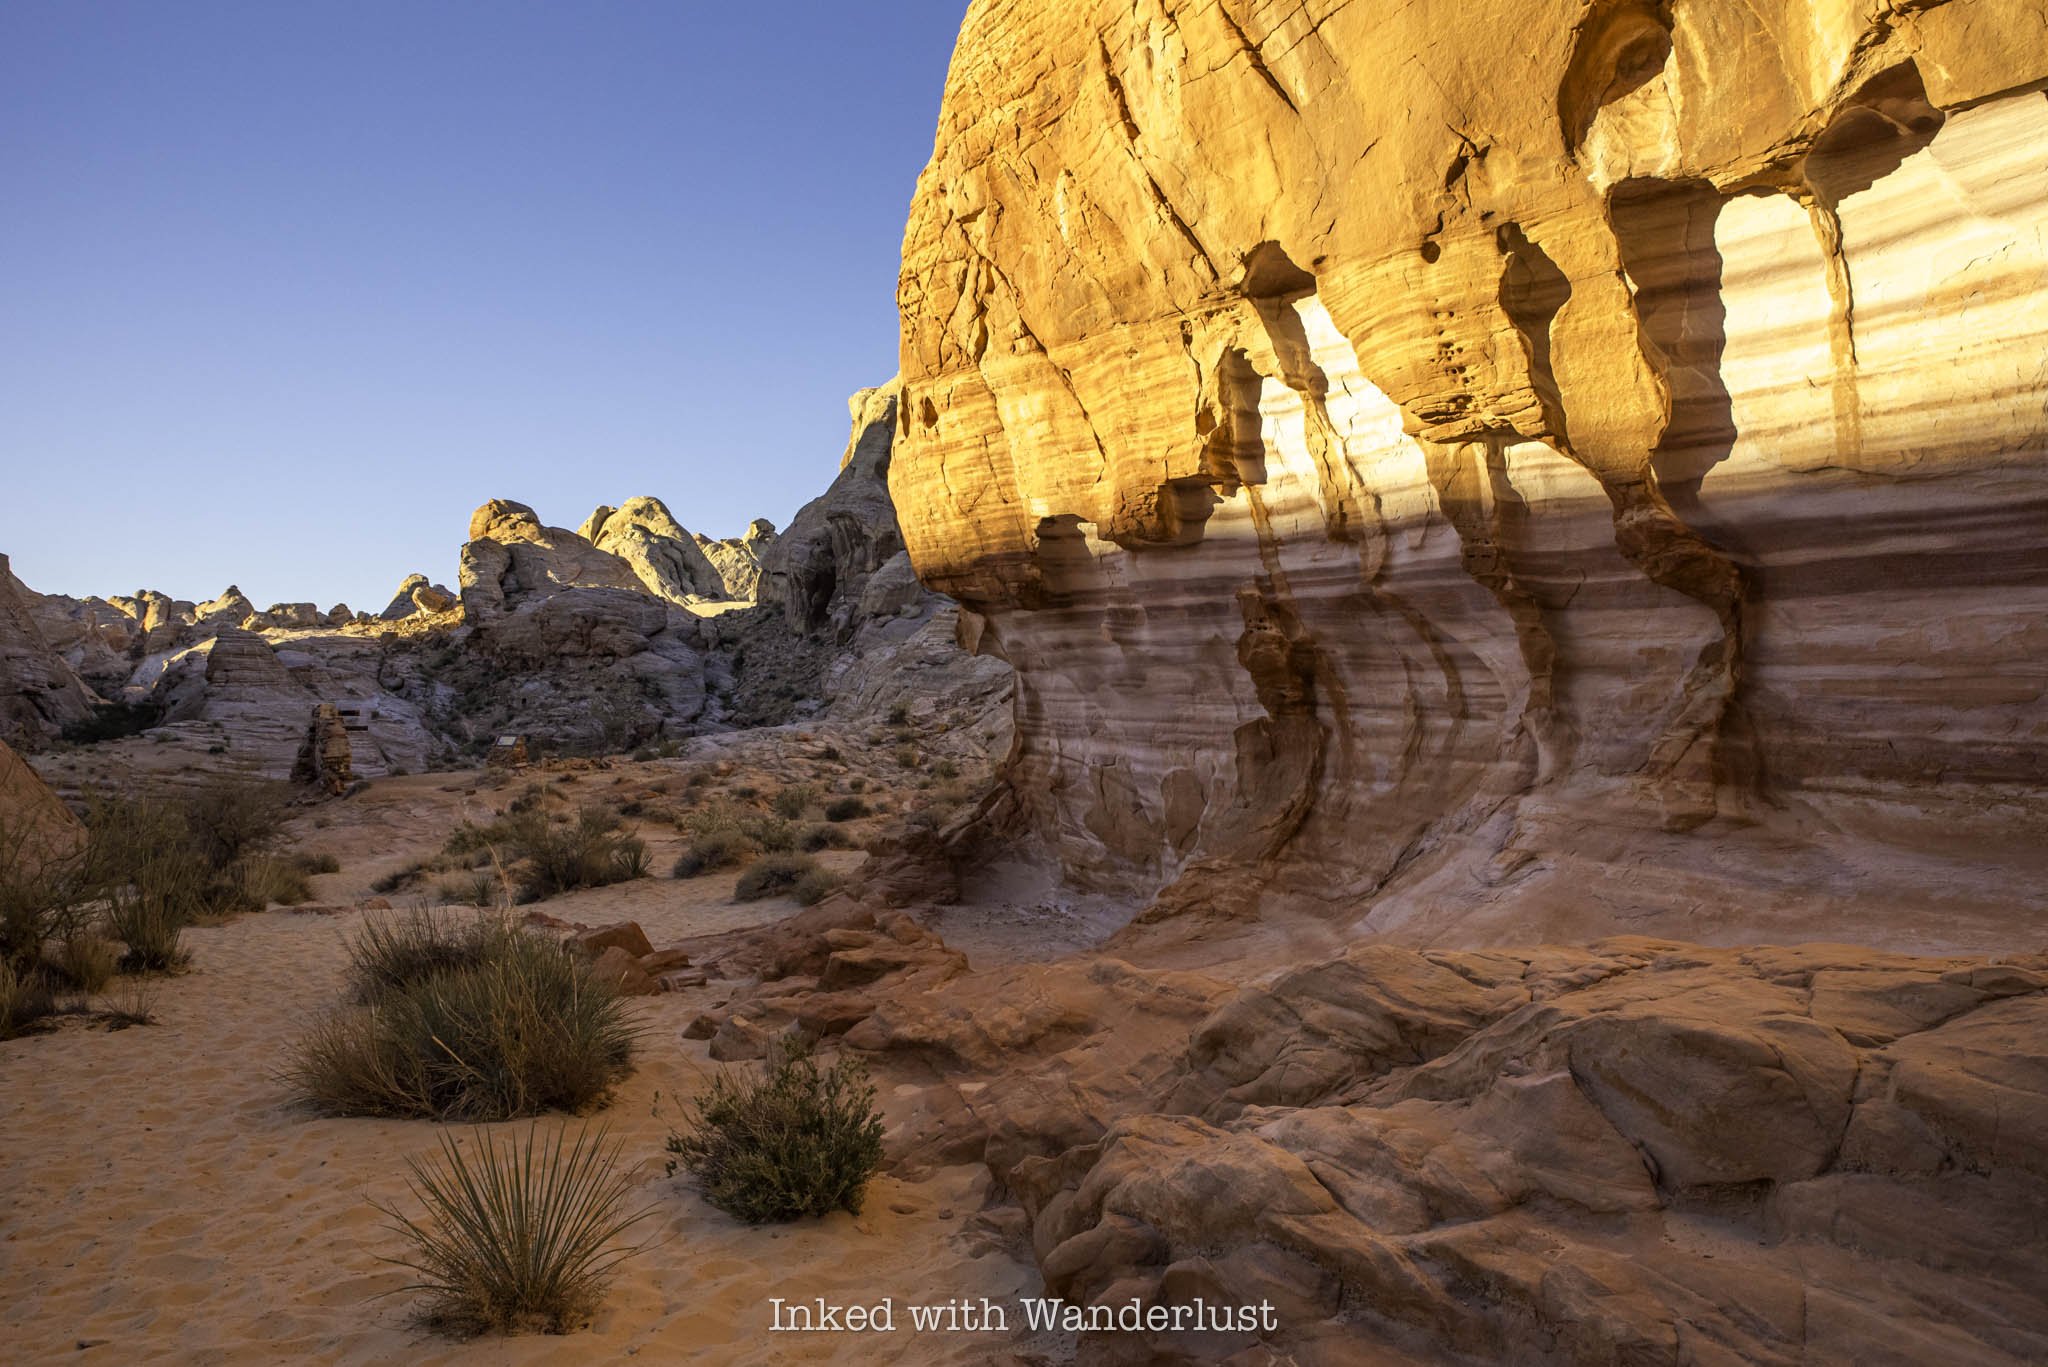
When the trail flattens out again, it’ll become sandy once more and will be lined with rocks, making it incredibly difficult to get lost. You’ll now see far more sandstone rock than sagebrush and the first teasers of Fire Wave and its color patten will become visible.
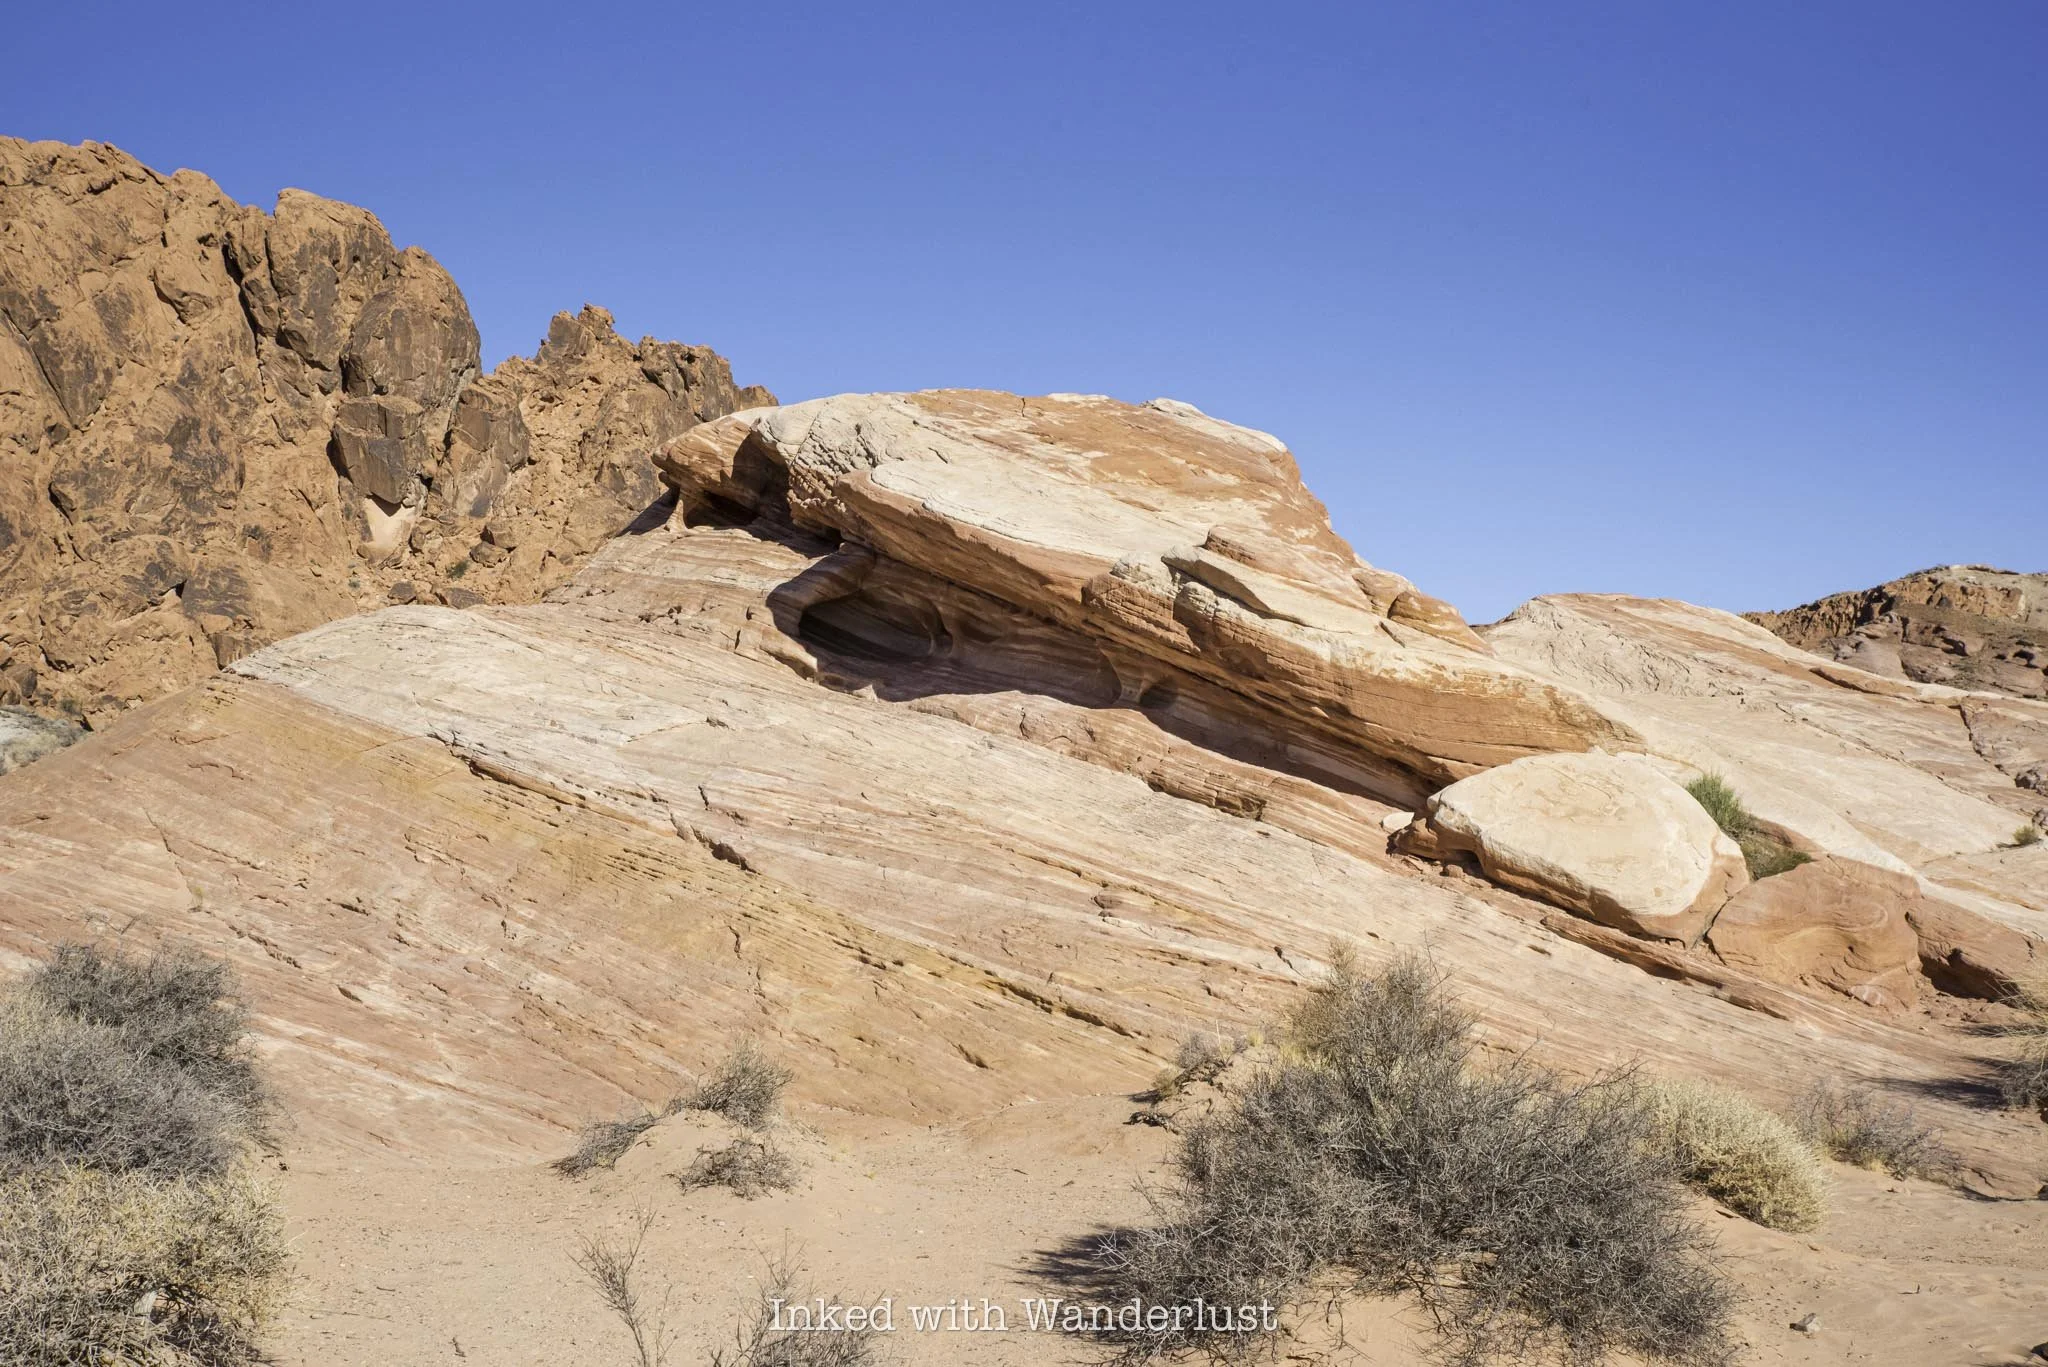
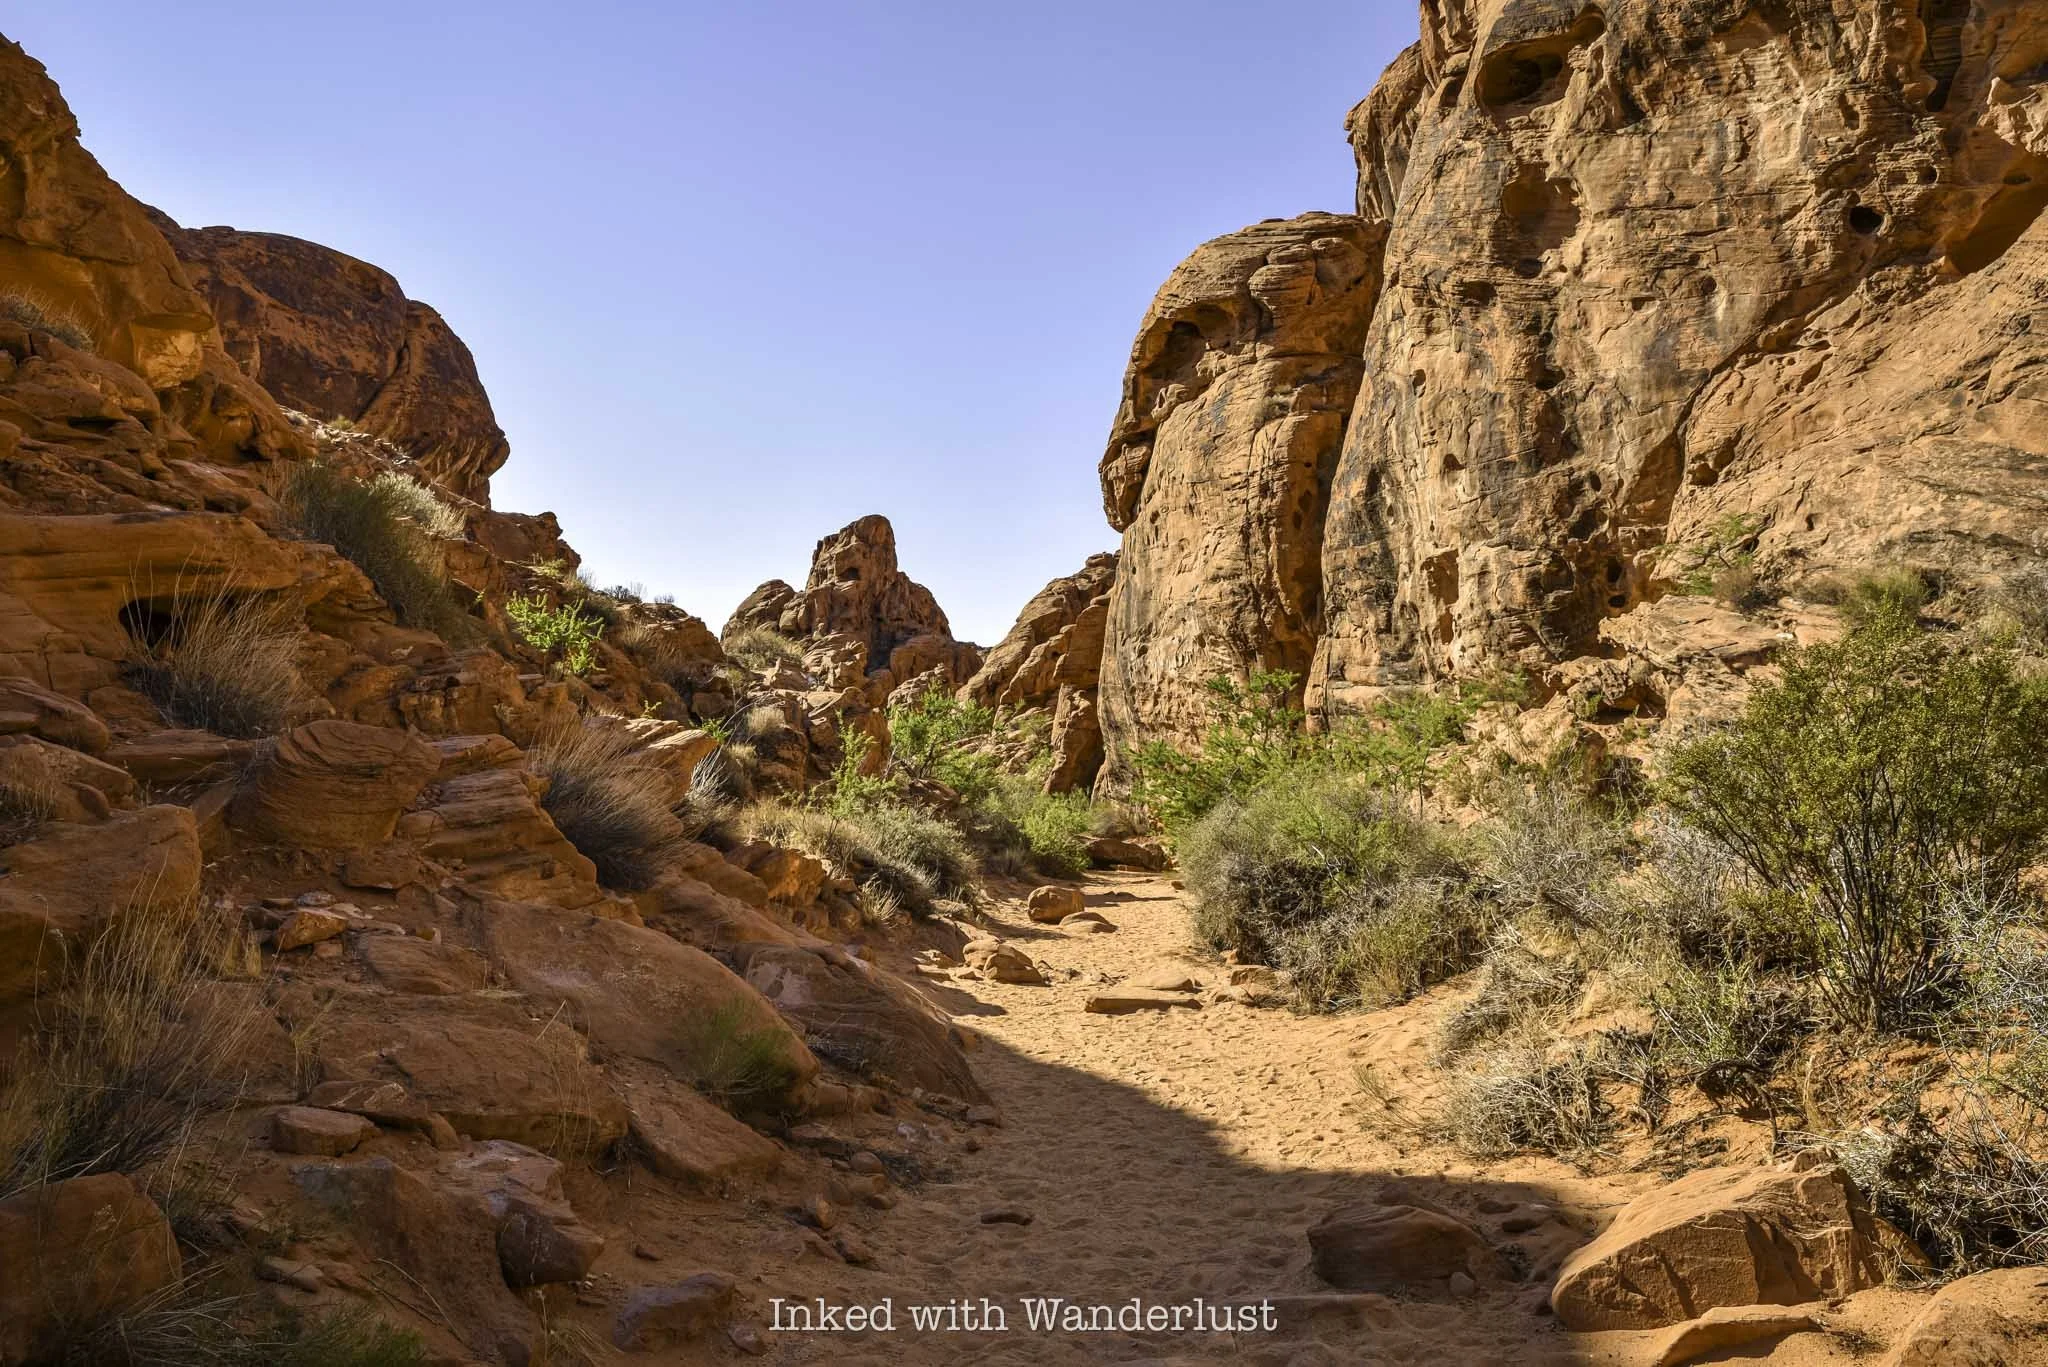
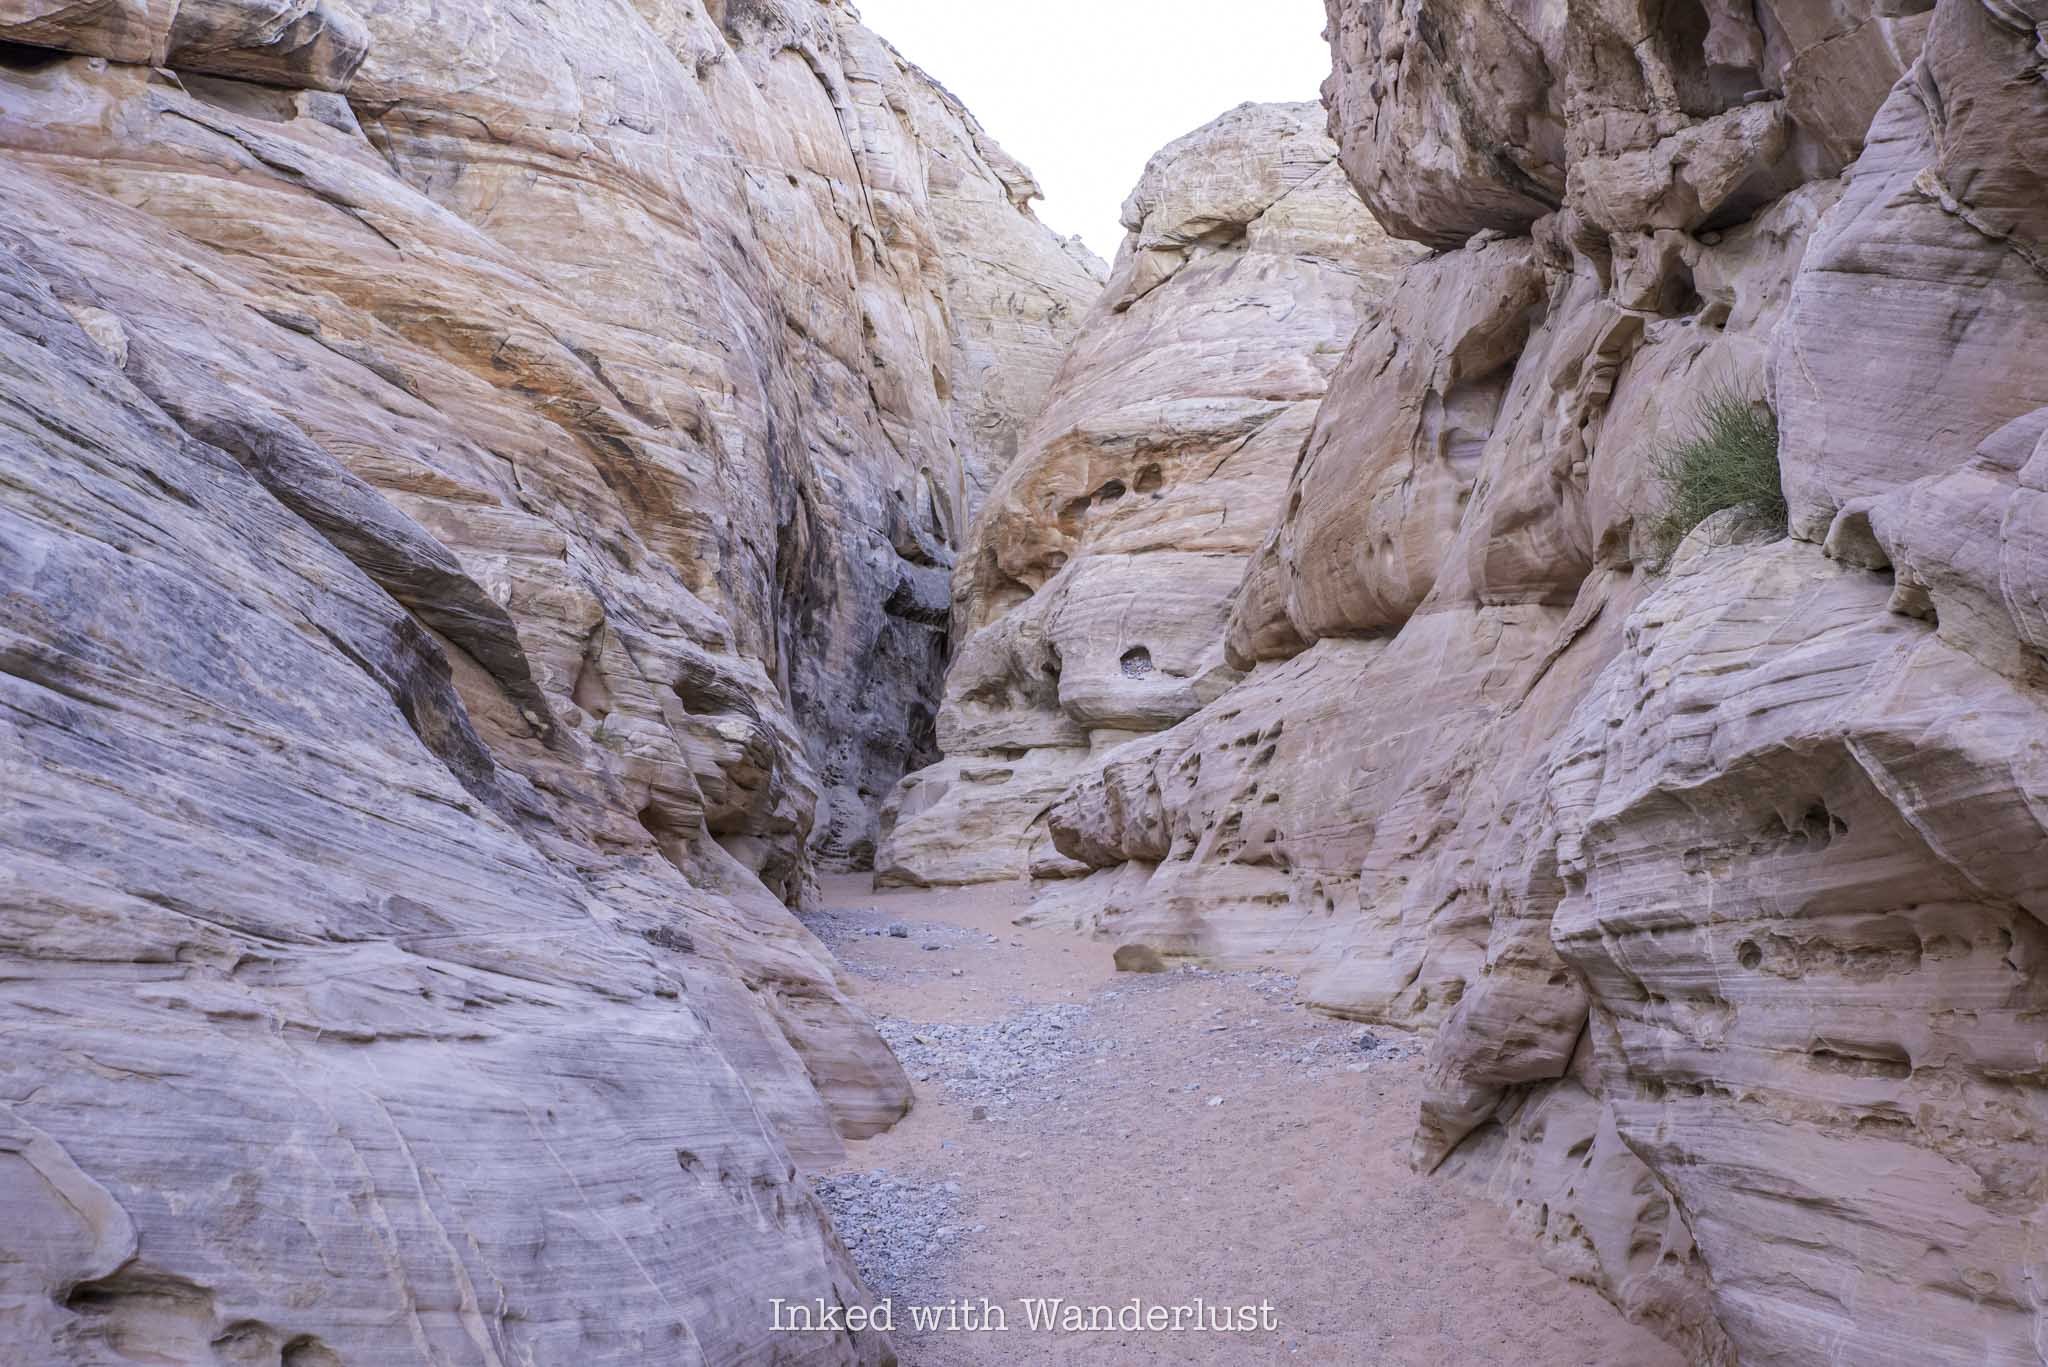
As you start seeing those wavy colors on the rocks, the trail will go from sand/dirt to pure sandstone. From here, there’s no proper trail and you’ll simply keep an eye out for the trail markers and follow them. Don’t worry, each one is easy to spot from the first.
From the last trail marker is where you’ll get your first glimpse of Fire Wave. Simply keep descending on the sandstone rock until it comes into full view. Once you’re there, you’re free to explore at your leisure.

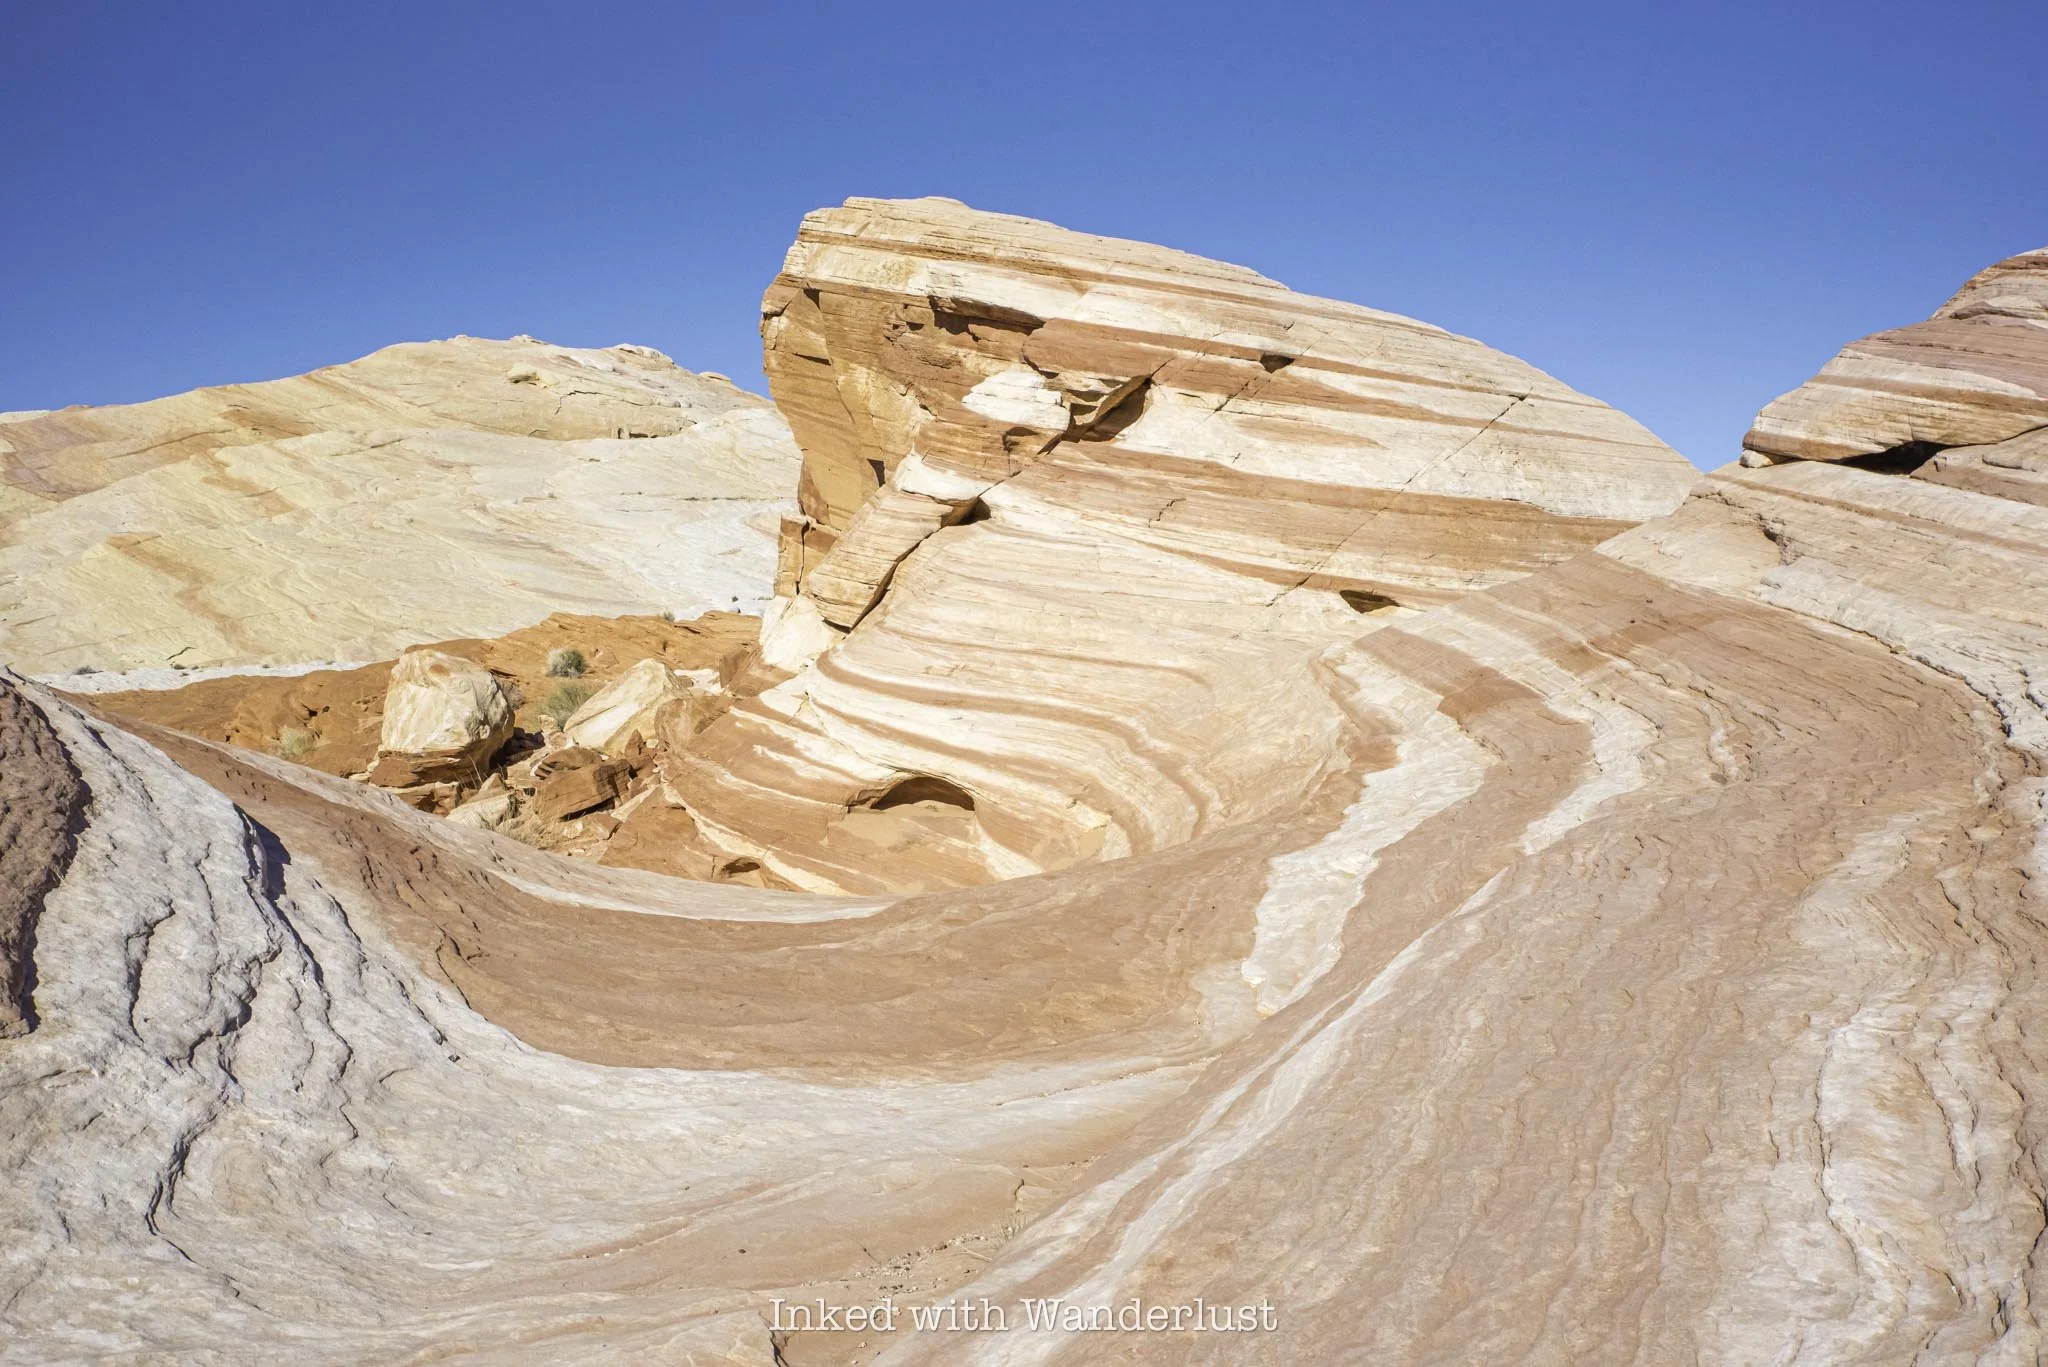
Pictures do no justice to how beautiful Fire Wave is. As stated above, sunrise and sunset are the best times to view it, as that’s when its colors really pop. Even during mid-day, though, like when I went, it’s still a sight to behold.
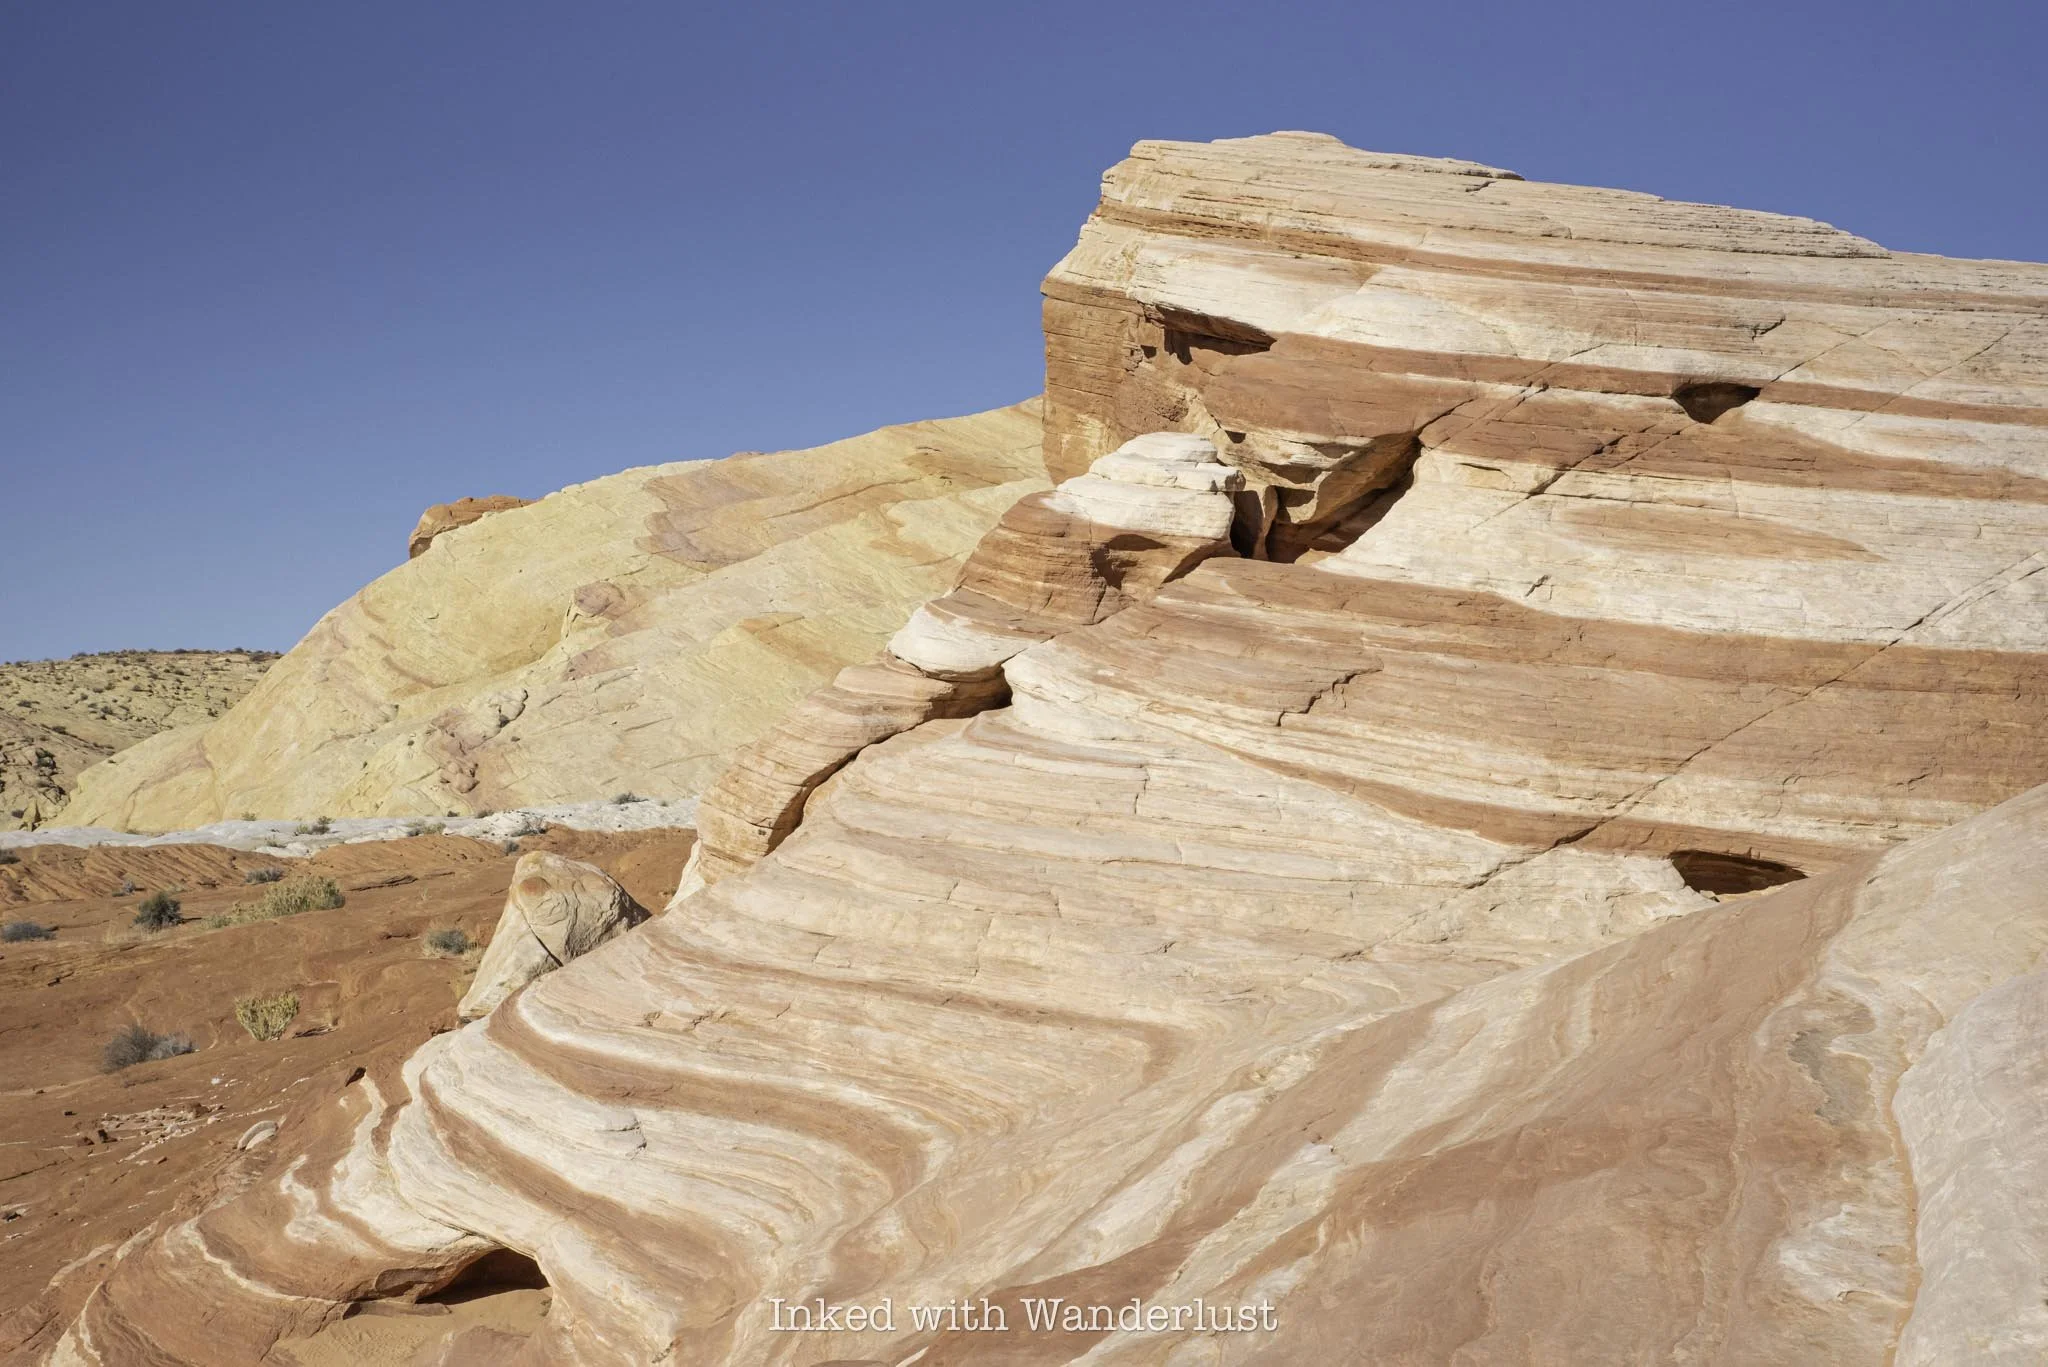
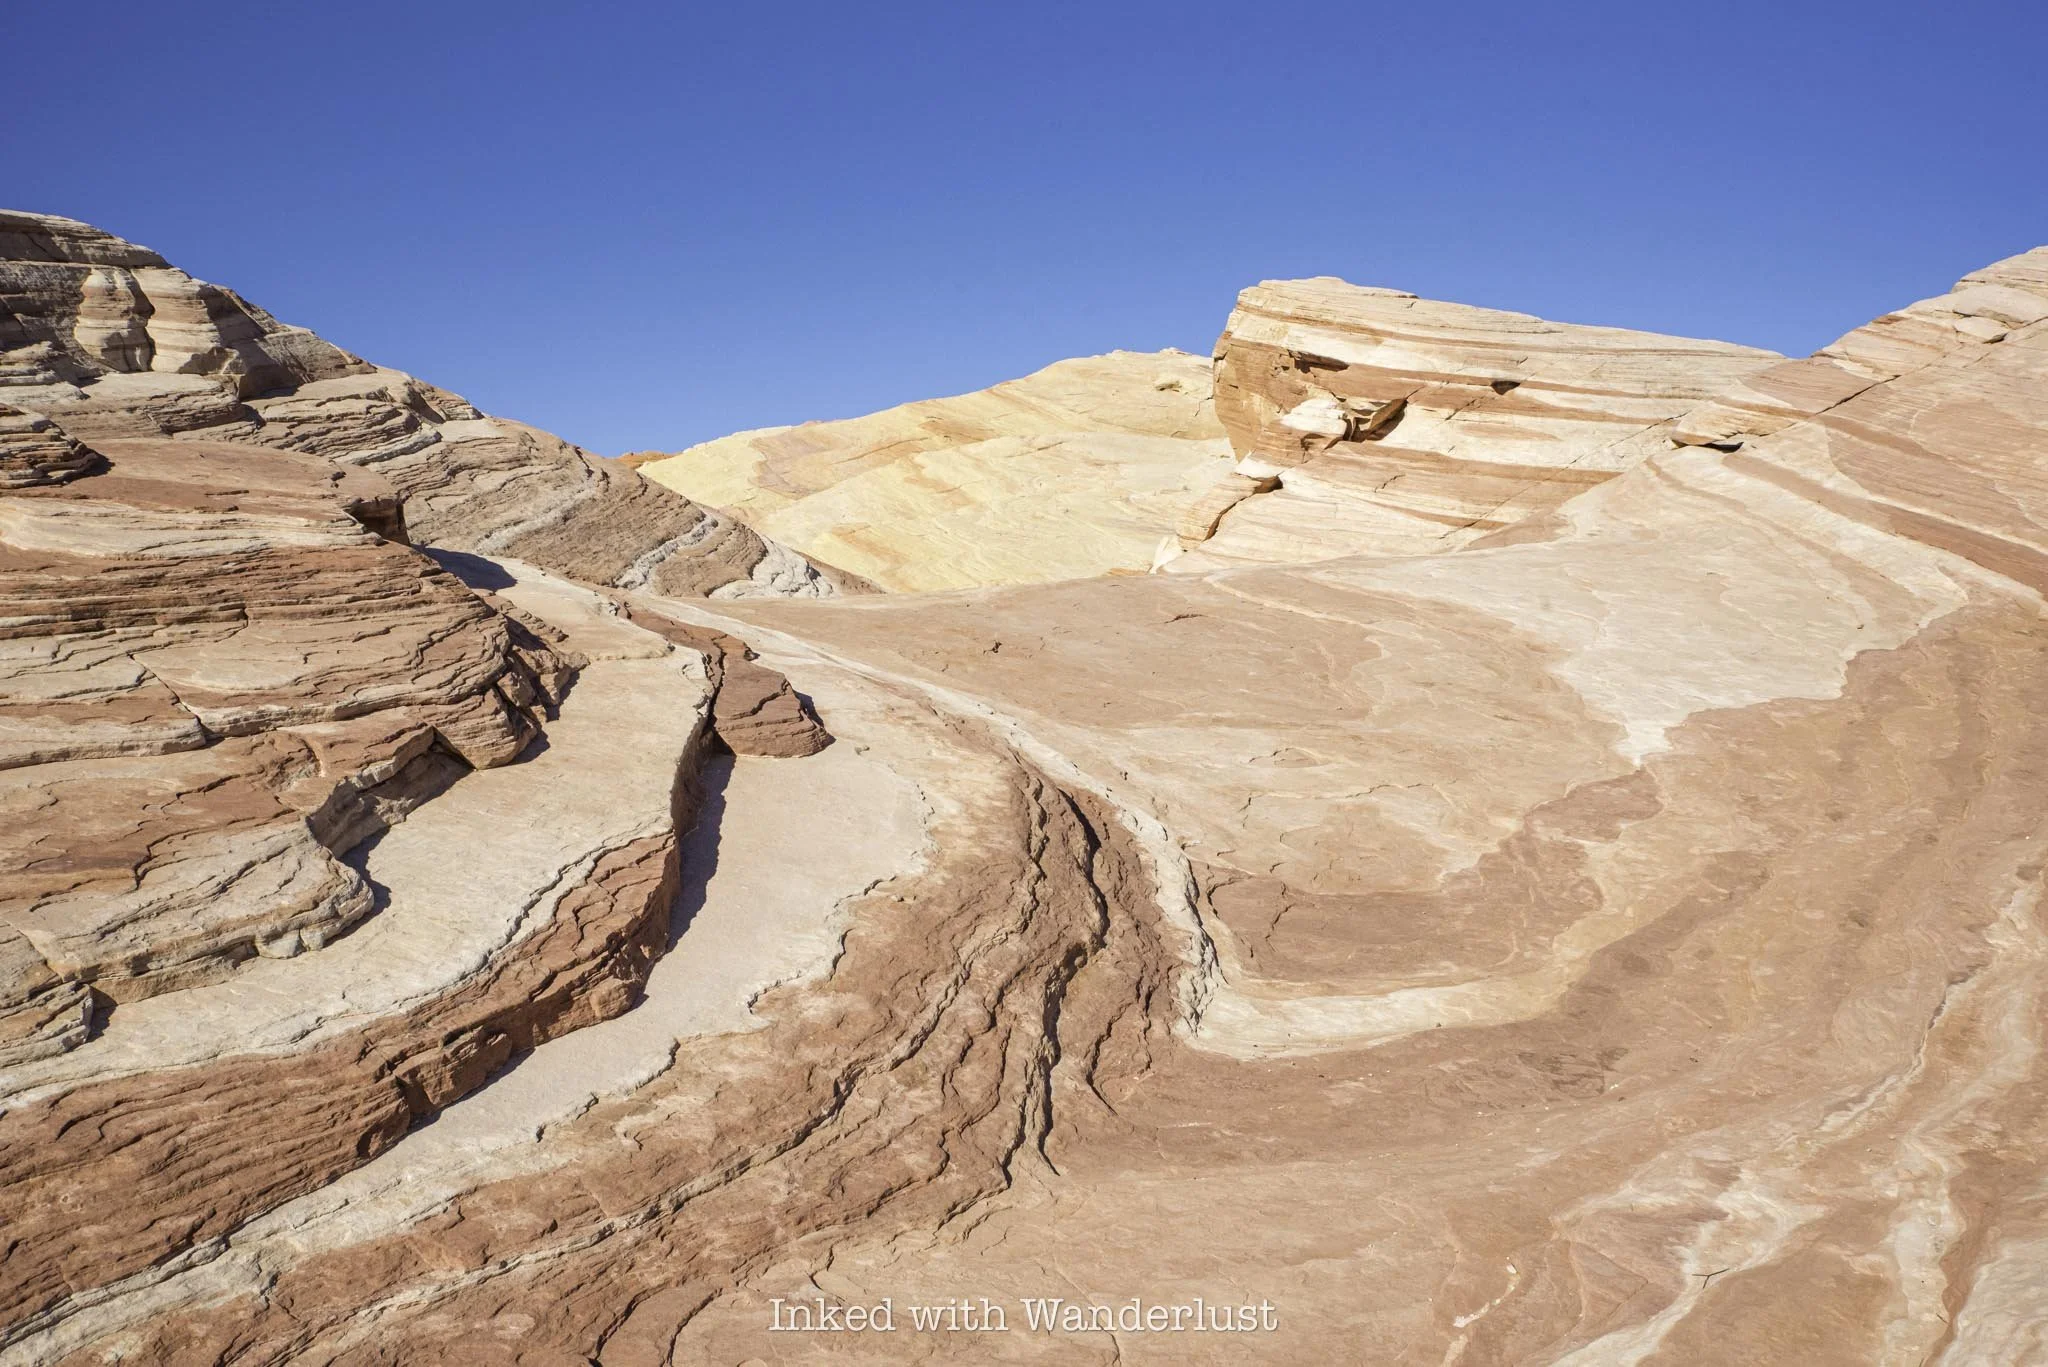
The swirling reds, oranges, and whites blend so perfectly with one another. The leading lines make it a wonderful photography subject, or to simply stare at in admiration. Either way, you need to see Fire Wave in person.
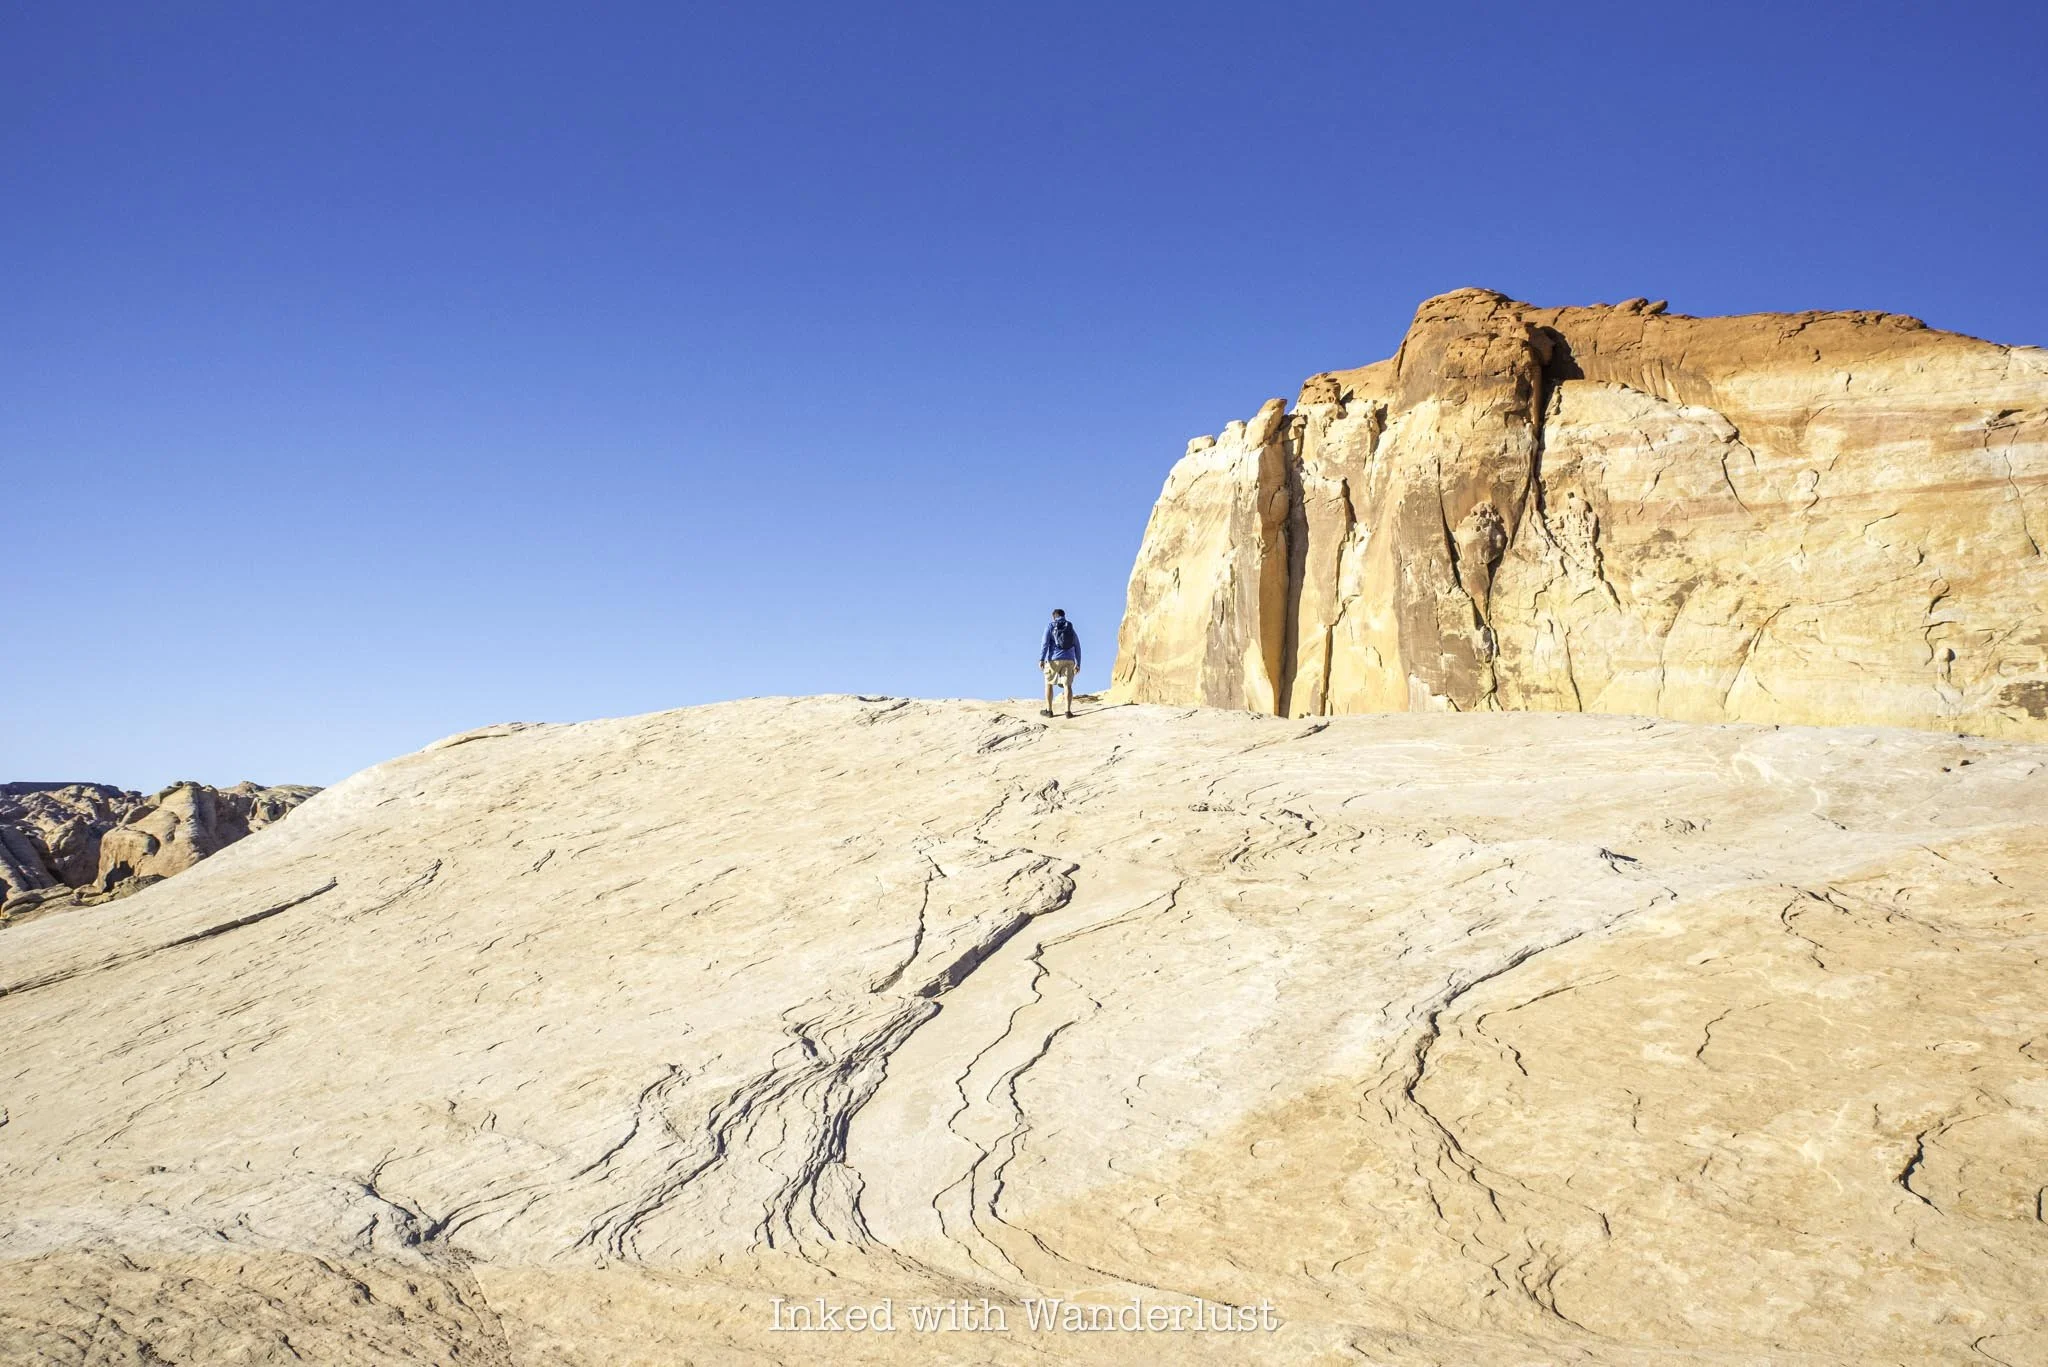
At Fire Wave is where the official trail ends. Simply turn back around and head in the same direction you came to your car. From there, continue driving north to hike White Domes Loop, an equally beautiful trail, or drive south to Mouse’s Tank Trail through Petroglyph Canyon. Or…
Seven Wonders Loop Extension

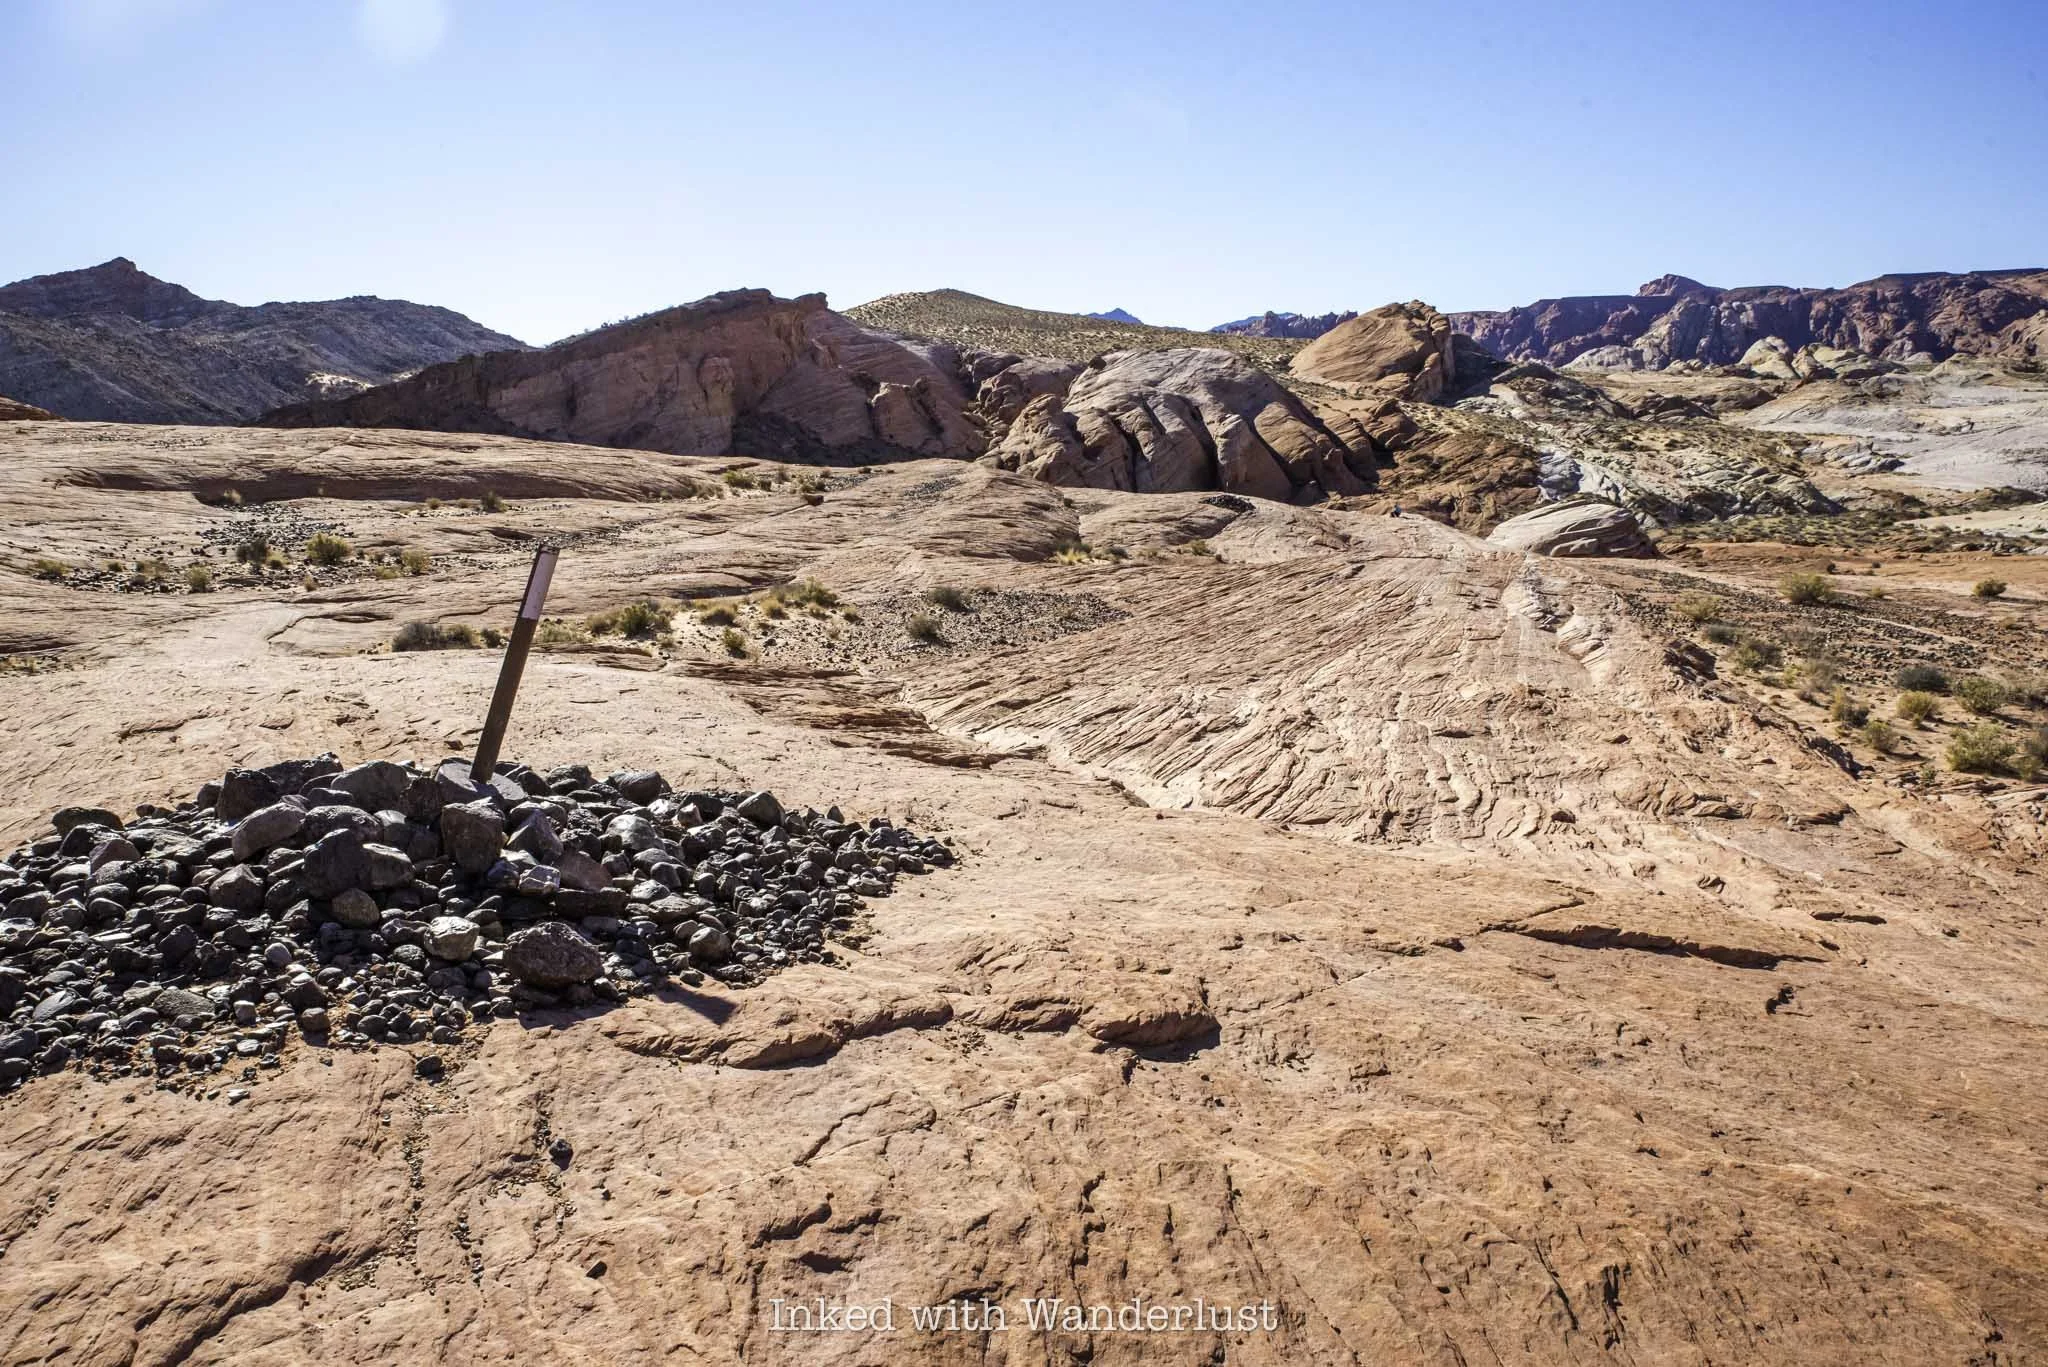
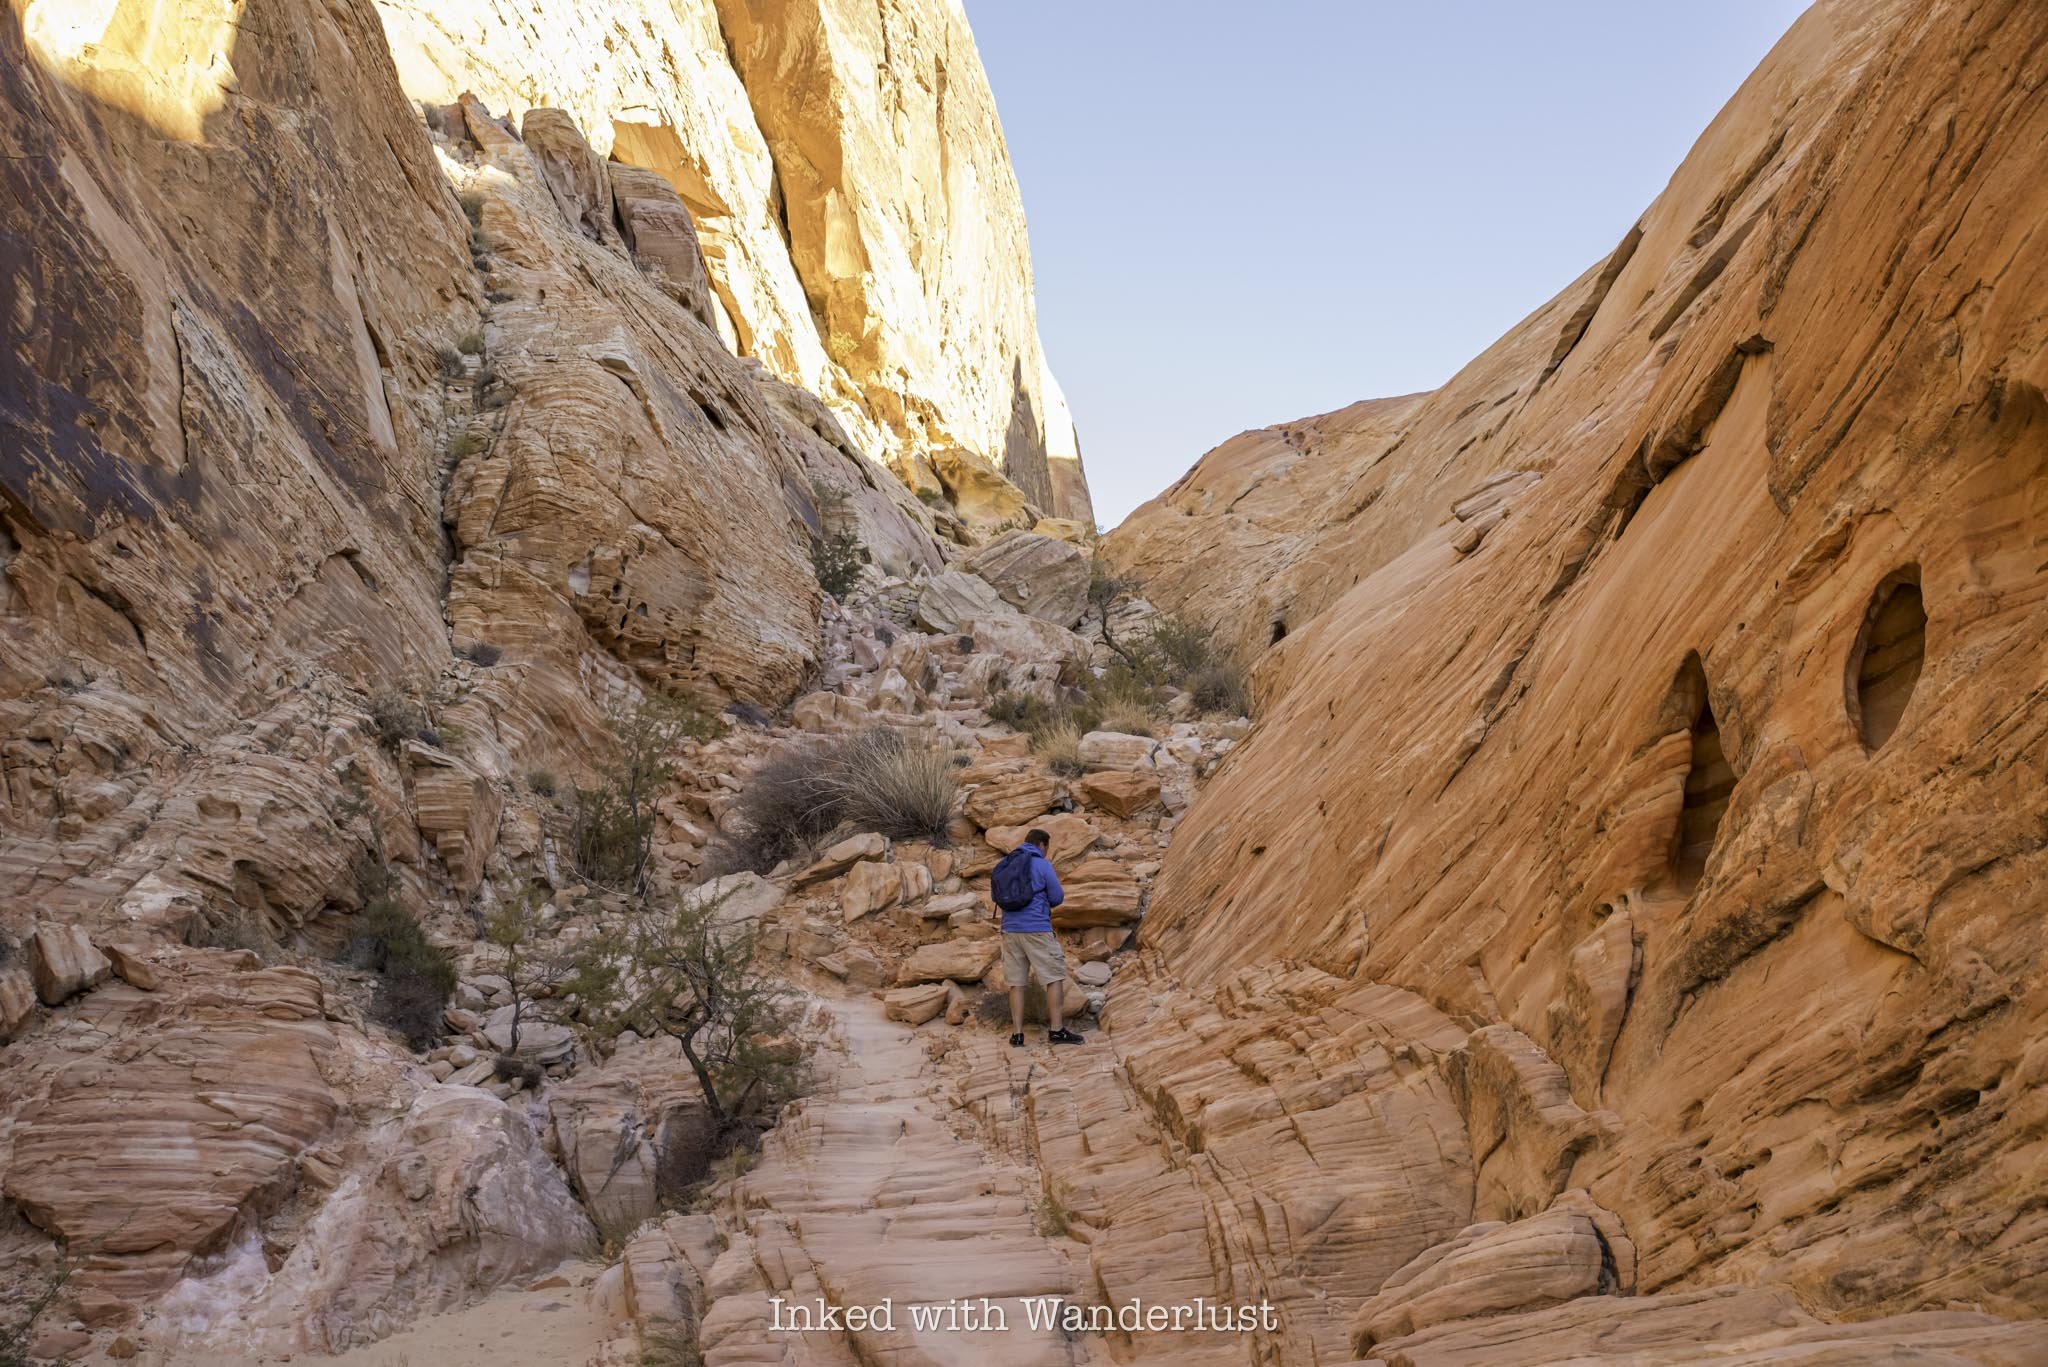
Just beyond Fire Wave, you’ll notice a pile of rocks with a sign atop indicating the end of the Fire Wave Trail. That same sign also marks the extension of the Seven Wonders Loop, if you have energy left over, that is.
Continuing will add another mile or so to your hike and will take you on a complete loop that’ll eventually spit you out to where you’ve parked. It’s definitely worth doing, provided it isn’t scorching that day and you’ve come prepared.
It’s a moderate-level trail and can be easy to lose at times. Due to that, I recommend coming prepared with a downloadable GPS map, like what AllTrails provides. Along the way, you’ll see several Valley of Fire attractions, such as Pastel Canyon, Crazy Hill, Thunderstorm Arch, and more.
Whether you do the full loop or just stick with Fire Wave, you’re sure to have a great time either way. Just remember to steer clear of this trail during the summer months and adhere to the trail closures. It isn’t worth the risk.
If you do find yourself here during the closure period, check out the following trails and attractions listed below, as they’re open all year:


How to Visit and Tour Hidden Cave in Fallon
Hidden Cave, located within Grimes Point Archaeological Area on the outskirts of Fallon, is a prehistoric archaeological site containing thousands…
Disclosure: This post contains affiliate links. If you make a purchase through these links, I may earn a small commission at no additional cost to you. I only recommend products or services that I believe will add value to my readers.
Hidden Cave, located within Grimes Point Archaeological Area on the outskirts of Fallon, is a prehistoric archaeological site containing thousands of years of human and geological history.
Pounding waves from ancient Lake Lahontan, a massive body of water in the last ice age, carved and developed the cave some 20,000 years ago. As the lake receded, the cave became exposed and started being used by animals.
Around 3,800 years ago, human activity began in the cave, as the Toi-Ticutta peoples used the cave not as a dwelling, but as a cache site. Pits were created, storing a variety of tools and supplies for safe keeping.
Today, the cave is open to the public for twice-monthly guided tours. During the tour, your guide educates you on the cave and area, taking you along a trail pointing out petroglyphs, additional caves, tufa formations and more.
Trail Stats
Location: Fallon, Nevada
Fee: None
Open: Trail is open year-round. Hidden Cave only accessible via guided tour, every 2nd and 4th Saturday of each month
Family Friendly: Yes
Cell Service: Good (Verizon)
Restroom: At the visitor center and trailhead
Parking: Large dirt/gravel lot
EV Stations: None
Difficulty: Easy to moderate
Popularity: Low to moderate
Mileage: 0.7 mile loop (not counting optional spur trails)
Time: Two hour tour
Elevation: 6,700 feet
Condition: Well maintained and easy to follow
Features: Multiple prehistoric caves, hundreds of tufa formations and ancient petroglyphs
Best Viewed: Spring or fall
Pets: Allowed on trail, but not inside Hidden Cave
Drones: Allowed in area
Hazards: Potential rattlesnake encounters, head injuries in the cave and exposed trail
My Visit(s): April 2025
Churchill County Museum - Hidden Cave Tour

All public tours to Hidden Cave begin at the Churchill County Museum in downtown Fallon. Tours are guided by a Bureau of Land Management (BLM) representative on the 2nd and 4th Saturday of each month, with the exception for holiday weekends. You can view current dates here.
You’ll want to arrive by 9:15am, as orientation begins promptly at 9:30am. There is no fee to enter the museum or to take the tour, nor are there any parking fees. The address for the museum is:
1050 South Main Street, Fallon, Nevada


If you can, I recommend arriving to the museum even early than 9:15 to give you more time to explore the it. For being a small museum, it’s packed with exhibits of Native American and pioneer history.
I believe they open at 9am on tour days, which gives you time to check out the exhibits (though not enough to see it all). If you don’t arrive early, consider heading back to the museum after the Hidden Cave tour.

When orientation begins, your tour guide will make their introduction and give you a brief breakdown of what to expect on the tour and provide some historic context of what you’ll see.
Then, you’ll watch a roughly 20-minute video which dives deeper into the Native American history of the cave, how it formed and what archeologists eventually discovered in the cave.
At the conclusion of the video, your guide will answer any final questions from the group and provide everyone time to use the restroom. You’ll then return to your vehicle and caravan to the cave.
Hidden Cave Trail

You can follow your tour guide there or simply punch “Hidden Cave” into your GPS of choice and go. The cave is about 15-minutes from the museum. When you turn left onto the dirt road, keep left at the junction. Going right will take you to Grimes Point.
The dirt/gravel road is riddled with potholes, but my sedan made it through just fine. Just take it slow if you need to. You’ll soon arrive at the trailhead. There, you’ll find a restroom (vaulted) and informational signs.

Once everyone in the group has arrived, your guide will again explain what to expect. To avoid the rocky portion of the trail, you can opt to head up the direct path to the cave and wait for the rest of the group there.
However, if you can, I recommend doing the entire trail. It is rocky, but only at certain points and is easily navigable, in my opinion. You’ll go right at the trailhead and the first feature you’ll see are petroglyphs on multiple rocks.
Petroglyphs

Your guide will explain the history of petroglyphs in the area and what ancient Indians may have been trying to convey with them. You’ll find many more at nearby Grimes Point, which I highly suggest stopping there after the tour.

From here, you’ll continue up the trail. Feel free to take your time and stop to take as many pictures as you want. The tour guide was good about waiting for everyone to get the next point before speaking.
Picnic Cave
The next stop on the Hidden Cave trail is another cave called Picnic Cave. This cave isn’t closed off like Hidden Cave is and you can visit it anytime you like, with or without a tour guide.
The best feature of this cave is the large amount of tufa formations around the entrance and roof. If you don’t know, tufa is a porous sedimentary rock composed of calcium carbonate or silica, and is formed under water.


In this case, the tufa in this area formed when Lake Lahontan covered this entire region. Keep in mind, Hidden Cave is at 6,700 feet elevation. Picnic Cave isn’t much lower. Literally all of this was submerged at one point.
Another great example of tufa formations is a couple hours away in Lee Vining, California, at the Mono Lake Tufa Natural Reserve. However, the examples here are more in abundance, covering nearly the entire cliffs and mountainsides around you.
A Quick Rest with a Great View

After Picnic Cave, it’ll be an uphill slog until you reach the entrance to Hidden Cave. Due to this, the tour guide will stop the group a couple times to allow time for rest. At the second stop, you’ll have a commanding view of what was once marsh land.
Take a look around you when you’re up here. You’re at around 6,500 feet elevation at this point. You’ll notice the cliffs above you that are easily 7,000 feet and up with more tufa formations on them.
Remember, tufa only forms under water with the right amount of minerals. Photos can’t do it justice, but getting that perspective from here really shows just how massive and deep Lake Lahontan was.
Hidden Cave

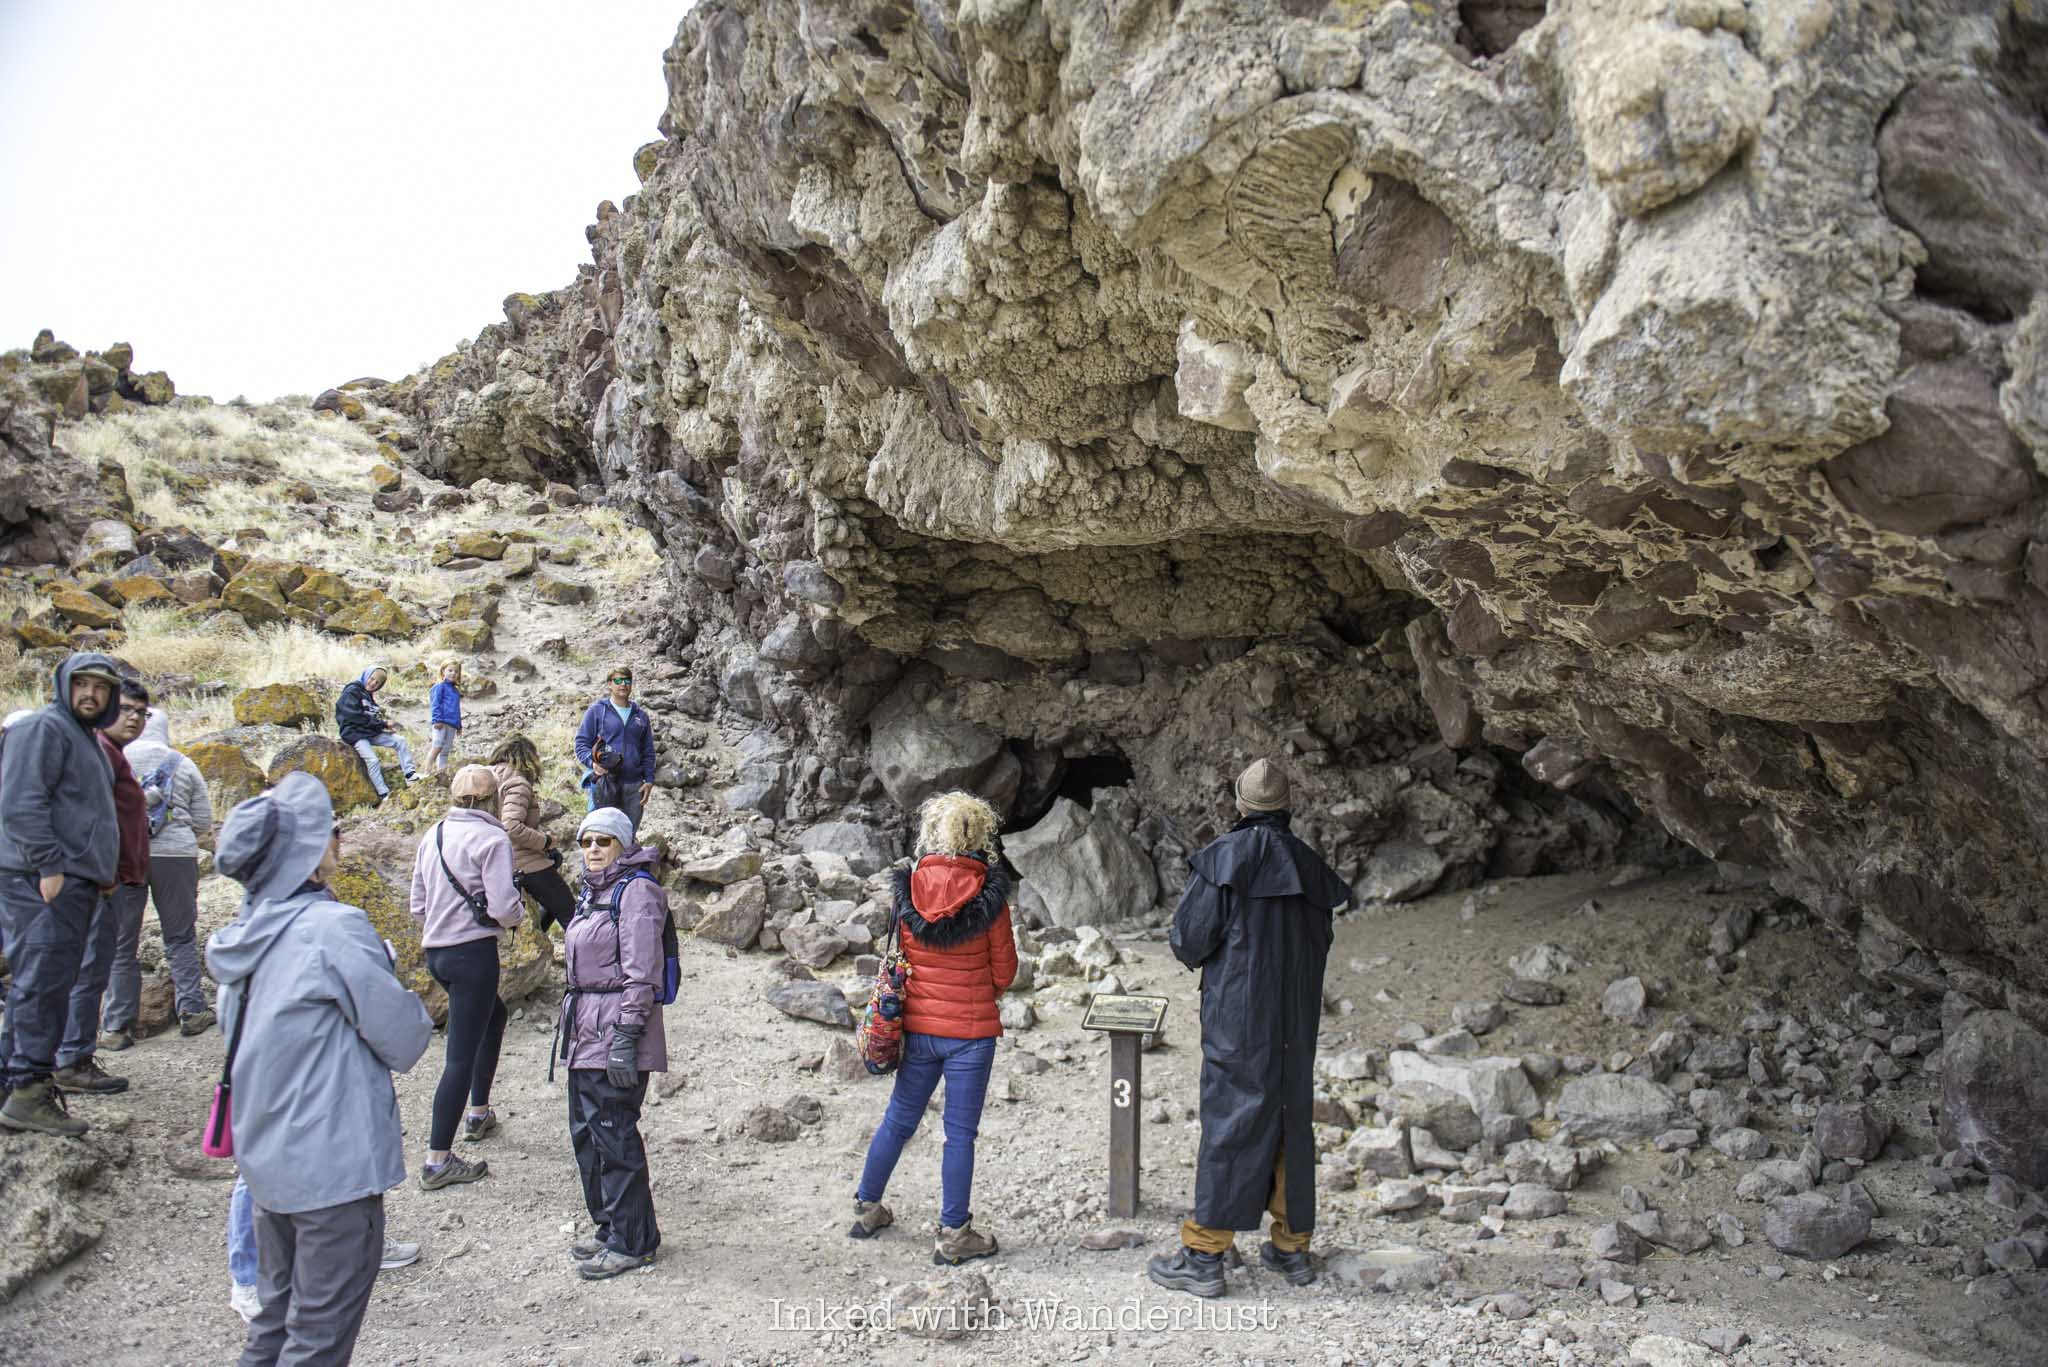
After a brief rest, the group will continue up another incline until you reach the entrance to Hidden Cave. The entrance is small, requiring all but small children to crotch down to get through it.
For context, I’m 5’9 and I had get down pretty low to get in. For anyone six feet or taller, I would imagine this being challenging for them. When you get through the entrance, keep your head down for a few feet as there are low-hanging rocks.

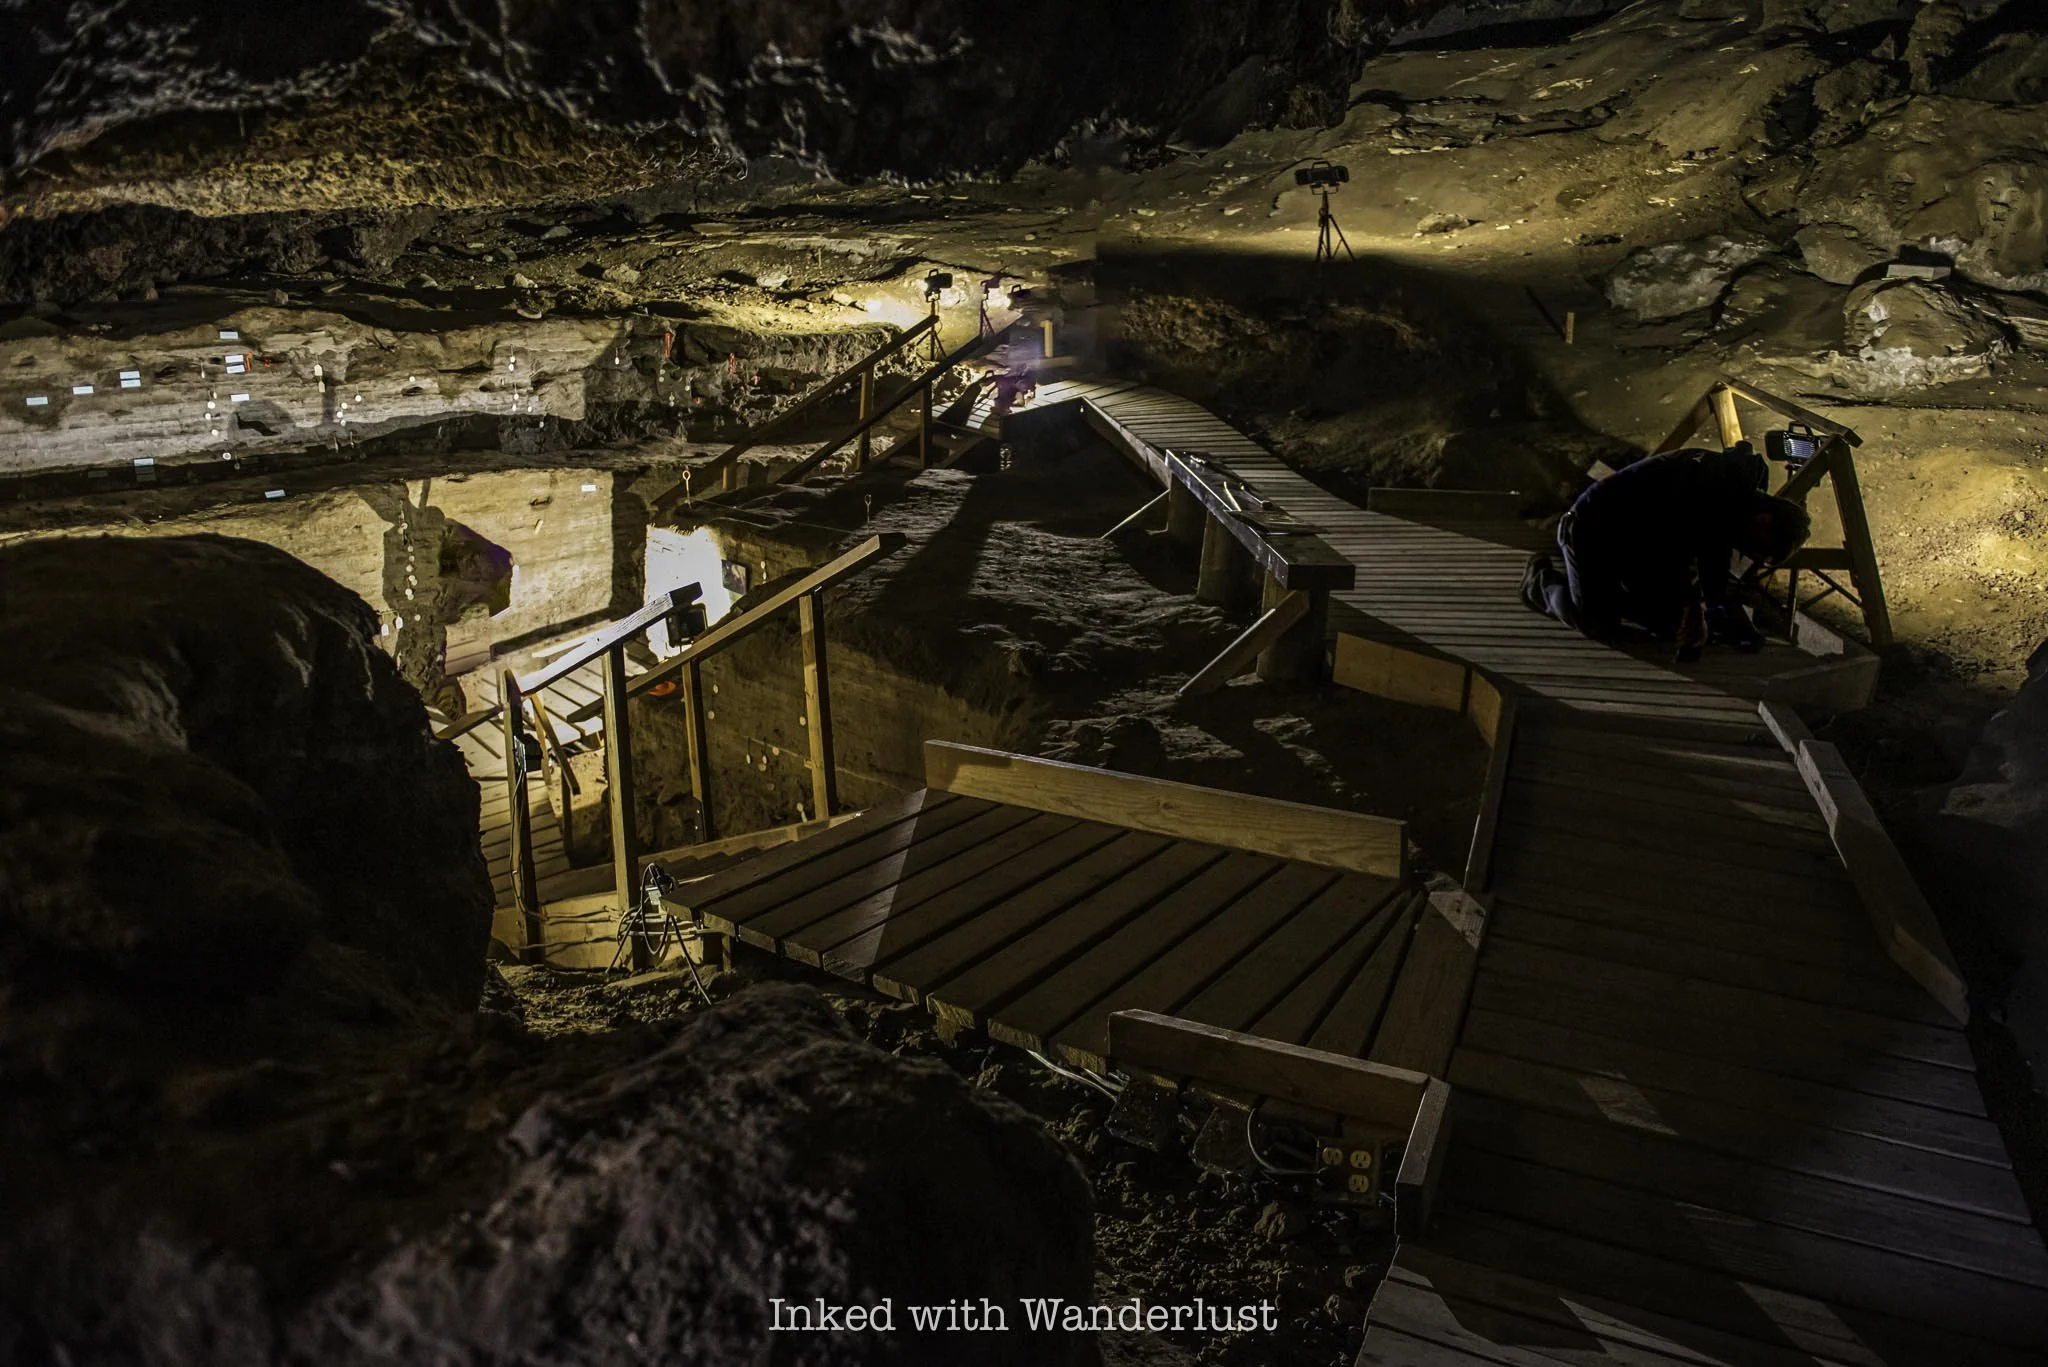
Once you get past the first few feet, you’ll arrive to an open chamber on a wooden boardwalk. As you can see in the photo above, you’ll be able to fully stand once inside, no matter your height.
In the video at the museum, it was stated you could fit two NBA-sized courts in the cave and have room for spectators on the side. I’m not so convinced of that, as it didn’t appear to be that roomy. It was still impressive, though.

The amount of walkable space on the boardwalks is small and you cannot walk on the cave floor at all. So if you’re part of large or even semi-large group (like I was), it can be tough to navigate.
Once folks start leaving, though, you’ll have more elbow room to explore. My tour guide said he would stay for as long as anyone wanted to explore, so there was no rush. I simply waited for most of the group to leave to look around.


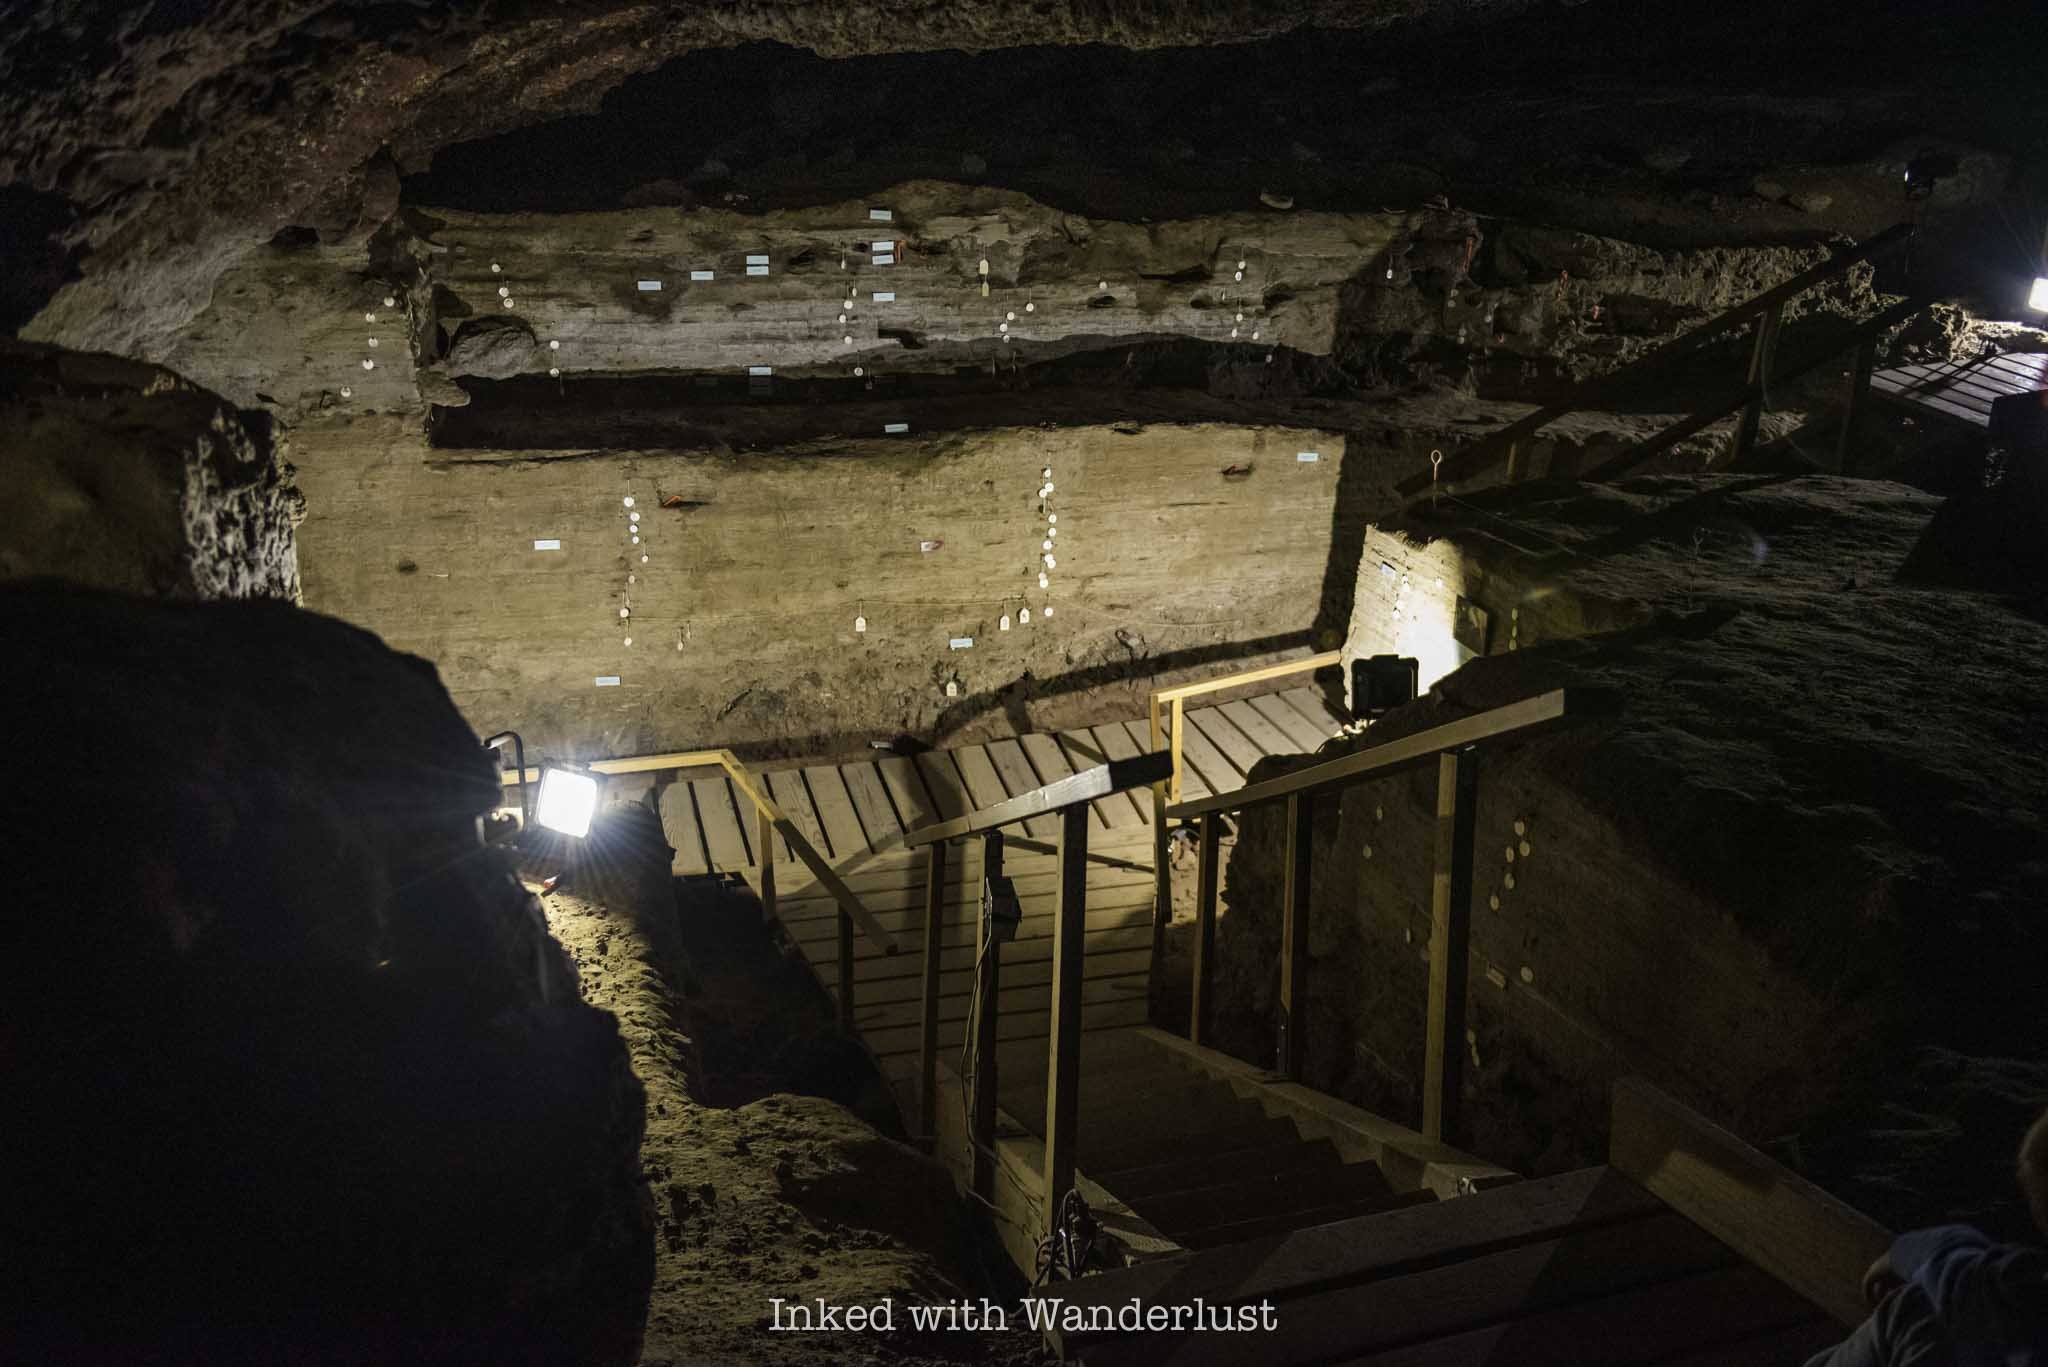
On the walls in the lower portion of the cave are markers. Some mark the age of each layer of rock you’re looking at and others indicate where certain animal fossils were found and their age.
Spend some time looking at these markers and getting photos, then make your way out of the cave. The entrance is also the exit. From here, the tour is over and you’re free to explore on your own.
Side Quest - Burnt Cave

When the tour was over, our guide tipped me off to another cave to check out that also had pictographs on the walls. To get there, head back down the trail until you reach the junction you see in the photo above.
Going right (where you just came from) will take you back to Hidden Cave. Take the trail on the left. You’ll start winding your way back down the mountain and see more examples of tufa formations and dramatic cliffs on the way.

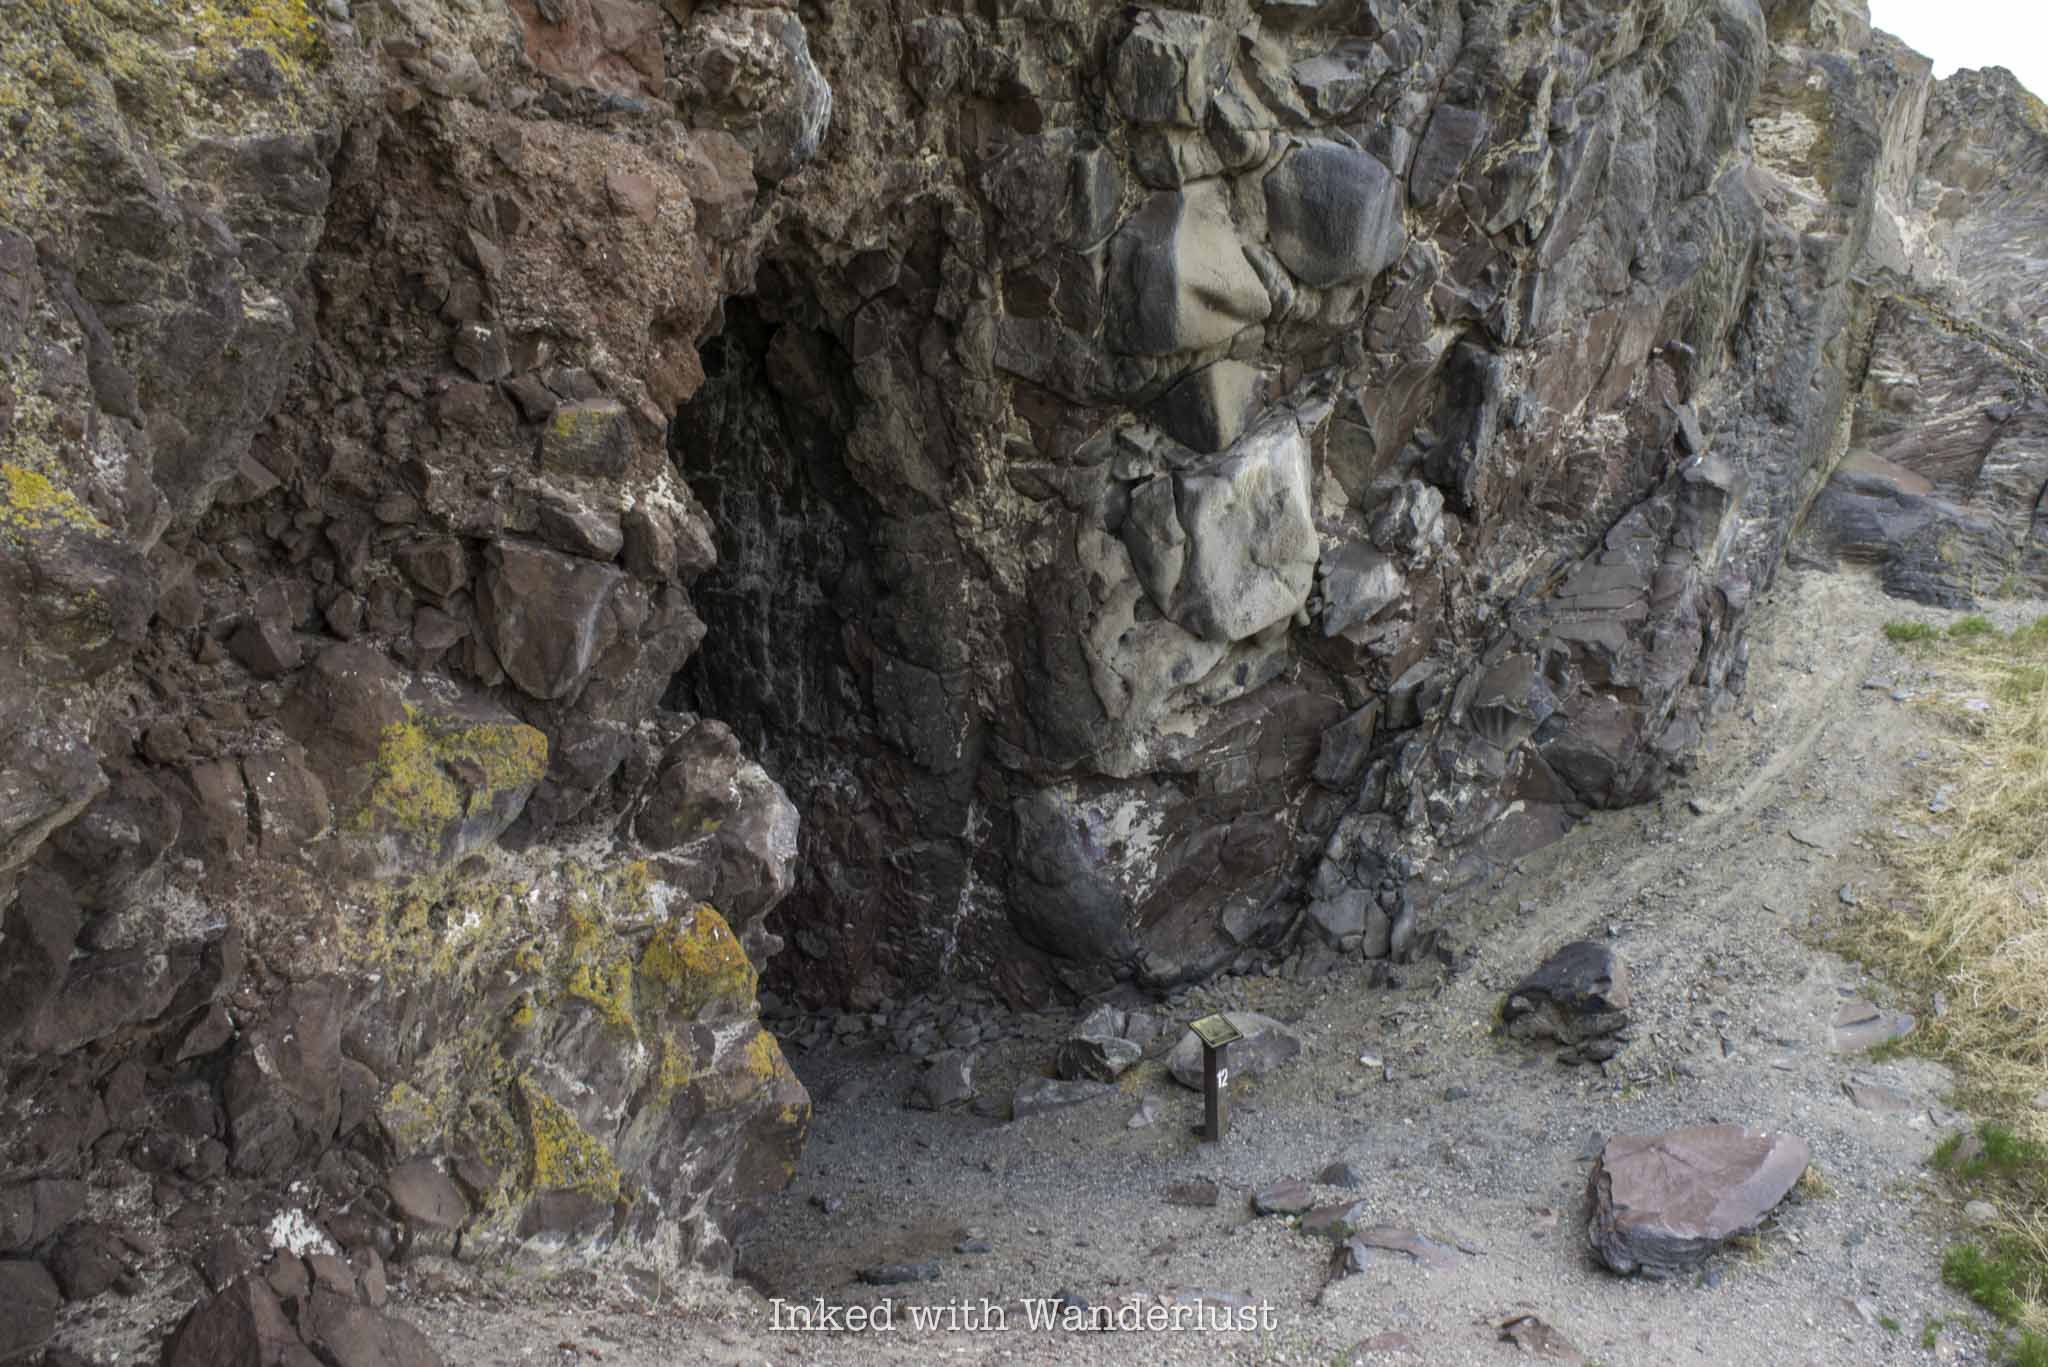
After about a quarter-mile, at trail marker twelve, you’ll see a series of wooden steps leading up an incline. When you get to the top, Burnt Cave will come into view. It’s more an indent into the mountain than a cave, but still cool to see.
This cave was excavated in 1971. Looking at the cave, you’ll notice the red pictographs that were unfortunately partially covered by modern vandalism. By the way, Hidden Cave is locked behind a gate now for that very reason. It was also vandalized back in 2014.
Go a little further up the trail to the other side of Burnt Cave to see even more tufa formations. The ones over here are even crazier than those at Picnic Cave. One almost looks like a mushroom-like formation.

The trail keeps going from here, but I didn’t go any further. To get back to your vehicle, simply head back down the trail. You won’t need to climb back up to Hidden Cave as the trail splits again towards the parking lot. Take a right at the junction to get there.
From here, I recommend driving down the road to Grimes Point and taking time to explore that. The amount of petroglyphs along that short trail is mind boggling. For places to eat, I recommend Pho, The Slanted Porch, and Middlegate Station.
If you’re on a road trip heading towards Interstate-80 east, you can make another stop at Lovelock Cave (near Lovelock) and Thunder Mountain Monument in Imlay. Heading towards Yerington? Consider stopping at Fort Churchill or hike the Wilson Canyon Loop.
JEREMIAH 29:11


Hike Petroglyph Canyon via Mouse’s Tank Trail in Valley of Fire
One such hike is Petroglyph Canyon via Mouse’s Tank Trail. It’s less than a mile (0.7 mile, to be exact) roundtrip along relatively flat…
Disclosure: This post contains affiliate links. If you make a purchase through these links, I may earn a small commission at no additional cost to you. I only recommend products or services that I believe will add value to my readers.

Valley of Fire State Park in Southern Nevada is a recreational paradise and escape from the noise and chaos of the Las Vegas Strip. In fact, it’s only a one hour drive (or less) from Vegas!
The park is chock-full of shorter hikes, giving families with small children and those who’re less experienced a chance to witness epic landscapes, mind-boggling geology, and a serene environment.
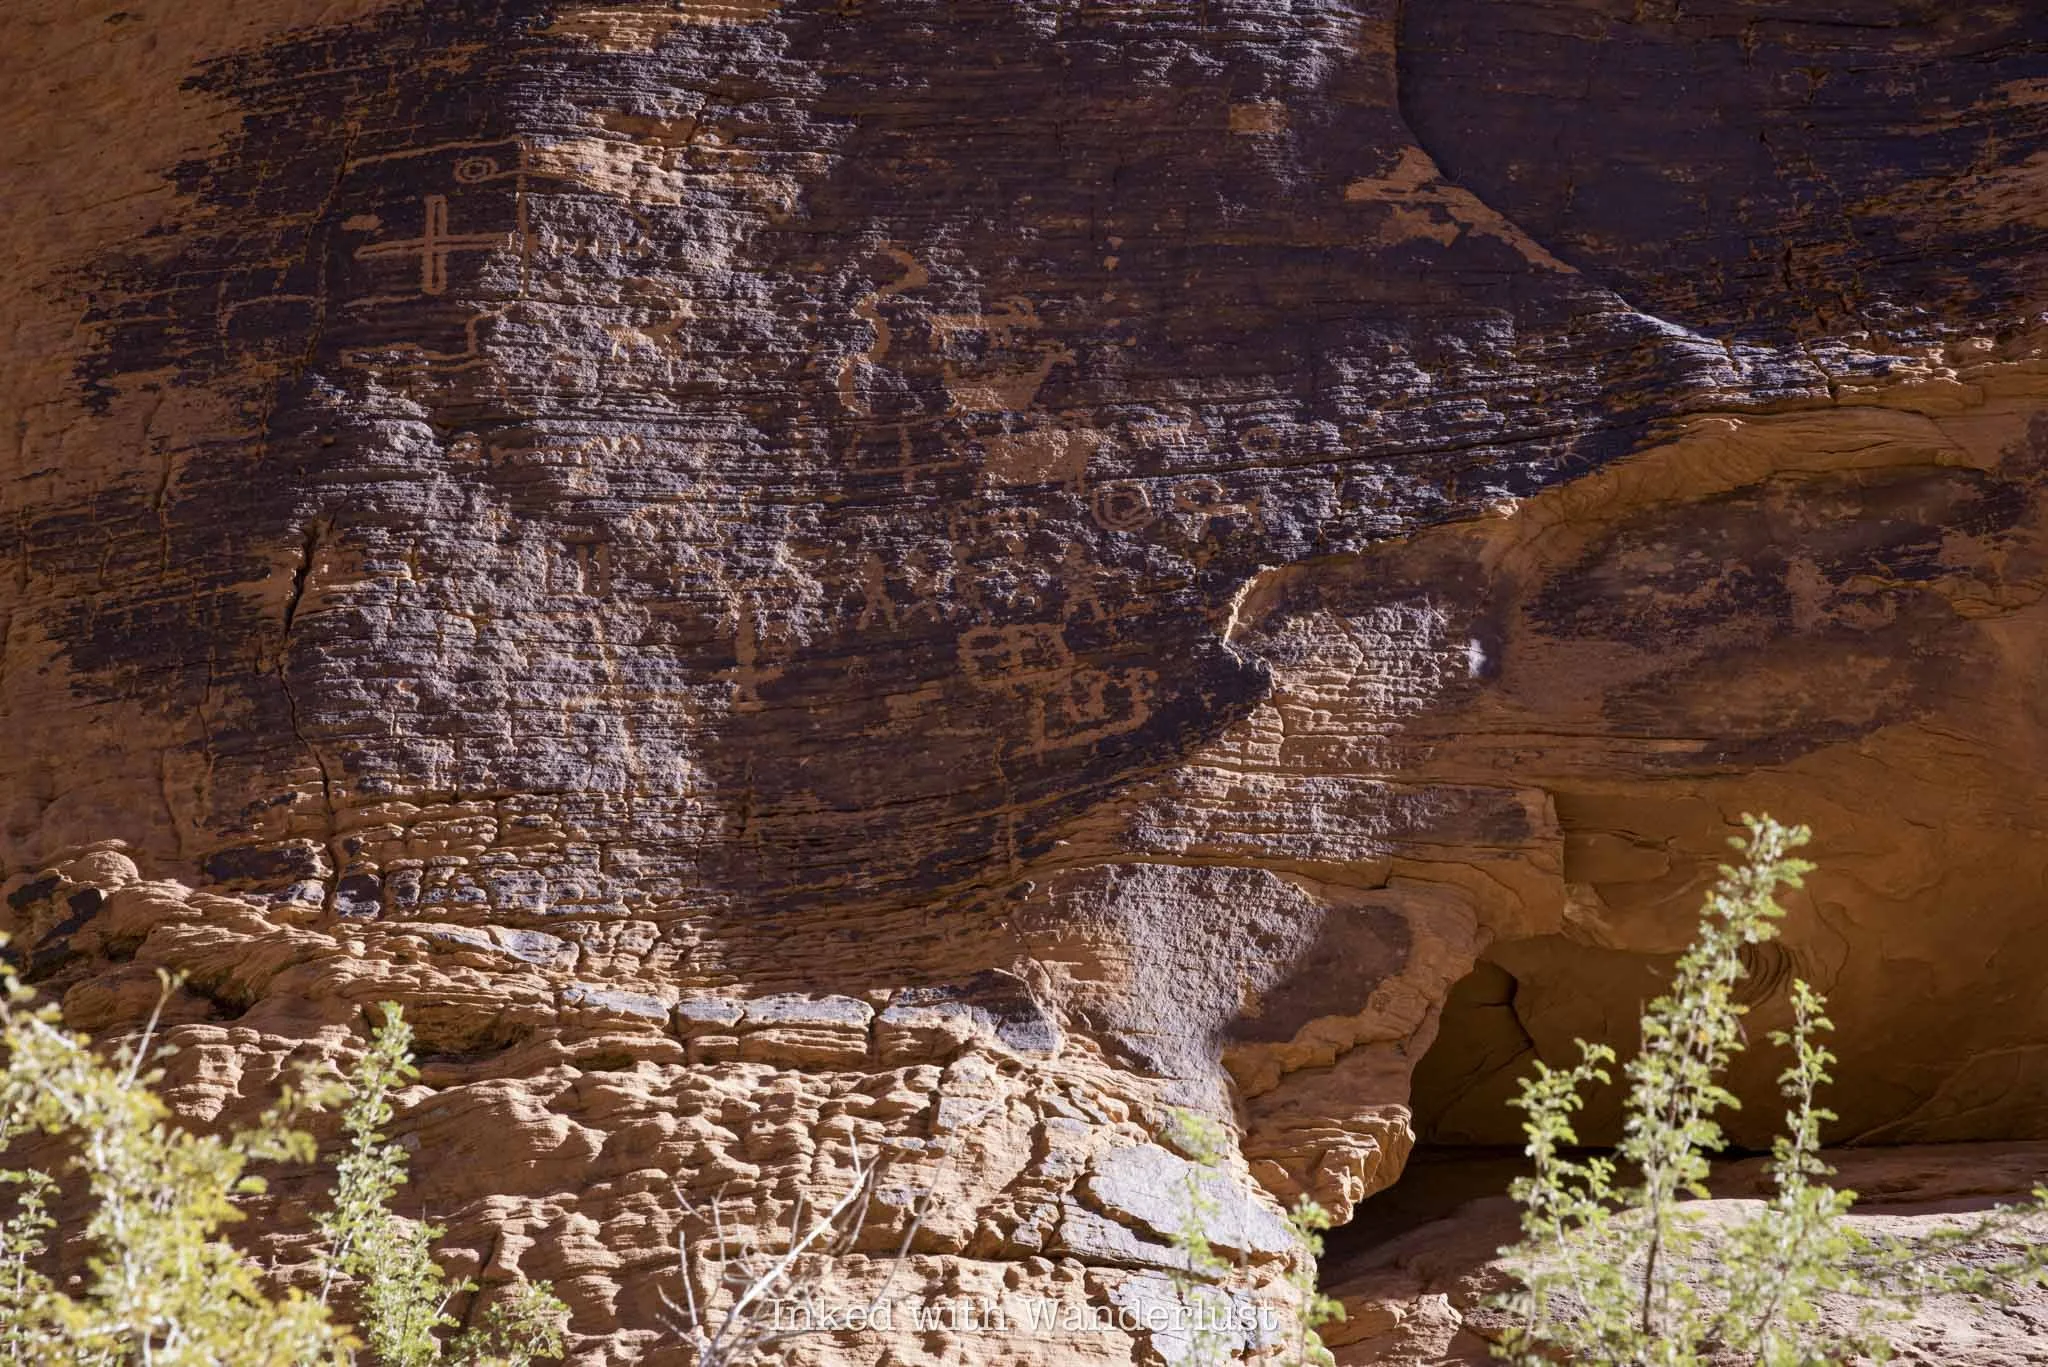
One such hike is Petroglyph Canyon via Mouse’s Tank Trail. It’s less than a mile (0.7 mile, to be exact) roundtrip along relatively flat and sandy ground through a canyon dotted with hundreds of ancient petroglyphs.
What are petroglyphs, you ask? Petroglyphs are images created by carving, etching, or scraping designs into rock surfaces. This form of rock art is often associated with Native American tribes. Which is the case here.
The petroglyphs in this canyon, much like at nearby Atlatl Rock, are believed to be between 2,000 and 4,000 years old and are associated with the Basketmaker and Early Pueblo cultures.
So what can you expect on this hike? Where in the park is it located? Is it worth it? I answer all of these questions and more in the post below. Let’s get into it!
At A Glance…
Location: Valley of Fire State Park
Fee: Standard park day-use fee
Open: Year-round
For: Hikers and families
Cell Service: None
Restroom: At the trailhead
Parking: Large gravel/dirt lot
EV Stations: None
Difficulty: Easy
Popularity: Moderate
Trail Condition: Easy to follow / soft sand
Elevation: 2,024 feet
Stoller Friendly: No
Kid Friendly: Yes
Mileage: 0.7 mile, out and back
Features: Ancient petroglyphs, visually striking rock formations, and natural water basin
Best Viewed: Spring and fall months
Pets: Allowed on leash
Drones: Prohibited
Hazards: Sun exposure and extreme heat (especially in the summer months), potential wildlife encounters
My Visit(s): August 2023 and November 2024
Petroglyph Canyon Trailhead and Parking

The parking lot and trailhead for Mouse’s Tank Trail is located just off of the park’s infamous Mouse’s Tank Road. To get there, you’ll need to drive through either the west or east entrance on the Valley of Fire Scenic Byway and make your way to the visitor center.
Once there, continue up Mouse’s Tank Road for just over a mile, at which point the parking lot for Mouse’s Tank Trail will be on your right. The parking lot is of the dirt/gravel variety and is rather large. There are restrooms here.


The official trailhead is just to the left of the restroom. Keep in mind that while this trail is open year-round, the extreme heat of the summer at Valley of Fire can make this otherwise easy hike a potentially dangerous one.
If you are here in the summer, it might be a good idea to do this one in the morning or later in the evening, as the canyon walls provide a decent amount of shade from the sun at these times.
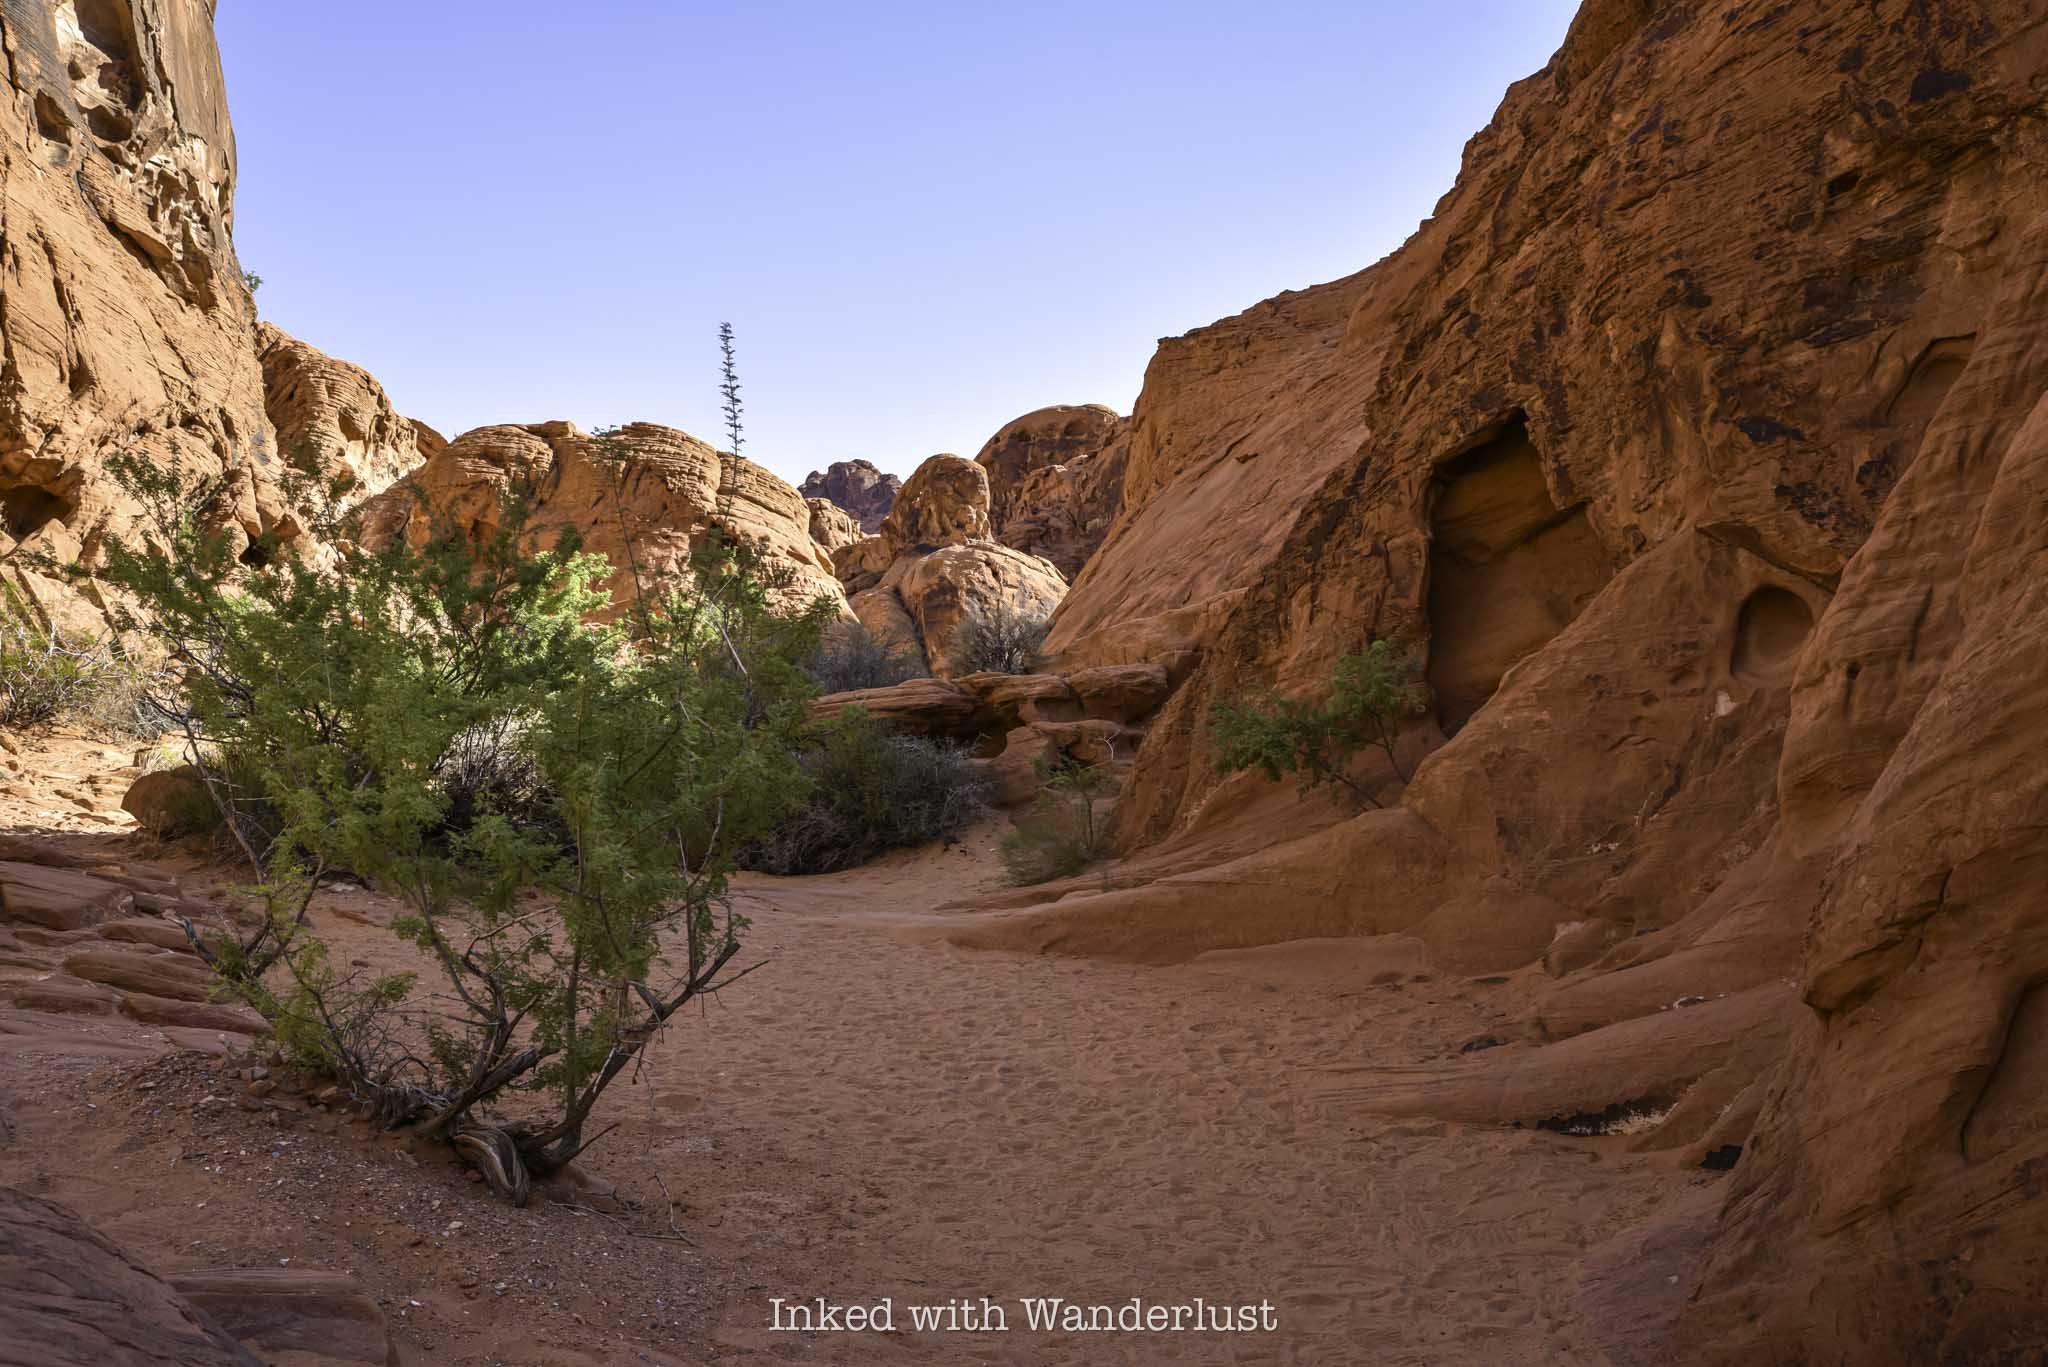
Petroglyph Canyon

The trail begins via a short descent into the mouth of the canyon on a paved ramp. At the end said ramp, you’ll be hiking on soft sand, which will continue throughout the remainder of your hike.
After a short distance, you’ll soon be surrounded by those reddish/orange rock canyon walls Valley of Fire is famous for. There isn’t much in the way of trees or greenery, just the usual desert brush.

The petroglyphs start popping up almost immediately. There are no signs pointing the way and they’re fairly easy to miss if you’re not paying attention. That said, they’re literally all over the canyon walls.
The first set of petroglyphs I spotted were just a few minutes into the hike. When you come to the sign in the photo above, look for an unmarked path on your left (right about where my Dad is standing in the photo).

Facing that unmarked path, you’ll notice a large rock in front of you and on the left side of that rock you’ll notice what looks like a large burn mark. That’s actually patina and in that patina is where you’ll find petroglyphs.


This is the largest concentration of petroglyphs on one rock that I’ve seen on this trail. The patina-heavy area of the rock is literally covered in them. I wasn’t able to spot any more in the area, but that doesn’t mean they’re not there.
Continue down the trail and keep your eyes peeled for patina on the canyon walls. Whenever you see patina, there will likely be petroglyphs there. However, there are some on non-patina’d rocks as well, so look out for those.


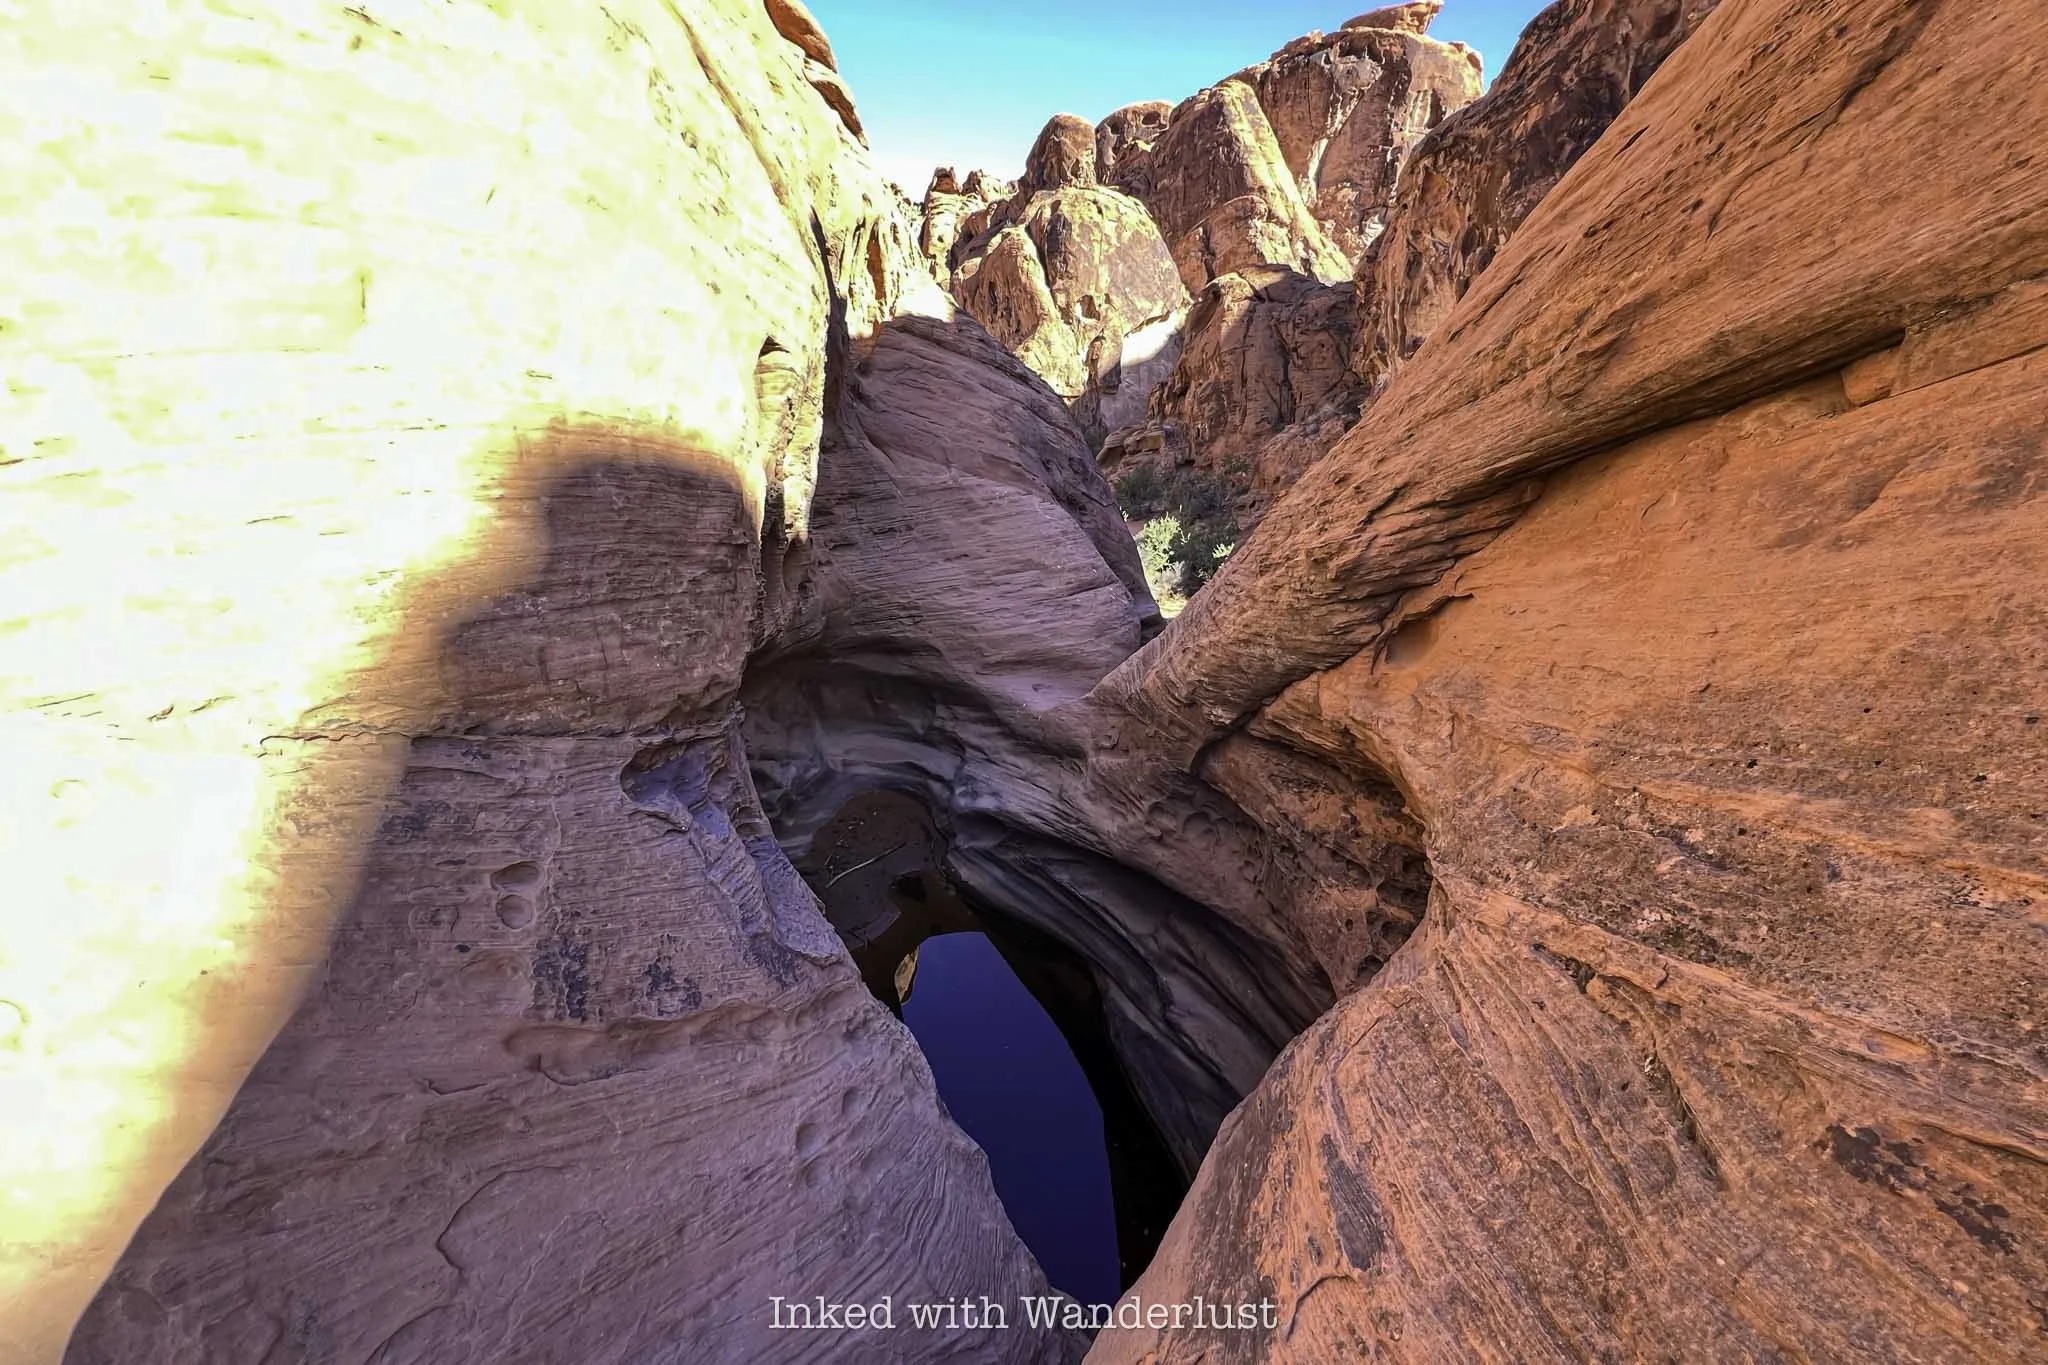
Before long, you’ll come upon a sign stacked onto a pile of stones pointing left, indicating the end of the trail. Turn left here and walk for about 100 feet to a natural basin of water, otherwise known as the “Mouse Tank”.

The “Mouse Tank” is a natural feature in the rocks that collects water after rainfall. It forms a natural basin where water collects. There are a few of these in the park, but this one is named for an Indian outlaw who hid out in this area named, Little Mouse (more on him momentarily).
Walk down to the end of the trail to view the tank. There isn’t always water in it, and sometimes you’ll need to lean over a fair amount to see it. Watch your footing, as it wouldn’t be fun to fall into that…water or not.

In addition to the water tank, there are more petroglyphs in this area. Some are high up on the rocks, so they’ll be a bit difficult to see. There are plenty others at eye level as well, though.
Throughout this post, you may have been wondering why they named this trail “Mouse’s Tank”. It’s named for a Southern Paiute Indian outlaw by the name of “Little Mouse” who hid in this area after being accused of and wanted for a number of crimes.
The Story of Little Mouse - A Southern Indian Paiute Outlaw

It’s said that Little Mouse - or simply, Mouse - hid in this area of the park after being implicated in the murders of two white prospectors (among other crimes). A posse gathered to find him, but they weren’t as familiar with the area as he was.
Walking through Petroglyph Canyon reveals many potential hiding spots in the walls. Whether or not Little Mouse used any of these spots is up for debate, but the sheer possibility is fascinating.


Little Mouse managed to successfully evade capture by hiding in this canyon for several years, utilizing the tank at the end of the canyon as a water source. How exactly he did that without falling is beyond me.
The posse did end up catching up to Little Mouse, though several miles away from this location near the Muddy River. He was surrounded and killed by the posse. Little Mouse’s guilt of the murder of those prospectors was never fully proven.

I hope this post inspired you to hike Mouse’s Tank Trail and explore all of the petroglyphs. When you’re done here, there are many other hiking trails nearby I recommend. White Domes Loop, Fire Wave and Elephant Rock, just to name a few.
Additionally, you can read this post to see a full list of 10 short hikes in Valley of Fire that I recommend. Additionally, if you have extra days and want to see more petroglyphs, check out nearby Atlatl Rock and the historic Petroglyph Wall in Red Rock Canyon.

Hike the Wilson Canyon Loop Trail near Yerington
Situated between the small town of Yerington and the even smaller community of Smith Valley, Wilson Canyon is a recreational paradise with something for everyone. Hiking…
Situated between the small town of Yerington and the even smaller community of Smith Valley, Wilson Canyon is a recreational paradise with something for everyone. Hiking, horse riding, river tubing, camping, motor sports, fishing, etc. You name it, you can do it.
Even though there are plenty of activities to take part in, this article is going to focus on the 3.5 mile interpretive loop trail on the west side of the canyon. If you want to use your dirt bike, quad, etc, you can do so on the opposite side of the highway at the dunes.
The trail is considered moderate in difficulty. The very beginning and end (where you climb in and back out) are short but steep sections. The rest is mostly flat with the occasional gradual ascent/descent that’ll ultimately lead you to an epic payoff at the viewpoint.
At the end of the article I’ve included a screenshot of the route we took that was recorded by my watch. That combined with the included images will give you a pretty good idea of what you’ll be dealing with.
Wilson Canyon Trail Trailhead

The interpretive loop trail begins and ends in the small parking lot located at the west end of the canyon. The decently maintained dirt lot can hold a couple dozen vehicles and features two shaded picnic tables. The trail begins just behind these.
If you’re coming from Yerington, the lot will be at the end of the canyon on your left. If you’re coming from Gardnerville or Topaz, the lot will be on your immediate right as you’re coming into the canyon (shortly after passing the rest stop).
The Loop

This first section of the trail leading up to the ridge of the canyon is the second steepest of the whole thing (the first being the opposite side coming back out, but more on that later). It isn’t difficult by any means, but if you’re not used to hiking at higher elevations, you may have a slow go at it.

When you get to the top of the ridge, be sure to turn around and take in the views. In a single frame of view you’ll see a portion of the west fork of Walker River with Mount Siegel and the Pine Nut Mountain Range providing the backdrop.
From here, you have two choices. You can go further up the ridge to the left and check out the vertigo inducing views of the river below or, once you’ve gotten your fill of the views, you can continue down the trail proper leading into the canyon.

Going down this section of the trail will mean you’re going to lose all the elevation you just gained. It’s frustrating, I know, but it’s the only way in. On your way down, you’ll get a vast view of the desert valley below that was once an ancient lake.
If you look closely to the upper left of the image above you’ll faintly see a sign along the trail just before it veers to the right. This sign indicates that you would be under water at that point had the lake still been there.

At the bottom of the trail you’ll reach a dry river bed that cuts through the trail you’re on. You’ll also see two pointed signs with one directing you to the left and another directing you forward. This is where the actual loop begins.
You could go in either direction and end up at the same spot. Going left will take you along the river before turning into and up the canyon. After reaching the viewpoint above, you’ll descend back into the canyon and here is where it’ll ultimately spit you out at. In our opinion, this is the better way to go.


After turning left at the juncture, you’ll follow the dry river bed for a short time before before running into Walker River. At the right time of year, this section of the river doesn’t move very fast. So if you brought your swimsuit, this would be a great spot to take a dip or maybe partake in some fishing.

The trail continues to the right and follows the river for about a quarter mile before finally cutting back into the canyon. When we did this hike it was still early spring, so the trees that dot the river weren’t yet blooming, unfortunately. When they do, it’s a sight to behold (especially in the fall).
Shortly after turning right into the canyon (roughly one mile into the hike), you’ll come across your first of only two opportunities for shade during this stretch of the trail. The next one is 3/4’s of a mile further. So if you’re feeling the need to rest for a bit, do it here.
This stretch of the trail starts from the time you leave the river to the time where you reach the viewpoint at the top and is almost exactly one mile in length. It is very exposed and as stated above, has only two opportunities for shaded rest breaks.
At first glance, you might think there isn’t much to look at here, but you’d be wrong. Thanks to the volunteers that maintain this trail, small informative signs dot the trail pointing out the several examples of desert flora, rock formations, and petrified wood.

Not long after the second shaded area of the trail, you’ll begin your ascent to the viewpoint. This ascent, while still requiring a fair amount of effort, is nowhere near as steep as the one you took to get into the canyon at the beginning.


At the top of the viewpoint, you’ll see a large informative sign detailing the history of the area and what you’re looking at. On your far right, you’ll see Mount Wilson, Singatse Range, and Shamarak Hill. Toward the middle and left you’ll see Ancient Lake Wellington, the Pine Nut Mountain Range, and Mount Siegel.
Once you’ve gotten your fill of the views and took your pictures, you’ll continue down the trail as you descend back into the canyon. This section of the trail is my personal favorite as you go from sweeping mountain views to feeling like you’ve stepped into a scene out of Star Wars.
READ ALSO: Visit Dayton State Park and Rock Point Mill

If you’ve ever seen the tufa’s at Mono Lake in California, the canyon walls that surround you will look similar to that environment. After all, all of what you see here was formed over millions of years of volcanic activity and water movement.
Towards the end, you’ll see examples of what are called, “Hoodoos”. Hoodoos are rock formations that were once solid pieces of land that were carved out by rain, snow melt, and wind leaving the pieces you see today. One of them, as pictured below, resembles a dragon.


Near the end of the Wilson Canyon trail.

The climb out of Wilson Canyon.
As you make your way through the canyon walls and Hoodoos, you’ll come out into an opening signaling the near the end of the hike. You’ll eventually reach a sign (similar to the one at the beginning) stating that you would be under water had the ancient lake still been here. At this point in the hike, you’re at the 3-mile mark.
From here, simply continue on the trail until it spits you out at that same junction you came to at the beginning. Now that you've completed the loop, you can either head back towards to the river to recreate in there or you can go straight up and over the ridge back to your vehicle. Remember the very beginning of this article when I stated the hardest part of the whole hike is the climb out? Well, there it is pictured above. Prepare yourself.
Wilson Canyon Trail - Things to Know

This is an all season trail. Rain and/or snow can make this trail incredibly muddy and hard or even dangerous to traverse. However, this area doesn’t receive a lot of either so it is accessible anytime of year. I do recommend checking the weather before heading out, though.
Wildlife hazards are present. As with any venture into the wilderness, potential conflicts with wildlife are possible. While I have never seen anything more menacing than deer out here, others have spotted both Cougars and Rattlesnakes. As with anything, use common sense, be prepared, pay attention to your surroundings, and know what to do in case you cross paths with one of them.
The majority of the trail is rocky. The volunteers who maintain this trail do a great job, but they can only do so much. At certain points at both ends of the trail it does get rather rocky and the potential of rolling an ankle is ever present. Watch your step, keep to steady surfaces as much as possible, and you’ll be fine.
The trail is very sun exposed. The descent back into the canyon from the viewpoint has more shade than the way up does. It’s a 3.5-mile trail and for the first two or so, you’re only going to have a couple opportunities for shade. If you’re doing this trail in the summer, we highly recommend getting an early AM start and as always, bring plenty of water and salty snacks with you.
We would rate this hike as family friendly. While it does have steep sections, the trail is mostly flat with occasional gradual inclines/declines. It is our opinion that everyone from adults to children can do this hike. If your kid has never hiked before, it would be a great way to introduce them to it.

10 Must-Do Short Hikes in Valley of Fire State Park
The beautiful rock formations and colors, in addition to being packed with short day hikes, make Valley of Fire State Park a place you could easily spend a whole day (or two) exploring. Best of all, most…
Disclosure: This post contains affiliate links. If you make a purchase through these links, I may earn a small commission at no additional cost to you. I only recommend products or services that I believe will add value to my readers.
Valley of Fire became Nevada's first state park in 1934 and since then, it's developed into one of the state's most sought after destinations and is one of the best things to do when visiting Las Vegas, often rivaling nearby Red Rock Canyon.
The beautiful rock formations and colors, in addition to being packed with short day hikes, makes Valley of Fire State Park a place you could easily spend a whole day (or two) exploring. Best of all, most of the park’s most popular hikes are short and easy, making them family-friendly.
In this post, I'm going to present to you 10 must-do short hikes in Valley of Fire. If you plan correctly and not visit on a day where the heat reaches dangerous levels, it's totally possibly to do all of these in a single day visit, dependent on your conditioning.
That said, there is one caveat to this list, and that's the seasonal trail closures discussed below...
Valley of Fire Seasonal Trail Closures

While the park itself is open daily, between the months of May and September, when temperatures at Valley of Fire State Park often reach dangerous levels, park officials enact trail closures at several popular hiking trails to prevent needless deaths.
There have been quite a few exposure-related deaths over the years, including in 2023 when two hikers were found dead on the Prospect Trail on a day when high temperatures reached a scorching 118-degrees.
Unfortunately, several of the hiking trails listed below are included on the closure list. So if you're going to visit between May and September, please respect these closures and don't risk it. It isn't worth the chance of a hefty fine or even worse...death.
These are the trails affected by seasonal closures:
White Domes Loop
Fire Wave/Seven Wonders/Pastel Canyon/Pink Canyon
Pinnacles Loop
Prospect Trail
Arrowhead Trail
Natural Arch Trail (excludes Arch Rock)
Charlie's Spring

West Entrance vs. East Entrance
There are only two entrances to Valley of Fire State Park. If you’re coming from Utah, Arizona, or any state east of Nevada, you’ll likely be entering through the east entrance. If you're like most people and you're coming from the Las Vegas Strip area, you'll want to head towards the west entrance.
For some reason, Google Maps likes to take people coming from the strip to the east entrance, which is further away. It has tried doing that to me twice now. So make sure that whichever navigation system you use that you specify the west entrance.
Entrance Fees
In 2025, the fees to enter Valley of Fire are:
$15 (non-Nevada vehicles)
$10 (Nevada vehicles)
Fees are payable, at either entrance, with cash via the iron ranger/envelope or with credit cards at the self-pay digital kiosk. Note that the digital kiosk doesn't always work, so it's best to bring exact cash as a back up.
1) Atlatl Rock

SEASONAL CLOSURE: NO
TRAIL LENGTH: 0.1 MILES
Atlatl Rock is one of the most popular attractions in the entire park. It isn't much of a hiking trail, as the stairwell and rock face are located a very short distance from the parking area. Where Atlatl Rock shines is its historical significance.
At the top of the stairwell, you'll reach a platform in front of a smooth rock face. On that rock face are several old petroglyphs which are believed to be up to 4,000 years old. Atlatl Rock isn't the only spot in Valley of Fire where you can see petroglyphs, but it's the easiest (aside from the stairwell, that is).
You can read more details about Atlatl Rock in this featured post.
2) Fire Wave Trail

SEASONAL CLOSURE: YES
TRAIL LENGTH: 1.3 MILES
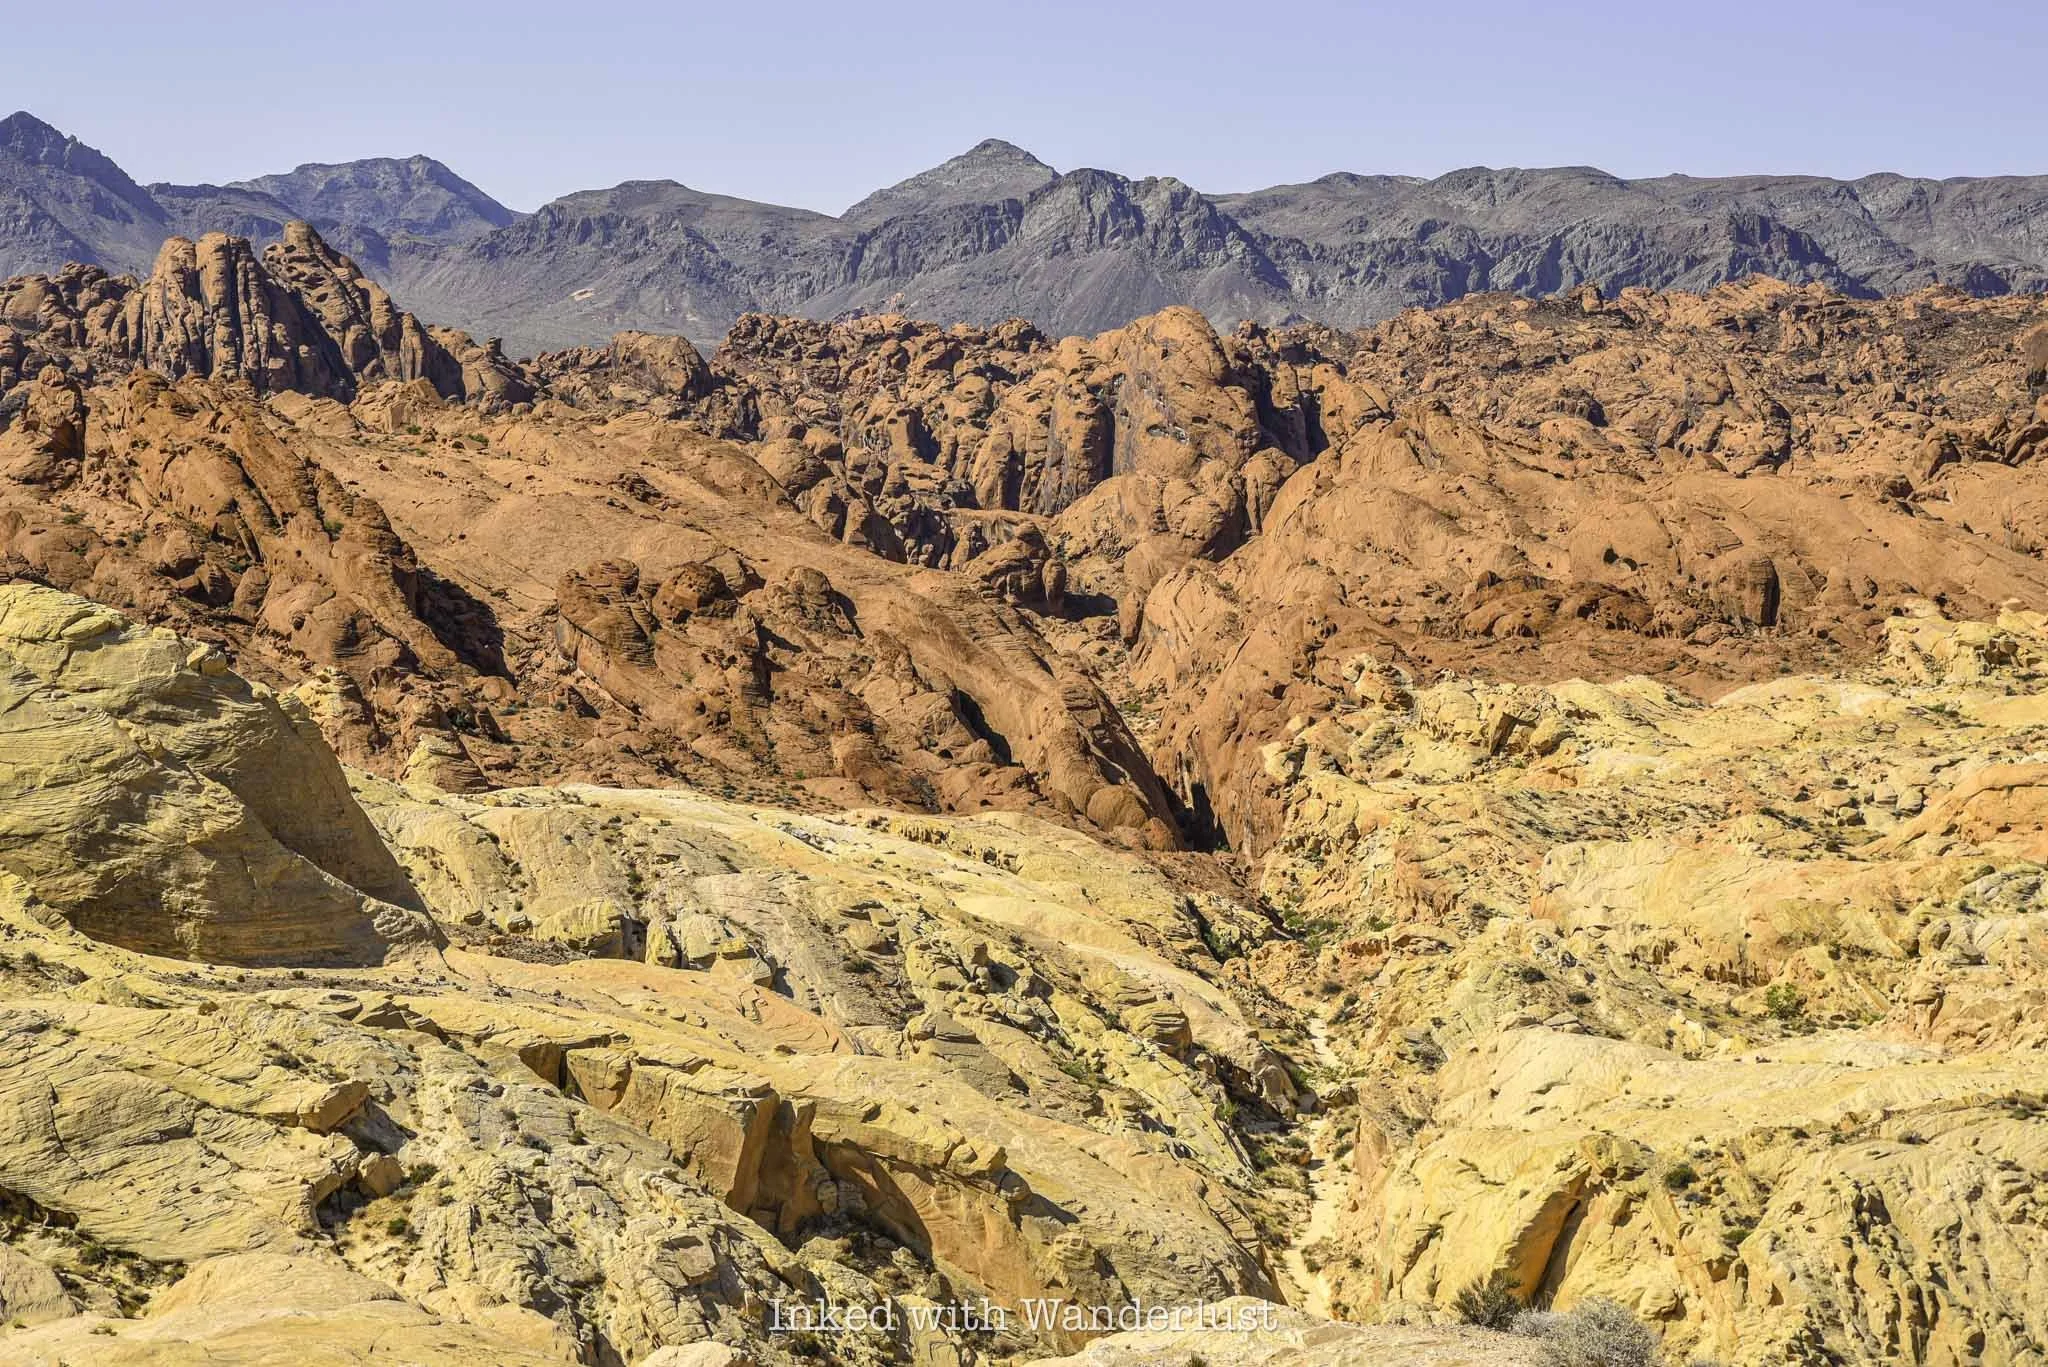
The Fire Wave is a stunning sandstone rock formation located at the backside of the park along White Domes Road. Over millions of years, shifting sand dunes compressed, creating the wavy swirls of red, white and pink stripes we see today.
Fire Wave is easy to get to via a short, well maintained trail that leaves from a fairly large parking area. Shortly after descending for about 6/10's of a mile, the Fire Wave will come into view. Getting there during the early morning light is good, but sunset is when Fire Wave comes to life.
3) Seven Wonders Loop

SEASONAL CLOSURE: YES
TRAIL LENGTH: 1.9 MILES
While not an official hiking trail at Valley of Fire, you can extend your hiking time by continuing past Fire Wave and see many other infamous Valley of Fire attractions. Hiking Seven Wonders will take you past Fire Wave and through pink rock formations at Pink Canyon.
You'll then cross White Domes Road and go through a stunning slot canyon, before heading onto additional sights like Crazy Hill, Fire Cave and Thunderstorm Arch. The loop will eventually take you back to where you parked for Fire Wave.
Since it's not an official trail, I suggest downloading the AllTrails map. While it isn't inherently difficult to follow, there are a few spots where the trail is easy to lose.
4) Mouse’s Tank Trail
SEASONAL CLOSURE: NO
TRAIL LENGTH: 0.7 MILES
Mouse's Tank Trail is one of my favorites in the park because of the story behind it. The canyon you hike through is one of the places where a Southern Paiute Indian, named "Little Mouse", took refuge after being accused of and wanted for the murders of two prospectors (and other crimes) in the late 1800's.
Additionally, the canyon walls are littered with old petroglyphs dating back thousands of years. They're easy to miss if you're not looking for them but once you spot them, they're easy to view. At the end of the canyon, you'll come across "Mouse's Tank", a natural rock basin which collects rain water.
The whole trail is less than a mile but you'll be traversing along loose, fine sand the entire time. Still, it's one of the park's most intriguing hikes with a great backstory, tons of history, and features numerous incredible rock formations. It can be found directly off of Mouse's Tank Road.
5) Petrified Log Loop
SEASONAL CLOSURE: NO
TRAIL LENGTH: 0.3 MILES
The Petrified Log Loop is an easy 0.3-mile loop trail that passes several examples of real petrified wood logs, as well as many informative displays detailing the history of the logs and how they came to be.
If you don't know, petrified logs are fossilized tree trunks that have been replaced by minerals. The process in which this is done - petrification - is essentially the process of turning wood into stone. It's a great trail for kids, as it has educational value in combination with outstanding views.
6) Elephant Rock

SEASONAL CLOSURE: NO
TRAIL LENGTH: 0.3 MILES
The trail to Elephant Rock is also an easy, 0.3-mile walk to and from the car. There's a slight amount of elevation involved, but you'll barely notice it. The trail leads to an amazing, orange-sandstone rock formation that strikingly resembles an elephant.
If you come into the park via the east entrance, the parking lot will be on your right as soon as you drive through. You'll ascend a short walk up a small hill and when you reach the top, Elephant Rock will come into view.
Additionally, Elephant Rock is clearly visible from the Valley of Fire Scenic Drive, but you cannot stop on this road to take pictures. Elephant Rock is a mega-popular attraction in Valley of Fire, so arrive early to beat the crowds.
7) Balancing Rock Trail

SEASONAL CLOSURE: NO
TRAIL LENGTH: 0.3 MILES
There's no way to classify the path to Balancing Rock as a "hike". The pathway is located on the left side of the visitor center parking lot and it's maybe a tenth of a mile to the viewing area. However, that doesn't make Balancing Rock any less impressive and worth checking out.
Balancing Rock is a stunning red rock formation where a large rock appears to precariously balance itself on top of a smaller, thinner rock resembling a pedestal. It's a visually intriguing rock formation, and a favorite amongst photographers.
8) Silica Dome/Fire Canyon

SEASONAL CLOSURE: NO
TRAIL LENGTH: 0.9 MILES
Silica Dome is a visually striking viewpoint in the northern section of Valley of Fire, right about where Mouse's Tank Road turns into White Domes Road. In the summer, it's the final spot in this area of the park where you explore on foot, as everything north of Silica Dome is closed in the summer months.
You can choose to just walk out onto the viewing platform and gaze at the stunning contrasting colors of red, white, and brown rocks seemingly stacked on top of one another, or you can take the trail into the canyon below.
Fans of Star Trek may find Silica Dome familiar, as it's the location of Captain Kirk's gravesite from the movie, Star Trek Generations. Many "trekkies" make the pilgrimage to this sight every year. However, you don't need to be into Star Trek to appreciate the visually striking views and formations.
9) Rainbow Vista Trail
SEASONAL CLOSURE: NO
TRAIL LENGTH: 1.0 MILE
The Rainbow Vista Trail, which is also located along Mouse's Tank Road, clocks in at just over a mile in length and features some of the best views in a short hike. In fact, this area of the park is where you have the best chance of seeing herds of Bighorn Sheep, as they're often found grazing near the parking lot and along the road.
This short and easy trail is known for its colorful red rock formations, as well as stunning views of neighboring Fire Canyon from the viewpoint at which the trail ends. While it doesn't close in the warmer months, it is mostly exposed. So if you're here in the summer, I would avoid this trail mid-day.
10) White Domes Loop

SEASONAL CLOSURE: YES
TRAIL LENGTH: 1.1 MILES
White Domes Loop, located at the northernmost point you can drive in the park, is my personal favorite Valley of Fire hike. To get to it, drive north on Mouse's Tank Road from the Valley of Fire Scenic Byway. After a couple miles, the road will become White Domes Road (just past Rainbow Vista). From there, drive another four miles until you reach the road's terminus at the White Domes day-use area.
Along this 1.1-mile loop, you'll encounter a variety of red, orange, and white sandstone formations, as well as an old movie set, slot canyon, and the white dome rocks for which the trail is known. If you're up for a longer hike, you can extend it another 7-miles or so by combining it with the Prospect Trail.
White Domes Loop is one of the most popular short hikes in Valley of Fire, so arrive early to beat the crowds. Additionally, this trail is on the seasonal closure list, so you'll need to visit between the months of November and April in order to experience it. You can read my comprehensive post on White Domes Loop here.
Do you plan to visit Valley of Fire this year? If so, let me know in the comments below. If you have any questions, you can leave them there or ask me on my Facebook page.

White Domes Loop Trail: A Valley of Fire Hike
The White Domes Loop Trail, located in Valley of Fire State Park, is one of the most popular trails in the entire park. Its trailhead is located at the terminus of Mouse’s Tank…
Disclosure: This post contains affiliate links. If you make a purchase through these links, I may earn a small commission at no additional cost to you. I only recommend products or services that I believe will add value to my readers.
The White Domes Loop Trail, located in Valley of Fire State Park, is one of the most popular trails in the entire park. Its trailhead is located at the terminus of Mouse’s Tank and White Domes Roads in the park’s north section.
This short, yet stunning Valley of Fire hike takes you through jaw-dropping scenery consisting of white sandstone formations which starkly contrast with the vibrant reds and pastels. Additionally, it’ll also take you through a narrow, but brief slot canyon.
Before heading out on this hike, there are a few things you should know first. In this post, I’ll discuss topics such as the trail’s seasonal closure, what to expect along the trail, some tips that’ll help ensure a smooth experience, and more. Let’s get into it.
Trail Stats
Location: Valley of Fire State Park in southern Nevada
Fee: $10 for Nevada license plates / $15 for non-residents to enter the park
Open: Typically between early October and mid-May.
Family Friendly: Yes
Cell Service: Spotty (based on Verizon service)
Restroom: Multiple in the trailhead parking lot (vault style)
Parking: Large paved lot with multiple parking spots
EV Stations: None
Difficulty: Easy to moderate
Popularity: High
Milage: 1.1 miles
Elevation Gain: 177 foot gain
Condition: Well maintained and easy to follow
Features: White, red, and pastel colored sandstone formations and slot canyon
Best Experienced: When open, in the morning
Pets: Allowed, must be leashed
Drone: Prohibited
Hazards: Rocky/sandy decents, sun exposure, and possible wildlife encounters
My Visit(s): 2023 and 2024
White Domes Trail Seasonal Closure

Valley of Fire is just an hour or so from the bright lights of Las Vegas but here, there are no air conditioned casinos to duck into when it gets too hot. Valley of Fire is pure desert. So when it gets hot, it gets really hot.
So much so that it isn’t unheard of for the heat to go well into triple digits in the summer months, making hiking a potentially dangerous, or downright life-threatening activity. In 2023, two women were found dead on the closed Prospect Trail, on a day where temperatures reached a scorching 118 degrees.
To prevent senseless loss of life, Valley of Fire officials enact seasonal closures of a handful of trails, White Domes being one of them. The exact dates change slightly year over year but generally, White Domes Trail is closed between mid-May and early October. You can monitor exact dates here.
You can still drive the highly scenic White Domes Road (which begins shortly after Rainbow Vista) and can access White Domes’ day-use area, but the trail itself is off limits during that period. Please respect the closure. If not, you risk fines, arrest, and death. No trail is worth that.
White Domes Trail Parking and Trailhead

To reach the parking lot and trailhead for White Domes Trail from either entrance of Valley of Fire, make your way to Mouse’s Tank Road, which is where the current visitor center is located. From the visitor center, it is roughly 15-minutes to the trailhead.
Drive along Mouse’s Tank Road for a few miles. When you pass Rainbow Vista on your right, the road will become White Domes Road. Continue for another couple miles until you reach the literal end of the road at the White Domes Trail parking lot.

The parking lot is large and paved, with spaces for many vehicles, including RVs. It isn’t unheard of to see tour busses parked here as well. At the trailhead are two restroom structures. In my experience, they’re not well maintained, so bringing your own biodegradable toilet seat covers and hand sanitizer would be wise (trust me on this).
Behind the restrooms, you’ll find a series of craggy, white sandstone towers with pastel stripes, a sneak peak into what awaits you on the trail. To the right of the restrooms are multiple covered picnic tables available for use. To the left are information boards. Between them and the restrooms is where the trail begins.
White Domes Loop Trail - What to Expect
Beyond the parking lot, you’ll start going slightly uphill on a trail consisting of fine, reddish-colored desert sand. There will be periods where the sand becomes a bit compact and moments where you’ll be traversing along solid, rocky ground but for the most part, you’ll be hiking through sand.
This is why I rated the trail as easy to moderate. Overall, this is an easy hike, but the fine sand takes the challenge level up a slight notch, particularly for those used to hiking on compact dirt. Soon into the trail, you’ll need to descend a series of rocky steps. Watch your step here.
The sandstone walls around you get higher and higher as you descend into the canyon. This is also where you’ll see a variety of unique sandstone formations that Valley of Fire is famous for, where no two formations are the same.
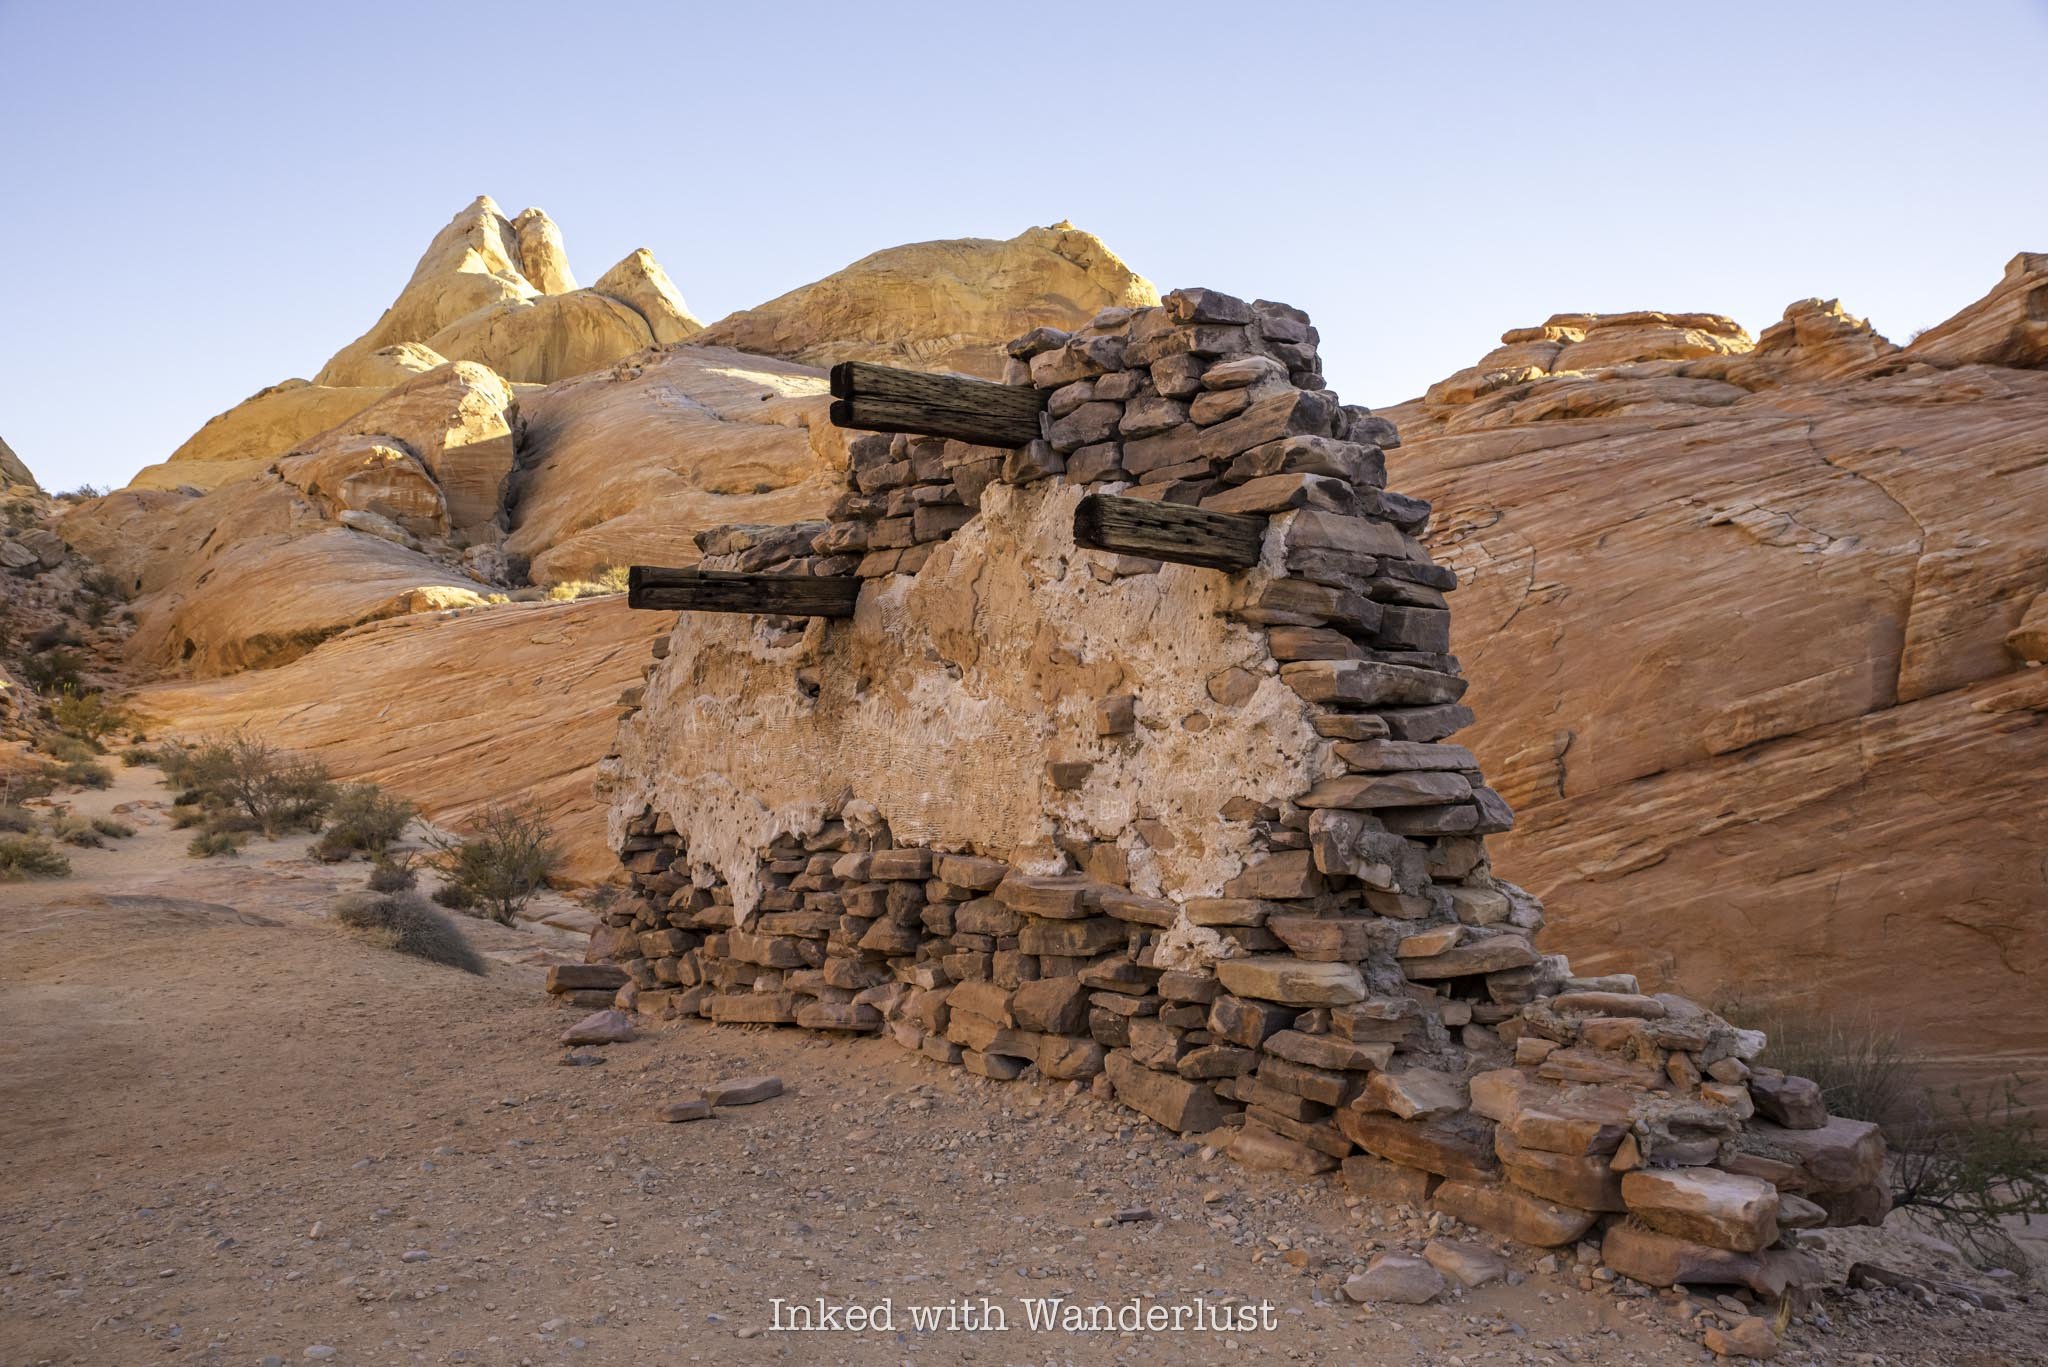
When you reach the bottom, the ground begins to soften again as you rejoin the sand-based trail. Up ahead, you’ll take notice of a man-made structure. This structure was part of a set piece for the 1965 movie, “The Professional”, which was partly filmed here. There’s a monument adjacent to the structure detailing Valley of Fire’s ideal location for filming westerns and the like.
Past the filming location, keep to the left to rejoin the trail. You’ll see a pile of rocks with a black trail marker guiding the way. When you descend further down the rock and back onto sand, you’ll turn right at the junction. Up ahead is another featured aspect of White Domes Trail - the slot canyon.
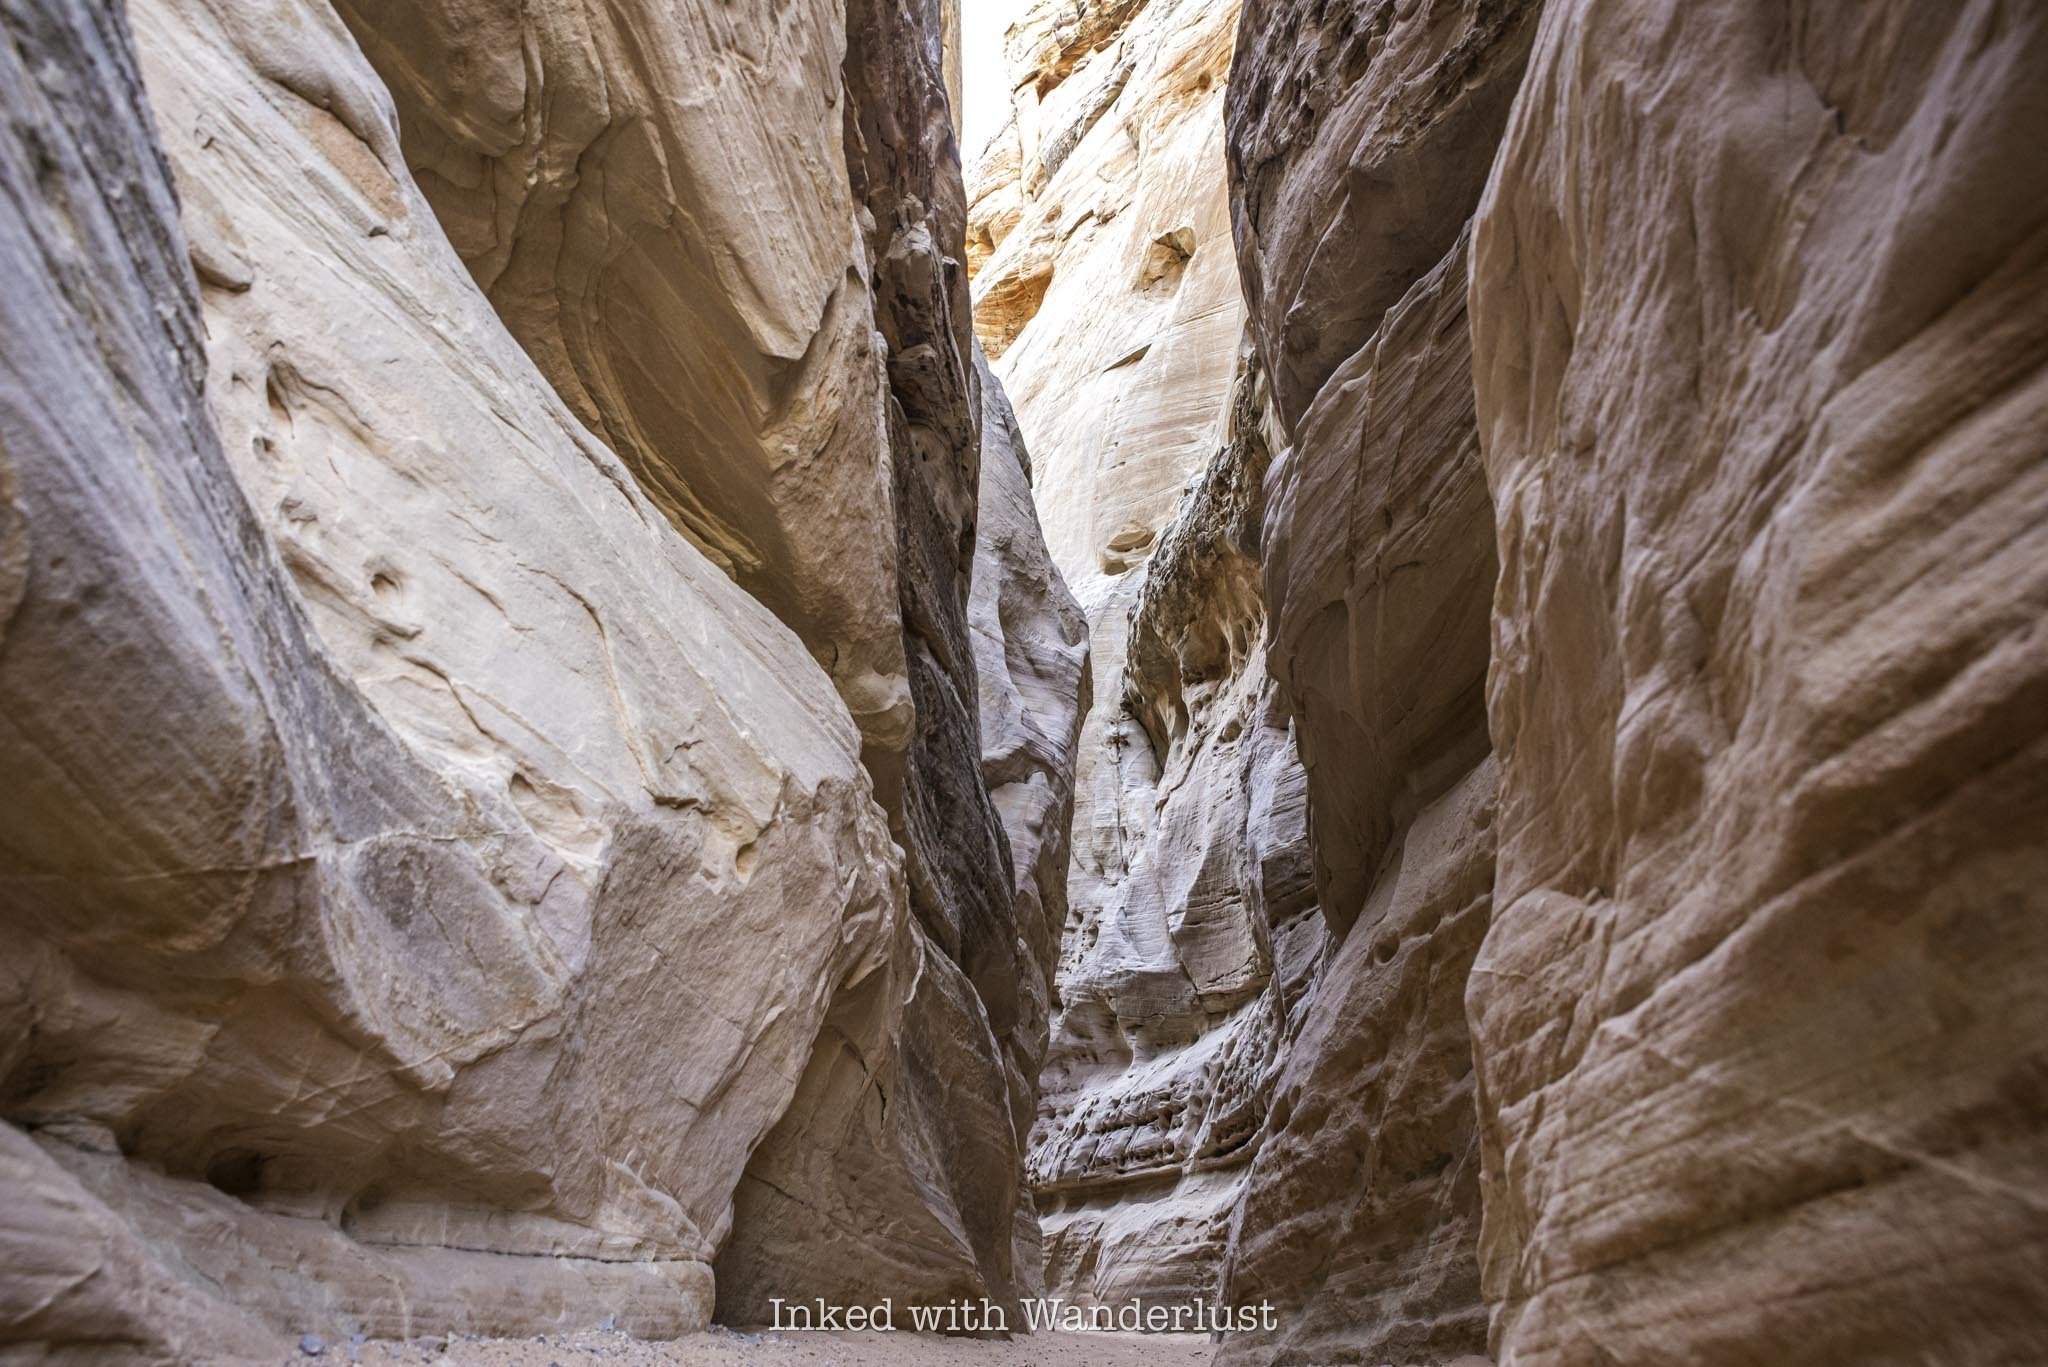
The entrance to the slot canyon is wide at the beginning, but quickly narrows as you progress, though not to the point where you’ll need to squeeze through it. The walls of the slot are a beautiful mixture of white and pastel waves, gliding through the sandstone. You would think it was painted on if you didn’t know any better.
The slot canyon is brief, taking mere minutes to get through. When you get to the other side, the trail continues to the right, up and over more rock. At this point, the ground becomes solid again, making for an easier trek.
This side is where the white domes aspect of the trail becomes more apparent. If you’re here early in the morning, you’ll see the pastel colors shine stunningly as the sun rises on the dome formations. Most of these are on the left side of the trail. On the right side, you’ll see mostly burnt-orange sandstone. The contrasts are truly a sight to behold.


Before long, you’ll reach the point in the trail where it again veers to the right, between two rock formations (pictured above). Past this point, the trail will briefly align with White Domes Road and lead you back to the parking lot, concluding your hike.
Accounting for some picture taking and additional exploring, hiking the White Domes Trail shouldn’t take longer than an hour or two, dependent on your level of fitness and experience, and how often you stop.
When is the Best Time to Hike White Domes Trail?
Obviously, the summer months are out due to the seasonal trail closure discussed above. That leaves early spring, mid-fall, and the entirety of winter. In case you’re wondering, yes, it does snow in Valley of Fire, but it’s rare and even when it does, it isn’t for long and melts away quickly.
My recommendation is to visit the park, and the White Domes Trail, in November. That’s when I came for my second visit and the weather was pleasant. The temperature maintained a comfortable 65 degrees throughout the day. The early morning was cold, though, so dress in layers.
My other recommendation is to start this trail early. White Domes isn’t nearly as sun exposed as nearby Fire Wave and Seven Wonders but in the middle of the day, it’ll definitely beat down on you. By starting your hike early in the morning, the canyon walls will provide shade for much of the hike.
Keep in mind that this will diminish the “pop” of the sandstone colors. If you’re here specifically for photography, that may not work for you. Conversely, if that doesn’t bother you, then you can’t beat morning. My Dad and I started shortly after sunrise and not only did we have plenty of shade, we had the trail all to ourselves until the very end.
PSALM 23:3-4
5 Best Things to Do in Incline Village (Summer)
Incline Village, an upscale area located on the north shore of Lake Tahoe, often gets overshadowed by the south shore of the lake…
Disclosure: This post contains affiliate links. If you make a purchase through these links, I may earn a small commission at no additional cost to you. I only recommend products or services that I believe will add value to my readers.
Incline Village, an upscale area located on the north shore of Lake Tahoe, often gets overshadowed by the south shore of the lake. Many don’t realize that Lake Tahoe is actually located within two states, California and Nevada.
While the California side often gets the lion’s share of the attention, the Nevada side of Tahoe is more than worthy of your vacation time as well. Incline Village, which is on the Nevada side, has many popular activities to keep you busy. Some argue that it even rivals the California side.
So what are the top things to do in Incline Village during summer? There’s plenty of hiking trails, water activities, beaches, and local restaurants to choose from, but which ones are the top attractions? In this post, I’ll present to you five activities that I feel you would enjoy most.
Products I recommend for a visit to Incline Village
1) Hit the Hiking Trails

If there’s one thing any shore of Lake Tahoe isn’t lacking, it’s hiking trails. Many regard Incline Village, and the north and east shore of Tahoe in general, as the “hikers sides” of the lake since they have a heavy concentration of trails.
A few of these include the historic Stateline Lookout, Folsom Camp Loop, and Mount Rose Peak (just a ten minute drive from Incline Village). The most popular hiking trail in Incline Village proper, though, has to be Monkey Rock.
Monkey Rock is a relatively short trail, clocking in at just 2.6 miles, out and back, that leads to a granite rock that strongly resembles that of a monkey. Additionally, the views of the north and east shores of the lake from there are outstanding.
The trail isn’t difficult but because of the incline segment of the final push, I would rate it as moderate for some, but easy for those who hike a lot. If you’ll be visiting Incline Village, hiking to Monkey Rock is a must as it’s one of the premiere hikes in the area.
READ ALSO: Hike to Monkey Rock for Incredible Views of Lake Tahoe
2) Enjoy a Tasty Meal at Several Local Restaurants
While not generally known as a culinary mecca, Incline Village does have its fair share of wonderful, locally-owned restaurants. Many of which are directly next to many hiking trails, beaches, and the like.
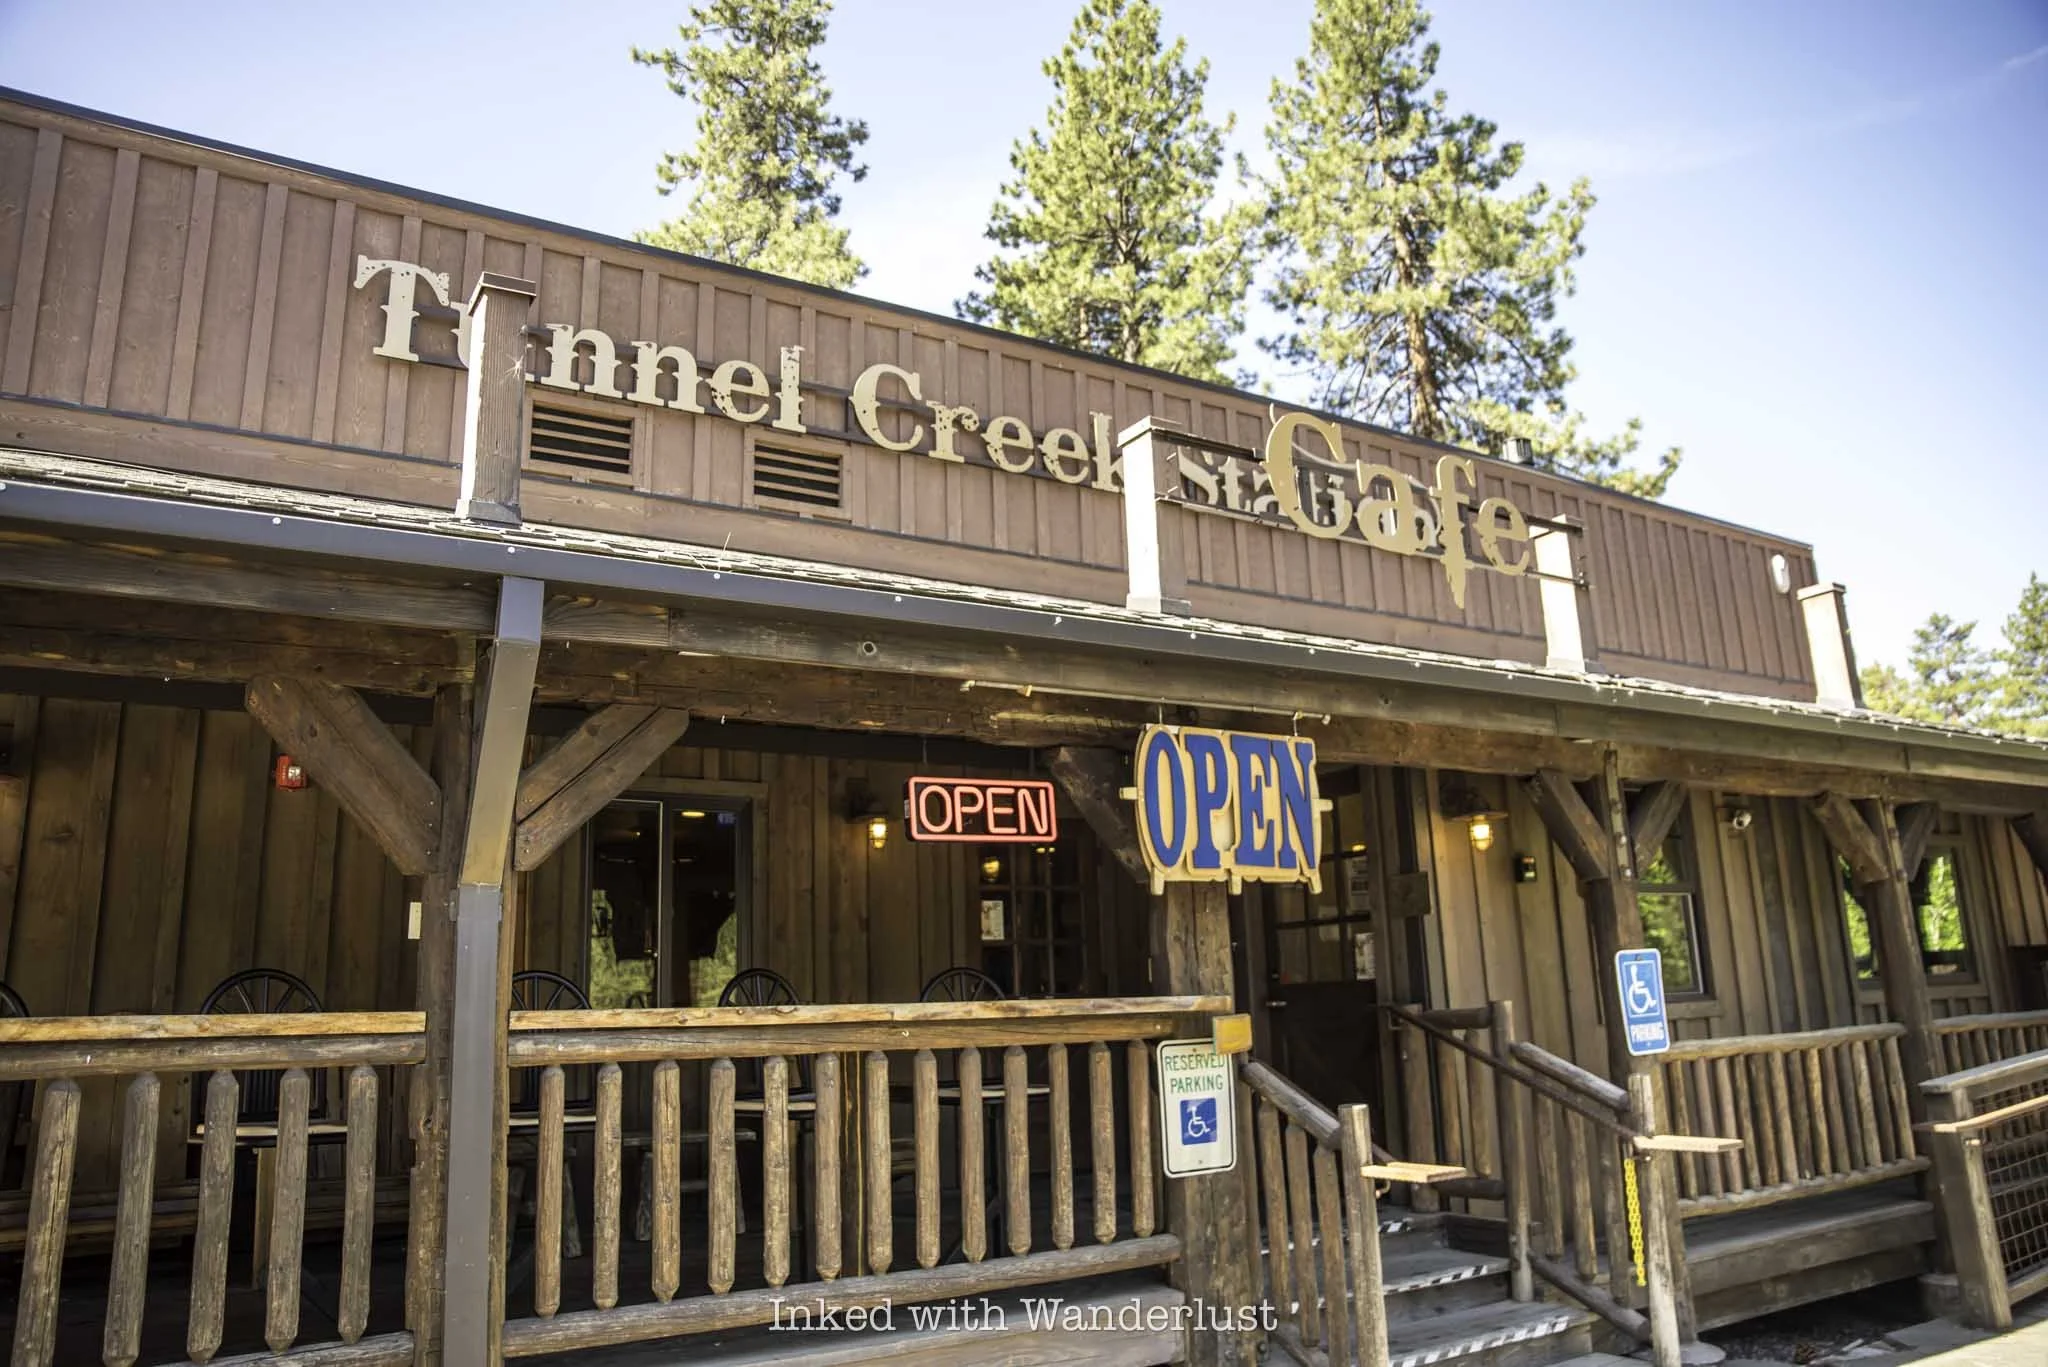
A few that receive high praise from visitors and locals alike include FUMO Cafe, Crosby’s Tavern, Inclined Burgers and Brews, Sage Leaf, and Tunnel Creek Cafe. The latter of which is a personal favorite of mine, due to its relaxed atmosphere, service, and tasty food.
It’s located next to two insanely popular trails in Incline Village, the above mentioned Monkey Rock and the soon-to-be-discussed Tahoe East Shore Trail. This alone makes it a super convenient spot to grab a pre or post-hike meal.
READ ALSO: Enjoy a Post-Hike Meal at Tunnel Creek Cafe
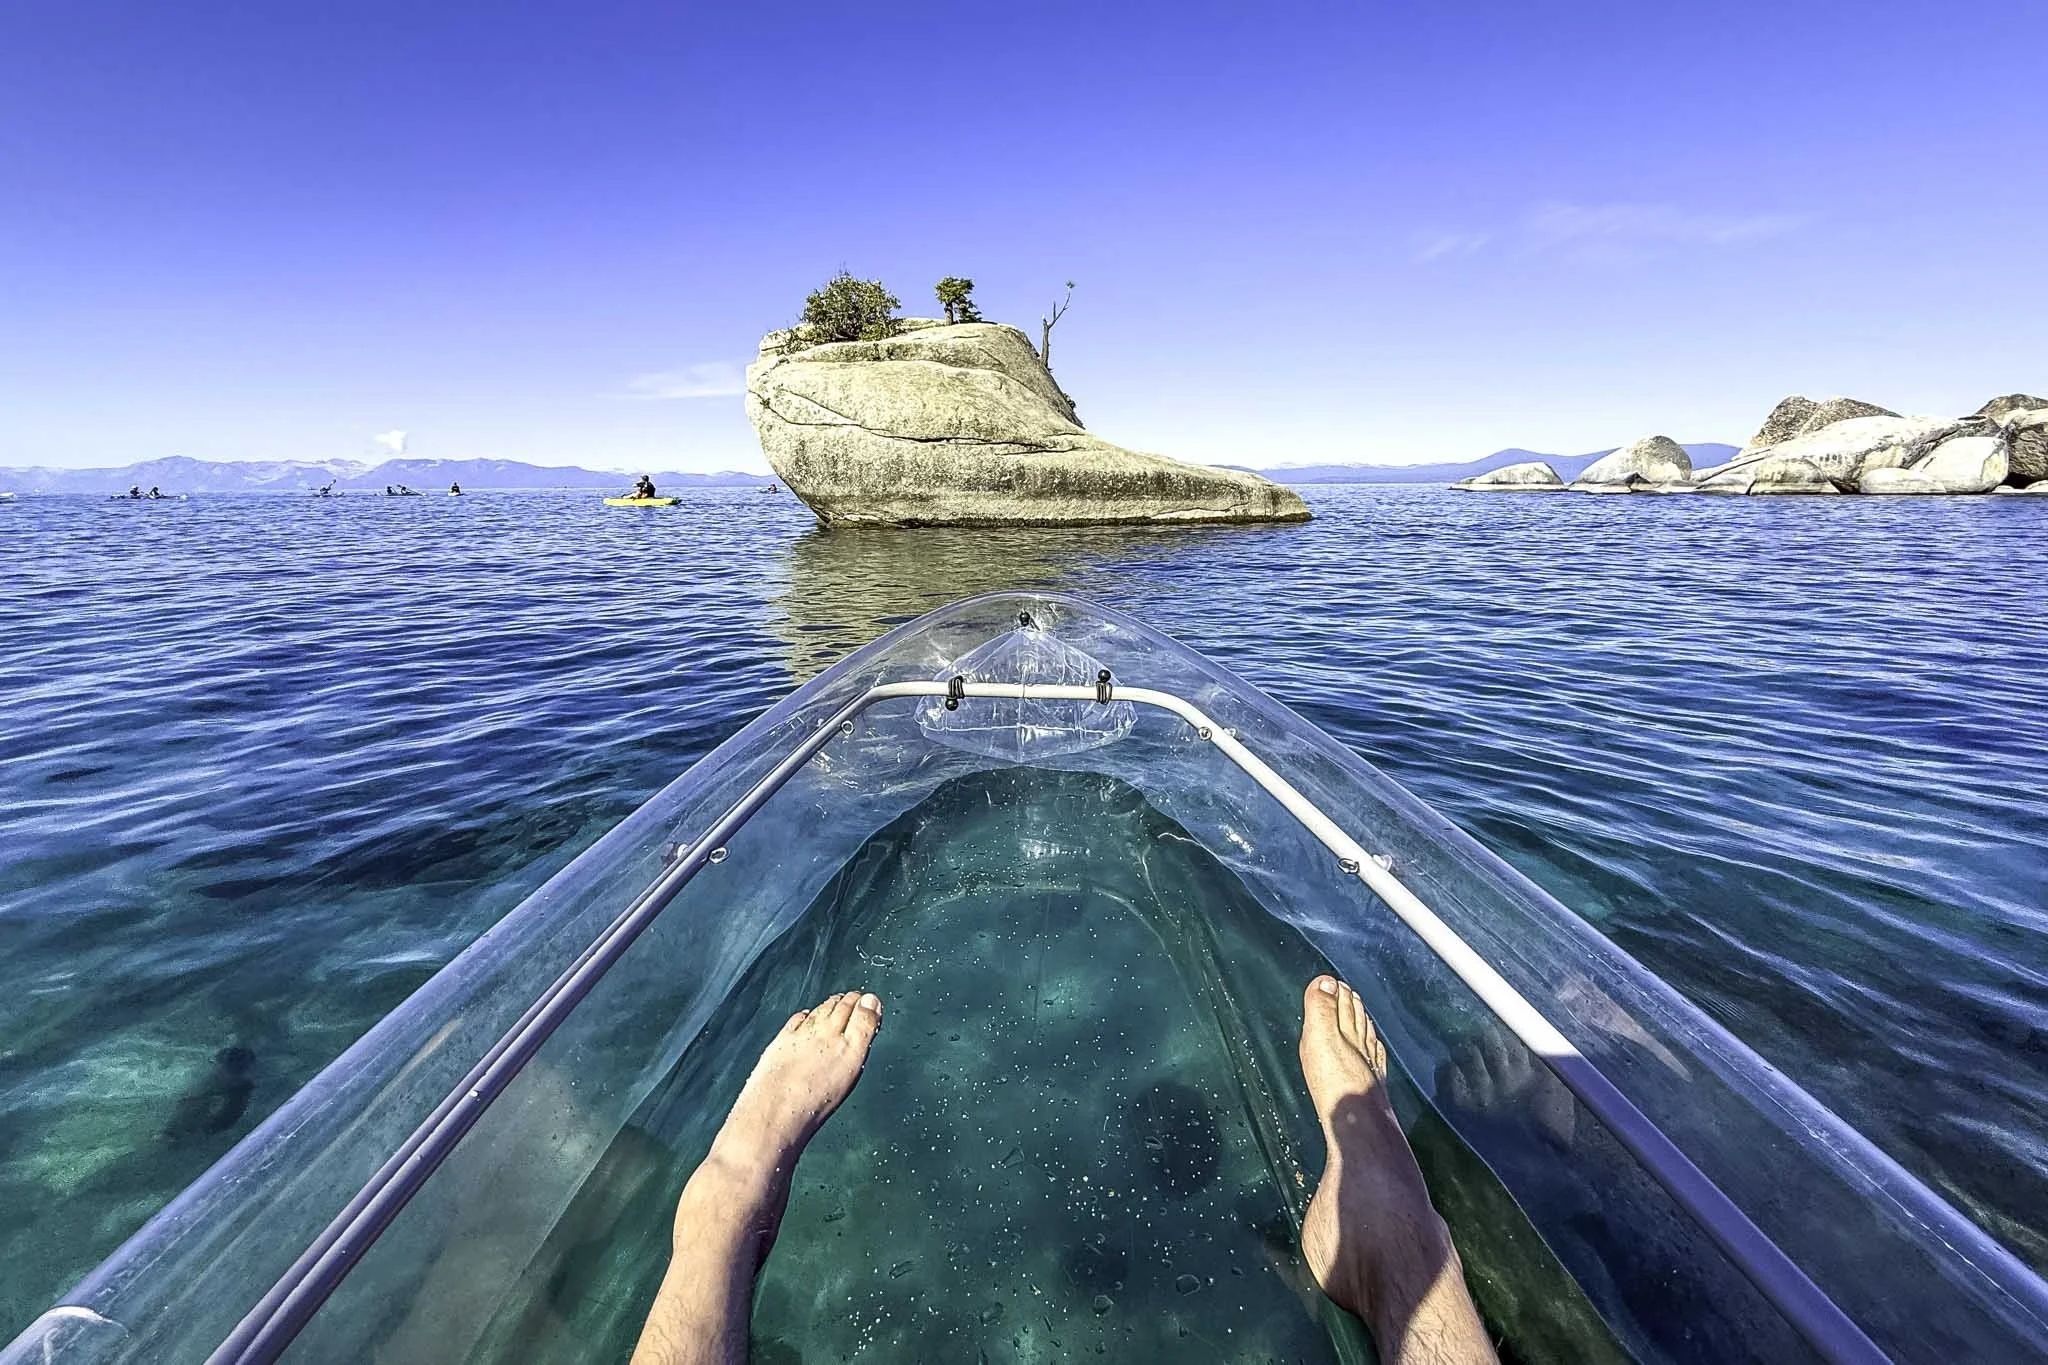
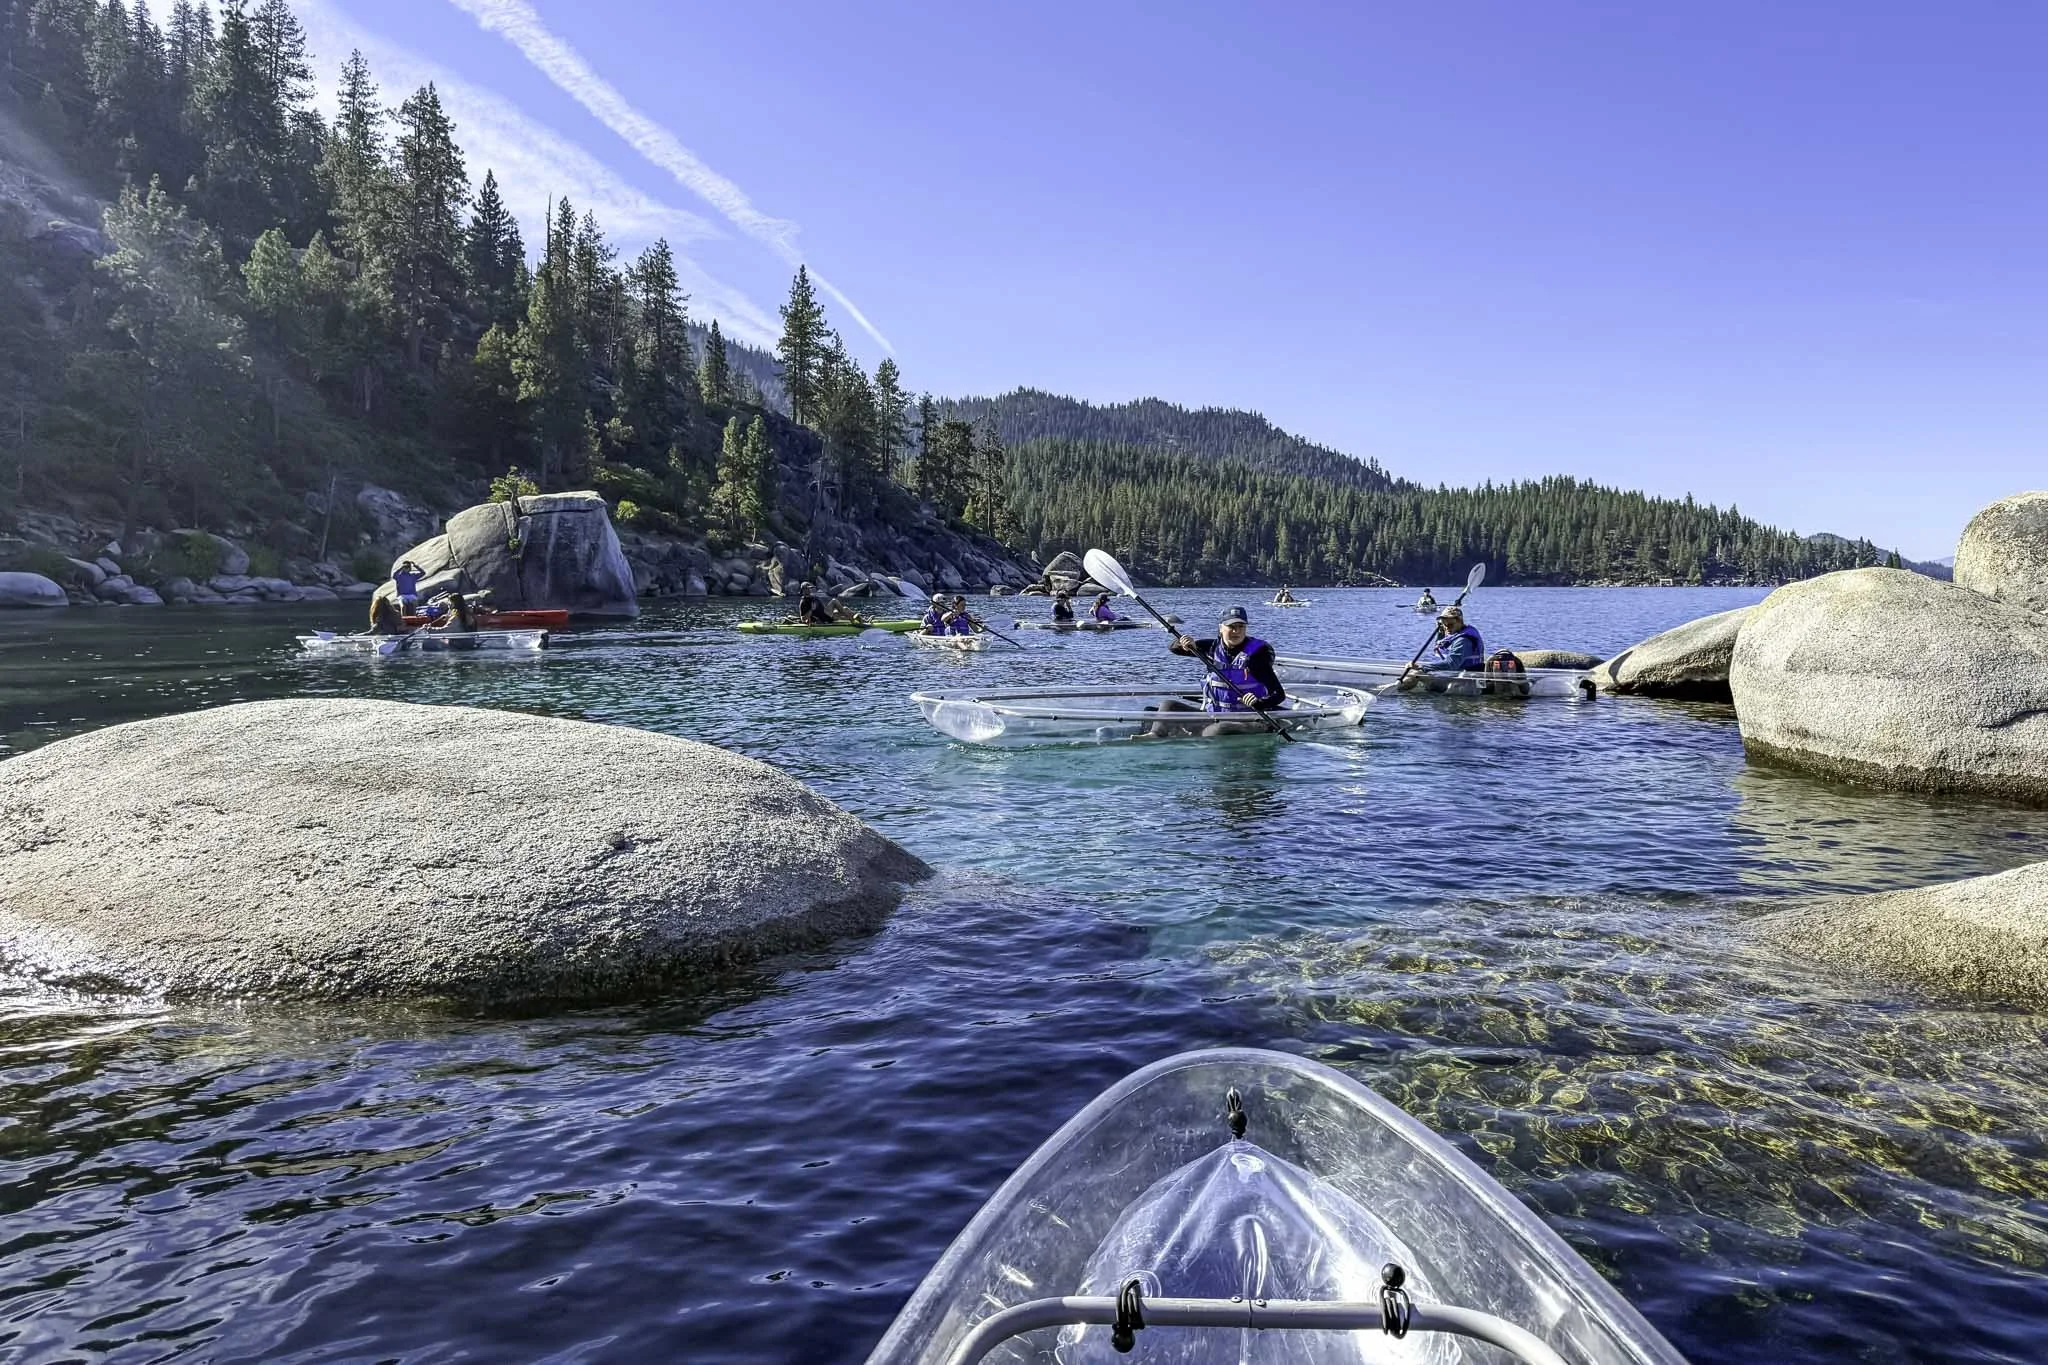
3) Take a Clear Kayak Tour to Bonsai Rock

Kayaking has always been a popular activity in Lake Tahoe. In fact, I had my first experience doing so kayaking out to the Fannette Island Tea House in Emerald Bay. In recent years, what’s known as “clear kayaking” has grown in popularity, particularly on the lake’s east shore.
Clear kayaking enables you to fully enjoy the lake’s crystal clear waters by looking straight down through your kayak. A company called Clearly Tahoe conducts regular tours from Incline Village, leading kayakers through the popular east shore of the lake and out to famed Bonsai Rock.
I recently had the pleasure taking this very tour with Clear Kayak and I had a great time. You can read my comprehensive review of my experience here.
4) Spend a Beach Day at Sand Harbor State Park
Just a five-mile drive from the center of Incline Village, Sand Harbor State Park is the crown jewel of the Nevada State Park system and is easily one of the top destinations in all of Lake Tahoe. So much so, that it’s often in contention with California’s Emerald Bay in terms of popularity.
You could carve out an entire day to spend at Sand Harbor since there’s so much to do there. Most people set up their beach tents or umbrellas and just relax, jumping in and out of the cobalt blue waters to cool off. There’s also an on-site restaurant, a nature trail, and boating opportunities.
Since Sand Harbor is mega-popular destination, the park will often close due to full capacity within a couple hours of opening, particularly during the summer months. Due to this, a new reservation policy was implemented in 2024 for weekends, with the full, daily requirement rolling out in 2025.
Given its popularity, reservations are going to be competitive. To avoid having to worry about it, simply take the East Shore Express shuttle, which picks up in Incline Village and drops off at Sand Harbor. If you go this route, you won’t have to worry about obtaining a reservation.
5) Walk or Bike the Tahoe East Shore Trail
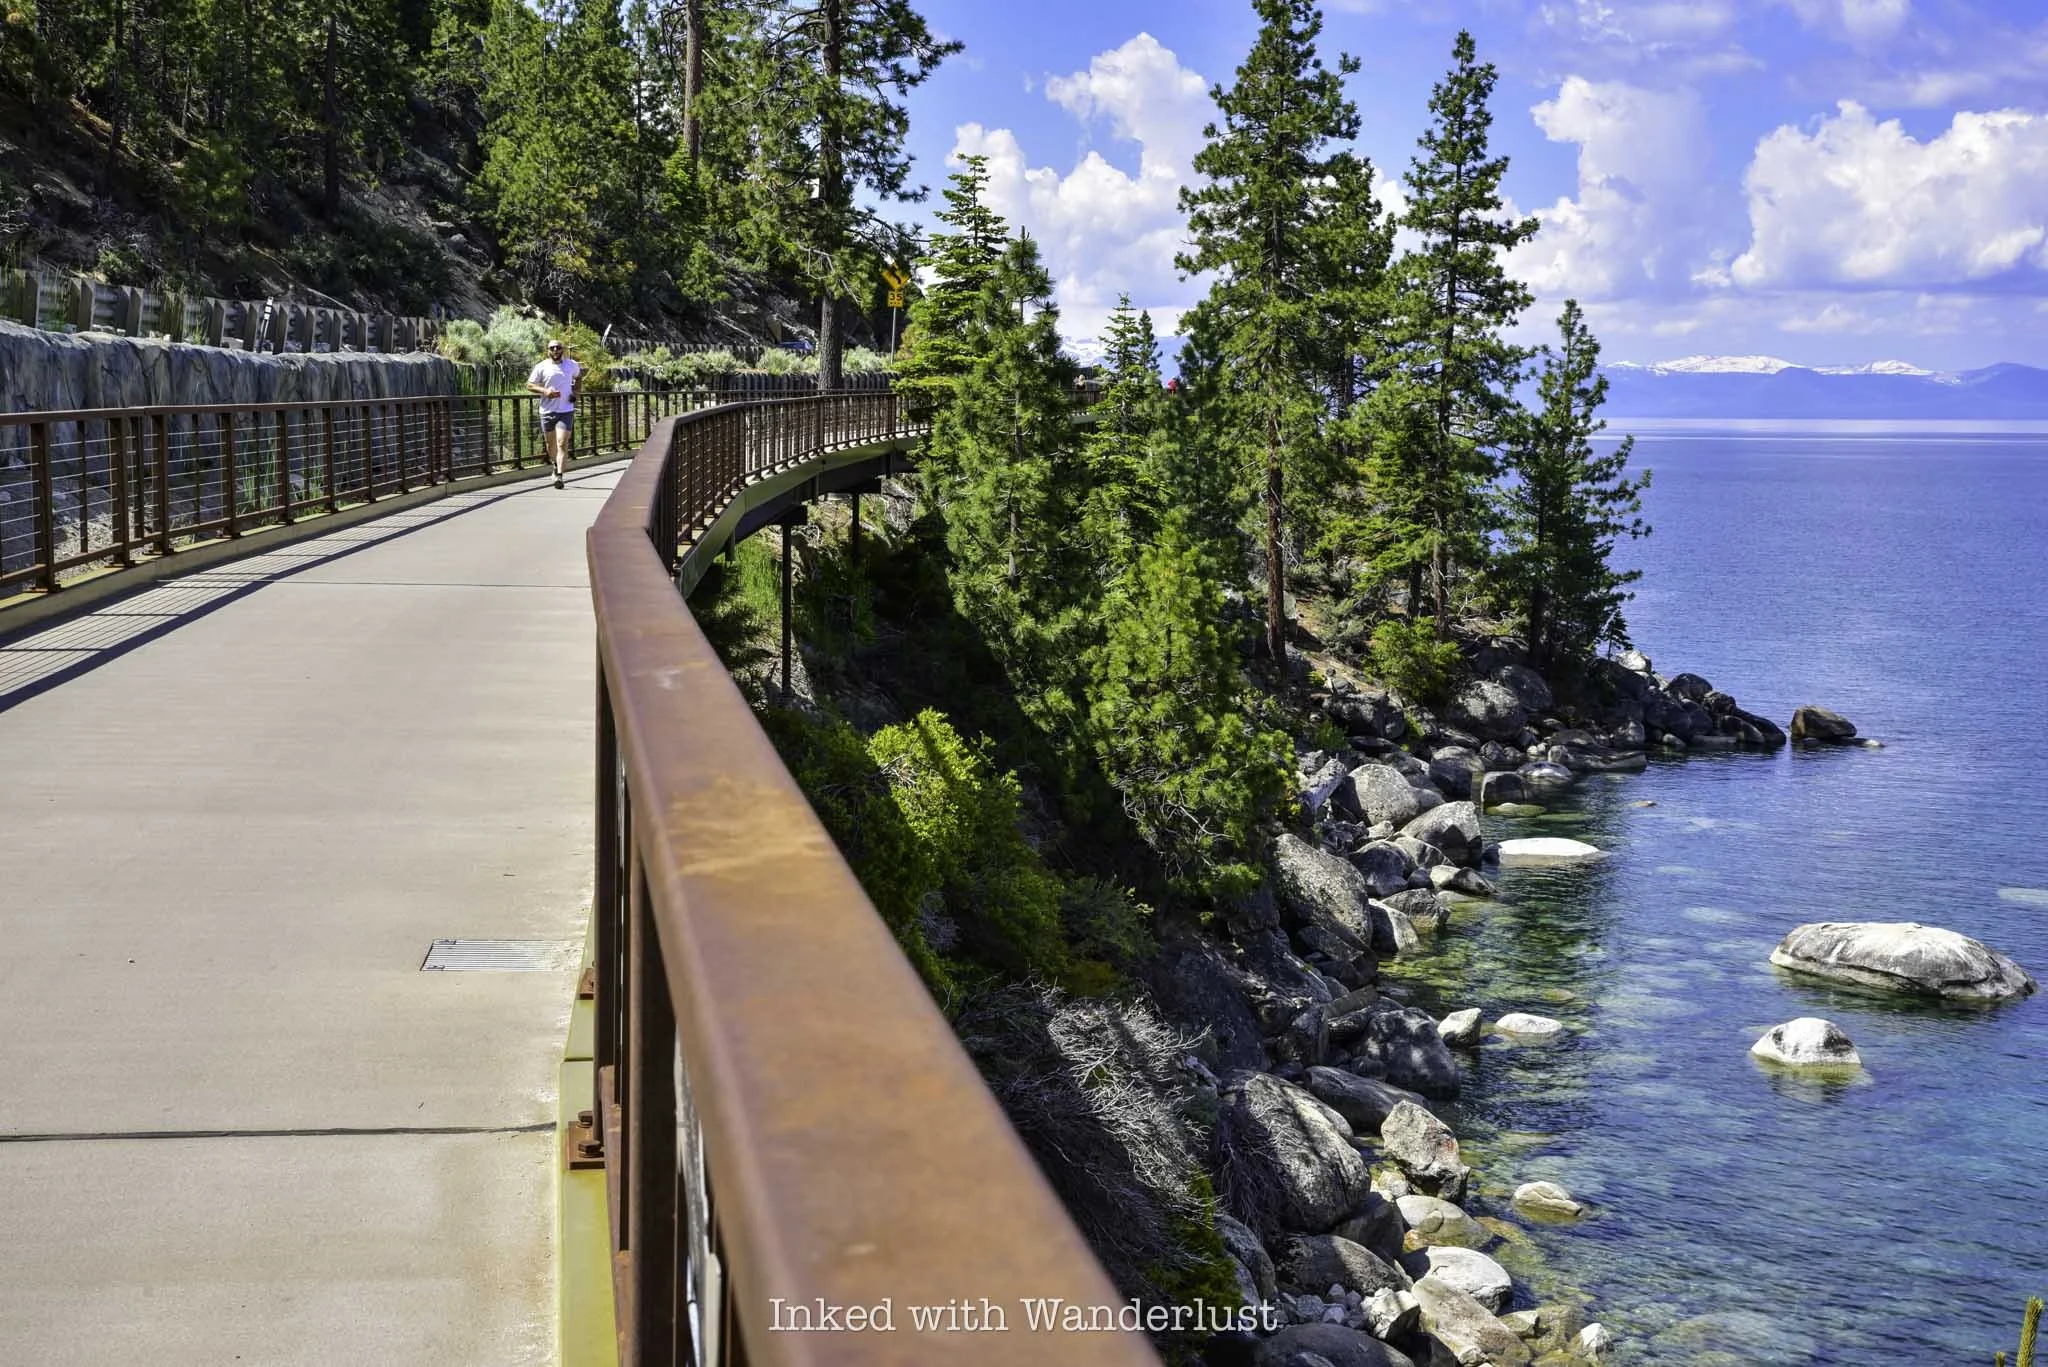
Just a few miles outside of Incline Village proper is the trailhead for the Tahoe East Shore Trail. It’s a three-mile long, paved trail that hovers above the gorgeous east shore stretch of Lake Tahoe, and terminates at Sand Harbor (though there is currently construction underway to expand the trail beyond Sand Harbor).
Visitors of the trail can walk or bike this path, and along the way to Sand Harbor are many offshoot trails leading to several coves and beaches that were once difficult to dangerous to access. Some of these include Hidden Beach, Granite Cove, Mountain Vista, and Sunset Cove.
In addition to the shuttle mentioned above, walking this path into Sand Harbor is another way to avoid the reservation policy. Though it is a three mile trek from the parking lot to Sand Harbor so to save time (and energy), you can purchase a bike rental at Flume Trail Bikes. They have regular pedal bikes in addition to e-bikes.
No visit to Incline Village would be complete without experiencing this gorgeous trail. Even if you don’t walk or bike the entire thing, it’s an experience all its own and it’s always one of my top recommendations for things to do in Incline Village, and Lake Tahoe in general.
READ ALSO: How to Hike the Tahoe East Shore Trail
PROVERBS 3:23


Hike To Monkey Rock For Incredible Views Of Lake Tahoe
In an area with many landmarks, Monkey Rock stands as one of Lake Tahoe’s most iconic and sought after. Its popularity has exploded over…
Disclosure: This post contains affiliate links. If you make a purchase through these links, I may earn a small commission at no additional cost to you. I only recommend products or services that I believe will add value to my readers.
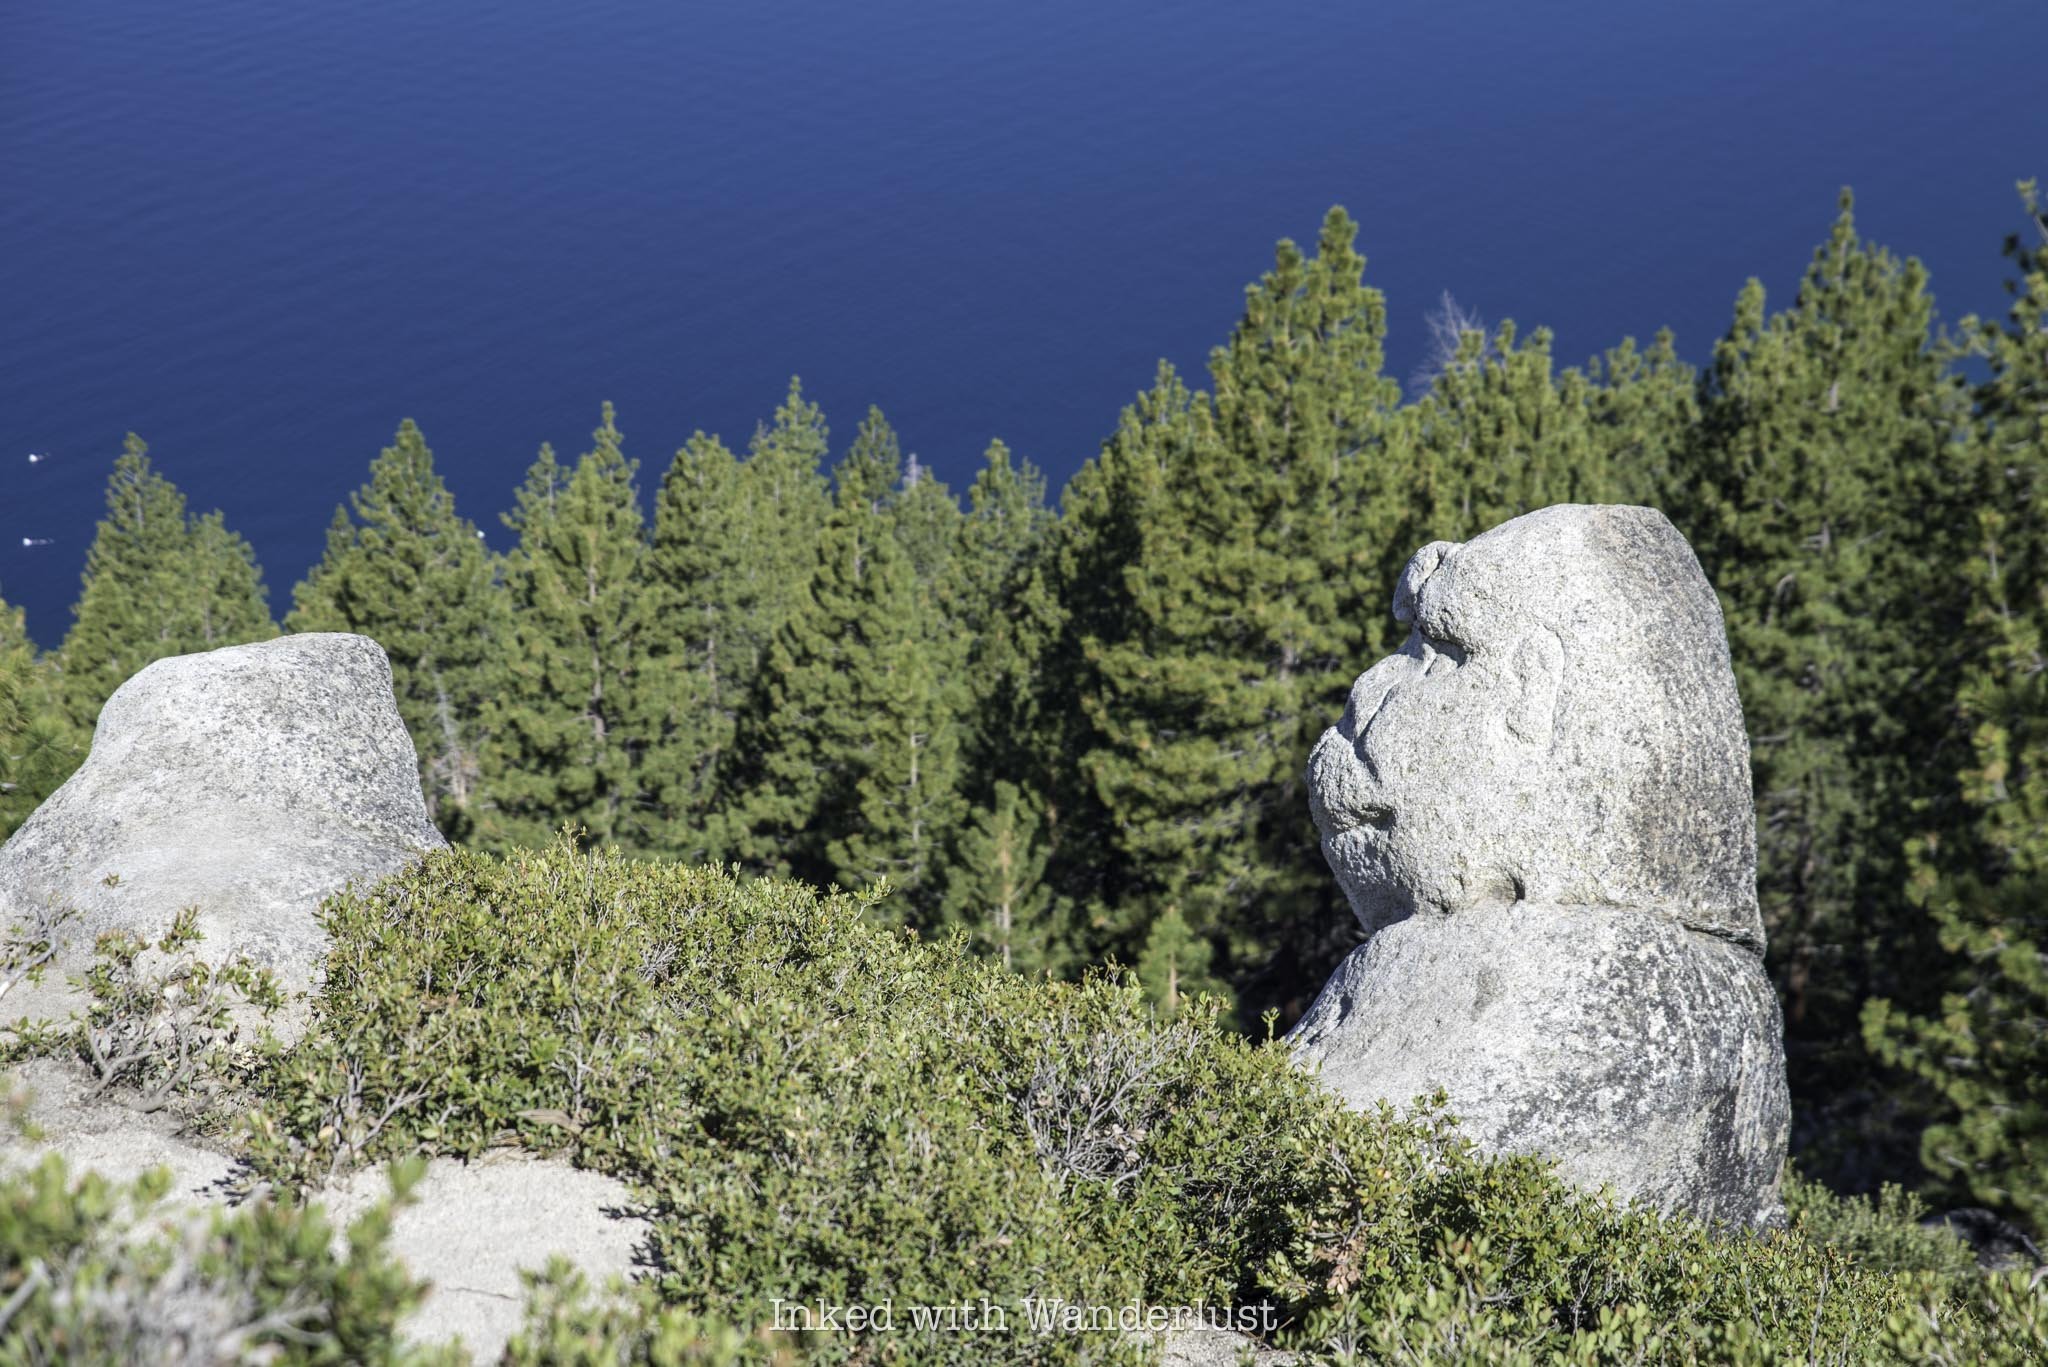
In an area with many landmarks, Monkey Rock stands as one of Lake Tahoe’s most iconic and sought after. Its popularity has exploded over the last few years due to its status on social media sites such as TikTok and Instagram.
This short and sweet Lake Tahoe hiking trail takes hikers above Incline Village, the Nevada side of Lake Tahoe, to a rock formation that, when observed at the right angle, looks an awful lot like a monkey sitting on the hillside taking in the views.
Many, however, would argue that Monkey Rock is only a bonus to this hike, as the real payoff is in the views of the lake you’ll get once you reach it. As much as I love odd and interesting rock formations, I’d be hard-pressed to disagree with that statement.
If you’re looking for a family-friendly hiking trail in Lake Tahoe, or you’re traveling to the lake and want to see as many of the highlights as possible, Monkey Rock is one trail you definitely do not want to pass up. There’s a few things you’ll need to know, though. Let’s get into it.

Trail Stats
Location: Incline Village, NV (Lake Tahoe)
Fee: Parking fees apply
Permit: None
Open: All year, but difficult to access in winter
For: Hikers
Cell Service: Good throughout most of the trail
Restroom: In the parking lot
Parking: Two large lots near Tunnel Creek Cafe
EV Stations: None
Difficulty: Moderate
Popularity: High
Mileage: 2.6 miles, out and back
Time: Two hours or less
Elevation Gain: 479 feet
Condition: Well maintained and easy to follow
Features: Rock formation in the shape of a monkey/epic views of the lake
Pets: Allowed on leash
Drones: No signage stating you can’t
Hazards: None, other than usual wilderness hazards
My Visit(s): May 2024
Monkey Rock Lake Tahoe Parking

The trailhead for Monkey Rock can be found in Incline Village, which is in the Nevada side of Lake Tahoe. Parking for Monkey Rock is located at the Tunnel Creek and Deer Creek parking lots, which are both adjacent to the Tunnel Creek Cafe. They’re located just a few miles from the Sand Harbor turn off.
These parking lots are the only available parking for Monkey Rock and the adjoining Tahoe East Shore Trail. There is no legal parking at the trailhead proper. There’s a private residence up there and they make their disdain for those trying to illegally park perfectly clear.

You can refer to the above photo for current parking fees. They’re based on several elements, such as time of year, time of day, day of week, etc. For reference, I arrived on a Tuesday at 7:30am and paid for three hours. My total was $6.00. You’ll need to know your license plate number and it only accepts plastic for payment.
Due to this area’s popularity, you’ll want to arrive as early as possible. When I got there at 7:30am it was just me and a couple other vehicles. By the time I finished with the hike (about (9:30am) both lots were nearly full.
To make your way to the actual trailhead to Monkey Rock, make sure you’re walking in the direction away from Tunnel Creek Cafe if you parked in the Tunnel Creek lot. There’s a road that runs adjacent and above the cafe (Tunnel Creek road). Take this road up to the trailhead.
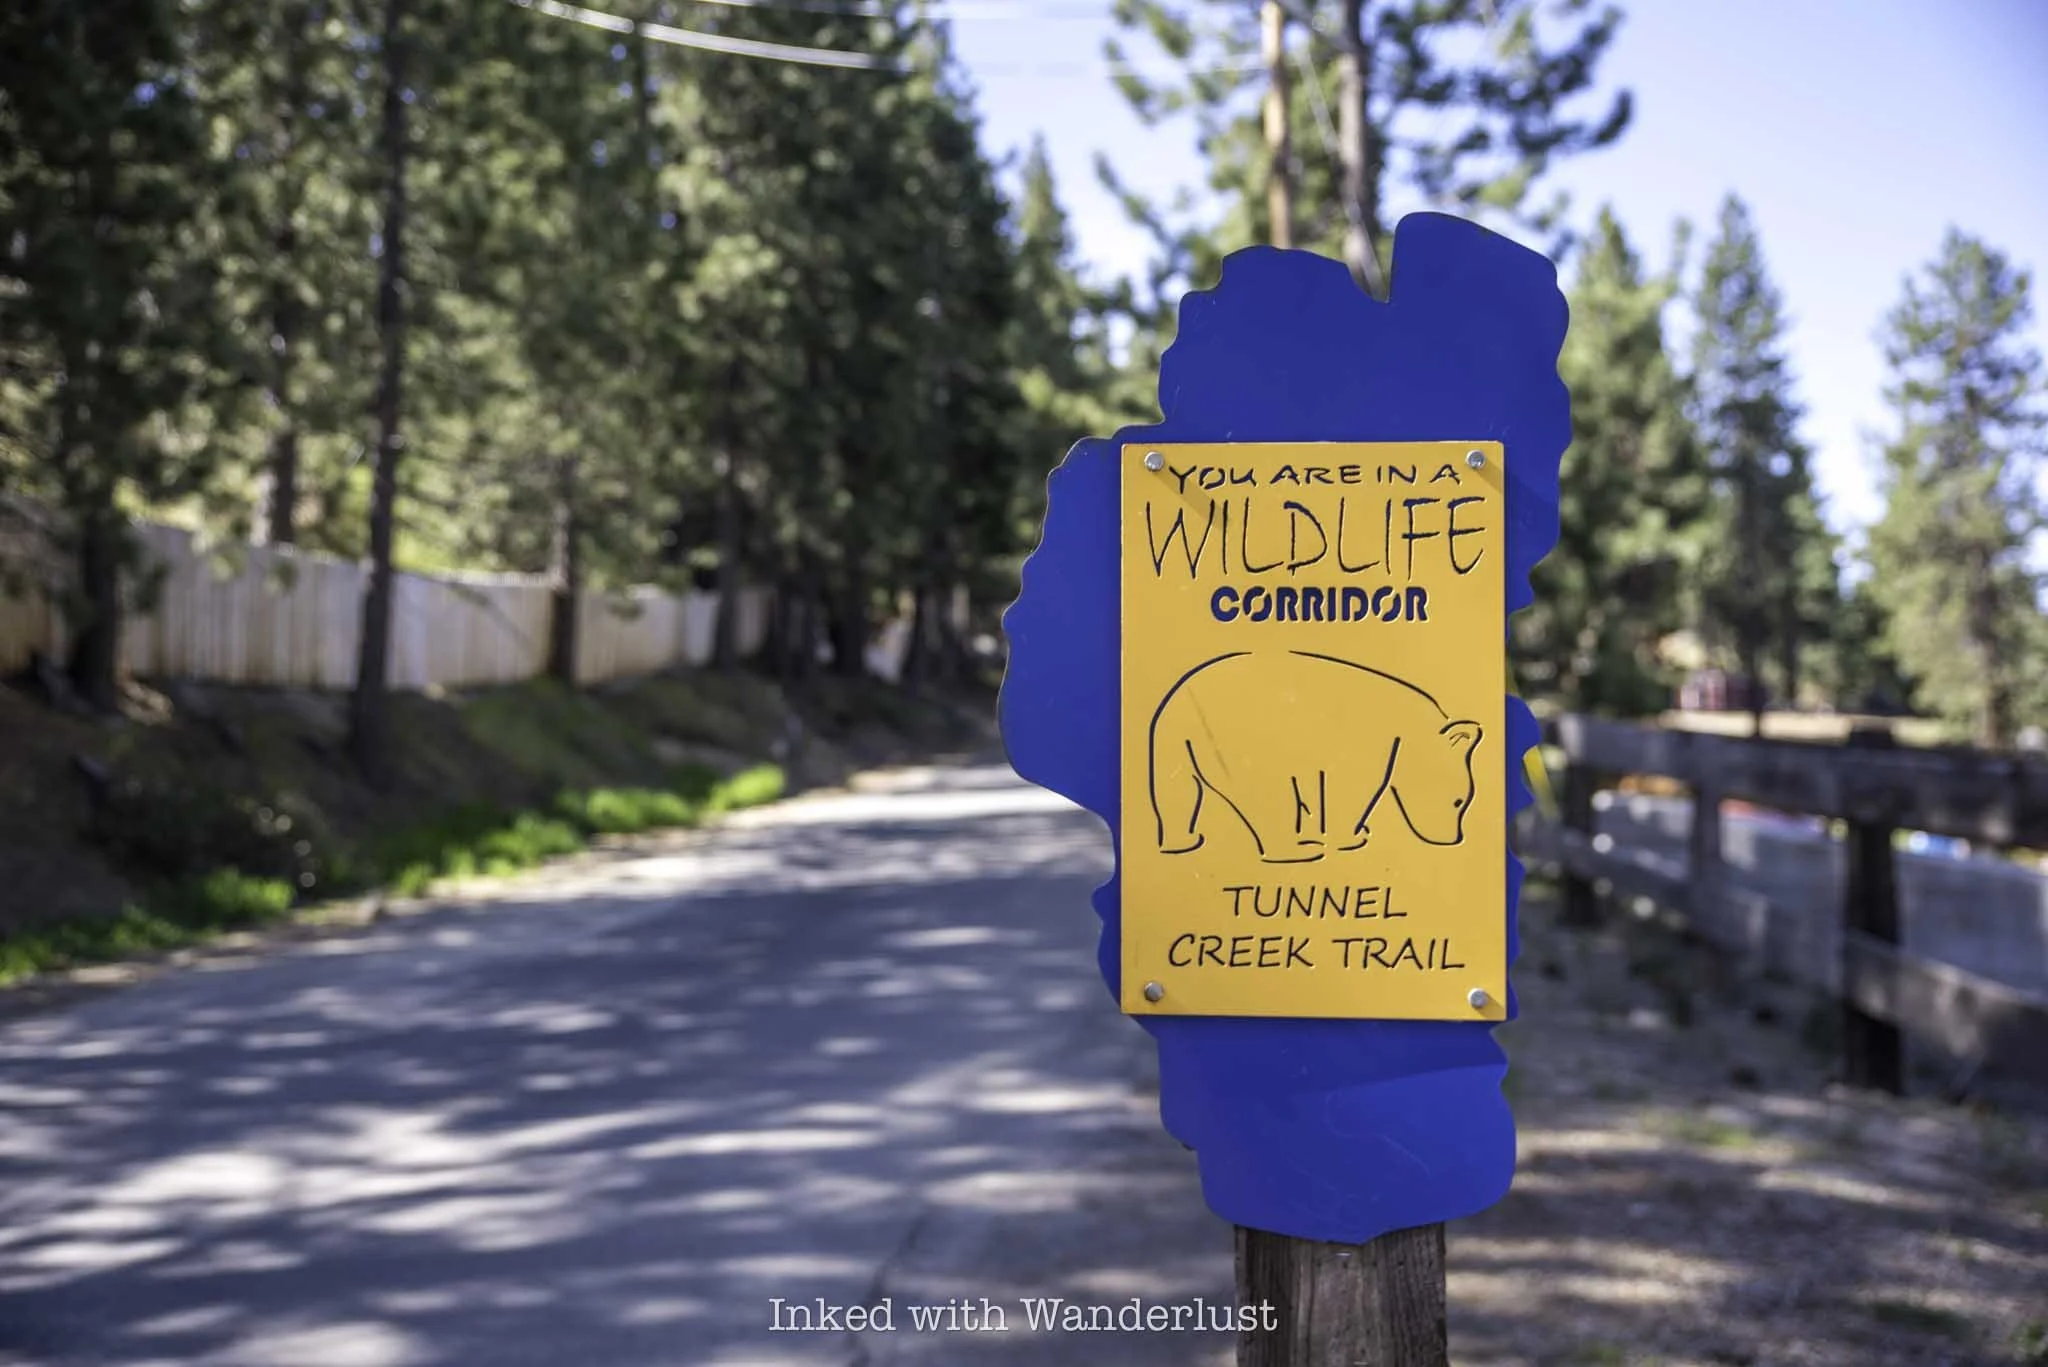
If you get turned around, there are many red signs in the area to point you in the correct direction. Just remember, if the road is going above Tunnel Creek Cafe, then you’re going in the correct direction. You’ll also pass a blue sign warning you of wildlife being present in the area.
When you get to the top of the road, you’ll see a private residence on your right and trail signage on your left. Up ahead will be the official trailhead for Monkey Rock. During my visit, there was construction happening shortly into the trail on the right.
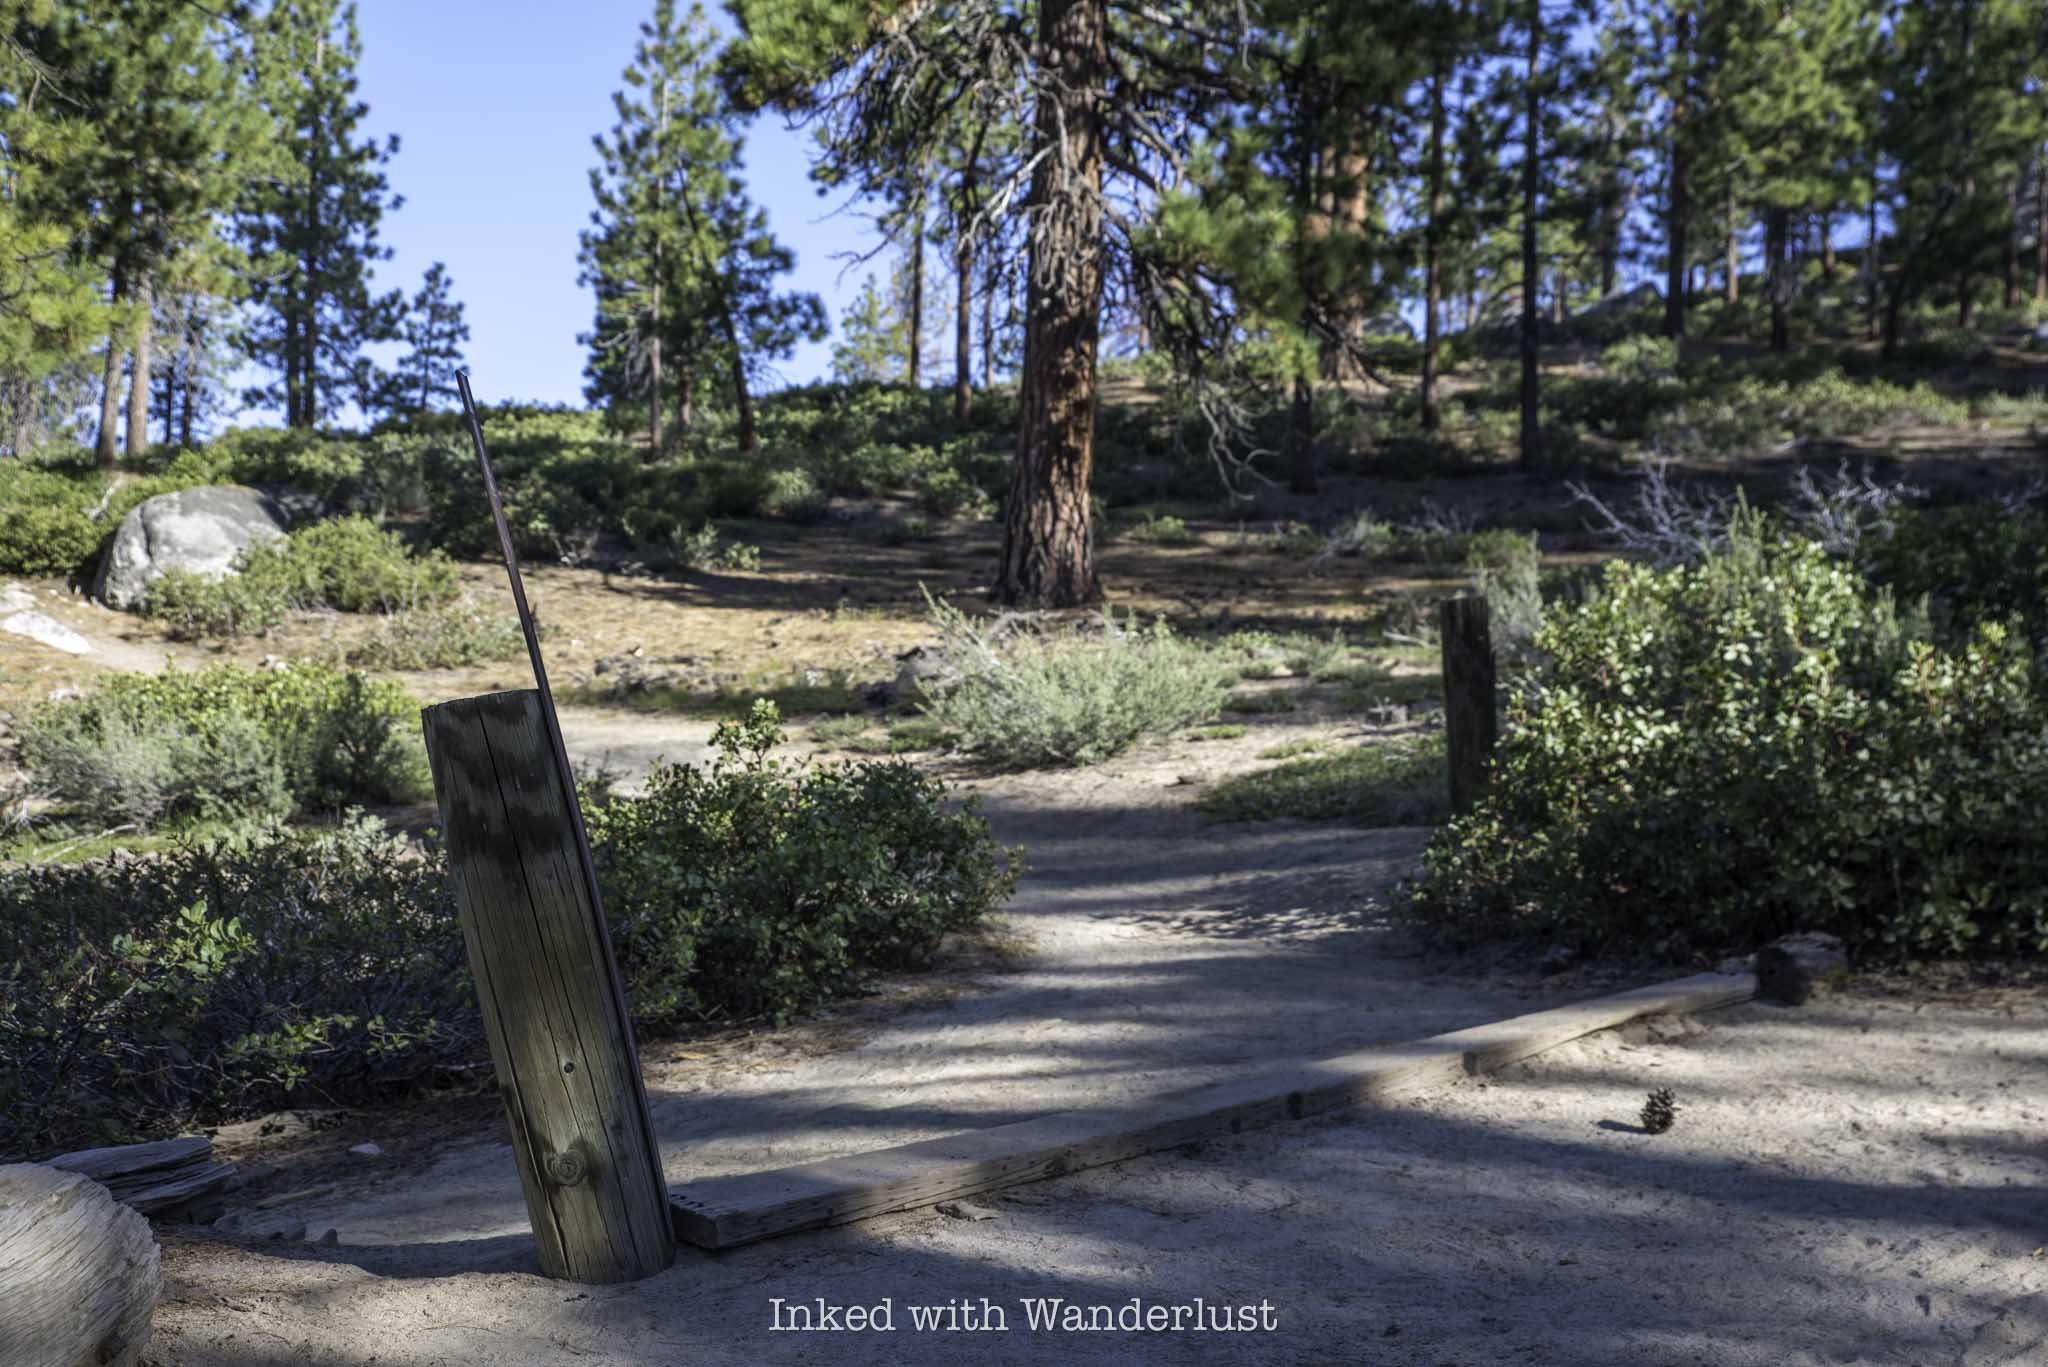
The Monkey Rock (Tunnel Creek) Trail

Once you’re past Tunnel Creek road, the trail becomes sandy and remains that way throughout the entirety of the hike. If you’ve done any hiking in Tahoe, you would know how infamously rocky many of its hiking trails are. I’m happy to report that the Monkey Rock trail is probably the least rocky trail in Tahoe I have been on.
Initially, the trail is mostly flat with only a slight, barely noticeable incline. If you have started early, you’ll enjoy a lot of shade on this stretch of the trail from all the tall trees. Down below you, you’ll notice you are hiking parallel with and above the Tahoe East Shore Trail, which I define as more of an urban hike in a forrest setting.


About a third of a mile into the hike you will come to a green gate with a spur trail heading off to the right. Keep straight past the gate. The spur trail eventually connects you to the Tahoe East Shore Trail, which would be an excellent extension to your hike on the way out. This is also where you’ll start getting those epic Lake Tahoe views.
You’ll see other spur trails on both sides of the trail. Just continue straight on the wide sandy path. Shortly after the green gate you’ll come to two wooden pillars on each side of the trail with, you guessed it, another spur heading off to Hidden Beach.
After these wooden pillars is when the trail begins to climb and it will remain that way until just before you reach Monkey Rock. The incline is a slog, but it isn’t difficult. If needed, there are plenty of rocks to sit on and compose yourself. From here, you’re only a quarter mile or so away.

One thing to note is the side trail that spurs off to the left from the main trail (pictured above). You won’t be able to miss it. Shortly after those wooden pillars and across from a community water bowl for dogs is where it’s located.
This trail will take you to Monkey Rock, but it is much steeper than what lies ahead of you. Additionally, based on other reports I’ve read, it isn’t much shorter than the actual trail and thus, not worth the extra effort.
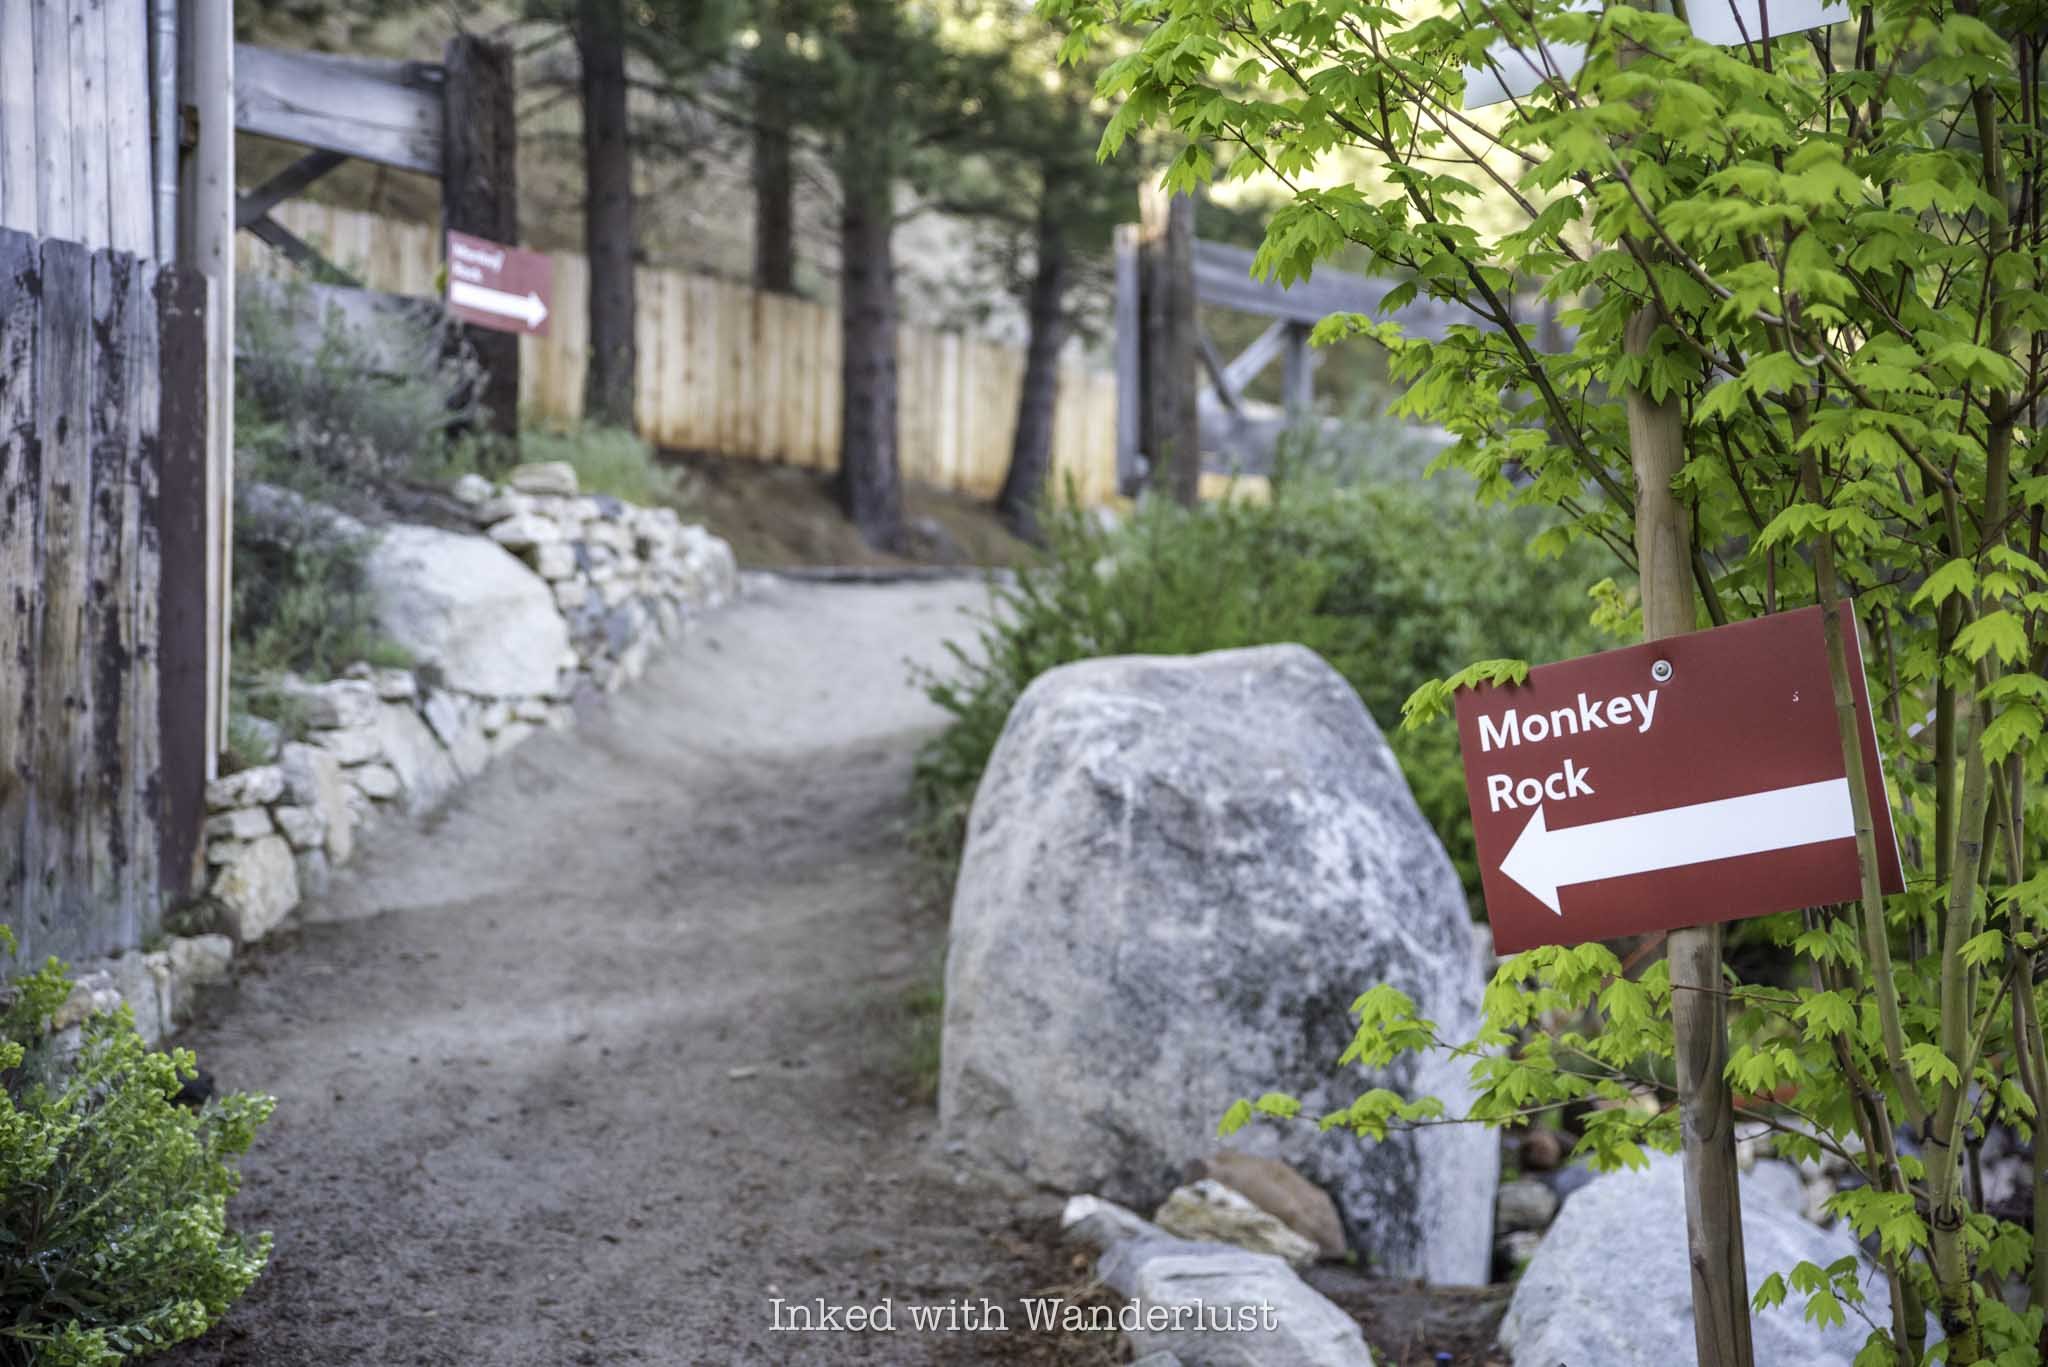
At right about the 1.3-mile mark of the hike, you’ll come across two more wooden pillars with a wooden board running across the ground between them on your left (pictured above). There’s an easily missed sign with an arrow on it. Take this trail to the left to continue to Monkey Rock.
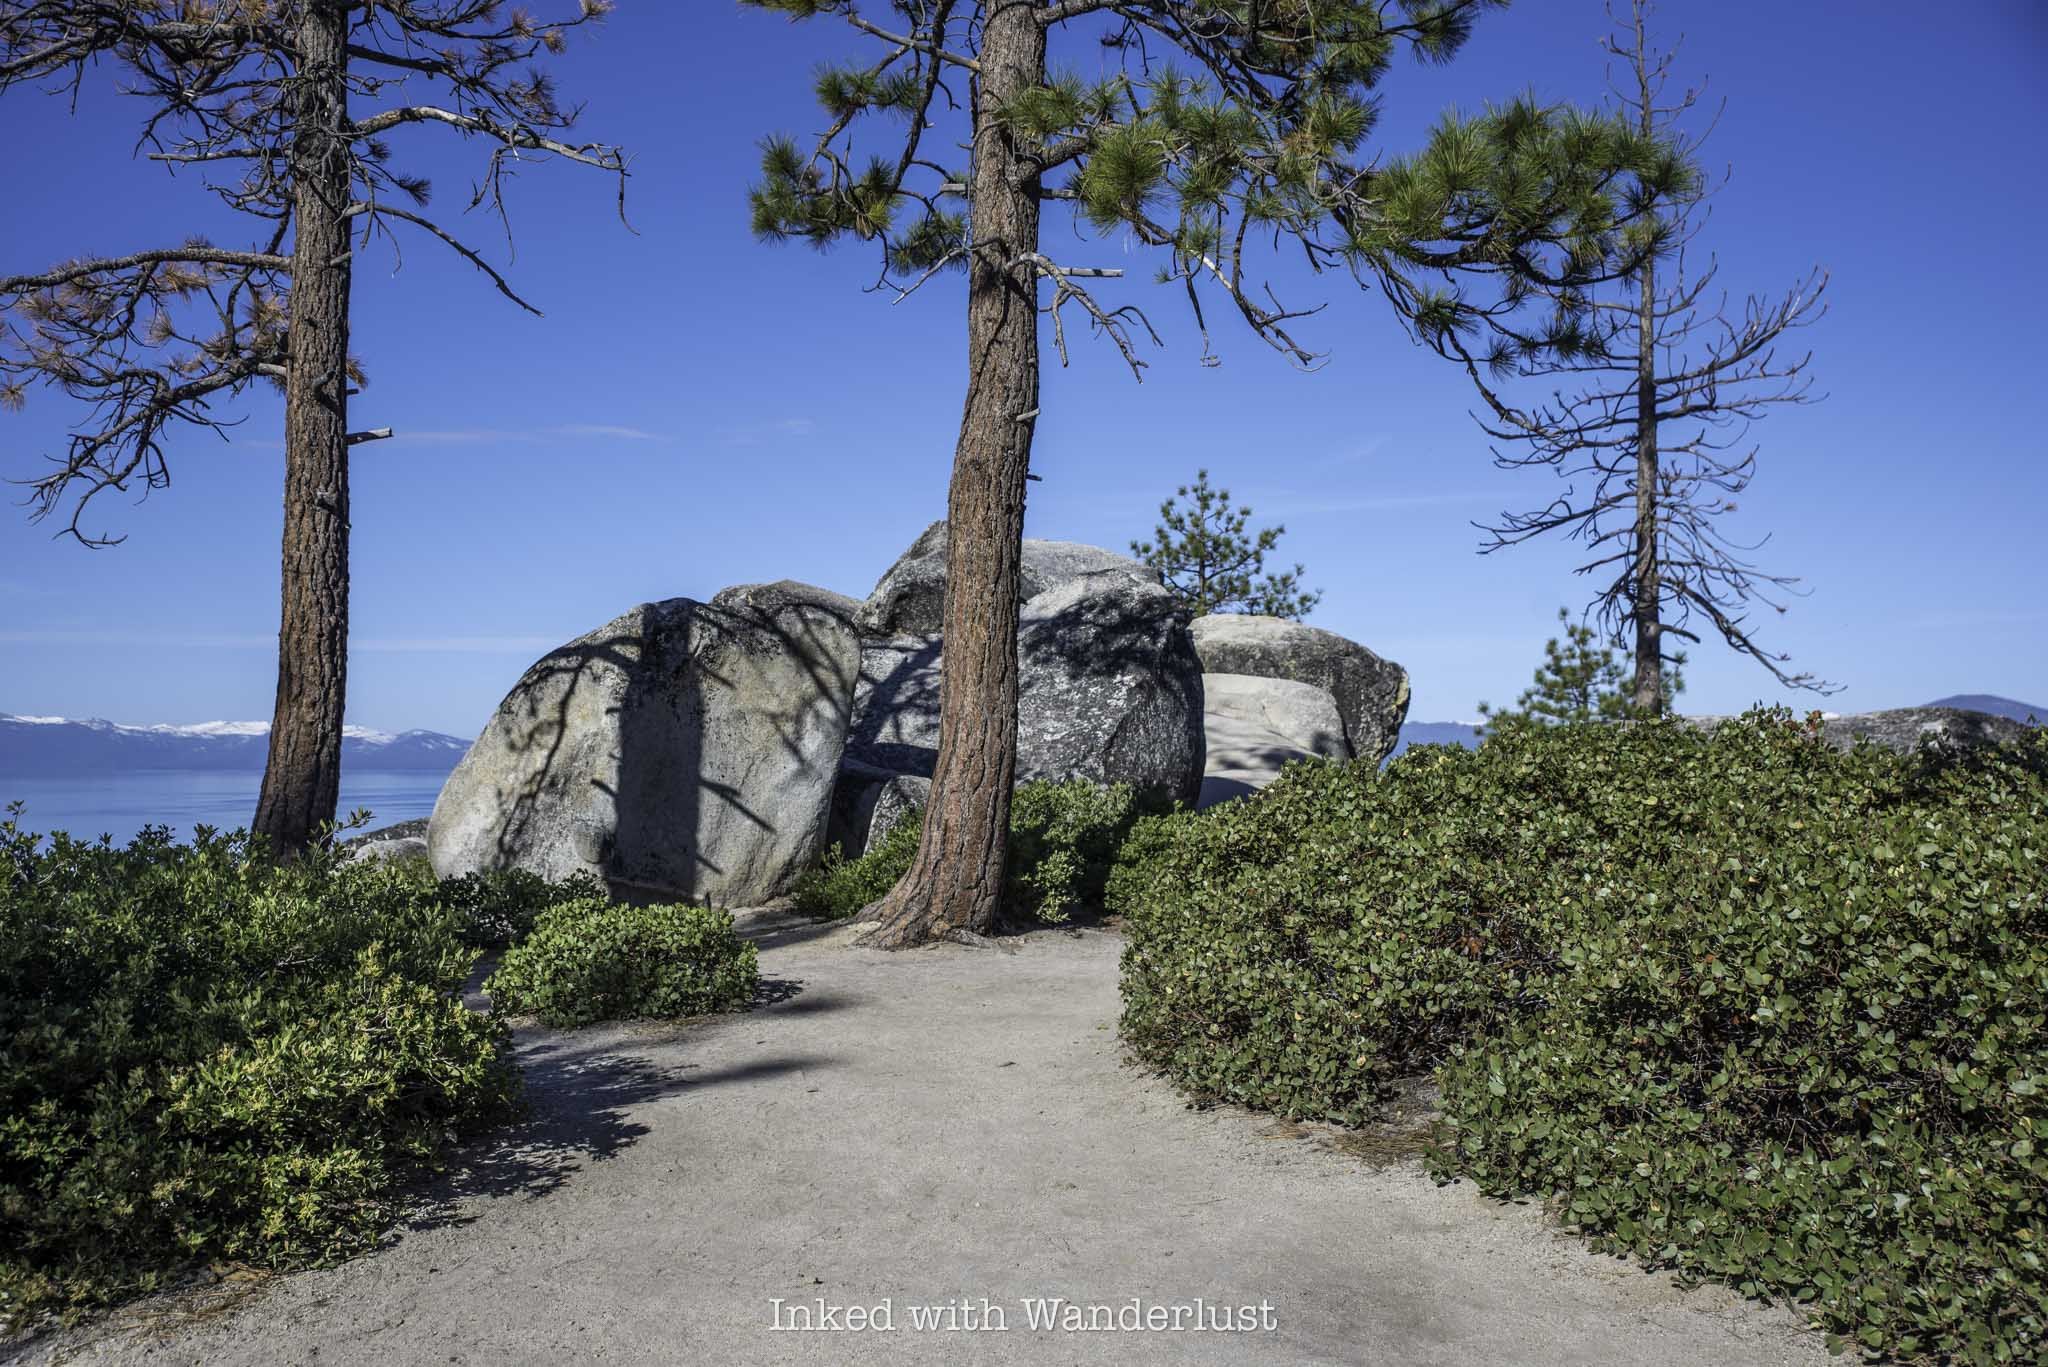

Shortly after turning onto this section of trail and heading up a short and sweet incline, you’ll see a boulder pile in front of you (pictured above). To get to Monkey Rock, stay to the right of the boulder pile. Eventually, Monkey Rock will come into view just off the sandy path.
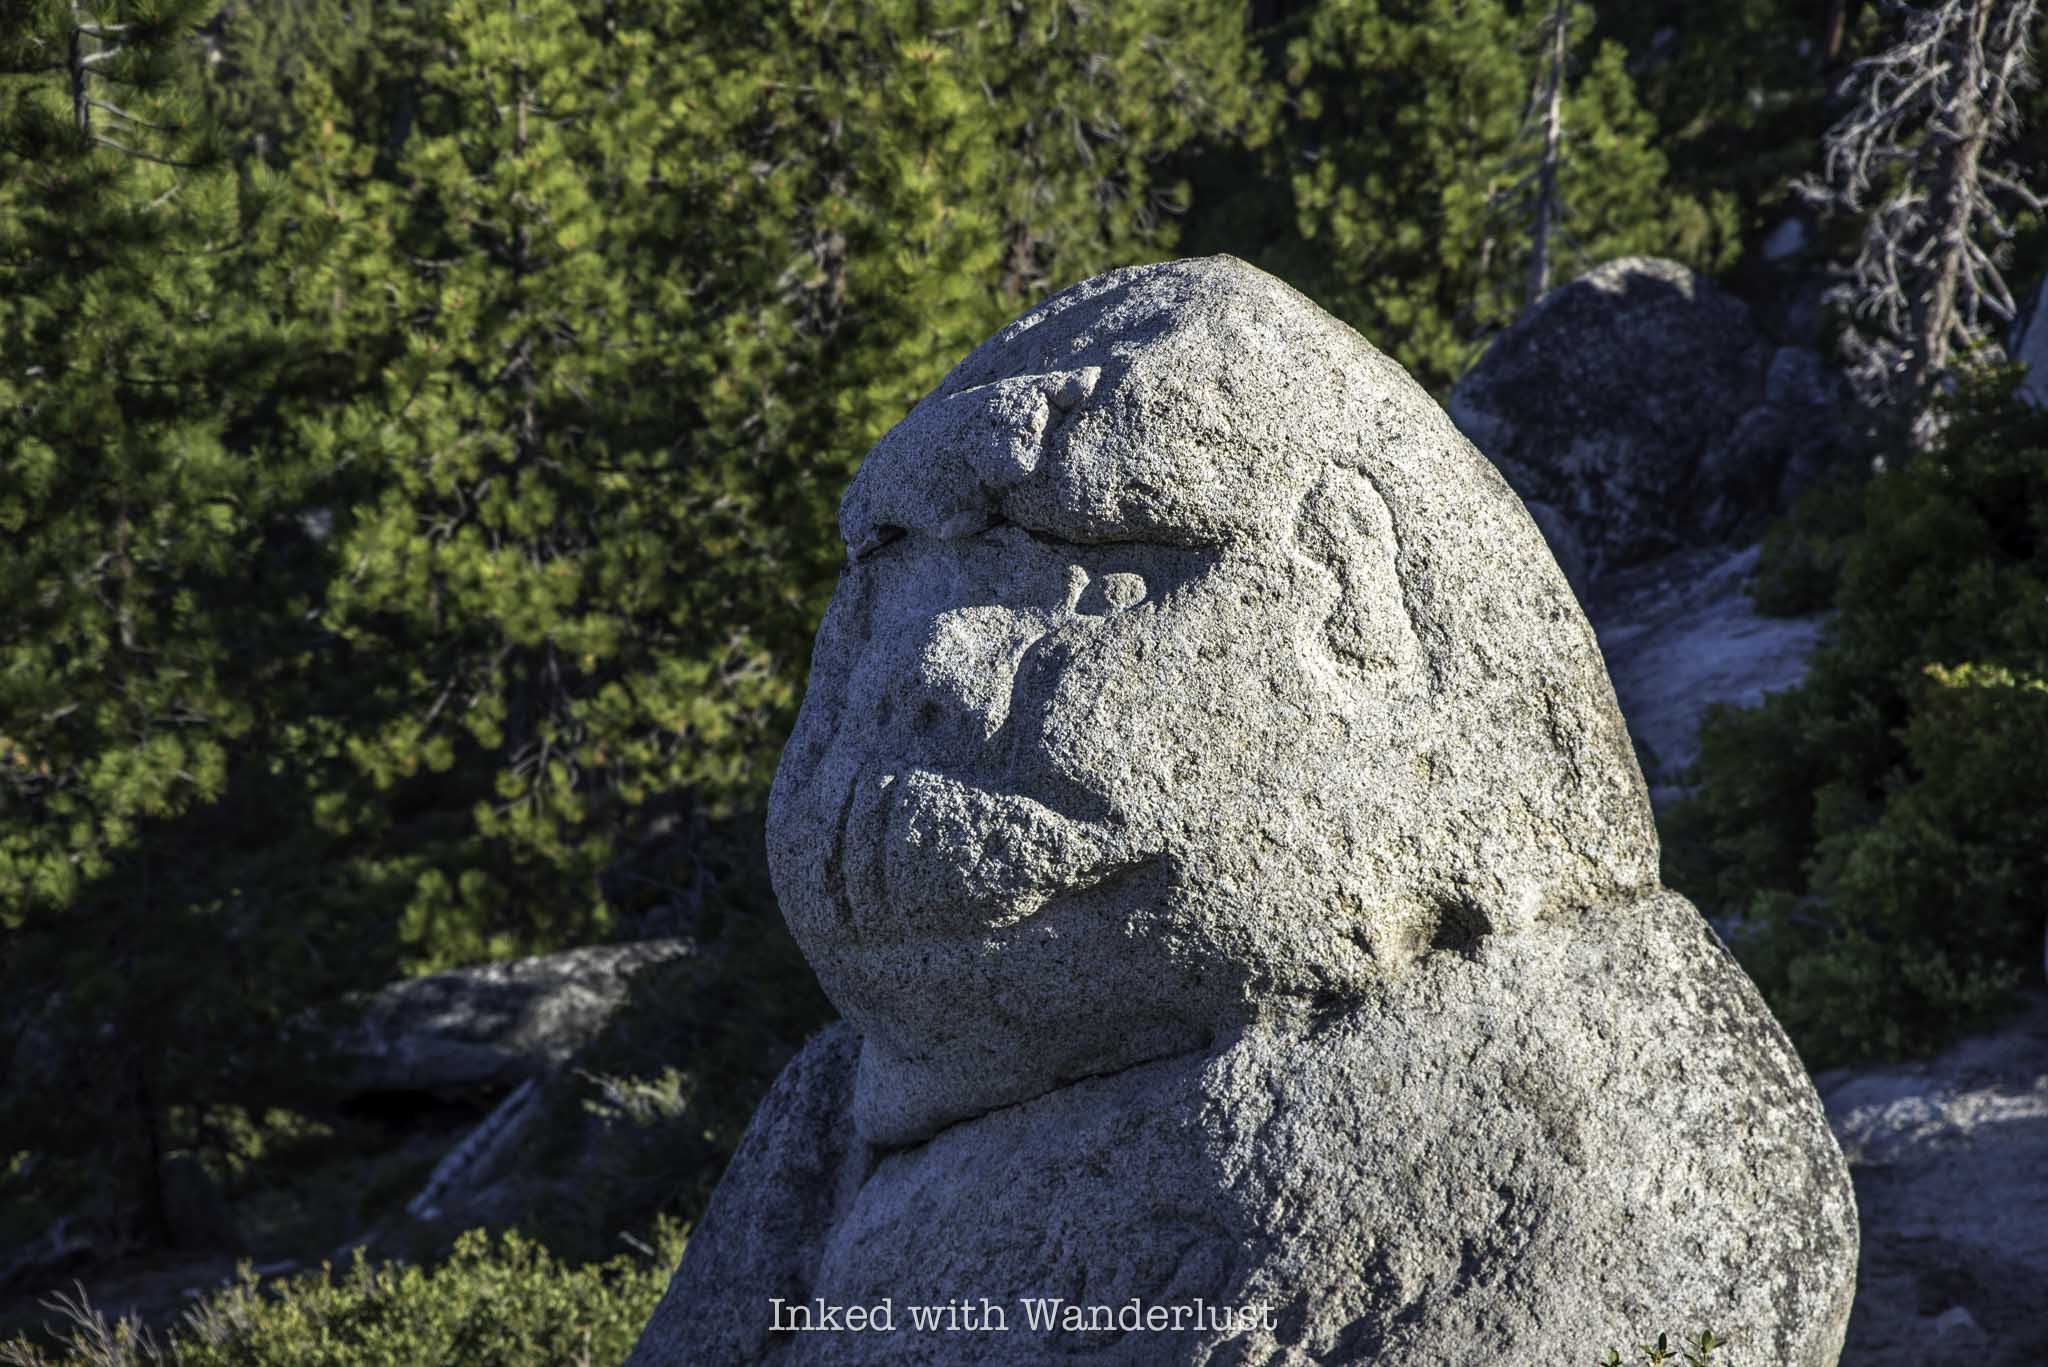
If you’re like me and you’re fascinated with interesting rock formations, Monkey Rock will surely leave you in awe, as it does resemble a monkey relatively closely. Do know, though, that while the rock has always looked like a monkey, it did receive a little help in attaining its current form.

Monkey Rock is easily viewed and photographed from the path. If you feel inclined, there’s another path that’ll take you down to it. Though if you have any kind of zoom on your camera, it’ll likely be unnecessary to do so.
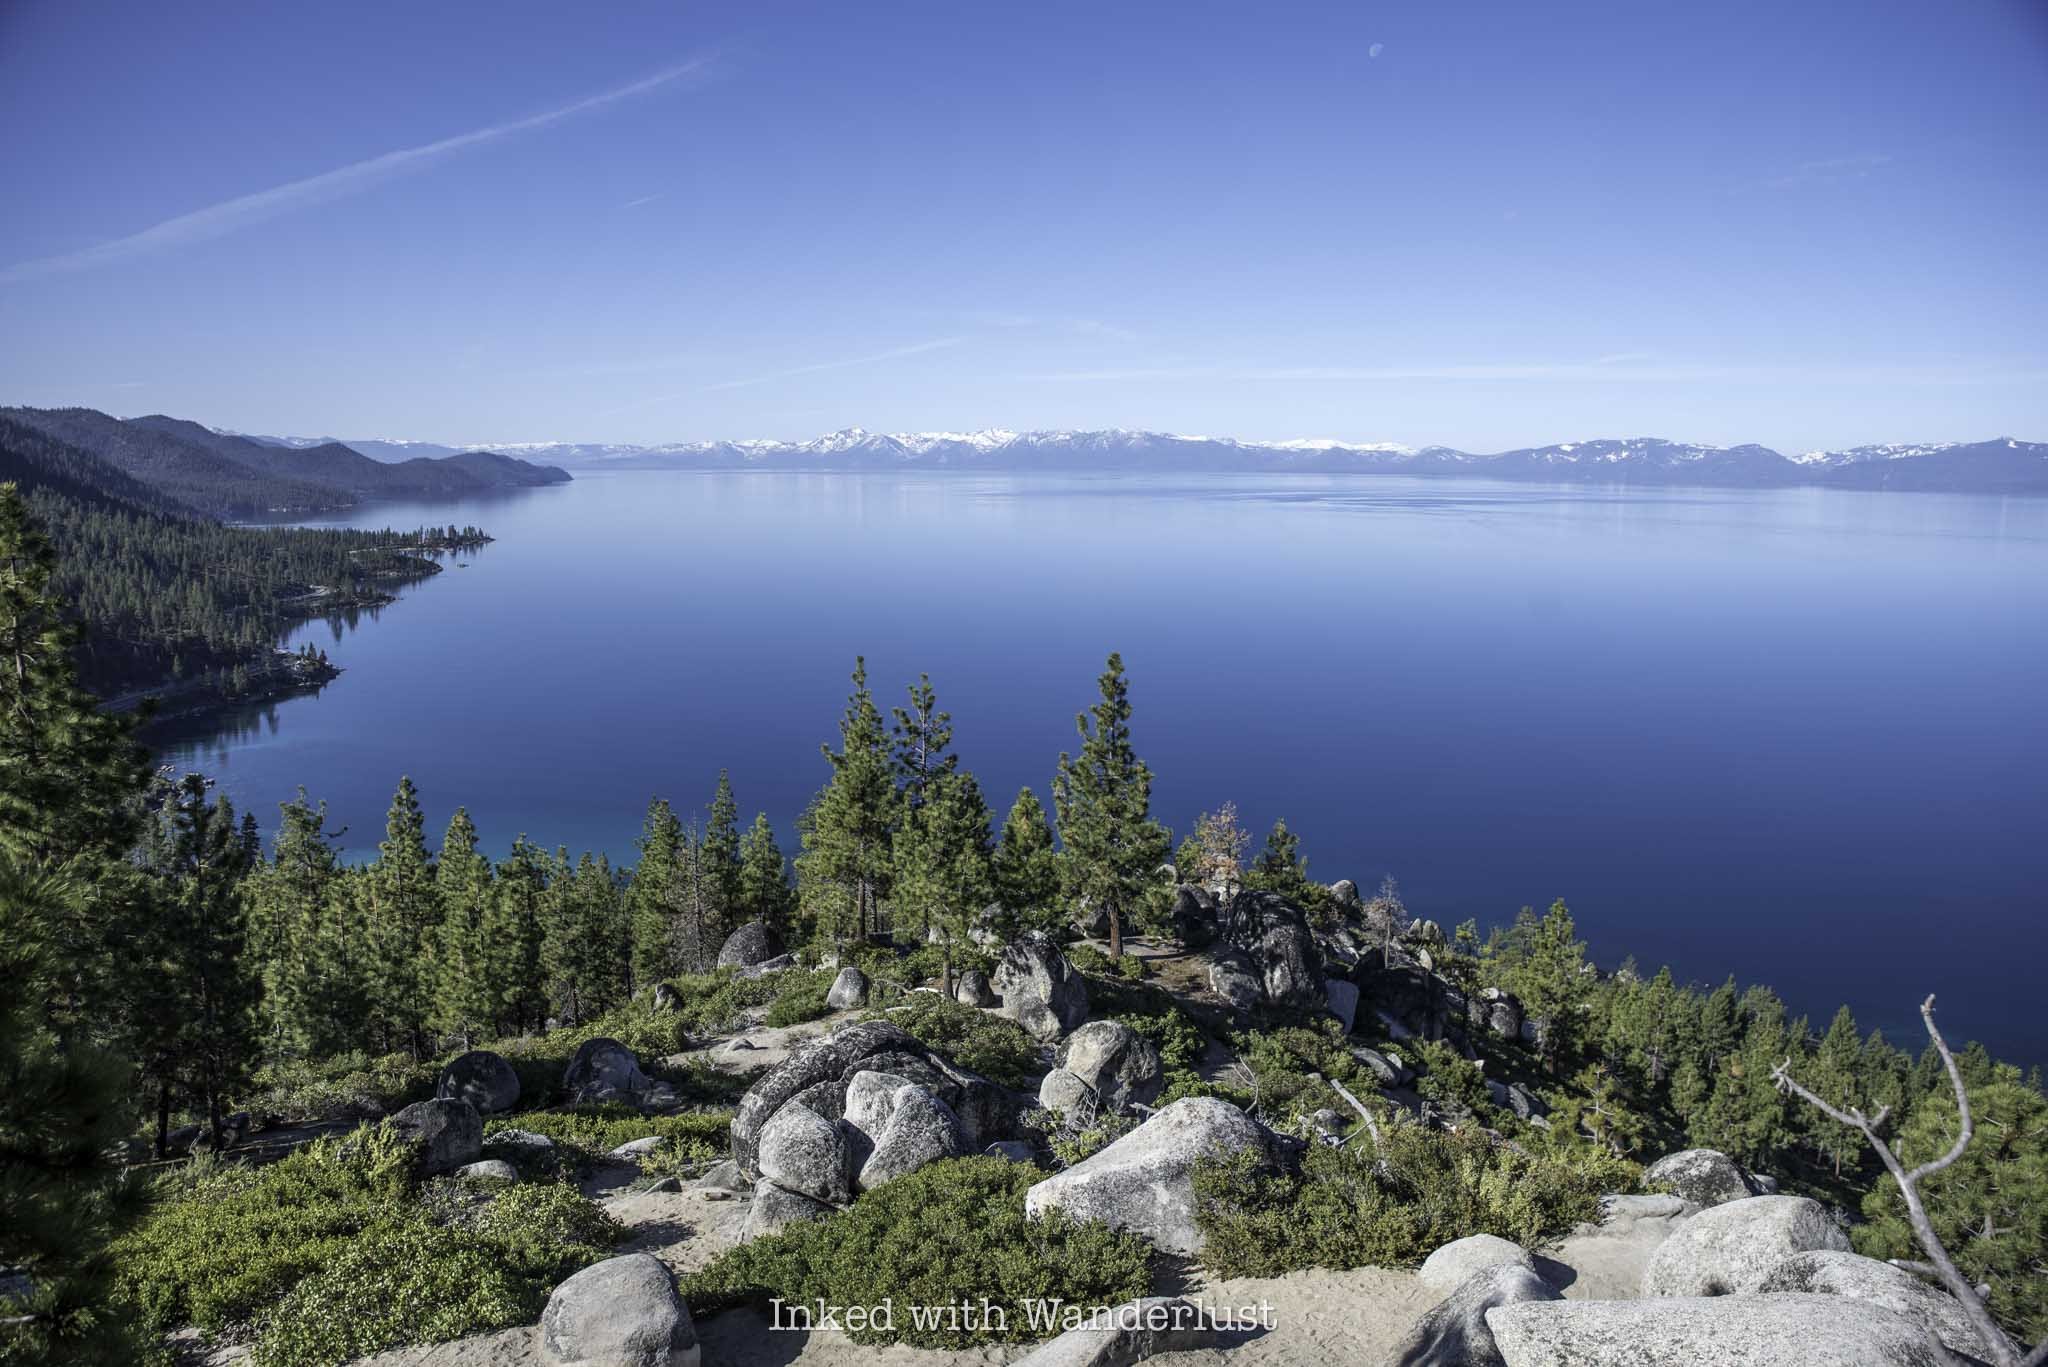
On the other side of the boulder pile, there’s an excellent view of the lake awaiting you. From there, you can faintly see Sand Harbor State Park, sections of the Tahoe East Shore Trail, and parts of the east and north side of the lake.

When you’re done taking in the views and getting your photos of Monkey Rock, simply head back the same way you came in. Since it’s all downhill from here, you should be able to get back to your vehicle in about twenty minutes or so.
Keep in mind the spur trails you saw coming in that led to the Tahoe East Shore Trail. If you have time on your parking slip, it would be an excellent extension of your hike. Or simply head to Hidden Beach and cool off with a dip in the lake. You can read about the TEST here and Hidden Beach here.
Common Questions About Monkey Rock

Where does the Monkey Rock trail start?
Unofficially, it begins on Tunnel Creek road, just behind Tunnel Creek Cafe on the east side of Lake Tahoe. Officially, the actual trail begins at the end of Tunnel Creek road.
Is Monkey Rock a hard hike?
That’s totally subjective, but I wouldn’t classify it as hard. Distance wise, it’s on the easy side, but the final push near the end could make it difficult to some. Overall, I’d rate it as easy for some and moderate for most.
Is Monkey Rock natural?
Yes and no. Yes in the sense that it’s an actual granite rock that highly resembles a monkey, but no in the sense that it did receive some help to give it more definition.
How long is the hike to Monkey Rock?
Based on the GPS on my apple watch, it’s 2.6-miles, all in.
How can I see Monkey Rock?
The only way to see Monkey Rock is by either hiking or biking up to it. It is not visible from the road.
What elevation is Monkey Rock?
Monkey Rock is roughly 500 feet above the Tunnel Creek parking lot.
Planning a trip to Lake Tahoe? To get information on camping and recreational activities, read my 2024 Emerald Bay State Park guide. Also, to read more about the Tahoe East Shore Trail, go here. If you’re into kayaking, read my Kayaking to Fannette Island post. Lastly, chase waterfalls in my 5 Best Lake Tahoe Waterfalls post.
PROVERBS 3:23
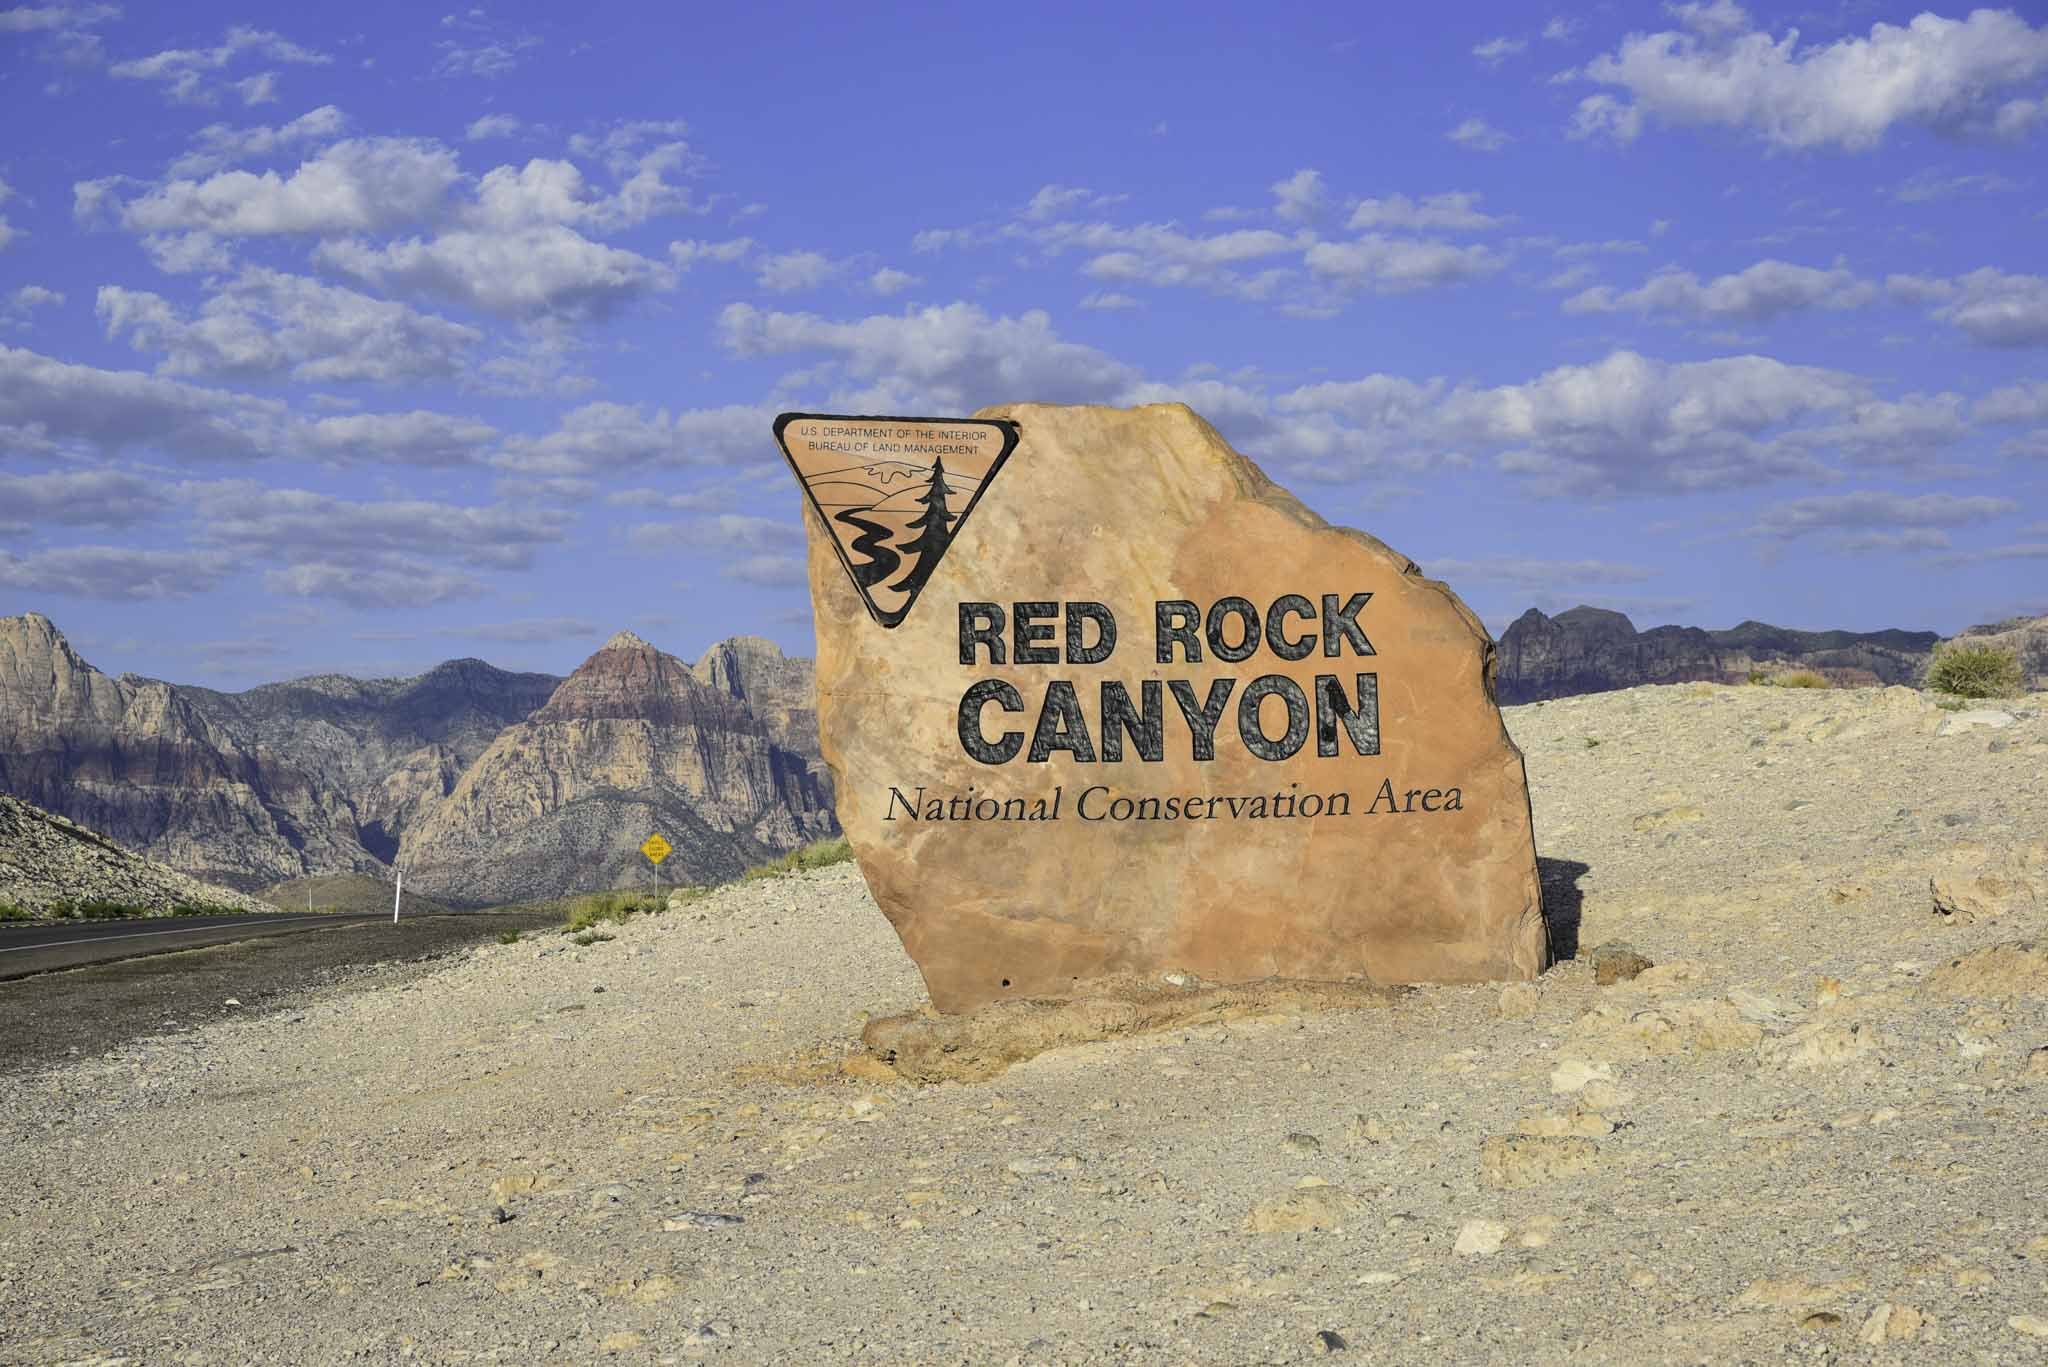
Red Rock Canyon: The Ultimate Travel Guide
Red Rock Canyon is a stunning desert oasis in Southern Nevada, just 15-miles or so from the Las Vegas strip. The park’s landscape includes…
Disclosure: This post contains affiliate links. If you make a purchase through these links, I may earn a small commission at no additional cost to you. I only recommend products or services that I believe will add value to my readers.

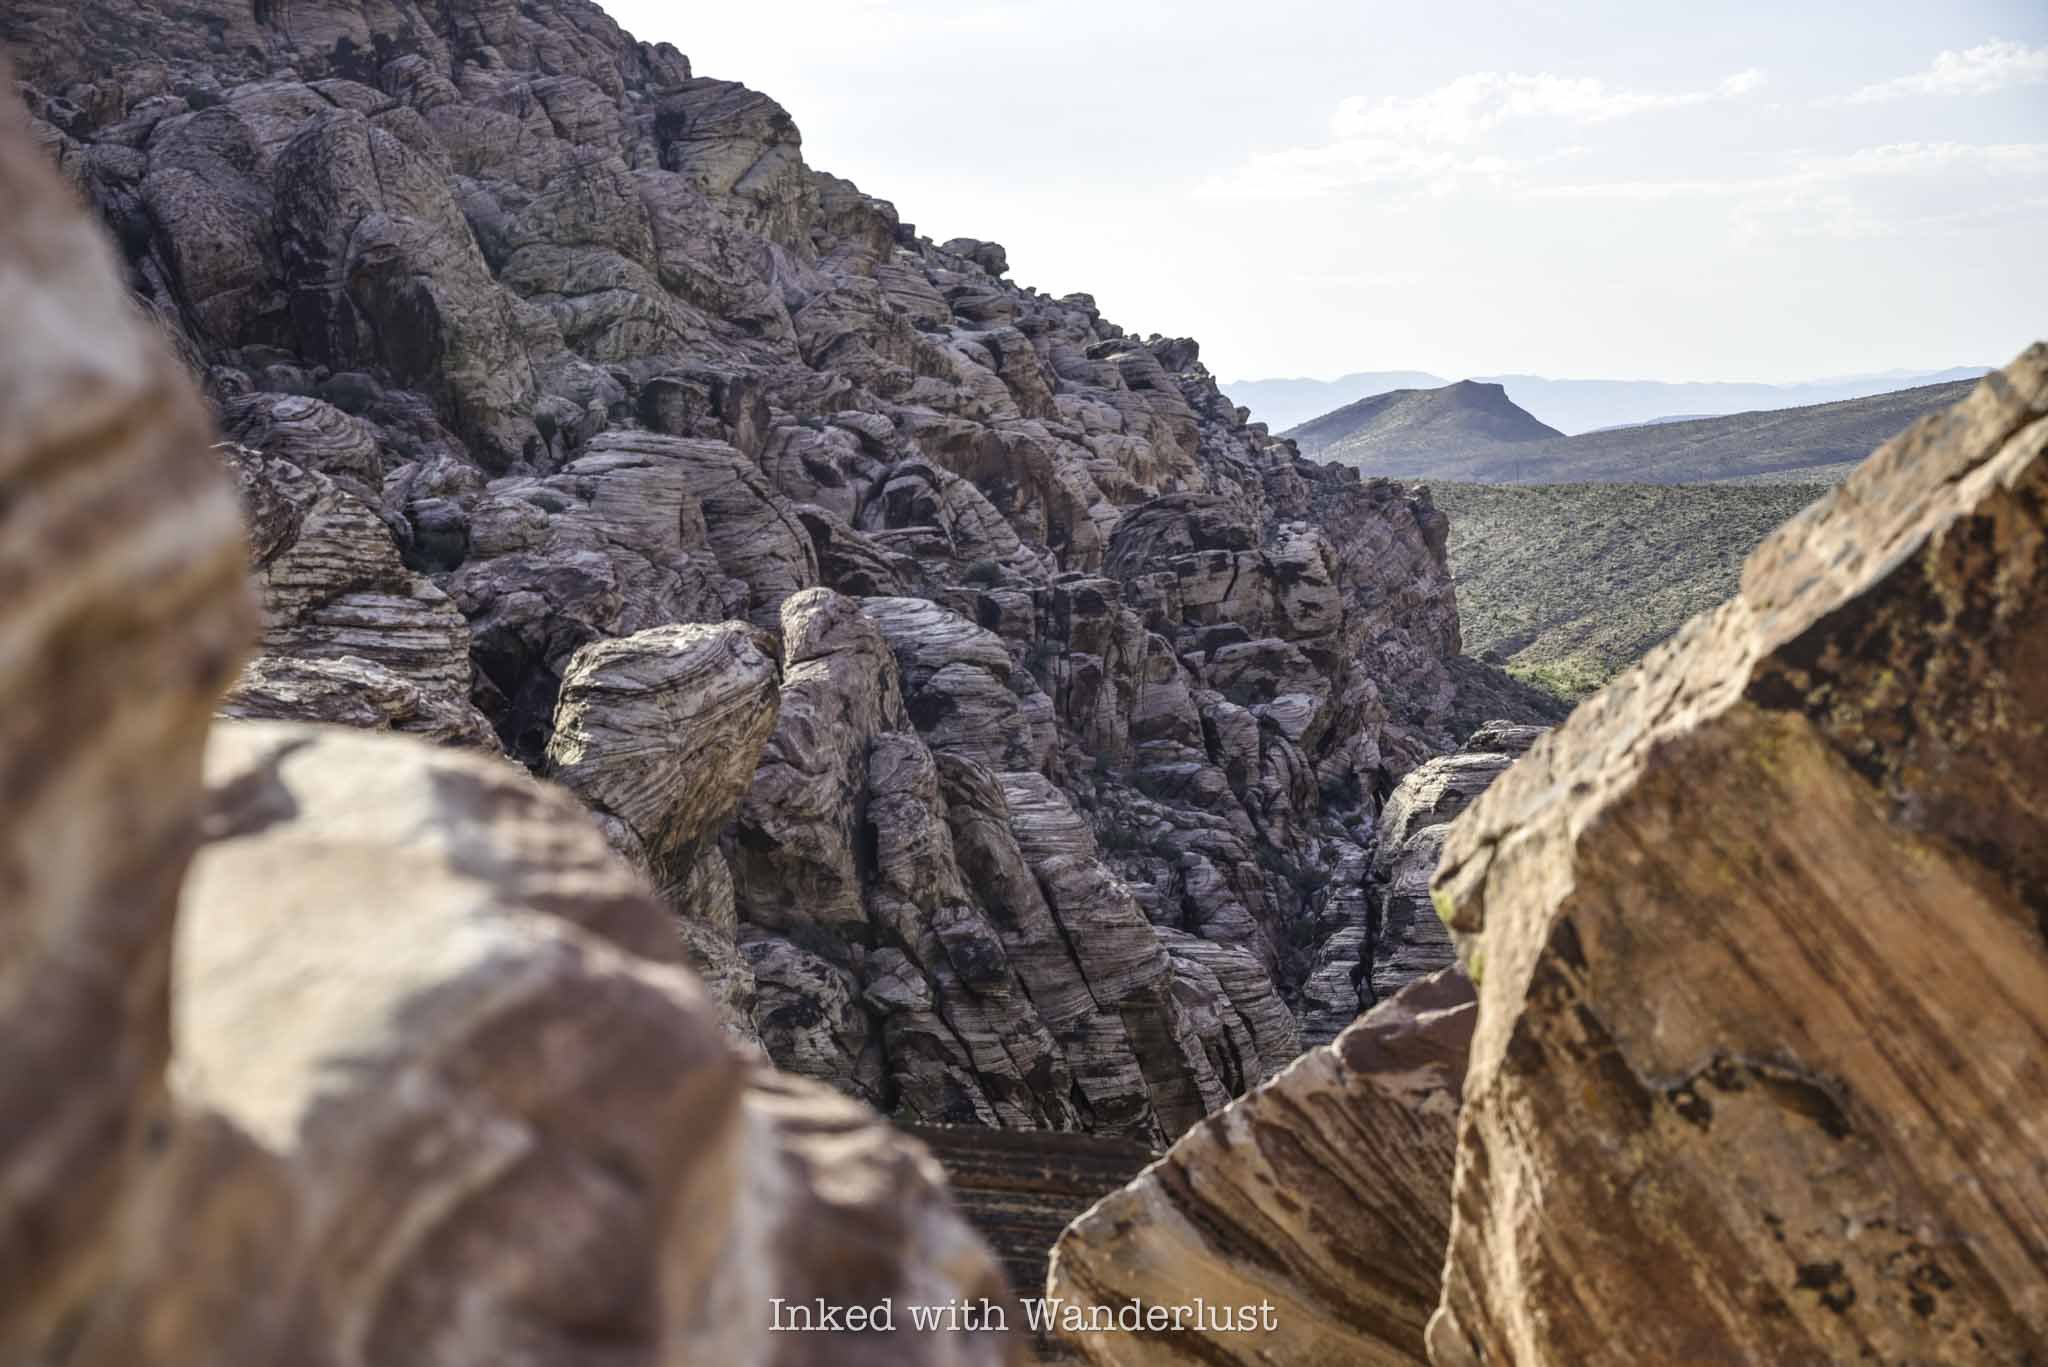
Red Rock Canyon is a stunning desert oasis in Southern Nevada, just 15-miles or so from the Las Vegas strip. The park’s landscape includes stunning mountain peaks, maze-like canyons, sandstone ridges, an abundance of wildlife and endless recreational opportunities.
If you are traveling with small children who cannot partake in the adult-only activities on the strip, Red Rock Canyon is an excellent alternative that the entire family can enjoy together. Likewise, it’s a great way to take a break from casino hopping. Some common activities in the park include:
Hiking
Rock Climbing
Photography
Wildlife Viewing
Bike Riding
Scenic Drive
and more…
Due to this, Red Rock Canyon has become a mega-popular destination, attracting upwards of three million people annually. Before visiting, there are several things you need to know. For example, dependent upon when you’re visiting, you may need a reservation.
Additionally, there are other aspects to Red Rock you need to know, such as entry fees, parking, the unfortunate vehicle breaks-ins that occur with regularity, which hiking trails to hit and more. Don’t visit Red Rock without consulting this guide first. Let’s get into it!
Red Rock Canyon Timed Reservations

Timed reservations for Red Rock Canyon are required during the park’s peak visitation season, which for the 2023/2024 season is October 1, 2023 through May 31, 2024. Normally, peak travel season would mean the summer months, but because of the triple digit temperatures the area sees in the summer, less people visit during this time.
If you plan to visit during this timeframe, you will need a reservation. Even if it’s a fee-free day. Timed reservations can be made and purchased online through Recreation.gov in one of two booking windows. Those windows are:
Primary Booking Window: Thirty days prior to your intended visit beginning at 7am.
Secondary Booking Window: Additional reservations are made available two days in advance. For example, reservations for November 3 will be available beginning November 1 at 7am.
During the process of making your reservation, you can also pay your entry fees, including an annual pass. If you already have one, including the America the Beautiful pass, simply state so while making your reservation.

When making your reservation, you’ll need to select what time you want to enter the park from the list of available times. Be sure of your choice because they’ll only give you thirty minutes for early or late entry. Meaning, if you chose 9:00am, the earliest you could enter is 8:30am and the latest would be 9:30am.
Additionally, keep in mind that there is no re-entry during the reservation period. You can stay in the park as long as you want but if you leave, you’ll need another reservation in order to re-enter the park.
Remember, if your visit falls outside of that timeframe, you don’t need to worry about making a reservation. You’ll still need to pay entry fees, but that’s it.
Red Rock Canyon Fees and Parking

How easy or difficult parking is to come by at Red Rock Canyon depends on several aspects, such as season, day of visit, time of day, how crowded it is, etc. Visiting on the off-season, arriving to the park early and coming on a weekday nearly ensures a hassle-free experience.
I visited in August, way outside of the park’s peak season. Though I had to deal with triple digit heat, the park was a literal ghost town and I had no issue with parking at any of the trailheads or any traffic jams on the scenic drive.
The first and largest parking lot is at the visitor center just inside the entry gate. From there, there are several parking lots dotted along the scenic drive at various trailheads and viewpoints. The largest of which are at the Calico Hills and Calico Tanks trailheads.

Much like most parks in the national park system, there are entry fees associated with visiting Red Rock Canyon. The fees for 2024 are:
$20 per vehicle
$10 per motorcycle
$8 per bicyclist
$5 per pedestrian (walk-in)
$50 for the Red Rock Canyon annual pass
$80 for the ‘America the Beautiful’ annual pass (good for all national park sites)
The first four fee categories listed are for a single day. Meaning if you plan to visit on multiple days, you would need to pay the entry fee on each day. If you’re planning to visit for three or more days in a calendar year or are visiting multiple national park sites, it may make sense to purchase one of the two annual passes.
How Much Time You Need at Red Rock Canyon

The scenic drive in Red Rock Canyon is only 13-miles from beginning to end but with so much to do and see, that 13-miles could take a while to get through. If all you want to do is drive through the park and take in the sights, 45-minutes to one hour is all you would need.
My recommendation, though, is to commit to more time than that. There are so many hiking trails, viewpoints and sights to see that you could easily spend an entire day (or three) in the park.
If you’re on a time crunch, I recommend choosing one hiking trail to hike (such as Calico Tanks) and driving the scenic drive. If you choose an easy to moderate trail at a few miles or less, it shouldn’t take you longer than a few hours to do that, plus the scenic drive.
How to Get to Red Rock Canyon

If you’re like most people, you’ll be visiting Red Rock Canyon from somewhere in Las Vegas, proper. From the Las Vegas Strip, Red Rock Canyon is only about 20-30 minutes away (by car), depending on where you’re staying.
You’re in an even better position if you’re staying in Summerlin, as hotels such as JW Marriott are only 10-15 minutes away. The closest conceivable hotel to the park, Red Rock Casino Resort and Spa, is less than a two-mile drive from the gate.
While you are allowed to walk to bike into the park, I highly recommend visiting in a car. There is no public transportation going to or within the park and since cell phone signals are spotty (at best), ride sharing options aren’t reliable.
Before driving to Red Rock Canyon, make sure your gas tank is full as there are no fuel services in the park. Also, bring with you an insulated cooler and stuff it with as much water as you can fit. Dehydration is a very real threat during a visit to Red Rock Canyon. So bring more than you think you’ll need.
You’ll also want to bring food with you as there aren’t any concessionaires in the park. There are a number of restaurants within a few miles of the park and the closest grocery store, Albertsons, is less than a mile away on W Charleston blvd.
The Best Time to Visit Red Rock Canyon

With an average of 295 days of sunshine and only four inches of rain per year, there are very few bad times to visit Red Rock Canyon. Still, each season has its own positives and negatives, so it’s a good idea to know ahead of time to avoid being caught off-guard.
Red Rock Canyon in Spring
Spring time, early spring specifically, can be a great time to visit Red Rock. Daytime temperatures rarely exceed 77 degrees, but nighttime temperatures hover around 50 degrees. This makes hiking during the day quite comfortable, but it’ll be chilly at night if you’re planning to camp.
One of the downfalls to visiting in spring, though, is how windy it can get. Wind can happen anytime of year at Red Rock but in March and April, gusts have been recorded at 60+ mph. Aside from that and the chilly evenings, spring is a great time for hiking and climbing.
Red Rock Canyon in Summer
If all you’re looking to do is take a lap around the Red Rock Scenic Drive and pop out here and there to take in the views, then summer is fine. If you’re looking to hike or rock climb, however, the hot weather can make a summer visit a potentially dangerous one.
With an average daytime temperature of 93-degrees and not much shade on the park’s hiking trails, dehydration is a real concern. A concern that I, unfortunately, know all too well. I, stupidly, hiked the Calico Tanks trail on a triple digit day and despite drinking lots of water, I started feeling the effects of dehydration on my way back to the car.
If you’re key on hitting the trails, my recommendation would be to visit in the spring or fall. If you must hike in the summer, go on a day with the lowest possible temperature and get an early start so you’ll be off the trail before the mid-day heat sets in.

Red Rock Canyon in the Fall
The benefits of visiting Red Rock Canyon in the fall are:
The daytime temperatures are significantly better than they are in the summer.
The fall foliage colors in contrast to the red rock makes for a stunning sight.
One significant drawback to fall, though, is it’s when monsoon season hits. So it’s imperative to check the weather forecast before heading to Red Rock (be sure to look up the weather for Red Rock, specifically, as it can differ greatly from nearby Las Vegas, proper).
Also, ready yourself for potential seriously high winds as much like in the spring, gusts can reach 60 mph or more. However, amidst all that wind, you’ll bare witness to the leaves and other foliage changing colors, creating a beautiful contrast to the red rocks.
Winter in Red Rock Canyon
If you’re planning to visit Red Rock in the winter, prepare yourself for chilly conditions as daytime temperatures average around 57 degrees and dip down to an average of 32 degrees at night. Needless to say, bring a warm jacket and dress in layers.
The upside to this time of year are the epic sunsets you can catch from various points in the park, including and especially from the various mountain peaks. If you do decide to hike up to the peaks, keep an eye out for patches of snow and ice.
While it doesn’t snow too often, it isn’t unheard of to see accumulated snow around the scenic drive and visitor center. Additionally, it tends to rain in the winter more-so than any other time of year, so be sure to bring an umbrella and a waterproof layer of clothing.
Things to Do in Red Rock Canyon

1) Drive the Red Rock Canyon Scenic Drive
One of the most popular things to do in Red Rock Canyon is to drive the 13-mile, one-way scenic drive that winds through the park. There are pull-outs and parking lots dotted along the road at several of the park’s most popular trailheads and lookouts.
2) Hit the Hiking Trails
There are many hiking trails in Red Rock with varying levels of difficulty. A couple of the easier trails include Pine Creek Canyon and the historic Petroglyph Wall. Two of the park’s most popular trails, Calico Tanks and Icebox Canyon, fall into the moderate category. If you’re looking for more of a challenge, Turtlehead Peak and Kraft Mountain Loop offer just that.
3) Book a Horseback Riding Tour
Access areas of the park only possible on horseback by booking a horseback riding tour through Viator. This two hour tour doesn’t require any experience and allows you to experience the rugged side of the park. Pay later options are available.
4) Try Your Hand at Rock Climbing
Red Rock Canyon is a rock climber’s paradise. If you’re still learning how to climb and aren’t comfortable going out on your own, there are many tour options available. If you are experienced, though, you’ll love the free range of options and solitude Red Rock provides.
5) Stop by the Visitor Center
A visit to the park wouldn’t be complete without stopping by the visitor center. Inside, there are many artifacts found in the park and exhibits detailing the history of Red Rock.
6) Take a Shaka Tour of Red Rock Canyon
Download a Red Rock Canyon Shaka Guide. It’s like having a personal tour guide in the car with you. Packed with useful information and stories of Red Rock, you’ll follow your Shaka Guide around the park, hitting up numerous stops such as the historic Petroglyph Wall, hike the Sandstone Quarry, enjoy lunch at Willow Springs and more!
Be Sure to Hide Your Valuables

Unfortunately, Red Rock Canyon has been fraught with vehicle break-ins in recent years in areas both outside and inside of the park. What happens is the criminals wait for people to make their way down a hiking trail and then inspect their vehicle. If they see something, they’ll smash out the window and grab the item(s).
To combat this issue, the Friends of Red Rock Canyon have been raising funds to increase the amount of cameras in the park’s parking lots. Furthermore, increased patrols from park rangers have been implemented.
However, to help ensure your windows don’t get smashed out, it’s best to keep all valuables hidden in the trunk. This includes backpacks, coolers (especially Yeti branded ones), cameras, wallets, cell phones, branded clothing such as The North Face and anything else that could be perceived as valuable.
Red Rock Canyon Frequently Asked Questions
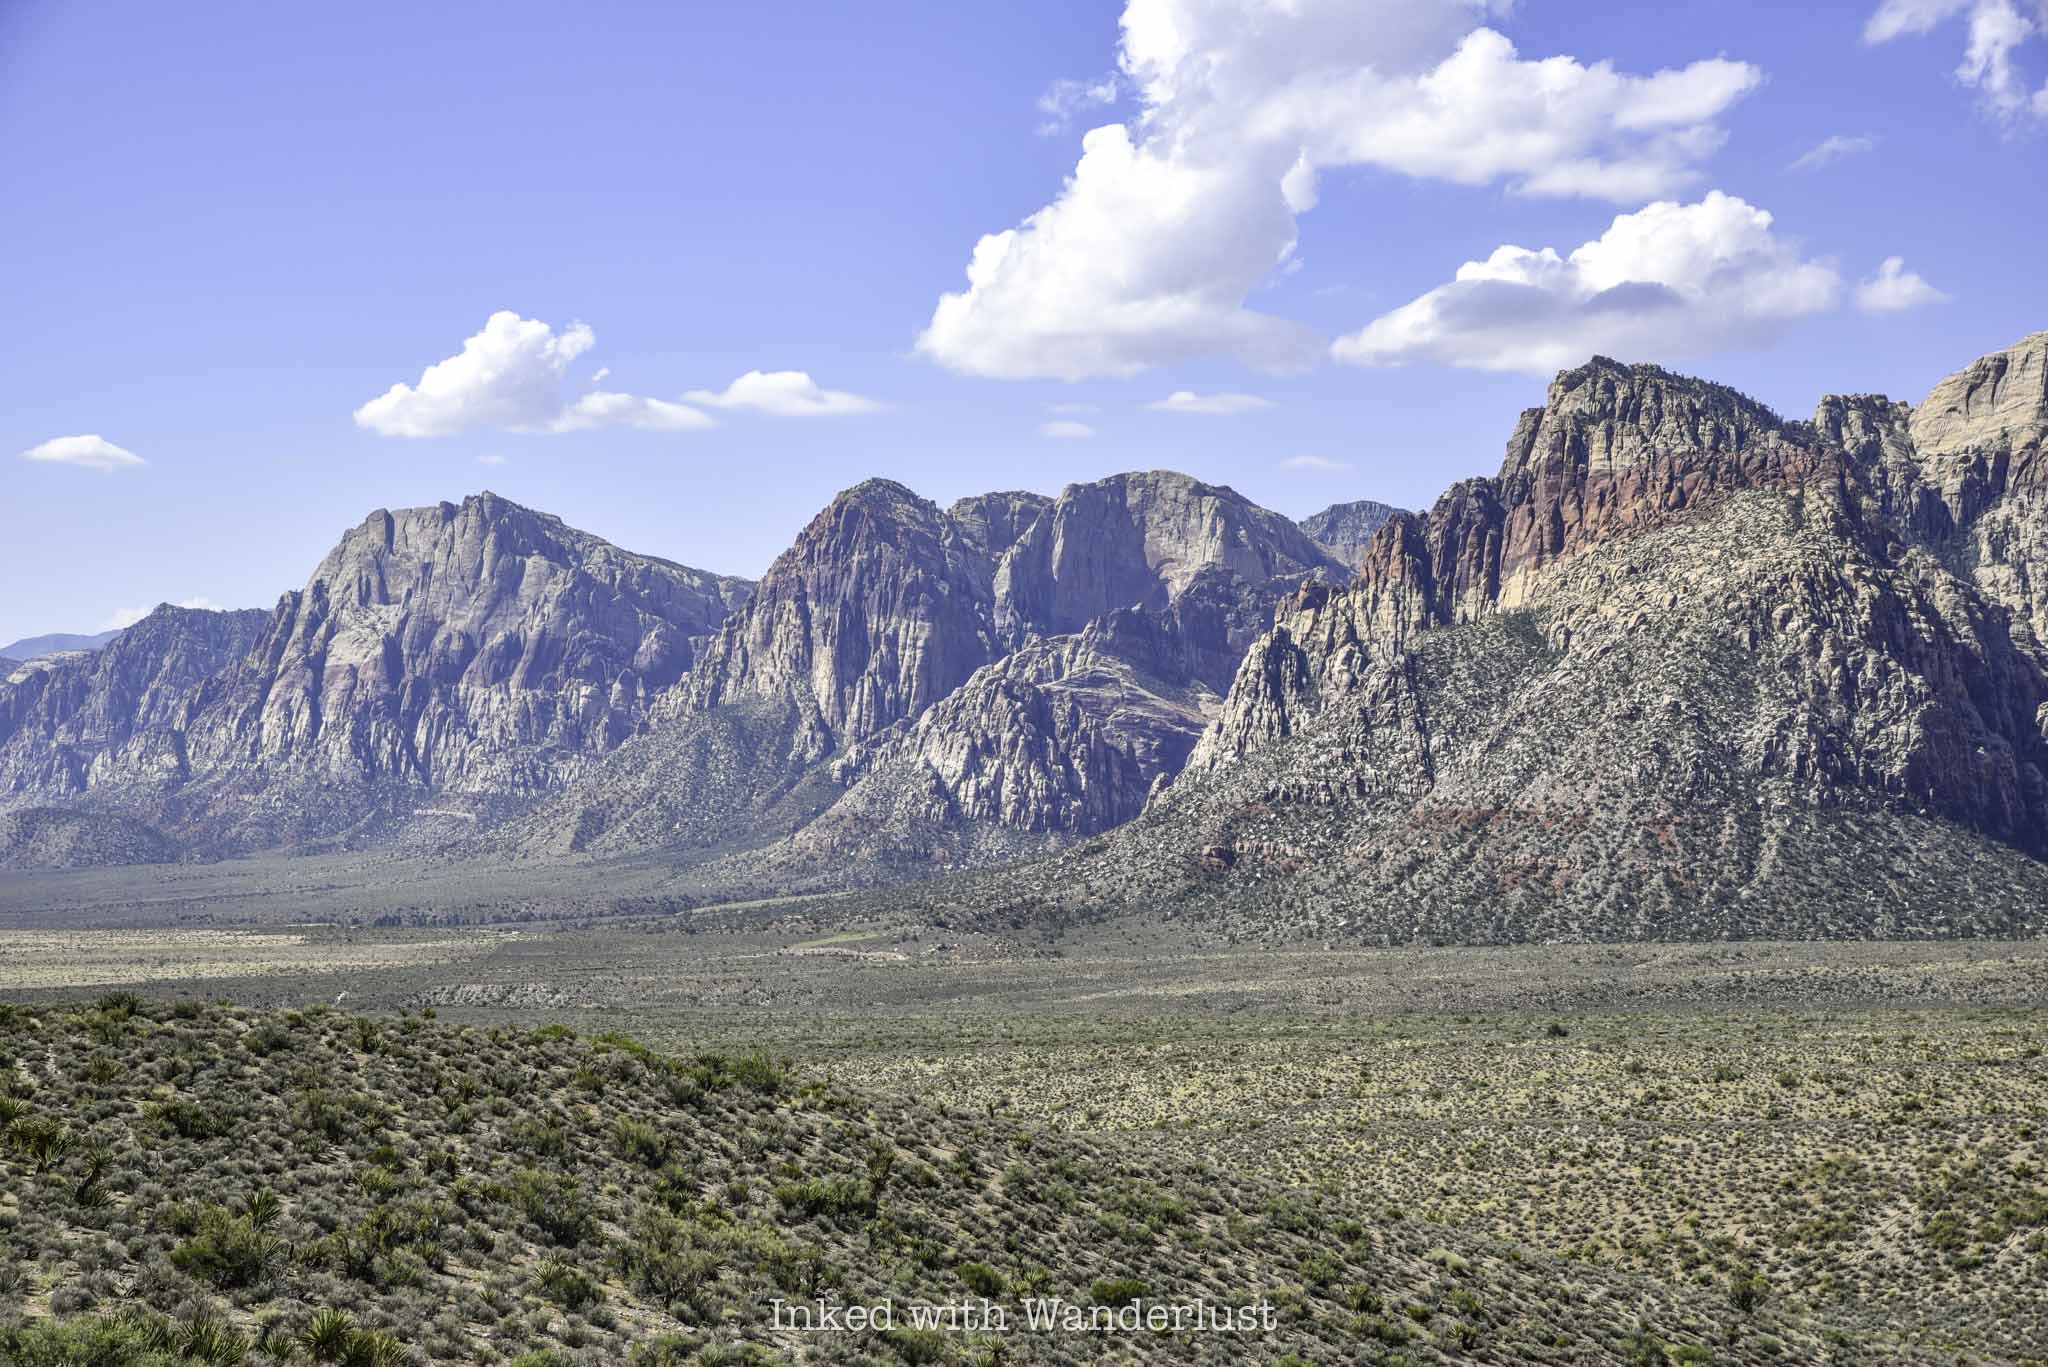
Are dogs allowed at Red Rock Canyon?
As long as they’re leashed and never left unattended, you are allowed to bring your dog(s) to Red Rock Canyon and its hiking trails.
How much time should I spend at Red Rock Canyon?
You should, at minimum, allocate two to three hours if all you want to do is the scenic drive and see the main highlights. If you want to hike multiple trails, though, I recommend setting aside two full days, at least.
Can I enter Red Rock Canyon without a reservation?
Yes and no. If you’re visiting between October and May, then yes, you’ll need a timed reservation. June through September, however, you can come and go as you please as reservations are not required during these months.
How far is Red Rock Canyon from Las Vegas?
From the Las Vegas Strip, Red Rock Canyon is around 20-miles (give or take) or a 30-minute drive away.
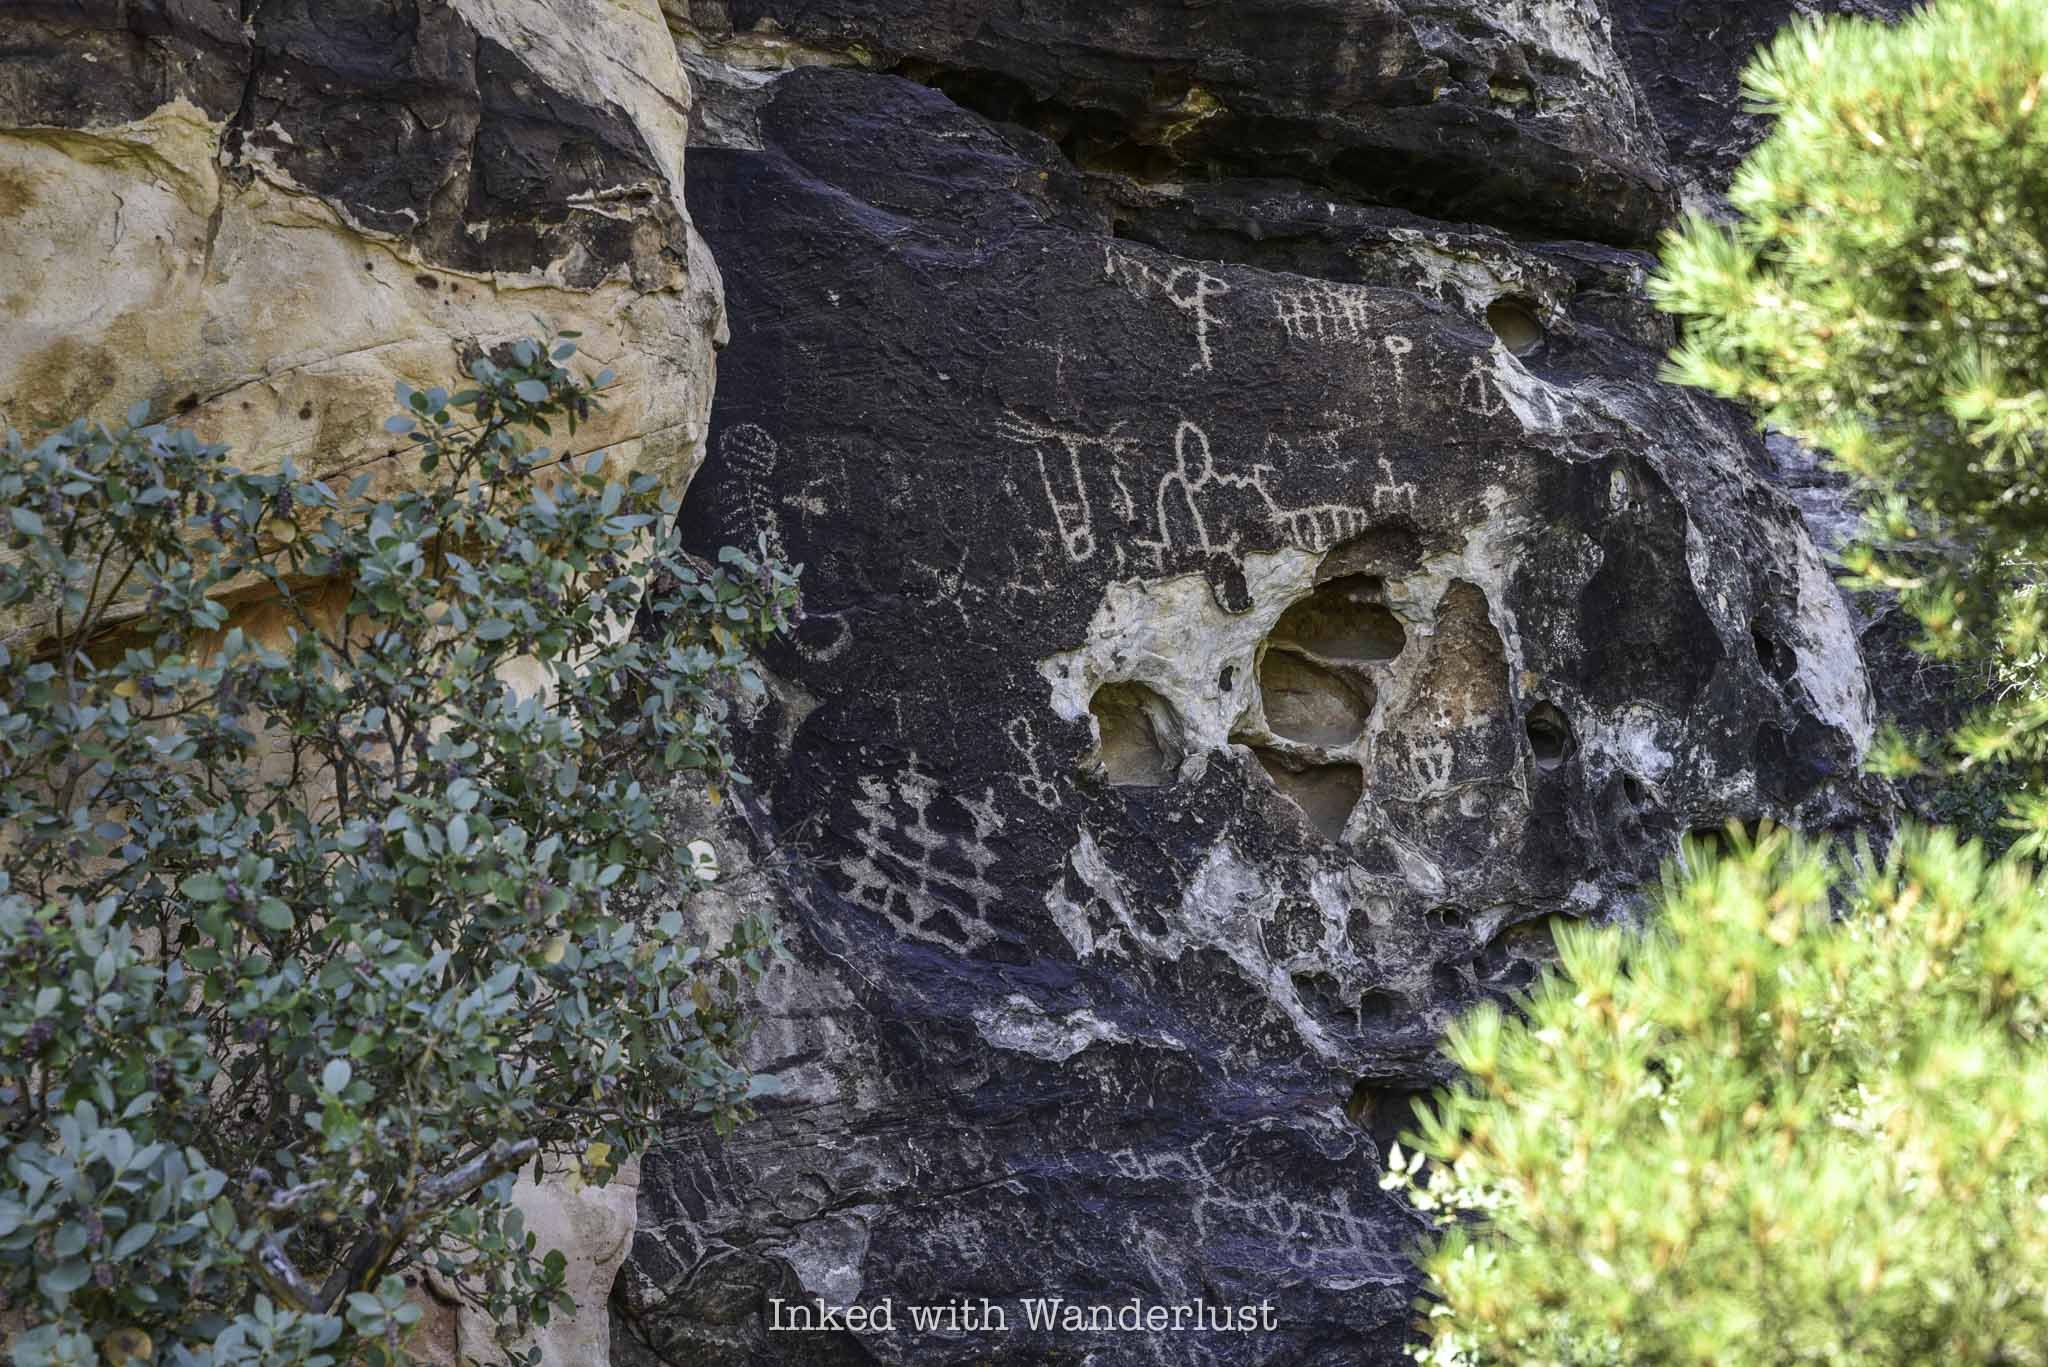
Which is better, Red Rock Canyon or Valley of Fire?
Both! Honestly, there’s no way to compare the two. They’re each amazing in their own right and I highly recommend visiting both. You can read my one-day at Valley of Fire itinerary here for inspiration.
Is there cell service at Red Rock Canyon?
Cell service is nearly non-existent at Red Rock Canyon.
Are there bathrooms at Red Rock Canyon?
Bathrooms are readily available at Red Rock Canyon. The visitor center has one and additionally, most of the trailhead parking lots and pull-outs have (rather clean) vaulted toilets.
Is there public transportation to Red Rock Canyon?
No. Additionally, due to limited cell service, ride sharing isn’t a viable option.
Is flying a drone allowed at Red Rock Canyon?
Yes! Flying a drone in the park for recreational purposes is allowed.
PROVERBS 3:23

Hike the Calico Tanks Trail at Red Rock Canyon
While there aren’t any fees associated with the trail itself, the trail is located inside Red Rock Canyon, which does…
Disclosure: This post contains affiliate links. If you make a purchase through these links, I may earn a small commission at no additional cost to you. I only recommend products or services that I believe will add value to my readers.
If you live in the Las Vegas area or you’re planning to visit soon and you’re in search of local hiking trails, you can’t go wrong with one of the most popular in the area - the Calico Tanks Trail.
Located in Red Rock Canyon National Conservation Area, right off the Scenic Drive, this trail takes hikers on a thrilling experience through red and white sandstone formations across rolling hills and inside the walls of a canyon, before ending at the famed Calico Tank and a jaw dropping view of the valley below.
While the trail length is moderate, coming in at only 2.4-miles, out and back, it’s far from your normal, everyday trail as there’s some mild scrambling required, increasing the time it’ll take to complete the hike.
Curious to see what the trail looks like? Want to know where the parking lot is and what, if any, fees are associated with this hike? I discuss all of that and more in the post below.

Click or tap on the ad to view offer
Trail Stats
Location: Red Rock Canyon National Recreation Area, Las Vegas, NV
Fee: Up to $20 per vehicle
Open: All year
For: Hikers
Cell Service: Spotty, at best
Restroom: At the trailhead
Parking: Large paved lot at the trailhead
EV Stations: None
Difficulty: Moderate
Popularity: High
Mileage: 2.4 miles, out and back
Elevation Gain: 440 feet
Condition: Trail is dotted with trail markers, but there isn’t much of a designated path for most of it. Bringing a map would be wise
Features: Beautiful sandstone formations, the Calico Tank and a great view of Las Vegas at the end
Accessible: Any time of year, but with the limited shade and the extreme heat, summer isn’t ideal
Pets: Not allowed
Drones: Not allowed
Hazards: Little to no shade, sandy boulders and rattlesnakes
My Visit(s): August 2023
Take a look at these products that I recommend for this hike…
Red Rock Canyon Fees and Parking

While there aren’t any fees associated with the trail itself, the trail is located inside Red Rock Canyon, which does charge a fee to enter. Fees for 2024 are as follows:
$20 per vehicle
$10 per motorcycle
$8 per bicyclist
$5 per pedestrian
Furthermore, if you’re visiting between the months of November and May, a timed reservation will be required to access the park between the hours of 8am and 5pm. An additional $2 fee will be charged by Recreation.gov for these.
If you have any variation of the America the Beautiful pass, you can use it for entry here. You will still need a reservation during the months mentioned above, though. Conversely, you can purchase a Red Rock Canyon annual pass for $50.
The parking lot for the Calico Tanks Trail is easy to find, as it’s located just off Scenic Drive on the right. It’s fairly large, capable of holding several dozen vehicles or so, and is paved.

It’s the second parking lot you’ll encounter along Scenic Drive. The first one is for the Calico Hills and Basin, so don’t confuse the two (though this area is also worthy of exploring if you have the time).
Unfortunately, Red Rock Canyon experiences vehicle break ins and thefts at the most popular parking lots, Calico Tanks being amongst them. So don’t leave valuables in plain view.
Near the entrance, I pulled over to take a photo of the welcome sign and while doing so, I witnessed a black SUV pull over. A young man jumped out, looked into my car and the car parked in front of me, looked up and saw me, jumped back in his car and took off. So definitely heed the warnings.
The Trail

The trailhead is located at the northern end of the parking lot, next to the restrooms. There’s trail signage here advising visitors of potential hazards and/or trail conditions, so be sure to give them a quick read.
The trail begins in the shade of the large canyon wall and runs straight for about 30 yards, before pivoting right towards an area of gravel wash.
This area can be easy to lose at times as the trail appears to have been washed away by reoccurring flooding events. You’ll know you’ve went the right direction when you see two giant boulders on your left (pictured below).

Past these boulders, you’ll travel along a clear pathway for a short spell before coming across an even larger gravel wash field. Throughout this stretch, it would be advisable to have a map on hand as the trail is non-existent.
If you don’t have one, just keep an eye out for the trail markers and make your way to the next one the best you can, simply repeating the process until you’re back on the path.

After a short while, the trail will become obvious again and will narrow as it aligns with the canyon walls. It is here where your adventure truly begins.
If there’s been rainfall recently, you’ll likely encounter several large puddles of water and work your way through the canyon. None of them are deep or treacherous, though.
You can easily bypass many of them by utilizing the spur trails, but there is one in particular that forces you to either scramble over the sandstone or just accept the fact that your feet are going to get wet.

You’ll soon come upon the first of many large boulders you’ll need to negotiate in order to complete the trail. None of which are difficult.
There are no ropes or chains to hoist yourself up on, nor will you need any special equipment. Be sure to bring shoes or boots with good tread, though, as the sandstone is slick and sandy in some spots.

Much like at the beginning of the trail, there are several trail markers placed along this stretch indicating the best possible path, as there is no proper trail from this point forward.
You’re never out of eye-shot of one of these markers, so as soon as you make your way to one, simply look around to find the next and make your way there, watching your steps.

Depending on the time of day, you’ll have some shade on this section of the trail, but it’s mostly in the morning. As the sun gets higher, the amount of shade dissipates, leaving you more exposed to the Las Vegas heat.
It goes without saying, but you should bring as much water your shoulders can handle on this hike. It’s always better to bring too much than not enough.

You’ll know you’re nearing the end of the trail when you reach a series of sandstone steps, coupled with a dirt path leading you upward.
At the top of those sandstone steps, you’ll notice a notch in the distance. Just beyond that notch is where the Calico Tank lies.

The water level in the tank varies throughout the year. It can be anywhere from bone dry in the summer to full and frozen over in the winter.
Either way, it makes for a great spot to sit and enjoy a snack. There are numerous rocks to sit on along the trail on the south side of the tank. Additionally, if the water level is low enough, there’s a small area on the shore where you can sit.
Just beyond the tank is an outstanding view of Las Vegas and the valley. I did not go any further as I was feeling the effects of the day’s 108 degree heat and had to turn back.
From what I was told by others on the trail that day, you’ll need to do a little more boulder hopping past the tank to reach the overlook, but it’s only a few more minutes beyond the tank.
READ NEXT: “How to Spend a Few Hours at Valley of Fire in the Summer”

How to See Elephant Rock at Valley of Fire
Located on the east side of Valley of Fire State Park, just inside the entrance, sits a sandstone formation so unique…
Disclosure: This post contains affiliate links. If you make a purchase through these links, I may earn a small commission at no additional cost to you. I only recommend products or services that I believe will add value to my readers.
Located on the east side of Valley of Fire State Park, just inside the entrance, sits a sandstone formation so unique that it has become one of the most popular in the park - Elephant Rock.
From nearly any angle, you can make out the shape of the trunk, head and body of an elephant. When using your imagination, you’ll start to notice the outline of legs in the rock. It’ll make you question if you’re actually looking at a formation, or an actual mammoth encased in rock.
Elephant Rock is a must-see when visiting Valley of Fire for the first time. It’s easily accessible and something the whole family can participate in.
So how do you get to Elephant Rock? What is the trail like? What’s the parking situation? I answer all of these questions and more below. Let’s get into it.
Click/tap the ad to see offer details.
Trail Stats
Location: Valley of Fire State Park, Southern Nevada
Fee: $15 per vehicle day use fee ($10 for Nevada plates)
Permit: None
Open: All year
Cell Service: Spotty
Restroom: At the trailhead
Parking: Small, paved lot at the trailhead
EV Stations: None
Difficulty: Easy
Popularity: High
Mileage: 0.3 miles, RT
Time: 30 minutes to 1 hour
Elevation Gain: About 50 feet
Condition: Maintained
Features: Sandstone formation in the shape of an Elephanet
Best Viewed: Early morning for low crowds, late afternoon for best light
Pets: Not allowed
Drones: Not allowed
Hazards: Heat can be extreme and little-to-no shade
Our Visit(s): August 2023
Parking at Elephant Rock & Getting There
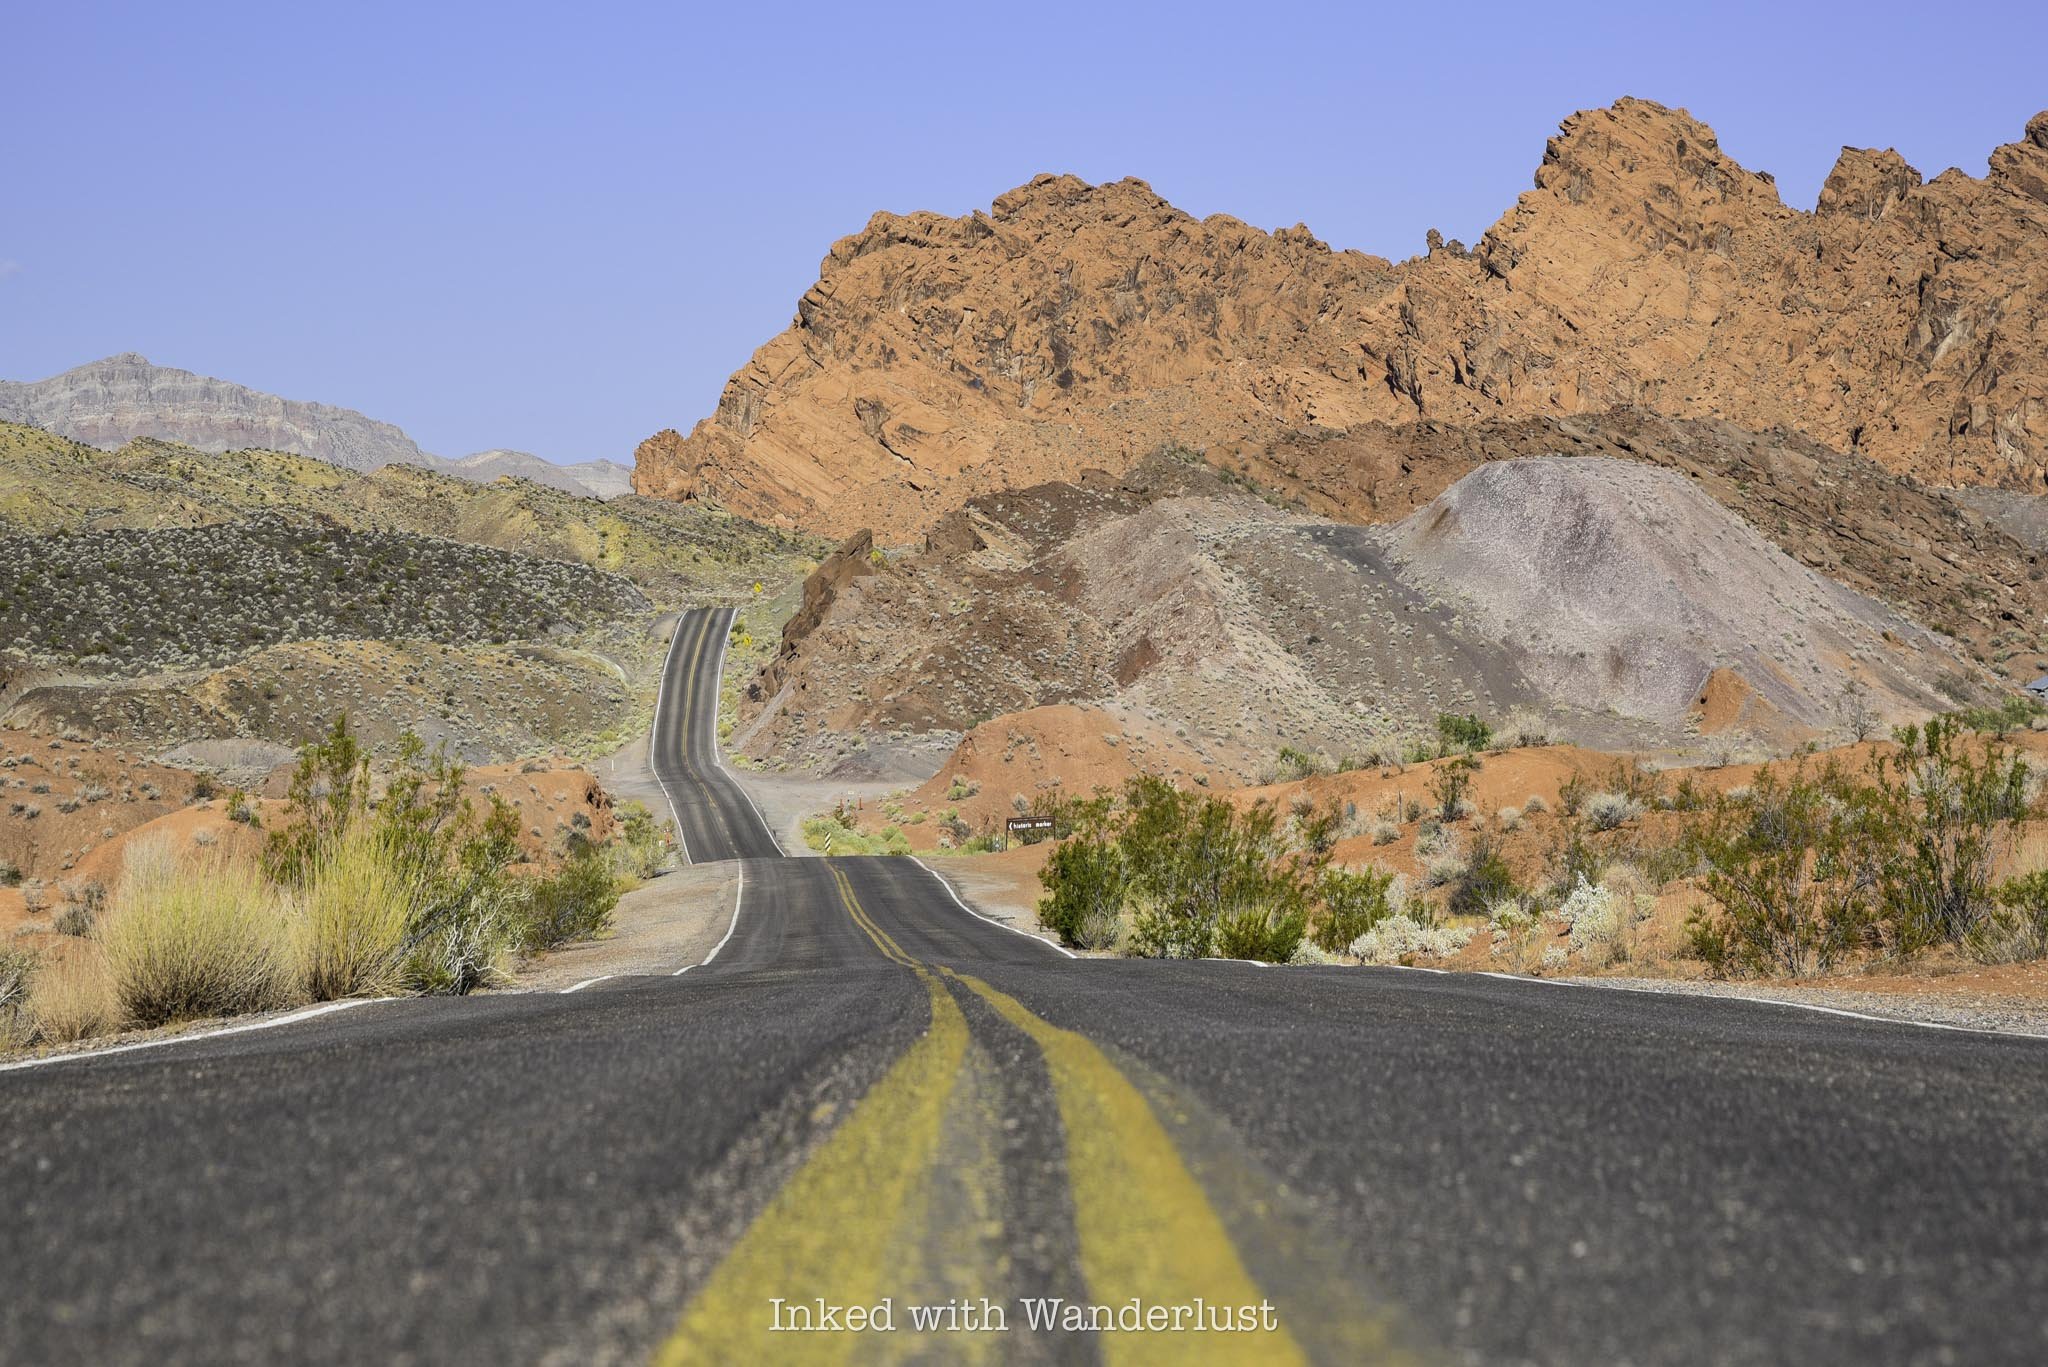
The ease of getting to Elephant Rock highly depends on which entrance you’re entering the park through. Elephant Rock is just past the east gate, on the right. So if you’re driving in on this side, you’re already there.
If you’re entering through the west gate, though, you’ll need to drive for eleven miles on the Valley of Fire Scenic Byway to the east gate, passing other attractions along the way, such as; The Beehives, Atlatl Rock and Mouse’s Tank Road.
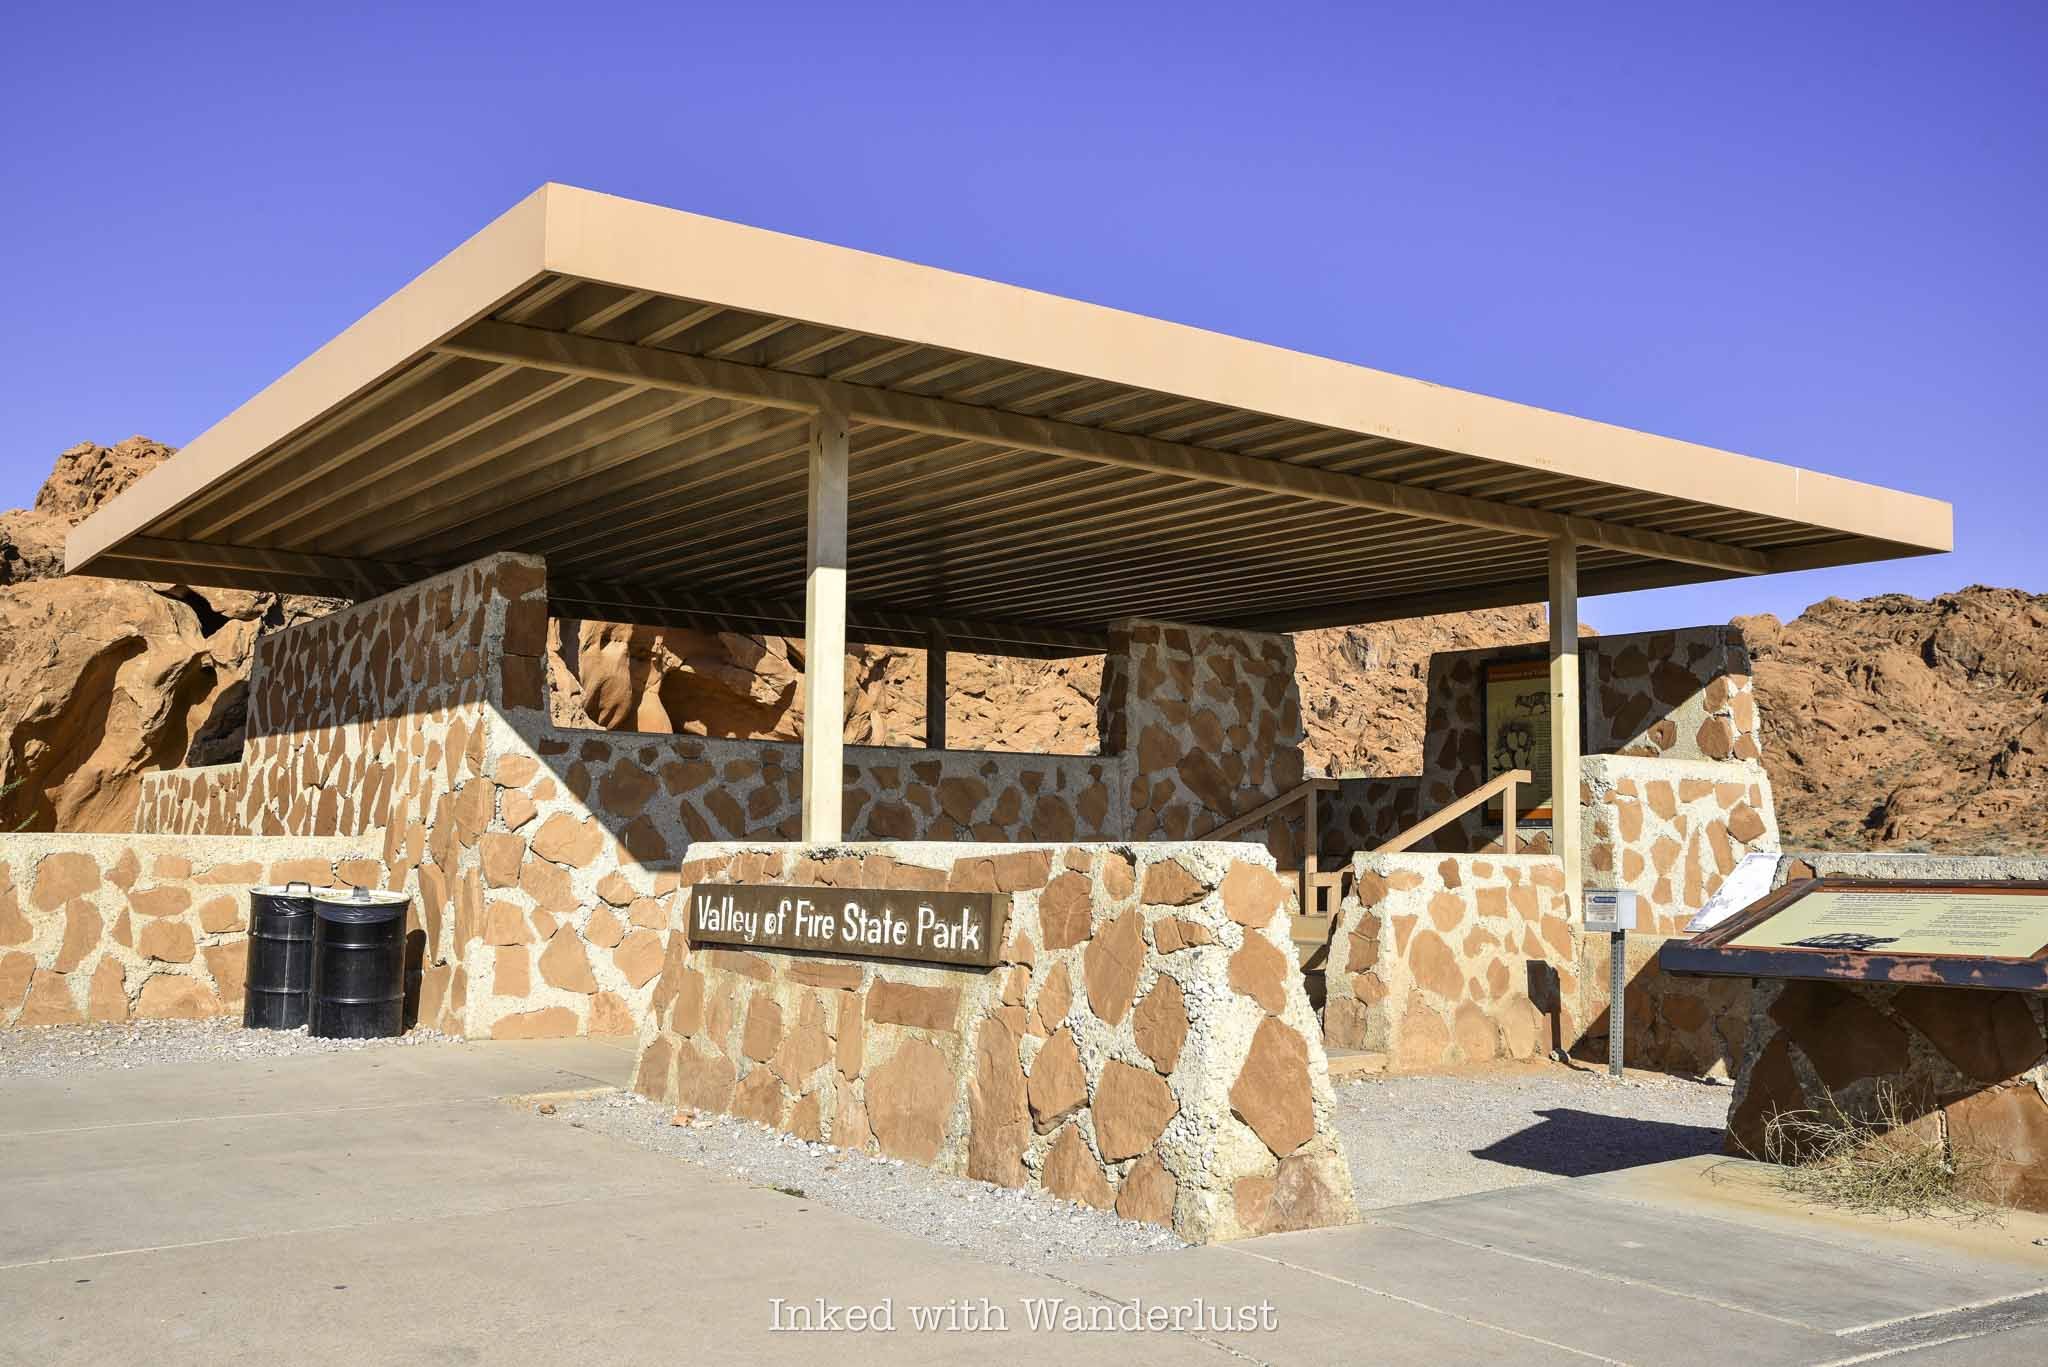
The parking lot for Elephant Rock is fairly small and paved, capable of holding a fair amount of vehicles. When the gate is unstaffed, this lot doubles as a place to park for visitors to pay their entry fees.
When I was here in August, my vehicle was the one of only two in the lot. Due to extreme heat, summer isn’t an ideal time to visit Valley of Fire, so visitation was low on this day.
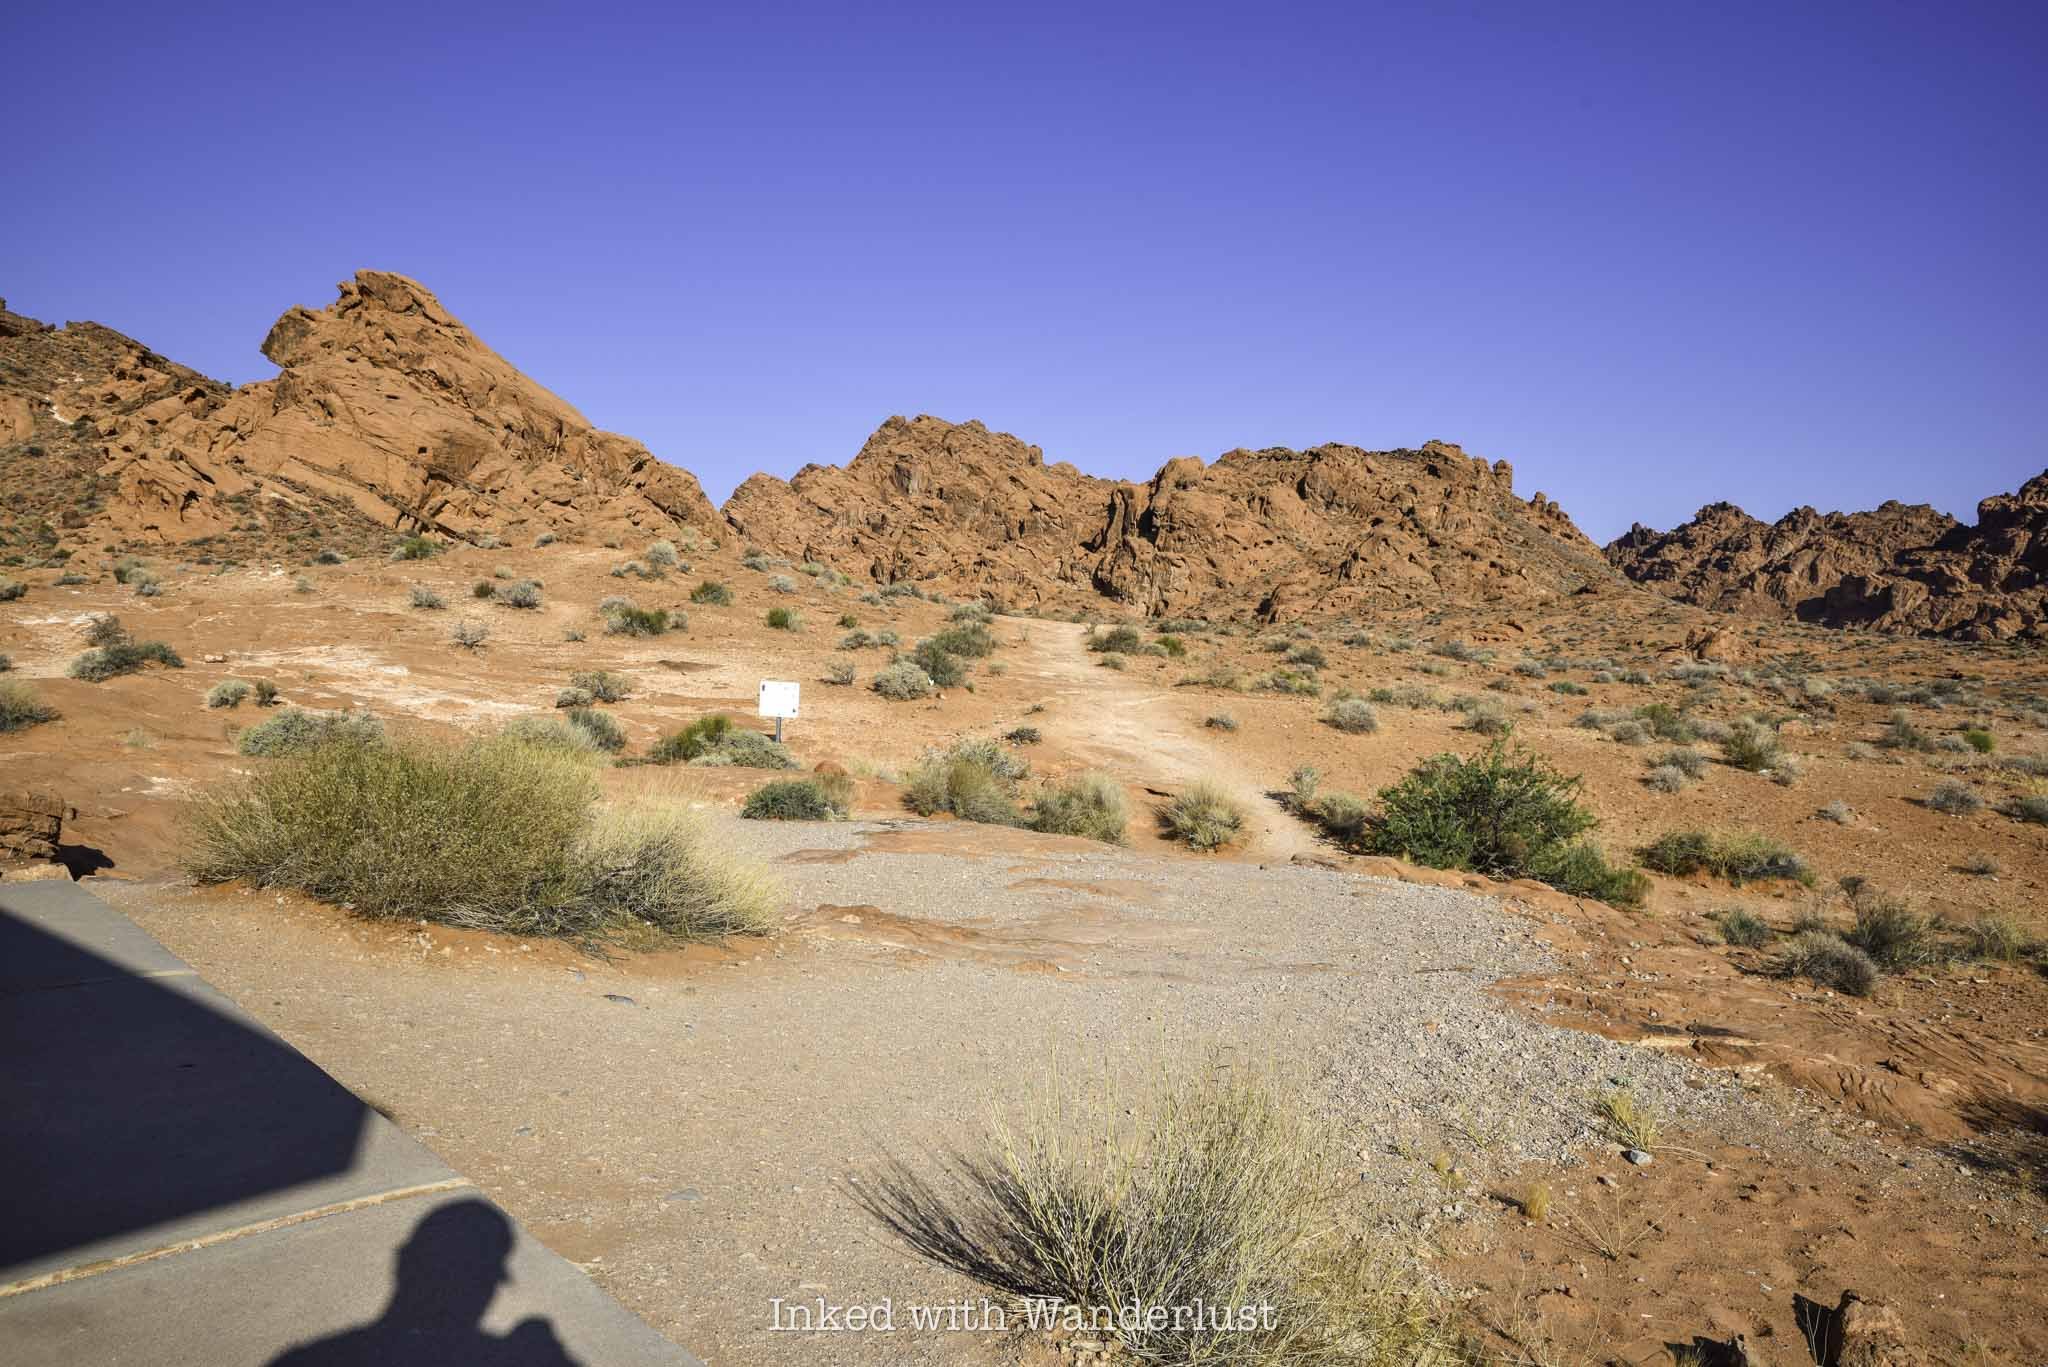
If you come during the peak season, which is October through April, that’ll likely be different. On a particularly busy day, I can see this lot filling up early and quickly. So arrive as early as possible.
To find the trailhead, simply walk between the brick structure and the Valley of Fire photo opp sign on the right. You’ll find the trail behind the structure leading towards the sandstone ridge in the distance.
The Trail to Elephant Rock
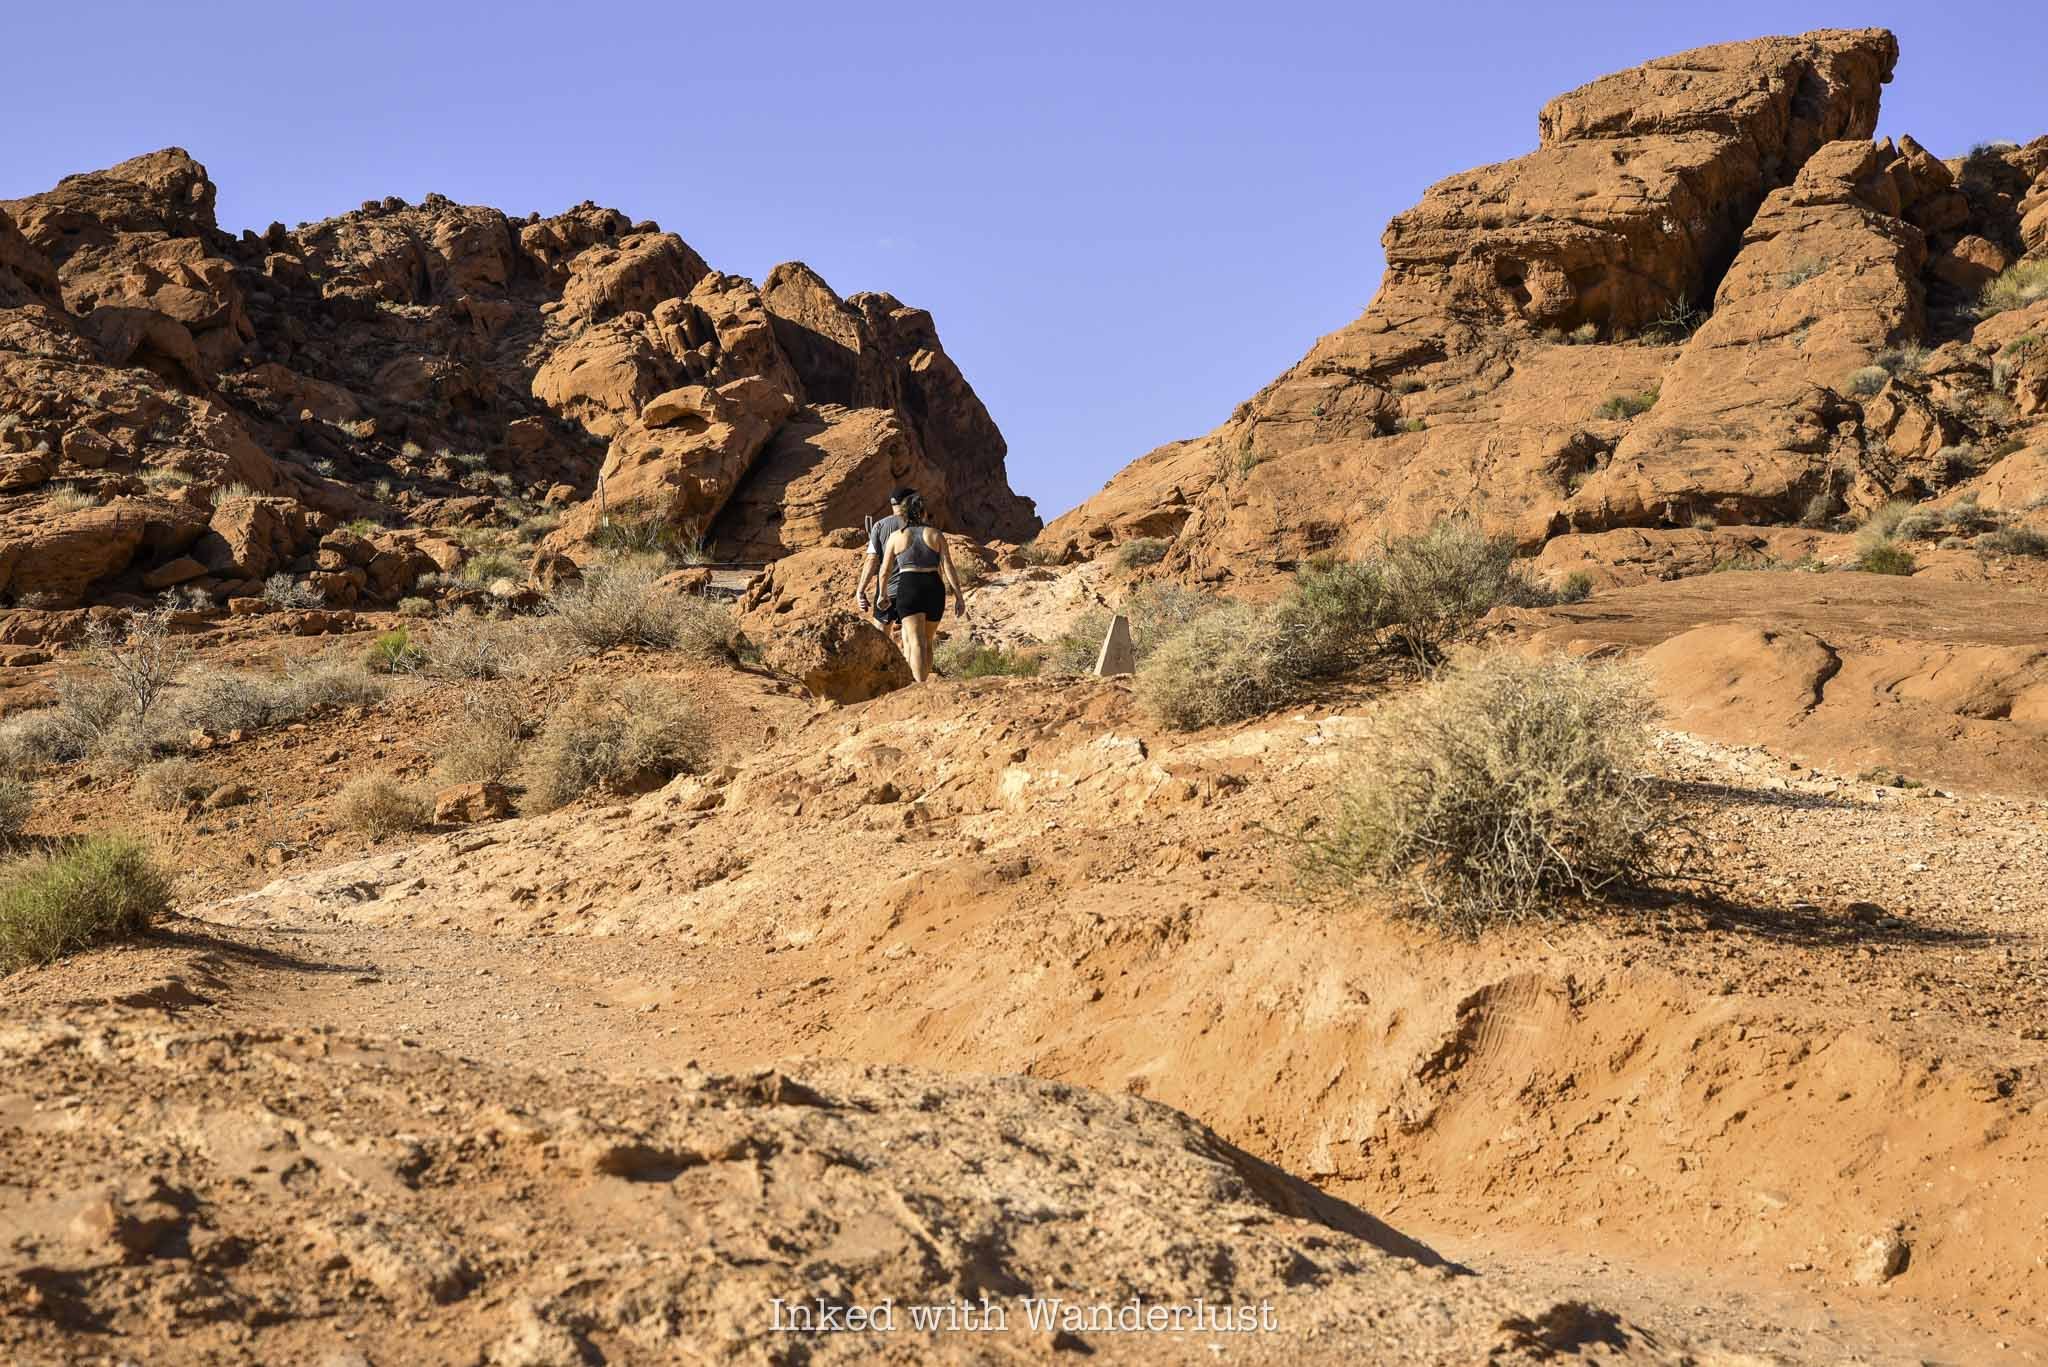
The trail is short and sweet with very little elevation gain. You’ll be walking uphill nearly the entire way but it’s nothing difficult. In fact, until you get close to Elephant Rock, it’s barely noticeable.
There’s only one trail junction. You will find it at around the halfway mark. Going right will place you on the 1.2-mile Arrowhead Trail. To keep to Elephant Rock, continue left.
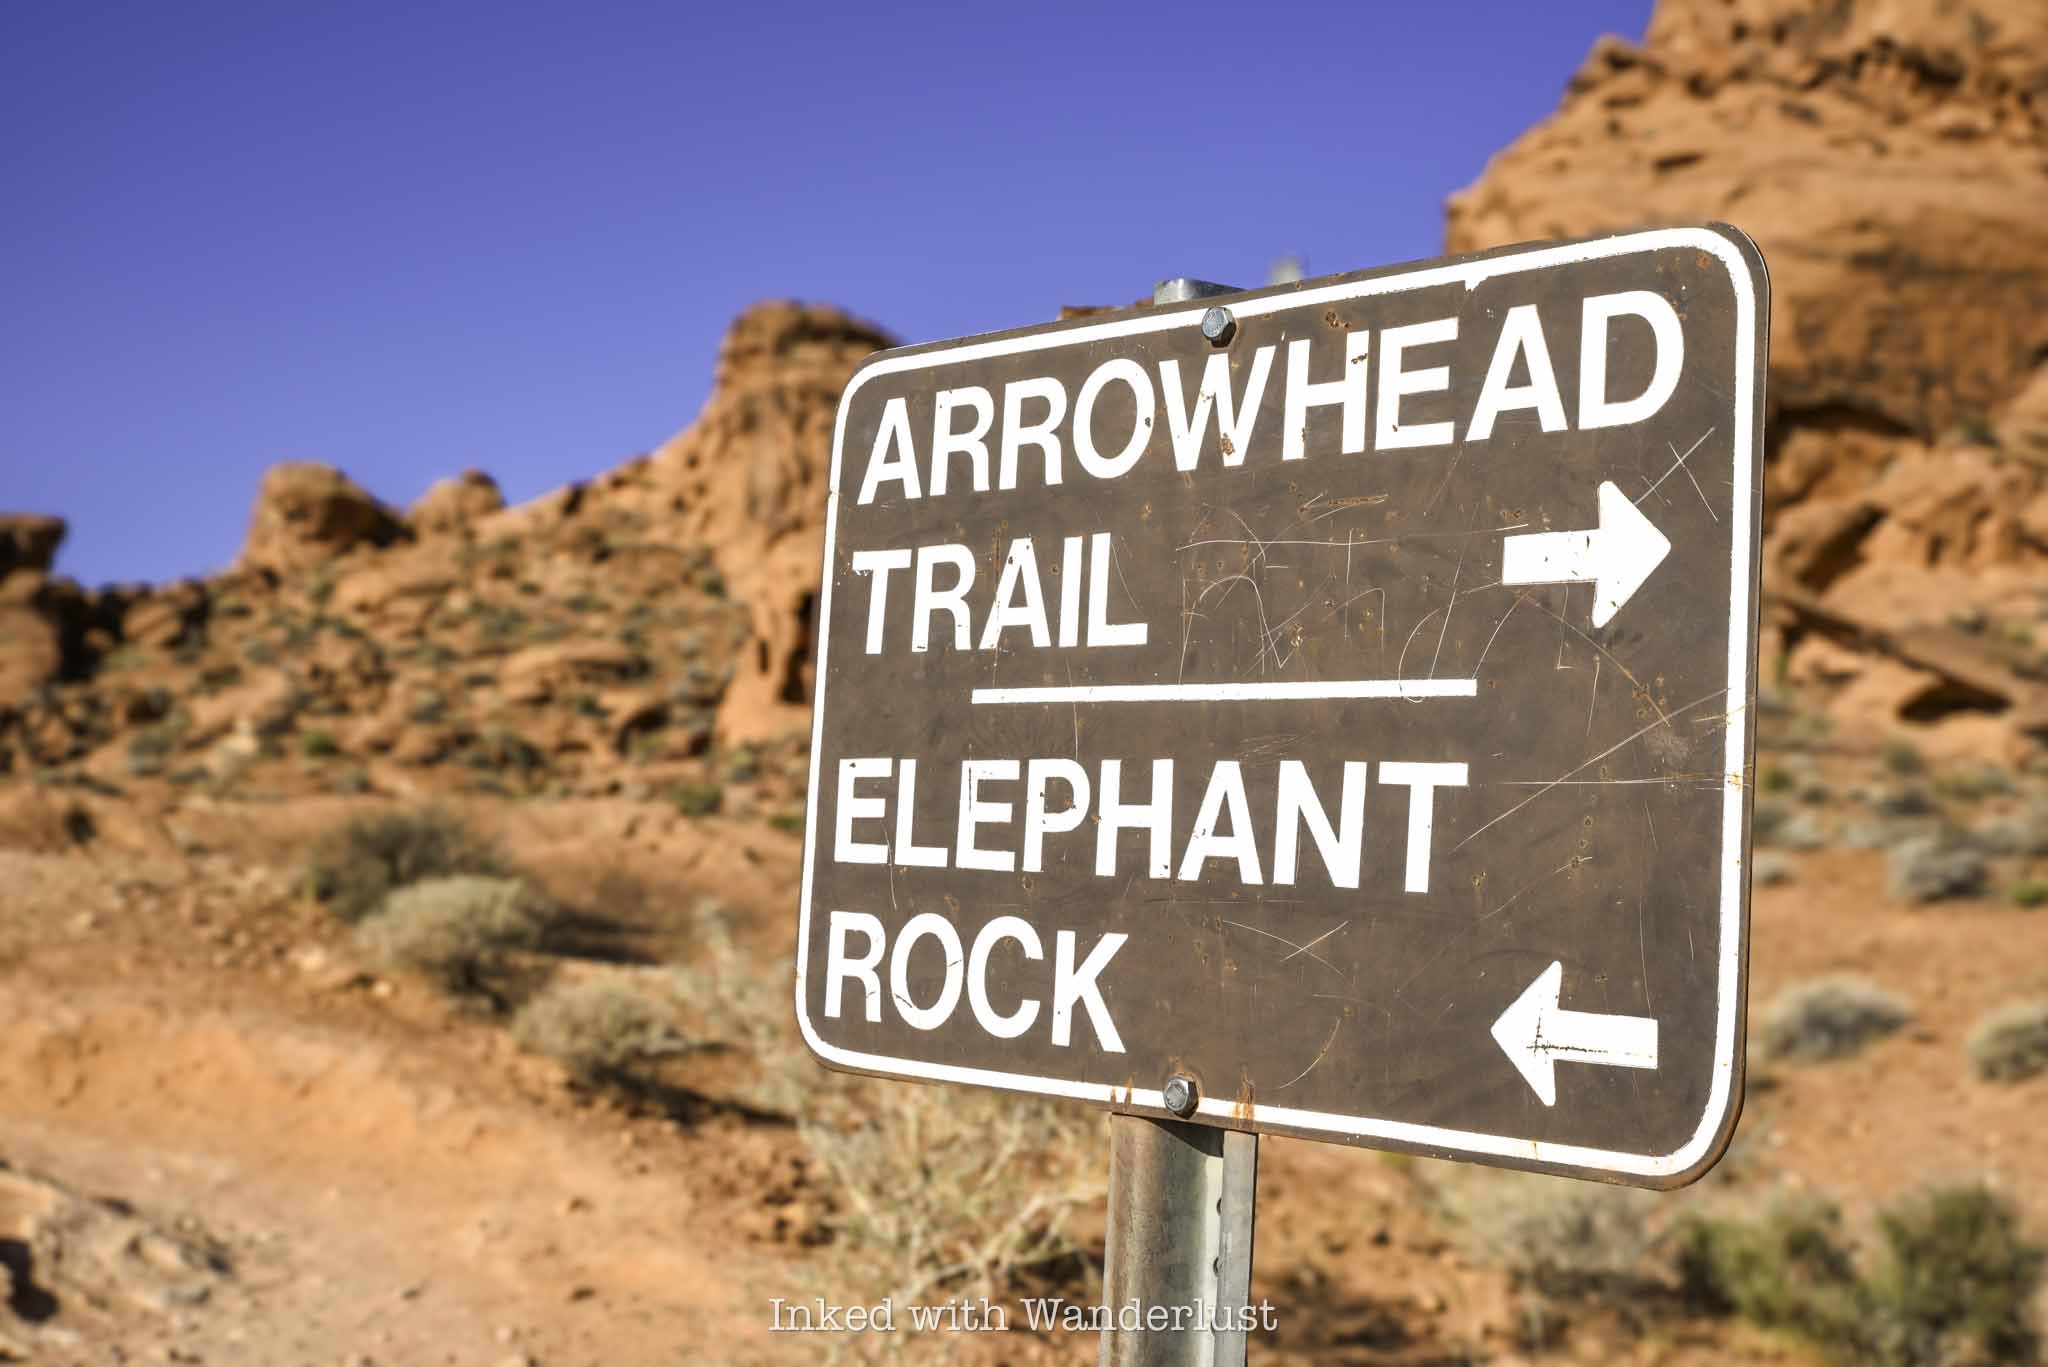
Shortly after the trail junction, you’ll notice the trail is leading you back towards the road. Once you are aligned with the road, you’ve reached the end of the trail. Elephant Rock will be to the right of the road, looking up.
Do keep in mind to stay off the road. Visibility of this area from the vehicle perspective isn’t very good, as they’ll be coming up a hill towards you.
Elephant Rock

Elephant Rock is easily viewed from below, with no real reason to force yourself to climb up to it. There are a number of paths leading the way if you choose to do so, though.
There is a sign stating there’s no climbing allowed. I asked a park ranger for clarification and she advised that it is ok to go up to Elephant Rock, but NOT to actually climb on it, as it could cause irreversible damage.
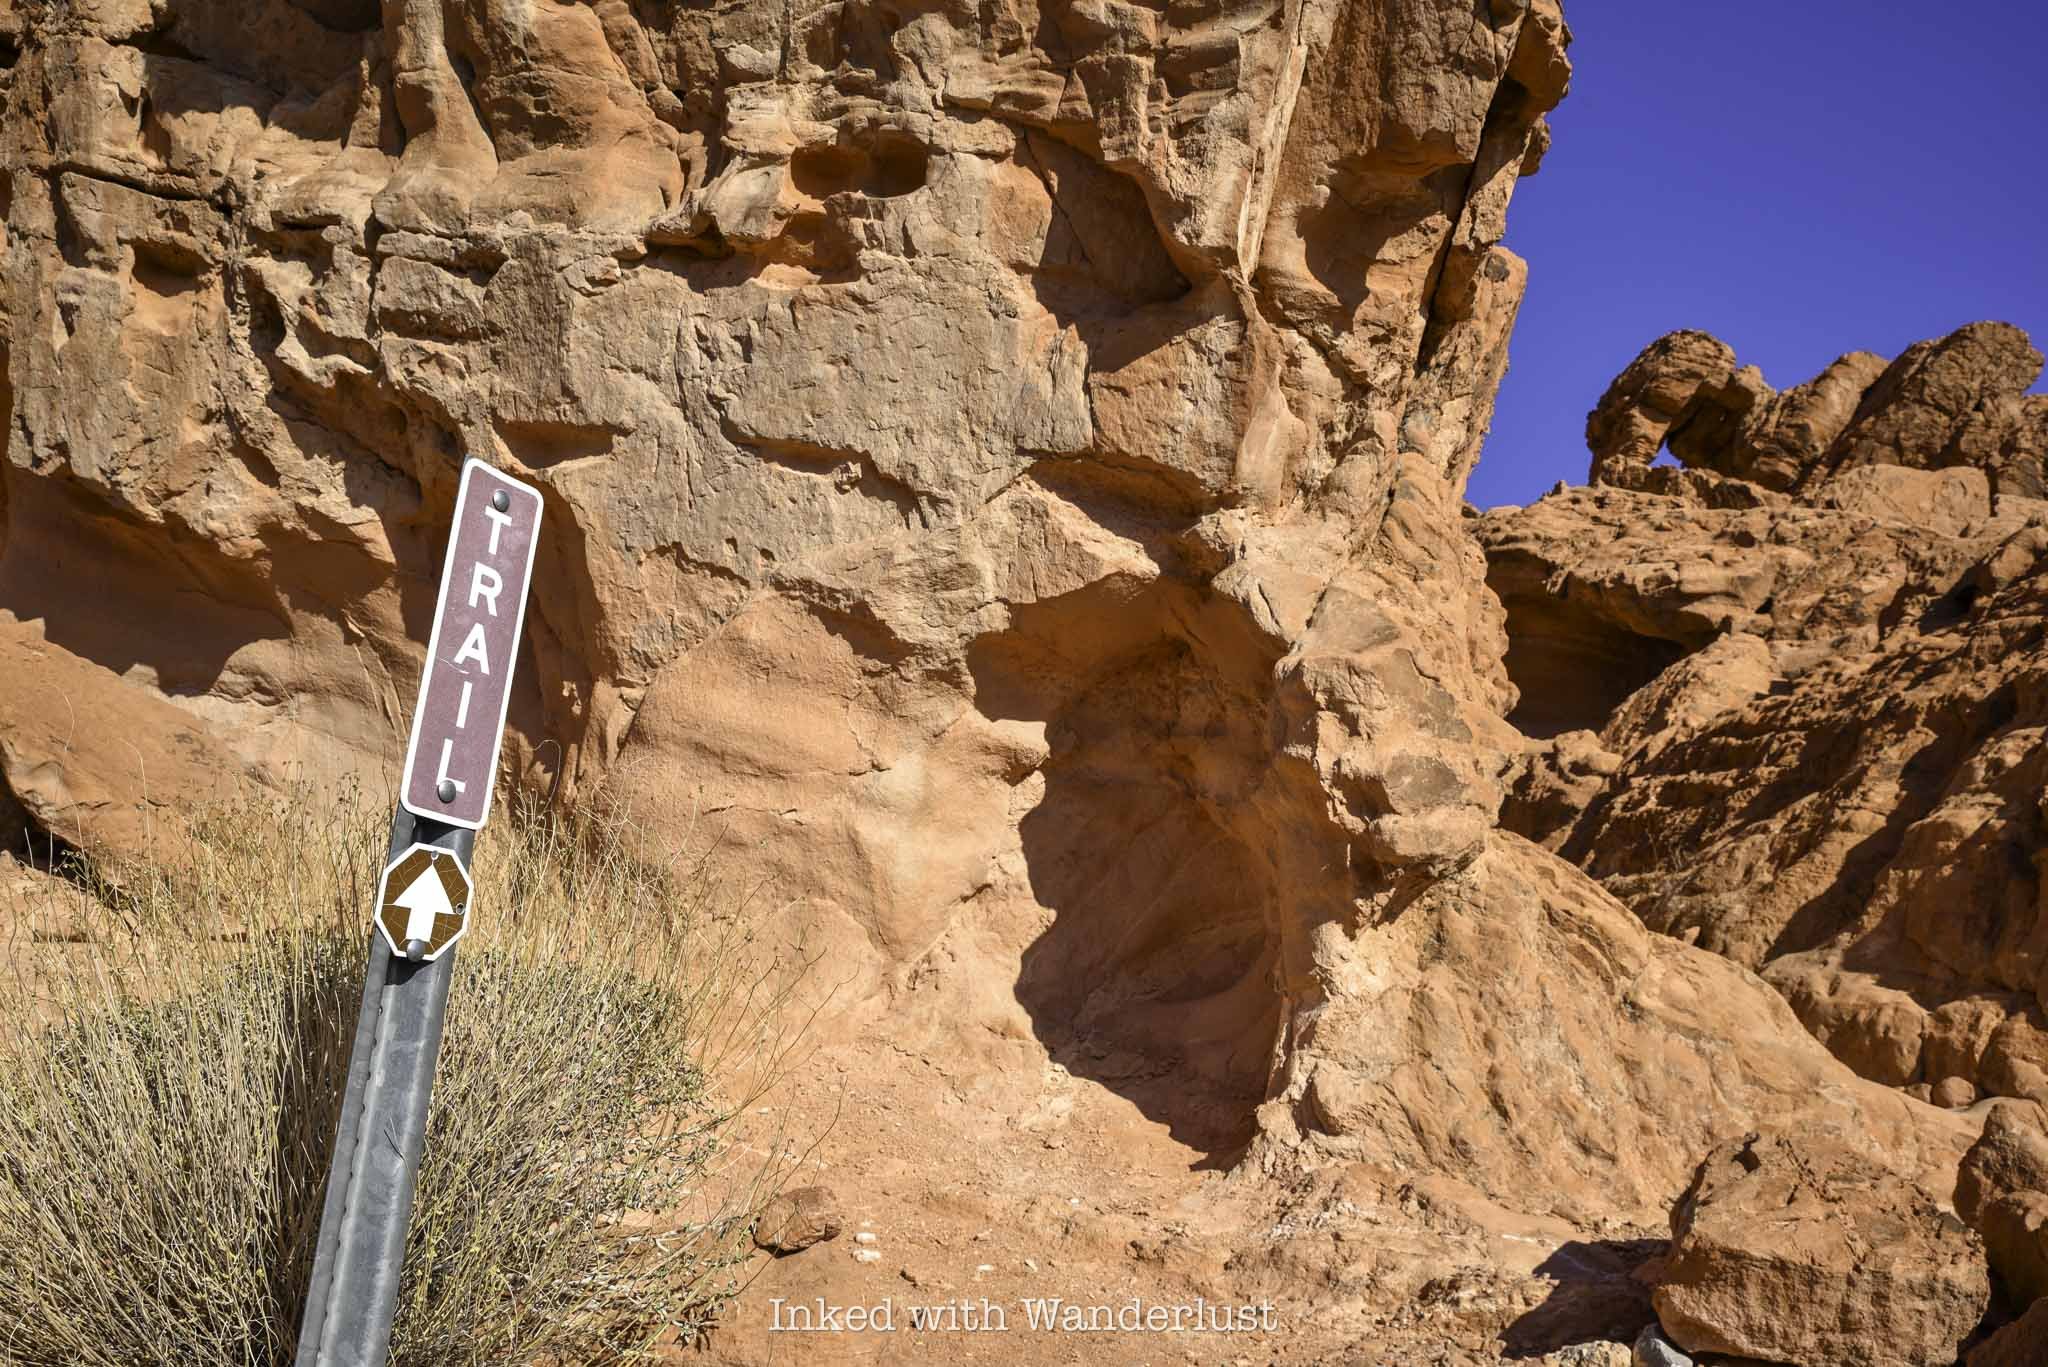
As stated above, there are several paths leading towards the formation, but the one I took (and appeared to be the easiest) was the one located just to the right of the sign pictured above.
It’s a quick jaunt to the top of Elephant Rock. Once you’re up there, you will have views of the mountains and valley in the distance.

Seeing Elephant Rock from this angle made the “Elephant” formation appear more clearly to me. So if you’re having a difficult time picturing it from below, try it from up here.
When you’re done, simply head back the same way you came in on the trail. Please do not walk along the road as park rangers will cite you if you’re caught.
From here, I recommend making your way to one of the most historic locations in the park, Atlatl Rock. You can read my post about it here.

Enjoy Relative Seclusion at Hidden Beach Near Incline Village
Welcome to our ultimate guide on exploring a hidden treasure on Lake Tahoe's eastern shore - Hidden Beach…
2 minute read | may contain affiliate links
Welcome to our ultimate guide on exploring a hidden treasure on Lake Tahoe's eastern shore - Hidden Beach!
Nestled amidst the captivating beauty of the Sierra Nevada mountains, this secluded gem offers an enchanting escape for nature enthusiasts and beach-goers alike.
In this article, we'll take you on a virtual journey to this picturesque oasis, unveiling its breathtaking views, turquoise waters and the myriad of experiences it has to offer.
Get ready to embark on an unforgettable lakeside adventure that will leave you in awe. Let's dive in and discover the hidden paradise of Hidden Beach.
Disclosure: This post contains affiliate links. If you click through and make a purchase, I may earn a commission at no additional cost to you. Thank you for supporting us!
Getting To and Parking For Hidden Beach

Hidden Beach doesn’t get nearly as crowded as those nearby, like Sand Harbor and Crystal Bay. A big reason for that is you can’t drive up to it.
To access it, you’ll need to park at the Tunnel Creek or Bullwheel lots at the north end of highway 28 near the Tunnel Creek Cafe.

Parking fees are associated with these lots and are hourly (the rates for 2023 are pictured above). If the lots are full, you can get there with the East Shore Express Shuttle.

To reach Hidden Beach, you’ll need to hike for about a mile on the Tahoe East Shore Trail.
The trail is paved and the grade never exceeds 8%, making it easy to push a stroller or pull a wagon (to haul all of your lake day essentials with).

At first, the trail runs along the opposite side of the highway, but will eventually take you to the shore side via a tunnel.


Beautiful murals, each depicting different perspectives of Lake Tahoe, adorn the walls and ceiling of the tunnel.

When you get to the opposite end of the tunnel, you’ll want to bear left to get to Hidden Beach. Shortly thereafter, you’ll see the shore access sign on your right.
Hidden Beach

Hidden Beach is reached via the shoreline access trail (pictured above). The trail is short, taking less than a minute to reach the sand.
The beach is roughly 750 feet long and features rocky alcoves and an abundance of granite boulders dotting the shore.

As stated above, Hidden Beach doesn’t get all that crowded. People mostly pop-in and pop-out while hiking the Tahoe East Shore Trail.
Hidden Beach may not be as popular or even as scenic as nearly Sand Harbor, but the relative seclusion you’ll enjoy more than makes up for it.
If you have an inflatable SUP (paddle board) or kayak, you’re allowed to use them here. You can also bring your dogs as long as they’re leashed.

I hope you’ll consider spending a beach day at Hidden Beach. It’s one of the most tranquil Lake Tahoe beaches I’ve ever been to and I have no doubt you'd enjoy it too.
If you’re interested, check out a few more of my posts about nearby attractions:
Also, if you’re considering a trip to Lake Tahoe (or any lake/beach for that matter) consider reading my list of 25 lake day essentials:
Please support this website by subscribing to the newsletter below.
Thank you for reading.

How to Hike To Skunk Harbor In Lake Tahoe
You may be asking why I’m making a post about Lake Tahoe and putting it in the “Nevada” section. Many people don’t actually…
2 minute read | contains affiliate links
Welcome to my comprehensive guide on visiting Skunk Harbor, a hidden(ish) gem nestled along the picturesque shoreline of Lake Tahoe.
Skunk Harbor offers a unique combination of breathtaking scenery and a tranquil hiking trail that’ll leave you in awe of its natural splendor.
Located on the eastern side of Lake Tahoe, Skunk Harbor is a welcomed break from the hectic, overly touristy southern portion of Tahoe.
As you arrive, you’ll be greeted by a sense of serenity, surrounded by towering pine trees, crystal-clear turquoise water and panoramic views of the Sierra Nevada mountains.
In this guide, I’ll cover many topics such as parking, the hiking trail, the cove itself and what to expect along the way. Let’s get into it!

Exciting news for our readers!
We’re excited to introduce the all-new "Inked with Wanderlust" online store!
We're thrilled to bring you a fantastic collection of wanderlust-inspired merchandise. Celebrate your love for travel and exploration with our stylish apparel and accessories, designed to ignite your sense of adventure.
Discover a range of unique designs that capture the spirit of wanderlust, from cozy hiking-themed t-shirts to charming accessories that make your wanderlust spirit soar!
Visit our online store today and start your journey of style and adventure. Happy exploring!
Trail Stats
Location: Lake Tahoe (east shore)
Fee: None
Permit: None
Open: All year, but difficult to access in winter
For: Hikers
Restroom: None
Parking: Two small pull-out style lots along the highway
EV Stations: None
Difficulty: Easy going in, moderate going out
Popularity: Medium to high
Mileage: 2.8-miles, RT
Time: 2-3 hours
Elevation Gain: 567 feet
Condition: Maintained, easy to follow
Features: A cove with clear waters and a historic cabin
Pets: Allowed, but must be leashed
Drones: Allowed, per the B4UFLY App
Hazards: Hike out is steep and sun exposed
Our Visit(s): 2016, 2017, 2019 and July 2023
Skunk Harbor Parking
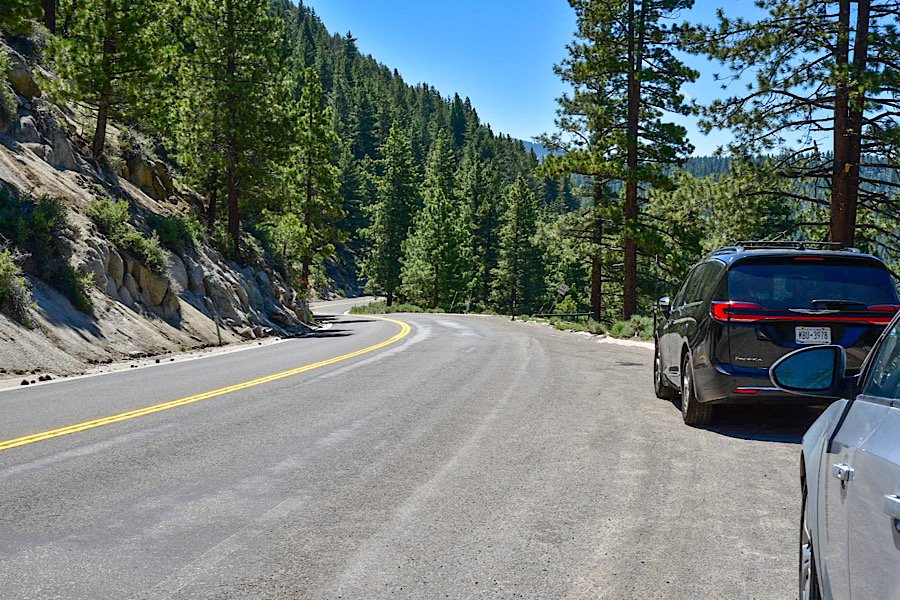
Lake Tahoe in general is notorious for its parking issues, but the eastern shoreline along Highway 28 is in a league all its own.
There are two small, pull-out style lots along the side of Highway 28 specifically for Skunk Harbor. However, they’re difficult to spot as they’re not signed.
Your best bet is to utilize a GPS device to locate them. That way you’ll know when they’re coming up.

If you’re coming from Carson City or the south shore, keep an eye out for the gate pictured above. Just past that gate is the first lot with a second, slightly larger one further up.
If you’re coming from Incline Village, you’ll know you’ve gone too far if you’ve reached Spooner Lake. Turn around a try again.
There is no parking fee (yet) but as of June 2023 and for the foreseeable future, construction on Highway 28 could damper, or even block your ability to park here.
There is ongoing efforts to improve the parking situation along this stretch of the lake. I’d wager that once they're done, there will be parking fees implemented.
The Trail To Skunk Harbor

If you parked in the lot near the gate, the trail begins past the gate along a forest service road. If you parked in the second one, the trail is a semi-steep descent on a dirt path that’ll soon intersect with the main trail.
For a short time the trail is gravel but soon turns to dirt. It’s much wider than your standard hiking trail, though. So it’s perfect for groups and pets.
Before the trail descends towards Skunk Harbor, you’ll be presented with a fork in the trail. Take a slight left to continue on the trail proper (don’t take the sharp left down the forest road).
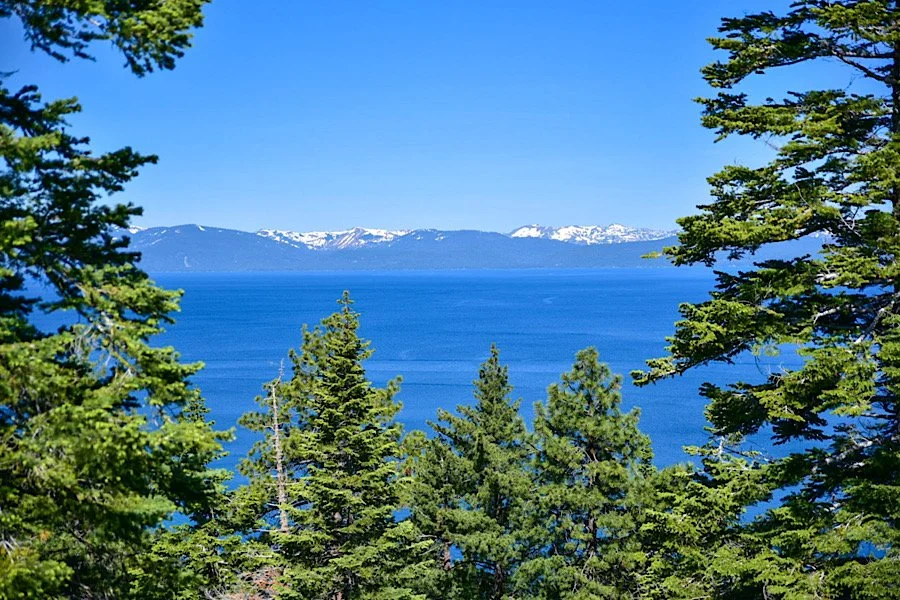
Shortly after this fork, you’ll walk between a couple of boulder stacks. Here, you’ll get a commanding view of Lake Tahoe and the mountains. Past here, you’ll begin your descent.
You’ll hit a few switchbacks before reaching the bottom. The initial half loop to the first switchback is steep, but they become more level after that.
As you approach the cove, you’ll see a stone stairwell with a trail marker indicating the correct path. You’ll know you’re in the right spot if you see a small wooden bridge ahead of you.
Skunk Harbor

If you get an early start, you’ll likely have Skunk Harbor largely to yourself. If you come later in the day, though, the cove and its beach will likely be inundated with anchored boats and beach goers.
Early in the season, there won’t be much a beach but as snowmelt eases, it’ll become more exposed. The boulders near the mouth will be accessible as well.

SEE MY TOP RECOMMENDATION FOR AN INFLATABLE STAND-UP PADDLE BOARD!
To the right of where you came in is a old stone cabin that was built in the early 1920’s by a wealthy family who purchased Skunk Harbor.
The interior of the cabin isn’t accessible but can be viewed through the grating in the window. You can explore all angles of the exterior, though.

Behind the cabin is a dirt path that’ll lead you to an overlook of Skunk Harbor. There are a lot of downed trees and boulders here, so you’ll need to navigate those.

From here, you’re able to better see the remains of the cabin’s boating dock submerged in the water.
CHECK OUT THIS GREAT CAMERA TO DOCUMENT YOUR OWN TRAVELS WITH!
I hope you’ll consider hiking to (or boating into) Skunk Harbor during your visit to Lake Tahoe. Get there early and you’re guaranteed to spend a serene morning in nature.
Disclosure: This post contains affiliate links. If you click through and make a purchase, I may earn a commission at no additional cost to you. Thank you for supporting us!
Please support this website by subscribing to my bi-weekly newsletter below.
Thank you for reading.

Hike the Tahoe East Shore Trail to Sand Harbor
Nestled amidst the picturesque Sierra Nevada Mountains, Lake Tahoe is a natural gem that beckons adventurers with its awe-inspiring…
Disclosure: This post contains affiliate links. If you make a purchase through these links, I may earn a small commission at no additional cost to you. I only recommend products or services that I believe will add value to my readers.
Nestled amidst the picturesque Sierra Nevada Mountains, Lake Tahoe is a natural gem that beckons adventurers with its awe-inspiring beauty. Known for its crystal-clear waters and stunning alpine landscapes, this iconic destination offers an abundance of outdoor activities for nature enthusiasts.
Among the many trails that wind their way through this pristine wilderness, the Tahoe East Shore Trail stands out as an enchanting path that leads hikers on a captivating journey to Sand Harbor State Park.
Stretching along the eastern shoreline of Lake Tahoe, the East Shore Trail is a remarkable testament to the region's commitment to preserving its natural wonders.
Spanning approximately three miles, this meticulously crafted trail offers an unparalleled immersiveness into the splendor of the surrounding environment.
The pinnacle of this remarkable journey lies at the destination—Sand Harbor State Park. This iconic gem is renowned for its pristine sandy beaches, hidden coves, and dramatic rock formations that emerge from the lake's depths.
Whether you're a solo adventurer or a family looking to create memories, hiking the Tahoe East Shore Trail to Sand Harbor State Park promises an escape from the day-to-day normalities.
In this guide, I’ll cover many must-know topics such as where to find parking, the length of the trail, which offshoot trails are the best and more!


Trail Stats
Location: Incline Village, NV
Fee: None for the trail, but there are variable parking fees and entry fees to Sand Harbor
Permit: None
Open: All year, but can be icy in winter
Restroom: At the Tunnel Creek parking lot, multiple throughout the trail and multiple at Sand Habor
Parking: Large(ish) paved lot at the Tunnel Creek parking lot and a huge lot at Sand Harbor
EV Stations: None
Difficulty: Easy
Popularity: High
Mileage: 2.5 miles (one-way) but can add more with the many offshoot trails
Time: 2-3 hours
Condition: Meticulously maintained
Features: The eastern shoreline, many coves/beaches and Sand Harbor State Park
Pets: Dog friendly, but must be leashed
Drones: No signs stating you can’t. The Nevada side of the lake is fairly drone friendly. No drone use allowed in Sand Harbor, though
Our Visit(s): June 2023
Trailhead, Parking & Fees

Construction on the Tahoe East Shore Trail took decades to complete, but officials knew right away how popular it would become. So ample parking was a major focus of the project.
On the north end of the trail are the Tunnel Creek and Bullwheel parking lots. They’re right off highway 28 and are adjacent to the Tunnel Creek Cafe and Monkey Rock trailhead.
In peak season, these lots tend to fill quickly. I arrived at 9:30 am and found only a few open spaces. So plan for an early arrival.
If the lots are full, you can drive to and park at the old Incline Elementary School and take the East Shore Express shuttle in. Fares are $3 per person (half that for seniors and those with disabilities).
Also during peak season, you’ll need to pay to park. Fees are charged per hour and depend on timeframe, day, month, etc. For reference, the photo below shows the fees as of June 2023.

You can pay via one of the digital pay stations or by texting the phone number in the picture below. If you intend to use the pay station, these are the steps:
Enter your license plate number
Insert your card (you’ll be charged an initial one-hour fee)
Select the amount of hours you want (go with more than what you’ll think you’ll need)
You’ll be charged upfront for the amount of hours selected and be given a receipt
If you’re not feeling up to hiking the trail, there’s a vendor called Flume Trail Bikes located adjacent to the parking lot where you can rent bicycles from. Additionally, if you’re feeling hungry, the Tunnel Creek Cafe is also right next to the parking lot.
Also at the trailhead is your first opportunity at using a restroom. It’s a port-o-potty set up and wasn’t maintained all that well, so come prepared.
SEE MY TOP RECOMMENDATION FOR THIS COMMON PROBLEM! (you’ll thank me later)
You’ll find the official start of the trail just past the informational display. I highly suggest giving it a read before heading out. It details the history of the trail, its construction and future plans.
The Tahoe East Shore Trail

You’ll start out on the opposite side of highway 28 (or the, “Mountain Side”). This section of the trail is the only one where there’s some elevation change.
When you get up the hill, you’ll be treated to epic views of the north side of the lake. This section is still wheelchair and stroller friendly as the grade never exceedes 8%.
This section is only a half mile or so, but the views are outstanding. It’s also the only section that has some shade provided by the tall pine trees.
As you reach the peak, you can look out ahead of you and get a glimpse of Sand Harbor State Park in the distance. From here, you’ll dip down and realign with the highway.


The second half of the trail continues along the shoreline on the other side. You won’t need to cross the highway, though, as the trail was built to go underneath.
The interior walls of the tunnel are covered in beautiful murals, each side depicting Lake Tahoe and its surrounding mountains.
Coming out of the tunnel you’ll arrive to a clearing where there’s more informational signage, views of the lake and another restroom.
If you’ll be taking the above mentioned shuttle to the trail, this is where they’ll drop you off. So you’ll effectively save yourself a half mile by doing so.

From the tunnel, you’re about 1.5 miles from Sand Harbor. To continue along the trail, go left coming out of the tunnel. This is also where you’ll come across your first offshoot trail.
There are many offshoots leading to a variety of beaches and coves that were once not as easily accessible as they are now. Each one only takes a minute or less to reach.
The first of which is the ever popular Hidden Beach. It’s small in comparison at just 750 feet, but it sees far less people than nearby Sand Harbor.
It’s also dog friendly and aside from parking, there are no fees associated with it. I highly recommend spending some time here.

Continue further down the trail and arrive to the next offshoot; Balancing Rock. There are two entry/exit points here so there’s no need to go back up the same way you came in.
The main feature here is the flat(ish) granite boulder balancing on a smaller pile of granite boulders beneath it in the water. It’s nothing spectacular but still worth a look.

Past Balancing Rock, the next few offshoots I either skipped or simply viewed from the trail (there was a storm coming in that afternoon and I wanted to beat it). Those offshoots include:
Granite Cove
Artist’s Point
Mountain Vista
Dipper Point
At Artist’s Point is another opportunity at using a restroom. This one is shared between trail users and people traveling on highway 28. From Artist’s Point, you’re about a half mile from Sand Harbor.
There are two more offshoots before you arrive to Sand Harbor, both of which I highly recommend visiting as I feel they both rival Sand Harbor in terms of beauty. They are Sunset Cove and Emerald Cove. Both are similar in that they’re dotted with granite boulder shorelines, have crystal clear turquoise water and require a hike down a quick trail.

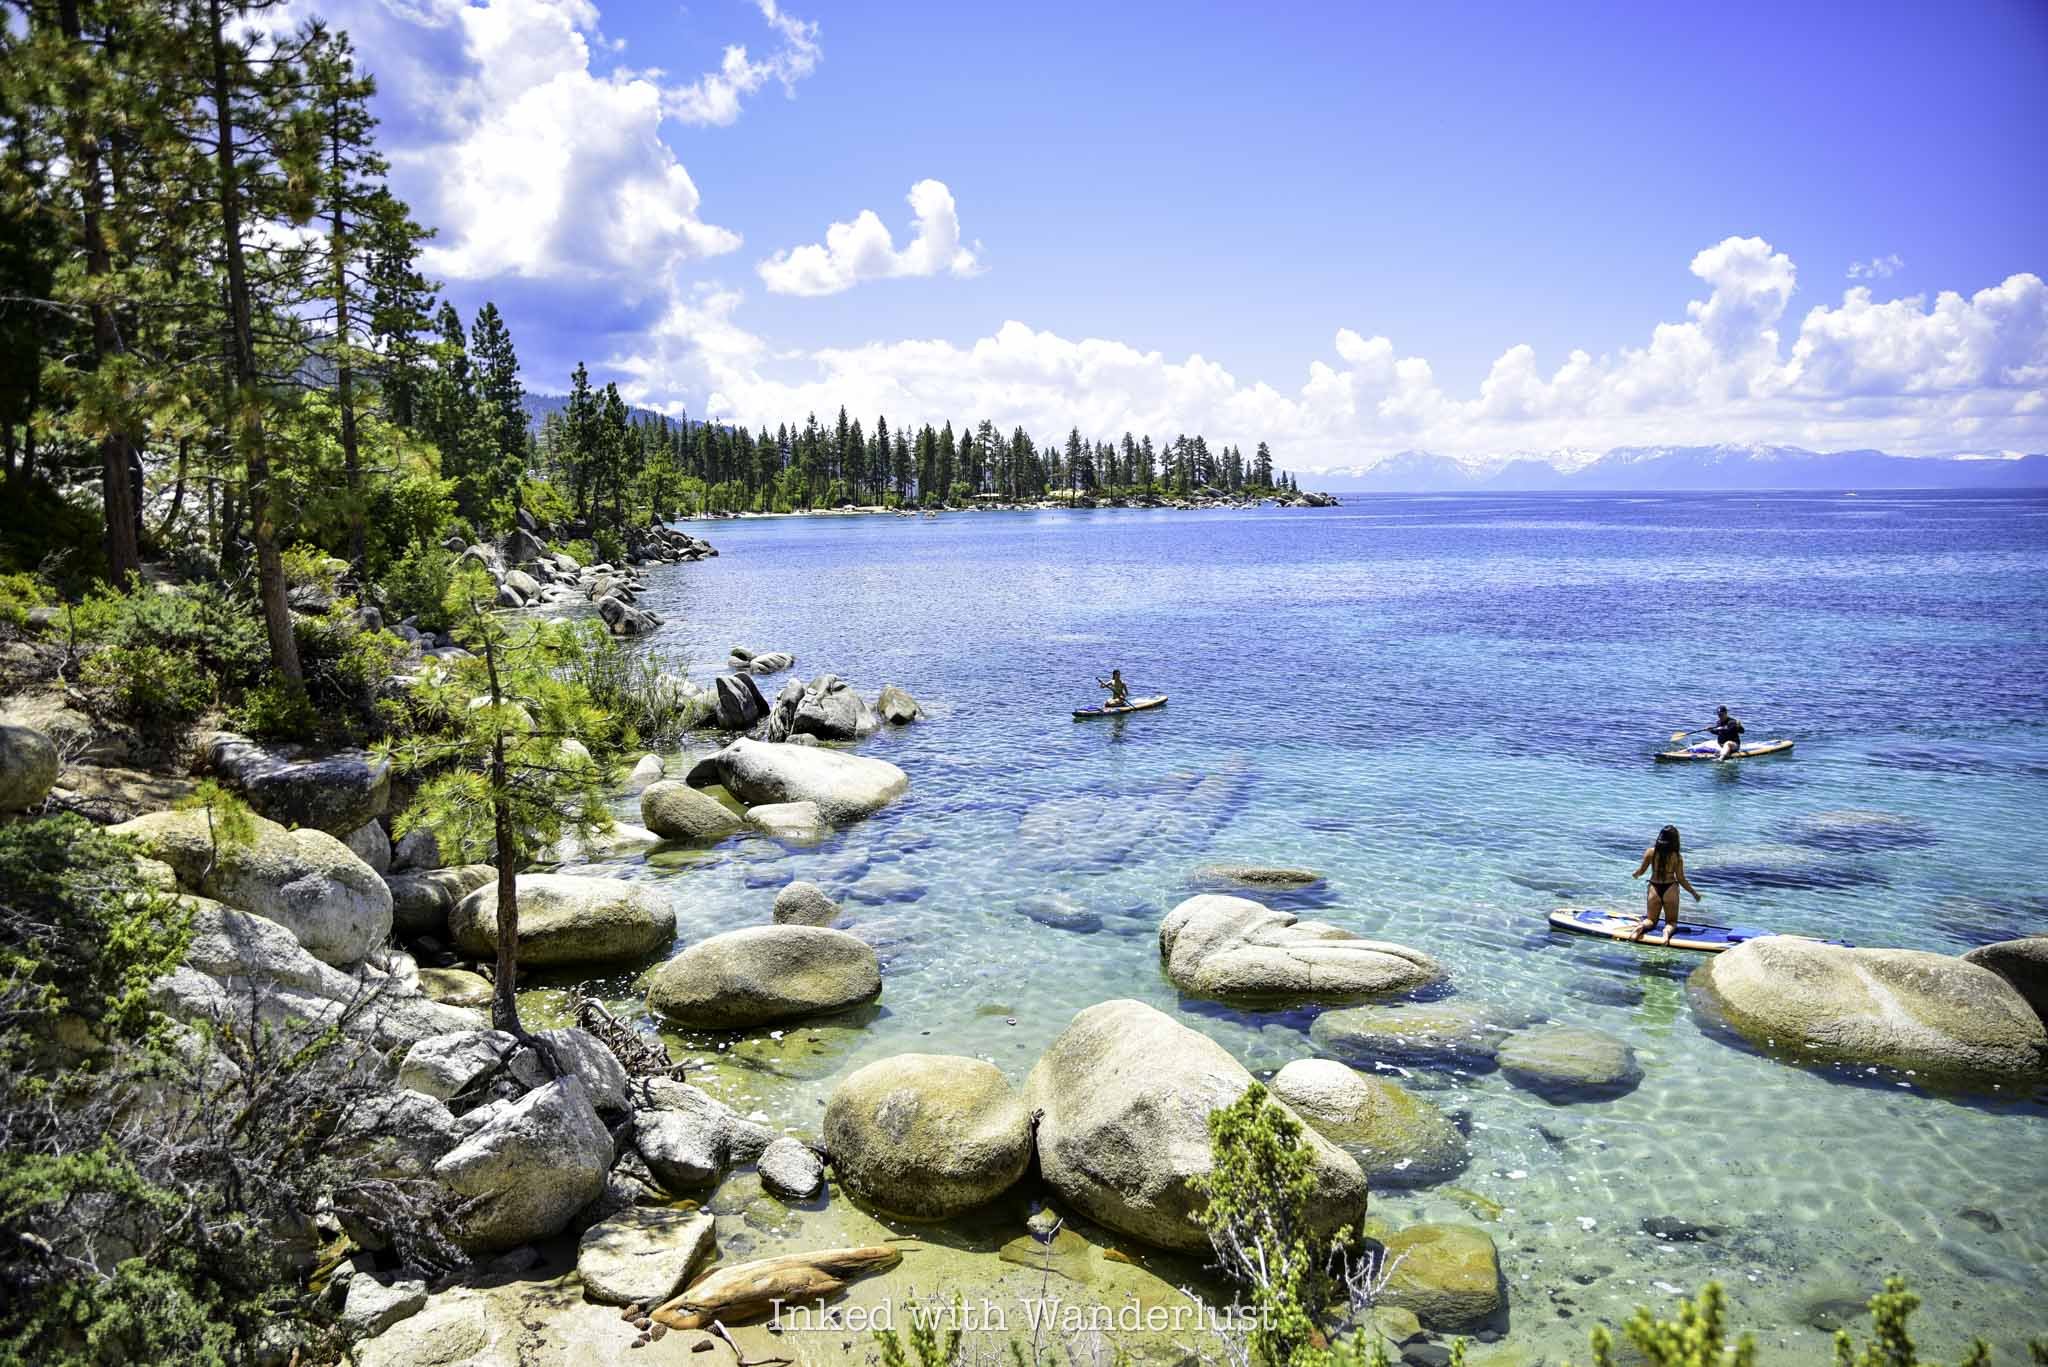
CHECK OUT THIS HIGHLY RATED INFLATABLE STAND UP PADDLE BOARD ON AMAZON!
If you must choose, I recommend Sunset Cove as it’s much easier to access and has an actual beach, whereas Emerald Cove was lined with boulders.
From here, continue down the trail for another 2/10’s of a mile before getting your first glimpse of the mega popular and beautiful Sand Harbor State Park. As you approach the entrance to Sand Harbor, you’ll start seeing signs stating as such and the fees associated with entering.
To walk or bike into Sand Harbor you’ll need to pay the $2 per person fee. You can pay cash or utilize the digital pay station near the ranger shack. If you’re paying with a card, be sure to select “other” rather than the “day-use” option to avoid over paying. The ranger helped me to avoid that mistake.

Once in the park, you can stay for as long as you like. Your ticket is good until one hour past sunset. There are many beaches and coves to explore.
Sand Harbor has many restrooms available and an on-site restaurant. The larger beach is located at the far end of the park from where you’ll enter.
From here, simply head back in the same way you came. If you like, you can utilize the above mentioned shuttle to take you most of the way back. You’ll still need to walk the final half mile, though.

Your Thoughts…
Since this trail is popular and follows highway 28, this isn’t a peaceful hike through the woods. On the flip side, this shoreline is perhaps the most beautiful in all of Tahoe and is a must-see for any visitor.
Up until Sand Harbor, the entire trail is wheelchair accessible and is pet, stroller, bicycle and family friendly.
Does this sound like something you and your family would enjoy? Are you planning a trip to Tahoe soon? Let us know in the comments and in the meantime, check out our other Tahoe related posts below!

Cave Rock Trail: A Short Hike To An Epic View Of Lake Tahoe
Located on the Nevada side of the lake, the Cave Rock trail may seem uneventful at first, but the mind-blowing view…
3 minute read | contains affiliate links
Located on the Nevada side of the lake, the Cave Rock trail may seem uneventful at first, but the mind-blowing view at the end will prove that assumption wrong.
This trail is great for hikers, families and everyone in between. If you happen to be driving through on a trip, it’s an excellent way to stretch your legs for an hour or so.
Note that this post is about the actual trail to the top of Cave Rock and not the state park on the other side of the highway. Those are two different things.
In this post, we’ll cover topics such as parking, how to find the trailhead, what to expect along the trail and more. Let’s get into it!
Here’s some great hiking products we recommend…

Quick Stats
Location: Stateline, NV (Tahoe)
Fee: None
Permit: None
Open: Year round
For: Everyone
Restroom: None
Parking: Tiny lot with enough room for 4-5 vehicles
EV Stations: None
Difficulty: Easy (though there’s some scrambling involved)
Popularity: Medium to high
Mileage: Less than a mile, roundtrip
Time: One hour
Elevation Gain: 137-feet
Condition: Maintained (not signed)
Features: Cave Rock & view of Lake Tahoe
Pets: Allowed on leash
Drones*: Allowed on the trail and Cave Rock itself (not within the state park boundaries, though)
Hazards: You’ll need to scramble up Cave Rock to get to the top. It’s nothing too difficult, though.
Our Visit(s): 2016 & 2022
*We refer to the app, “B4UFLY”, to help determine if we’re legally allowed to launch our drone from a particular location. We suggest you do the same to ensure you’re flying responsibly.
Cave Rock Trailhead & Parking

When looking for the parking lot and trailhead for the Cave Rock trail, many people mistakingly go to Cave Rock State Park along the shore of the lake.
Unfortunately, there is no access to the trail from there. That area is for swimming, kayaking and other types of recreating.
For the trail to the top of Cave Rock, you’ll need to drive up Cave Rock road, just off the highway. You’ll see a, “Cave Rock Estates”, sign indicating the correct road.
About a quarter-of-a-mile up the road (as it elbows), you’ll see a tiny, pull-out style lot on the left side of the road. This is the parking lot for the trail (pictured above).

As you can see, there isn’t a whole lot of room. It’s a stretch to even call it a parking lot. There’s room for maybe four or five vehicles.
On top of that, there’s no parking allowed along the street (you could get towed). If there’s no space, you may have to circle around a couple times.
Due to this, we recommend getting here early. We arrived at around 8am and there was just one other couple at the rock.
Cave Rock Trail

The trail is a well maintained, compacted dirt path that’s less than a mile, out and back. You will be walking at an incline but it’s barely noticeable.
Along the way, you’ll be treated to periodic views of Cave Rock and the lake itself. There’s a few spots to get creative with your camera by using the trees to frame the rock.

As you get further up the trail, you’ll see a large set of boulders on the right side of the trail (pictured below).

Shortly after these boulders, you’ll come to an unsigned junction. Keep left (in the direction of Cave Rock) to remain on the trail.
Almost immediately after bearing left, the base of Cave Rock will come into view.


If you or someone in your group isn’t up for scrambling up the rock, you can get a similar view as the one up top.

For an even better view, though, you’ll want to get to the top. To begin, make your way around the rock-wall to begin your climb.
Scrambling Up Cave Rock

There’s no actual trail or path to the top. Take a minute to scan the boulders around you, use common sense and scramble your way up.
If we had to rate it, we’d both say it’s an easy, beginner level scramble. Or the lower end of moderate, at worst. It only took us about five minutes.


The views from the top are simply jaw-dropping, no matter which direction you look. Being up here for sunrise or sunset would be even more amazing.
There isn’t a lot of room up here. So if you’re here on a particular busy day, expect it to be a bit cramped. In our experiences, though, its never been an issue.
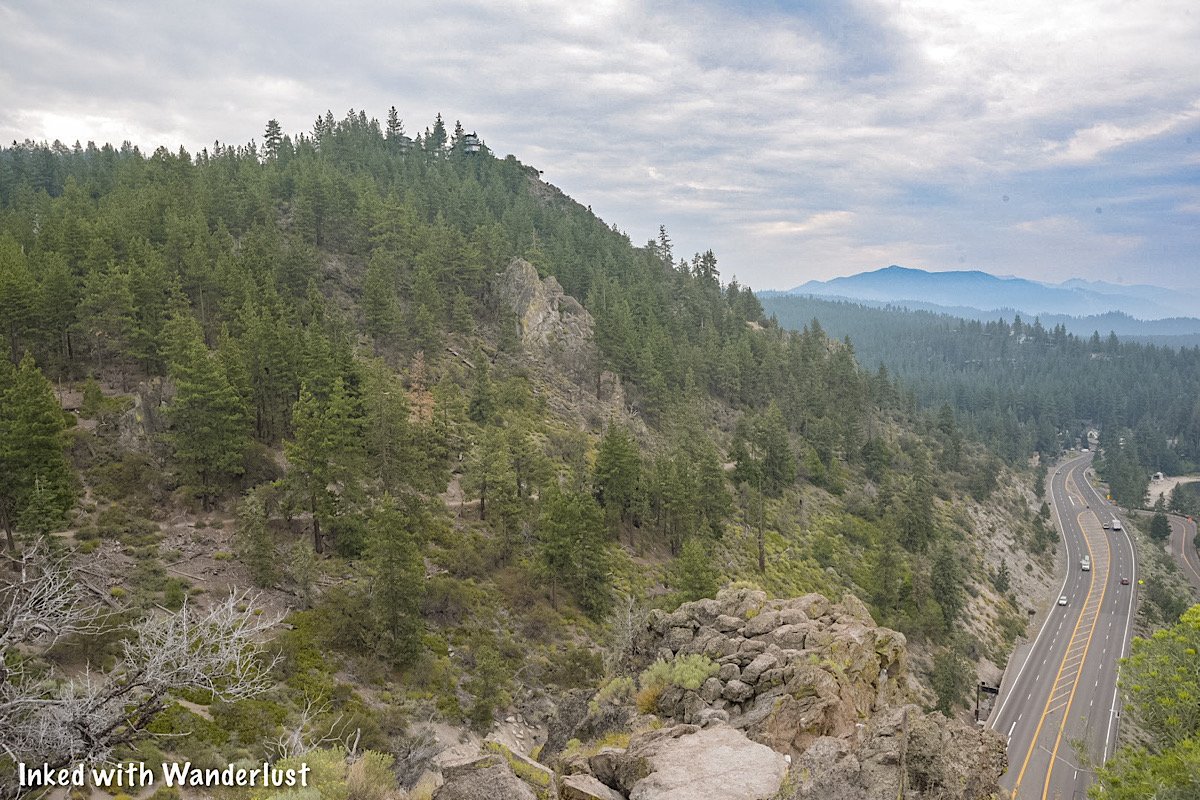

When you’re done taking in the views, safely scramble back down the rock and head back to your car. If you’re up for more adventures, see our posts below for a few other Lake Tahoe hikes.
“Hike To Eagle Falls and Eagle Lake In Lake Tahoe”
“Hiking To Cascade Falls Near Emerald Bay”
“How To Kayak To Fannette Island Tea House In Emerald Bay”
Your Thoughts…
Does this sound like a trail you and your family would enjoy doing? Have you been to the top of Cave Rock? Let us know in the comments below. We love hearing from our readers!
Please support our website by sharing it with your family and friends.
Thank you for reading.

Hunter Creek Falls: An Epic Hike Just Outside Of Reno
Up until fairly recently, people would generally associate Reno solely with gambling, bars, and being the (much) smaller sibling…
5 minute read | Contains affiliate links
Until fairly recently, people would generally associate Reno solely with gambling, bars, and being the (much) smaller sibling to Las Vegas.
In recent years though, Reno has been earning a reputation for being more than that. You may not realize it, but Reno is an outdoor recreational haven.
Activities like skiing, hiking, white water rafting, and camping can all be done in Reno. This article, however, will focus on Reno’s most popular hiking trail; Hunter Creek Falls.
This trail is spectacular! It parallels Hunter Creek the entire way through rocky terrain, before taking you through crisp-smelling pine trees and terminating at the namesake thirty-foot waterfall.
Despite living near Reno, I’ve only just recently hiked this gem. If you haven't, there’s a few things you should know before hitting the trail. Let’s get into it!
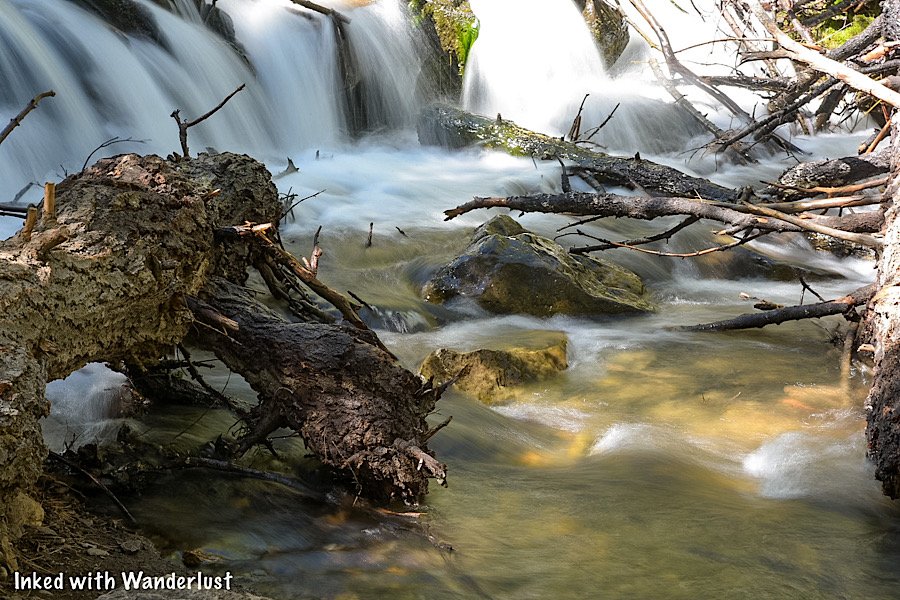
Quick Stats
Location: Reno, Nevada
Fees/Permit: None
Open: April through October
For: Hikers, Mountain Bikers, & Equestrians
Parking: Large, paved lot.
Restroom: At the trailhead
EV Stations: None
Drone Use: No signage stating you can't
Difficulty: Moderate
Time: Three to four hours for most
Mileage: 6.4 miles, RT
Popularity: Heavily trafficked
Elevation Gain: 1,023 ft
Trail Condition: Maintained and easy to follow
Main Feature(s): 30-foot waterfall
Campground: None nearby
Pets: Allowed on leash
Special Notes/Hazards: 1) Sun exposed throughout the majority of the trail. Bring lots of water and sunscreen. 2) Several heavily rocky sections that pets and small children may have a hard time navigating without assistance. 3) A good portion of the trail is narrow along a steep ravine.
Our Visit: June 2022
*Please practice leave no trace principles and keep to the trail*

Trailhead and Parking
Getting to the trailhead for this spectacular hike is easy and straight-forward. It’s just 20-minutes from the downtown area and midtown at the end of a beautiful housing development called, “Jupiter Ridge”.
*Tip: Simply punch “Hunter Creek Falls trailhead” into any GPS system for easy directions
You’ll arrive at a well maintained parking lot large enough to hold a few dozen vehicles. GPS directions will try to take you to a dirt pull-out but this isn’t it. Go a little further up the road and take the first right out of the roundabout. The lot will be right there.
In it, you’ll find trail/area information signage, a picnic table, trash cans, and a well-kept restroom. If you must, utilize before you head down the trail as there are no other restrooms beyond this point.

The Trail
Facing the restroom, you’ll find the start of the trail on your left (pictured above). On it, you’ll descend a short distance to Hunter Creek before coming up on a wooden bridge.
Note: If you’re an Equestrian, there’s signage asking you to cross through the creek (there’s an opening to the right) instead of crossing the bridge.


After crossing the bridge, you’ll see a split. To continue to Hunter Creek Falls, go left. You’ll be hiking parallel to the creek along this short stretch.
There are many spur trails leading you to the waterline. Throughout the entirety of the trail the creek is covered by trees, providing a plethora of shade.

Soon, you’ll begin to ascend above the creek and tree line. Here, the trail narrows, gets rockier, and is completely sun exposed. It maintains all three of these elements (for the most part) until you get closer to the waterfall.

At the top of your first ascent, look to your left for a rocky ledge and take in the view ahead. You’ll get a glimpse of Downtown Reno in the distance.
From this point, the trail gets VERY rocky. There’s more than a few sections of trail that are nothing but loose rock (pictured below). This is where pets and kids may have a hard time navigating.
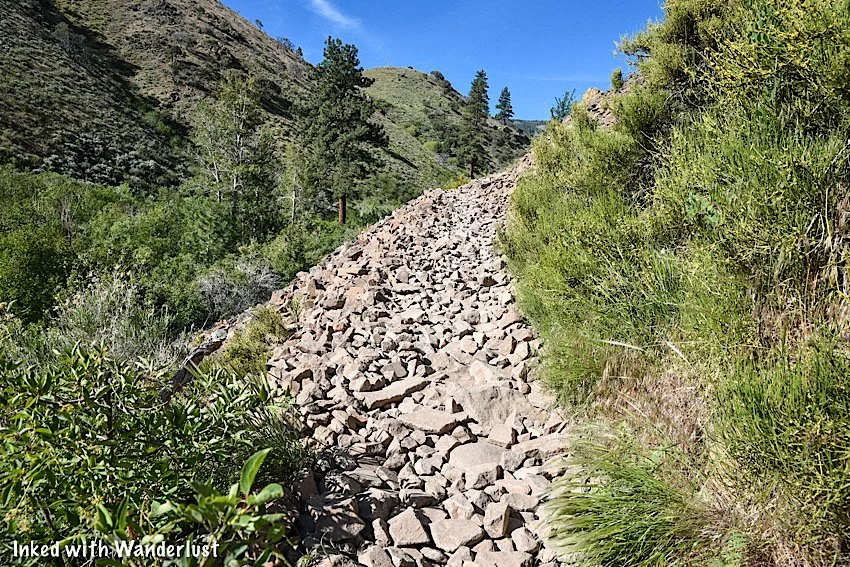

On the plus side, here is where the scenery around the trail moves into a proper wilderness setting as you put the view of Reno behind you.
If you’re here at the right time in the season you’ll see lots of flora and fauna, along with pine trees and mountains that still have snow on them.


As stated at the beginning of this post, the trail is very narrow. If you’re hiking in a group, you’ll need to hike single file throughout the majority of it.
On the way up and back, there were a few instances where finding a safe spot to stand as another hiker passed was quite the challenge.

It’s not impossible or inherently dangerous by any means, but it’s something to be mindful of. How hikers get around Equestrians on this trail is beyond me.

Pictured above, you’ll see the beginning of the most intense part of the trail. Up until now, it has ascended fairly evenly. Here, it’s a semi-sharp ascent. This is about two miles into the hike.
Personally, I wouldn’t rate it as difficult. It will, however, take the breath out of most people (it did to me). Take your time, catch your breath when needed, and you’ll get up there just fine.
Hunter Creek Falls

You’ll know you’re getting closer to the waterfall when you enter a thick section of pine trees and re-align with Hunter Creek. There are two final spots on this trail I felt should be pointed out as it isn’t entirely clear which direction to go.
Every other blog post or review I read of this trail stated it was well-signed. This is emphatically false. Past the bridge at the beginning, I didn’t see a single sign. So I’ll do my best to help you avoid going in the wrong/least convenient direction.

The first one you’ll come to (pictured above) seemingly continues forward. When you come up on this, those two boulders in the picture will be on your right. Straight ahead, you’ll both see and hear the creek.
DO NOT continue straight. Instead, turn right, in between the boulders. The one going straight isn’t the official trail. After turning right, the trail becomes obvious again.
*Tip: Essentially, if you come right up on the creek, you went too far.
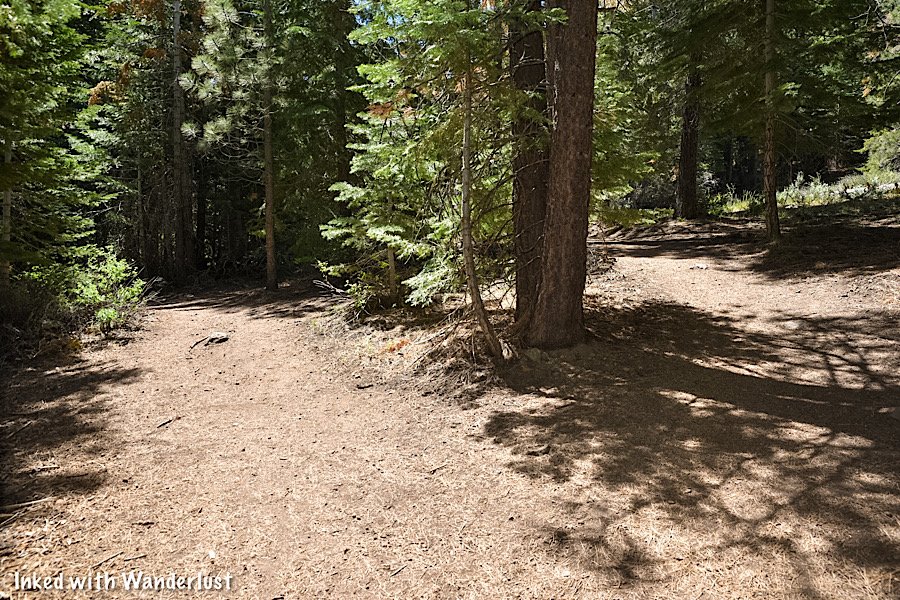
The second one (pictured above) presents itself about a quarter-mile after the right turn you made. Here, you have two options:
Option #1: Continue straight and arrive at the waterfall shortly. However, on this side of the falls, there’s nowhere to sit, you won’t have a good view and you’ll need to cross a log to get to the other side.
Option #2: Go left and cross the creek via the make-shift bridge made from sketchy tree branches people randomly found. Shortly after making it to the other side, you’ll arrive at the falls in an area with a plethora of seating, shade, and space.
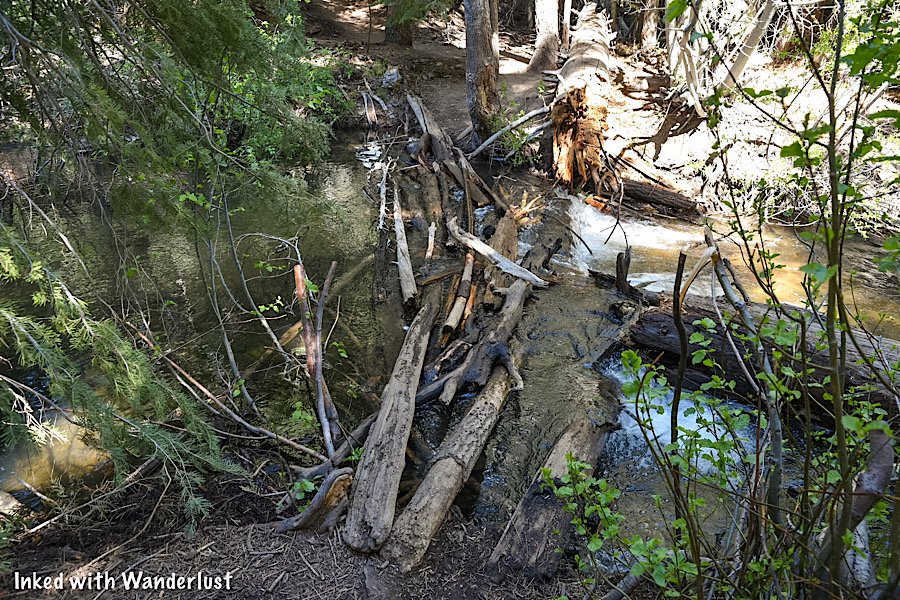
I recommend taking the second option. Worst case, you could cut straight through the creek. I estimate this part of the creek was about half shin deep when I hiked it (early June).
*Note: There used to be a solid bridge here for people to cross but it was destroyed a few years ago by heavy water flow and debris.
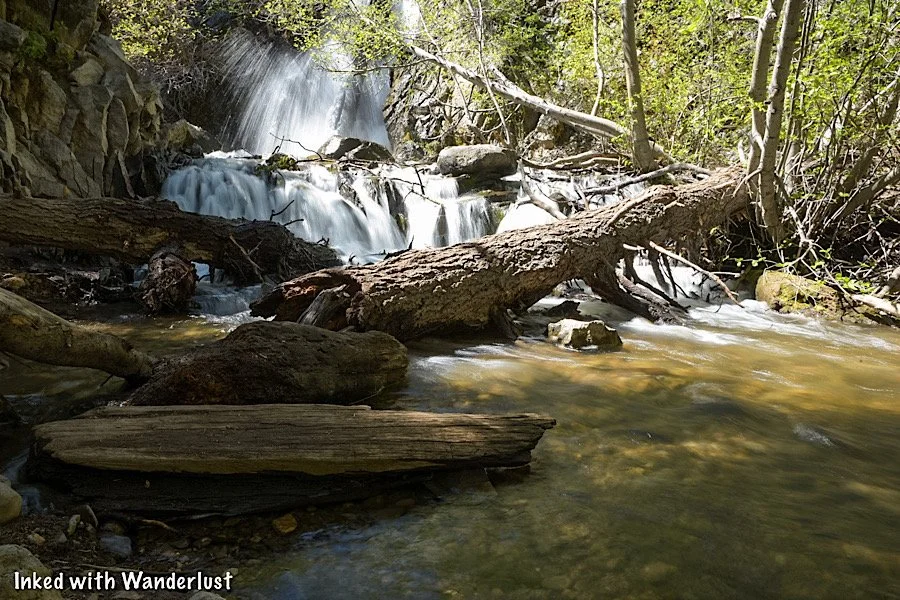
Regardless of which direction you take, you’ll soon arrive at the beautiful Hunter Creek Falls. If you take my recommendation and go left, you’ll come to a large area with lots of seating and shade.
When I was here, there was a tree branch that collapsed and was partially blocking the view of the first section of the waterfall. Still an awesome view, regardless.

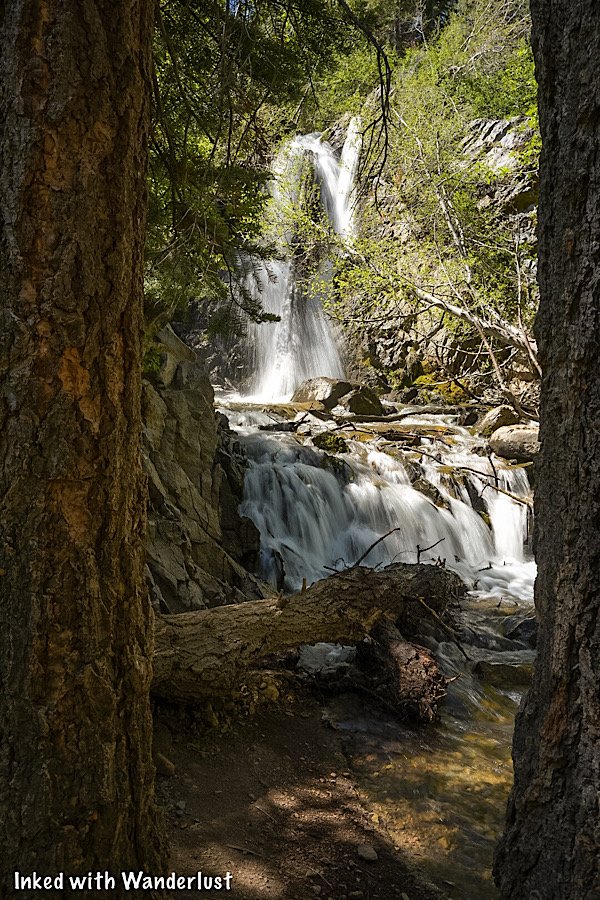
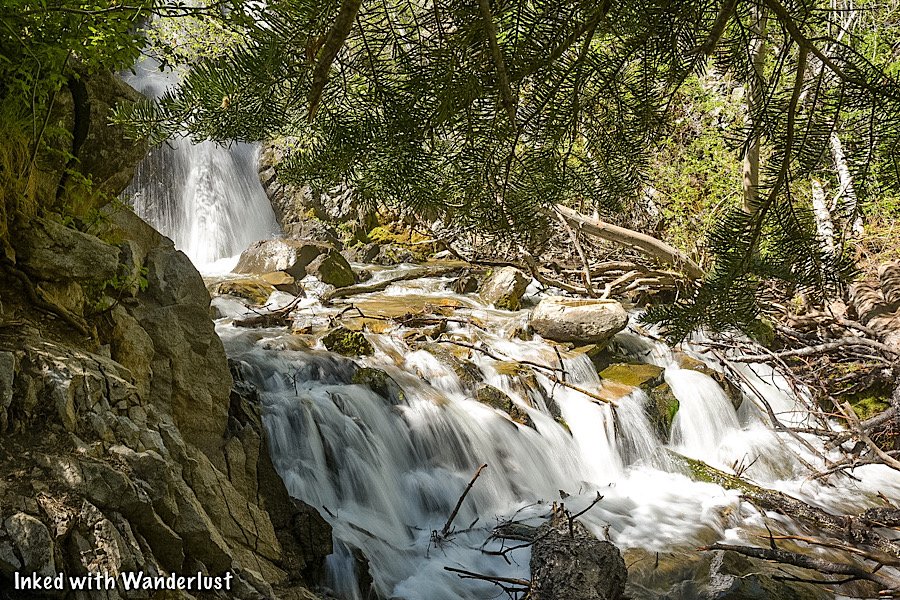
Stay as long as you like. Get all the pictures you can. When you’re ready, simply turn around and head back in the same direction you came.
Have you hiked Hunter Creek Falls before? If so, did you find the trail pretty easy or more towards the moderate/difficult side? If not, do you have plans to hike it now or have any further questions? Shoot us a note in the comment section below!


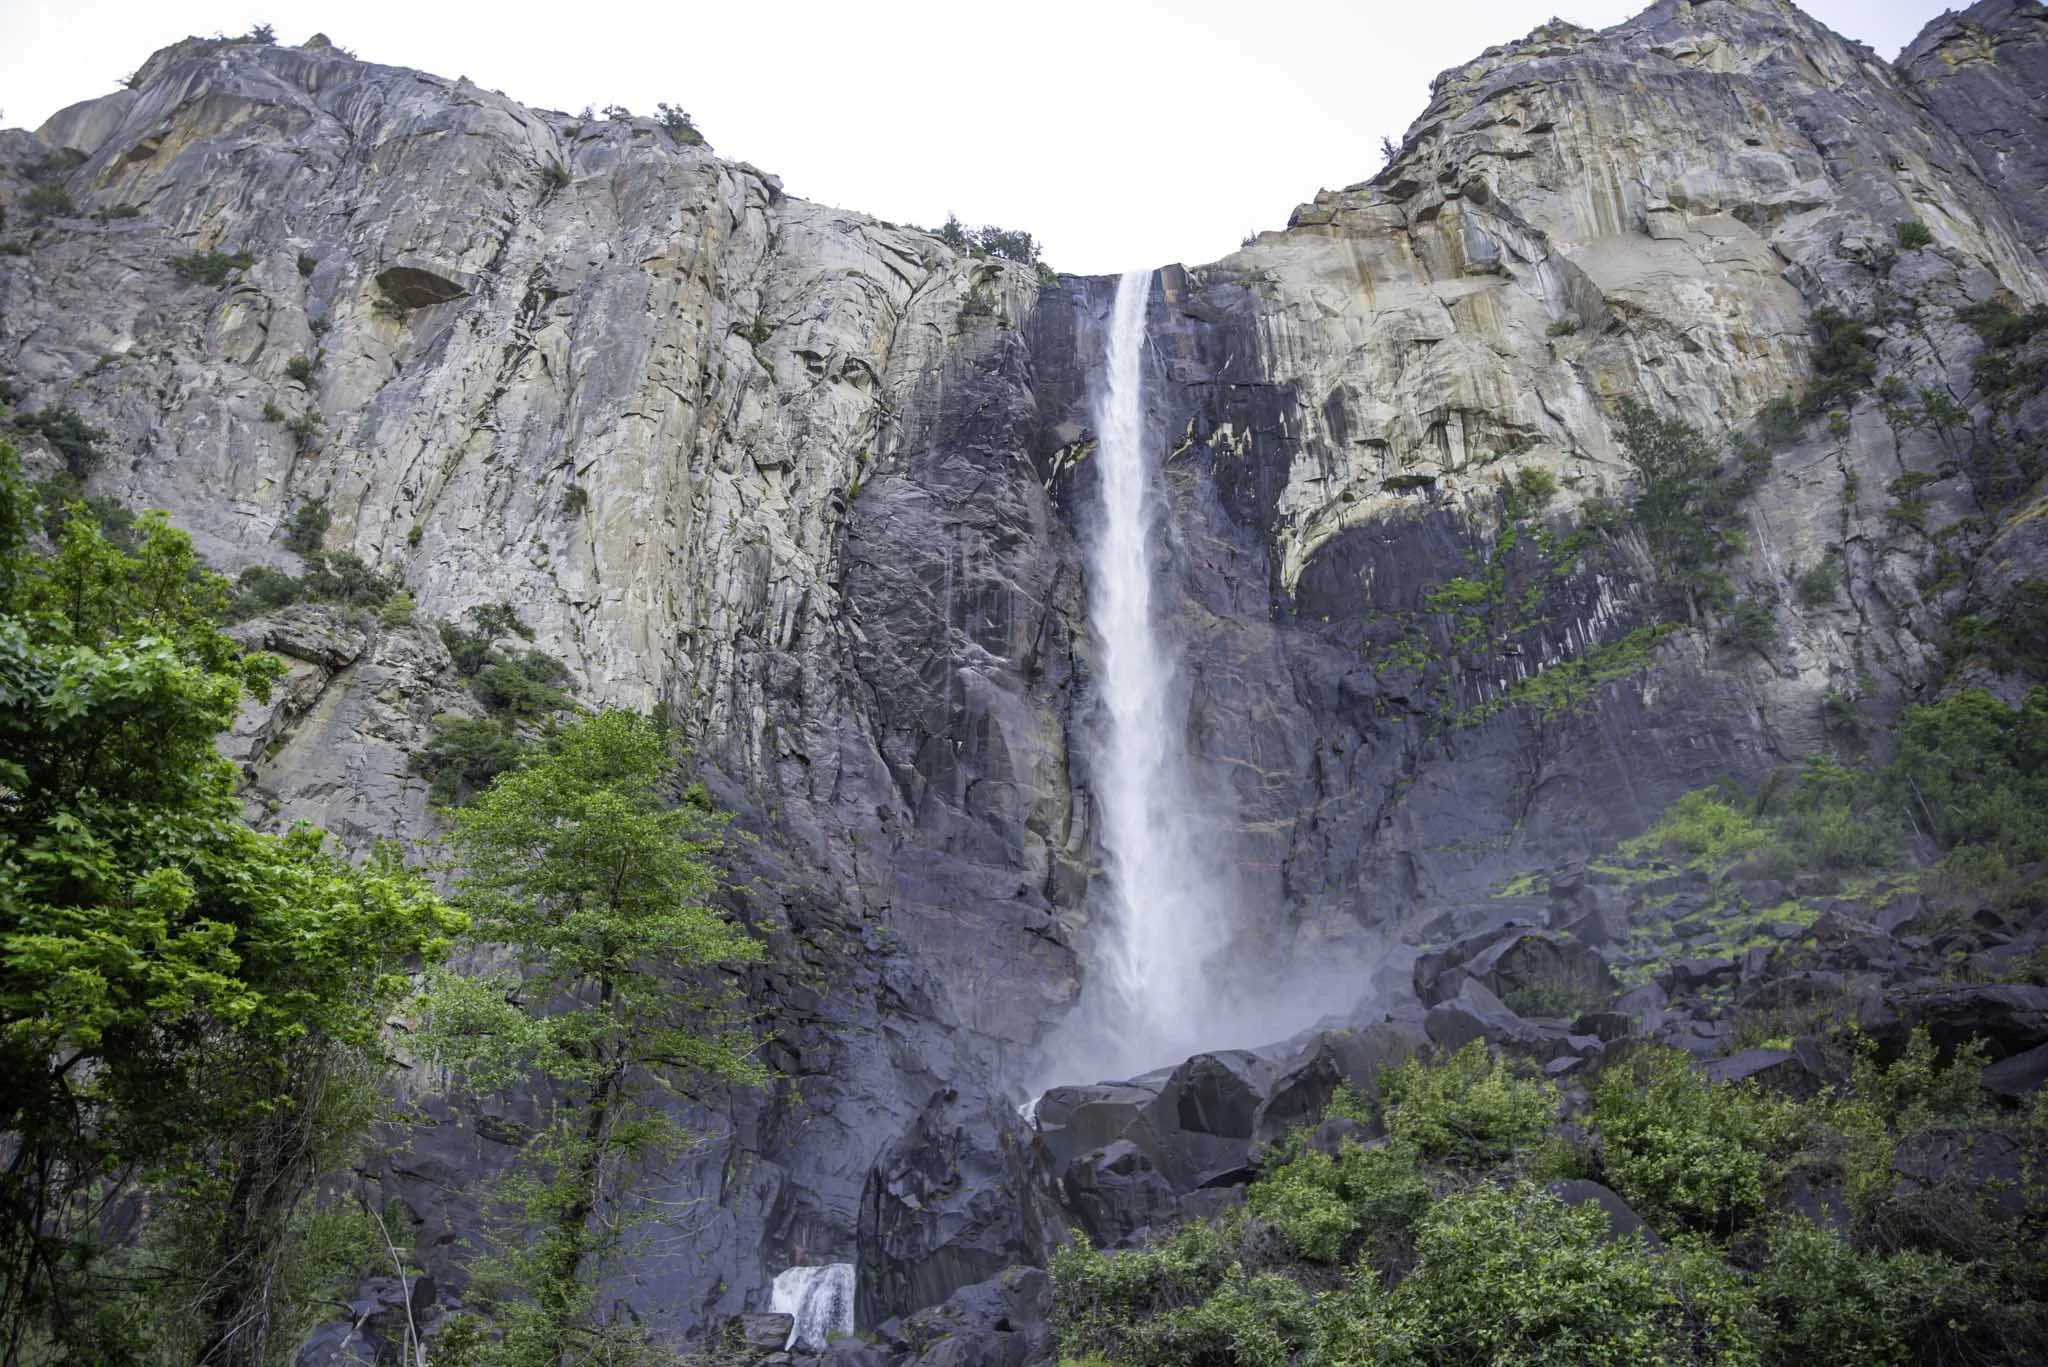


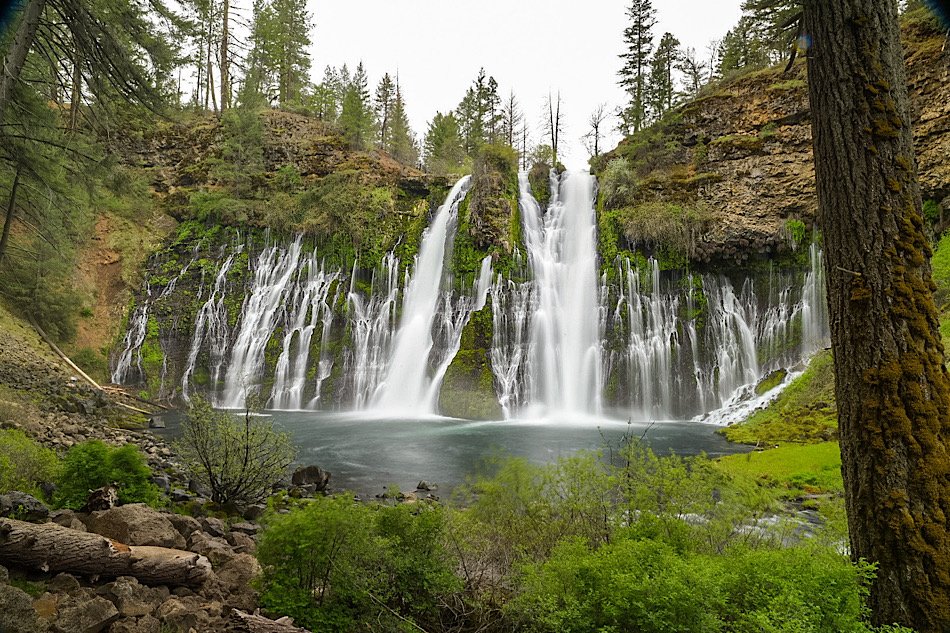

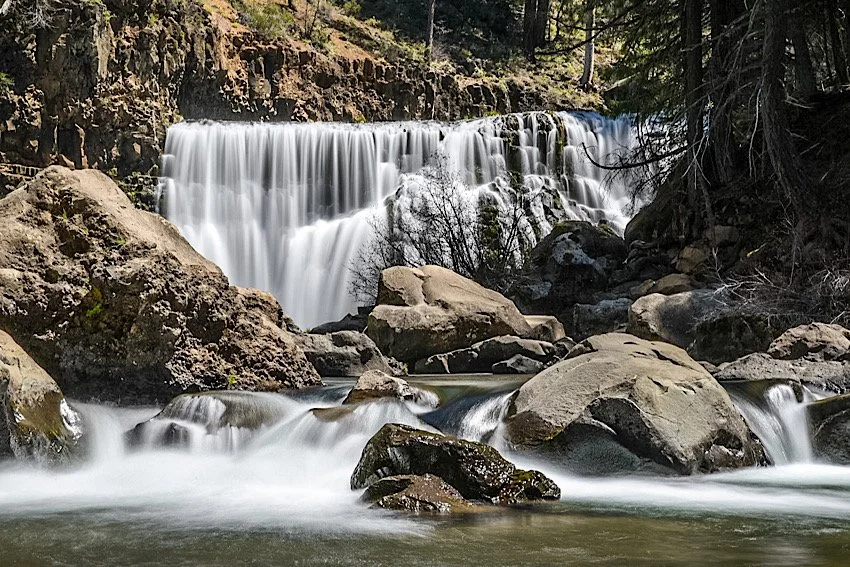


Please support our website by sharing this article with your family and friends.
Take An Easy Hike To King’s Canyon Falls in Carson City
Located in Carson City at the end of King’s Canyon road, this 25-foot cascading waterfall offers families and solo hikers alike easy access to a natural oasis
Located in Carson City at the end of King’s Canyon road, this 25-foot cascading waterfall offers families and solo hikers alike easy access to an oasis away from the hustle and bustle of downtown.
We have been here numerous times and have almost always had the falls to ourselves at least part of the time. It is known mostly to locals, so your chances of not having to deal with hoards of tourists are decent.
If you’re planning a trip to Carson City or Reno, we highly recommend adding this place to your list of must-do activities. Below, you’ll find the information you’ll need for your visit.
The Trailhead

Kings Canyon Falls trailhead.
Getting to the trailhead from the downtown area is straightforward and simple. From the capital, you’ll do the following:
Turn onto East Musser street
Turn left onto N. Division street
Turn right onto W. King street
Continue on King’s Canyon road for about two miles
Keep left to stay on King’s Canyon road for about a third of a mile until you hit the dead end.
At the dead end, you’ll see a small dirt lot ahead of you with informative signage on both sides. This is the lot you’ll use. It can comfortably hold around 6-8 vehicles but if it’s full, you can simply park on the side of the road.

Kings Canyon Falls trailhead.
After you park, you’ll see a dirt road heading off to the left and a set of stairs leading up to some signage on your right. You’ll want to take the latter as that’s the most direct route to the falls.
Firefighter memorial. Kings Canyon Falls.
You’ll also want to take note that this trail is for hikers only. Equestrians and biking are not permitted. If you’re looking for a trail that can accommodate one or both of those activities, check here.
Be sure to stop at the sign and read about the fire that took place in this area in 1976 and the resulting deaths of three Firefighters who bravely fought it. There’s a memorial plaque on the left of the trailhead listing the names of those of perished.
The Trail

As stated in the title, this would be considered an easy trail just based on length alone. From the trailhead to the falls, it’s just about a quarter mile over just two quick sets of switchbacks.
Don’t be fooled, though, because it is deceptively steep in some sections. It isn’t hard, but if you’re not in decent shape or you’re not used to the elevation, you’ll definitely feel it.

Trail to King’s Canyon Falls.

Kings Canyon Falls trail.
Along the trail you’ll see sporadic signs asking you to remain on the trail and not cut through. It may be tempting in some spots but please obey the signs and stay on the trail. There’s been a lot of effort in recent years to restore the area.

View of Carson Valley from the trail.
As you near the top of the trail you’ll be rewarded with sweeping views of Carson Valley below. This view is also an indication that you’re close to the falls and that the “hard” part of the trail is over with.
Also around this part of the trail is where you’ll see the junction (on your left) that leads to the 1.8-mile North Kings Loop. This trail goes over and around the falls, not to it. So you’ll want to continue straight on the trail.
The Falls

Kings Canyon Falls.

Kings Canyon Falls.
As you turn the corner into the canyon, you will run right into the falls. In fact, like most waterfalls, you’ll hear it before you see it. As you arrive, you’ll notice boulders off to the left that make for the perfect spot to get off your feet.
The falls flow year round, but spring time is when it’s at its best while getting reduced greatly in the fall. Winter is the one season we haven’t been up here but from what I hear, there is water flowing and the trail, while snow covered and icy in some spots, is still accessible.
READ ALSO: Your Complete Guide To Visiting Burney Falls

Kings Canyon Falls.

Kings Canyon Falls.
If you’re here during a particularly heavy flow, the pool at the base of the falls will be around ankle deep, at best. Prior visitors have set up rocks to step on to get across to the other side so you can avoid stepping into the water.
If you’re feeling particularly adventurous, there are boulders off to the right of the falls that you could use to scramble up to the top. From what I hear, there are small cascades you could check out up there. We have yet to do this so I can’t vouch for it, unfortunately.

Kings Canyon Falls.

Kings Canyon Falls.
Take as long as you like to hang out. People will come and go but if you’re patient, chances are good you’ll have it to yourself at some point. When you’re ready, simply turn around and head back in the same direction you came.
On the way back, you’ll again be presented with the opportunity to extend your hike via the North Kings Loop. This will add 1.8 miles to the overall hike. This is something I plan to do on my next visit so I’ll be sure to update this post when that happens.
Conclusion
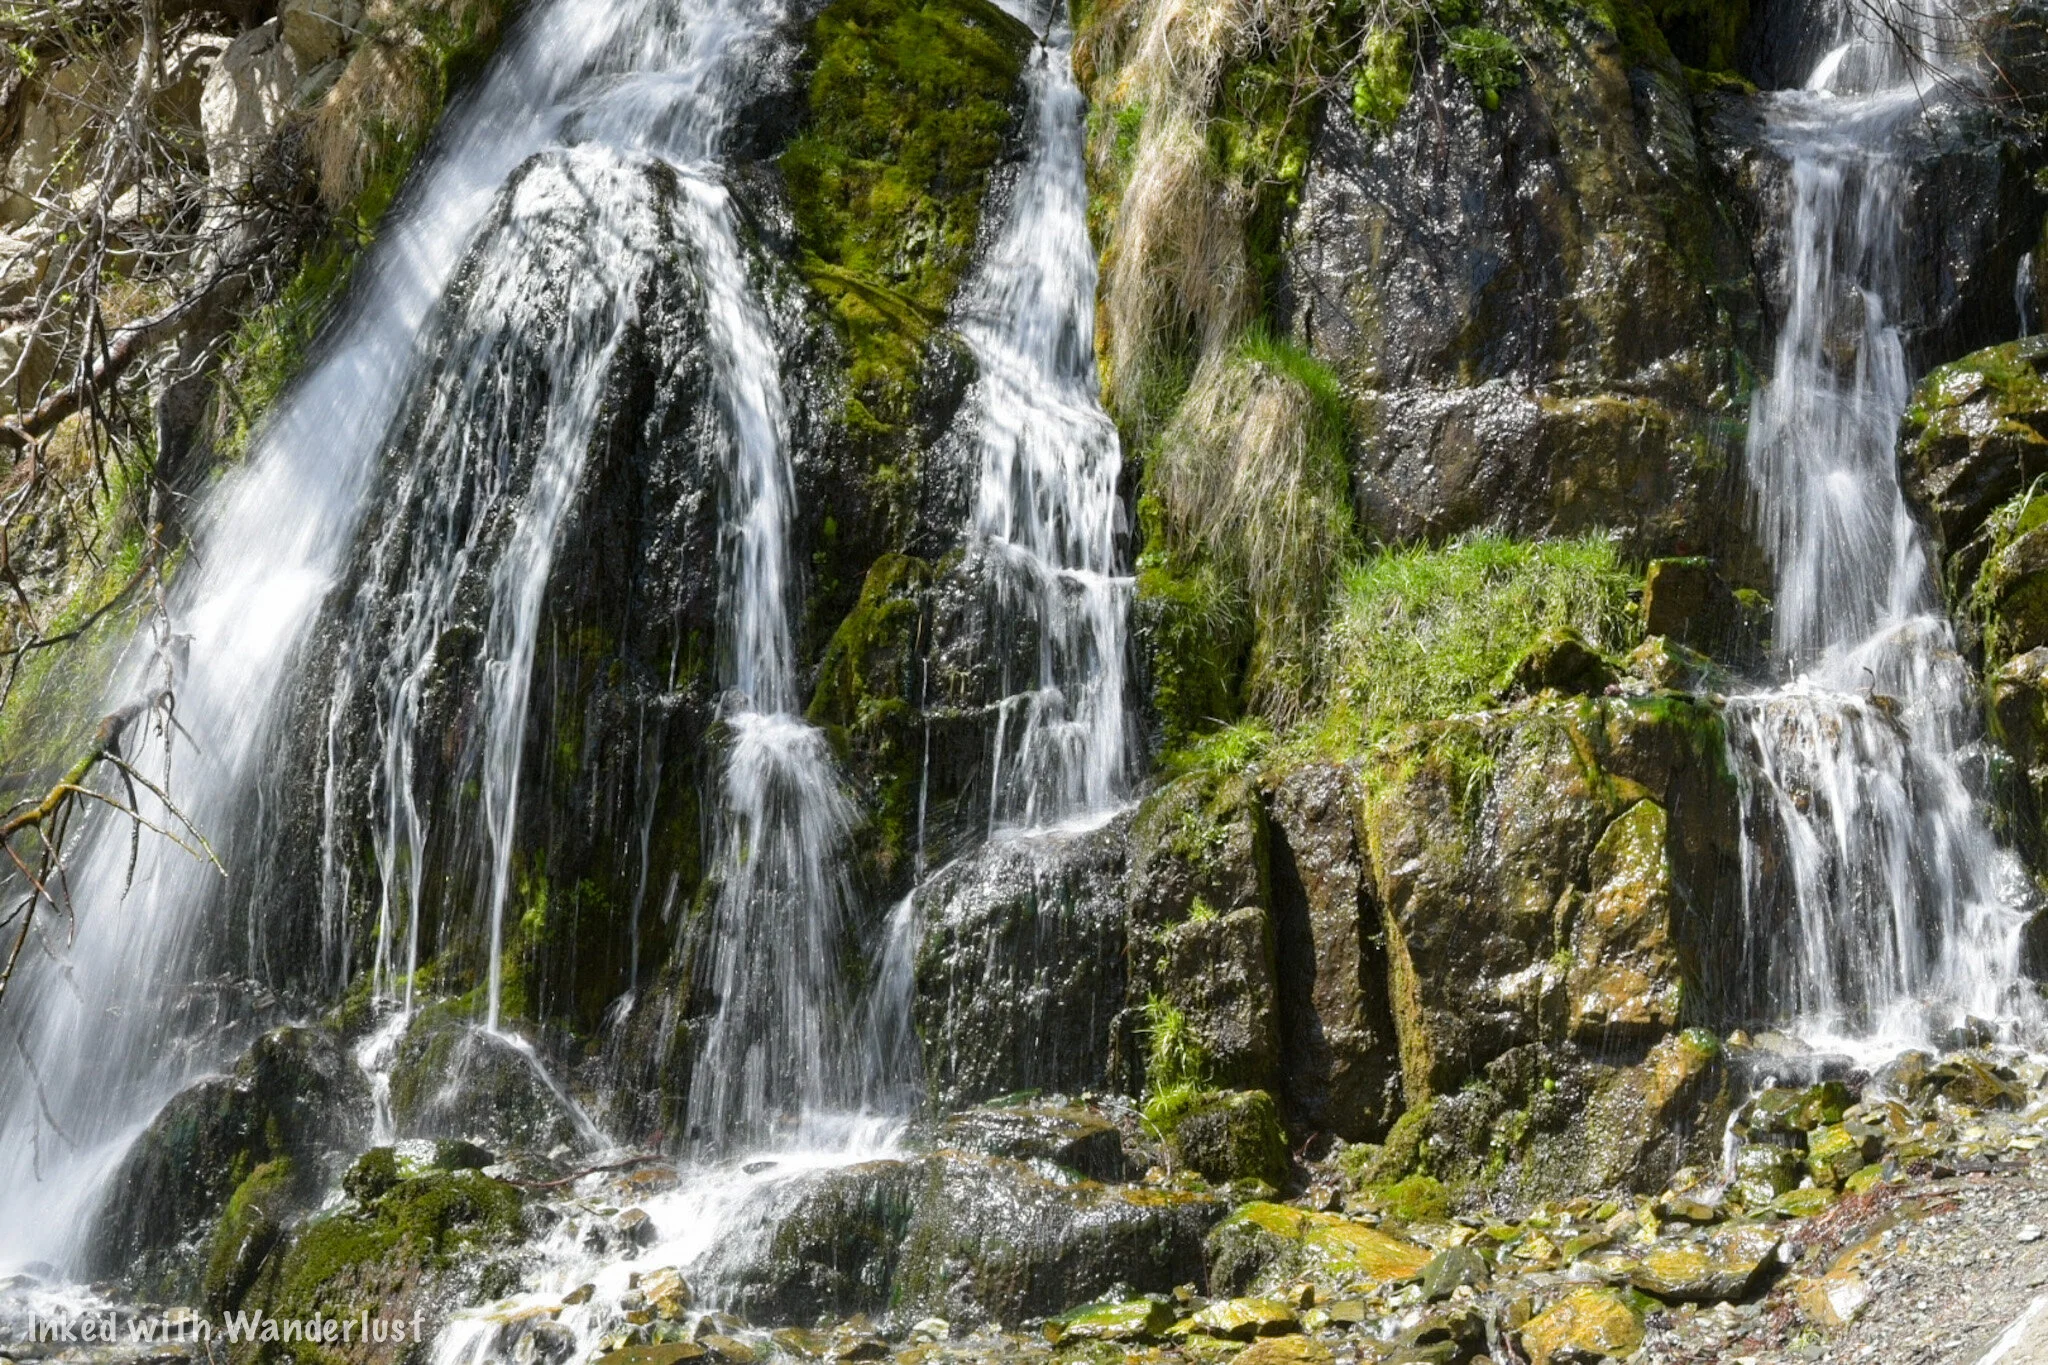
Kings Canyon Falls.
We hope you’ve found this article useful for planning out your adventures. If you enjoyed it, please support us by sharing this article with your friends and family on Facebook, Pinterest, or your favorite social media site.
You can further show your support by staying on and reading one or more of the related article above. You can also subscribe to our newsletter below. Thanks!